
Turk’s Buildup, One Dream & Endless Nightmares

Recovering Milkaholic
iTrader: (7)
Joined: Jan 2002
Posts: 8,206
Likes: 0
From: Budds Creek, Maryland
That's great news man, it's always seems like a never ending project when they go down for so long. It's definitely nice to get them out and actually drive them, and work out minor kinks like tags, insurance and alignment issues.
Enjoy!
Enjoy!
This is far from the end for it but Its pretty much done for the summer except I have to fit the A/C back in because I couldn't close the hood with the big Koyo in there.
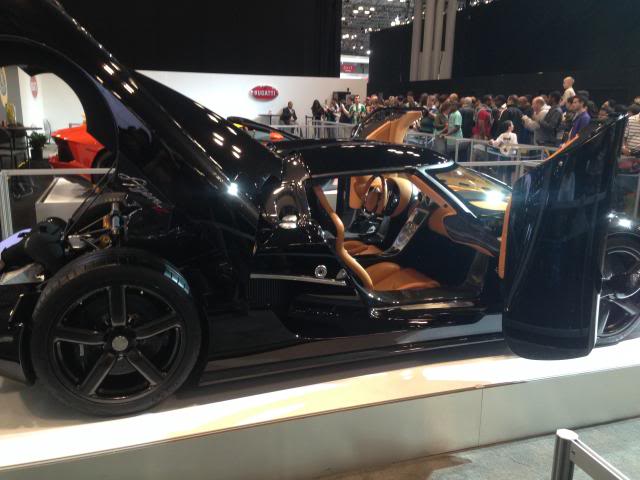
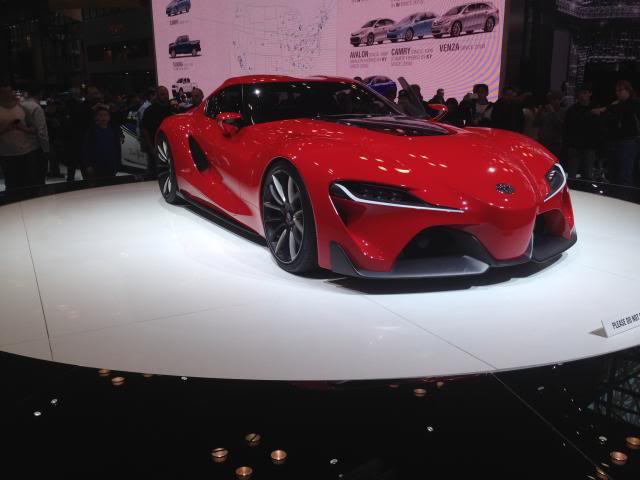
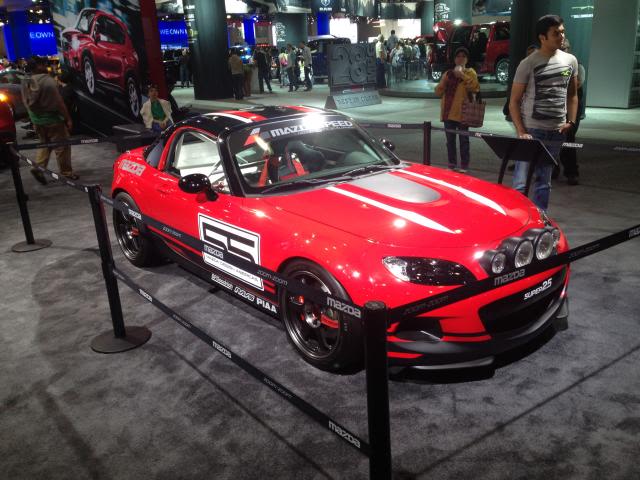
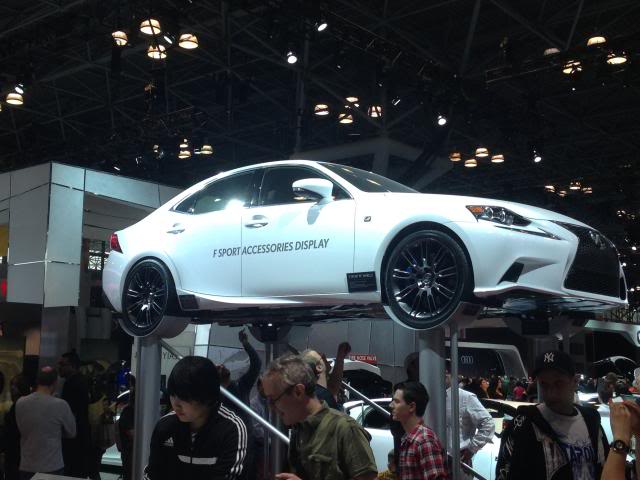
Had a busy weekend. Touched some things up on the FD Friday night. Went to the NY auto show on Saturday. Then woke up early on Sunday to go to the car show that I used to run while I was in college.
I'm thinking about getting a forester as a daily. Not sure if I want this body style or older but this is inspiration.
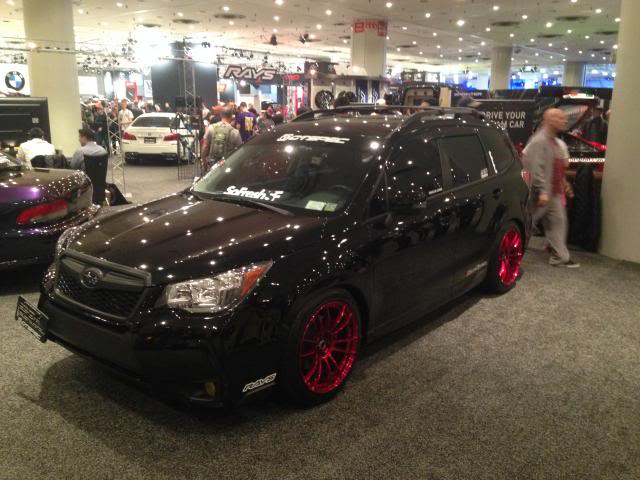


I'm thinking about getting a forester as a daily. Not sure if I want this body style or older but this is inspiration.

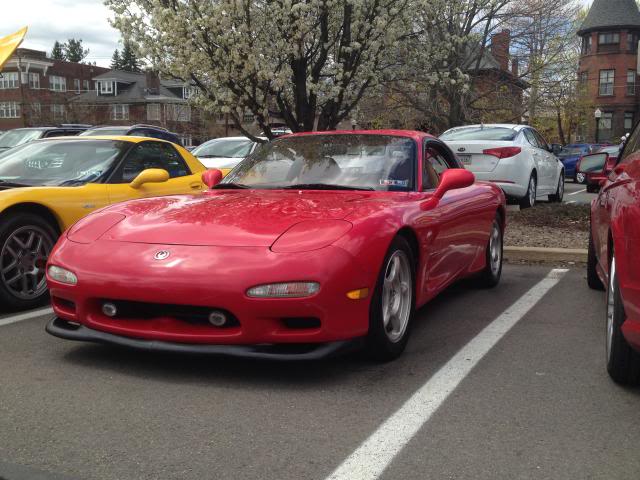
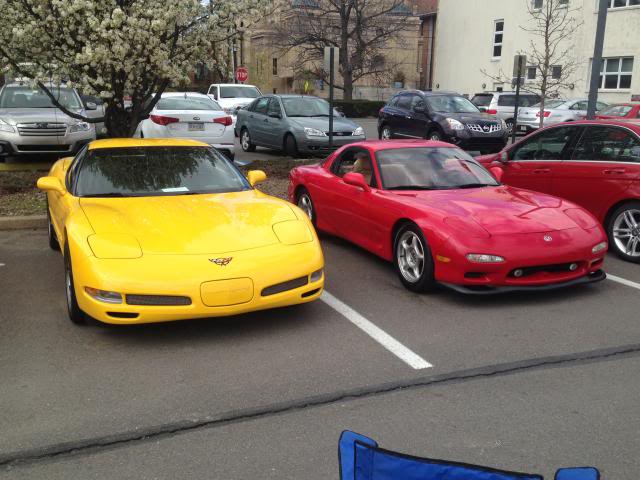
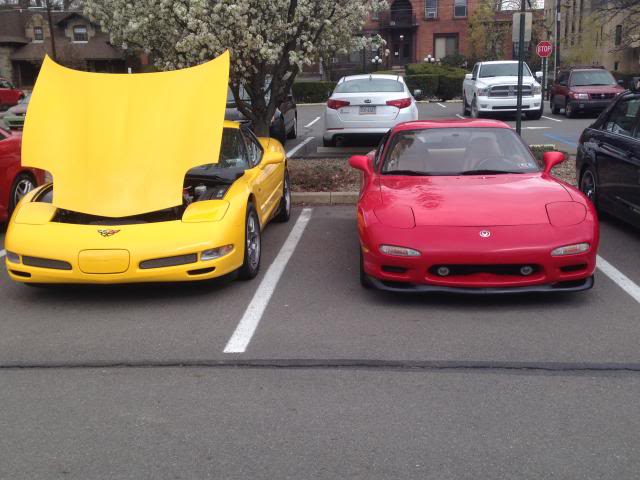
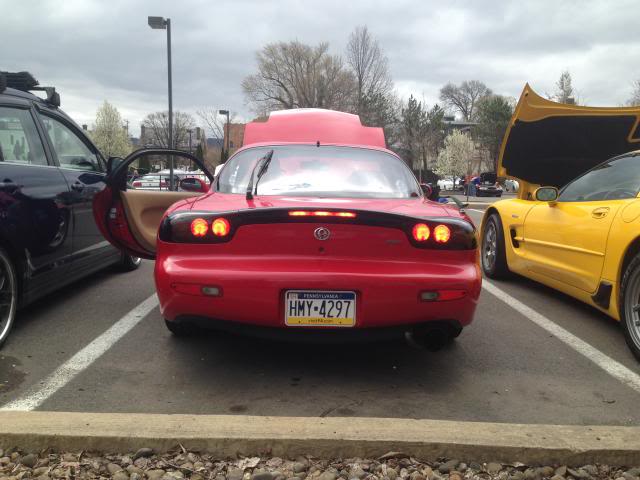
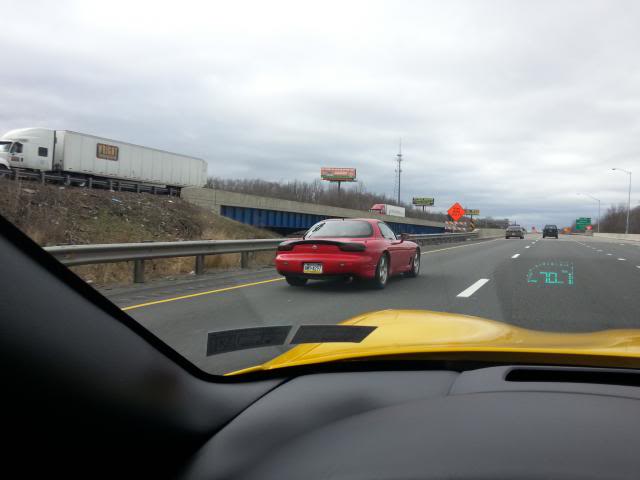
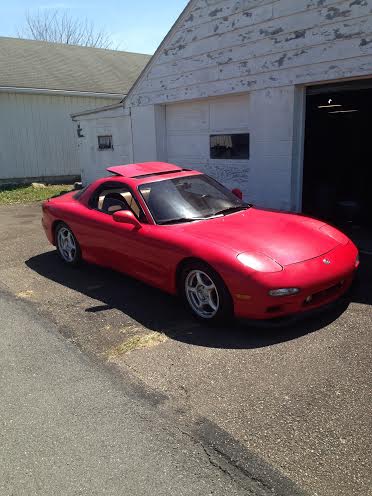
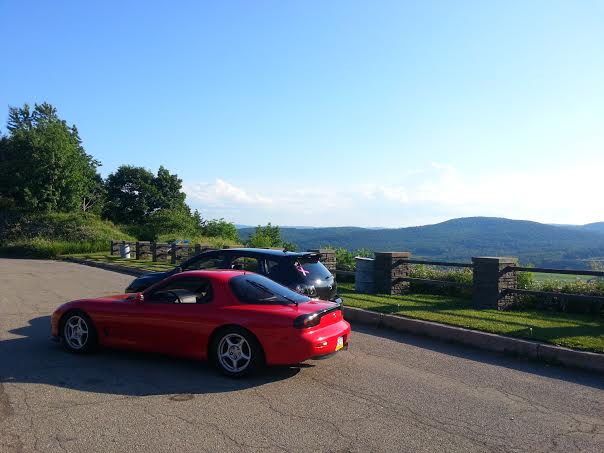
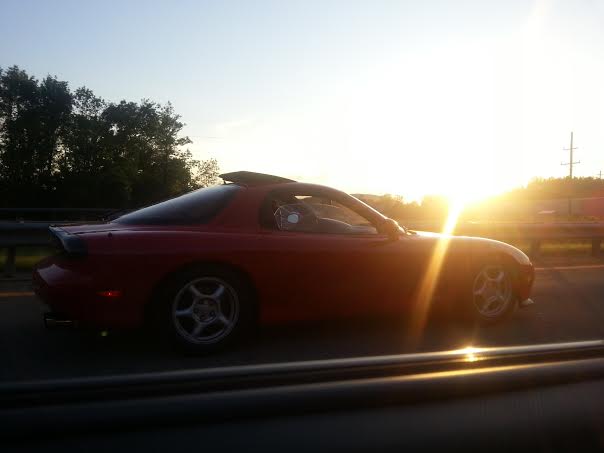
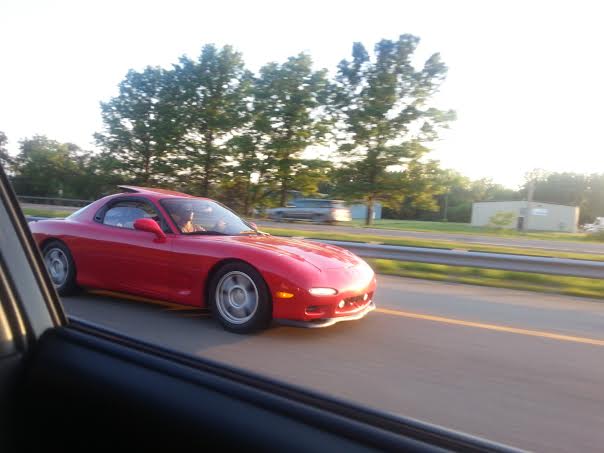
My friend that helped me run the car show the last two years met me at my garage and we cruised down 30 miles. FD and Z06 playing leap frog all the way. It was probably an interesting site. This was my first public experience with the car so I got the full effect of what kind of attention the FD brings. I had two offers to trade and an endless stream of people asking about it and saying they want one.

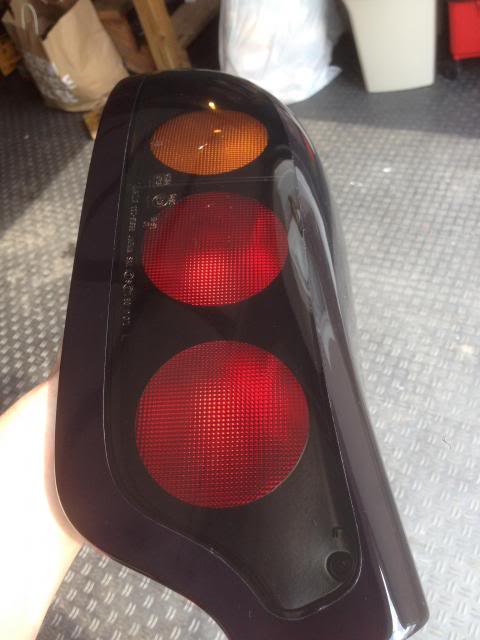
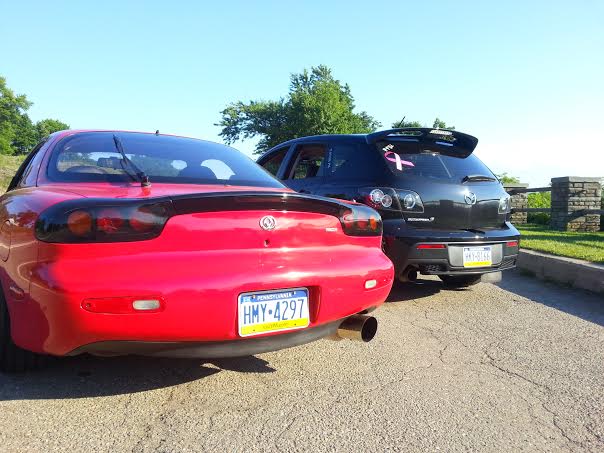
I also finished my 99 spec tail lights. My roommate polished them for me and they came out amazing.


I also finished my 99 spec tail lights. My roommate polished them for me and they came out amazing.


Didn't do all that much on the car this weekend because I didn't have to. Wow it's good to be able to say that. It's an unbelievable feeling for me to be able to step back and just enjoy the car for once. I took it out to do errands on Saturday and couldn't have loved it more. Now that said I did do some things on the car. touch up paint, painted wiper arms, and swapped seats. I also did some much needed work to my DD/Beater.
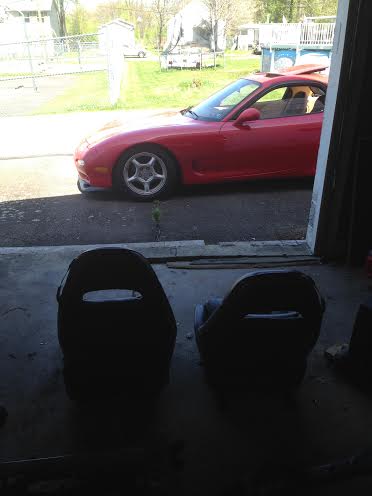
I'll start with some action shots my friend took on our cruise to the show last week.
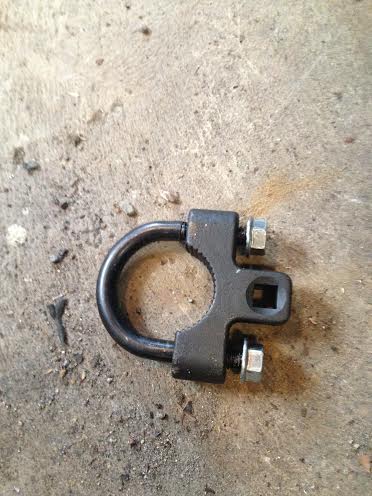
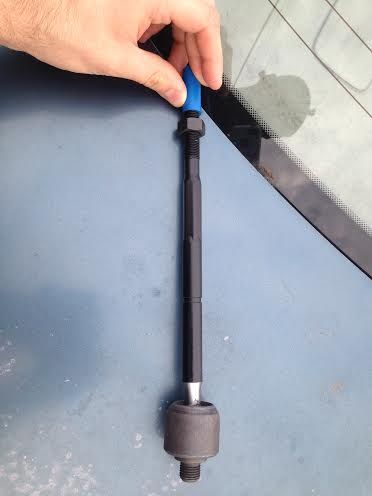
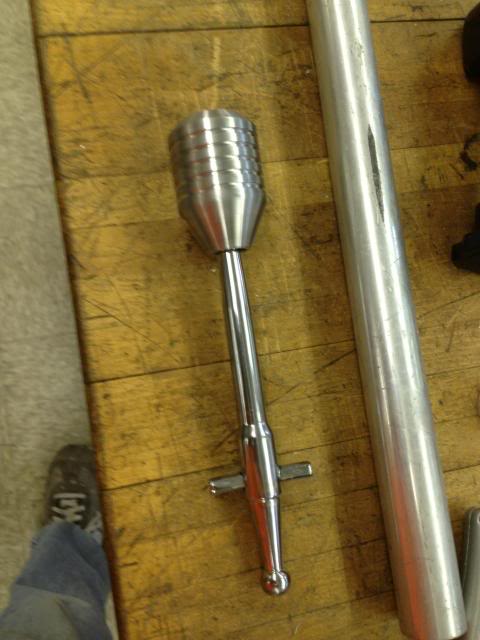
Now I'm going to vent a little about my DD. Nissan thought the standard approach to inner tie rods was too easy and decided to not put flat spots on them. Instead they made them completely round. This poses two issues, one is that you cant get a normal tool from the parts store to remove/install them. The other is that they don't use lock plates to ensure they stay in place, instead they use a ton of lock-tite
This is pure genius on Nissan's part. I applaud them for it

This is the 20 dollar tool I found to get the job done. Still a pita.
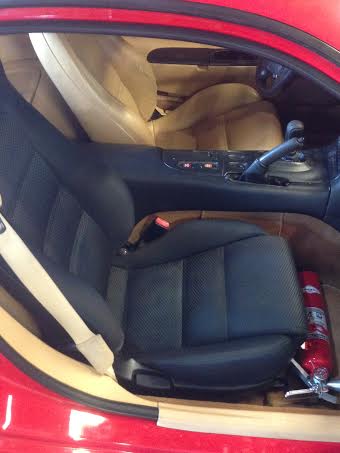
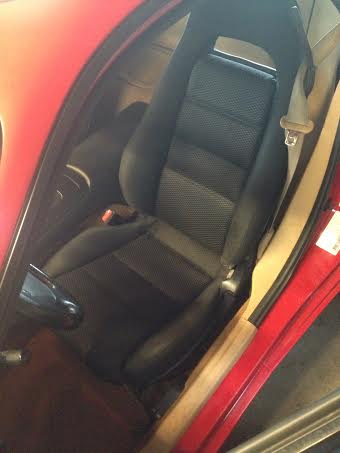
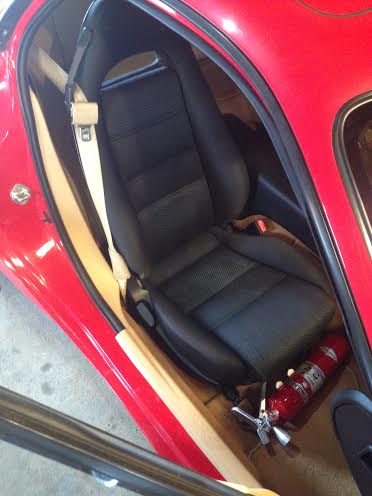
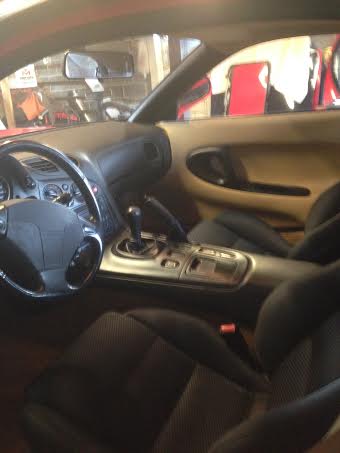
Now back to the FD. I am not at all a fan of leather. It gets hot, it gets cold, and it fades & cracks. This dislike of leather was also combined with a dislike of the tan interior, causing me to make a change. Luckily I had a set of cloth seats that were planned to go into the old car stored in the attic (also more head room for my 6'2" self). My family didn't like the idea and wanted me to stick with the tan but once they saw it they changed their opinion. I might still have to swap the seatbelts to black but that should only take about an hour.
I'll start with some action shots my friend took on our cruise to the show last week.


Now I'm going to vent a little about my DD. Nissan thought the standard approach to inner tie rods was too easy and decided to not put flat spots on them. Instead they made them completely round. This poses two issues, one is that you cant get a normal tool from the parts store to remove/install them. The other is that they don't use lock plates to ensure they stay in place, instead they use a ton of lock-tite
This is pure genius on Nissan's part. I applaud them for it

This is the 20 dollar tool I found to get the job done. Still a pita.

Now back to the FD. I am not at all a fan of leather. It gets hot, it gets cold, and it fades & cracks. This dislike of leather was also combined with a dislike of the tan interior, causing me to make a change. Luckily I had a set of cloth seats that were planned to go into the old car stored in the attic (also more head room for my 6'2" self). My family didn't like the idea and wanted me to stick with the tan but once they saw it they changed their opinion. I might still have to swap the seatbelts to black but that should only take about an hour.


Nothing major going on, just enjoying the car. Still has a slight oil leak but nothing of a concern for the summer. The only current bothersome thing is the car doesn't like to stay in 5th gear. It will pop out when I hit bumps and touch the shifter at all. I'm not sure if this is a transmission issue or something caused by the B&M short shifter.
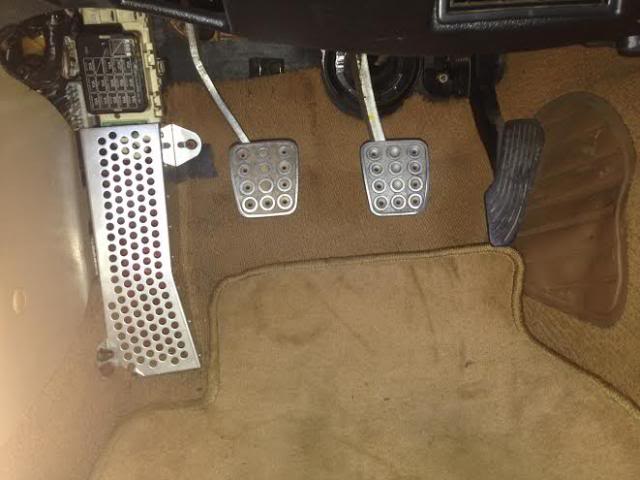
Mocking up my ongoing dead pedal project for modification
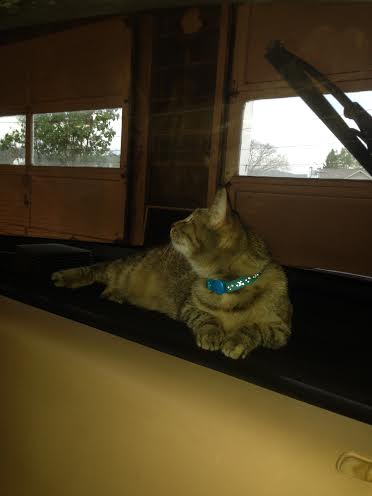
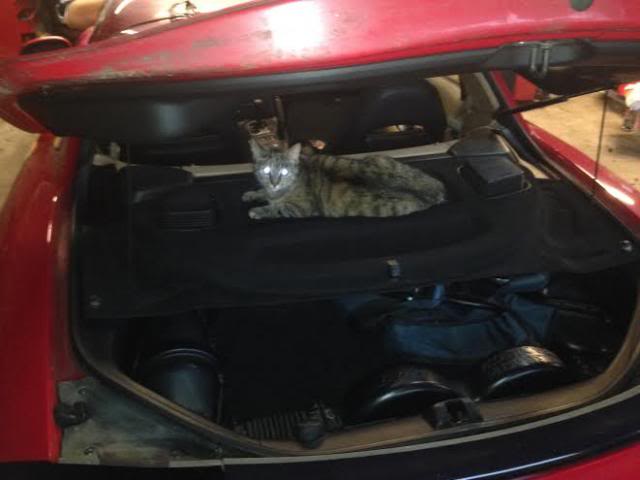
Cat tested, Cat approved.
Pulled the car out on Sunday and just sat in the old seats for a few hours. even took a nap out in the garage. It's so relaxing to be able to sit back and just admire the car and the work you've put into it.
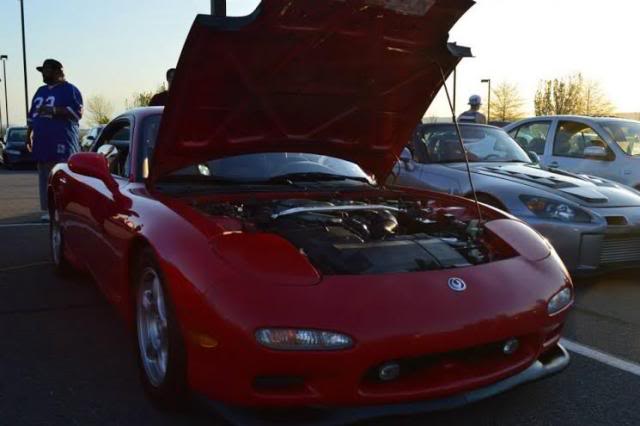
Also took it to a meet on Sunday night. It got a whole lot of love and it was'nt at all the nicest car there. The big turbo S2K I parked next to was flawless but the FD brought all the onlookers.
Mocking up my ongoing dead pedal project for modification

Cat tested, Cat approved.


Pulled the car out on Sunday and just sat in the old seats for a few hours. even took a nap out in the garage. It's so relaxing to be able to sit back and just admire the car and the work you've put into it.


Also took it to a meet on Sunday night. It got a whole lot of love and it was'nt at all the nicest car there. The big turbo S2K I parked next to was flawless but the FD brought all the onlookers.

has a Full Member

Joined: Jan 2008
Posts: 96
Likes: 7
From: Southern California
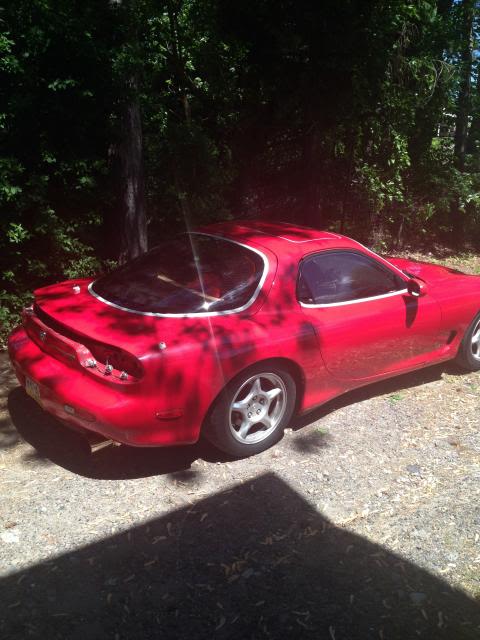
Looking good man! Love to see a stock-ish restoration type build every once in awhile. Have you tried buffing your paint? I had a red miata once that looked worse than yours. Used a harbor freight buffer and some foam pads, shine came back perfectly...
As far as the paint goes, I haven't tried buffing it yet. To be honest I've never buffed a car and I'm lazy when it comes to aesthetics. I've had countless people tell me it will buff right back to a shine, I just have to get around to doing it. My coworker said he'd do it for free (details cars for dealers on the side), I just have to bring it down to him.

Now I'm going to vent a little about my DD. Nissan thought the standard approach to inner tie rods was too easy and decided to not put flat spots on them. Instead they made them completely round. This poses two issues, one is that you cant get a normal tool from the parts store to remove/install them. The other is that they don't use lock plates to ensure they stay in place, instead they use a ton of lock-tite
This is pure genius on Nissan's part. I applaud them for it
This is the 20 dollar tool I found to get the job done. Still a pita.
This is pure genius on Nissan's part. I applaud them for it
This is the 20 dollar tool I found to get the job done. Still a pita.
Had the car out all weekend, put 200+ miles on it without issue. Also detailed it on Saturday. Compound, buff, wax. We were afraid to go really hard on it because we weren't sure how it was treated in the past when detailed. The paint on the mirrors and front bumper was pretty thin so we avoided compounding them. It didn't come back 100% but it's damn close.
Before
Almost done
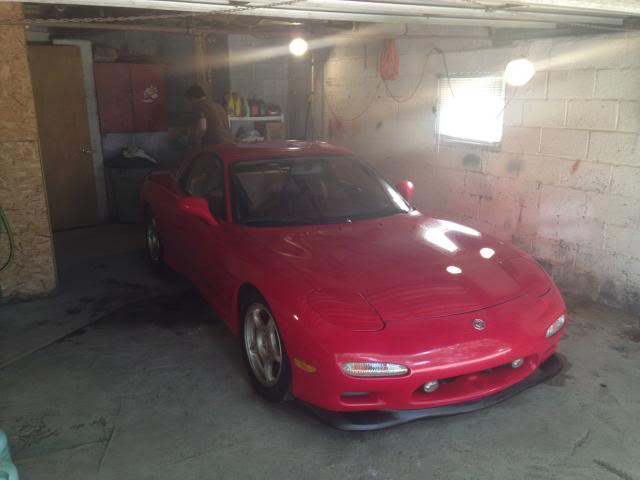
All shined up
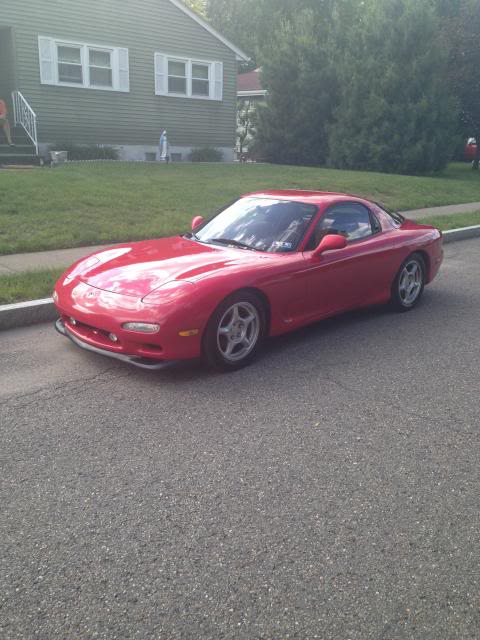
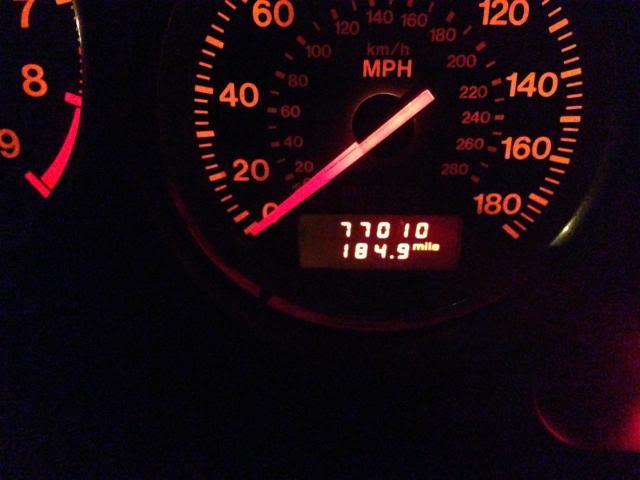
On the way home from detailing she turned 77k miles.
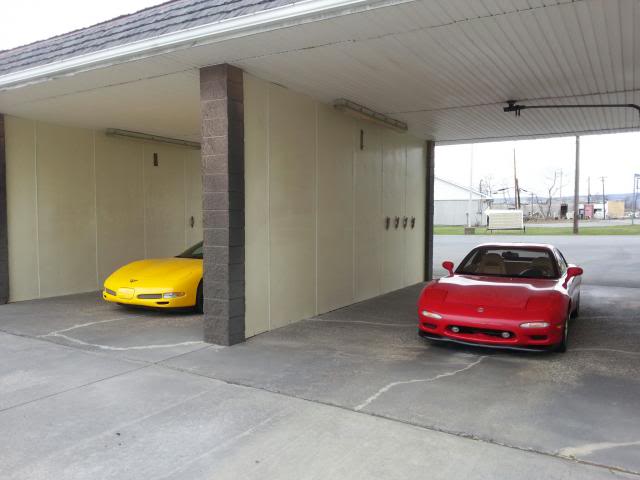
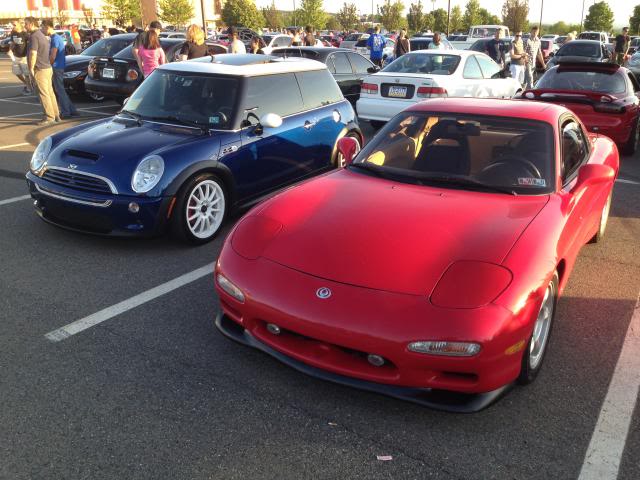
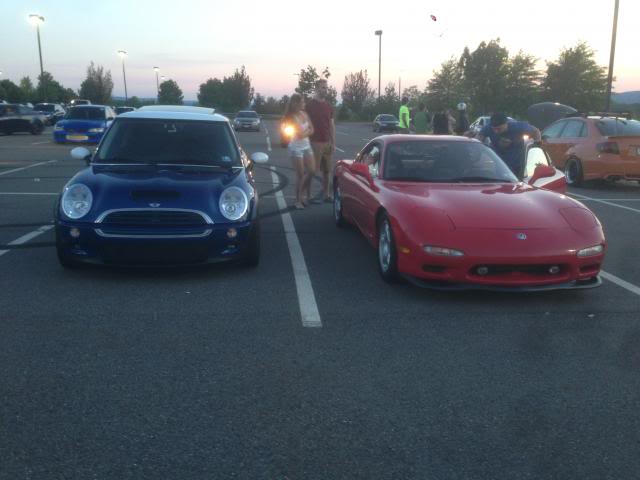
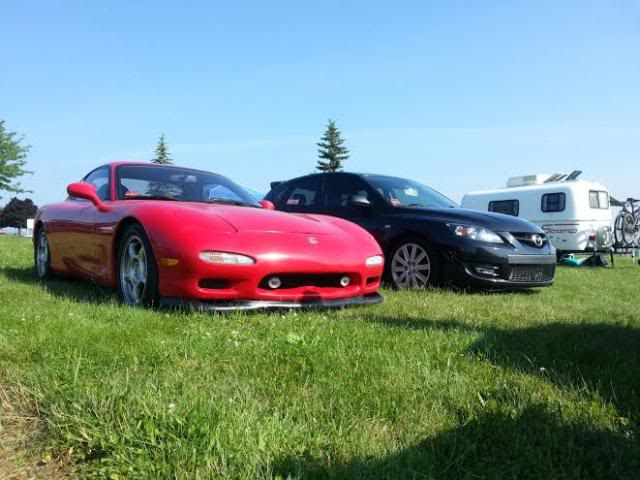
And finally two shots of my FD and my roommate's R53 together. These pictures have been waiting 4 years to be taken. We both have had a good hand in getting each others cars to the point they're at now. (That's my tall self in the red shirt between the cars in the second picture)
Before

Almost done

All shined up

On the way home from detailing she turned 77k miles.

And finally two shots of my FD and my roommate's R53 together. These pictures have been waiting 4 years to be taken. We both have had a good hand in getting each others cars to the point they're at now. (That's my tall self in the red shirt between the cars in the second picture)


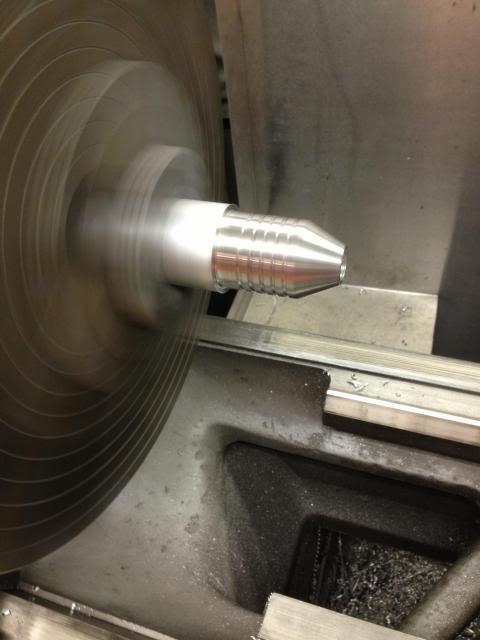
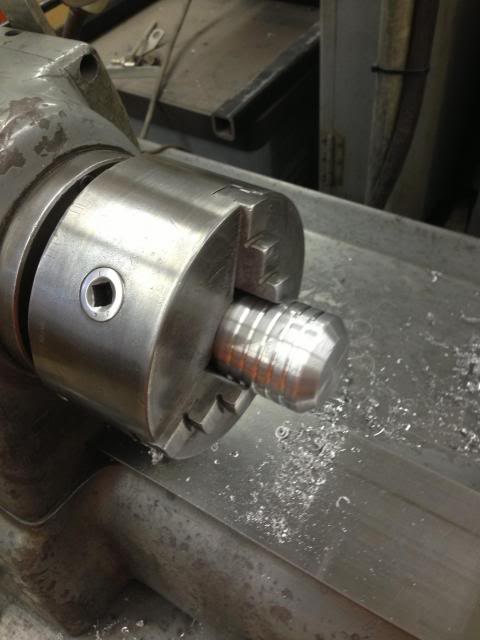
Not a real update on the build but I had to bump it up. I've just been enjoying the car and doing little things like adjusting the shifter (so I don't get stuck in reverse again), adding a new billet aluminum shift **** that I made, test fitting some upcoming custom fire extinguisher brackets, and driving the car every weekend.
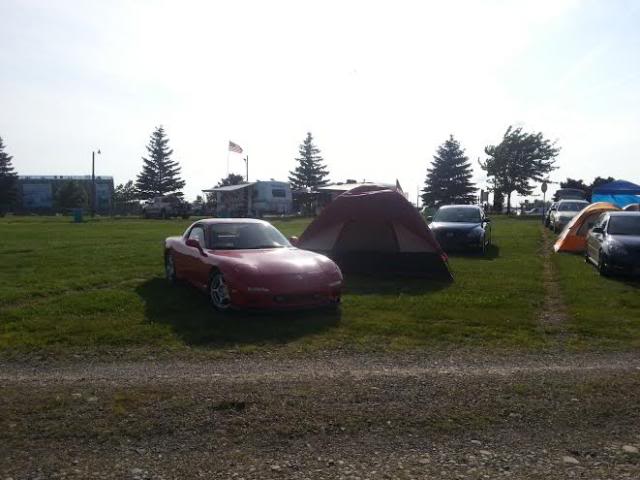
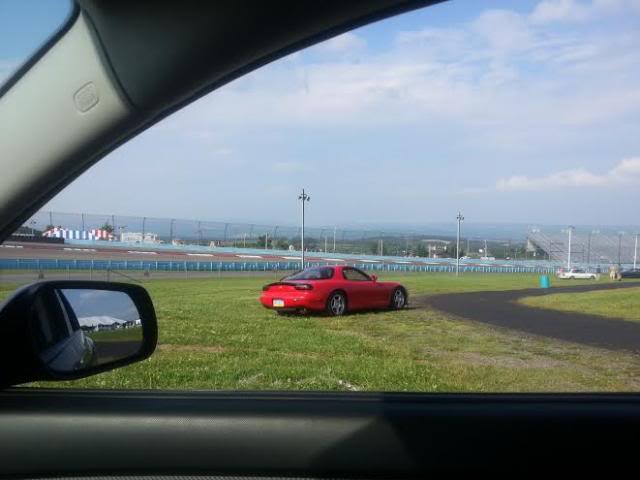
The past two weekends I have gone to races, one being Formula D at Wall and the other 6 hours of the Glen. Watkins Glen had a Mazda corral and a few smaller races going on over the weekend before the main race. Made a few friends and got to talk to some of the Mazda teams as well as get up close with the cars. The weekend put exactly 276 miles on the car with no problems other than the secondary turbo burning oil (which cant be fixed until winter) and the small oil pan leak which was already known. There were also two parade laps around the Glen. We were allowed to go as fast as our lead car could go while keeping up with the pace car. This was my first time on a track and probably this FD's first and it won't be the last.
Enjoy the pictures.


Its been a long time since my last post. I've just been driving the car and trying to decide whether to go single or replace my twins with a good set and do all the vacuum lines.
In my spare time I've been designing a a quick release fire extinguisher mount and its just about complete. I have to alter the bottom mount a little but the quick release is all done and working and it looks the part. If people like these and want one I can try to set up a group buy for them.

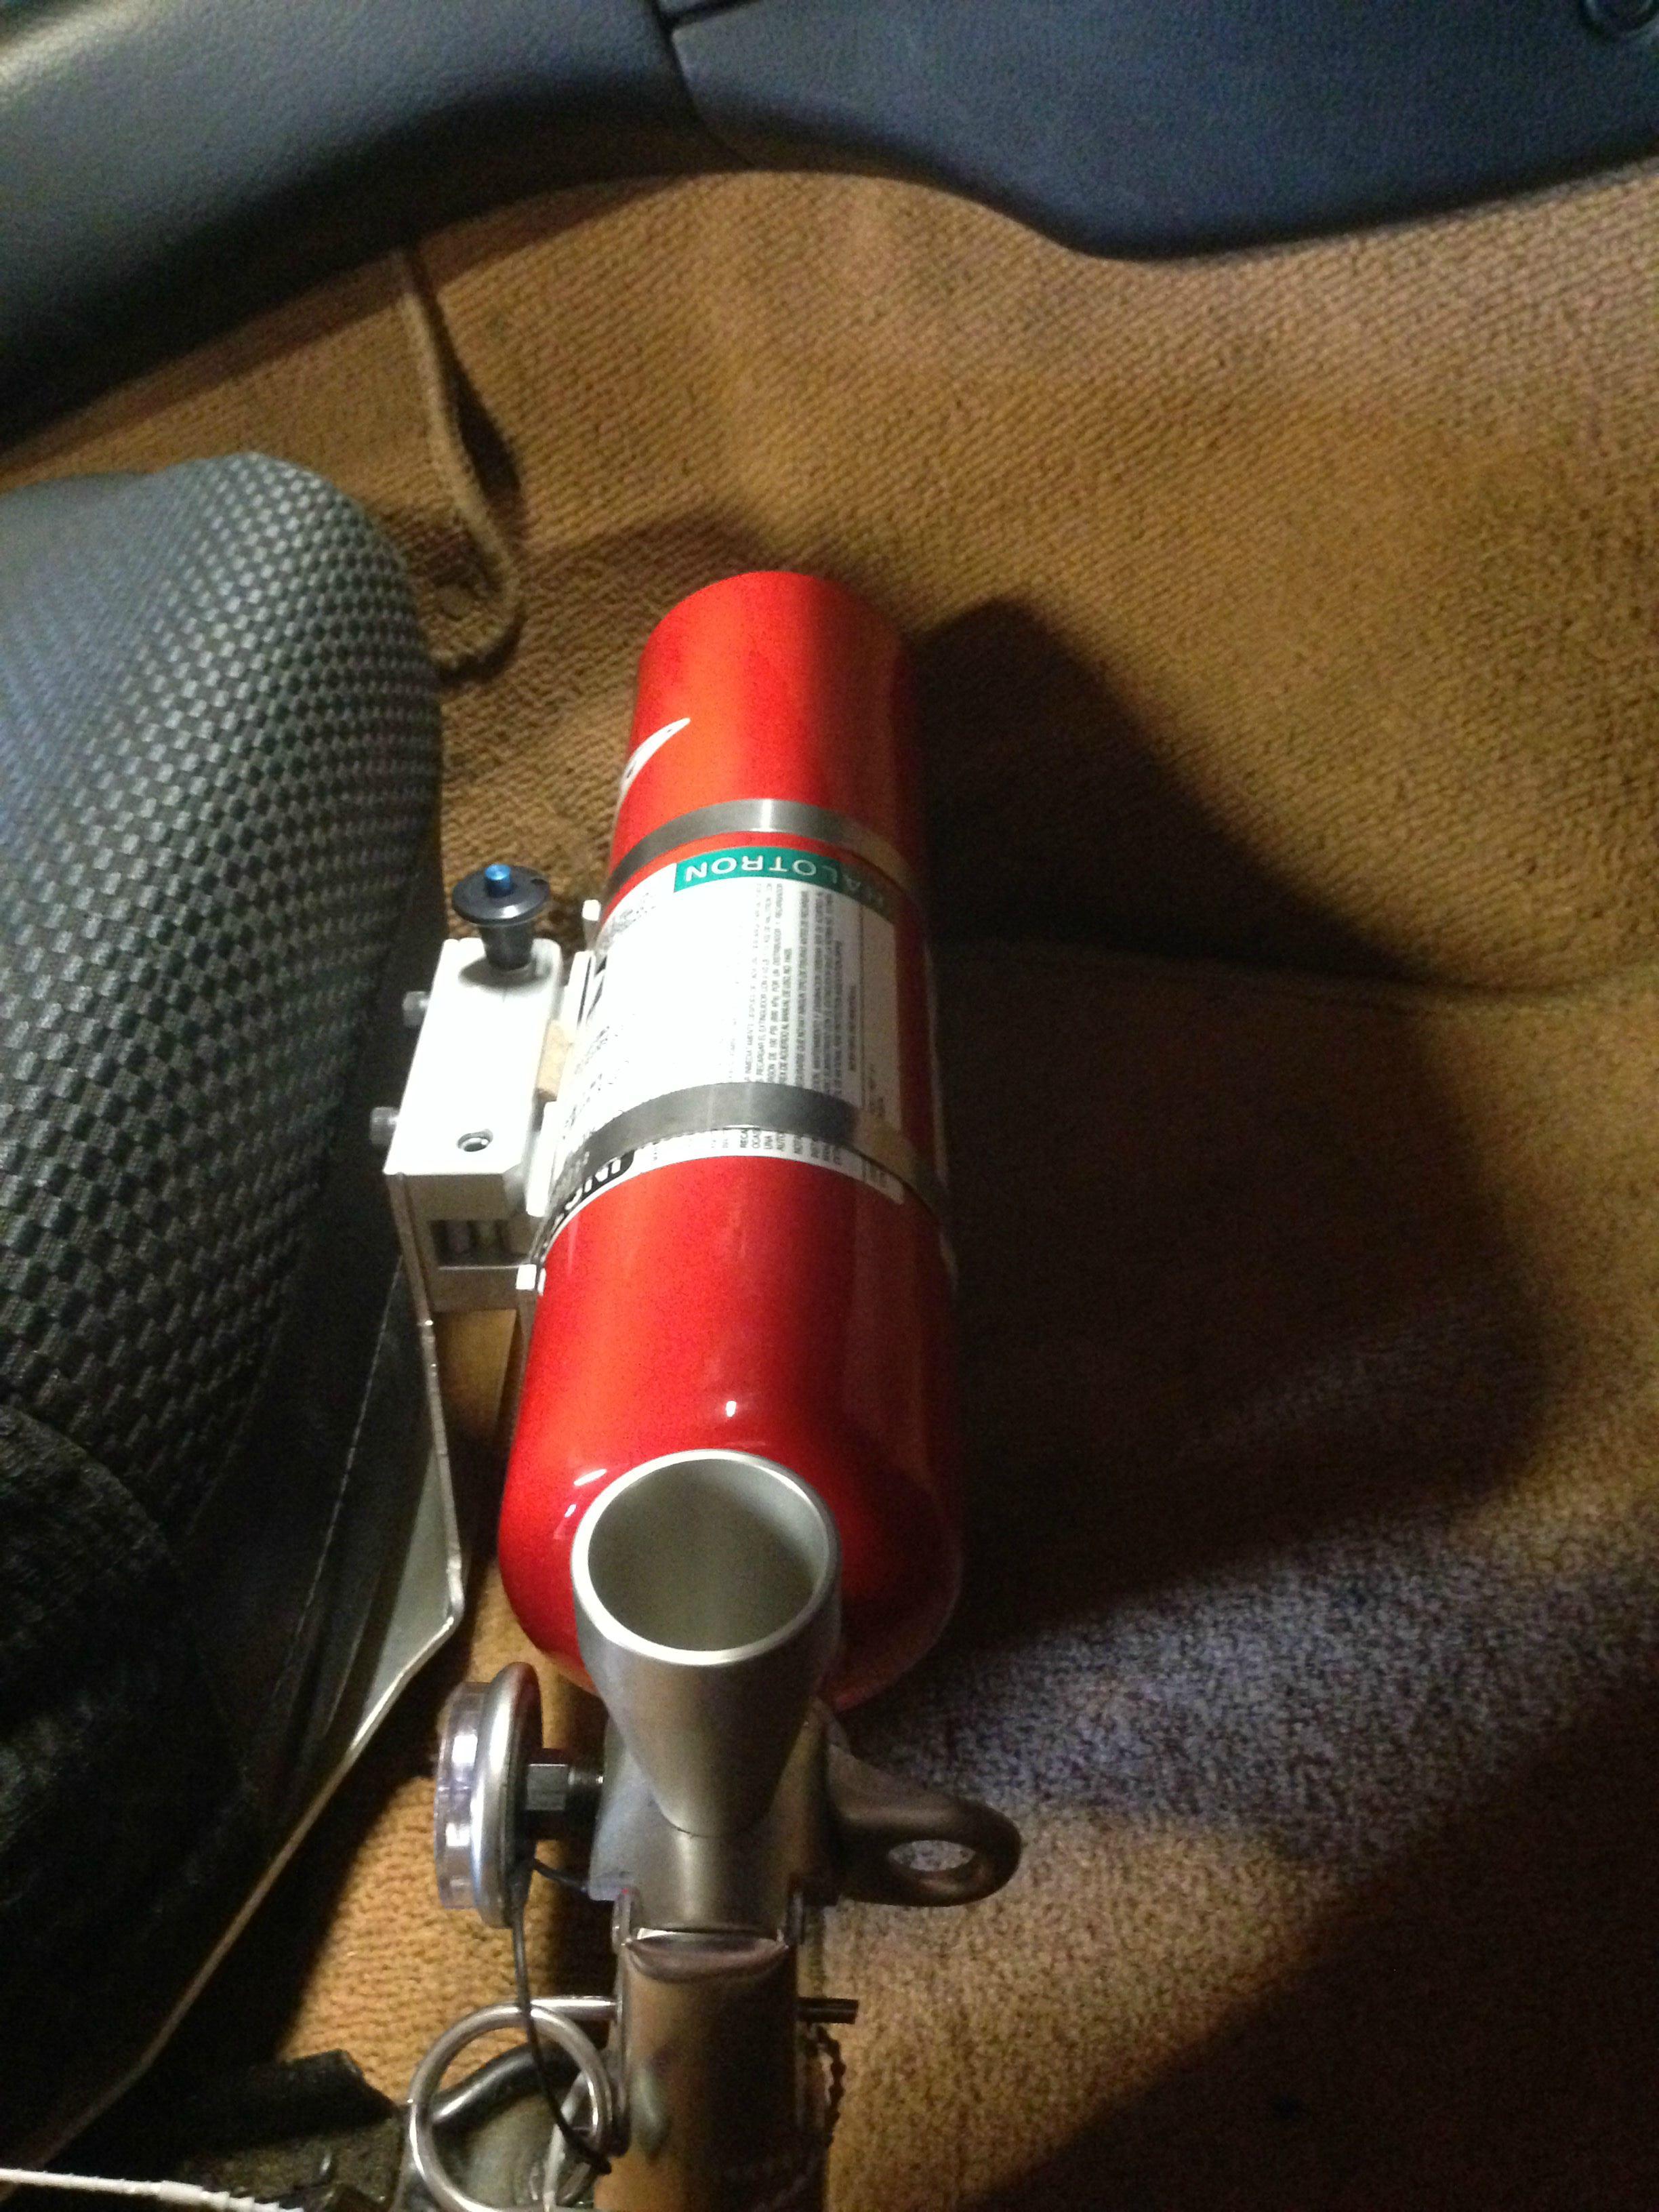
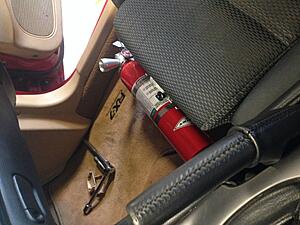
In my spare time I've been designing a a quick release fire extinguisher mount and its just about complete. I have to alter the bottom mount a little but the quick release is all done and working and it looks the part. If people like these and want one I can try to set up a group buy for them.


Went to start the car to go to a show yesterday and got denied. Car cranks but sounds weak and will not fire. I have spark and fuel pump runs. Pulled the intake elbow and smelled like fuel so simplest thing would be flooded. I pulled the plugs and they weren't wet, cranked the car with them out and reinstalled but no dice. I didn't have the time to really diagnose the issue so I'll have to do it later this week.
The last time it ran was two weeks ago. I had it inspected and returned it to the house, moved it from the driveway to the garage later that day. The next day I plugged in my PFC to see if it worked so I can sell it. The car started and idled, but I had to jump the fuel pump in the diag box for it to do so, so I shut it down (probably ran no more than a minute, Bad idea I know). I removed my PFC and put the Pettite ECU back in and did not start the car. Went to start it yesterday and it just sounds weak and will not fire. Logic says the PFC dumped fuel because it would've been in idle learn stage and flooded it out.
The last time it ran was two weeks ago. I had it inspected and returned it to the house, moved it from the driveway to the garage later that day. The next day I plugged in my PFC to see if it worked so I can sell it. The car started and idled, but I had to jump the fuel pump in the diag box for it to do so, so I shut it down (probably ran no more than a minute, Bad idea I know). I removed my PFC and put the Pettite ECU back in and did not start the car. Went to start it yesterday and it just sounds weak and will not fire. Logic says the PFC dumped fuel because it would've been in idle learn stage and flooded it out.
Long time no post. In the fall I got the Car deflooded and took it to the Chris Carlisi Memorial meet at NJMP. Once again that was a great meet and I will be attending the next one, (hopefully it's warmer next year). Since this meet is hosted by IRP In was able to talk with Ihor about my car and its goals. This really got the ball rolling for me on what I wanted out of the car and what fit in my budget.
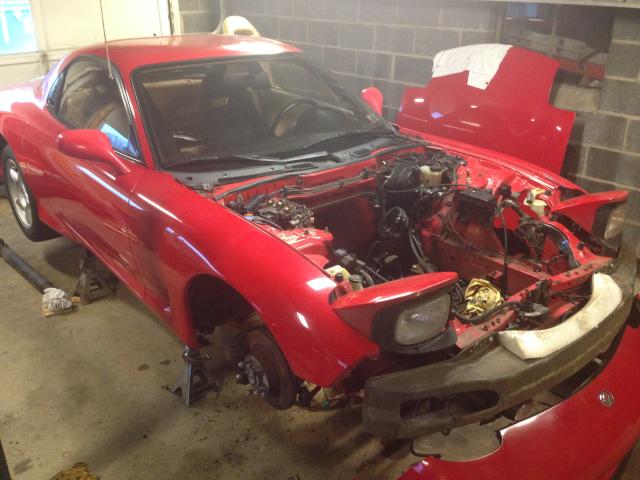
After the meet I had the car out once or twice more and got my last taste of it for the winter. I knew the motor had to come out to address the oil leaks and turbos at the very least. So out came the motor. This car was basically untouched since it was built so I had no surprises other than acorns in every crevice.
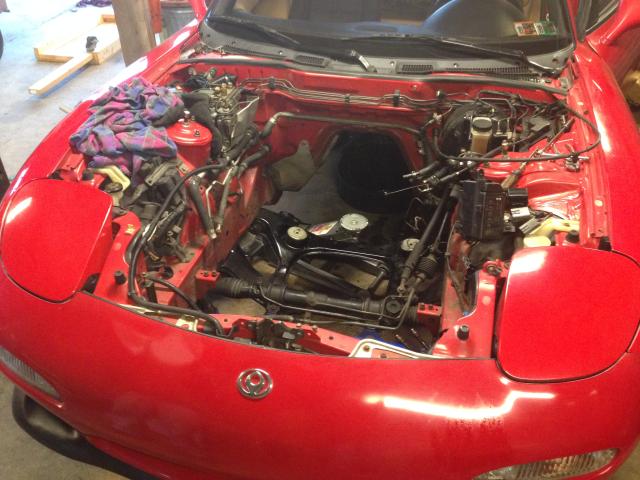
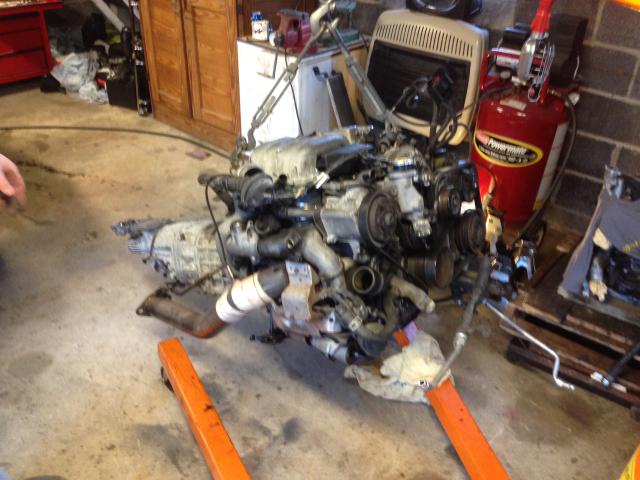

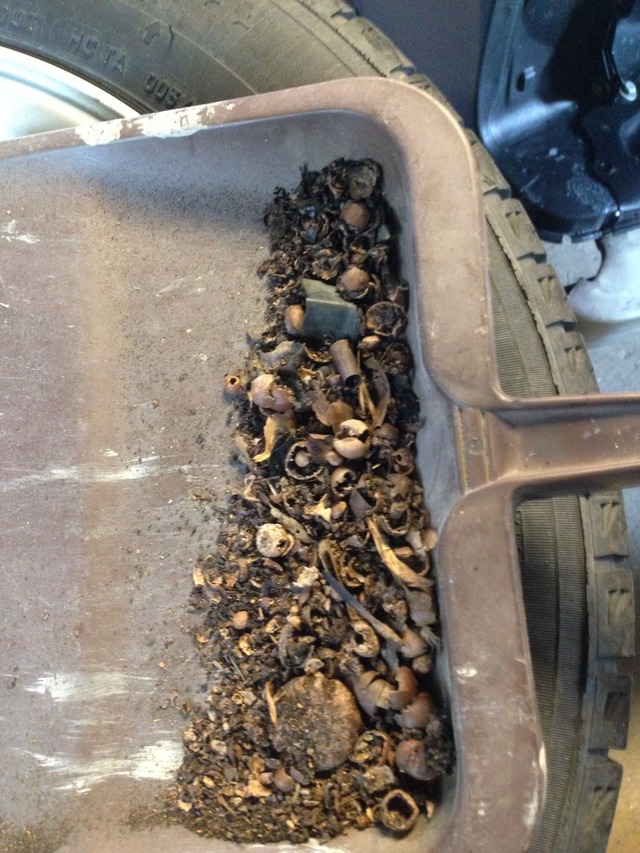
After the meet I had the car out once or twice more and got my last taste of it for the winter. I knew the motor had to come out to address the oil leaks and turbos at the very least. So out came the motor. This car was basically untouched since it was built so I had no surprises other than acorns in every crevice.


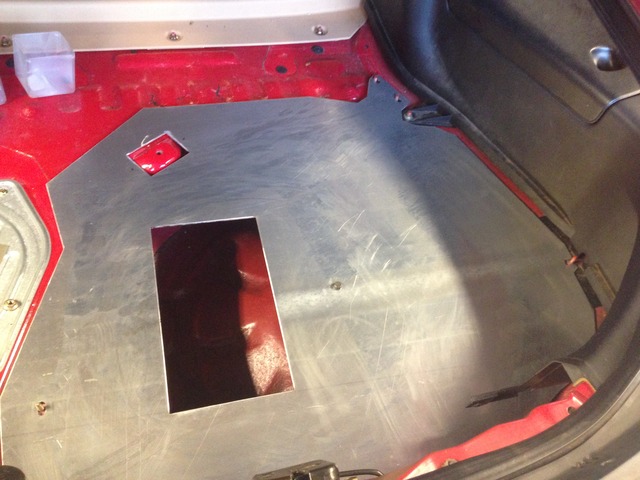
Since it was so cold out I got to work on little projects that I could manage in short spurts. I knew the spare was useless and wanted to put my battery in the back as well as get rid of the Bose system as it didn't even work.
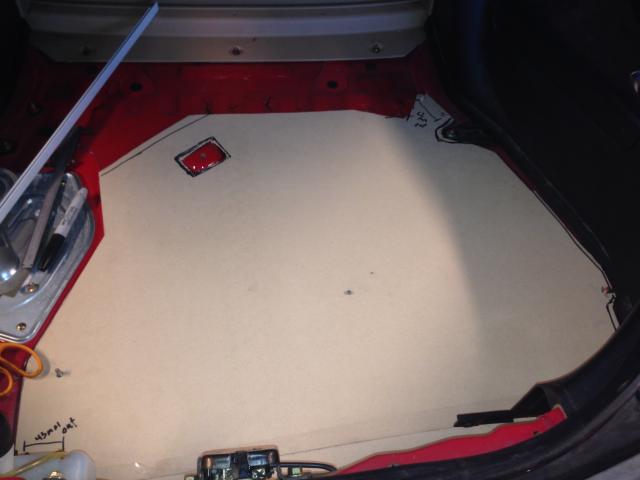
Paper board template
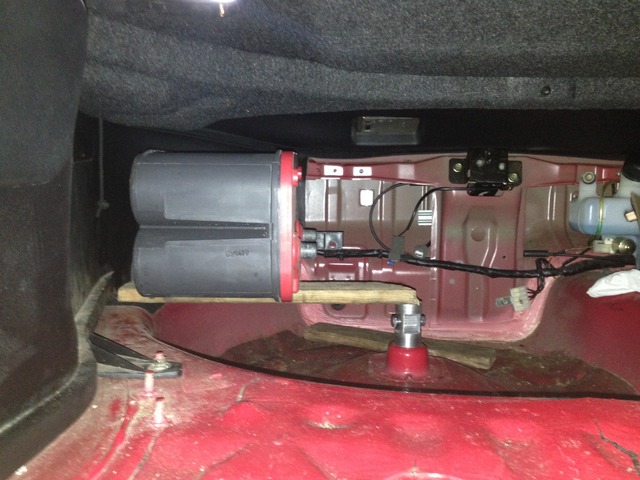
Optima clearance check with my machined center mount/ground point.
First test fit of the panel. Only had to clearance the one small piece of it with the grinder, all holes lined up perfectly. The battery box itself if waiting to be welded so I'll get back to this later. The cutout is for a pocket that I will store my 2 stroke oil and tool kit in.
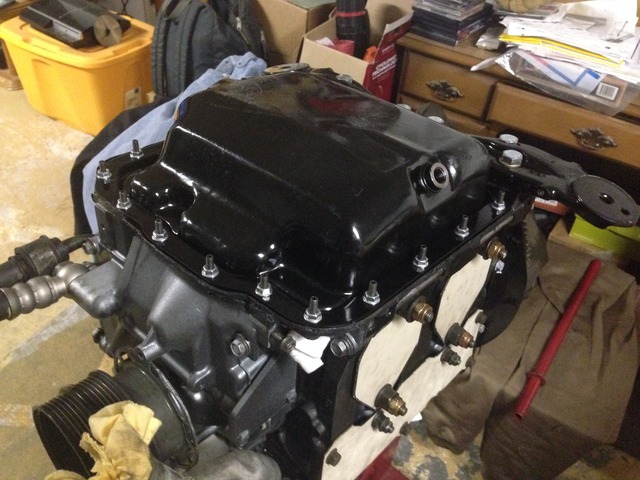
I also brought the rebuilt motor in the house to do the oil pan again and install my banzai brace(powdercoated black, it's an addiction)

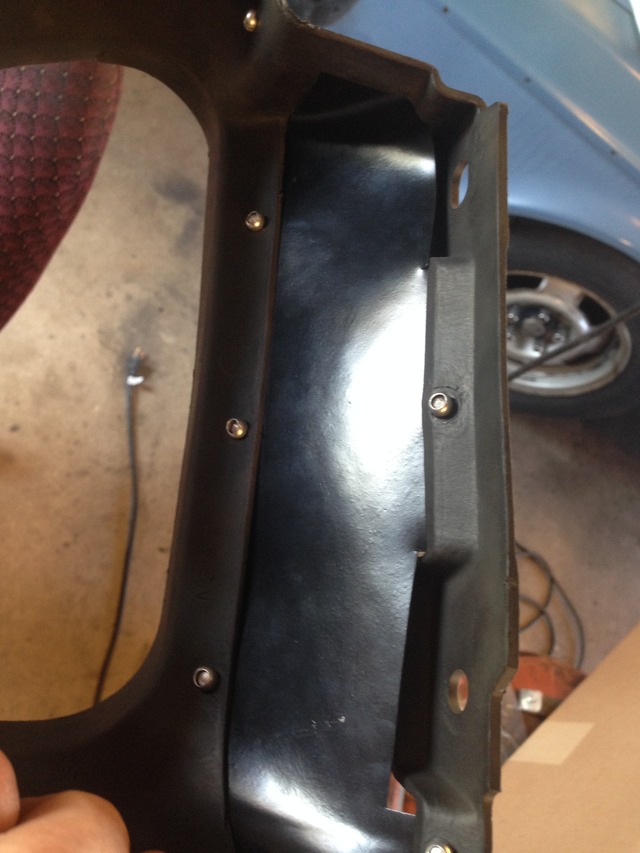
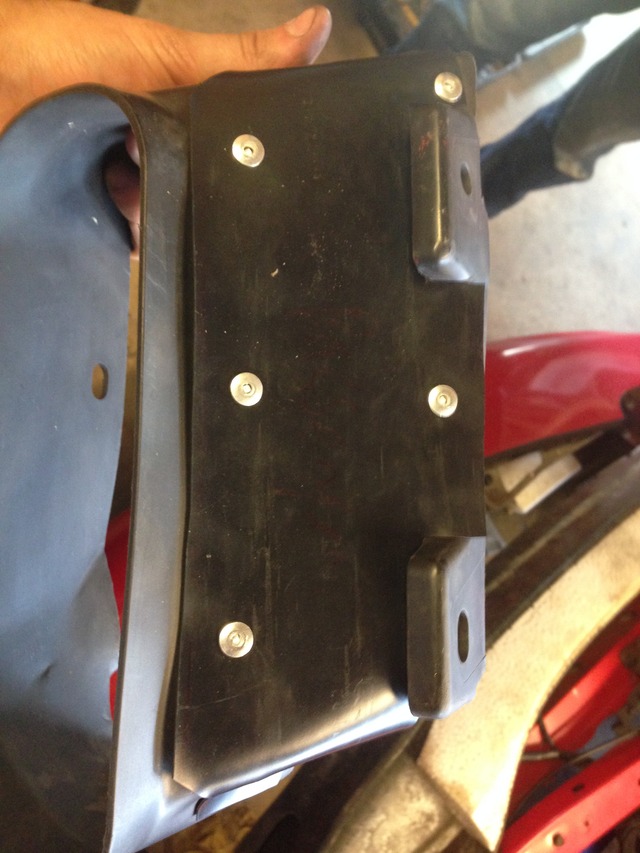
And one last little detail for this post was refurbing the rubber on the dual oil cooler ducts. The rubber was missing on one and very deteriorated on the other. Got some material called Maskant from work, a plastic/rubber that has suitable properties for the application.
Paper board template

Optima clearance check with my machined center mount/ground point.

First test fit of the panel. Only had to clearance the one small piece of it with the grinder, all holes lined up perfectly. The battery box itself if waiting to be welded so I'll get back to this later. The cutout is for a pocket that I will store my 2 stroke oil and tool kit in.

I also brought the rebuilt motor in the house to do the oil pan again and install my banzai brace(powdercoated black, it's an addiction)


And one last little detail for this post was refurbing the rubber on the dual oil cooler ducts. The rubber was missing on one and very deteriorated on the other. Got some material called Maskant from work, a plastic/rubber that has suitable properties for the application.


I've been working on the car nearly every night to get it done. In February I purchased a turbo kit from IRP along with many other supporting mods. I ended up waiting 3 months for this kit due to circumstances at the shop so I got a late start on the motor install. Parts started coming in from Ihor and I got to fitting them on my setup.
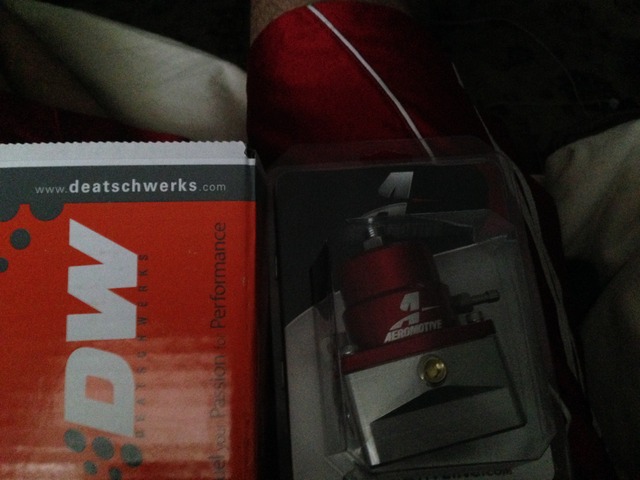
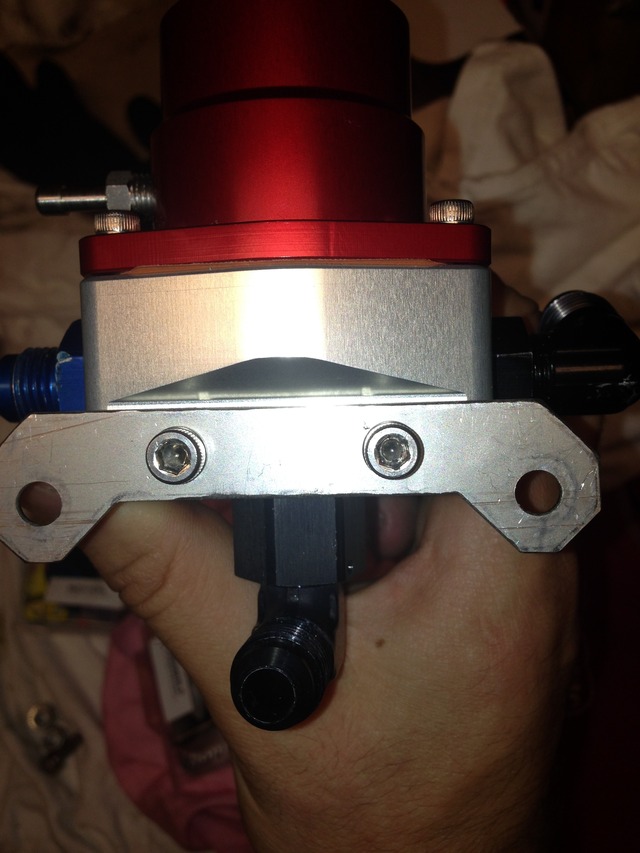
DeatschWerks DW300 and new FPR. I haven't heard of one of these being installed in an FD yet but I've only heard good things about the pump and it's more than adequate for my goals. Its similar to the Aeromotive Stealth but draws fewer amps. More on the install later.
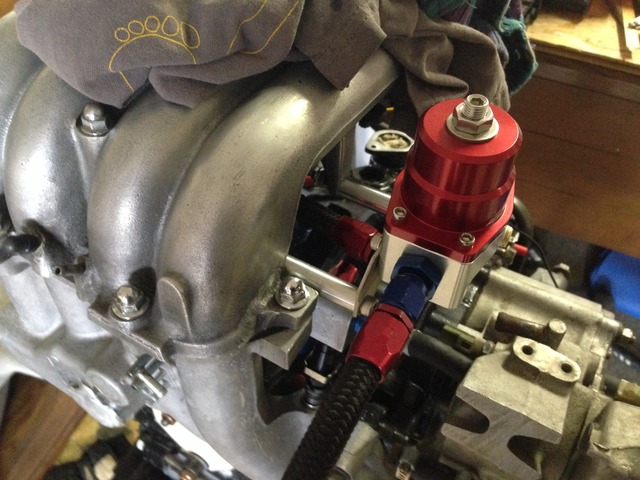
Fabbed up a mount for the FPR. Since I didnt want to put the motor in without the turbo system installed I was running blind with fitment when Fabricating these parts.
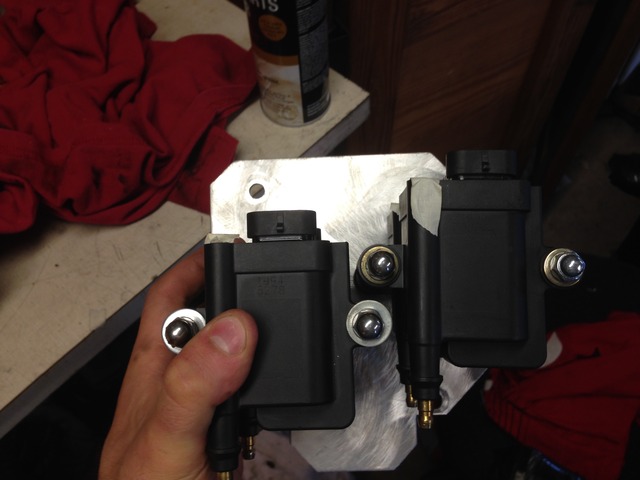
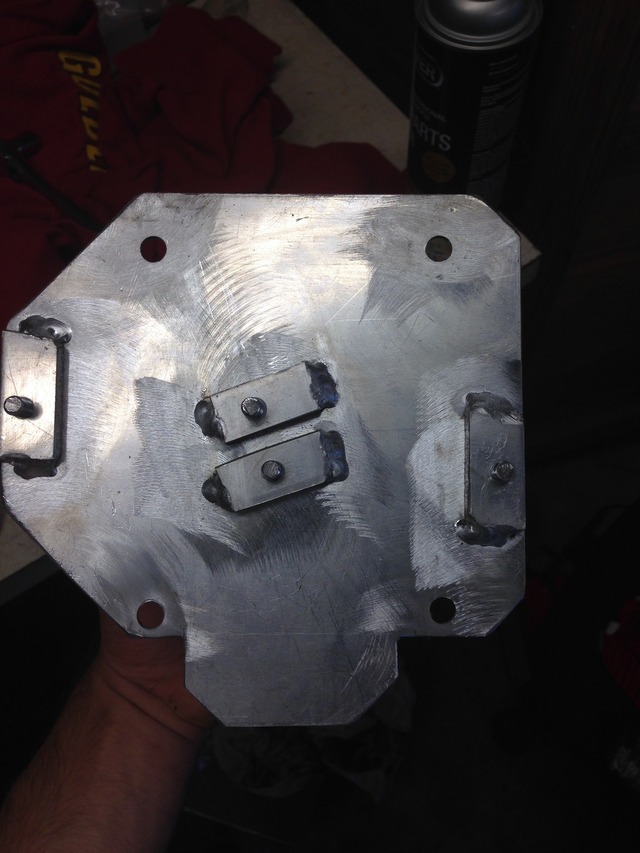
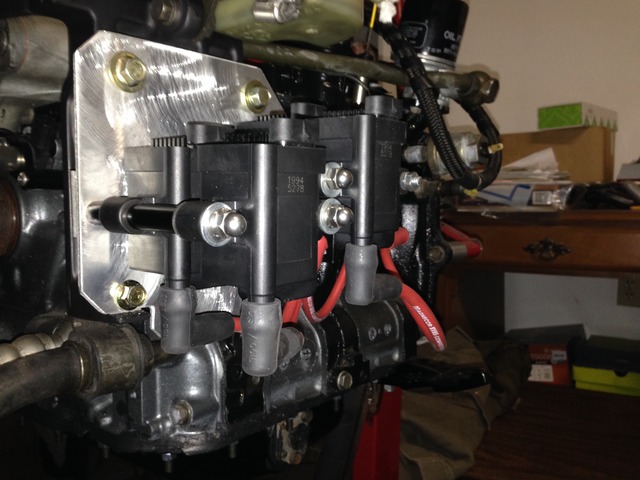
Set of 4 IGN-1A coils showed up so I can run direct fire. I made a mount for these to place them in the Air conditioning pump location. I wanted to keep cruise control so this was the only available location.
Also has this little guy show up. Plug and play unit for the FD.
DeatschWerks DW300 and new FPR. I haven't heard of one of these being installed in an FD yet but I've only heard good things about the pump and it's more than adequate for my goals. Its similar to the Aeromotive Stealth but draws fewer amps. More on the install later.

Fabbed up a mount for the FPR. Since I didnt want to put the motor in without the turbo system installed I was running blind with fitment when Fabricating these parts.


Set of 4 IGN-1A coils showed up so I can run direct fire. I made a mount for these to place them in the Air conditioning pump location. I wanted to keep cruise control so this was the only available location.


Also has this little guy show up. Plug and play unit for the FD.

The turbo system showed up soon after installing the FPR and coils on the engine so I got right to installing them.
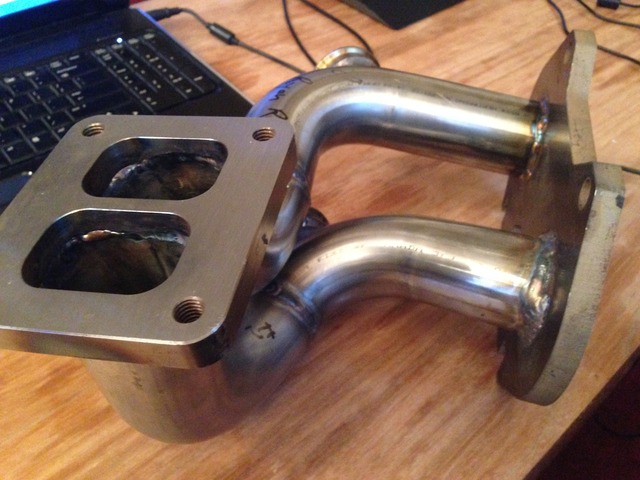
The turbo kit is the standard manifold and downpipe that IRP offers but I went with a TDX-57 from Elliot at Turblown. I went with this option because I wanted to retain a quick response but keep the price tag reasonable. After all, I'm building a street car, not a competitive track monster.
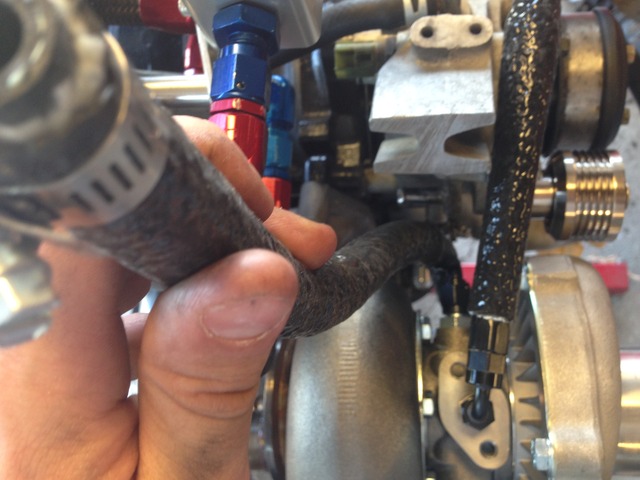
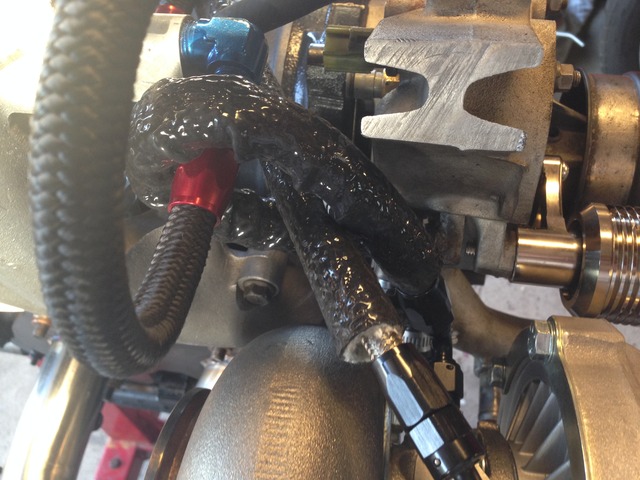
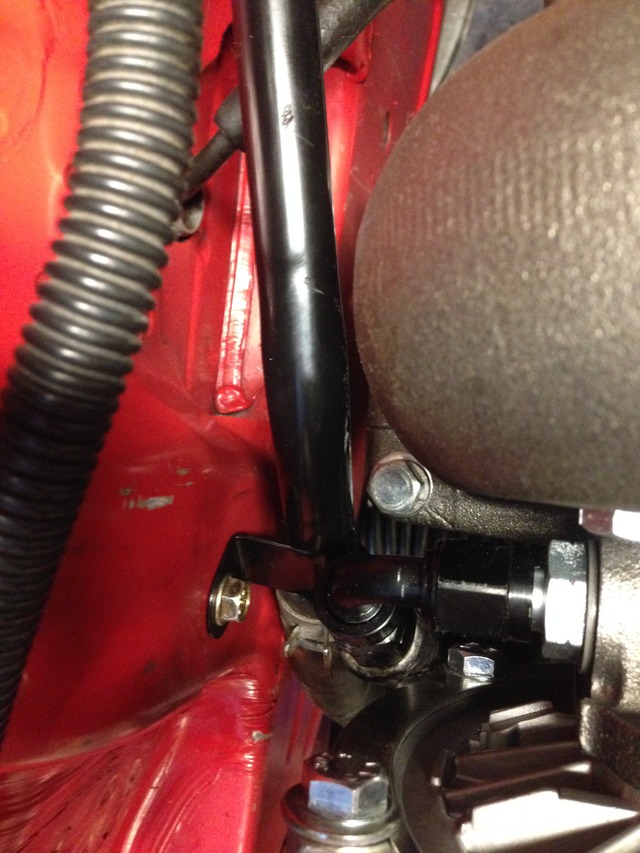
Upon install it was very apparent that the looped fuel line had to be moved because it hovered right above the turbine housing and got in the way of the coolant & oil feel lines.
Now onto a little info about the IRP kit. In my eyes the coolant feed line in not ideal. It has to make a full loop in order to attach to the stock feed barb on the water pump housing. This is cause by how the manifold positions the turbo. No real fault because this works but it is not ideal.
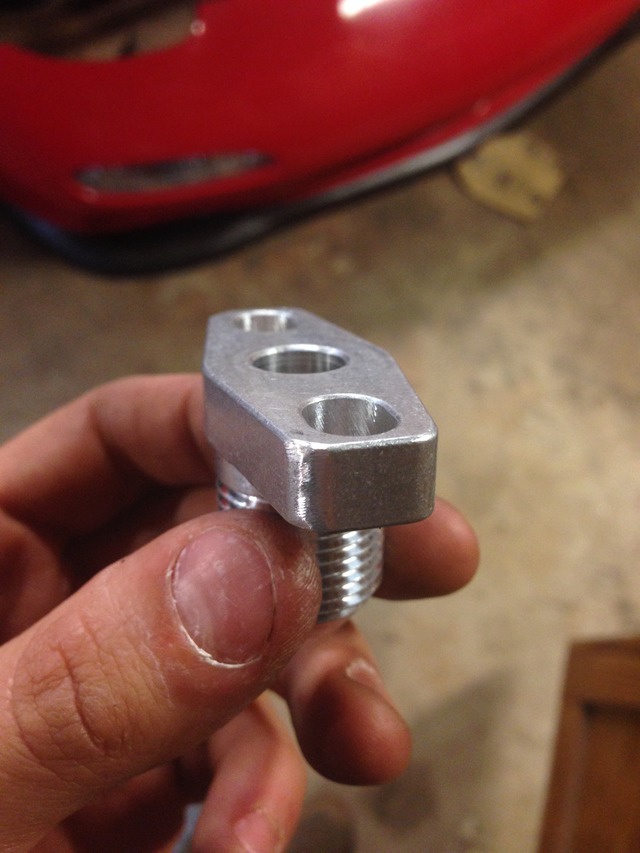
Another issue I ran into was the fitting for the oil return. This was a somewhat universal 10-AN fitting that may or may not have been designed for the FD. The fitting would not sit flat when mounting on the block. It was not sitting on the machined surface of the block, instead two corners of the flange were catching on the edge of the unmachined section of the block. Hit it with the die grinder and that took care of that.
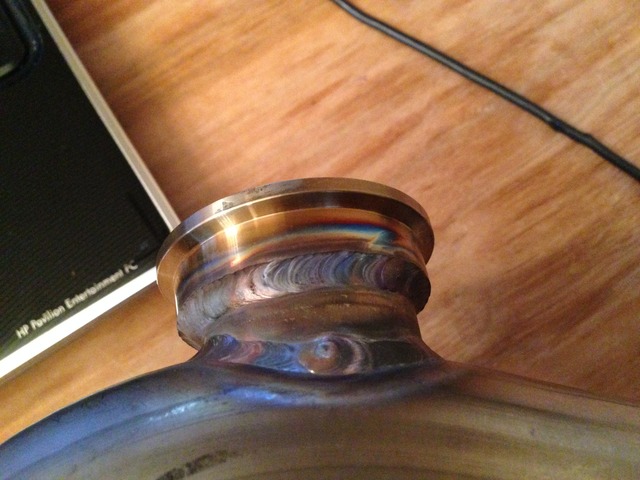
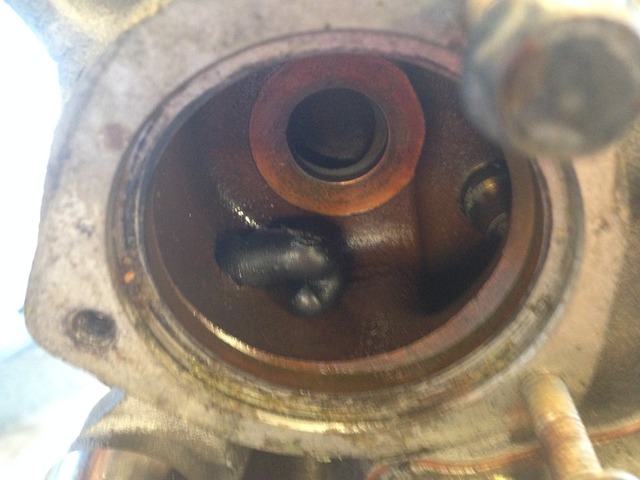
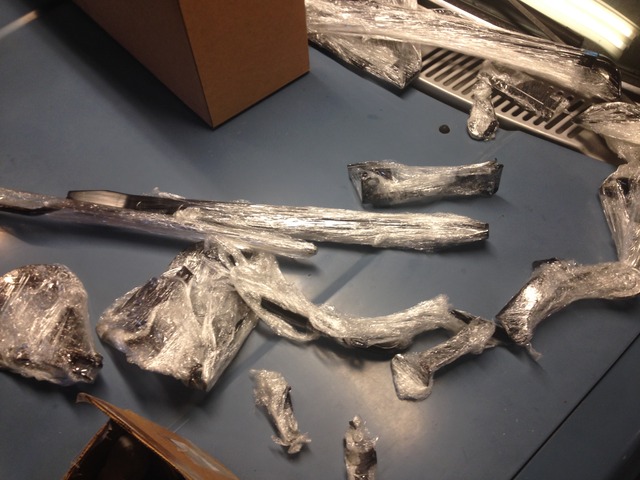
Now a little issue that showed up to haunt me from the old bent car. The motor was rebuilt by Speed 1 and the turbo coolant feed & returns were capped off by them or the previous owner. When I pulled these caps I found this on the feed barb.(Picture taken after diggin at it a little bit)
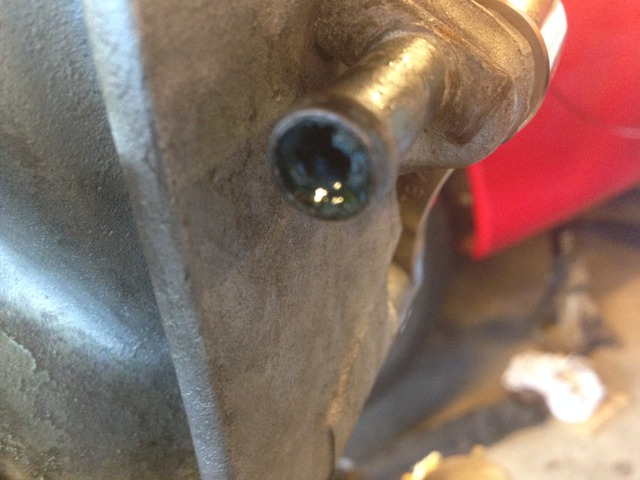
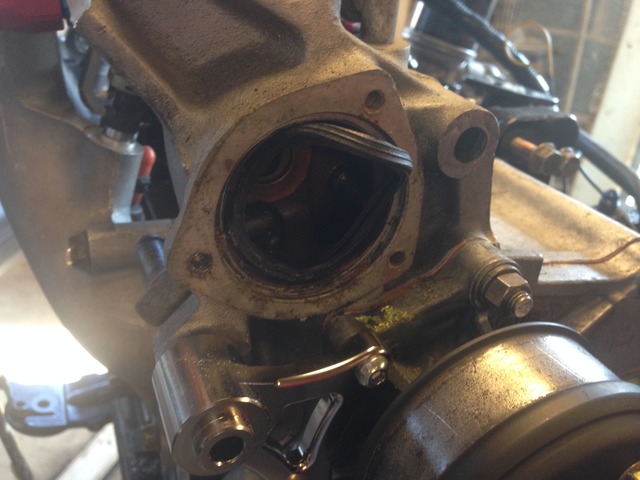
It was filled with silicon. It wasnt apparent whether Speed 1 did the silicon work or the previous owner of the old car but it had to go. Off came the Thermostat housing to investigate further. Turned out there was no thermostat, the thermostat gasket/ring that was there wasnt seated either. I have no idea how it even kept the coolant system from leaking. Oh, and the silicon job was impressive.
The turbo kit is the standard manifold and downpipe that IRP offers but I went with a TDX-57 from Elliot at Turblown. I went with this option because I wanted to retain a quick response but keep the price tag reasonable. After all, I'm building a street car, not a competitive track monster.


Upon install it was very apparent that the looped fuel line had to be moved because it hovered right above the turbine housing and got in the way of the coolant & oil feel lines.
Now onto a little info about the IRP kit. In my eyes the coolant feed line in not ideal. It has to make a full loop in order to attach to the stock feed barb on the water pump housing. This is cause by how the manifold positions the turbo. No real fault because this works but it is not ideal.


Another issue I ran into was the fitting for the oil return. This was a somewhat universal 10-AN fitting that may or may not have been designed for the FD. The fitting would not sit flat when mounting on the block. It was not sitting on the machined surface of the block, instead two corners of the flange were catching on the edge of the unmachined section of the block. Hit it with the die grinder and that took care of that.

Now a little issue that showed up to haunt me from the old bent car. The motor was rebuilt by Speed 1 and the turbo coolant feed & returns were capped off by them or the previous owner. When I pulled these caps I found this on the feed barb.(Picture taken after diggin at it a little bit)

It was filled with silicon. It wasnt apparent whether Speed 1 did the silicon work or the previous owner of the old car but it had to go. Off came the Thermostat housing to investigate further. Turned out there was no thermostat, the thermostat gasket/ring that was there wasnt seated either. I have no idea how it even kept the coolant system from leaking. Oh, and the silicon job was impressive.


It always amazes me what people will do to a vehicle because of being too cheap or too lazy to fix it properly. It's not like it's a 22r or anything.
Anyway, glad you're taking care of it. I'll be interested to see your results from the turbo.
Anyway, glad you're taking care of it. I'll be interested to see your results from the turbo.
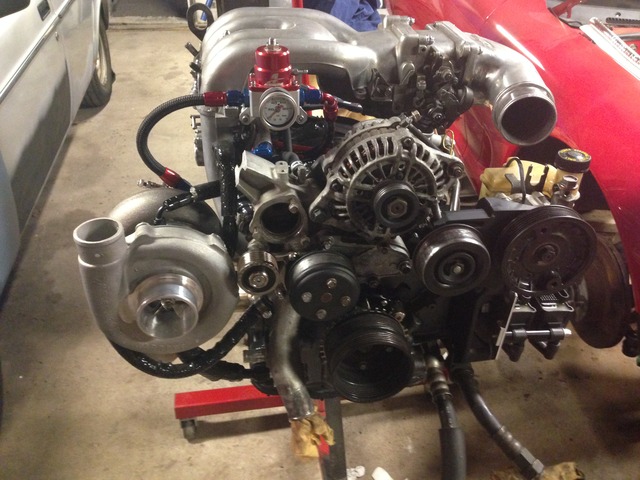
Soon after I got the turbo system on I got the clutch and trans mounted up, ready to drop in. I also had a bunch of the brackets in the engine bay powdercoated satin black. This had to be done because the brackets were beginning to oxidize and drove me insane when looking at the engine bay. Powdercoating really does become an addiction.
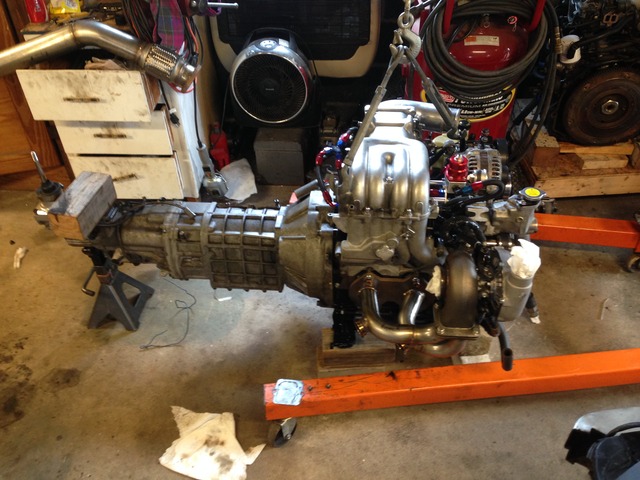
When I dropped the motor in everything went as planned. There was only one fitment issue that may or may not be a problem. The heater hard line runs very close to the turbine housing and manifold flange. not a big problem as it is a hard line but the hard line ends and changes to rubber fairly close to that area. I brought up the concern to Ihor and he was nice enough to send out some silicon line to re-route the heater line. Only problem is that the line he sent is blue and doesn't really fit my color scheme. For now I will heat wrap the line and keep a close eye out for issues.
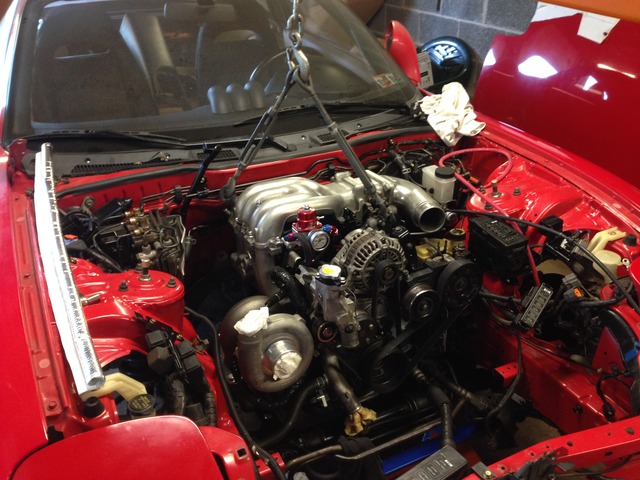
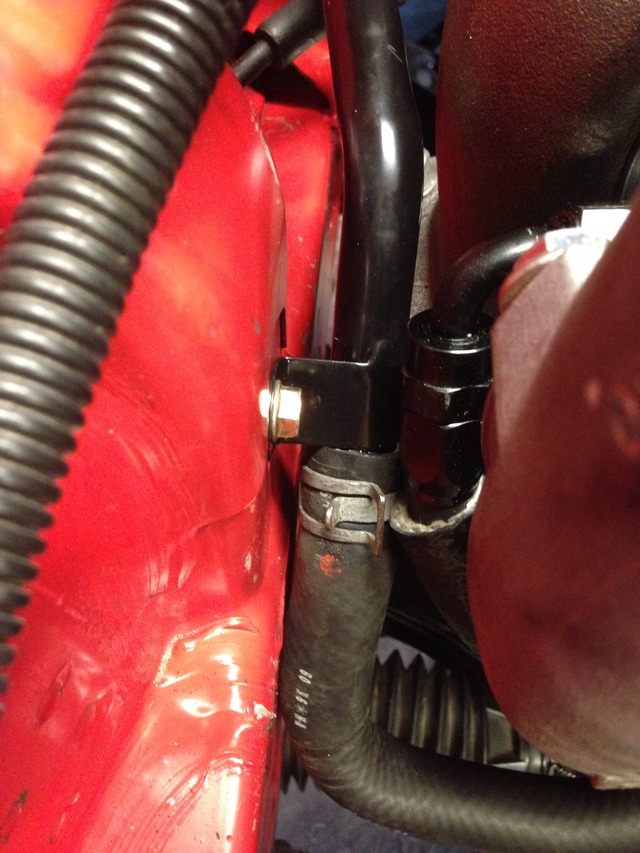
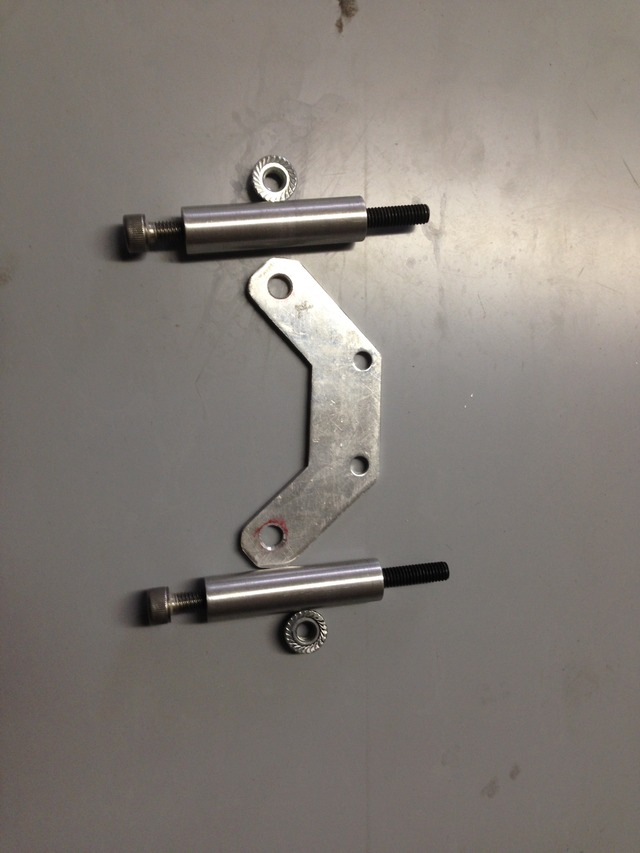
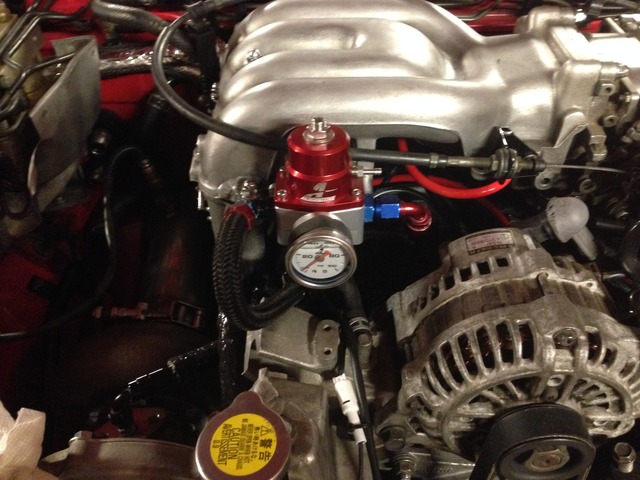
A day later I looked at the engine bay and realized I had one other fitment issue. The FPR was obviously above the hood line. I could tell I had room to adjust my bracket so I put the hood on quick to measure how much I needed to bring it down. One program later on a piece of scrap and I had a new FPR bracket made out of 16 Ga 304. I also shortened my standoffs by .500" to gain a little more clearance. Fuel lines were adjusted accordingly, not ideal but these will work just fine and can be re-made when the car is down for another extended period.


When I dropped the motor in everything went as planned. There was only one fitment issue that may or may not be a problem. The heater hard line runs very close to the turbine housing and manifold flange. not a big problem as it is a hard line but the hard line ends and changes to rubber fairly close to that area. I brought up the concern to Ihor and he was nice enough to send out some silicon line to re-route the heater line. Only problem is that the line he sent is blue and doesn't really fit my color scheme. For now I will heat wrap the line and keep a close eye out for issues.


A day later I looked at the engine bay and realized I had one other fitment issue. The FPR was obviously above the hood line. I could tell I had room to adjust my bracket so I put the hood on quick to measure how much I needed to bring it down. One program later on a piece of scrap and I had a new FPR bracket made out of 16 Ga 304. I also shortened my standoffs by .500" to gain a little more clearance. Fuel lines were adjusted accordingly, not ideal but these will work just fine and can be re-made when the car is down for another extended period.

