
Turk’s Buildup, One Dream & Endless Nightmares

Turk’s Buildup, One Dream & Endless Nightmares
After over 3 years of owning the car I have decided I should start my build thread and with my college career over I should actually have time to start and update a thread as I write up the past and make current progress.
I bought the car in the summer of 2010 after my first year of college, studying mechanical engineering. This is what brought me to the rotary. I loved how it worked and how different it was. I was on a budget, trying to find a car that fit my price range with some mods that I wanted done already. I didn’t know much about these cars or any car for that matter but I had previously built an ATV from the ground up and was mechanically inclined. I finally stumbled upon a car that fit the profile of what I was looking for and all looked good (to the untrained FD owner). I’m waiting for someone to respond with ”Oh, you bought that car, that sucks.”
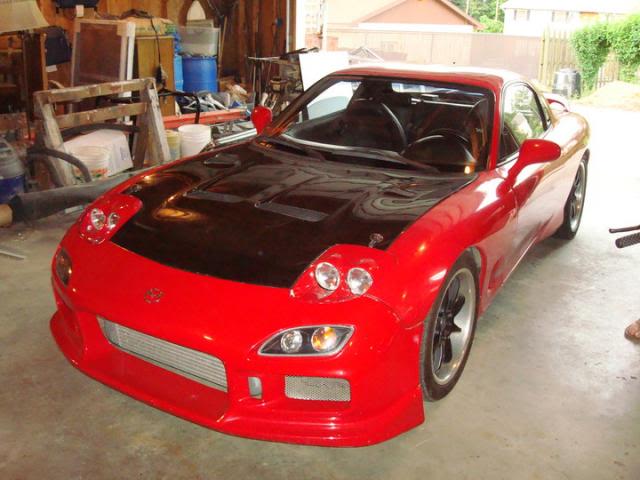
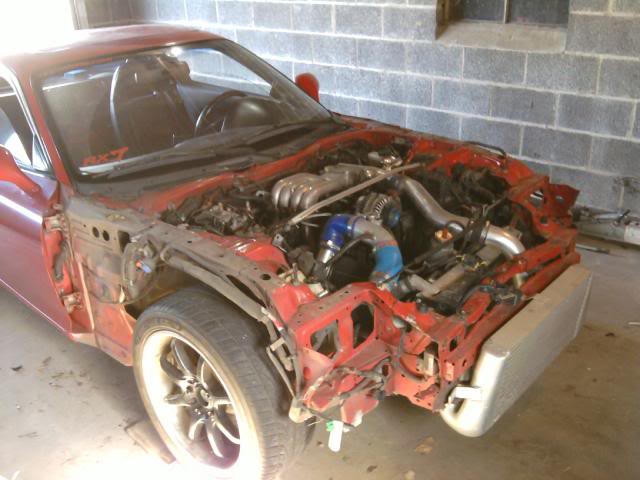
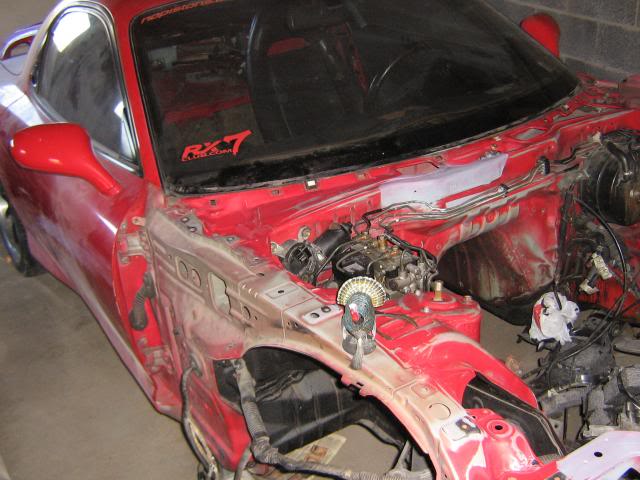
The car had a single turbo conversion with an OBX manifold, HKS wasegate, 3" straight through exhaust to a racing beat dual tip, koyo rad, Real Greddy front mount, PFC, upgraded fuel pump, SS brake lines, bald tires, leaky oil pan, bad struts, and many other problems. This is what it looked like when it was first pulled into my garage.
I bought the car in the summer of 2010 after my first year of college, studying mechanical engineering. This is what brought me to the rotary. I loved how it worked and how different it was. I was on a budget, trying to find a car that fit my price range with some mods that I wanted done already. I didn’t know much about these cars or any car for that matter but I had previously built an ATV from the ground up and was mechanically inclined. I finally stumbled upon a car that fit the profile of what I was looking for and all looked good (to the untrained FD owner). I’m waiting for someone to respond with ”Oh, you bought that car, that sucks.”
The car had a single turbo conversion with an OBX manifold, HKS wasegate, 3" straight through exhaust to a racing beat dual tip, koyo rad, Real Greddy front mount, PFC, upgraded fuel pump, SS brake lines, bald tires, leaky oil pan, bad struts, and many other problems. This is what it looked like when it was first pulled into my garage.


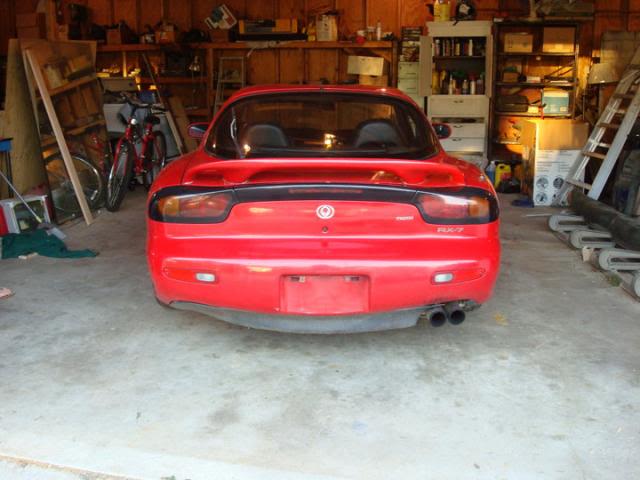
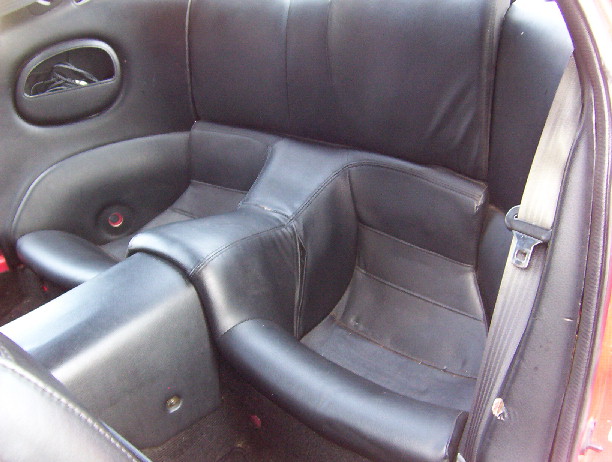
3 years down the road I am still on the fence as to whether it was a good buy or not. The backseats weren't complete (missing seatbelts and a pivot point was broken on the backrest) so I traded them off for parts as only a chihuahua could fit back there.
There is going to be a realative lack of photos until we hit recent times because finally got a smartphone 9 months ago.
I didn’t drive the car a lot the summer I got because I didn’t trust it all that much (I have trust issues with things that are modified that I haven’t built myself). This was due to a master cylinder failure and hot start issues so I assumed possible coolant seal leak.
My parents bought the adjacent lot to our house which just so happend to have a 2 car garage on it this became my garage for all things car related.
So winter rolled around that year and as planned I began to tear the car down, expecting to just rebuild the motor and fix up the drivetrain. and drive the car fixing things along the way from there.
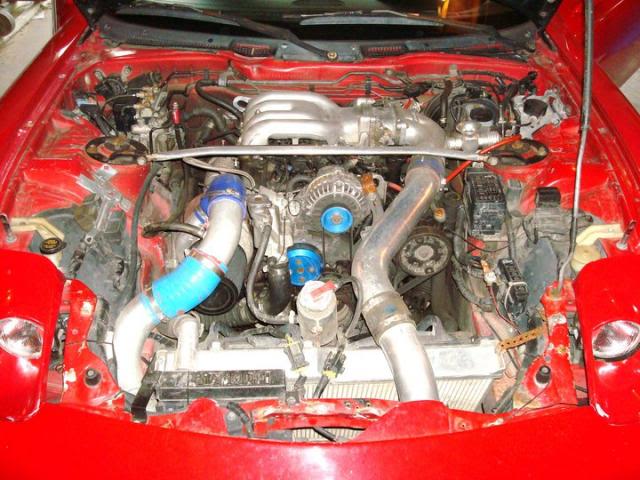
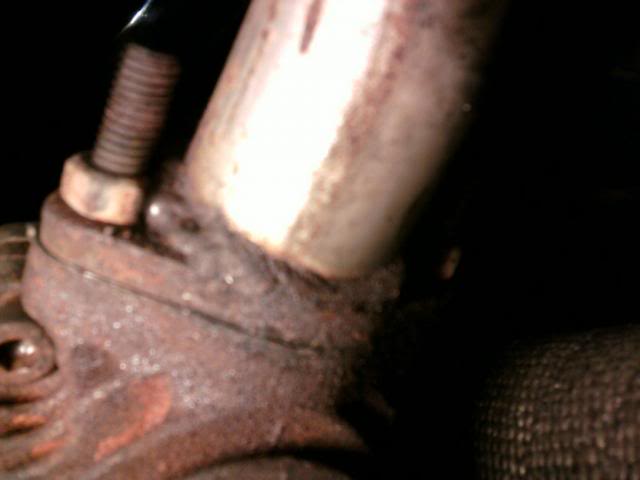
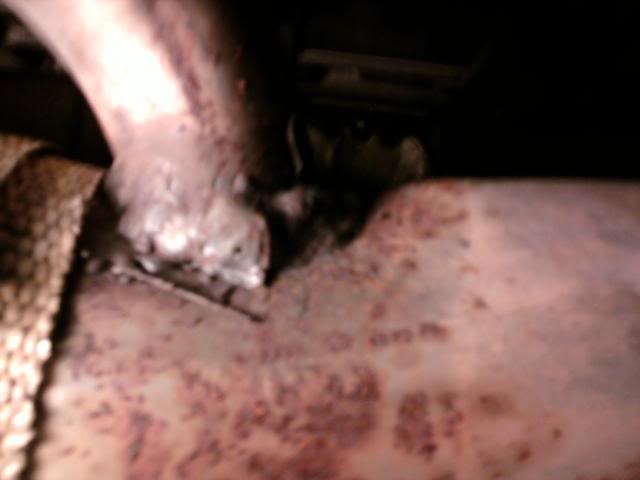
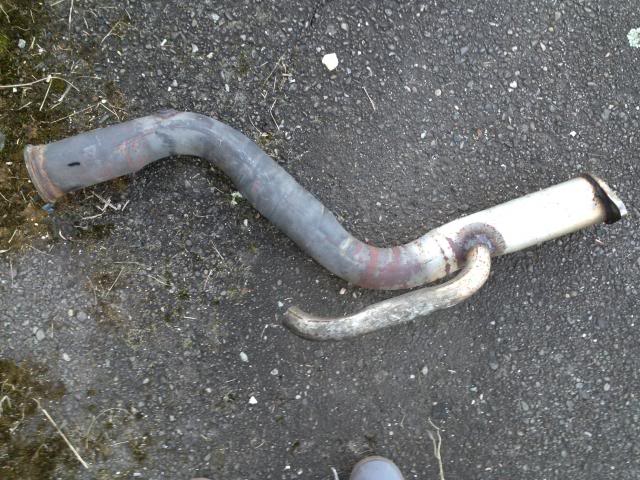
When I began disassembly it became apparent how poorly built the car was by the previous owner. Here are some of the issues. Wastegate was welded to the downpipe and the downpipe had some exceptional quality welding.
Installed incorrectly
Top notch down pipe that I had to use a sawzall to remove
Broken tensioner

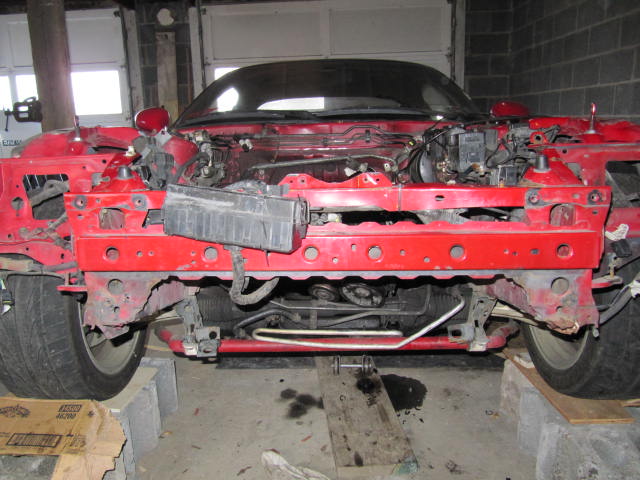
Motor out
I didn’t drive the car a lot the summer I got because I didn’t trust it all that much (I have trust issues with things that are modified that I haven’t built myself). This was due to a master cylinder failure and hot start issues so I assumed possible coolant seal leak.
My parents bought the adjacent lot to our house which just so happend to have a 2 car garage on it
this became my garage for all things car related.So winter rolled around that year and as planned I began to tear the car down, expecting to just rebuild the motor and fix up the drivetrain. and drive the car fixing things along the way from there.


When I began disassembly it became apparent how poorly built the car was by the previous owner. Here are some of the issues. Wastegate was welded to the downpipe and the downpipe had some exceptional quality welding.
Installed incorrectly


Top notch down pipe that I had to use a sawzall to remove

Broken tensioner

Motor out

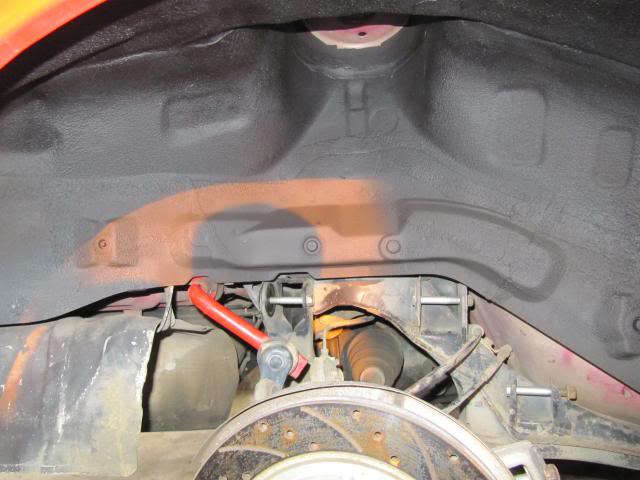
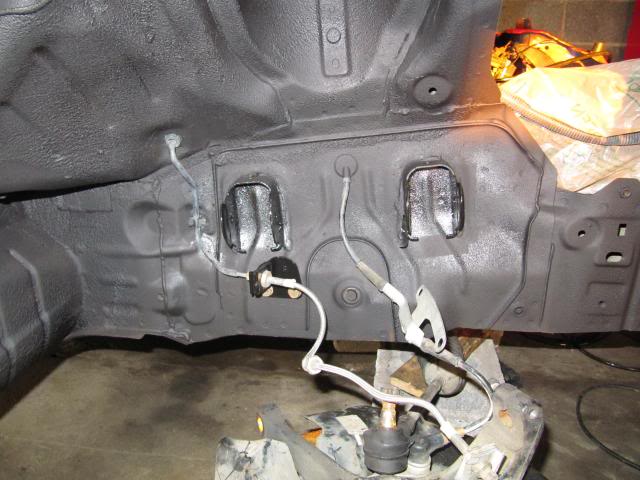
The biggest issue of all that I found was that the car had been hit in the driver side at some point and the pulled the rail straight but didn’t pull the kink out of the rail. Instead they decided it would be better to weld a 0.250” plate over it and call it a day. In hindsight I should’ve addressed this issue immediately but I had two frame shops come look at it and assured me the car was straight and everything looked good. So I took the professionals word for it and began doing some other work on the car.
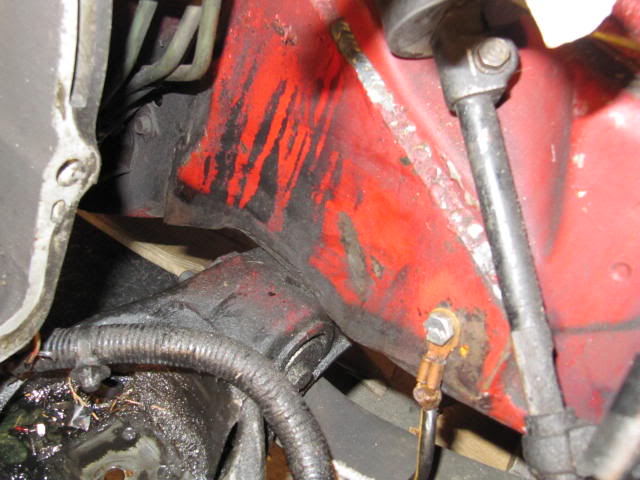
Wrinkling by the cruise control actuator

Wrinkling by the cruise control actuator


Trending Topics
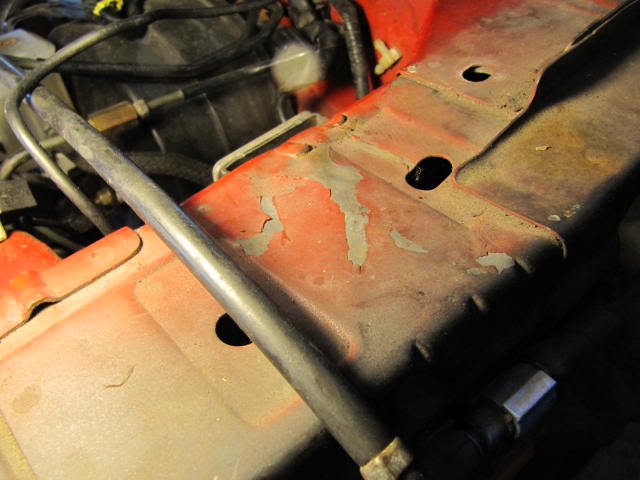
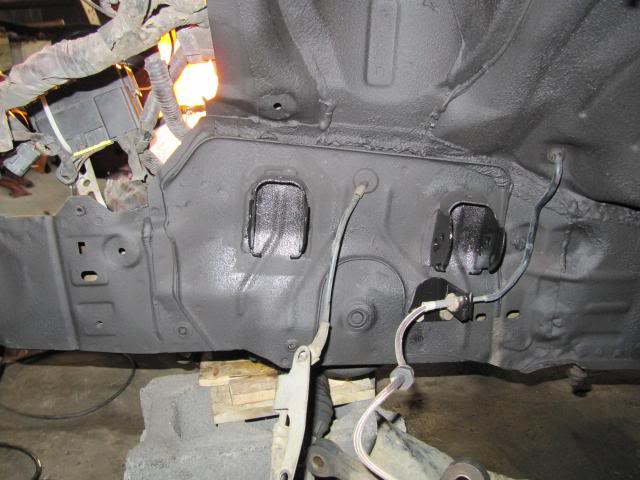
With the frame guys tell me “it’s all good” I began to dig further into the project. Seeing the quality of the previous build in the engine bay and the frame issue I decided the rest of the car was at the same standard for quality. So I began complete teardown of the car to ensure nothing was missed.
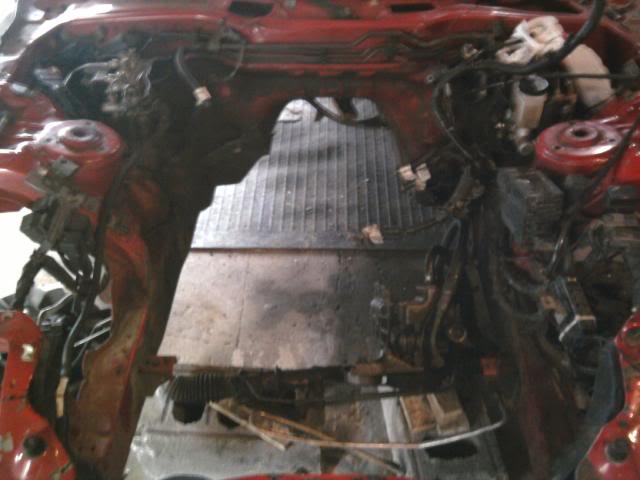
Subframe came out
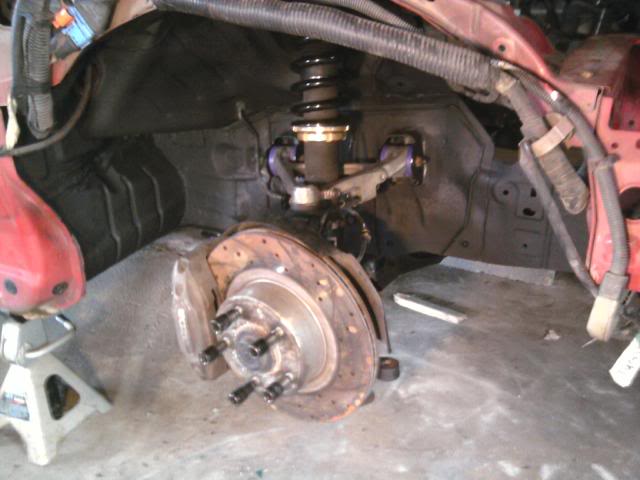
All suspension removed (Diff & rear subframe stayed in, I am only one man and all 6’2” 175lbs of me didn’t want to mess with those beasts alone)

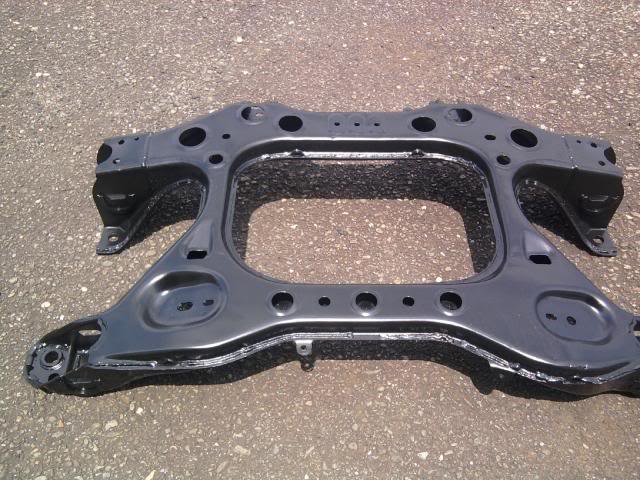
Cleaned and painted front subframe
Subframe came out

All suspension removed (Diff & rear subframe stayed in, I am only one man and all 6’2” 175lbs of me didn’t want to mess with those beasts alone)

Cleaned and painted front subframe

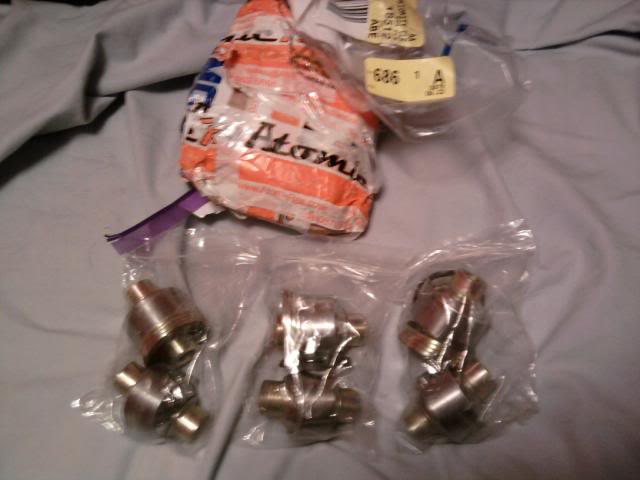
At this point I went to town on the wheel wells and suspension components. Powerflex bushings all around, AtomicRex pillowballs (took 3 months to get these things), Stance GR+pro coilovers, and re-undercoated the wheel wells.
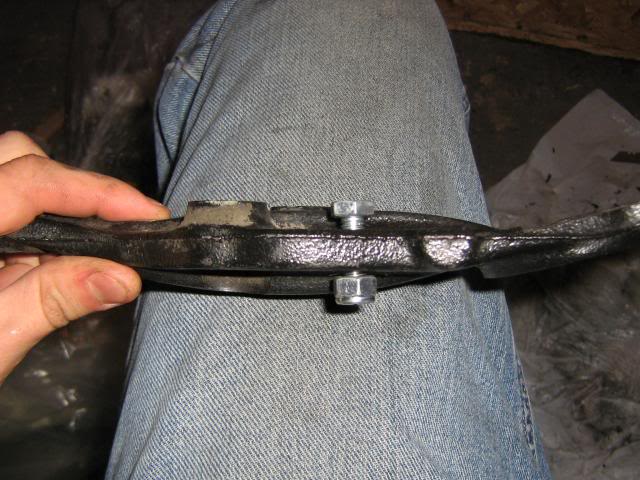
Front control arms cleaned and bushings installed.
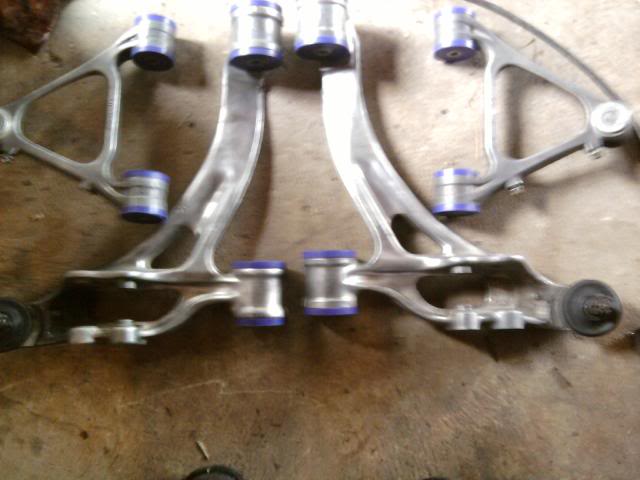
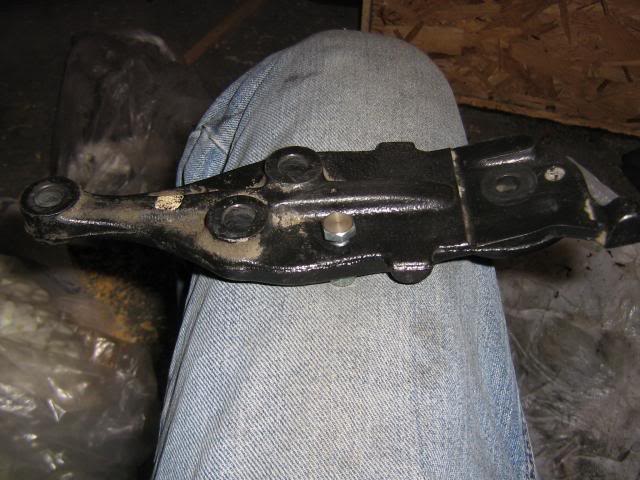
Rear arms, diff mount, & coilovers ready to go in.
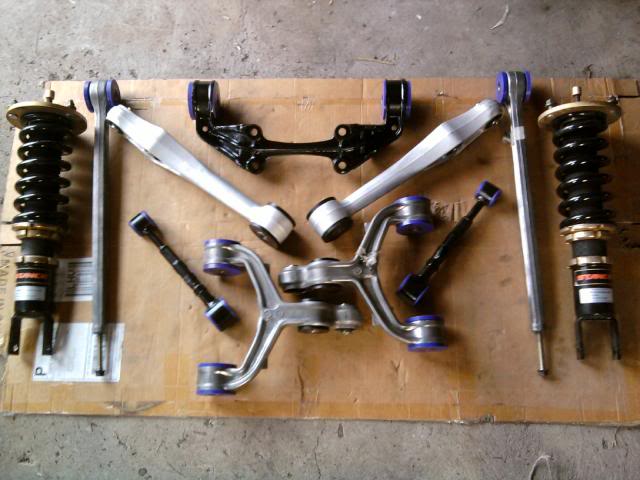


Front control arms cleaned and bushings installed.


Rear arms, diff mount, & coilovers ready to go in.

Other than the weld work its pretty hard to tell that the car was in an accident. Looks like a fun build. I need to rear down my suspension and do my bushings. Have you thought about adding grease fittings?
I thought about adding grease fittings but it was already too late and I had the suspension installed. For reasons that will come up later in the thread the car is coming back apart and I might add them when it does. Nearly all the bushings are two piece so they come out easy enough.
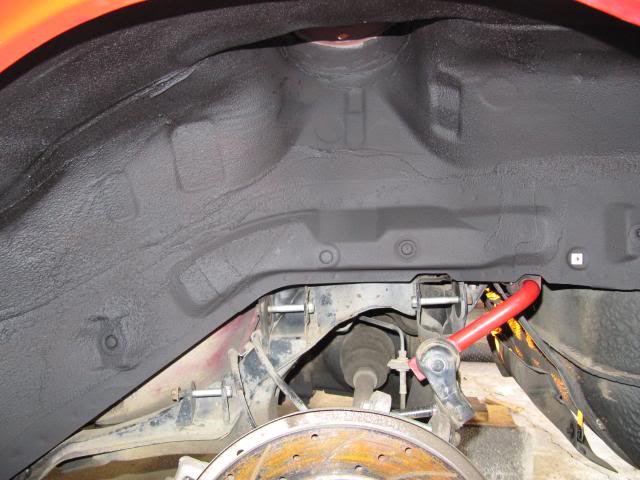
With the suspension all restored and fresh I decided whether the frame was straight or not I needed to get it on a frame rack to make sure because what goot is a perfect suspension if the chassis isnt right. So I took it to a shop and they did a pull on it. They pulled the wrinkles out by the cruise control, did some straightening of the headlight bucket, and rolled the strut tower out 0.625” because it was pushed in. I had pictures of the car on the frame rack but lost them along the way.
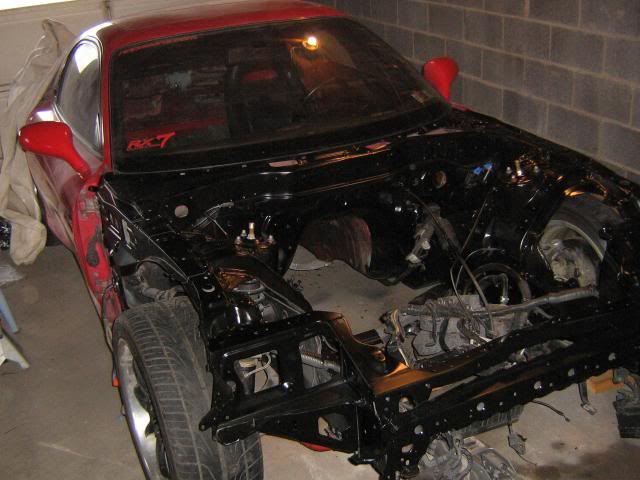
This is the car back from the shop, getting ready to paint the bay (supposedly straight and true). My turkey bobble head is hanging out there too.
This is the car back from the shop, getting ready to paint the bay (supposedly straight and true). My turkey bobble head is hanging out there too.

It then came time to paint the engine bay. I decided on a satin, almost semigloss black because I wasn’t sure what color the rest of the car was going to end up and I like the look of black engine bays. This was my first time painting anything with a spray gun so give me a break here. I went with 3 coats of primer and 3-4 coats of black, laid on thin to avoid runs. It turned out great for my first time painting. It got really cold out the night I painted it so the black chips fairly easy but it can all be redone
Here are the results.
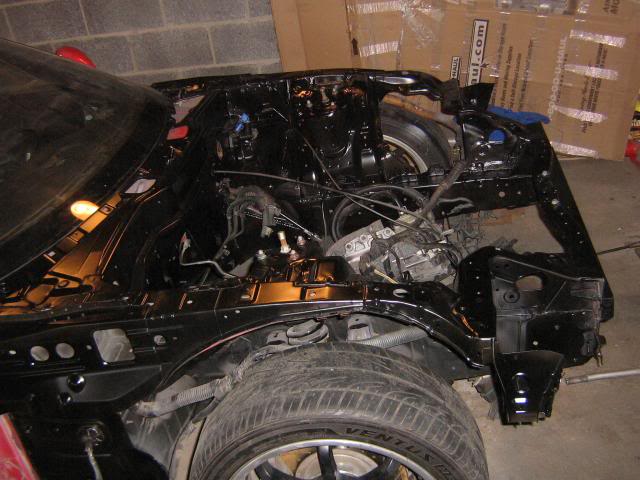
Here are the results.


The jury is still out on whether the shop did the job correctly, I've only driven it like 10 miles since and I wasn't focused on how it was handling at the time.
Thanks, I used 3M undercoat/truck bed liner. It came in big spray cans at Advanced Auto. they had a store brand there too but I went for the pricey stuff.
With the engine bay painted it was time to work on the engine, clean it up a little, fix some oil leaks and block off some lines. The plan was to get it all cleaned up and in good working order before I took it for a rebuild so there would be no surprises. I didn't have an engine stand and being a college student I didn't want to buy one to save more money for the FD. This posed a slight issue because I had to re-seal the oil pan and install new motor mounts but I had no way to get to the bottom of the engine, so I got creative.
The motor was sitting on a pallet so I wheeled it into the house and built a box around the motor and covered the motor itself in a 50 gallon garbage bag. I then filled in the area between the motor and the box with spray foam expanding insulation and sealed the lid. Once dry I simply rolled the motor over and got to work.
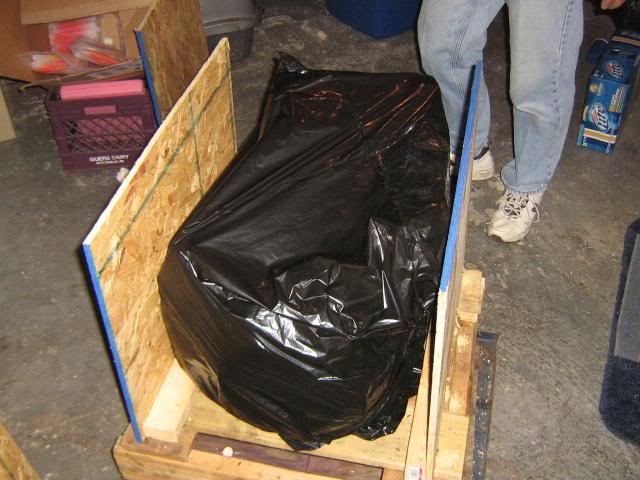
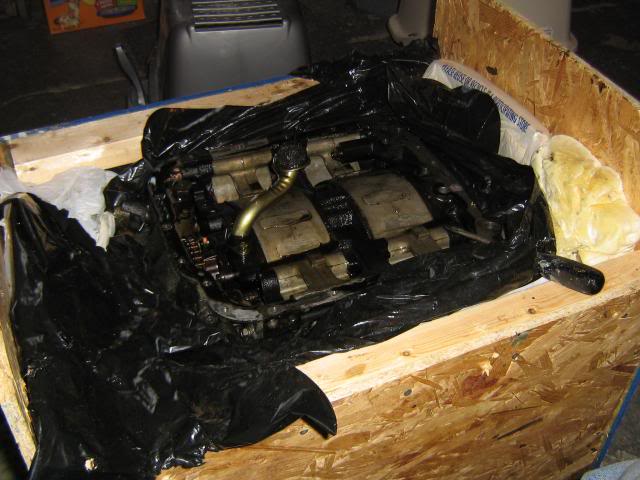
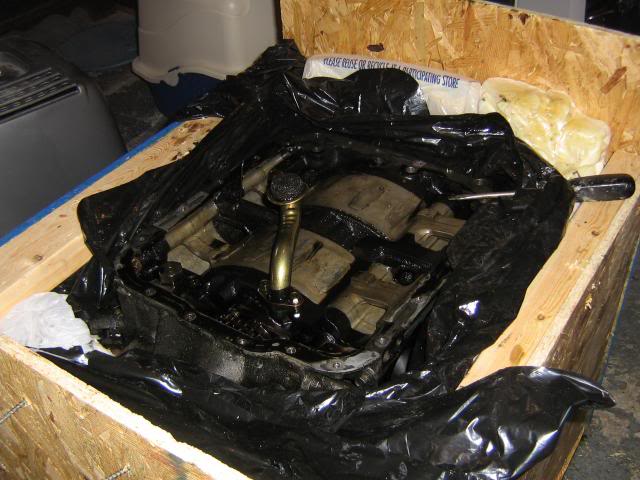
The motor was sitting on a pallet so I wheeled it into the house and built a box around the motor and covered the motor itself in a 50 gallon garbage bag. I then filled in the area between the motor and the box with spray foam expanding insulation and sealed the lid. Once dry I simply rolled the motor over and got to work.


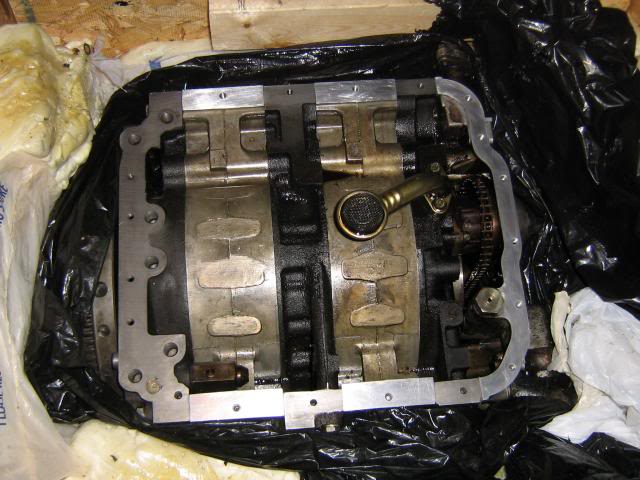
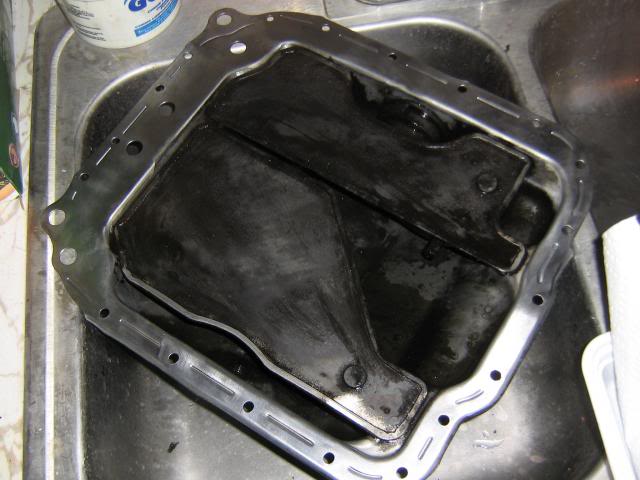
Then came time to seal the pan and put on the engine mounts. I was going with two steel mounts rather than one steel and one aluminum mount. With this mod there has always been the debate as to whether or not you need to do something to apply pressure to the pan where the nub on the aluminum mount used to. To solve this I drilled and tapped a steel mount and faced off a stainless bolt so I can tighten it against the pan to apply pressure to that point.


After doing the work to drill and tap the mount I went to check fitment and realized that someone drilled and tapped the rear iron in the past and then installed the aluminum mount on top of the bolt, causing it to be on a slight tilt. So the mount had been installed wrong for however long the motor was in the car and my work had been for nothing.


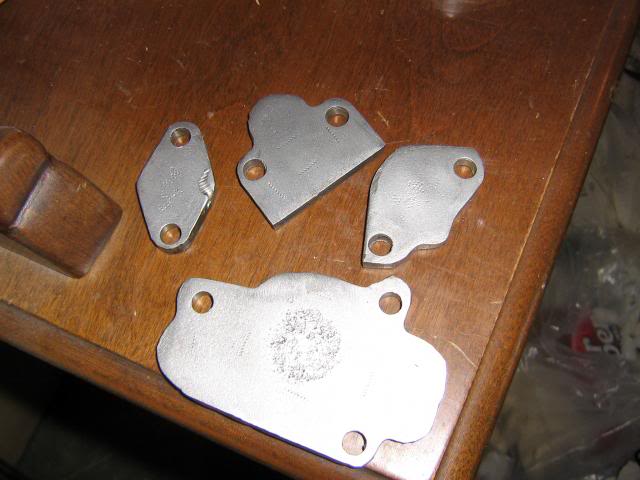
The motor had custom made block off plates from one of the previous owners. They weren't the best in the world fit just fine but I wasn't sure how well they sealed so I took them off and put them on the Bridgeport.
Before (sandblasted to see what I was working with)
After
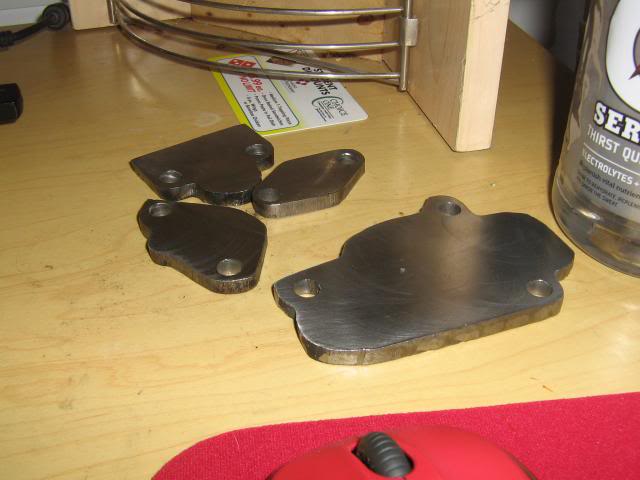
Before (sandblasted to see what I was working with)

After

I don't have any pictures of it but part of the reason the motor was so filthy was because the OMP lines were broken off and left to shoot oil wherever and to seal the intake chamber they actually welded the oil injector tips shut.
Here is the top notch pilot bearing that I pulled out of the E-shaft mostly with my fingers.
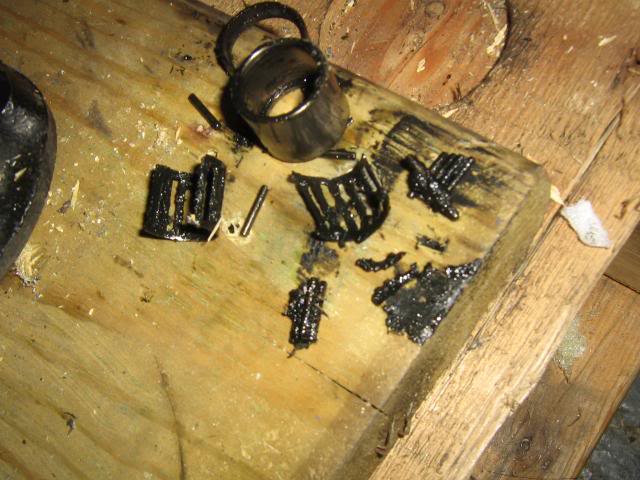
Here is the top notch pilot bearing that I pulled out of the E-shaft mostly with my fingers.

I don't have any pictures of it but part of the reason the motor was so filthy was because the OMP lines were broken off and left to shoot oil wherever and to seal the intake chamber they actually welded the oil injector tips shut.
Here is the top notch pilot bearing that I pulled out of the E-shaft mostly with my fingers.
Here is the top notch pilot bearing that I pulled out of the E-shaft mostly with my fingers.