Turk’s Buildup, One Dream & Endless Nightmares
 09-25-13, 05:57 PM
#26
Believe it or not the car actually ran and drove fairly well. It pulled pretty hard but I never took it past 6k and 3/4 throttle because it still had stock injectors on a single turbo with an unknown backwoods tune. It had a pretty solid idle too, when it started.
 09-25-13, 06:05 PM
#27
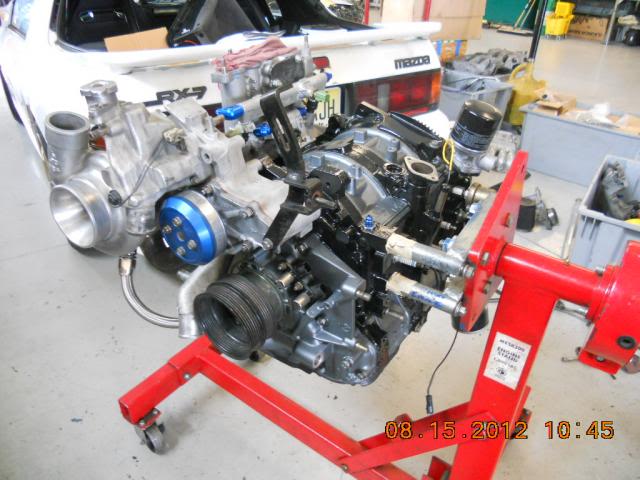
The next order of business with the motor was to get rid of the Ebay manifold and “special” downpipe that came off the car. So as with most of the parts on this car I bought used. I found an A-Spec manifold and downpipe for a great deal in the for sales.
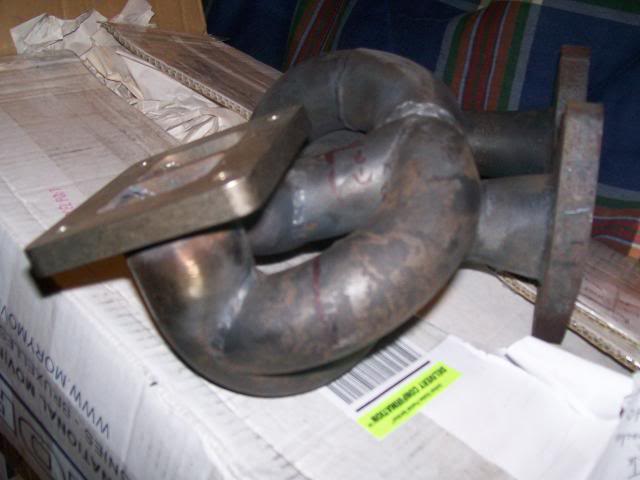
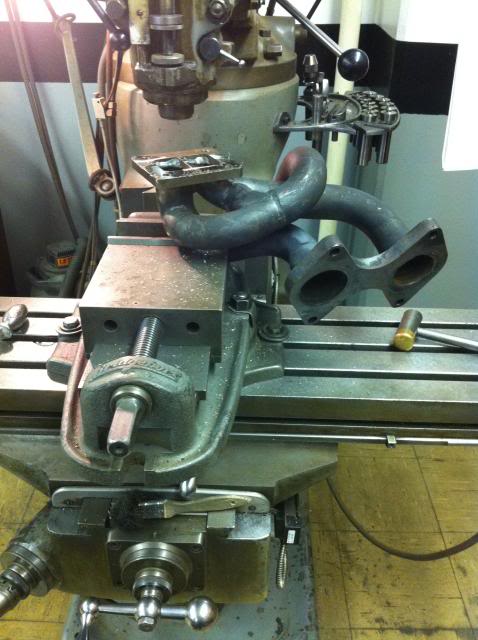
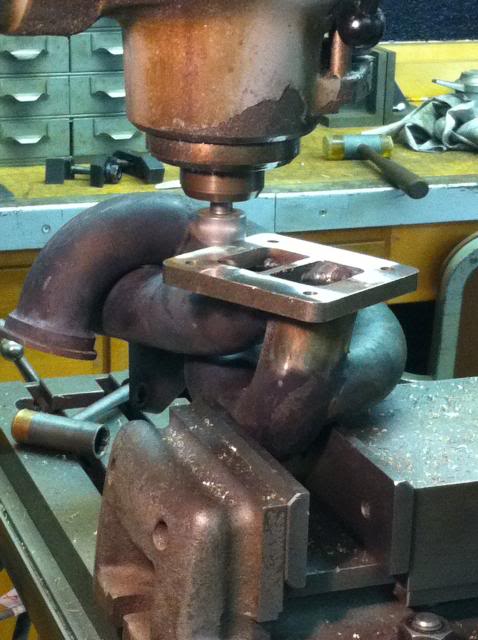
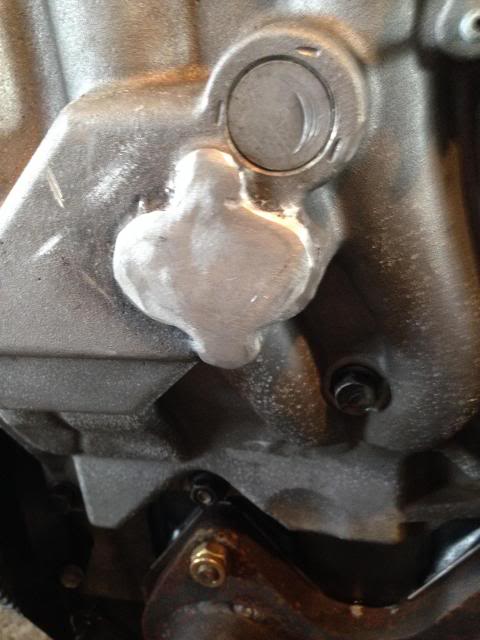
Everything wasn’t perfect with this manifold though. Somehow the T4 flange was warped (I doubt it came that way from A-Spec originally). So that had to be fixed out. Off to the Bridgeport it went. This was tough though, because there is no easy way to get a solid grip with a vise on a finished manifold.
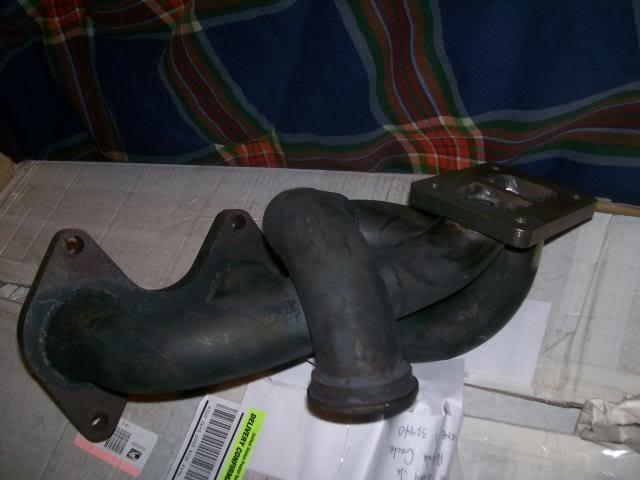
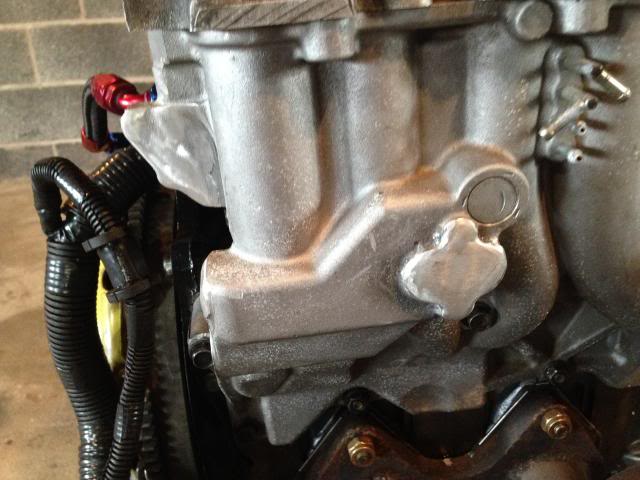
Manifold installed
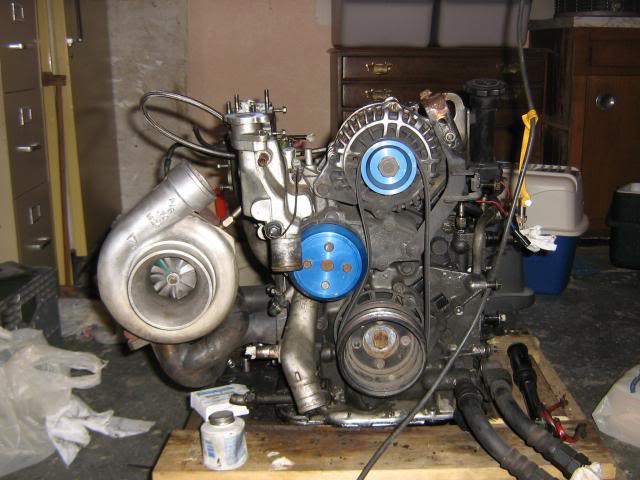

 09-25-13, 10:24 PM
#28
Senior Member
iTrader: (9)
Join Date: Dec 2012
Location: ft.lauderdale
Posts: 317
Likes: 0
Received 0 Likes
on
0 Posts
I know that feeling. I milled two uims and it was nearly impossible to keep them from chattering nice job tho. I would have just slapped it on the belt sander.
09-30-13, 09:45 PM
#30
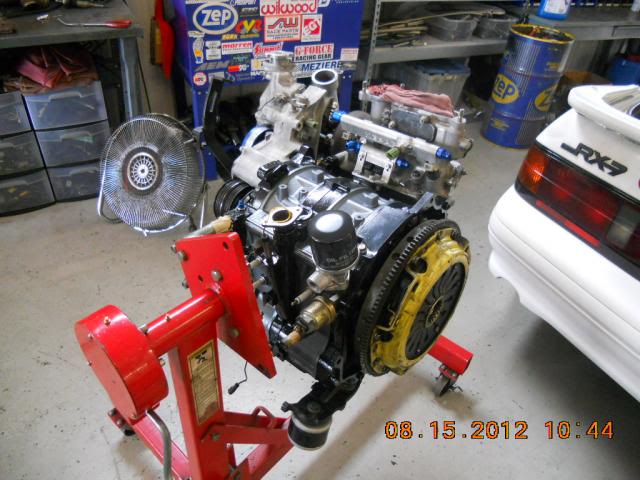
There is a slight gap here between some work being done and the motor going back in but I bolted it up to a rebuilt trans and dropped it in the car. While it was out I did a single turbo harness conversion. I buttoned up everything around the engine and it fired up on its first try. It idled healthy and revved like a champ.
The next order of business was to have the motor rebuilt. I should’ve just sent it off to be rebuilt while I had it out but at the time I didn’t trust myself installing a fuel system and some other components on a brand new engine, so off it went to Speed 1.
The motor got a streetport, cryo-treatment, Twin Power, Fuel system, and some other odds & ends. The previous engine had 3mm apex seals so this engine was also built with them.


The next order of business was to have the motor rebuilt. I should’ve just sent it off to be rebuilt while I had it out but at the time I didn’t trust myself installing a fuel system and some other components on a brand new engine, so off it went to Speed 1.


The motor got a streetport, cryo-treatment, Twin Power, Fuel system, and some other odds & ends. The previous engine had 3mm apex seals so this engine was also built with them.


 10-06-13, 05:24 PM
#34
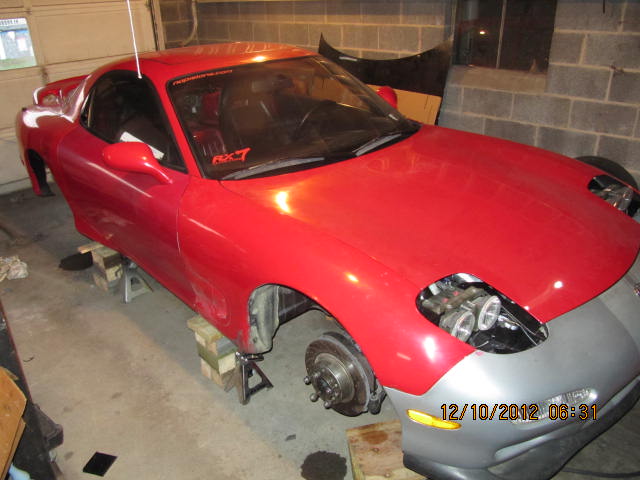
With the motor rebuilt and all set with supporting parts for the single turbo you would think I would bolt the fenders up and drive this thing to get some miles on it but that wasn't the case. It had starting issues, which turned out to be a bad battery cable. Once I got it to start regularly it had an uncontrollable idle surge. It would rev up to 1100 and then drop until it nearly died. I fiddled with this for a while and got it to idle well enough to drive. At this point I took it for an "inspection" to get it on the road a bit. On the way to the inspection station, this happened…
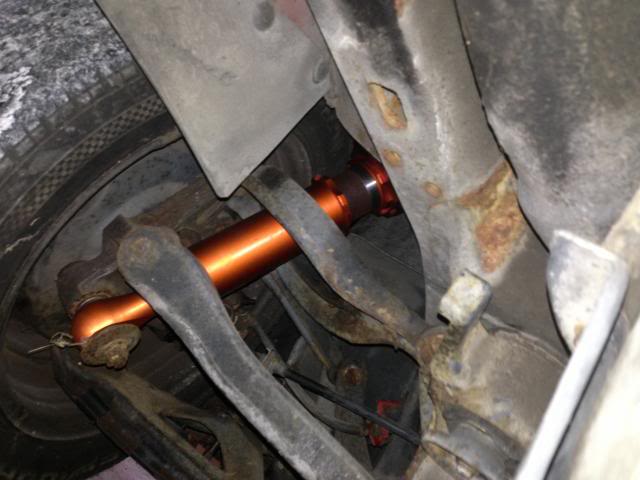
3 hours of work later and the diff was out of the car and on its way to IRP for a rebuild with an s4 T2 LSD. I decides to keep the stock 4.10 Ring and pinion because I thought Rx8 4.33 gears would be excessive.
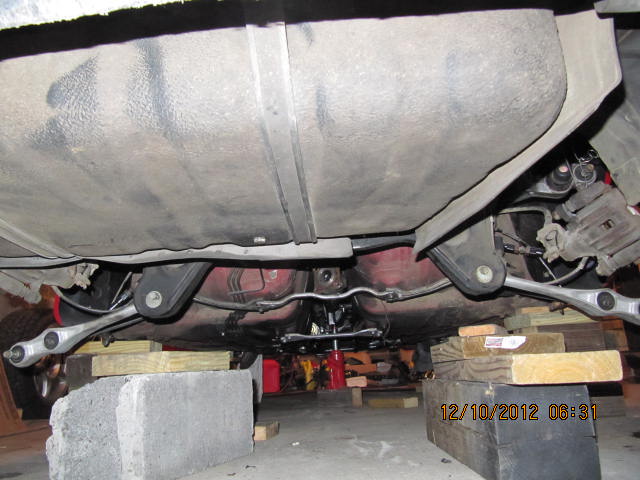

3 hours of work later and the diff was out of the car and on its way to IRP for a rebuild with an s4 T2 LSD. I decides to keep the stock 4.10 Ring and pinion because I thought Rx8 4.33 gears would be excessive.


 11-03-13, 11:13 AM
#35
So it had been a while since my last update but I will continue documenting the build until I get to the current time.
So I left off with the Diff being built by IRP. While the diff was out and the car still ran like garbage I decided I would remove some weak links and narrow down the number of variables on the engine. I took the LIM and UIM off and removed the block off plates and welded everything shut to remove any possibility of vacuum leaks.
So I left off with the Diff being built by IRP. While the diff was out and the car still ran like garbage I decided I would remove some weak links and narrow down the number of variables on the engine. I took the LIM and UIM off and removed the block off plates and welded everything shut to remove any possibility of vacuum leaks.


 11-03-13, 03:01 PM
#36
While welding the manifold I also upgraded from the low impedance injectors to an ID 725/2200cc. I don't have any pictures of this but I had to machine some spacers for the rails because these new injectors were longer. The secondary rail spacers were easy but the one for the primary rail was more complicated. This one needed to be machined to size and then I had to mill a pocket in it so the injectors could clear the spacer. Ill try to get picture of this later.
With the diff out I also took the time the time to relocate the fuel filter. For me with my long arms and little hands its stock location wasn't terrible and I would be able to change it but it was easy to move so why not. I reused the stock bracket and just drilled and tapped the subframe. If I pull the subframe out at a later date I will rework this a little because tapping the subframe wasn't ideal.
Here is the relocated fuel filter with a rag tag shield that is nothing to look at but serves its purpose well.

From the front
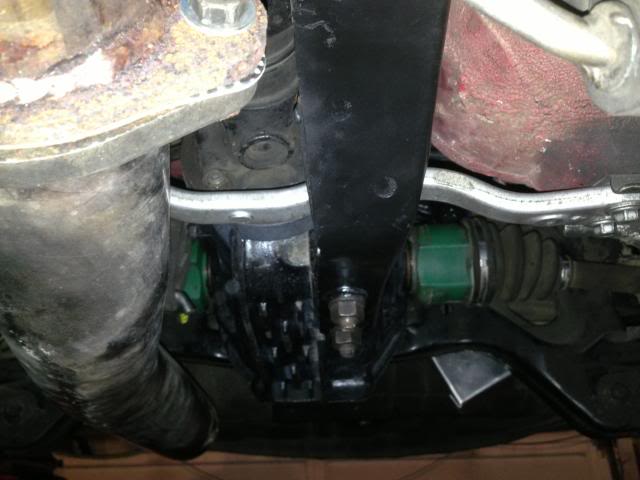

 11-03-13, 11:07 PM
#38
looking good.
i know how you feel with having to re-do some things. i basically re-did my entire turbo/manifold/EMS/tuning situation and now i couldn't be happier with it. it's a great feeling knowing everything is done correctly, finally.
check out my build thread.
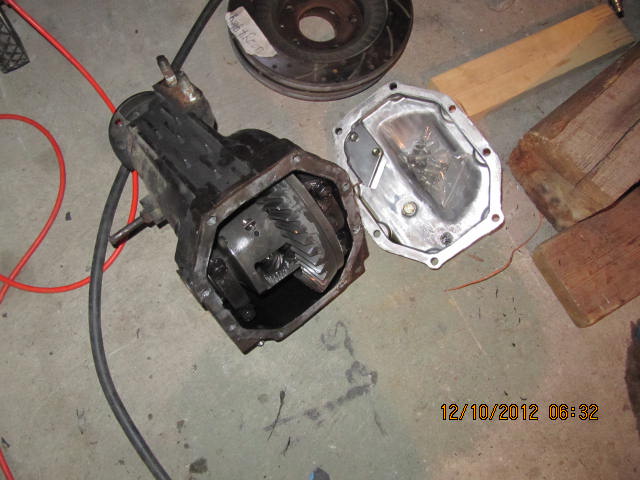
also, WTF happened to the diff? i have never seen that happen before.
i know how you feel with having to re-do some things. i basically re-did my entire turbo/manifold/EMS/tuning situation and now i couldn't be happier with it. it's a great feeling knowing everything is done correctly, finally.
check out my build thread.
also, WTF happened to the diff? i have never seen that happen before.
11-05-13, 04:51 PM
#39
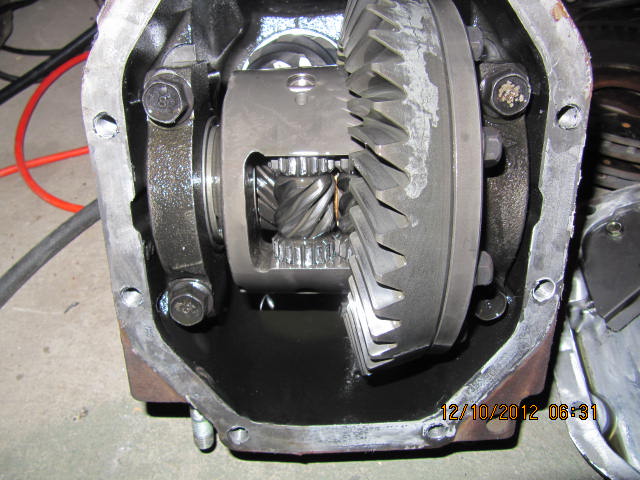
A lot of FD LSDs break like this. the torsion type diff cant hold up to power. In my case some teeth were probably broken off when I bought the car because there was an incredible amount of drivetrain movement from busted diff mounts and basically non-existent engine mounts. I actually had the shifter move in my hand once while driving and I thought I was imagining it. When the drivetrain was properly secured the LSD just let go.
11-06-13, 07:25 AM
#40
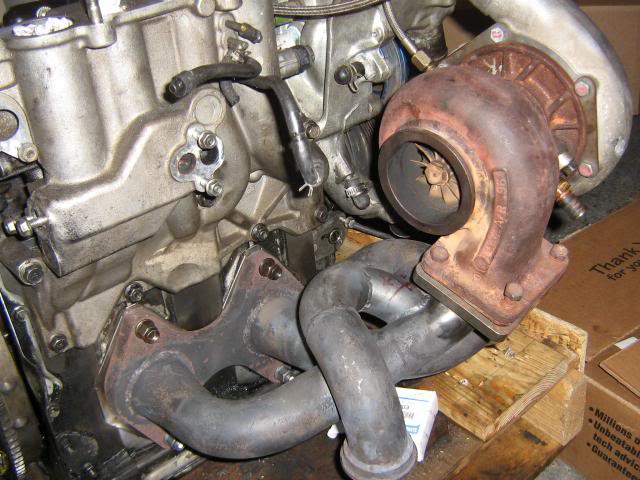
It came with the car and is supposed to be a Garrett T04s, I don't know how true that may be. It is in pretty good shape, no end play and a little shaft play. It has a 0.70 cold side and 0.96 hot side. For the safety of my car I am thinking about replacing this turbo with something fresh to eliminate any unknowns.
That being said, what are some good options for turbos? I am shooting for 400whp but really could care less what the final number is. I want the power to come on fairly fast but be able to make power through the usable rpm range.
That being said, what are some good options for turbos? I am shooting for 400whp but really could care less what the final number is. I want the power to come on fairly fast but be able to make power through the usable rpm range.
11-06-13, 08:01 AM
#41
White 94 RX7 - Japanese

Join Date: Feb 2009
Location: Okinawa
Posts: 19
Likes: 0
Received 0 Likes
on
0 Posts
Wow great story and great build. You really have accomplished something! For your turbo I would go with a GT35r. It's the most popular turbo for the FD and a street ported 13b just loves em. It will give you exactly what you are looking for 400whp that comes on fairly fast and holds through the rpm range.
11-06-13, 04:14 PM
#42
The 35r is what I figured would be a good choice. I was going to talk to Turblown to see what he thinks as I will be buying some other things from him.
Back to the build. I got the car all set with the new diff and injectors installed along with a base tune that IRP was kind enough to do for free when I went to pick up my diff. Primed the fuel and oil and the car started right up. All was not well though. It idled much better (probably due to faster reacting injectors) but there was still a surge in idle and it would stumble when revved. This led me to my next adventure in this car. WIRING
I decided to go through the main harness because this was the one thing I hadn't touched yet in the car and with Speed 1 doing some wiring other places I thought there might be some sub par work done in the past. The initial goal was to return it all back to factory spec.
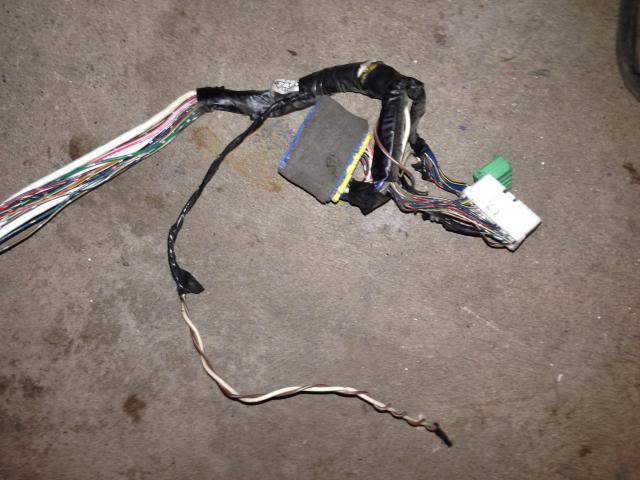
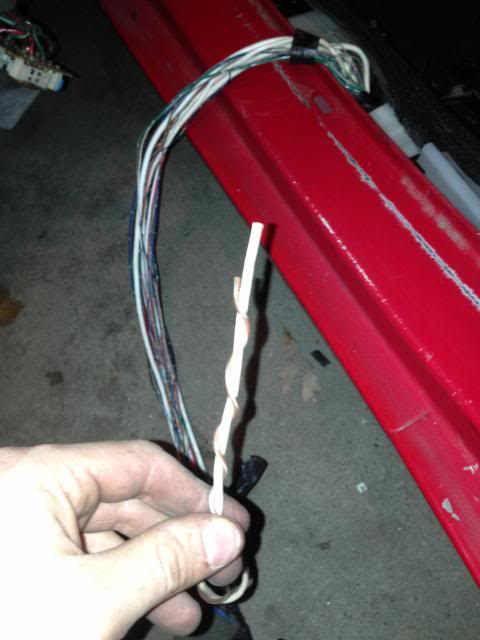
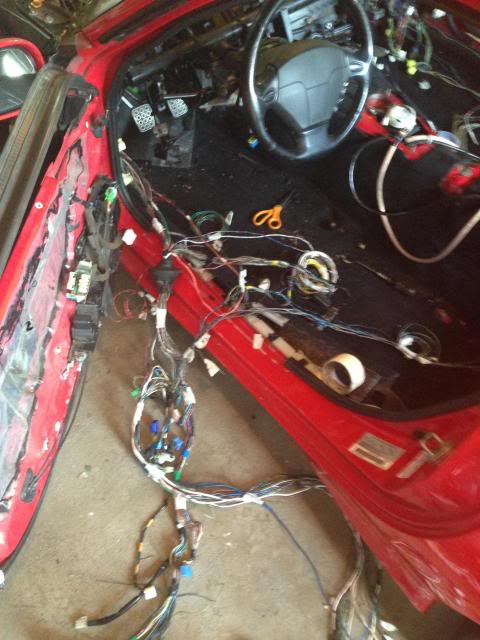
Found this little beauty hiding in the driver footwell, tapped into the hazard module plug. Two wires wound together and then twist and taped into the harness for no reason. the two didn't even connect to eachother.
My roommate pulling this monster of a harness out of the wheel well.

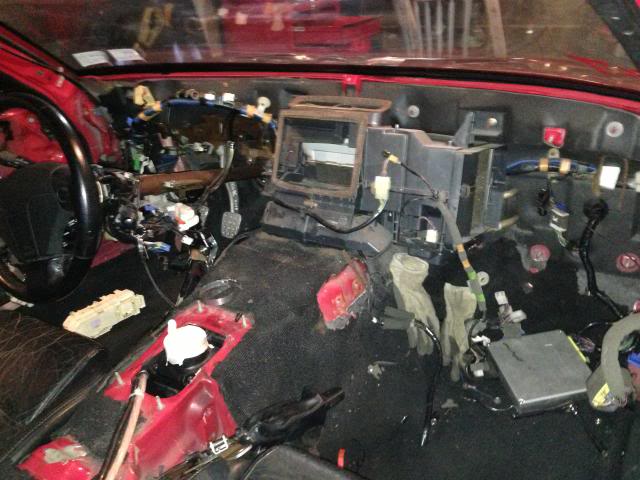
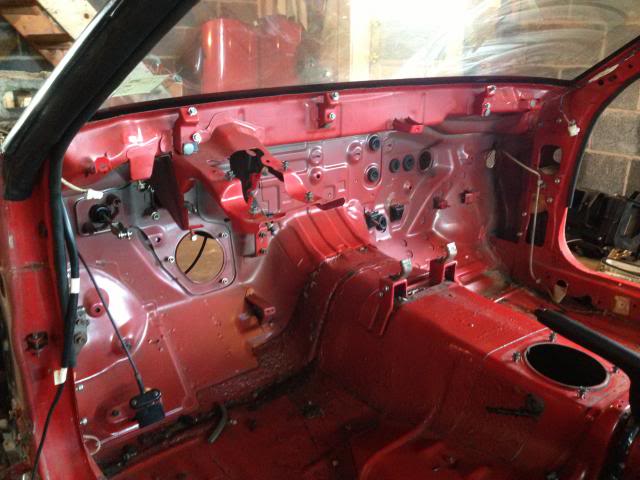
Dash out
Back to the build. I got the car all set with the new diff and injectors installed along with a base tune that IRP was kind enough to do for free when I went to pick up my diff. Primed the fuel and oil and the car started right up. All was not well though. It idled much better (probably due to faster reacting injectors) but there was still a surge in idle and it would stumble when revved. This led me to my next adventure in this car. WIRING
I decided to go through the main harness because this was the one thing I hadn't touched yet in the car and with Speed 1 doing some wiring other places I thought there might be some sub par work done in the past. The initial goal was to return it all back to factory spec.
Found this little beauty hiding in the driver footwell, tapped into the hazard module plug. Two wires wound together and then twist and taped into the harness for no reason. the two didn't even connect to eachother.


My roommate pulling this monster of a harness out of the wheel well.

Dash out
 11-06-13, 04:40 PM
#43
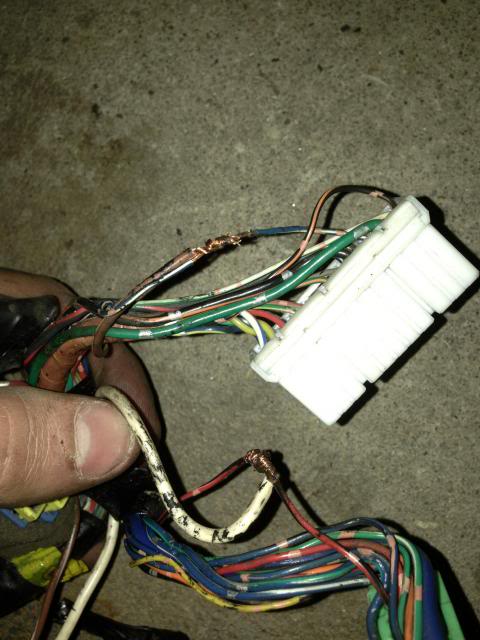
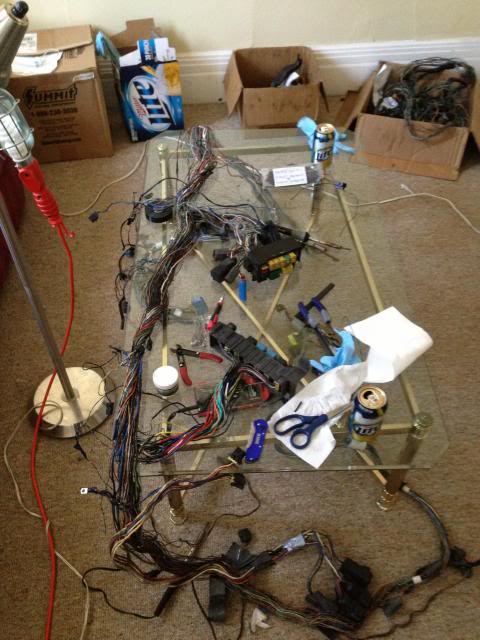
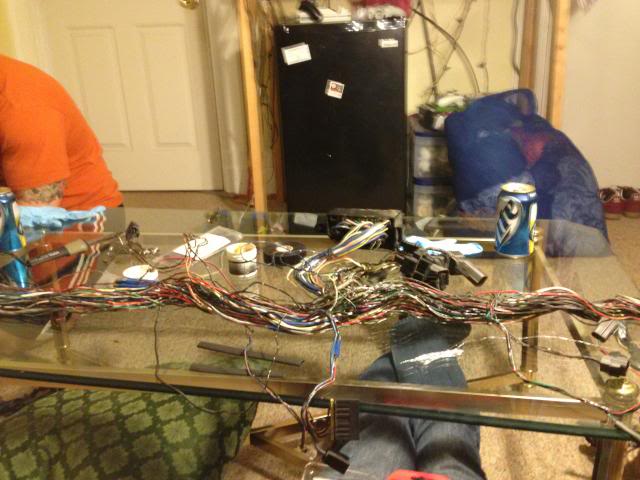
I stripped the tape and protection from the harness in the garage since this was dirty and just a terrible job. I then took the harness to my apartment to fix the problems with the harness (don't worry this is a college apartment so it wasn't that nice). I found an area with some melted wires, some proken wires (fuel pump related), and some other odds & ends that needed to be fixed.
Just pulled it out of the box
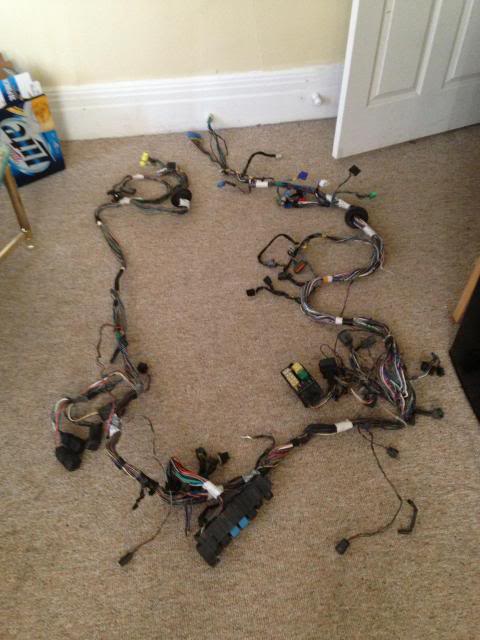
Laid out and ready for work, drop light included for that garage feel.
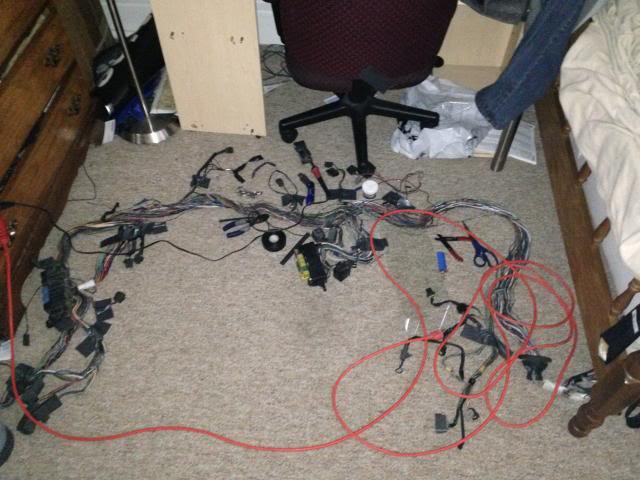
Roommate doing some soldering
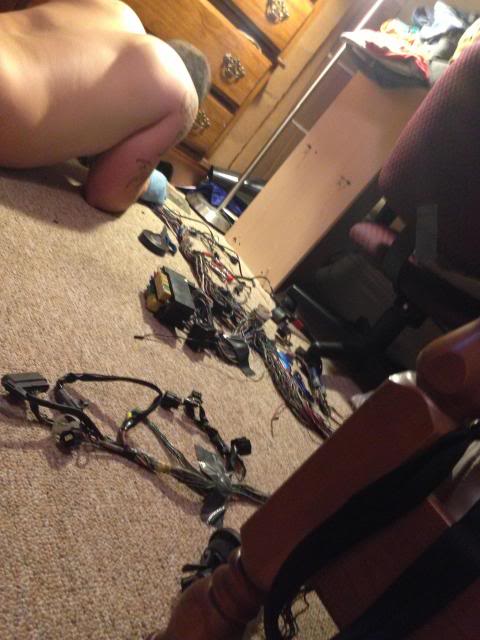
We got sick of working on the floor so we moved it to the coffee table
Just pulled it out of the box

Laid out and ready for work, drop light included for that garage feel.

Roommate doing some soldering

We got sick of working on the floor so we moved it to the coffee table

 11-06-13, 05:07 PM
#44
jesus this makes me miss my college days. i did this exact same thing multiple times for different cars over the past 8-10 years.
also, turk, i just noticed that it looks like your turbo oil drain looks like it's not doing a constant downward slope, like the oil will puddle. this is not good. (the picture of it on the engine stand).
also, how is your engine harness? i see you dug into the body harness with good reason. i ask because i generally recommend selling the power FC/datalogit/twinpower/etc. whatever you have and getting a haltech if you're up for it. this would be a perfect time to do it. it is such a good feeling to do a lot of that wiring work you're doing but with a NEW flying lead wiring harness for the engine...
11-06-13, 05:18 PM
#45
^ The turbo oil drain looks odd in that picture because its from the side. If you look at it from the front it is a downward slope until it hits the 90 degree AN fitting where it enters the block. Ill try to get some better pictures of it when I'm in the garage this weekend.
As for the engine harness, I have converted it to a single turbo harness and it all looks good. You were talking about converting to Haltech and lets just leave it at that for now because I am still getting this build to current times.
As for the engine harness, I have converted it to a single turbo harness and it all looks good. You were talking about converting to Haltech and lets just leave it at that for now because I am still getting this build to current times.
11-06-13, 05:57 PM
#46
It came with the car and is supposed to be a Garrett T04s, I don't know how true that may be. It is in pretty good shape, no end play and a little shaft play. It has a 0.70 cold side and 0.96 hot side. For the safety of my car I am thinking about replacing this turbo with something fresh to eliminate any unknowns.
That being said, what are some good options for turbos? I am shooting for 400whp but really could care less what the final number is. I want the power to come on fairly fast but be able to make power through the usable rpm range.
That being said, what are some good options for turbos? I am shooting for 400whp but really could care less what the final number is. I want the power to come on fairly fast but be able to make power through the usable rpm range.
good response, good power, about the same size as a GT35R (the T4 version) but about 500$ cheaper. my turbo was 900$ new.
i would recommend either this turbo or a Borg Warner S362 with the .90 T4 turbine housing. these are even cheaper, at about 700$, and about the same size as the 6262 and gt35R (the BW has a larger hot side and is overall slightly bigger and flows more). if i ever replace my turbo i am going to go with the BW s362.
check out howard coleman's "turbo size" thread... it's very informative, and he lists almost every turbo you can think of.
and keep in mind there has been some turmoil with Precision Turbos the last ~5 years, which they seem to have cleaned up (quality related, cheap parts issues). i have had zero problems with mine and it has been rockin'.
i would PERSONALLY not recommend spending the extra money on the ball bearing CHRAs. they're not worth the 2x price tag in my opinion, but i've built my setup mainly for track events, and not autocross or something that requires quick off/on response like the BBs are good for.
11-06-13, 06:41 PM
#47
I wasn't planning on ball bearing unless one fell into my lap because it's a street car and in reality it doesn't need to be at the very highest level of performance. Garrett and borg warner are probably the two I'm looking at. I don't think I will ever touch a precision because I have seen one that was fairly new and it was completely seized until about 3000 RPM.
How are turbonetics? I never really hear much on them
How are turbonetics? I never really hear much on them
11-11-13, 08:20 PM
#48
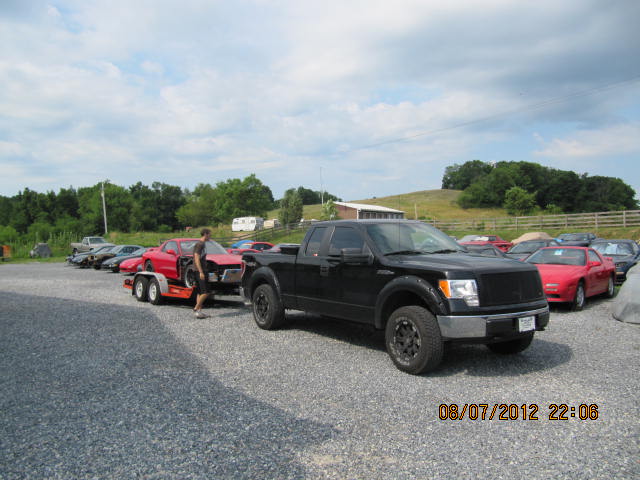
Around the time I started doing the wiring my roommate decided he wanted to buy a 240 hatch if the right one came along with minimal rust and no accidents. When people say they want to find something I take it as a challenge and within a week I found and he bought a nearly rust free roller with 0 accident history so the FD had a garage companion. We towed this thing 2 hours with bald and dry rotted tires, on a dolly, at night in, the snow.
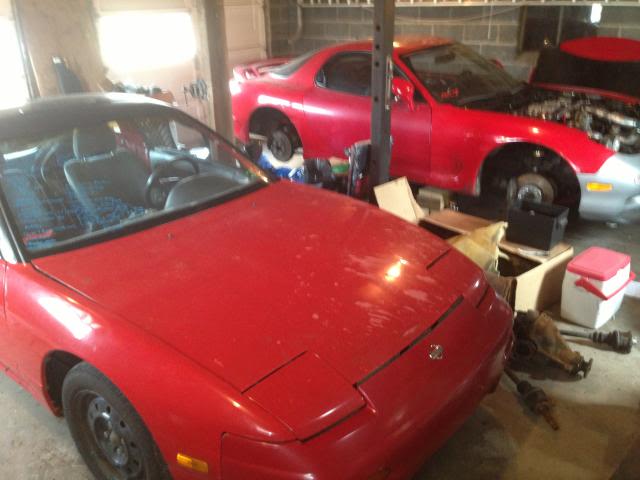
It came with K-Sport coilovers worth more than he paid for the car.
Within a few days we had it stripped to nothing but a bare shell


It came with K-Sport coilovers worth more than he paid for the car.

Within a few days we had it stripped to nothing but a bare shell
 11-11-13, 08:50 PM
#49
Back to the FD now. My semester ended, I graduated and was hired full time where I had been working as an intern for two years and I wired all summer. I got the wiring back to stock while I was at my apartment and when I got it home I had a terrible idea. Wire Tuck. The main harness running around the front was always something that bothered me so it had to go.
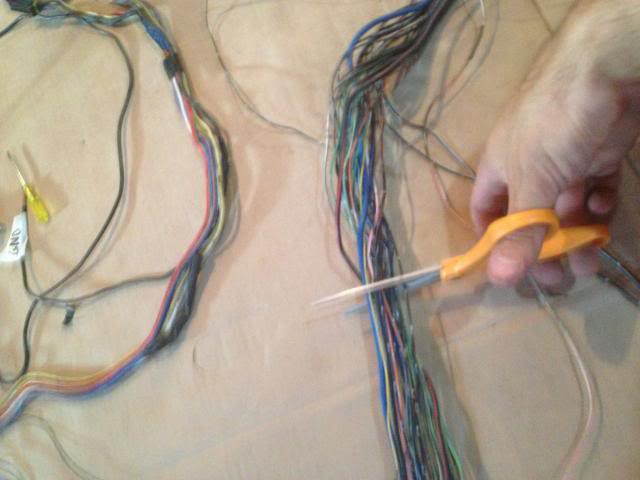
I didn't actually just hack it in half. I cut wires one by one, calculating where I should cut it to be able to have the easiest time reconnecting it through the cabin.
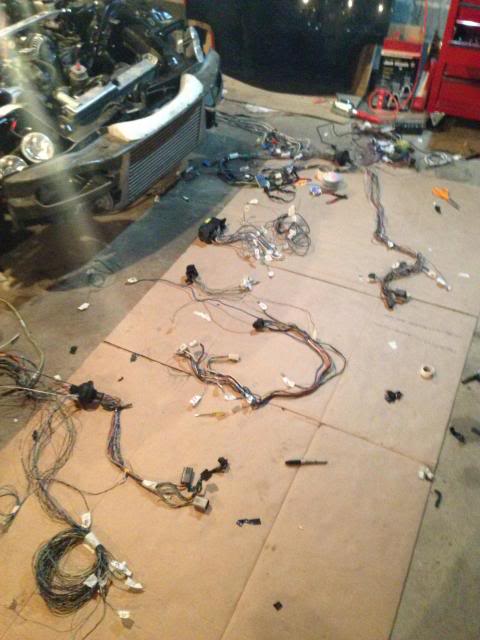
All cut and marked for reconnection
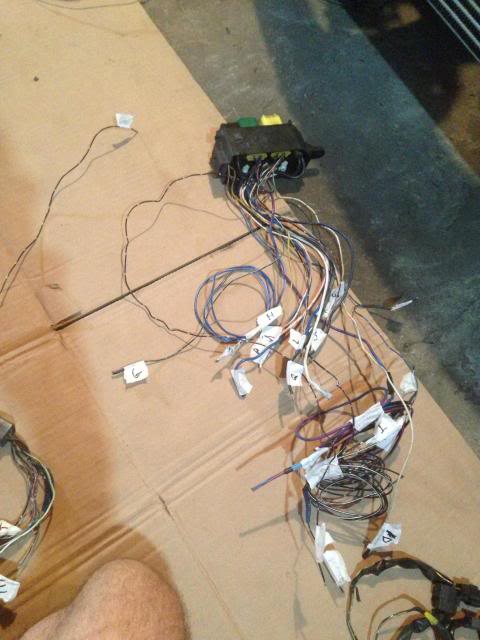
One of the many mock ups for wire lengths
Lights working much better than they did before the wire tuck. There was no questioning whether the headlights would turn on with the switch and the running lights weren't constantly on.

I didn't actually just hack it in half. I cut wires one by one, calculating where I should cut it to be able to have the easiest time reconnecting it through the cabin.
All cut and marked for reconnection


One of the many mock ups for wire lengths


Lights working much better than they did before the wire tuck. There was no questioning whether the headlights would turn on with the switch and the running lights weren't constantly on.
