When you click on links to various merchants on this site and make a purchase, this can result in this site earning a commission. Affiliate programs and affiliations include, but are not limited to, the eBay Partner Network.
Wow!! That really came out nice. I wonder how durable that paint is. Did you have to do any prep
Originally Posted by Skeese
Man the painted bins and headliner came out great! I'd like to know what, if any, prep you did on that and how you went about the painting. I've got like 80% of the black interior in mine and am only missing the really hard to find bits, which I would most definitely be ok painting if I could get a finish like yours!
Thanks,
Skeese
Nothing special (i.e Primer or paint promoter) was done beyond cleaning before painting both the headliner and bins etc.
FIRST START UP! The base Haltech Single Turbo map seems to be really good. Starts up quick and idles really well. Yes it does die at the end, potential issue with the alternator to figure out.
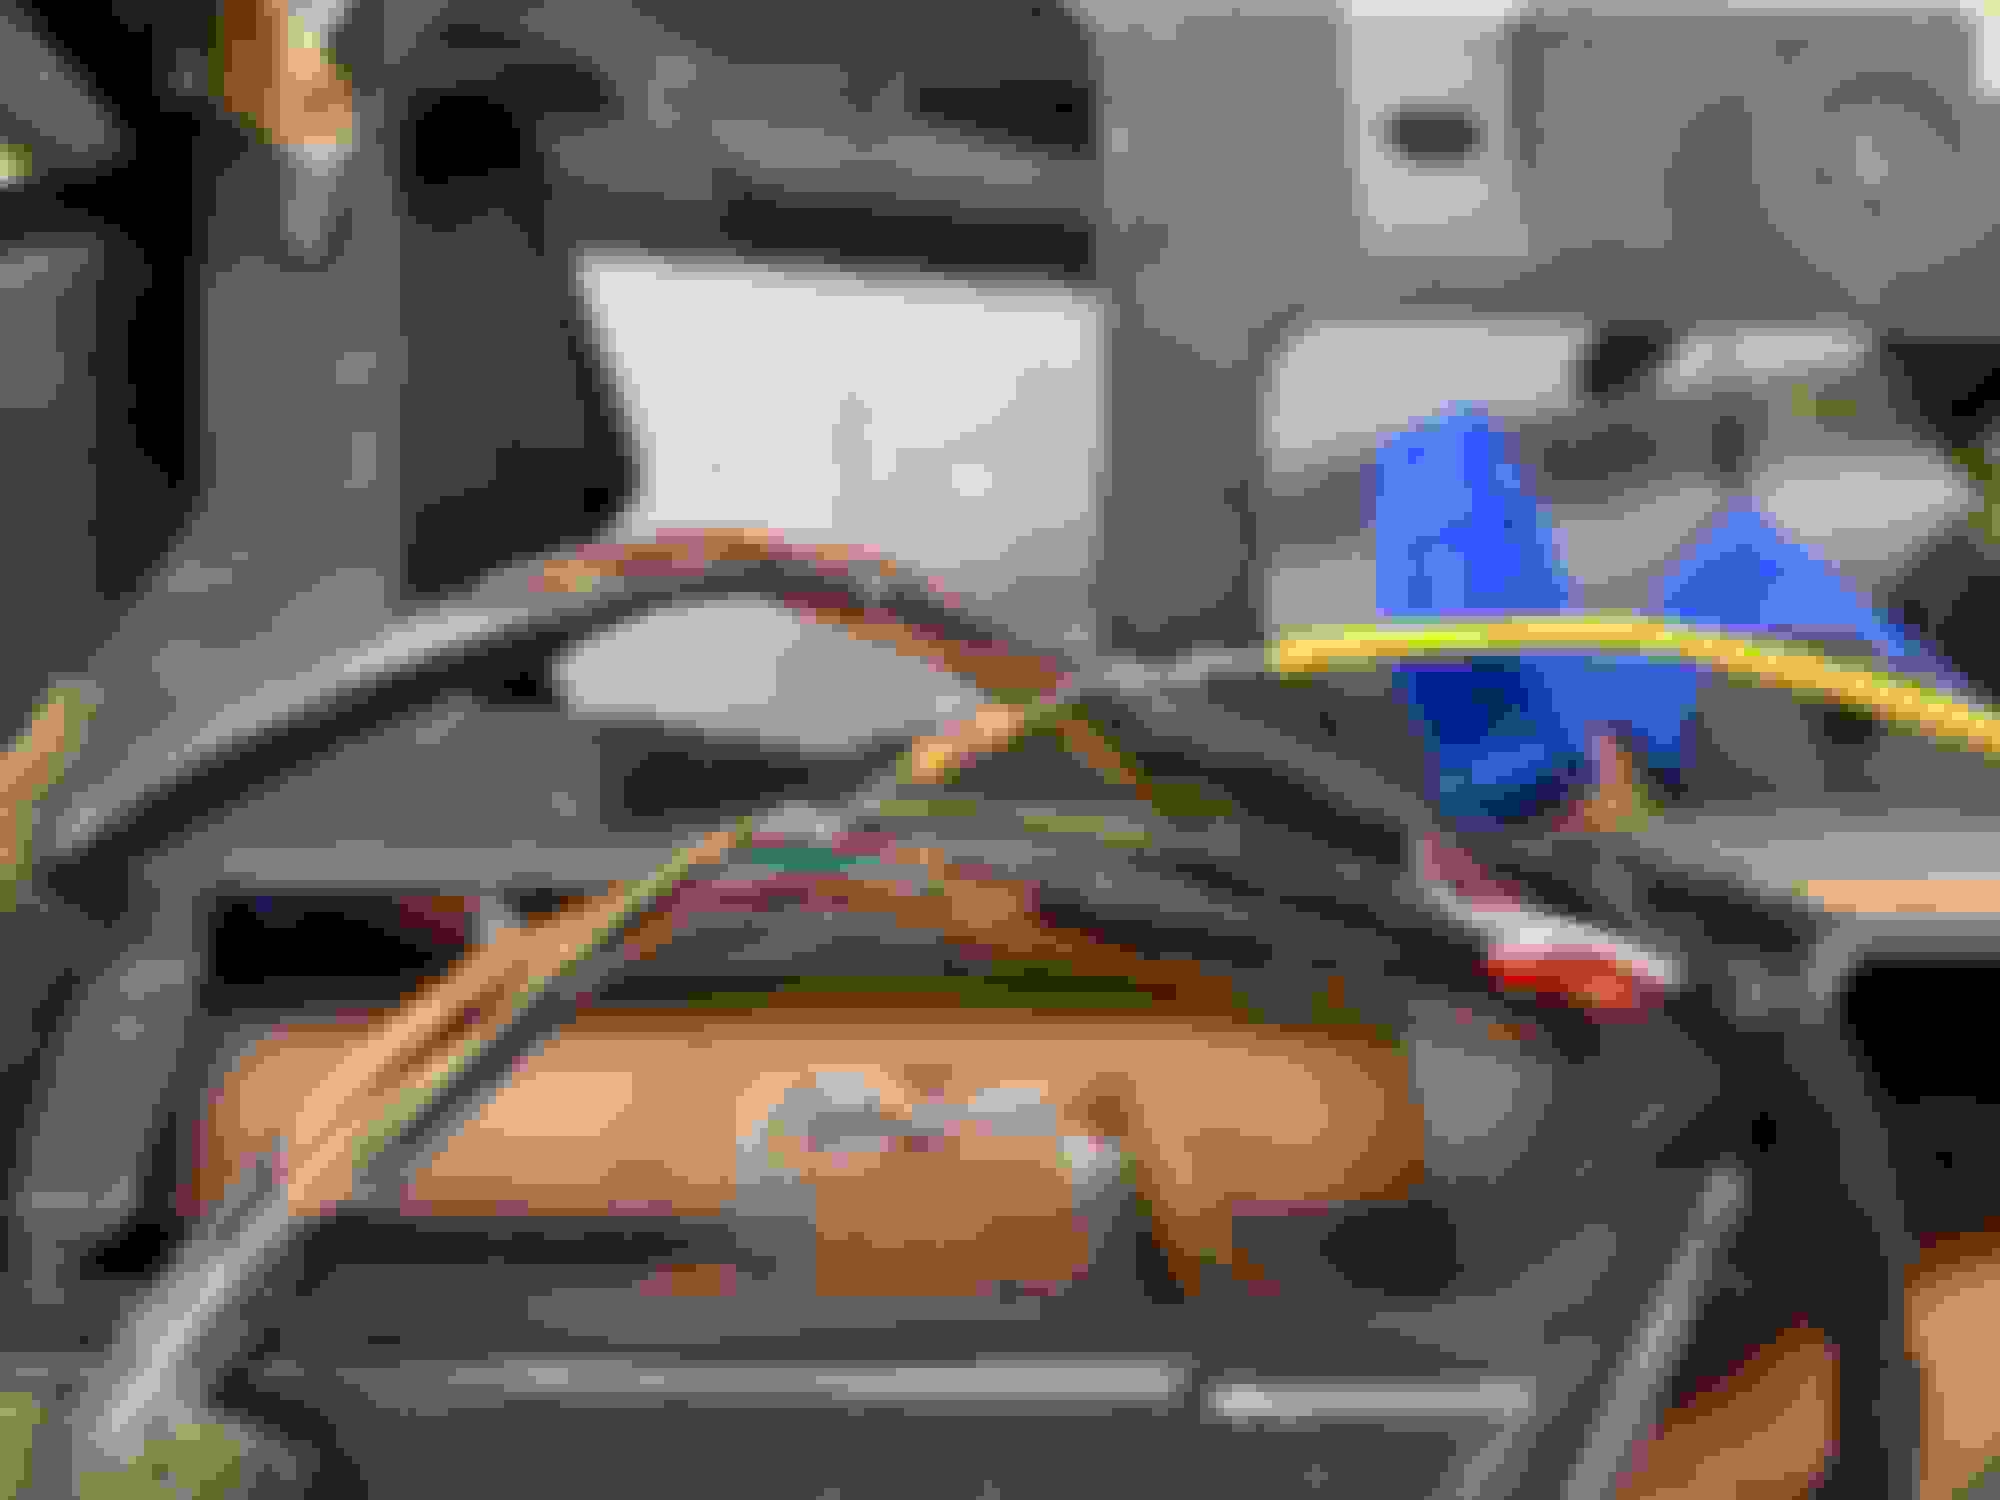
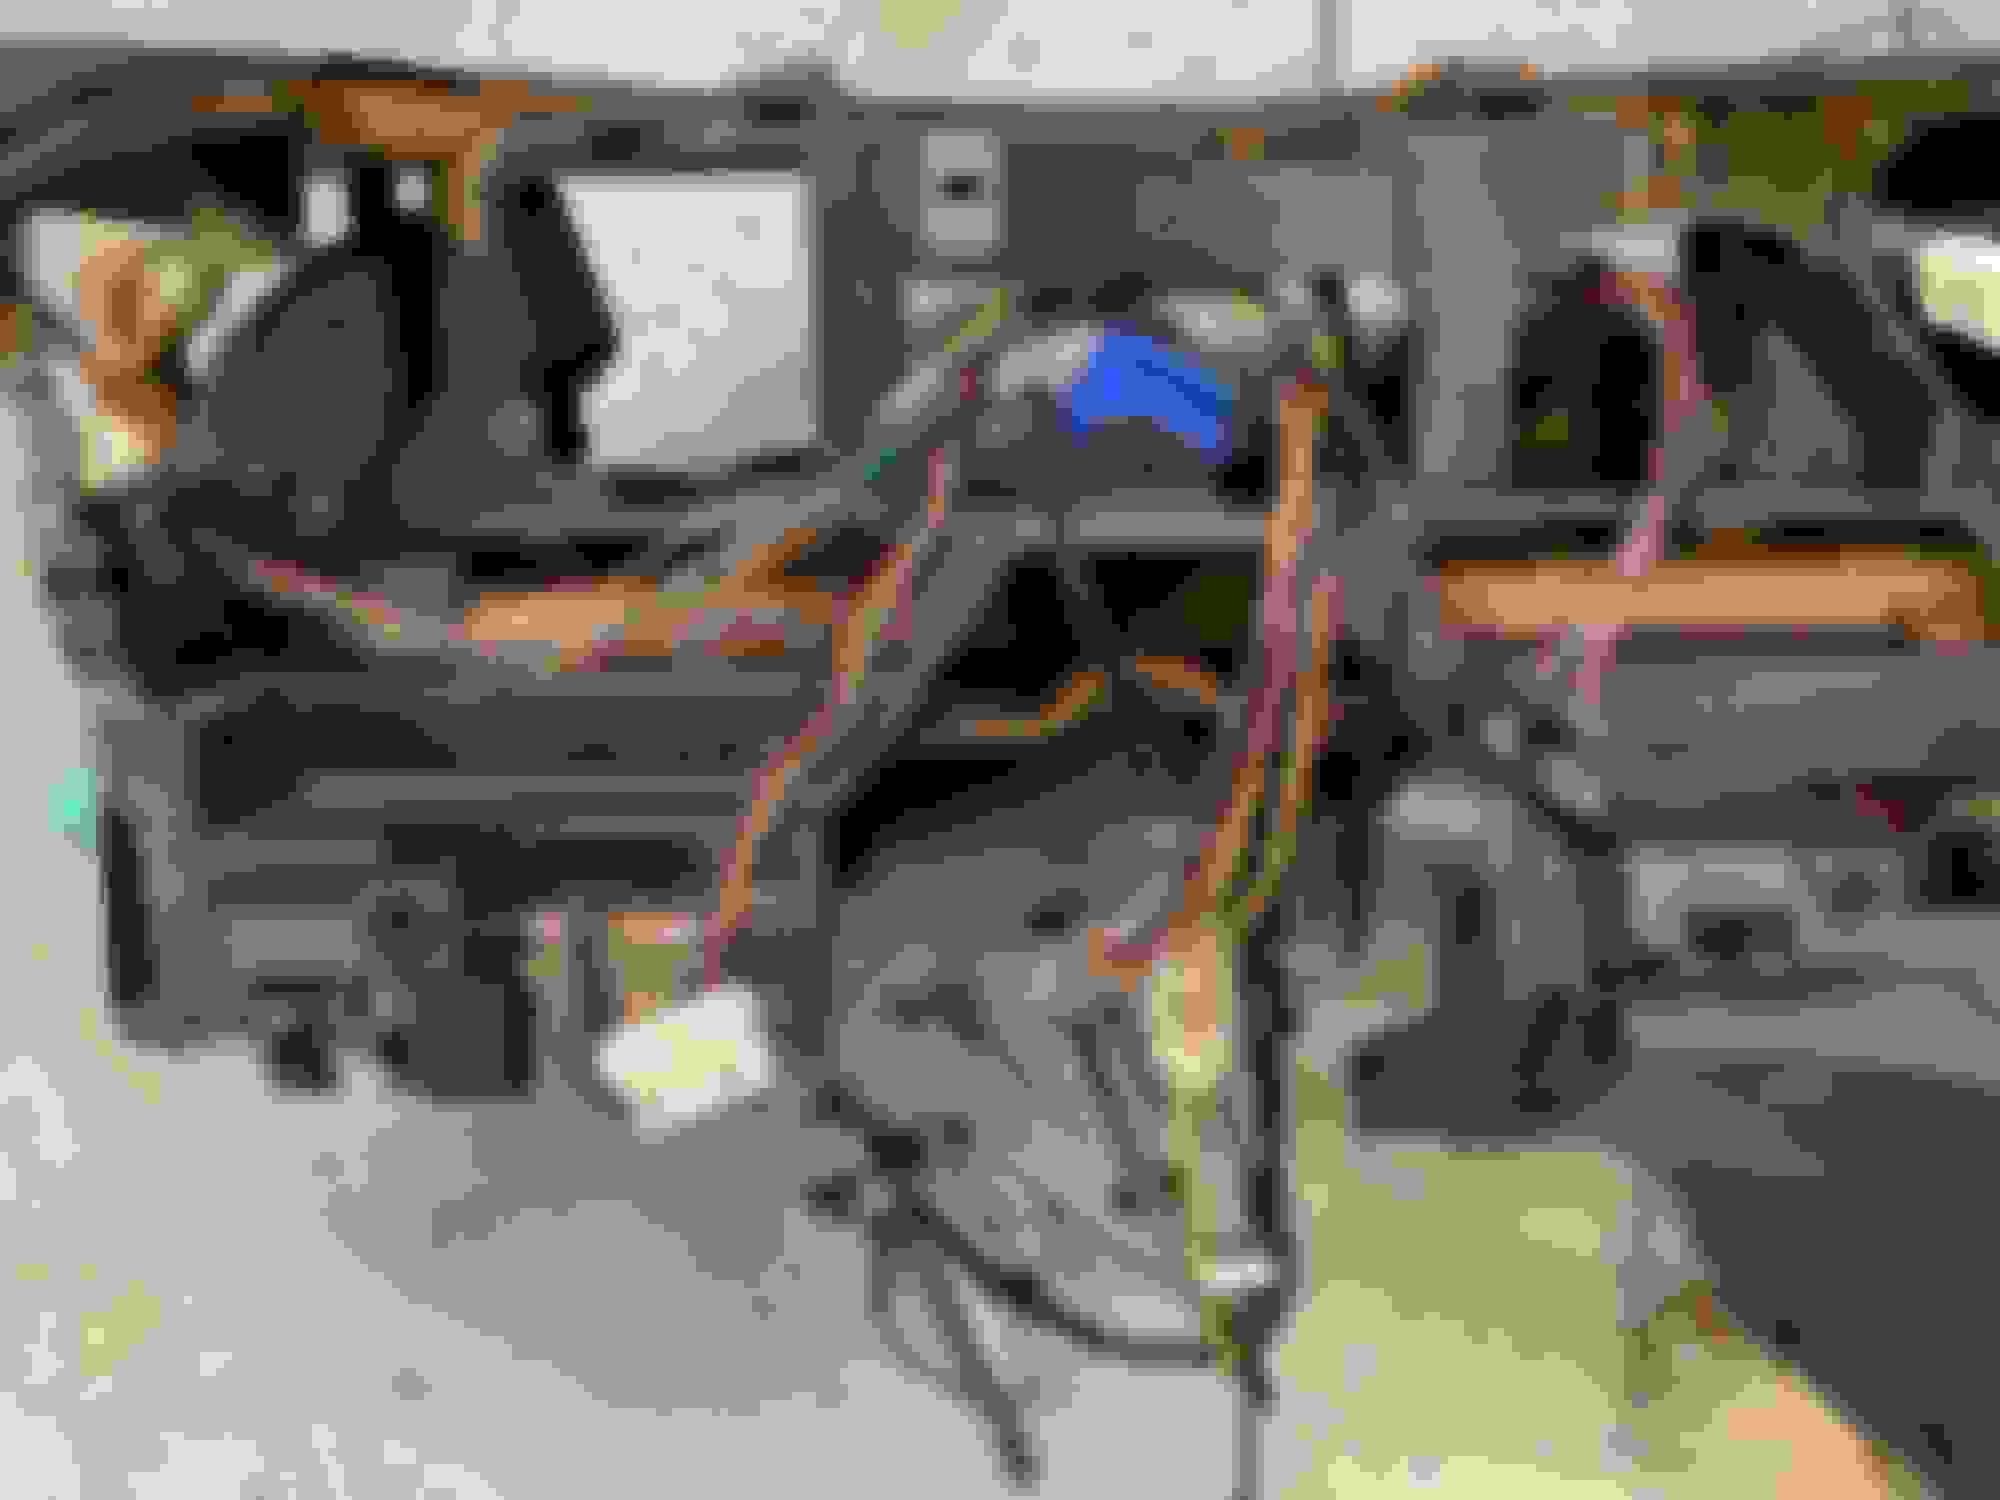
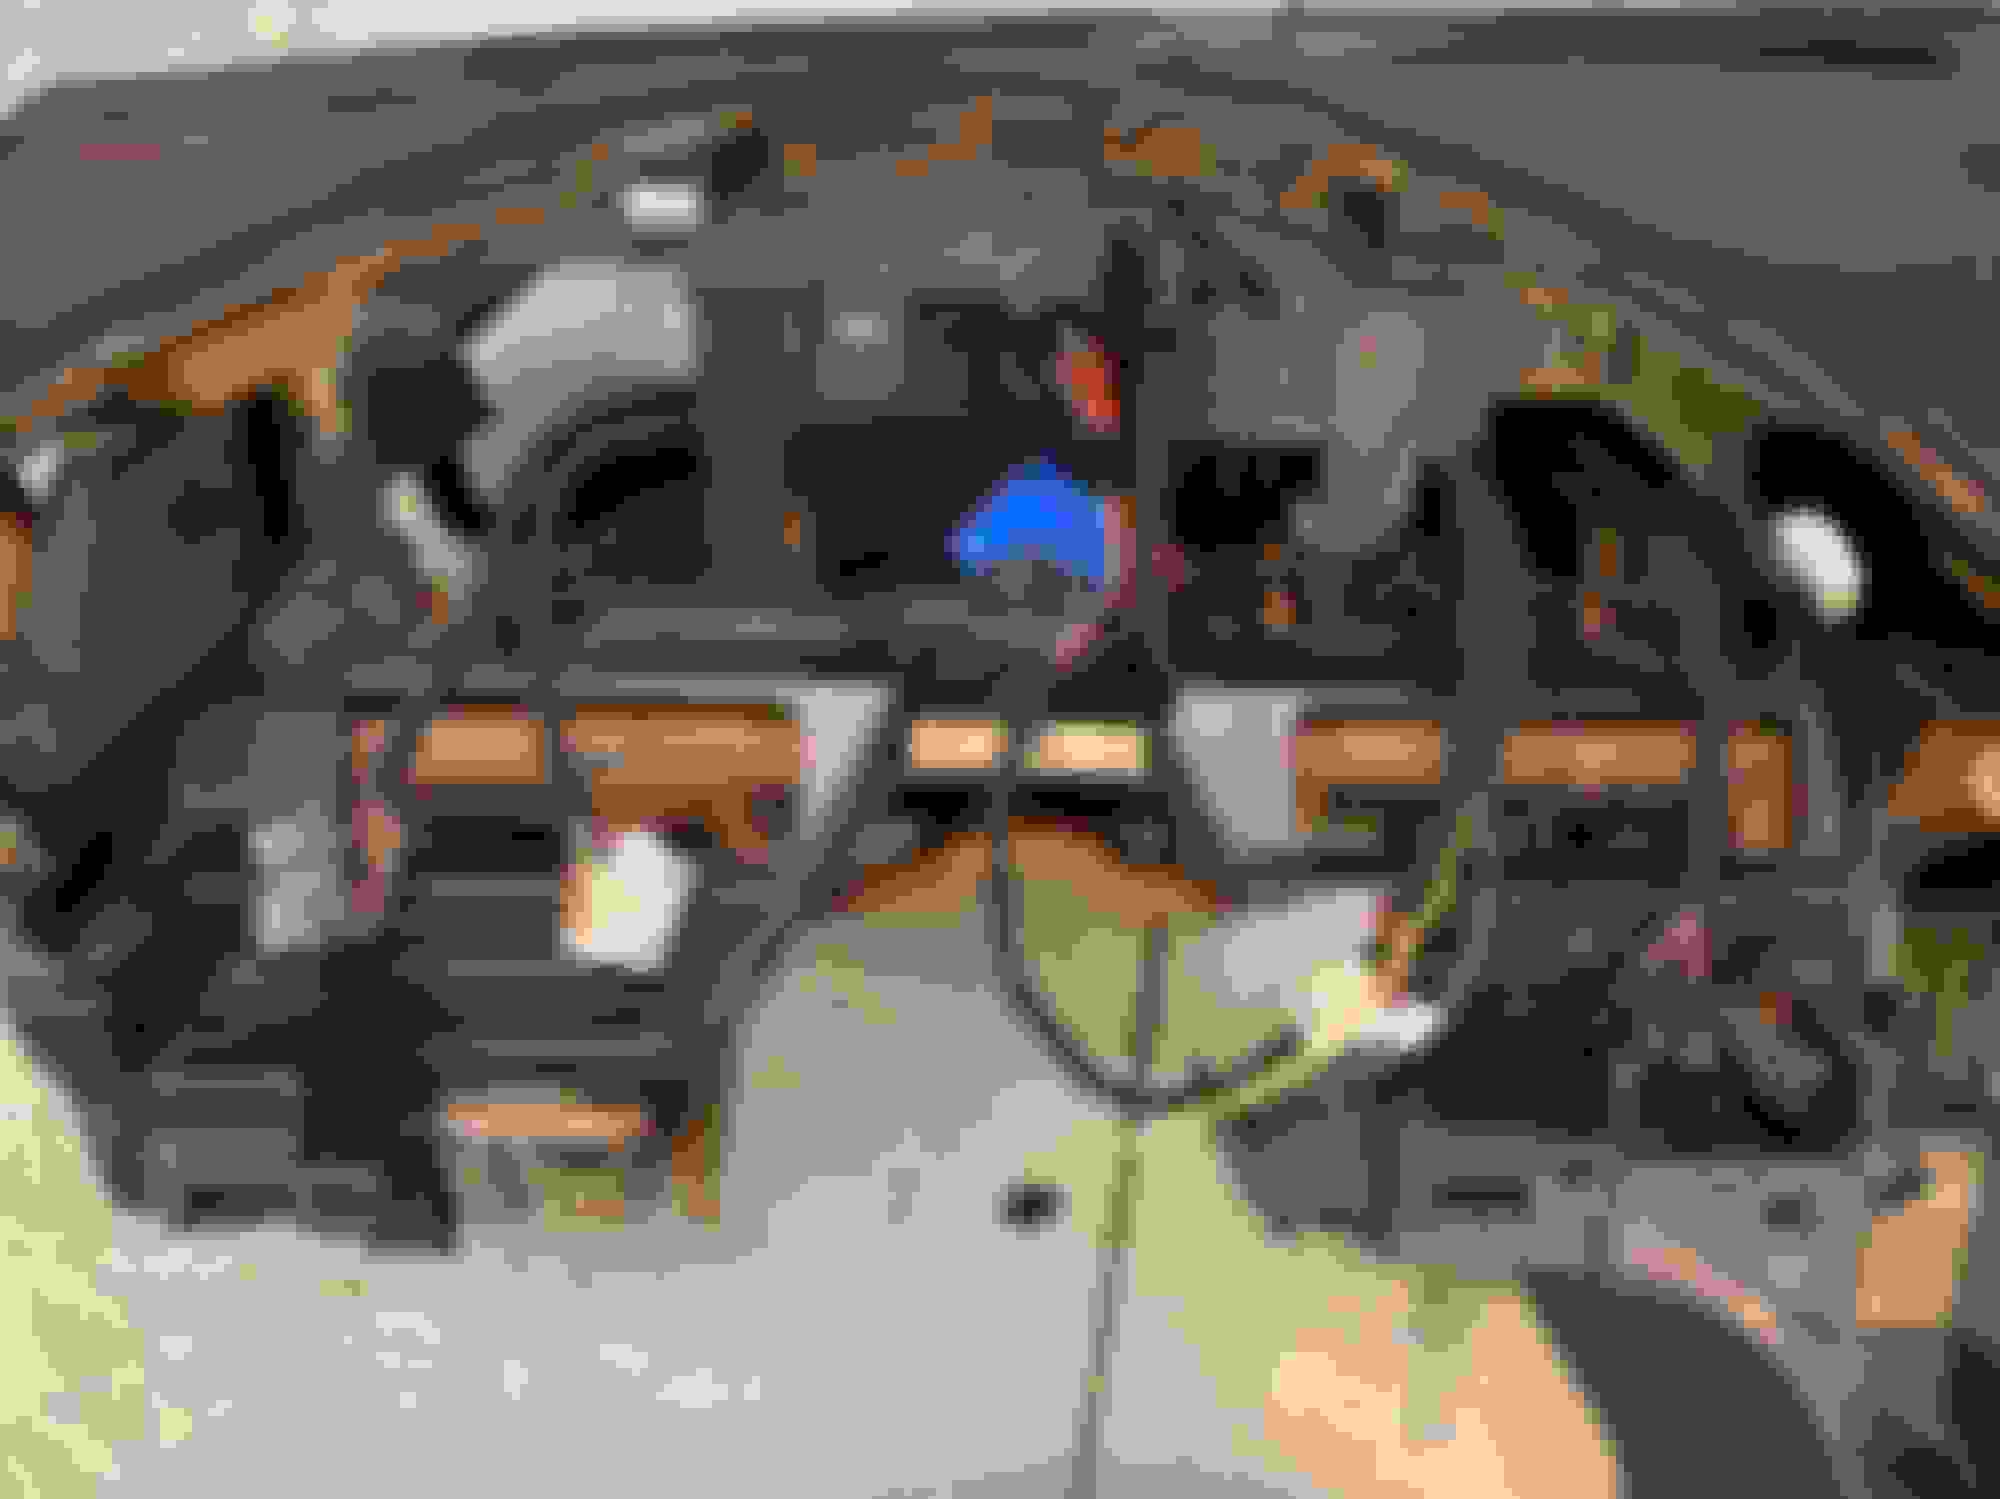
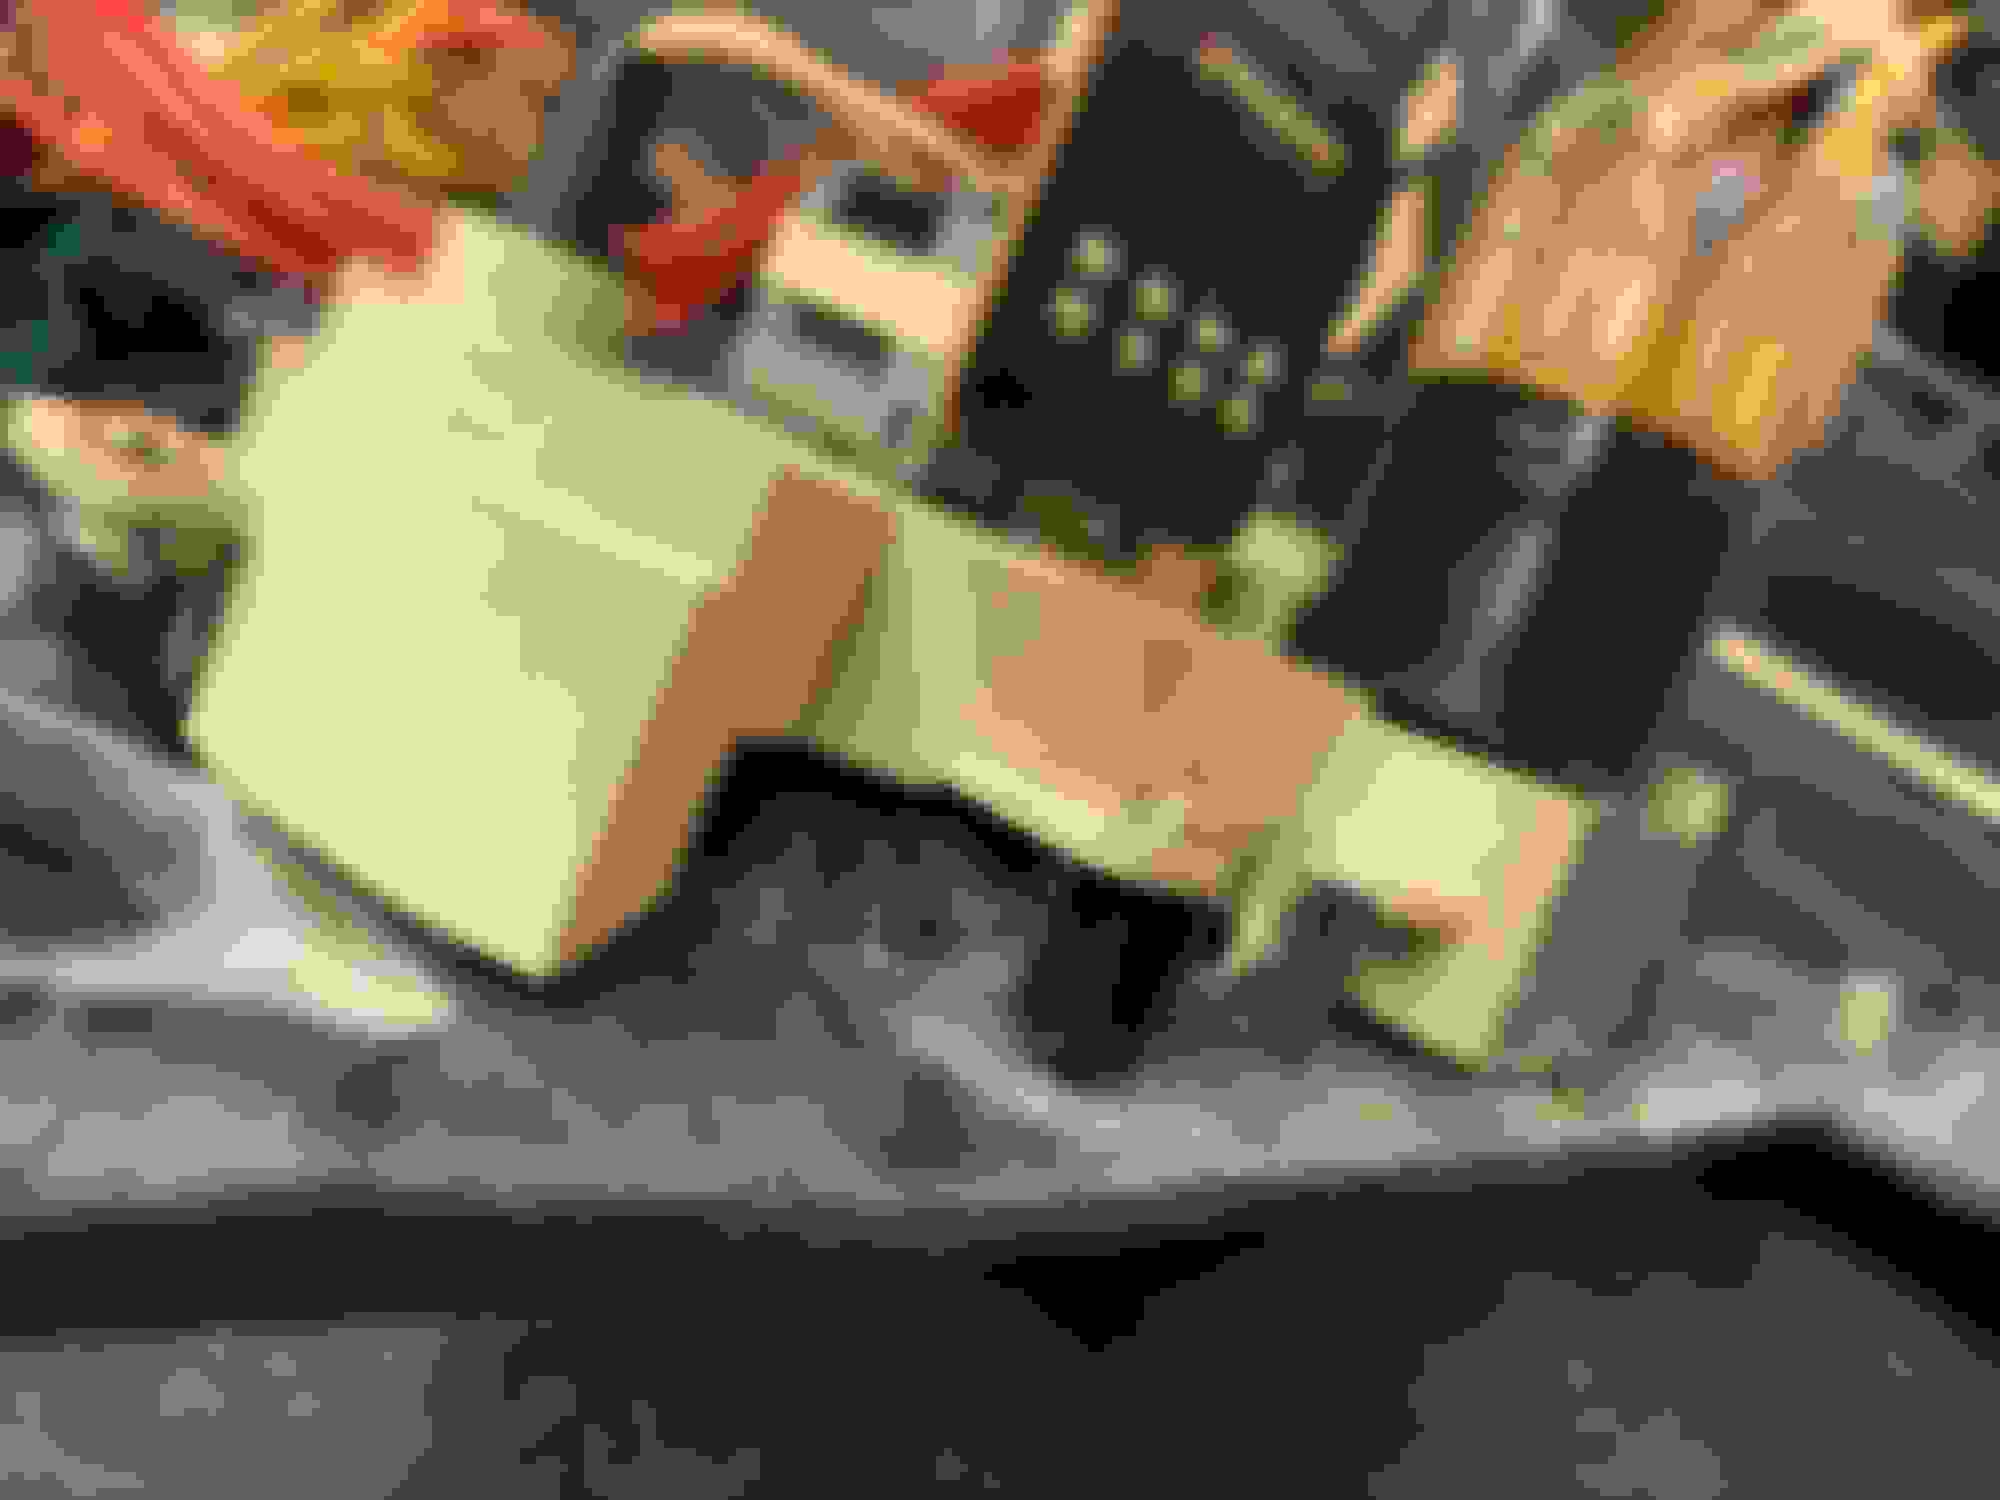
Andrew came through with a super clean wiring job for the new gauges documented below. The relays on the speedometer were used to invert the ground signal from the low oil and low coolant switches to light up the turn signal lights on the gauge so the OEM turn signal lights will still be used.
in other news, the alternator was sent to IRP to swap for the 140Amp unit and some other odds and ends are coming together.
Last edited by quinnry2; May 19, 2020 at 11:06 AM.
Very very nice thread and build ! (And good photos so far)
it's the first time I get the evidence of a non sunroof tan interior has ever existed, since I was looking for this info for a long time, thank you very much
Do you know what model it is ? 93 base model ? R1 ?
Nice build, I really like your setup !
and I like what you have done with the oem fuelpump bracket
Just one question, why the Haltech 2000 and not 1500 or something ? There is something special on the 2000 ?
"Very very nice thread and build ! (And good photos so far)
it's the first time I get the evidence of a non sunroof tan interior has ever existed, since I was looking for this info for a long time, thank you very much
Do you know what model it is ? 93 base model ? R1 ?"
It was my understanding that it is a Base VR with the leather option. I don't think rare is a good thing in all cases. Although a Tan interior with no sunroof might actually be rare (no idea if that is true) the black is much more desirable.
Nice build, I really like your setup !
and I like what you have done with the oem fuelpump bracket
Just one question, why the Haltech 2000 and not 1500 or something ? There is something special on the 2000 ?
Honestly I can not remember exactly the reason. I think at the time they were so similar in price and knowing the 2000 is an 8 injector/8 ignition ECU I figured that it would be easier to sell if I ever wanted to change things up.
Some progress on the Carbon Miata pieces. I can say with confidence that unless you are some engineer/ work with carbon and plastic often that you should not go this route. Needed to do lots of trimming and adjusting/ stealing tabs from the OEM pieces to make it all work. Time consuming for sure to make them all fit well but the end result is turning out absolutely amazing.
Last pic is some new HVAC stickers from Black Cat Customs, totally recommended.
- Lifting the car slightly, Full alignment referencing some Pettit racing guidelines. Final numbers for the front were around 1/16in toe, -1.4 Camber and +6 Caster. Once the rear is done we will know the situation in the rear with some potential rubbing with the Tire/Wheel setup on the trailing arm. Rolling fenders will be next.
- New air guide and reinforcement bar added
- New Tie rod ends installed.
- HVAC Carbon interior pannel installed.
Nice build. The cutting could've been avoided with a different intercooler setup.
I don't understand the tan to black paint on conversion. You had a complete VR shell with a clean~ish tan interior. At least leave the roof tan for the original 2 tone interior, but all black?
Damn, another VR buttercup gone, I'm interested to see how this holds up.
Seats and door cards would have needed to be replaced so going black made sense. Tan just doesn’t look good to me but everyone is entitled to an opinion.
Last edited by quinnry2; Jun 13, 2020 at 05:06 AM.
Here is a look at the titan 7 wheels at full compression. This is when they we’re still selling the 18x10.5 +50 square setup for the FD. Tires are 285/35. Trailing arms hit at full compression. At normal driving they have about 3mm of clearance. Adding in a spacer would be the easy solution but likely would open another can of worms in needed extended rear studs.
Last edited by quinnry2; Jun 13, 2020 at 05:10 AM.
Was having some alternator issues so picked up an IR performance alternator and dang does it looks nice and seems to be performing well.
The car has gone out on a couple quick street drives and after some basic fuel adjustments / data logging would like to get it on a dyno. I have contacted a couple known tuners but was a little surprised to hear they lock the tune.
Can anyone comment if that is industry standard?
Street driving/tune has all been 93 - any specific procedures to making a transition to E85?
Can do things remote but it would be nice to get an in person dyno session. I am in the west MI area. I will be spending a week in Minneapolis July 6th if that opens any doors to get it done.
Last edited by quinnry2; Jun 23, 2020 at 05:56 AM.
I love the Dash gauges and all the little custom details to repair stuff and make it stronger.
Amazing work and thanks for all the detailed pics - it really helps the rest of us too.
I wish I could take credit for the detail stuff but really thats all Andrew aka Zprecision and he deserves all the praise here. He has been a HUGE help on this build.
Here is a look at the titan 7 wheels at full compression. This is when they we’re still selling the 18x10.5 +50 square setup for the FD. Tires are 285/35. Trailing arms hit at full compression. At normal driving they have about 3mm of clearance. Adding in a spacer would be the easy solution but likely would open another can of worms in needed extended rear studs.
Well Thank you Andrew aka Zprecision for all your work and attention to detail and to you quinnry2 for documenting everything. Its really cool reading everyones build so we can learn how to do something new. It also helps so much to show what you can do on your own without having to have to pay a shop a ton of money to do it for you. All that money saved can be used to buy more parts !!!!!!