When you click on links to various merchants on this site and make a purchase, this can result in this site earning a commission. Affiliate programs and affiliations include, but are not limited to, the eBay Partner Network.
It does look like you have a pretty wide range and you can bring it up a good bit from their recommended height.
Dale
Hey Dale, so on the stock height difference figures, I assume that's based on using Tein's recommended height adjustment specs? That's where I'm at now.
Originally Posted by gracer7-rx7
Ride height looks good as is but...
Personally, I'd probably go for measurement closer to 25.5" if being conservative. Mine are around 25.25" up front and a wee bit higher in the rear since the rear is going to sit lower once my fat *** is in the driver seat.
There looks like there's plenty of clearance in the fender wells to go lower if I wanted to, but in my area there are way too many speed bumps/humps, steep driveway entrances and other road hazards (i.e., cratered roads) so having a smidge more ground clearance is a benefit - less likely to bottom out or crunch the chin spoiler. Also that extra 1/4 inch ground clearance (25-3/4" vs 25-1/2" arch heights) makes life A LOT easier when jacking up the car while it's sitting on my 4-post lift to do any wheels off work.
Originally Posted by scotty305
This is now a few people who have said they are happy with Tein Flex Z coilovers, but I might want more ground clearance than in your photo. How much adjustment is left, do you think it could get near stock height?
Yeah, there's enough adjustment range to get it up to stock ride height or even a little higher. See Dale's max adjustability figures above.
So today I had my appointment to get the wheel alignment done after installing the Tein Flex-Z coil overs. Through word of mouth referrals from a few local car guy friends, I took it to Agile Automotive in Forrest Hill, MD for the job. They specialize in all things motorsports except tuning/building rotary engines. Great shop, will be going back if/when I need similar work - come to think of it, my FC can use a good alignment. The shop is just under an hour drive from my house if I take the back roads to get there - benefit being there's a few twisty parts to test out the alignment work on. The FD handled like it was on rails, real game changer, looking forward to Deals Gap next year!
Here's the before (top) and after/final (bottom) alignment print out...
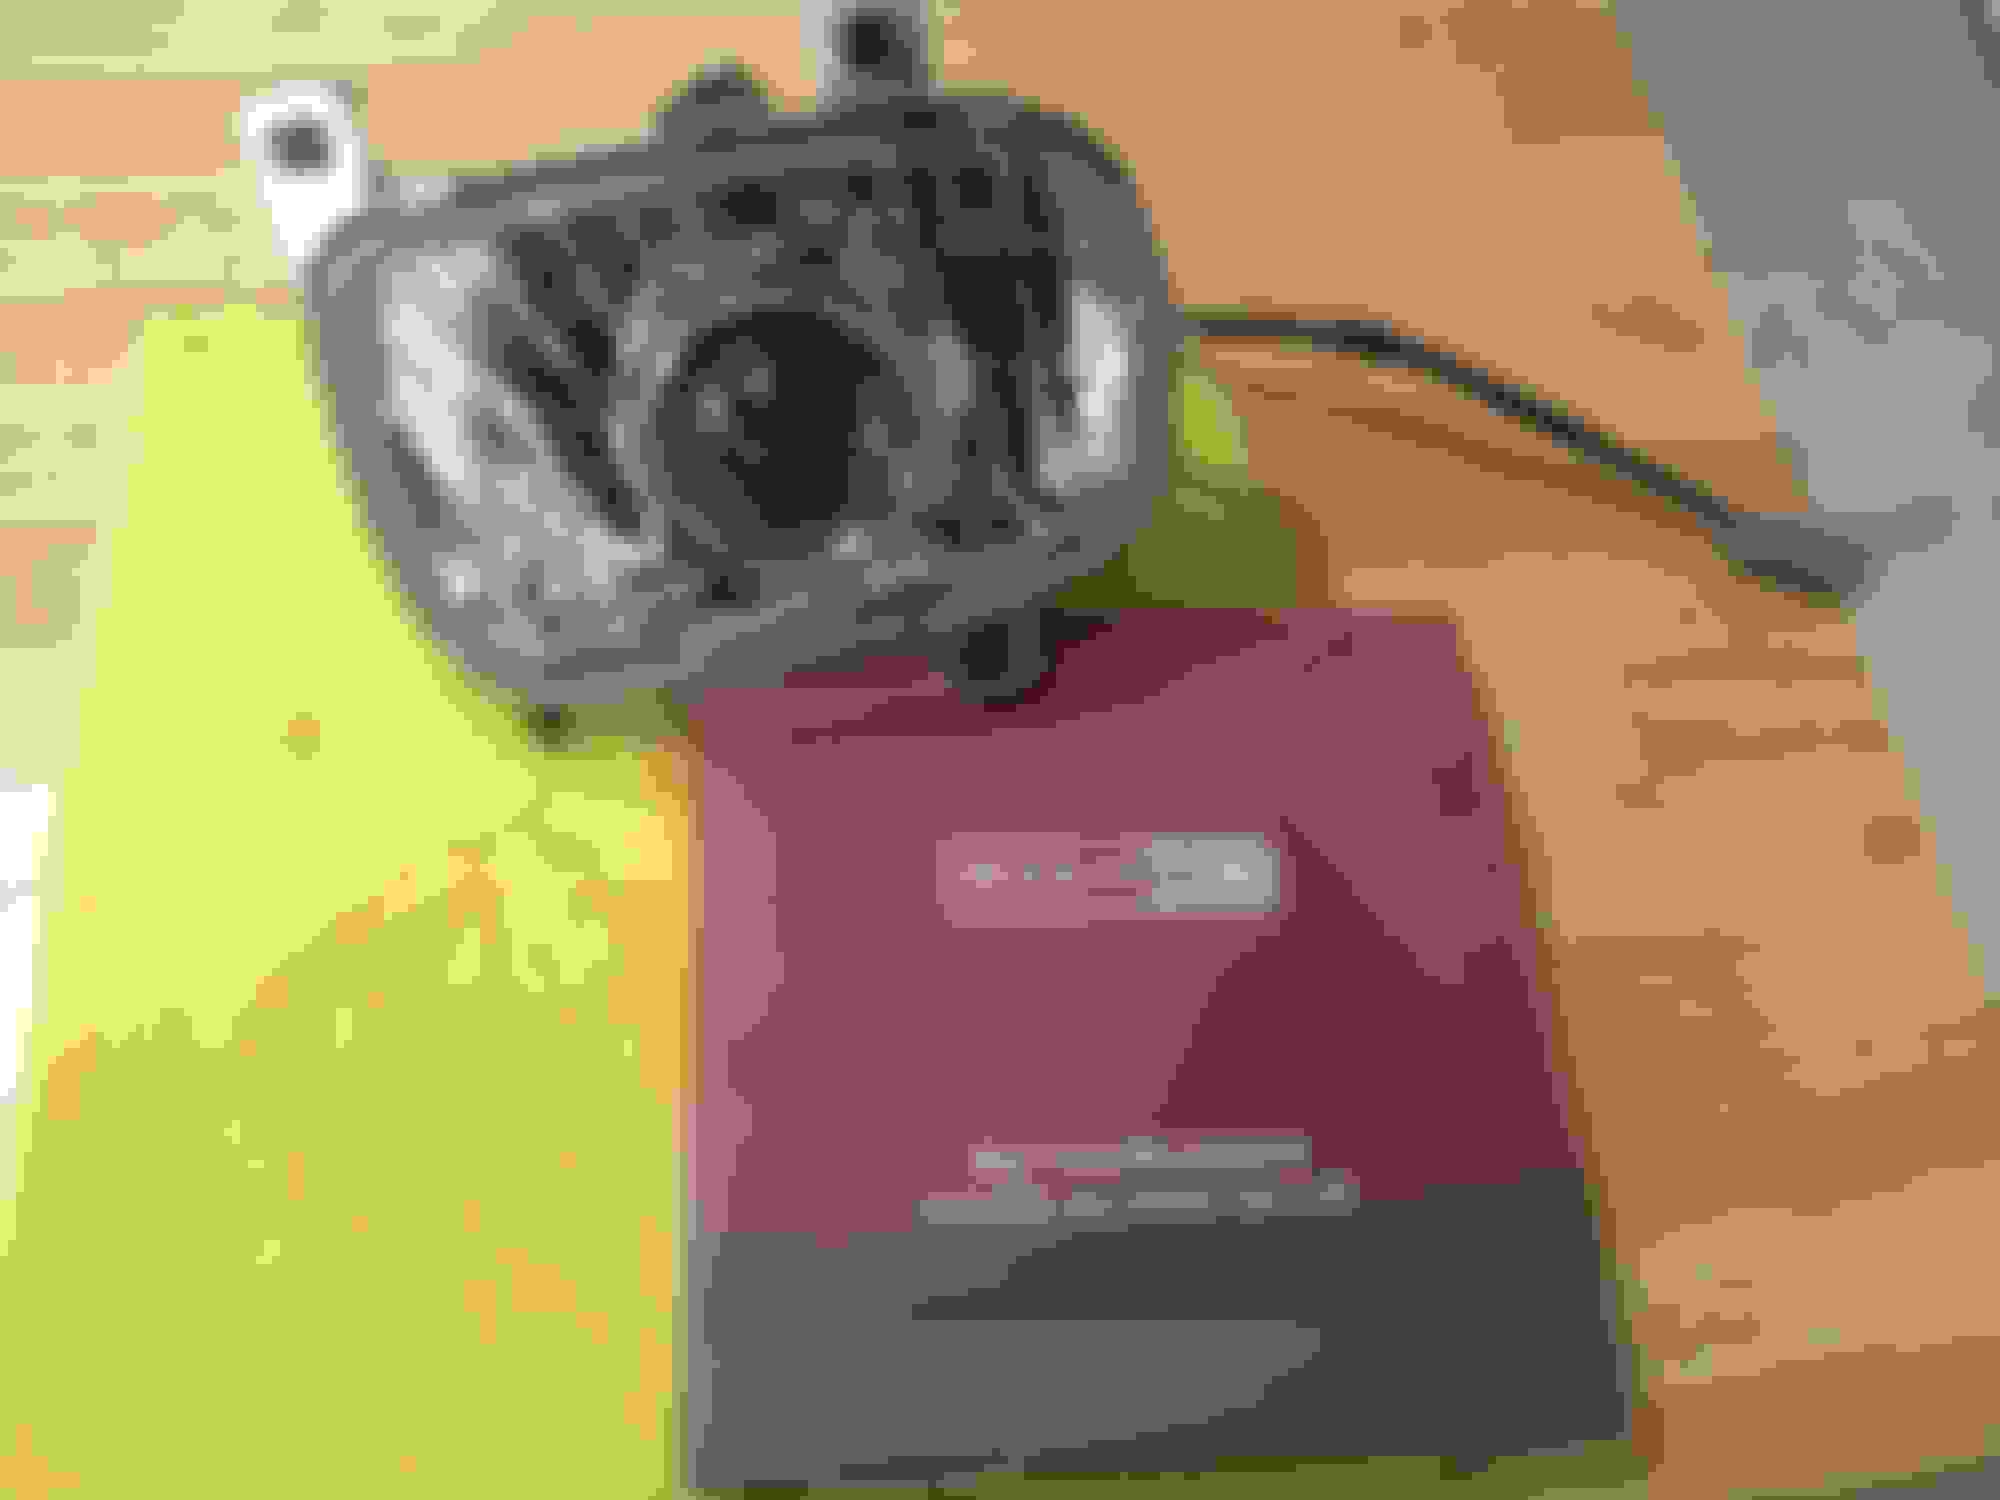
While it was in the shop, the tech noticed an interference issue with my A/C suction line coming off the compressor - in the picture below where I highlighted it in yellow, the hose is showing some contact damage with the serpentine belt. Weird thing is there's at least 1/4" clearance between the belt & hose there, and when the engine is running but the A/C is off they never touch, but when I do run the A/C, the belt and/or hose vibrates & flexes just enough to make intermittent contact. I've never noticed it before now, so I'm really glad they caught it before it got worse! So it's back to the drawing board to figure out the best and most expedient way to correct this - don't want to be without A/C in the summer.
Zip ties to pull the hose over a bit and constrain how far it can move around?
Then figure out a more elegant solution over the winter?
What I've done for now is adjusted that hose clamp you see to the left of the hose rub area that bolts to the IC support. There was enough slack in the hose to pull the hose a little bit to the right, and then re-torque that hose clamp down to get a bit more clearance with the belt. Then I adjusted the serpentine belt tension a smidge tighter, as it was on the loose side of the FSM spec. Finally I wrapped that section of hose with some AL tape, to give me a quick & easy to see visual indicator if it ever rubs in the future. So far so good, hasn't rubbed yet with the A/C running.
But yeah, over the winter, I think I'll re-engineer and revise that line.
So there were a few little cosmetic things on my FD that needed attention. First was the Mazda emblem on the front bumper - driving down to DGRR this year, it flew off and was lost on the highway. Apparently it wasn't fastened down with the spring clips, and was just sitting loose on the bumper. Anyway, brother Ray hooked me up with a new emblem & clips for it...
Next up was to replace my missing RX-7 emblem on the rear, as I never had one. PO never replaced it after he had the car painted, not surprising since it's a self-adhesive emblem, it would have been trashed. That emblem wasn't cheap either, like $60+ with the brother Ray discount. But I think it completes the rear end nicely...
The *** end is complete now!
Going to the interior, I decided to do something about my rear view mirror. It had a couple of problems - First the mount was missing one of the two tiny and unobtainable screws, so it rattled & vibrated like crazy. Second it had that black cancer discoloration creeping along all of the mirror edges. So I basically replaced the mirror and the metal "button" piece that glues to the windshield with more modern Mazda OEM parts that were used on a bunch of Mazda models from the late 90s thru the 2010's. Got the idea from Dale Clark's great how-to thread on mirror replacement here: https://www.rx7club.com/3rd-generati...-easy-1111316/
I love how solid this thing is now, and that it has 2 pivot points vs. 1 for up & down adjustment - so us taller guys can adjust the mirror so it won't block our vision on tight right-hand corners.
This post will be old news for the experienced tuners out there, but I thought I'd share a couple of engine protection features I've implemented in my FD with the Link G4+ ECU and its GM DBW throttle setup. Now the Link G4+ ECU already offers a very capable hard RPM limiter and hard MAP/boost limiter function that cuts fuel & spark in a rotary specific mode (just like Mazda's OEM ECUs) that takes into account the fact that at the moment an RPM or MAP limit needs to occur, we have 3 faces on each rotor in different phases of the 4-stroke cycle. Some of those rotor faces will have fuel/air charge in the chamber, so even with a properly executed rotary-specific fuel/spark cut, you WILL get a rather explosive exhaust backfire when it happens. Very uncouth and uncivilized, and not good for your FD's turbo or exhaust system either.
So DBW enables the ability to program "soft" RPM and MAP/over boost limits, which you can set to occur earlier than whatever hard limits you have set with the rotary specific fuel/spark cut engine protection feature. Here's how I did it with my G4+. First I'll cover the soft RPM limit via DBW. Reference the screenshot below...
What you're looking at is my primary E-throttle mapping in the Link, which relates accelerator position (AP), Engine RPMs and Throttle Position (TP) being commanded. For the most part, except for the idle cells (top row, <2000 RPMs) and the right most column (redline) AP is commanding a 1:1 proportional TP opening. My previously described "hard" RPM limit is set at 8500 RPMs, but based on the #'s entered in those last 2 columns (highlighted in yellow oval), the 8000 RPM column #'s are 1/2 of those in the 7500 RPM row before it. So what happens due to interpolation is right about 7750 RPMs, if I keep on the accelerator, the throttle will drop to 1/2 of where it was. This results in a 100% reliable soft RPM limit that puts the kabosh on the party before the uncouth hard limiter kicks in at 8500 RPMs
Next up is a soft MAP/boost limiter. This isn't as straight forward, but it works just as well. The first thing to do is set up what Link calls a "Virtual AUX" to monitor your MAP or MGP (boost) pressure. The next thing to do is create a 2nd/alternate E-throttle map - this E-throttle map is only activated when the condition(s) set by your Virtual AUX are triggered. So in my case, I have a hard MAP limit set at 15psi MGP (that's where the fuel/spark cut would come in if I ever let it boost that high), and I set my soft boost limit with the Virtual AUX which switches to the 2nd alternate E-throttle map whenever boost exceeds 10.2 psi MGP = 24.7 psi MAP. The Virtual AUX will switch it back to the primary E-throttle map as soon as MGP goes back below 10.2 psi. Explanation of how the 2 E-throttle maps work together follows in next picture.
On top we have the "active" or primary E-throttle map - that's the one in play whenever boost is less than 10.2 psi MGP. The bottom (shown inactive) E-throttle map becomes active as soon as the Virtual AUX switches it on when MGP becomes greater than 10.2 psi MGP. Notice yellow circled cells in the top & bottom maps - the bottom map is commanding 1/2 the throttle it was before in the top map - instant soft boost limit!
Here's a log screenshot of it in action. In this case I was in 5th gear holding a pretty steady throttle at about 56% AP and about 3750 RPMs, going up a slight grade while trying to maintain a constant speed - I was using the terrain and cool weather to try to induce some boost creep here. My boost control is still turned off, so it's strictly on mechanical springs. Typically my 7 psi springs (dual Turbosmart 40mm Gen IV external gates, recirculated into the DP) will hold a steady 8~9psi MGP boost on a sustained 3rd gear pull or on a shorter duration 4th gear pull. The yellow cursor line is at the point where boost just exceeded my set threshold and MAP hit 24.8 psi. Just past that point, you can see where my foot was holding the AP% steady, but the TP% rapidly trended down to about 1/2 of the AP%, and boost quickly drops off. Then as soon as the boost dropped below the threshold (about 9.5psi MGP here), you can see the TP% and AP% tracking at 1:1 again, after it switched back to the primary DBW map. Behind the wheel you'll feel an immediate reduction of power, almost like a misfire, but then it comes right back as you stay on the accelerator (as in the log snippet). So you get the safety of a boost limit without the nasty backfires or drive line shocks that a hard limiter fuel/spark cut would give you.
It's been a while since I last updated this thread, and my FD is in semi-hibernation for the winter. "Semi" hibernating meaning that if it's warm enough outside, and prior rains wash all the damned salt off the roads, I'll take her out for a spin!
Anyway, before going into hibernation I was finding that with the colder weather, my lowest boost limit (i.e., running on WG springs alone) was spiking & creeping to the moon. My goal here was to setup a "daily driver" mode with my Link G4+ that would keep boost at a stock-ish 10psi or so. Instead, I was seeing boost go well beyond 12psi MGP while running on 7psi WG springs at less than 60% throttle in 3rd & 4th gear. This post of mine in the single turbo section delves into my boost control problem, and what I hope is an effective solution at the end of that thread: https://www.rx7club.com/single-turbo...stions-1159603
Just prior to hibernating the FD, I swapped my 7psi WG springs for a set of 3psi springs and did some road testing & logging. So far, at least up to about 70% throttle, that change seems to have solved my problem - I haven't seen it boost beyond 6.5~7psi MGP in the logs yet, when comparing before & after logs under the same test conditions (e.g., same gear, throttle %, same road/grade, IATs, etc.). Road tuning where I live is difficult, as it's next to impossible to find a long enough uncluttered stretch of road to safely let her rip at 100% throttle. Hoping to get on a dyno and get more comprehensive road tuning miles after winter hibernation.
Next up is a headlight upgrade to Bi-LED projectors. Not long after I purchased my FD, I purchased a set of Sylvania Silverstar halogen bulbs to replace the bulbs that were in there, aimed them per the FSM, and to be honest the OEM type halogen lighting wasn't too bad. But in comparison to my daily driver, which has OEM HIDs, and my FC, which I retrofitted a set of Morimoto mini-H1 projectors into, I felt the light output of the halogens was lacking - guess I got spoiled. I really didn't want to have to deal with the all the fabrication labor needed to retrofit bulky HID projectors into a set of FD headlight housings, or replacement housings (e.g., Spyder/Sonar brand clear lens replacements), or spend crazy $$$ on an HID kit like the Sakebomb setup. Then I stumbled across this forum thread by member Alexdimen on his Bi-LED projector retrofits that inspired me to give it a shot: https://www.rx7club.com/3rd-generati...rofit-1148884/
Basically the gist of it is you buy a pair of new clear lens FD headlight housings (about $100 on Amazon, etc.) and a set of Bi-LED projectors (also about $100, AliExpress, Amazon & elsewhere). For those interested, the link above goes into lots of detail on how to do this, along with my experiences put them in my FD. For the most part I followed Alexdimen's approach verbatim. Only significant difference is I chose to use a 2" diameter Bi-LED projector in lieu of the 2.5" diameter projectors he used, sourced from the same manufacturer, Sanvi Lighting on AliExpress. Reason I went with the smaller projector was fitment & ease of installation - I was able to retain use of the silicone cushioning washer that comes with the projectors which he stated he had to omit with the larger 2.5" projectors. Here's a few pictures...
Completed Headlight housing & Bi-LED projector assembly ready for install in my FD
Bi-LED Low Beam test - Still need to adjust the aim here.
Bi-LED High Beam test - Still need to adjust the aim here.
And finally since I'm a guy who can't leave well enough alone, I felt it was time to do something about the cold air intake (CAI) I fabricated for my FD some time ago... Although that CAI worked great at keeping my IATs under control, I was never really happy with the looks & esthetics of that thing and felt I might be able to optimize the design to get a little more airflow into the air filter. So it was on to design & fabricate version #3! For this version I was inspired by a Youtube video that shows you how to fabricate sheet metal cones, and I found this handy-dandy website app that lets you create printable templates that you can use to fabricate your sheet metal cones. You punch in the cone base diameter, top diameter & length and it produces a template that you can save & print as a PDF file. Link: https://www.blocklayer.com/cone-patternseng
This one is also fabricated mostly with sheet aluminum, and utilizes the same K&N cone filter I had before. Difference is I created a cone shaped enclosure for the filter, modified the "snorkus" duct that routes air from the space between the radiator & frame so it has less of a choke point where it necks down to fit & mate with the new plenum piece. The new plenum piece routes air to the top of the cone, and also to the side in the part where it overlaps the cone enclosure. It works as good as the version 2 was in managing IATs, and looks a hell of a lot better IMHO Here's a few pictures of it under construction and the final product:
Mock up progress - here you can see the larger "snorkus" opening, and the new cone enclosure More mock-up progress - here you can see how almost the entire cone top is open to flow air from the plenum, before I opened up part of the cone's side where the plenum mates over it. Finished view of the completed CAI V3 from the driver's side Here's a view of the finished CAI where you can see the plenum (painted black) attached to the cone. Another engine bay view - if that CAI was made of black plastic, it would almost look OEM
Coming soon (I hope) to my FD is leather seat restoration. Early in December, I ordered a set of new tan leather seat skins from Ari at RX7.com. I'm expecting a long wait on these, but Ari doesn't charge your credit card until the product (which comes from another vendor) is ready to ship - class act business! My existing leather has the usual driver's side bolster wear, and a hole in the driver's seat cushion, and I wanted to restore the tan leather with as close a match to OEM in terms of color & texture as possible. Out of all the vendors out there that sent me leather swatch samples, RX7.com had the best match to OEM... If I was going to switch to black leather, I'd have more supplier options. Anyway, I hope I have them in before Deals Gap!
Last edited by Pete_89T2; Jan 13, 2023 at 07:04 PM.
Reason: fix typo
I have Ari's seat covers and I am very pleased with them. The tan was plenty close enough for oem. I recall looking at them when I was trying to decide which color. I went black as I have one of those odd interior that's like 1/2 and 1/2 and just wanted black. I believe you will be very happy with them. As for him and the charging. Ari is one of the most reputable people to deal with as far as vendors go. He is my #1 go to guy.
I hope to see you up there this year! I am getting an exhaust leak fixed (pre turbo) and a new clutch which should be exciting.
The long wait is over, and it looks like I'm going to be very happy with these! Ordered them in early Dec from RX7.com, but Ari didn't charge my CC until they shipped out on 2/3/23. These just arrived on Friday, 2/10/23. So far I just unpacked them, and am letting the leather relax inside the house at a comfortable room temperature before attempting to do the install. Some unpacking pictures...
They were well packed & folded inside out and sealed in plastic And here's what they look like unpacked on my living room floor. Three pieces for each seat - a bottom cushion section, the seat back/headrest section and the center/lumbar section of the seat back.
I've done DIY seat recovery before on my FC, so I'll be doing it again with the FD. Naturally the FD seats are a bit trickier, but still do-able. For reference I'll be using this excellent how-to write up courtesy of forum member "Andre The Giant" to help me along: https://www.rx7club.com/3rd-generati...w-diy-1041306/
Before I tear into this job, I'm going to have to figure out what to do about the seat belt guides. Tan guides are no longer available new from Mazda, so my options are (1) Restoring my existing tan guides - they look faded, so I'd need to replace the fabric strap with something new, and probably refinish the plastic bits with SEM paint OR (2) Have a simple leather strap & snaps fabricated like Andre the Giant did in his how-to post. Stay tuned for the before & after - hope to get these in before Deals Gap!
Might be worth googling around a bit to see what�s out there. Hard to tell if these would look good, but cheap enough to explore. Think they are from a BMW roadster.
Might be worth googling around a bit to see what�s out there. Hard to tell if these would look good, but cheap enough to explore. Think they are from a BMW roadster.
.
I had seen those same seat belt clips on Amazon, and had given it some thought. They would probably look OK on black seats, but if I can't restore the stock ones, I'd prefer going the matching leather strap & snaps route like "Andre The Giant" did in his how-to post I linked. I think it looks better, and the design would allow freer belt movement with no snagging when compared to the BMW part with that narrow belt slot.
For the leather straps, I found these finished leather straps that could be cut to size, then you would add the snaps at each end and finish the cut leather edge. They also do custom work, so I plan to call them tomorrow to see if they can make some straps to my specs and maybe save me some time. https://valuebeltsplus.com/products/...12204611141726
This weekend I finished installing the new leather seat skins I purchased from Ari at RX7.com. Overall I'm very happy with the end result - they really freshen up my cabin, it feels great sitting in them and the new leather smell rocks! For the most part, my installation followed the how-to thread posted by forum member "Andre The Giant" - https://www.rx7club.com/3rd-generati...w-diy-1041306/
Here's a picture of the completed seats in my living room (aka - temporary upholstery shop):
They both have a bit more wrinkling than I'd like on the door side bolsters hear the headrests, but I think I can exorcise that with a fabric steamer or just letting the car sit outside on a warm sunny day. And this is probably where I should provide my critique of the RX7.com seat covers.
Pros:
(1) Leather material of high quality, and construction is top notch.
(2) For those of you who want to match the OEM tan, these are probably the best match you'll find in the market in terms of color, shade & leather surface texture. Before buying, I've rounded up leather swatches from every company I know of who does FD seats (Leatherseats.com; Katzkin; Ridies.com, Interior Innovations; Lseats.com, etc.), and RX7.com were the closest to OEM out there.
Cons:
(1) The seat pattern is not a 100% exact copy of the OEM design/pattern. Mind you, if you are handy and know what you're doing these minor detail differences won't prevent you from installing them and getting good results - it may just take a bit more muscle and cleverness to get the job done. To quote "Andre The Giant", in his write-up he describes part of the process "like trying to put on a jacket that's 2 sizes too small", which is spot on. Though at times I felt these covers were 3~4 sizes too small, but I prevailed!
Now for the seat belt guides, after removing the old ones it was blindingly obvious to me that restoring them would be a no-go. The driver's side plastic was broken in 2 places, and passenger side in one. So I ended up going with a snap-on straps route, similar to what "Andre The Giant" did, but no sewing required. I actually made 2 versions of the belt guide straps - one in leather, and one with nylon fabric. I thought that the no sewing approach gives me maximum flexibility - so if the straps ever wear out over time, I can simply make another set and snap them to the seat. Here's some pictures of the process:
Here's a finished seat belt guide, with the snaps installed. Snaps are a heavy duty Tandy "Line 24" closure set. You basically punch a hole in your fabric/leather, the post goes thru and then you crimp the snaps onto both fabric/leather sides with the pictured anvil & punch tools. For the fabric straps, I just folded the ends over twice, using a fabric glue to hold it together. This gives a meatier/sturdier end for the post/snaps to fix to. Here's a shot of the snap "receivers" installed on the new seat skins. I created a template that referenced the seat's seams so both seats would have the snaps placed identically (and I didn't want to screw up punching a hole in the new leather! You know, measure twice/cut/punch/drill once) And here's a shot with the belt guide installed as a test fit And here it is installed in the car, Fabric belt guide version And here's the leather guide version - I purchased the leather online, but the color match wasn't as good in real life as it was on my computer monitor. Might do a version 3 using the leather from my old seats to get a better match, as the leather is much sturdier than the fabric
What do you think folks? Keep the fabric guides, or go with the leather?
Really nice work. Looks great. And I bet those wrinkles will come out and look even better.
For the straps, I'd call the place that made them and see if they can give you some matching leather. I think if it matches it will blend in a lot more and look better. The nylon doesn't do it for me, but the closer color is better than the leather option you did.
Originally Posted by DaleClark
Looks great, Pete! Car is coming along big time!
Dale
Thanks guys!
For the leather straps, the place I ordered that pre-finished leather strap material from only had 4 color choices, what I got was the closest they stock. Since I didn't throw away the old seat leather yet, I could use that material to make a set of straps. But since I don't know how to sew leather, I'll have to farm that job out to a local shop. One such shop said they can do it for about $75, which seems crazy for what it is, and using my old seat leather. So for now the nylon fabric straps are good enough - they are functional, and the color match is pretty close.
After having zero luck finding a local shop to turn my old leather seat material into a pair of nice matching seat belt guide straps, I decided to give it a go myself. Again, since I can't sew, never mind sewing leather, these were made with nothing more than a glue that works on leather/fabrics, a set of snaps and leather harvested from the old driver's seat leather. Pictures:
Here's the leather harvested from the old driver's seat back. These strips are approx. 2" wide X 7" long. To "finish" them, so the side edges & backside look decent, I did 2 lengthwise folds, using the glue to keep it folded & sealed. Needed to clamp it under a straight edge bar to let the glue setup (about 1 hour) Added the snaps on each end, and here's the finished result. I may try to finish the top & bottom unfinished edges by burnishing & applying a leather bee's wax to seal the edges. Pretty happy with it otherwise, functional and the leather strips now matches the new seat leather.
Haven't done all that much with the FD since Deals Gap, just been enjoying the hell out of it and driving it as much as possible since last spring, but there's a few bits worth updating here...
First update is on the tuning front. Been DIY road tuning, and setting up a couple of closed loop boost control profiles with my Link G4+ ECU. I'm finished road tuning the lower power "daily driver" mode, which keeps the boost capped at a stock-ish 10.2psi MGP. I'll be doing a high power mode too, plan there is to boost up to 15psi MGP or hit 400RWHP, whichever happens first, but I'll probably need to do that on a dyno - too easy to run out of road around here. Below is a log screenshot of the almost final tune for my low power mode - in this log, I was still tweaking the boost control solenoid DC table, and closed loop boost control PIDs. It's about 1psi shy of my target in this log, but the boost control was nice & linear - reference the yellow trace, which is boost target vs. the blue trace, which is MAP or actual boost. This was a rolling 4th gear pull on the highway, and if you notice the driven wheel speed (parameters list), you can see why I'm running out of road and really need to get this thing on a dyno to tune the higher power mode!
Next project I started over the summer was to restore a functional evaporative emissions/fuel vapor purge valve similar to the OEM setup. My FD has the OEM charcoal canister, but it was open air vented at the hard line that pops up on the driver's side firewall. So when the car sits for a lengthy period of time unused, the cabin picks up some fuel stink, and I found that when driving in hot weather (+90*F) with a 1/2 tank of gas or less, I'd smell fuel vapors from that open vent. So I added a new OEM Mazda purge valve (part # matches to RX8's and a few other Mazda's), one of Dale Clark's Viton check valves & some hose to plumb it to the UIM like the OEM setup, and will be wiring it up to a spare output from the Link ECU to control it. More specifics on what I did can be found in this thread, starting on post #40 https://www.rx7club.com/3rd-generati...ssion-1152638/
Here's a picture of the mechanical install of the purge valve. I ended up fabricating a new bracket to mount my Link 4 bar MAP sensor and the new purge valve for the install.
Which brings me to the final step on the purge valve project - wiring it to my Link ECU. After reviewing my existing wiring & output assignments, I realized I could have done things a little smarter to maximize the use of the ECU. For example, by re-assigning simple on/off switched outputs such as the fuel pump relay and fan relays from the AUX outputs to the unused fuel injector or ignition outputs, it freed up a few AUX outputs that can be used for full 3D/PWM duty cycle type outputs for things like a purge valve or even controlling water/meth injection. Fortunately, none of the wiring revisions require me to mess with the under-hood wiring that is past the MILSPEC firewall bulkhead connector, but I will have to do a bit of re-pinning of the 2 AMP SuperSeal connectors on the Link. Being good engineer I planned the revisions and built the wiring schematic first - Attached .PDF file is "Rev 4" of my FD's schematic for the electrically OCD types. I'll do the wiring updates when I put the FD down for winter hibernation, or maybe a little sooner.
I'm curious if the seat cover wrinkles eventually smoothed out?
They have for the most part, especially the driver's seat which obviously gets much more use. I didn't do anything special to smooth them out, like using a steamer on them, just parked outside in the sun for a bit right after the install. I recovered my passenger seat first, so that probably explains why that one came out a bit more wrinkly than the driver's seat - installation learning curve was at play. Also, regular use tends to help stretch & smooth the leather, and I rarely have anyone sitting in the passenger seat.
Wasn't sure where to put this one on the forum, but since I have to build it, I figured my build thread is as good as anywhere else... Check out what my eldest son got me for Christmas!
It's a Tamiya 1/10th scale FD radio control drift missile!
Already started building this thing, have much of the chassis done, but have to pause to buy some more RC gear to wrap up the construction. The kit came with the motor, motor controller and an LED light kit, but you have to purchase a battery, battery charger, steering servo and at least a 3 channel transmitter & receiver to finish this thing and take it for a spin. I think I'll paint it the same color as my FD when I get to that step. This RC stuff is fun, and I can see it becoming another expensive hobby, though not as bad as keeping a few rotaries on the road
Since this is a build thread, here's a picture of some progress...
Chassis is almost done. Need to buy a transmitter/receiver to finish it. Loving the all wheel drive & fully independent suspension. Actually had to assemble the oil filled shock dampers & coil overs myself
Since my last fall 2023 update, I finished up a couple of little projects on the FD. First was to add a set of OEM fog lights - my FD started life as a touring model originally equipped with the fogs, but they were removed several PO's ago, and it just annoyed me that I had a fully functional fog light switch in the console doing nothing. Since all the wiring except the fog light sub-harness in the bumper was still there, and I tested & verified it was functional, I purchased a set of good used OEM lights & brackets from a forum member. The installation of the brackets was more of a PITA than I suspected, as it was impossible to thread a nut on 1 of the 2 studs on each bracket without removing the freaking bumper. I also had to trim a little bit of sheet metal off the corner of the IC duct I fabricated for my IC to clear the left fog light. For the wiring, I fabricated the fog light sub-harness that hides in the bumper; for this task you'll just need suitable wire (I used 16AWG TXL) and 3x of these connector kits from Corsa Technic for about $12 shipped - https://www.corsa-technic.com/item.php?item_id=553 Pictures of the fog light fun...
Here's the fogs installed on the bumper rebar - here you can figure out why the bumper needs to come off to thread the nuts on those 2 outboard fog bracket studs. This picture also shows the finished fog light sub-harness I had to fab up to connect to the OEM connector on the front (F) harness Here you can see the corner edge of my IC ducting that interfered with the left fog light housing. And here's the left fog installed showing the newly trimmed IC duct - everything fits & works now! Finished fogs!
Next up was another lighting project - While the 2" SANVI Bi-LED projectors I put in last year were OK, and produced decent light output, I thought it could be better with the 2.5" SANVI Bi-LEDs that others have used. As it turned out, because I complained to Ali Express last time about the rotational alignment issue we've all had with these lights (about 10~20* off horizontal cut-off line), and the screws that were missing from the package, they gave me a full refund! So I figured, what the hell, I'll try it again with the larger 2.5" Bi-LED projectors. Not much to say about the install job here, as it was just a repeat of what I posted before - complete with the same goofy alignment washers that needed to be modified. Anyway, the 2.5" projectors just barely fit in the Spyder housings without touching the plastic lens. Here's some pictures...
Since this is the 2nd time opening up these housings, I removed all the old sealant and replaced it with the pictured Morimoto butyl rubber sealant that I had left over from when I did my HID projector retrofit on my FC Here's a picture of the old 2" Bi-LED projector. Notice it has more of a "tiny beady eyes" look than the 2.5" Bi-LED projectors (next picture) And here's the finished 2.5" Bi-LED projector
The final project to update was my Link ECU wiring. Recall in the fall '23 update I had to finish wiring in the fuel vapor purge solenoid valve, and this required me to do some I/O re-assignments on the Link ECU. These wiring updates were pretty simple, and only involved the in-cabin wiring, but they enabled me to get the most out of my Link platform. By using unused fuel injector & ignition outputs to control the simple on/off stuff like E-fans & fuel pump relays, it freed up 2 full AUX outputs that can be used for full PWM type control of things like ECU integrated water-meth injection or a 2nd boost control solenoid. One of those freed AUXs now runs my new fuel vapor purge valve, which I'm happy to find eliminated my previous open vented fuel stink issue.
The wiring mods didn't go without any glitches though... One of the I/O changes I made was to have the Link obtain its speed input from the dash cluster in lieu of direct from the OEM vehicle speed sensor (VSS) on the tranny. The benefit of this is the cluster outputs a digital 0/5VDC square wave (4 pulses per VSS rotation), while the VSS direct is an A/C sine wave, 8 peaks/VSS rotation, and the Link is happier processing the digital square wave input. But this change had an unintended consequence - my speedo, tach & odometer went dark/dead as soon as the engine started! Weirder still was just keying on the ignition (not starting) everything looked normal during the self-test, with the tach doing its programmed 0-redline-0 test sweep on power up, and the odometer lighting up and showing correct miles. But start the car, and it all went dark.
I was stumped, and thought maybe I may have inadvertently killed my cluster due to the new wiring mod, so I reached out to Michael Gagne (FD cluster guru) to discuss my options for repair. After discussing the symptoms & details of my wiring in depth, he gave me the good news that my wiring changes removed a necessary ground that the cluster's tach, odo & speedo need and the fix is stupid simple! As it turns out, the cluster ground travels thru several OEM harnesses, one being the emissions (EM) harness that everyone with an aftermarket ECU removes. Before it was getting this ground because I was previously tapping the VSS sensor directly, so the cluster was grounded via the Link's sensor ground, which is essentially the same as chassis ground. With that ground routing gone, I had to add a new cluster ground, which fixed the dead cluster problem - pictures show how:
The yellow circled screw terminal is what you have to ground - I simply used a suitable ring lug for the screw & 18AWG TXL wire that I grounded to the metal dash support bar with another ring terminal & self-tapping hex screw. To make cluster R&R a little easier with the new ground wire, I added an insulated male/female spade terminal in the middle of the ground wire run to facilitate removal
And my wiring is finally complete - attached is the updated PDF schematic
Another thing I was surprised and somewhat pissed to learn about my FD when I had the bumper off for the fog light job was that I'm missing all of the airbag sensors that are supposed to be on the front end of the car, as well as the associated air bag wiring harnesses going to those components.
I got curious about the airbags because when I had the cluster out, I discovered I was missing the bulbs & sockets for the airbag, ABS and CEL lights, so I dove into the FSM airbag section to take inventory of whatever else might be missing. I knew the PO removed the CEL and ABS idiot lights because I got the car from him with the ABS removed and the Link ECU, but he told me that the airbag system was fully functional. Had I known it wasn't, I might have chosen a different non-airbag steering wheel instead of the bag-equipped Nardi wheel I got to upgrade the wheel.


 Here's a few pictures of it under construction and the final product: