PandazRX-7: Dedicated FD Time Attack Build!
 01-22-15, 06:27 PM
#401
Rotary for LIFE!
Join Date: Jan 2008
Location: Adelaide, South Australia
Posts: 71
Likes: 0
Received 0 Likes
on
0 Posts
Good question... I actually thought about buying the crimper until I saw the price tag. Luckily the shop anplumbing.com who I ordered from is about 40 minutes away from me so I mocked up my fittings and hoses, marked them and took them back to get crimped. If I were you I would just take it to any hydraulic hose shop, they should be able to crimp them pretty easily. It literally took 5-10 minutes to crimp all my lines.
 01-29-15, 11:58 AM
#402
Not much of an update but slowly chipping away on the small stuff...
Before installing the cockpit mounted brake proportioning valve, I had to make my own metric firewall bulkheads... Picked up the metric M10X1.0 inverted flare unions then used a M14X1.5 die to thread the body. If anyone needs any of these M14 jam nuts let me know, I have a bag full of them from McMaster.
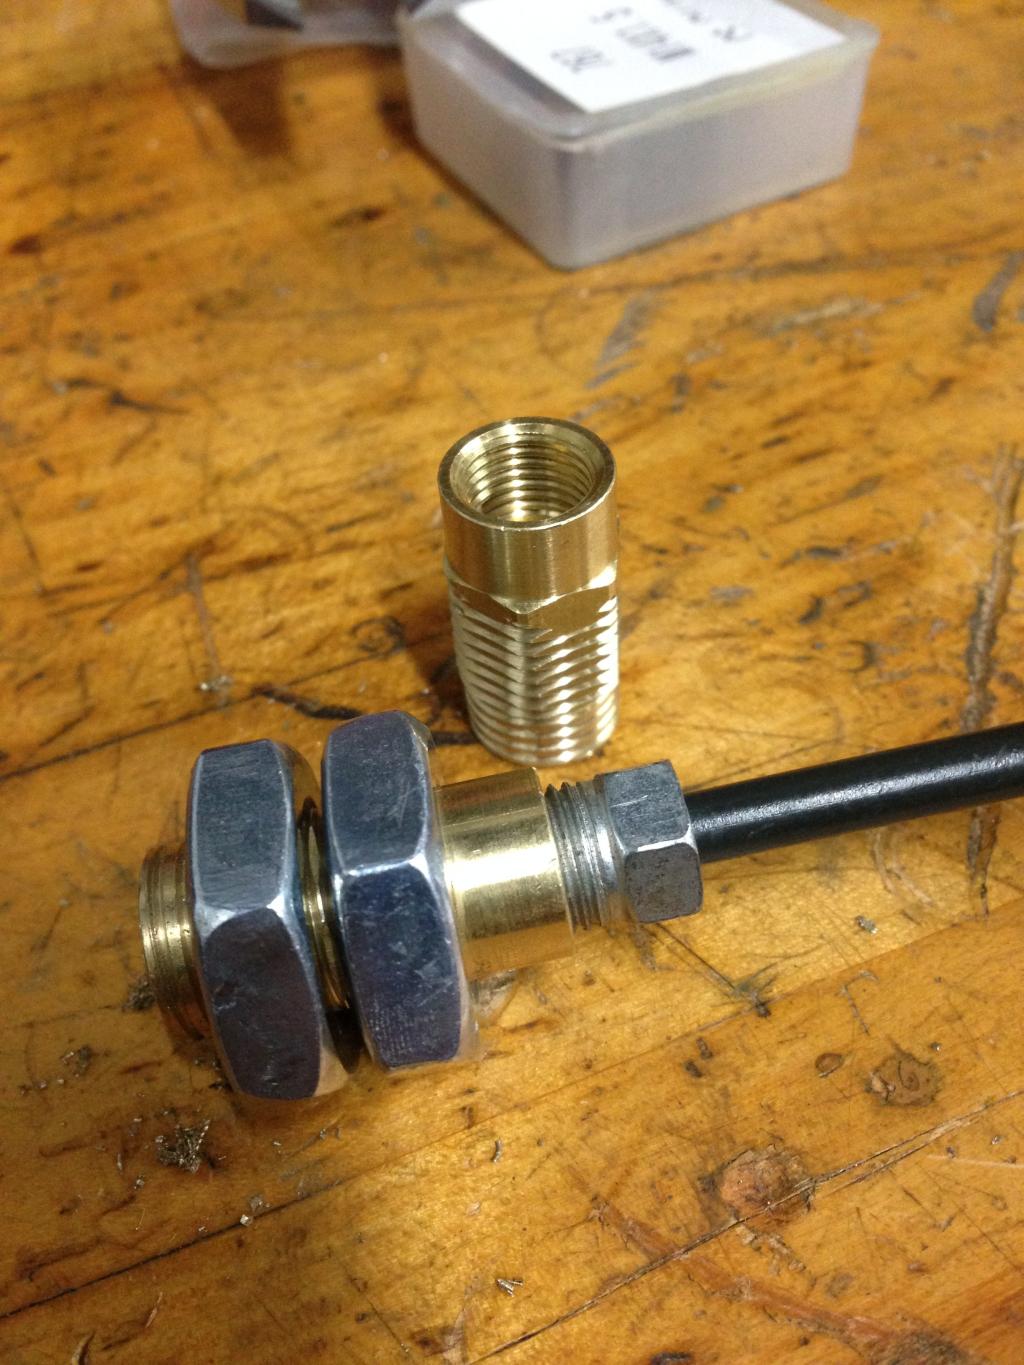
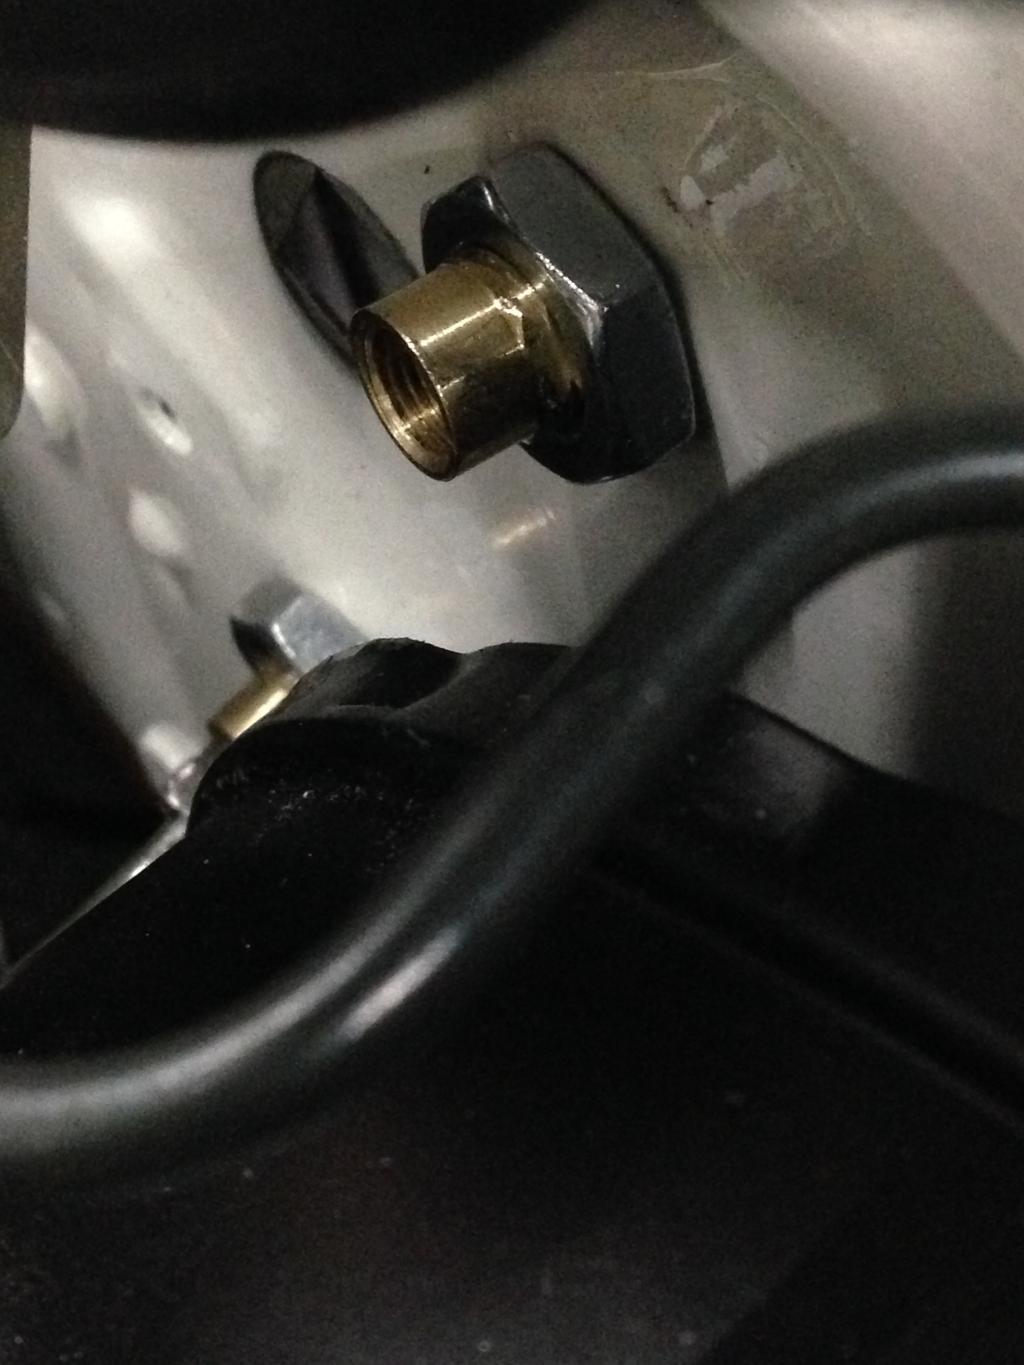
Before installing the cockpit mounted brake proportioning valve, I had to make my own metric firewall bulkheads... Picked up the metric M10X1.0 inverted flare unions then used a M14X1.5 die to thread the body. If anyone needs any of these M14 jam nuts let me know, I have a bag full of them from McMaster.

 01-30-15, 07:53 AM
#403
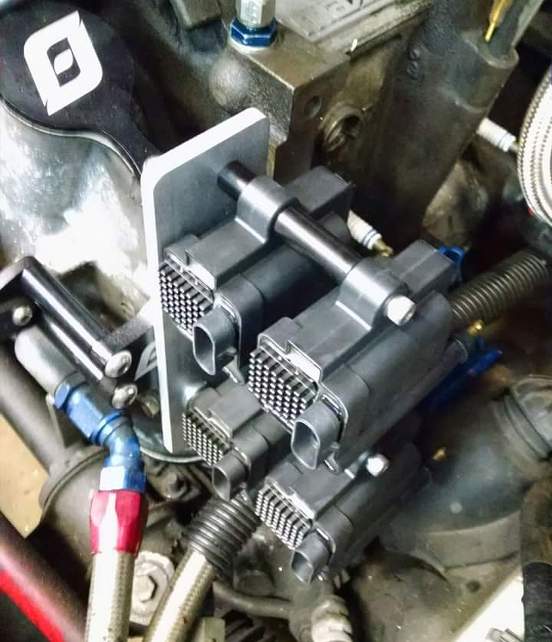
Glad to see your build is still going well. Also nice to finally get to see a set of the new injector plugs in someone else's build  .
.
I'm liking where you mounted your fuel surge tank. Designing the enclosure for mine (since it is inside the cabin) has been more trouble than initially expected.
.I'm liking where you mounted your fuel surge tank. Designing the enclosure for mine (since it is inside the cabin) has been more trouble than initially expected.
02-07-15, 08:13 PM
#407
Rotary Freak
Join Date: Mar 2003
Location: GLENDALE, CA
Posts: 2,274
Likes: 0
Received 0 Likes
on
0 Posts
Will do! btw, if you need some stuff machines let me know. I changed fields doing mechanical engineering now and im about a few weeks away from rebuilding my CNC machine so definitely let me know if you need anything!
 05-07-15, 12:29 PM
#409
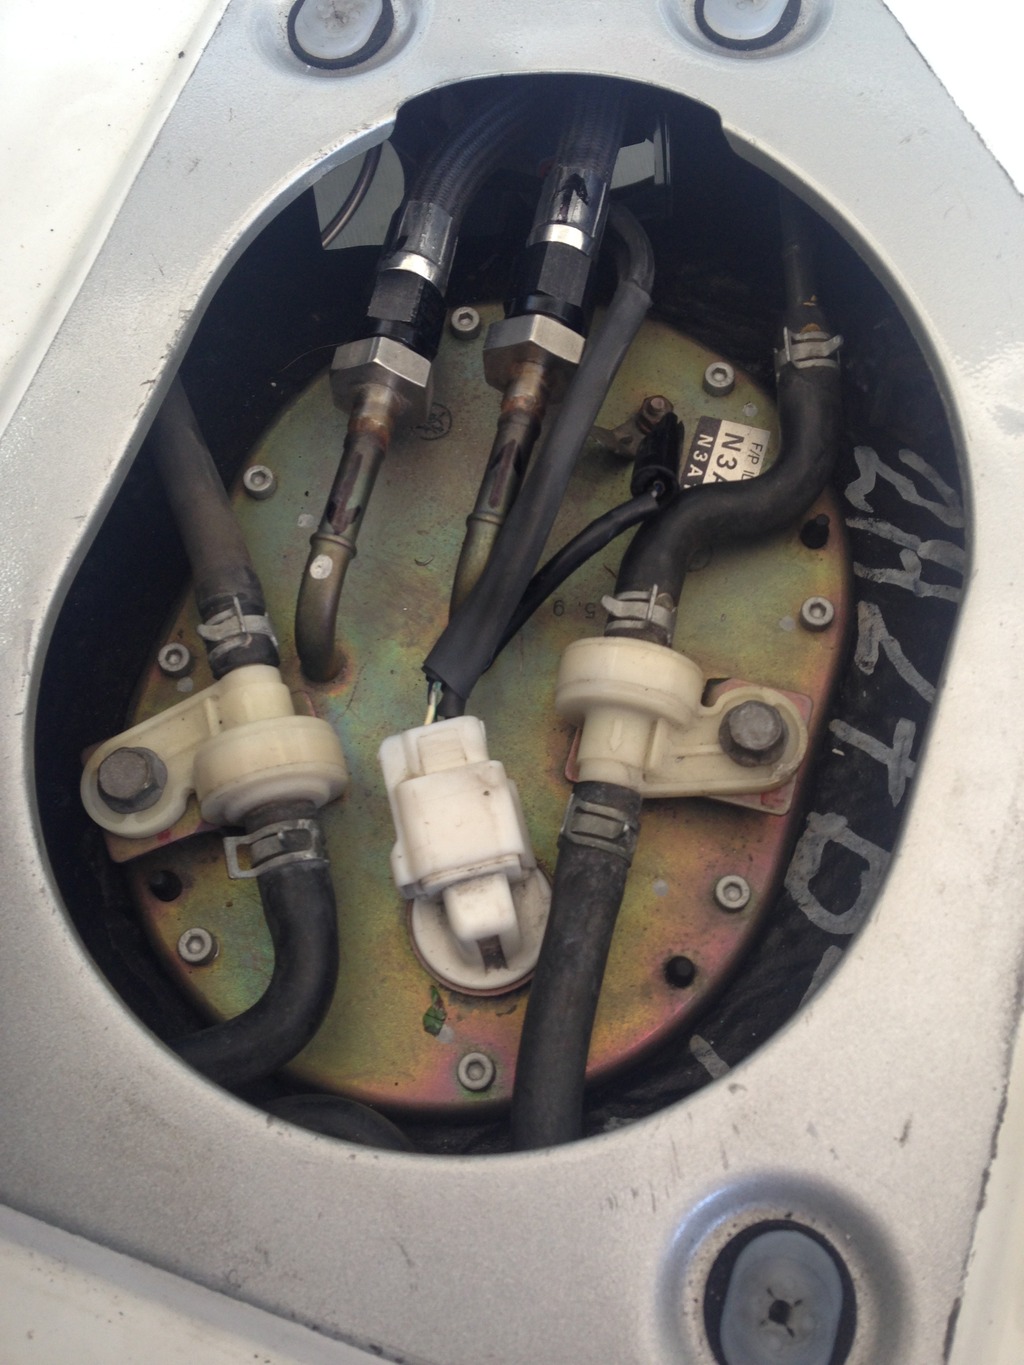
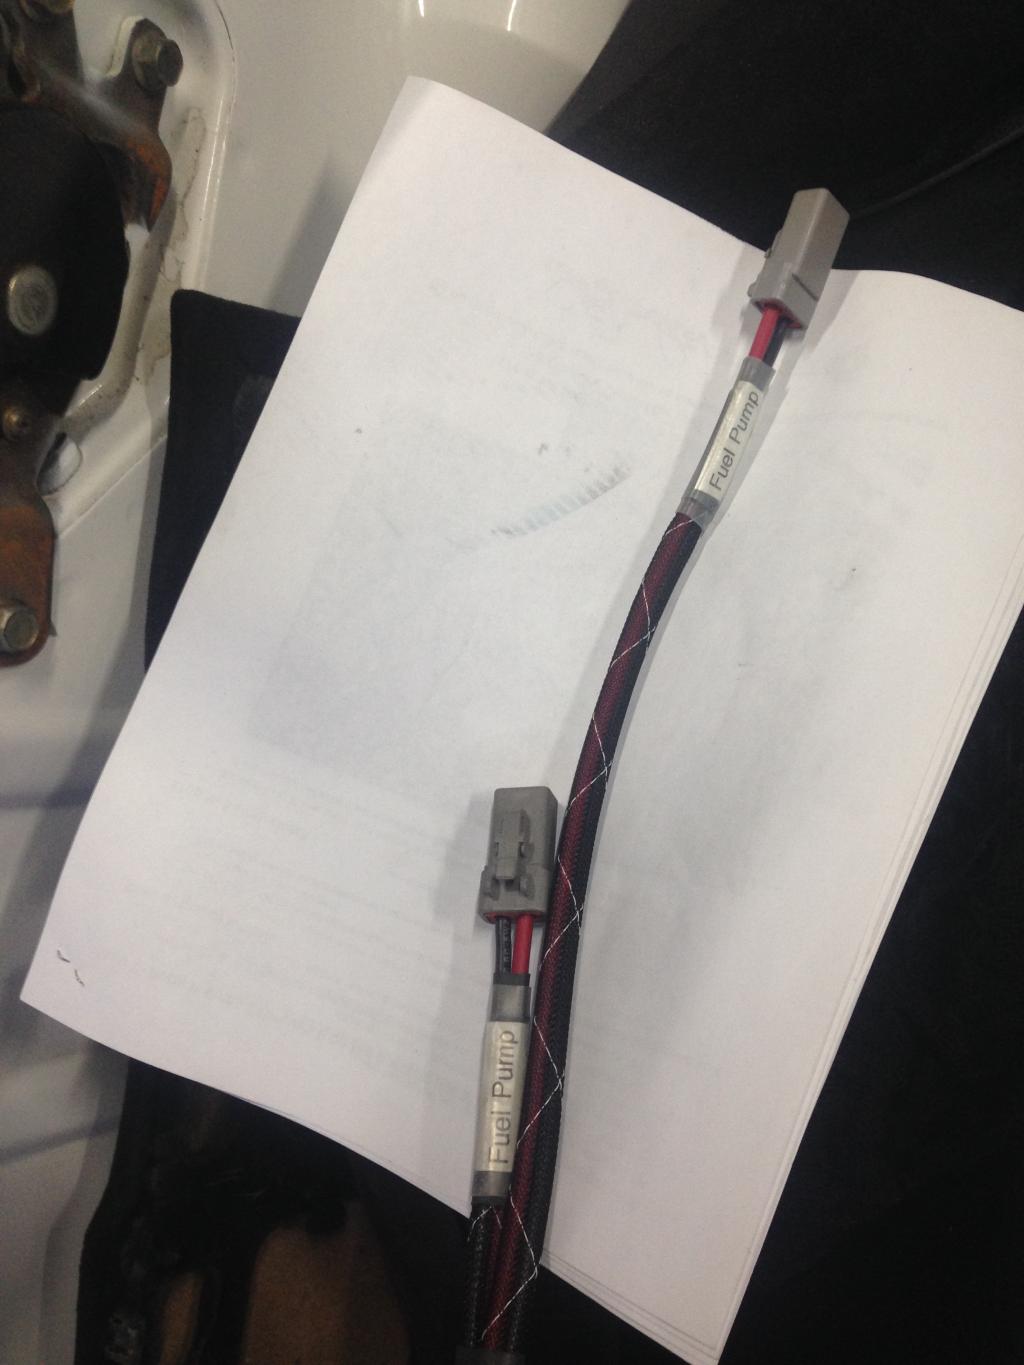
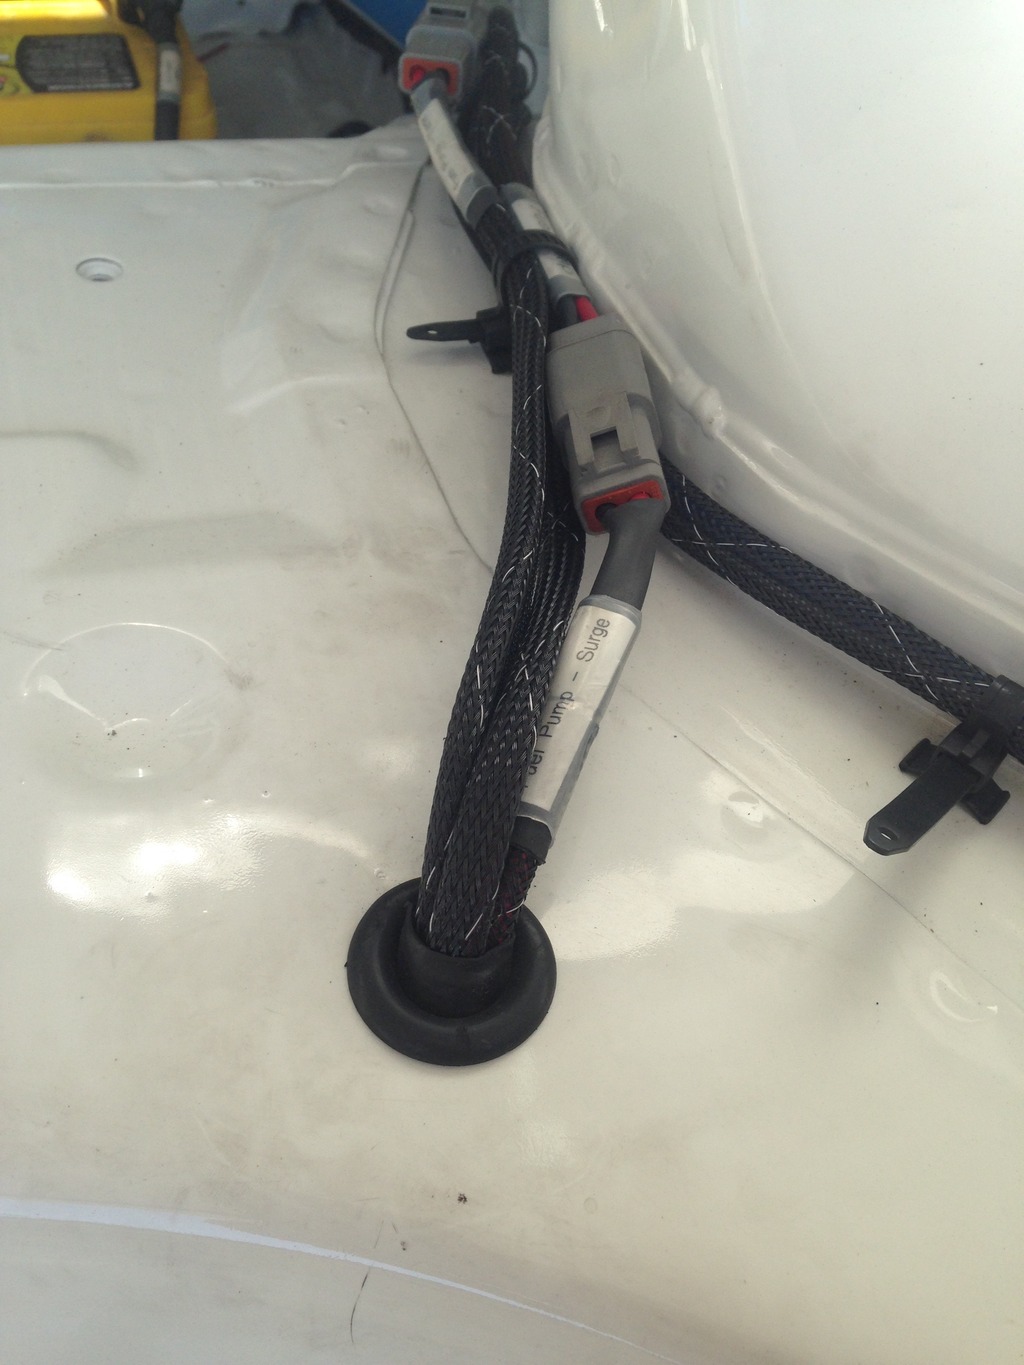
Mini update... been slowly finishing up the wiring still with limited free time I have. Fuel pumps and flex fuel sensor harness, fuel level sensor harness all done and routed. Wanted a clean professional look so ended up buying a variety of Deutsch connectors and parts form wirecare.com.Thanks to Aaron (Mannykiller) for pointing me in the right direction on that.
Stock fuel pump and level sensor harness...
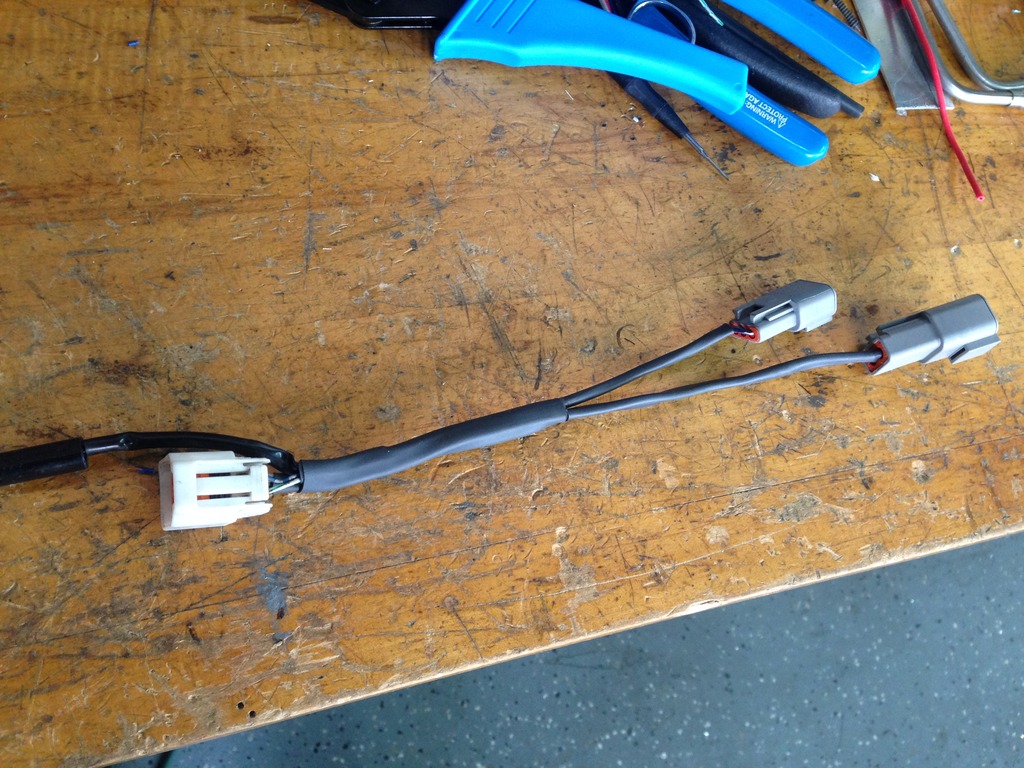
Connections for both fuel pump harness with 12awg wires. Didn't want to cut corners so each pump has it's own positive and ground.
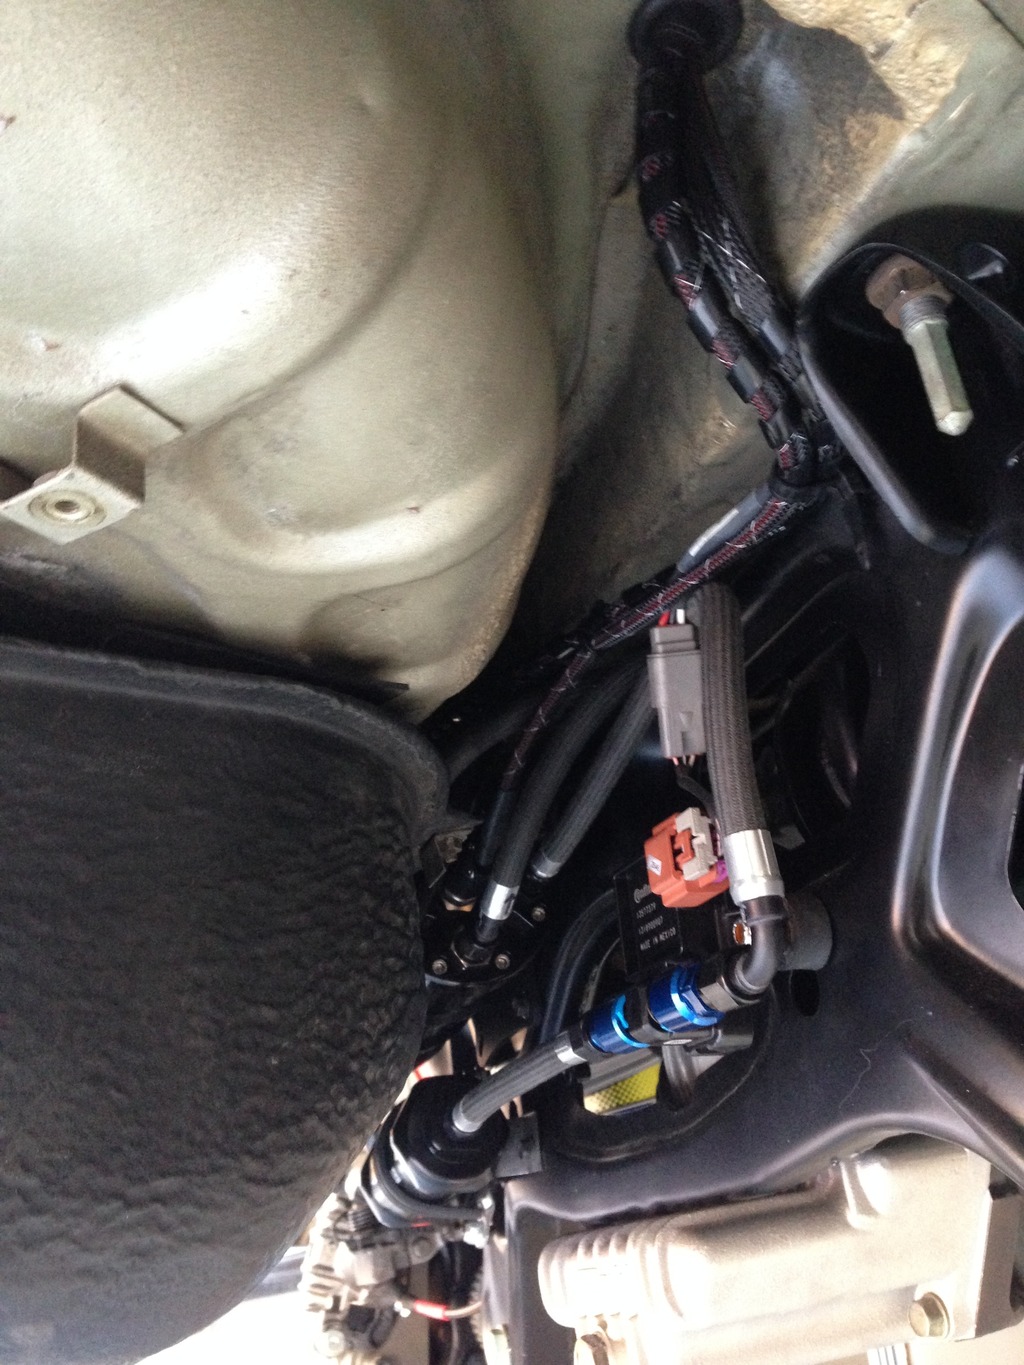
Next on my list for wiring is the rear parking and brake lights harness. No turn signals for track.
Stock fuel pump and level sensor harness...


Connections for both fuel pump harness with 12awg wires. Didn't want to cut corners so each pump has it's own positive and ground.


Next on my list for wiring is the rear parking and brake lights harness. No turn signals for track.
06-01-15, 08:24 PM
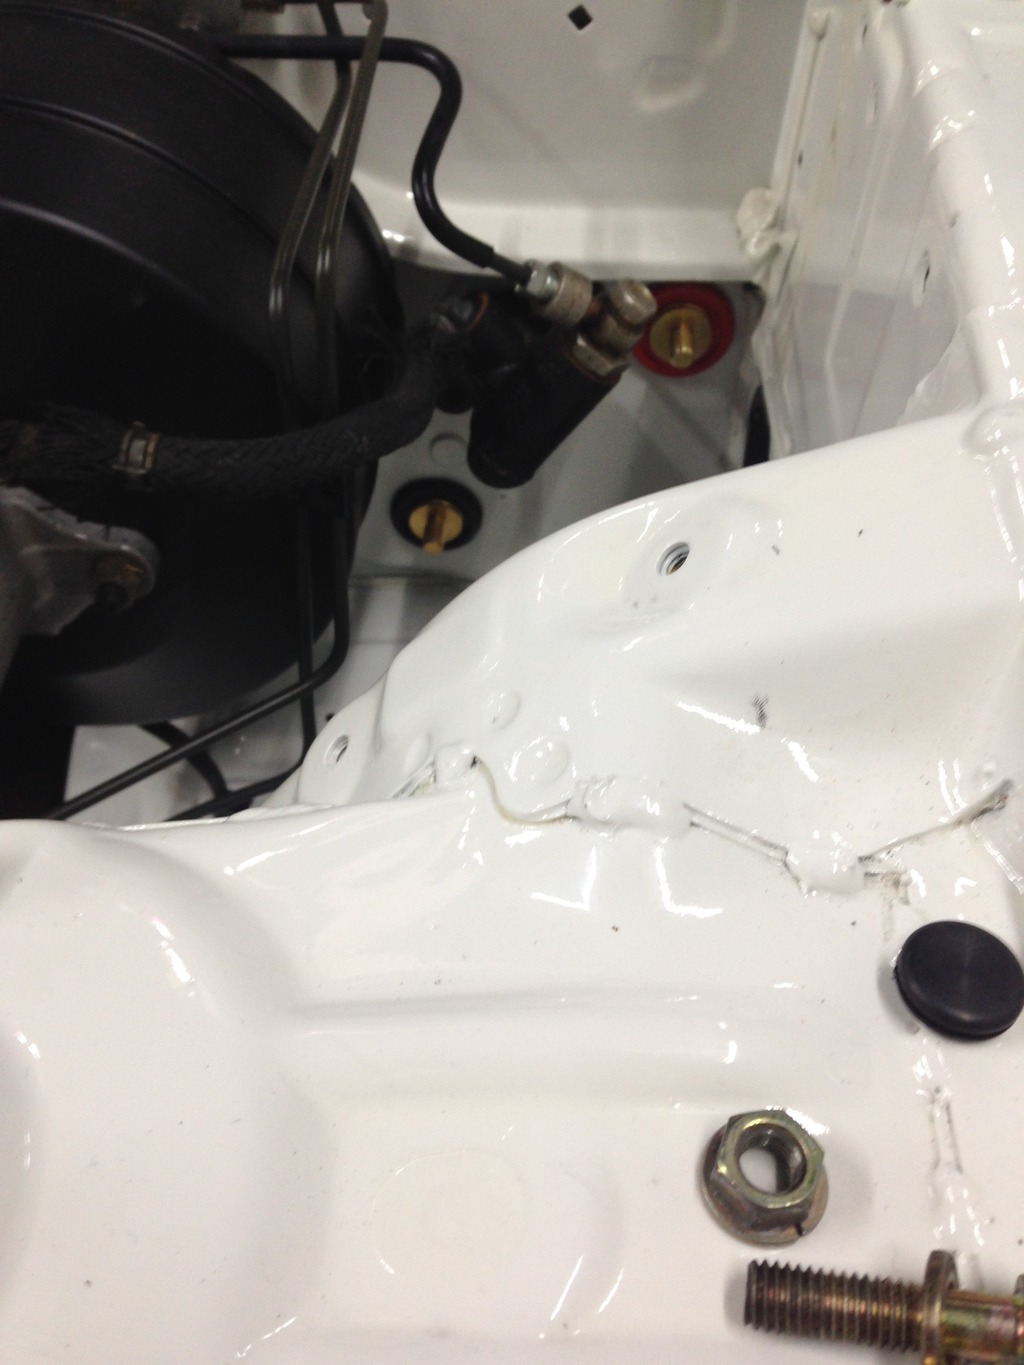
#410
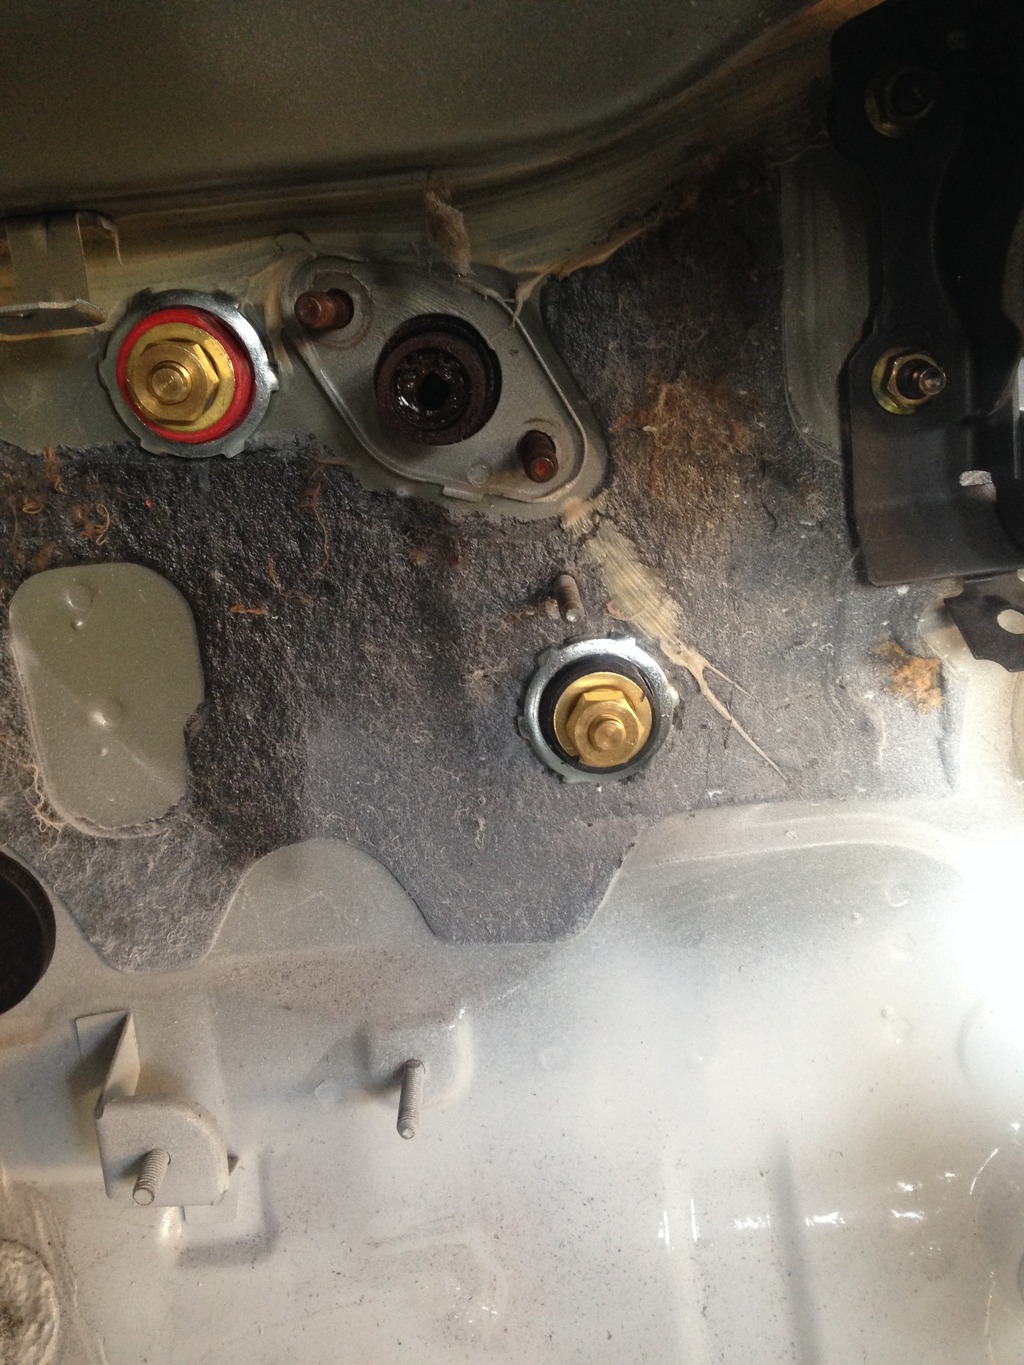
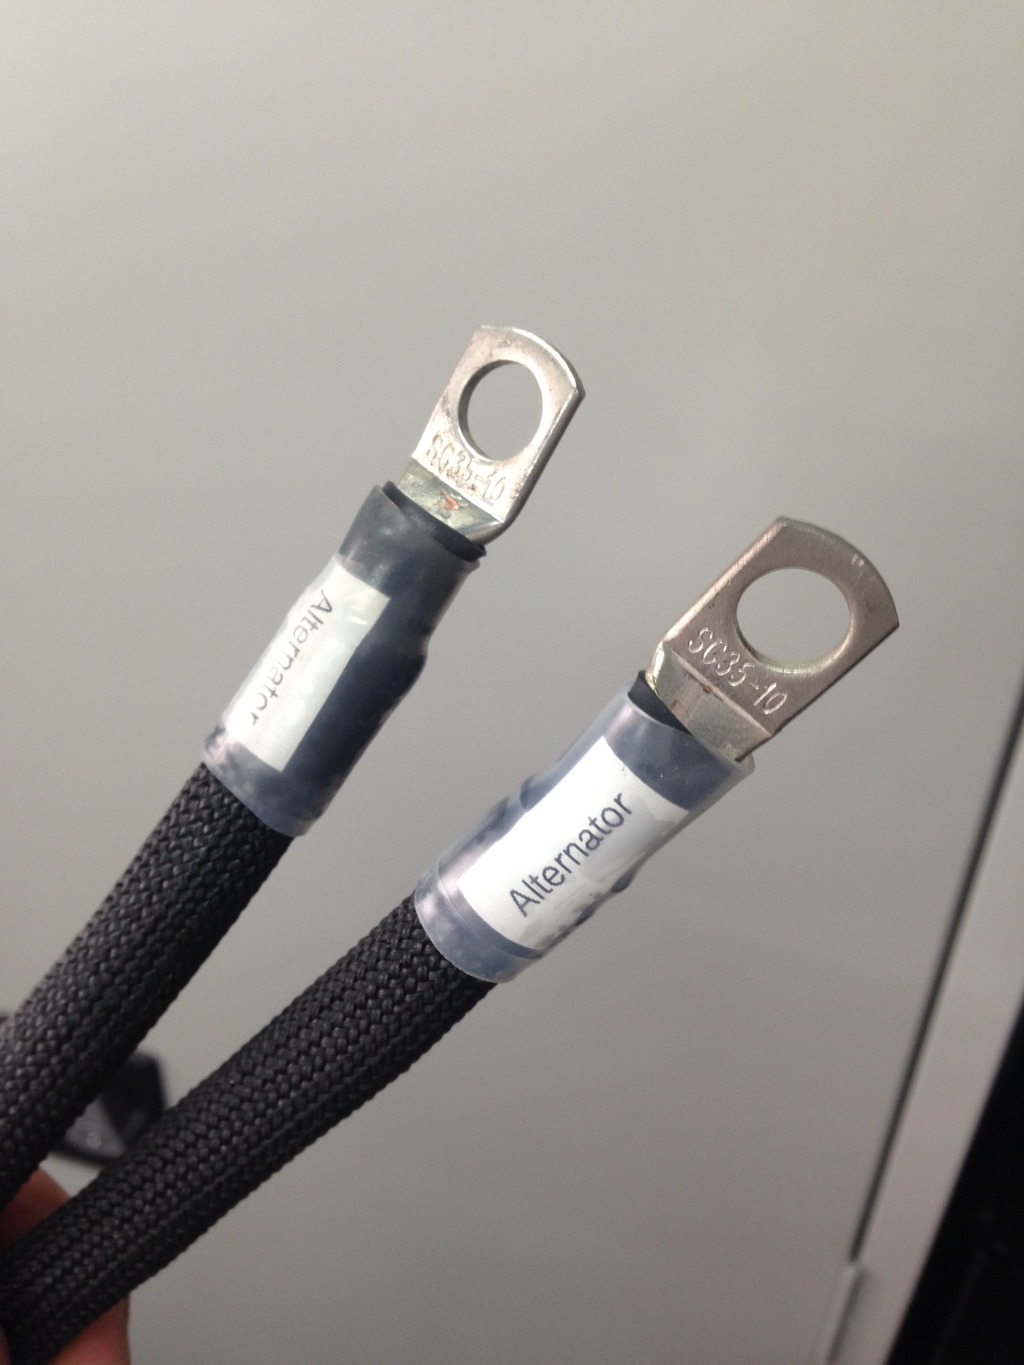
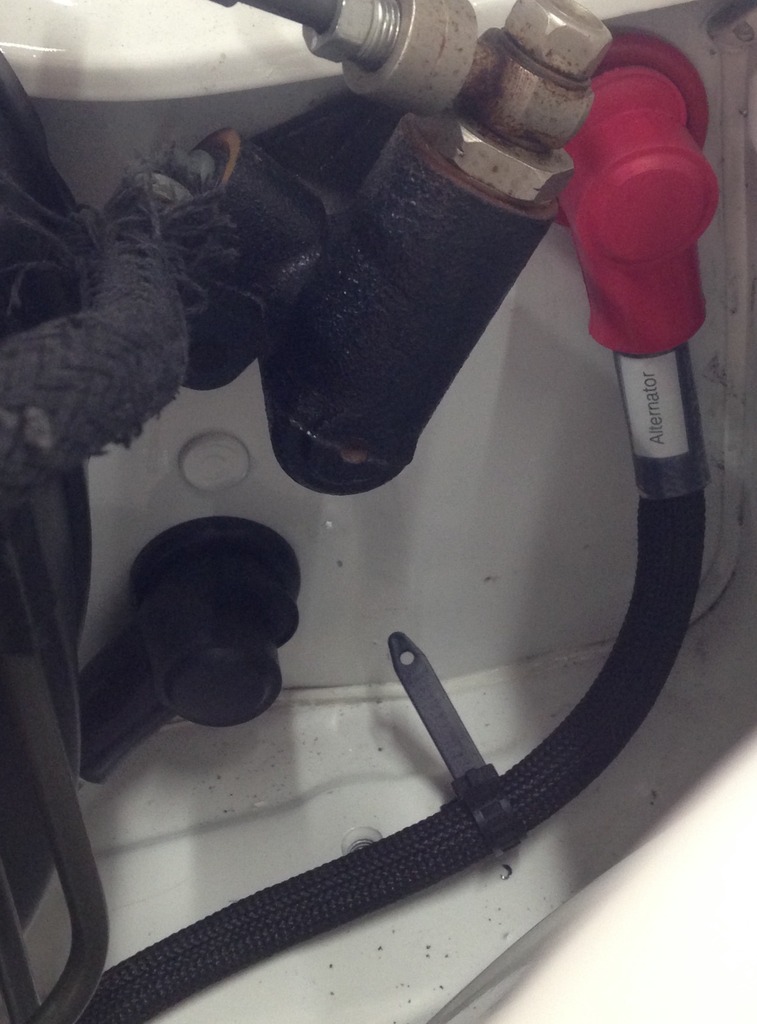
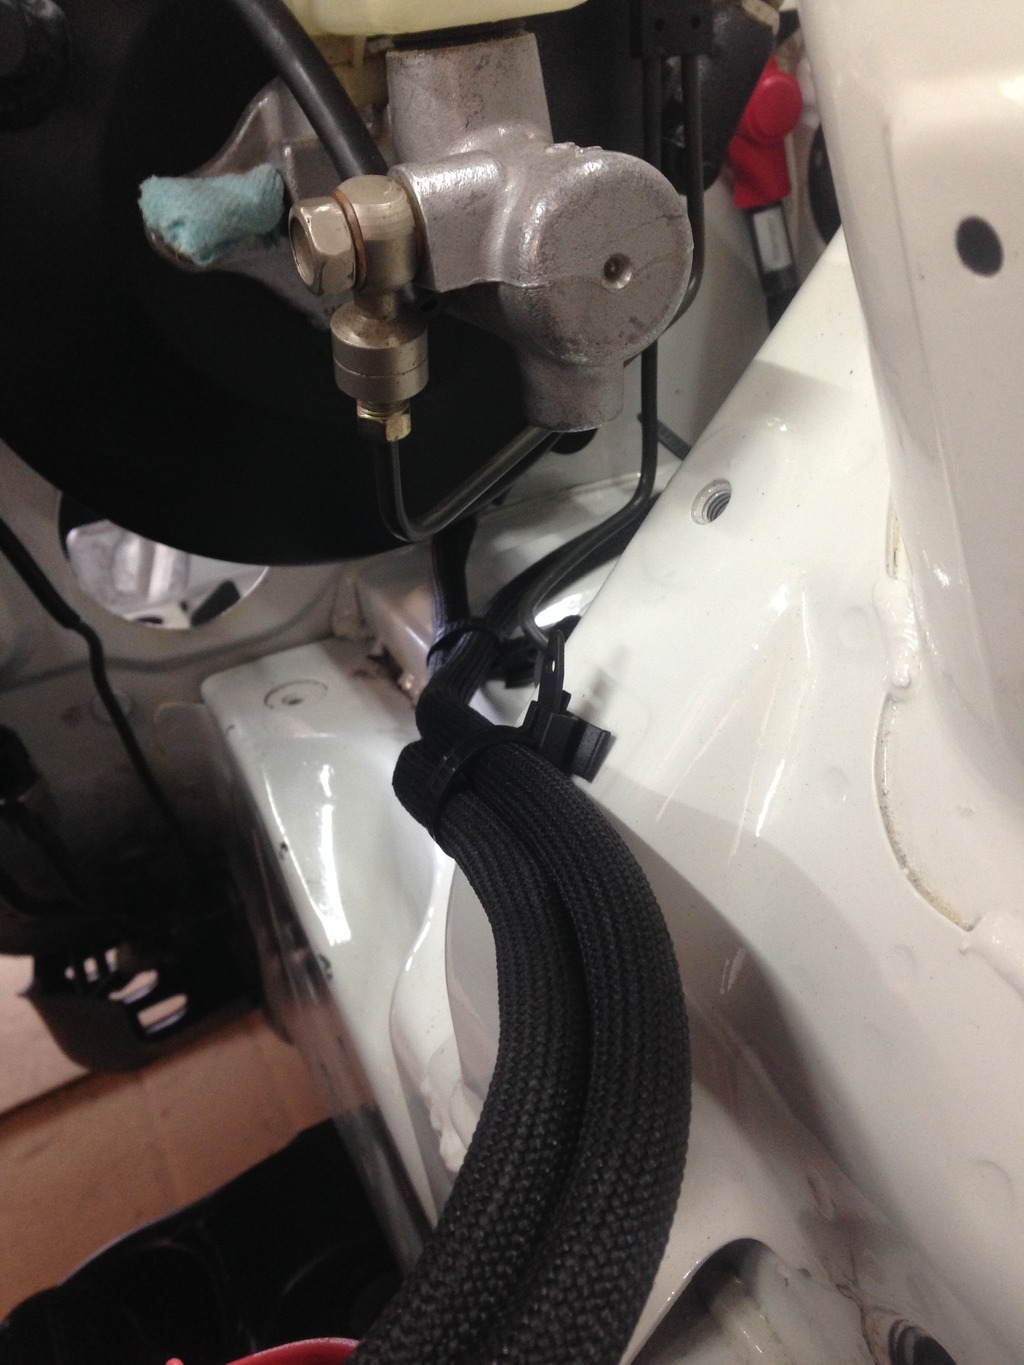
Made and routed the engine ground from battery and alternator power cable. Took me a while to decide exactly where I wanted to go through the firewall, but I think it came out pretty clean. Used high quality flexible 2/0 welding cable and covered it with high temperature sleeving.


 08-12-15, 02:44 PM
#413
Not much of an update but I'll try to keep this thread alive...
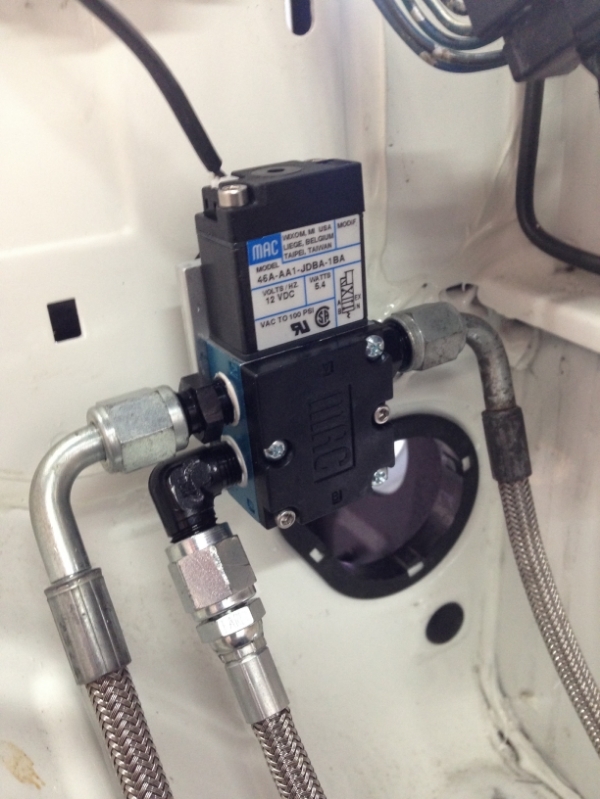
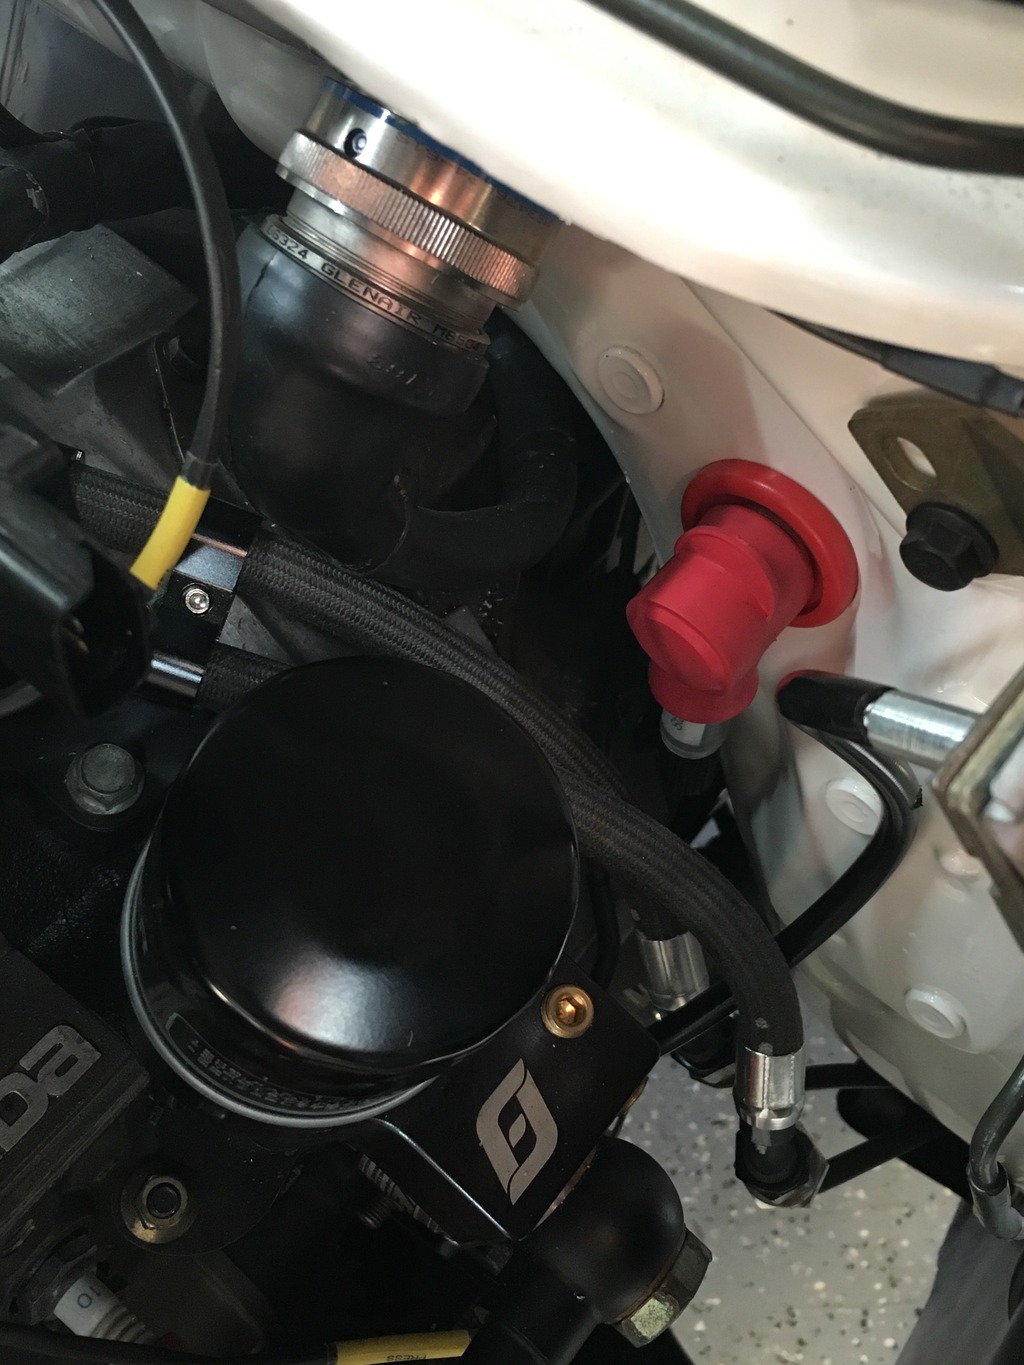
Found the perfect spot for my MAC boost valve mounted near the wiper motor... don't mind the crusty line, they're just for mock up. I'll be making all new lines with appropriate shielding all the way to the waste gate.
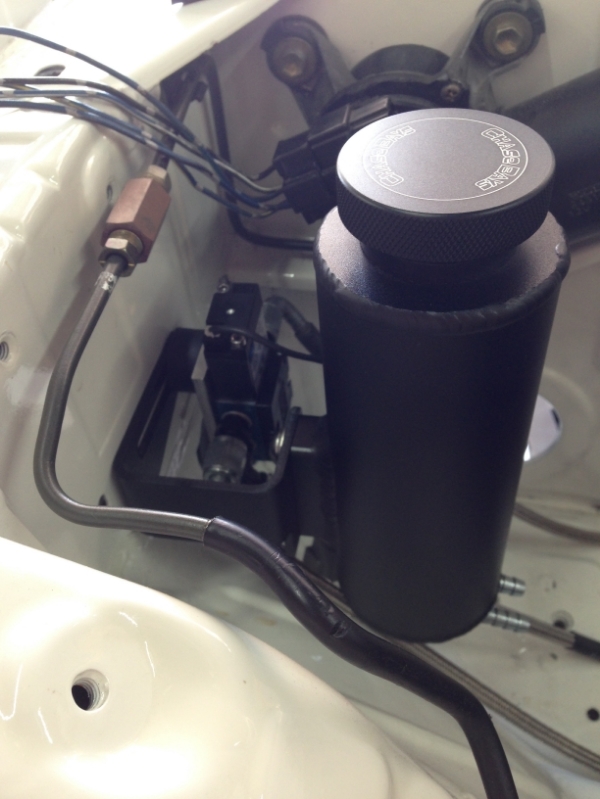
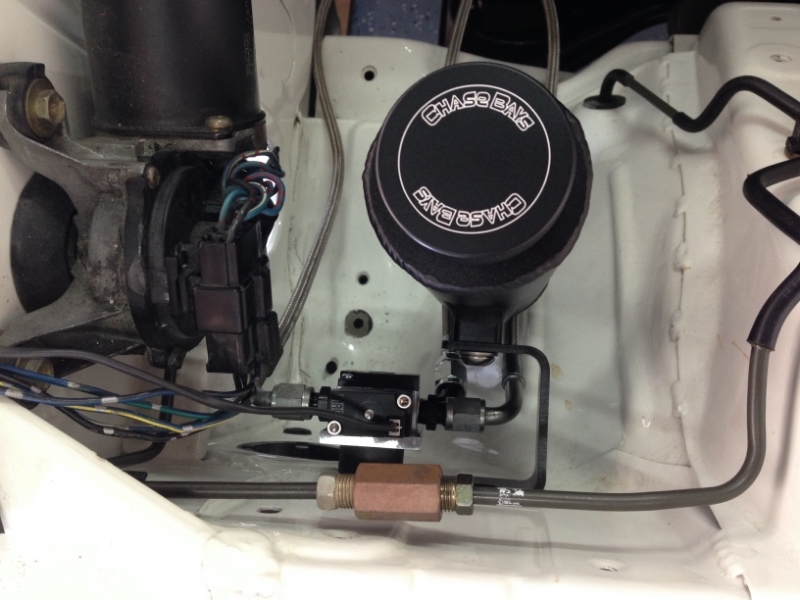
Also, decided to mock up my coolant overflow in the same spot... that corner will be nicely shielded form the turbo heat of course. Tank from Chase Bays... wish it was slightly bigger but I estimate about 22oz should be OK.
Found the perfect spot for my MAC boost valve mounted near the wiper motor... don't mind the crusty line, they're just for mock up. I'll be making all new lines with appropriate shielding all the way to the waste gate.

Also, decided to mock up my coolant overflow in the same spot... that corner will be nicely shielded form the turbo heat of course. Tank from Chase Bays... wish it was slightly bigger but I estimate about 22oz should be OK.

 11-24-15, 02:37 AM
#414
Small update! Been a busy year with work but still slowly chipping away at this project. I'm determined to finish it!
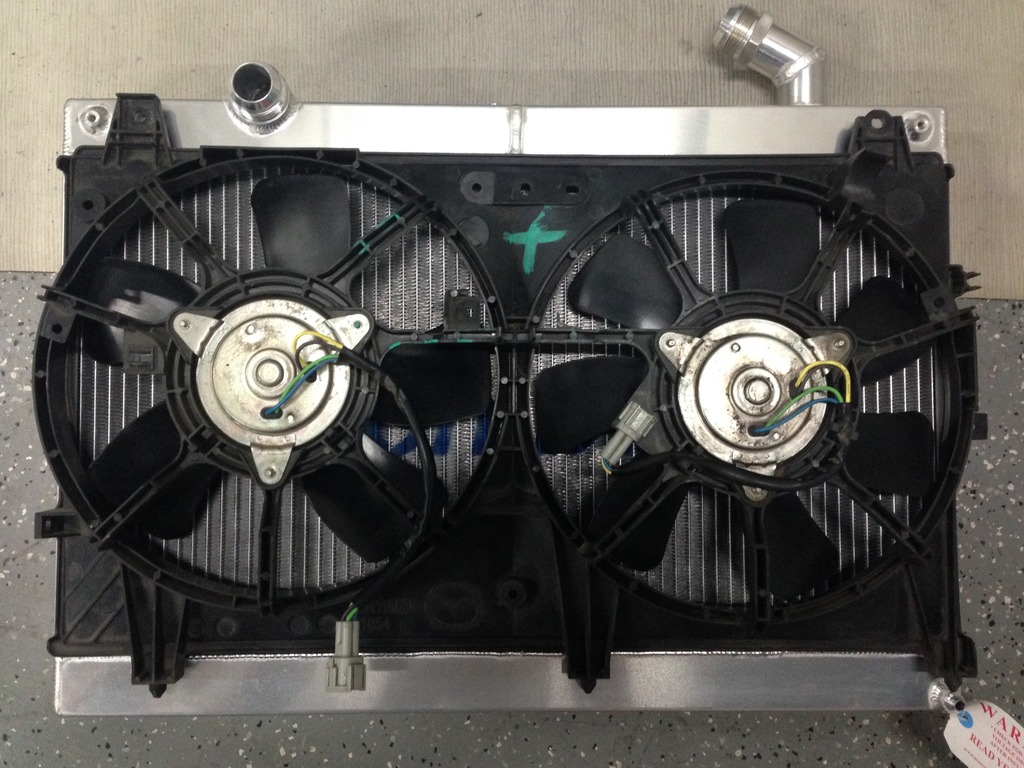
Custom spec'd Ron Davis V-Mount radiator... -20AN inlet/outlet, -6AN drain and vent. Shown here with RX-8 radiator fans and shroud. Still need to fab/weld mounting brackets and fan mounting tabs/blind nuts.
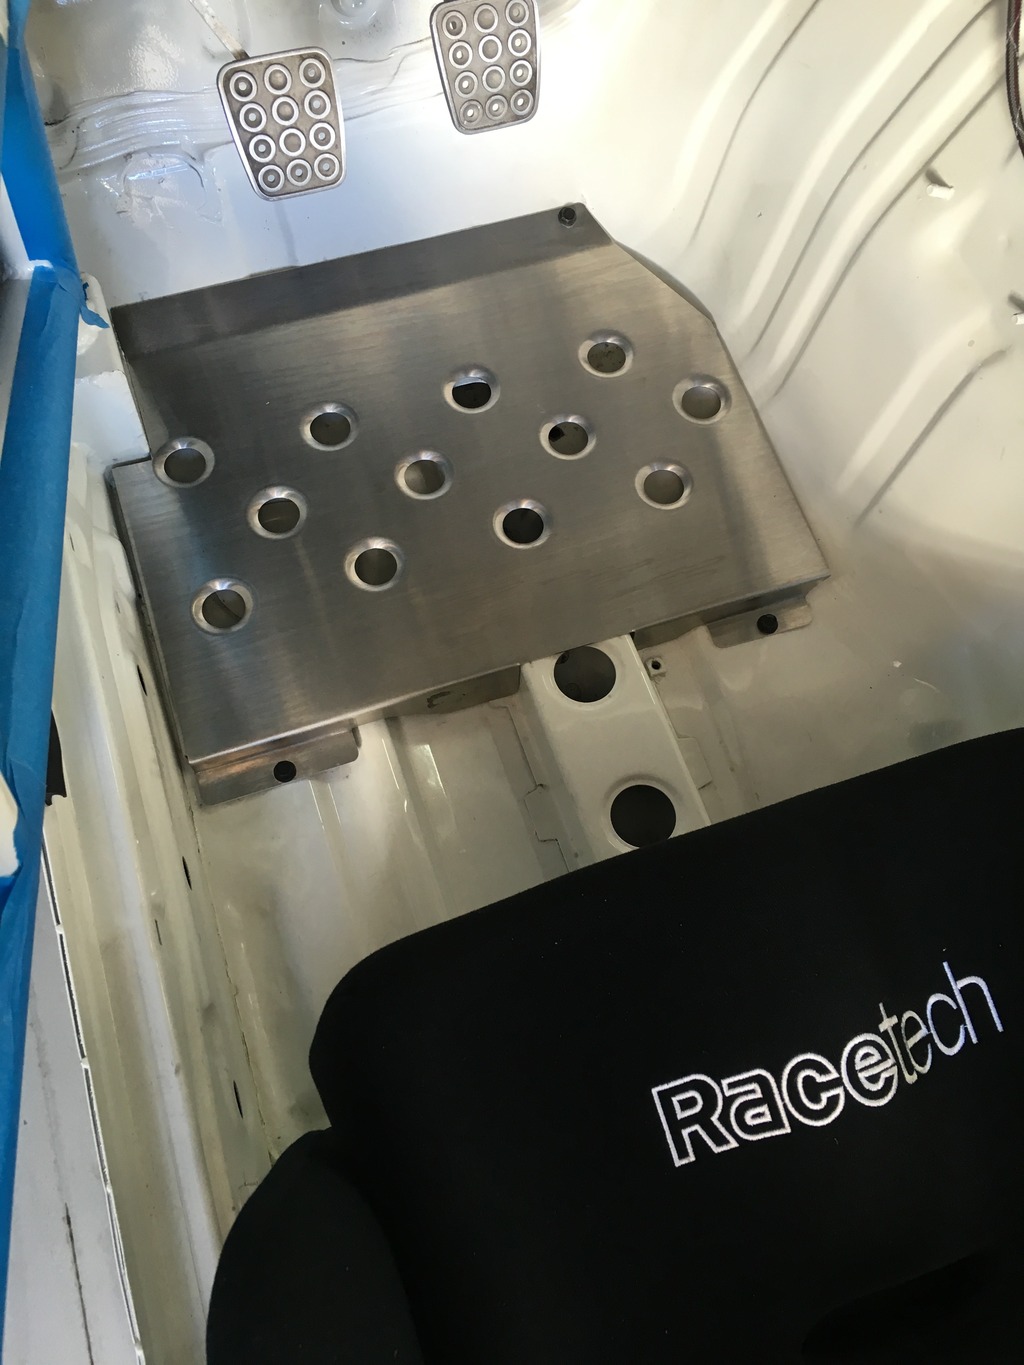
Finally got around to installing the Bubbletech heel plate. Trimmed for the cage base and I used M6 rivnuts for a clean install and easy to remove. I'm thinking about powder coating it wrinkle black for a clean, durable, not slip finish.
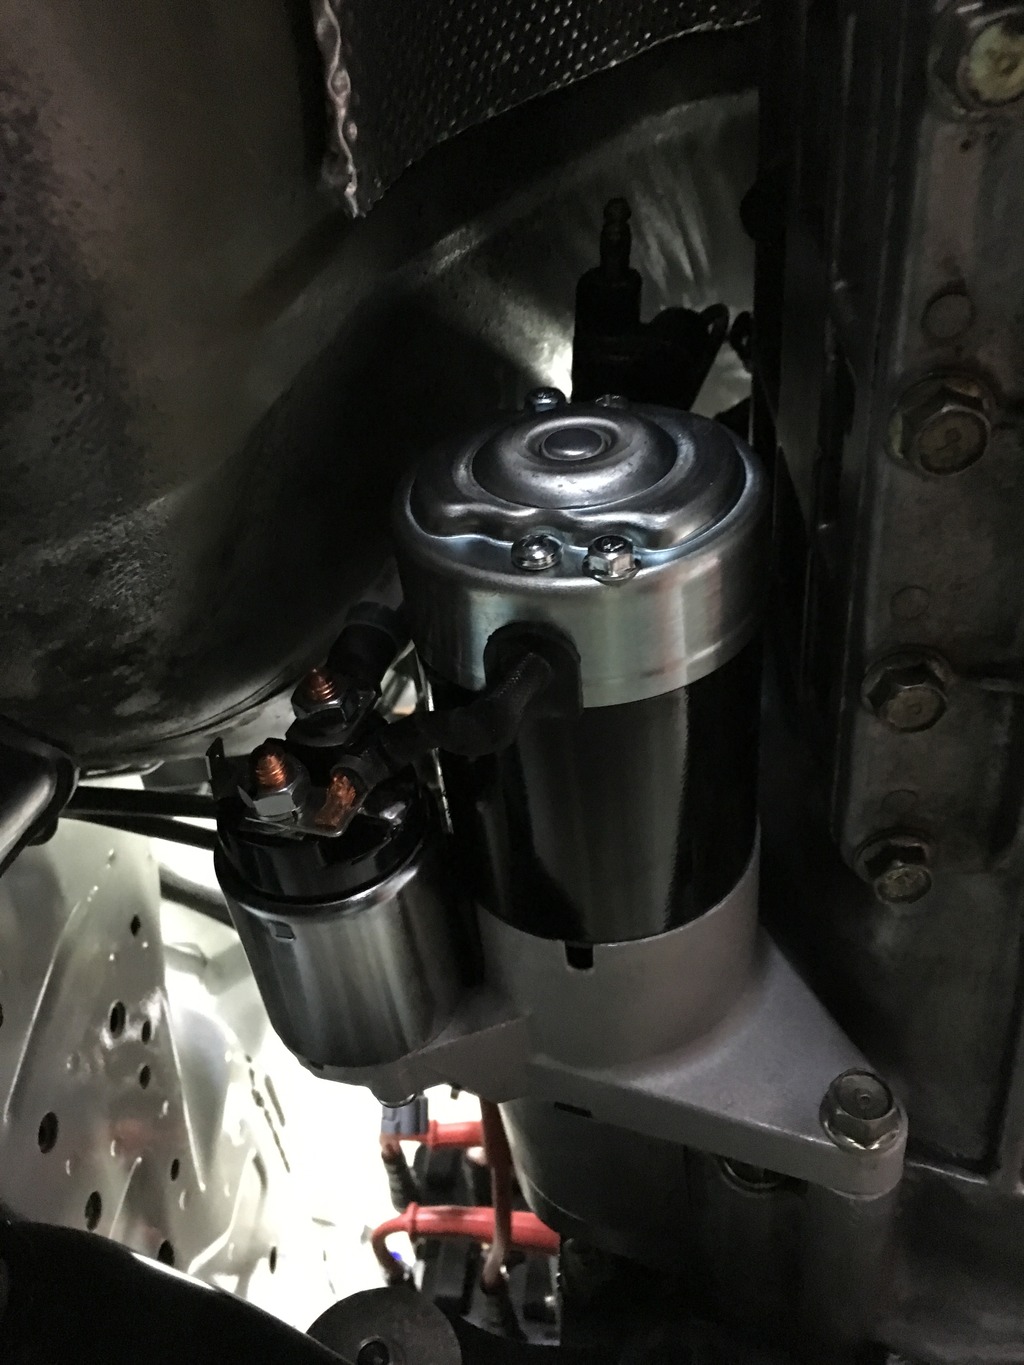
Installed my new 2kw starter and installed the firewall bulkhead for the power cable. I think it's a good spot for it.
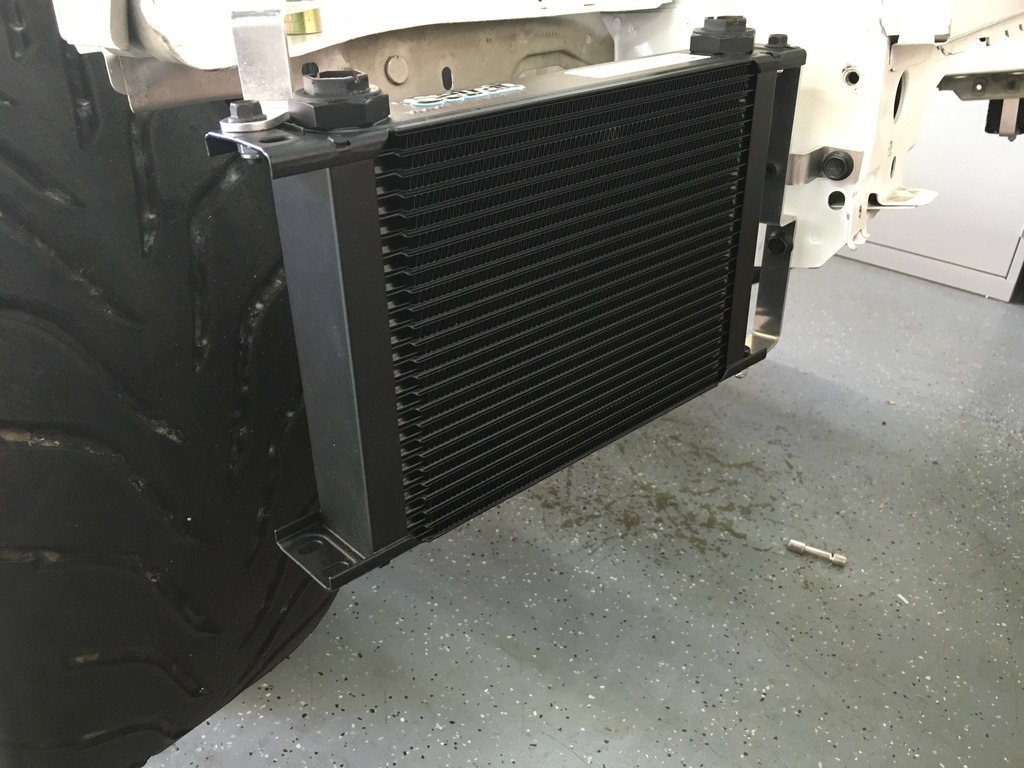
Mounted Setrab oil coolers. (Thanks Sake Bomb Garage)
More updates hopefully in a couple weeks.
Custom spec'd Ron Davis V-Mount radiator... -20AN inlet/outlet, -6AN drain and vent. Shown here with RX-8 radiator fans and shroud. Still need to fab/weld mounting brackets and fan mounting tabs/blind nuts.

Finally got around to installing the Bubbletech heel plate. Trimmed for the cage base and I used M6 rivnuts for a clean install and easy to remove. I'm thinking about powder coating it wrinkle black for a clean, durable, not slip finish.

Installed my new 2kw starter and installed the firewall bulkhead for the power cable. I think it's a good spot for it.

Mounted Setrab oil coolers. (Thanks Sake Bomb Garage)

More updates hopefully in a couple weeks.

 11-26-15, 07:05 PM
#417
Finished up the bottom braces and PPF adjustment. Drivetrain will be ROCK solid now.
Banzai Racing transmission cross member.
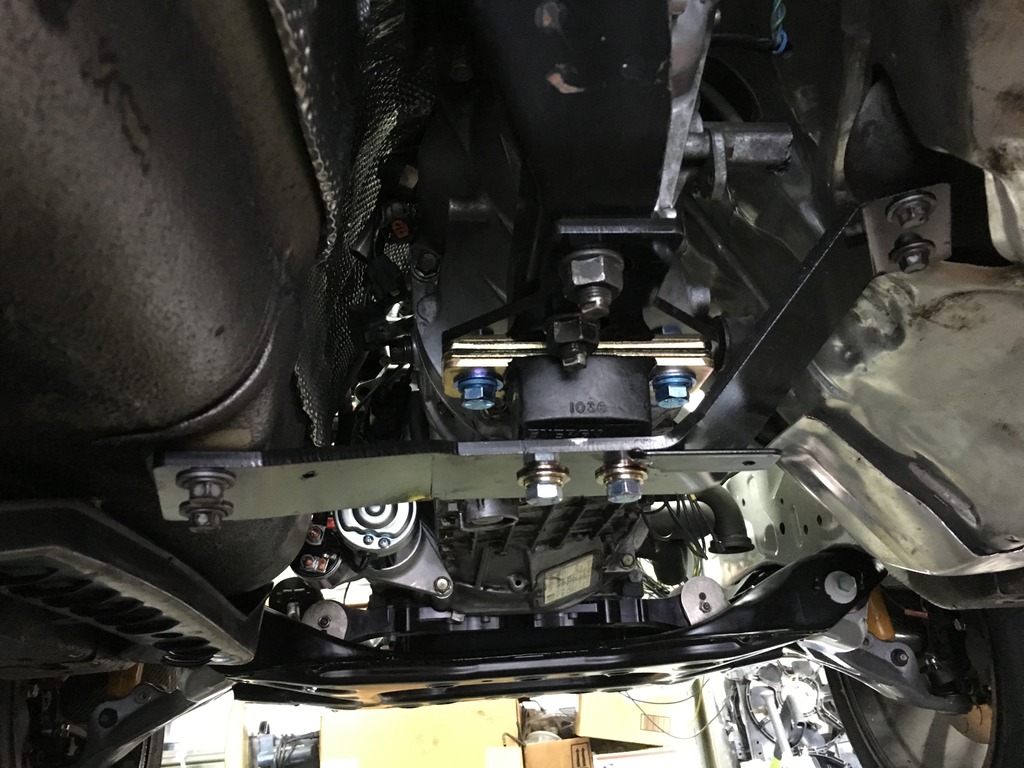
Banzai Racing differential brace. Very similar to the "Dragon" brace from years back.
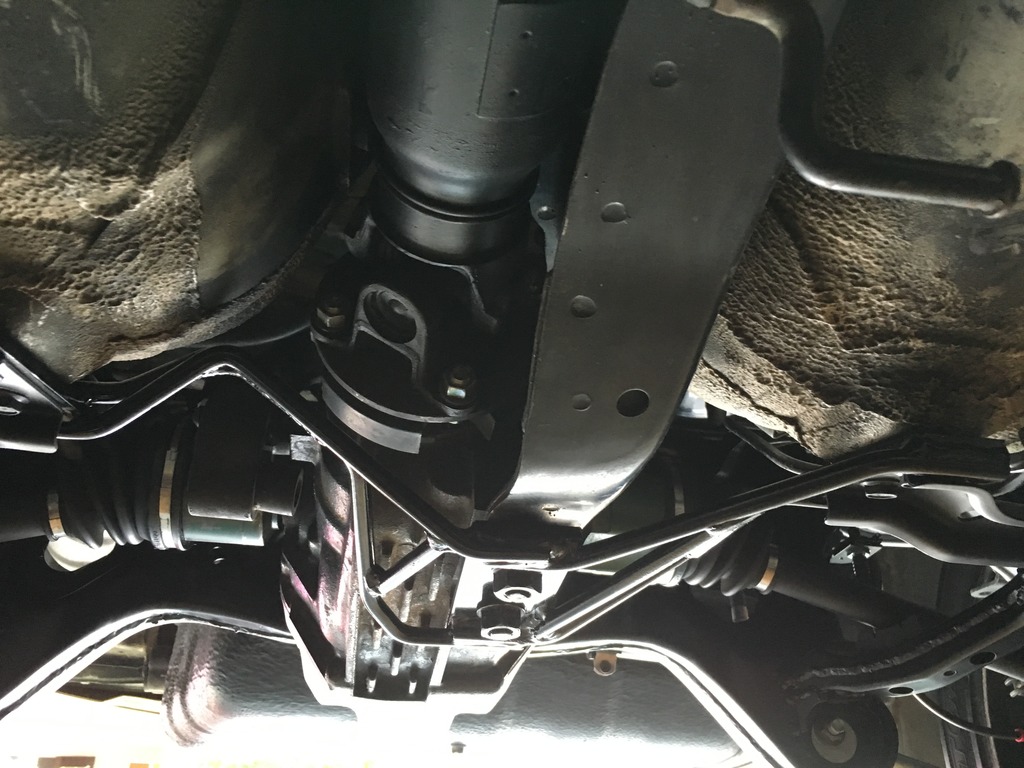
And the new starter...
Banzai Racing transmission cross member.

Banzai Racing differential brace. Very similar to the "Dragon" brace from years back.

And the new starter...

Last edited by PandazRx-7; 11-26-15 at 07:08 PM.

 12-28-15, 08:14 PM
#424
Otherwise, I would just go with what Chris has to offer. Looks clean, simple and bolt-on.
12-29-15, 07:58 AM
#425
Honestly, it was a real pain getting them to fit on the stock PS/AC bracket... had to chop off a tab, grind down, and shave a lot to make it work. Only reason I went through the trouble was to retain the power steering pump mounting spot in case I wanted to add it back one day. Also, the alternator adjustment bracket is bolted to it as well.
Otherwise, I would just go with what Chris has to offer. Looks clean, simple and bolt-on.
Otherwise, I would just go with what Chris has to offer. Looks clean, simple and bolt-on.