
My 93 Rx7's upkeep thread


Thread Starter

Joined: Feb 2010
Posts: 1,105
Likes: 118
From: Sacramento, Ca
My 93 Rx7's upkeep thread
Build threads are made to document typically the build up of a modified higher-than-stock-hp car. I researched Rx7's for 2 years before I made my purchase. I decided to make this thread to document upkeep and reliability an FD or not. I have receipts for everything I have ever purchased for this FD and I ALWAYS do all my own work. So without further adieu: My 93 VR Touring.
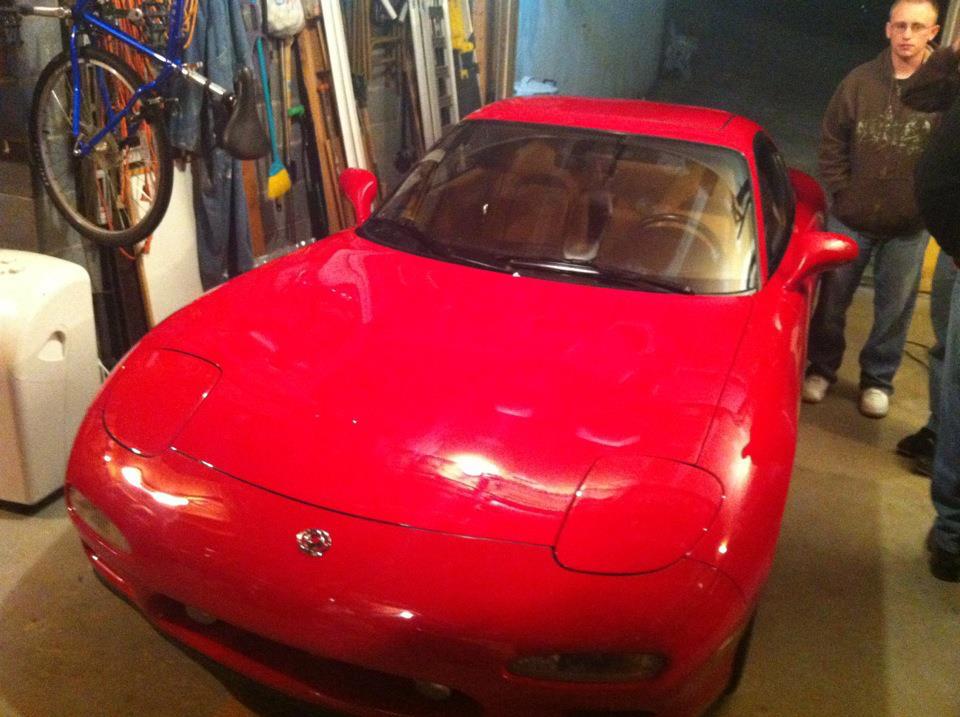
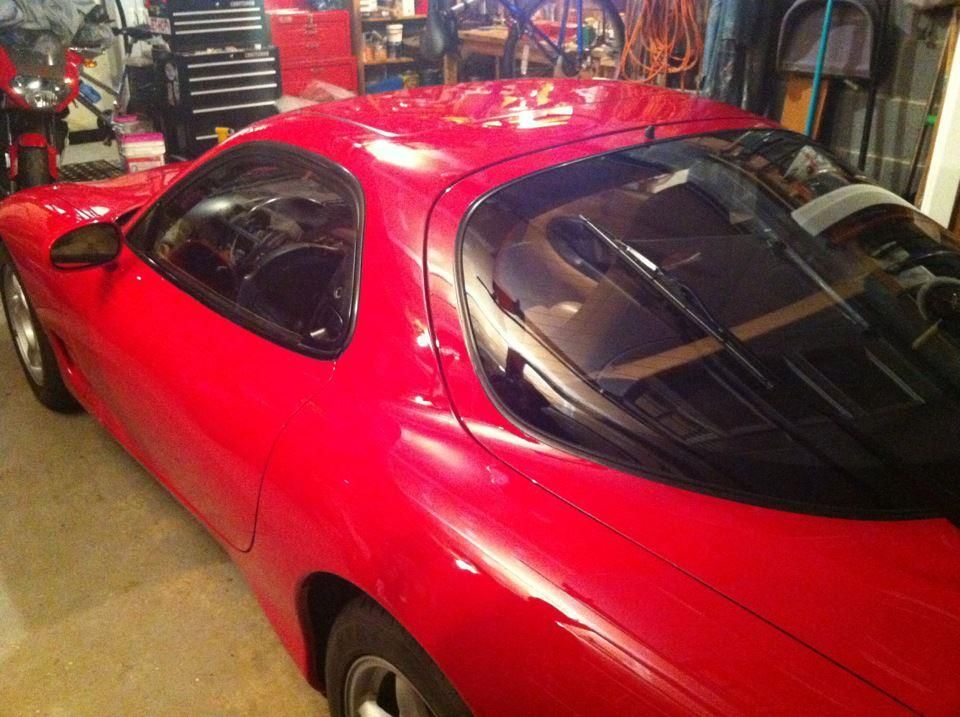
I found my 93 Touring in an older man's garage under a cover. He had purchased it because he had always loved Rx7s. For any maintenance, he did his research and used the right people and the right parts. He had stopped driving it due to a motorcycle accident and it had been sitting for a couple months. It was a true beauty. He purchased it with 38k and had driven it a total of maybe 2000 miles before the odometer quit working. He said he he then drove it another 200 or so before his accident. I was stoked for this FD. It was a gem in the rocks. Everything was stock minus the radio. It started right up and drove perfect. I took it for a test drive and it had low boost in 1st yet a good 10-8-10 in third. I figured I'd dig into it later. The AST was damn near perfect shape and it didn't leak a drop of fluid. The paint was beautiful for an almost 20 year old car. I worked out a deal with the kind man and came back for it with a check the next week. I still keep in contact with the previous owner. He told me he had had some young punks try and lowball him for it, but no one showed the drive and the knowledge for the car like I did. Enough blabber. So I changed the oil on the spot and drove it on the 200 mile journey home.

I looked deeper into the odometer issue and found several threads. Its definitely not an uncommon problem. I replaced the bad capacitor and was on my way with a working odometer.
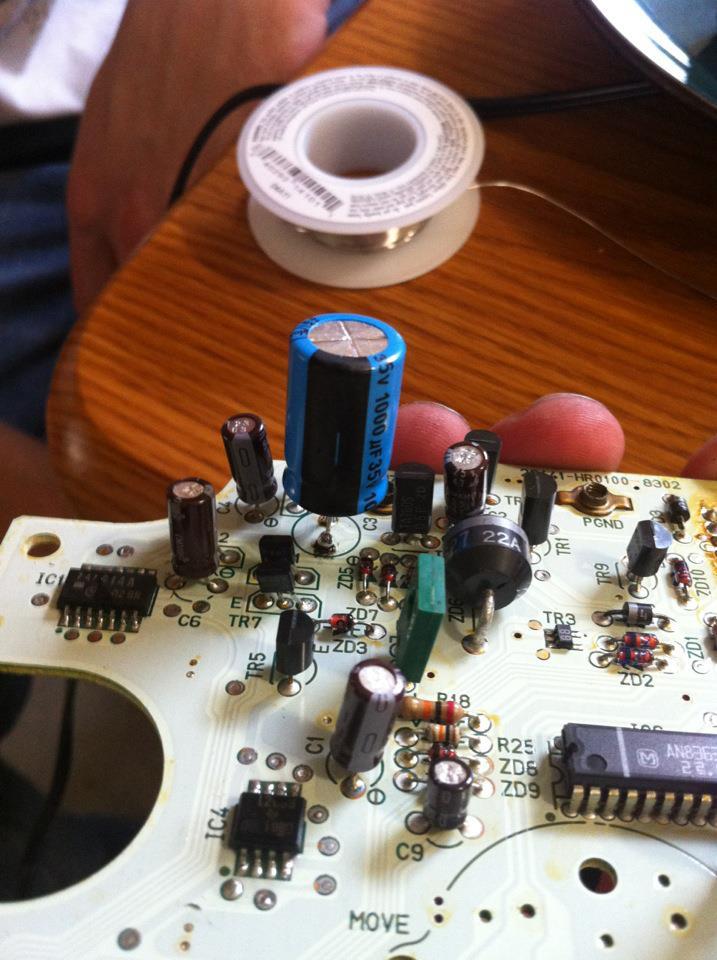

The kind old man certainly did not lie.
I immediately began purchasing reliability mods for my seven. Aluminum AST, new fuel filter, new plugs and wires, silicone vacuum lines, new check valves, FC thermoswitch, new Oil pressure sending unit, new turbo coolant lines, new OEM intake manifold gaskets, SS OMP lines, petit SS downpipe, new studs and nuts for the downpipe, new OEM OMP nozzles, Defi water temp and boost gauges, pulsation damper, tripower dual gauge pod, new OEM wastegate and precontrol solenoids, and AzeKnightz turbo control solenoids.
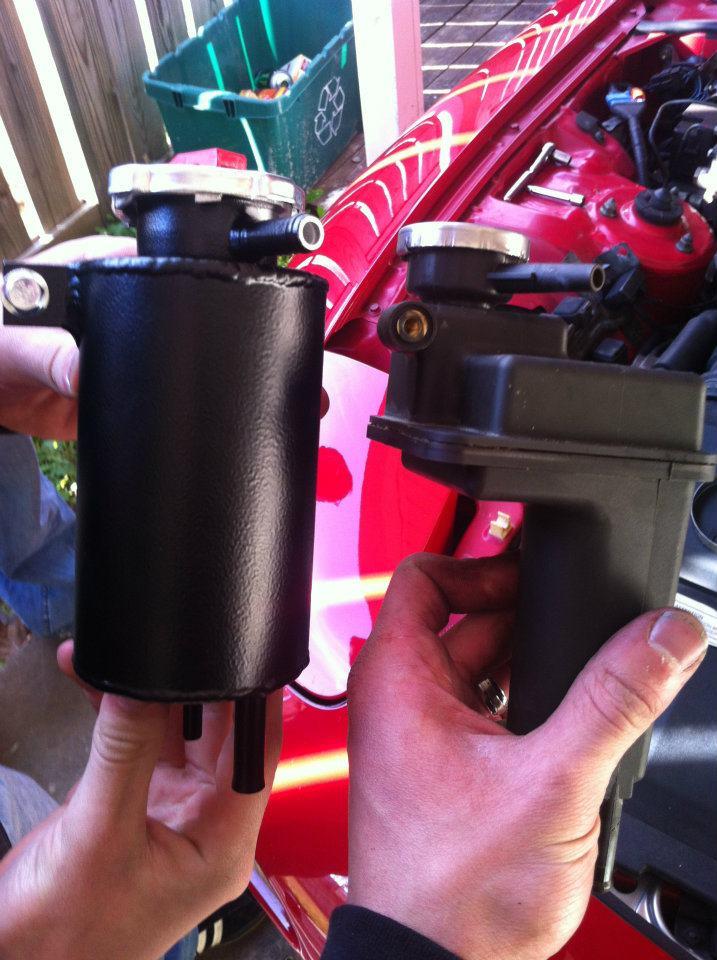
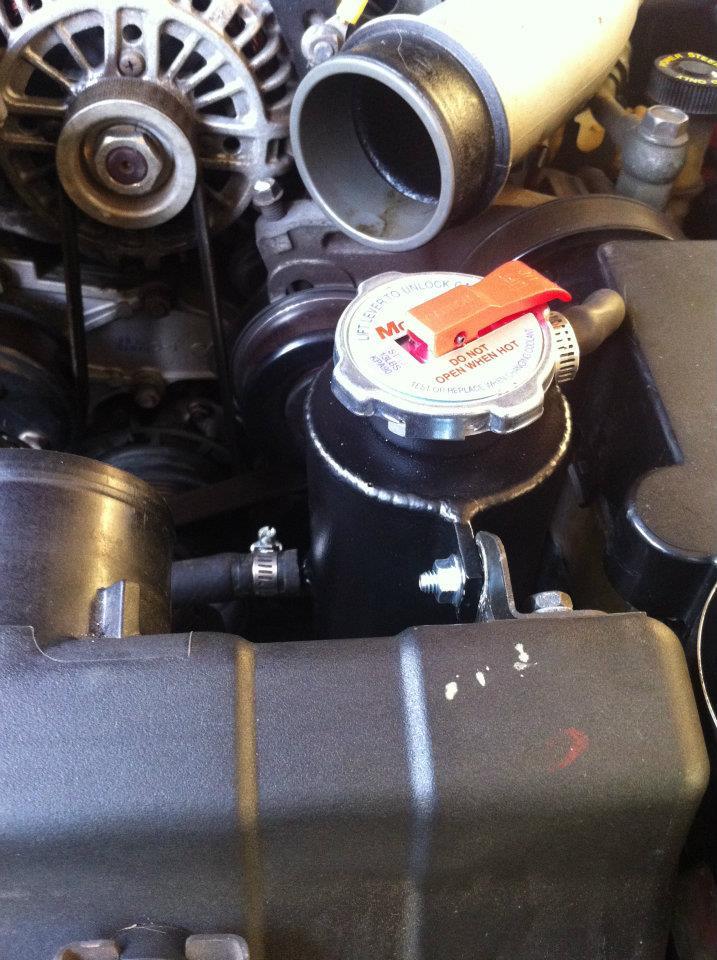
New AST and installation. During the installation, the lower hose cracked and leaked. I purchased new coolant lines from advanceauto [the universal stuff] and routed the new line.
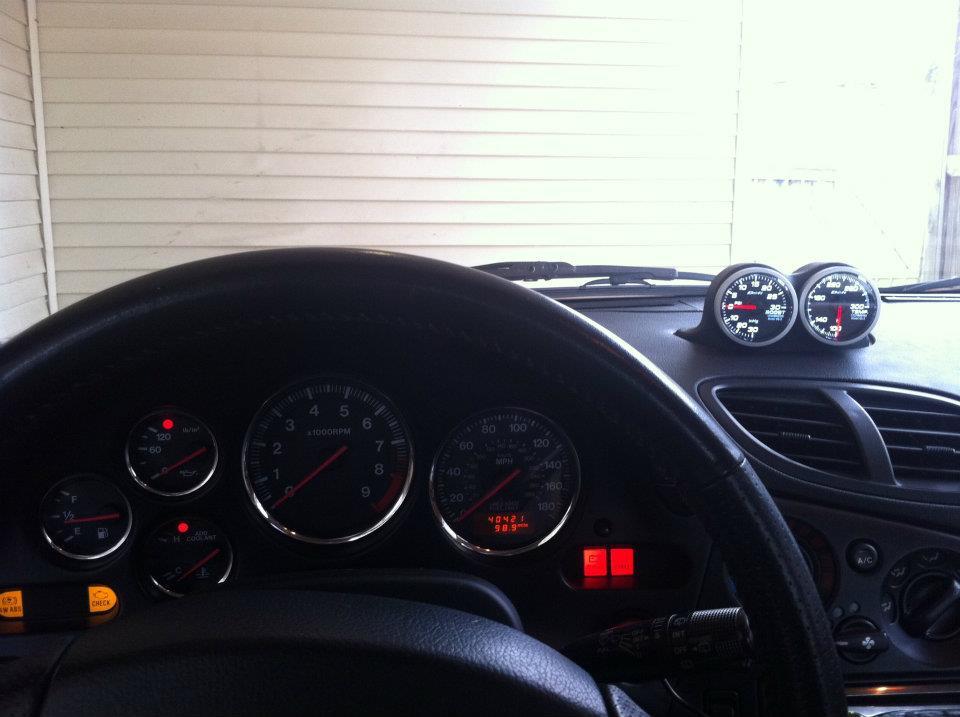
New Defi gauges installed.
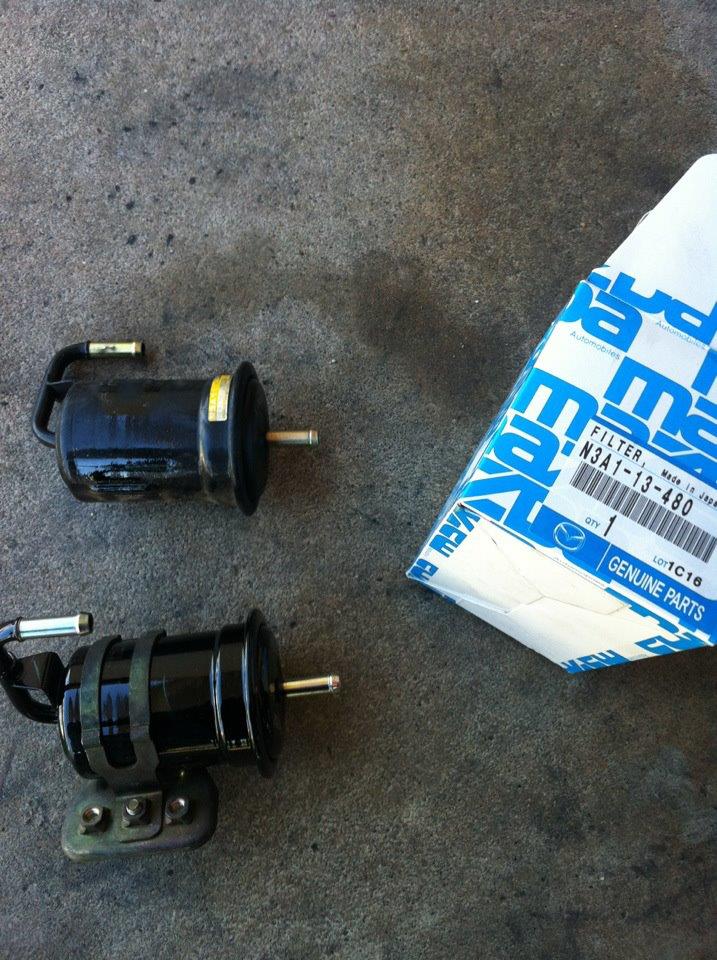
New fuel filter. Installed in the OEM location. Only little girls relocate.
I found my 93 Touring in an older man's garage under a cover. He had purchased it because he had always loved Rx7s. For any maintenance, he did his research and used the right people and the right parts. He had stopped driving it due to a motorcycle accident and it had been sitting for a couple months. It was a true beauty. He purchased it with 38k and had driven it a total of maybe 2000 miles before the odometer quit working. He said he he then drove it another 200 or so before his accident. I was stoked for this FD. It was a gem in the rocks. Everything was stock minus the radio. It started right up and drove perfect. I took it for a test drive and it had low boost in 1st yet a good 10-8-10 in third. I figured I'd dig into it later. The AST was damn near perfect shape and it didn't leak a drop of fluid. The paint was beautiful for an almost 20 year old car. I worked out a deal with the kind man and came back for it with a check the next week. I still keep in contact with the previous owner. He told me he had had some young punks try and lowball him for it, but no one showed the drive and the knowledge for the car like I did. Enough blabber. So I changed the oil on the spot and drove it on the 200 mile journey home.
I looked deeper into the odometer issue and found several threads. Its definitely not an uncommon problem. I replaced the bad capacitor and was on my way with a working odometer.
The kind old man certainly did not lie.
I immediately began purchasing reliability mods for my seven. Aluminum AST, new fuel filter, new plugs and wires, silicone vacuum lines, new check valves, FC thermoswitch, new Oil pressure sending unit, new turbo coolant lines, new OEM intake manifold gaskets, SS OMP lines, petit SS downpipe, new studs and nuts for the downpipe, new OEM OMP nozzles, Defi water temp and boost gauges, pulsation damper, tripower dual gauge pod, new OEM wastegate and precontrol solenoids, and AzeKnightz turbo control solenoids.
New AST and installation. During the installation, the lower hose cracked and leaked. I purchased new coolant lines from advanceauto [the universal stuff] and routed the new line.
New Defi gauges installed.
New fuel filter. Installed in the OEM location. Only little girls relocate.
Thread Starter
Joined: Feb 2010
Posts: 1,105
Likes: 118
From: Sacramento, Ca
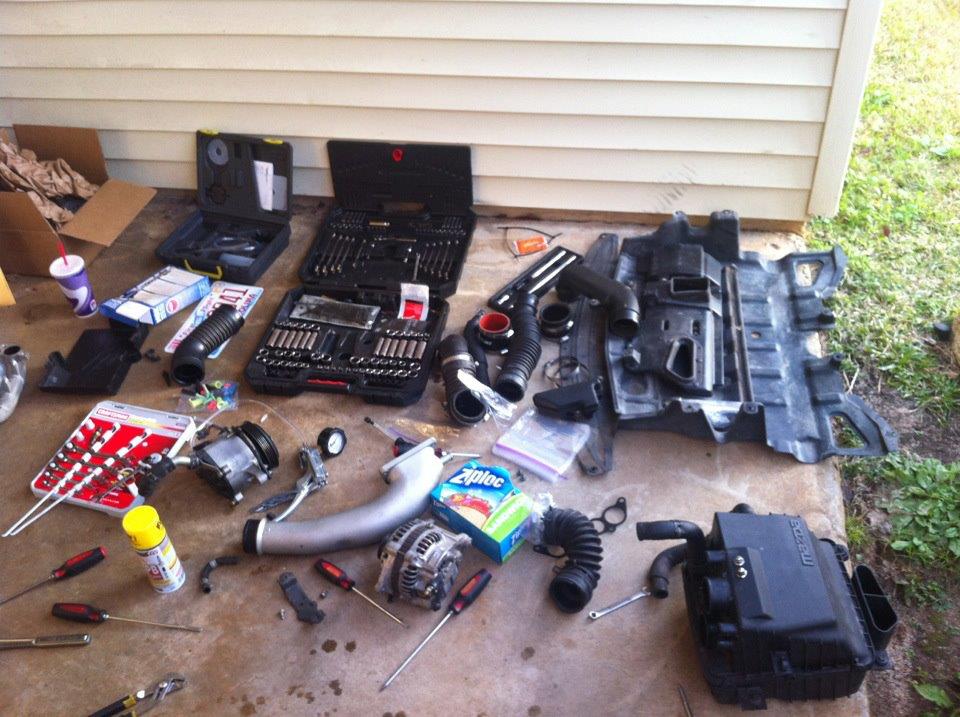
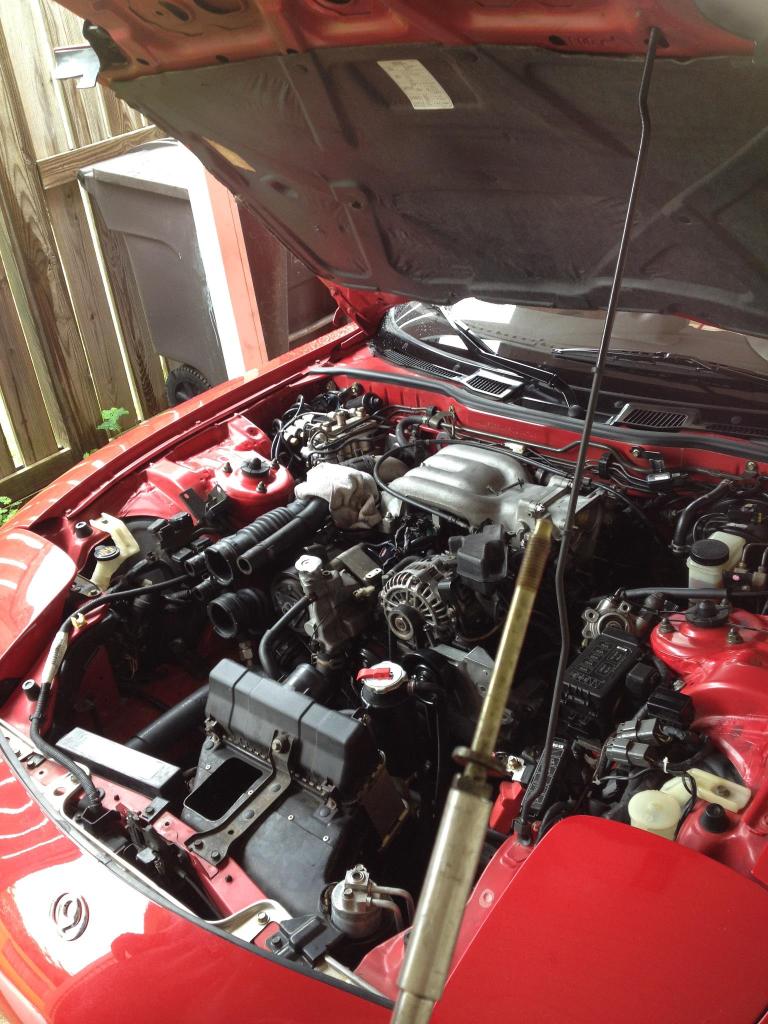
And then the teardown began. 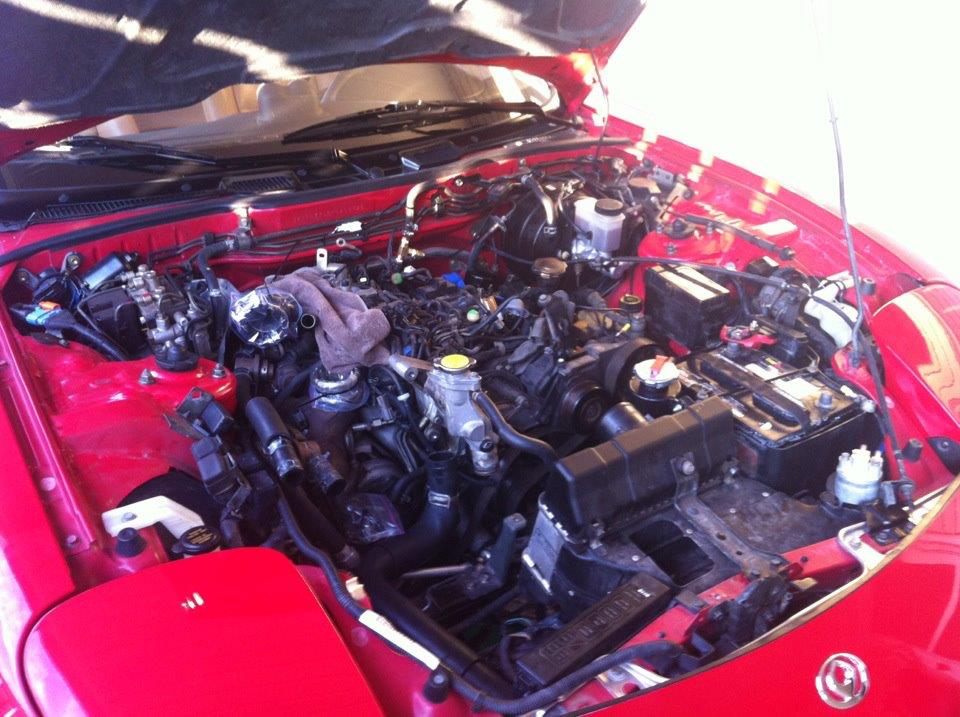
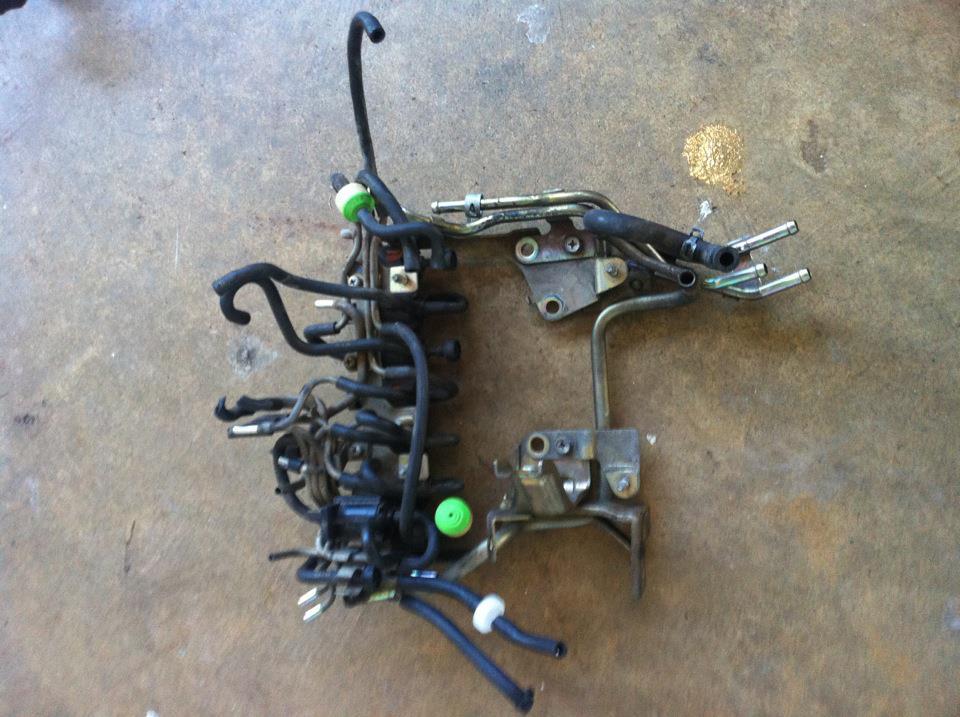
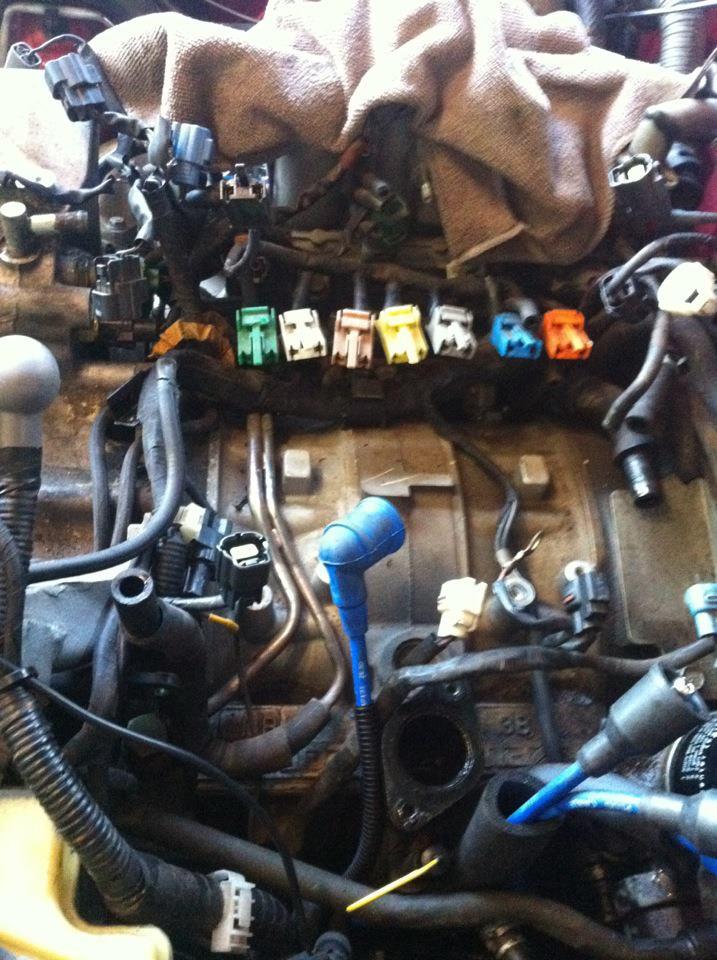
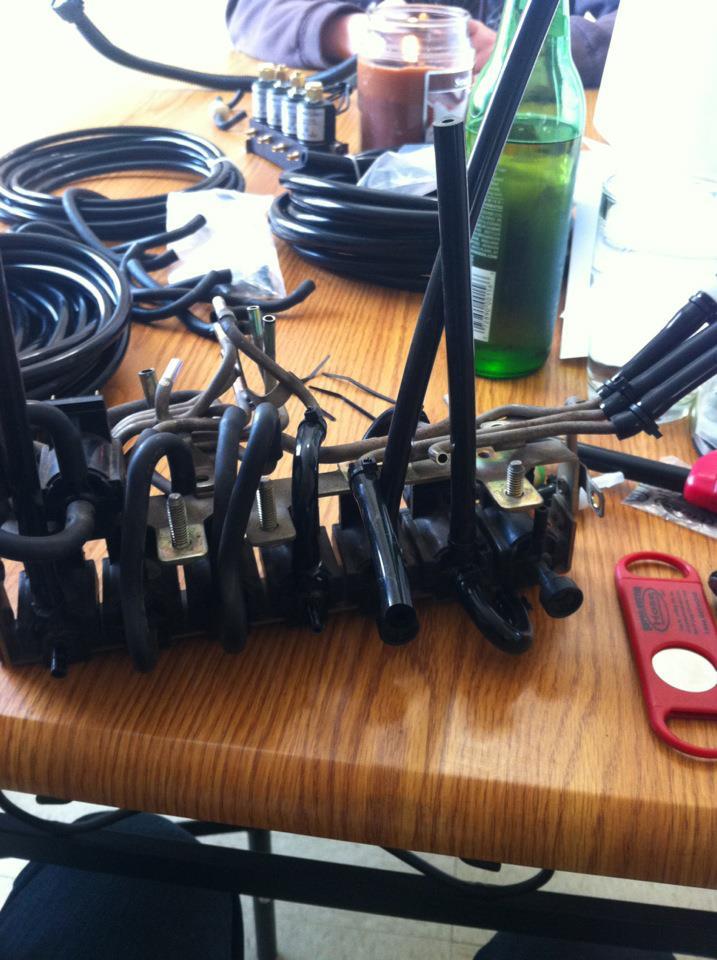
While replacing all the hoses on the rats nest, I decided to eliminate a hardline manifold and customize the routing of my vacuum lines. I was able to do this because of the AzeKnightz solenoids.
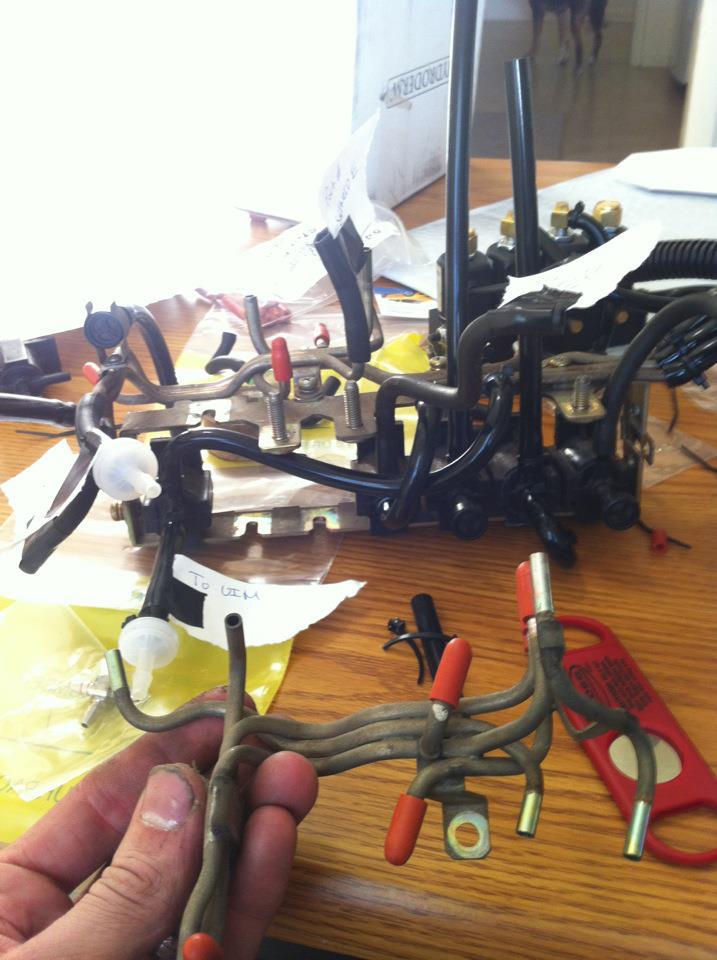
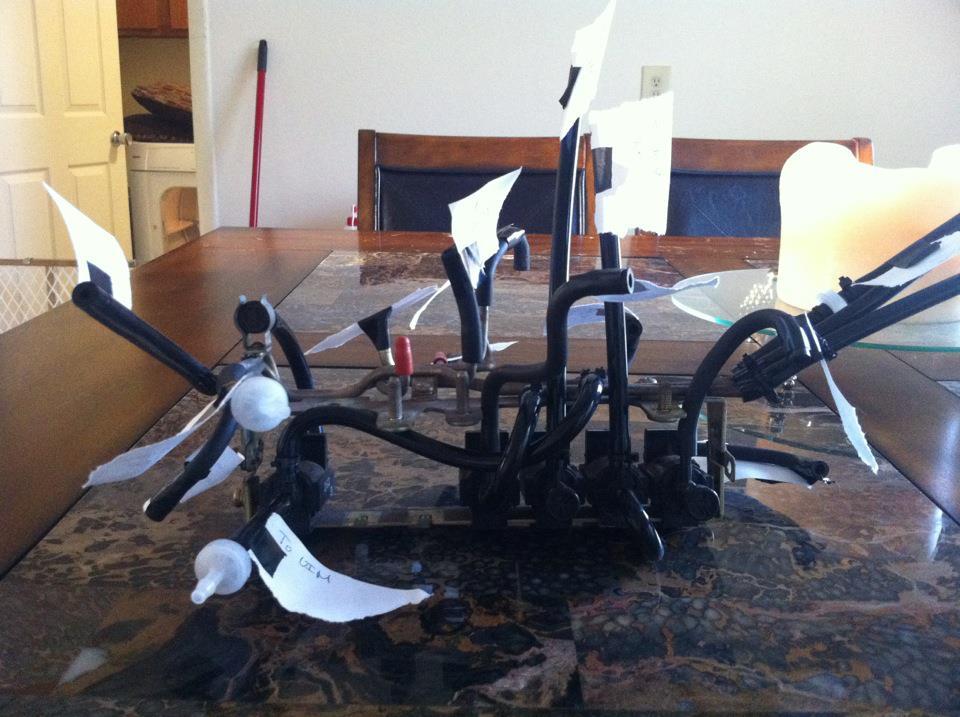
Please excuse my labeling technique. It worked though :P
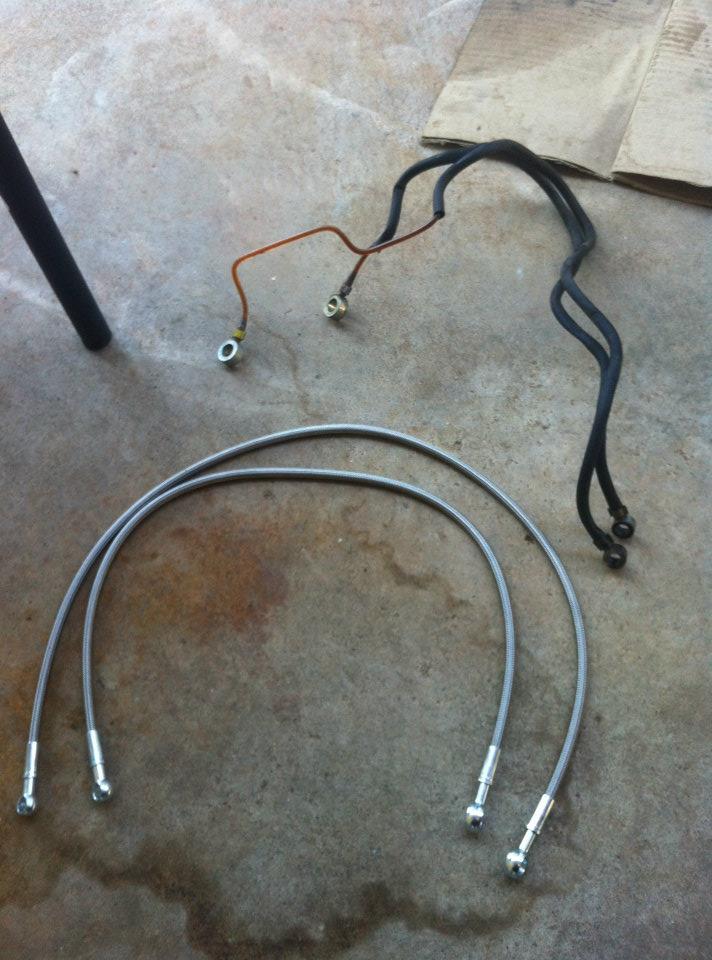
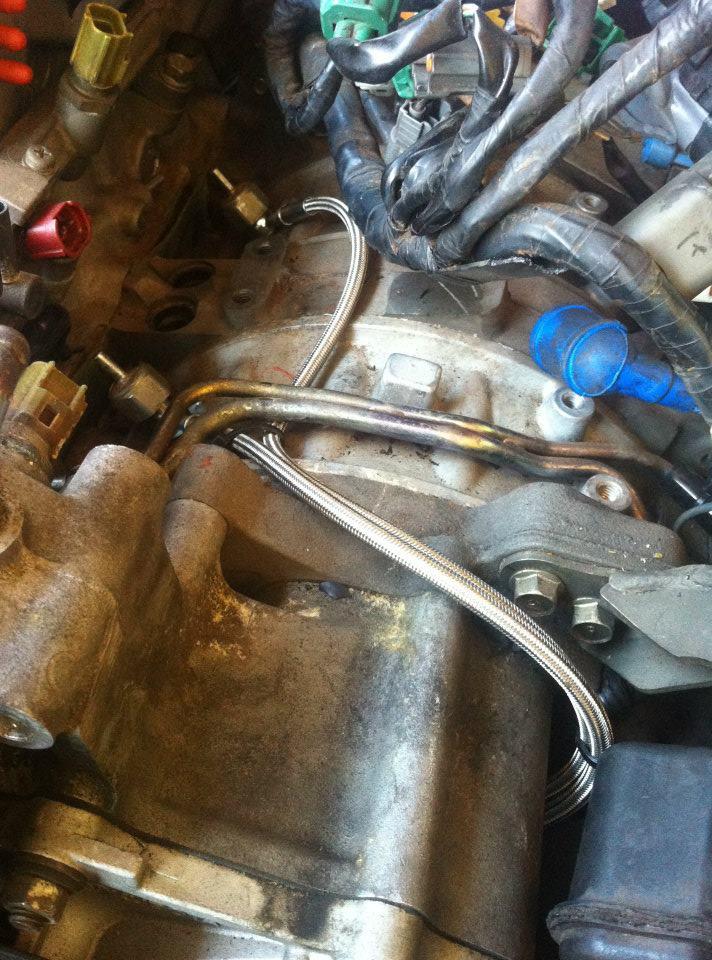
SS OMP lines. I took one look at the OEM lines and immediately felt I could not trust them. I've read that they're generally robust, but I felt I would replace them with something more permanent. Properly routed lines should not chafe.
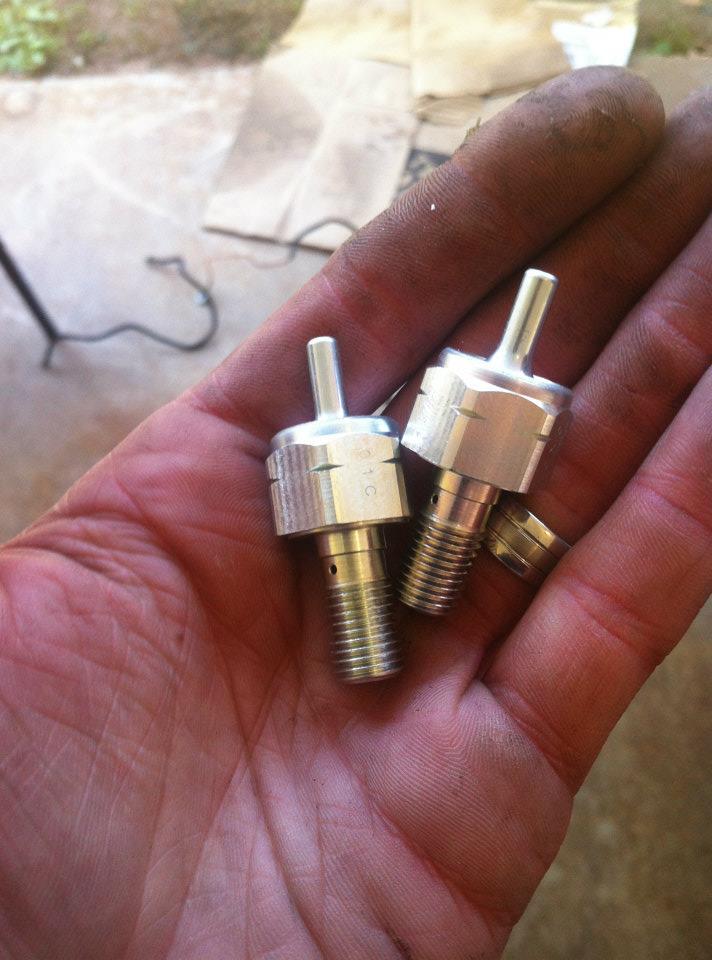
My OMP nozzles had failed at 40k. I always premix and I'm glad I do. When the check valves in these nozzles fail, your lubrication under boost stops because the oil backflows through the breather into you primary turbo inlet pipe. And BTW, don't break the nipple on the primary turbo inlet pipe hen taking off the vacuum line, a new one is $92 and $6 for the gasket.
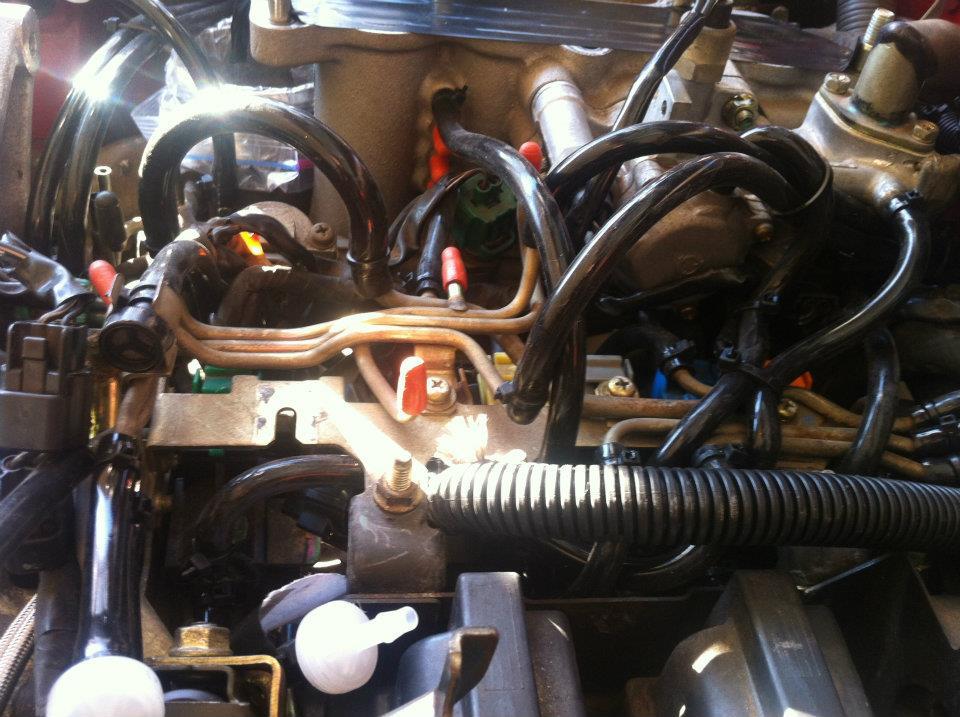
Rat's nest reinstalled with new silicone lines and the harness for the Azeknightz rack routed.
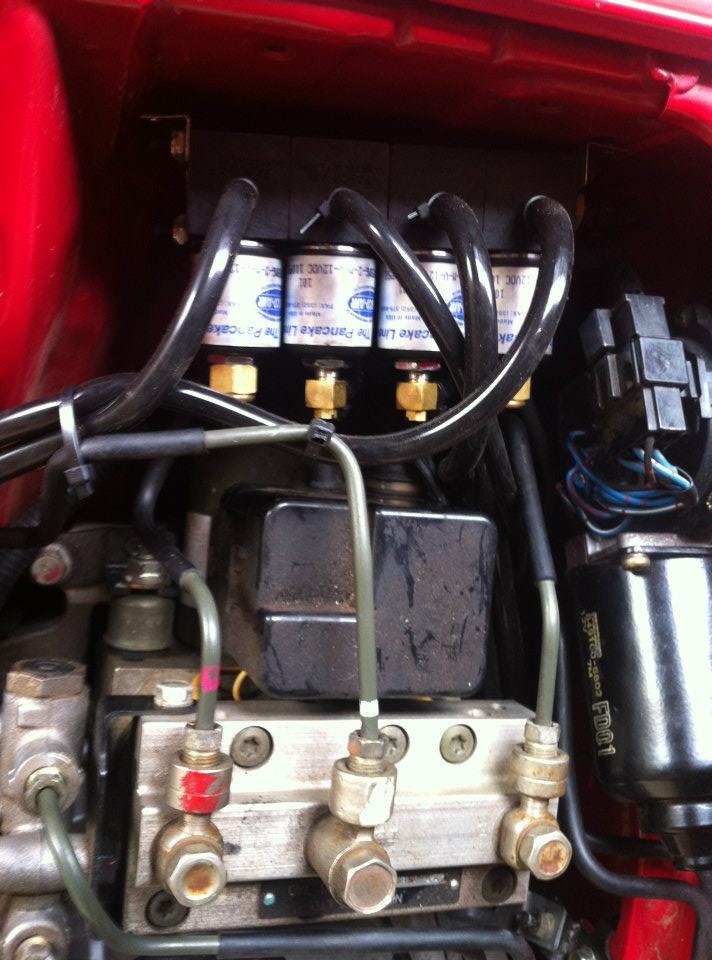
The placement of my Azeknightz solenoid rack.
Total costs so far [with shipping]:
SS OMP lines $100.20
OEM PC/WG solenoids $143.07
OMP nozzles $64.70
OMP line crush washer gaskets $41.20
Azeknightz solenoids $664.10
HT silicone vac hose kit $190.59
Pulsation damper, intake manifold gaskets, downpipe nuts/studs and gasket, oil filters and crush washers $332.52
Fuel filter $59.41
Primary turbo inlet pipe, gasket, oil pressure sending unit $203.03
Turbo coolant lines, FC thermoswitch, plug wires, premix $137.11
Defi boost and water temp gauges $357.14
Tripower dual gauge pod, aluminum AST, new radiator hoses $304.55
Secondary turbo to precontrol elbow, y pipe silicone coupler $28.95
mcmaster-carr vacuum caps, check valves, brass t fittings, $17.78
Pettit SS downpipe $325.27
Total cost for reliability thus far:
$2969.62
While replacing all the hoses on the rats nest, I decided to eliminate a hardline manifold and customize the routing of my vacuum lines. I was able to do this because of the AzeKnightz solenoids.
Please excuse my labeling technique. It worked though :P
SS OMP lines. I took one look at the OEM lines and immediately felt I could not trust them. I've read that they're generally robust, but I felt I would replace them with something more permanent. Properly routed lines should not chafe.
My OMP nozzles had failed at 40k. I always premix and I'm glad I do. When the check valves in these nozzles fail, your lubrication under boost stops because the oil backflows through the breather into you primary turbo inlet pipe. And BTW, don't break the nipple on the primary turbo inlet pipe hen taking off the vacuum line, a new one is $92 and $6 for the gasket.
Rat's nest reinstalled with new silicone lines and the harness for the Azeknightz rack routed.
The placement of my Azeknightz solenoid rack.
Total costs so far [with shipping]:
SS OMP lines $100.20
OEM PC/WG solenoids $143.07
OMP nozzles $64.70
OMP line crush washer gaskets $41.20
Azeknightz solenoids $664.10
HT silicone vac hose kit $190.59
Pulsation damper, intake manifold gaskets, downpipe nuts/studs and gasket, oil filters and crush washers $332.52
Fuel filter $59.41
Primary turbo inlet pipe, gasket, oil pressure sending unit $203.03
Turbo coolant lines, FC thermoswitch, plug wires, premix $137.11
Defi boost and water temp gauges $357.14
Tripower dual gauge pod, aluminum AST, new radiator hoses $304.55
Secondary turbo to precontrol elbow, y pipe silicone coupler $28.95
mcmaster-carr vacuum caps, check valves, brass t fittings, $17.78
Pettit SS downpipe $325.27
Total cost for reliability thus far:
$2969.62
Thread Starter
Joined: Feb 2010
Posts: 1,105
Likes: 118
From: Sacramento, Ca
After all that maintenance, I deployed to South Korea for 5 months. While I was there I purchased some more parts for install when I got home.
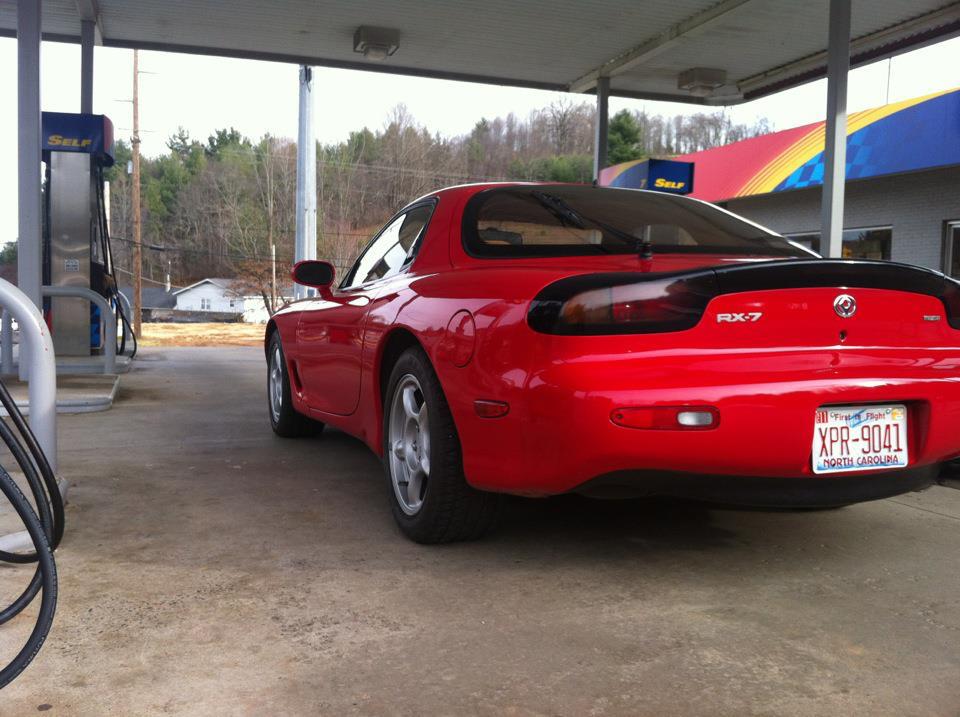
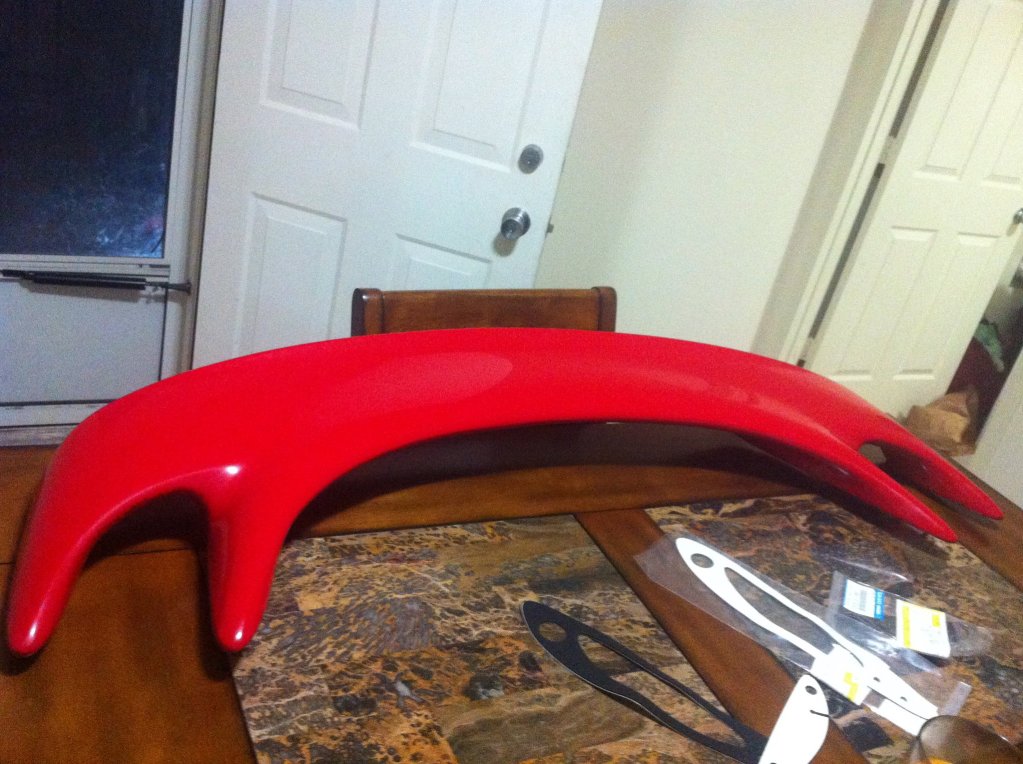
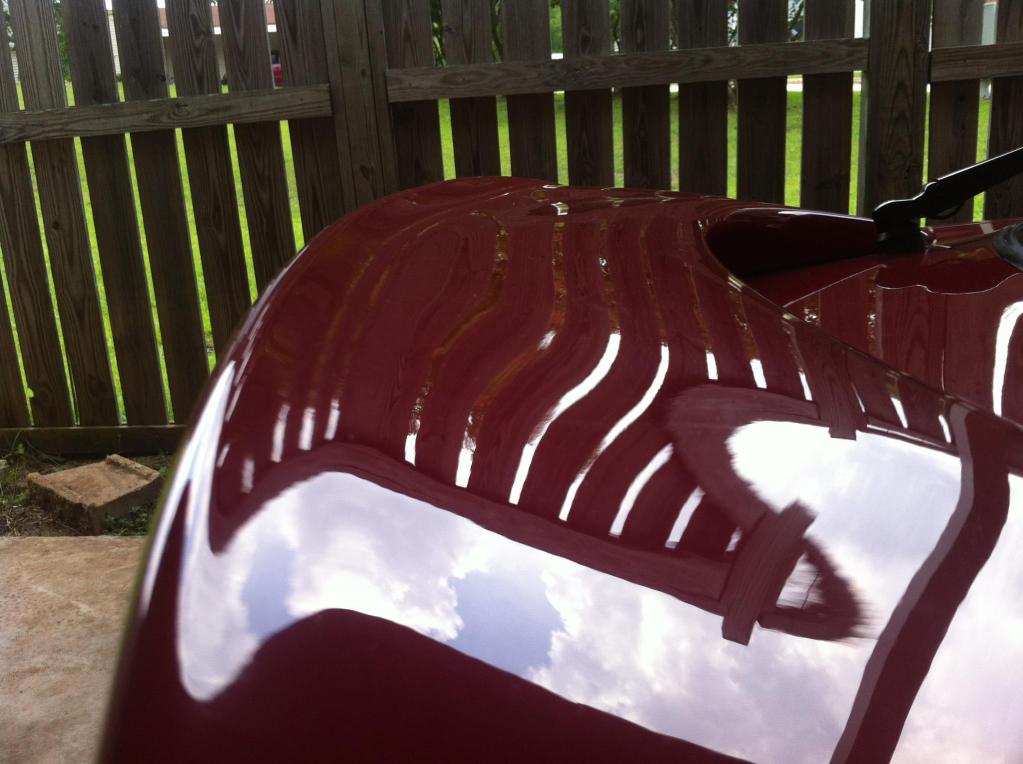
I purchased a VR R1 spoiler and touch up paint to clean it up.
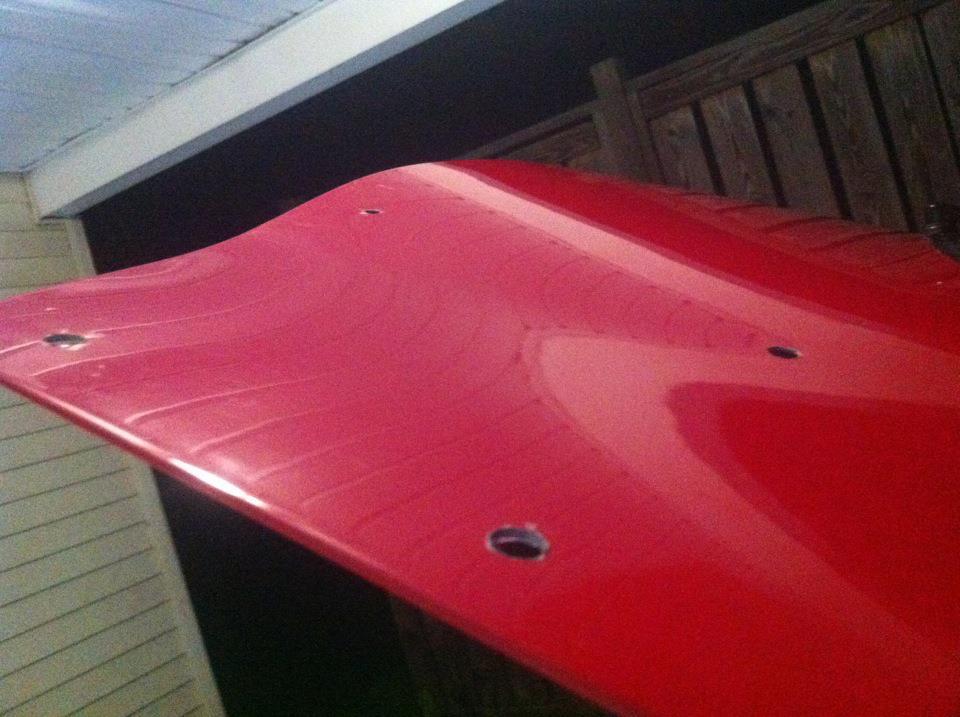
I drilled the holes and primed the bare metal to prevent corrosion.
On my time off I had time to fix other issues. I found that my O2 sensor was shot.

And while changing my OEM belts to some goodyear gatorbacks, I ended up stripping out my tensioner bracket :/ Rookie mistake. Always loosen the pulley before attempting to adjust tension. ESPECIALLY on an aluminum bracket.
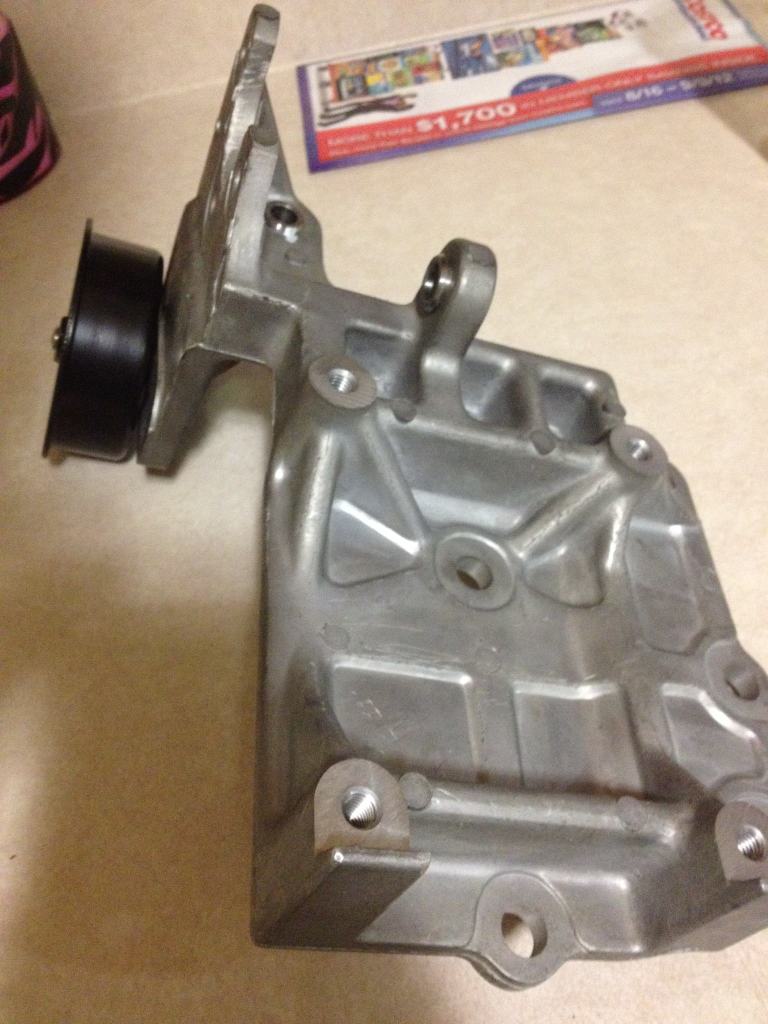
Brand new OEM tensioner bracket
While I was installing the new tensioner bracket, I left the bolts for the AC compressor in the compressor assuming they were too long to fall out. Oh man, was I wrong. One of the compressor bolts fell in that hole in the frame rail.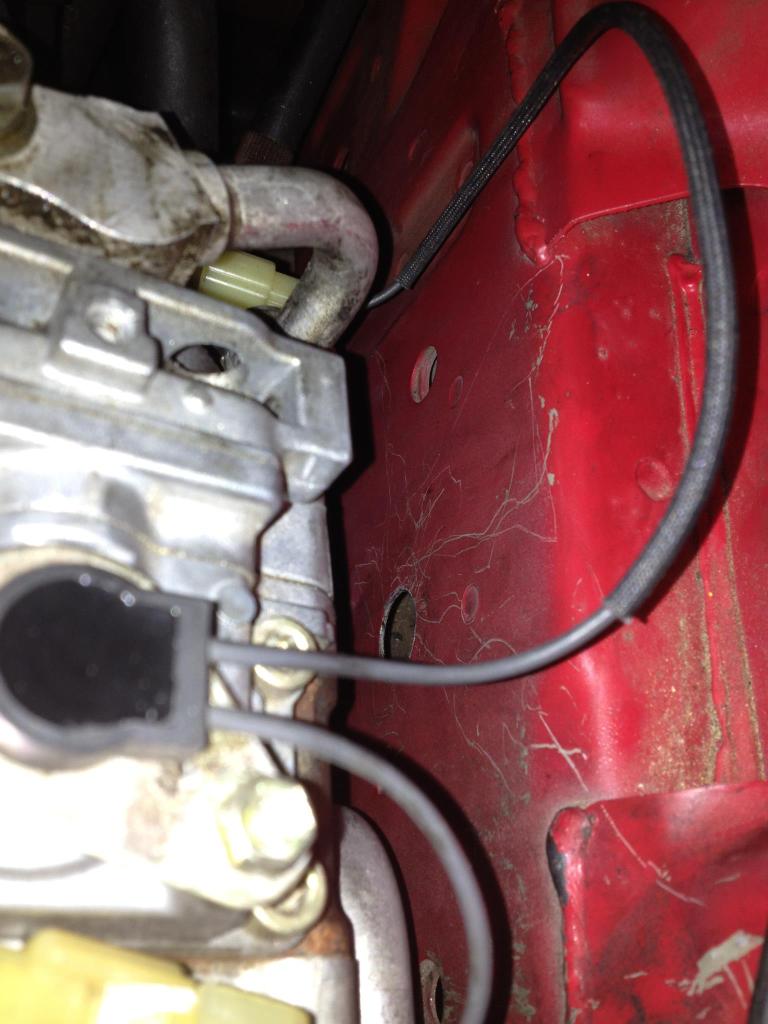
But with some perseverance, the foreign object in my frame rail was obtained.
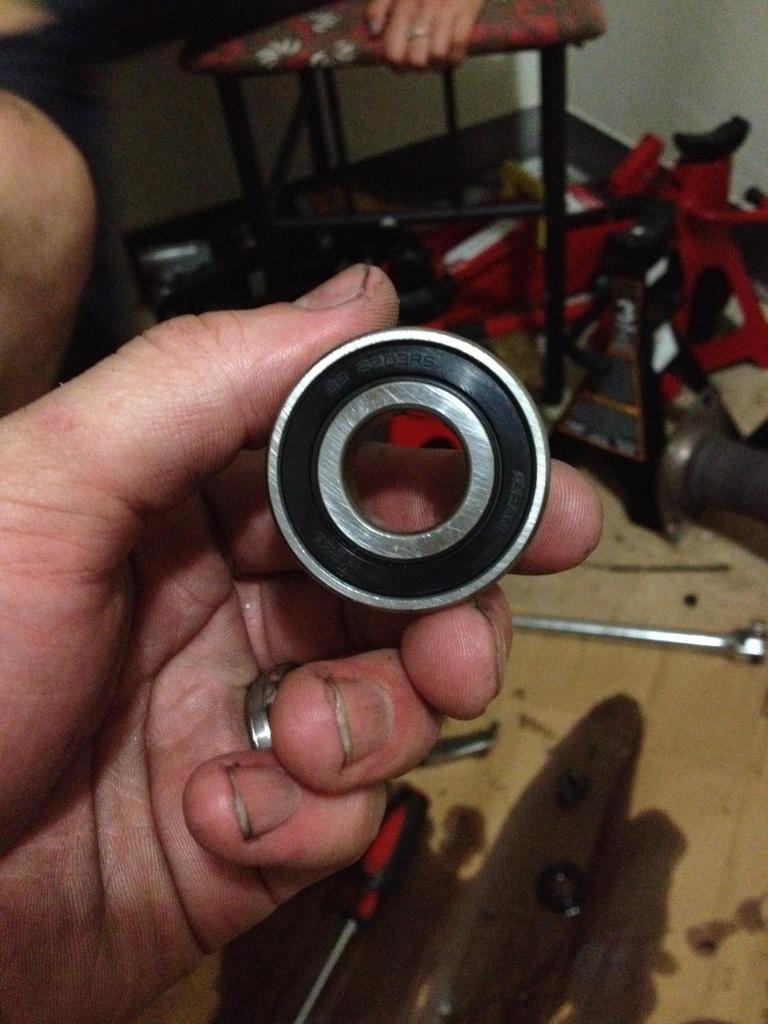
I had changed my belts because I had a squeek from my belts that was highly annoying. It had continued even with the new belts and with a careful ear I narrowed the noise to the bearing in my power steering pump. I removed my power steering pump and rebuilt it with a new bearing.
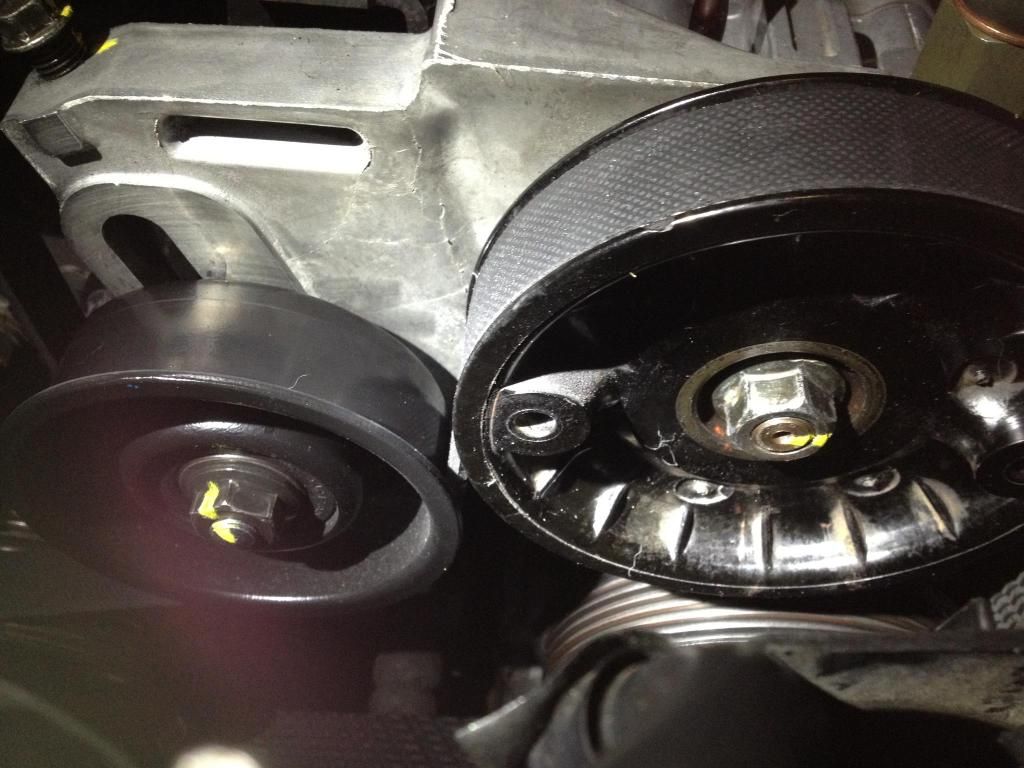
Rebuilt pump installed, pulley nuts torqued and striped.
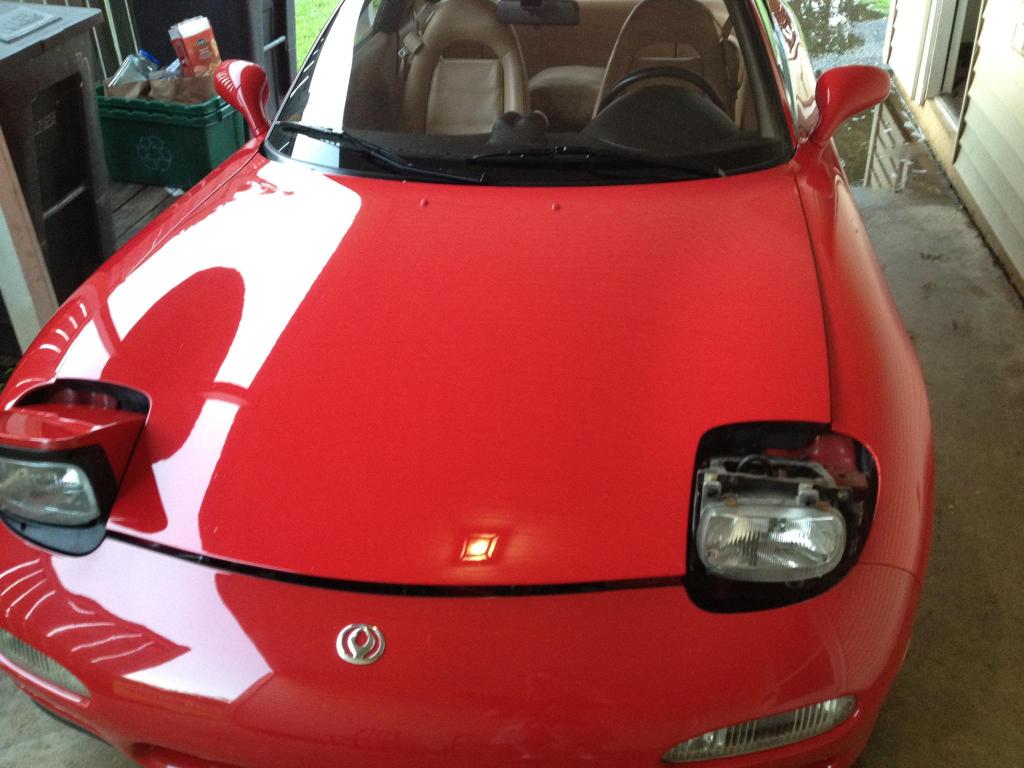
While washing my 7 one day, I noticed that my driver's side headlight cover was not sitting well. I further investigated and noticed almost all the tabs were broken on them! One more drive on the highway and it would have been history.
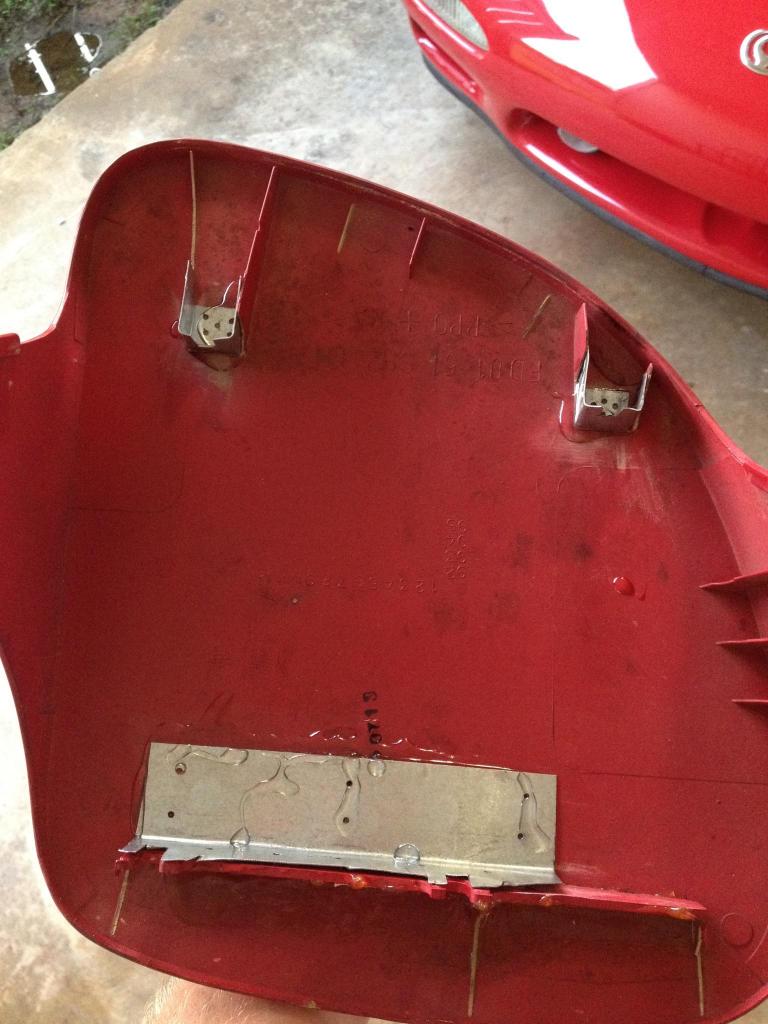
Some patience, sheet metal, and epoxy later, and I had new mounting tabs that should withstand it all.
I purchased a VR R1 spoiler and touch up paint to clean it up.
I drilled the holes and primed the bare metal to prevent corrosion.
On my time off I had time to fix other issues. I found that my O2 sensor was shot.
And while changing my OEM belts to some goodyear gatorbacks, I ended up stripping out my tensioner bracket :/ Rookie mistake. Always loosen the pulley before attempting to adjust tension. ESPECIALLY on an aluminum bracket.
Brand new OEM tensioner bracket
While I was installing the new tensioner bracket, I left the bolts for the AC compressor in the compressor assuming they were too long to fall out. Oh man, was I wrong. One of the compressor bolts fell in that hole in the frame rail.
But with some perseverance, the foreign object in my frame rail was obtained.
I had changed my belts because I had a squeek from my belts that was highly annoying. It had continued even with the new belts and with a careful ear I narrowed the noise to the bearing in my power steering pump. I removed my power steering pump and rebuilt it with a new bearing.
Rebuilt pump installed, pulley nuts torqued and striped.
While washing my 7 one day, I noticed that my driver's side headlight cover was not sitting well. I further investigated and noticed almost all the tabs were broken on them! One more drive on the highway and it would have been history.
Some patience, sheet metal, and epoxy later, and I had new mounting tabs that should withstand it all.


Thread Starter
Joined: Feb 2010
Posts: 1,105
Likes: 118
From: Sacramento, Ca
Amongst all this, my drivers side window switch decided to break. So I ordered a new one and installed it. Man those things are expensive! At least I now have auto up and down! [no picture its just a window switch  ]
]
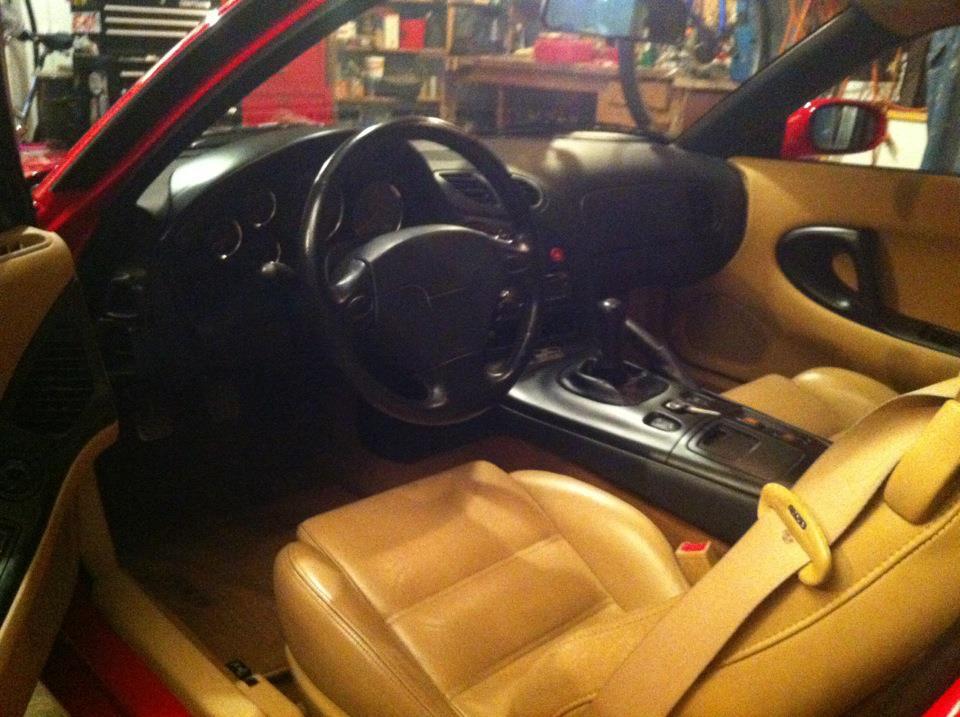
While I was at it with my window switch I took a look at my interior trim. The gummy clear coat was looking real crummy.
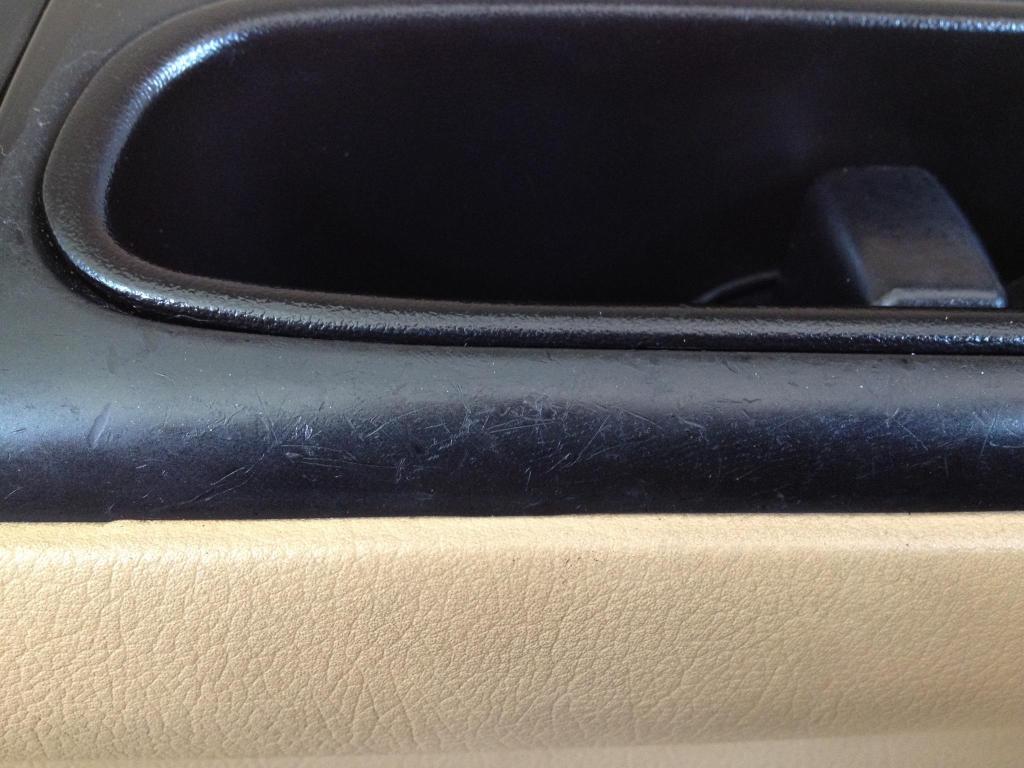
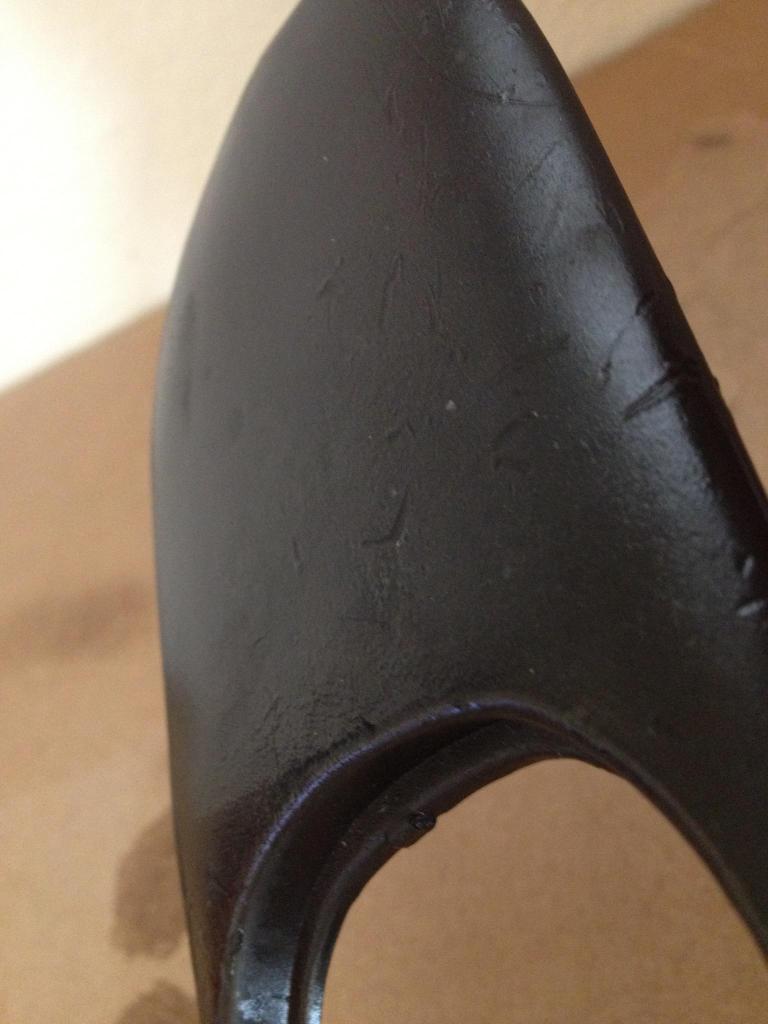
I took them off and refinished them with bumper coating. I was VERYU pleased with the finish and the color match.
I had also picked up some Eibach pro kit springs and installed them with new rubber upper and lower mounts. Those bumpstops are expensive but I'm glad I got them. I measured my ride height on the stock springs and it was surprisingly uneven. With the new rubbers I have a nice even ride height.
I also installed new Pillowballs in the rear as I had the dreaded clunky rear end.
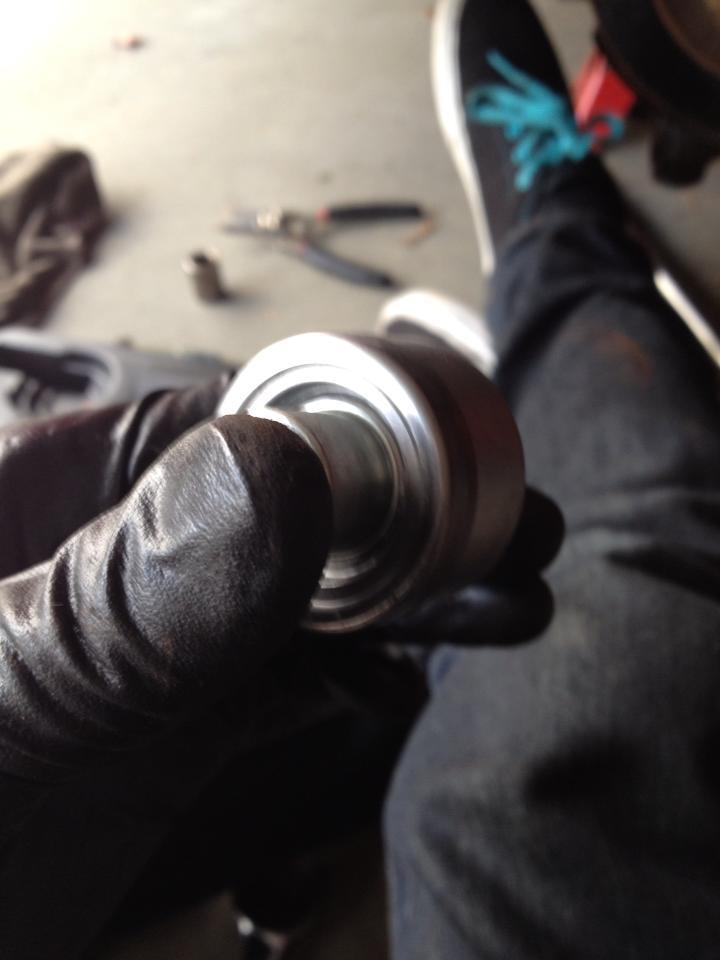
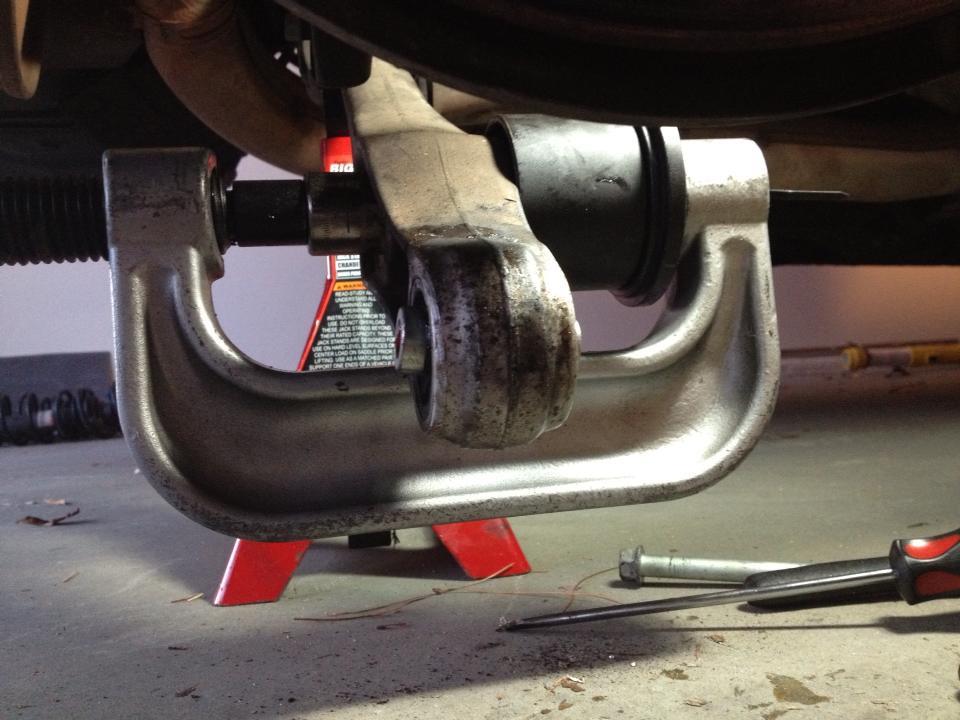
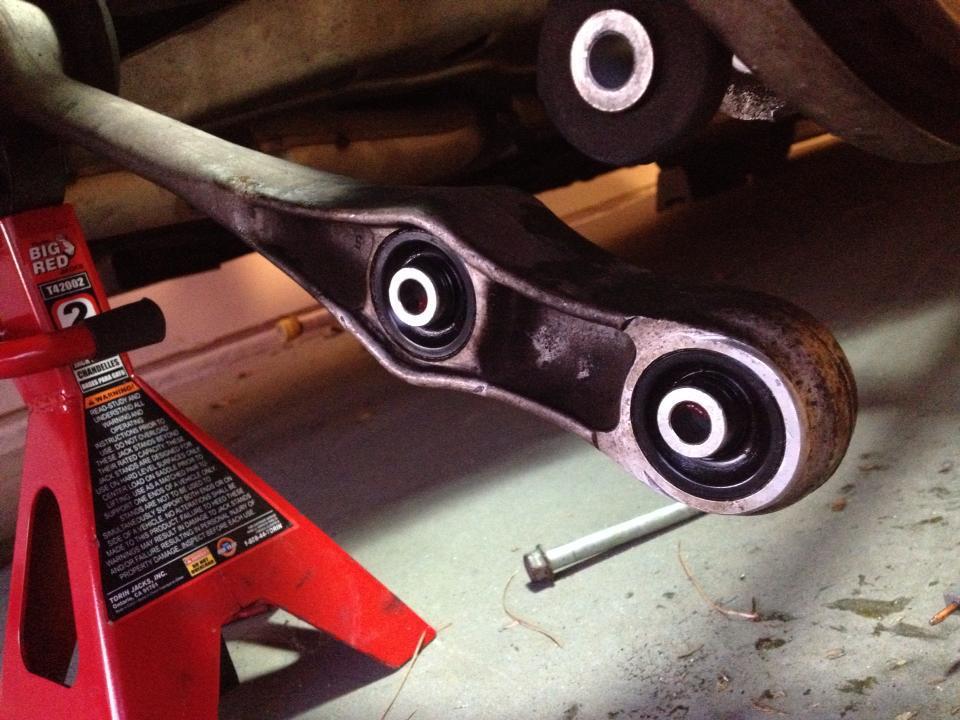
New ones installed.
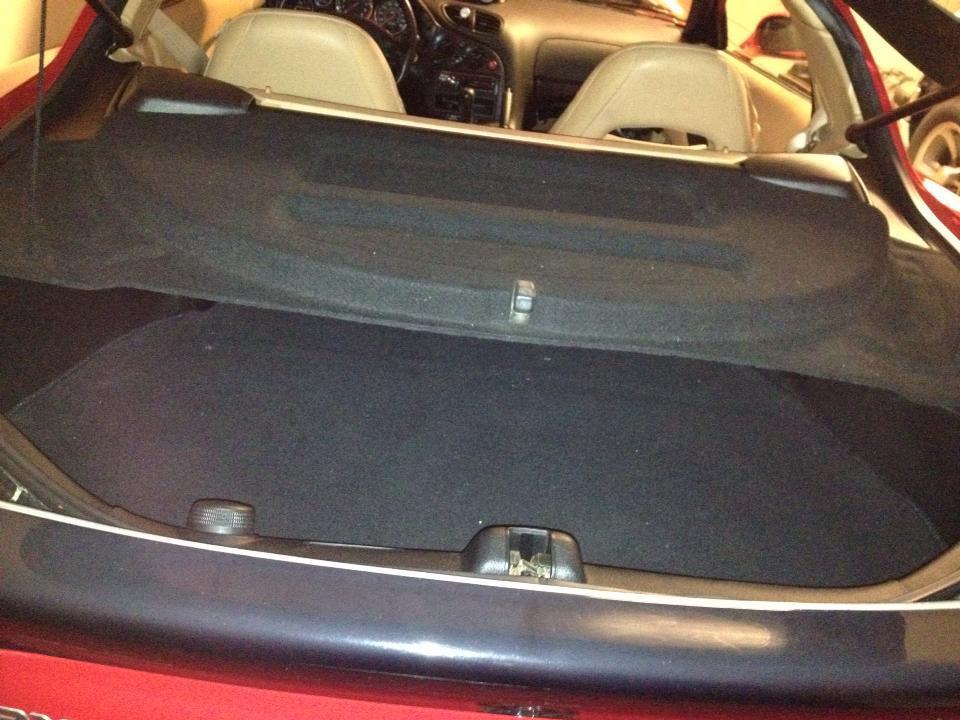
I also picked up a mint R1 rear carpet and cargo cover to remove my Bose snake tube as well as rear speaker brackets and speaker covers.
I will now attempt to add up the rest of my costs as this is the most recent thing I've done to my FD in the year that I have now owned it.
Previous balance: $2969.62
New headlight bulbs and wipers: $84.95
New hood rubber bump stops and throttle dashpot: $130.83
New tensioner bracket: $218.38
New O2 sensor: $45.74
New 8g ground wires: $11.88
Touch up paint: $61.24
R1 Spoiler mount kit: $78.92
Neo synthetic tranny/diff oil, case of Idemitsu premix, ABV to air box hose $190.19
Alignment $82.47
Upper rubber shock mounts, lower spring seats $335.32
NGK spark plugs: $28.12
Gatorback belt: $45.89
Power window switch: $177.15
ATE superblue brake fluid, New pillow ***** and seals: $443.00
Bonez stage 1 pads: $130.00
Rear speaker brackets and speaker covers $170.00
Fast IAT $55.00
Fast IAT harness $16.00
R1 Carpet/cargo cover $215.00
Diff/Trailing link bushings Powerflex $126.98
R1 Spoiler: $130.00
Eibach Prokit springs $200.00
Total: $5946.68
Honestly, Its not as bad as I feared adding all this up. It seems like a lot of money but it all seems worth it in the end as well. My future purchases include: Banzai transmission crossmember, new OEM shifter bushings, and some new tires [z1 star specs or potenza re11].
Through all these purchases I have obtained a solid running Rx7 with all the kinks worked out. All of that pricing does not include several things like new tool purchases or consumables such as WD-40, PB nutbuster, spray paint, etc.
I do love this car and I love just keeping it in perfect shape. I will continue to update this thread with my endeavors. I hope this helps some future owners in their decision making on whether to get an Rx7 or not. Its a of time, money, work, blood, sweat, and effort. But its all worth it.
Matt
]While I was at it with my window switch I took a look at my interior trim. The gummy clear coat was looking real crummy.
I took them off and refinished them with bumper coating. I was VERYU pleased with the finish and the color match.
I had also picked up some Eibach pro kit springs and installed them with new rubber upper and lower mounts. Those bumpstops are expensive but I'm glad I got them. I measured my ride height on the stock springs and it was surprisingly uneven. With the new rubbers I have a nice even ride height.
I also installed new Pillowballs in the rear as I had the dreaded clunky rear end.
New ones installed.
I also picked up a mint R1 rear carpet and cargo cover to remove my Bose snake tube as well as rear speaker brackets and speaker covers.
I will now attempt to add up the rest of my costs as this is the most recent thing I've done to my FD in the year that I have now owned it.
Previous balance: $2969.62
New headlight bulbs and wipers: $84.95
New hood rubber bump stops and throttle dashpot: $130.83
New tensioner bracket: $218.38
New O2 sensor: $45.74
New 8g ground wires: $11.88
Touch up paint: $61.24
R1 Spoiler mount kit: $78.92
Neo synthetic tranny/diff oil, case of Idemitsu premix, ABV to air box hose $190.19
Alignment $82.47
Upper rubber shock mounts, lower spring seats $335.32
NGK spark plugs: $28.12
Gatorback belt: $45.89
Power window switch: $177.15
ATE superblue brake fluid, New pillow ***** and seals: $443.00
Bonez stage 1 pads: $130.00
Rear speaker brackets and speaker covers $170.00
Fast IAT $55.00
Fast IAT harness $16.00
R1 Carpet/cargo cover $215.00
Diff/Trailing link bushings Powerflex $126.98
R1 Spoiler: $130.00
Eibach Prokit springs $200.00
Total: $5946.68
Honestly, Its not as bad as I feared adding all this up. It seems like a lot of money but it all seems worth it in the end as well. My future purchases include: Banzai transmission crossmember, new OEM shifter bushings, and some new tires [z1 star specs or potenza re11].
Through all these purchases I have obtained a solid running Rx7 with all the kinks worked out. All of that pricing does not include several things like new tool purchases or consumables such as WD-40, PB nutbuster, spray paint, etc.
I do love this car and I love just keeping it in perfect shape. I will continue to update this thread with my endeavors. I hope this helps some future owners in their decision making on whether to get an Rx7 or not. Its a of time, money, work, blood, sweat, and effort. But its all worth it.
Matt

Thread Starter
Joined: Feb 2010
Posts: 1,105
Likes: 118
From: Sacramento, Ca
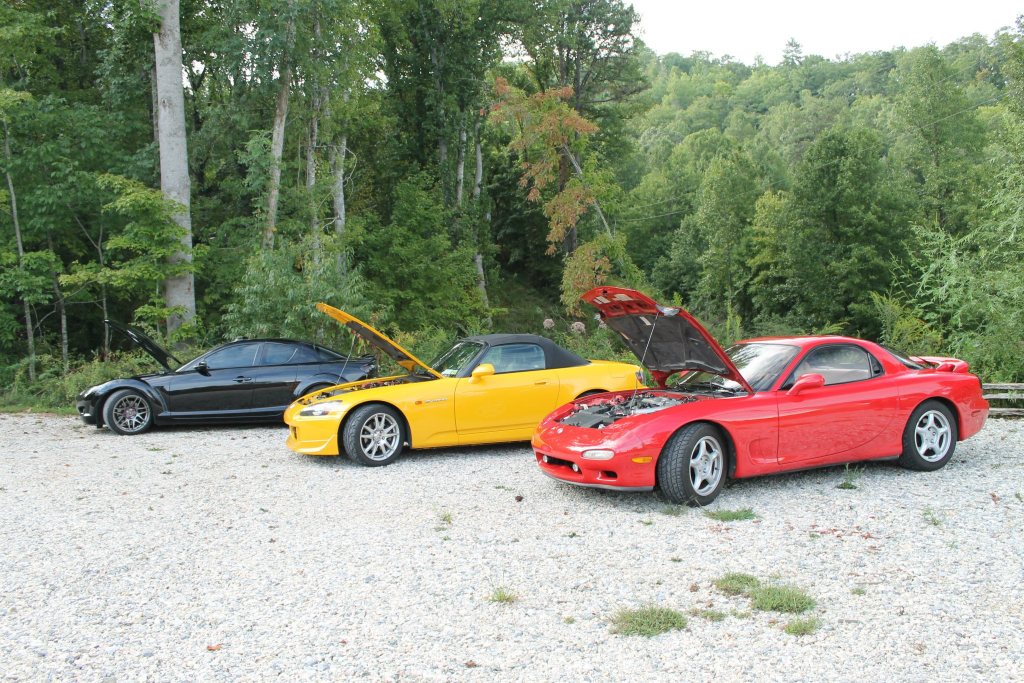
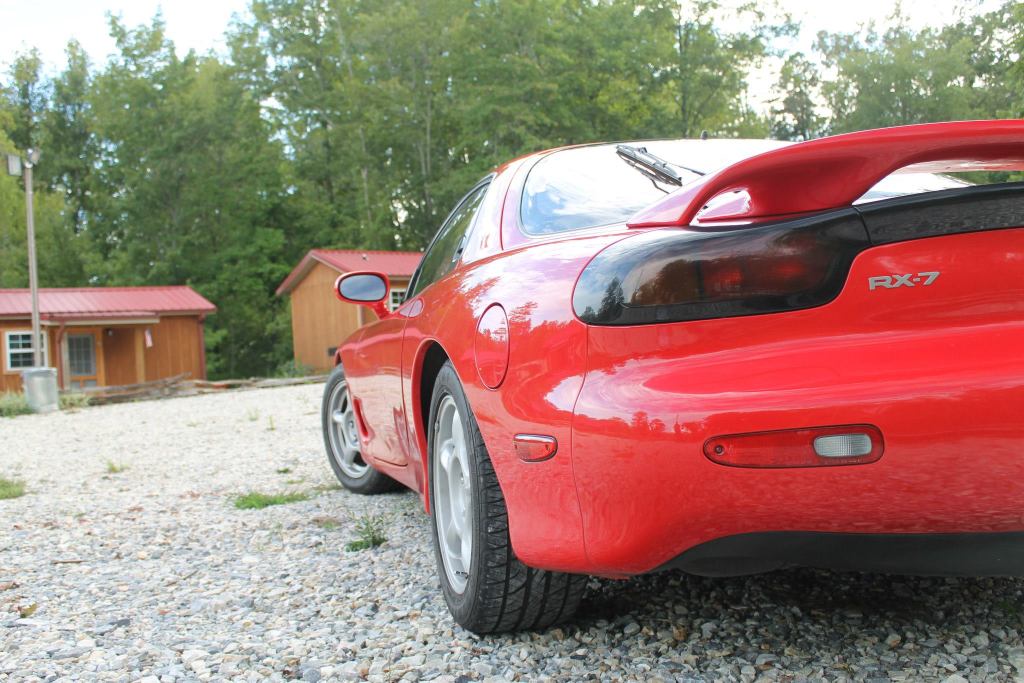
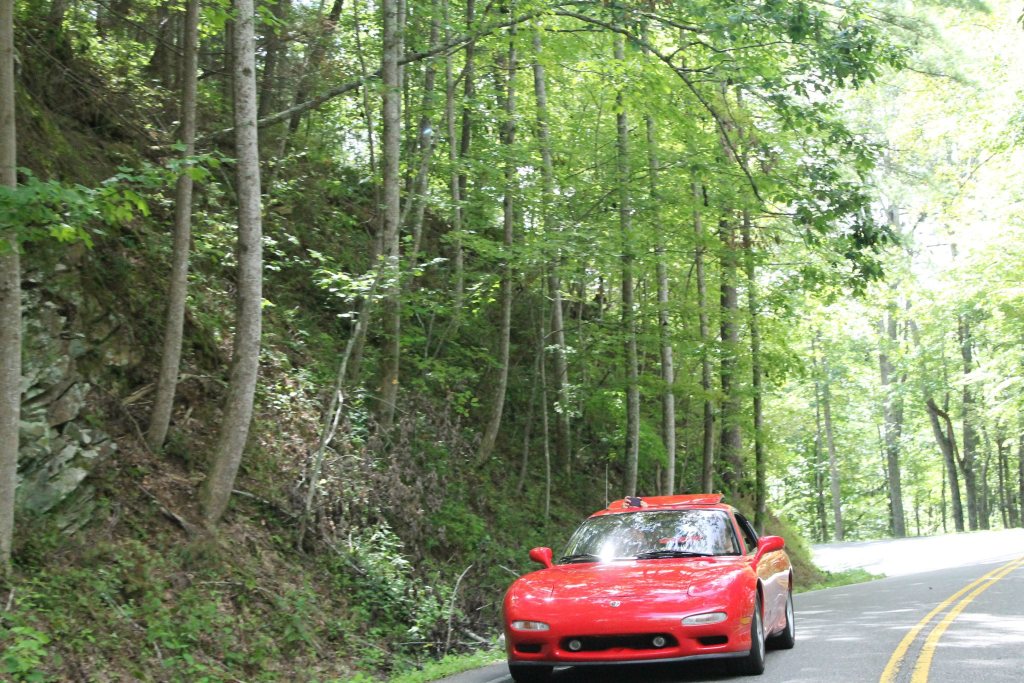
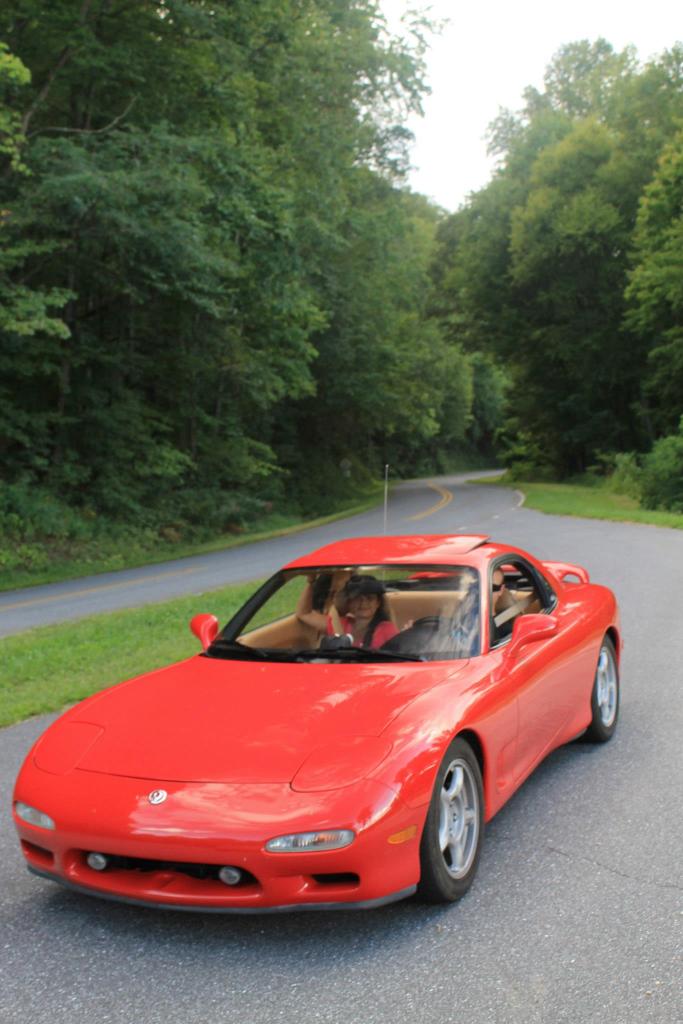
All my cell phone pictures don't do it true justice :P
Here are some nice HQ pics from Tail of the Dragon when my two buddies and I went.

Thank you for the comments
Here are some nice HQ pics from Tail of the Dragon when my two buddies and I went.
Thank you for the comments
Trending Topics

Thread Starter
Joined: Feb 2010
Posts: 1,105
Likes: 118
From: Sacramento, Ca
Nice eye. Funny thing about that though. On my old tensioner the lip was on the inboard side. I then went to change the belts and screwed up the tensioner bracket threads. Looking at the picture of the NEW tensioner, that is how it came put together from the factory. That is a new idler and everything. When I installed it I reversed it so it was like my old tensioner. It then proceeded to grind away about 1mm of my belt and leave it all over my tensioner. So when I went to rebuild my pump, I put it back to the way it was from the factory. The belt does not rub up on the lip when it is installed with the lip outboard.
Thanks for the kind words,
Matt

Rotarymadness
Joined: Jul 2010
Posts: 57
Likes: 0
From: florida
Nice work. I am working on my 93 rx7 touring. I am learning how to do my own work. I have been worked over by many thiefs here in Orlando, Fl that call themeselves rotary mechanics. It feels good when you do your own work. At least you know you did it right. Once again nice work. By the way I see you are in the military, Thank you for your service.

[QUOTE\]New fuel filter. Installed in the OEM location. Only little girls relocate.[/QUOTE]
My thoughts exactly.
Glad my old R1 spoiler made it to you; it looks good on your car. If that is original paint on the rest of the car, that car must have been pampered. GOOD FIND!
My thoughts exactly.
Glad my old R1 spoiler made it to you; it looks good on your car. If that is original paint on the rest of the car, that car must have been pampered. GOOD FIND!
Thread Starter
Joined: Feb 2010
Posts: 1,105
Likes: 118
From: Sacramento, Ca
Nice work. I am working on my 93 rx7 touring. I am learning how to do my own work. I have been worked over by many thiefs here in Orlando, Fl that call themeselves rotary mechanics. It feels good when you do your own work. At least you know you did it right. Once again nice work. By the way I see you are in the military, Thank you for your service.
[QUOTE\]New fuel filter. Installed in the OEM location. Only little girls relocate.
My thoughts exactly.
Glad my old R1 spoiler made it to you; it looks good on your car. If that is original paint on the rest of the car, that car must have been pampered. GOOD FIND!
My thoughts exactly.
Glad my old R1 spoiler made it to you; it looks good on your car. If that is original paint on the rest of the car, that car must have been pampered. GOOD FIND!
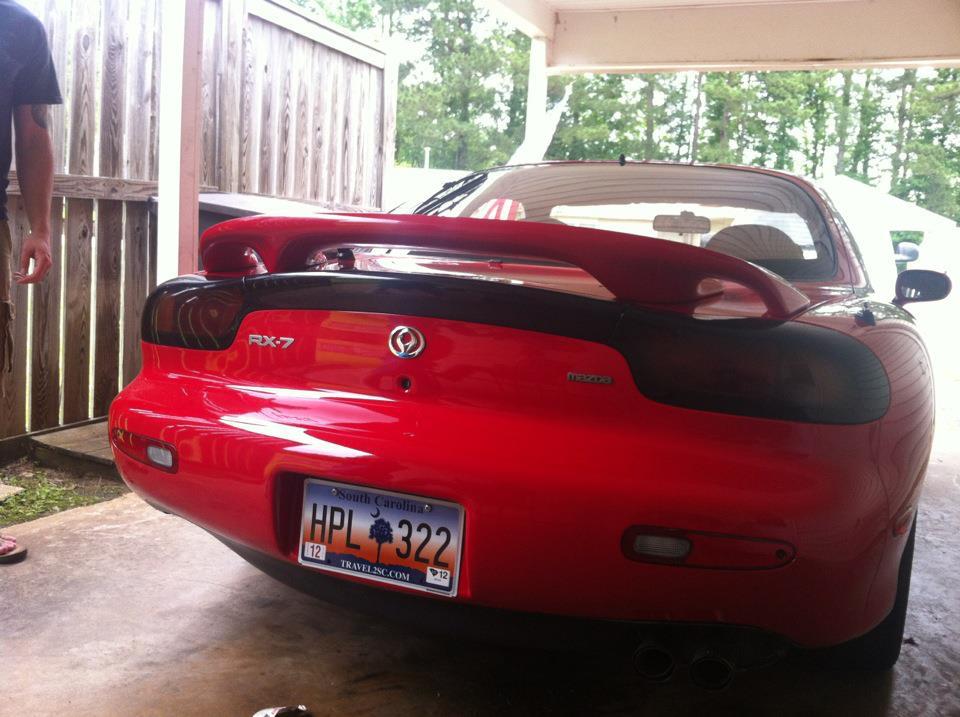
I promised you pictures and I totally forgot to give them to you! Well, they're posted now
The spoiler needed a bit of love, but it got cleaned up, touched up, and mounted up and looks great. The paint is also supposedly original. The previous owner told me it was repainted by the factory for the recall for flaky paint. Since then its been garaged and pampered Thanks for the comments!
Matt
Last edited by Mrmatt3465; Dec 22, 2012 at 08:42 PM.


Thread Starter
Joined: Feb 2010
Posts: 1,105
Likes: 118
From: Sacramento, Ca
Thank you for the comments.
Here is my current plan for upgrades/upkeep:
I seem to have the habit of missing 3rd and hitting fifth. My s2k buddy drove my 7 and commented on the slop in the shifter. I had never noticed it before. After some research, it appears the 93s have the aluminum driver's side mount that tends to annihilate itself. Without looking at my mounts, I jumped on a set of IRP mounts because the deal was too good to pass up. I'm also saving for a banzai racing transmission crossmember as well as new oem shifter bushings. My shifter rattles in gear which leads me to believe that my shifter bushings are shot.
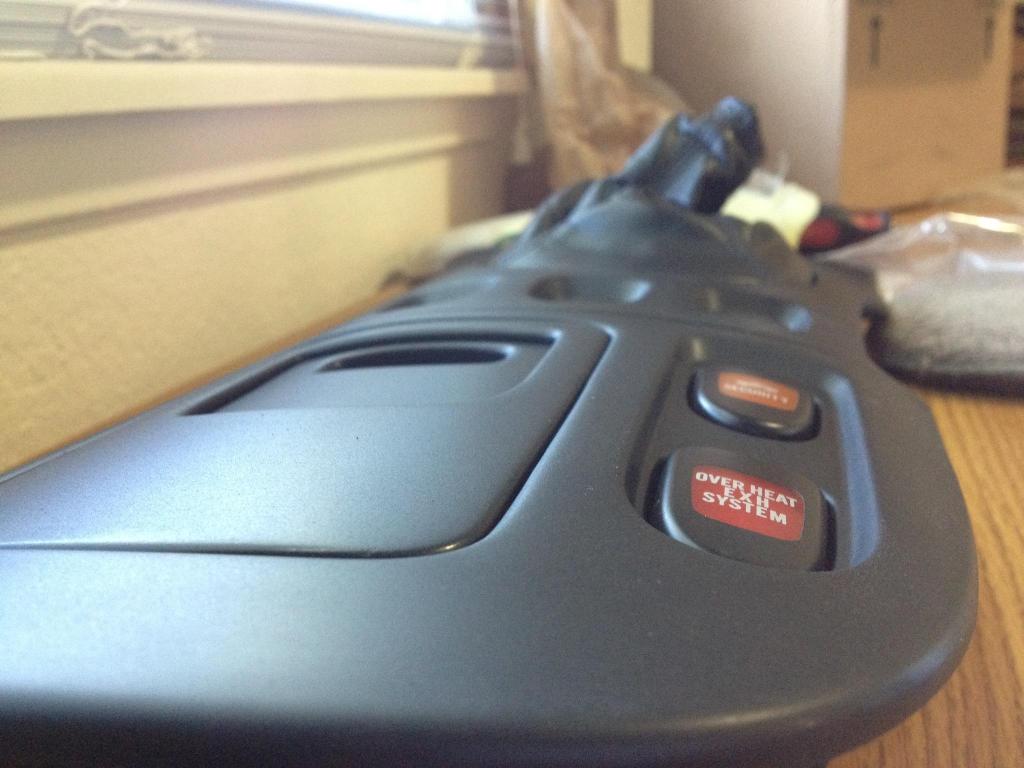
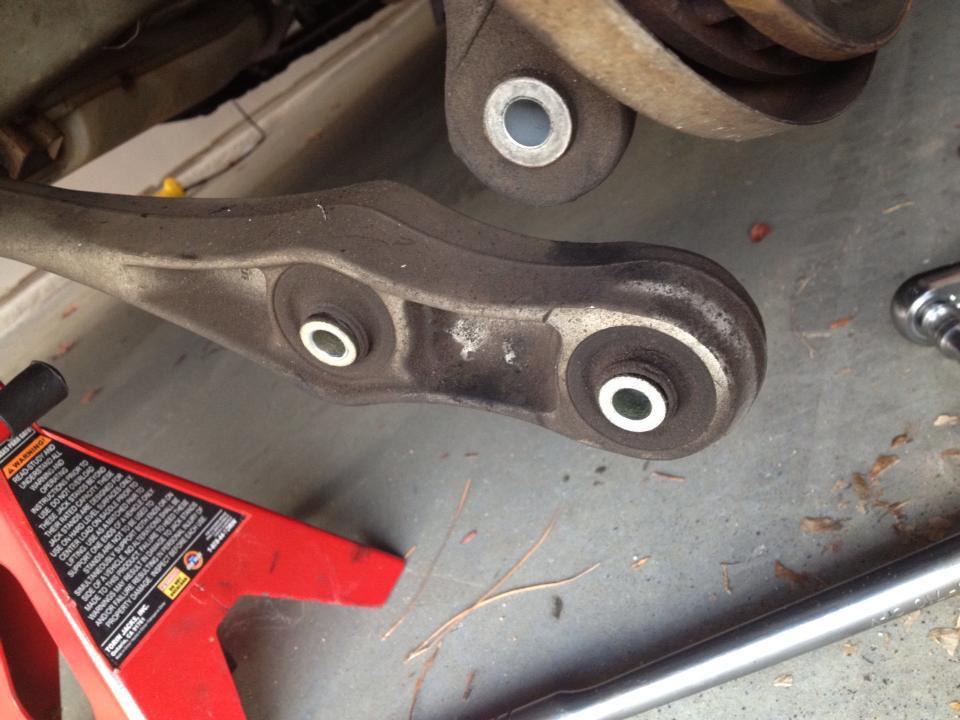
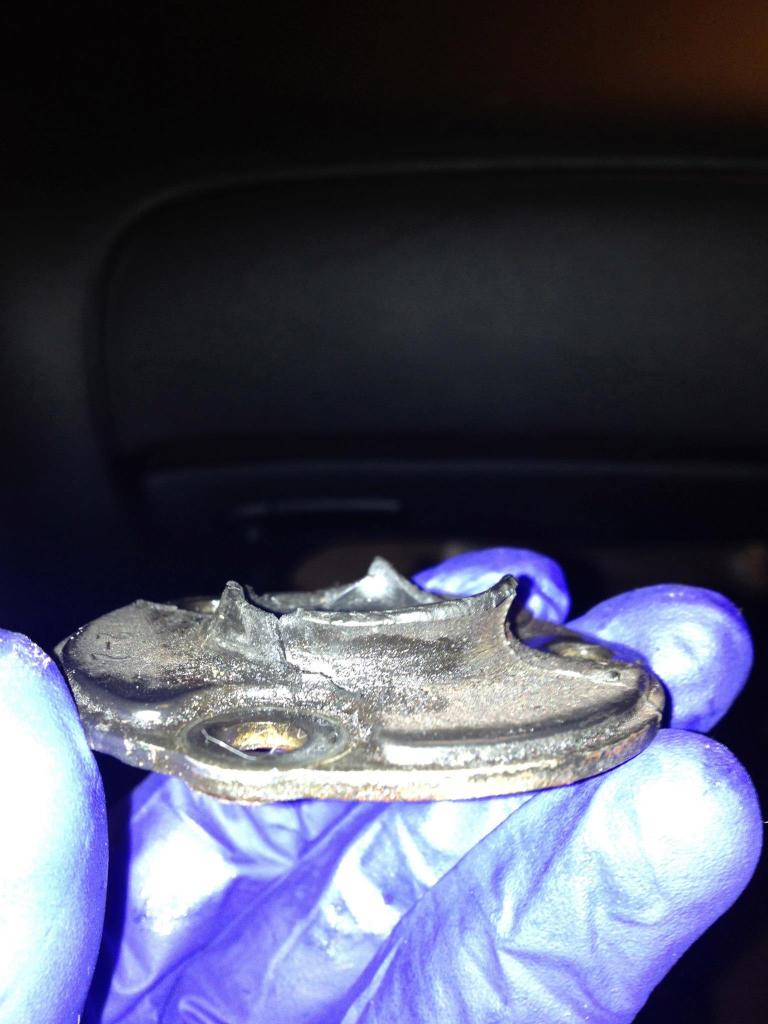
I also went to inspect my drivers side mount today(from what I can see its fine) and noticed a leak. It seems it's the black gooey isolator from my knock sensor. It's helps isolate erroneous knock detection. Naturally a new oem one will be on order. With the purchase of the motor mounts, I researched the mount arms further and opted for using a modified aluminum arm over a steel one. There really is no reason to go with two steel ones. It APPEARS that the arms are interchangeable left and right, however I believe there is a key difference in a passenger steel mount and a true drivers mount. I believe the key is the small nub that helps support the oil pan when the arm mounts up. The passenger side mount does not have this nub and I believe is the cause for the infamous oil pan leak around the motor mount. By swapping to a modified arm and carefully and evenly removing and replacing the arm, I hope to disarm the oil pan leak trend and disprove a few things.
More updates to come next month as this is when I plan to make my purchases and further my maintenance.
Matt
Here is my current plan for upgrades/upkeep:
I seem to have the habit of missing 3rd and hitting fifth. My s2k buddy drove my 7 and commented on the slop in the shifter. I had never noticed it before. After some research, it appears the 93s have the aluminum driver's side mount that tends to annihilate itself. Without looking at my mounts, I jumped on a set of IRP mounts because the deal was too good to pass up. I'm also saving for a banzai racing transmission crossmember as well as new oem shifter bushings. My shifter rattles in gear which leads me to believe that my shifter bushings are shot.
I also went to inspect my drivers side mount today(from what I can see its fine) and noticed a leak. It seems it's the black gooey isolator from my knock sensor. It's helps isolate erroneous knock detection. Naturally a new oem one will be on order. With the purchase of the motor mounts, I researched the mount arms further and opted for using a modified aluminum arm over a steel one. There really is no reason to go with two steel ones. It APPEARS that the arms are interchangeable left and right, however I believe there is a key difference in a passenger steel mount and a true drivers mount. I believe the key is the small nub that helps support the oil pan when the arm mounts up. The passenger side mount does not have this nub and I believe is the cause for the infamous oil pan leak around the motor mount. By swapping to a modified arm and carefully and evenly removing and replacing the arm, I hope to disarm the oil pan leak trend and disprove a few things.
More updates to come next month as this is when I plan to make my purchases and further my maintenance.
Matt
Last edited by Mrmatt3465; Dec 29, 2012 at 06:42 PM.

Joined: Mar 2001
Posts: 30,814
Likes: 655
From: FL-->NJ/NYC again!
Lookin' good Matt
As someone who has probably relocated 50 FD fuel filters over the years, I must take offense to your girly comment

I notice you moved from dirty hands to wearing nitrile gloves as I moved through all the pics
Btw, you'll notice a HUGE improvement moving from the tires the car came with to the Star Specs or RE-11s, especially on a road like the Tail of the Dragon
As someone who has probably relocated 50 FD fuel filters over the years, I must take offense to your girly comment
I notice you moved from dirty hands to wearing nitrile gloves as I moved through all the pics
Btw, you'll notice a HUGE improvement moving from the tires the car came with to the Star Specs or RE-11s, especially on a road like the Tail of the Dragon
Thread Starter
Joined: Feb 2010
Posts: 1,105
Likes: 118
From: Sacramento, Ca
Lookin' good Matt
As someone who has probably relocated 50 FD fuel filters over the years, I must take offense to your girly comment
I notice you moved from dirty hands to wearing nitrile gloves as I moved through all the pics
Btw, you'll notice a HUGE improvement moving from the tires the car came with to the Star Specs or RE-11s, especially on a road like the Tail of the Dragon
I started wearing gloves because I hate getting dirty. I'm kinda surprised I didn't wear em more often. I wear them all the time at work so maybe I felt more free without them :P I guess I don't have a problem with the fuel filter because I'm 100% used to working in cramped places as well. I can't wait to grab some new tires as well. I really want to get some RPF1s and get a 255/40 setup on all 4 corners
As for some form of update, I purchased the shifter bushings and installed them. As I was installing them, it turns out my rubber boots were annihilated. I went ahead and got some new ones on order. I also took a video of my shifter play before and I'll take another after. If anyone is going to do shifter bushings, I HIGHLY recommend at LEAST getting the new boot that bolts to the transmission. It's like $38 which seems absurd but it'll keep the dust off of your fresh grease on your shifter
Costs:
Shifter bushings ~$34
Rubber boots ~$90 [ouch right?]
Matt
Thread Starter
Joined: Feb 2010
Posts: 1,105
Likes: 118
From: Sacramento, Ca
Since threads are useless without pics.
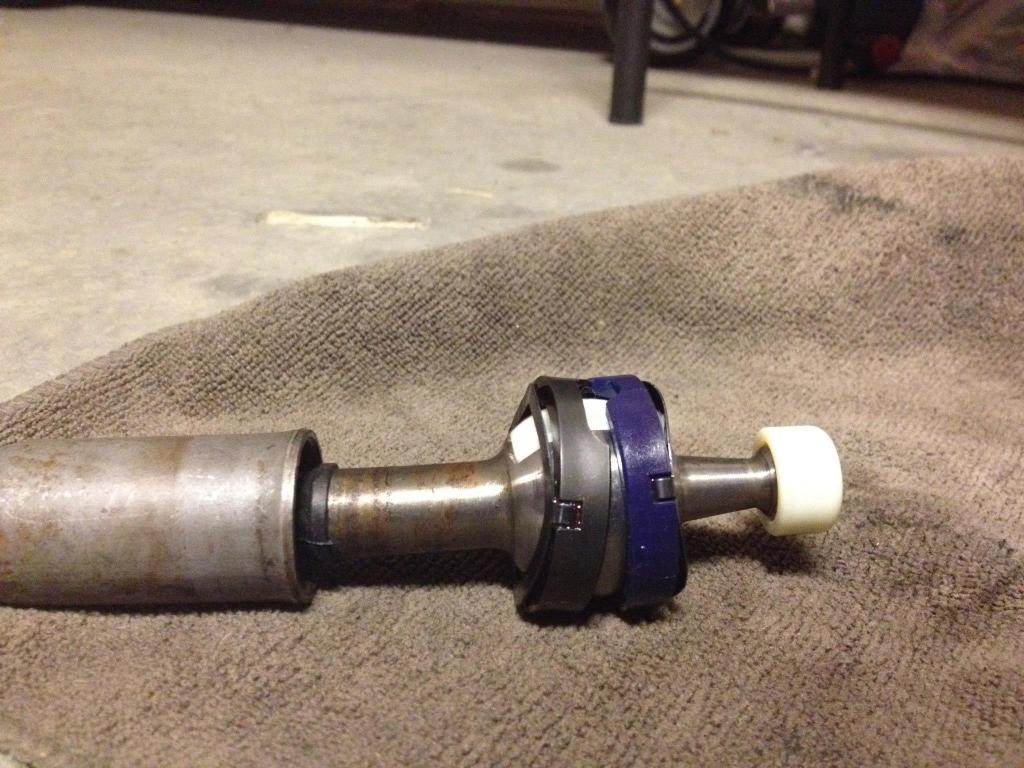
Here is what my shift boots looked like after 20 years and ~44,000 mi.

The one that bolts to the transmission was torn in half. The upper part of the boot was still attached to shifter. These boots are important as they'll keep dust out of your nice, freshly greased bushings. While I was in there I also changed the shift case oil with some fresh amsoil. I had some issues trying to decipher exactly how much oil was supposed to be in the shift case. Mazdatrix.com has a nice FAQ that says it has to be above the shift rod. So people aren't confused by this I'll decipher it. When I changed my shift case oil I pumped the old fluid out with a fluid pump and then measured 80-95cc [as per FSM] which turns out to be a little less than half a cup. If you look inside you can see the box where the shift seat seats. That box is attached to a rod that shifts your transmission. 80-95cc of tranny fluid will submerge that rod maybe 2 mm deep. So if you lazy guys wanna eyeball your fluid, that's the way to do it.
Here is also the order of the shift bushings. And don't worry.

I greased it :P As per FSM, grease the inside and outside of the shift seat and the ball joint area.
When I get the new boots I'll post before and after shift play results as well as a review of how it feels.
Matt
Here is what my shift boots looked like after 20 years and ~44,000 mi.
The one that bolts to the transmission was torn in half. The upper part of the boot was still attached to shifter. These boots are important as they'll keep dust out of your nice, freshly greased bushings. While I was in there I also changed the shift case oil with some fresh amsoil. I had some issues trying to decipher exactly how much oil was supposed to be in the shift case. Mazdatrix.com has a nice FAQ that says it has to be above the shift rod. So people aren't confused by this I'll decipher it. When I changed my shift case oil I pumped the old fluid out with a fluid pump and then measured 80-95cc [as per FSM] which turns out to be a little less than half a cup. If you look inside you can see the box where the shift seat seats. That box is attached to a rod that shifts your transmission. 80-95cc of tranny fluid will submerge that rod maybe 2 mm deep. So if you lazy guys wanna eyeball your fluid, that's the way to do it.
Here is also the order of the shift bushings. And don't worry.
I greased it :P As per FSM, grease the inside and outside of the shift seat and the ball joint area.
When I get the new boots I'll post before and after shift play results as well as a review of how it feels
.Matt

Thread Starter
Joined: Feb 2010
Posts: 1,105
Likes: 118
From: Sacramento, Ca
Updates!
So I ordered a set of IRP mounts and they still have yet to arrive. Not the fault of IRP its the stupid post office. They seem to have misplaced it . So I've been dying to get me some new shoes. My Rx8 buddy gave me a link to just what I was looking for.
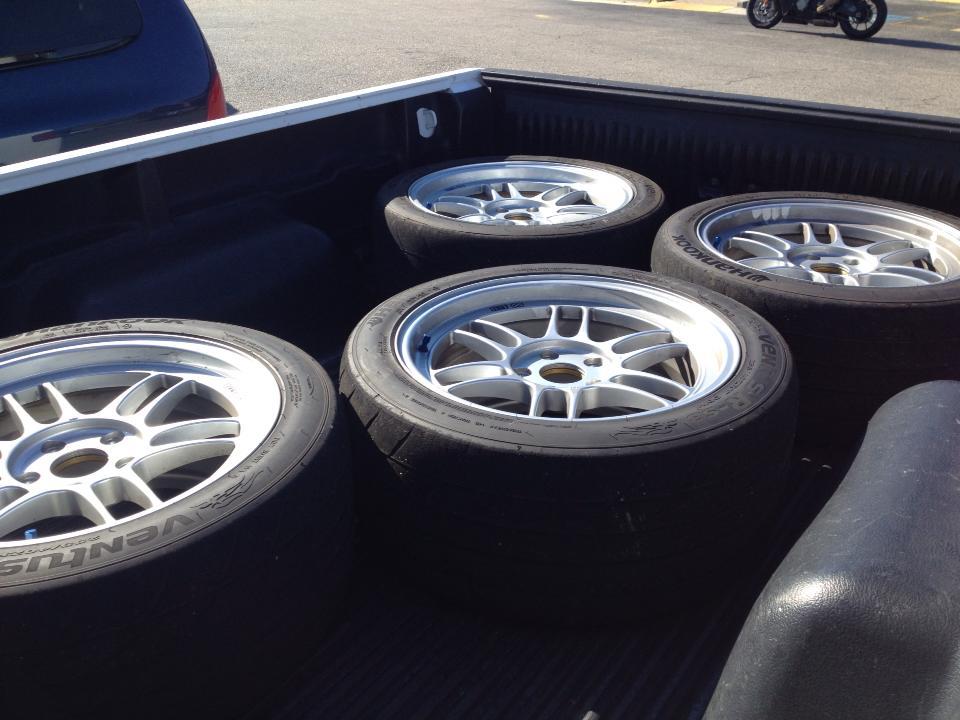
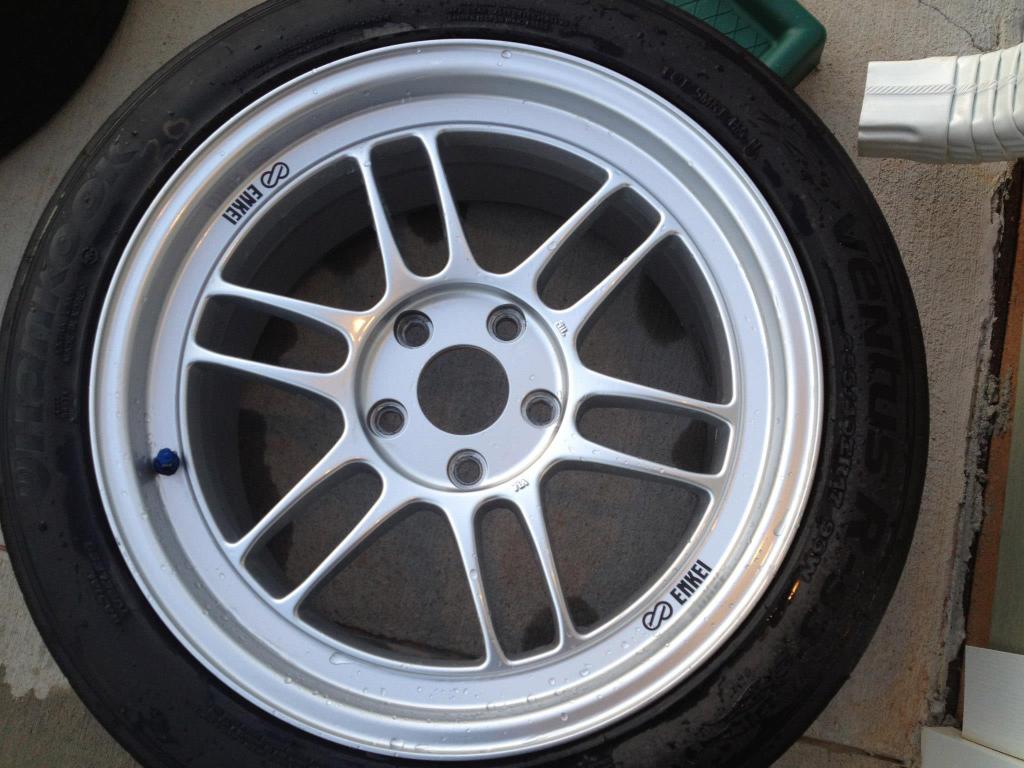
About a 3 hour drive away I picked up a lightly used set of RPF1s in 17x9 +45. They have Hankook RS3's mounted with good tread. They have approximately 3000 miles on them. The seller was an Rx8 owner who only used them for track and auto x. Therefore they are in AWESOME condition. Not a scratch and no curb rash! They seriously are in brand new condition. I dropped him a deposit and picked them up when I returned from my TDY.
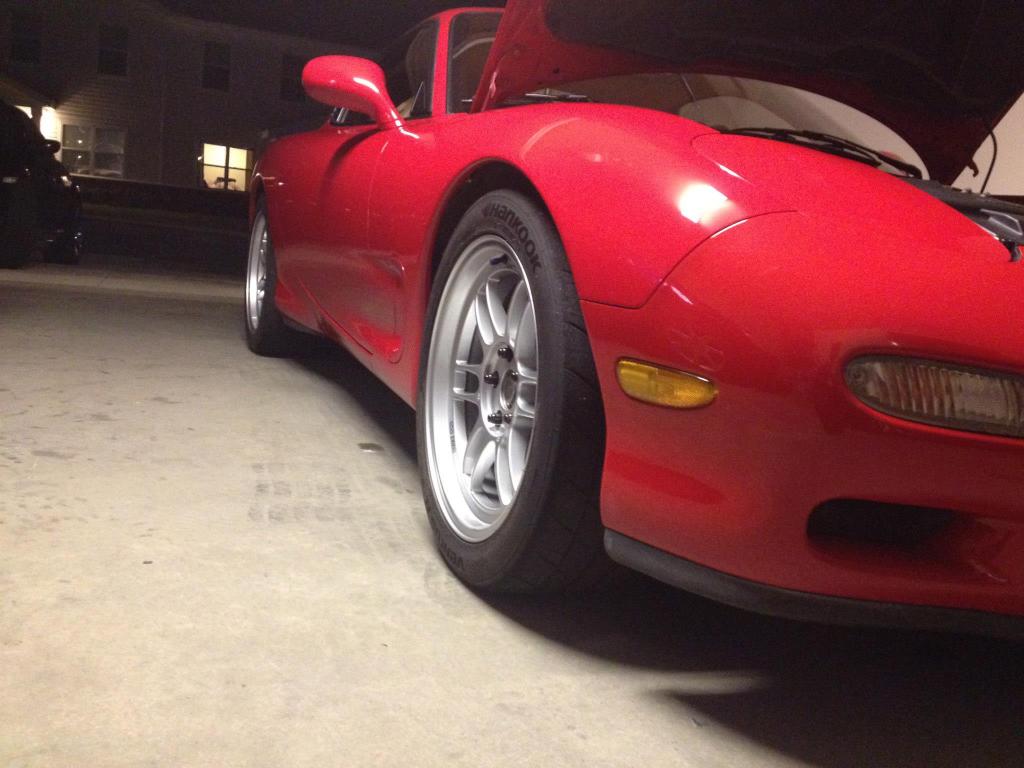

Here's a shot showing the size difference from 225's to 255's.
The RS3's are MUCH grippier than my crappy Sumitomo HTR+. I look forward to being able to push these a bit on an upcoming Deals Gap trip. The new shift boots came in a couple weeks ago and I finished the install of the shifter bushings with new boots. The difference is seriously ASTOUNDING. My shifter is significantly tighter. I believe the new boots played a larger roll in tightening the slop in the shifter than the bushings did. The shifter snaps back into place in neutral and does not flop about. I can now find 3rd every time thanks to my updated bushings and boots. I believe this is because a lot of the slop was reduced and it snaps back to the 3rd/4th shift range when pushing it out of 2nd. This helps guide me right into 3rd with zero effort. If anyone plans on doing shifter bushings, SPEND THE EXTRA $100 AND GET NEW BOOTS.
Its kind of late but tomorrow I will upload the video of before and after shifter bushing install and play amount. I will also report total costs.
Matt
So I ordered a set of IRP mounts and they still have yet to arrive. Not the fault of IRP its the stupid post office. They seem to have misplaced it
. So I've been dying to get me some new shoes. My Rx8 buddy gave me a link to just what I was looking for. About a 3 hour drive away I picked up a lightly used set of RPF1s in 17x9 +45. They have Hankook RS3's mounted with good tread. They have approximately 3000 miles on them. The seller was an Rx8 owner who only used them for track and auto x. Therefore they are in AWESOME condition. Not a scratch and no curb rash! They seriously are in brand new condition. I dropped him a deposit and picked them up when I returned from my TDY.
Here's a shot showing the size difference from 225's to 255's.
The RS3's are MUCH grippier than my crappy Sumitomo HTR+. I look forward to being able to push these a bit on an upcoming Deals Gap trip. The new shift boots came in a couple weeks ago and I finished the install of the shifter bushings with new boots. The difference is seriously ASTOUNDING. My shifter is significantly tighter. I believe the new boots played a larger roll in tightening the slop in the shifter than the bushings did. The shifter snaps back into place in neutral and does not flop about. I can now find 3rd every time thanks to my updated bushings and boots. I believe this is because a lot of the slop was reduced and it snaps back to the 3rd/4th shift range when pushing it out of 2nd. This helps guide me right into 3rd with zero effort. If anyone plans on doing shifter bushings, SPEND THE EXTRA $100 AND GET NEW BOOTS.
Its kind of late but tomorrow I will upload the video of before and after shifter bushing install and play amount. I will also report total costs.
Matt
Thread Starter
Joined: Feb 2010
Posts: 1,105
Likes: 118
From: Sacramento, Ca
Here are the before and after results of the shifter bushings and boots install.
Also here is my pricing update.
Previous Total
$5946.68
Shifter Bushings $43.90
Shifter boots $97.11
Enkei RPF1 w/ tires and hubcentric rings $850
Black locking lugnuts $20
Total $6957.69
Also here is my pricing update.
Previous Total
$5946.68
Shifter Bushings $43.90
Shifter boots $97.11
Enkei RPF1 w/ tires and hubcentric rings $850
Black locking lugnuts $20
Total $6957.69