
Mannykillers/ AAPARKAH Street/time Attack/Drift Build (heavy Pics) #Thisisthewolf


Absolutely!! Blue
Me and my boy Nam have been nailing em!! Almost went again this morning but I've gotta finish this engine!!! WOOO!!!! I'll be at all FD rounds with Mike!!!
Just in case I don't like how the 4-port is responding.....or If I can't seem to get it to work the way I want. More of a Back up sort of deal but I figure'd it'd be better to have it and not need it than not have it WHEN i need it as well.
I'm not. But anything is possible if you work hard enough. I'm a firm believer in that. Stop saying "I wish.".... and start taking action. If you want to be rich... then work towards it. Rich can be much more than money though. "Rich" means so much more than funds. Being paid is always nice and it helps..but pull a 12 hour shift Helping a buddy accomplish his dreams is much more rewarding.
Yezzir!! I'd have to make sure but pretty positive it's stroked!! 3.2 It's a Borg Warner EFR 9174 with a 1.05 Yeeeooow!!!!
One's a 4-port and the other is a 3-port. Pretty much just for back up or in case I don't think the 4-port is working any better.
I'm not too worried about the Allen Head Screws
Updates coming in HOT!!!
Teaser!!!

Just in case I don't like how the 4-port is responding.....or If I can't seem to get it to work the way I want. More of a Back up sort of deal but I figure'd it'd be better to have it and not need it than not have it WHEN i need it as well.
I'm not. But anything is possible if you work hard enough. I'm a firm believer in that. Stop saying "I wish.".... and start taking action. If you want to be rich... then work towards it. Rich can be much more than money though. "Rich" means so much more than funds. Being paid is always nice and it helps..but pull a 12 hour shift Helping a buddy accomplish his dreams is much more rewarding.
I'm not too worried about the Allen Head Screws
Updates coming in HOT!!!
Teaser!!!

Full Member
Joined: Jan 2013
Posts: 234
Likes: 0
From: NZ
Seen the engine posts on Instagram. looking good. when do we get any of the secrets lol. joking. stoked it's all coming together. you running turbo blown studs?
next weekend round 1 of formula D? when is your first event with new setup?
next weekend round 1 of formula D? when is your first event with new setup?
Joined: Aug 2004
Posts: 4,785
Likes: 145
From: Colorado Springs, CO
I hope you're right lol. I just swapped out some of those alloy screws for stainless steel because they had a lot of surface rust. As long as they don't rust on the threads and then you need to take them out again you should be alright.
Never heard of PTS, where are they located?
Never heard of PTS, where are they located?
I'm pumped to get all my parts back and the engine together!!! It's currently 100% Complete as a Short Block and spent last night doing accessories and water pump housing etc!!
So Abel has actually made a New Stud Kit that i'm using which has a big improvement to it!!!
This week is Formula Drift and the weekend is the comp yes!!! Mike, Myself, and TJ are headed to Formula D Media Day today.
I'm hoping to have the car on the dyno This next week and following that my first Event!!
I hope you're right lol. I just swapped out some of those alloy screws for stainless steel because they had a lot of surface rust. As long as they don't rust on the threads and then you need to take them out again you should be alright.
Never heard of PTS, where are they located?
Never heard of PTS, where are they located?

Updates real soon!!!

Absolutely!! Blue
I'm not. But anything is possible if you work hard enough. I'm a firm believer in that. Stop saying "I wish.".... and start taking action. If you want to be rich... then work towards it. Rich can be much more than money though. "Rich" means so much more than funds. Being paid is always nice and it helps..but pull a 12 hour shift Helping a buddy accomplish his dreams is much more rewarding.
I'm not. But anything is possible if you work hard enough. I'm a firm believer in that. Stop saying "I wish.".... and start taking action. If you want to be rich... then work towards it. Rich can be much more than money though. "Rich" means so much more than funds. Being paid is always nice and it helps..but pull a 12 hour shift Helping a buddy accomplish his dreams is much more rewarding.
Sorry for the comment in this otherwise great thread but simply could not resist.
Joined: Jul 2013
Posts: 2,596
Likes: 799
From: █▬█ █▄█ █▬█ █▄██▬█ █▄█ █▬█ █▄█
I'm not. But anything is possible if you work hard enough. I'm a firm believer in that. Stop saying "I wish.".... and start taking action. If you want to be rich... then work towards it. Rich can be much more than money though. "Rich" means so much more than funds. Being paid is always nice and it helps..but pull a 12 hour shift Helping a buddy accomplish his dreams is much more rewarding.
Well he may not be rich to his standards but to others it may seem like he has a decent cash flow , and you kinda have to, to be doing these kinds of hobbies, calling out of work to do events, traveling to and from ect.ect. unless you wanna eat ramen everyday of your life.. lol.
We all have our own opinions of rich, it's not always the same as everyone..
We all have our own opinions of rich, it's not always the same as everyone..
Anyone that owns an fd, or any other relatively expensive 20yr old 2 seater with parts that are becoming hard to find should have decent cash flow. Otherwise you aren't prioritizing your life very well.
Anyway, back on topic, moar updates!
Anyway, back on topic, moar updates!
Well he may not be rich to his standards but to others it may seem like he has a decent cash flow , and you kinda have to, to be doing these kinds of hobbies, calling out of work to do events, traveling to and from ect.ect. unless you wanna eat ramen everyday of your life.. lol.
We all have our own opinions of rich, it's not always the same as everyone..
We all have our own opinions of rich, it's not always the same as everyone..
Correct..and I don't necessarily mind much...but with that is what you're implying.. and that's that I am In Fact rich.. Which I won't disagree with...Because I'm very thankful that I'm Rich in Life
More Updates soon as Things have been INSANE these past couple weeks!!!
The TB looks a lot better than I thought it would. But, porting is a picky thing and I still think you'd do better to let a pro handle it. Plus those fancy TB's are bored with larger blades, and you can't do that with a dremmel! Looking forward to more updates.
On the rich thing: I think we all wish we had a couple more bucks to drop in our FD or FD-substitute. Money doesn't have to dictate your state of mind. But, it sure is the way the world works :/
On the rich thing: I think we all wish we had a couple more bucks to drop in our FD or FD-substitute. Money doesn't have to dictate your state of mind. But, it sure is the way the world works :/
Update!!!! "heart of the Wolf build"
I've been hammered here guys!!! But all is well and good!
The week before and After Formula Drift Long Beach Round 1 with Mike....wasssss gnarly!!! Not a moment to blink let alone sleep.
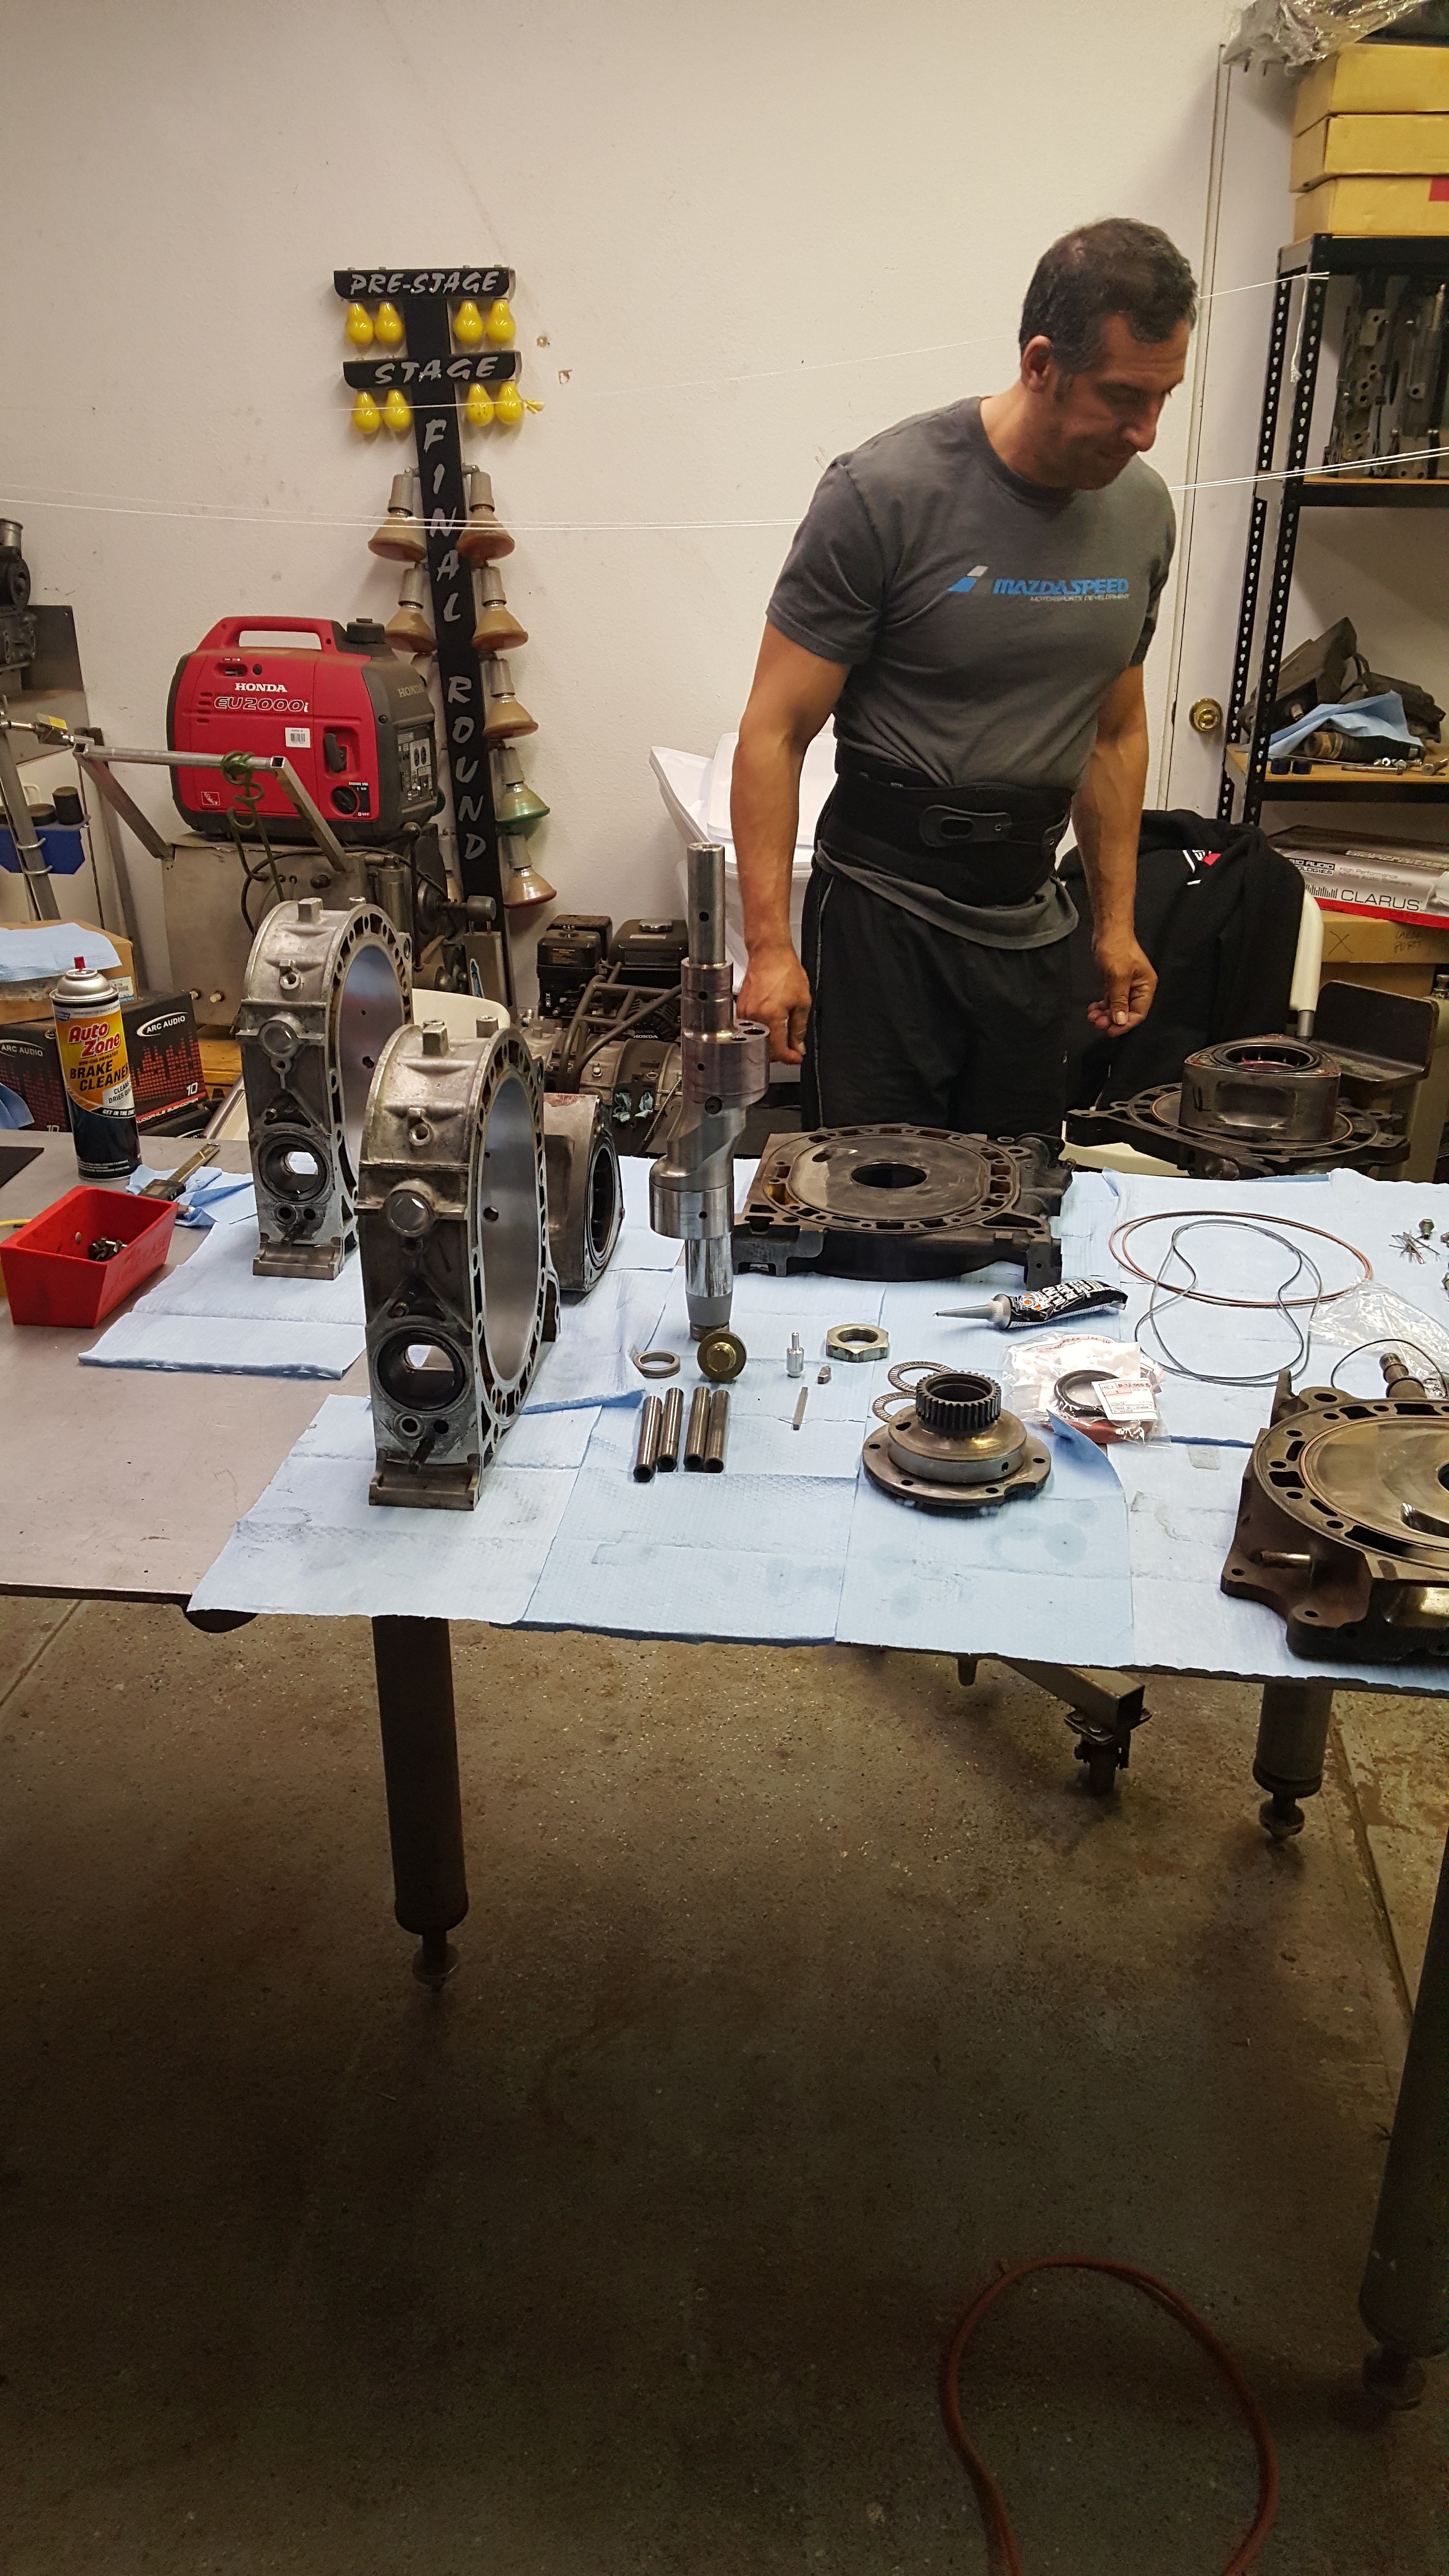
Lets start where I left off...The heart of the wolf build!!
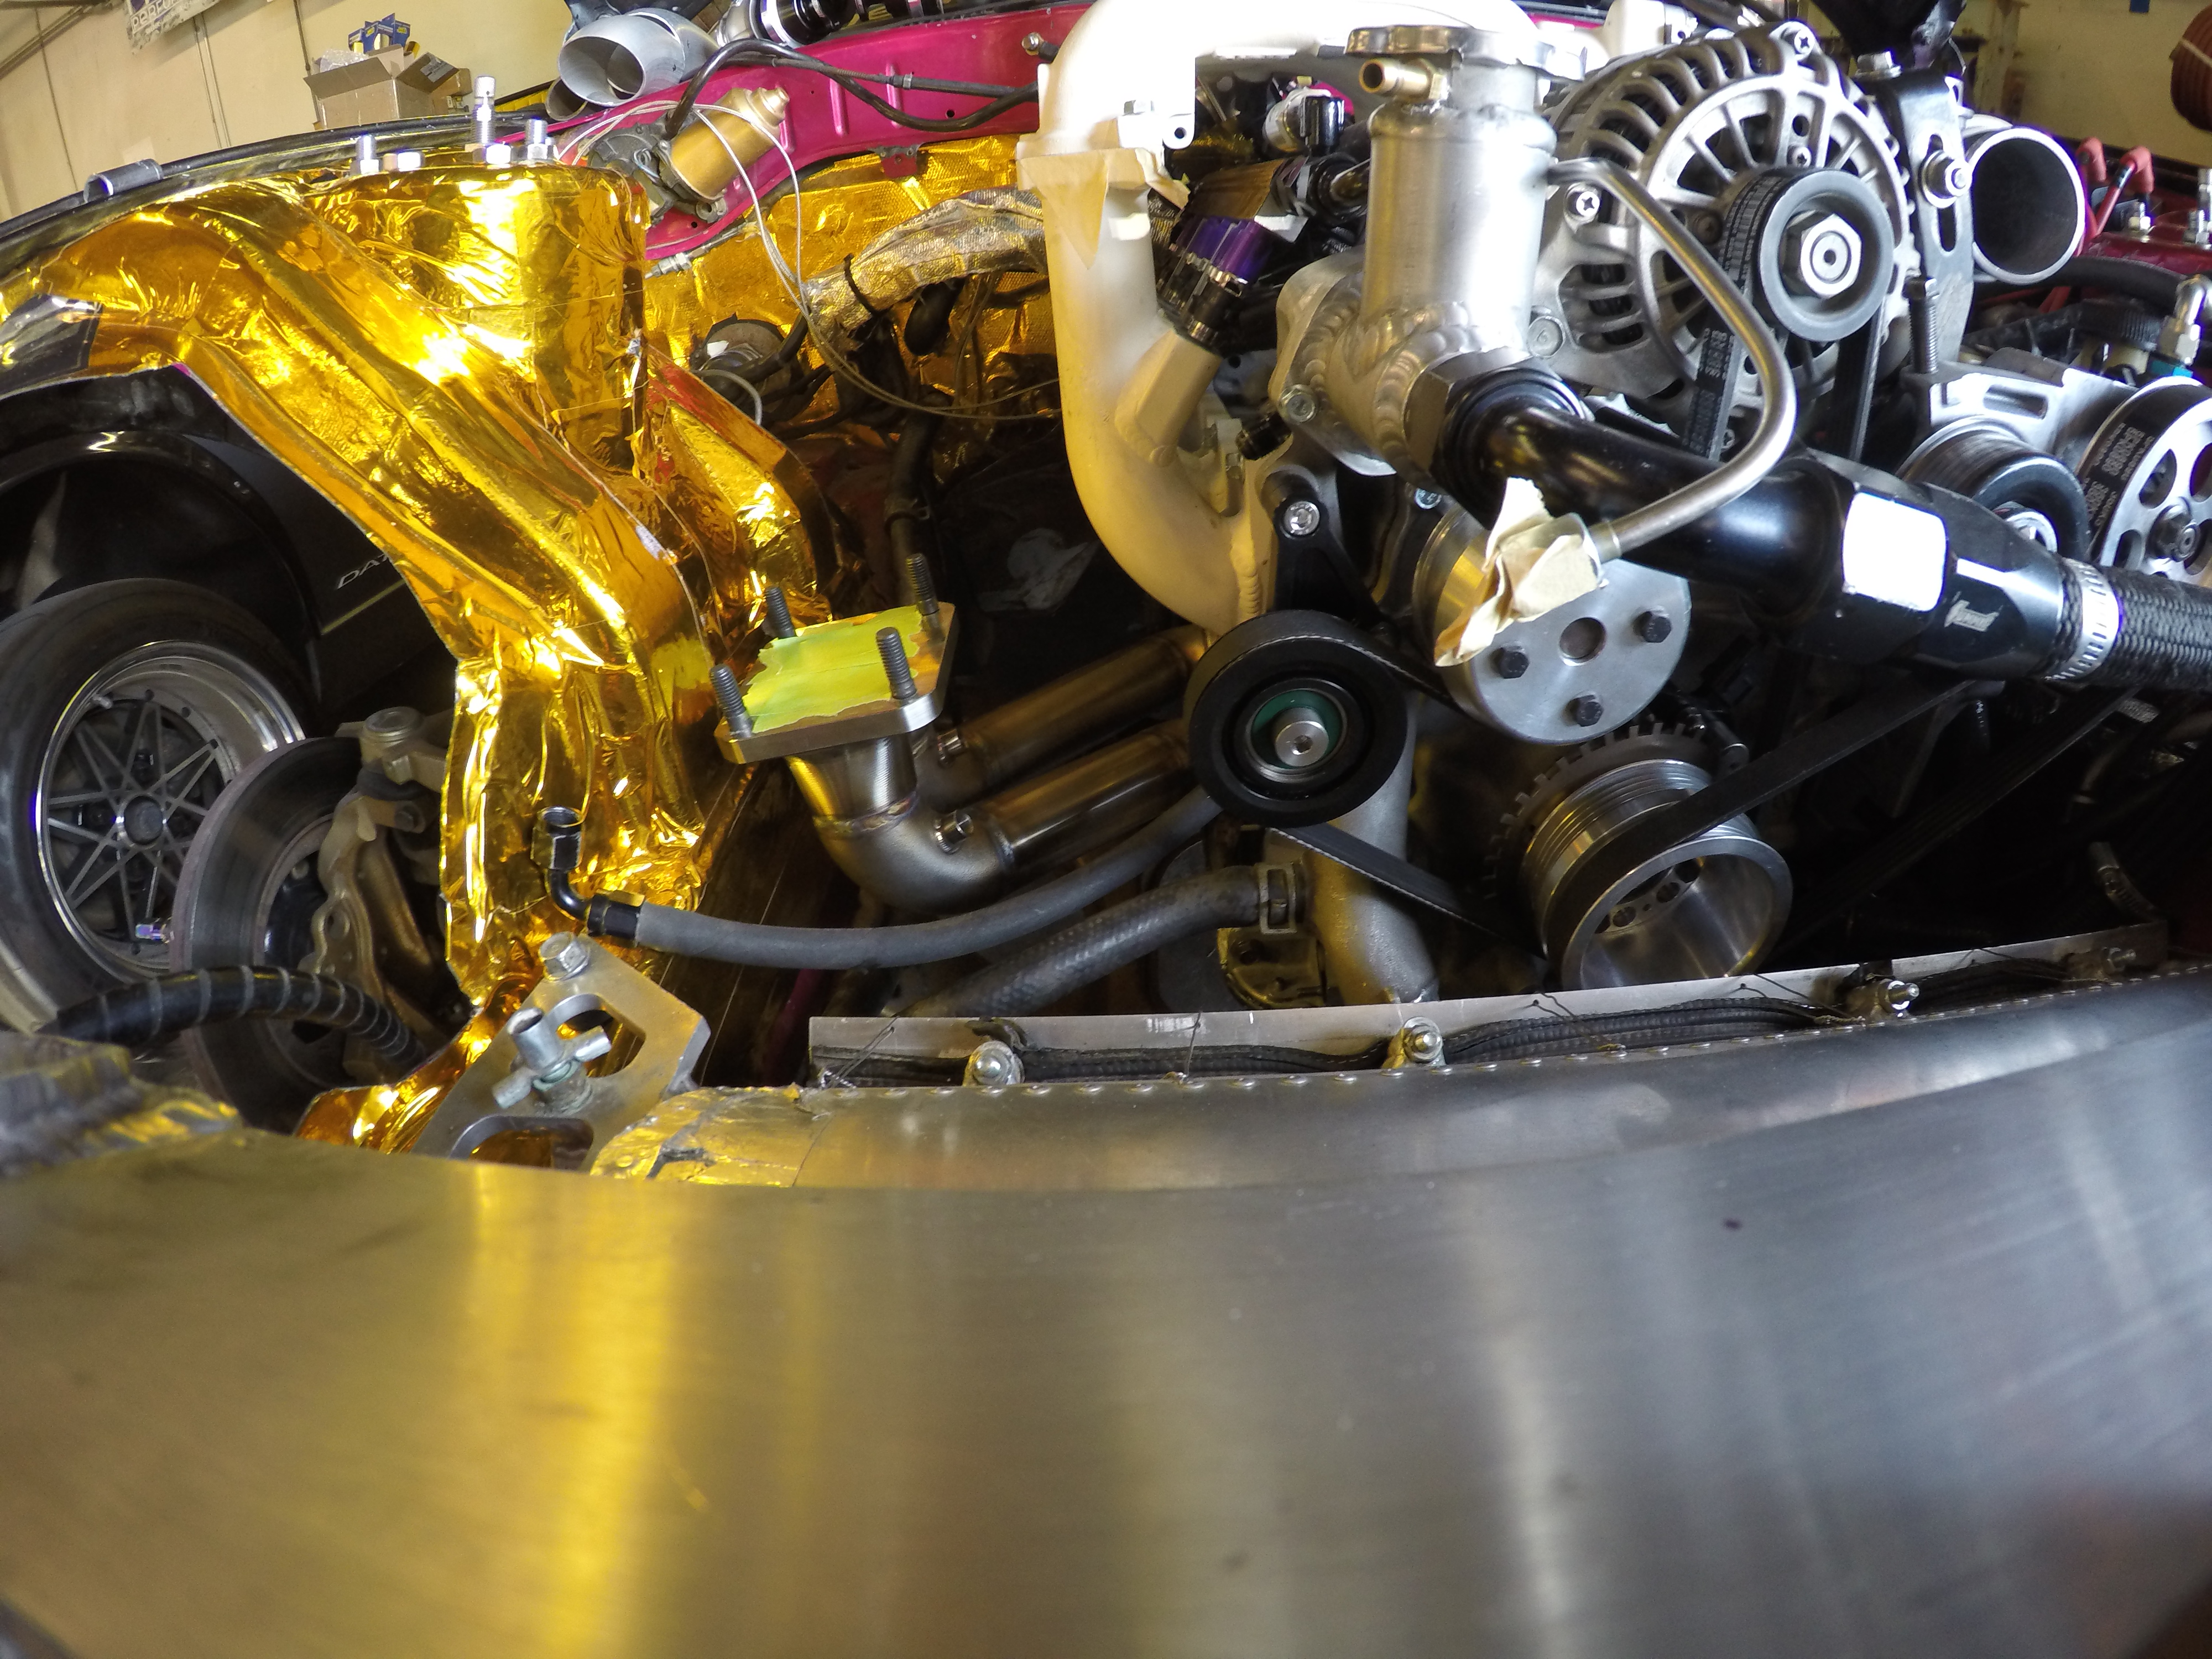
This would mark the second time I've built one of my engines with the man himself.. Abel Ibarra. Since the last build...i can't count how many engines i've helped him put together ..and it's incredible the methodology behind it. Gives "Systematic" a new meaning. Each and every engine is done exactly the same. With no bogus spec sheet. It's all done on the fly...and the end product always shows. Even new parts get cleaned. And when I say clean...I can't really explain to you what exactly that entails..but lets just say that everyone out there who says they can put together an engine in a couple hours..isn't doing it the right way. Every build takes us (2) 8+ hour days. We took our time on The wolfs new heart.
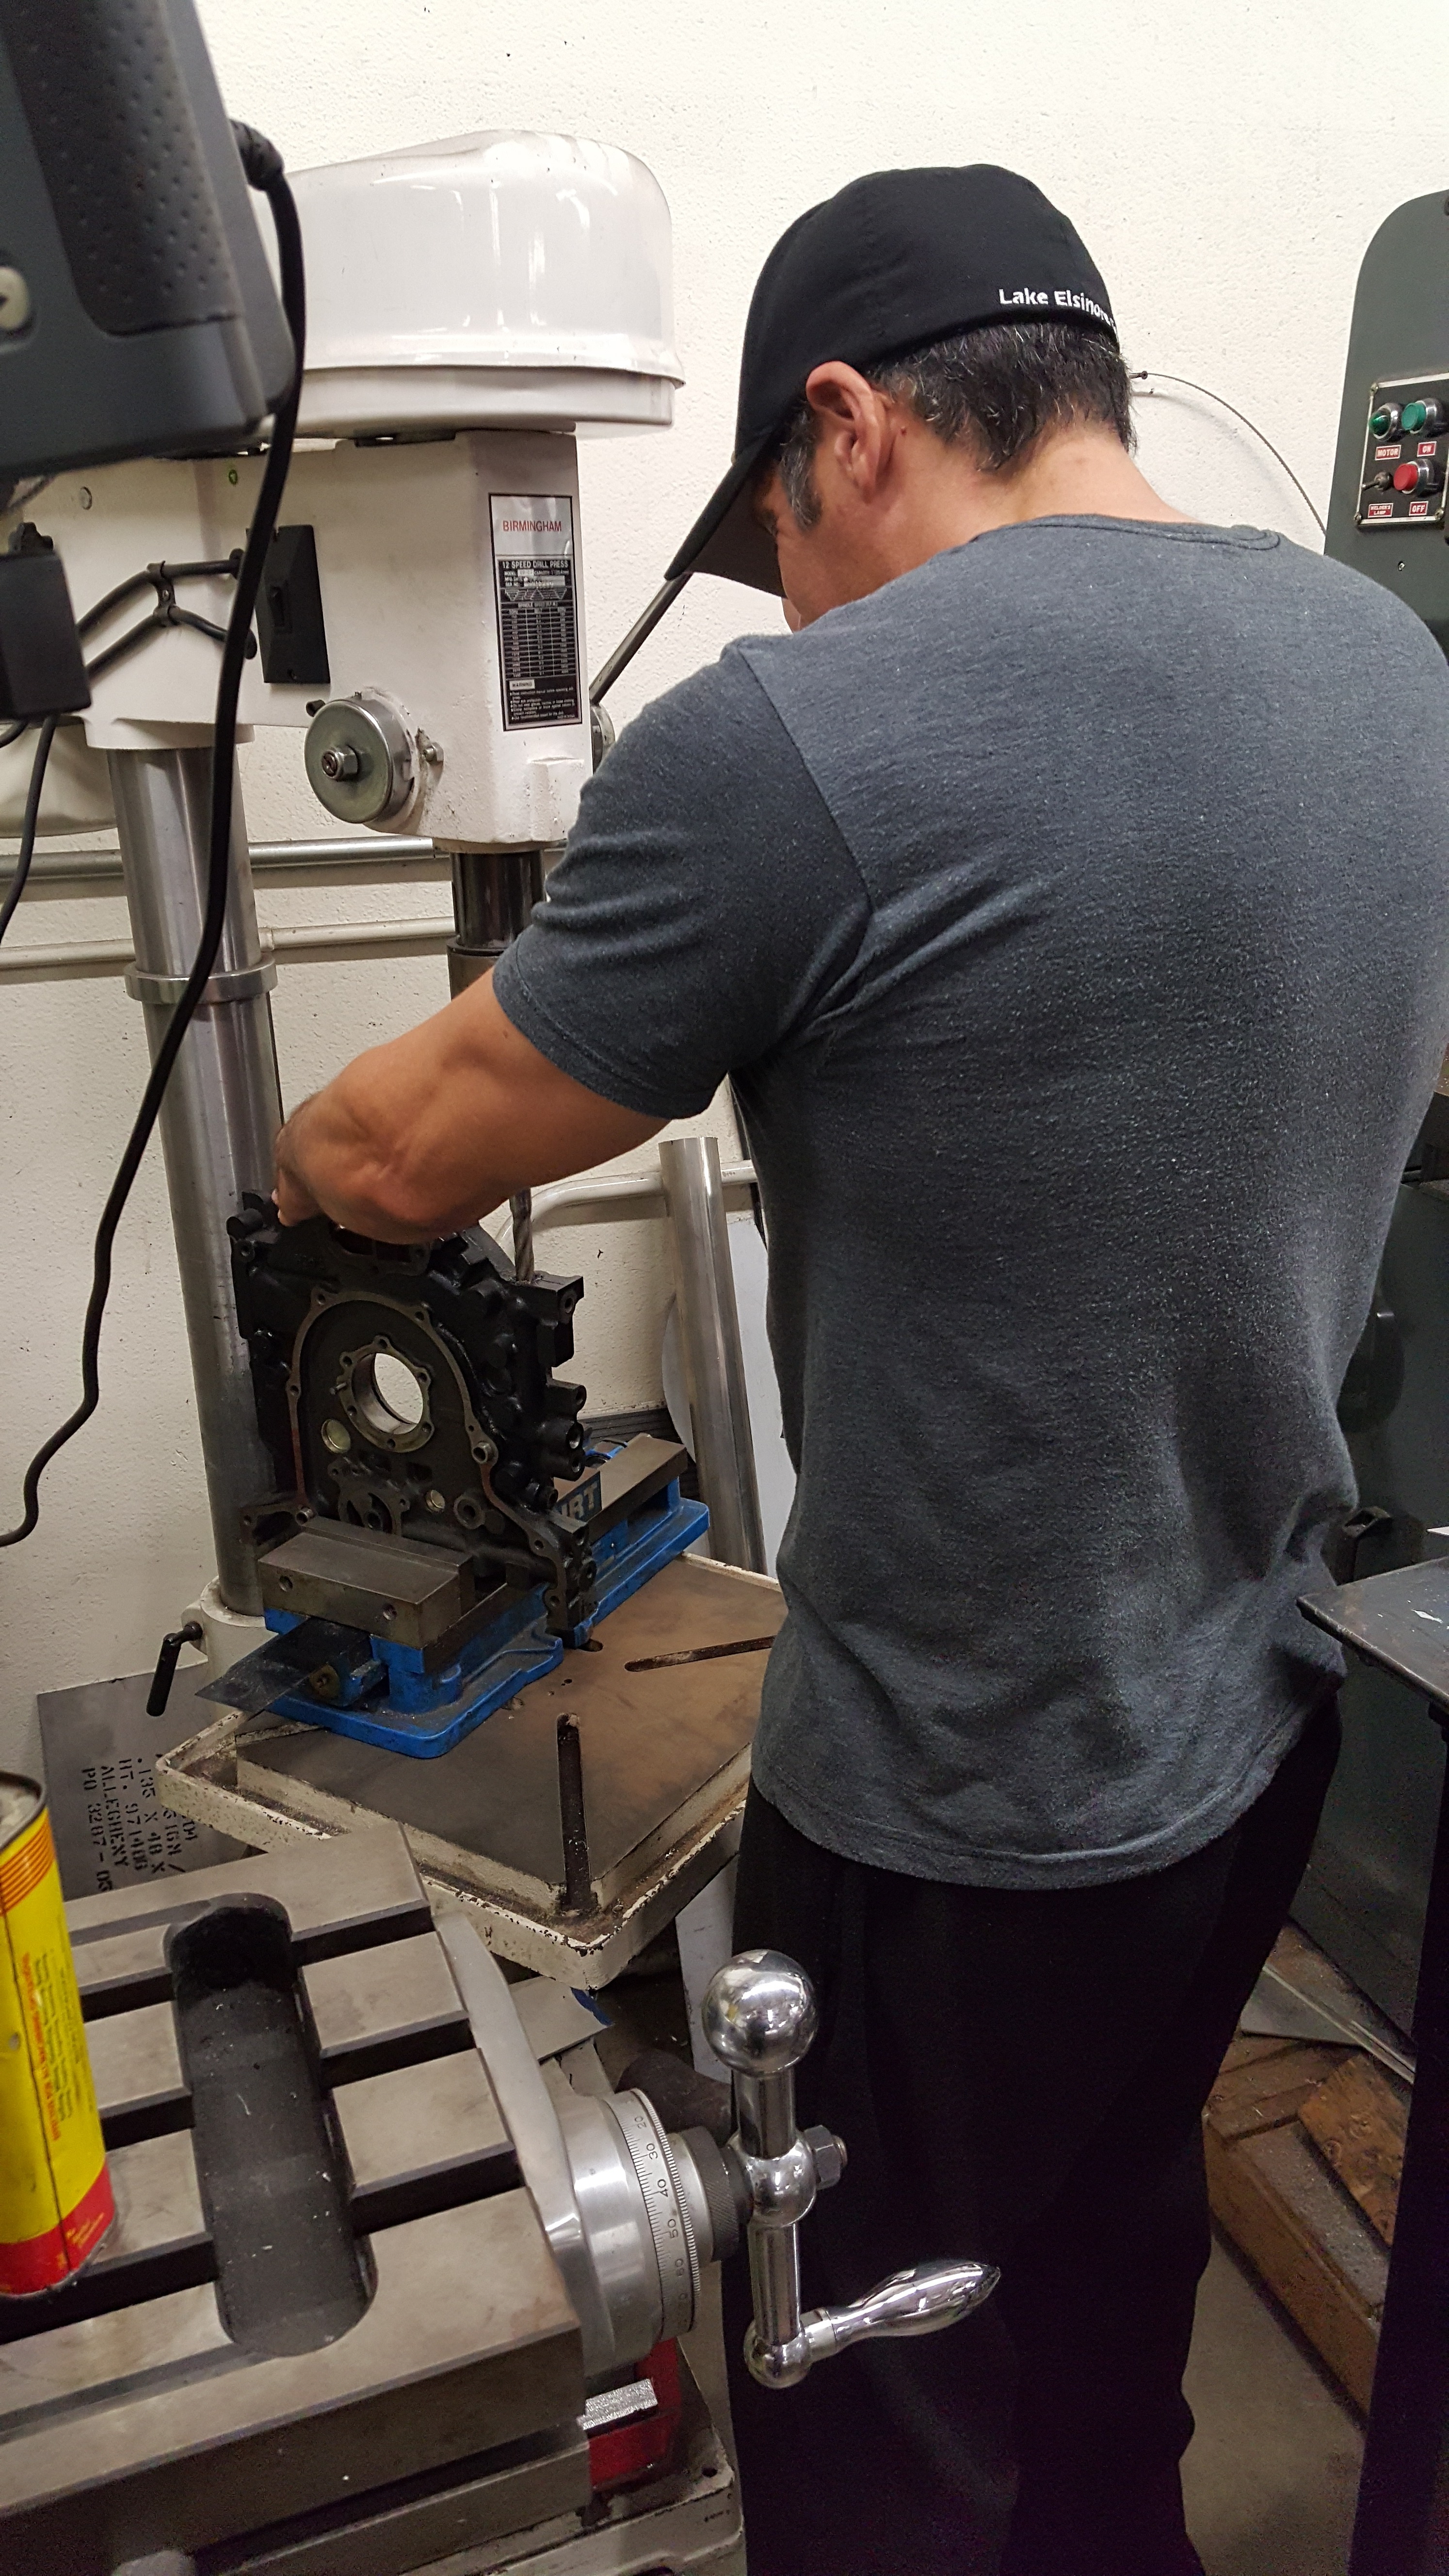
Here's Abel doing a little bit of machining... just a taste of some of the things that keep Race engines running!
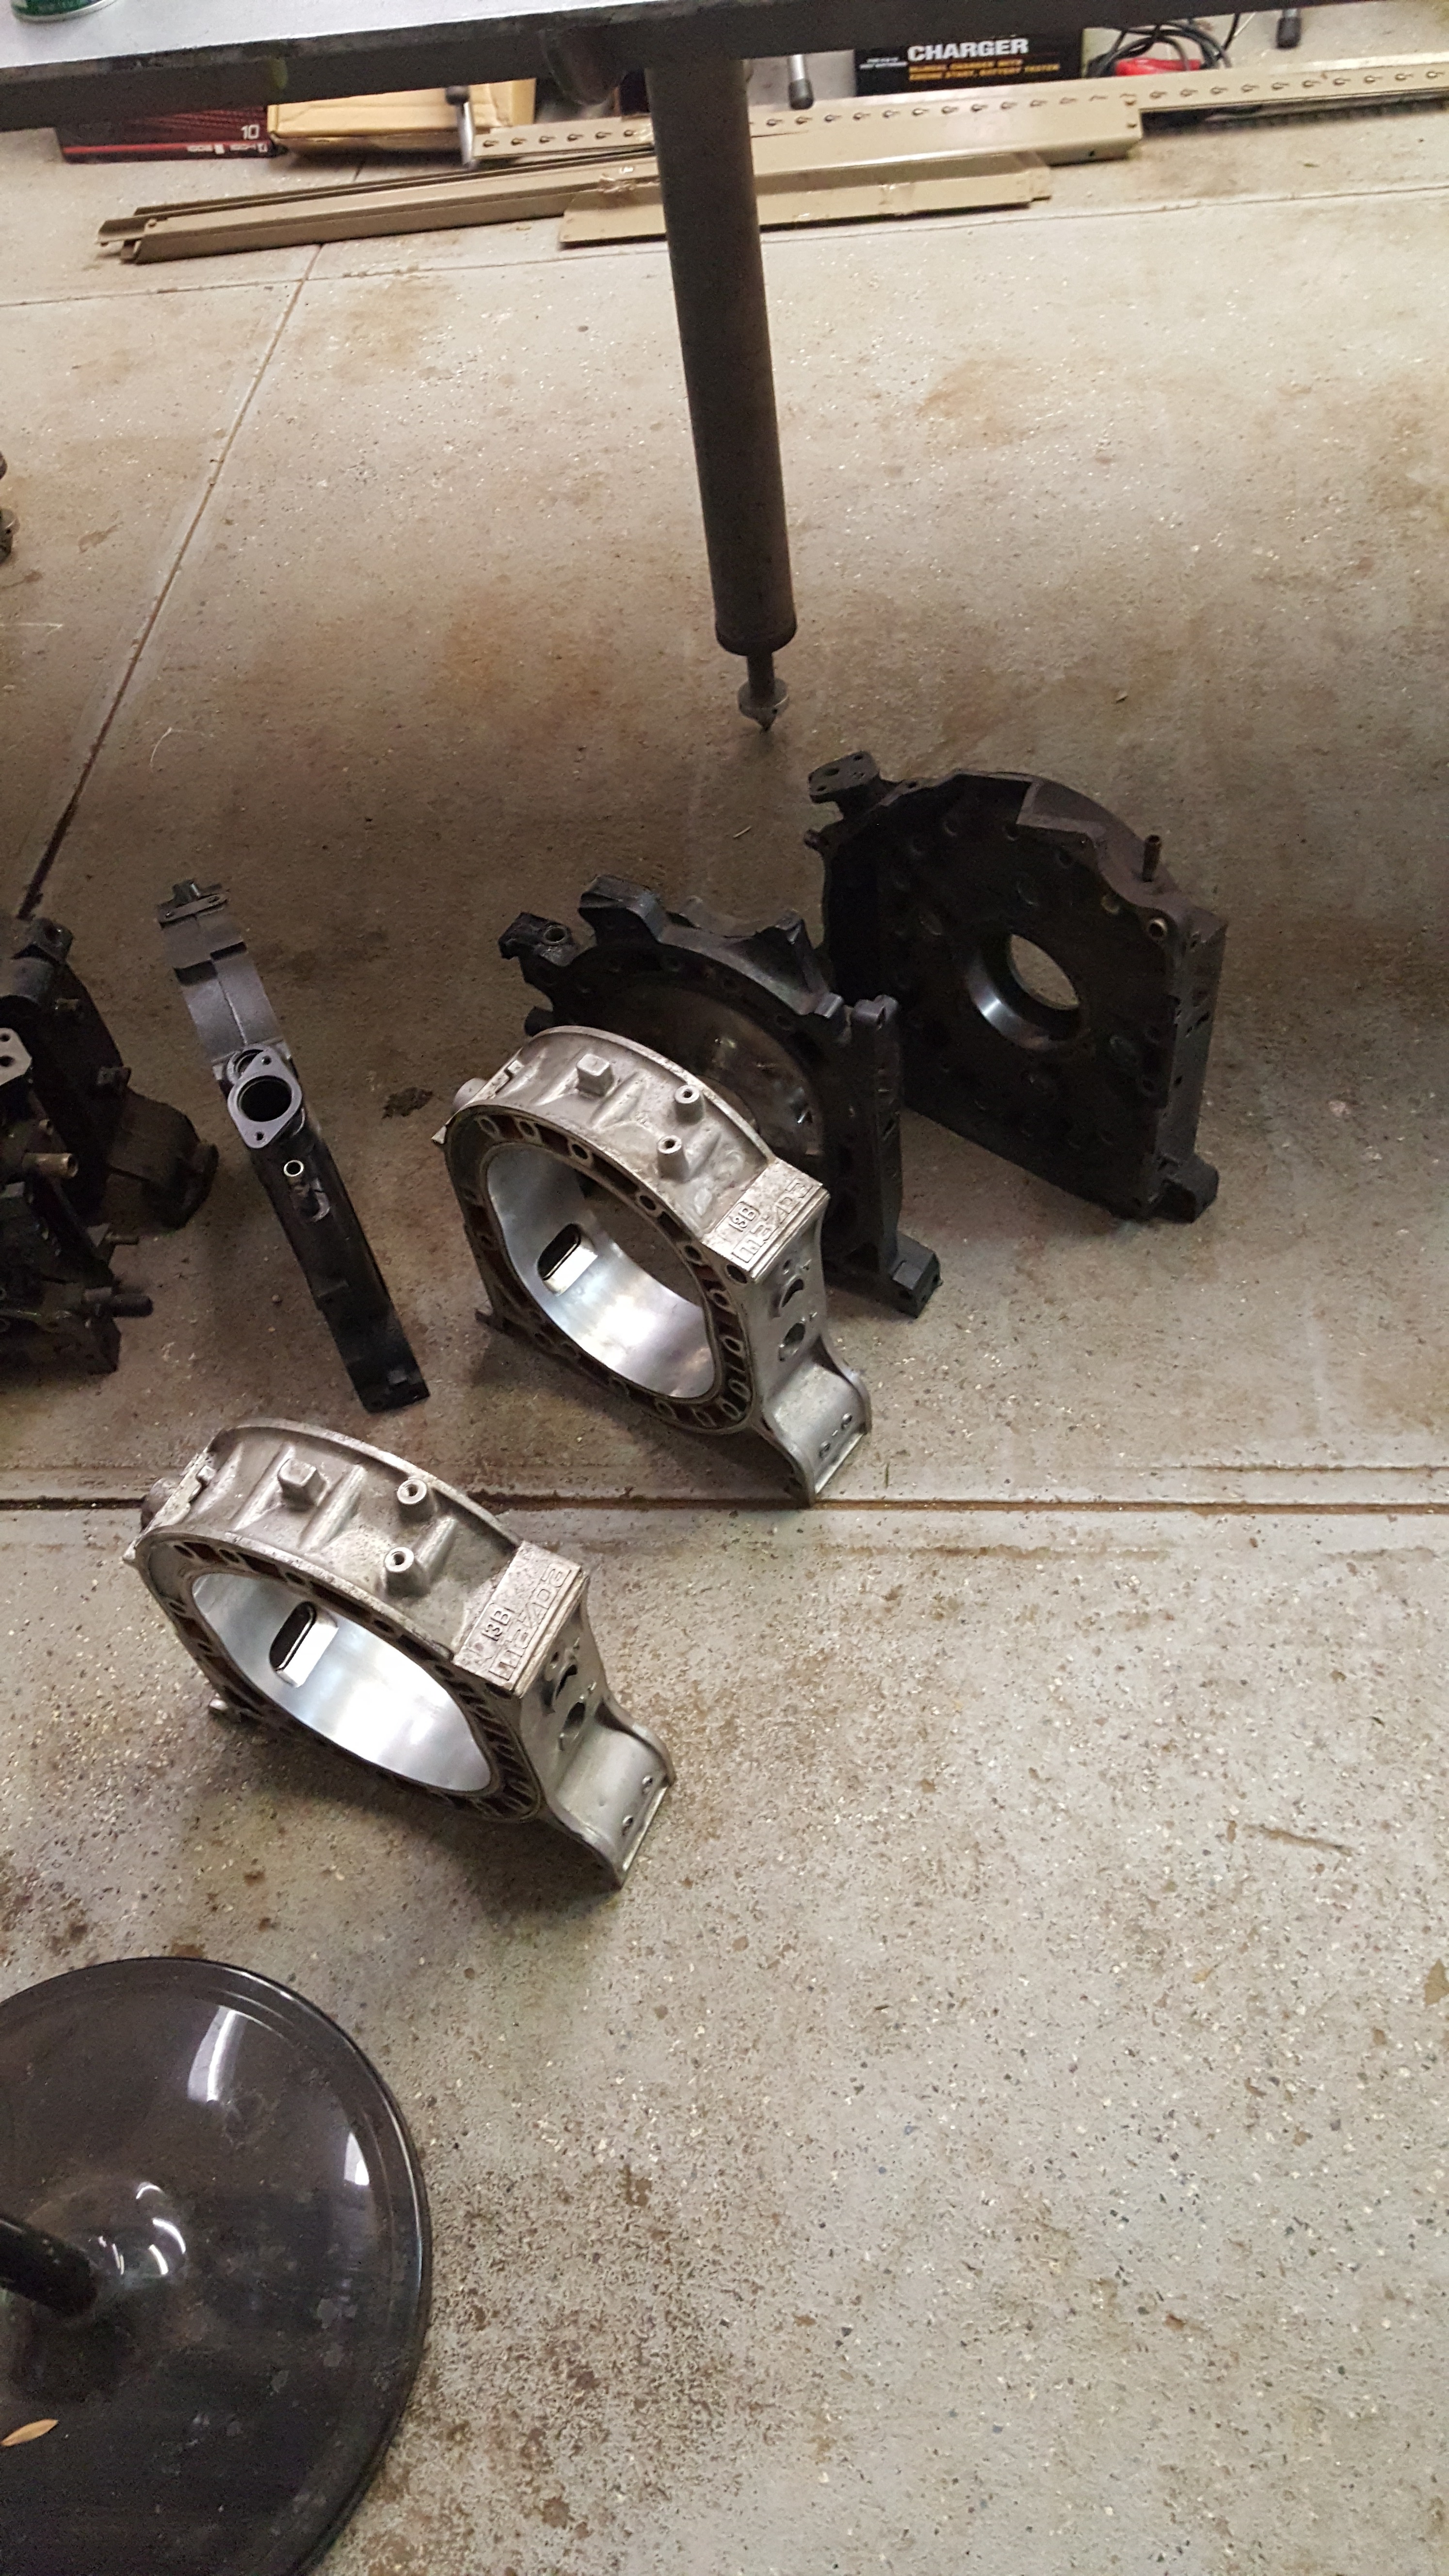
Fresh parts... I must say I am VERY proud to tell the world that i've saved roughly 1500 dollars on sourcing used plates and Irons. None of them getting Lapped...Or Resurfaced =-)
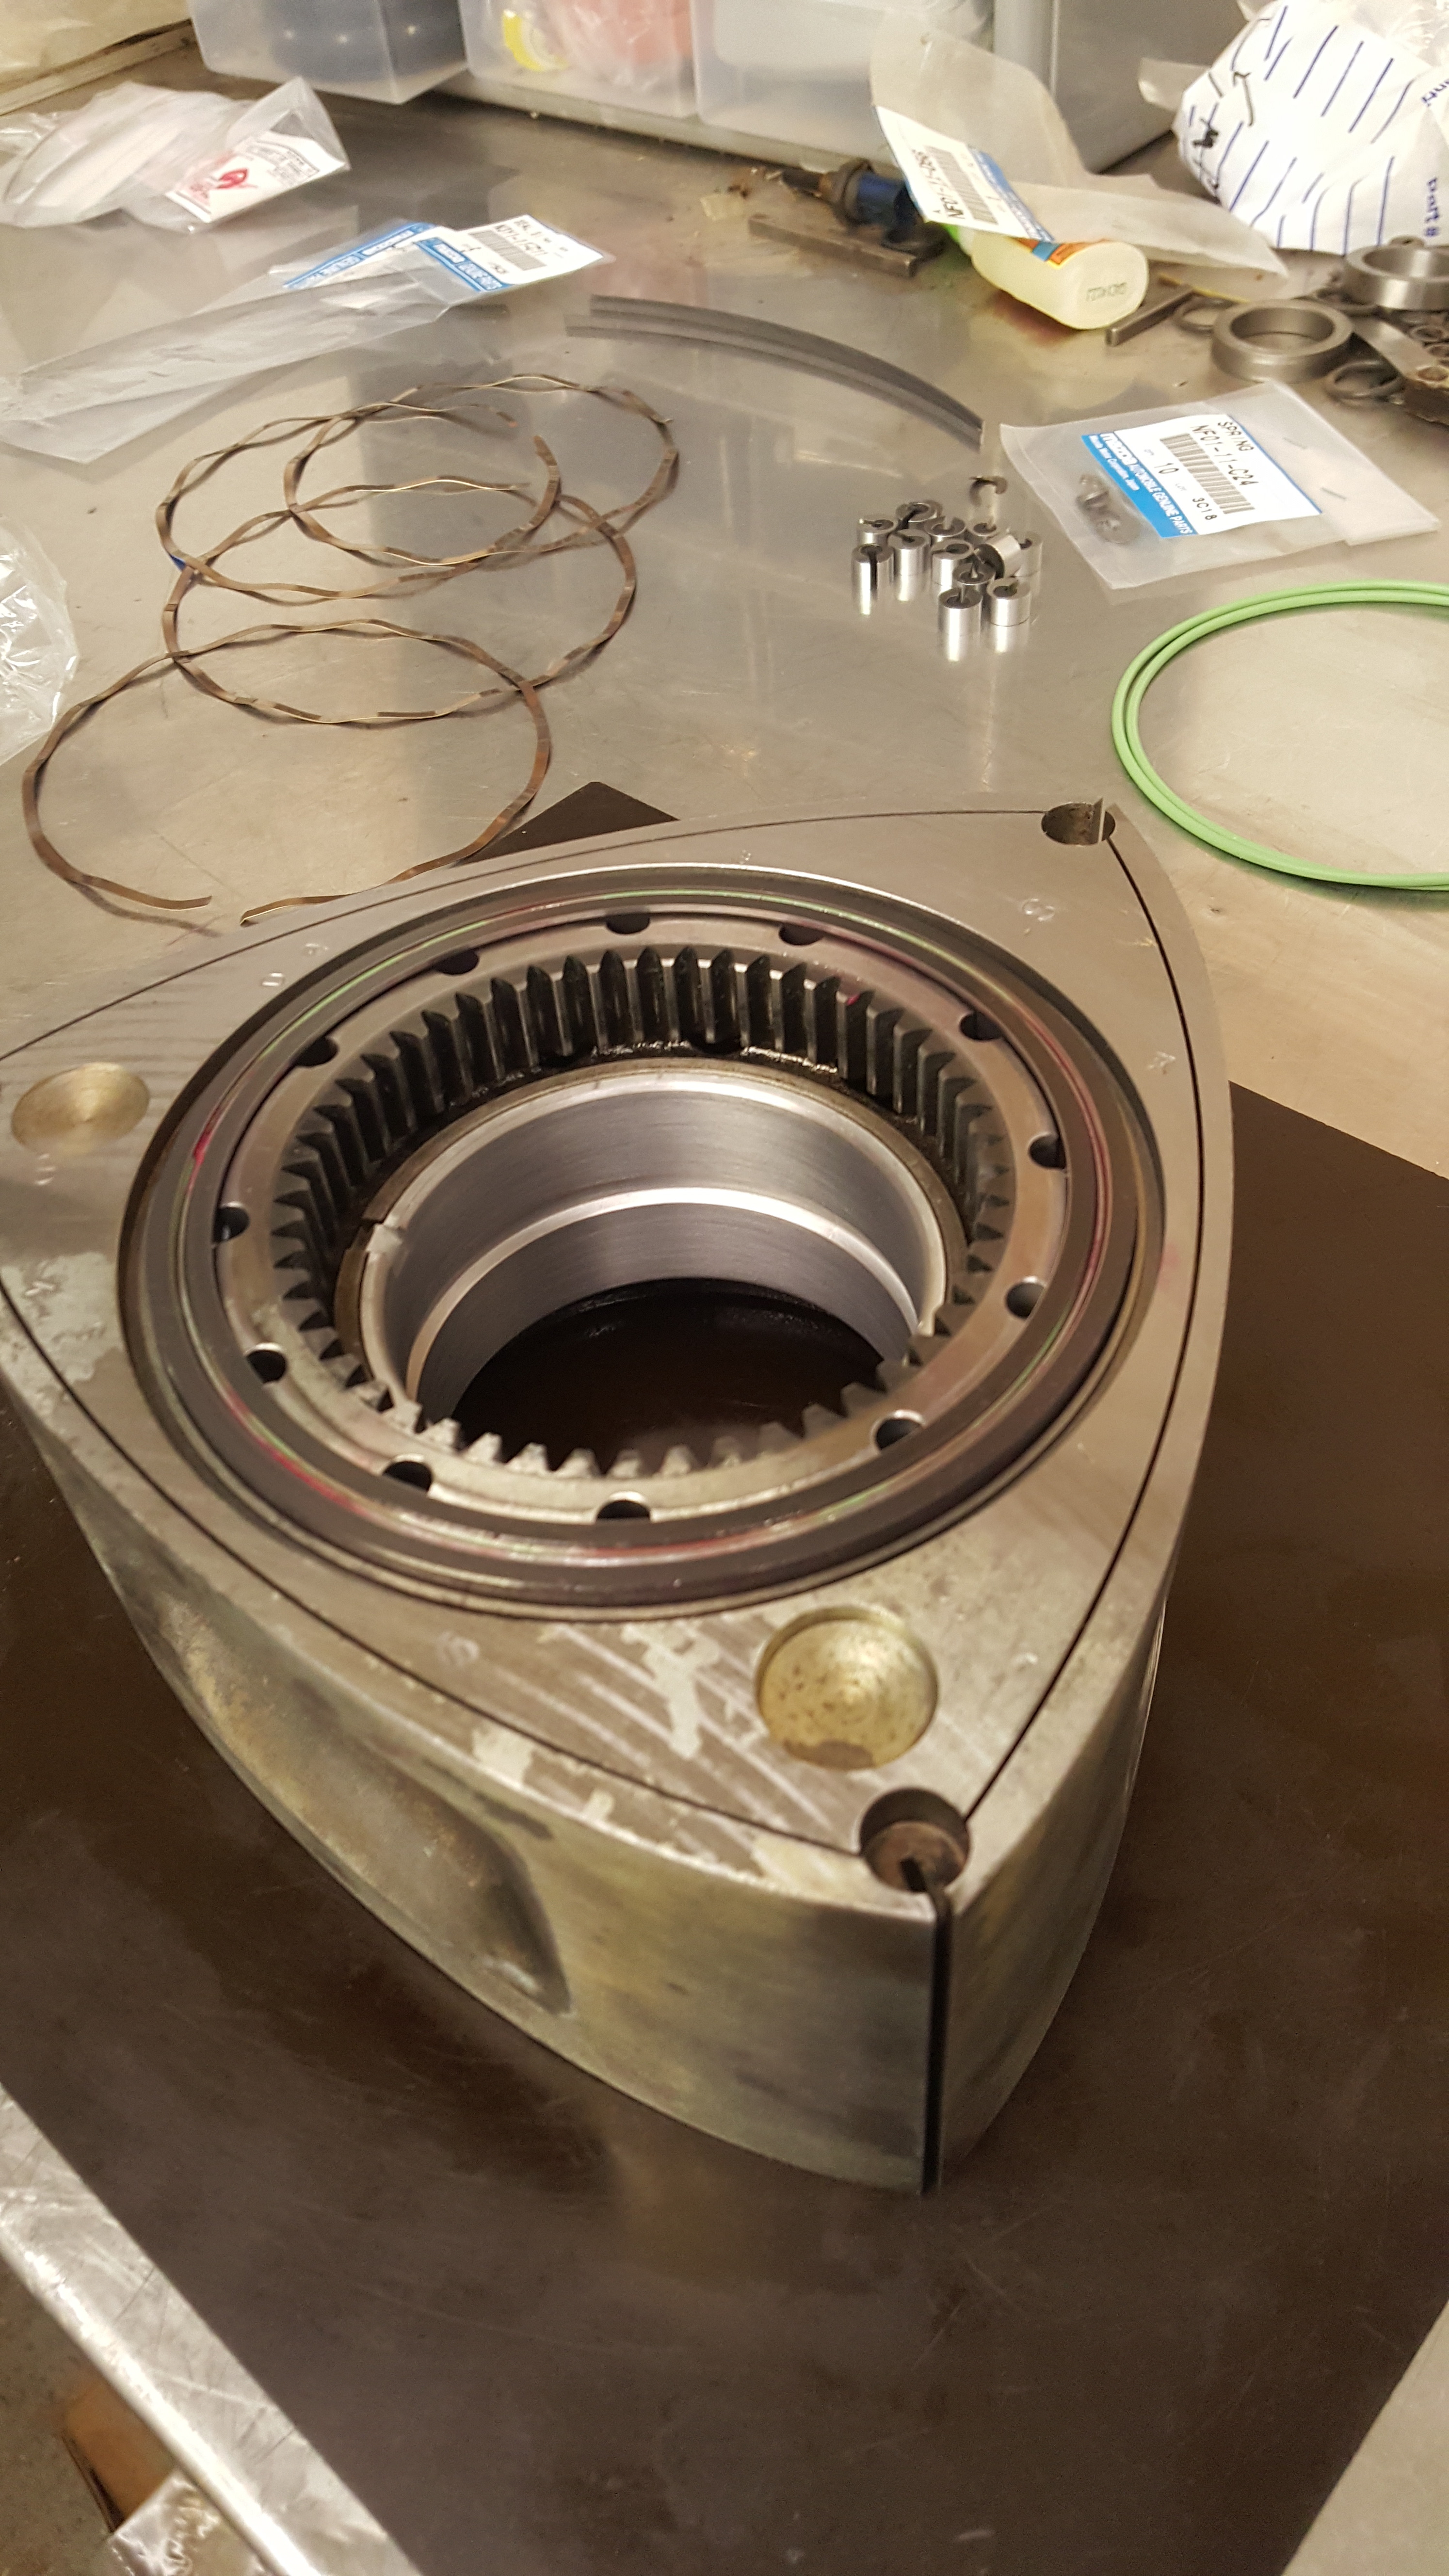
2mm Rotors....No Balancing required...and have a look at that Mazda Race Bearing.. secrets secrets!!!!
It's crazy how we do things now. We see eachother for roughly 10 hours and may say 15 to 20 sentences to eachother....Alll busy work. Im really thankful For Everything he's taught me. Pretty much forever in-debted...for the Mentorship/friendship and support he's shown me throughout this Journey. Who has an actual Drag Tree? haha... but a testament of his days while he was in "the zone." He used to sit in here and practice for hours on it...
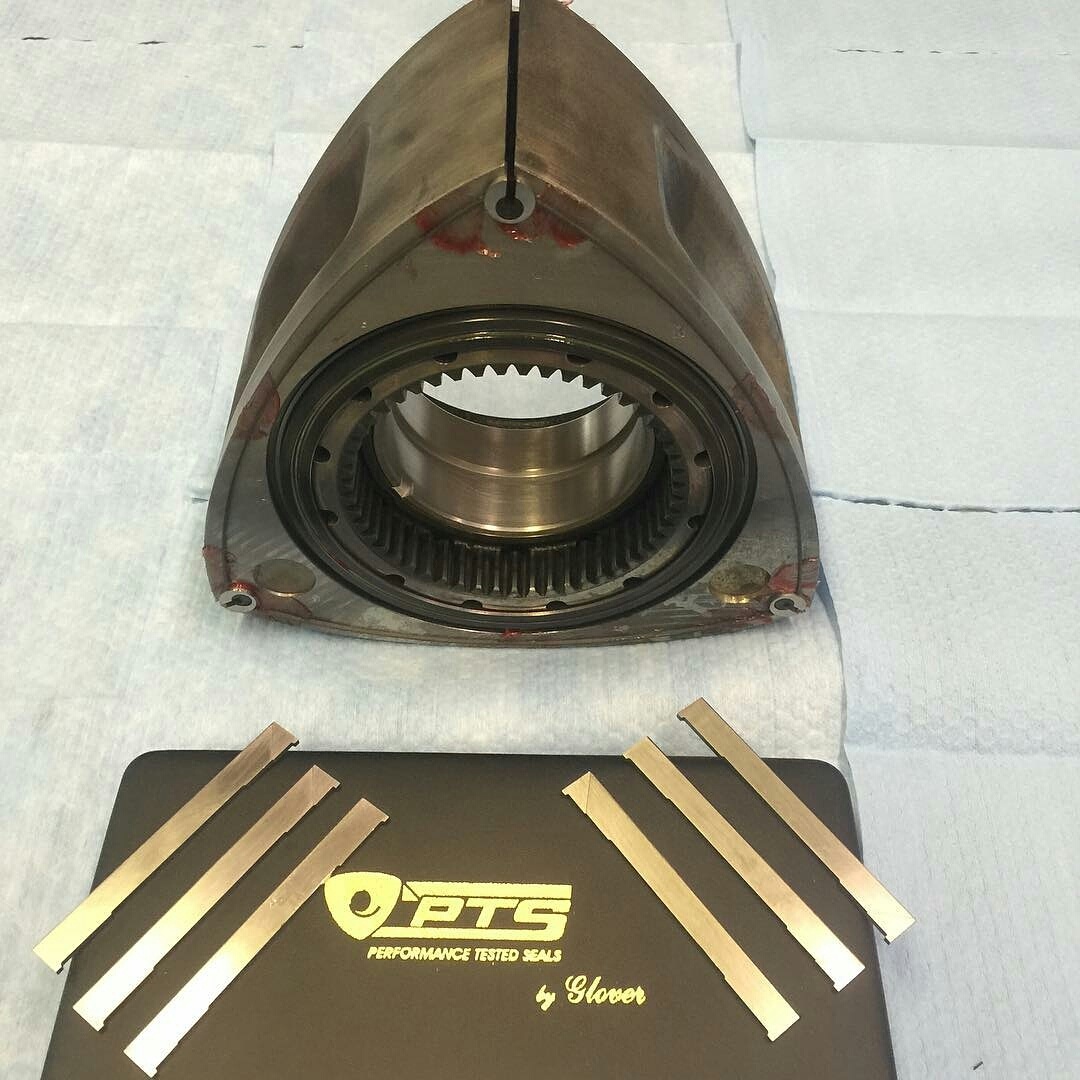
PTS Seals... When only the best will do
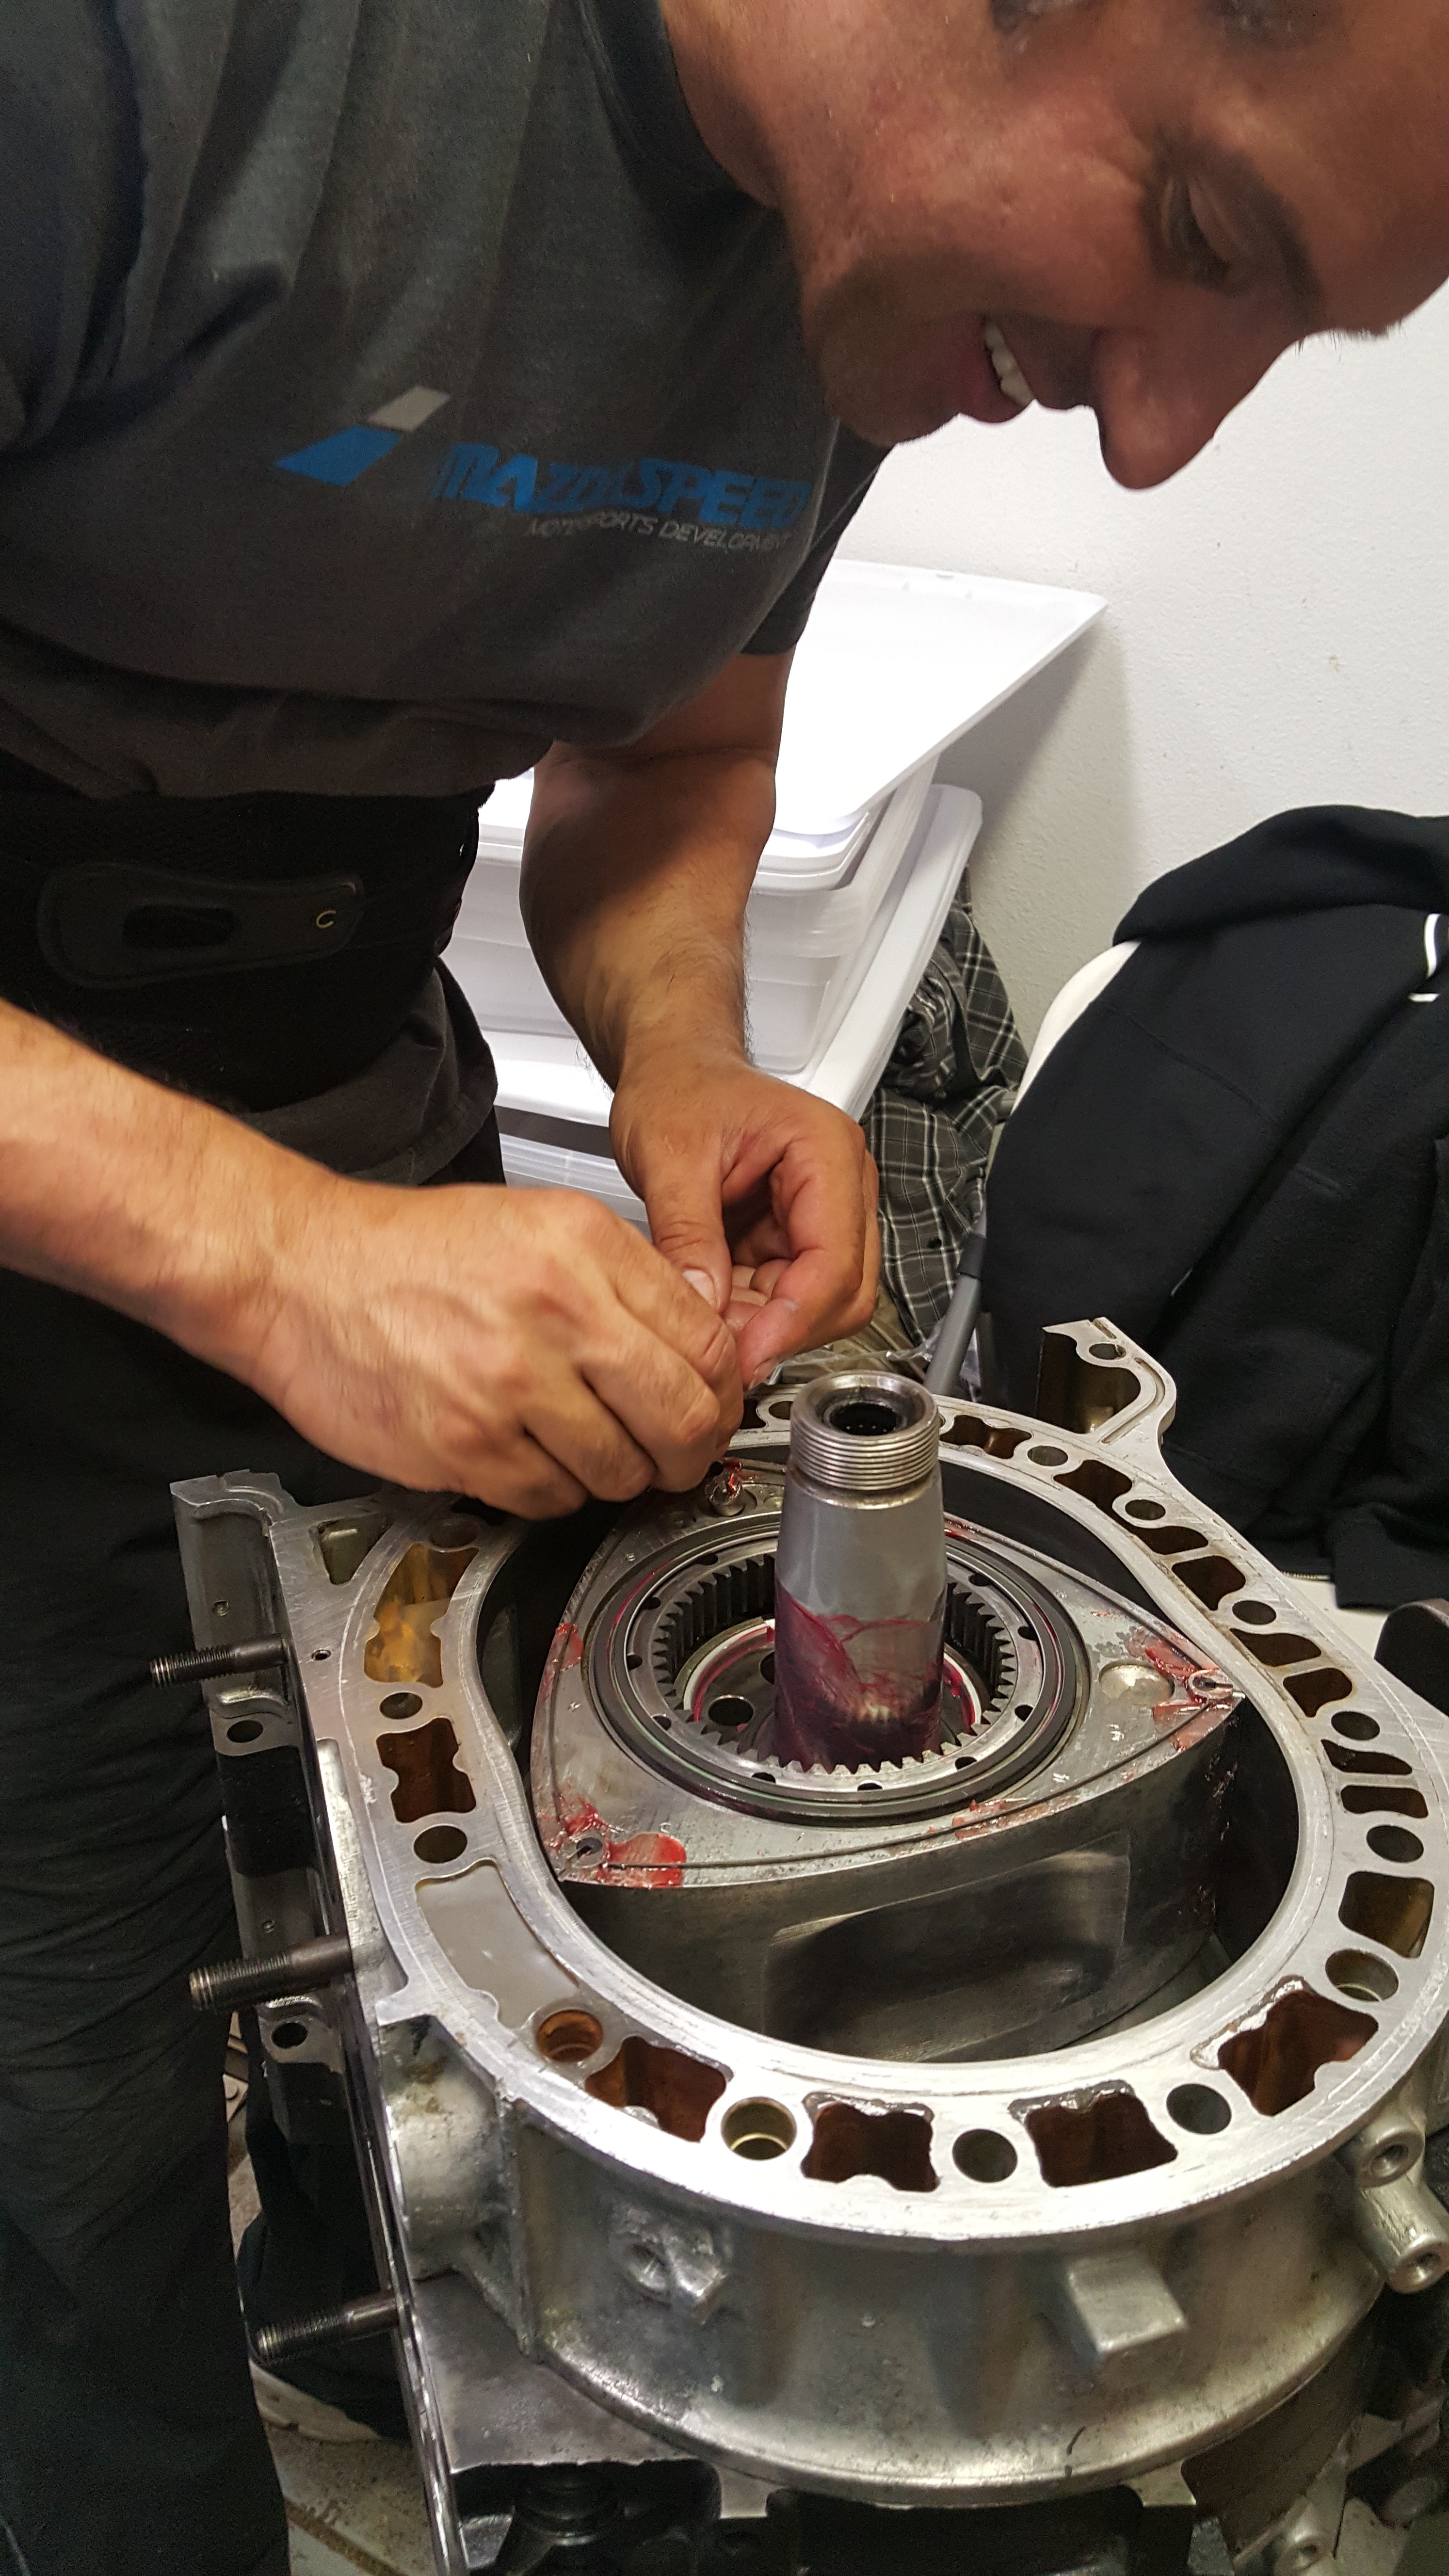
All finished up... "More Art and expression than product." Each engine takes a bit of us with them.
Late nights and Parts mocking.... I did this on Wednesday Night after Dropping all Mikes stuff off at the track in long Beach. It was 3 Am and I had to stop working because I made a mistake. That's usually my warning that it's time to stop working.
The Dream team eating at Rosco's Chicken and Waffles.... I ate the chili and cornbread.. I've actually never had it before... but I wasn't necessarily impressed with the waffles and chicken.. The Chili and Cornbread was Excellent though haha.

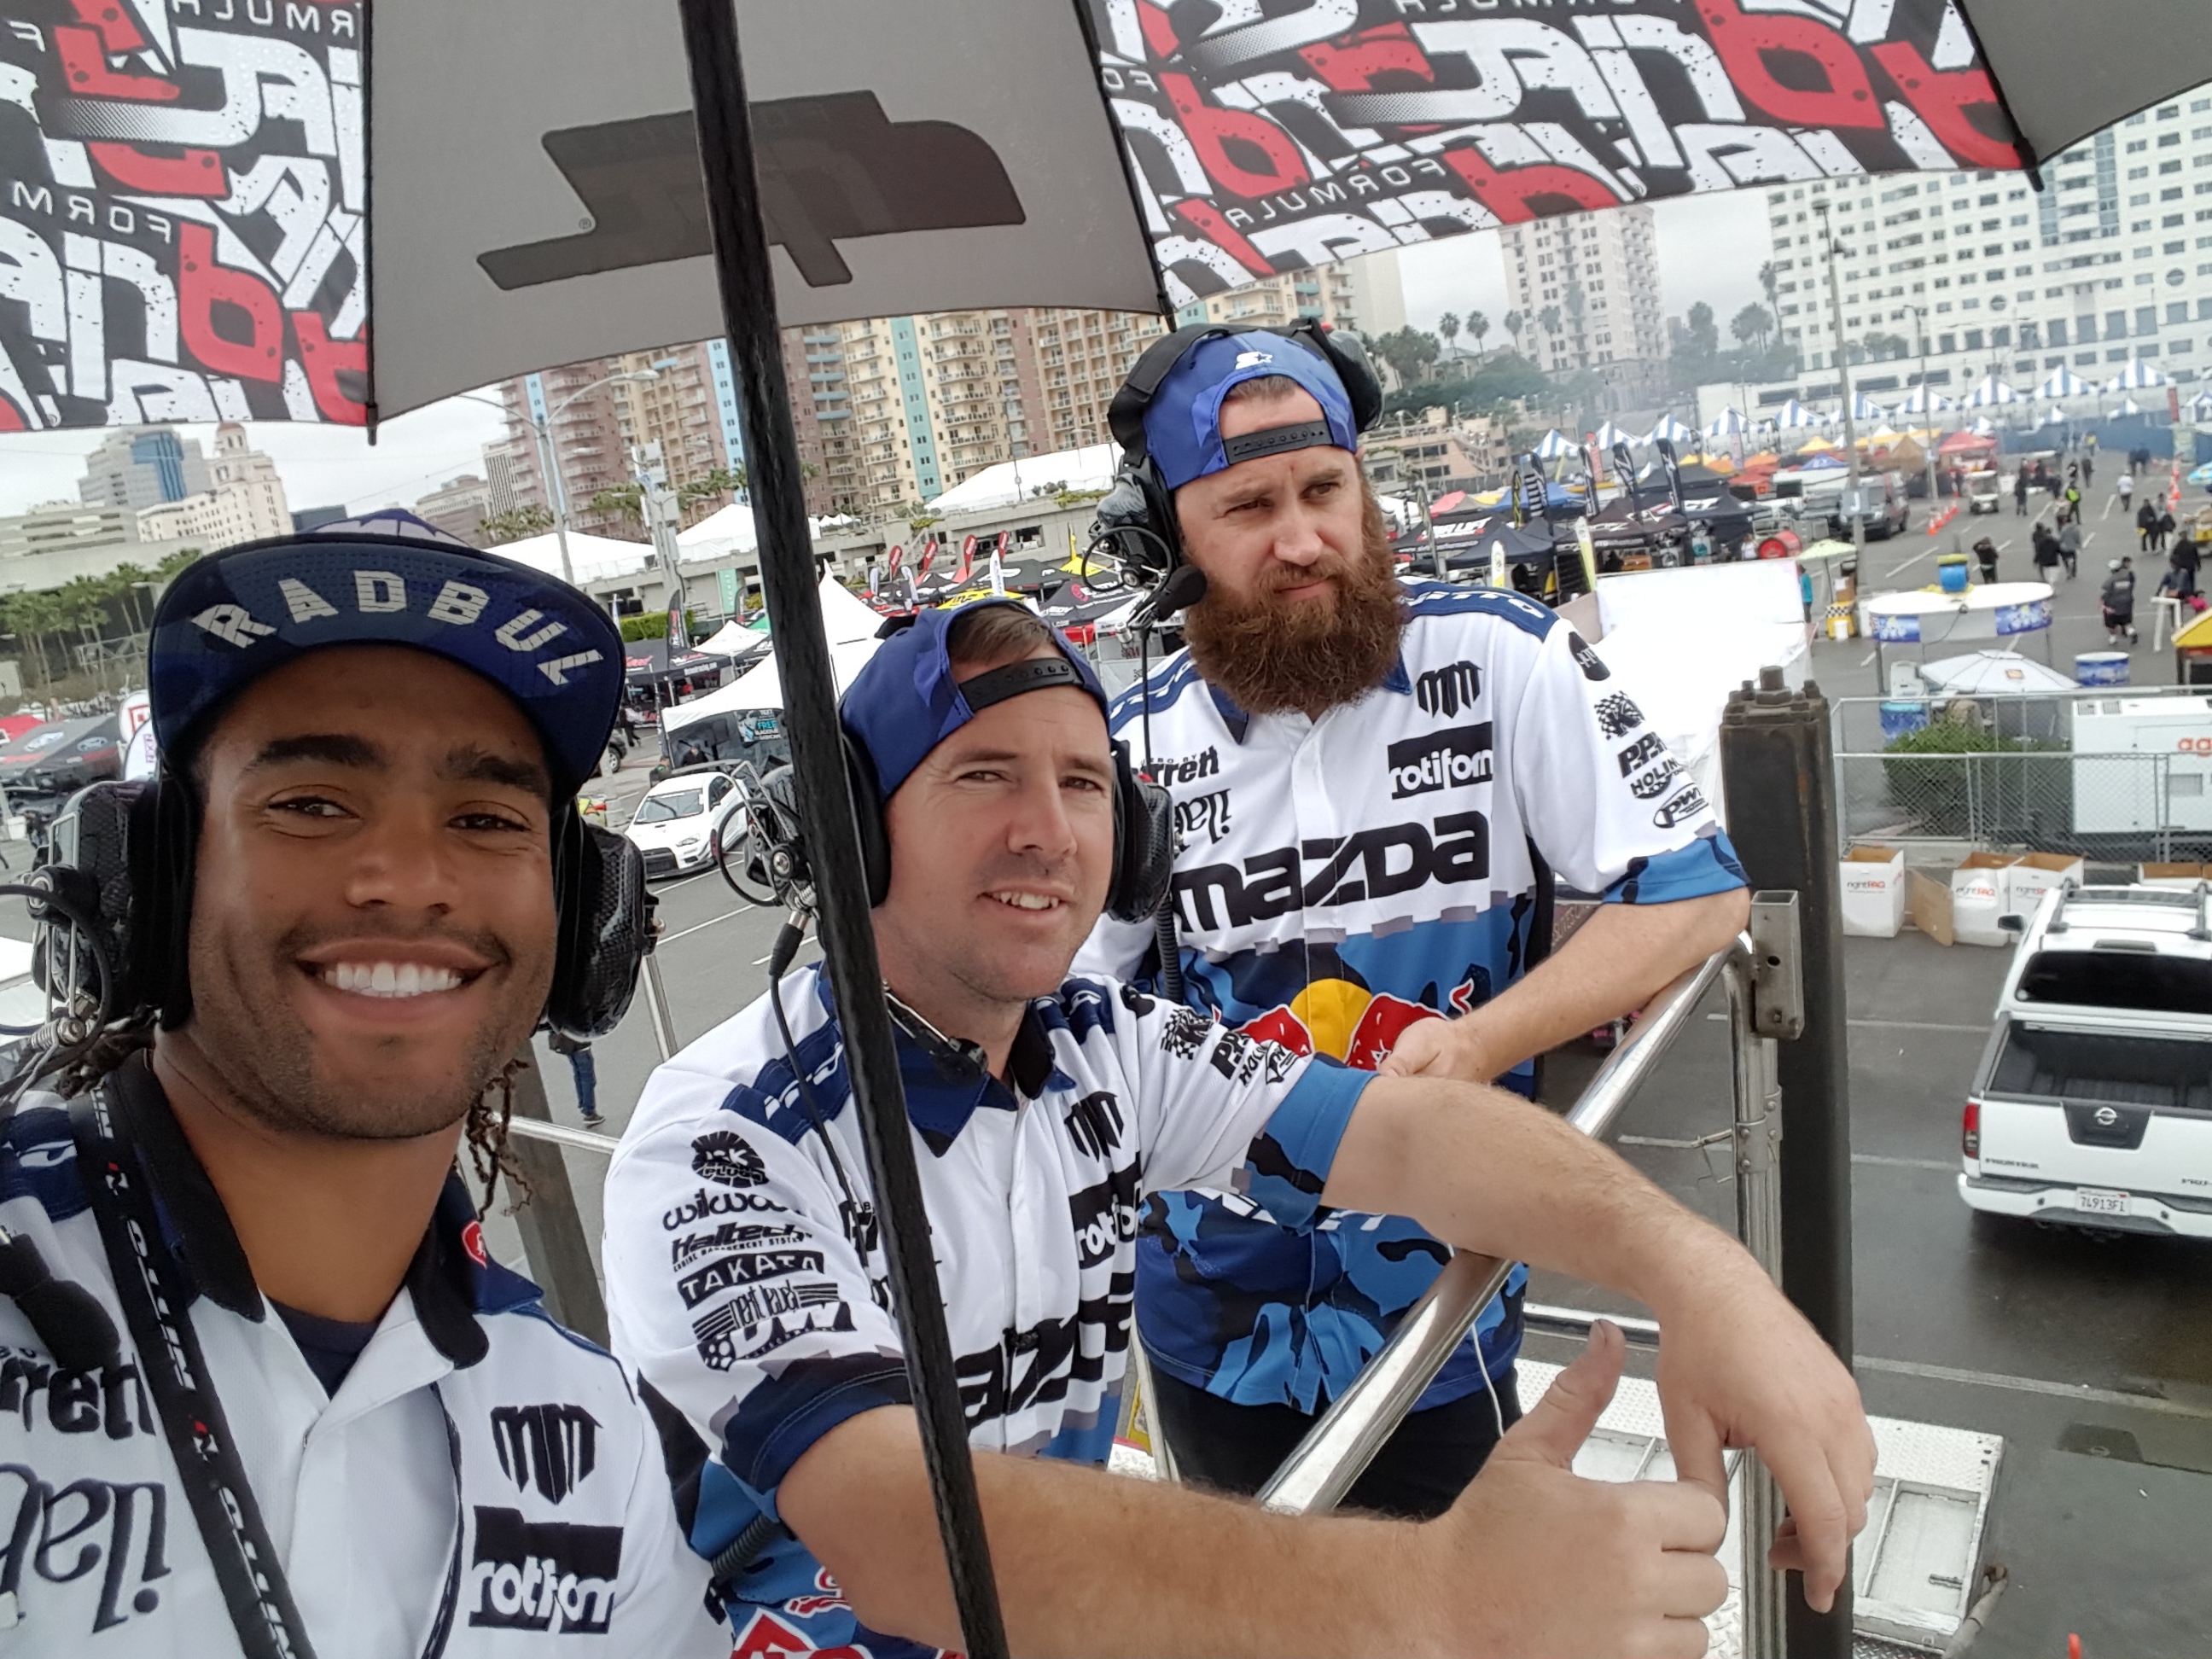
On top of the Nitto Rig watching from the Pit
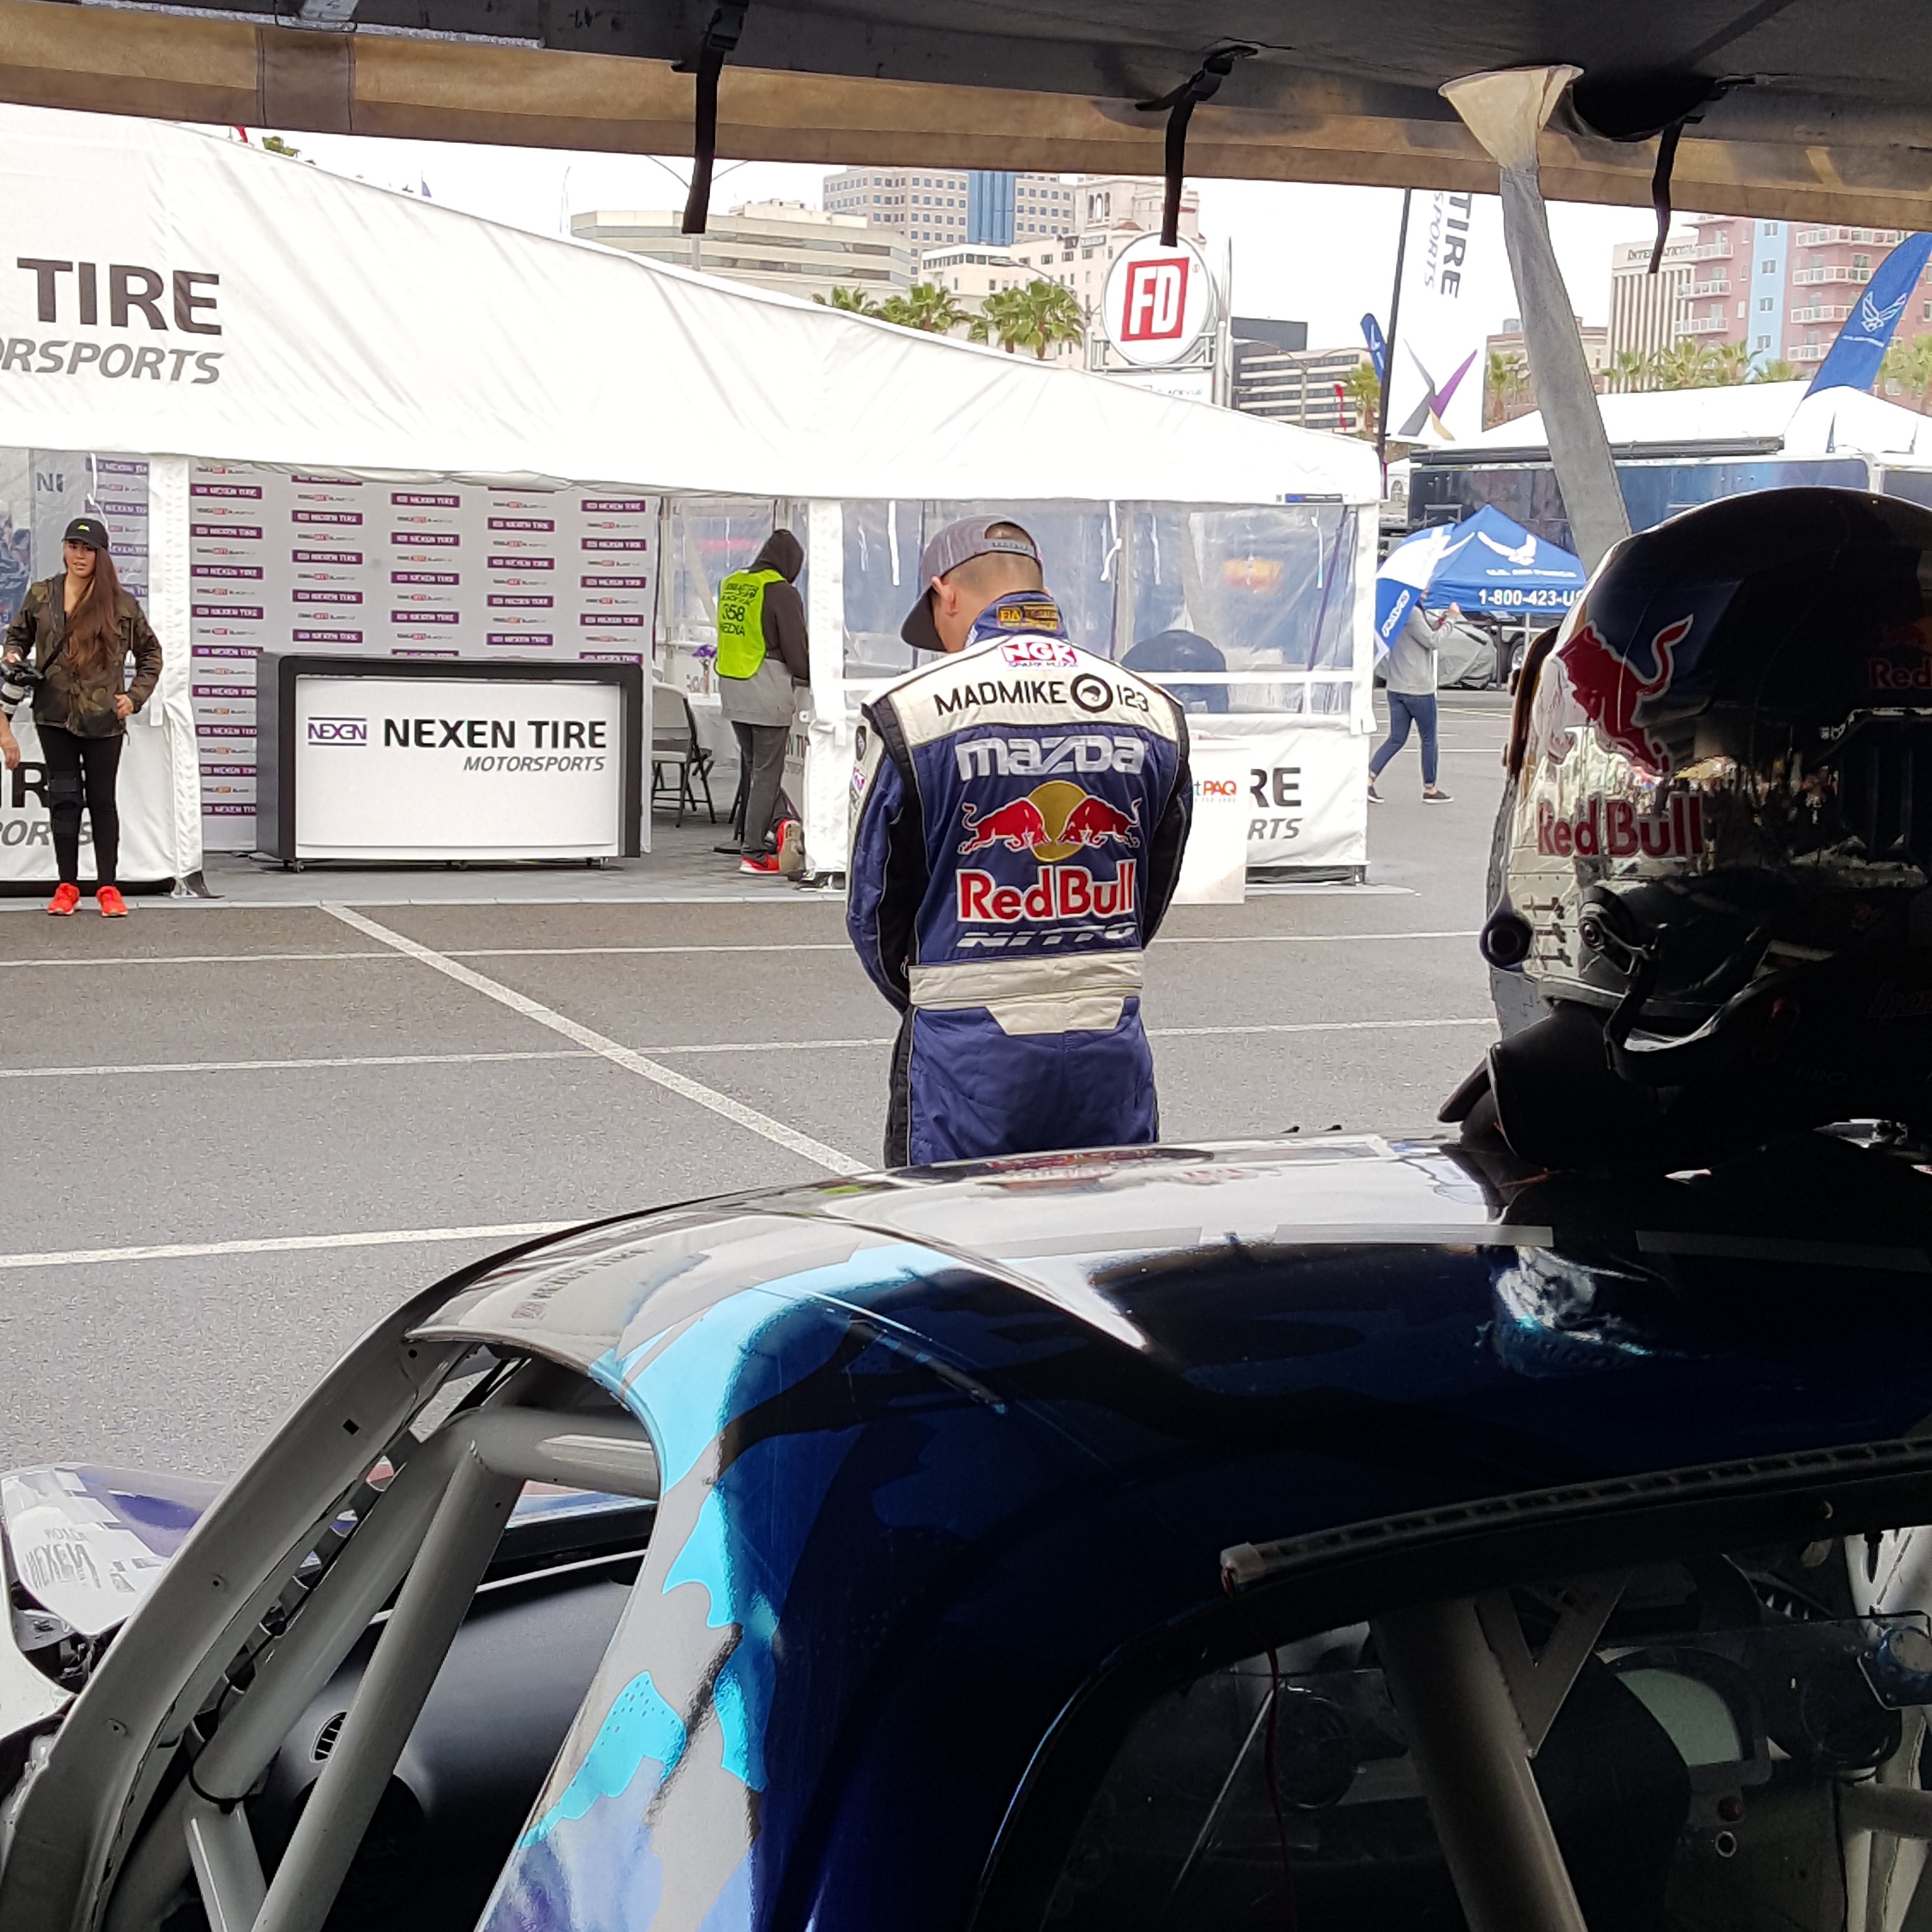
Before everyone gets to the event... Focus
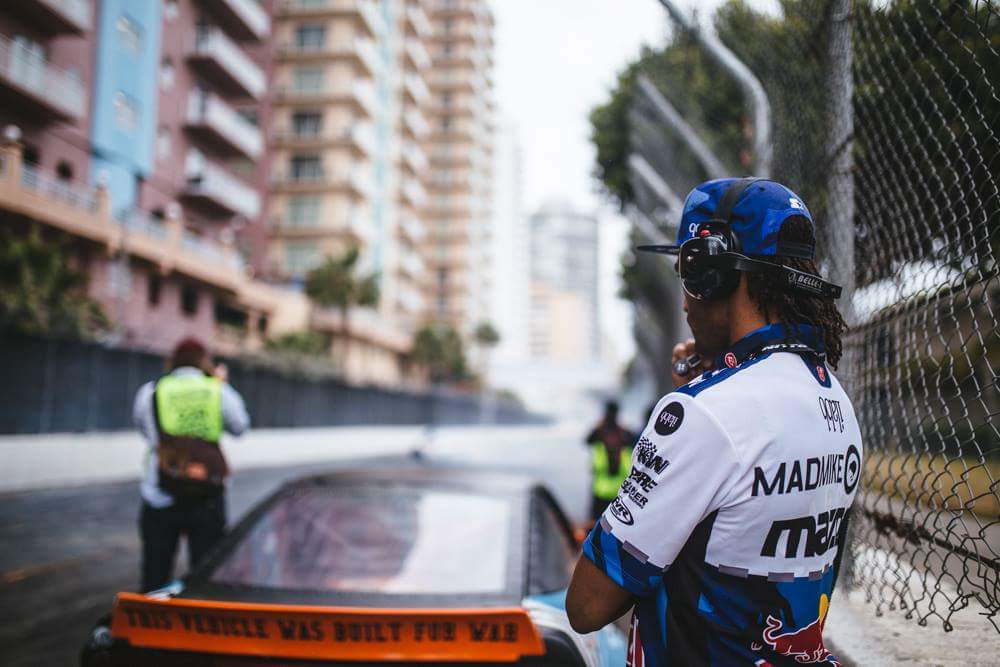
On grid for Practice
A little sneak Peak
More Updates soon!!!!
Stay Tuned!!
#Thisisthewolf!
If you guys aren't following me on IG My User Name is @AAPARKAH!!! Hit me with a follow and I'll get you back!!!! Thanks for all the Support Guys!!! #Rx7Club4Lyfe!!
I've been hammered here guys!!! But all is well and good!
The week before and After Formula Drift Long Beach Round 1 with Mike....wasssss gnarly!!! Not a moment to blink let alone sleep.
Lets start where I left off...The heart of the wolf build!!
This would mark the second time I've built one of my engines with the man himself.. Abel Ibarra. Since the last build...i can't count how many engines i've helped him put together ..and it's incredible the methodology behind it. Gives "Systematic" a new meaning. Each and every engine is done exactly the same. With no bogus spec sheet. It's all done on the fly...and the end product always shows. Even new parts get cleaned. And when I say clean...I can't really explain to you what exactly that entails..but lets just say that everyone out there who says they can put together an engine in a couple hours..isn't doing it the right way. Every build takes us (2) 8+ hour days. We took our time on The wolfs new heart.
Here's Abel doing a little bit of machining... just a taste of some of the things that keep Race engines running!
Fresh parts... I must say I am VERY proud to tell the world that i've saved roughly 1500 dollars on sourcing used plates and Irons. None of them getting Lapped...Or Resurfaced =-)
2mm Rotors....No Balancing required...and have a look at that Mazda Race Bearing.. secrets secrets!!!!
It's crazy how we do things now. We see eachother for roughly 10 hours and may say 15 to 20 sentences to eachother....Alll busy work. Im really thankful For Everything he's taught me. Pretty much forever in-debted...for the Mentorship/friendship and support he's shown me throughout this Journey. Who has an actual Drag Tree? haha... but a testament of his days while he was in "the zone." He used to sit in here and practice for hours on it...
PTS Seals... When only the best will do
All finished up... "More Art and expression than product." Each engine takes a bit of us with them.
Late nights and Parts mocking.... I did this on Wednesday Night after Dropping all Mikes stuff off at the track in long Beach. It was 3 Am and I had to stop working because I made a mistake. That's usually my warning that it's time to stop working.
The Dream team eating at Rosco's Chicken and Waffles.... I ate the chili and cornbread.. I've actually never had it before... but I wasn't necessarily impressed with the waffles and chicken.. The Chili and Cornbread was Excellent though haha.
On top of the Nitto Rig watching from the Pit
Before everyone gets to the event... Focus
On grid for Practice
A little sneak Peak
More Updates soon!!!!
Stay Tuned!!
#Thisisthewolf!
If you guys aren't following me on IG My User Name is @AAPARKAH!!! Hit me with a follow and I'll get you back!!!! Thanks for all the Support Guys!!! #Rx7Club4Lyfe!!
 Great post Aaron take care and have fun doing what you do.
Update: "Race Season Scramble"
Well it seems like race season has sprung on me fully...in what seems like no time! It's almost hard to even put together thoughts let alone gather them to share but I'll do my best to give you guys the low down!!
But firstly....I really wanted to thank everyone that has stuck around and supported me through text and even silently. I feel pretty damn lucky to have such a bad *** forum to help support me. Although we are a pretty "Different breed" of people...rx7 and rotary people specifically...I feel lucky to have a forum to come on to and read and see what other members are doing with their builds. I understand I won't ever be able to please everyone but I am doing my best to do so.
So lets see where we left off!!
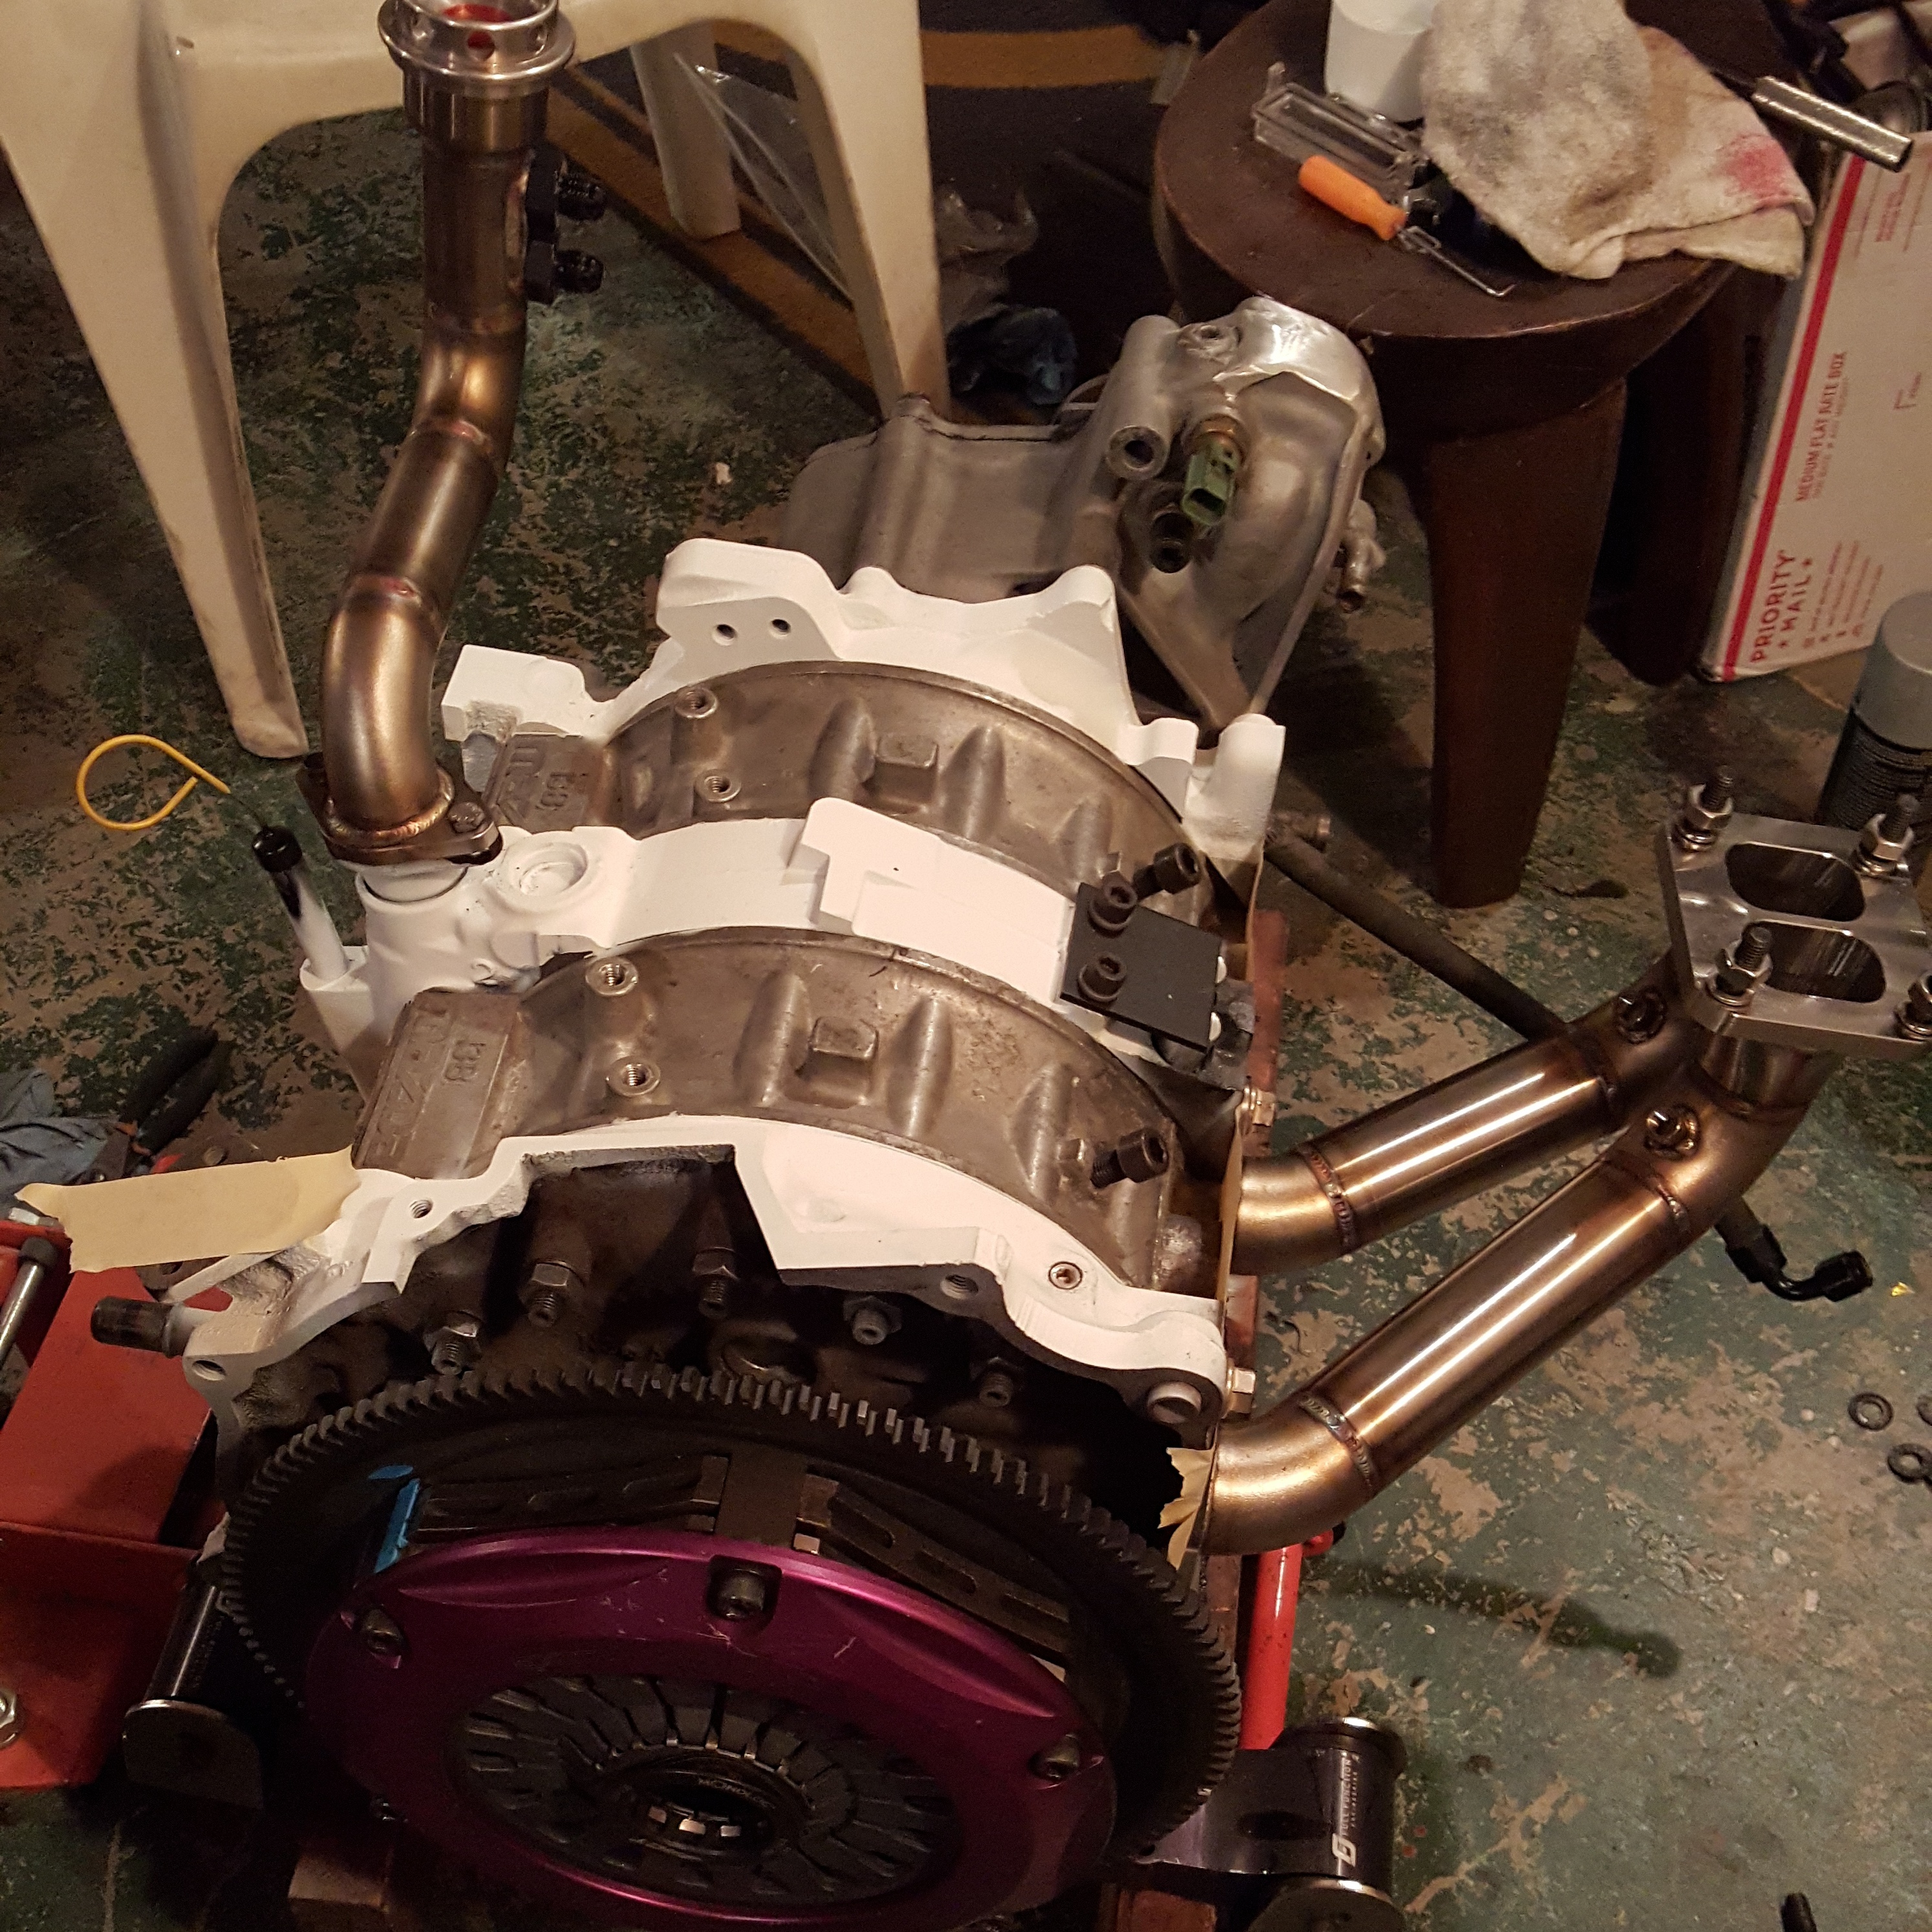
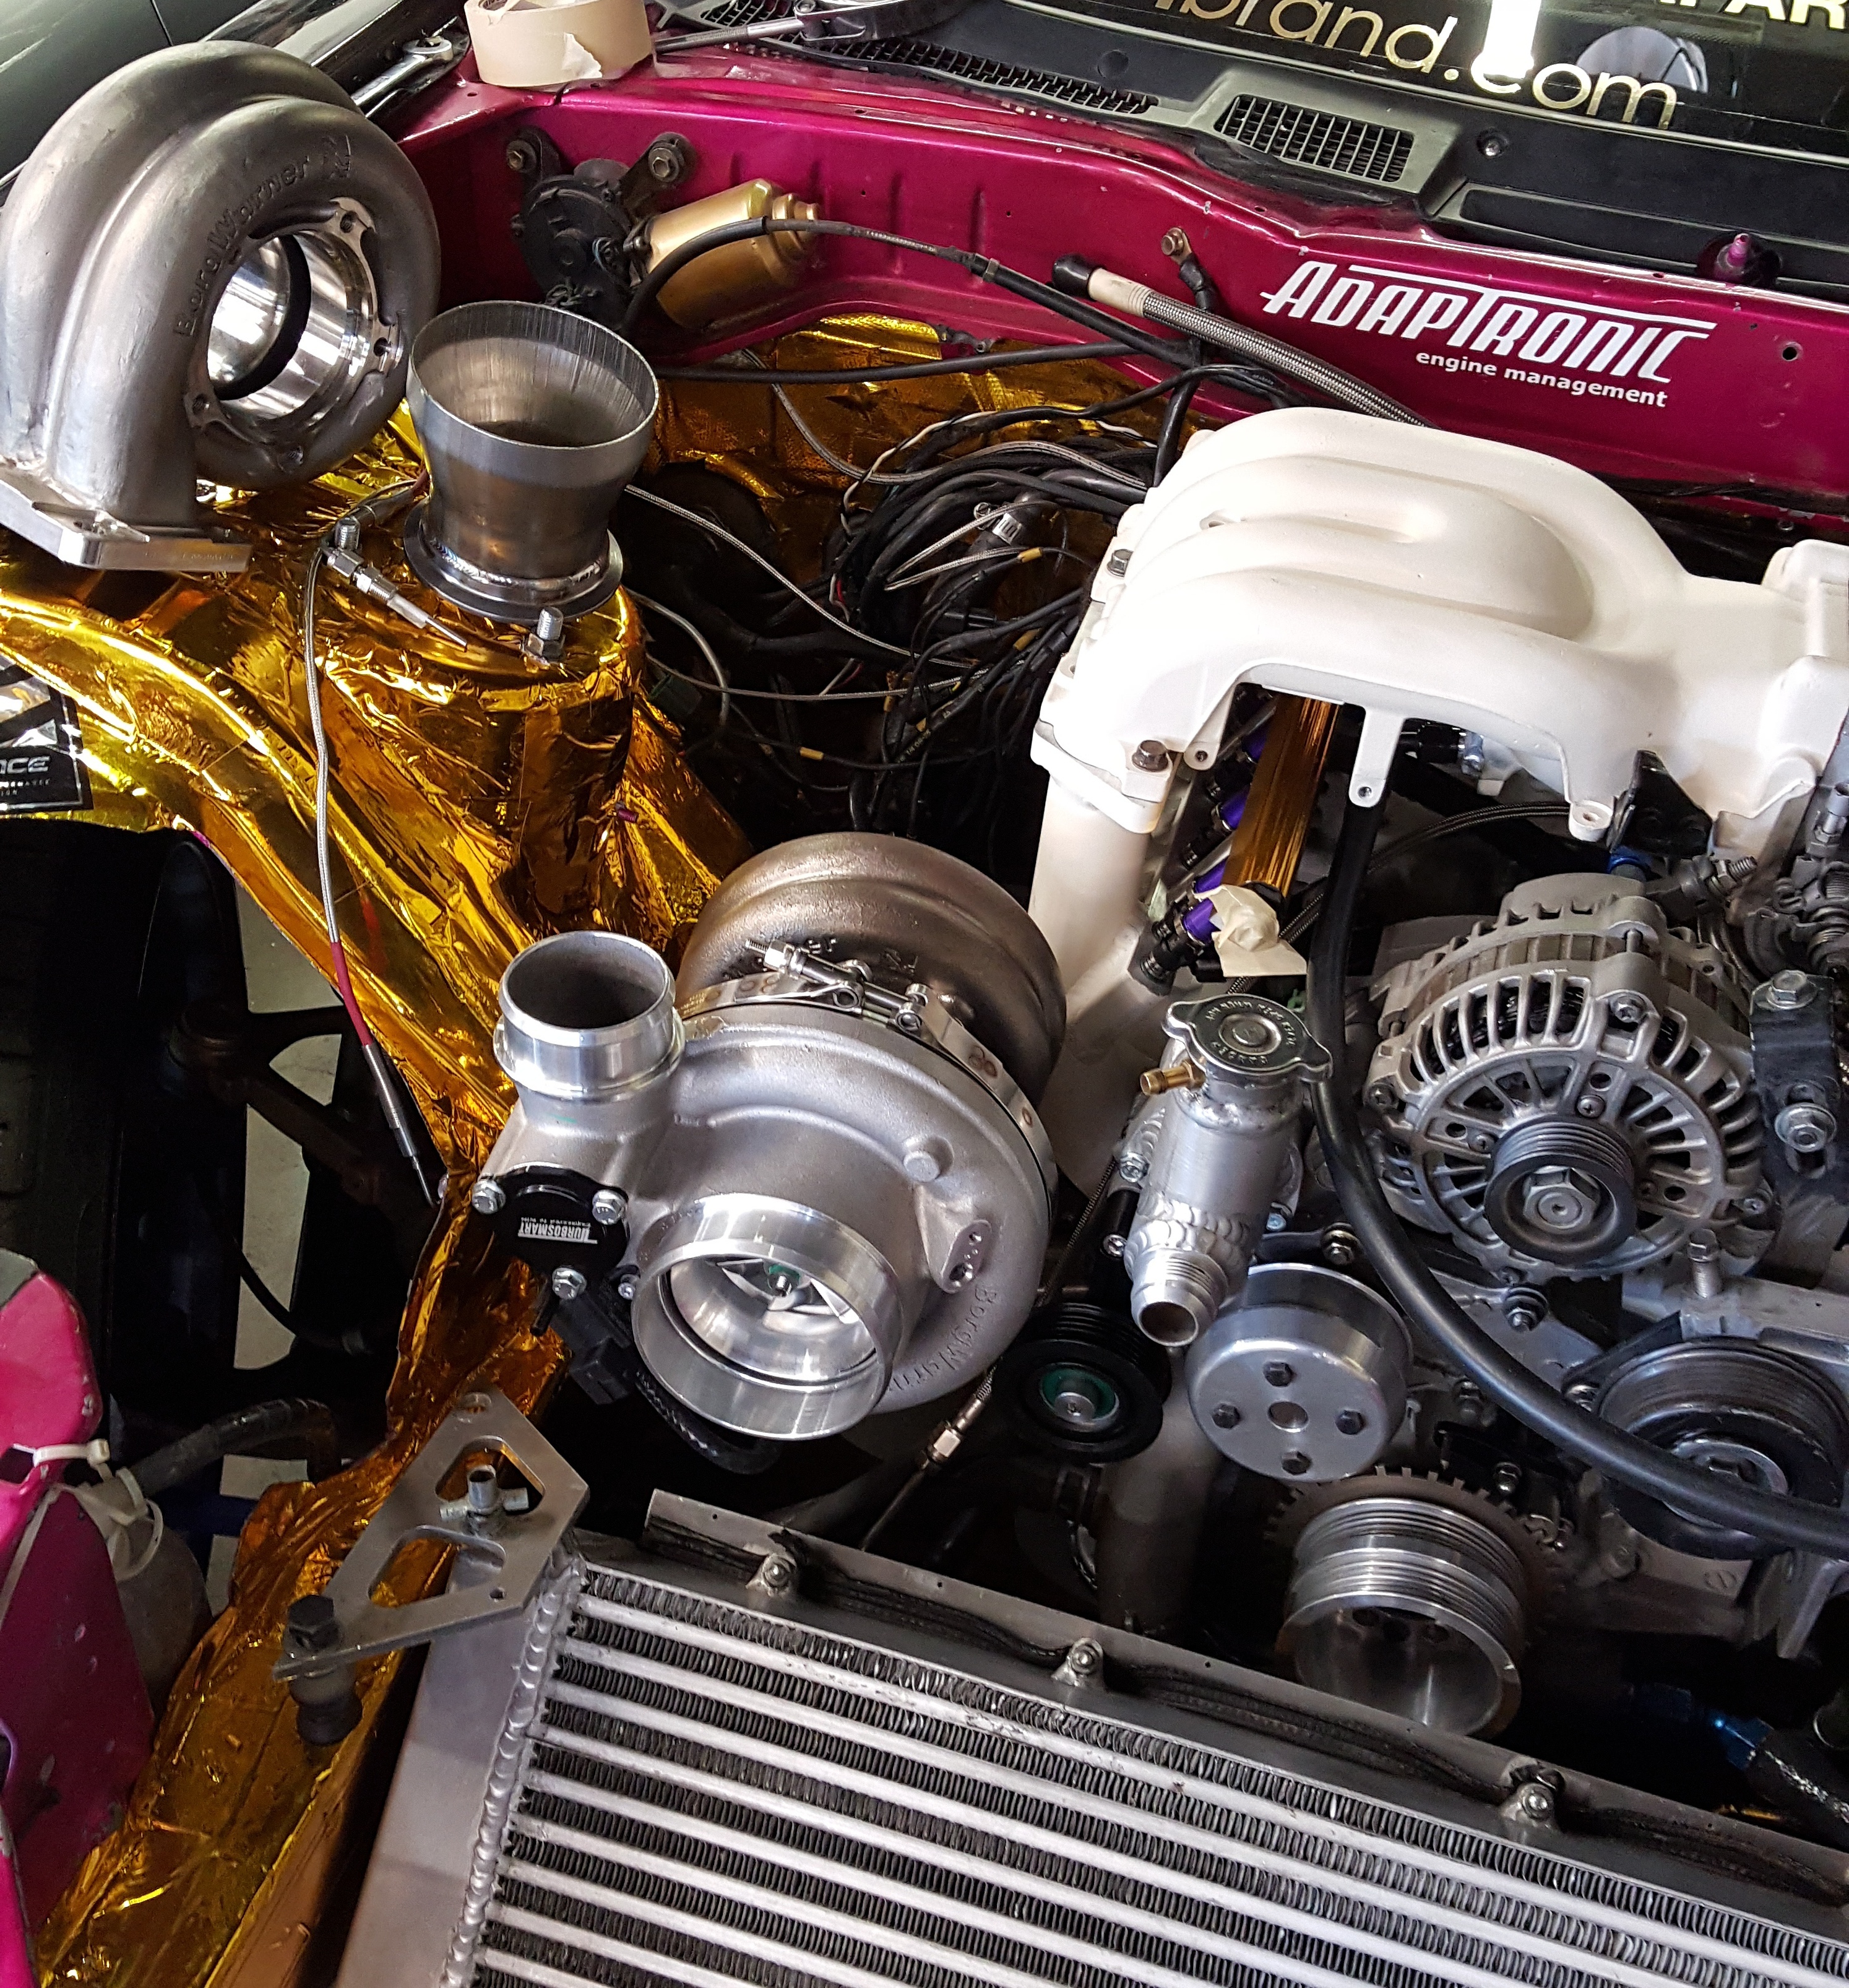
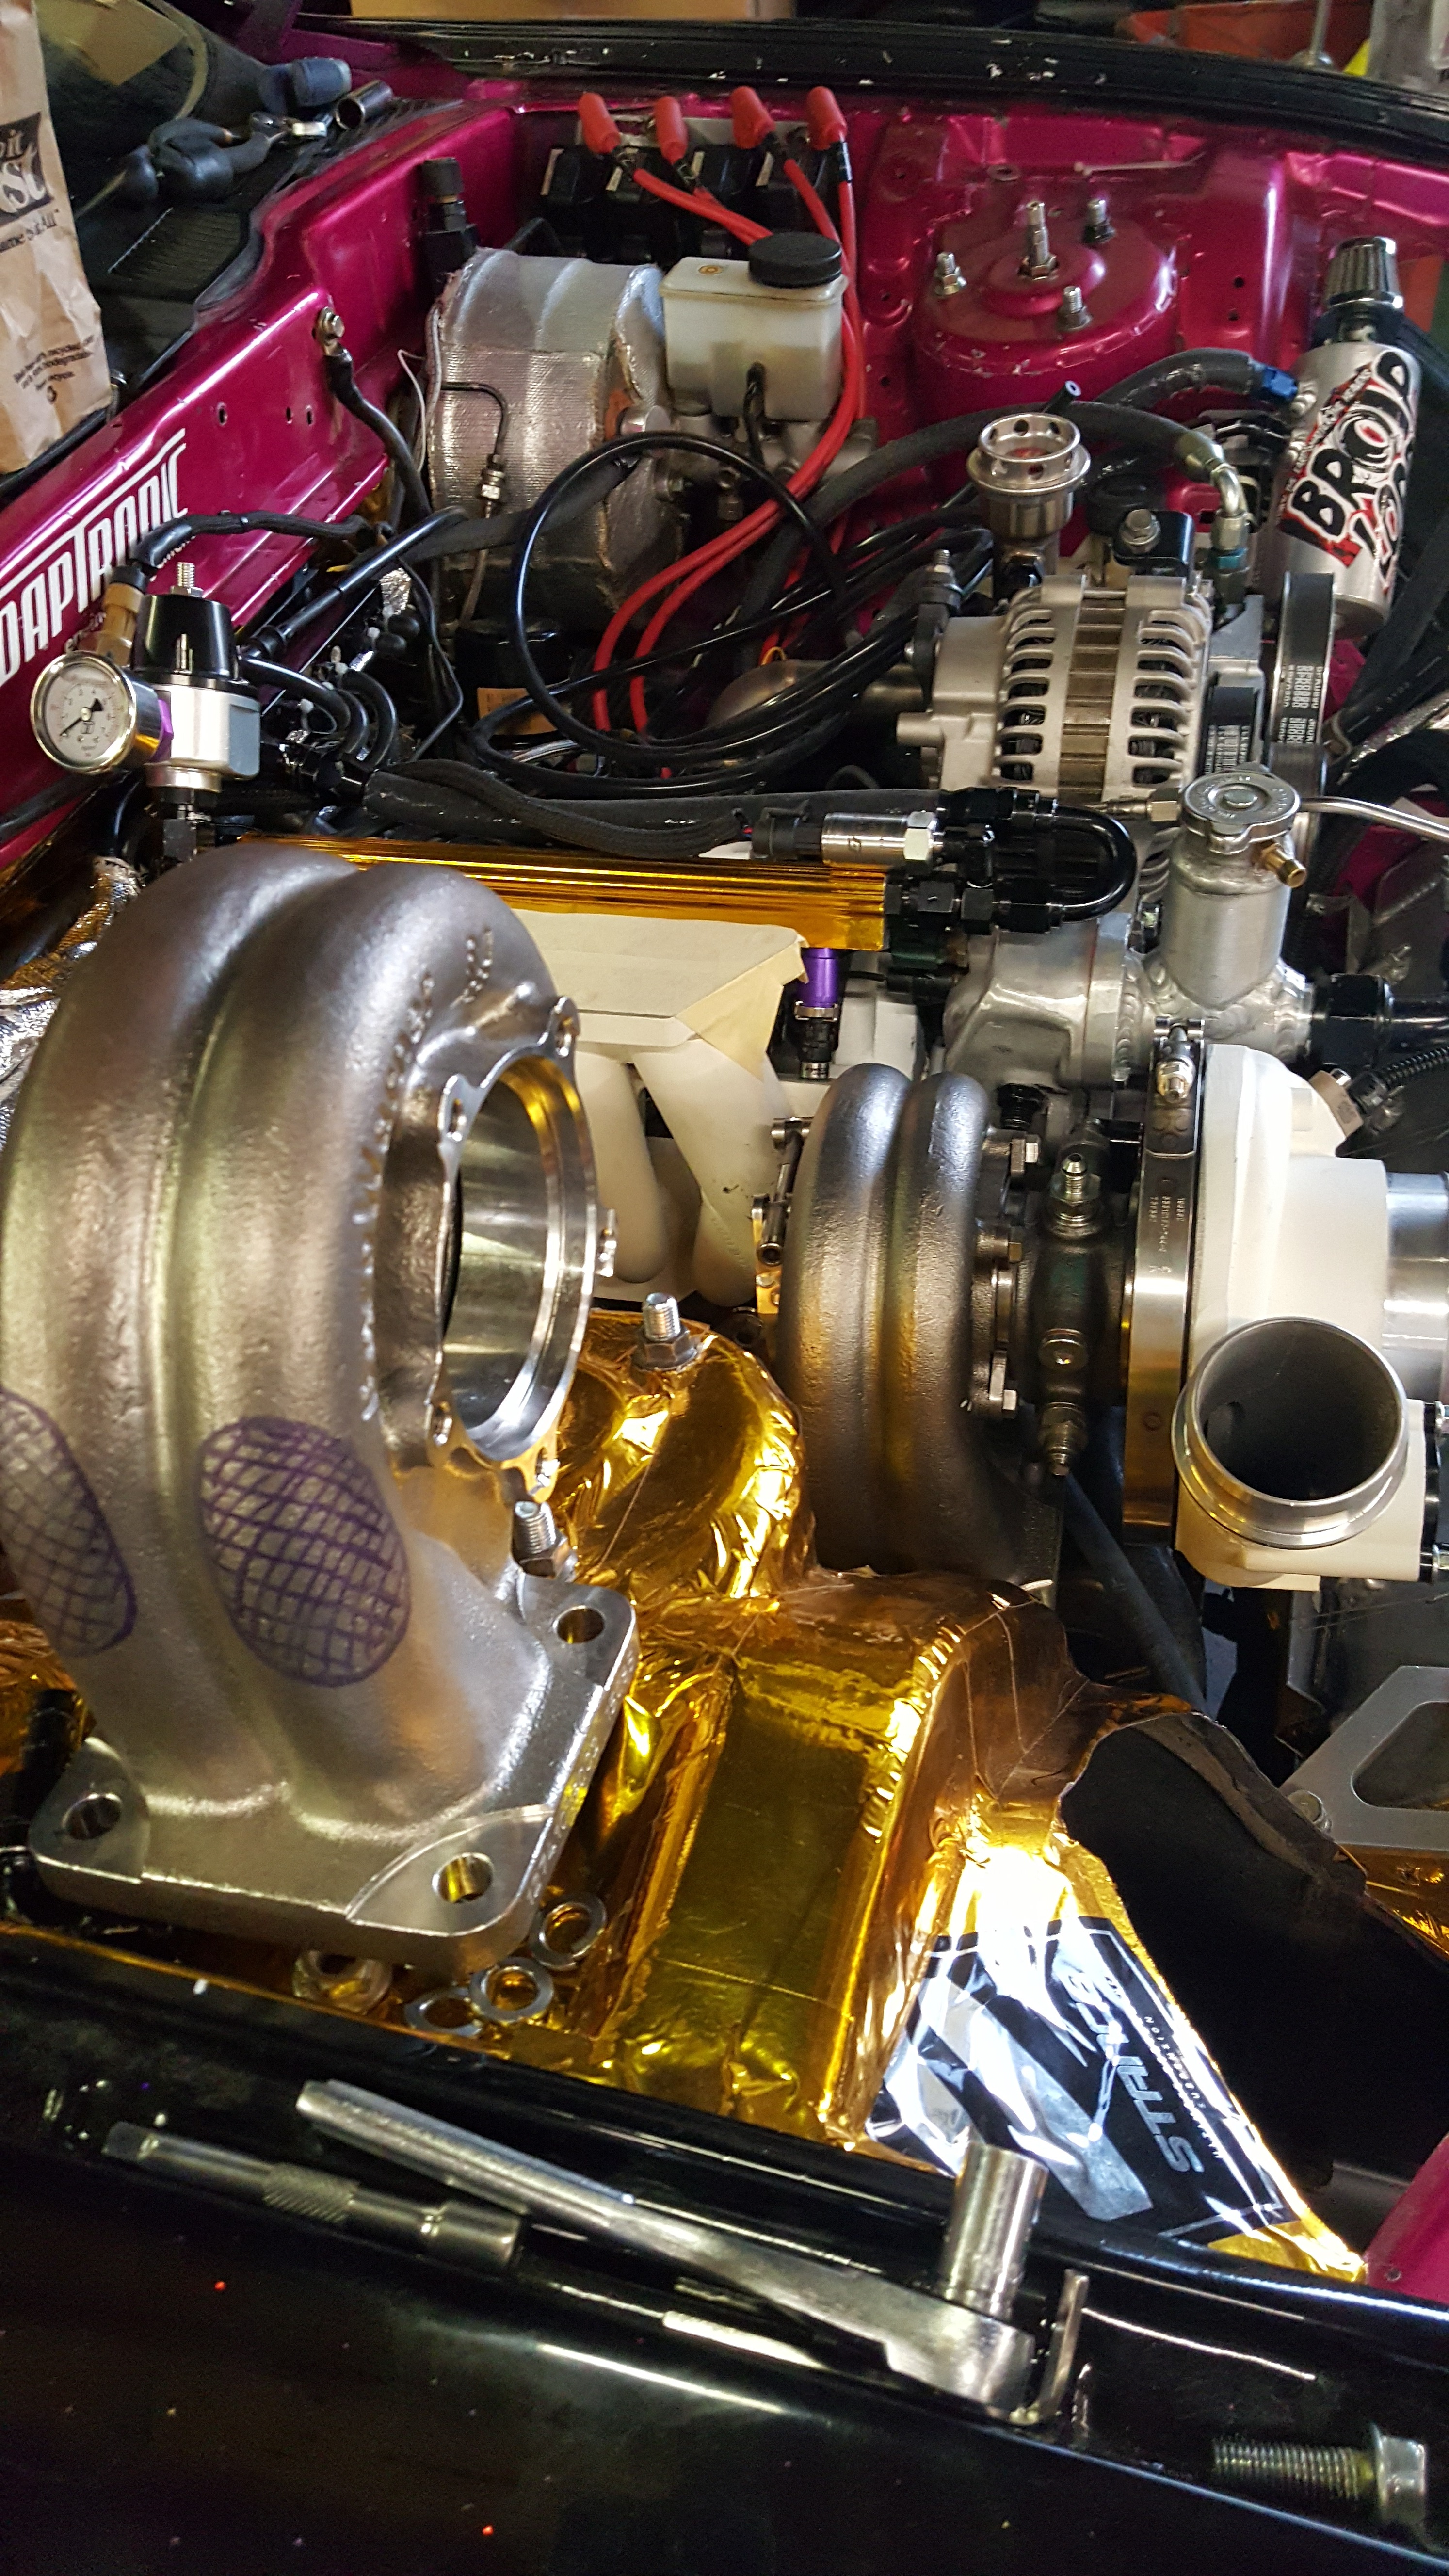
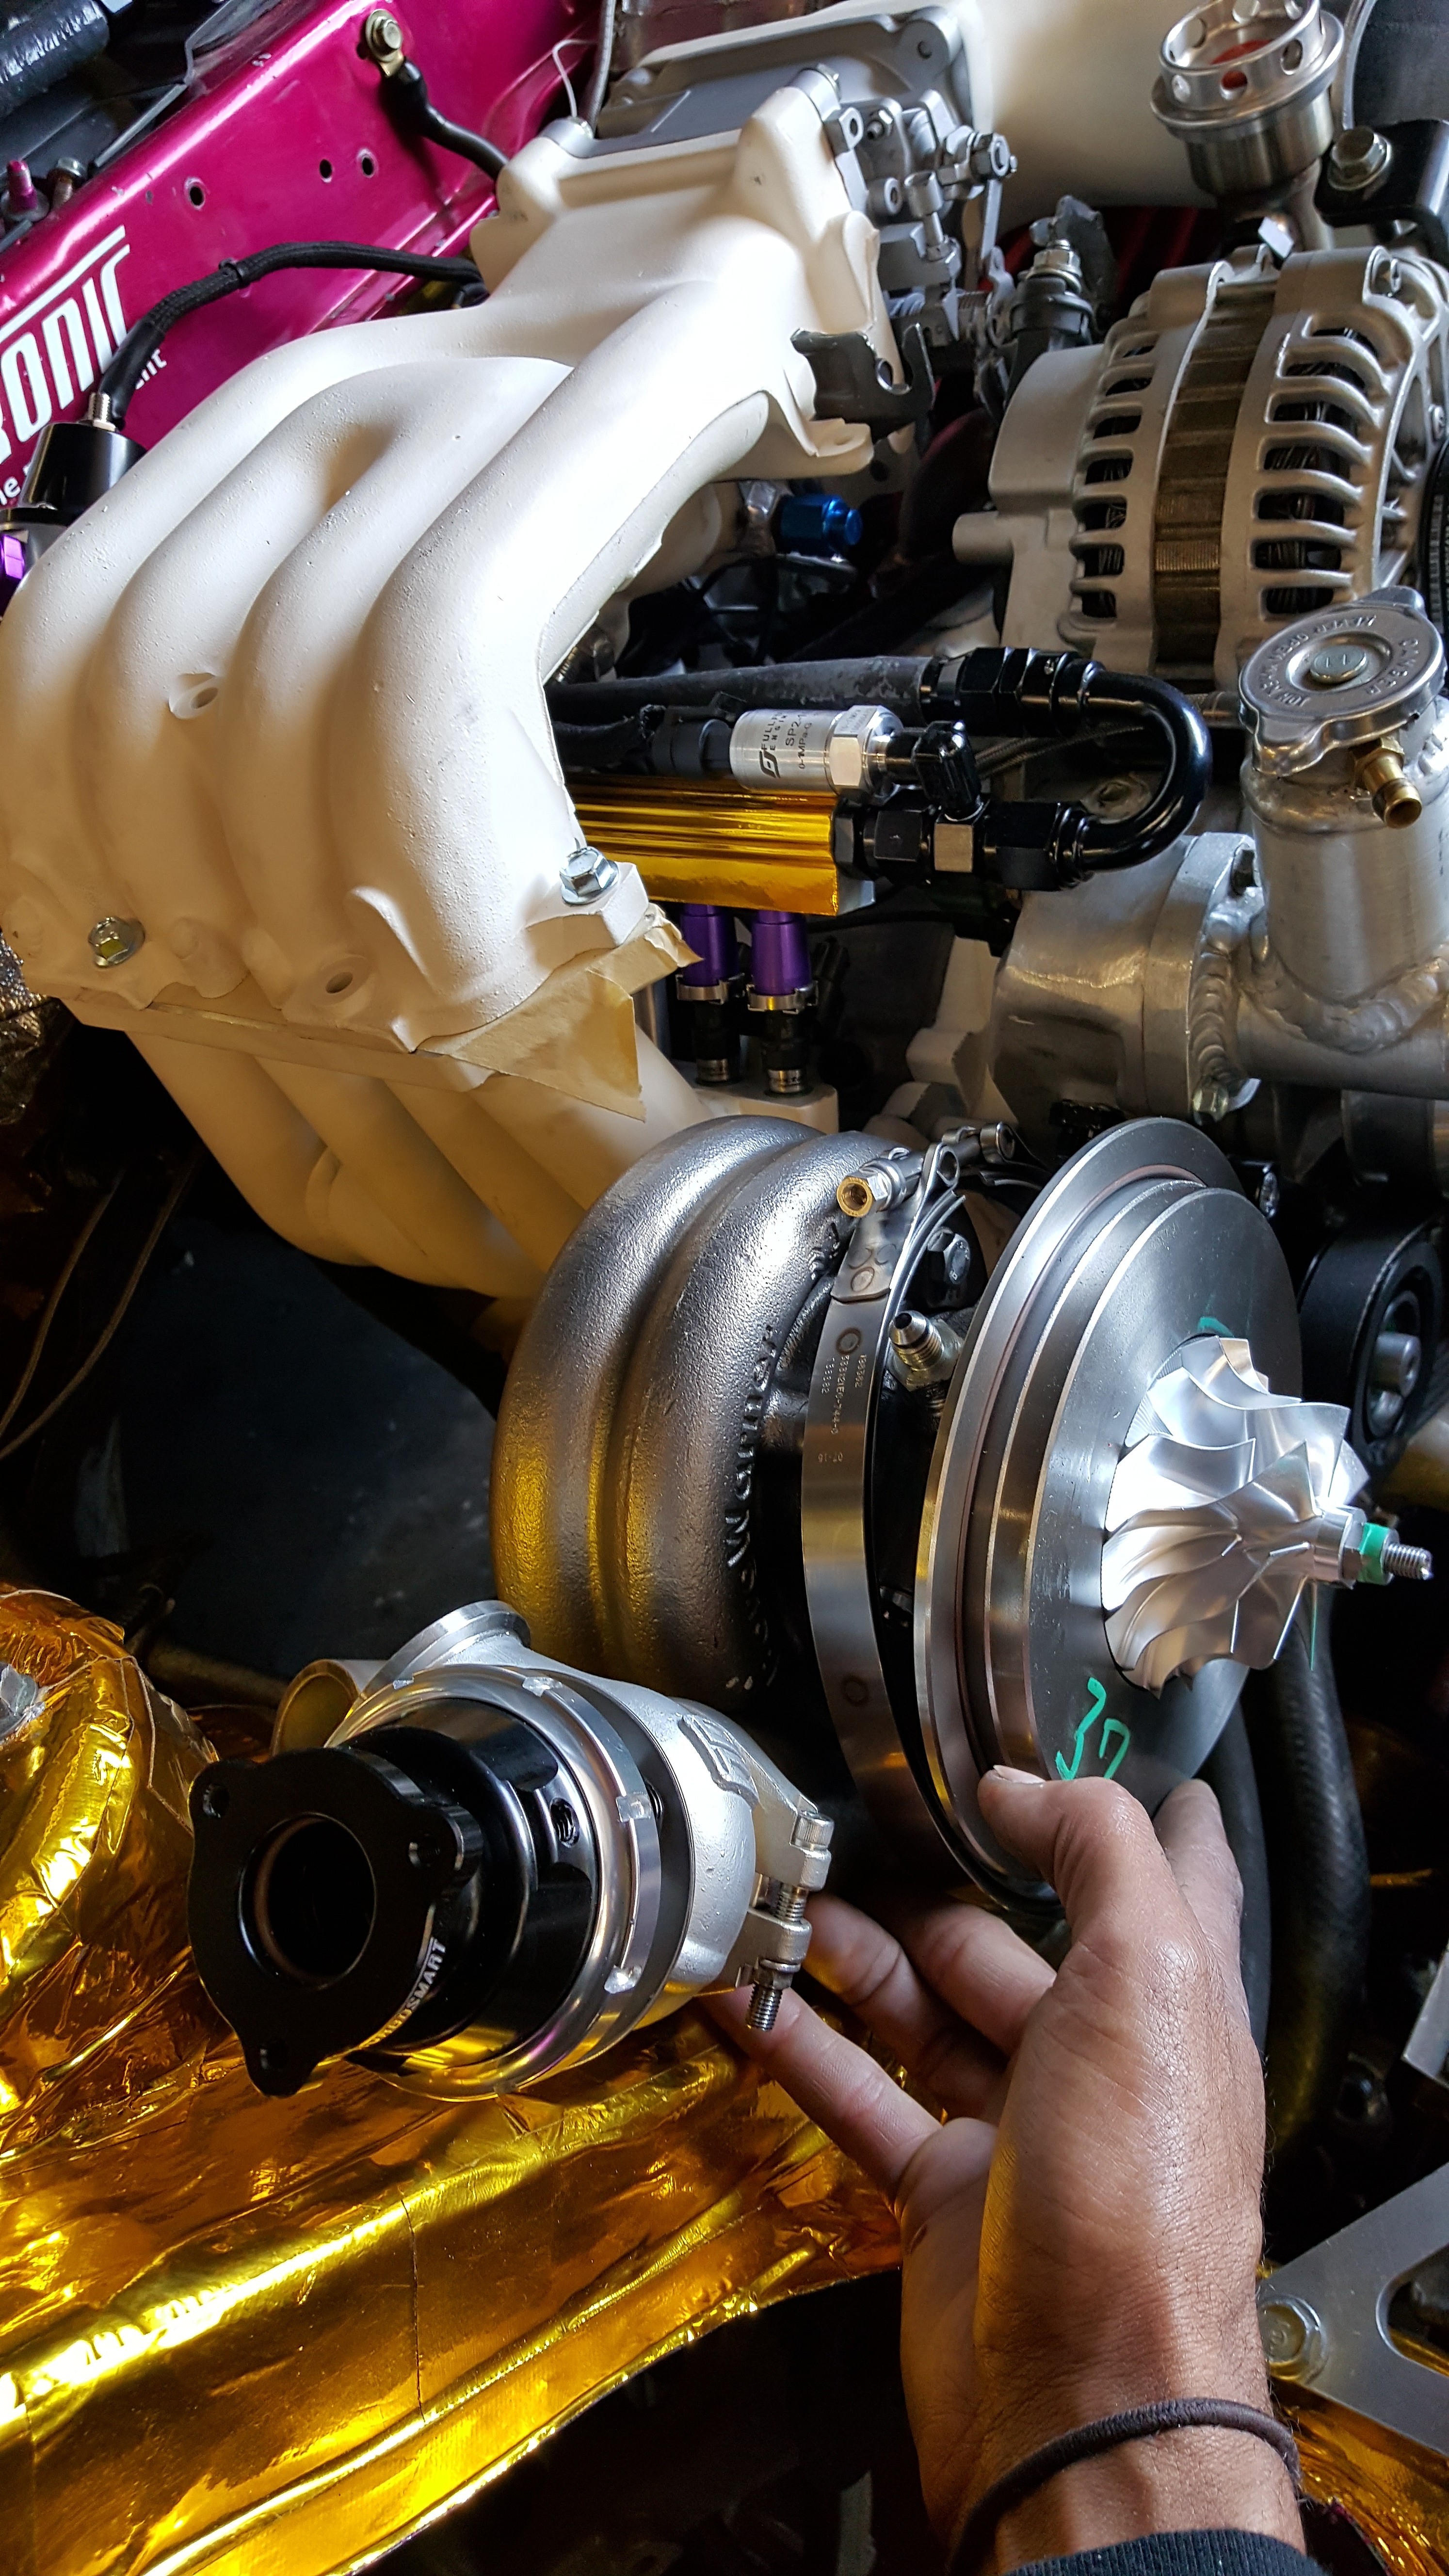
I ended up hitting a bit of an issue. The Semi peripheral Lower Intake manifold hit the turbine housing of the EFR. Both the EFR8374 and the 9174 share the same exhaust housing...so it wouldbn't necessarily matter which turbo I used.. But it hit. So To make it work... there were a few different options.
1) The first would be to have a spacer made to go in between Gleasemans manifold and the engine block.
2) The second would be to have Gleasemans manifold flange machined at an angle. ( NOT COOL)
3) And the third and most time taking.... mock up and make a jig for John and have him construct a manifold with it.
I went back and forth for about 4 hours trying to think of other ways and or other options to fix the issue and get the car running but I eventually realized that anything other than a perfectly fitting manifold would be cutting corners. So I bit the bullet and decided that i'd make a jig based off Gleasemans original manifold and send that jig to him so that he could construct a manifold to fit.
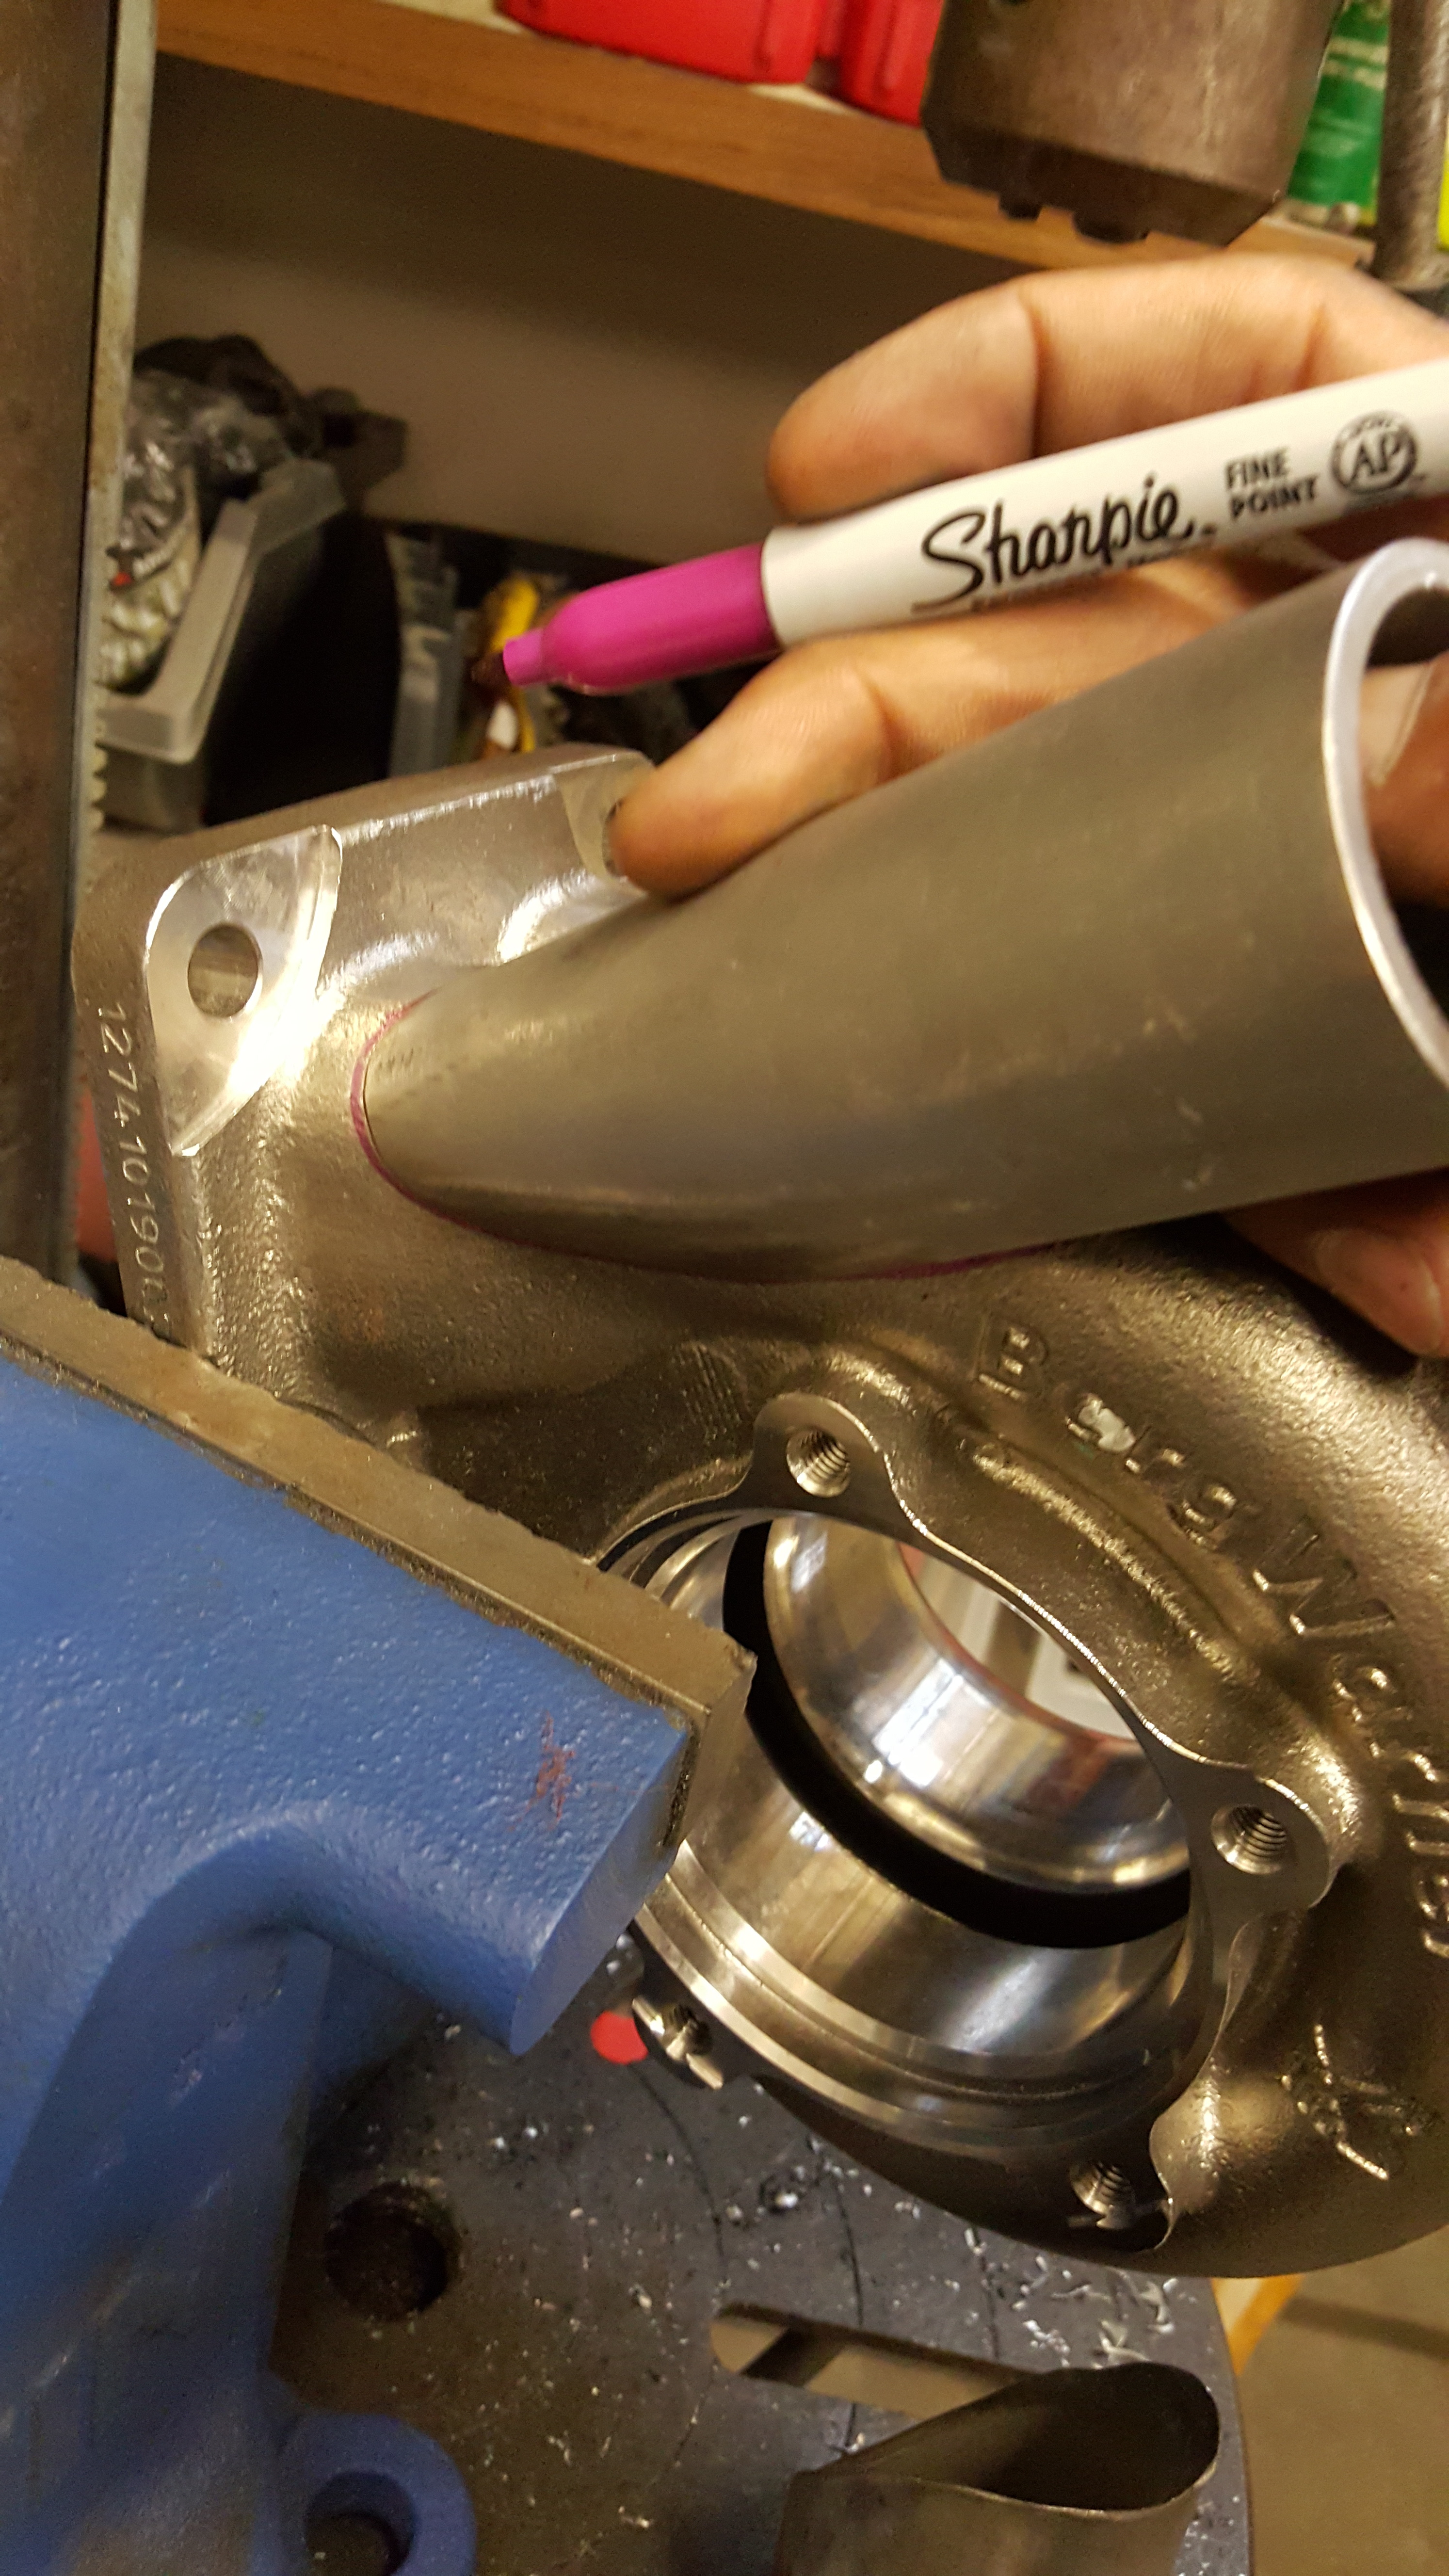
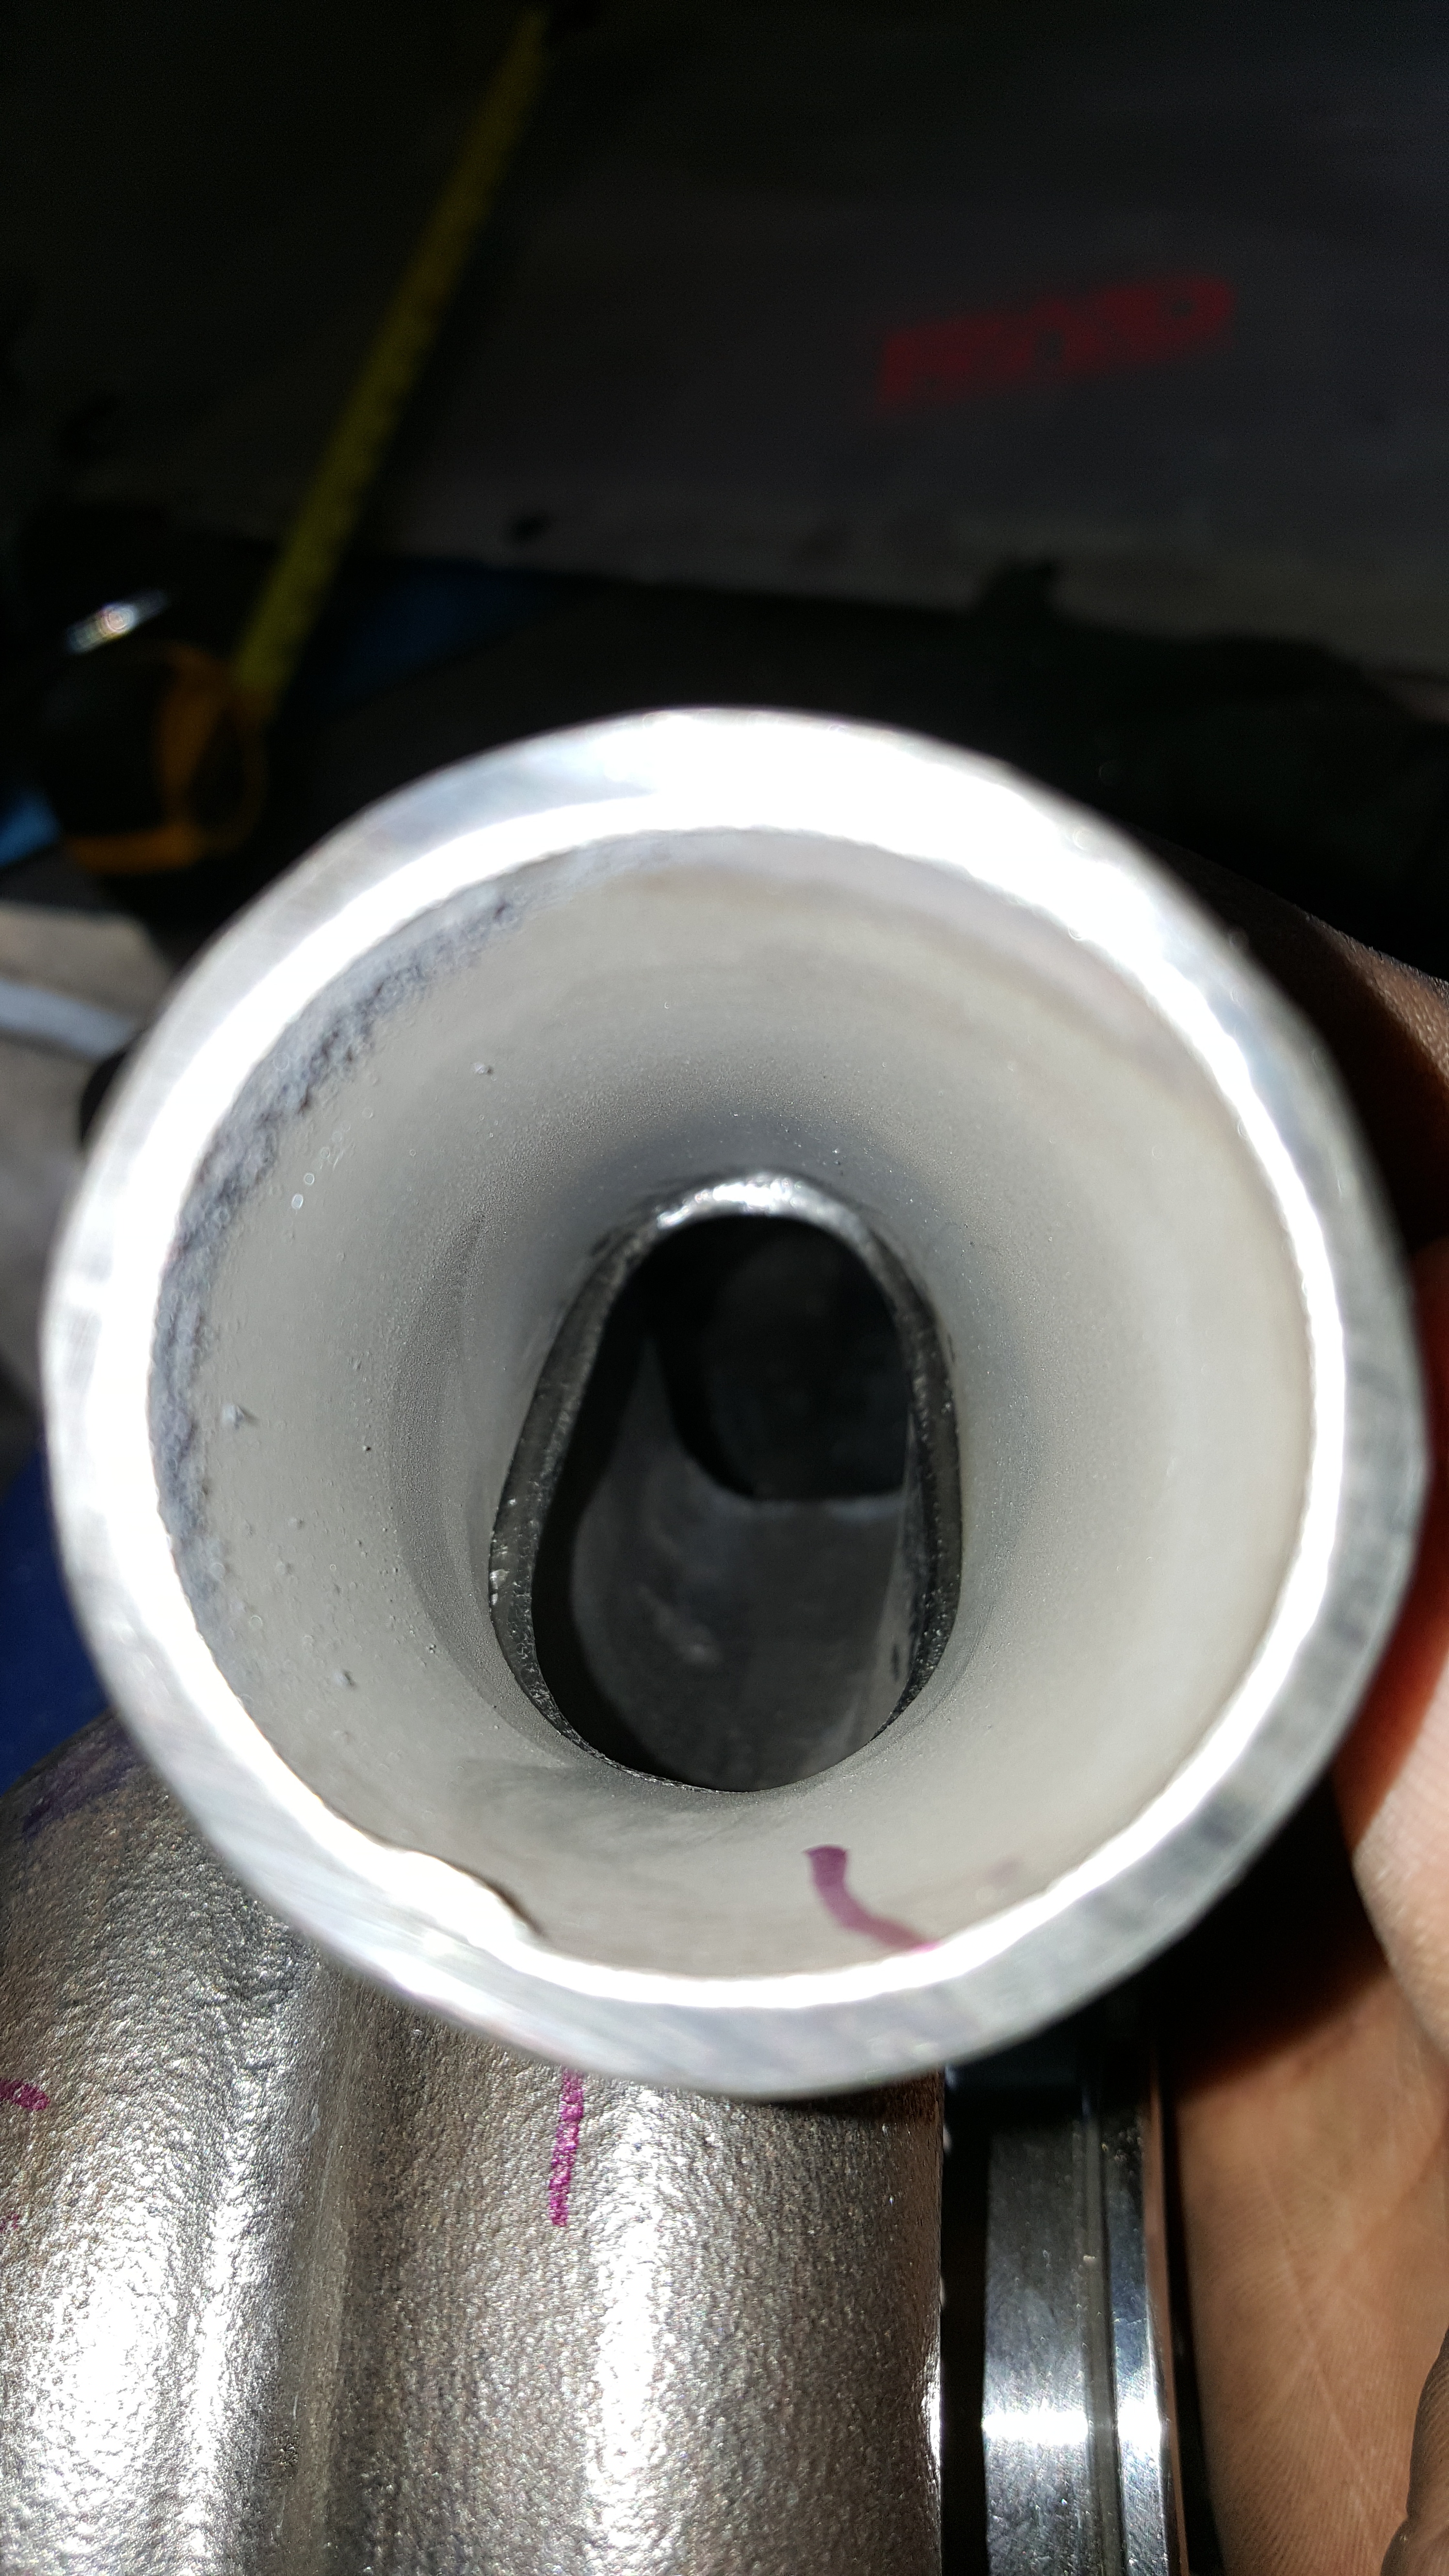
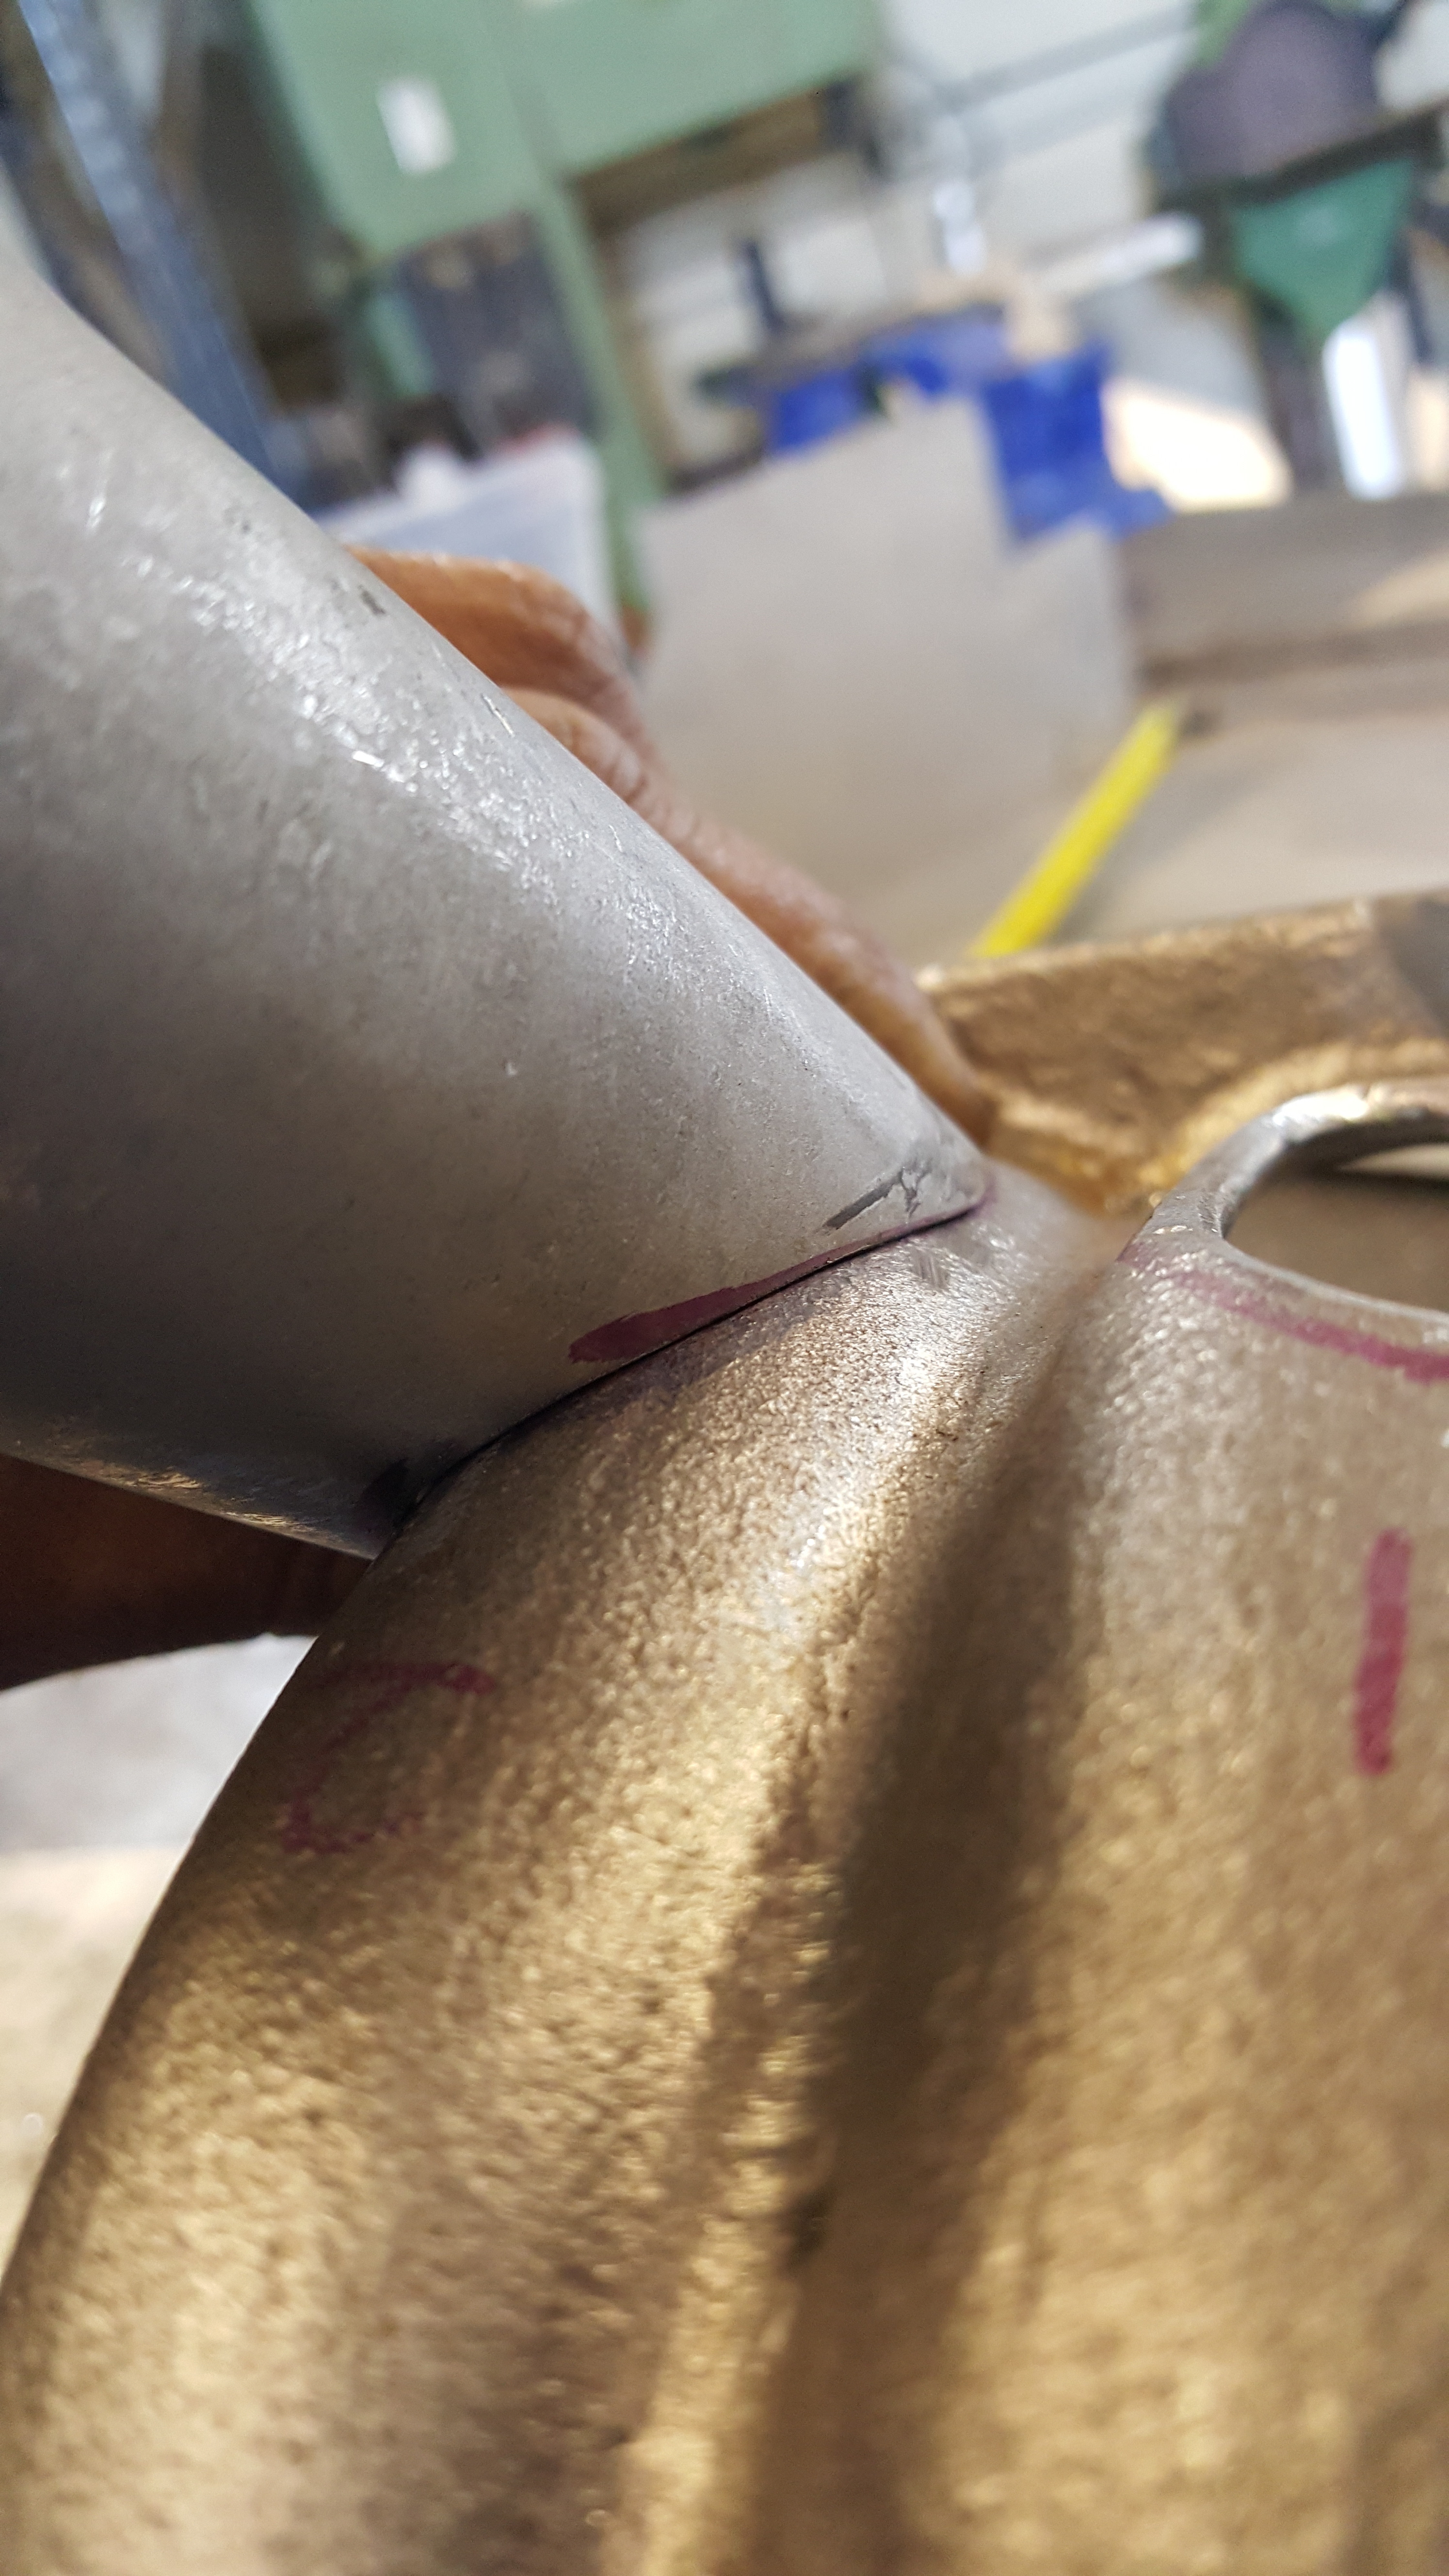
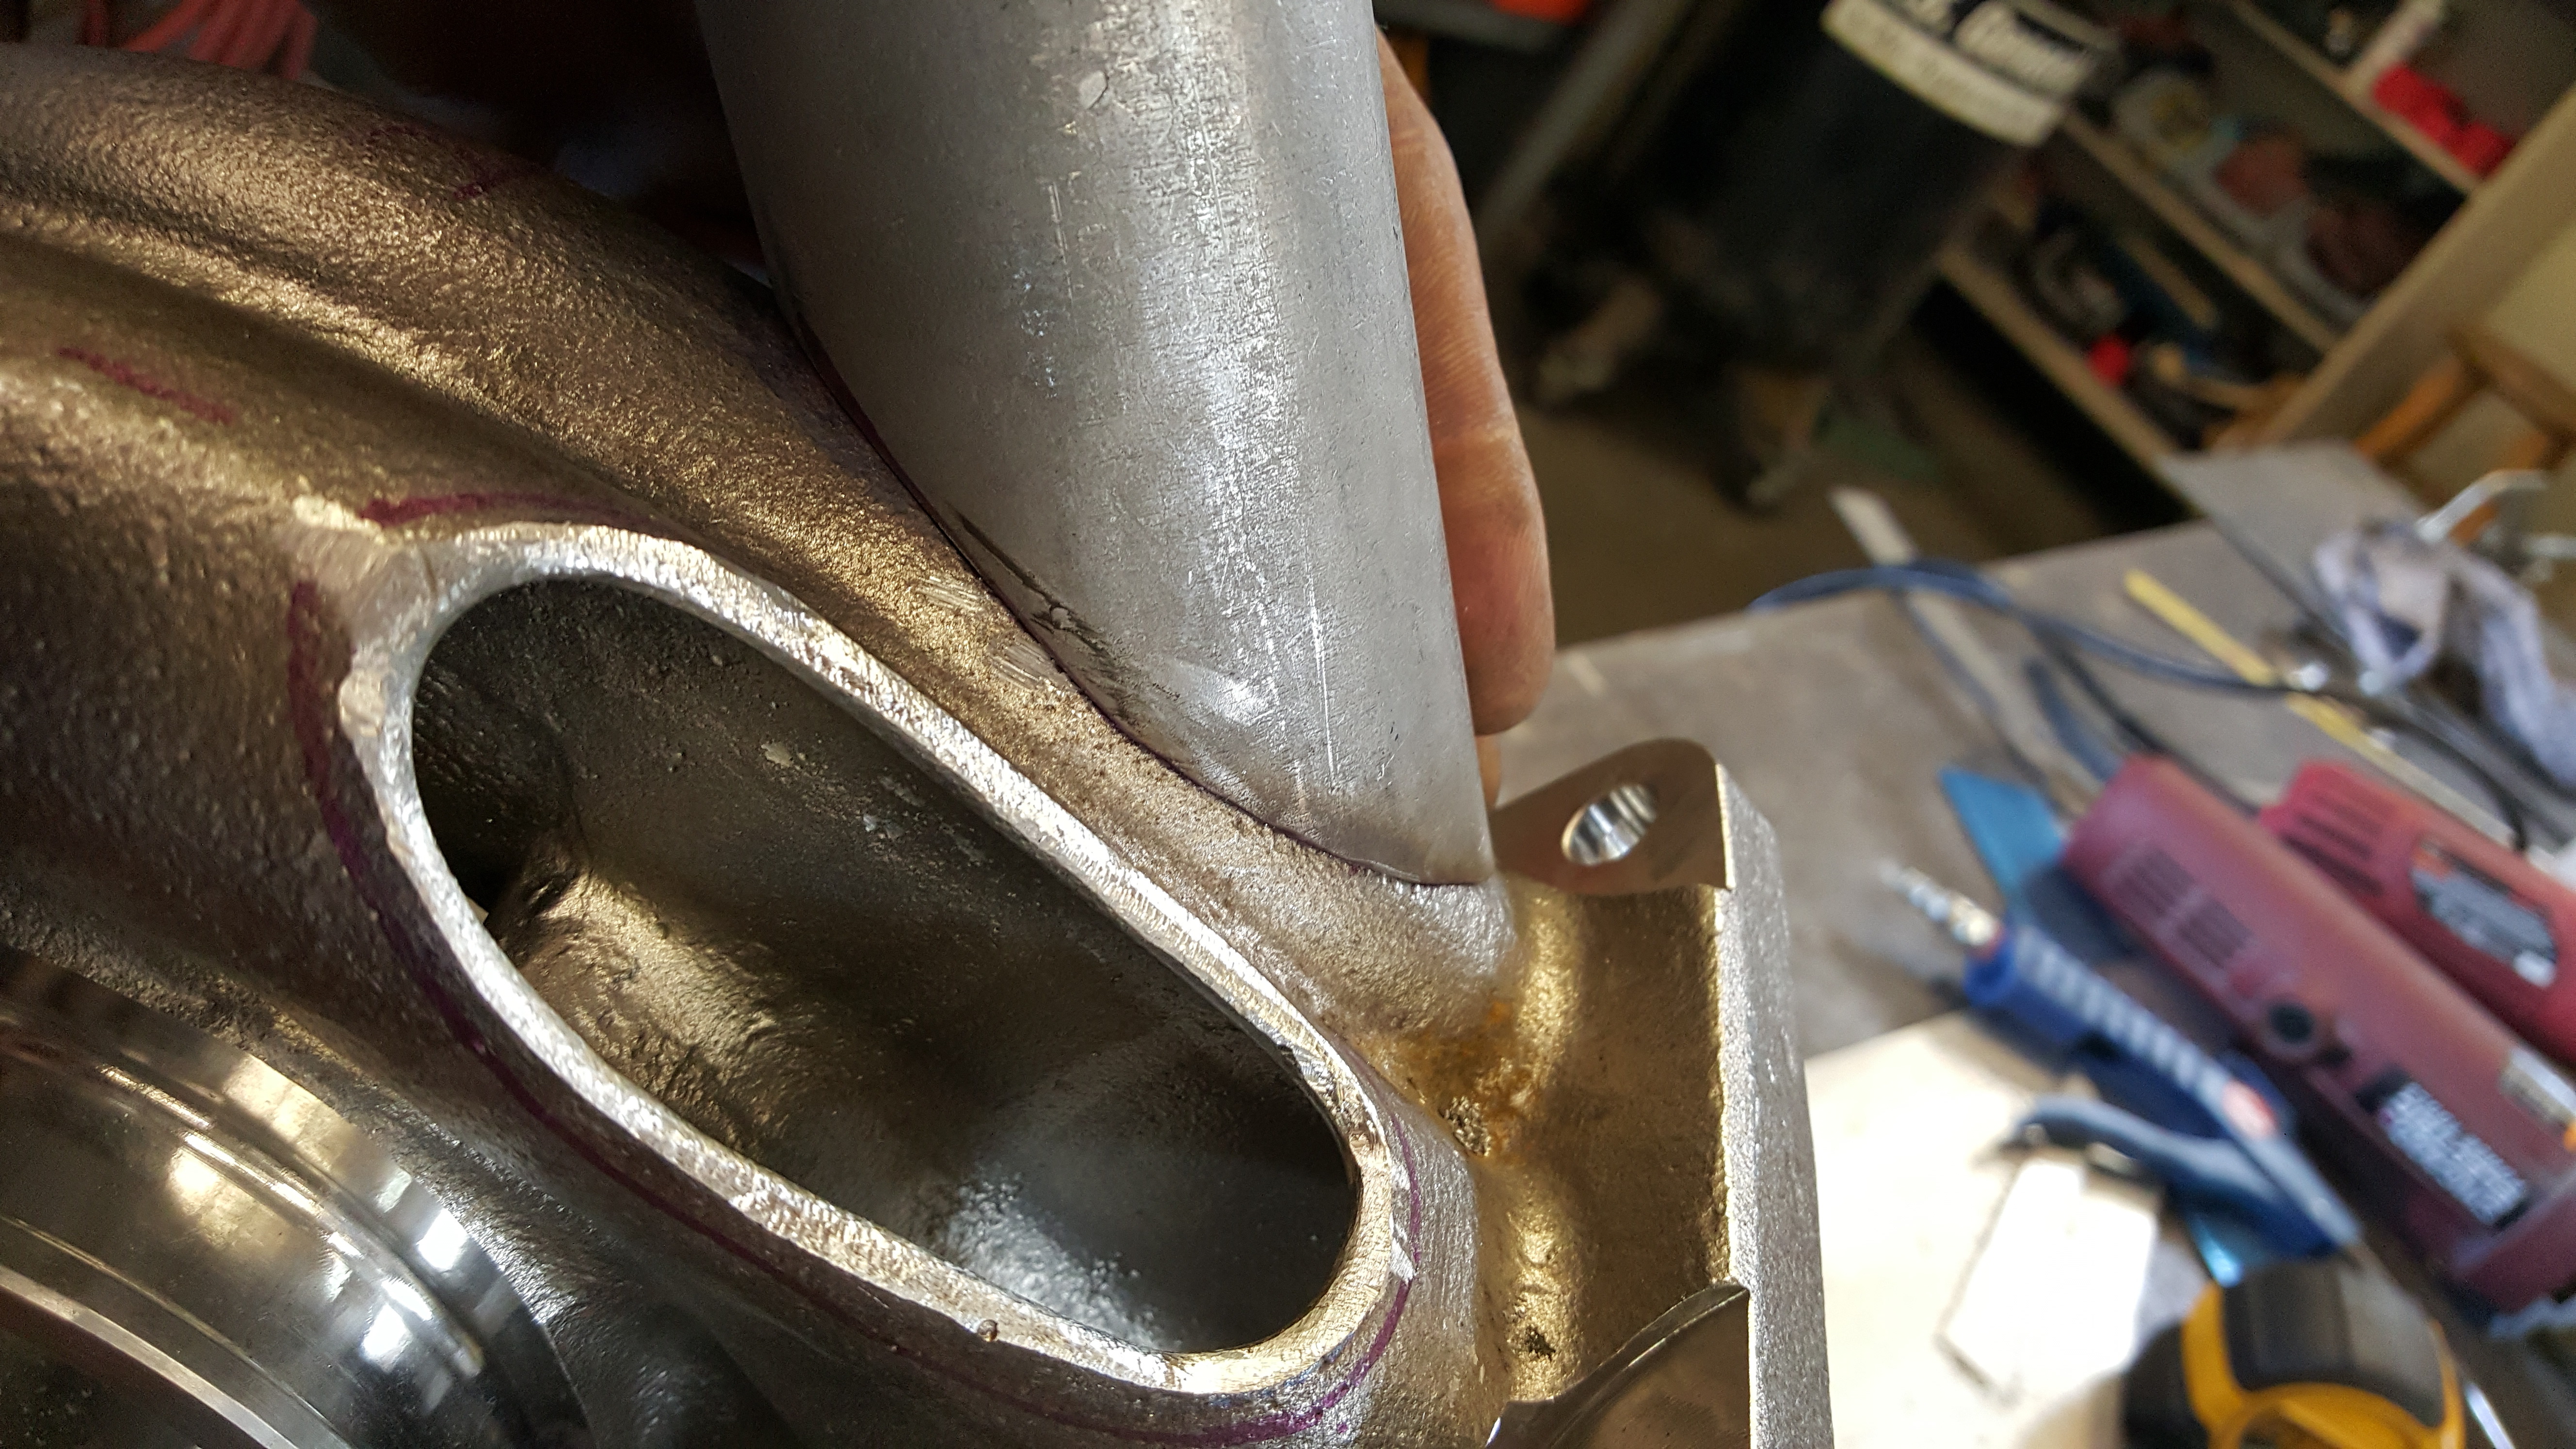
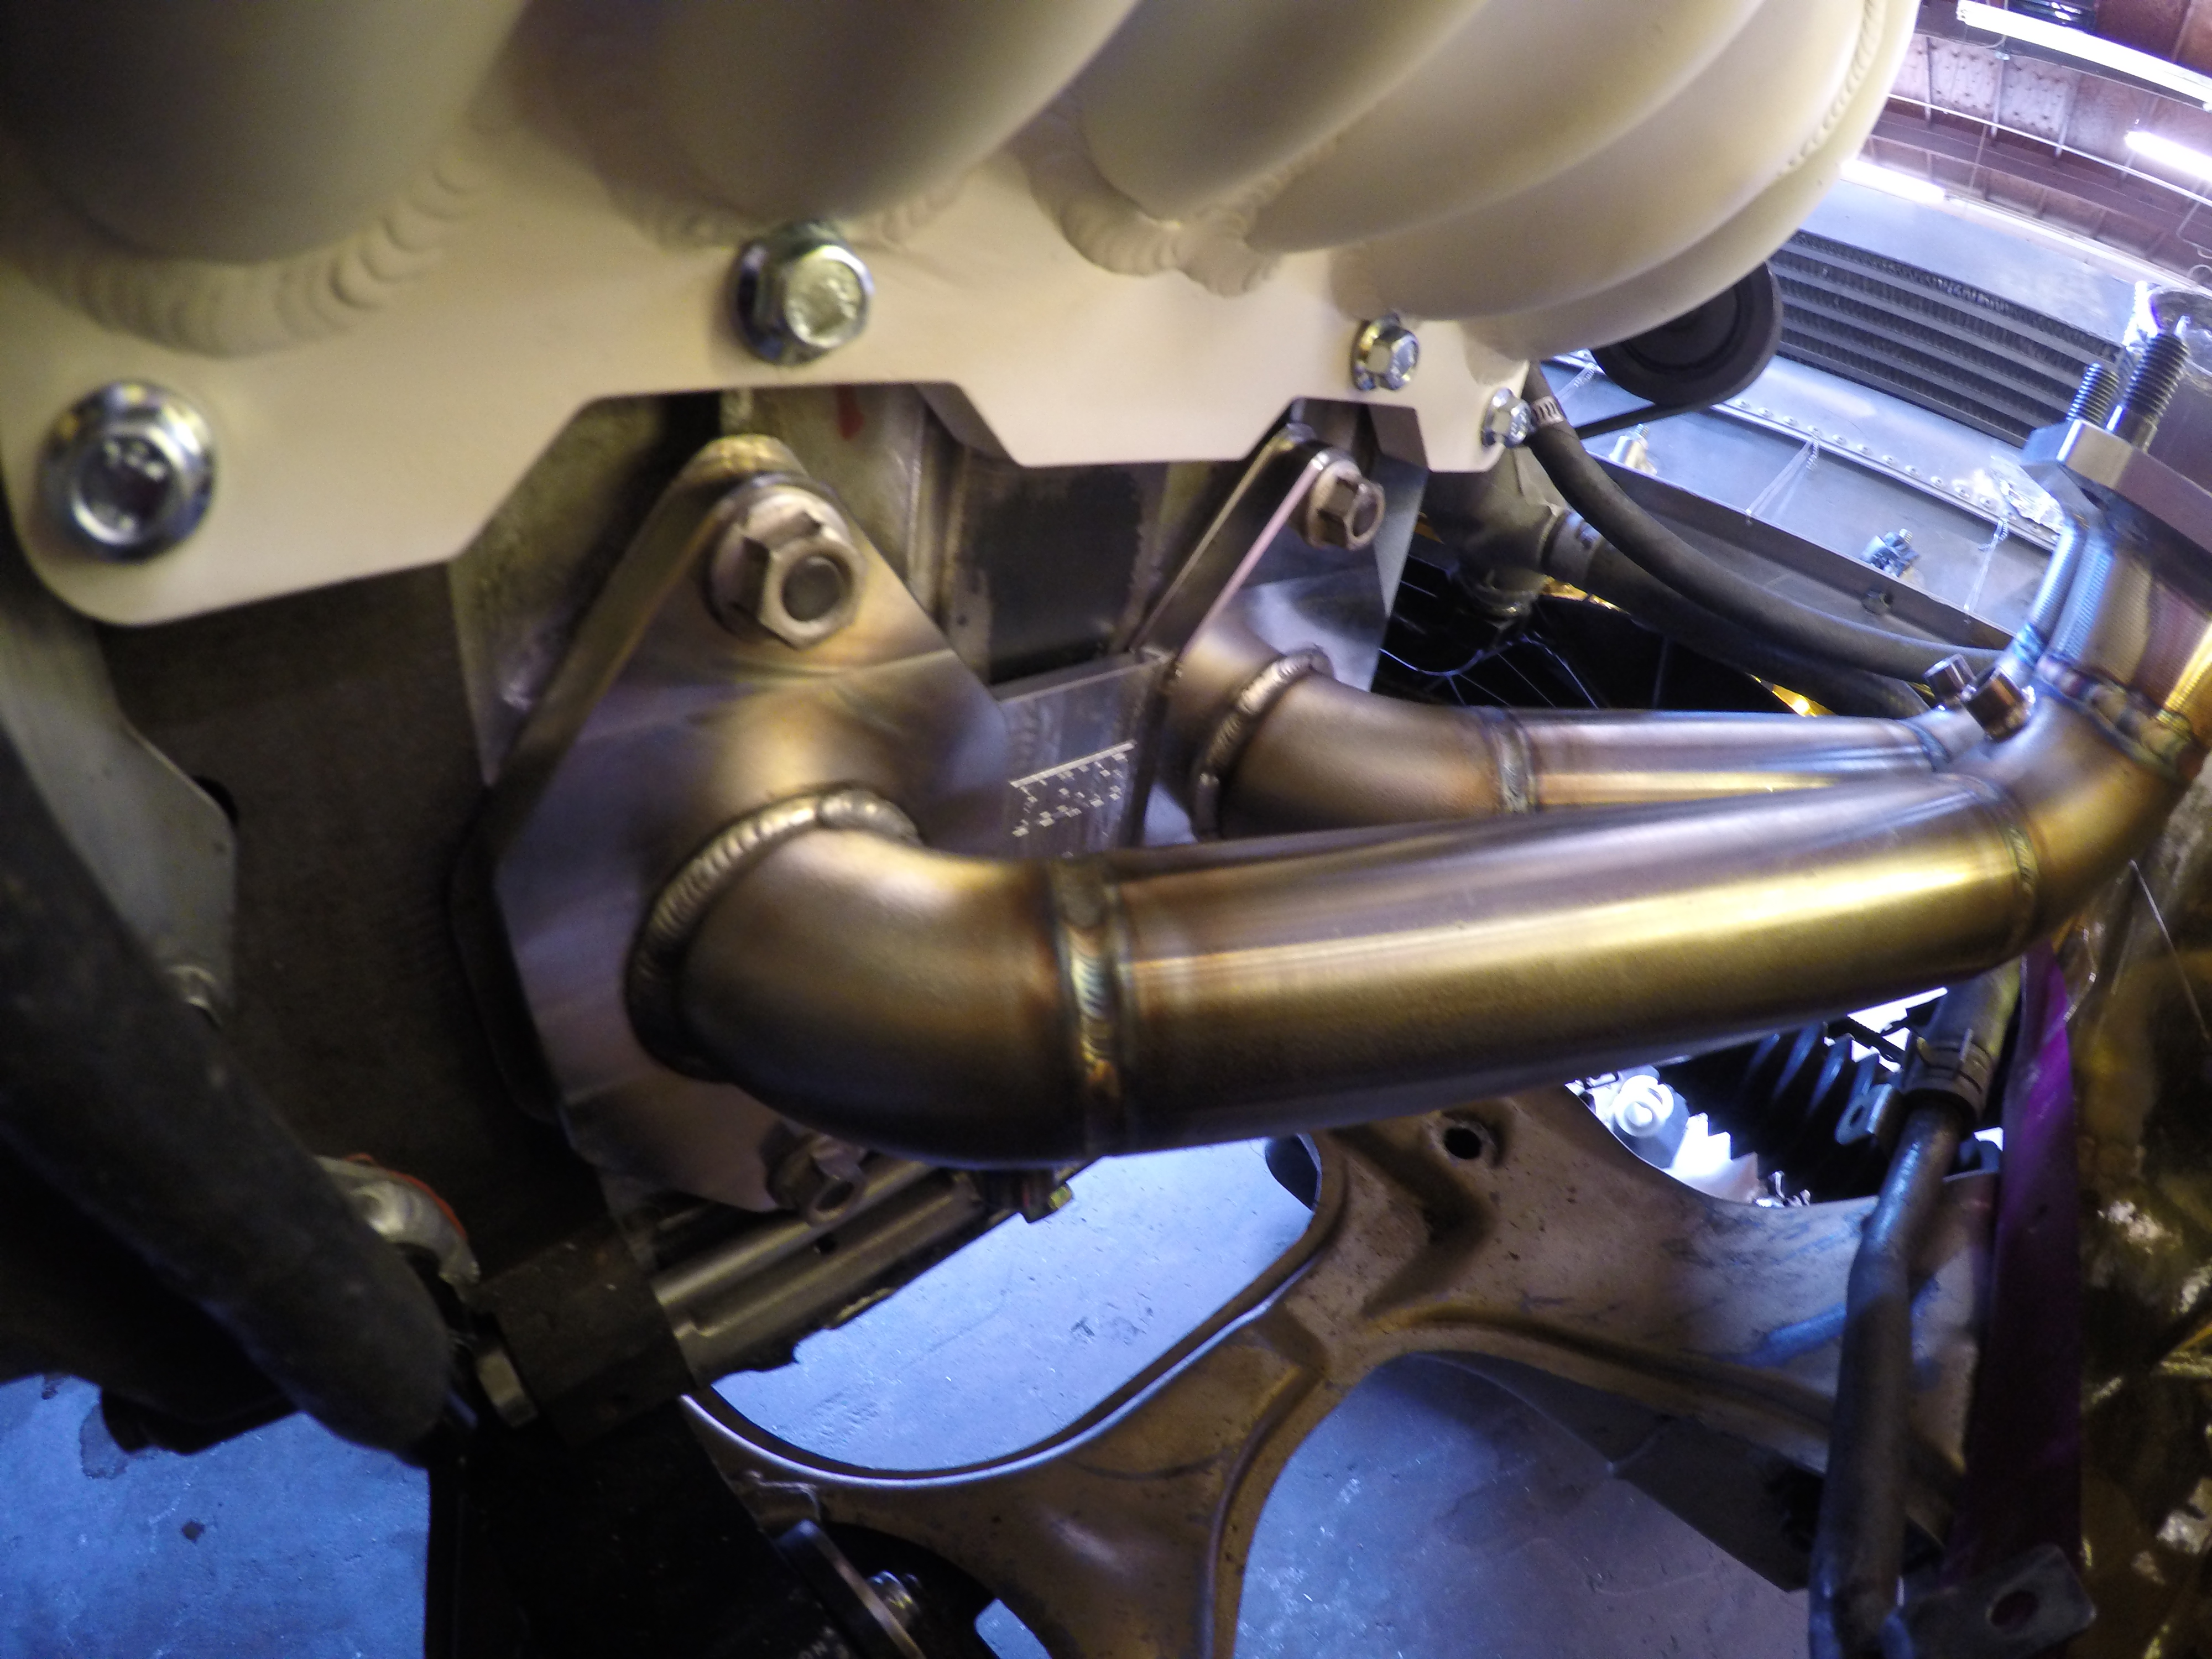
Here's where the Manifold NEEDED to place the turbo:
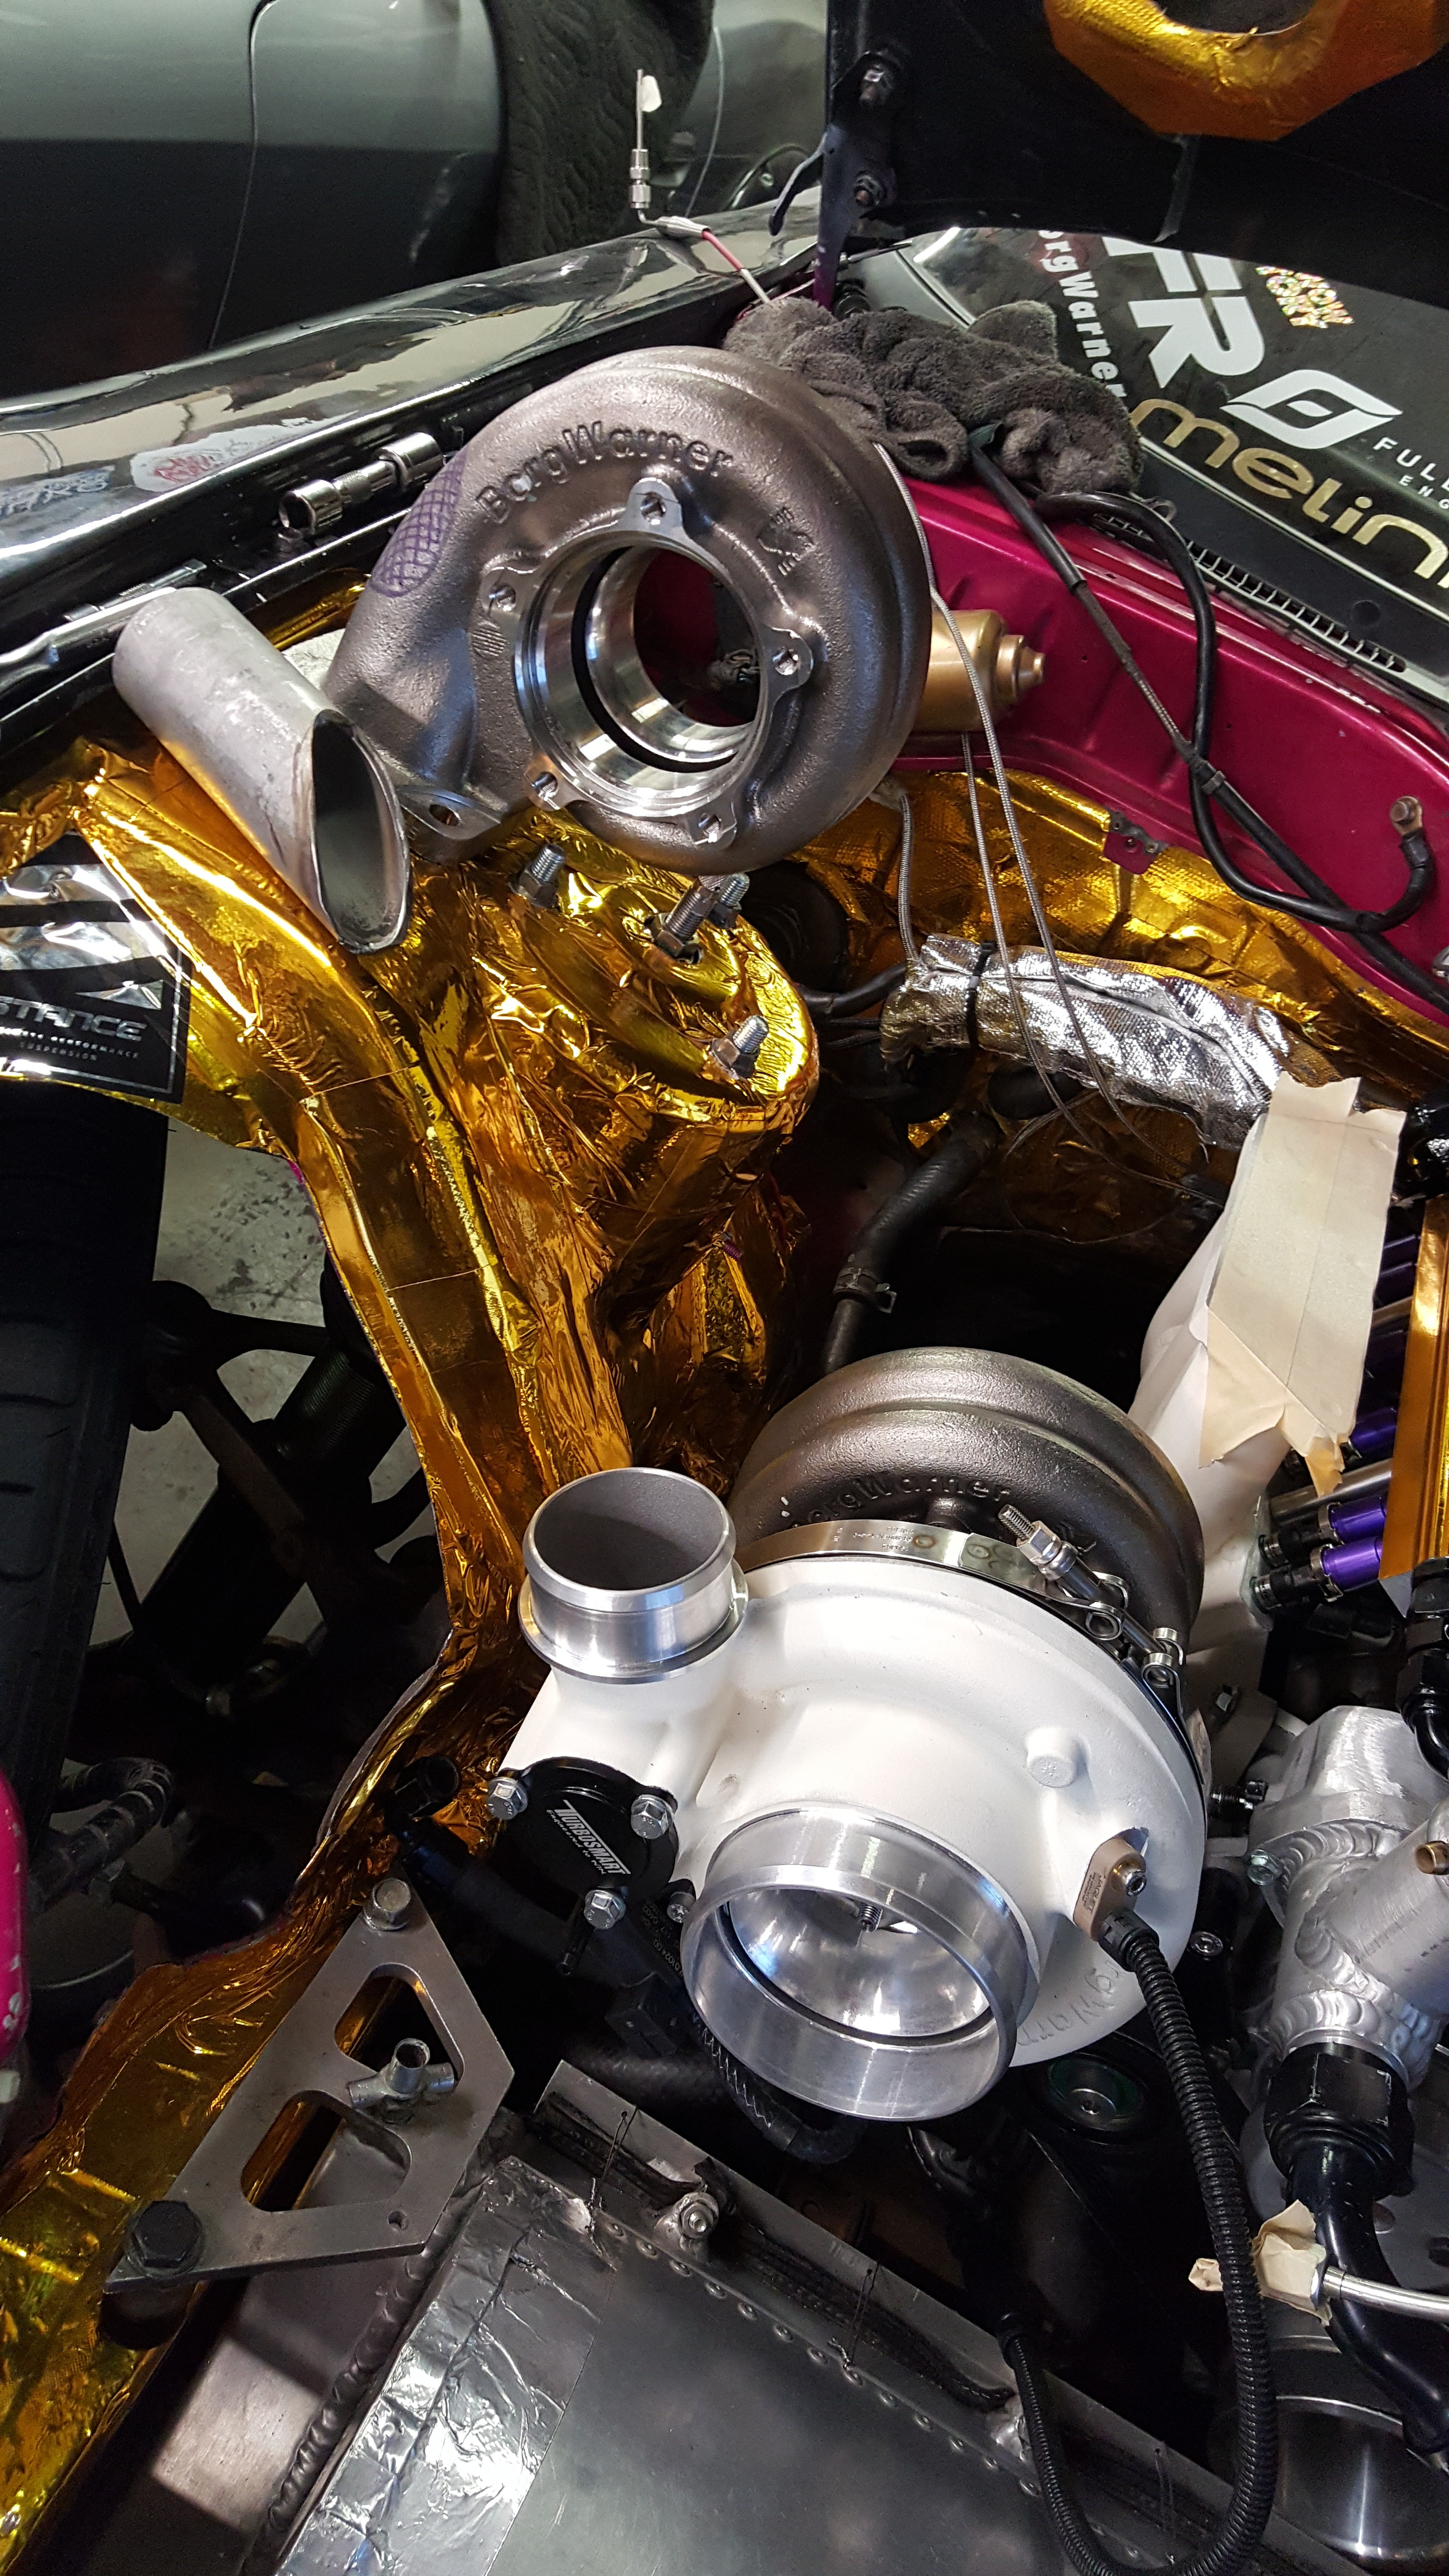
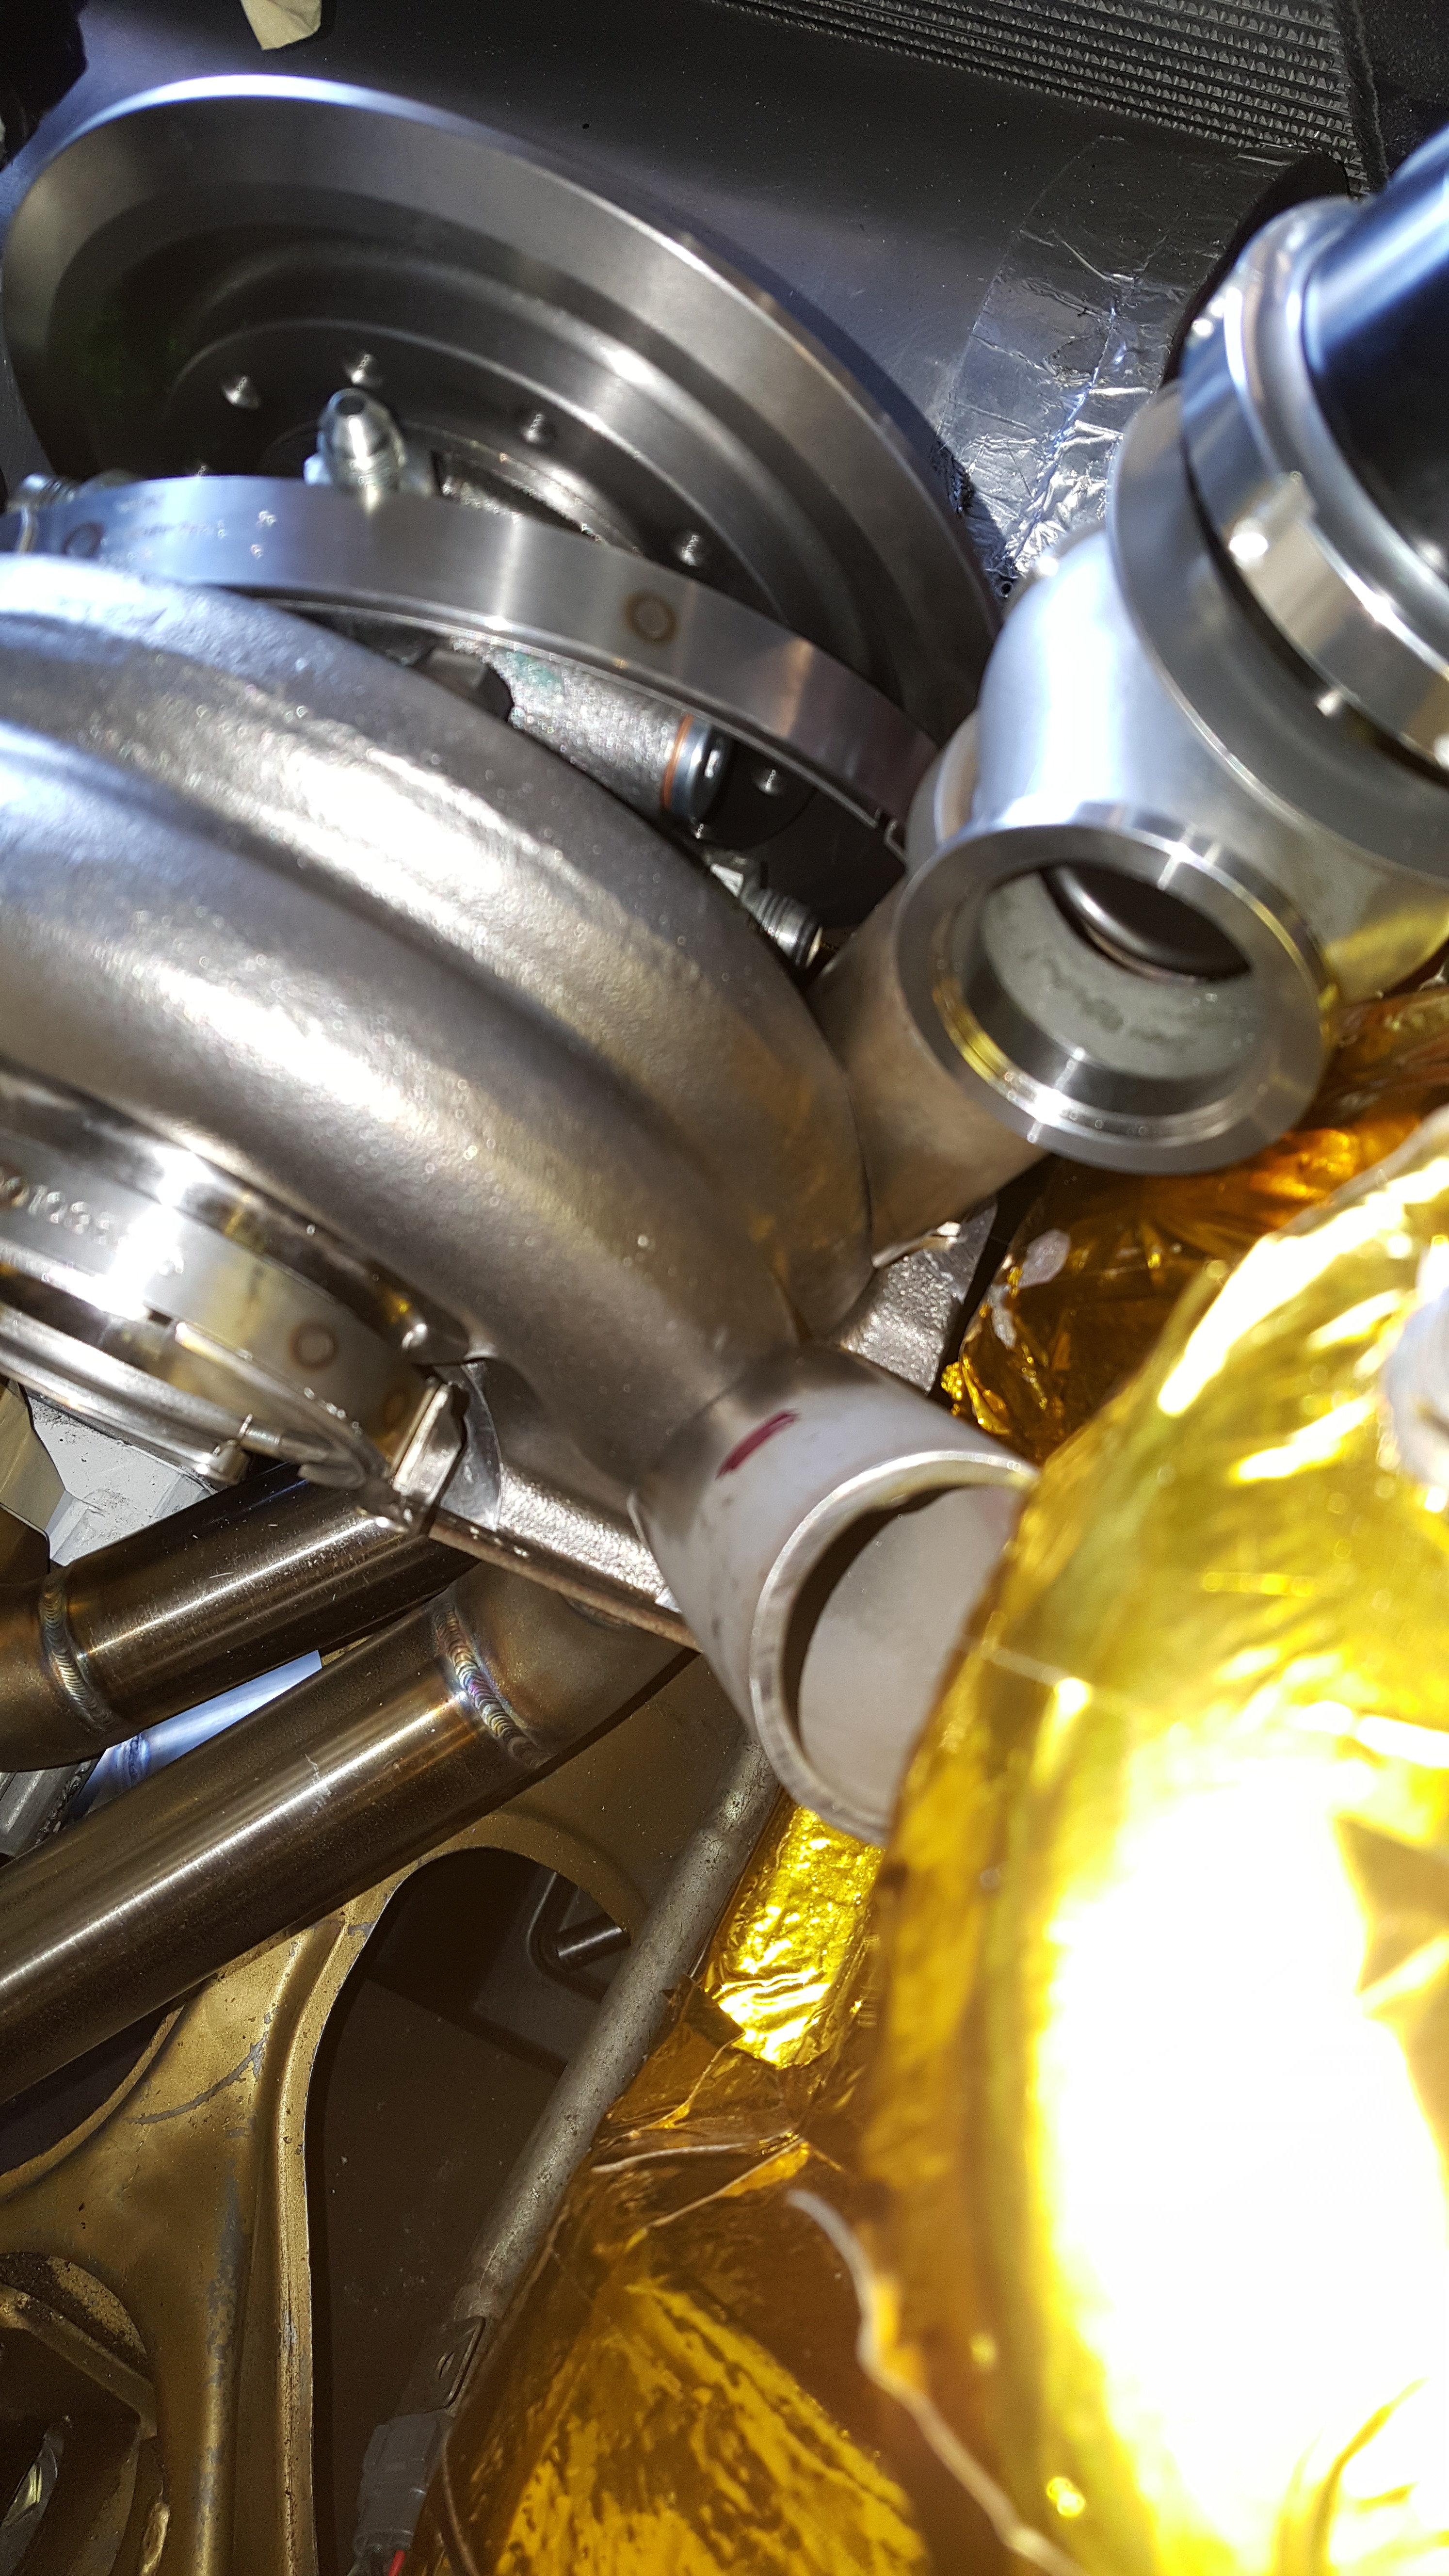
And after 6 Days including 5 days shipping John "Gleaseman" had a Brand new Extended version of his billet Series EFR manifold constructed AND Jigged, and on it's way back to Sunny California! So if anyone needs to run one of these manifolds with the SEMI Peripheral Manifold that I'm using... We're All Set! IT WILL FIT! As Seen Below...with a 3" to 4" Transition for the Down Pipe
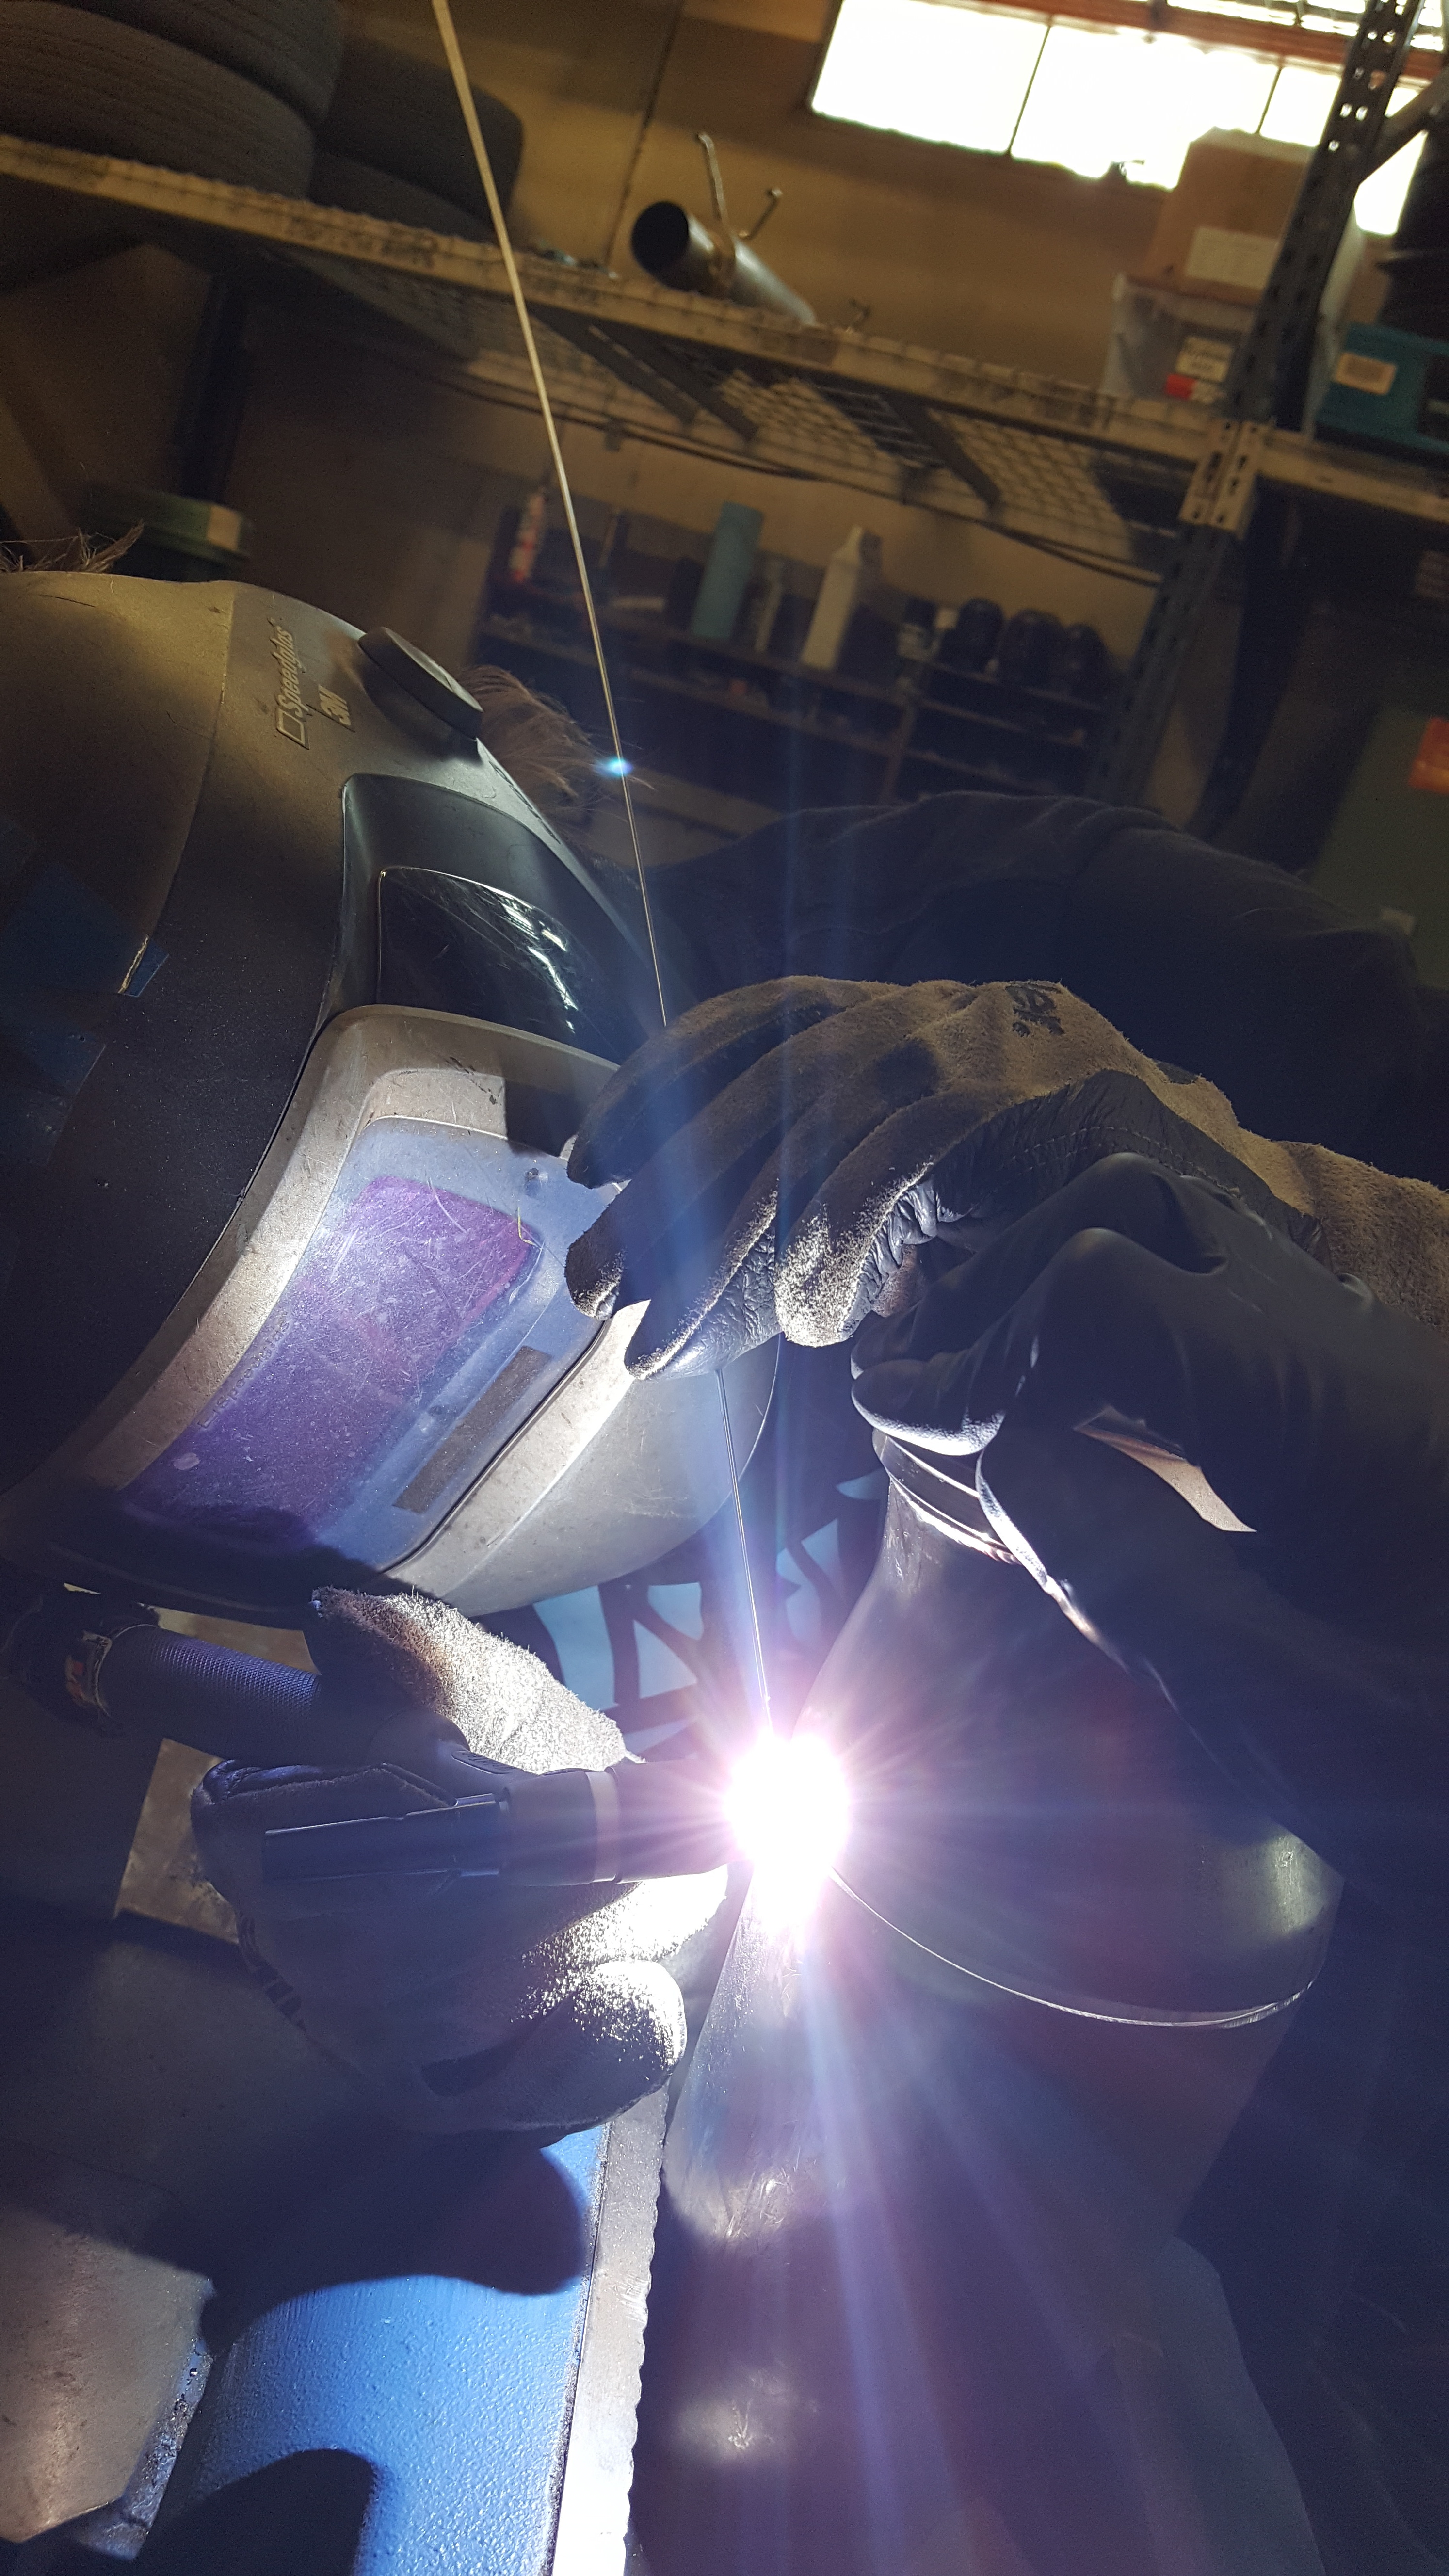
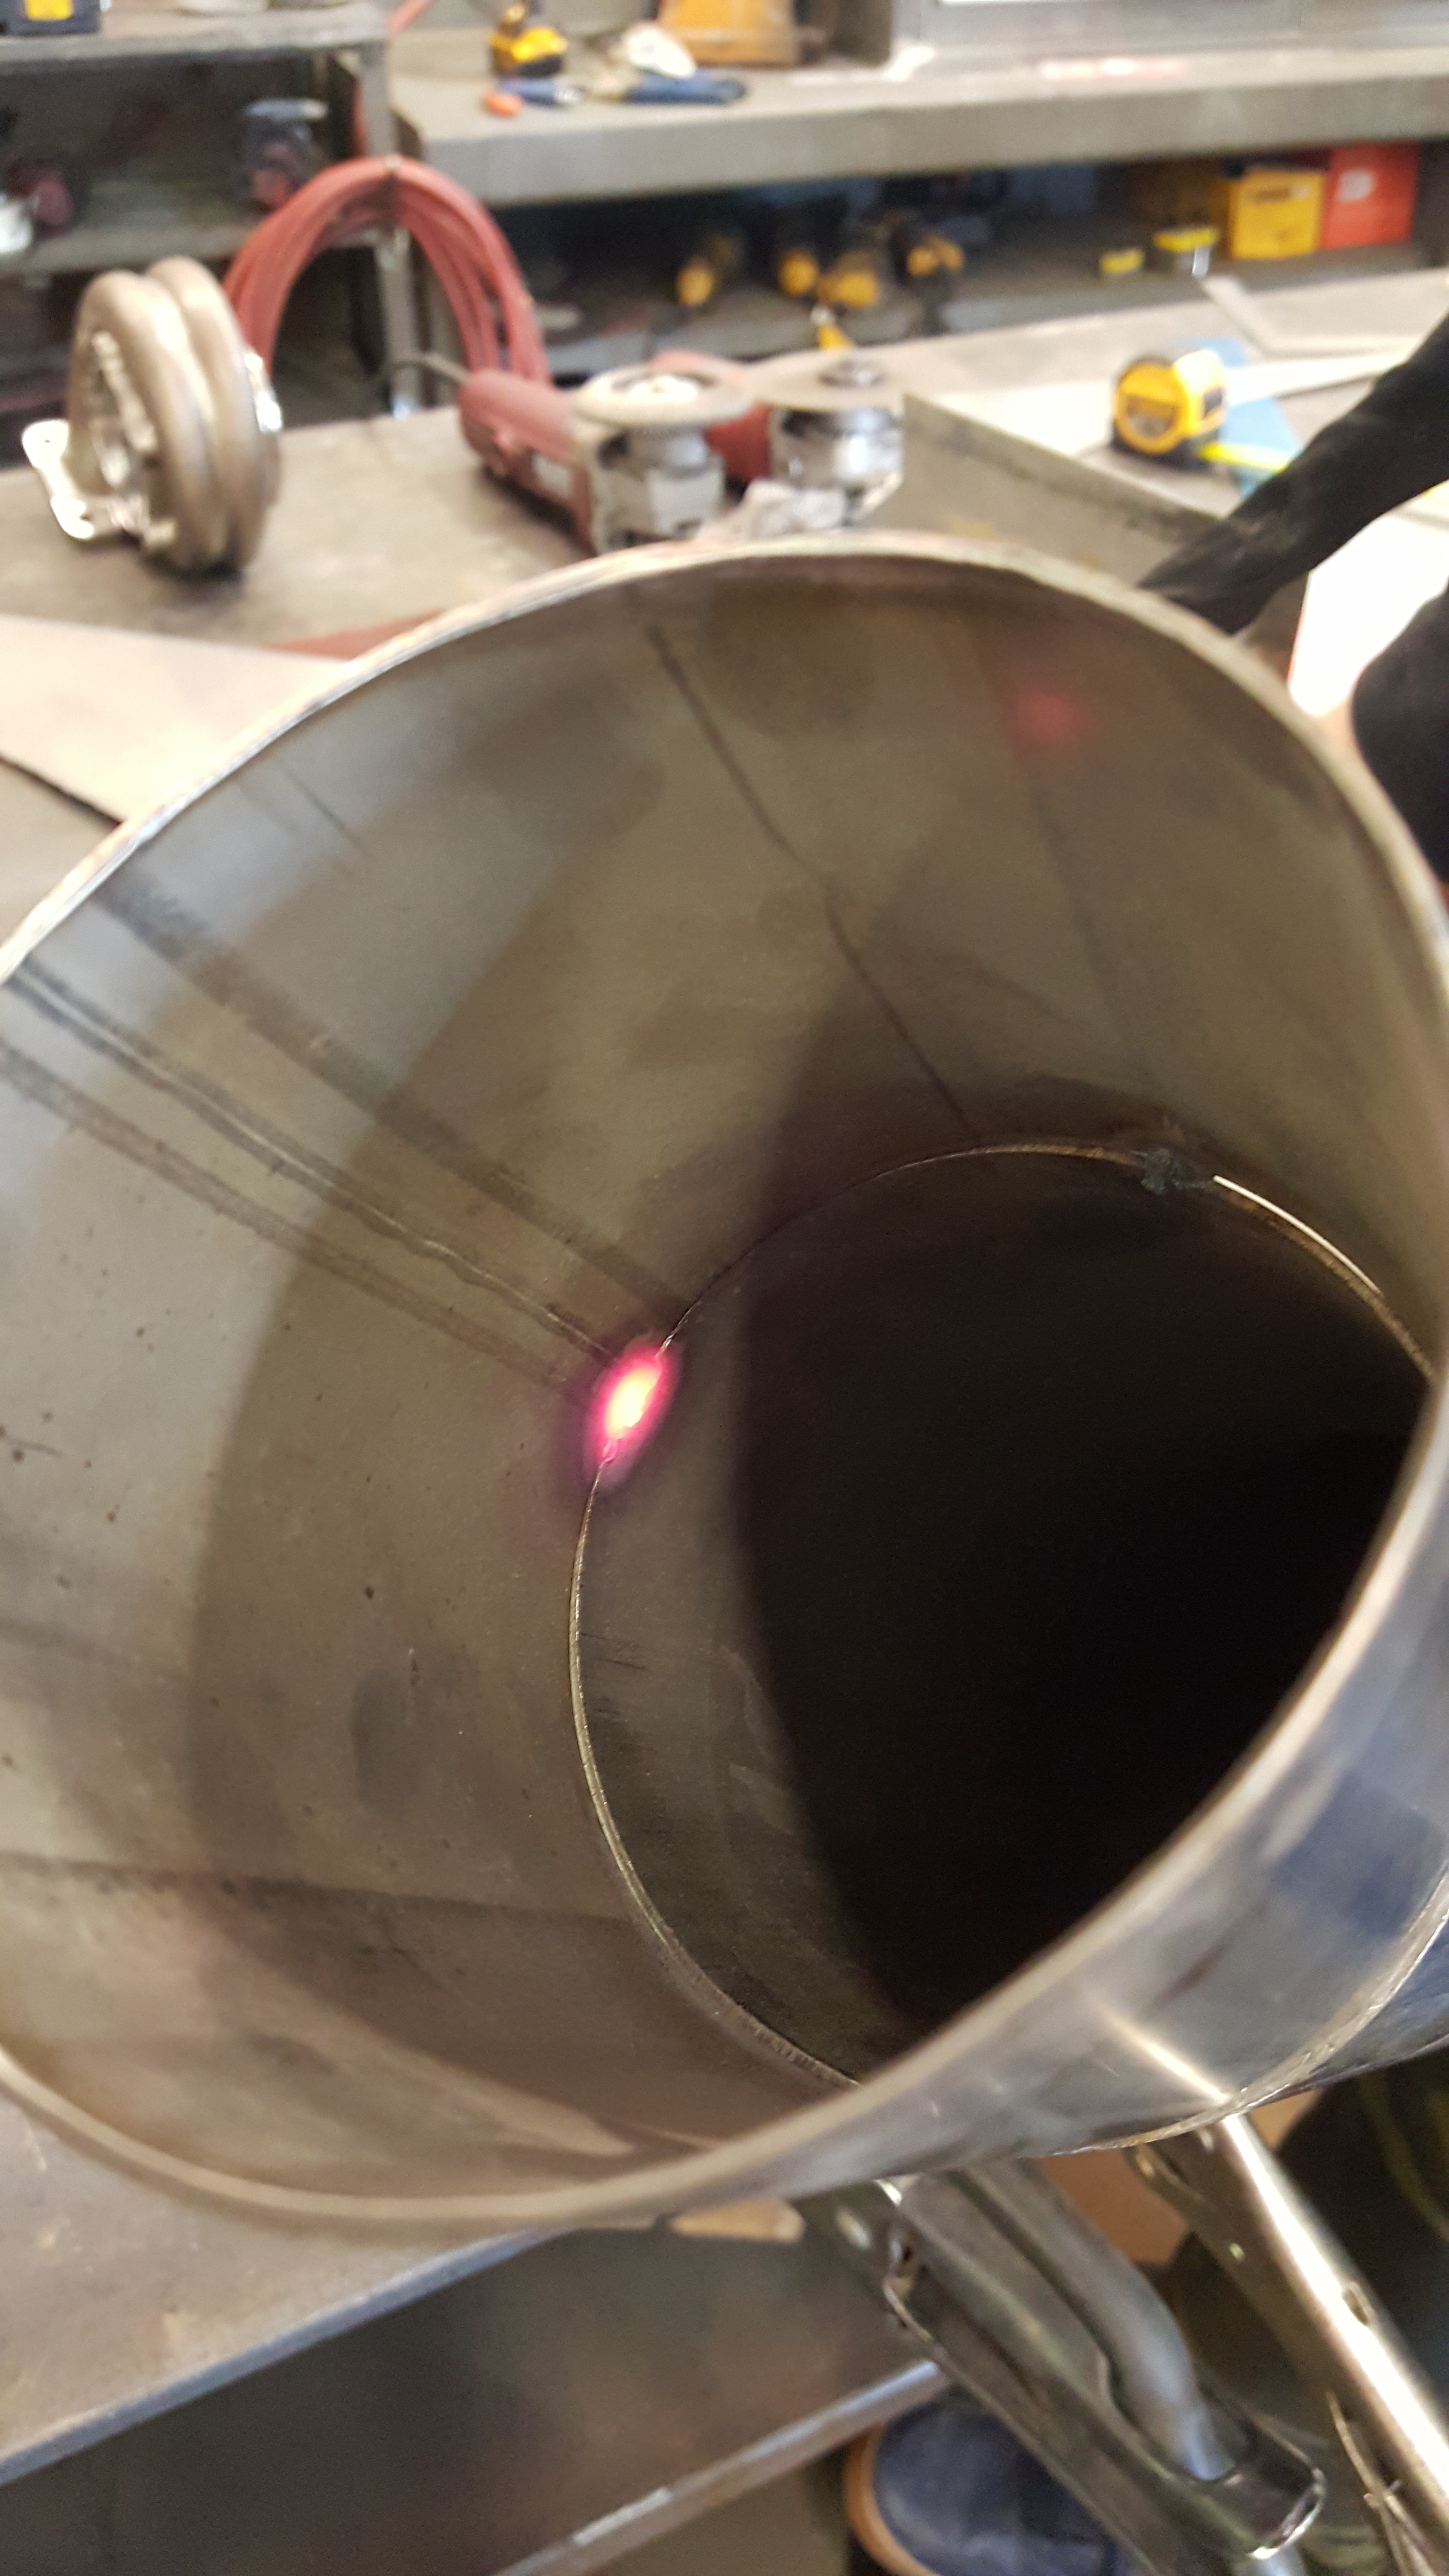
So because Dan has been so busy getting ready for Formula Drift Atlanta..... He only had time late at night to help me. So During the day I'd do all fabrication metal "Cuts" and mock up.. ON and off the car so that when night came...He could sit down and weld everything out for me.
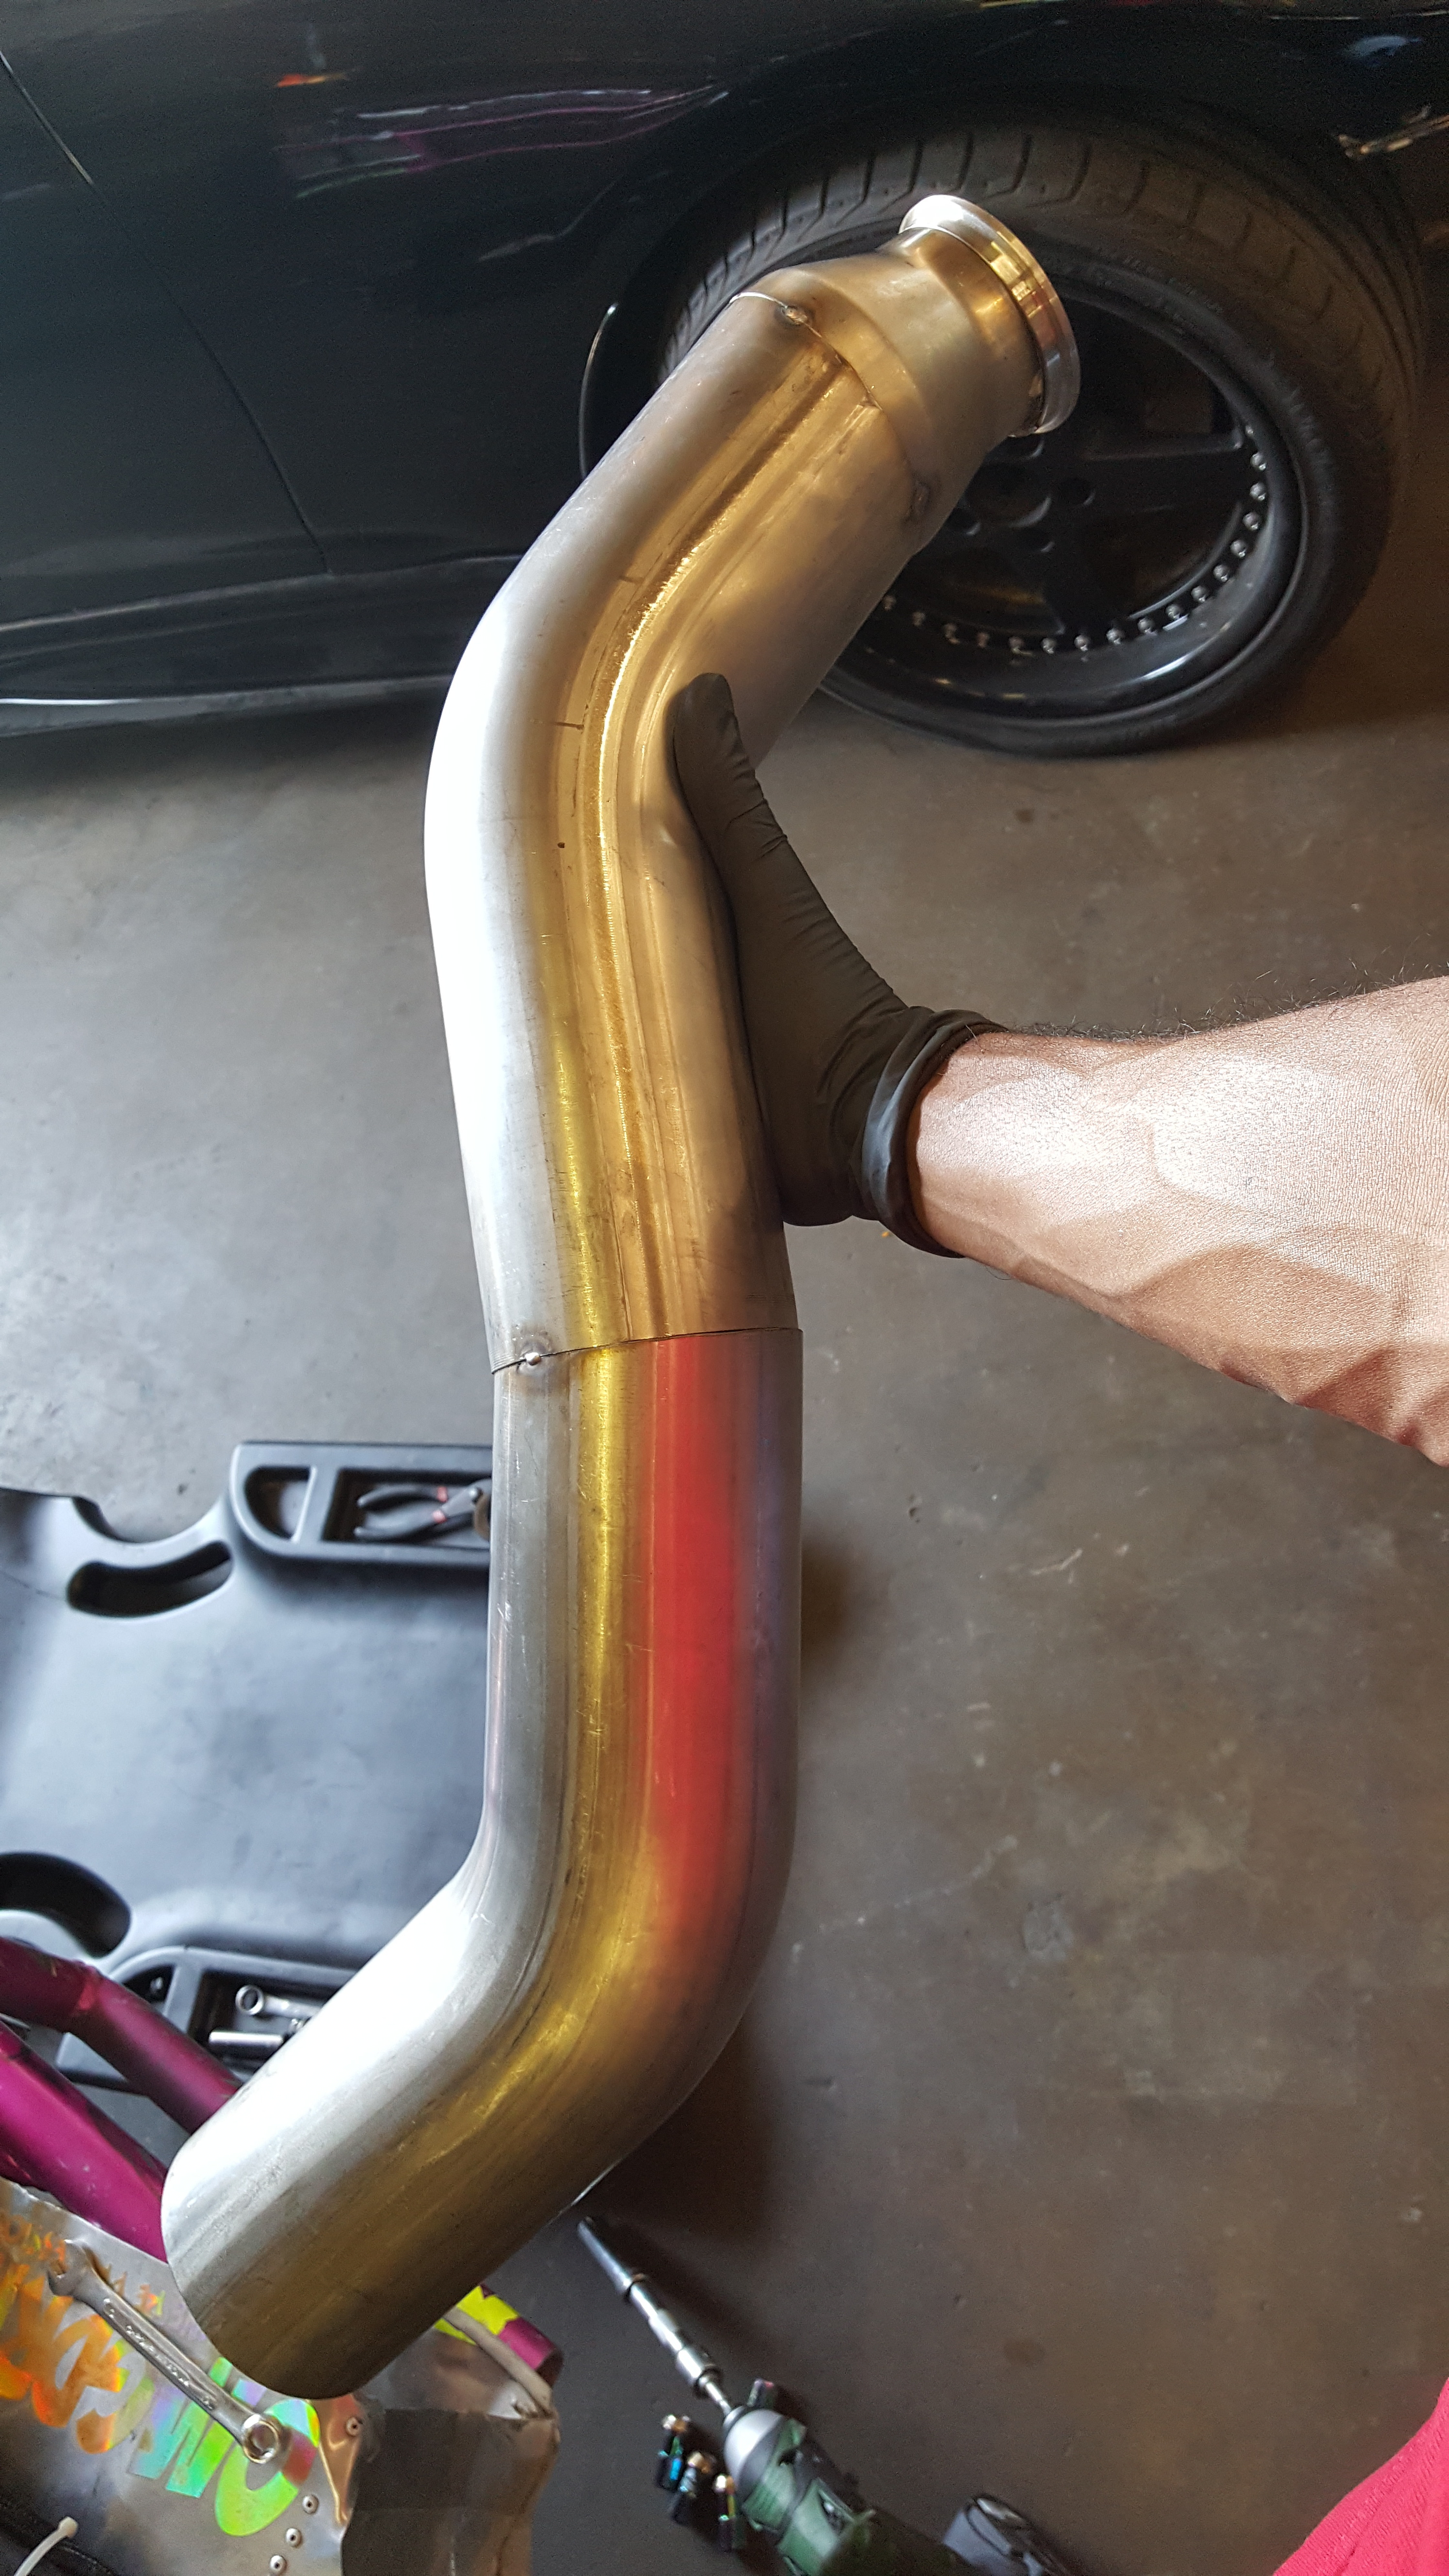
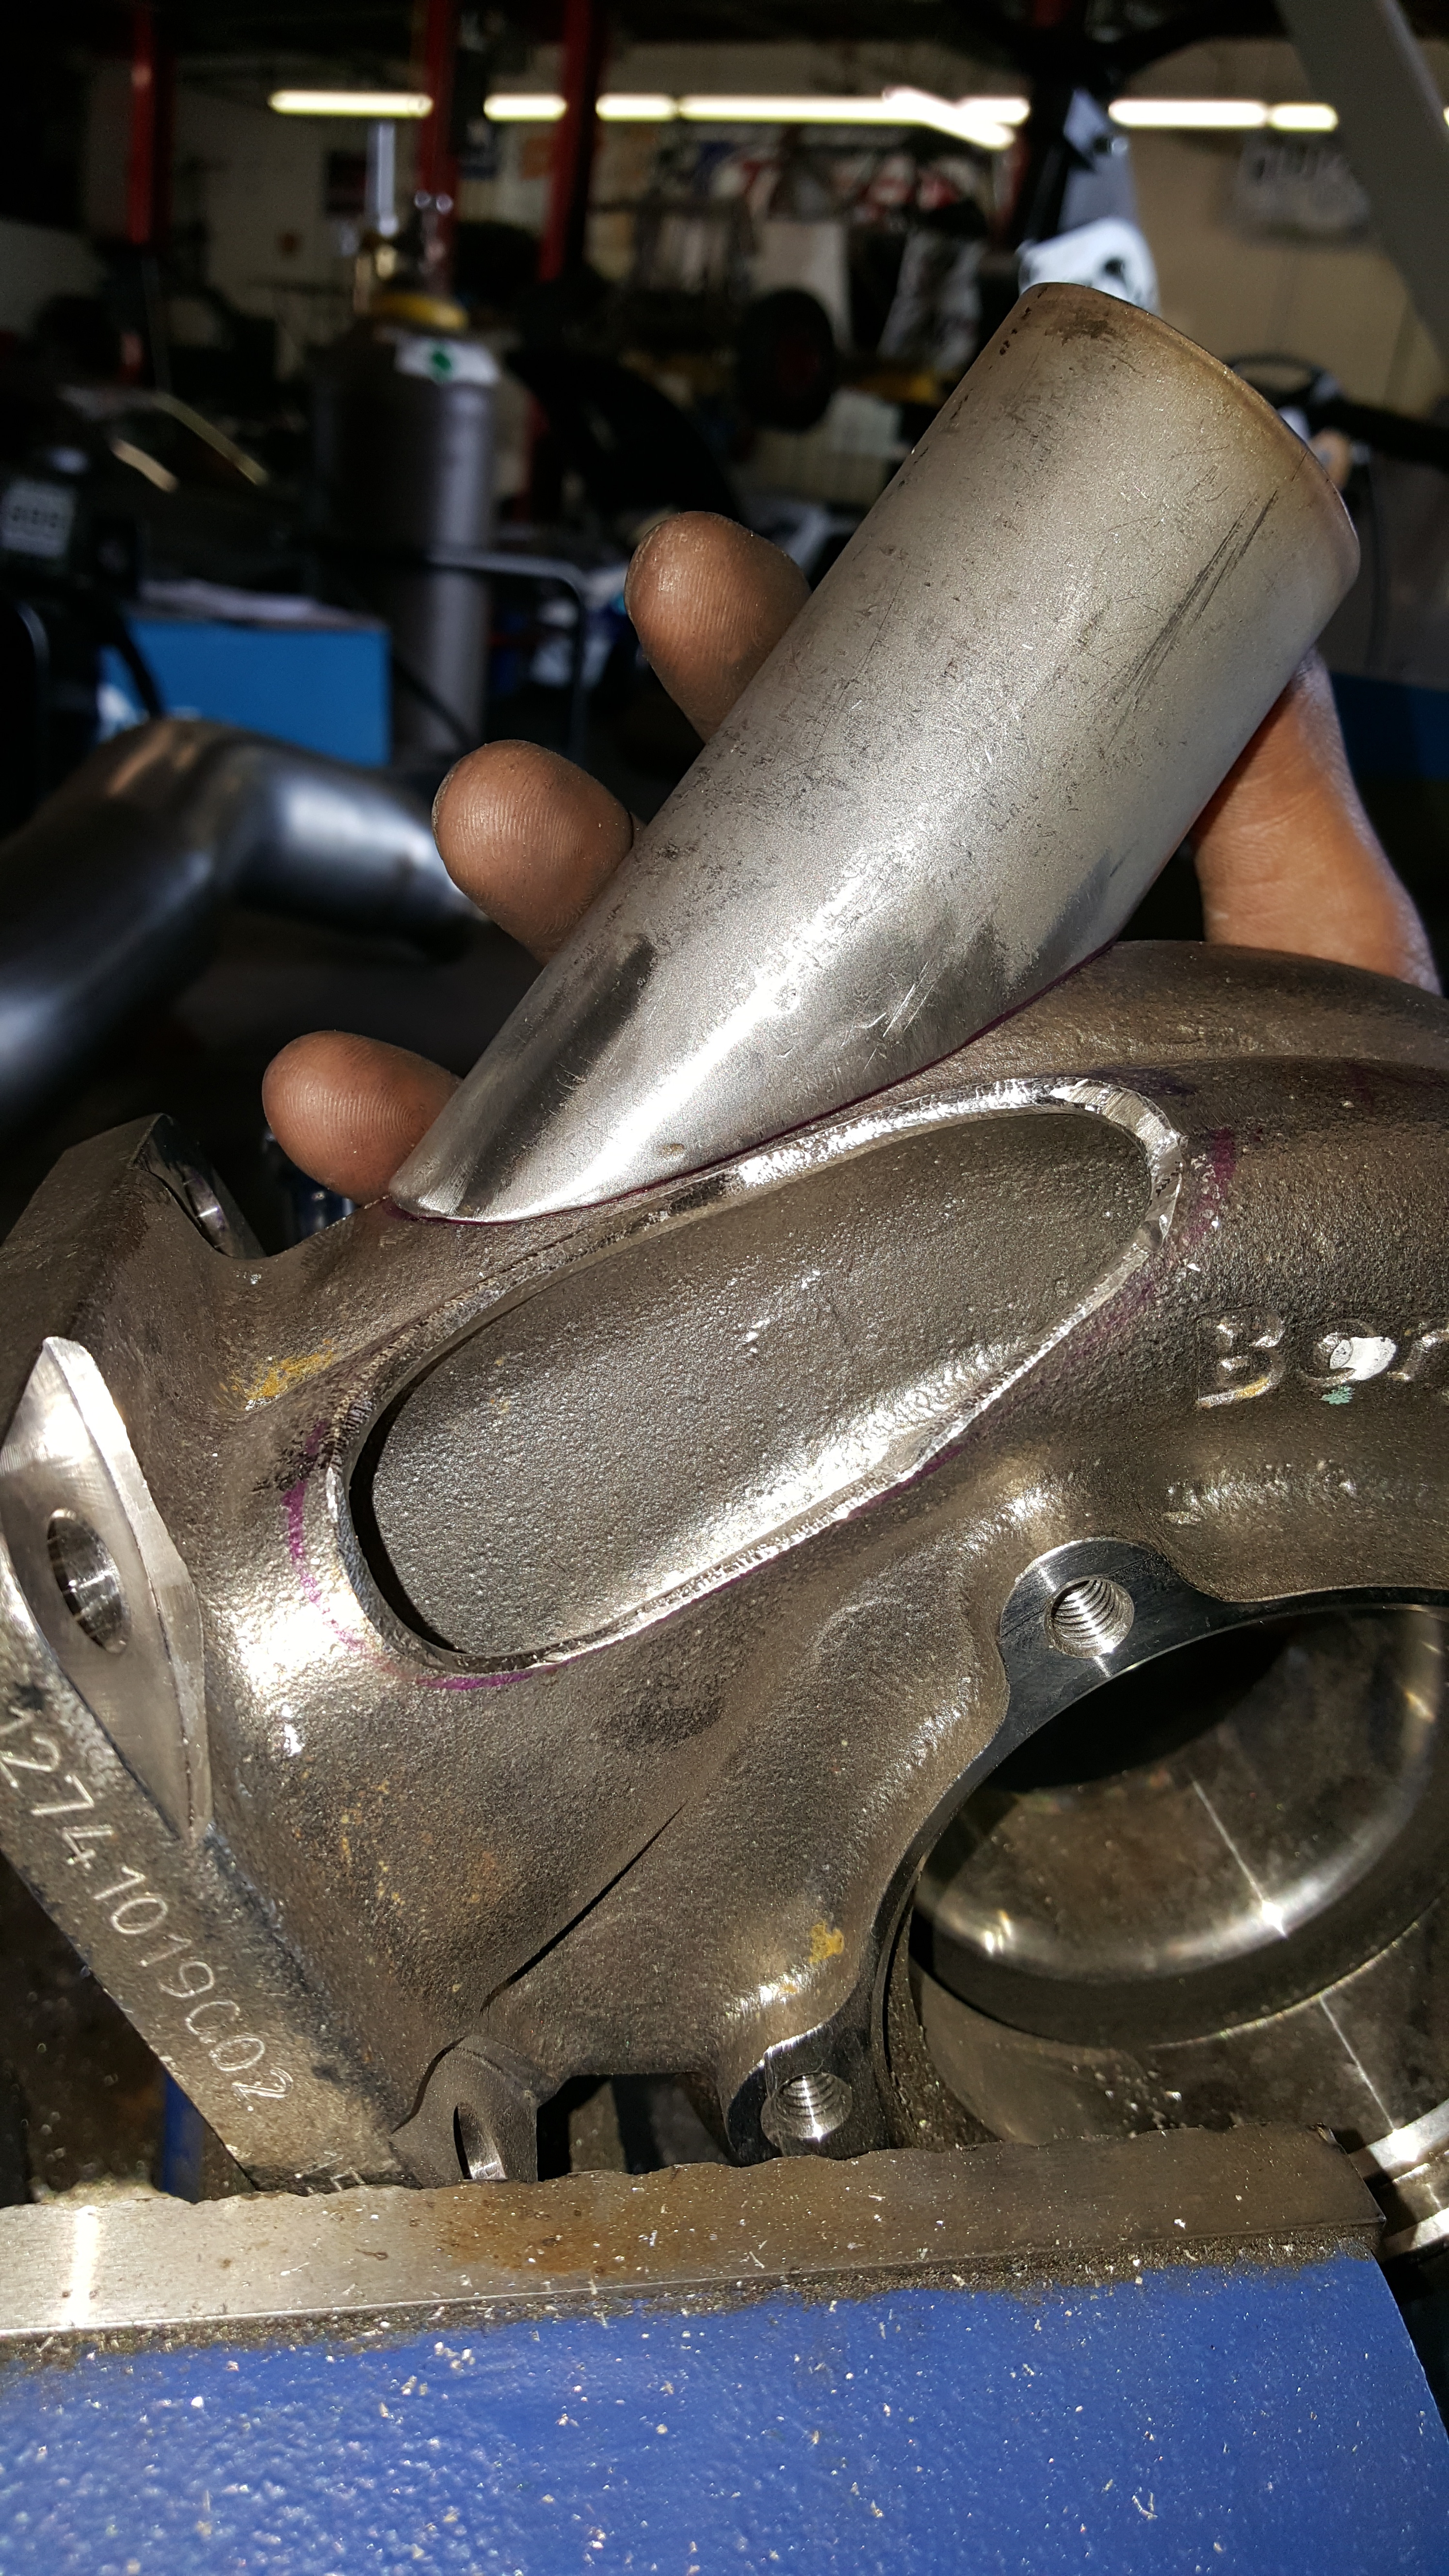
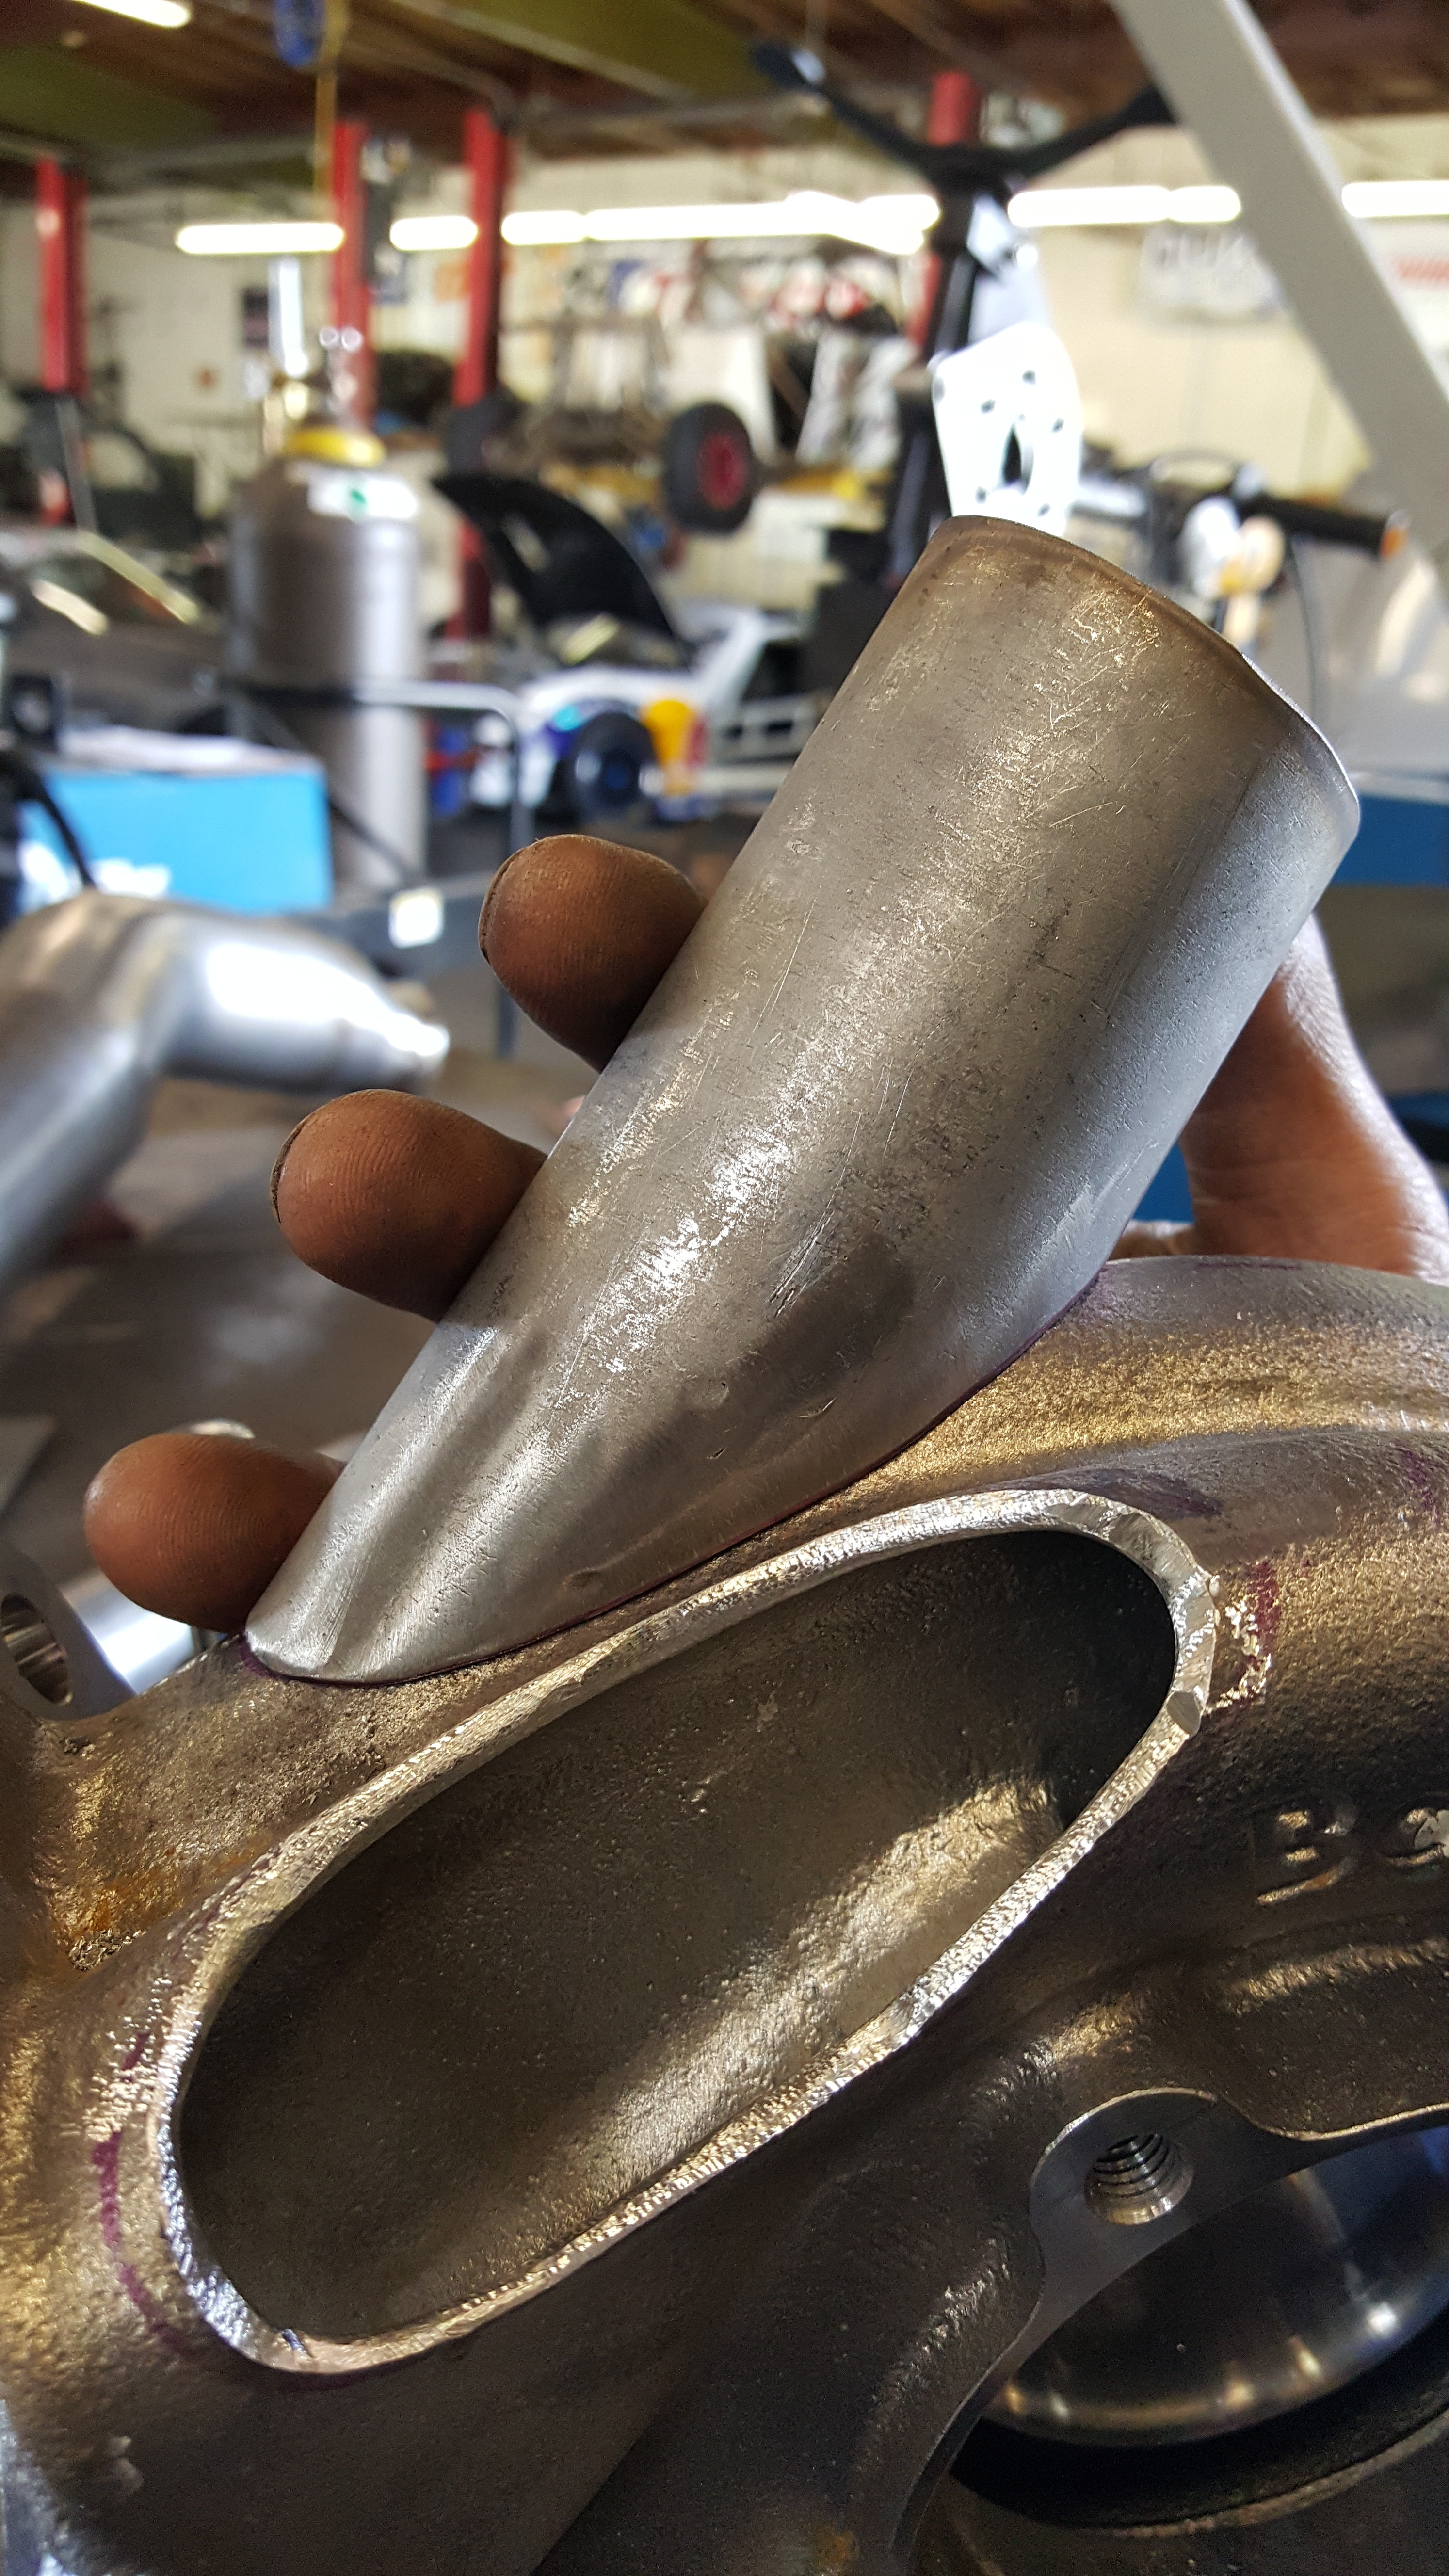
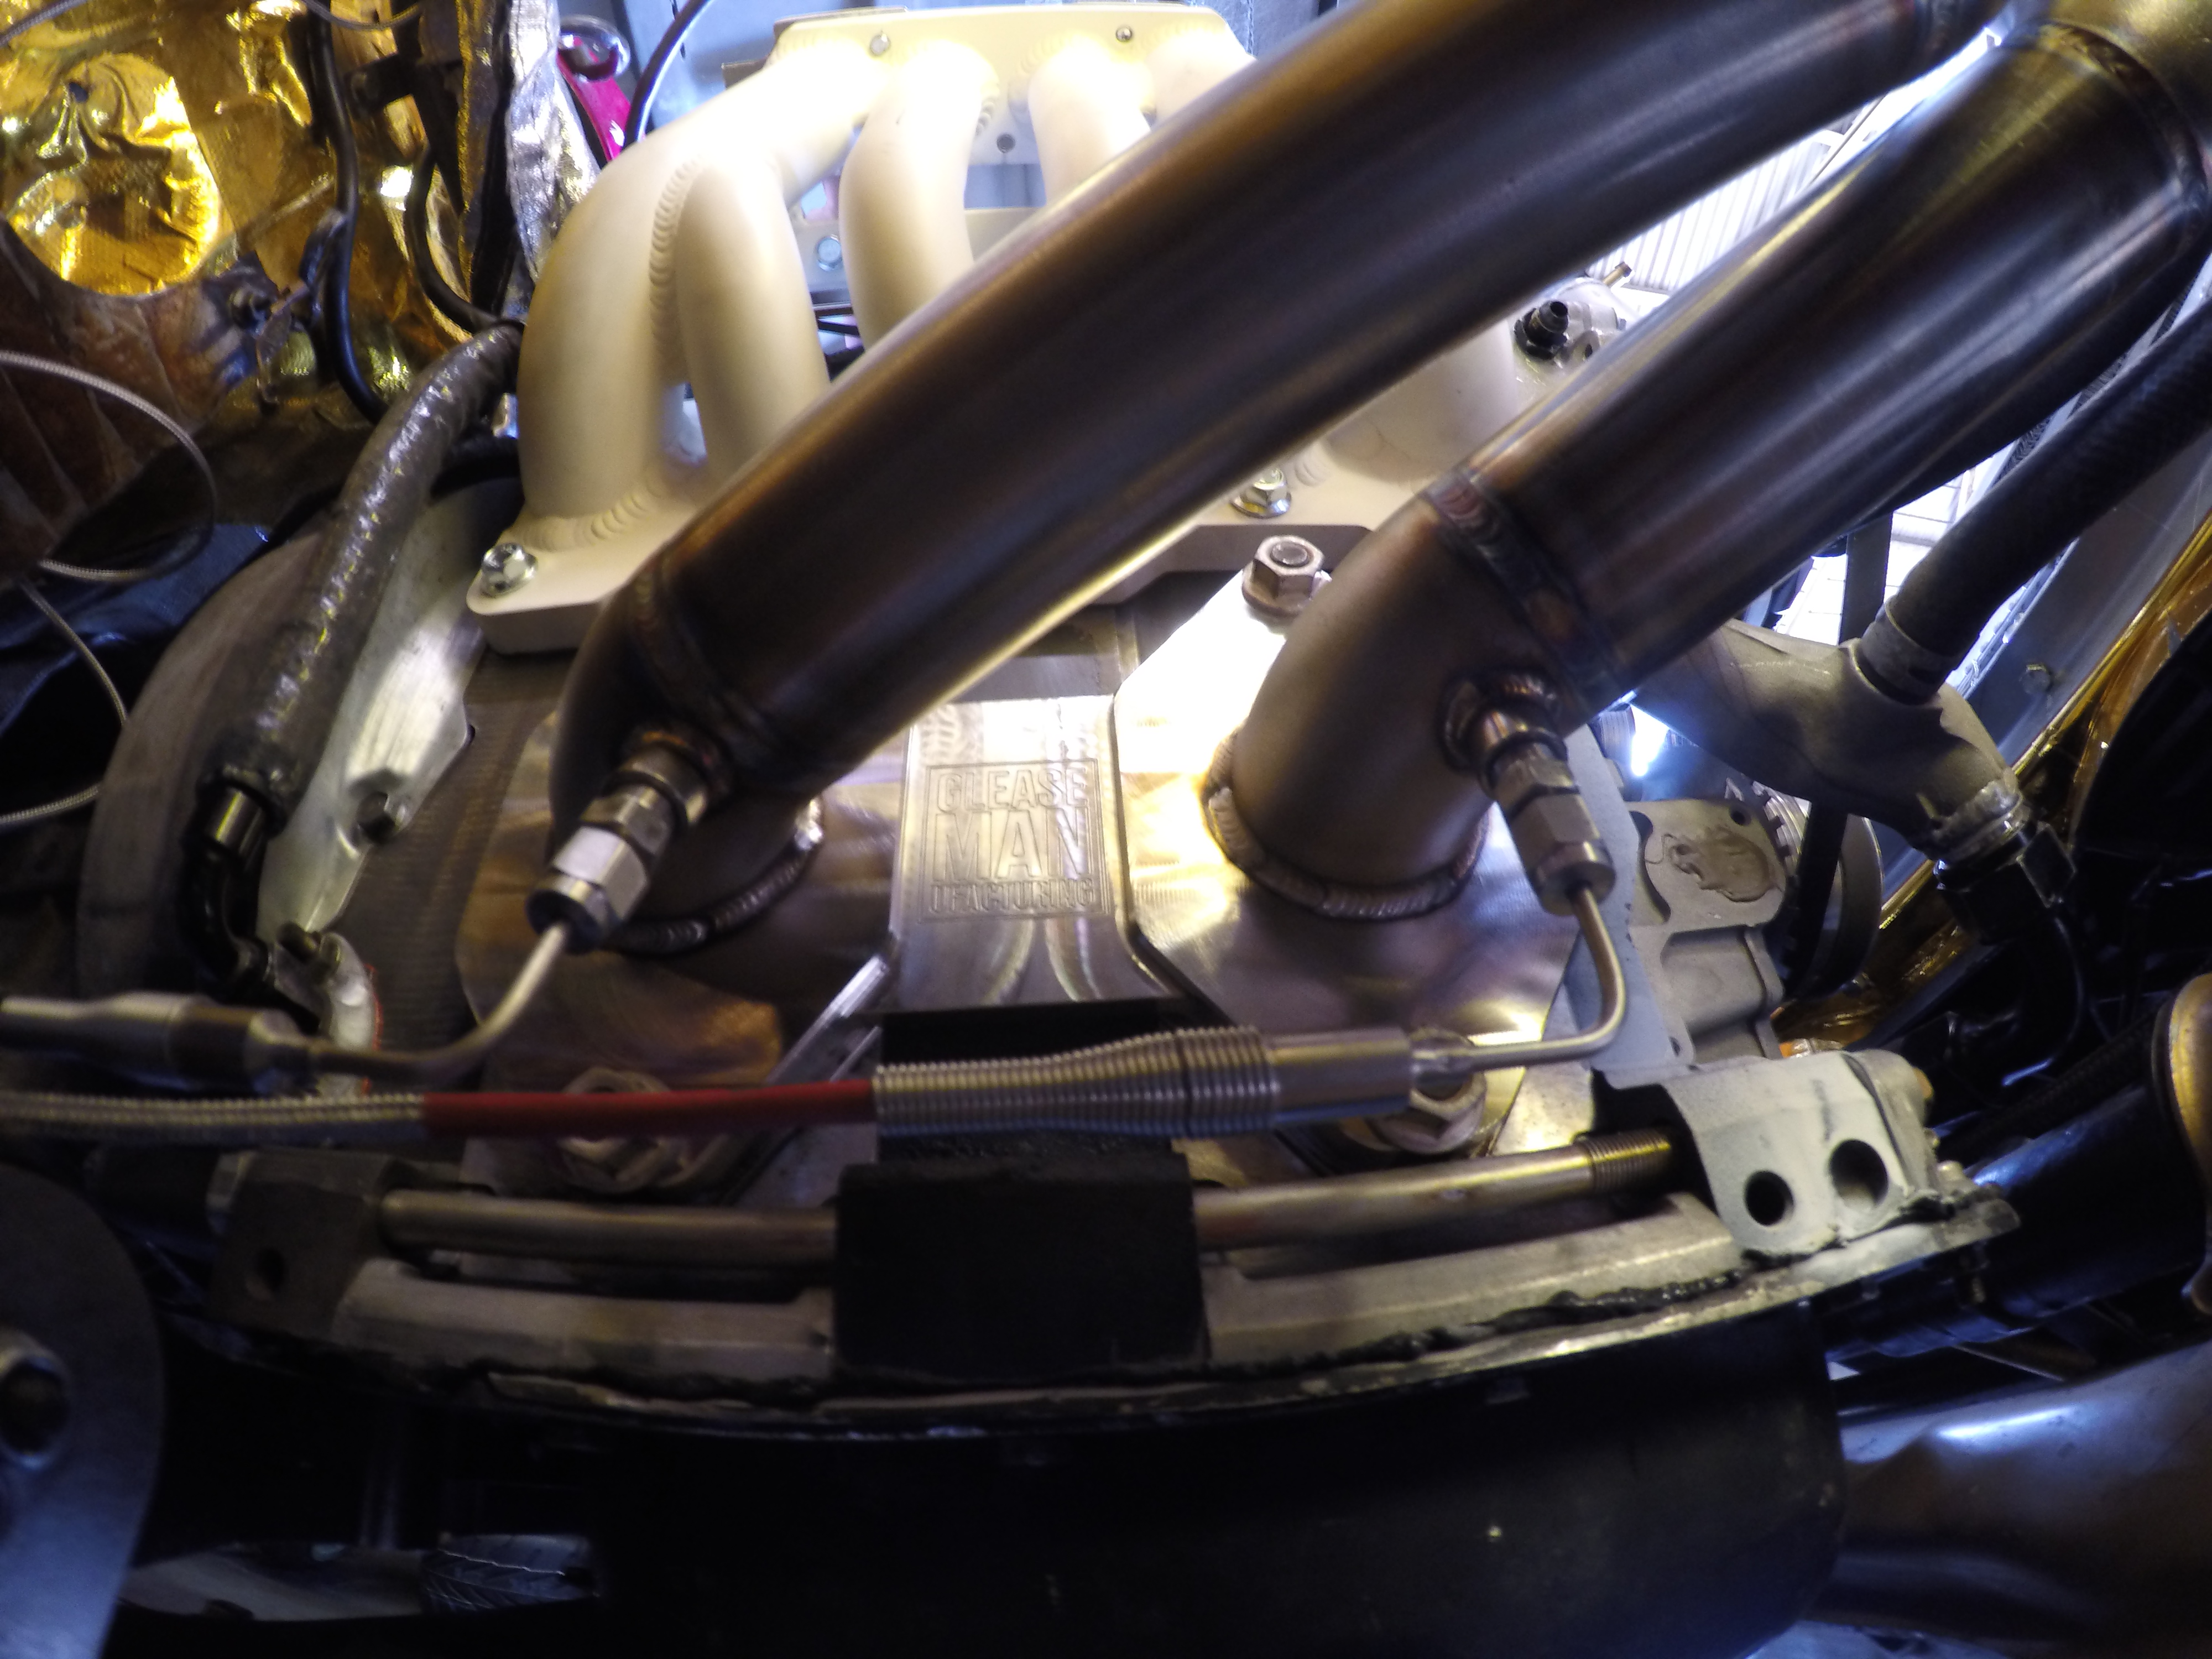
It takes time to make sure everything fits well. I've learned from my first couple go arounds...that you really want to ensure that everything fits properly..because you never know when you'll need to pull something apart.. hell...even if you don't ever have to take it apart... and all you do is install it. Installing something that fits well and is easy to put into the car is a hell of a lot more enjoyable than something that is all mickey mouse hacked up. I took my time with this down-pipe and took into consideration where I wanted my dual Wideband Sensors to sit... ground clearance..Heat management.. spacing from the body of the car...transmission. and bell housing.. EVEN where I wanted to run the EGT Wires...which equated me needing to make the slightest bit of a pie cut below to kick the whole piece down a tad more. The End product came out well and still retains all it's functions =-) Pumped on it.
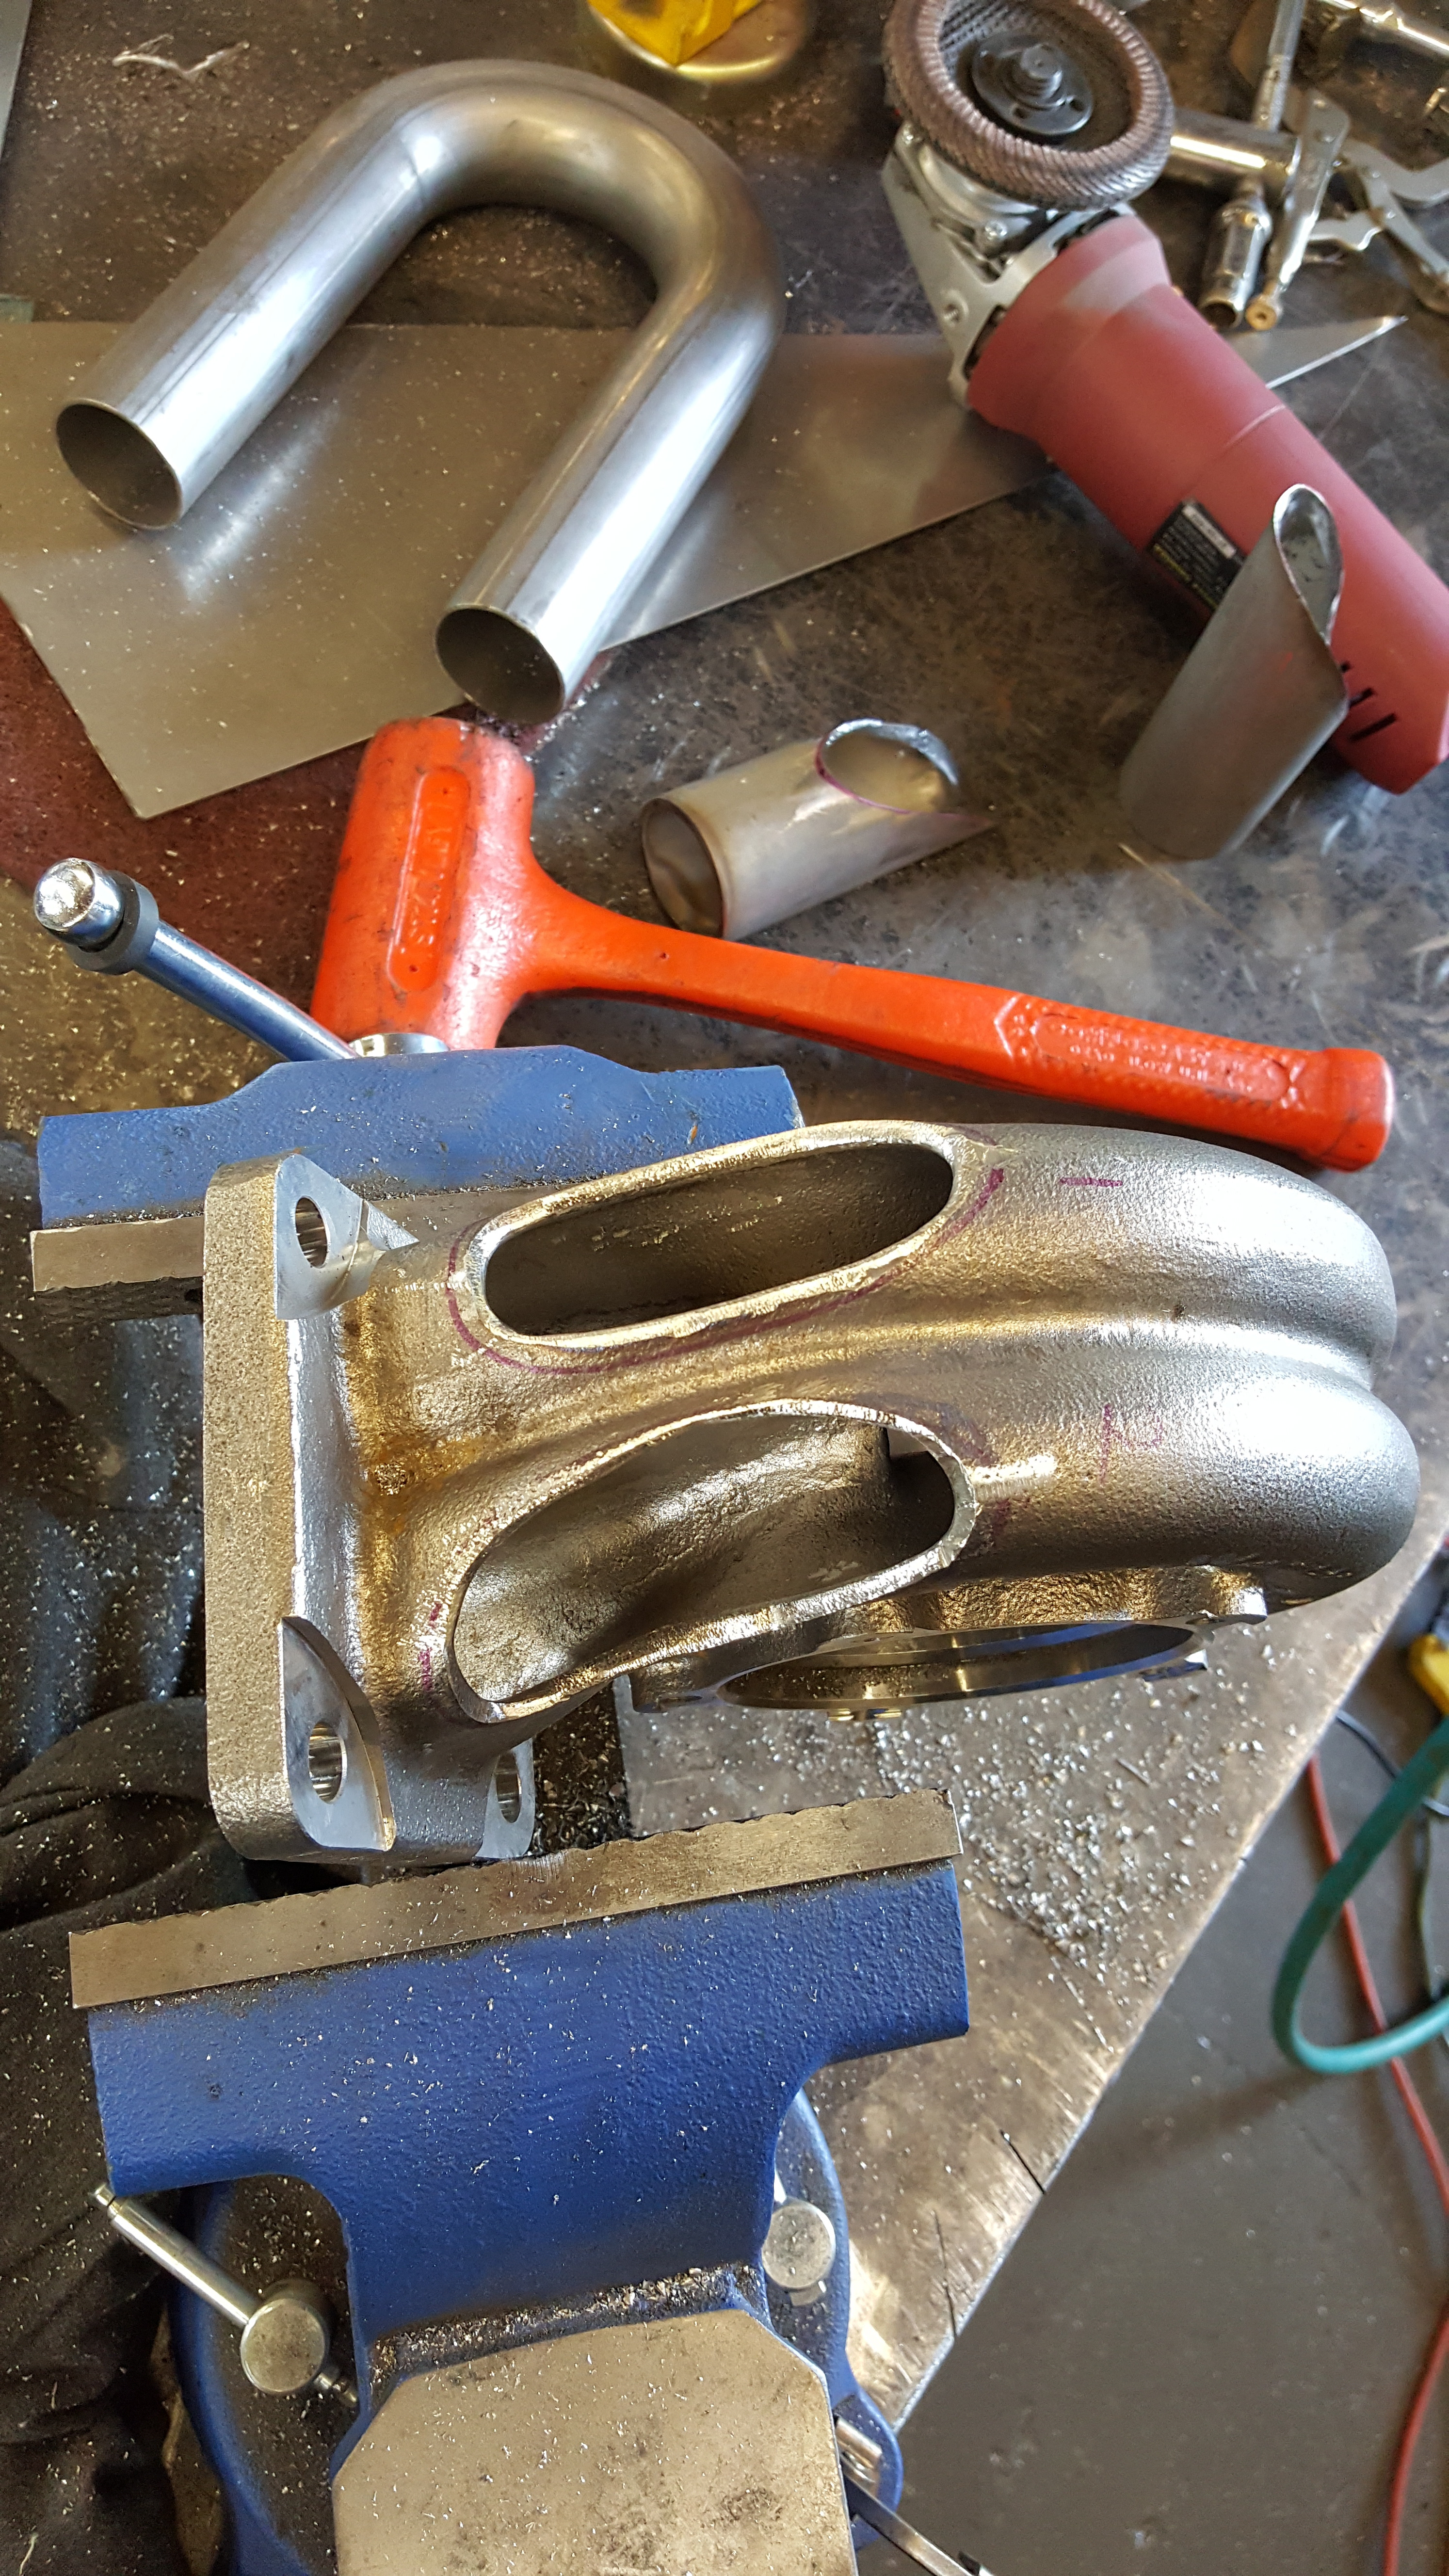
Down Pipe Cut and Tacked up
Dan doing his thing
So this is how I do it. I leave everything loose... Including the turbo Juuuuust a tad. When I mock everthing up....I move it up down left right and circular to make sure it's free from hitting anything. You do Of Course...need the space to do that...but Since I had the space.. it wasn't an issue. Some people....even a guy at the shop who was just passing through had told me that I was dumb for not tightening down my turbo all the way. But the thing is... If you tighten it down ALL the way.. If something moves...and usually when it's welded..it does.. Then you've got not margin for error. If you have the space... In my experience.. mock it up and make sure you have clearance for WHEN things move. At the worst case scenario...the turbo can only move SOOO much on the studs.... so use that space..and plan for the IF. I guess this may only apply to people like myself who don't weld... but ****..it worked like a charm.. Twice In fact!! on the old set up and this one as well.
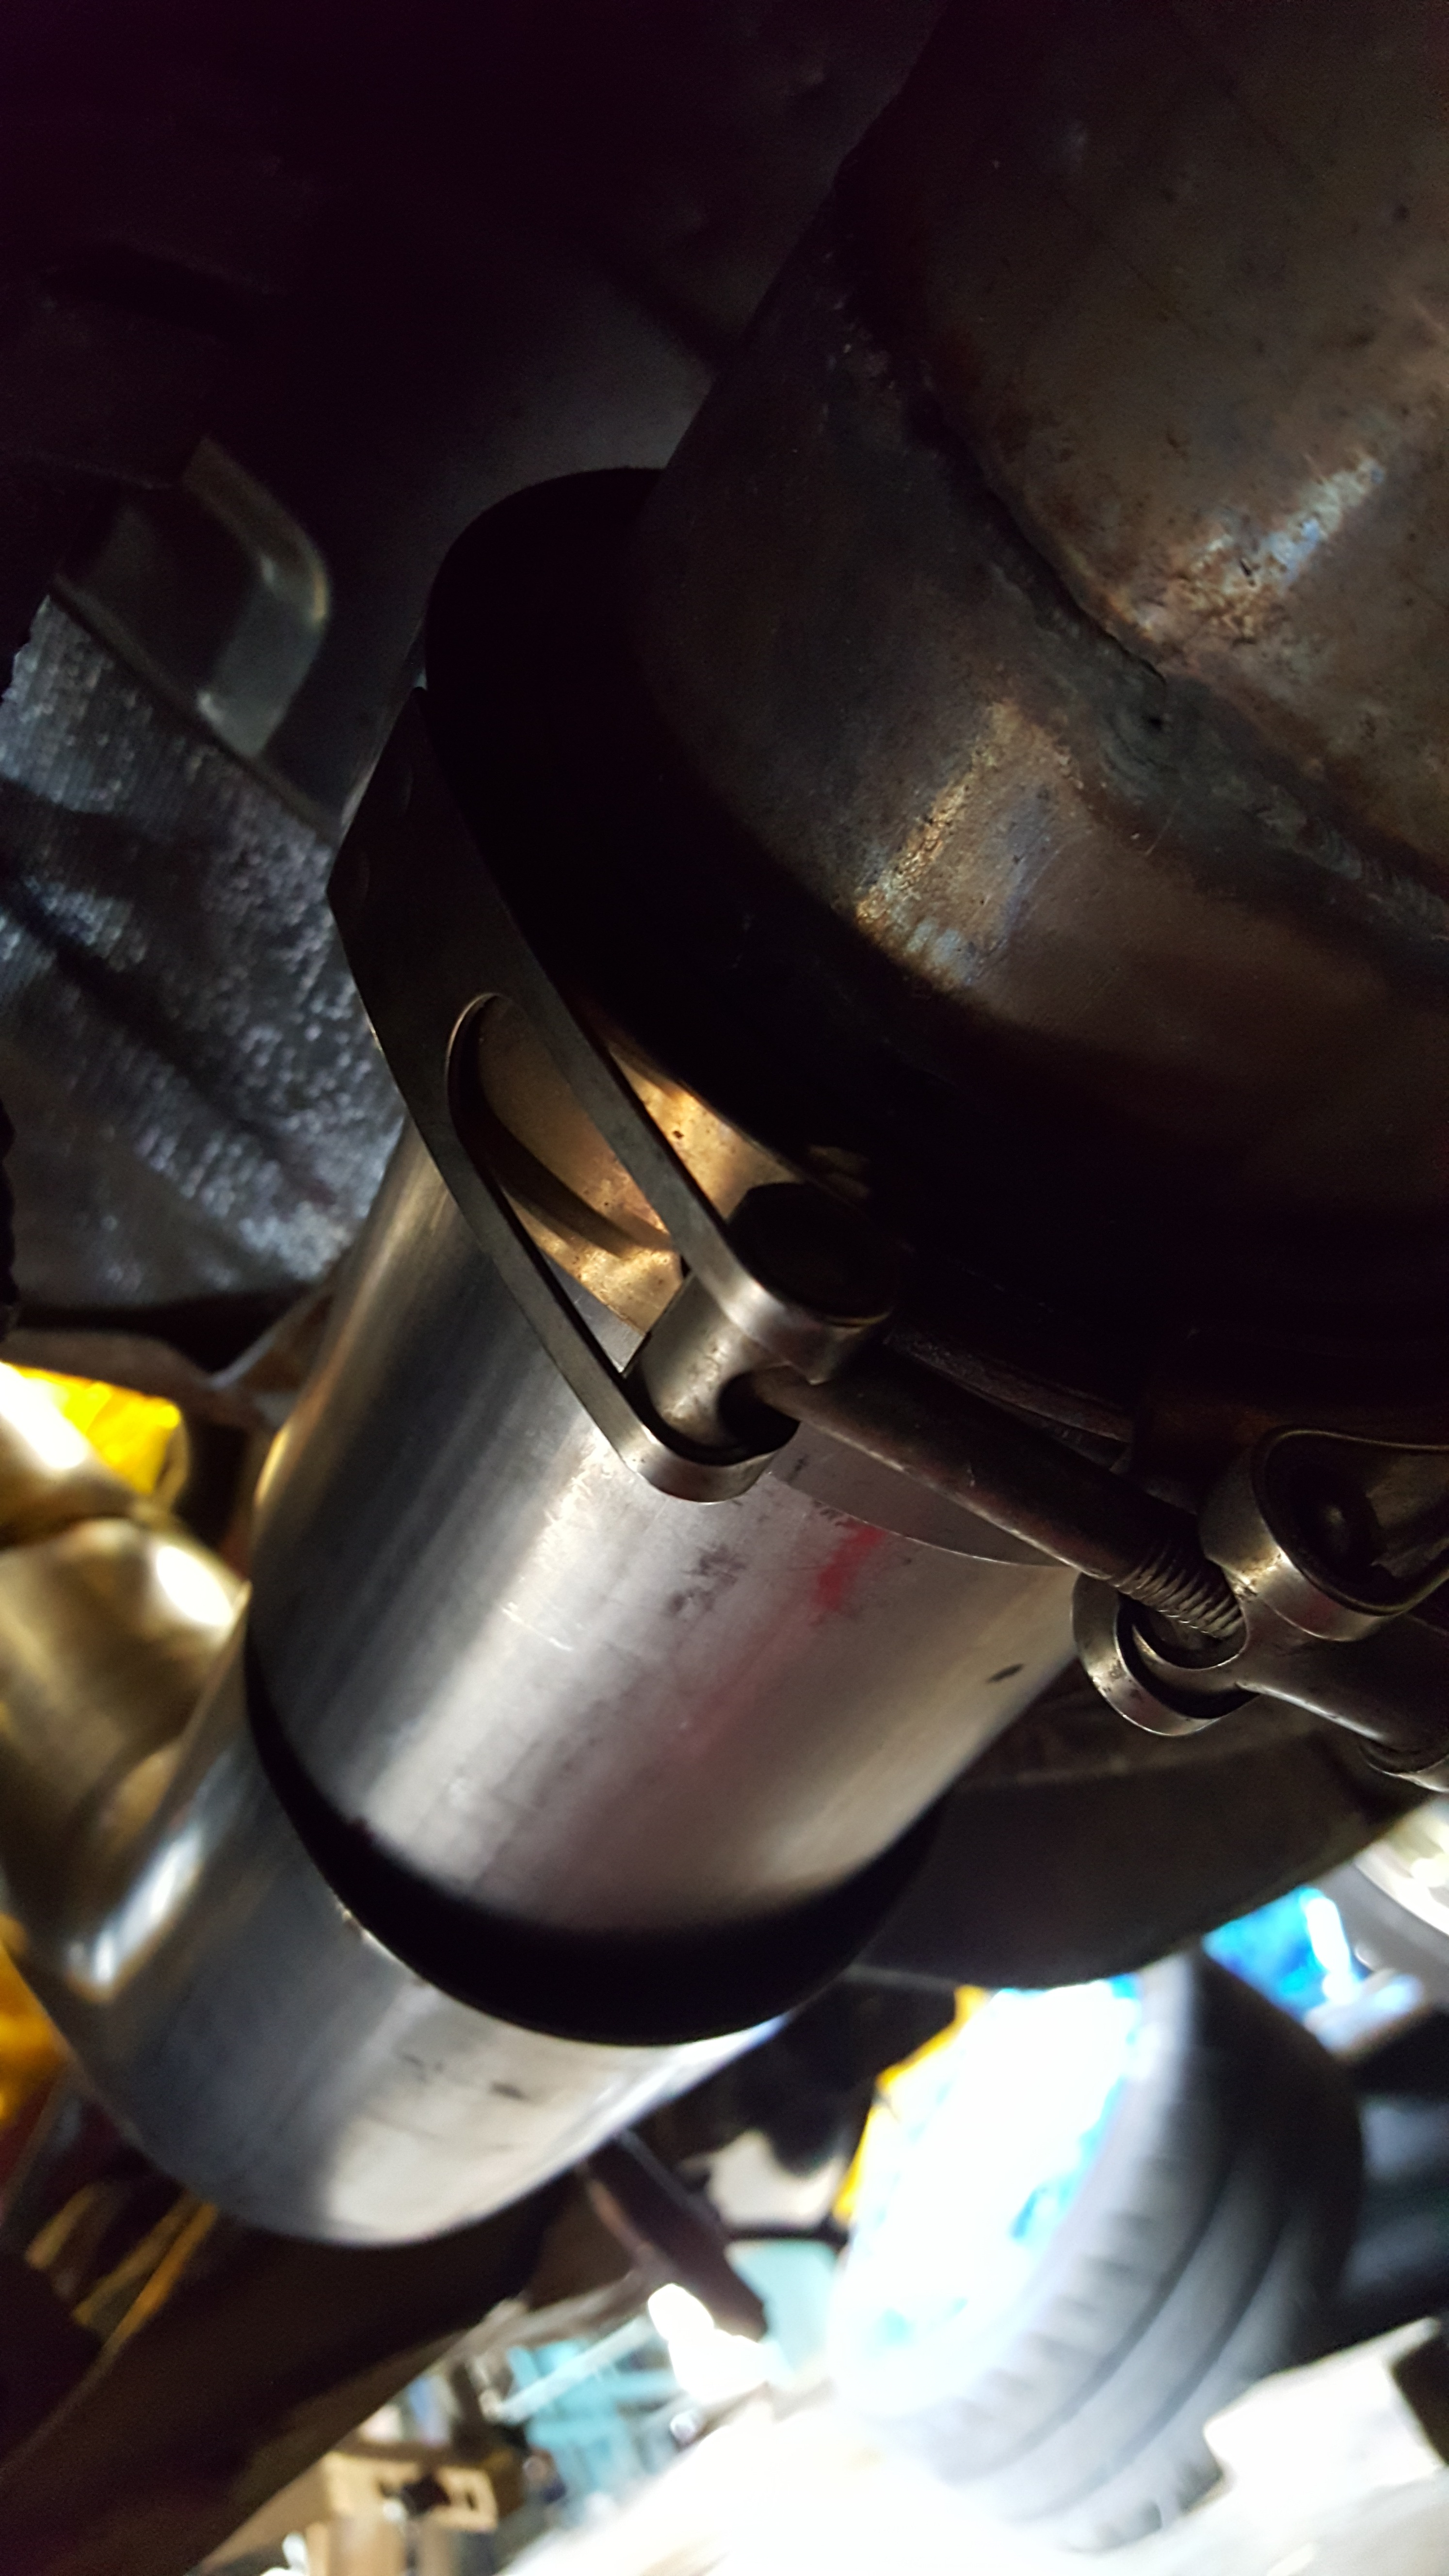
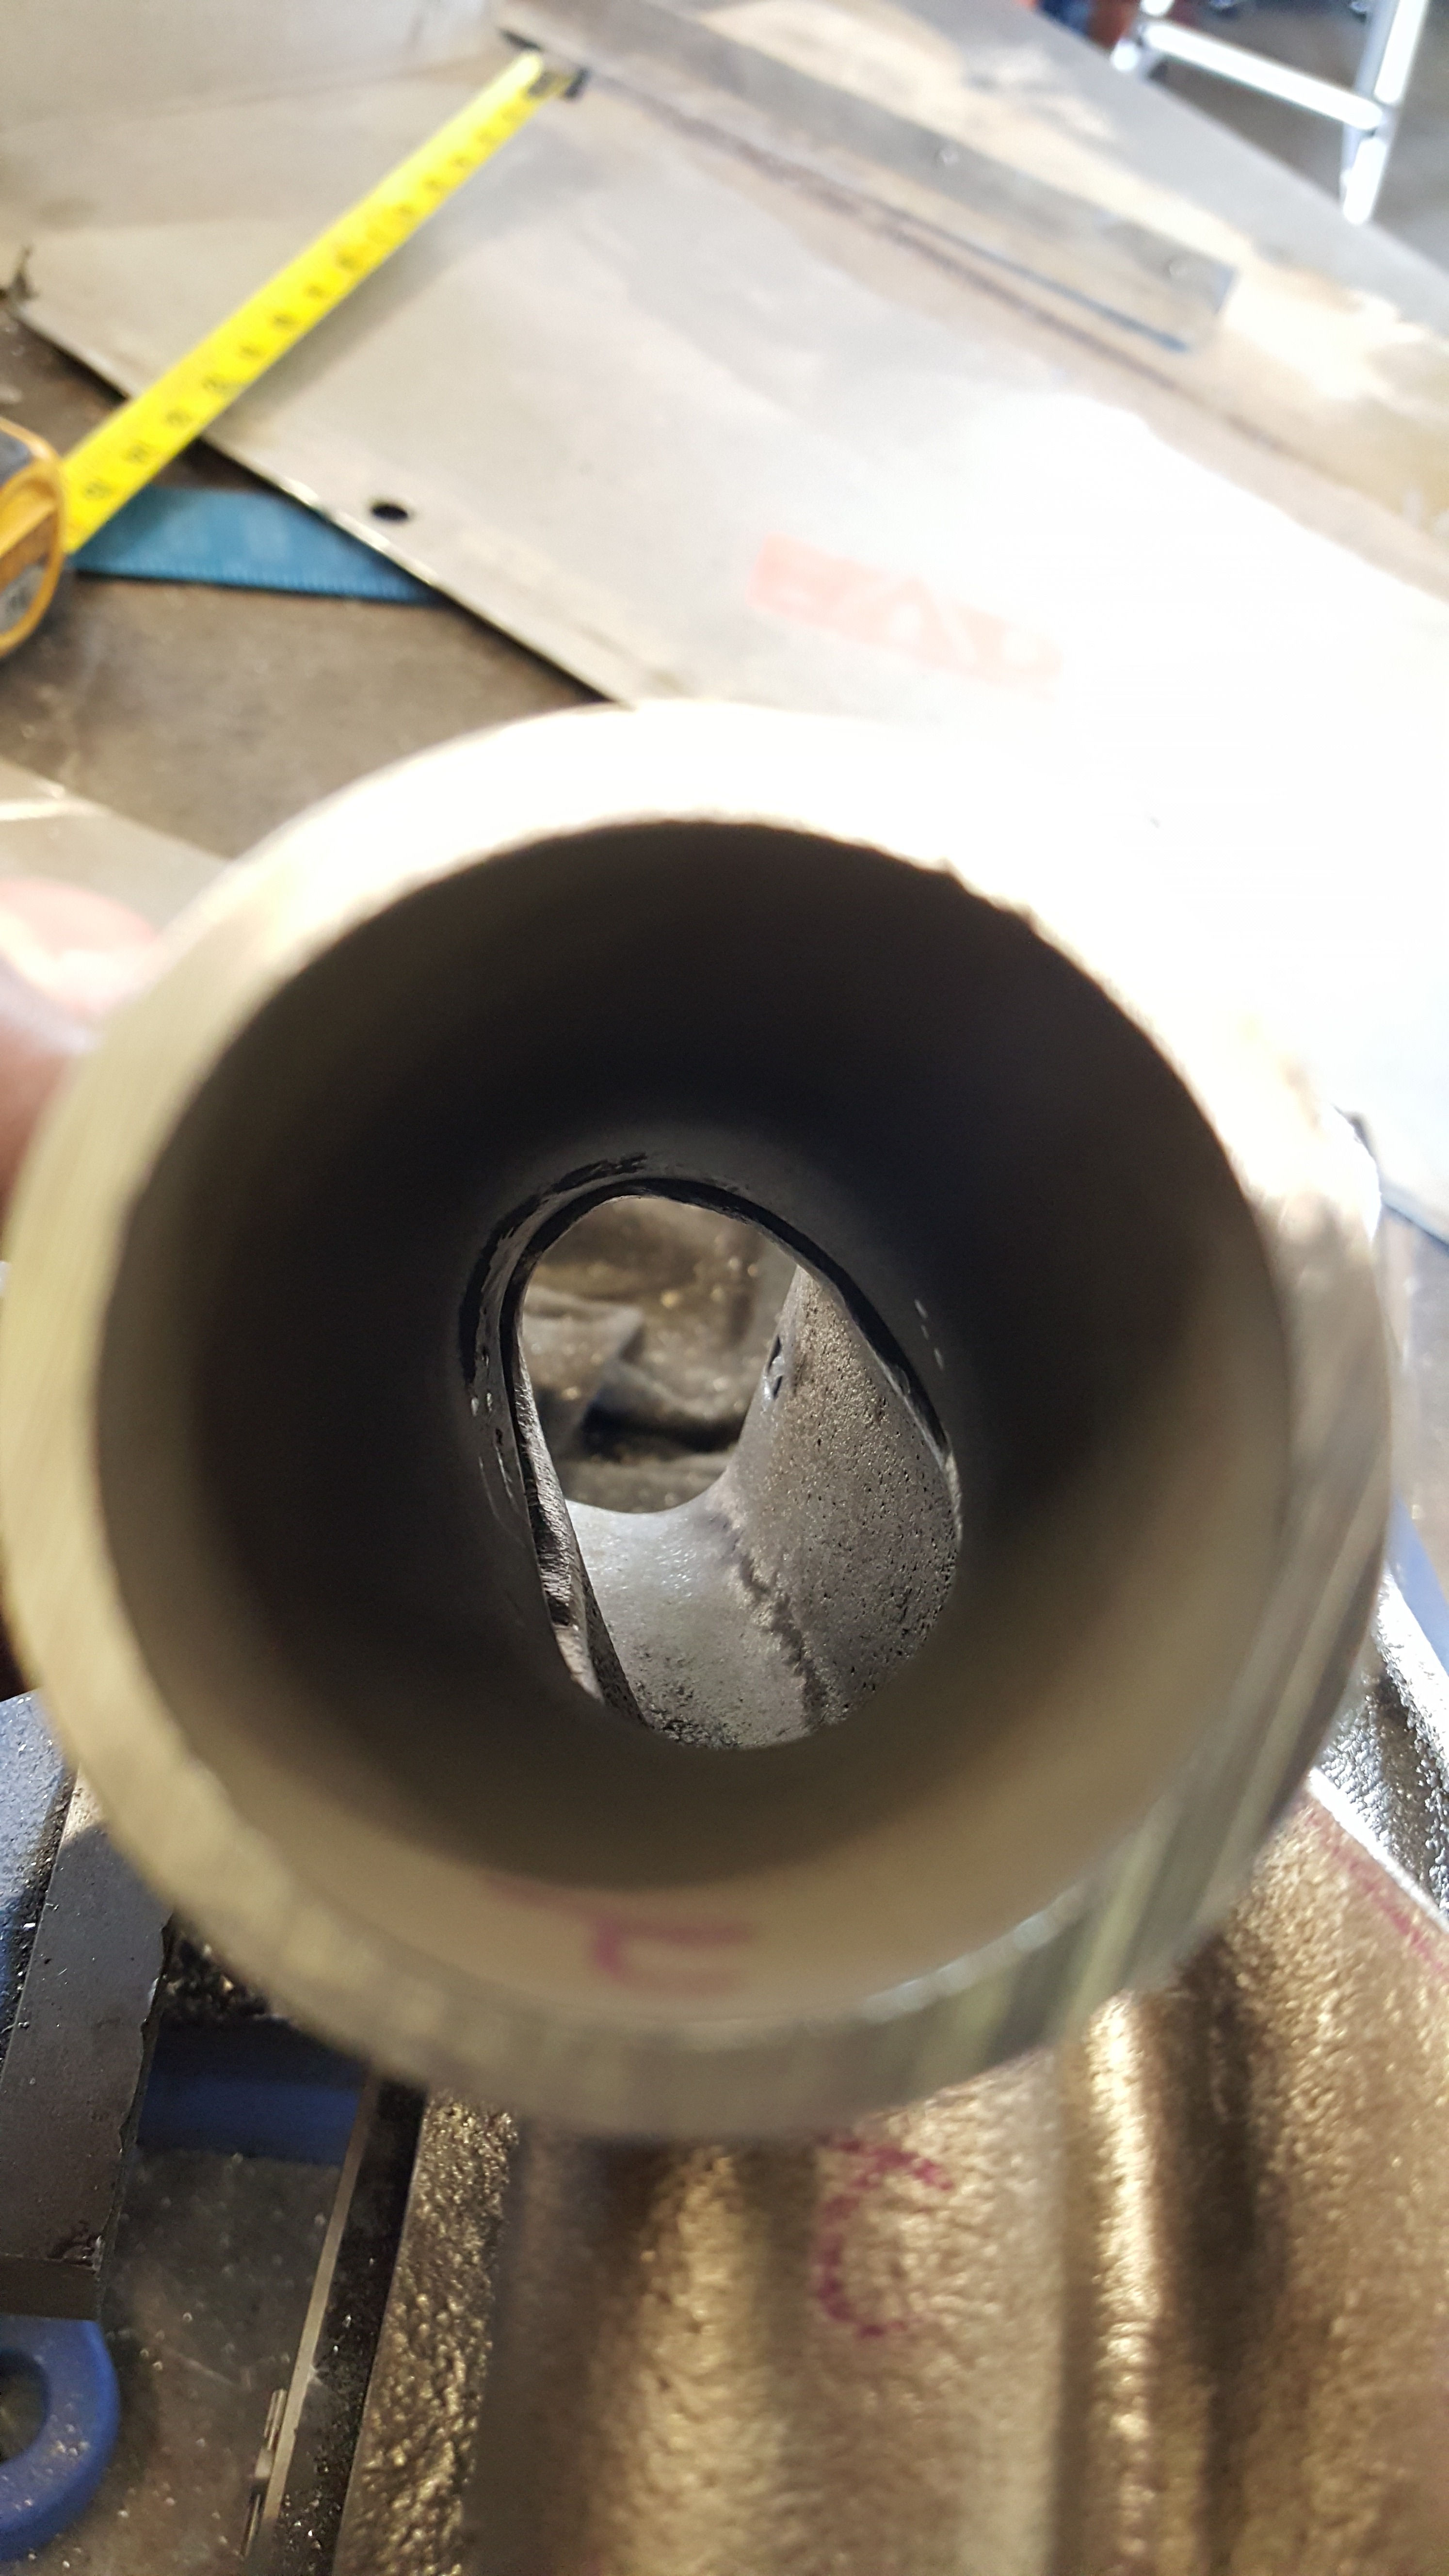
This is a pic of the mating end of the down pipe ..where it meets the mid pipe. The mid pipe was connected to my Exhust tip and I tilted it up with wire to see how far it would go. When I let tension off.. it mates up Perfectly!!!
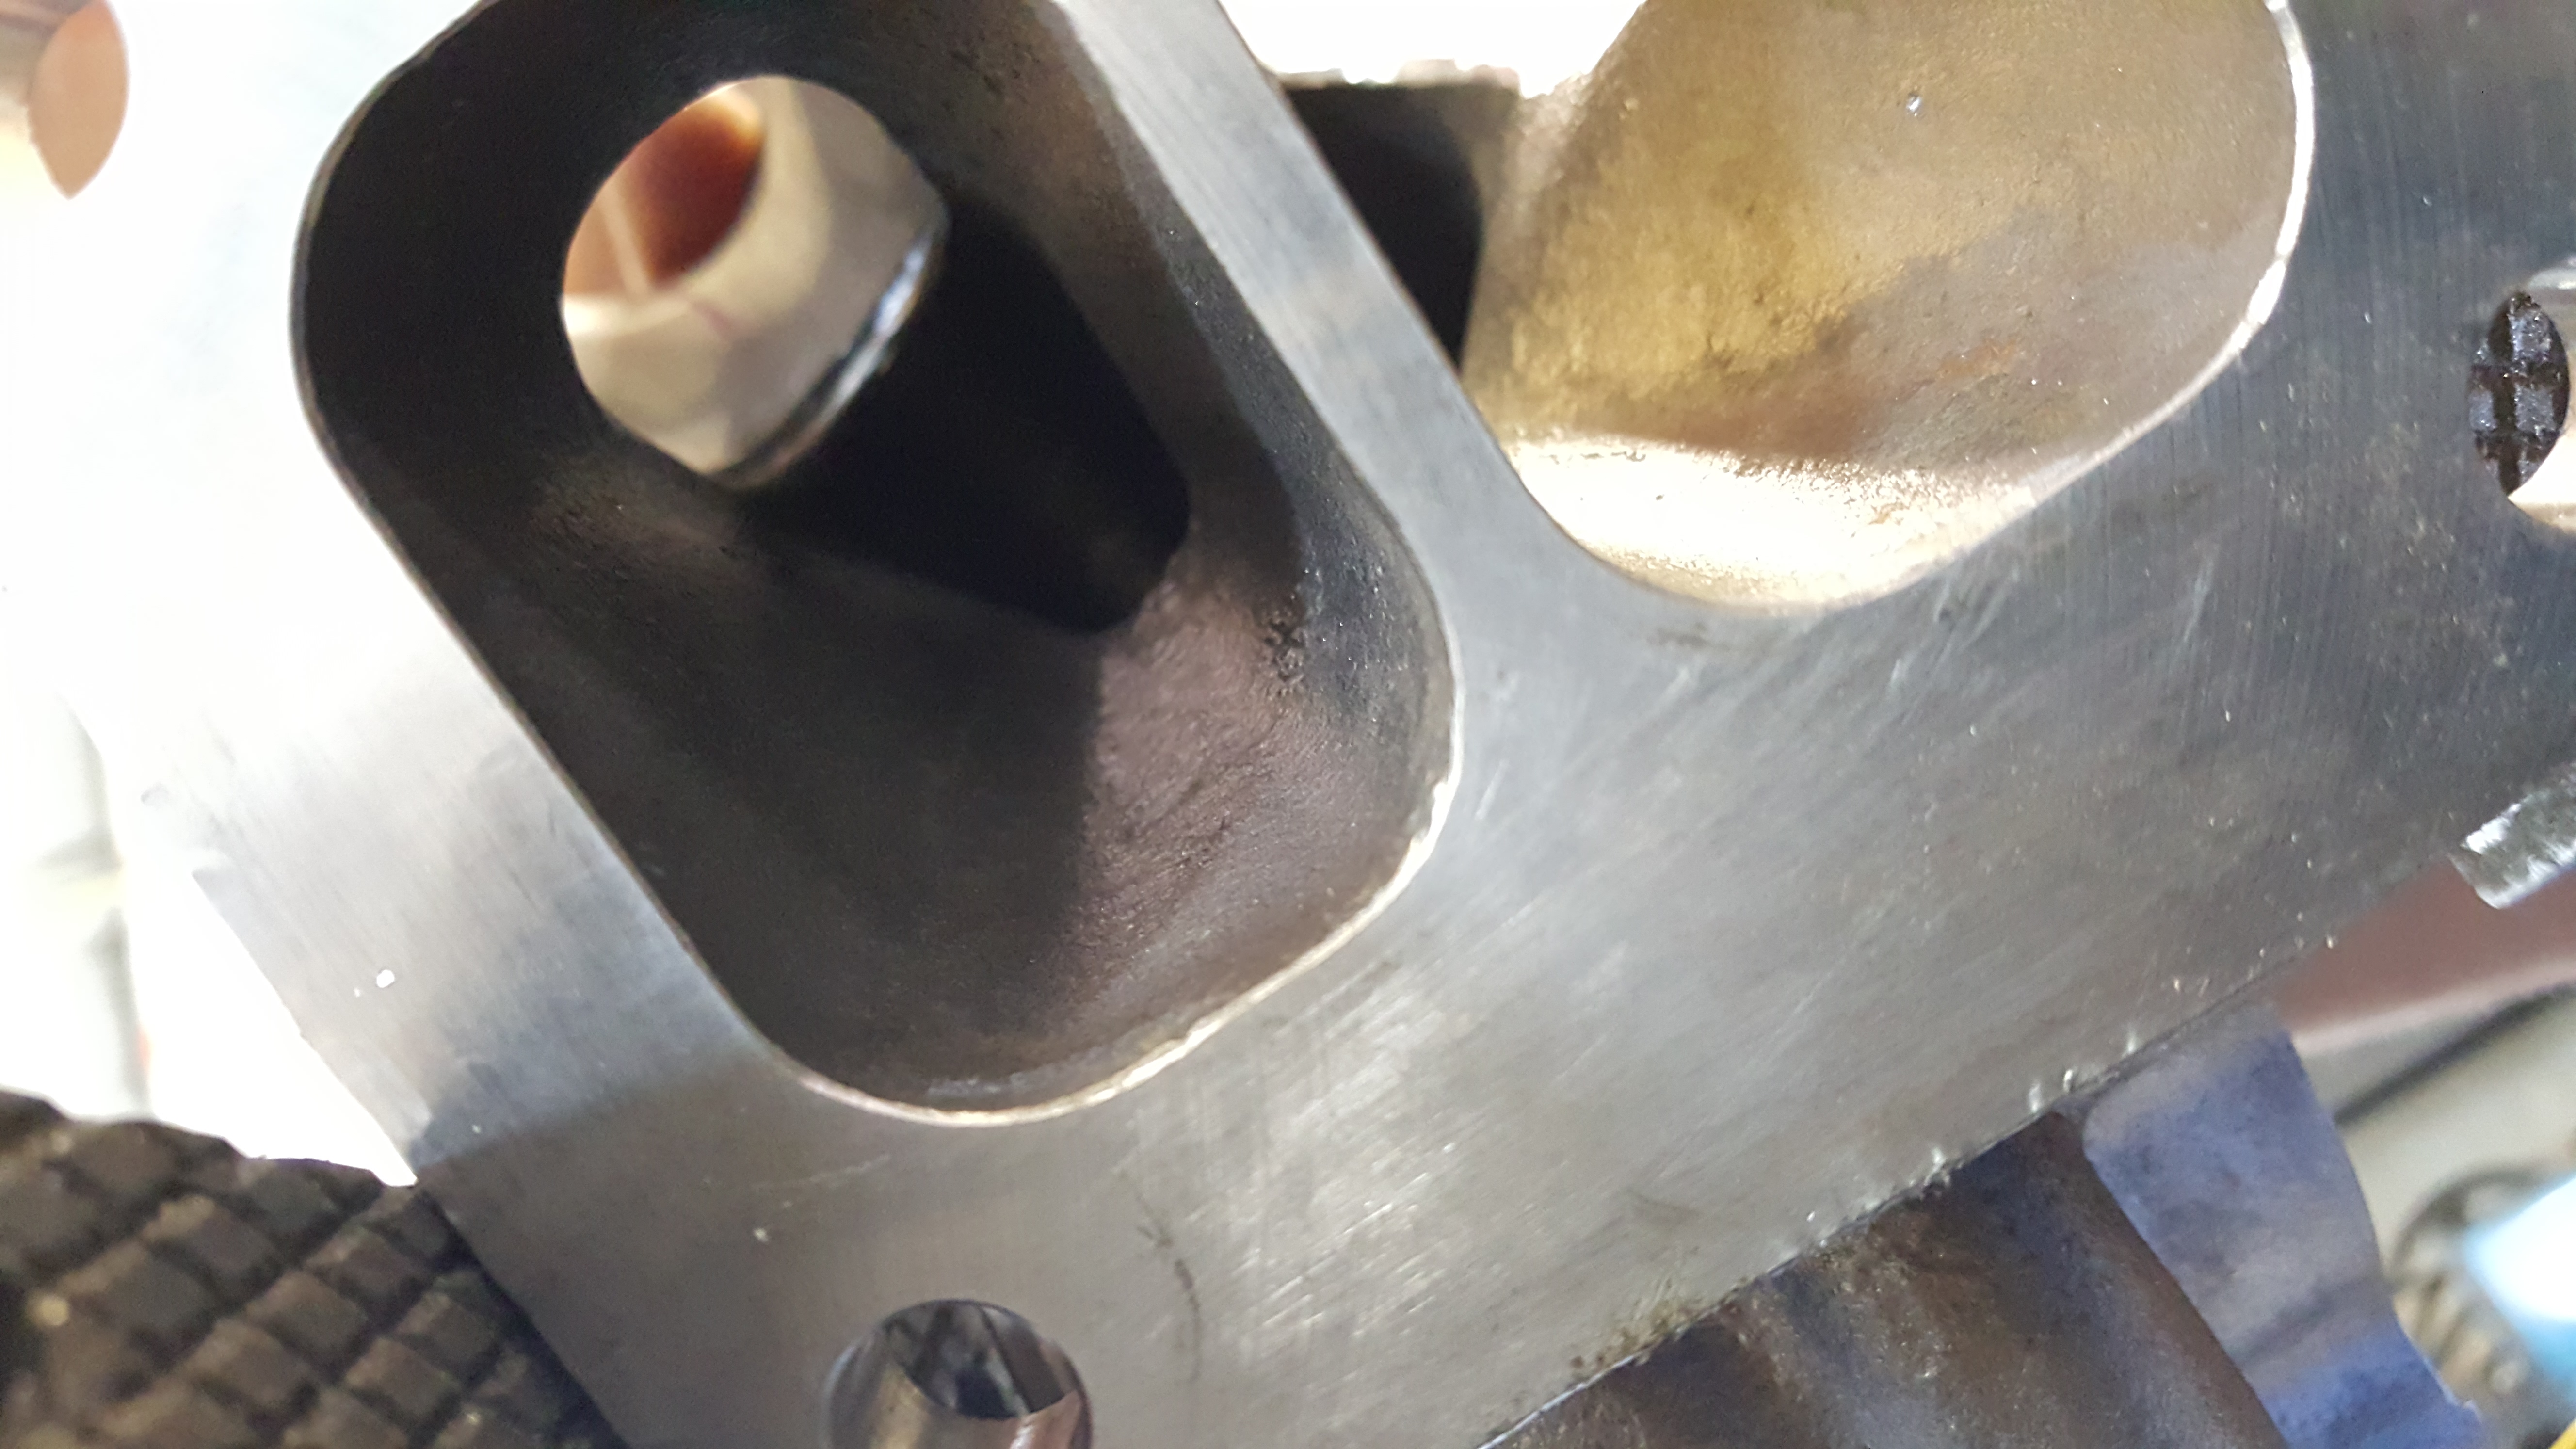
Then I got out my Heat sink Wideband O2 bungs. They're too long and would only allow 1/4" of the tip of the sensor to sit in the flow of the exhaust path. That just wouldn't do.... So i ended up cutting a few sinks off each so that the sensor would set fully in the flow of exhaust gas.

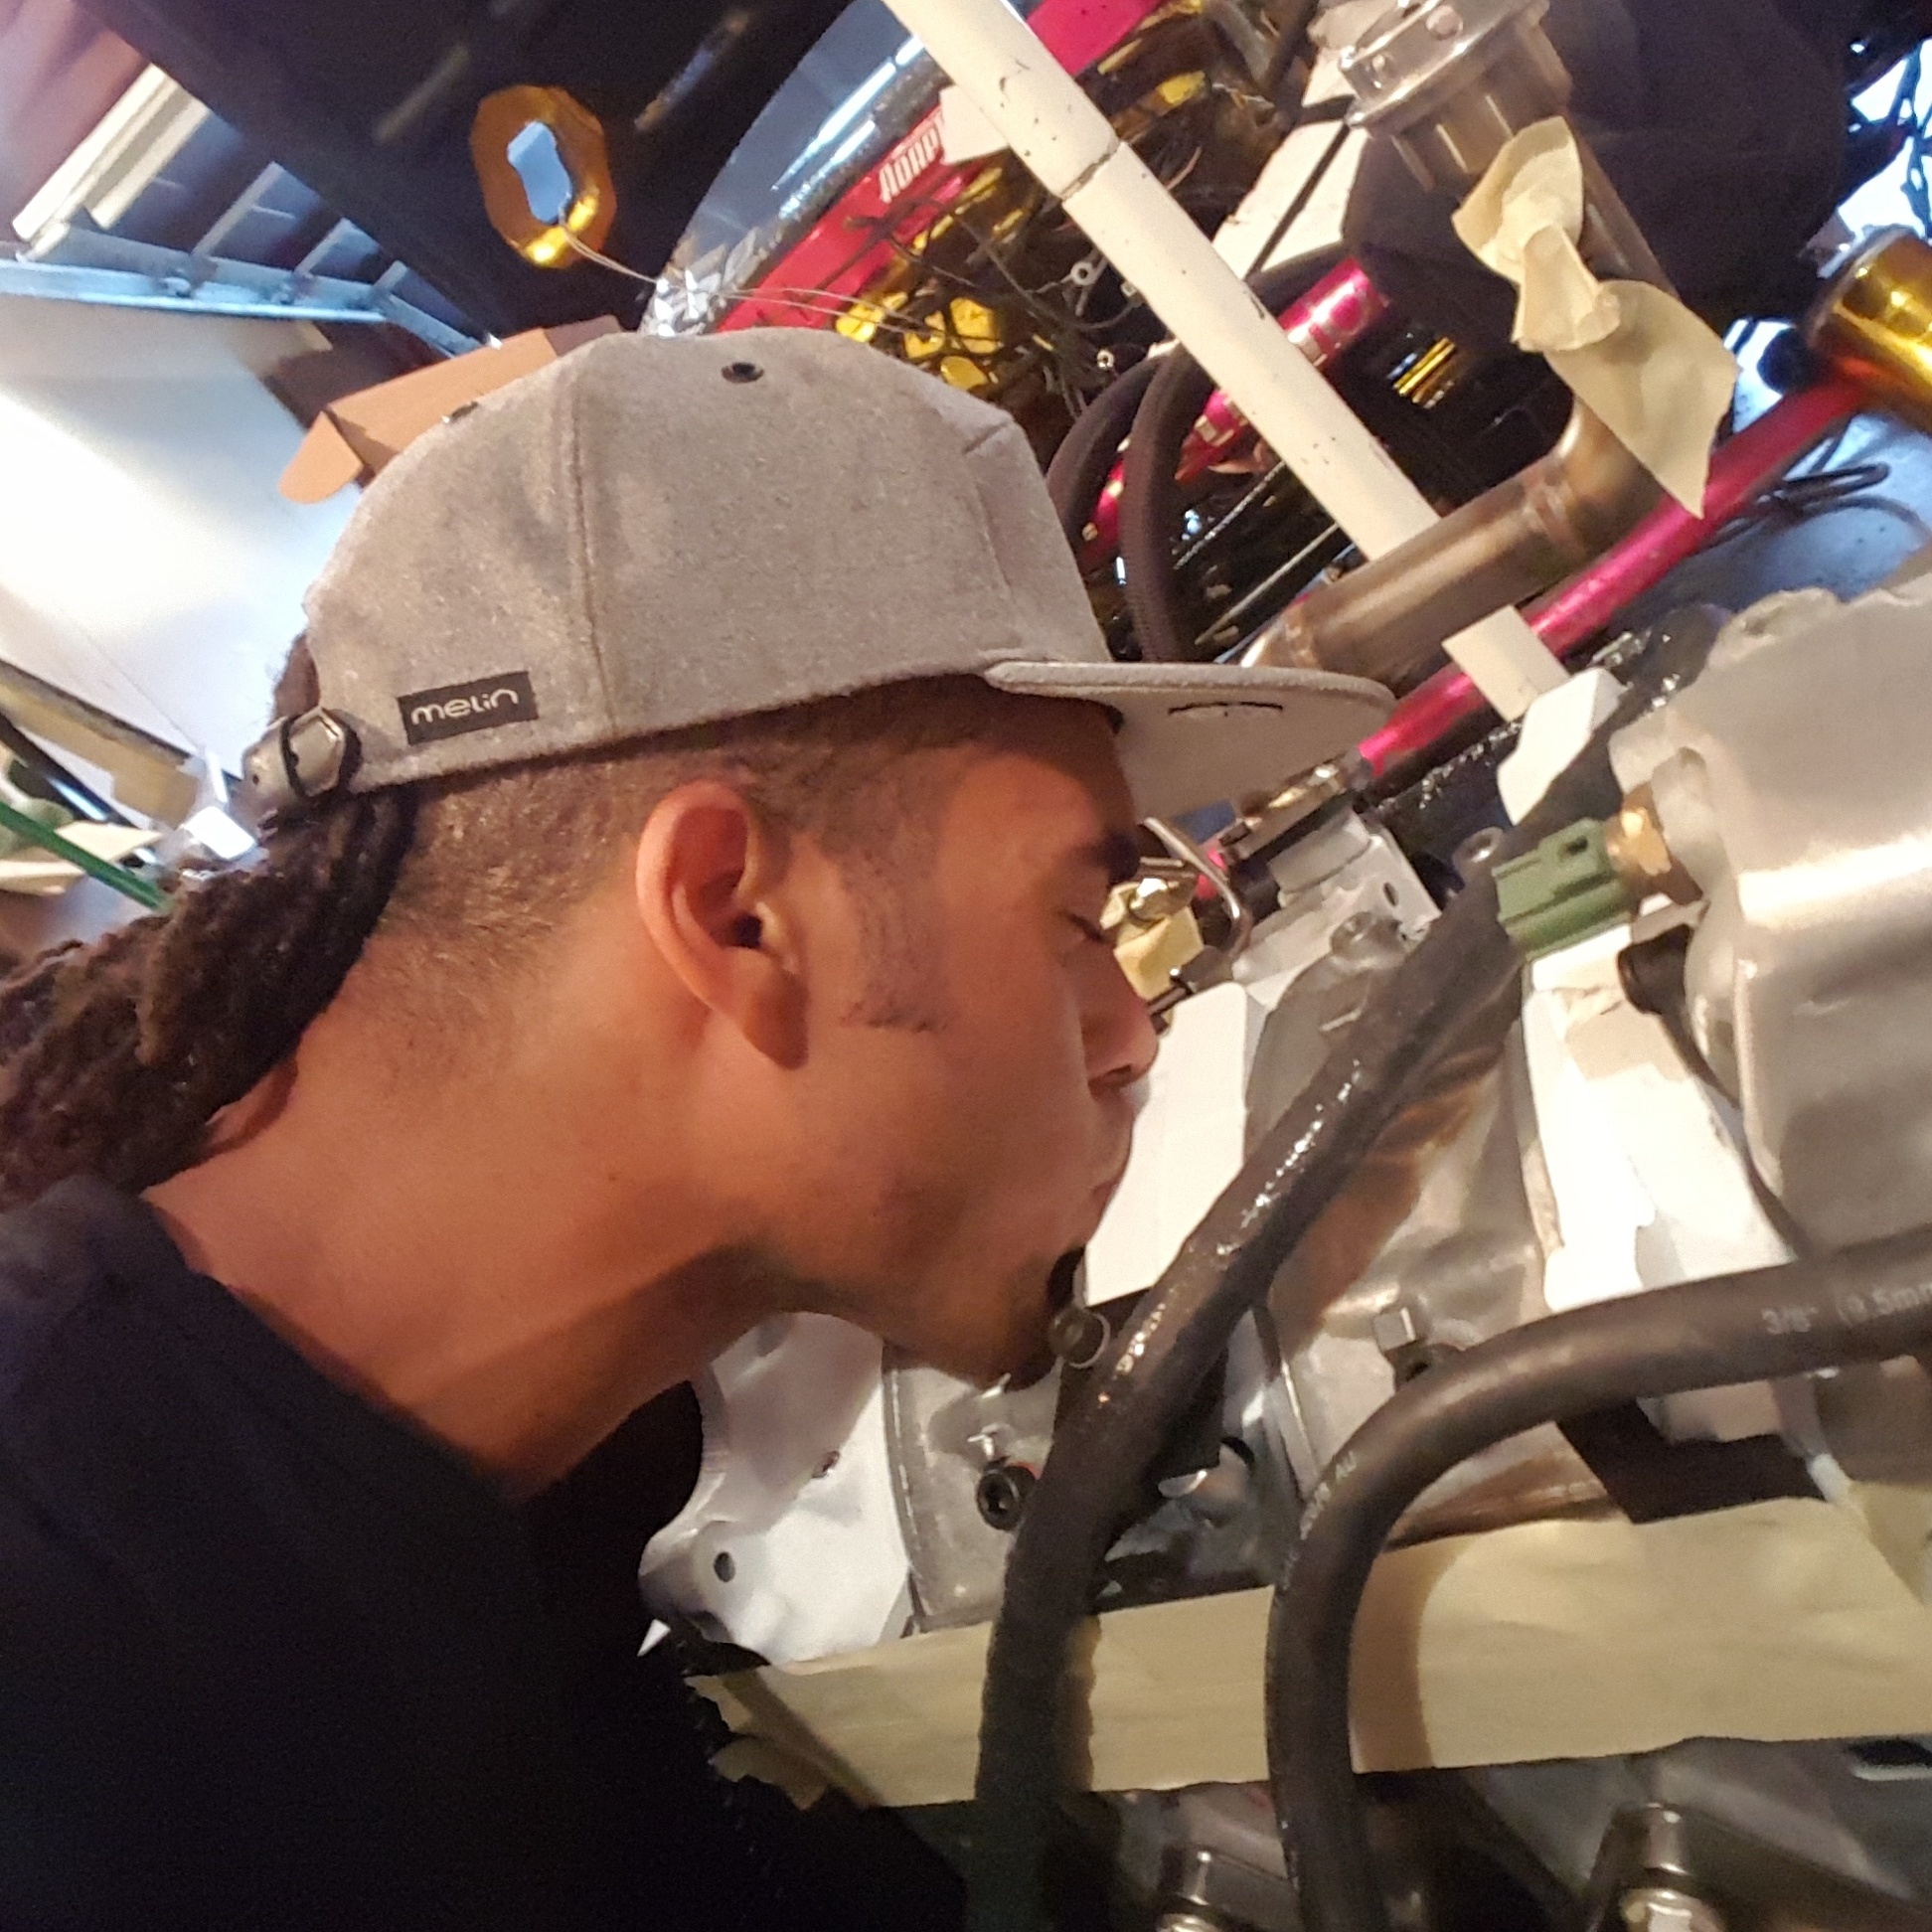
Look how retarded my friends are... Hahaha... straight screen nab
And here is where things start to get intense. Although I do have a full shop that is accessible to me.. and my car is now Located at Rad Industries in Santa Ana.. I still use all my tools etc to get stuff done. The one thing I have taken advantage of is Our Teams Tools. But at the same time... I still like to use my own...because Then I know that If I don't have something... I'll need to cough it up and get it.. It's like an investment in my own program ya know? Plus I know what tools are being used for what..and what I'll need to use in case of something needing to be fixed.
So ....On to one hell of a tedious process...
Well it seems like race season has sprung on me fully...in what seems like no time! It's almost hard to even put together thoughts let alone gather them to share but I'll do my best to give you guys the low down!!
But firstly....I really wanted to thank everyone that has stuck around and supported me through text and even silently. I feel pretty damn lucky to have such a bad *** forum to help support me. Although we are a pretty "Different breed" of people...rx7 and rotary people specifically...I feel lucky to have a forum to come on to and read and see what other members are doing with their builds. I understand I won't ever be able to please everyone but I am doing my best to do so.
So lets see where we left off!!
I ended up hitting a bit of an issue. The Semi peripheral Lower Intake manifold hit the turbine housing of the EFR. Both the EFR8374 and the 9174 share the same exhaust housing...so it wouldbn't necessarily matter which turbo I used.. But it hit. So To make it work... there were a few different options.
1) The first would be to have a spacer made to go in between Gleasemans manifold and the engine block.
2) The second would be to have Gleasemans manifold flange machined at an angle. ( NOT COOL)
3) And the third and most time taking.... mock up and make a jig for John and have him construct a manifold with it.
I went back and forth for about 4 hours trying to think of other ways and or other options to fix the issue and get the car running but I eventually realized that anything other than a perfectly fitting manifold would be cutting corners. So I bit the bullet and decided that i'd make a jig based off Gleasemans original manifold and send that jig to him so that he could construct a manifold to fit.
Here's where the Manifold NEEDED to place the turbo:
And after 6 Days including 5 days shipping John "Gleaseman" had a Brand new Extended version of his billet Series EFR manifold constructed AND Jigged, and on it's way back to Sunny California! So if anyone needs to run one of these manifolds with the SEMI Peripheral Manifold that I'm using... We're All Set! IT WILL FIT! As Seen Below...with a 3" to 4" Transition for the Down Pipe
So because Dan has been so busy getting ready for Formula Drift Atlanta..... He only had time late at night to help me. So During the day I'd do all fabrication metal "Cuts" and mock up.. ON and off the car so that when night came...He could sit down and weld everything out for me.
It takes time to make sure everything fits well. I've learned from my first couple go arounds...that you really want to ensure that everything fits properly..because you never know when you'll need to pull something apart.. hell...even if you don't ever have to take it apart... and all you do is install it. Installing something that fits well and is easy to put into the car is a hell of a lot more enjoyable than something that is all mickey mouse hacked up. I took my time with this down-pipe and took into consideration where I wanted my dual Wideband Sensors to sit... ground clearance..Heat management.. spacing from the body of the car...transmission. and bell housing.. EVEN where I wanted to run the EGT Wires...which equated me needing to make the slightest bit of a pie cut below to kick the whole piece down a tad more. The End product came out well and still retains all it's functions =-) Pumped on it.
Down Pipe Cut and Tacked up
Dan doing his thing
So this is how I do it. I leave everything loose... Including the turbo Juuuuust a tad. When I mock everthing up....I move it up down left right and circular to make sure it's free from hitting anything. You do Of Course...need the space to do that...but Since I had the space.. it wasn't an issue. Some people....even a guy at the shop who was just passing through had told me that I was dumb for not tightening down my turbo all the way. But the thing is... If you tighten it down ALL the way.. If something moves...and usually when it's welded..it does.. Then you've got not margin for error. If you have the space... In my experience.. mock it up and make sure you have clearance for WHEN things move. At the worst case scenario...the turbo can only move SOOO much on the studs.... so use that space..and plan for the IF. I guess this may only apply to people like myself who don't weld... but ****..it worked like a charm.. Twice In fact!! on the old set up and this one as well.
This is a pic of the mating end of the down pipe ..where it meets the mid pipe. The mid pipe was connected to my Exhust tip and I tilted it up with wire to see how far it would go. When I let tension off.. it mates up Perfectly!!!
Then I got out my Heat sink Wideband O2 bungs. They're too long and would only allow 1/4" of the tip of the sensor to sit in the flow of the exhaust path. That just wouldn't do.... So i ended up cutting a few sinks off each so that the sensor would set fully in the flow of exhaust gas.
Look how retarded my friends are... Hahaha... straight screen nab
And here is where things start to get intense. Although I do have a full shop that is accessible to me.. and my car is now Located at Rad Industries in Santa Ana.. I still use all my tools etc to get stuff done. The one thing I have taken advantage of is Our Teams Tools. But at the same time... I still like to use my own...because Then I know that If I don't have something... I'll need to cough it up and get it.. It's like an investment in my own program ya know? Plus I know what tools are being used for what..and what I'll need to use in case of something needing to be fixed.
So ....On to one hell of a tedious process...
Continued: "Race Season Scramble" (Part 2)
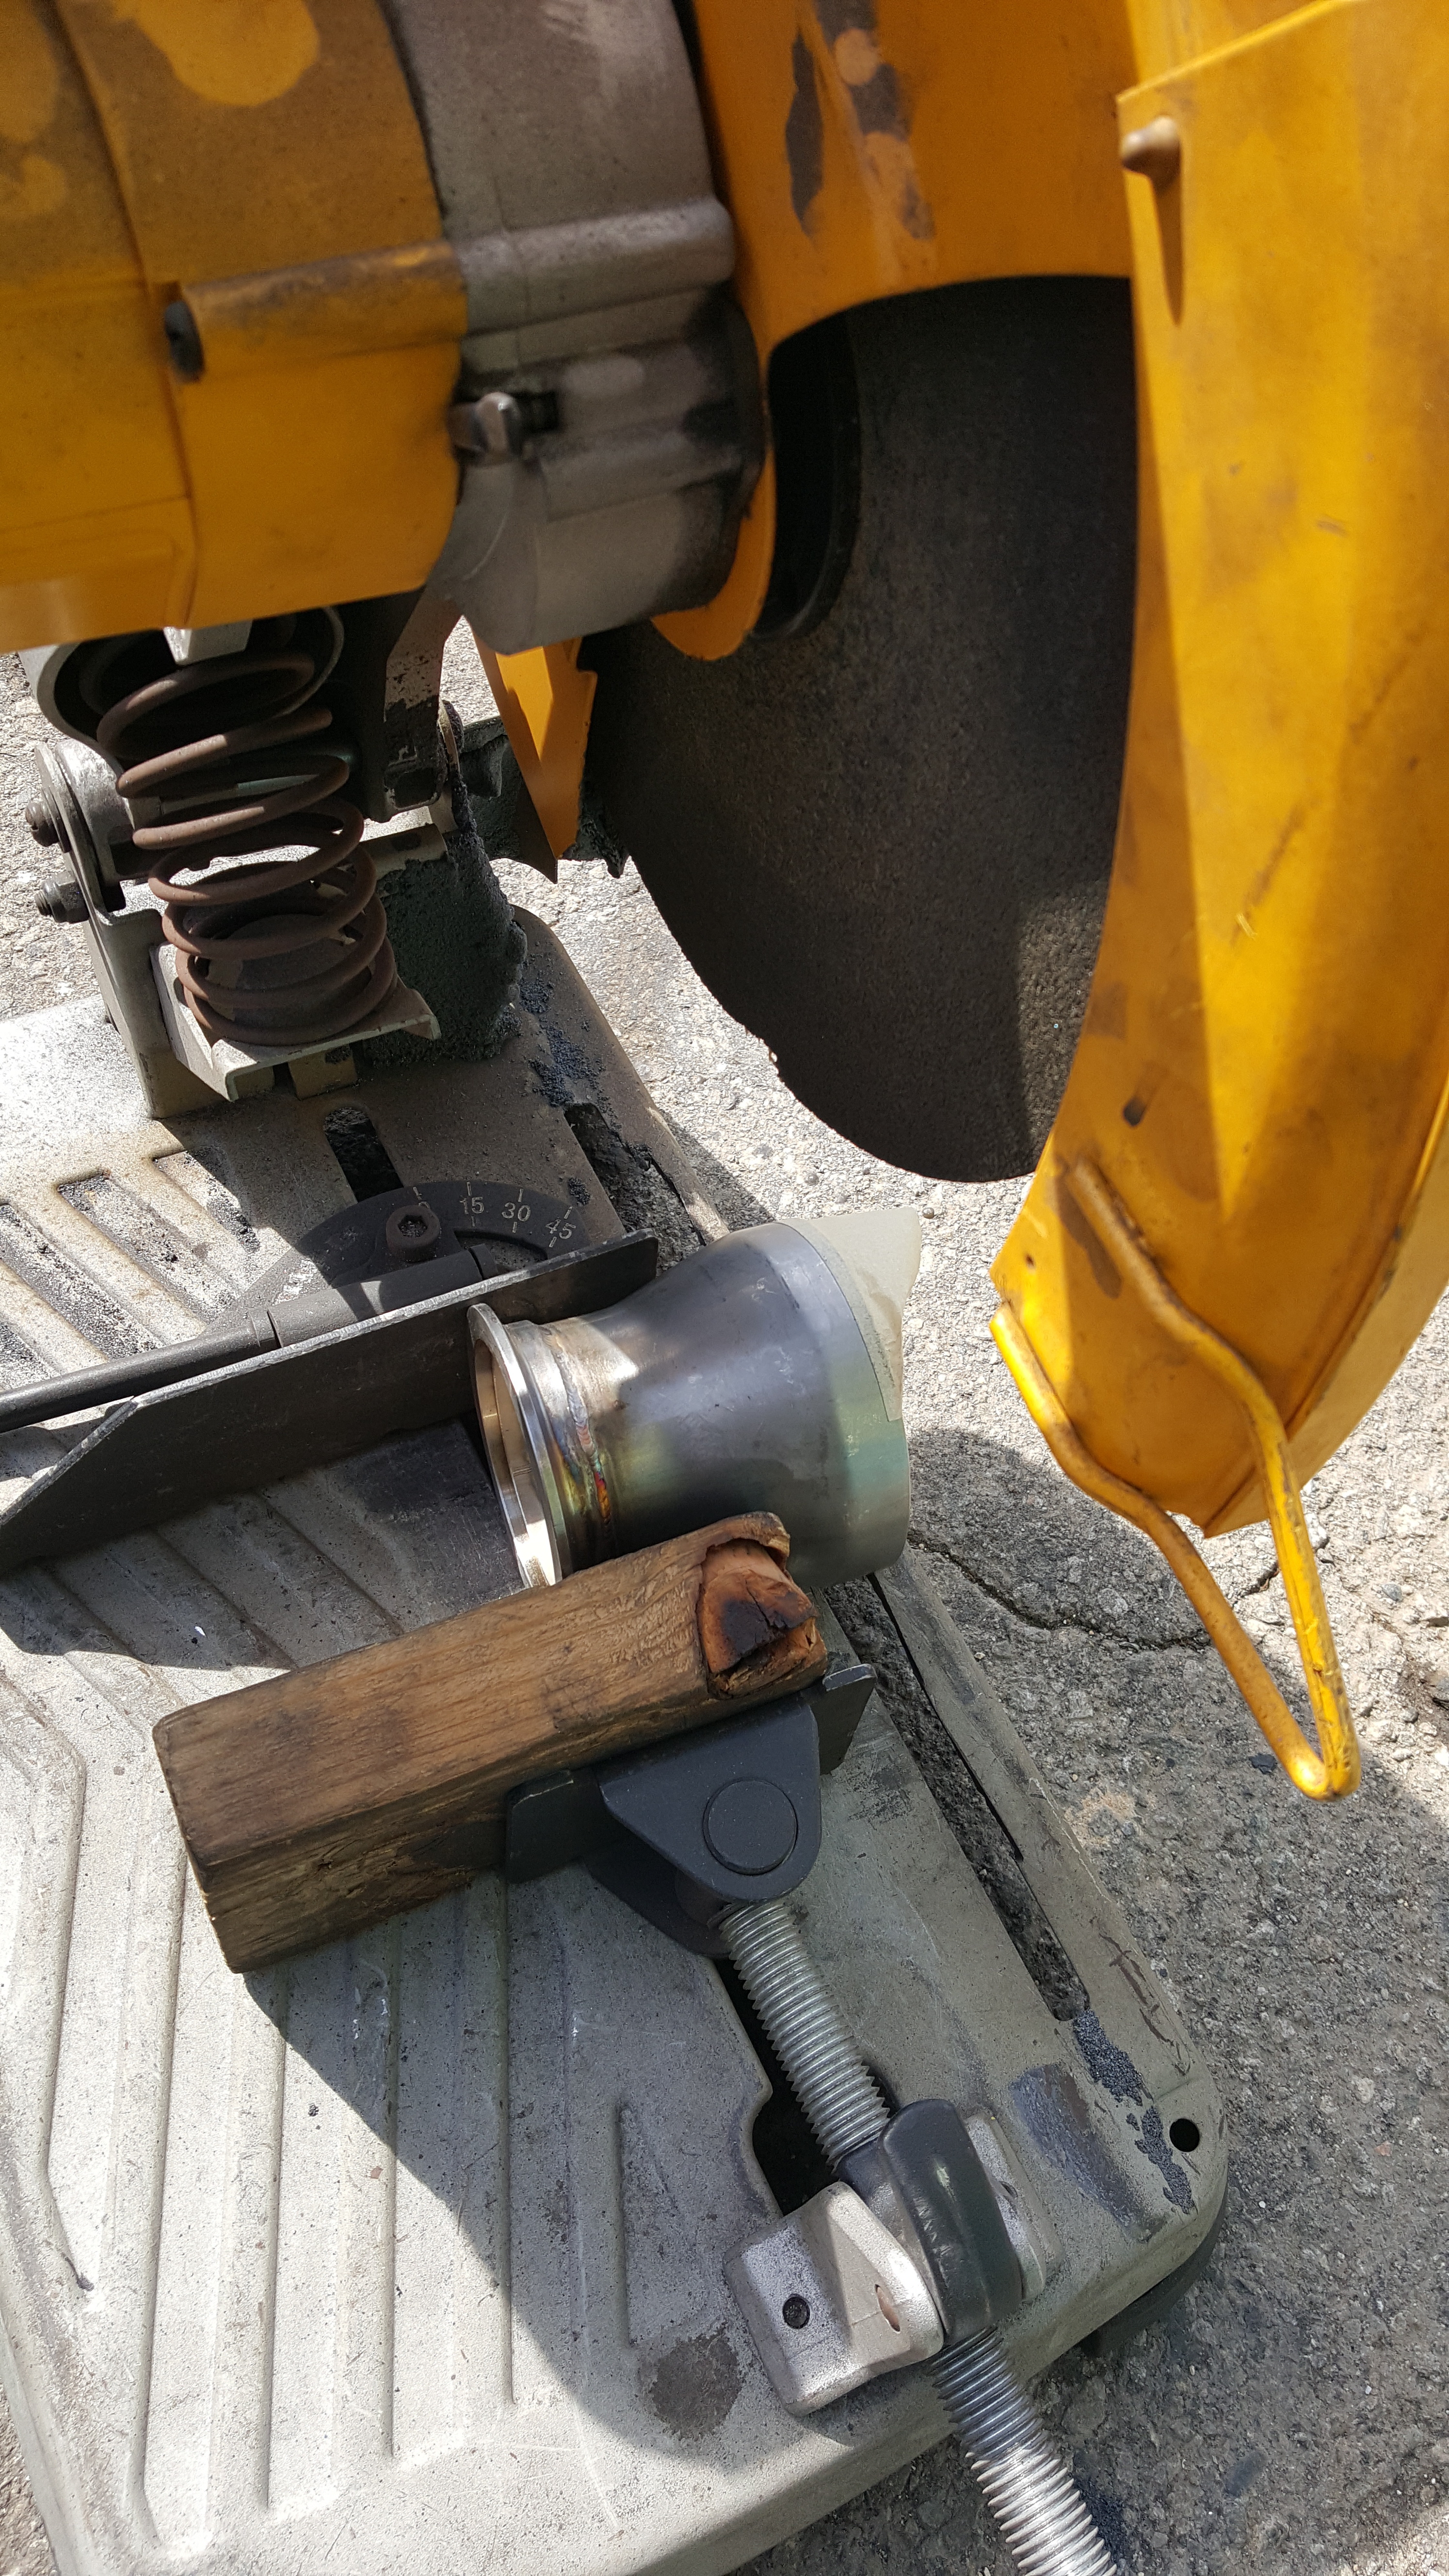
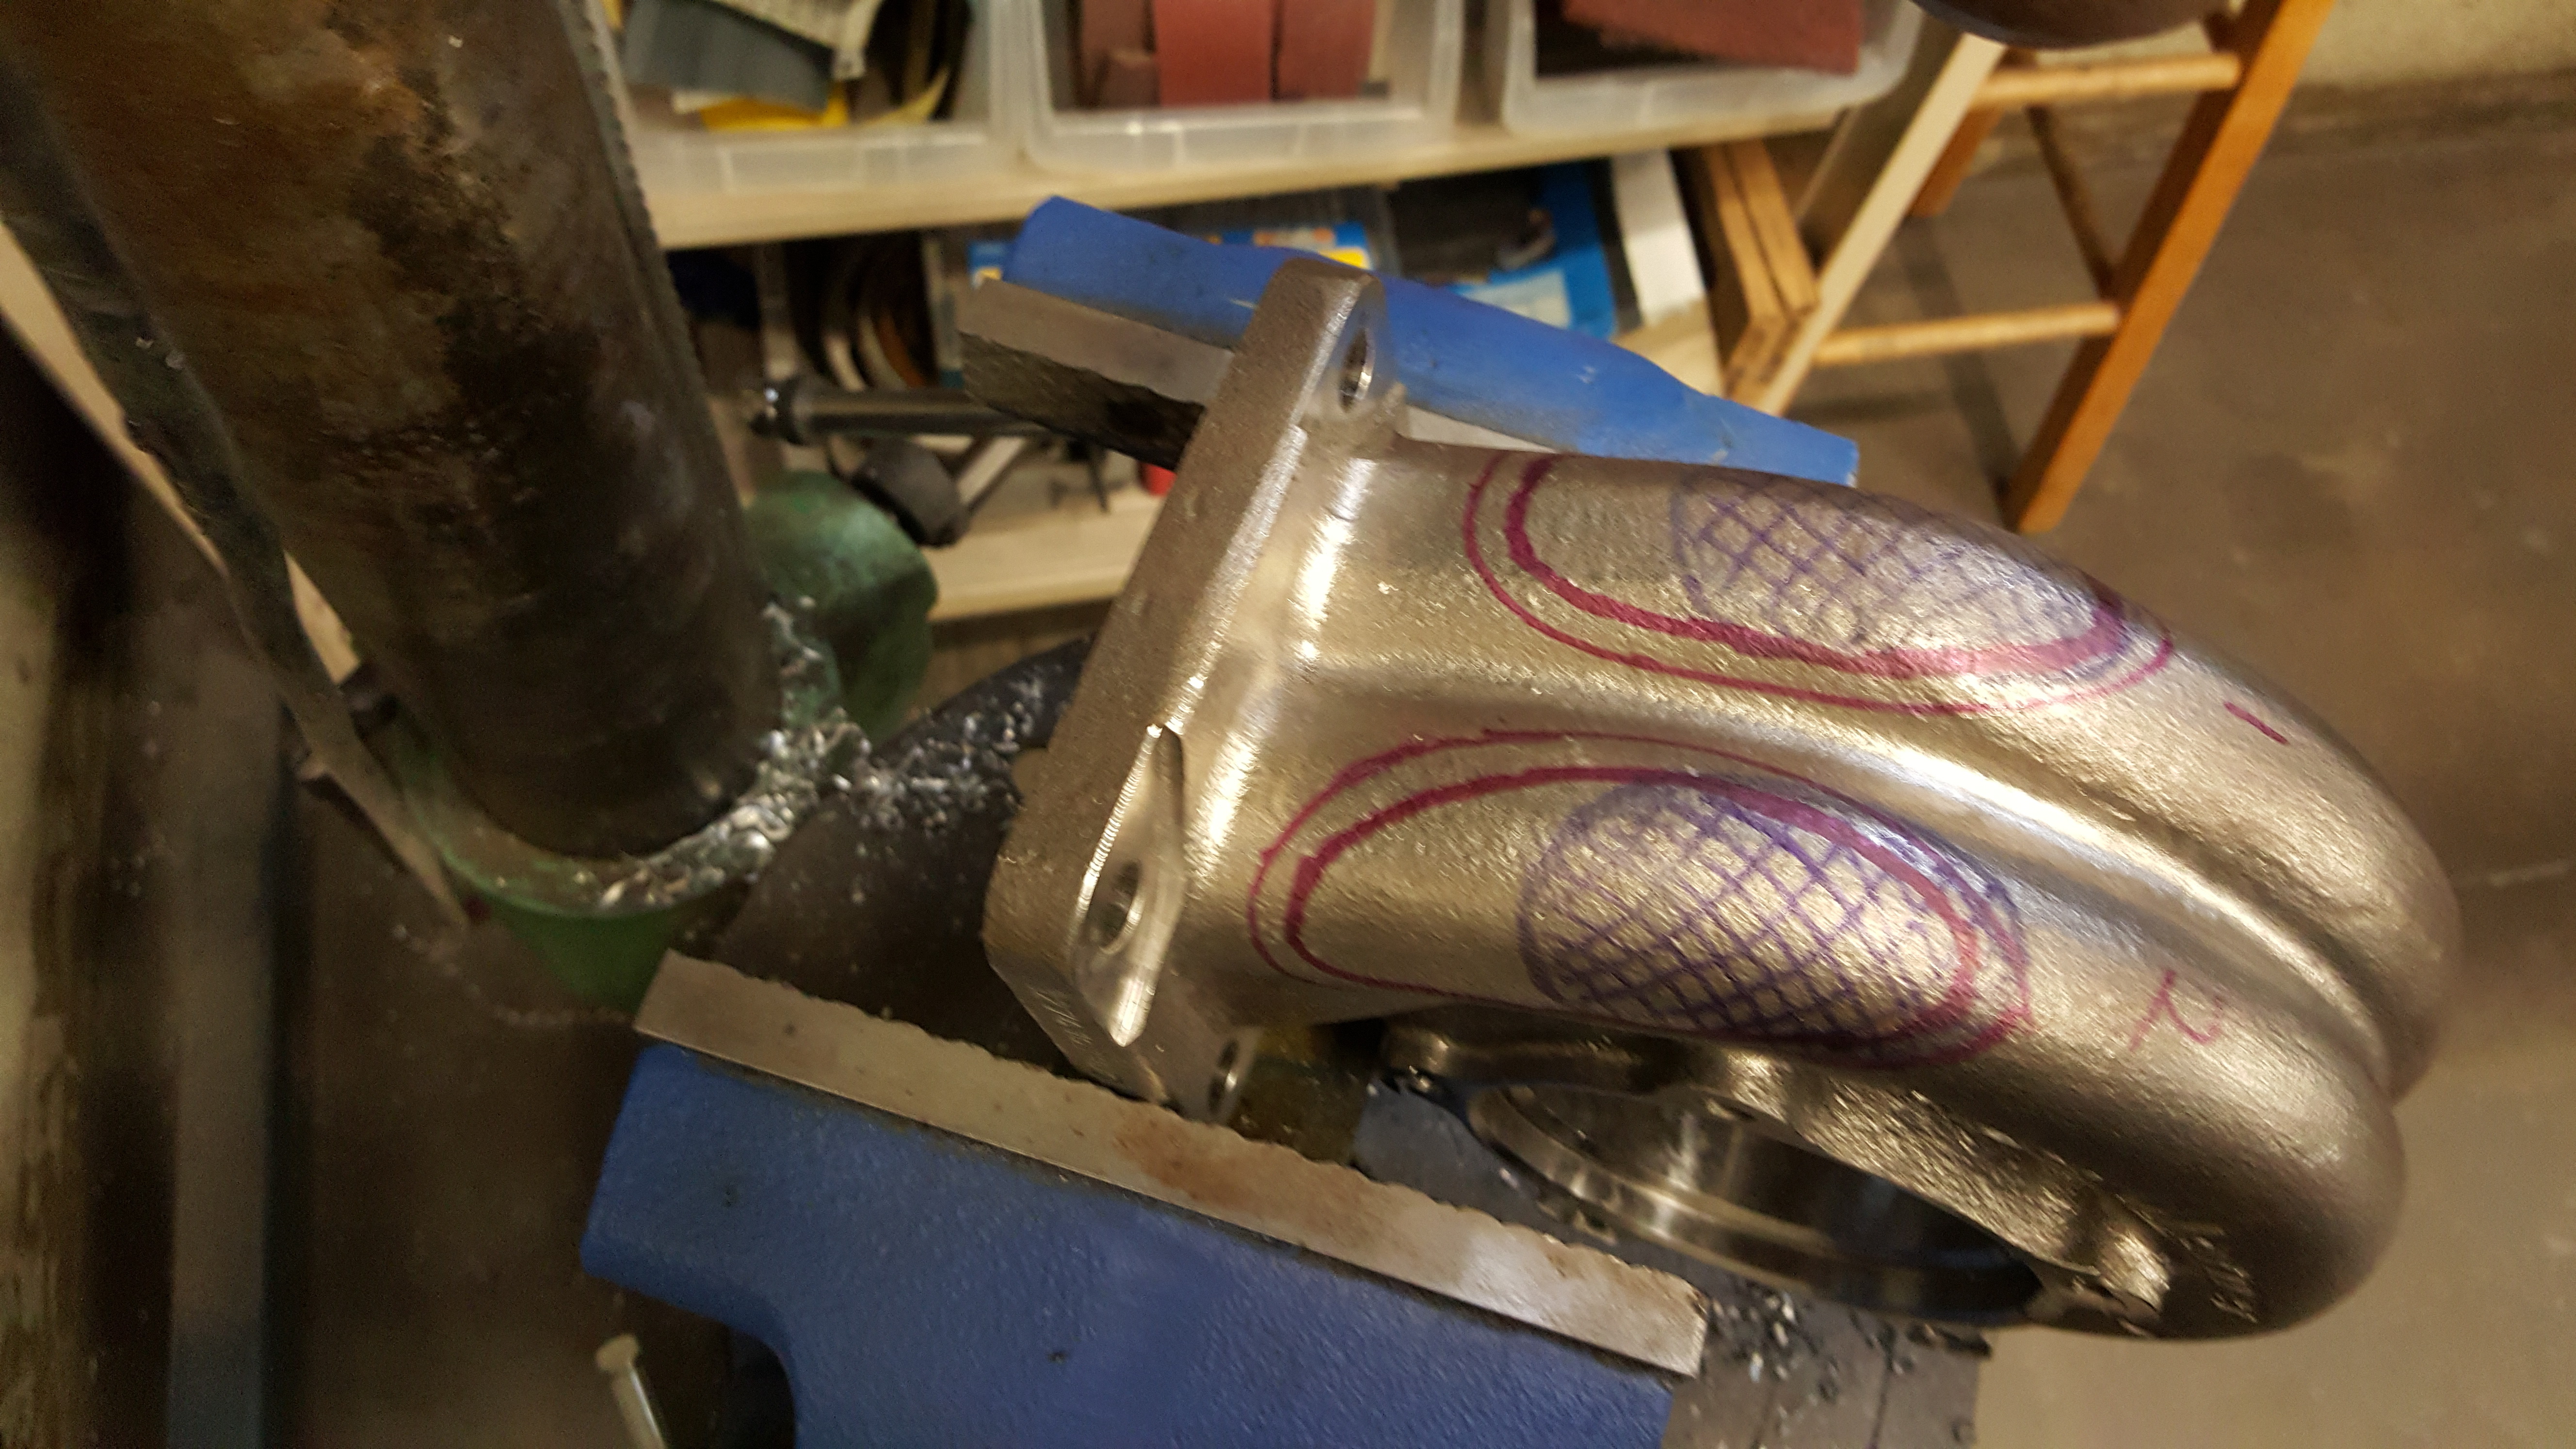
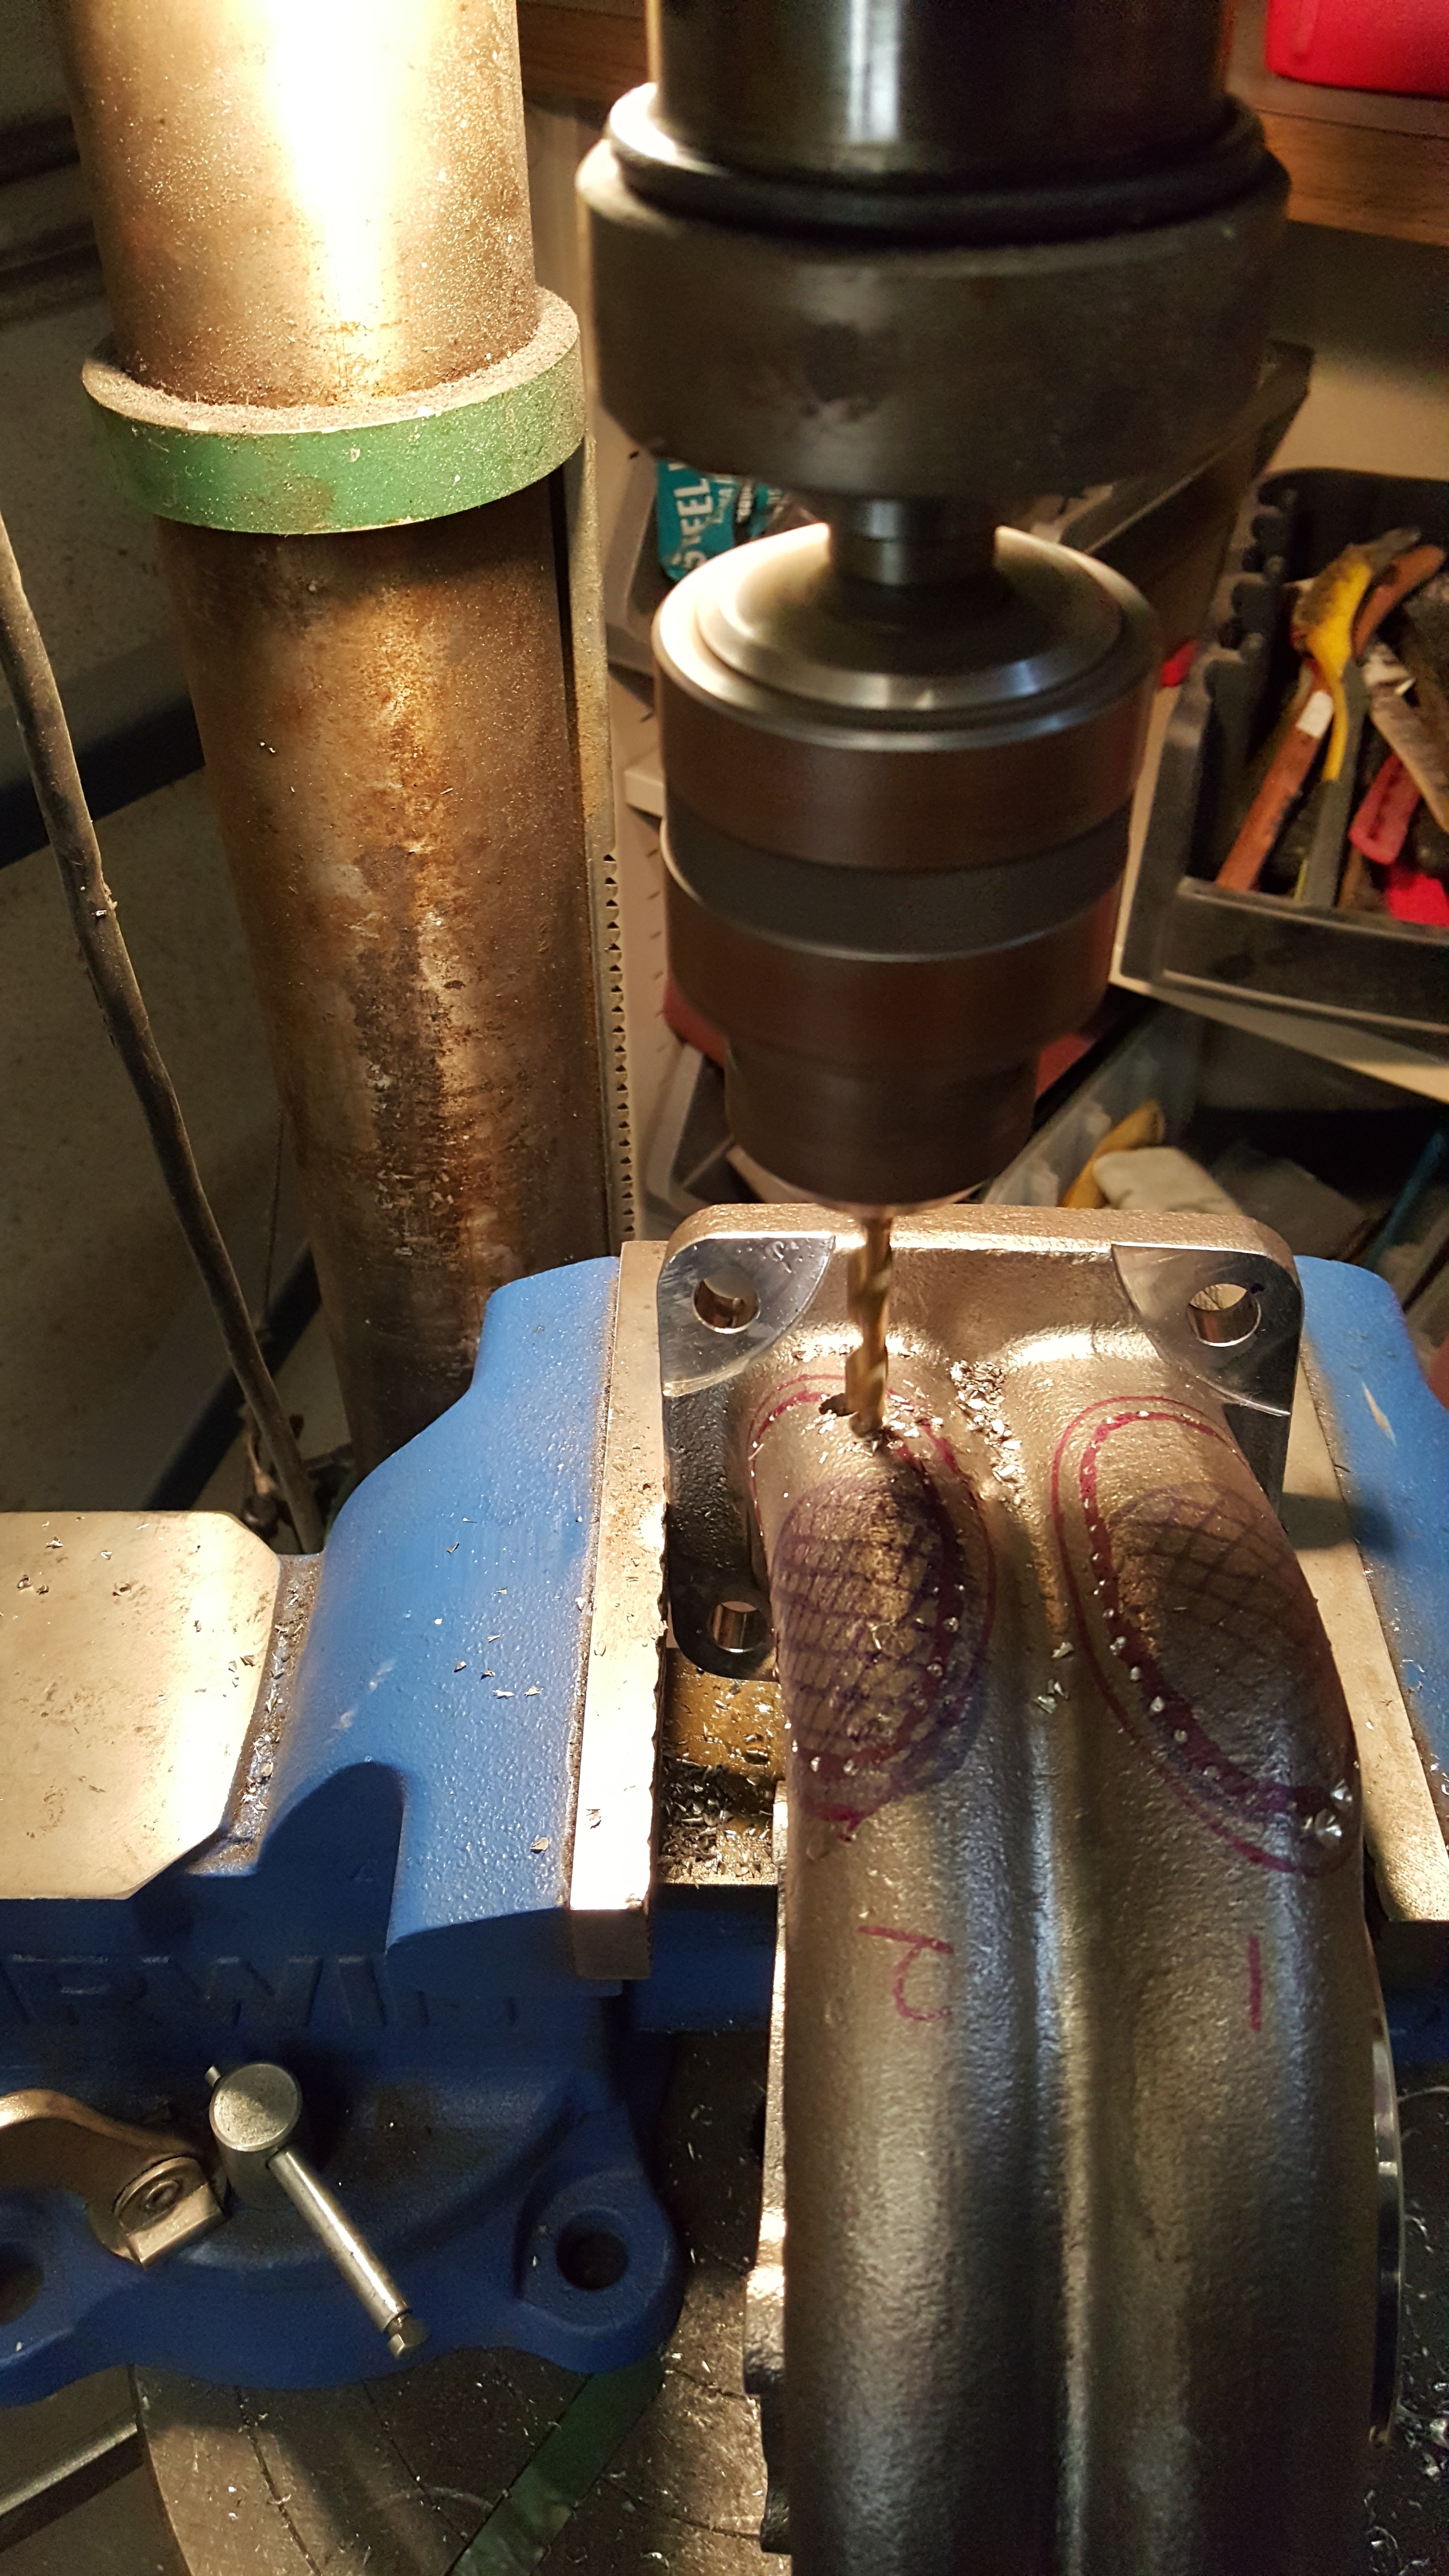
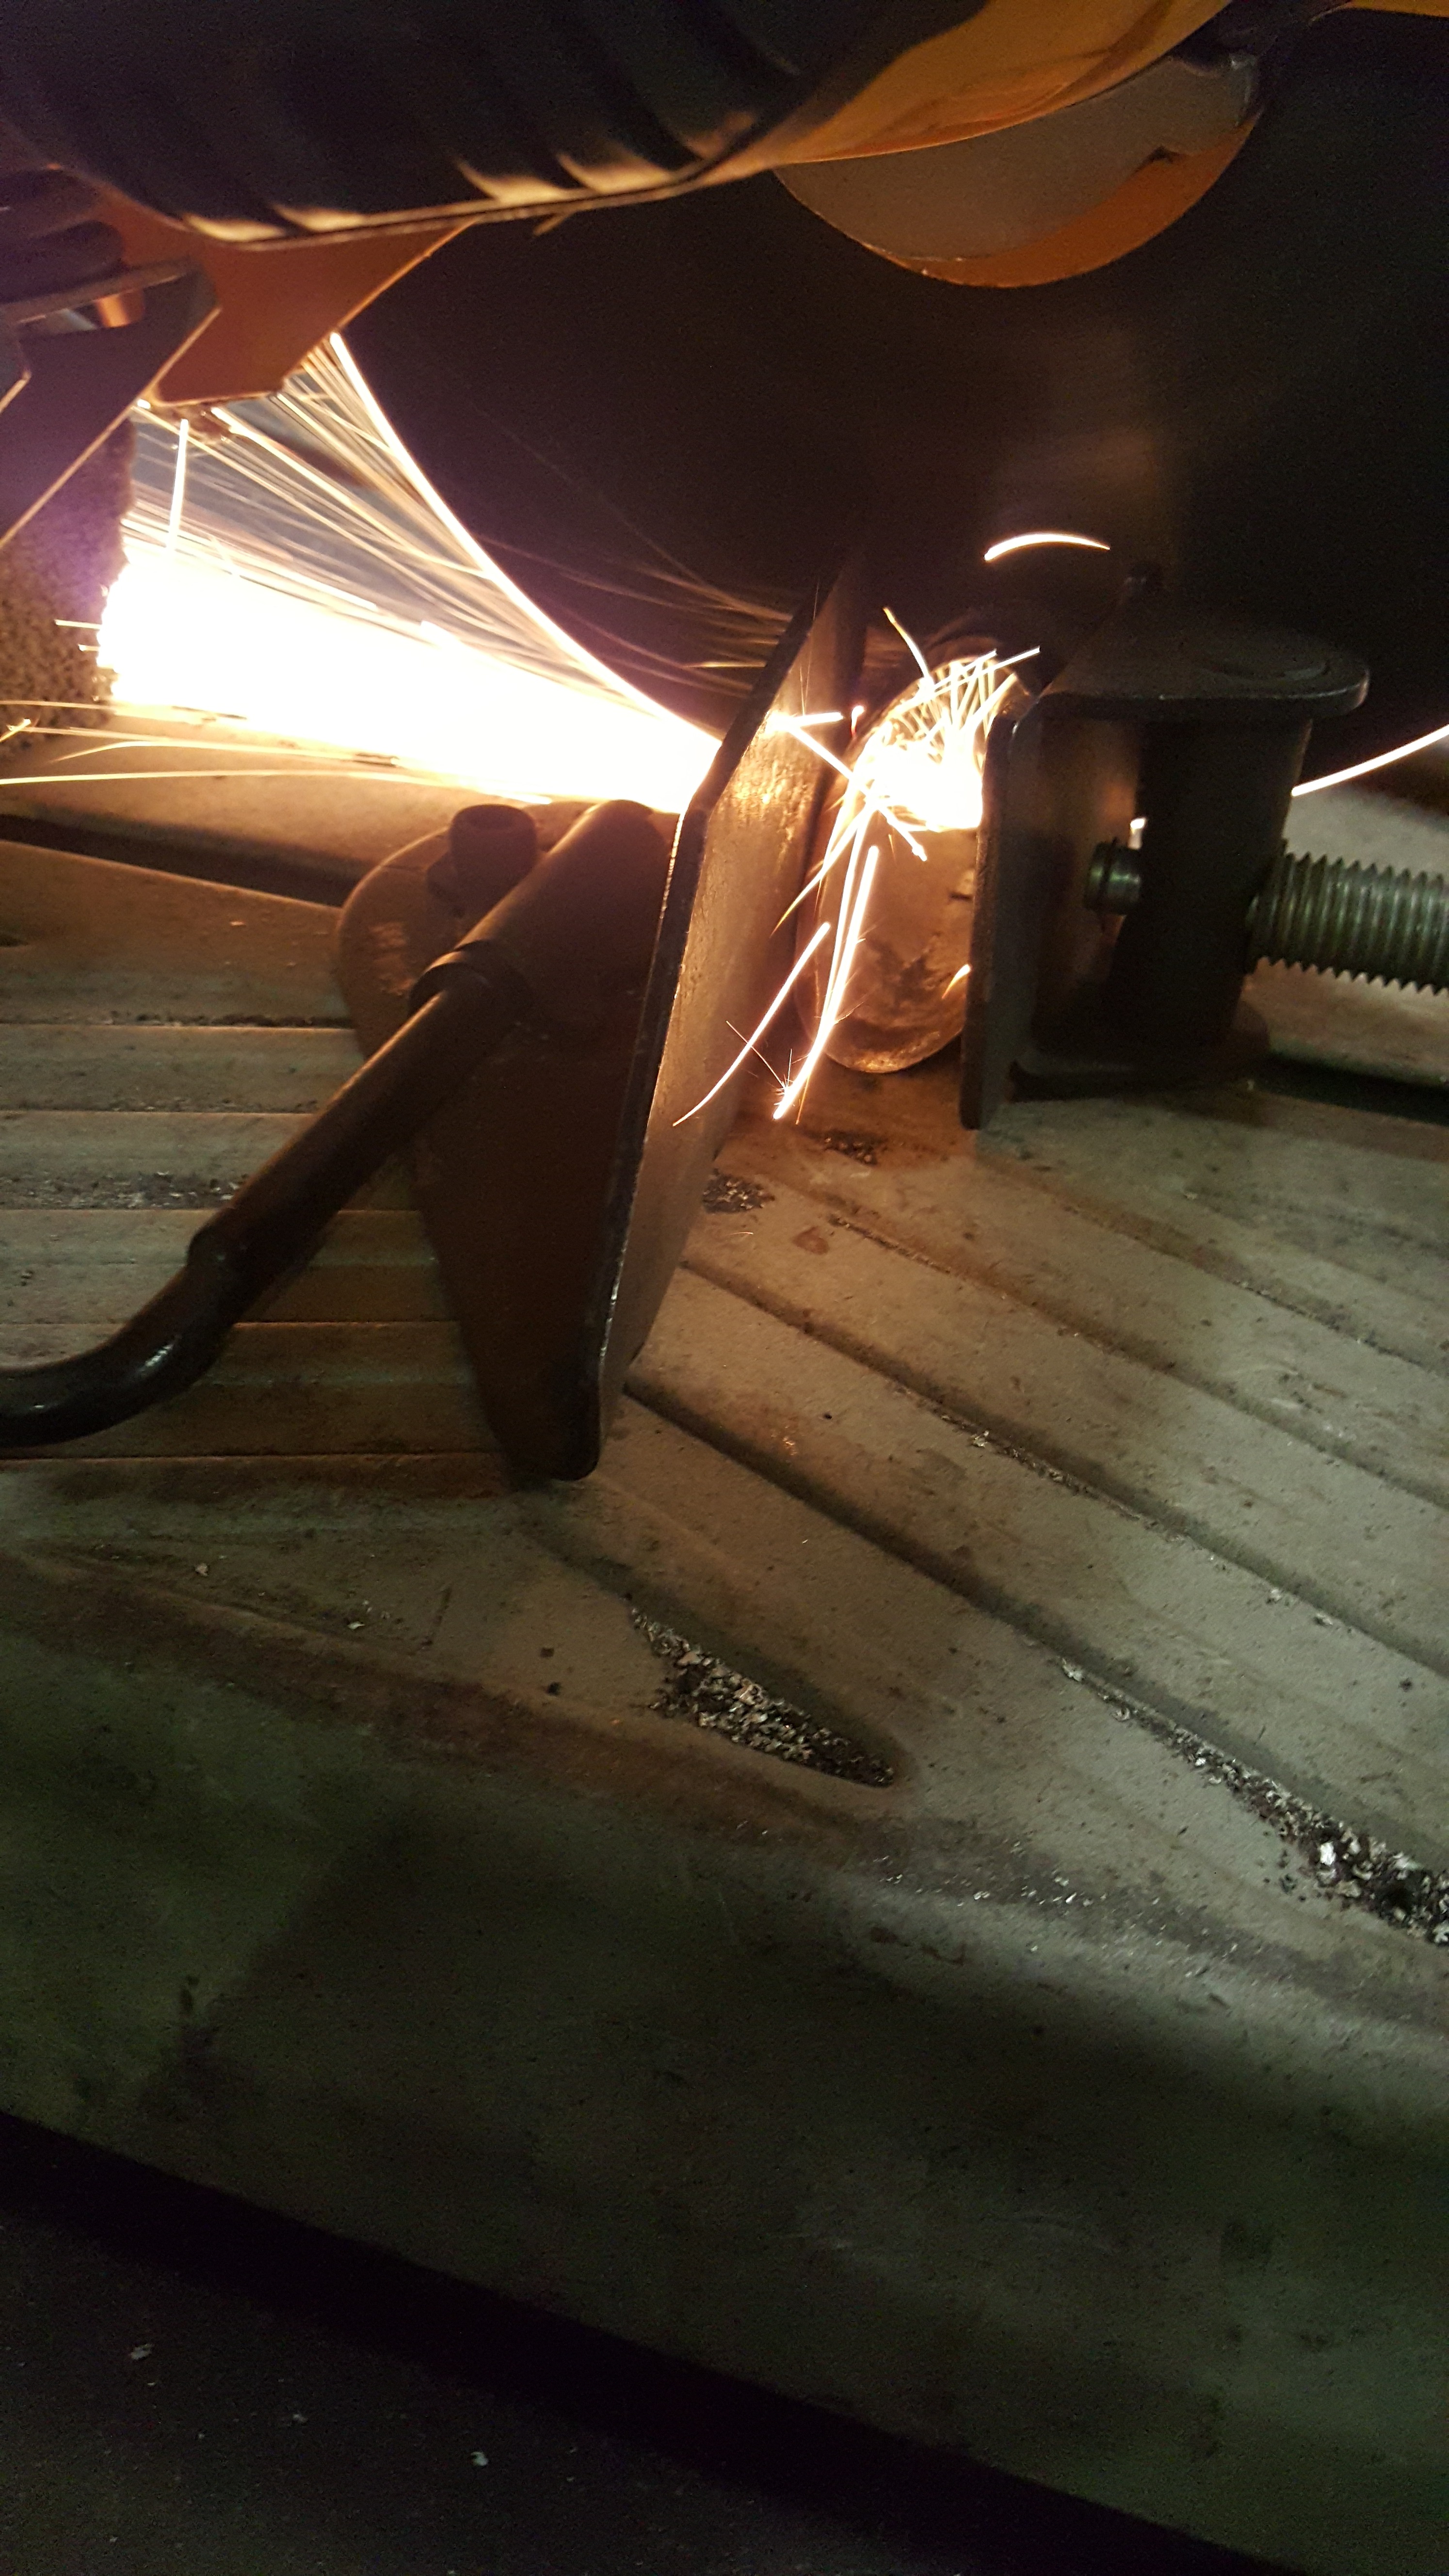
So with this process... In cutting the Borg Warner EFR 1.05 A/R... I wanted to make sure that I did it right. So I needed to pre plan it..and really try and figure out where I wanted to vent the gates on the turbine housing. Too close to the Divided Flange...and getting the turbo on and off..(Fastening it with hardware) would be a royal Pain. Too high... and I'd be ...In My Opinion... messing with Aerodynamics of the inside of the Volutes. To me... at this point in the cycle...from my knowledge of how exhaust gas expands and hits the turbine wheel.. When it gets closer to the wheel..it's Channeled into the vein and forced through a smaller area than it's been traveling in order to hit the turbine wheel optimally. If I vent too close to this.. then I'm adding all this turbulence to that specific area. I didn't want to do that. So what I did was get as close to the flattest part of the "Run" as possible... after the flange.. before the bend into the vein...but at the same time.. i'm working with limited space.. so needless to say.. Choosing the right area..took a whole lot of time... a ton of imagination... and a lot of brainstorming haha. My goal was to end up with a 50/50 shoot internally.... that way Gas hit the tear dropped portion off the housing and vein to the turbine wheel equally. I wanted this to be the case for both front and rear divides of the turbine wheel. So here's all my pics of that process... And holy sweet baby jesus was it time consuming! Hours would go by and it would seem like I was still working on a possible solution. Then I'd come up with one and it wouldn't meet all of my goal.
I can't really remember how long it took to get to this point...but it took a very long time. I Used an angle grinder for most of it.. a big vice... a giant hard plastic 3lb mallet... and patience
I will say that the rear....the second of the two was a bit easier after I figured out a good method to getting it to fit.
Just part of the process
Once I got my attack method down.... Fitment started getting better and better
And then My original Tear Drops Changed shape quite a bit. But it's ok, because it's not a straight shot.
Cutting the Turbine Housing process
Rough Cuts
Gate side looking into the Volute
More Rough Mock ups
Slowly cleaning up
Continued: "Race Season Scramble" (Part 3)
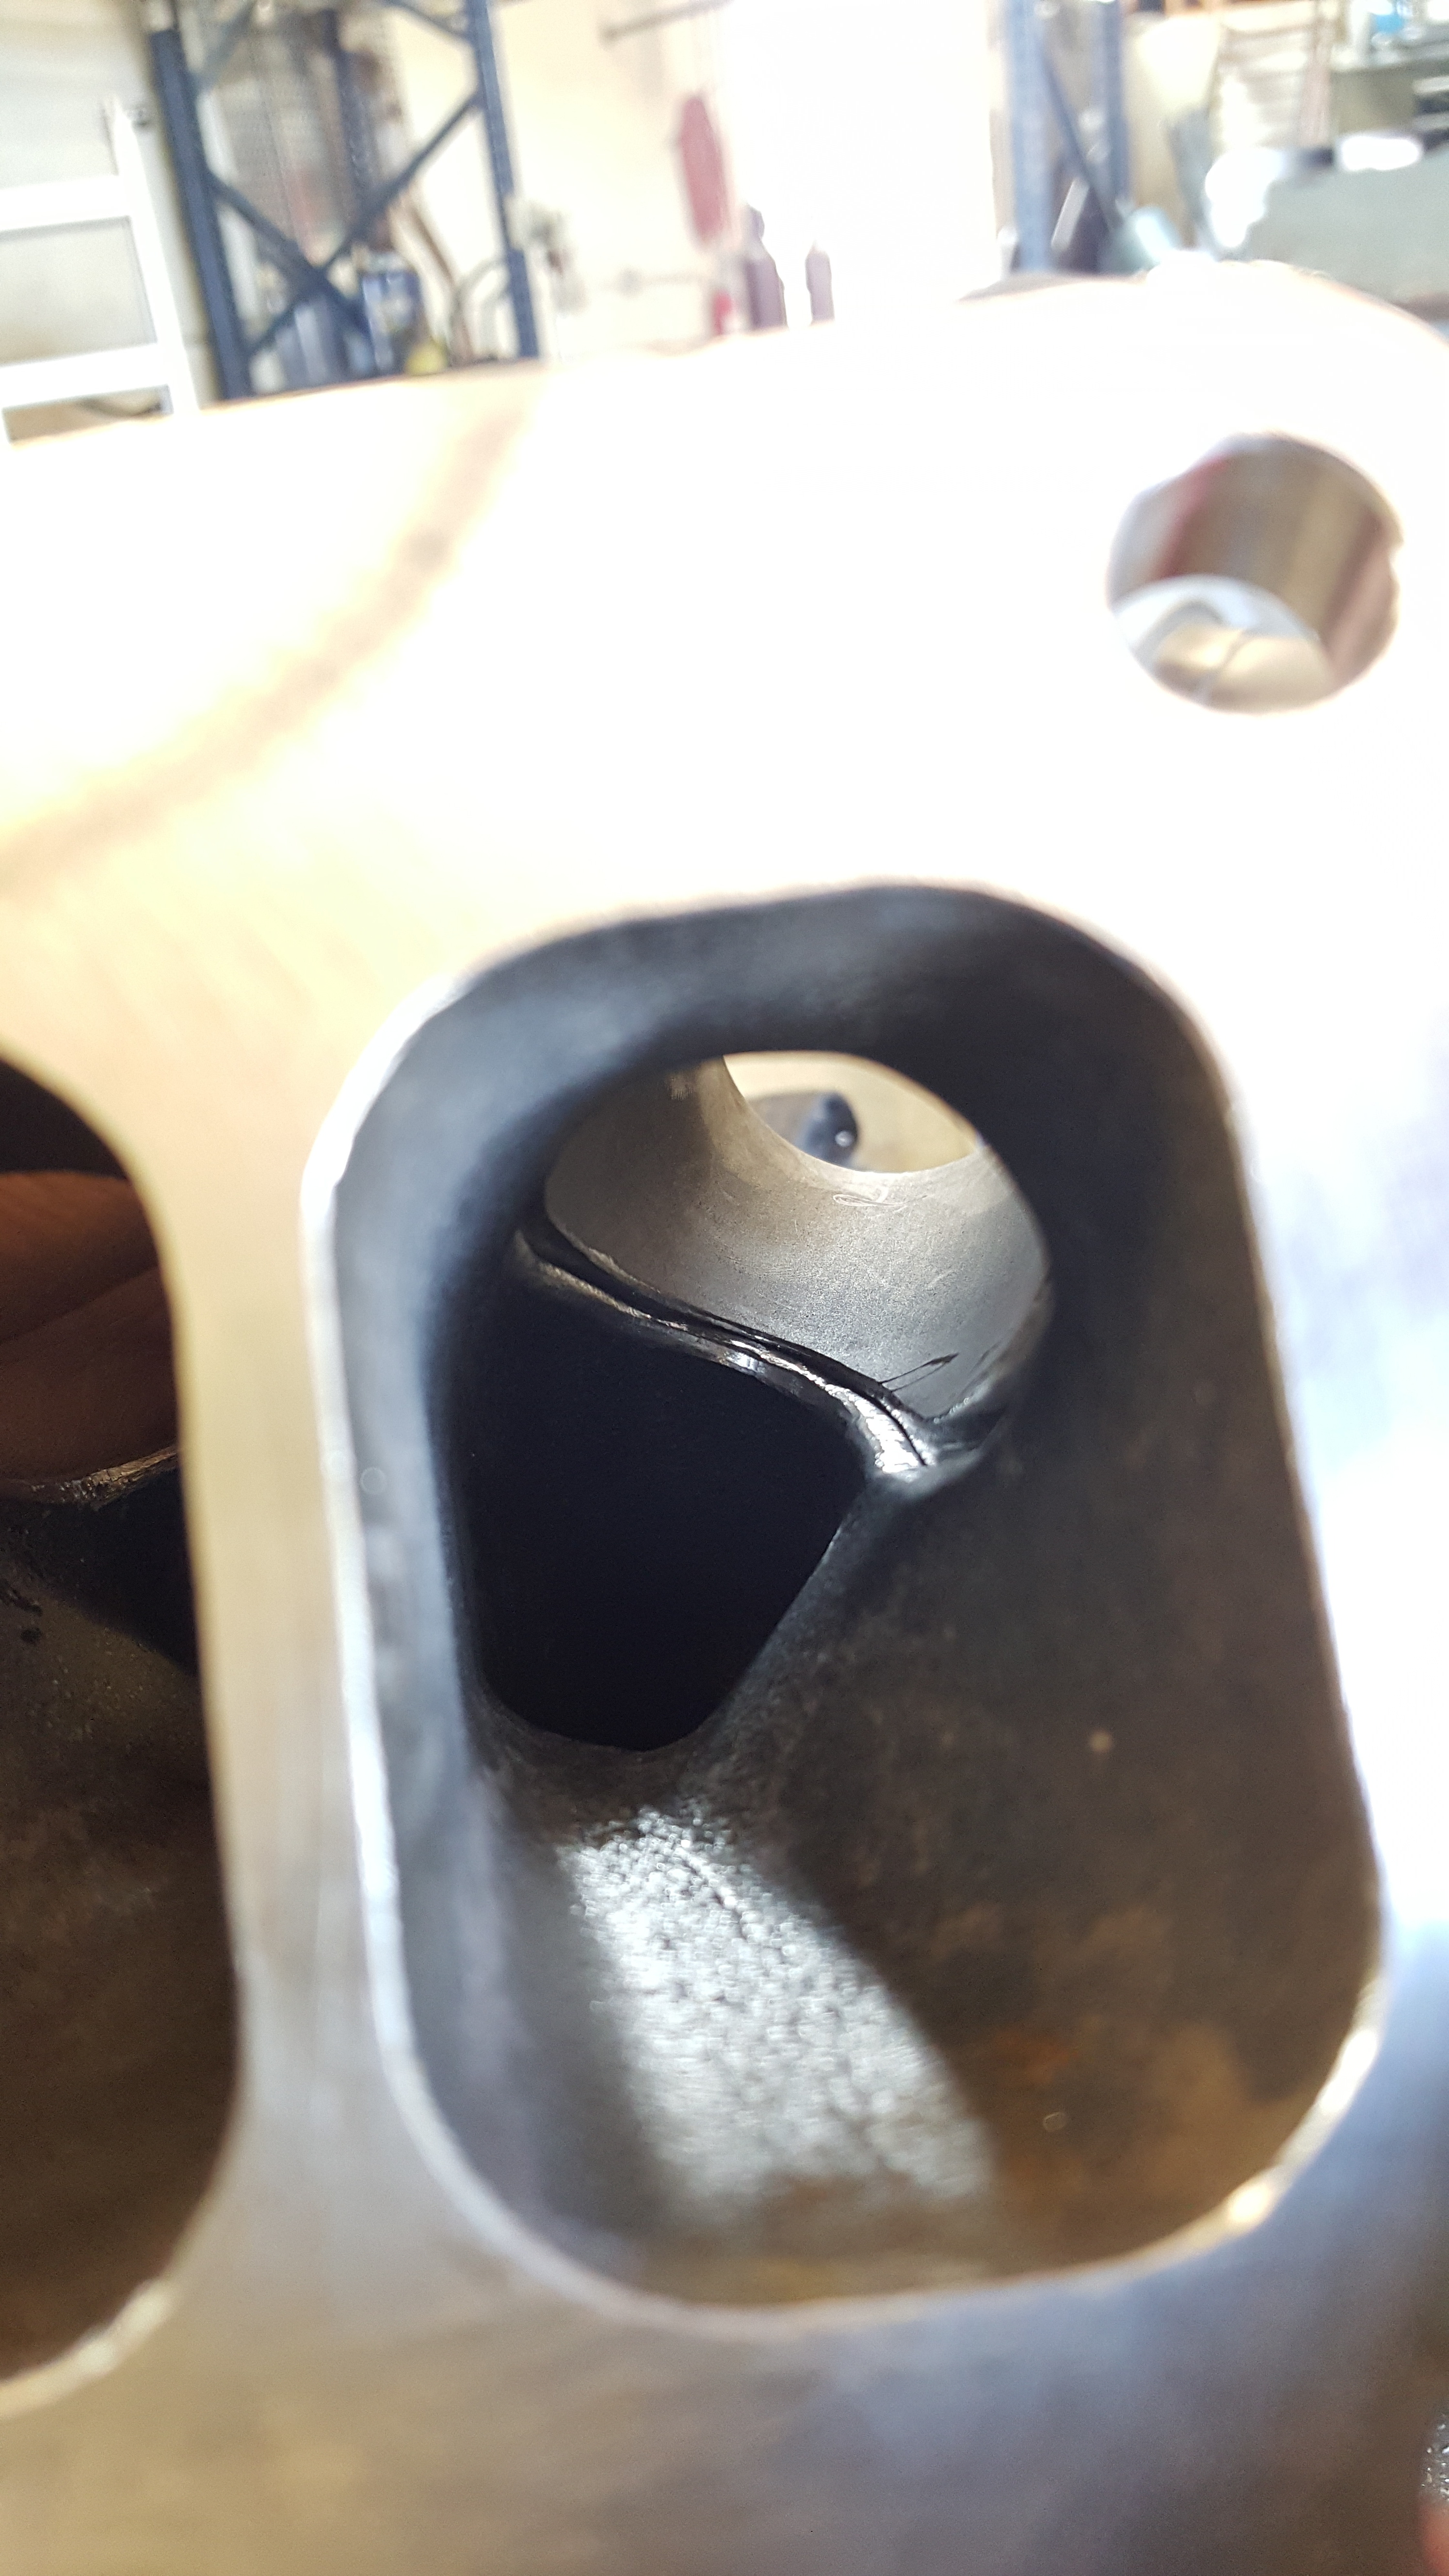
Inside Looking towards the Gate vent
Turning out pretty good!!!! Fitment wise!!! Yeeooww!!
Opposite Side Looking from gate looking Down into Turbine
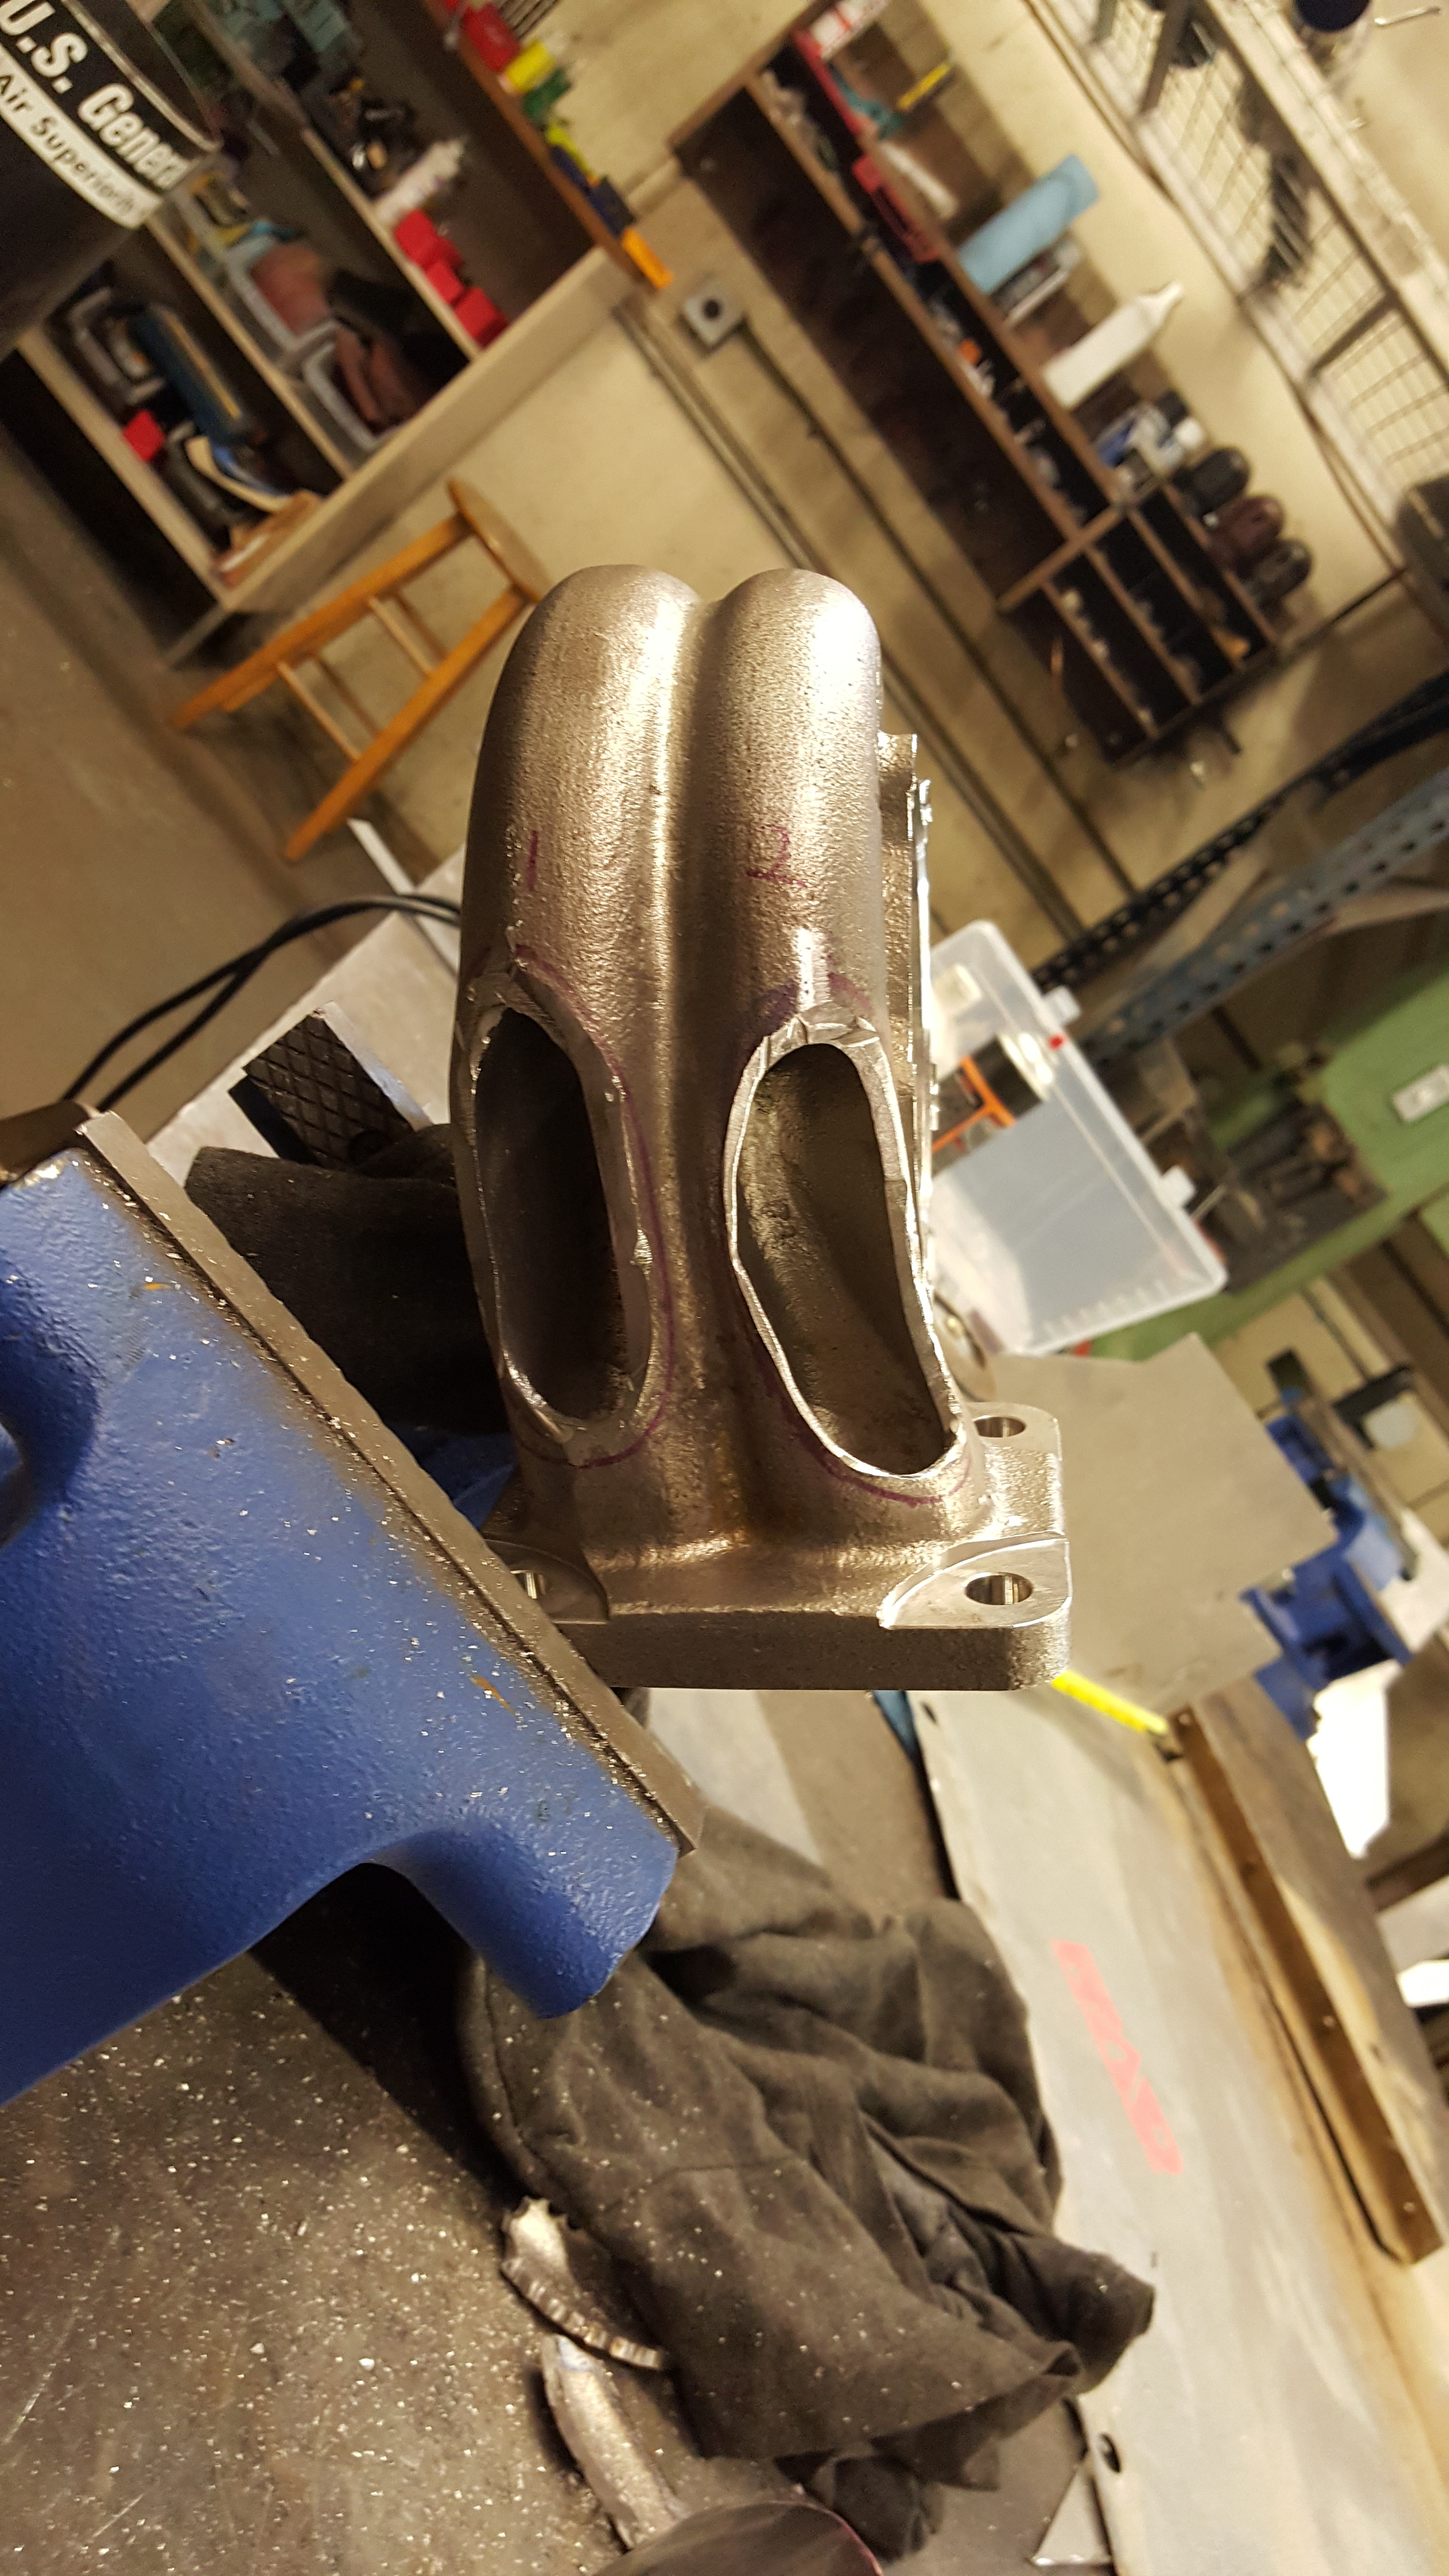
End result for the Exhaust Turbine Housing. I may port it out a little After the Sched 40 Stainless Gate routes are welded on. But I ensured all edges were in favor of Flow..and there were no sharp and or jagged edges etc
one side
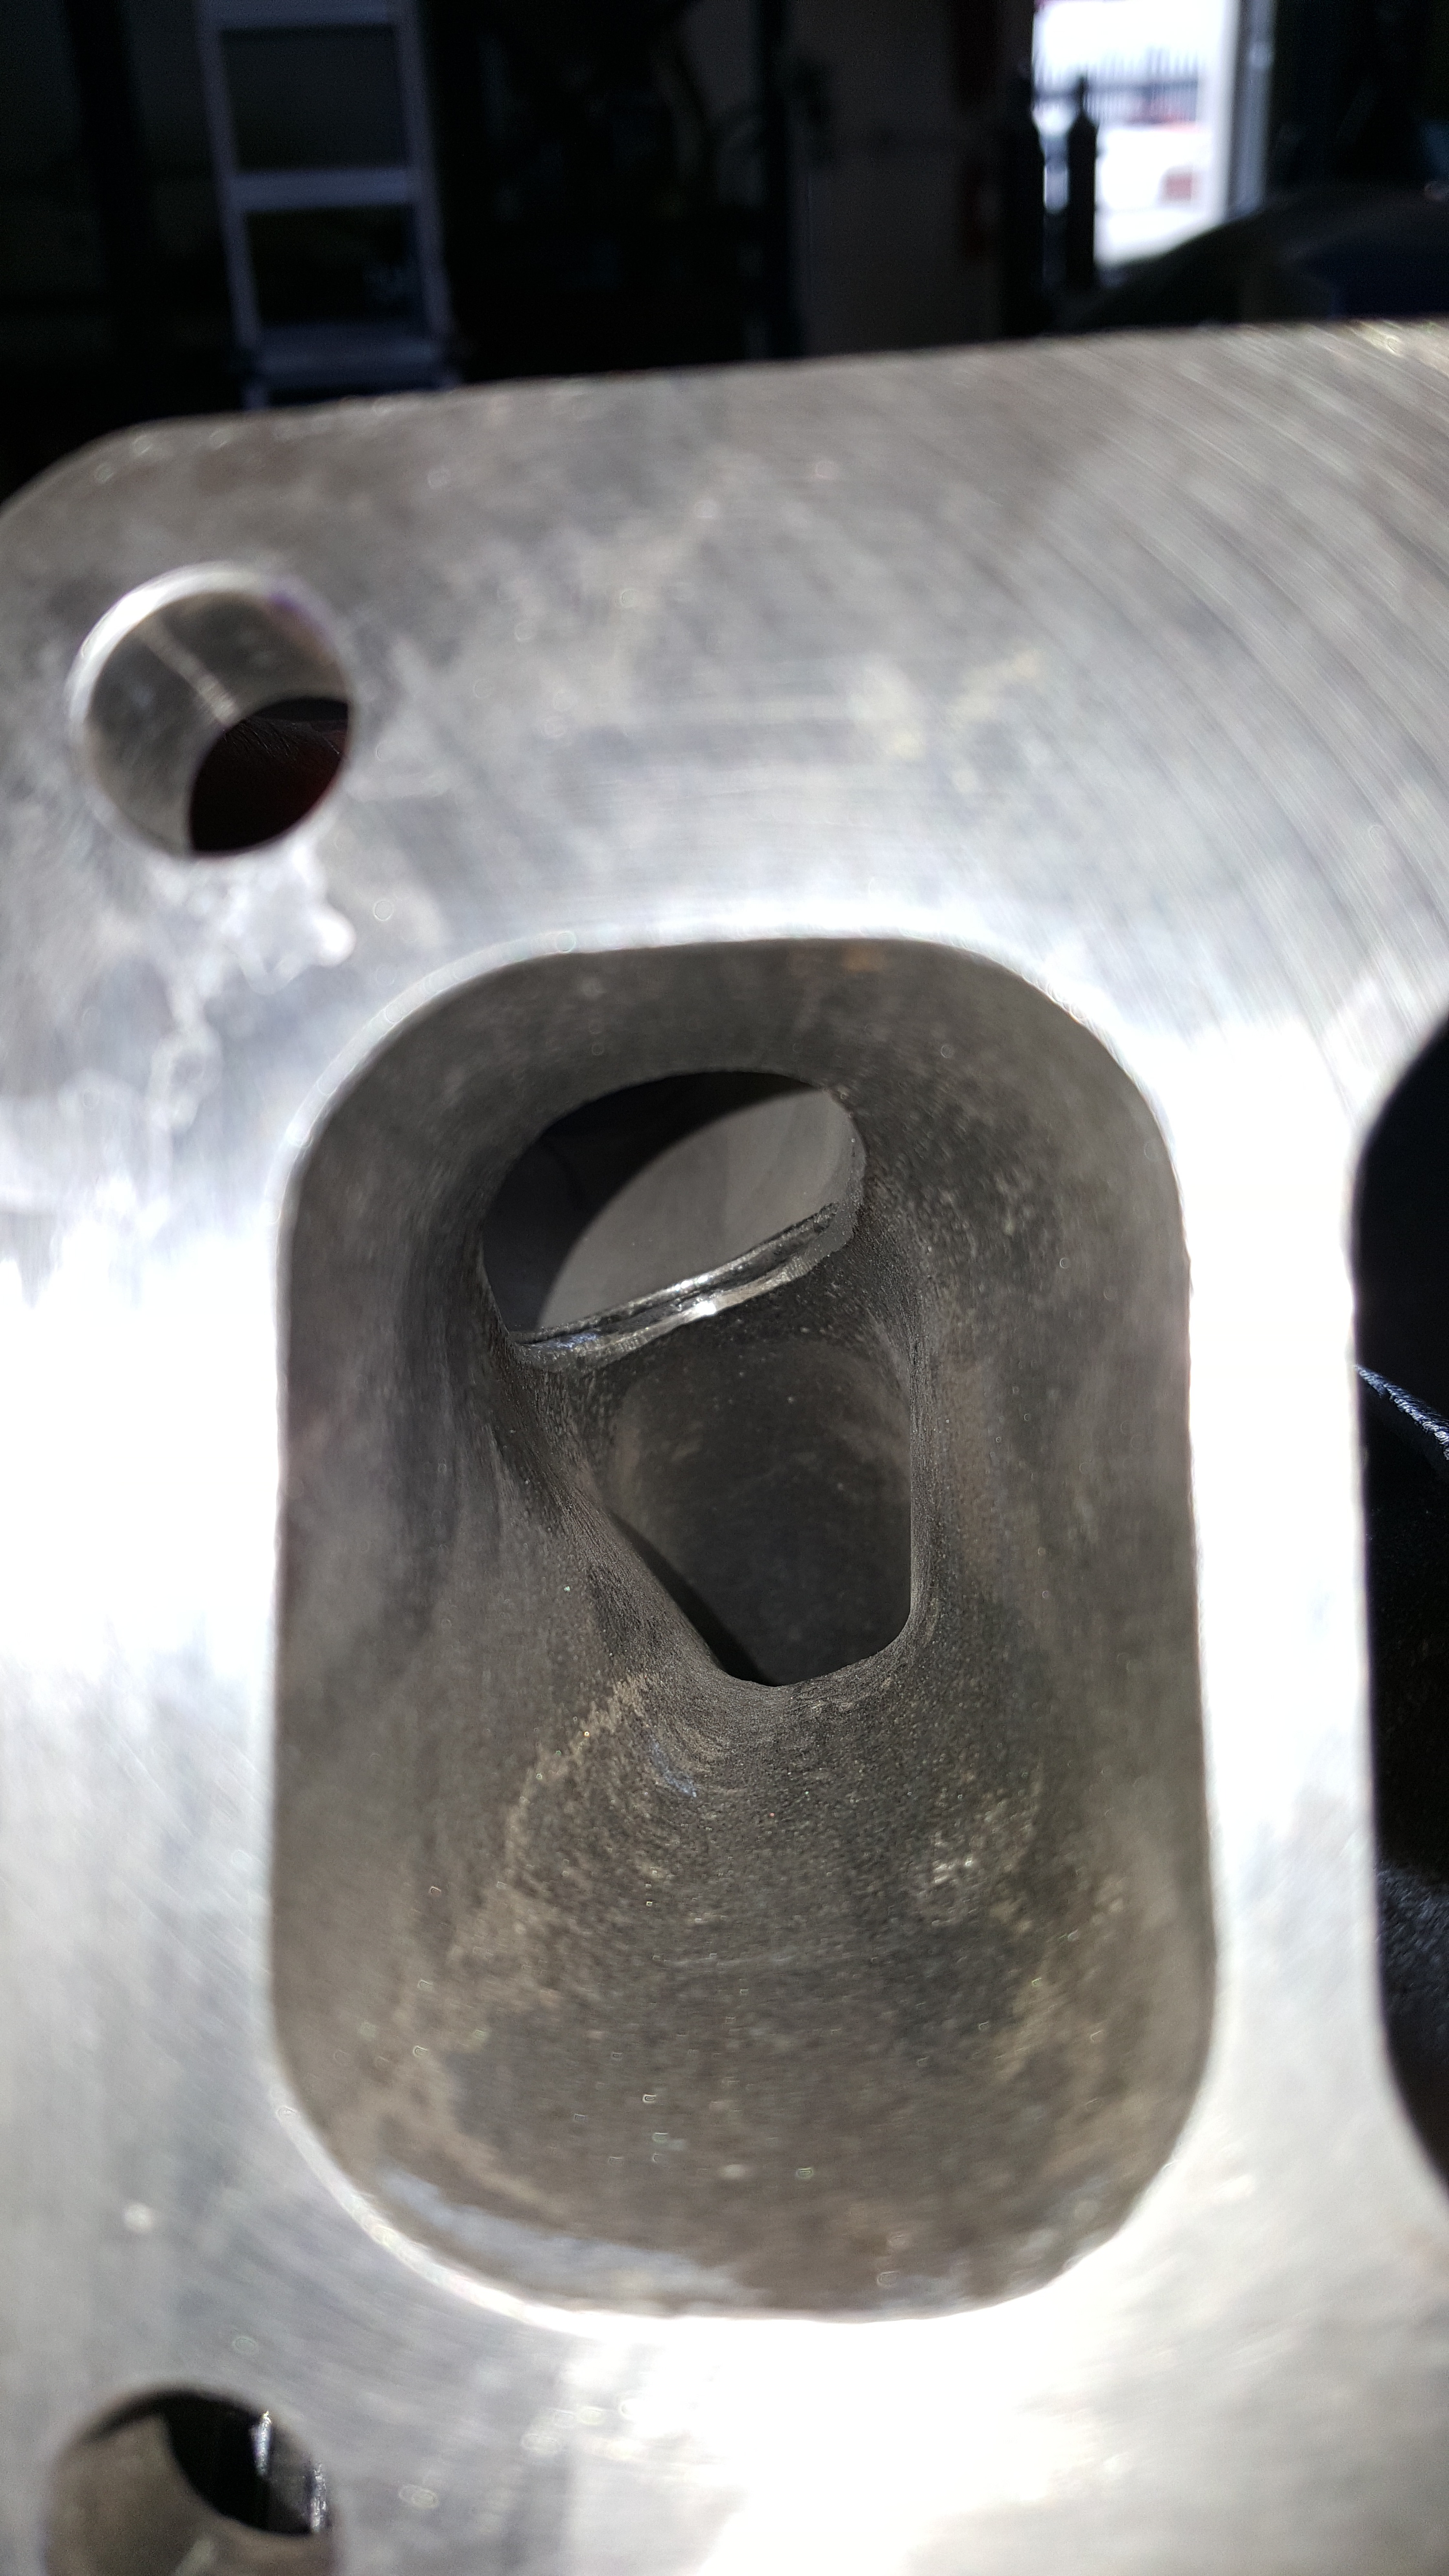
the other
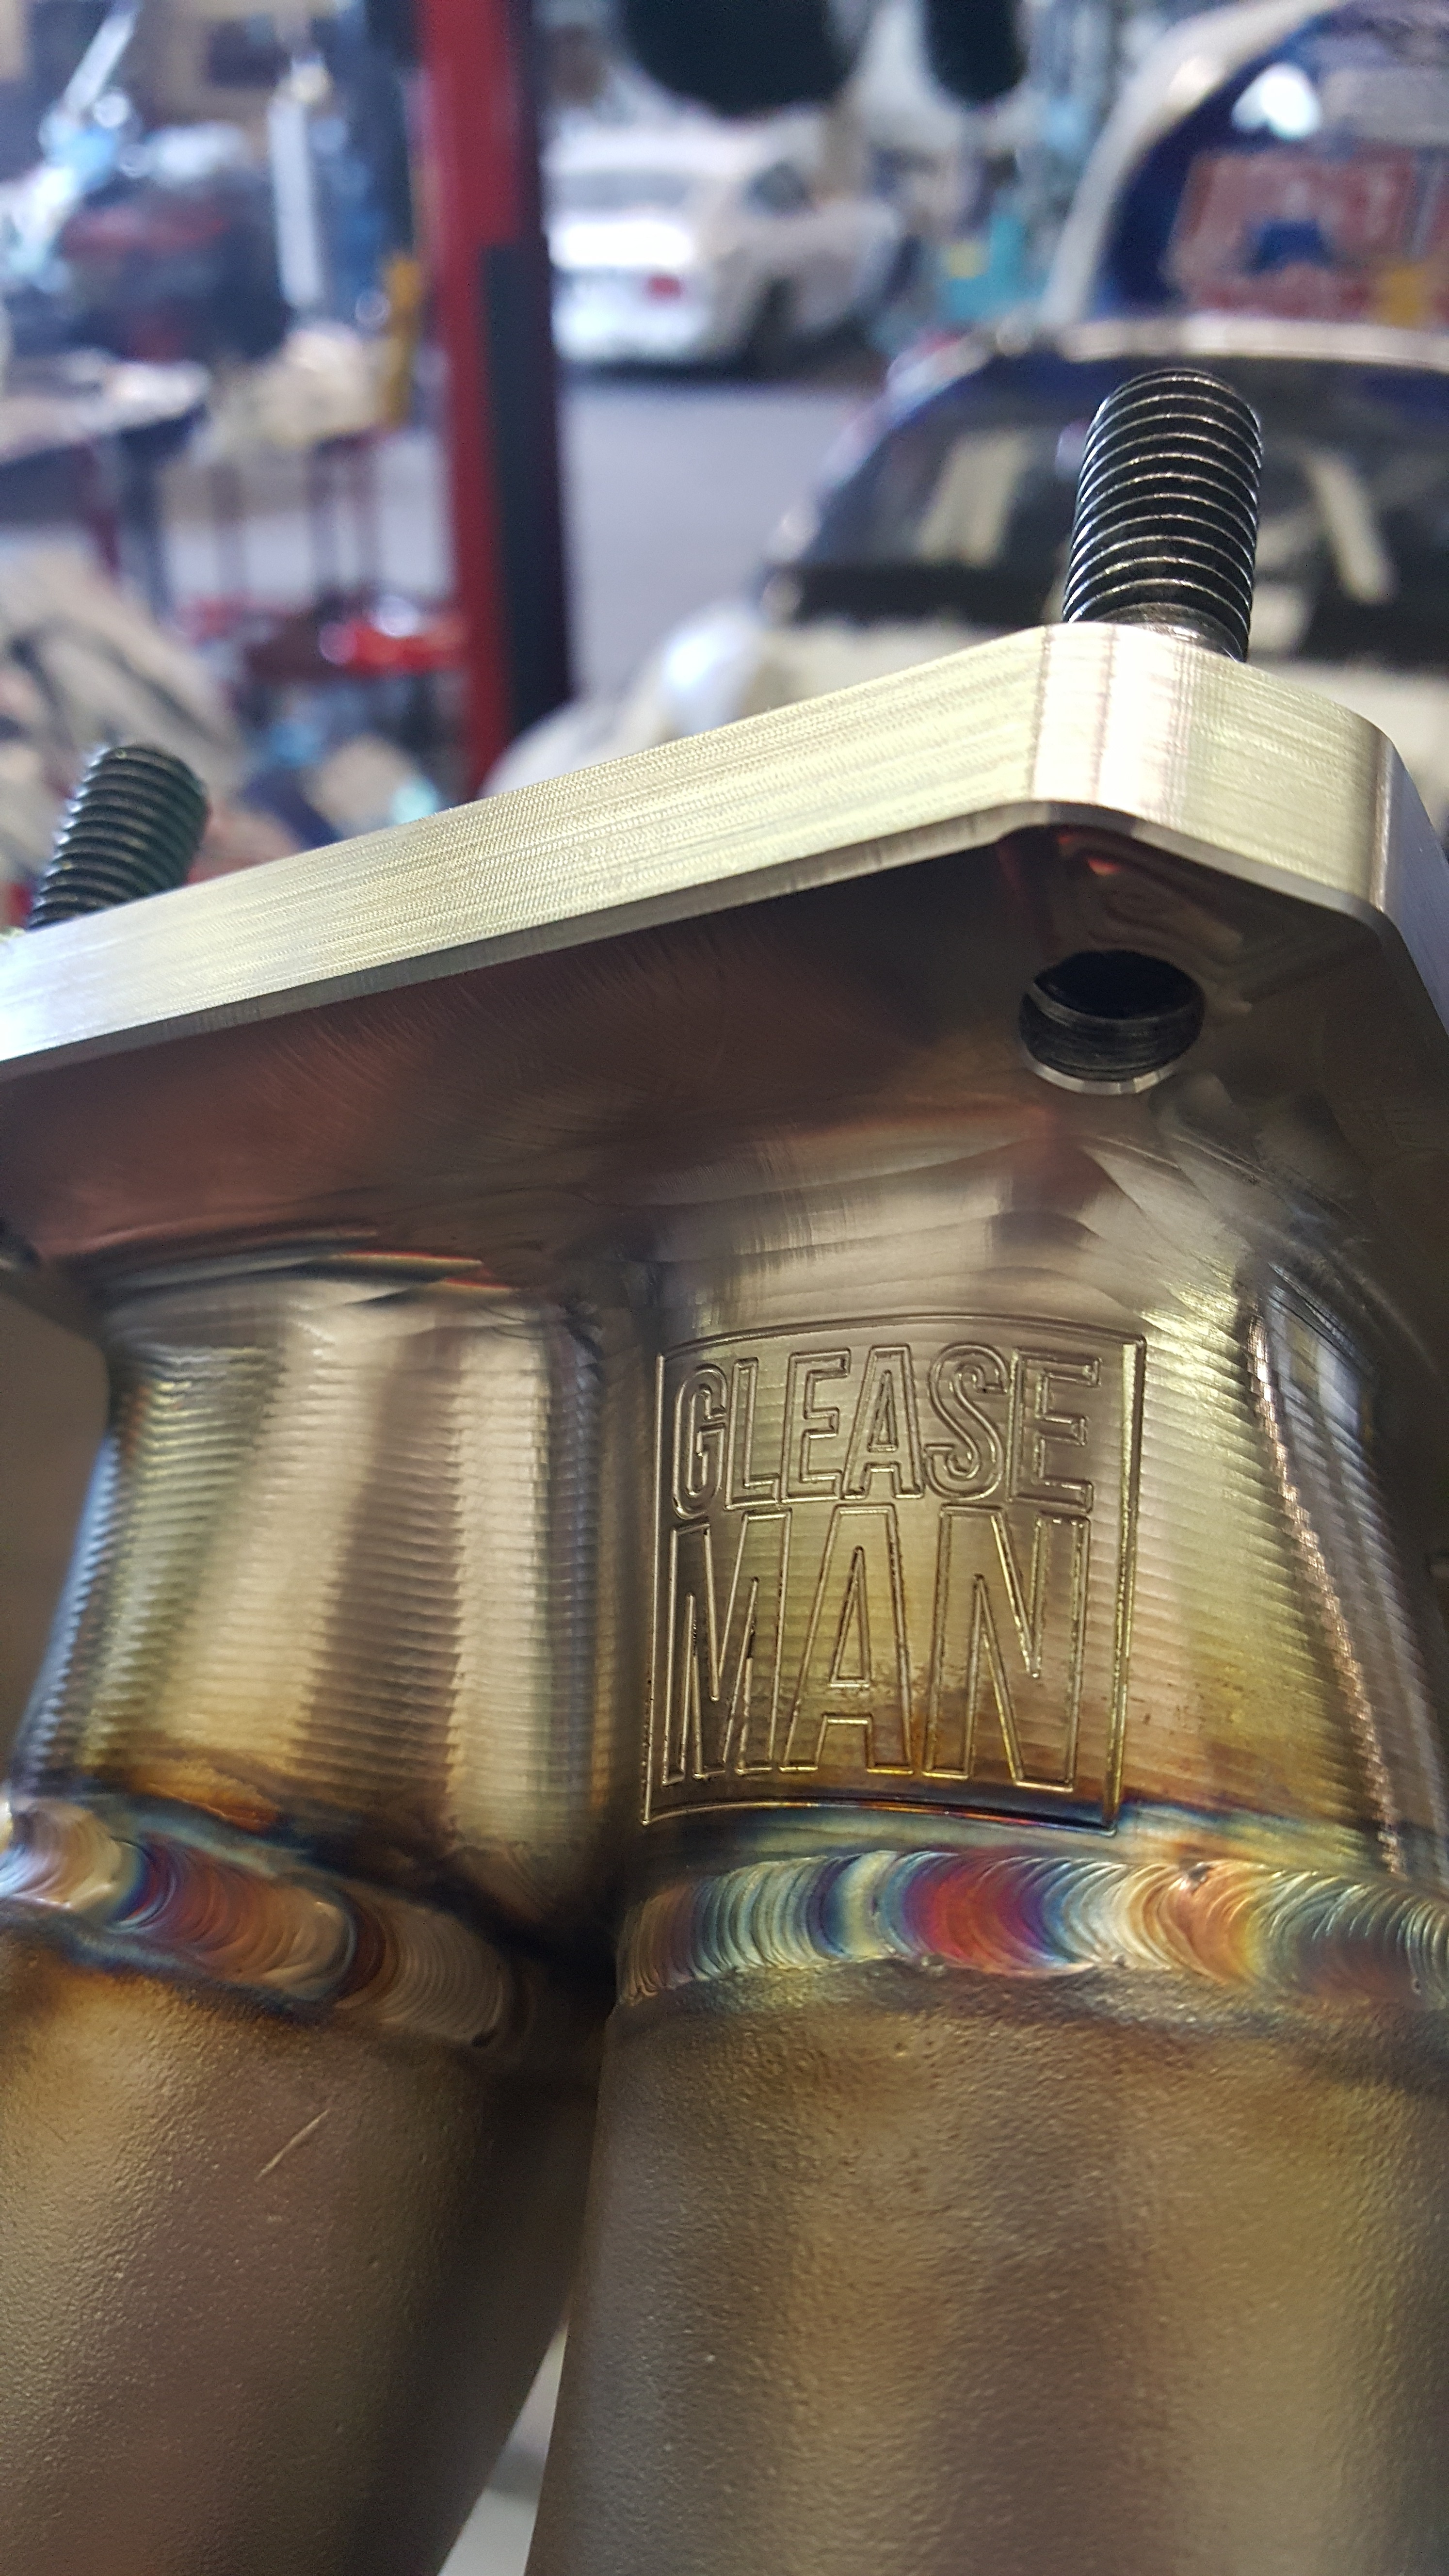
Heres a look at just how nice John Gleason (Gleasemans Billet Port Matched EFR Flange is. It Literally fits... PERFECTLY to the Flage of the EFR Inlet. No overhangs... edges sticking out..or anything that would hinder or upset flow. Some people say a little here and there doesn't matter.... But Everything Matters!!
This was a hard cut
Down Pipe Wrapping......Using PTP Lava Heat Wrap. This stuff does Wonders!!! NO JOKE!!! IT actually works!! This stuff is NOT just for looks.
Forgot to post pics of the Welded out O2 Bungs on the Down Pipe!!
Inside Looking towards the Gate vent
Turning out pretty good!!!! Fitment wise!!! Yeeooww!!
Opposite Side Looking from gate looking Down into Turbine
End result for the Exhaust Turbine Housing. I may port it out a little After the Sched 40 Stainless Gate routes are welded on. But I ensured all edges were in favor of Flow..and there were no sharp and or jagged edges etc
one side
the other
Heres a look at just how nice John Gleason (Gleasemans Billet Port Matched EFR Flange is. It Literally fits... PERFECTLY to the Flage of the EFR Inlet. No overhangs... edges sticking out..or anything that would hinder or upset flow. Some people say a little here and there doesn't matter.... But Everything Matters!!
This was a hard cut
Down Pipe Wrapping......Using PTP Lava Heat Wrap. This stuff does Wonders!!! NO JOKE!!! IT actually works!! This stuff is NOT just for looks.
Forgot to post pics of the Welded out O2 Bungs on the Down Pipe!!
Continued: "Race Season Scramble" (part 4)
Once the Gate runners were completed.. we decided to put the weld on V-band flanges on before we welded the runners to the Housings.
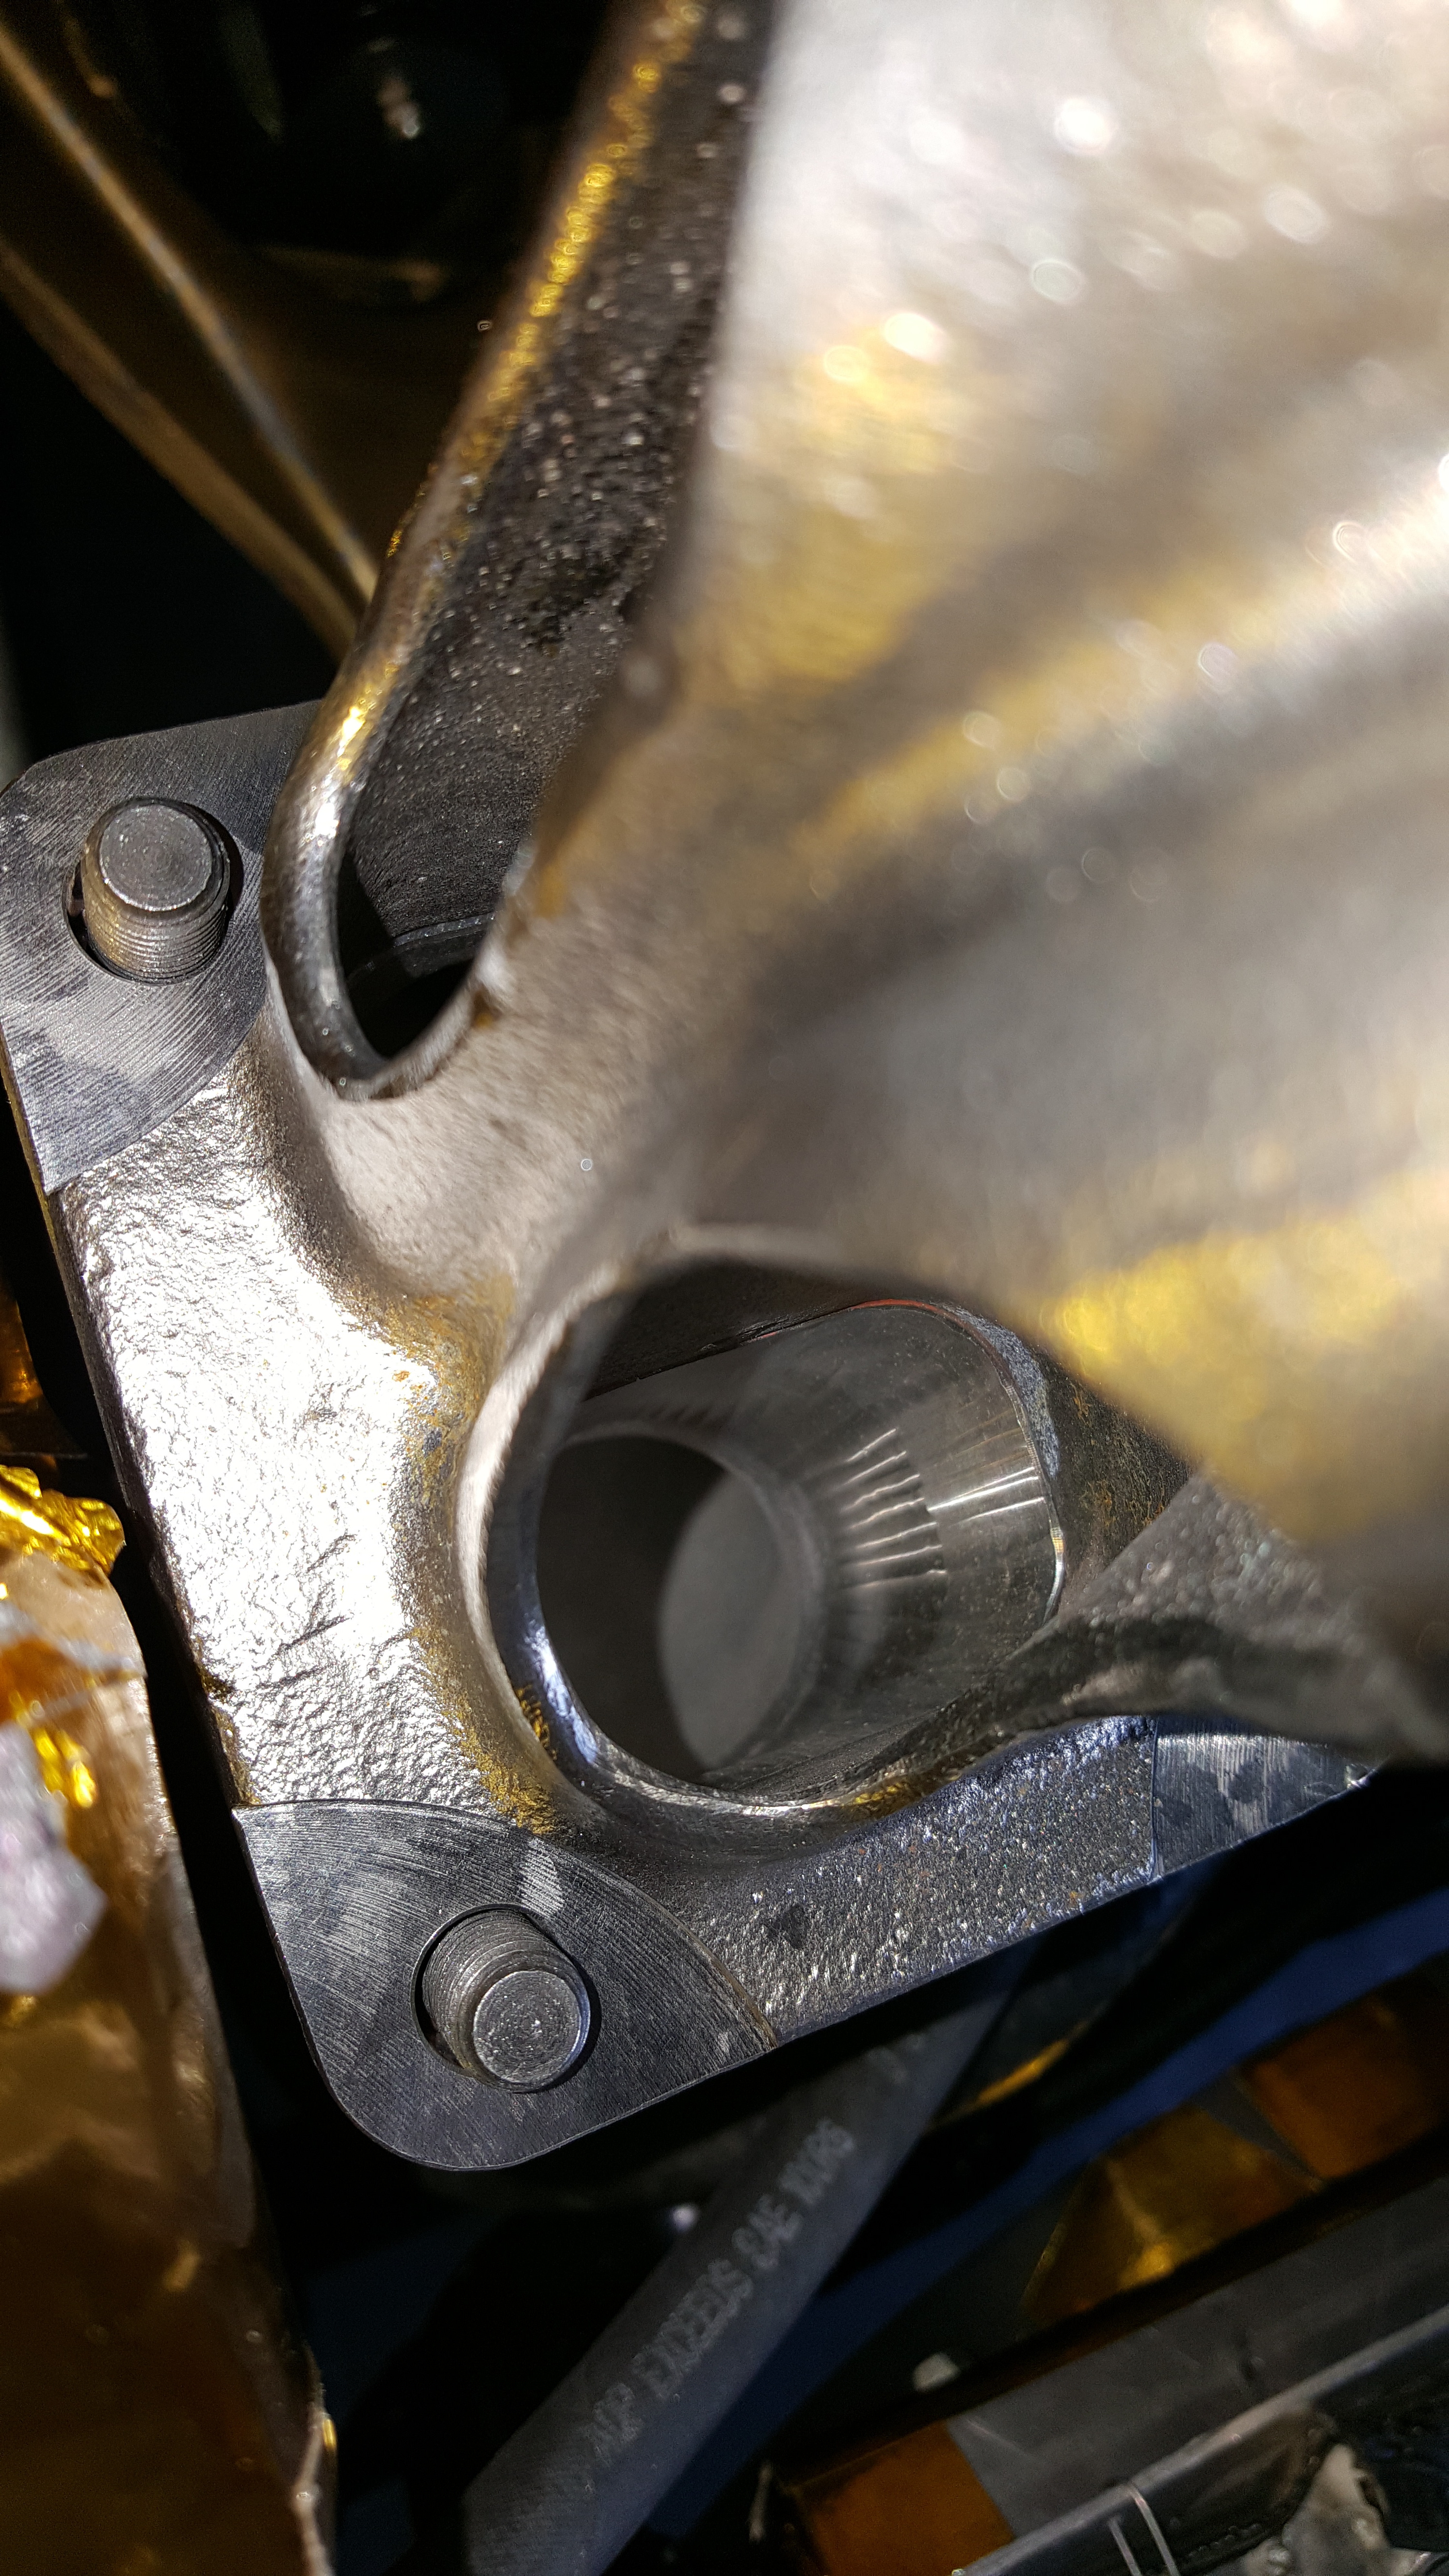
Worst Case Scenario Mock. As you can see it doesn't fit 100%. But its also not aligned perfectly. We always shoot for perfect alignment..but I make sure we have NON perfect alignment room haha
another
ANother close look at just how nice GleaseMans Billet Series Manifolds truly are..... Gets me everytime.
Pure Quality....IN Art!!
sorry for the blurry pic...
Ayyy..... Getting there eh?!!
On and off... parts go on and off soooo many times during this process!!!!!!on off on off on off.. Annoying ya? But 100% Necessary!!!!
Finally pulled the tape from the Exhaust Ports... sealed the Turbo Flange of the manifold so nothing can fall into it and installed the manifold to spec! EGT's installed. It took me a good min to make sure both EGT Bungs were 100% inserted at the same depth haha. A guy at the shop walked by a few times and eventually said... "What the Hell are you doing dude." Now a days ...My response is simply.. "EVERYTHING MATTERS!!!"
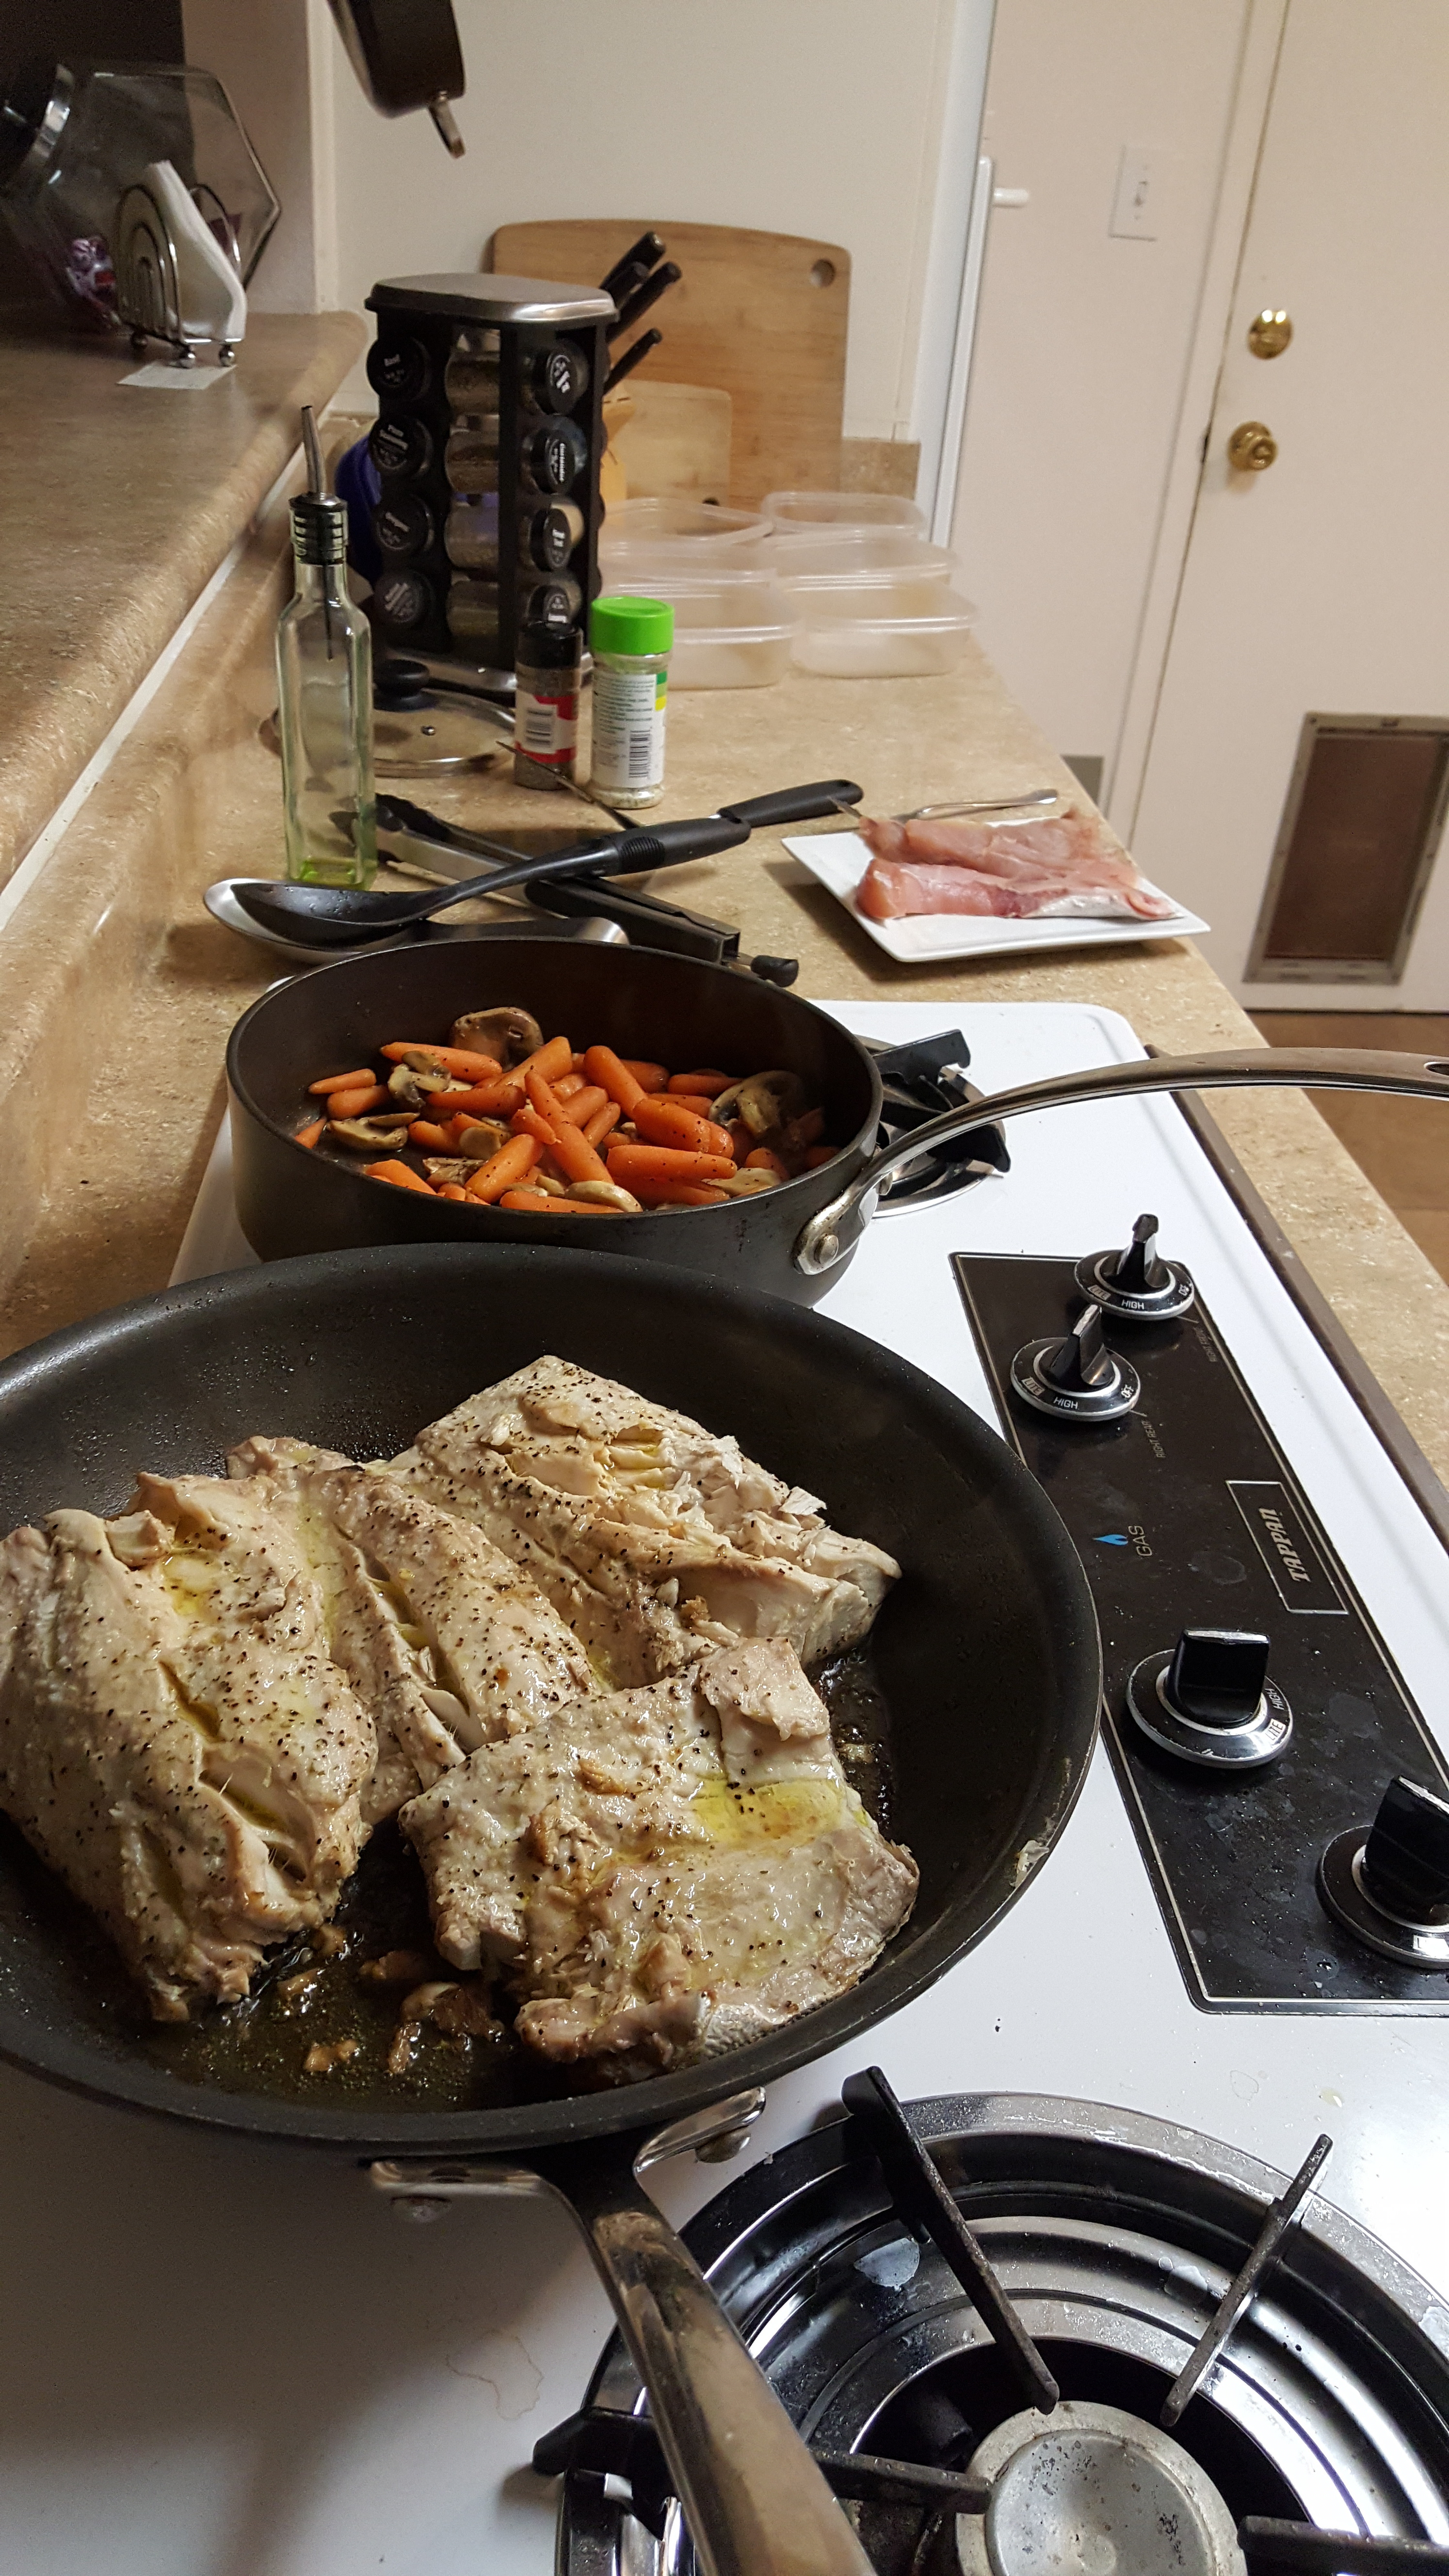
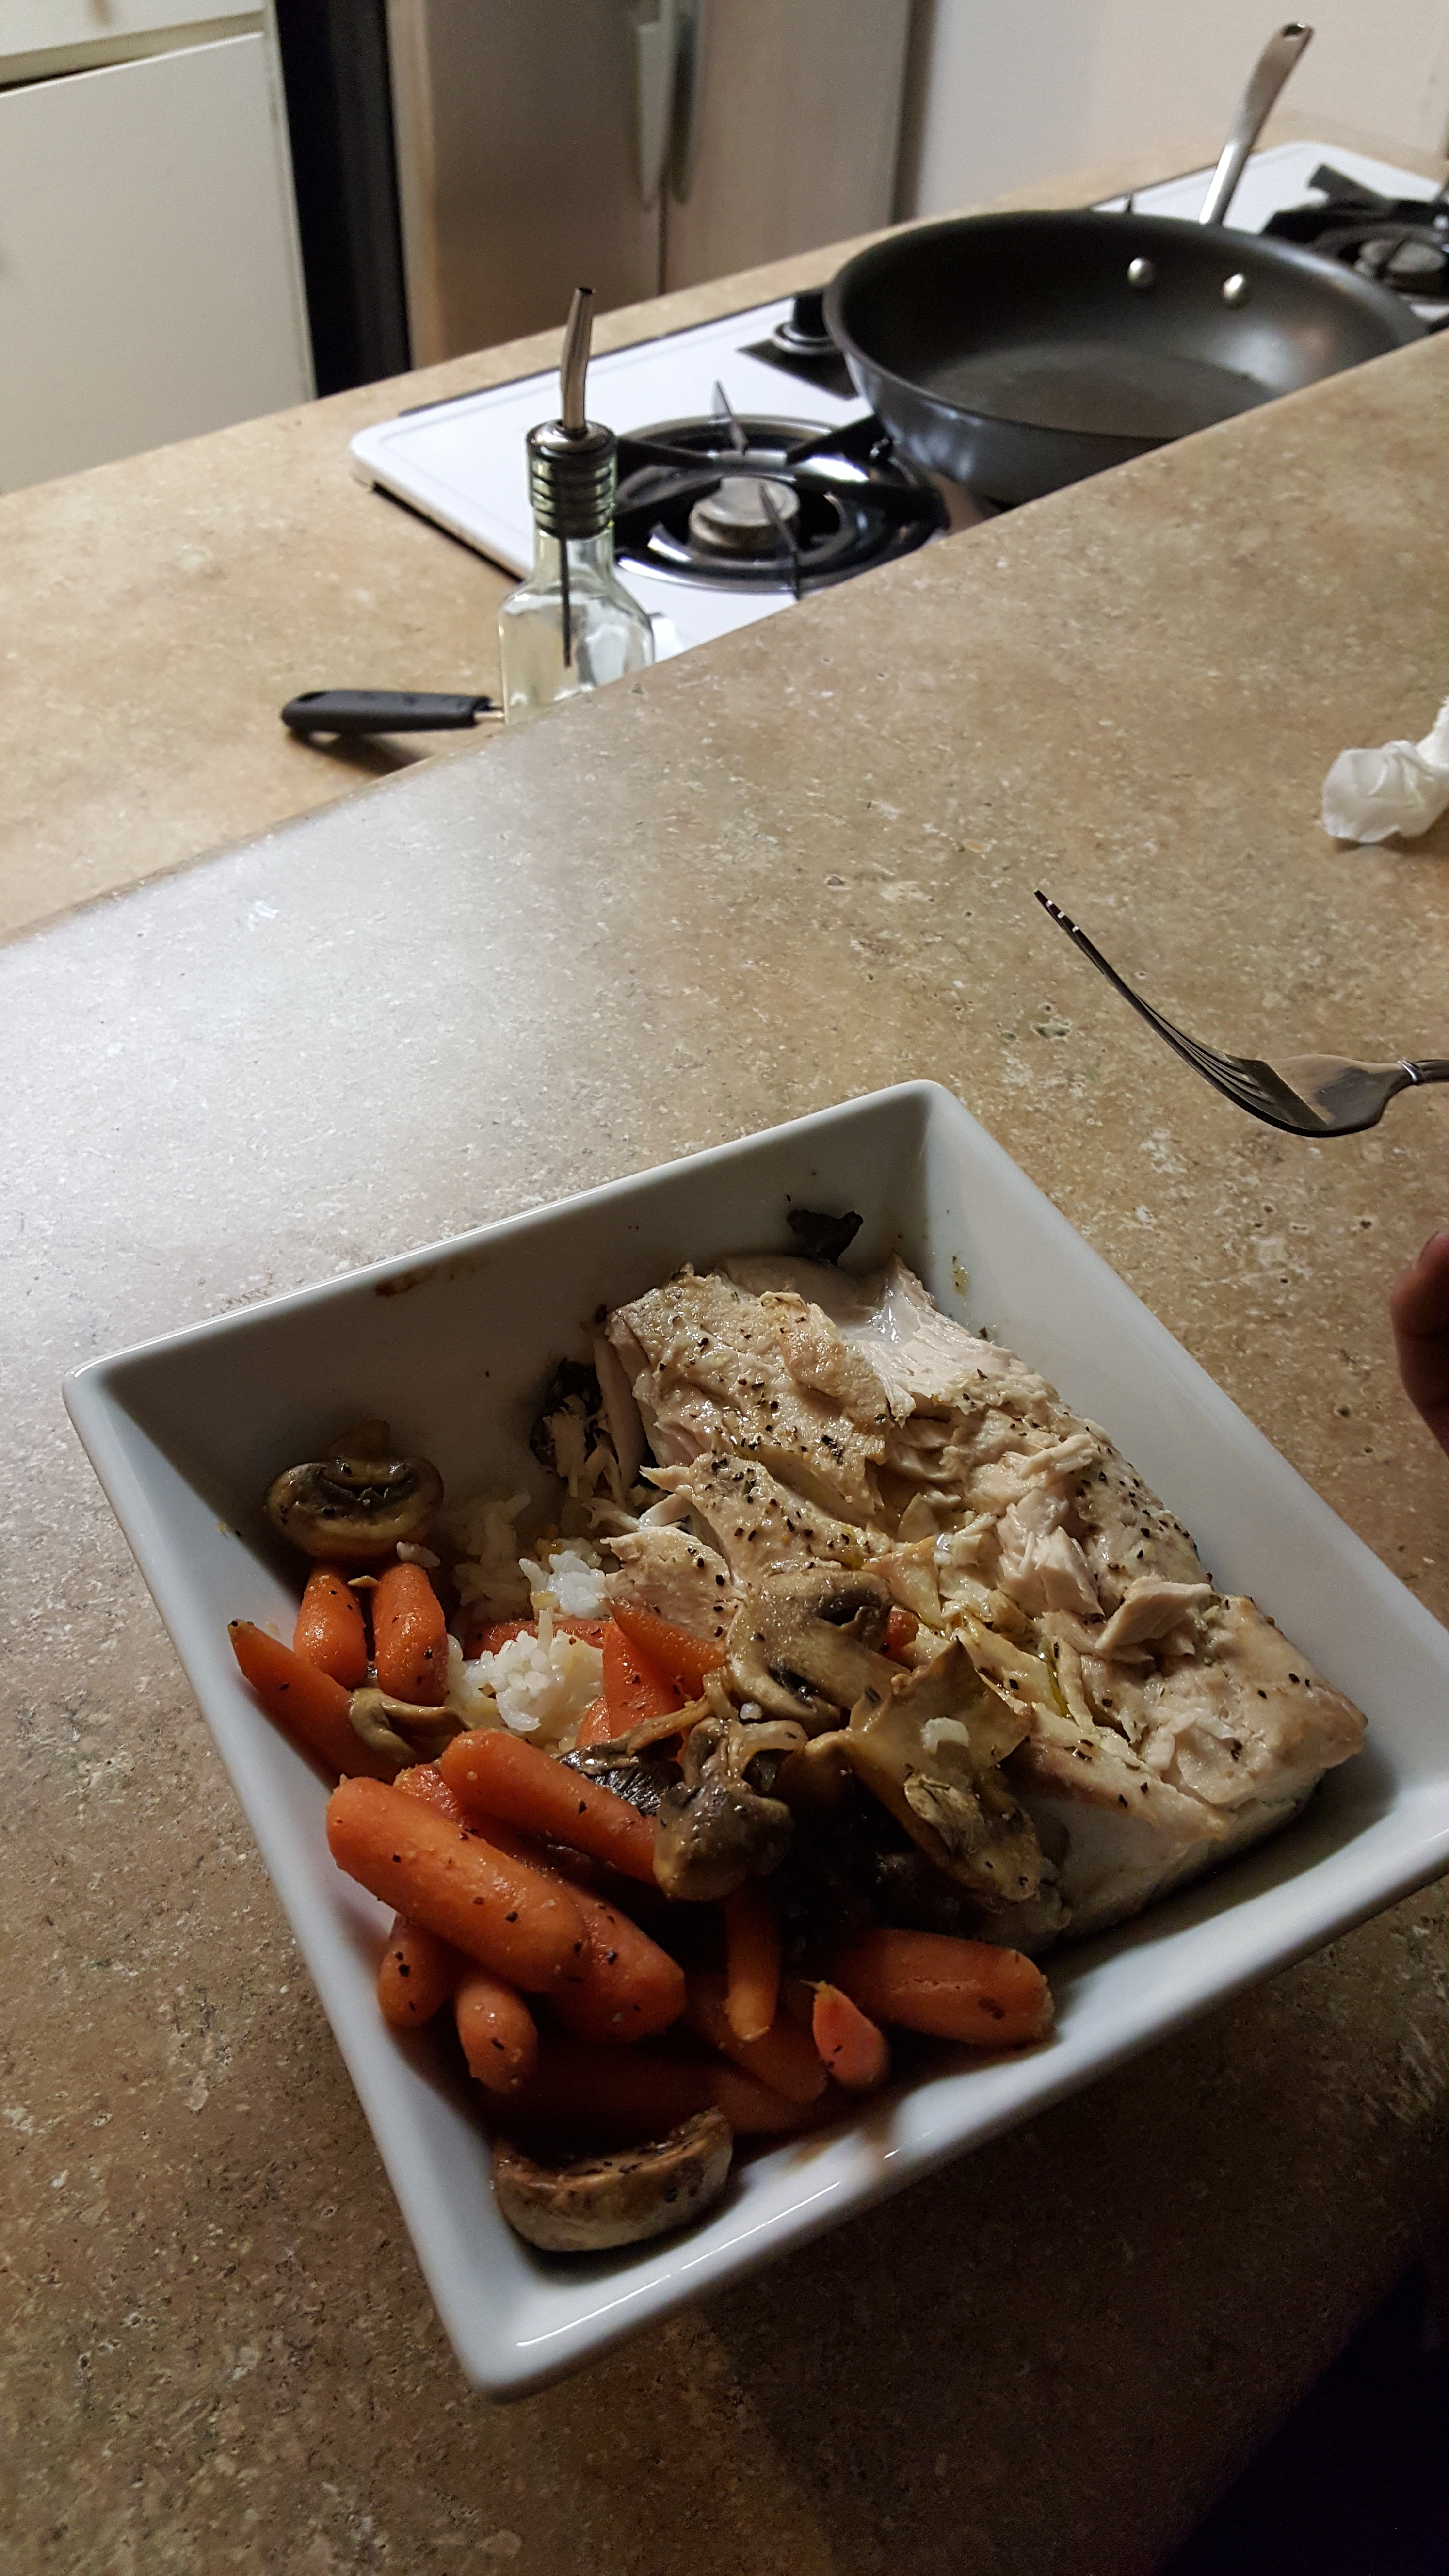
Cooked some of that Fresh Yellow Tail! Gangusters good!!
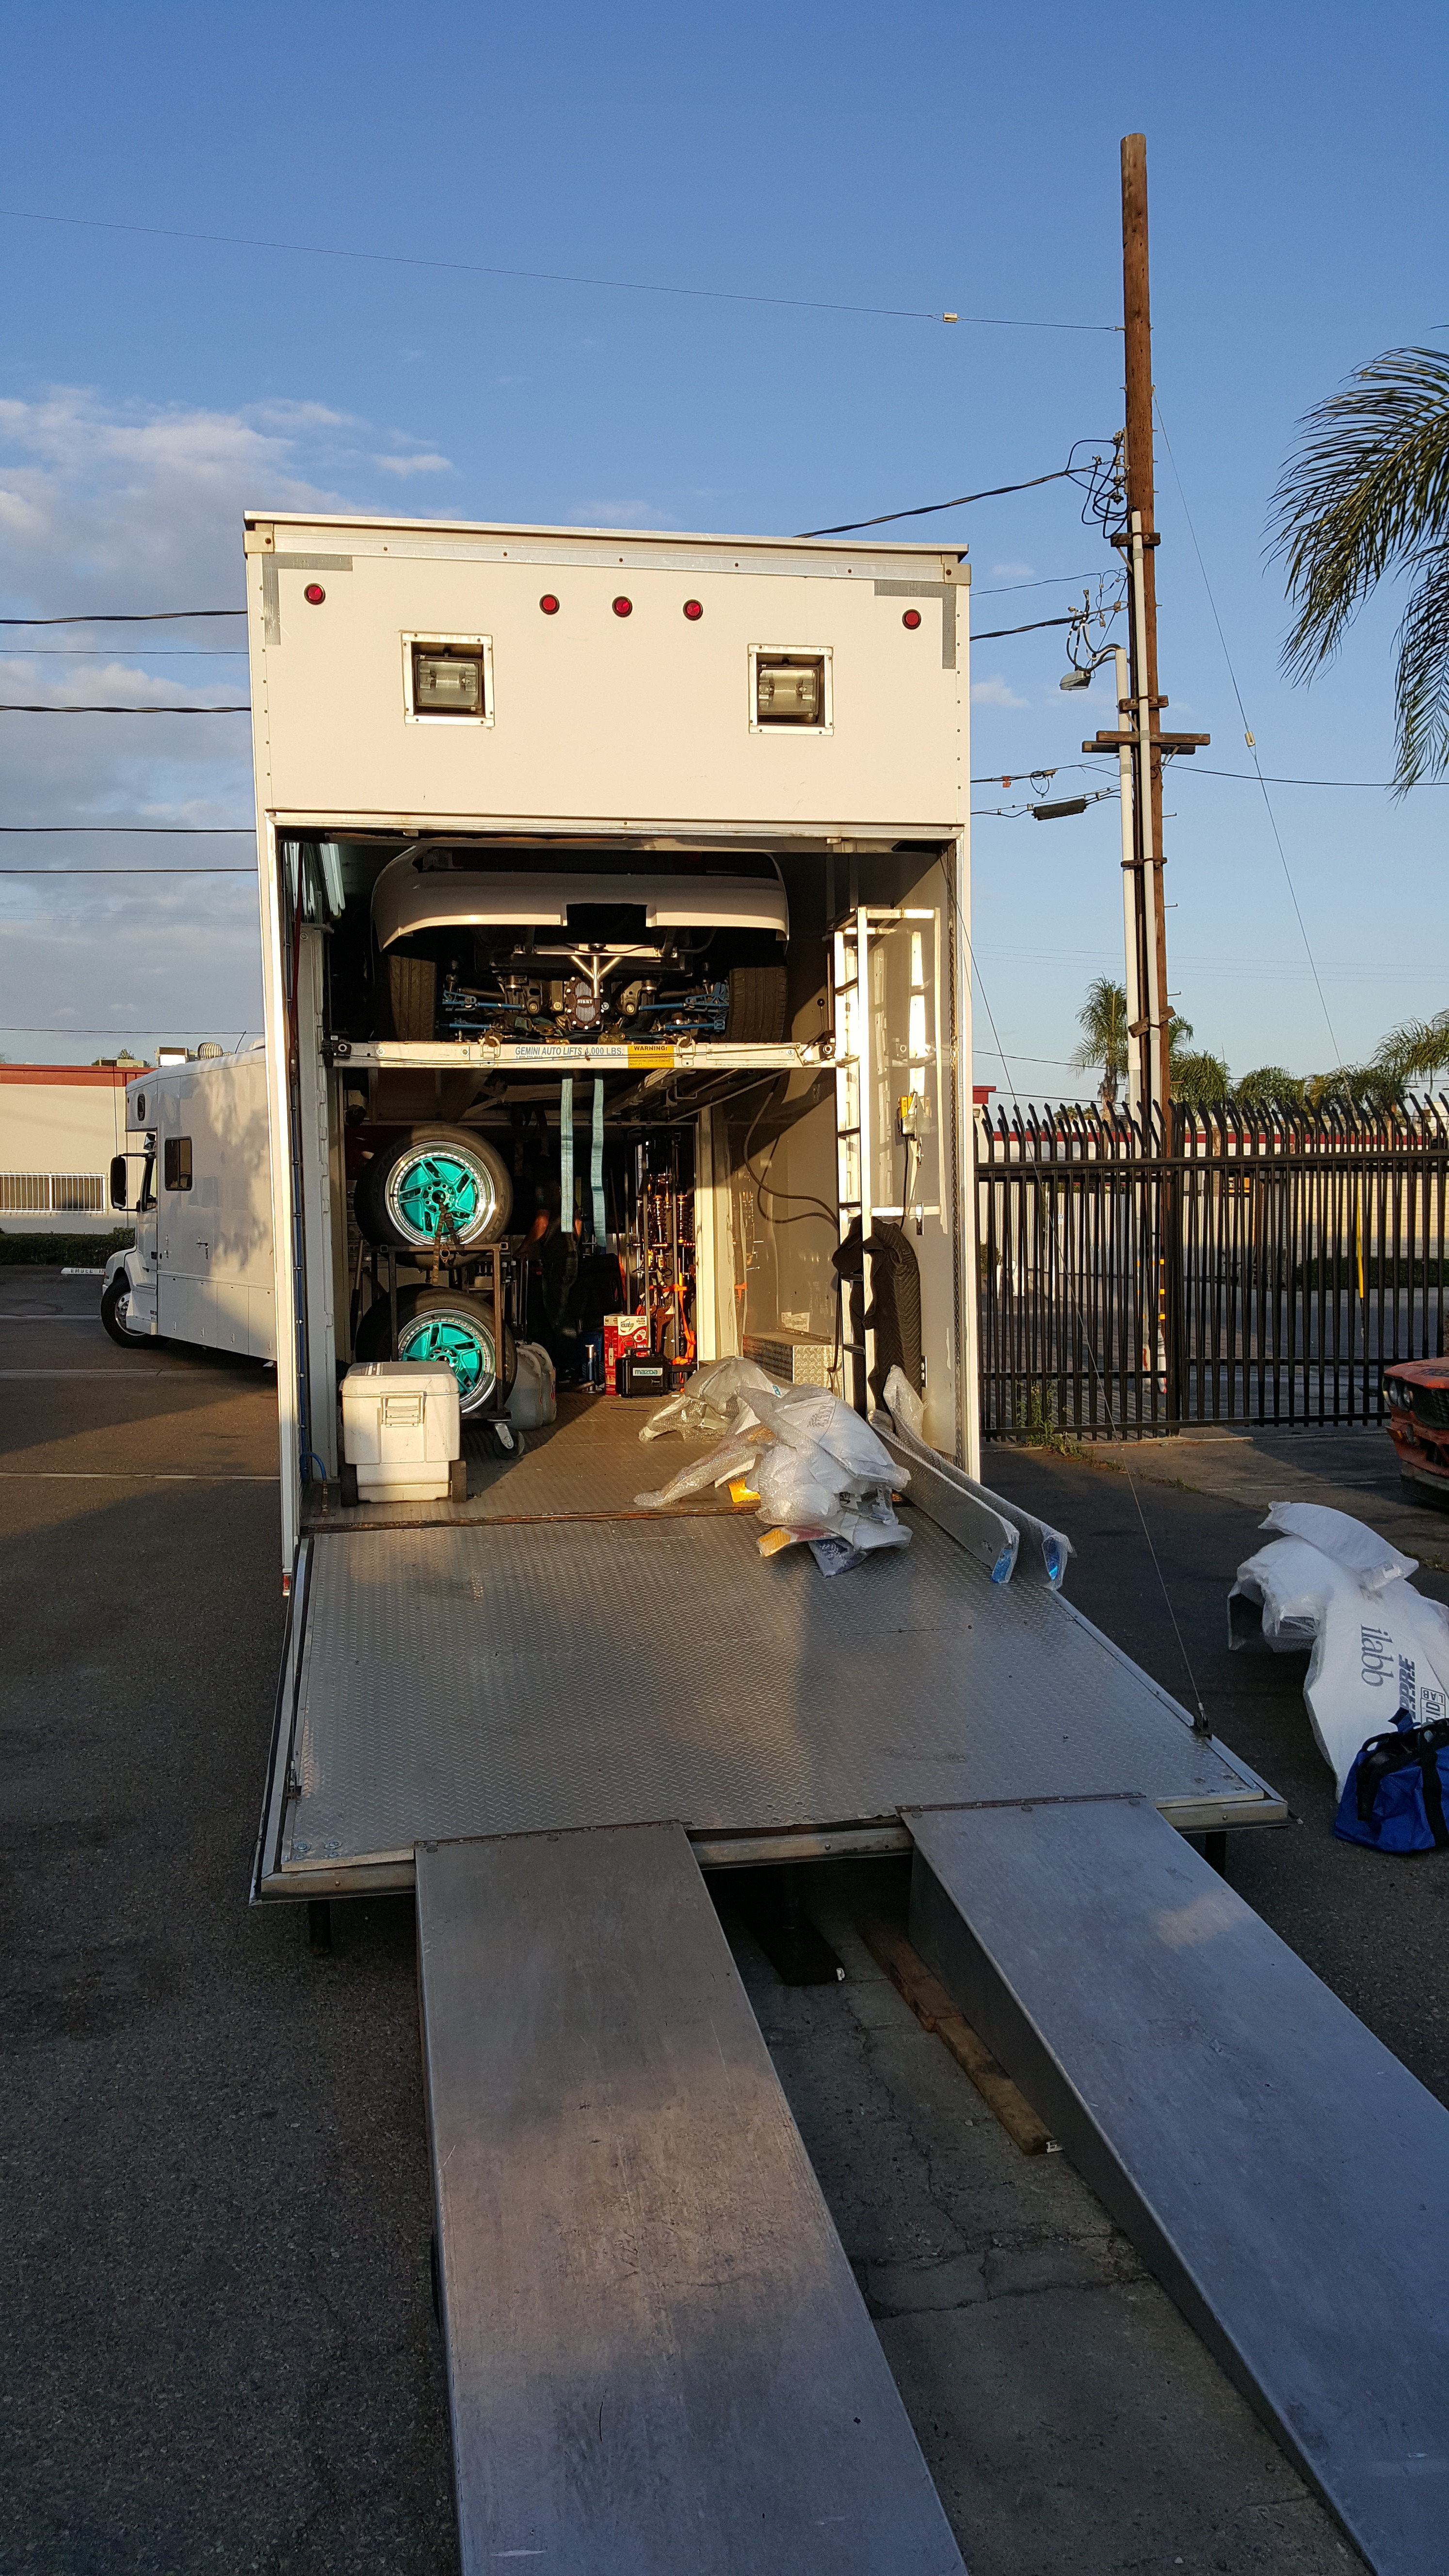
And that concludes where I left off just yesterday morning. The Transporter showed up for Radbull so we spent the day Loading up all the goods and equipment for Formula Drift ATLANTA!!! Pretty pumped to get out again and can't wait to see the rest of the team!
I'll get sorted on my car on the flip side and I'm looking forward to first start up and test days before Round 2 Top Drift at HTM!!! Stay tuned and THank you for all the support!
More Updates soon!
Stay Tuned!!
#Thisisthewolf
IG: AAPARKAH
Once the Gate runners were completed.. we decided to put the weld on V-band flanges on before we welded the runners to the Housings.
Worst Case Scenario Mock. As you can see it doesn't fit 100%. But its also not aligned perfectly. We always shoot for perfect alignment..but I make sure we have NON perfect alignment room haha
another
ANother close look at just how nice GleaseMans Billet Series Manifolds truly are..... Gets me everytime.
Pure Quality....IN Art!!
sorry for the blurry pic...
Ayyy..... Getting there eh?!!
On and off... parts go on and off soooo many times during this process!!!!!!on off on off on off.. Annoying ya? But 100% Necessary!!!!
Finally pulled the tape from the Exhaust Ports... sealed the Turbo Flange of the manifold so nothing can fall into it and installed the manifold to spec! EGT's installed. It took me a good min to make sure both EGT Bungs were 100% inserted at the same depth haha. A guy at the shop walked by a few times and eventually said... "What the Hell are you doing dude." Now a days ...My response is simply.. "EVERYTHING MATTERS!!!"
Cooked some of that Fresh Yellow Tail! Gangusters good!!
And that concludes where I left off just yesterday morning. The Transporter showed up for Radbull so we spent the day Loading up all the goods and equipment for Formula Drift ATLANTA!!! Pretty pumped to get out again and can't wait to see the rest of the team!
I'll get sorted on my car on the flip side and I'm looking forward to first start up and test days before Round 2 Top Drift at HTM!!! Stay tuned and THank you for all the support!
More Updates soon!
Stay Tuned!!
#Thisisthewolf
IG: AAPARKAH

