
Kilo Racing 3 Rotor FD Conversion


I'm off now to purchase a USB cable for the Cannon camera so I can upload some shots for you guys.
Was just speaking to Dean Colver, another Jacksonville FL FD owner, about this yeaterday evening. We're both going to attend although he might bring his John Works Mini instead of his 1993 Cym. What a wimp.
Pictures!
The Best Buy turned into an Office Depot and they had the cable so here goes:
Carlos Lopez balanced rotors:
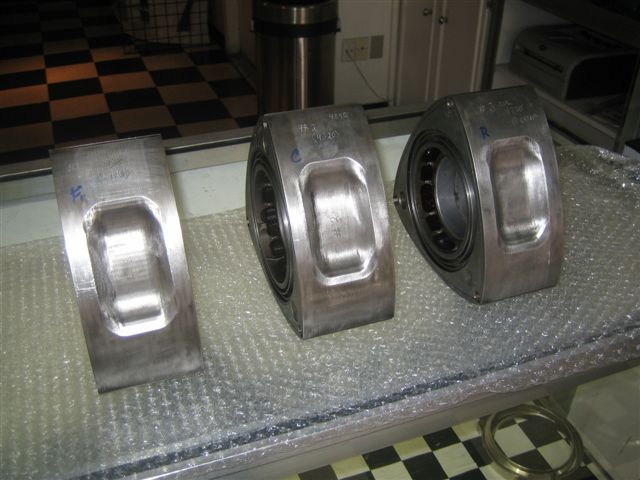
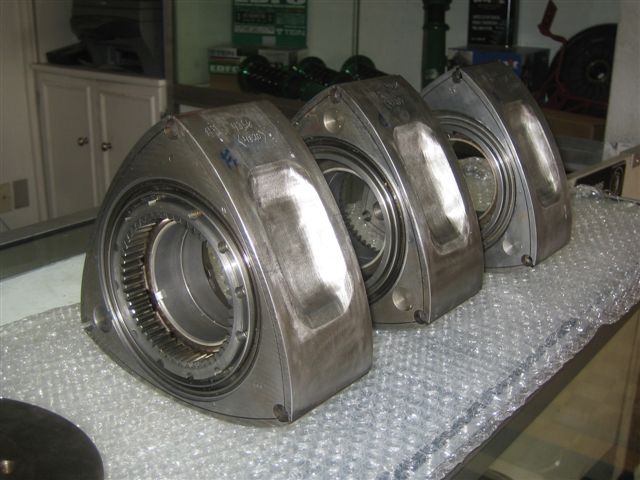
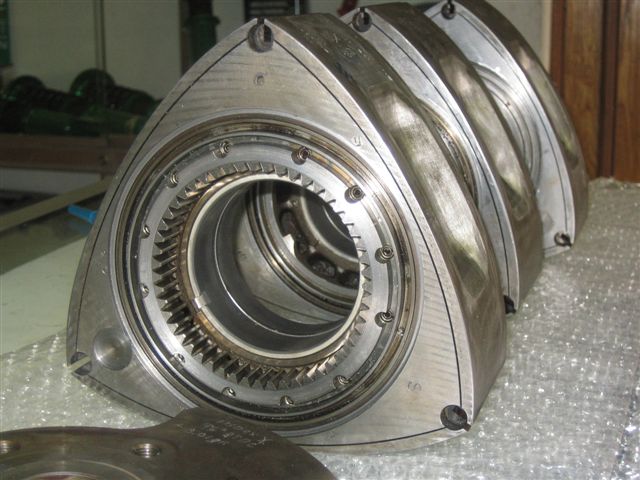
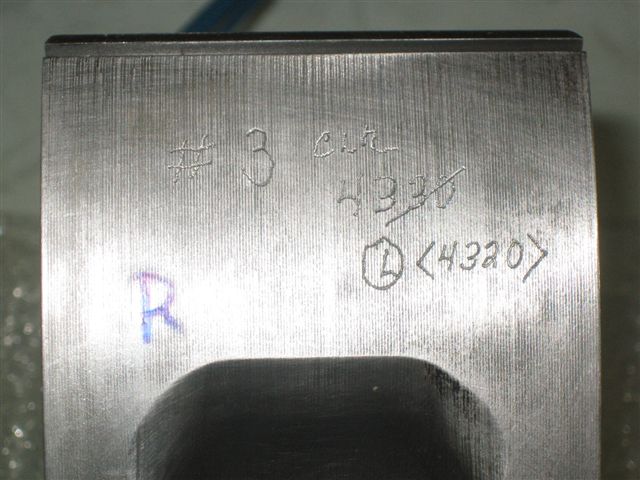
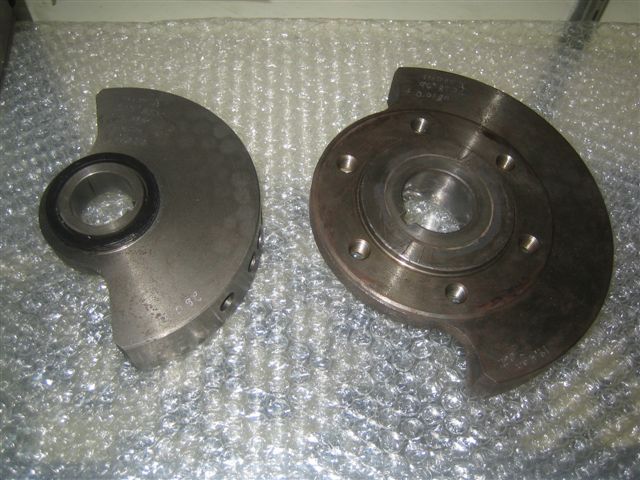
The assembly is balanced to less than one gram. I'll let Carlos comment on the balancing process which is quite intricate. Notice the scribe marks on all the components. The weight of the rotors are all now 4,320 grams.
Carlos Lopez balanced rotors:
The assembly is balanced to less than one gram. I'll let Carlos comment on the balancing process which is quite intricate. Notice the scribe marks on all the components. The weight of the rotors are all now 4,320 grams.
Pics #2
Balanced new eccentric shaft thanks to Brian/japan2la:
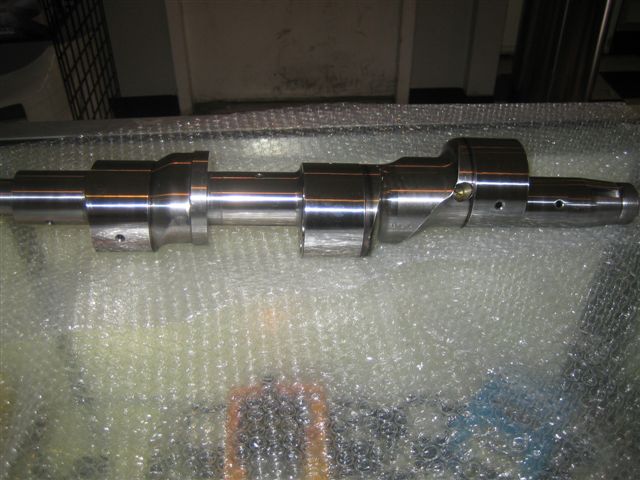

Carlos micropolished the e-shaft. Note the tape residue still on the shaft. Gotham is going to wash and clean the shaft before installation.
Carlos micropolished the e-shaft. Note the tape residue still on the shaft. Gotham is going to wash and clean the shaft before installation.
Pics #3
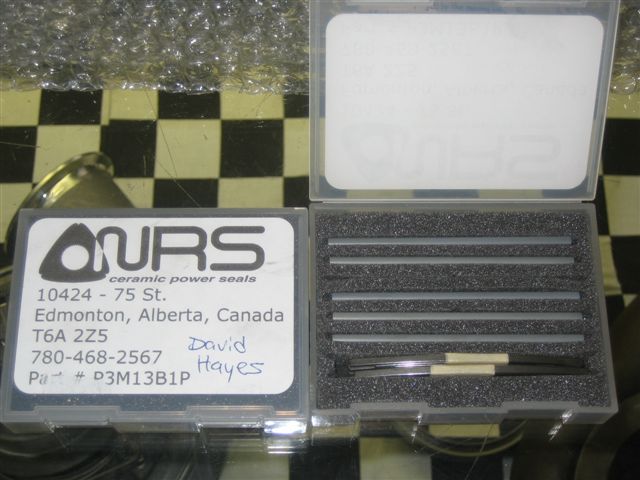
NRS ceramic seals compliments of Cam of Pettit Racing and Sven from NRS Motorsports:
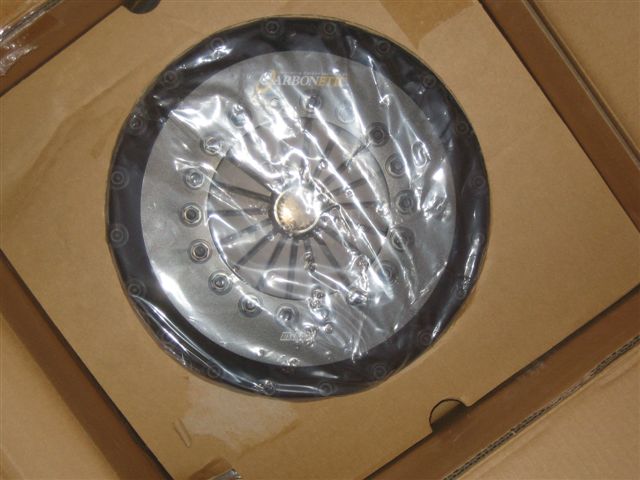
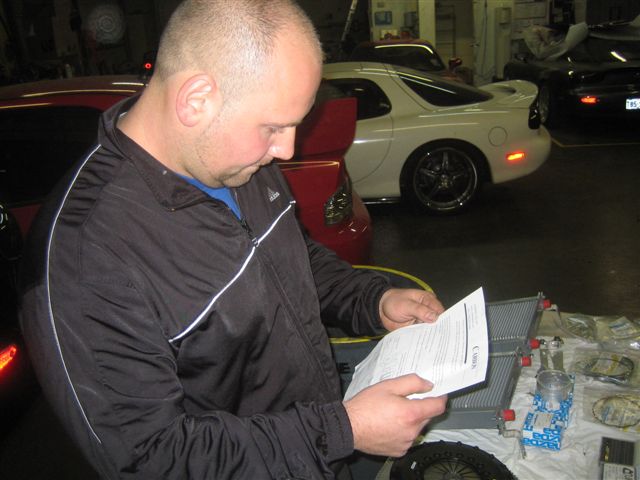
Carbonetics triple disc clutch with 1100 pressure plate:

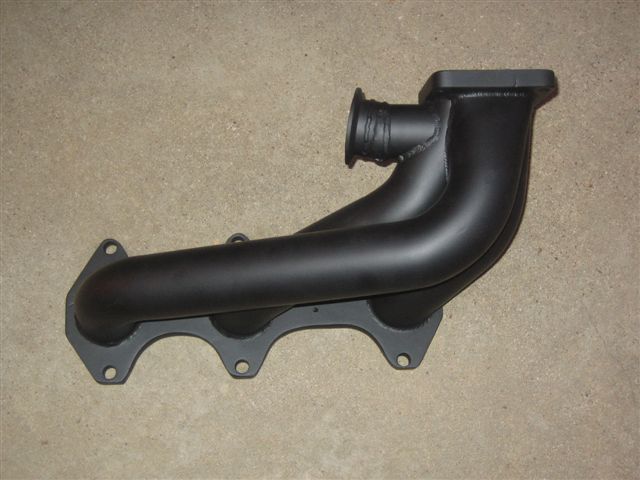
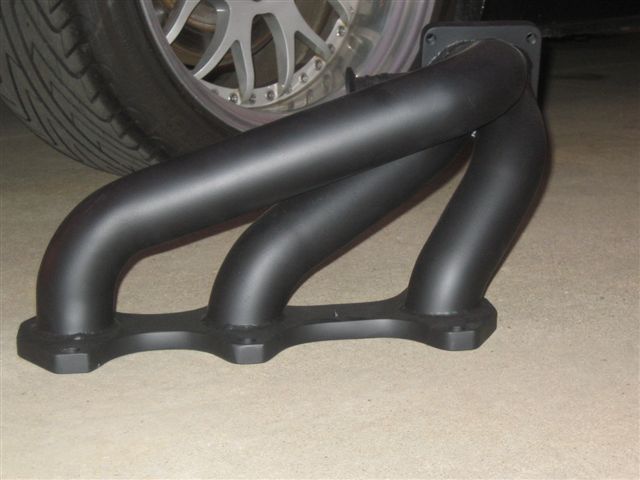
Ceramic coated exhaust manifold:
Carbonetics triple disc clutch with 1100 pressure plate:
Ceramic coated exhaust manifold:

Pics #4
Car in need of a heart transplant. The front-end needs lowering doesn't it?:


While I was hanging out, I cleaned and prepped the engine bay. Had some rust from where the fender well was modified for the turbo. I ground the rust (minor) off, rust enhibited it, and the primered and painted it with a high-temp gloss paint:

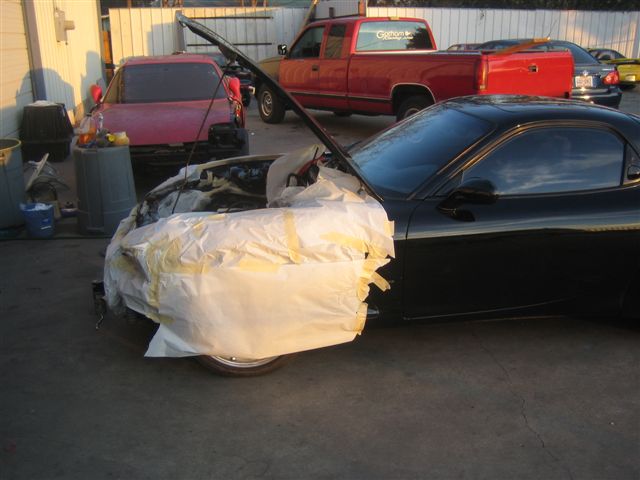
While I was hanging out, I cleaned and prepped the engine bay. Had some rust from where the fender well was modified for the turbo. I ground the rust (minor) off, rust enhibited it, and the primered and painted it with a high-temp gloss paint:
rebreaking things
Joined: Apr 2006
Posts: 866
Likes: 0
From: Manhattan
Nice David. As discussed, I have the same clutch with the heavier pressure plate. My preliminary impression is that it is very streetable; engagement is linear and the pedal is not too heavy. On a downside the install instructions are horrific and bleeding it is a nightmare. FWIW, let me know if any input is needed on the install.
Pics #5
Carbonetics clutch and adapter kit unwrapped:


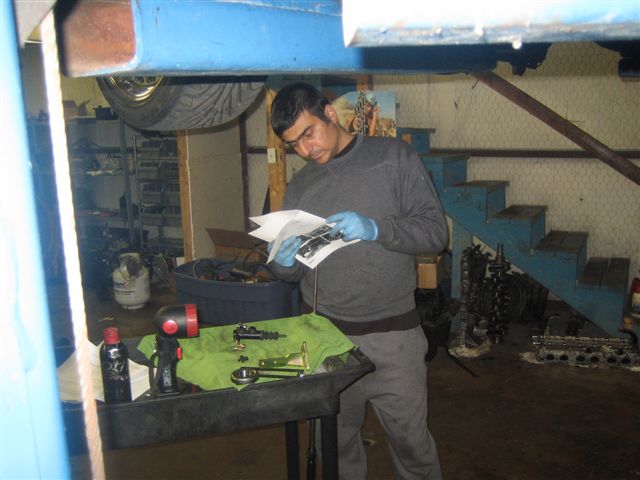
All parts except irons and housings inventoried. We're running the Mazda competition bearings in the engine:

Banzai Racing motor mounts. My old ones were squished:

Turbo back from inspection. No damage from metal shavings!:

All parts except irons and housings inventoried. We're running the Mazda competition bearings in the engine:
Banzai Racing motor mounts. My old ones were squished:
Turbo back from inspection. No damage from metal shavings!:
Pics #6
Old oil coolers:
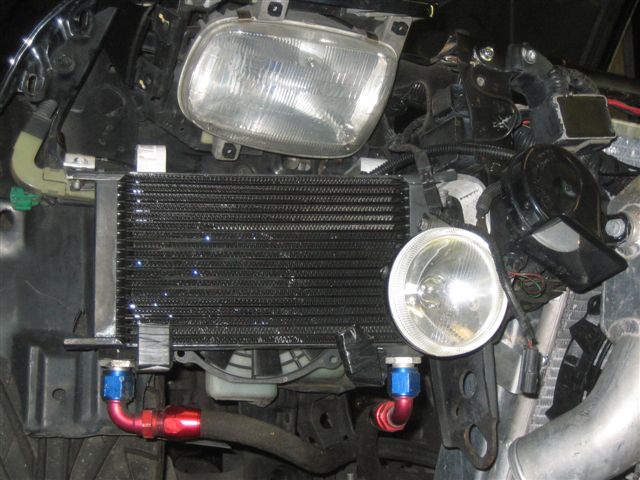

Replaced with new 25 row twin Gotham setup:

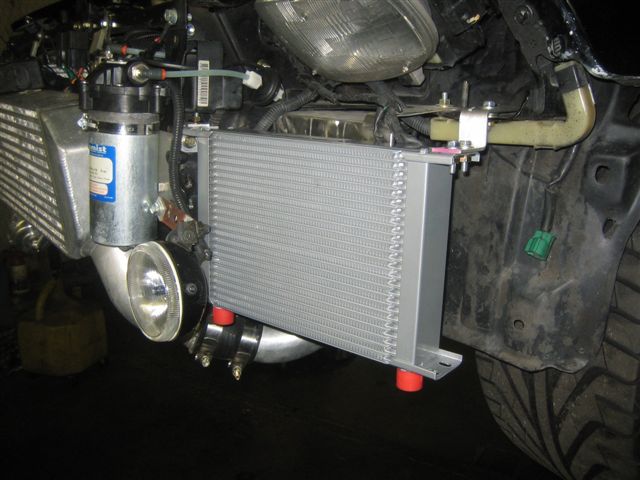
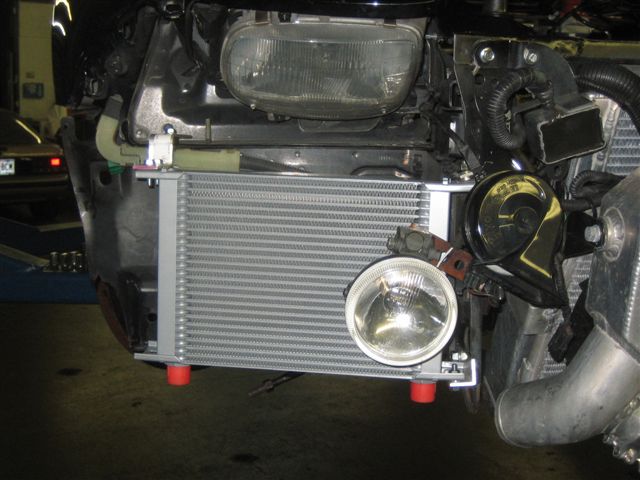
FYI - Don, the fabricator, is going to flip my intercooler so the piping runs up, not down. Never felt comfortable with the piping and BOV so low to the ground.
Replaced with new 25 row twin Gotham setup:
FYI - Don, the fabricator, is going to flip my intercooler so the piping runs up, not down. Never felt comfortable with the piping and BOV so low to the ground.
So that's it for now. The machine shop just called and the irons and housings are ready! Finally. Alex is on his way over to pick them up so it looks like we're a go for engine assebly tomorrow. More pics to come!
Nice David. As discussed, I have the same clutch with the heavier pressure plate. My preliminary impression is that it is very streetable; engagement is linear and the pedal is not too heavy. On a downside the install instructions are horrific and bleeding it is a nightmare. FWIW, let me know if any input is needed on the install.
 The instructions do suck pretty bad though. Fortunately George has done a few of these before so it wasn't too bad.

 One is the original oil cooler and the other was added by Pettit. I'll see what brand it is (Pectal?) and post it up.
I'm headed over to Gotham now for the engine rebuild. Will take lots of pics!
 Wait till later on today.
Senior Member
Joined: Sep 2004
Posts: 272
Likes: 0
From: Indianapolis
I havent commented yet, but i have been keeping up with this thread and am very excited to see the finished project, I kind of talked my significant other into the money spent on a rebuild race port, front mount, ect.....being worth while but after watching this all come together i am going to have to start working on her again so that the 20b project i will have to do someday wont scare her too bad..
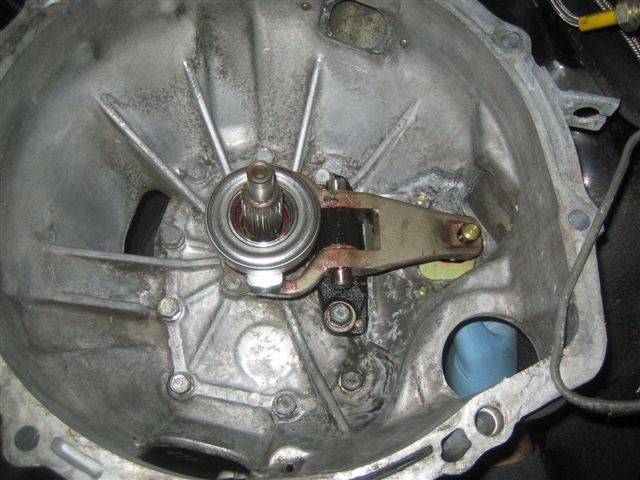
ps. i always use the excuse that if i HAD to do it you cant be mad. and my transmission had a broken fork in first gear so i "HAD" to have the motor rebuilt with lots of goodies because who wants to pay labor twice in unhooking a tranny right?
ps. i always use the excuse that if i HAD to do it you cant be mad. and my transmission had a broken fork in first gear so i "HAD" to have the motor rebuilt with lots of goodies because who wants to pay labor twice in unhooking a tranny right?