
Heaven or Hell: A Decade Long Time Attack Build

Thread Starter
Joined: Mar 2003
Posts: 390
Likes: 13
From: Anaheim
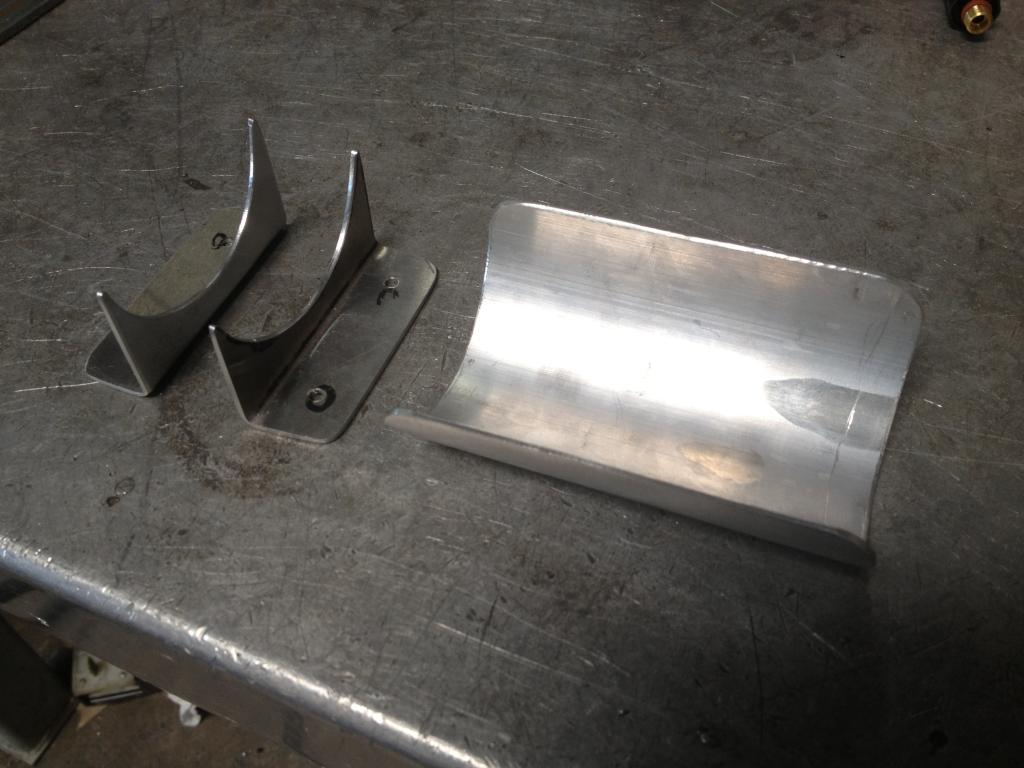
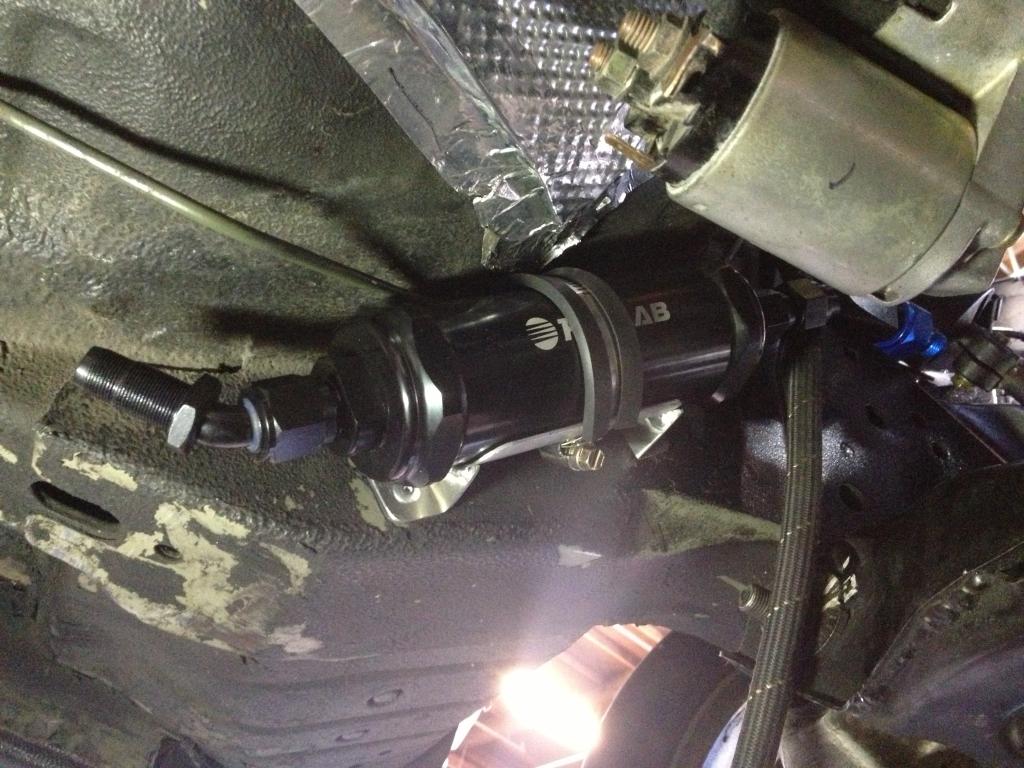
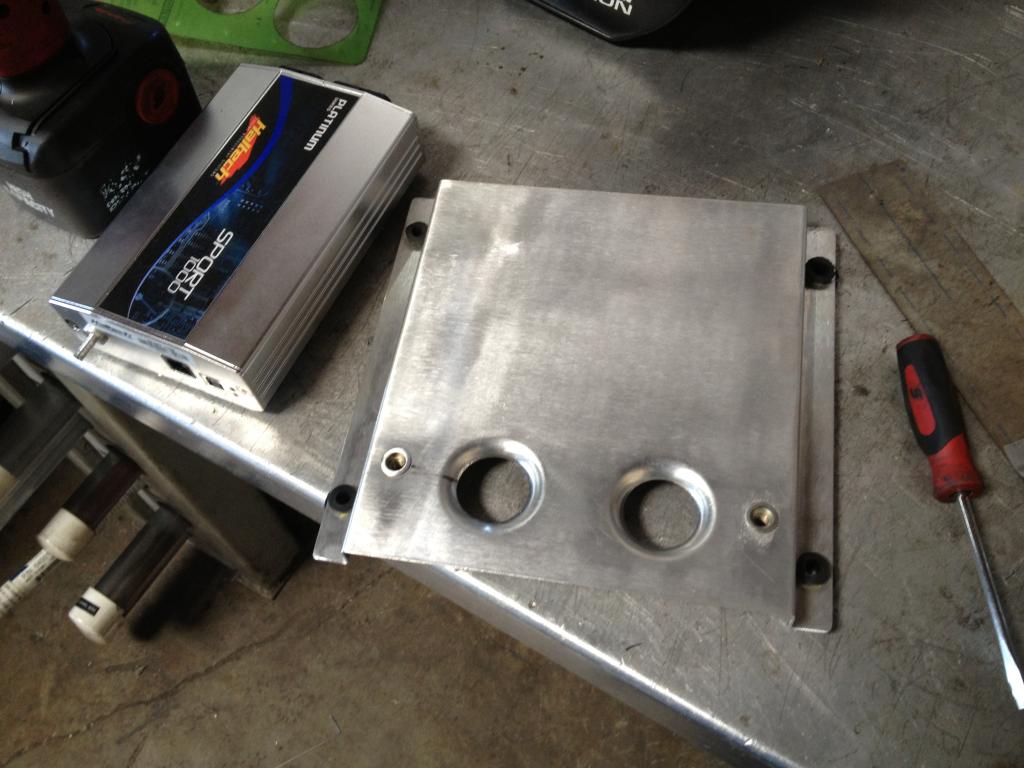
Made a simple fuel pressure regulator mounting bracket.
(I trimmed it up and rounded the edges before installation.)
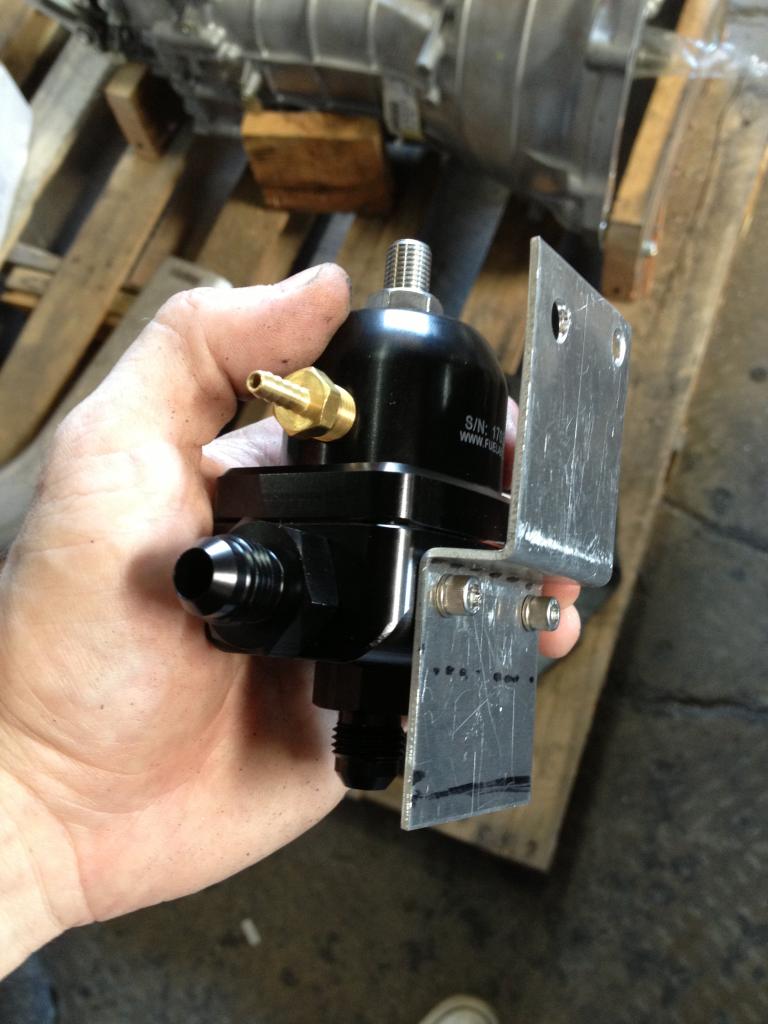
We originally were going to mount it in the often used UIM location. Eric walked by and we started talking about fuel temp and how placing the regulator right on top of the engine obviously doesn't help. He said he's seen rotaries boil fuel so perhaps mounting the regulator away from the engine would be best. We had obviously thought about this before, but I was trying to minimize the amount of baller Goodridge fuel line we had to use so placing the regulator close to the rails was ideal in that sense.
In the end I ended up mounting it way over by the clutch master cyl where the stock igniter once was -- which required about 6 additional feet of -6 hose lol. I since have researched E85 fuel temp and from what I gather the stuff runs so cool no one really worries about it. No fuel cooler necessary. Ive read that the Continental flex fuel sensor can also read fuel temp, if so I will log that as well.
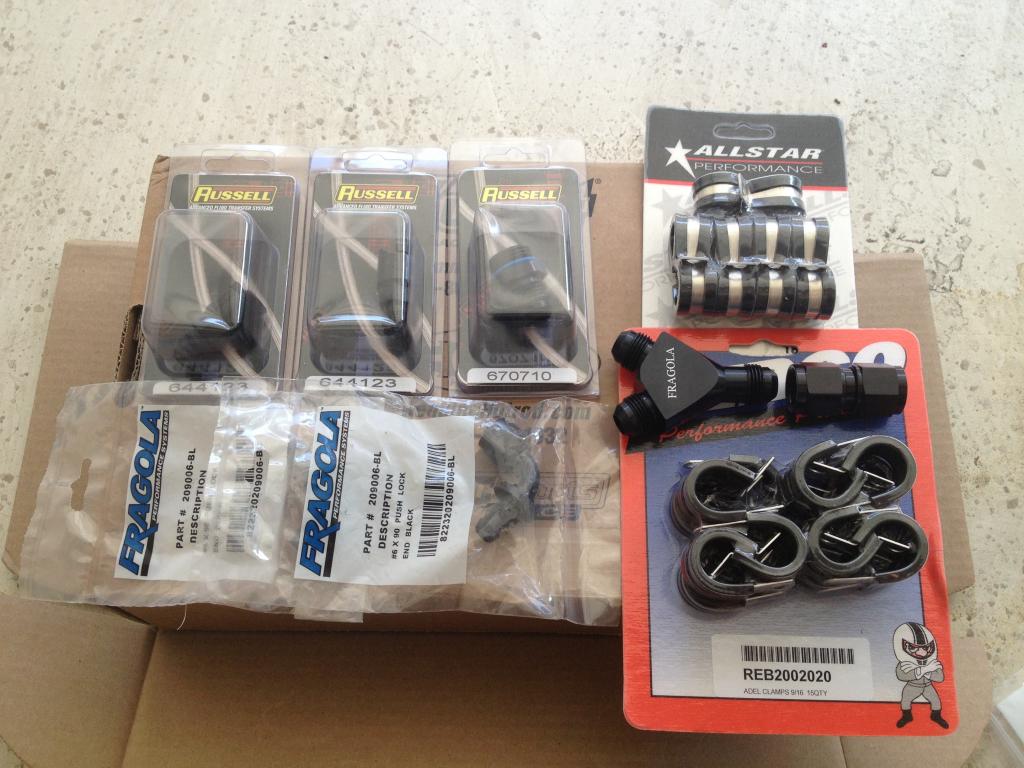
Summit boxes were arriving like every other day. Summit quickly became my favorite website. I am so impressed with their customer service and shipping times. Sometimes the stuff arrives next day!
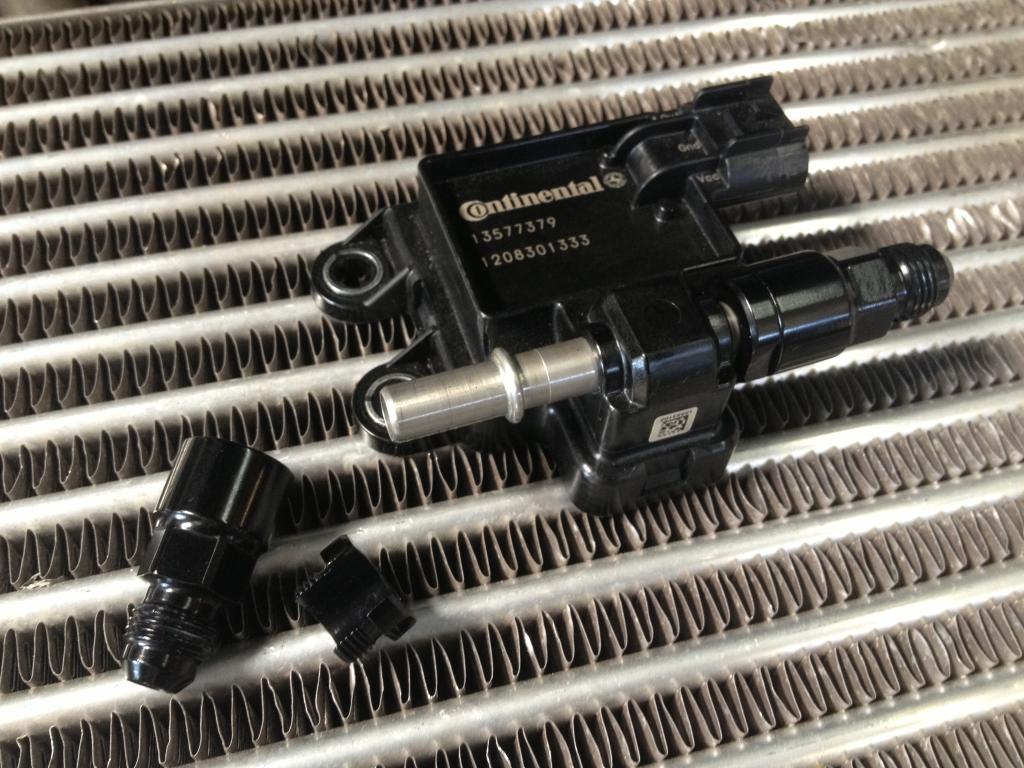
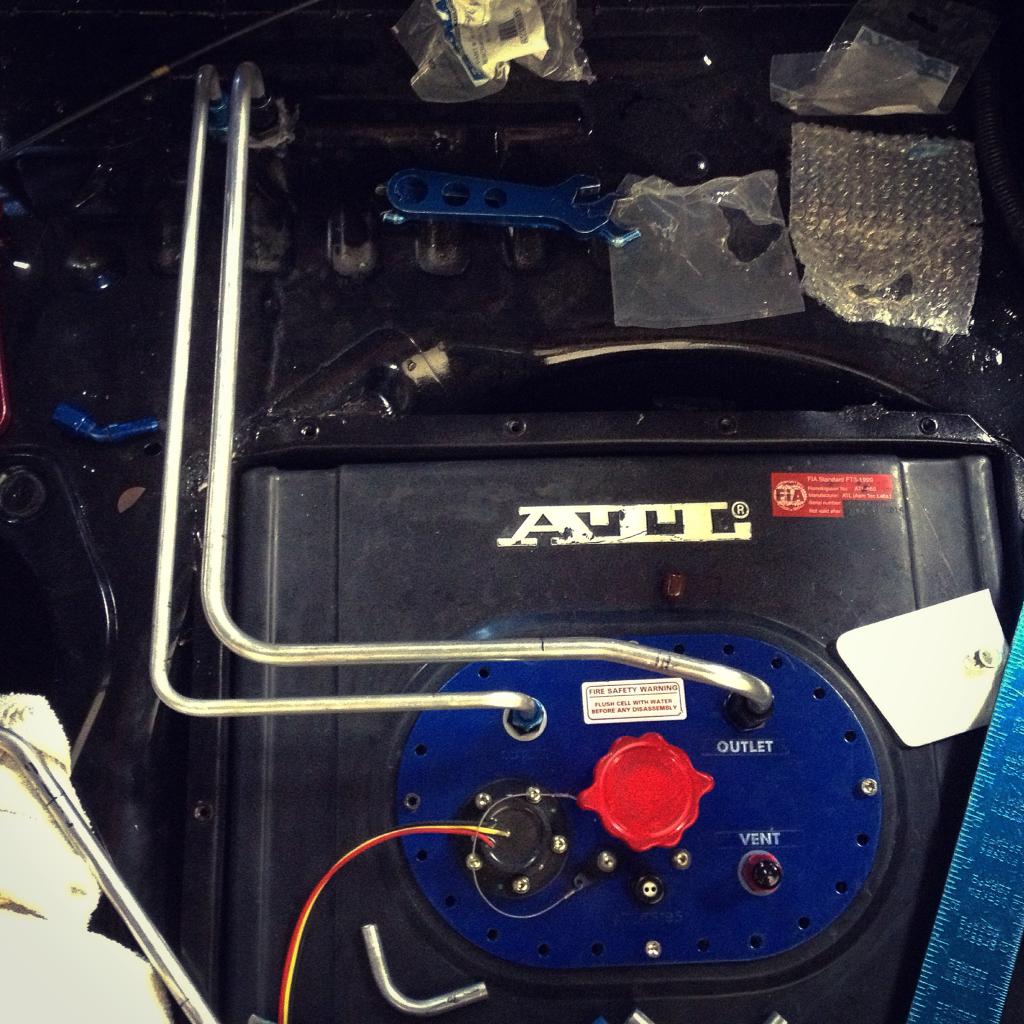
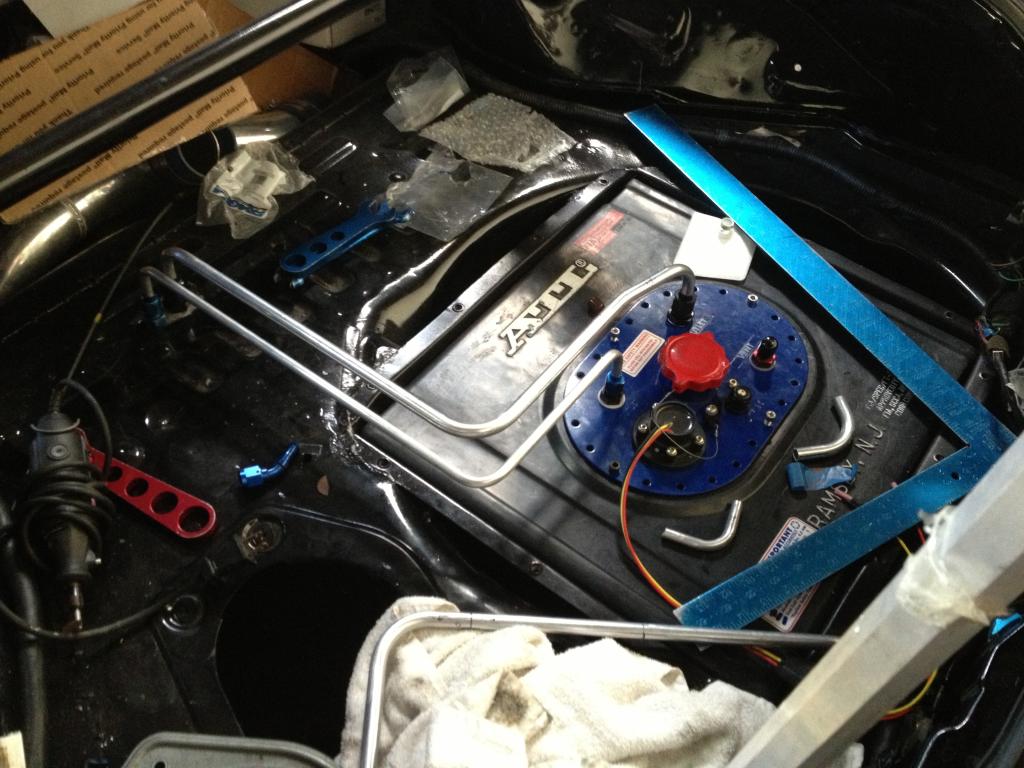
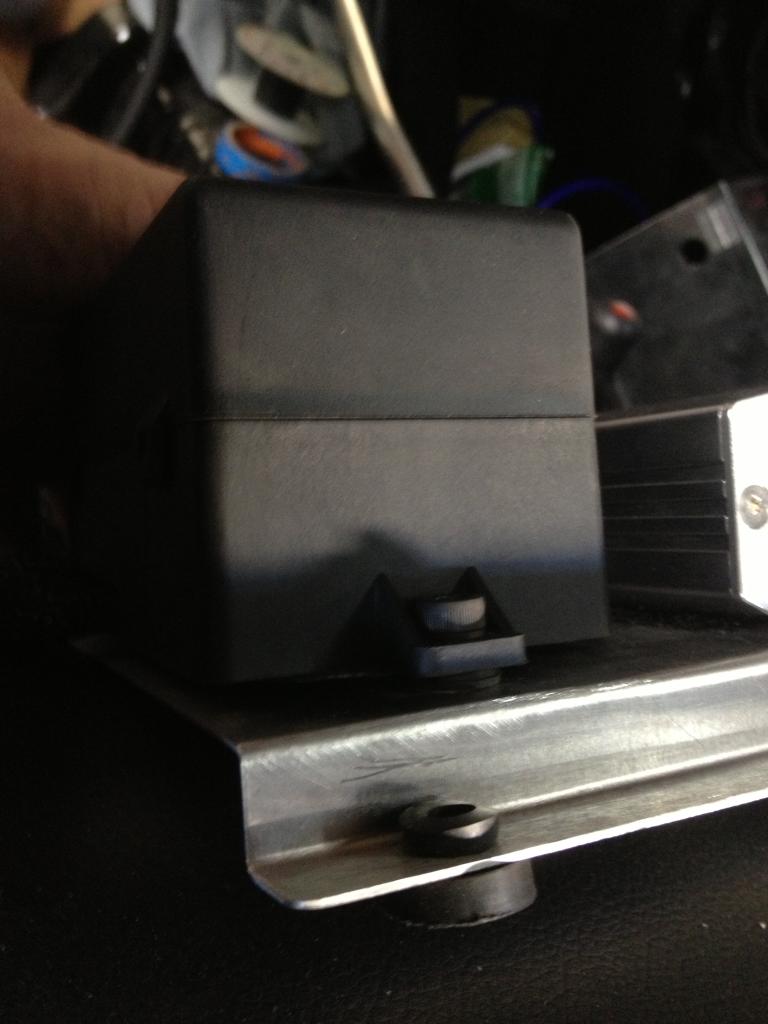
Flex fuel sensor with Russell tube to -6AN adapters.
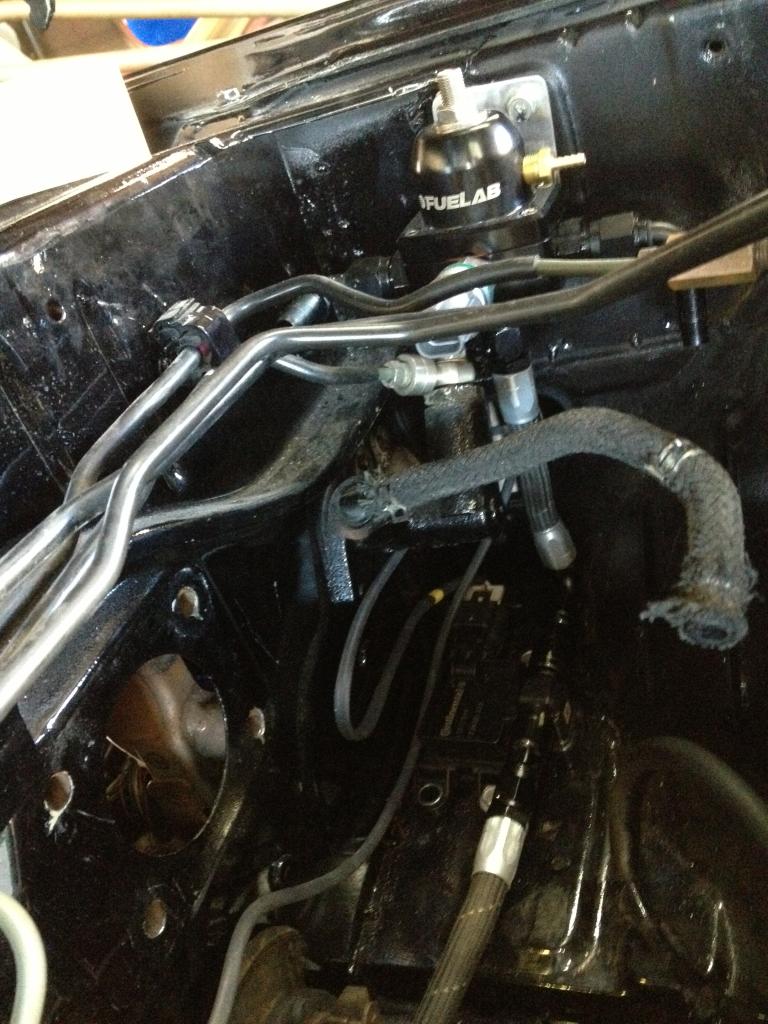
Crappy shot of regulator and FFS mounted. FFS is mounted to the chassis using rivnuts (nutserts).
More fuel system work to come.
(I trimmed it up and rounded the edges before installation.)

We originally were going to mount it in the often used UIM location. Eric walked by and we started talking about fuel temp and how placing the regulator right on top of the engine obviously doesn't help. He said he's seen rotaries boil fuel so perhaps mounting the regulator away from the engine would be best. We had obviously thought about this before, but I was trying to minimize the amount of baller Goodridge fuel line we had to use so placing the regulator close to the rails was ideal in that sense.
In the end I ended up mounting it way over by the clutch master cyl where the stock igniter once was -- which required about 6 additional feet of -6 hose lol. I since have researched E85 fuel temp and from what I gather the stuff runs so cool no one really worries about it. No fuel cooler necessary. Ive read that the Continental flex fuel sensor can also read fuel temp, if so I will log that as well.
Summit boxes were arriving like every other day. Summit quickly became my favorite website. I am so impressed with their customer service and shipping times. Sometimes the stuff arrives next day!

Flex fuel sensor with Russell tube to -6AN adapters.

Crappy shot of regulator and FFS mounted. FFS is mounted to the chassis using rivnuts (nutserts).

More fuel system work to come.

Thread Starter
Joined: Mar 2003
Posts: 390
Likes: 13
From: Anaheim
When I asked Geoff about the placement of the wastegate runners, he noted that they were purposely placed indirect of the exhaust flow for turbine priority and to maximize response. When using dual wastegates, especially 44mms, there should be ample surface area where boost control should not be an issue, as you noted. Let us know how it goes 
Thread Starter
Joined: Mar 2003
Posts: 390
Likes: 13
From: Anaheim
Continuing on with the fuel system work...
We had to find a mounting solution for the big *** Fuel Lab fuel filter so I got to work on an aluminum bracket.
Heres Pete welding it up for me.
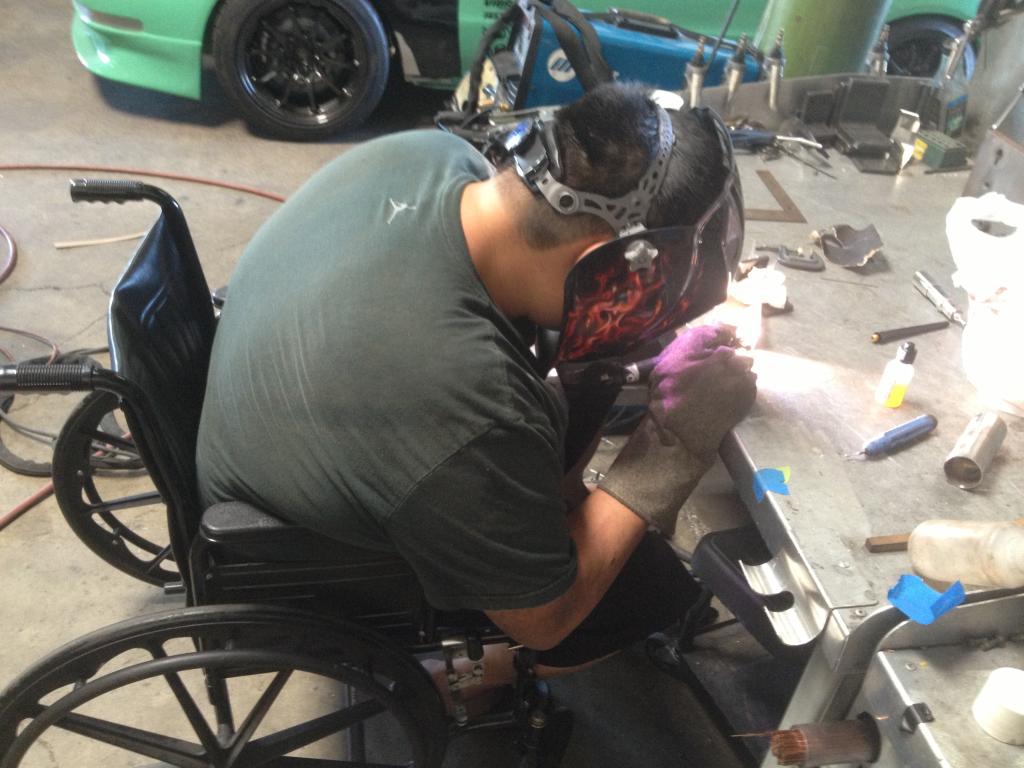
Yup, thats a wheelchair. Its actually quite handy around the shop lol.
Finished piece ready for installation.
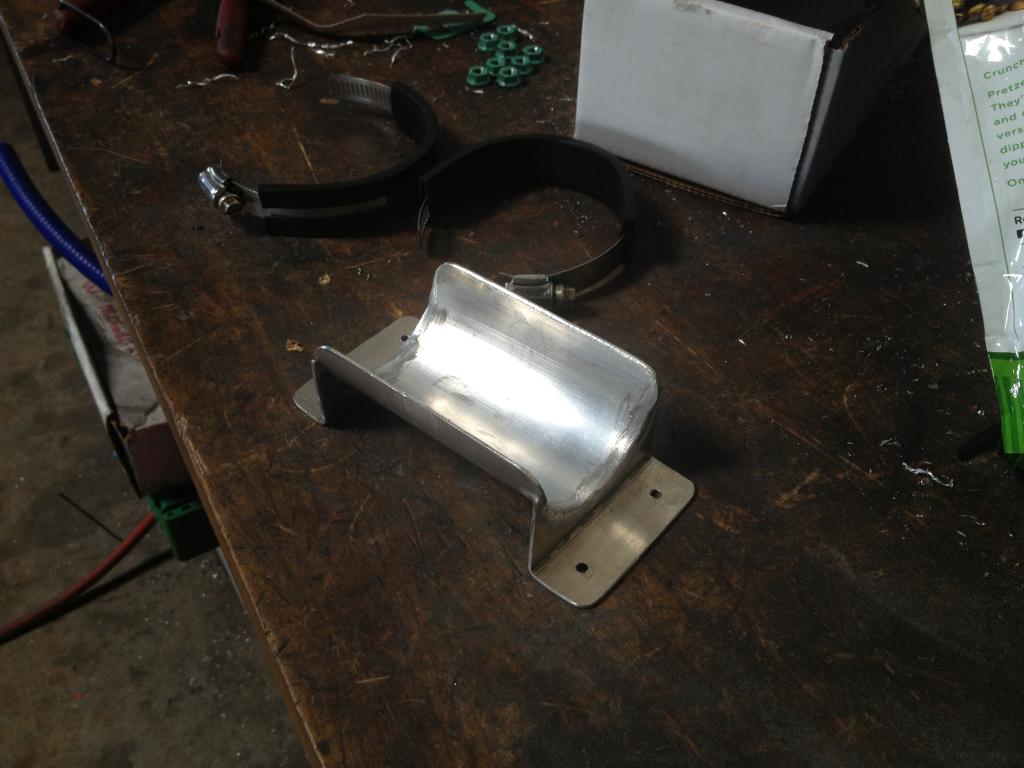
Riveted to chassis.
Finished.
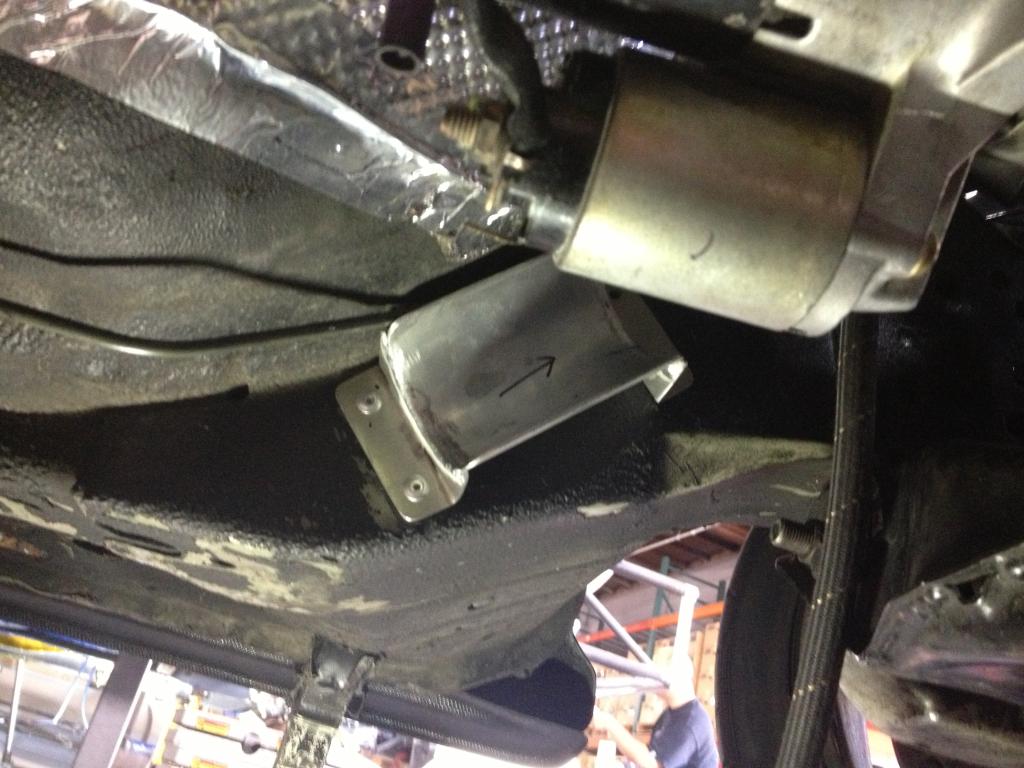
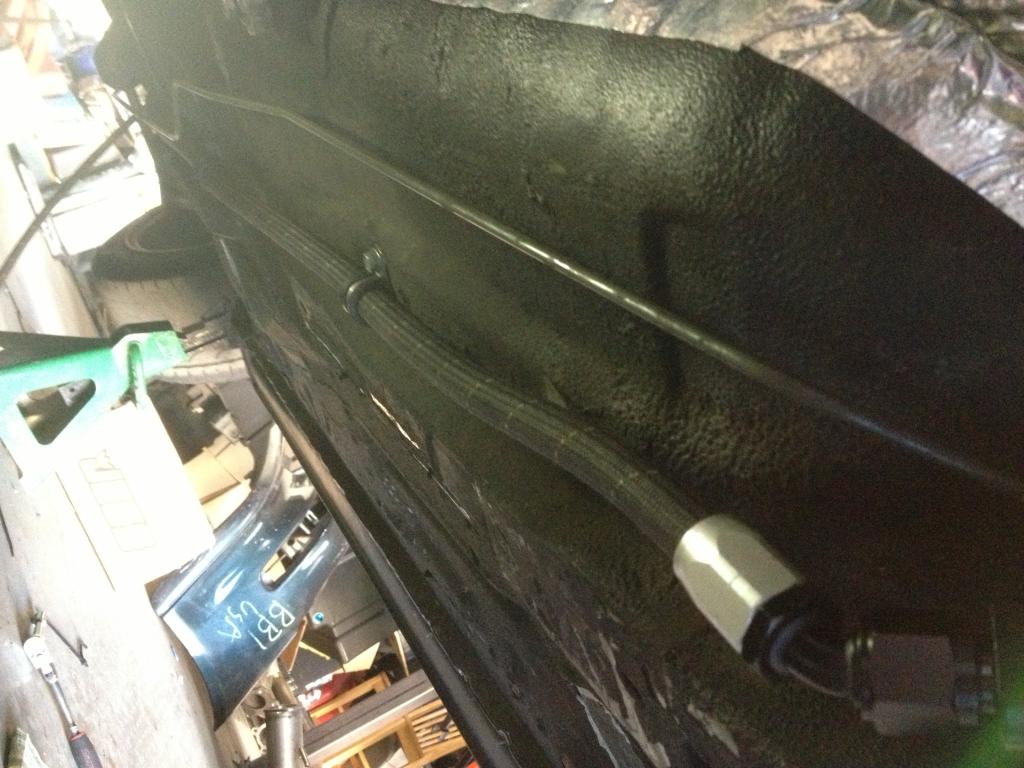
Plumbed with the pretty Goodridge 910 hose.
Yes...we are working on jack stands...so European/JDM of us.
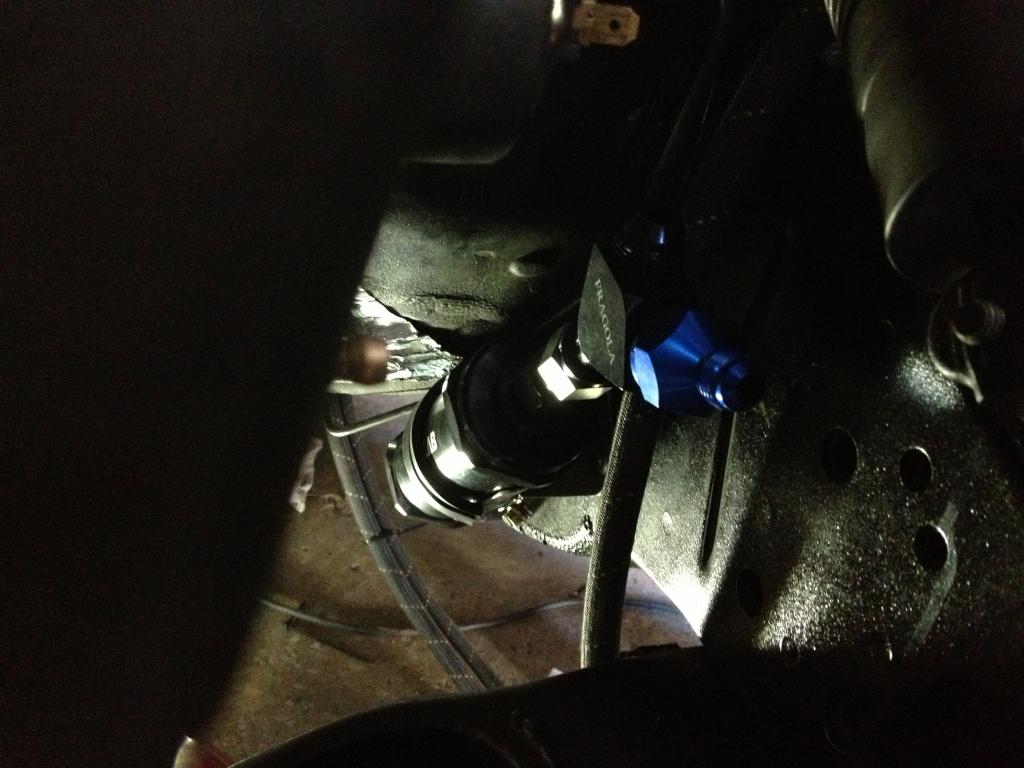
This is a top view of the Y fitting at the end of the filter. I couldn't find a Y that splits a -8 into a -8 and -6, so I just had to go with a -8 all around and use a -8 to -6 reducer for the primary rail feed. Its blue...and that kind of bothered me, but you can't even see it and I was too lazy to exchange it.
In retrospect, I would have preferred to place the filter in the trunk by the fuel cell for easier serviceability...but, this location makes sense from a functionality standpoint since I was able to just attach the Y fitting directly to the end on the filter using a -8 female/female union and eliminate 2 hose ends. Money saved...and less points of possible leakage. Its not all that hard to service, but getting to the ends of the Y is a bit awkward.
We had to find a mounting solution for the big *** Fuel Lab fuel filter so I got to work on an aluminum bracket.

Heres Pete welding it up for me.

Yup, thats a wheelchair. Its actually quite handy around the shop lol.
Finished piece ready for installation.

Riveted to chassis.

Finished.

Plumbed with the pretty Goodridge 910 hose.

Yes...we are working on jack stands...so European/JDM of us.
This is a top view of the Y fitting at the end of the filter. I couldn't find a Y that splits a -8 into a -8 and -6, so I just had to go with a -8 all around and use a -8 to -6 reducer for the primary rail feed. Its blue...and that kind of bothered me, but you can't even see it and I was too lazy to exchange it.

In retrospect, I would have preferred to place the filter in the trunk by the fuel cell for easier serviceability...but, this location makes sense from a functionality standpoint since I was able to just attach the Y fitting directly to the end on the filter using a -8 female/female union and eliminate 2 hose ends. Money saved...and less points of possible leakage. Its not all that hard to service, but getting to the ends of the Y is a bit awkward.


Thread Starter
Joined: Mar 2003
Posts: 390
Likes: 13
From: Anaheim
Decided to run hardline from the cell to the bulkhead fitting in the rear.
Time to bust out the hand bender and double flare tool...
-6 return and -8 feed.
I think they came out pretty decent and symmetrical for a novice line maker like myself. I did, however, botch one attempt at the last bend so I had to toss one line in the trash. Pete found much delightful entertainment in my failure lol. Im sure he could have made better lines in a fraction of the time I spent on them, but that is not what Im looking for and would take away from my enjoyment of the build. I love how the process of building a race car forces you to become intimate with every sub system of the car. Learning new skills and becoming better at things you're not great at is one of the most rewarding parts of the whole experience. I learned so much in this last bout in the shop with Pete. While being rich and paying a facility for immaculate work would definitely be cool...I also appreciate the visceral connection with the car that can only be developed by using your own hands to create the machine.
Time to bust out the hand bender and double flare tool...

-6 return and -8 feed.


I think they came out pretty decent and symmetrical for a novice line maker like myself. I did, however, botch one attempt at the last bend so I had to toss one line in the trash. Pete found much delightful entertainment in my failure lol. Im sure he could have made better lines in a fraction of the time I spent on them, but that is not what Im looking for and would take away from my enjoyment of the build. I love how the process of building a race car forces you to become intimate with every sub system of the car. Learning new skills and becoming better at things you're not great at is one of the most rewarding parts of the whole experience. I learned so much in this last bout in the shop with Pete. While being rich and paying a facility for immaculate work would definitely be cool...I also appreciate the visceral connection with the car that can only be developed by using your own hands to create the machine.


Joined: Oct 2002
Posts: 1,771
Likes: 0
From: Boulder, CO
Reading this section of your build put such a huge smile on my face. Only because I can remember doing this when I was back in college with 4 jack stands and a car jack. Pulling it was a pain but good god... re installing the as a one man operation was a ****ing nightmare.
I can still recall the pinnacle of this experience almost ten years later. I was having similar problems with the jack not being able to get the transmission high enough to mate properly with the splines. Using my monkey brain I decided to roll the transmission onto my chest, bench press the front of the bell housing above my face while simultaneously balancing the rear of the transmission with my feet. Totally filthy and covered in gear oil from head to toe and after four attempts of not succeeding, I was so pumped out that I literally just laid the transmission on my chest and lay there in total defeat. I think I literally said a small prayer to God to help me get this PITA back in place and somehow on my 5th attempt I succeeded...
I think the most nerve racking part for me above all else was the constant question in the back of my mind as to whether or not the car was about to crush my face from wiggling and shaking the transmission so damn much.
So I built myself a platform and somehow managed to lift the jack/trans assembly onto it. At this angle, laying under the car and lifting that thing 4 inches onto the platform was pretty challenging to solo. There was much profanity and many drawn out "ohhh my godddddd" moments. Have you ever just collapsed your body and laid your head down on the floor like you're going to sleep under the car? If so...you "know dat feel".
Thread Starter
Joined: Mar 2003
Posts: 390
Likes: 13
From: Anaheim
^^ LOL!
Resting the trans on your chest and bench pressing it up to install takes things to a whole new level. Hahaha! The exhaustion breaks are so pathetic...laying there on the dirty floor waiting for willpower and strength to return for another go.
Like I said...I did it the exact same way, using the exact same jack on my E36 M3 and it was smooth sailing. Its not that the tunnel is particularly cramped on the FD, theres plenty of space...its just the trans itself is pretty cumbersome. Ive taken the trans on and off of my S13 multiple times and after dealing with the tunnel on that car it makes you feel like you could park a truck in the FD tunnel. Twin plate on S13 isn't fun.
I was reading another build thread on here a few months ago and found it funny that someone commented that they heard the OP was losing his sanity and penning poems on the underside of the FD. I found this hilarious because over the last 10 years there are random pictures and words in paint marker on the underside of my car like its the Berlin Wall. I think only a handful of people undergo builds that long and perilous (read: stupid enough). Its good to know that there are others out there who share that experience haha.

Thread Starter
Joined: Mar 2003
Posts: 390
Likes: 13
From: Anaheim
Small update:
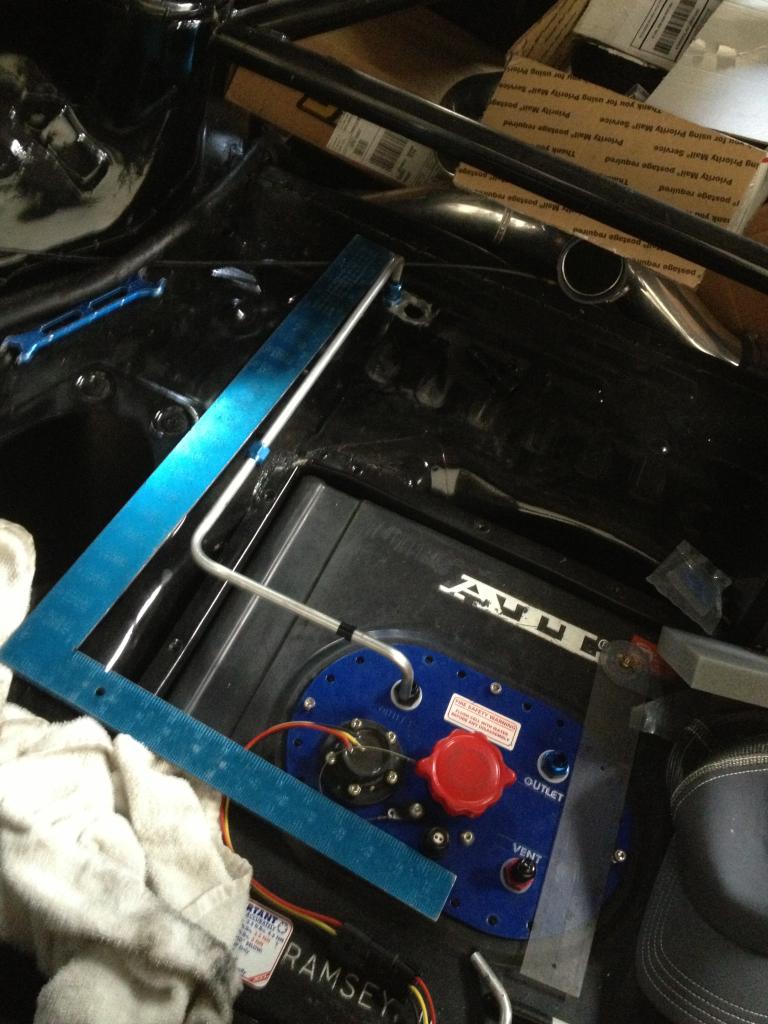
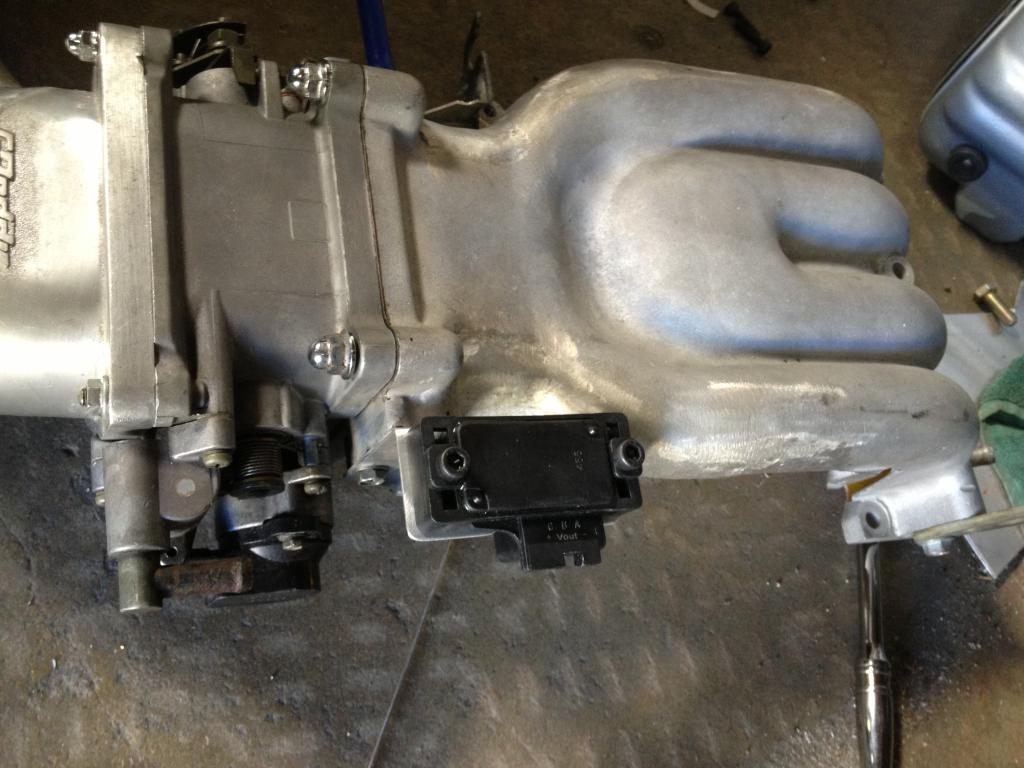
More parts
Bracket I made for the GM 4 bar MAP
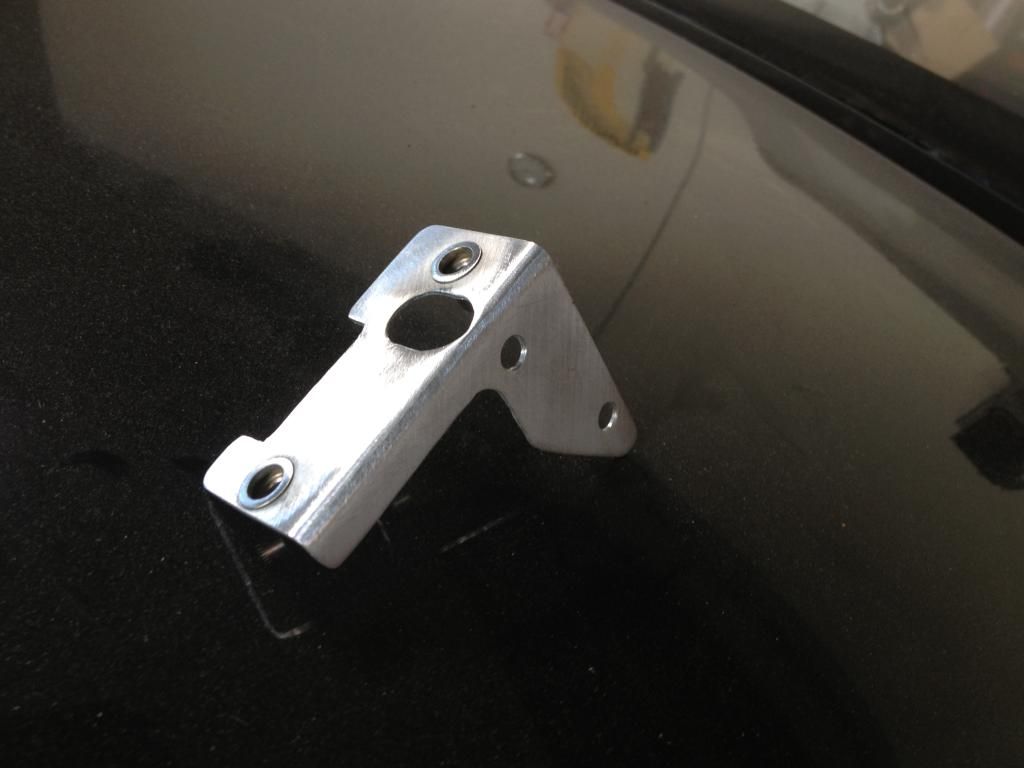
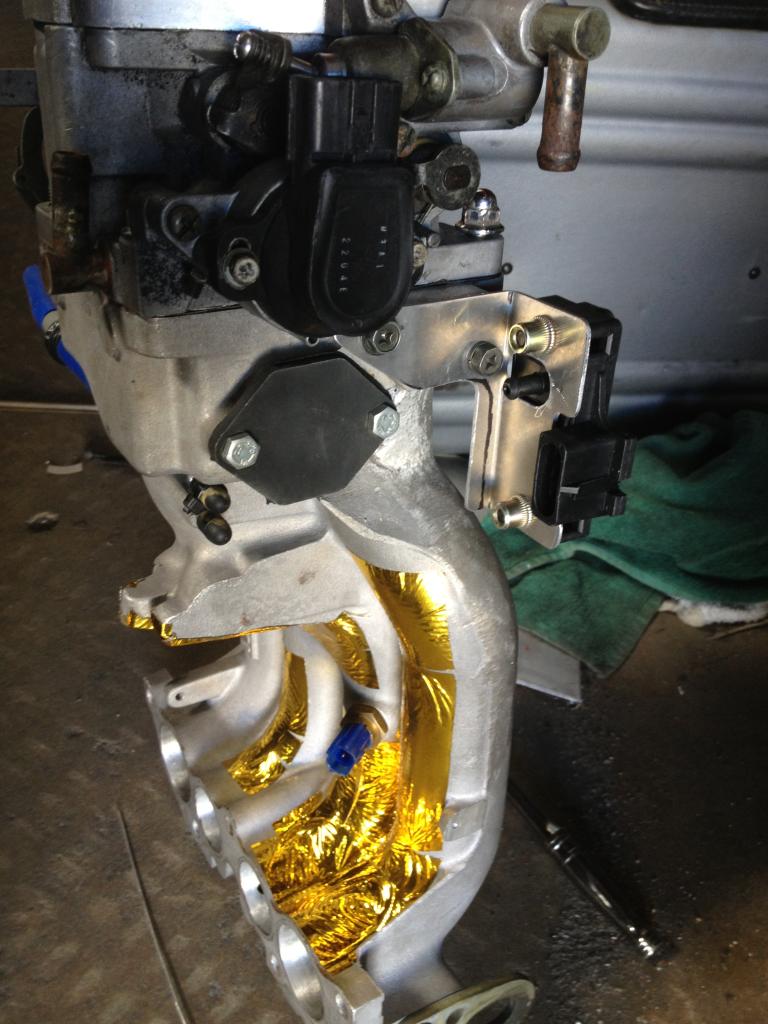
...still need to finish the gold tape
Mounting plate for the fuse box and ECU
Forgot to take a pic of it installed.
More parts


Bracket I made for the GM 4 bar MAP


...still need to finish the gold tape

Mounting plate for the fuse box and ECU


Forgot to take a pic of it installed.
Thread Starter
Joined: Mar 2003
Posts: 390
Likes: 13
From: Anaheim
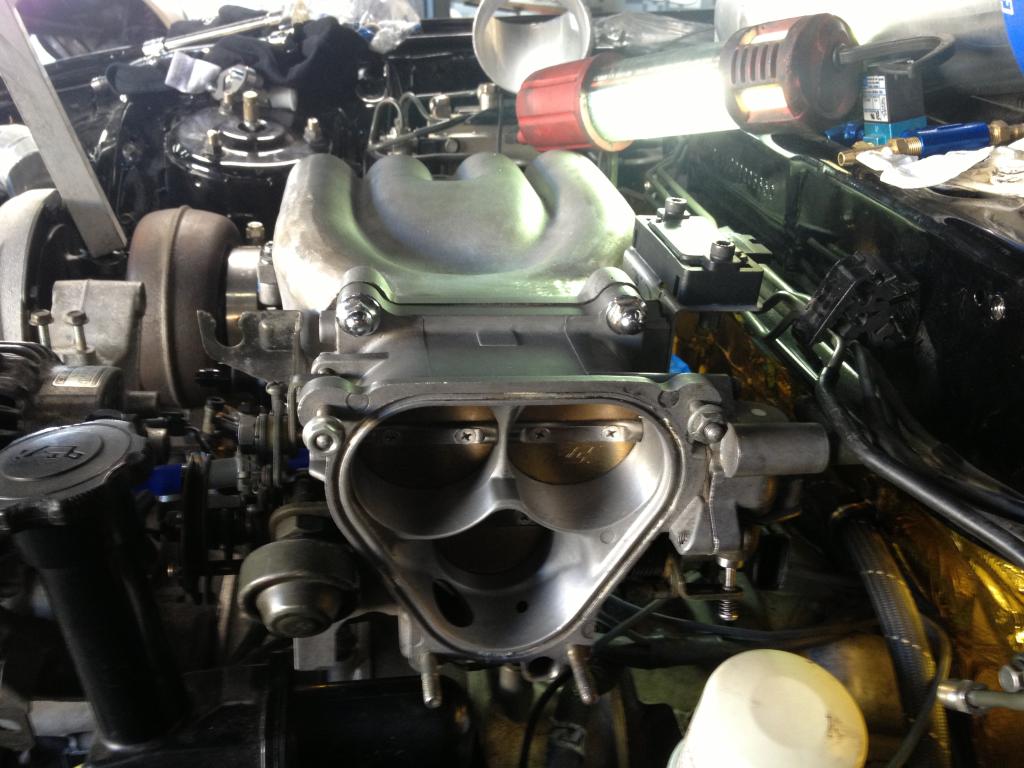
IC almost done.
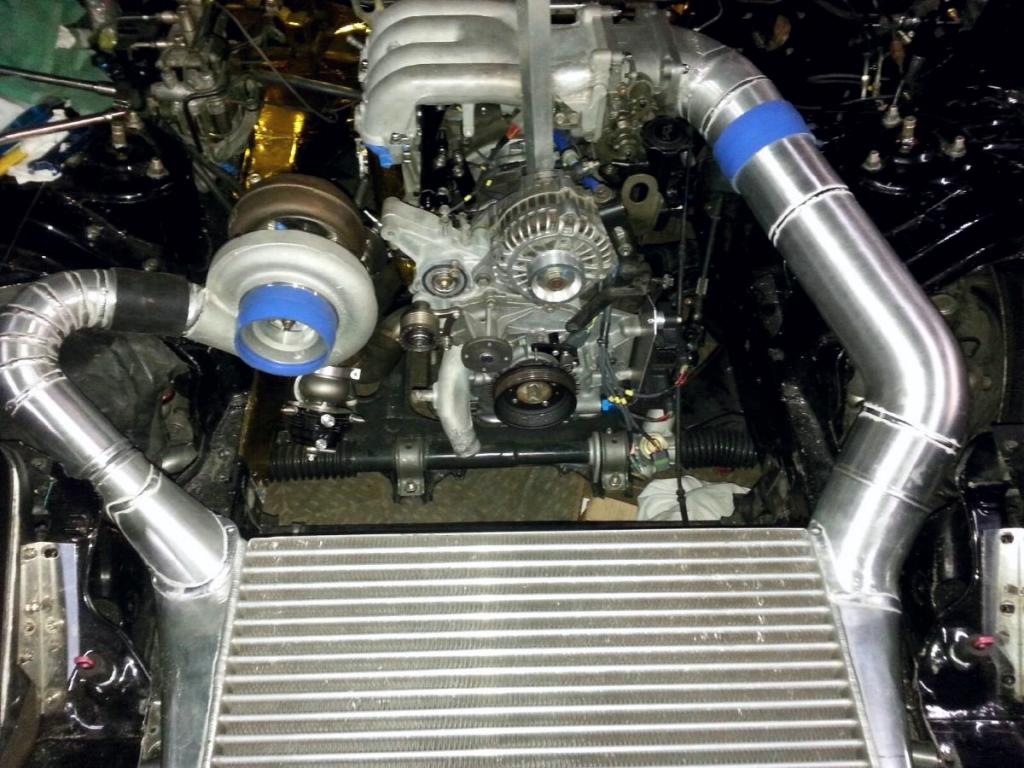
Thank you to HPS Performance for supplying the couplers, aluminum bends, and vacuum hose!
HPS - Manufacturer of High Temp Reinforced Performance Silicone Hoses , Aluminum Tubing & Stainless Steel Clamps

Thank you to HPS Performance for supplying the couplers, aluminum bends, and vacuum hose!
HPS - Manufacturer of High Temp Reinforced Performance Silicone Hoses , Aluminum Tubing & Stainless Steel Clamps
Thread Starter
Joined: Mar 2003
Posts: 390
Likes: 13
From: Anaheim
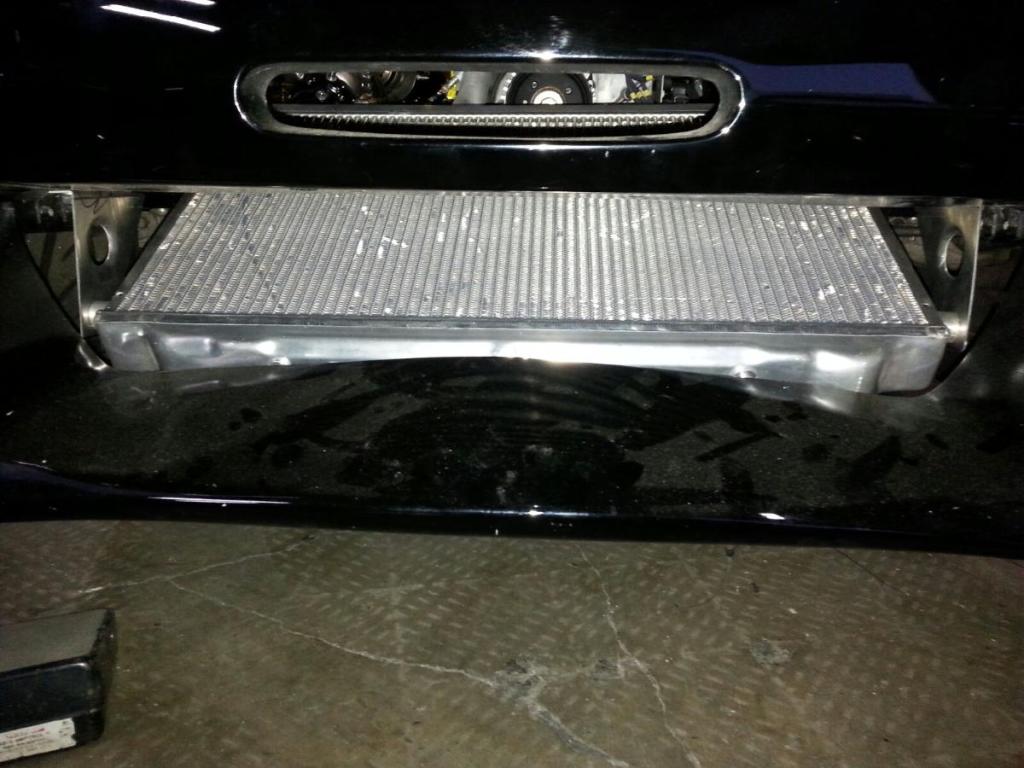
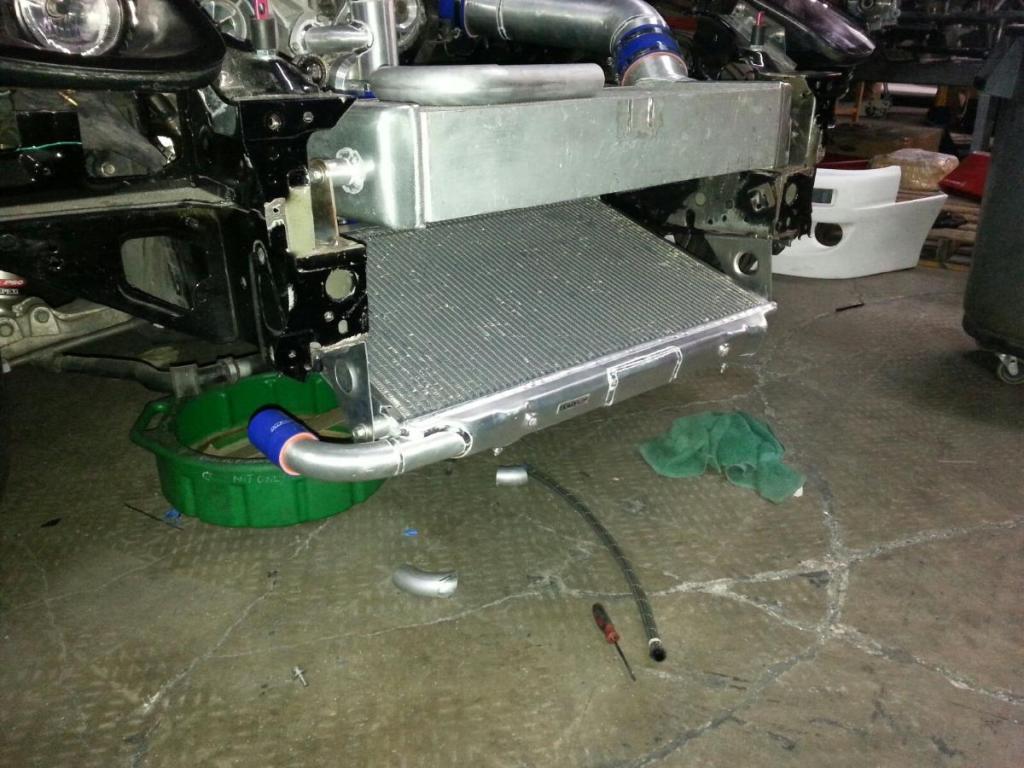
Now to figure out the angle/position of the radiator.
Pete made some nice dimple die mounts.
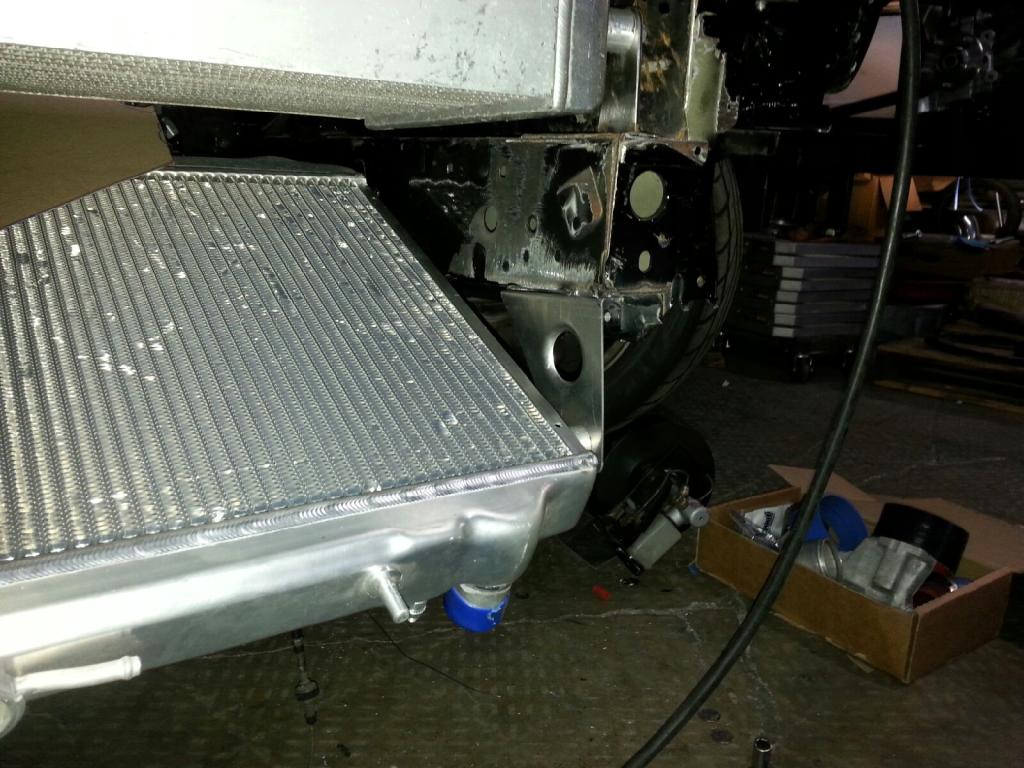
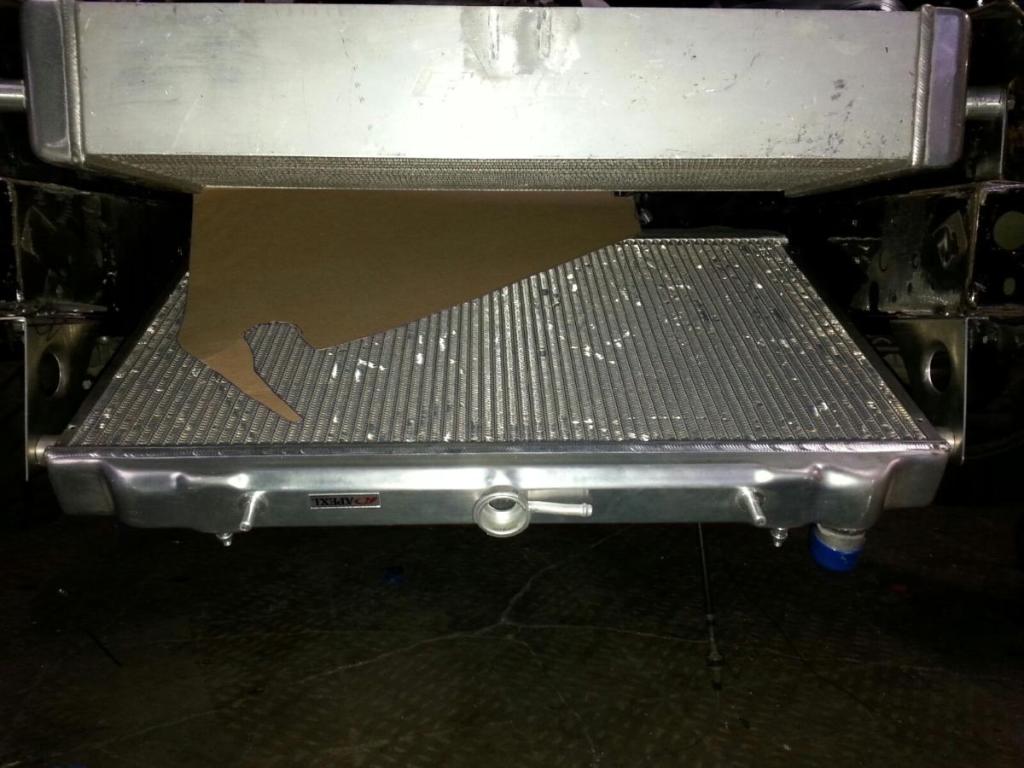
We want it to sit flush with the front air dam...this causes it sit quite low to the ground and any off track adventures will likely cause some havoc. I don't see any way around this if I want to run v-mount (rear mounted radiator may be an idea for the future), so I think it will just serve as greater motivation to build a really strong front splitter that will protect the radiator from any minor incidents.
As far as fans...We all sat around the shop theory crafting radiator air flow.
The first concept was: How do you direct airflow out from the engine bay after it passes through a v-mounted radiator. For the IC its simple to build a shroud that seals to the hood. For a car running a front splitter with a flat bottom that extends back to the transmission, getting air out after it cools the radiator is a bit tricky. If directed downwards, you would have to create a hole in the flat bottom splitter, probably causing turbulence under the car and negating the purpose of the splitter in the first place. We came to the conclusion that if you just let it swirl around in the engine bay it will create a high pressure environment and likely be sucked out the vents in the sides of the hood. Ideally, Id like to figure out a way to direct the spent air to the sides and duct it to cool the brakes.
None of us are aerodynamicists, so if anyone has any great ideas Im all ears.
Back to the fans...the talk lead to discussion of radiator fans for track cars. Gary does the track prep and event support for the C-West dry carbon S2000 and was recalling how the car was having heat management issues at the first few events it ran. The car had a very high CFM fan so restriction of airflow wasn't the first thing to come to mind, but to test the hypothesis they ran the car with no fan. Without the fan the temps settled down to tolerable range, so simply just having the fan attached to the radiator was impeding airflow enough to cause overheating. The solution they came up with was a quick release fan powered by an external jack on the front of the car. After lapping, they could return the car to the hot pit to make adjustments and idle heat soak would not be a problem. Installation and removal is done in a matter of seconds.

I plan to run something similar.
Pete made some nice dimple die mounts.


We want it to sit flush with the front air dam...this causes it sit quite low to the ground and any off track adventures will likely cause some havoc. I don't see any way around this if I want to run v-mount (rear mounted radiator may be an idea for the future), so I think it will just serve as greater motivation to build a really strong front splitter that will protect the radiator from any minor incidents.

As far as fans...We all sat around the shop theory crafting radiator air flow.
The first concept was: How do you direct airflow out from the engine bay after it passes through a v-mounted radiator. For the IC its simple to build a shroud that seals to the hood. For a car running a front splitter with a flat bottom that extends back to the transmission, getting air out after it cools the radiator is a bit tricky. If directed downwards, you would have to create a hole in the flat bottom splitter, probably causing turbulence under the car and negating the purpose of the splitter in the first place. We came to the conclusion that if you just let it swirl around in the engine bay it will create a high pressure environment and likely be sucked out the vents in the sides of the hood. Ideally, Id like to figure out a way to direct the spent air to the sides and duct it to cool the brakes.
None of us are aerodynamicists, so if anyone has any great ideas Im all ears.
Back to the fans...the talk lead to discussion of radiator fans for track cars. Gary does the track prep and event support for the C-West dry carbon S2000 and was recalling how the car was having heat management issues at the first few events it ran. The car had a very high CFM fan so restriction of airflow wasn't the first thing to come to mind, but to test the hypothesis they ran the car with no fan. Without the fan the temps settled down to tolerable range, so simply just having the fan attached to the radiator was impeding airflow enough to cause overheating. The solution they came up with was a quick release fan powered by an external jack on the front of the car. After lapping, they could return the car to the hot pit to make adjustments and idle heat soak would not be a problem. Installation and removal is done in a matter of seconds.
I plan to run something similar.
Thread Starter
Joined: Mar 2003
Posts: 390
Likes: 13
From: Anaheim
TYVM guys. Sharing all the hard work with other enthusiasts helps keep the motivation going.
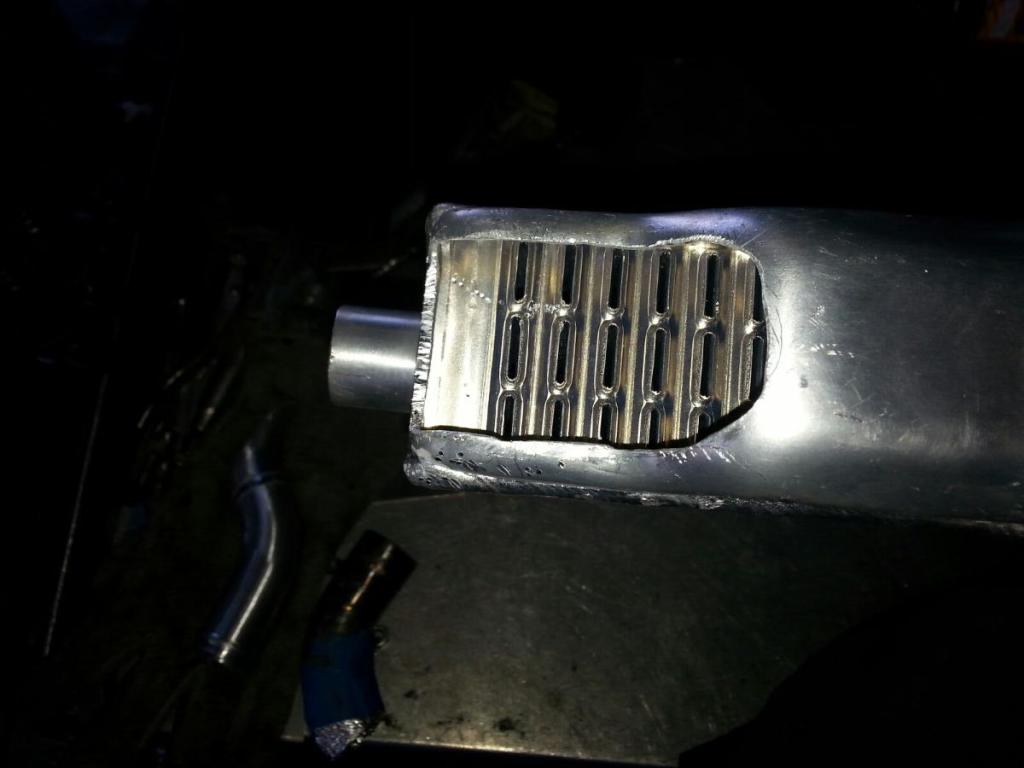
Not only do they look cool...they improve the rigidity of the metal while simultaneously reducing weight. Win + win.
Actually, I have started the car several times and even driven it about 50 feet lol (I laugh, but seriously...after 10 years since I last drove the car, that was an amazing moment). So technically I suppose its running, but still lots of work left ahead before we can tune. Since I decided to abort anything involving the retention of the factory wiring, the times I started the car was using solely Ludwig's engine harness with no other wiring in the car. This means no starter or alternator (charge harness stuff). Ive ordered a Racepak Smartwire (which should be arriving this Wends) so I can simplify and rewire everything.
We also need to finish the exhaust and make wastegate dump tubes. Right now theres just a downpipe as far as the exhaust goes (it was surprisingly not THAT loud...but Im sure under load is a totally diff story). Haven't decided on traditional exhaust or side exit.
I actually just pulled the motor in my home garage the other day due to a leaky oil pan (don't ask) and some other things I wanted to check out. With no radiator support, minimal engine accessories, and a simple harness the engine is insanely easy to pull so I didn't mind it.
Im still catching up on the updates here. Hopefully can get the car wired up, leak free and ready to tune in the next couple months (time is a scarce resource now that my second child is coming any day). 2015 should be a fun one.
Originally Posted by tt7hvn
Looks like it's coming together well.
Do you have an expected time she should be running?
Do you have an expected time she should be running?
We also need to finish the exhaust and make wastegate dump tubes. Right now theres just a downpipe as far as the exhaust goes (it was surprisingly not THAT loud...but Im sure under load is a totally diff story). Haven't decided on traditional exhaust or side exit.
I actually just pulled the motor in my home garage the other day due to a leaky oil pan (don't ask) and some other things I wanted to check out. With no radiator support, minimal engine accessories, and a simple harness the engine is insanely easy to pull so I didn't mind it.
Im still catching up on the updates here. Hopefully can get the car wired up, leak free and ready to tune in the next couple months (time is a scarce resource now that my second child is coming any day). 2015 should be a fun one.

[QUOTE=AX75F92;11822661]TYVM guys. Sharing all the hard work with other enthusiasts helps keep the motivation going.
Not only do they look cool...they improve the rigidity of the metal while simultaneously reducing weight. Win + win.
/QUOTE]
Absolutely. I actually just finished hand forming on a cooling plate out of 20 gauge ALU. It was quite flimsy around the intercooler pipe cutout bevelling the edges similar to what the dimples do made a huge difference. I would love to do that on the brackets I made to keep them light and strong. Love what you are doing with the car, keep it up. Don't fail the forum just because you got another kid on the way. JK.
Thread Starter
Joined: Mar 2003
Posts: 390
Likes: 13
From: Anaheim
^^^ If I was gonna quit it would have happened sometime during the last 10 years. Im in this one till the bitter end.
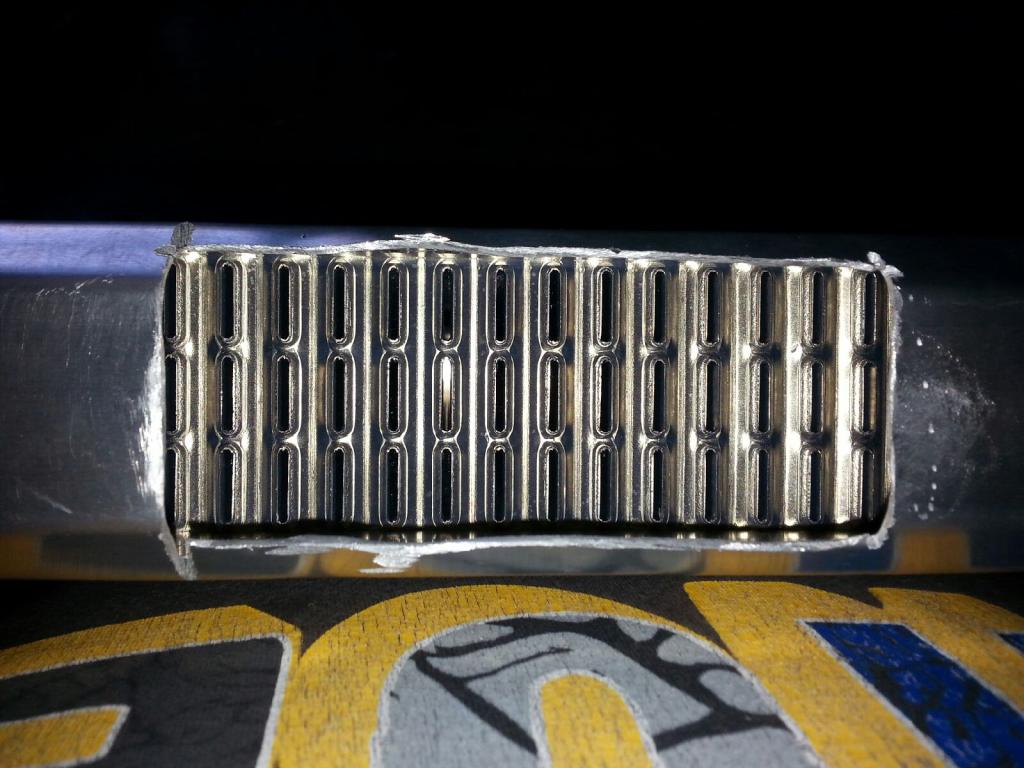
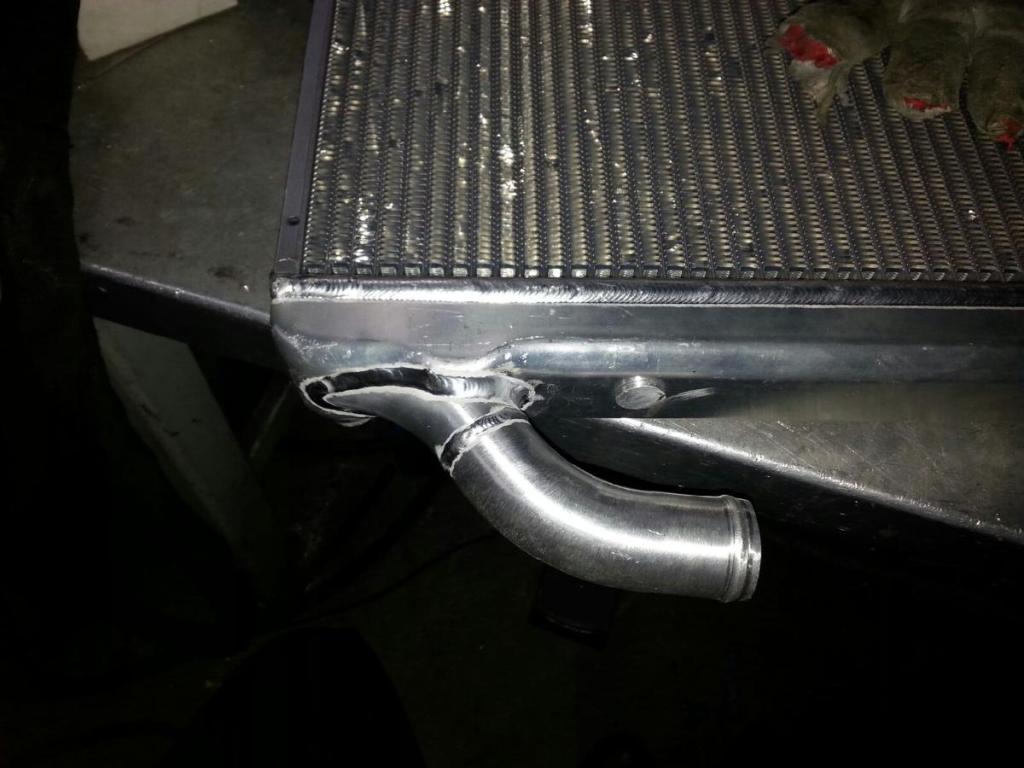
Some more v-mount work...
Pete sliced into the rare and beautiful A'PEXi GT Radiator like it was a cha siu bao. It kind of hurt my soul to cut up such a nice (and expensive) piece, but #fuckitracecar. This particular radiator was for an R32 Skyline GTR, so all the inlets/outlets had to be cut and plugged and the end tanks cut and adapted to our own 1.5" inlet/outlet. We also added a -10 AL weld bung to run a bleeder line to an A'PEXi GT Reservoir air separator tank.
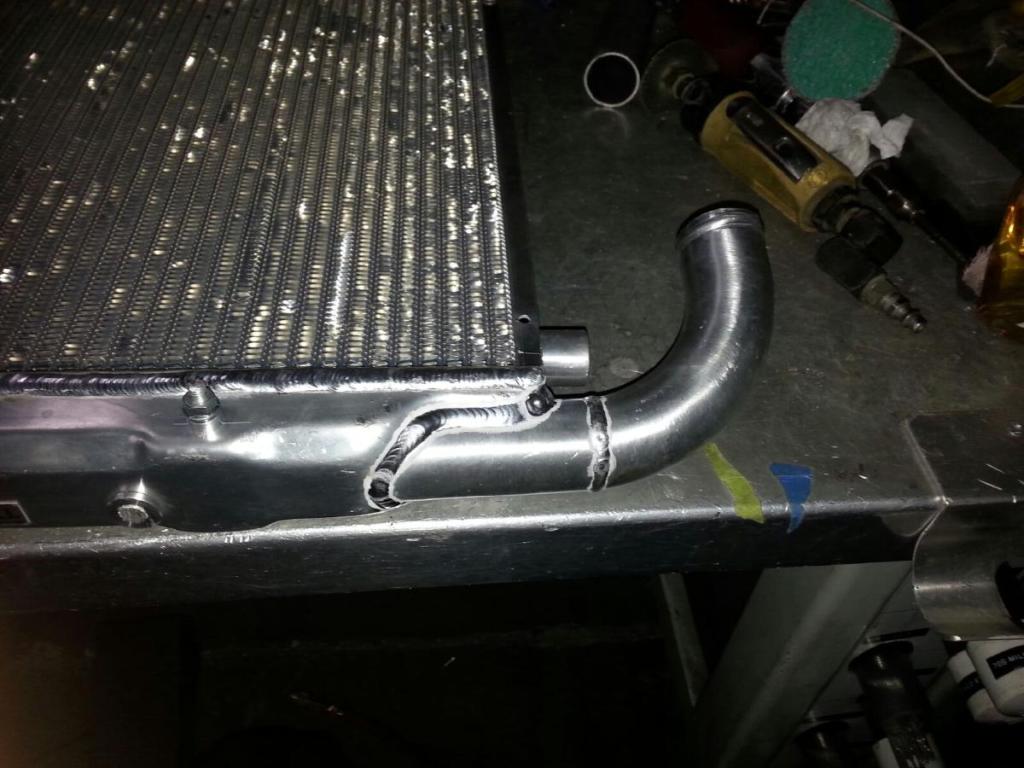


Thread Starter
Joined: Mar 2003
Posts: 390
Likes: 13
From: Anaheim
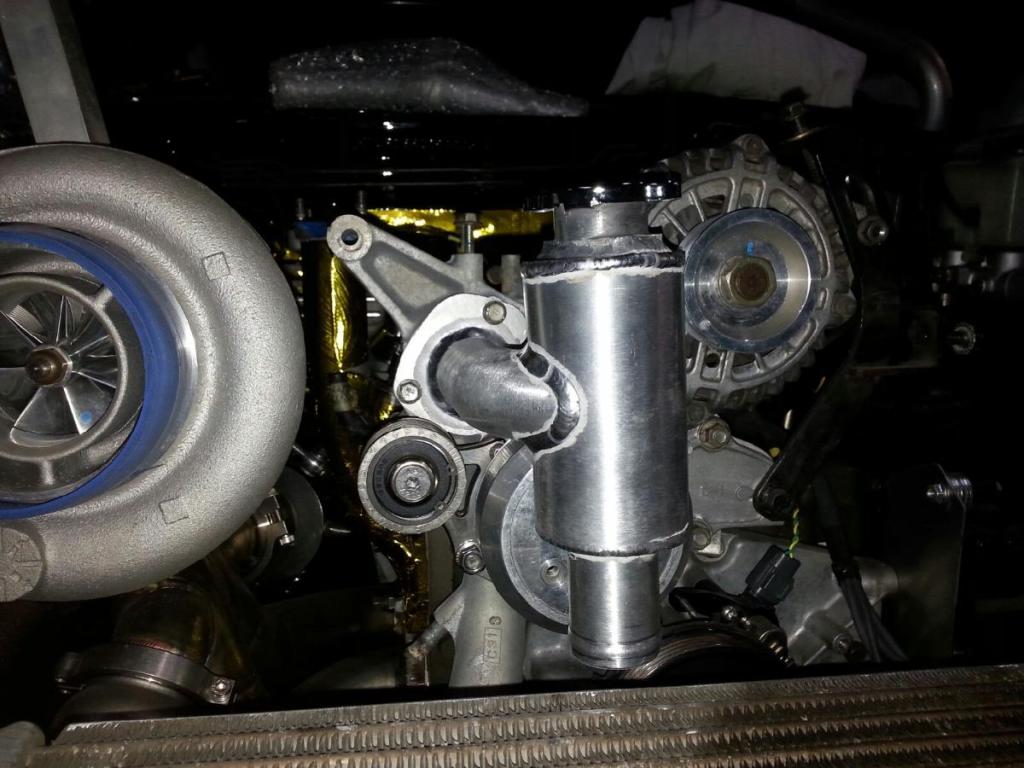
Pete made some threaded aluminum mounts.
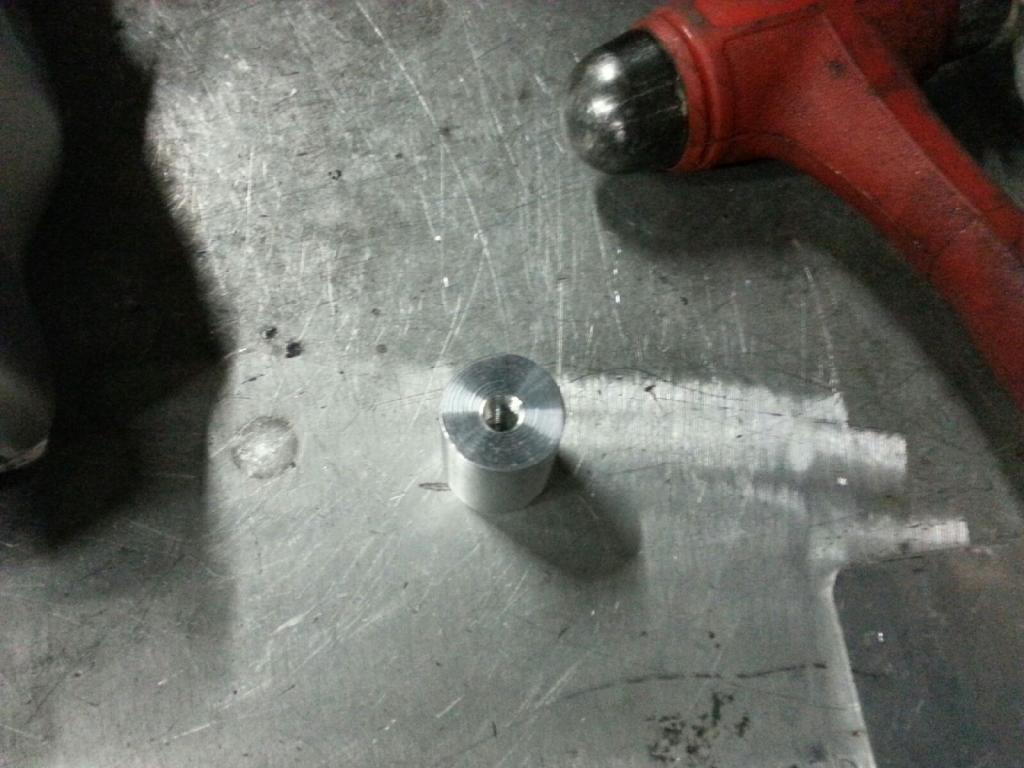
The finished piece mounted. You can see the plate we had to make to cover the area that the high pressure neck used to occupy.
Next task was to make the rest of the AL cooling sys plumbing.


The finished piece mounted. You can see the plate we had to make to cover the area that the high pressure neck used to occupy.

Next task was to make the rest of the AL cooling sys plumbing.

Thread Starter
Joined: Mar 2003
Posts: 390
Likes: 13
From: Anaheim
Thanks Jacob and Avila.
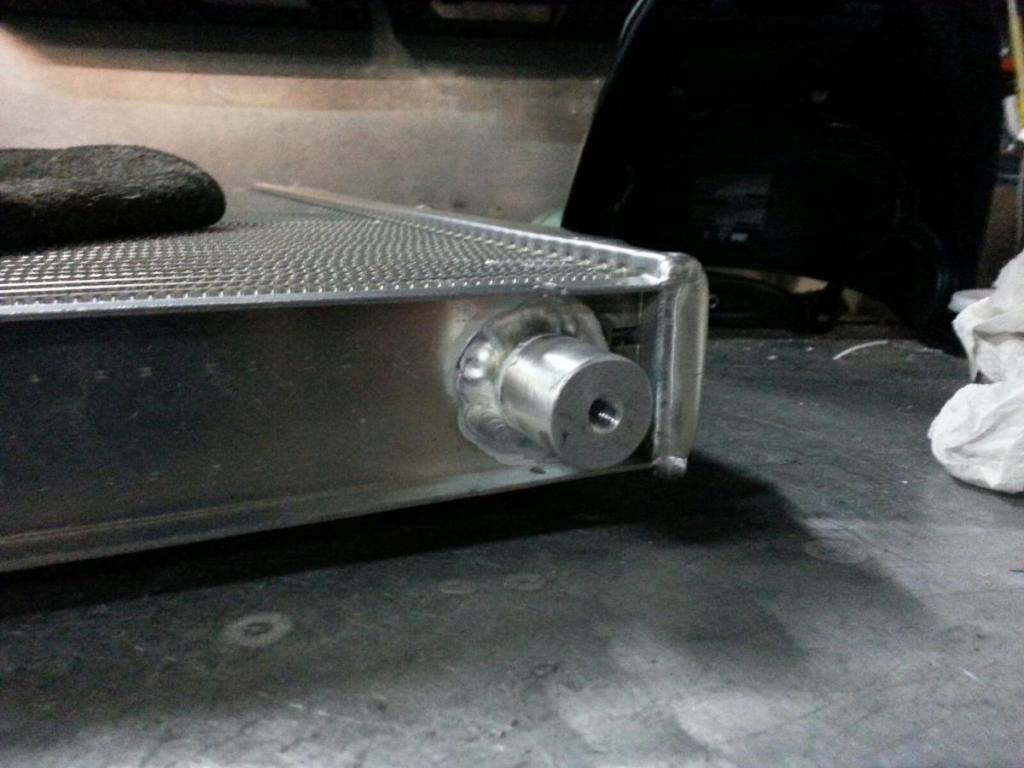
Here is a swirl pot that Pete made from scratch to replace the factory water neck. Only a shitty cell phone pic for now, Ill take some better shots later.
There is a -4 AL weld bung not shown here that bleeds air to the A'PEXi reservoir tank. The cooling system uses multiple -4 bleeder lines in various locations that all connect to the reservoir tank, which is located at the highest point in the system. With so many people having cooling issues on the track we want to make sure we do everything we can to combat the heat. Shrouding the radiator will be critical. The goal is to be able to run full 30-45min sessions only having to pit for gas.
Here is a swirl pot that Pete made from scratch to replace the factory water neck. Only a shitty cell phone pic for now, Ill take some better shots later.

There is a -4 AL weld bung not shown here that bleeds air to the A'PEXi reservoir tank. The cooling system uses multiple -4 bleeder lines in various locations that all connect to the reservoir tank, which is located at the highest point in the system. With so many people having cooling issues on the track we want to make sure we do everything we can to combat the heat. Shrouding the radiator will be critical. The goal is to be able to run full 30-45min sessions only having to pit for gas.