
GrandMighty.com's Project R2

Thread Starter

Joined: Jun 2008
Posts: 1,065
Likes: 1
From: B̷͈͇̠̗͔̼̝̓̎͛͂A̧̡̠̩̭̹̼̭͔̎̃̈́̍͂ͬͬ̚Y̯̜ͨ̒̾̽͊͘ ͈͙̰
Since the last update, the car has just SAT in the garage in anticipation for this one last project I have up my sleeves. Nearly everything on this car has been touched, so I'm finally nearing the finish line.
I wasn't happy with the stock gauges and wanted more and accurate readings, so I decided to approach this in a dramatic fashion.
I enlisted the help of Toby at Broadfield Customs to make this idea a reality. He has a unique craft and is just the man for the job. I actually started following his blog years ago because I was drawn to the cleanliness of his personal 240SX's build, and also the custom interior stuff was interesting to see. I knew that one day I would have a need for such work.
I've asked him to send me detailed progress pictures, so you can all follow and see the details.
During the planning phases, I purchased a set of spare interior trim pieces and sent them to Toby.
Unmolested*trim pieces:


80-Grit Prep:

Prepping for Norton SpeedGrip:


ABS filler plates and SpeedGrip applied:


36-Grit rough down:

80-Grit knock down:


I wasn't happy with the stock gauges and wanted more and accurate readings, so I decided to approach this in a dramatic fashion.
I enlisted the help of Toby at Broadfield Customs to make this idea a reality. He has a unique craft and is just the man for the job. I actually started following his blog years ago because I was drawn to the cleanliness of his personal 240SX's build, and also the custom interior stuff was interesting to see. I knew that one day I would have a need for such work.
I've asked him to send me detailed progress pictures, so you can all follow and see the details.
During the planning phases, I purchased a set of spare interior trim pieces and sent them to Toby.
Unmolested*trim pieces:
80-Grit Prep:
Prepping for Norton SpeedGrip:
ABS filler plates and SpeedGrip applied:
36-Grit rough down:
80-Grit knock down:
Thread Starter
Joined: Jun 2008
Posts: 1,065
Likes: 1
From: B̷͈͇̠̗͔̼̝̓̎͛͂A̧̡̠̩̭̹̼̭͔̎̃̈́̍͂ͬͬ̚Y̯̜ͨ̒̾̽͊͘ ͈͙̰
Evercoat Rage skim coat:


Evercoat Fiber Tech (kevlar reinforced filler) buildup:

120-Grit knockdown:


36-Grit knockdown:

80-Grit:

I wanted to take this opportunity to fill in and delete superfluous items. The majority of the gauge fascia has been filled, including the cruise control hole at the upper right hand corner. Since my car is an R2 model, it never came with cruise control from the factory. Instead, Mazda just used a blank, plastic button there. On the stereo surround panel, I had the A/C, Air Recirculation, and Gauge Dimmer switches removed. On the shifter console, all of the buttons and lights were removed.
Evercoat Fiber Tech (kevlar reinforced filler) buildup:
120-Grit knockdown:
36-Grit knockdown:
80-Grit:
I wanted to take this opportunity to fill in and delete superfluous items. The majority of the gauge fascia has been filled, including the cruise control hole at the upper right hand corner. Since my car is an R2 model, it never came with cruise control from the factory. Instead, Mazda just used a blank, plastic button there. On the stereo surround panel, I had the A/C, Air Recirculation, and Gauge Dimmer switches removed. On the shifter console, all of the buttons and lights were removed.


Exciting.
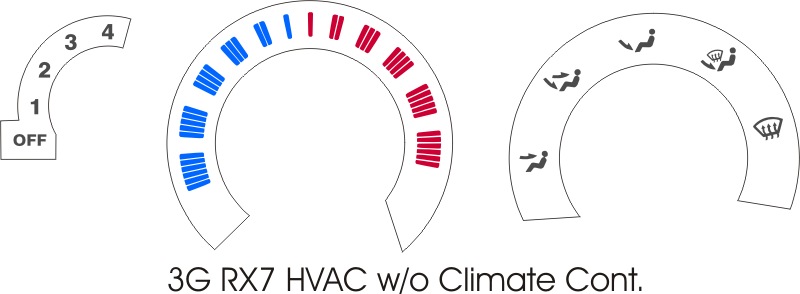
FYI - if you wanted to replace those HVAC faces, Black Cat Customs sells them:
Black Cat Custom Automotive - Mazda RX7 Gauge Faces
FYI - if you wanted to replace those HVAC faces, Black Cat Customs sells them:
Black Cat Custom Automotive - Mazda RX7 Gauge Faces
Thread Starter
Joined: Jun 2008
Posts: 1,065
Likes: 1
From: B̷͈͇̠̗͔̼̝̓̎͛͂A̧̡̠̩̭̹̼̭͔̎̃̈́̍͂ͬͬ̚Y̯̜ͨ̒̾̽͊͘ ͈͙̰
Thanks, how do those compare to the Mazda OEM prints?
The ones that are on the trim panels right now are just for mock up purposes. I have good condition ones currently installed on my car, which I plan to swap over.
The ones that are on the trim panels right now are just for mock up purposes. I have good condition ones currently installed on my car, which I plan to swap over.
I haven't installed them yet... but plan to along with LEDs in the sockets.
Thread Starter
Joined: Jun 2008
Posts: 1,065
Likes: 1
From: B̷͈͇̠̗͔̼̝̓̎͛͂A̧̡̠̩̭̹̼̭͔̎̃̈́̍͂ͬͬ̚Y̯̜ͨ̒̾̽͊͘ ͈͙̰
More finishing work continues on the trim pieces.
Ultra-thin coat of pinhole filler:


Blocked down with 180-Grit:


A texture coating and then blocked down again for referencing:

One more time to get it perfectly straight:

Final texture coat, waiting on the color topcoat now:


Ultra-thin coat of pinhole filler:
Blocked down with 180-Grit:
A texture coating and then blocked down again for referencing:
One more time to get it perfectly straight:
Final texture coat, waiting on the color topcoat now:

Thread Starter
Joined: Jun 2008
Posts: 1,065
Likes: 1
From: B̷͈͇̠̗͔̼̝̓̎͛͂A̧̡̠̩̭̹̼̭͔̎̃̈́̍͂ͬͬ̚Y̯̜ͨ̒̾̽͊͘ ͈͙̰
According to Toby, he used to use a product called SEM Texture Coat. Now he uses something that is better and much more consistent - SEM Satin Black Chip Guard.
Thread Starter
Joined: Jun 2008
Posts: 1,065
Likes: 1
From: B̷͈͇̠̗͔̼̝̓̎͛͂A̧̡̠̩̭̹̼̭͔̎̃̈́̍͂ͬͬ̚Y̯̜ͨ̒̾̽͊͘ ͈͙̰
With the stereo surround and shifter console pieces filled in and prepped, attention was turned back to the gauge fascia. This is where the money making happens.
Picking up from before, more sanding and smoothing... and scribing:


Cutout made:


More filler and smoothing:


Wrinkle finish applied:

Painted grey with the new AiM MXG dash mocked up:

I will save the elaboration of the dash itself for a later date. In the meantime, I'm focusing these posts around Toby's custom work with the trim pieces. The goal was to apply a wrinkle finish and then paint it a charcoal grey, similar to the color found in the Spirit-R interiors.
Toby painted the other pieces as well and set them up in a white photo booth. The picture below should portray the shade of grey with accurate lighting and color balance. I am still debating if this grey is a touch on the light side, so I've asked spray out 2 samples in slightly darker shades.

To be continued!
Picking up from before, more sanding and smoothing... and scribing:
Cutout made:
More filler and smoothing:
Wrinkle finish applied:
Painted grey with the new AiM MXG dash mocked up:
I will save the elaboration of the dash itself for a later date. In the meantime, I'm focusing these posts around Toby's custom work with the trim pieces. The goal was to apply a wrinkle finish and then paint it a charcoal grey, similar to the color found in the Spirit-R interiors.
Toby painted the other pieces as well and set them up in a white photo booth. The picture below should portray the shade of grey with accurate lighting and color balance. I am still debating if this grey is a touch on the light side, so I've asked spray out 2 samples in slightly darker shades.
To be continued!
Last edited by Farkel; Aug 27, 2015 at 12:40 AM.
Thread Starter
Joined: Jun 2008
Posts: 1,065
Likes: 1
From: B̷͈͇̠̗͔̼̝̓̎͛͂A̧̡̠̩̭̹̼̭͔̎̃̈́̍͂ͬͬ̚Y̯̜ͨ̒̾̽͊͘ ͈͙̰
Here's a dump of pics from what I've been working on while waiting for the interior stuff to finish. The real party will start when Broadfield is done and I can start installing the new dash.


Thread Starter
Joined: Jun 2008
Posts: 1,065
Likes: 1
From: B̷͈͇̠̗͔̼̝̓̎͛͂A̧̡̠̩̭̹̼̭͔̎̃̈́̍͂ͬͬ̚Y̯̜ͨ̒̾̽͊͘ ͈͙̰
We picked a new shade of grey that would be slightly darker. Toby repainted all of the interior pieces and completed flush mounting the AiM MXG into the gauge fascia.
Here are new pictures with the new color.


The AiM MXG had menu buttons located on the side of the dash, which would have been inaccessible given the flush mounting to the fascia. Luckily, AiM released a button relocation kit specifically for this purpose and could be plugged into generic momentary buttons. I purchased these subtle, metal momentary buttons and asked Toby to install them adjacent to the menu indicators.


I can't wait to get my hands on everything and start the install... The trim pieces on the driver side door panel is still pending paint matching.
Here are new pictures with the new color.
The AiM MXG had menu buttons located on the side of the dash, which would have been inaccessible given the flush mounting to the fascia. Luckily, AiM released a button relocation kit specifically for this purpose and could be plugged into generic momentary buttons. I purchased these subtle, metal momentary buttons and asked Toby to install them adjacent to the menu indicators.
I can't wait to get my hands on everything and start the install... The trim pieces on the driver side door panel is still pending paint matching.

 ?
?
Thread Starter
Joined: Jun 2008
Posts: 1,065
Likes: 1
From: B̷͈͇̠̗͔̼̝̓̎͛͂A̧̡̠̩̭̹̼̭͔̎̃̈́̍͂ͬͬ̚Y̯̜ͨ̒̾̽͊͘ ͈͙̰
The V8 is awesome and pulls like no tomorrow, but I've only been able to drive it a handful of times post-swap. And those drives were mostly back and forth to various shops. So the car has basically sat for the past half year. How sad is that?
I wanted to get this AiM MXG installed with all the sensors working before I could really enjoy the car.
The turbo rotary certainly has its intriguing qualities, but I don't miss it in this car. It would be nice to have another FD that's more stock, and keep it rotary... especially with all the latest developments on those EFR turbos and investment cast manifolds and such.
If only N/A 3-rotors weren't so cost prohibitive and had more support and backing...
Thread Starter
Joined: Jun 2008
Posts: 1,065
Likes: 1
From: B̷͈͇̠̗͔̼̝̓̎͛͂A̧̡̠̩̭̹̼̭͔̎̃̈́̍͂ͬͬ̚Y̯̜ͨ̒̾̽͊͘ ͈͙̰
I've been pushing hard to get everything installed and the car truly roadworthy. I will save the in depth write up as that can all be found on my website: [b]Grand Mighty
Check it out there!!
First up, I had to document the original cluster's mileage before pulling everything since the AiM MXG will restart its odo at 0.

Starting the install


The differences between the 93 and 94 temp dial:

All the AiM components:


RaceStudio software:


Check it out there!!
First up, I had to document the original cluster's mileage before pulling everything since the AiM MXG will restart its odo at 0.
Starting the install
The differences between the 93 and 94 temp dial:
All the AiM components:
RaceStudio software:


Thread Starter
Joined: Jun 2008
Posts: 1,065
Likes: 1
From: B̷͈͇̠̗͔̼̝̓̎͛͂A̧̡̠̩̭̹̼̭͔̎̃̈́̍͂ͬͬ̚Y̯̜ͨ̒̾̽͊͘ ͈͙̰
I did actually buy an entire new HVAC panel from Mazda to get the dial graphics. The pedestal holding the fan position indicator graphic is DIFFERENT from the '93 to '94 panels. I ended up just transferring over the graphics from my original dials, which were in good shape.
INSTALLED!!! Let me know if you guys are interested in video clips of everything working. Or check out my Instagram @grandmighty as I have a couple clips up there.
Now, water temperature, oil temperature, and oil pressure are all displayed directly in front of me, real time with a 10-20hz (could go way higher, but that would be overkill) sample rate. The RPM signal is pulled right from the ECU. The Speedometer is powered by the GPS system. There is even the bonus of having a gear indicator, which is currently configured off a mathematical preset based on transmission and final drive ratios. I can finally and officially drive the car with the peace of mind of knowing what�s going on with the engine.
There is a RGB shift light array at the top with programmable LED alarm lights at the side. I patched in the 1 and 5 alarm lights to the left and right turn signals, respectively, and they act as indicators now. The remainder of the alarm lights are set to various behaviors: low fuel level, low battery voltage, high water & oil temperatures, and low oil pressure.


I think due to the lighting or my cell phone the grey color on the panels look a lot lighter/brighter than their actual shade in these pictures.
INSTALLED!!! Let me know if you guys are interested in video clips of everything working. Or check out my Instagram @grandmighty as I have a couple clips up there.
Now, water temperature, oil temperature, and oil pressure are all displayed directly in front of me, real time with a 10-20hz (could go way higher, but that would be overkill) sample rate. The RPM signal is pulled right from the ECU. The Speedometer is powered by the GPS system. There is even the bonus of having a gear indicator, which is currently configured off a mathematical preset based on transmission and final drive ratios. I can finally and officially drive the car with the peace of mind of knowing what�s going on with the engine.
There is a RGB shift light array at the top with programmable LED alarm lights at the side. I patched in the 1 and 5 alarm lights to the left and right turn signals, respectively, and they act as indicators now. The remainder of the alarm lights are set to various behaviors: low fuel level, low battery voltage, high water & oil temperatures, and low oil pressure.
I think due to the lighting or my cell phone the grey color on the panels look a lot lighter/brighter than their actual shade in these pictures.

Thread Starter
Joined: Jun 2008
Posts: 1,065
Likes: 1
From: B̷͈͇̠̗͔̼̝̓̎͛͂A̧̡̠̩̭̹̼̭͔̎̃̈́̍͂ͬͬ̚Y̯̜ͨ̒̾̽͊͘ ͈͙̰

As they say, the bigger the more... leverage.
I want to definitely get some better pictures taken of everything with more accurate lighting on the trim's color, maybe once I get the driver side door panel back and installed.