
Fdr1ft taxi

Thread Starter
Full Member
Joined: Dec 2011
Posts: 74
Likes: 0
From: England
Fdr1ft taxi
Apologies for those who have seen this already on FDUK / DW but thought i'd bang all my thread updates on here too so to get some more exposure
With the new year quickly aproaching I thought I'd start a new build thread for 2012 to cover the progress of the car and the progress of my Drifting.
A month ago I was selected on a Santa Pod audition day to joing the Drift Taxi team. Meaning that from March 2012 onwards I will be atending all of the large car shows and taking part in teh Drift Demo's for general public.
Good news for getting loads of seat time and getting to show off in front of 1000's of people :thumbsup:
Over the next couple of month's i'll be making various upgrades to the car. Some to add reliability, some hadling and some just to resolve anoying problem's that i've been putting up with for too long.
So please keep an eye on the build to see what's happening :thumbsup:
Thread Starter
Full Member
Joined: Dec 2011
Posts: 74
Likes: 0
From: England
PRE AUDITION WORK
Beffore last months audition I made the decision to get the car sorted out becasue It's apearance was upsetting me and to stand a better chance of selection.
So I started with this:

USED alot of this:

Added a little of this:

And ended up with this:


Beffore last months audition I made the decision to get the car sorted out becasue It's apearance was upsetting me and to stand a better chance of selection.
So I started with this:
USED alot of this:
Added a little of this:
And ended up with this:
Thread Starter
Full Member
Joined: Dec 2011
Posts: 74
Likes: 0
From: England
I've had the help of some good people aproaching the audition day and without that help I'd have been working very late nights and tearing my hair out to be ready on time.
Thanks to DM-Motorsport
who sent me out a replacement shift collar for my mashed one. Found this very late on and thanks to quick shipping got it fitted and was up and running in time :thumbsup:

Also thanks to Pete over at Purple Panda Graphics http://purplepandagraphics.co.uk/ who managed to sort my out some graphics quick sharp to give the car a little branding. Pete is a top bloke and I'll be in touch with him again about some larger designs hopefully in the not to distant future.

Also I have to give thanks to my close friend and Next door neighbour Charlie, who put in the time to get the car repaired, prepped and painted. TOP GUY! Just need to nag him to give me a hand stripping and painting my wheels now!

Thanks to DM-Motorsport
who sent me out a replacement shift collar for my mashed one. Found this very late on and thanks to quick shipping got it fitted and was up and running in time :thumbsup:
Also thanks to Pete over at Purple Panda Graphics http://purplepandagraphics.co.uk/ who managed to sort my out some graphics quick sharp to give the car a little branding. Pete is a top bloke and I'll be in touch with him again about some larger designs hopefully in the not to distant future.
Also I have to give thanks to my close friend and Next door neighbour Charlie, who put in the time to get the car repaired, prepped and painted. TOP GUY! Just need to nag him to give me a hand stripping and painting my wheels now!
Thread Starter
Full Member
Joined: Dec 2011
Posts: 74
Likes: 0
From: England
Finaly I'll mention a couple of mechanical issues which I had to address prior to auditions.
After STUPIDLY flooding the engine i had to take out the pugs to try out the rotor housings. And found that both pairs of Leading and Trailing pugs were VERY carbonated. So swapped them out for some BUR9EQP's that i had sitting on the shelf. Should help keep the 13b running sweet for a bit longer

The other thing I addressed was the power steering cooler (Mitsubiti Pagero oil cooler). I'd had varuious problems the system boiling over and getting air locks. So with a fabricated bracket I relocated the cooler to it's new location between the IC & RAD. No pic's I'm afraid but all good :thumbsup:
Here's the pic's from the Audition day:


After STUPIDLY flooding the engine i had to take out the pugs to try out the rotor housings. And found that both pairs of Leading and Trailing pugs were VERY carbonated. So swapped them out for some BUR9EQP's that i had sitting on the shelf. Should help keep the 13b running sweet for a bit longer
The other thing I addressed was the power steering cooler (Mitsubiti Pagero oil cooler). I'd had varuious problems the system boiling over and getting air locks. So with a fabricated bracket I relocated the cooler to it's new location between the IC & RAD. No pic's I'm afraid but all good :thumbsup:
Here's the pic's from the Audition day:
Thread Starter
Full Member
Joined: Dec 2011
Posts: 74
Likes: 0
From: England
TAXI on the way 
Got some time in the garage last night so had a tidy up and got ready with a couple of bits.
Got the car jacked up onto axle stands and stripped the Decat and the T shape Diff brace.
Next step is to remove the PPF and then the work can begin.
Hopefully this weekend I'll get the time to:
Fabricate Diff Brace
Stitch Weld the PPF
-----------
Not had a chance to do anything more on the FD since teh above update.
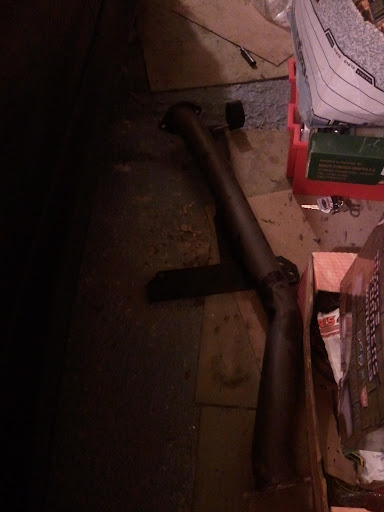
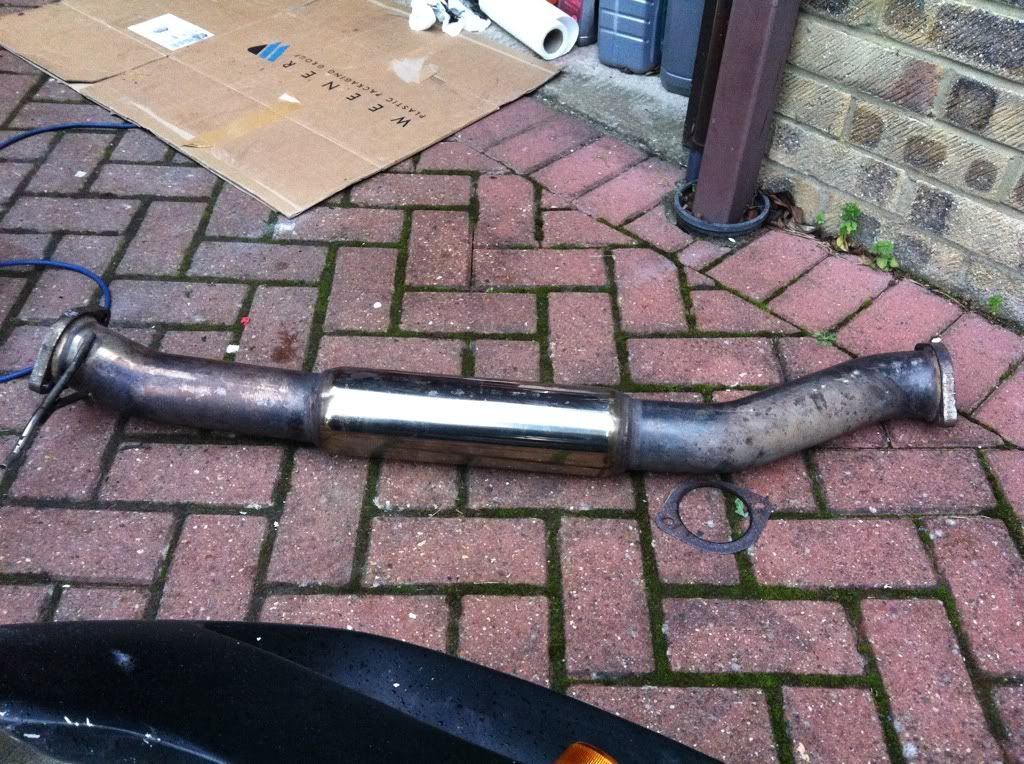
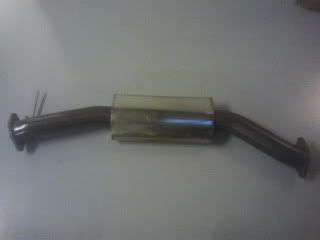
Although have now got 2 new midpipes to chose from
And recieved a spare PPF in teh post from Dyno Torque.
So got plenty of welding and assembling to do soon :thumbsup:
And all beffore the 7th for the next practice day
Got some time in the garage last night so had a tidy up and got ready with a couple of bits.
Got the car jacked up onto axle stands and stripped the Decat and the T shape Diff brace.
Next step is to remove the PPF and then the work can begin.
Hopefully this weekend I'll get the time to:
Fabricate Diff Brace
Stitch Weld the PPF
-----------
Not had a chance to do anything more on the FD since teh above update.
Although have now got 2 new midpipes to chose from
And recieved a spare PPF in teh post from Dyno Torque.
So got plenty of welding and assembling to do soon
:thumbsup:And all beffore the 7th for the next practice day
Thread Starter
Full Member
Joined: Dec 2011
Posts: 74
Likes: 0
From: England
:thumbsup:Started the process of mocking up a demo Diff brace.
This will be used as a template to make a tidyer version at a later date! :thumbsup:
Spray paint to mark the template


Fraid no more pics at the moment as it's bolted under the car
This will be used as a template to make a tidyer version at a later date! :thumbsup:
Spray paint to mark the template
Fraid no more pics at the moment as it's bolted under the car
Thread Starter
Full Member
Joined: Dec 2011
Posts: 74
Likes: 0
From: England
Ok so i've completed version 1 of the diff brace. Not gunna lie it was a right faff to get the first "template" done. Not helped by the fact that i was doing it all with the car on axle stands.
Anyway, spot welded some rough rods in place with the bars bolted to the car to make this guide.

then just added aditional rods


added some triangles

painted primer (in the junk yard that is the garden)

Then finaly painted blue to end up with this bad boy

I could have done with cleaning up the welds but to be honest as this is my first draft and I will most likely be making more alterations / revisions i though **** IT!
Any way will be getting a proper test this weekend at pod where my 2way will be trying to tear it in half.
Anyway, spot welded some rough rods in place with the bars bolted to the car to make this guide.
then just added aditional rods
added some triangles
painted primer (in the junk yard that is the garden)
Then finaly painted blue to end up with this bad boy
I could have done with cleaning up the welds but to be honest as this is my first draft and I will most likely be making more alterations / revisions i though **** IT!
Any way will be getting a proper test this weekend at pod where my 2way will be trying to tear it in half.
Trending Topics


Thread Starter
Full Member
Joined: Dec 2011
Posts: 74
Likes: 0
From: England
OK a proper update is required to explain how my week went leading up to the Drift day on Saturday. If this doesn't show commitment i don't know what does!?!?!
I set out with the intention of simply fitting my newly fabricated diff brace, silenced midpipe and doing some minor cosmetic repair to one of the front wings.
This all went smoothly until on Thursday night i found a pool of transmition oil sitting right under the gearbox. As it was late I had to wait until morning to start the car and see where the leak was coming from. Morning came and I started the engine and soon found oil was pouring from a hole in the casing which looks to be a bolt which has decided to make its escape at some stage:

At which point i could have cried as i knew I had 24 hours to source a gearbox and replace it. But i also have a day job lol.. so that meant being at work till 6 FFS!!! My friend charlie came over from next door in his dressing gown to see what was up and I explained the issue and without hesitation he offered to spend the night doing what ever was needed to put the car back together.
Soo..
I posted on FDUK begging for a box and the offers flooded in. I managed to have two different people offer to actually drop the box off to me in the day, I then just picked the one with the lowest millage and it was on it's way to me. I popped home at work and this ended up in my garden:

Box from a FD with only (45,000 miles clocked)
I finished work, picked up some essentials Castrol Box oil from Halfords, rushed home, got the little the one fed and was then in the garage like this for the rest of the night.

Came accorss various issues during fitting, including finding that my PPF had actualy cracked and when fitting it actualy snapped at the diff side. This happened at 2 in the morning!!! THANK FDUK i had a spare which i bought with intention of modding. If i hadnt got this i would have been stiffed.
I finished up at 4:00 in the morning very tired and still not 100% whether the car would even move.
I set out with the intention of simply fitting my newly fabricated diff brace, silenced midpipe and doing some minor cosmetic repair to one of the front wings.
This all went smoothly until on Thursday night i found a pool of transmition oil sitting right under the gearbox. As it was late I had to wait until morning to start the car and see where the leak was coming from. Morning came and I started the engine and soon found oil was pouring from a hole in the casing which looks to be a bolt which has decided to make its escape at some stage:
At which point i could have cried as i knew I had 24 hours to source a gearbox and replace it. But i also have a day job lol.. so that meant being at work till 6 FFS!!! My friend charlie came over from next door in his dressing gown to see what was up and I explained the issue and without hesitation he offered to spend the night doing what ever was needed to put the car back together.
Soo..
I posted on FDUK begging for a box and the offers flooded in. I managed to have two different people offer to actually drop the box off to me in the day, I then just picked the one with the lowest millage and it was on it's way to me. I popped home at work and this ended up in my garden:
Box from a FD with only (45,000 miles clocked)
I finished work, picked up some essentials Castrol Box oil from Halfords, rushed home, got the little the one fed and was then in the garage like this for the rest of the night.
Came accorss various issues during fitting, including finding that my PPF had actualy cracked and when fitting it actualy snapped at the diff side. This happened at 2 in the morning!!! THANK FDUK i had a spare which i bought with intention of modding. If i hadnt got this i would have been stiffed.
I finished up at 4:00 in the morning very tired and still not 100% whether the car would even move.
Thread Starter
Full Member
Joined: Dec 2011
Posts: 74
Likes: 0
From: England
By the time i washed up and got into bed it was 4:30 and the first thing the other half says is, "Thomas will be up soon"... in other words I'll be up soon.
Sure enough I got a grand total of 2 hours of broken sleep.
Got him up and sorted and eventually got outside to start the car, get it dropped down off the axle stands, out of the garage, packed for pod and then off to the petrol station.
Went out for a test drive and was NOT happy. I could only engage 2nd 4th & Reverse..... I was bitching and moaning and cursing everyone's name. But decided that a day at pod with only 2nd gear would be better than no day at all....
Topped up with fule with charlie:

GOOD NEWS the gears freed up on the drive to pod and I had a fully working smooth changing gearbox for the first time... EVER. Event 5th's synchro was perfect... MENTAL lol
Then the Boost controller stopped working.. NIGHTMARE! Sorted this out quickly after the drivers briefing and then was skidding.
The rest of the day went smoothly, specially once the track dried out and the skidding got better and better throughout the day.


Would like to give thanks once again to Charlie for spending hours under the car with me late at night. PROPER LEGEND!
Sure enough I got a grand total of 2 hours of broken sleep.
Got him up and sorted and eventually got outside to start the car, get it dropped down off the axle stands, out of the garage, packed for pod and then off to the petrol station.
Went out for a test drive and was NOT happy. I could only engage 2nd 4th & Reverse..... I was bitching and moaning and cursing everyone's name. But decided that a day at pod with only 2nd gear would be better than no day at all....
Topped up with fule with charlie:
GOOD NEWS the gears freed up on the drive to pod and I had a fully working smooth changing gearbox for the first time... EVER. Event 5th's synchro was perfect... MENTAL lol
Then the Boost controller stopped working.. NIGHTMARE! Sorted this out quickly after the drivers briefing and then was skidding.
The rest of the day went smoothly, specially once the track dried out and the skidding got better and better throughout the day.
Would like to give thanks once again to Charlie for spending hours under the car with me late at night. PROPER LEGEND!
Thread Starter
Full Member
Joined: Dec 2011
Posts: 74
Likes: 0
From: England
Random update.
got some time in the garage tonight so had a crack at starting to refurb my Super Advan Gen II's.
As they are split rim's i though.. i know, i'll have a crack at splitting them to get at them properly and give them a decent sand down ready for prime and paint.
Soo...

Which resulted in a few off, but a massive PITA!!

Some came off with just a 10mm spanner, but the rest need an allan key in the very tight groove on the front face of the wheel.
Sooo... without the patience or correct toolset.. i just sanded down best i could and did a quick coat of primer.

Going to be painting BRIGHT YELLO
got some time in the garage tonight so had a crack at starting to refurb my Super Advan Gen II's.
As they are split rim's i though.. i know, i'll have a crack at splitting them to get at them properly and give them a decent sand down ready for prime and paint.
Soo...
Which resulted in a few off, but a massive PITA!!
Some came off with just a 10mm spanner, but the rest need an allan key in the very tight groove on the front face of the wheel.
Sooo... without the patience or correct toolset.. i just sanded down best i could and did a quick coat of primer.
Going to be painting BRIGHT YELLO

Thread Starter
Full Member
Joined: Dec 2011
Posts: 74
Likes: 0
From: England
Completely different update:
After speaking with a friend Pete i decided to follow his exaple and reinforce the mounting points used by the DIY diff brace. This involved cutting a hole through the floor of the car to where the offending crappy nuts were, cutting them out and then tack welding some decent one's in place.
So i drilled a few holes and with a pair of metal snips started a hole:

Once the hole was big enough i then used the existing nuts as a guide to drill larger 10mm holes:

Then using metal snips cut the nuts into 4 pieces which then pulled off easily:

I'm now here, m10 bolts and nuts in place securely, ready to tack weld the nuts into place:

Once the spot welding is done I'll tidy up the butchered floor. to ensure it is covered and rust proofed :-)
After speaking with a friend Pete i decided to follow his exaple and reinforce the mounting points used by the DIY diff brace. This involved cutting a hole through the floor of the car to where the offending crappy nuts were, cutting them out and then tack welding some decent one's in place.
So i drilled a few holes and with a pair of metal snips started a hole:
Once the hole was big enough i then used the existing nuts as a guide to drill larger 10mm holes:
Then using metal snips cut the nuts into 4 pieces which then pulled off easily:
I'm now here, m10 bolts and nuts in place securely, ready to tack weld the nuts into place:
Once the spot welding is done I'll tidy up the butchered floor. to ensure it is covered and rust proofed :-)

Thread Starter
Full Member
Joined: Dec 2011
Posts: 74
Likes: 0
From: England
Please ignore the mess, but here's the spot welded nuts in place of the **** one's which have been cut out.

I'll be painting the whole of the inside area with seam sealant.
And here is an idea of what i'm welding over the top to cover the holes:

I'm only going to be spot welding the corners and then using a sealant around the edges then finally paint the whole area with
I'll be painting the whole of the inside area with seam sealant.
And here is an idea of what i'm welding over the top to cover the holes:
I'm only going to be spot welding the corners and then using a sealant around the edges then finally paint the whole area with
Thread Starter
Full Member
Joined: Dec 2011
Posts: 74
Likes: 0
From: England
Havent updated for a while but here's a quick random update:
Le Fin - Replaced diff brace mounts.. Far from perfect, but done

Some pics from the fast show which was my first Taxi Event back in March?


Not sure about these... Should have gone fleuro?

Le Fin - Replaced diff brace mounts.. Far from perfect, but done
Some pics from the fast show which was my first Taxi Event back in March?
Not sure about these...
Should have gone fleuro?
Thread Starter
Full Member
Joined: Dec 2011
Posts: 74
Likes: 0
From: England
Has been a while as had not,alot going on car wise since my first taxi day.
But getting a list of bits to do now foklowing buying a few bits.
Spare ppf (to be seam welded for stiffness)
poly diff bushes (in the post, stiffen up back end)
Tein hr coilovers from chris stretton :-D & dm-motorsports
Bosch 044 pump (just won on eGay) :-D
Swirlpot (need to buy)
Yellow advans waiting to be wrapped in rubber
freddy (fake greddy) elbow needs silicone joiner
Thread Starter
Full Member
Joined: Dec 2011
Posts: 74
Likes: 0
From: England
Ok so a bit of a bigger update today.
I poped into the garage with the idea of doing a couple of little bits.
Started welding a spare PPF i have to give it a little more rigidity.


Then had another stap at applying stickers lol:

Which was all fine ... and then i decided to have a go at freddy (my fake greddy elbow).
Because freddy is shorted than the stock elbow it meant re-jigging the intercooler piping.
But once i started stripping bits off i couldnt stop and soon ended up with a pile of pipework and i'd taken off the front mount intercooler.

Sooo.. while the cooler was off and resting in the bay i realised... WHY THE F*CK can't i use this cooler for a V-Mount setup?
So next thing you know I'm draining the coolant and ripping out the RAD to do a test fit.
After slamming the bonnet down and and hitting the pipes a few times i've now realised that fitting the cooler like this: seems to be a good fit:

NOTE THE FREDDY IS NOW FITTED LOL
Just needs to either have really gay u bend pipes, or get somone to cut and weld the pipes facing the right way.... SOo... I'm going to have a crack hat test fitting the rad in a Vmount config, see if the cooler has enough room still and the go from there.
Here's an idea of pipe lengths... SO MUCH SHORTER THAN front MOUNT!!!

Shouldnt have started this!!!
I poped into the garage with the idea of doing a couple of little bits.
Started welding a spare PPF i have to give it a little more rigidity.
Then had another stap at applying stickers lol:
Which was all fine ... and then i decided to have a go at freddy (my fake greddy elbow).
Because freddy is shorted than the stock elbow it meant re-jigging the intercooler piping.
But once i started stripping bits off i couldnt stop and soon ended up with a pile of pipework and i'd taken off the front mount intercooler.
Sooo.. while the cooler was off and resting in the bay i realised... WHY THE F*CK can't i use this cooler for a V-Mount setup?
So next thing you know I'm draining the coolant and ripping out the RAD to do a test fit.
After slamming the bonnet down and and hitting the pipes a few times i've now realised that fitting the cooler like this: seems to be a good fit:
NOTE THE FREDDY IS NOW FITTED LOL
Just needs to either have really gay u bend pipes, or get somone to cut and weld the pipes facing the right way.... SOo... I'm going to have a crack hat test fitting the rad in a Vmount config, see if the cooler has enough room still and the go from there.
Here's an idea of pipe lengths... SO MUCH SHORTER THAN front MOUNT!!!
Shouldnt have started this!!!
Last edited by rx7ali; Apr 29, 2012 at 05:33 PM.


