
Fastfalcon94's LS2 build thread


I bought my first Rx7 two weeks ago. It's a 94 red car with a sunroof. I had it shipped from Virginia to Vermont. I think I have only seen 2-3 other FD's in my life before this one. This was the first one I ever sat in.
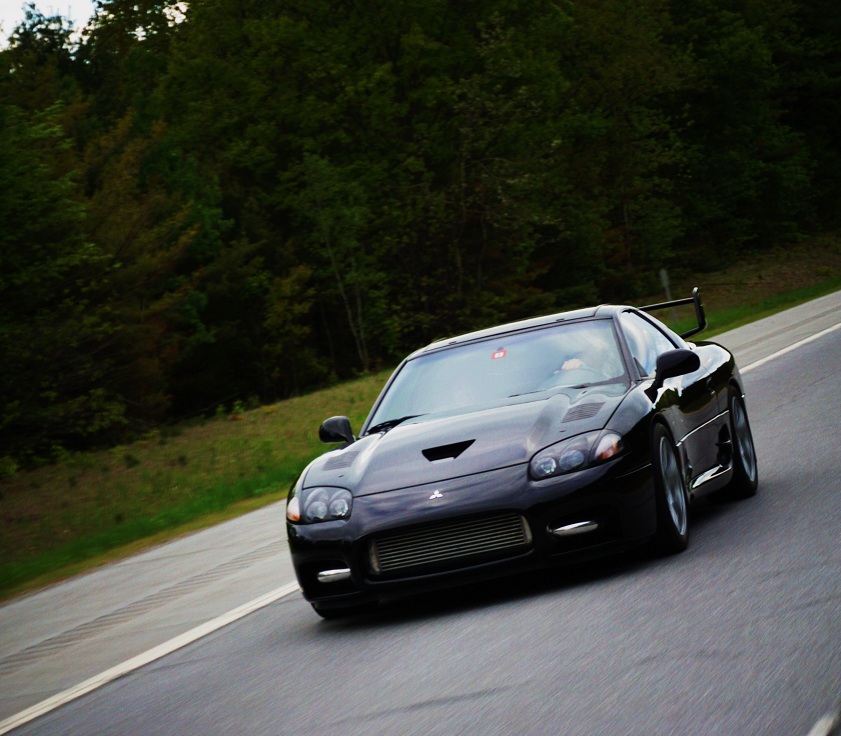
I've been doing a ton of research every night and planning. I decided to go with an LS swap. My current cars that I've built are a 94 3000gt vr4 and an sti swapped 2.5rs. Those projects are finished though and I needed something else to keep me busy, hence the RX7 I'm looking to make a comfy street car that will make an occasional trip to the dragstrip or autocross.
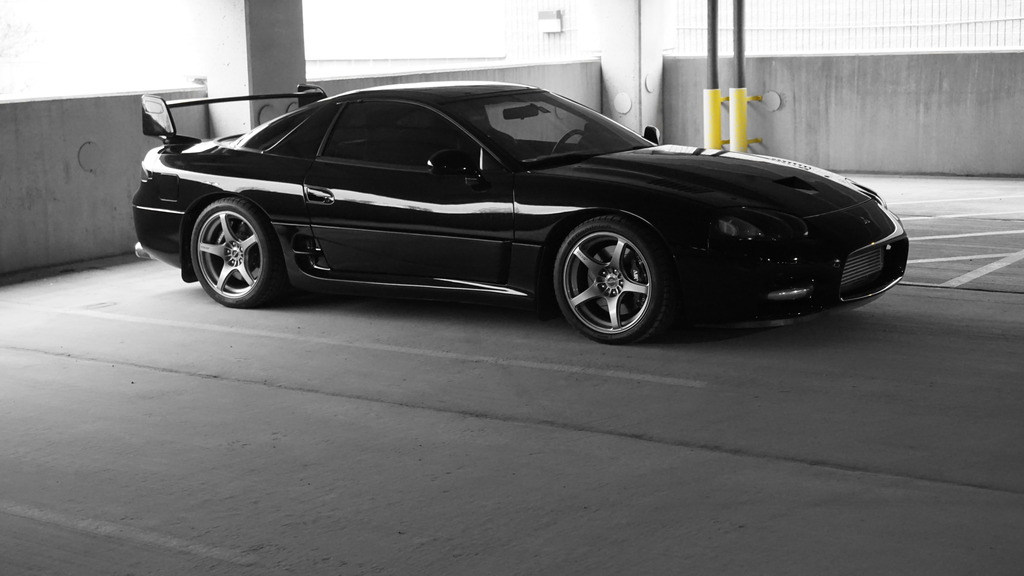
Pics of vr4. I bought it at 38k miles completely stock in 2008 and drove it home from San Diego.
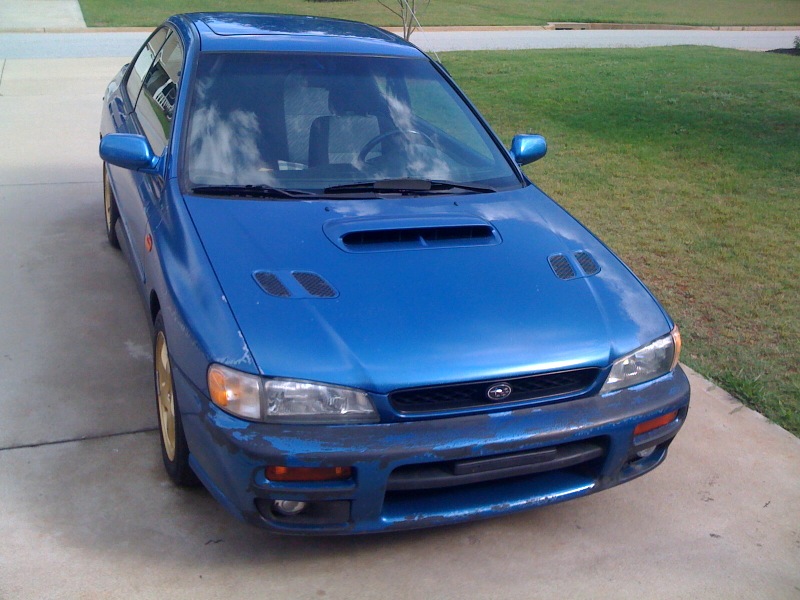
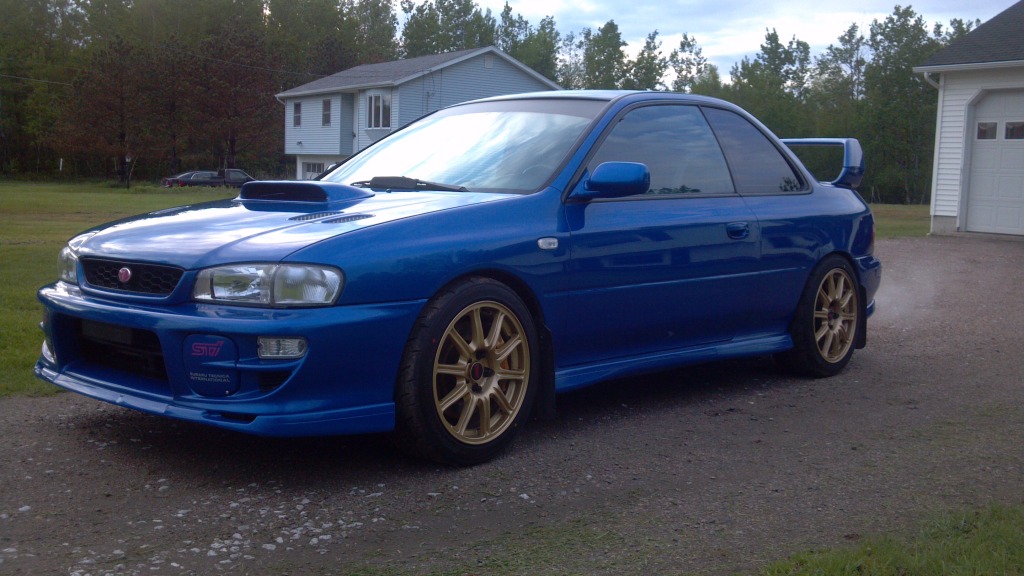
Suby. Purchased completely stock and beat up w/ 150k miles in 2011 and drove it home from South Carolina.
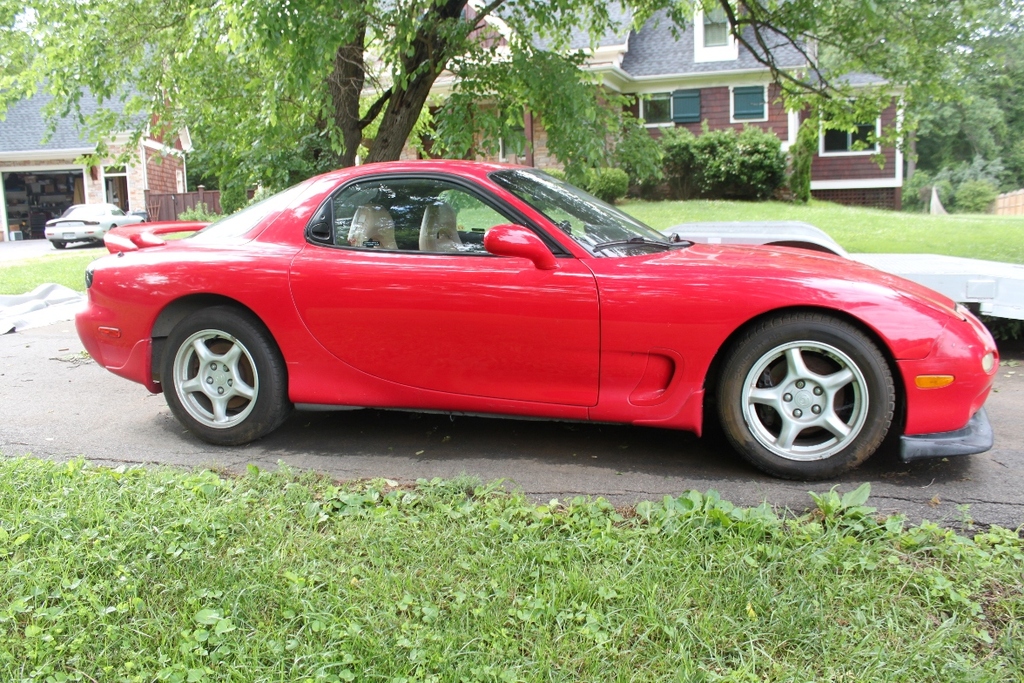
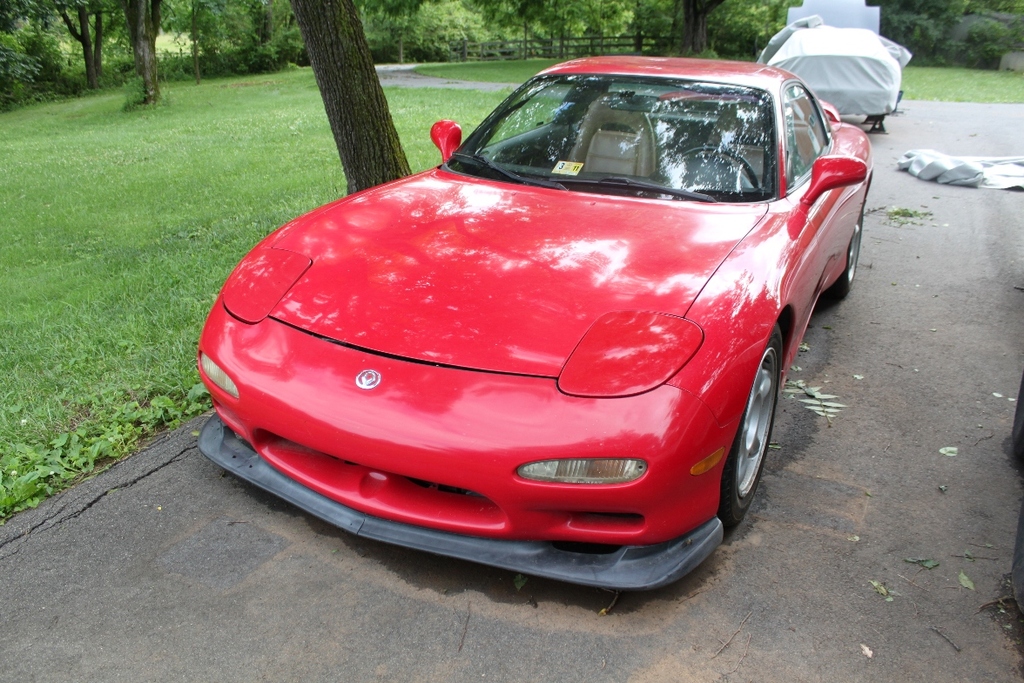
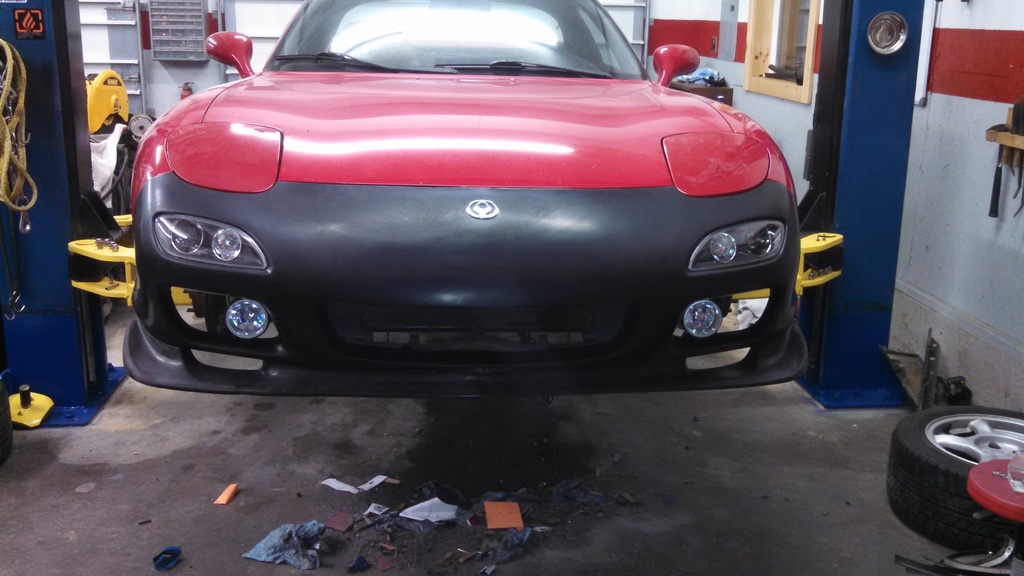
And now for the Rx7
Pics from the sale add (and they do it justice)
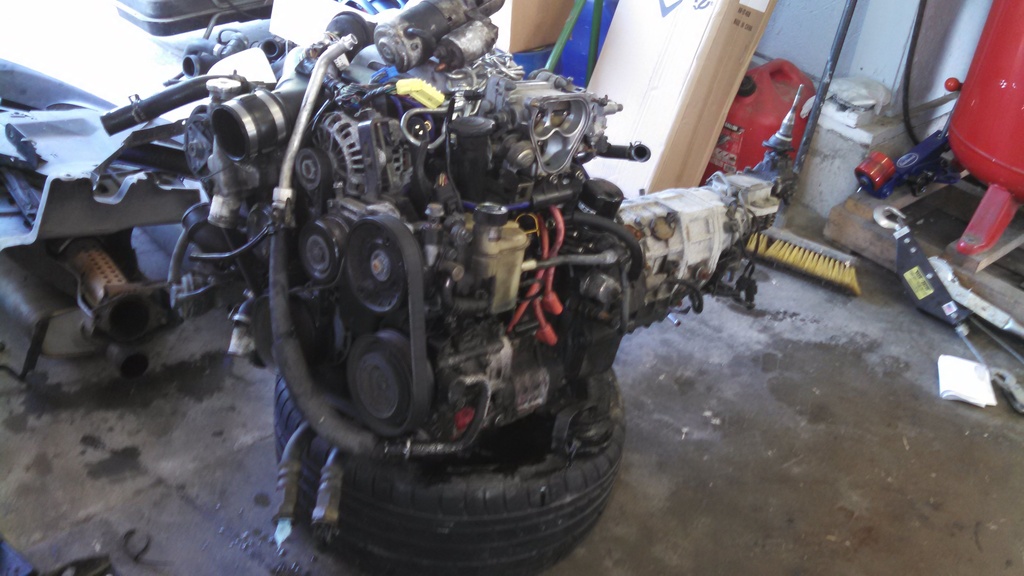
The first day I pulled the motor and sold it locally. It did run but had bad coolant seals. Somone bought it locally to build and put in their miata.
I've been doing a ton of research every night and planning. I decided to go with an LS swap. My current cars that I've built are a 94 3000gt vr4 and an sti swapped 2.5rs. Those projects are finished though and I needed something else to keep me busy, hence the RX7
I'm looking to make a comfy street car that will make an occasional trip to the dragstrip or autocross.Pics of vr4. I bought it at 38k miles completely stock in 2008 and drove it home from San Diego.


Suby. Purchased completely stock and beat up w/ 150k miles in 2011 and drove it home from South Carolina.


And now for the Rx7
Pics from the sale add (and they do it justice)


The first day I pulled the motor and sold it locally. It did run but had bad coolant seals. Somone bought it locally to build and put in their miata.

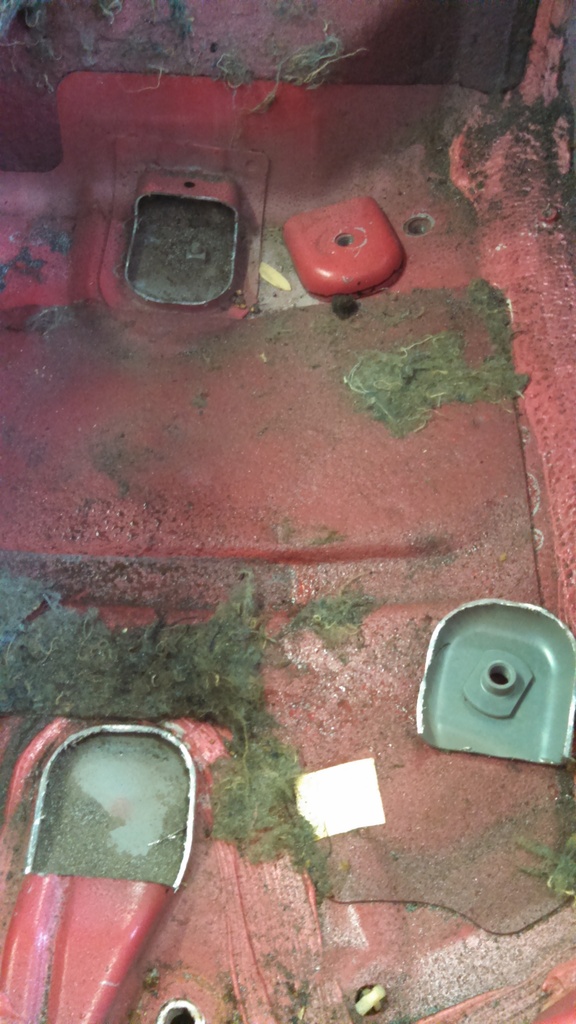
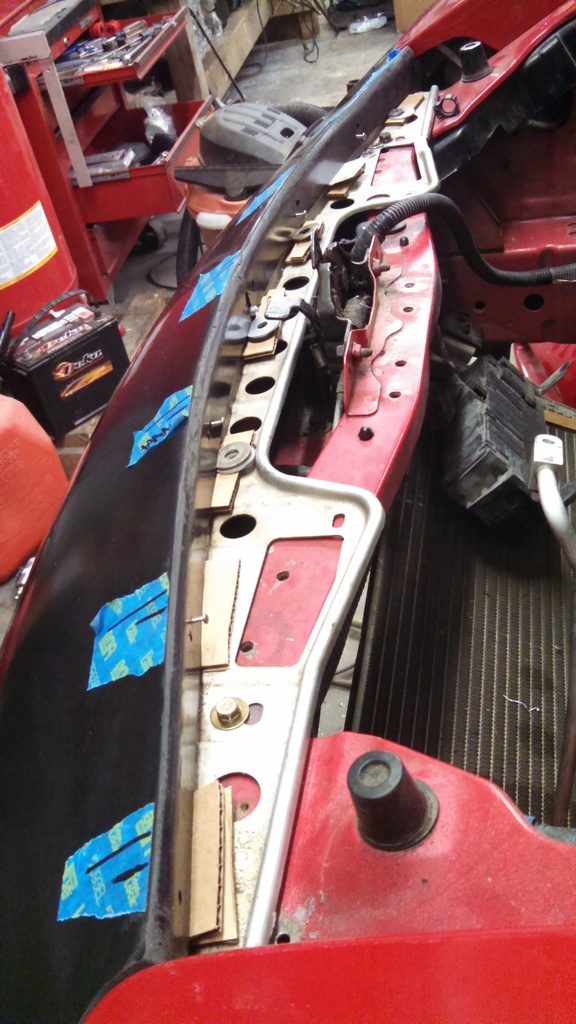
The car once had a cd changer in it, and a turbo timer, some PIAA foglights and some aftermarket boost gauge. I removed all of the wiring.
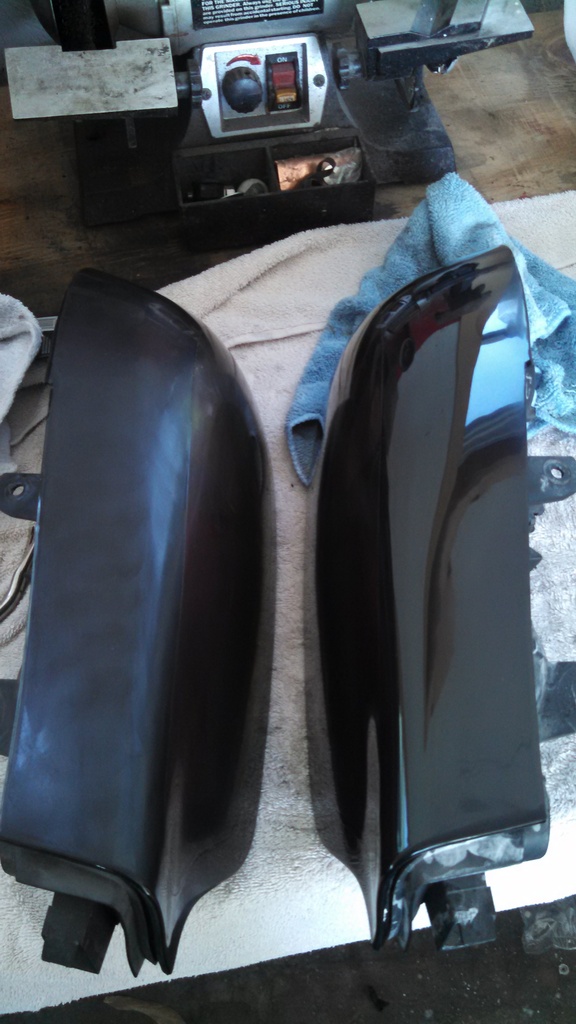
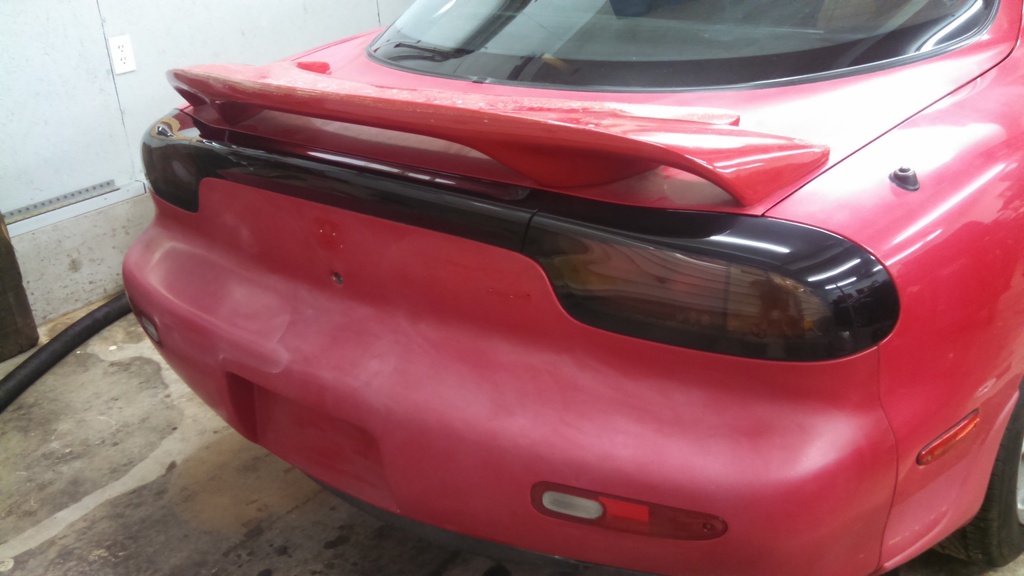
The tail lights were all scuffed up. I wet sanded them with 2000 grit, then some 3000 grit foam thing from advanced auto. I buffed them after and they look perfect now. One on the left is after wet sanding, one on the right is after buffing. I really like the stock 94 tails. I know a lot of people upgrade to the 99 tails but I think the older ones look better. I'll be keeping the stock wing too.
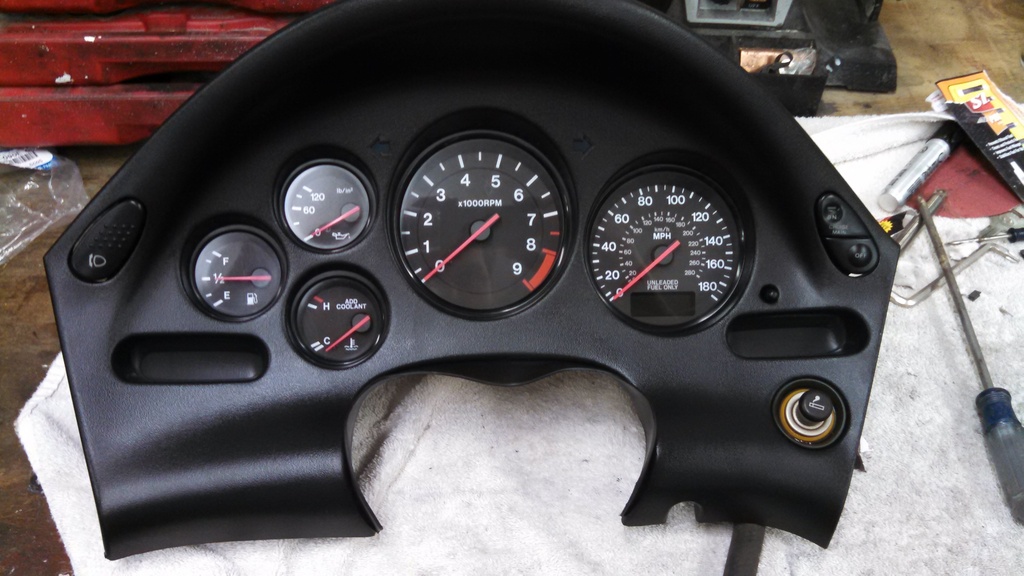
The gauge cluster was kind of bugging me with the chrome rings. I read taking metal polish could clean them up. I didn't have any but I found that scatchX and a magic eraser also work well.
Part way through:
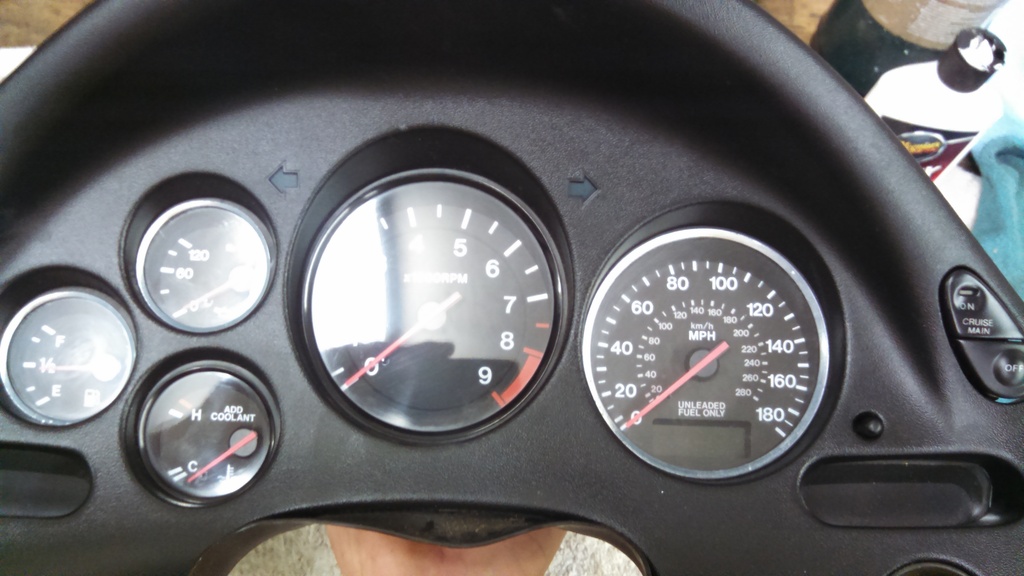
Much better now
That's about all I have done so far. I have a bunch of parts on their way. But it will be a little while saving before I can buy some of the other stuff I need. I've been listing some extra 3000gt parts I have on ebay to help gather the funds sooner.
Ordered:
-------------------
polyurethane 99 spec bumper
99 oem lip
jdm replica turn signals
shine 99 style sideskirts
new oem headlight lids
ls2 motor/wiring/ecu/pedal and t56 trans
Future plans
----------------
- decide if I'll be using cobra rear, or explorer rear, or stock fd rear
- figure out what I need for clutch master
- Ronnins powdercoated samberg kit with custom ac/ps lines
- poly superpro bushings all around and hope that my ball joints are good
- undercoat car and fender wells
- bc coilovers
- new pads/rotors, pain calipers either red or black
- stainless lines, abs delete
- shine rear fiberglass diffuser
- custom exhaust. I want something with a rumble but not very loud.
- nice rims/tires (something similar to racing hart c2 rims)
- tint windows (I'm kind of excited to try shrinking the rear one. Curious if it will be harder than my 3000gt was)
- replica 99 fogs hooked up to oem fog switch
- replica 99 fender turn signals
- new speakers/head unit
- try to lower factory seats and recover, or find some kind of tan bucket seat
- new shift/ebrake boot with red stiching
- jdm arm rest cover
- Last thing will be paint. A lot of people say NU (Vintage Red). My paint is so awful on the car though that a majority of the panels look pink. I may go with a more orangy red or possibly 3000gt red.
The tail lights were all scuffed up. I wet sanded them with 2000 grit, then some 3000 grit foam thing from advanced auto. I buffed them after and they look perfect now. One on the left is after wet sanding, one on the right is after buffing. I really like the stock 94 tails. I know a lot of people upgrade to the 99 tails but I think the older ones look better. I'll be keeping the stock wing too.


The gauge cluster was kind of bugging me with the chrome rings. I read taking metal polish could clean them up. I didn't have any but I found that scatchX and a magic eraser also work well.
Part way through:

Much better now

That's about all I have done so far. I have a bunch of parts on their way. But it will be a little while saving before I can buy some of the other stuff I need. I've been listing some extra 3000gt parts I have on ebay to help gather the funds sooner.
Ordered:
-------------------
polyurethane 99 spec bumper
99 oem lip
jdm replica turn signals
shine 99 style sideskirts
new oem headlight lids
ls2 motor/wiring/ecu/pedal and t56 trans

Future plans
----------------
- decide if I'll be using cobra rear, or explorer rear, or stock fd rear
- figure out what I need for clutch master
- Ronnins powdercoated samberg kit with custom ac/ps lines
- poly superpro bushings all around and hope that my ball joints are good
- undercoat car and fender wells
- bc coilovers
- new pads/rotors, pain calipers either red or black
- stainless lines, abs delete
- shine rear fiberglass diffuser
- custom exhaust. I want something with a rumble but not very loud.
- nice rims/tires (something similar to racing hart c2 rims)
- tint windows (I'm kind of excited to try shrinking the rear one. Curious if it will be harder than my 3000gt was)
- replica 99 fogs hooked up to oem fog switch
- replica 99 fender turn signals
- new speakers/head unit
- try to lower factory seats and recover, or find some kind of tan bucket seat
- new shift/ebrake boot with red stiching
- jdm arm rest cover
- Last thing will be paint. A lot of people say NU (Vintage Red). My paint is so awful on the car though that a majority of the panels look pink. I may go with a more orangy red or possibly 3000gt red.


Decided to mess around with the stock drivers seat tonight to see what I could do to make it lower. I came up with a game plan.
Stock rails as is:
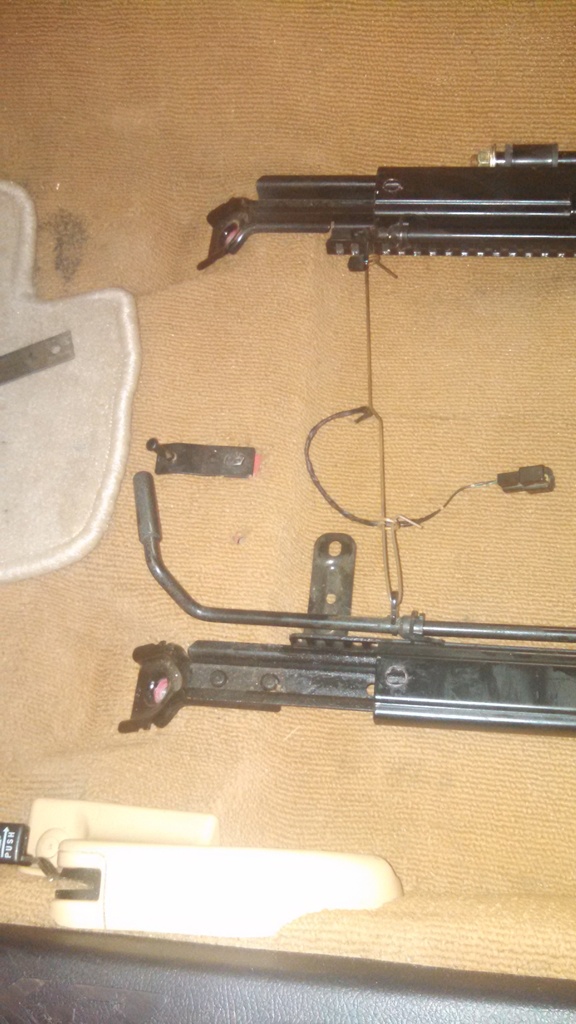
I drilled the rivets to remove the front feet.
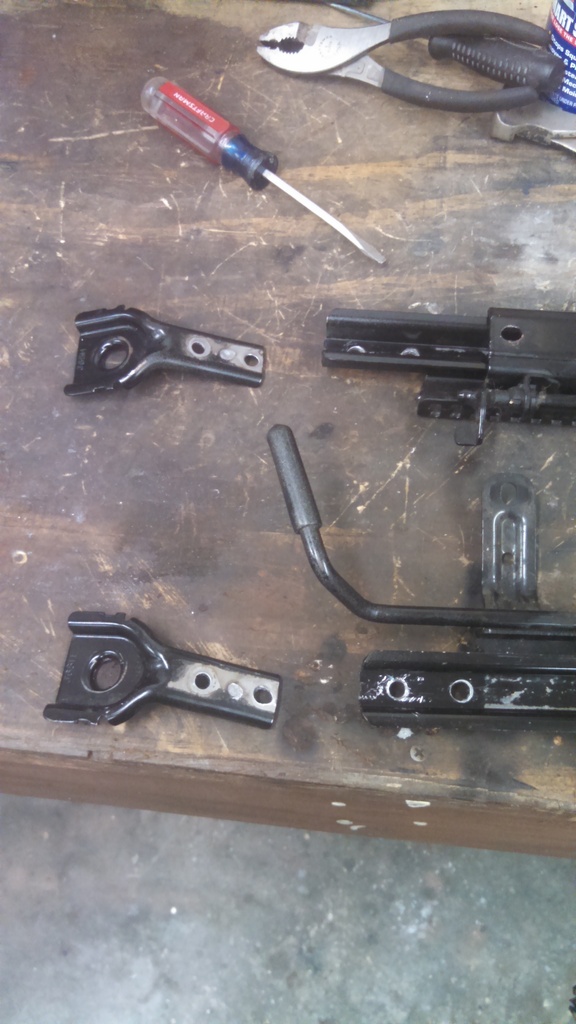
Removed the little connector bracket that hangs off the bottom
I cut the bottom portion out of the rail where it once bolted to the feet.
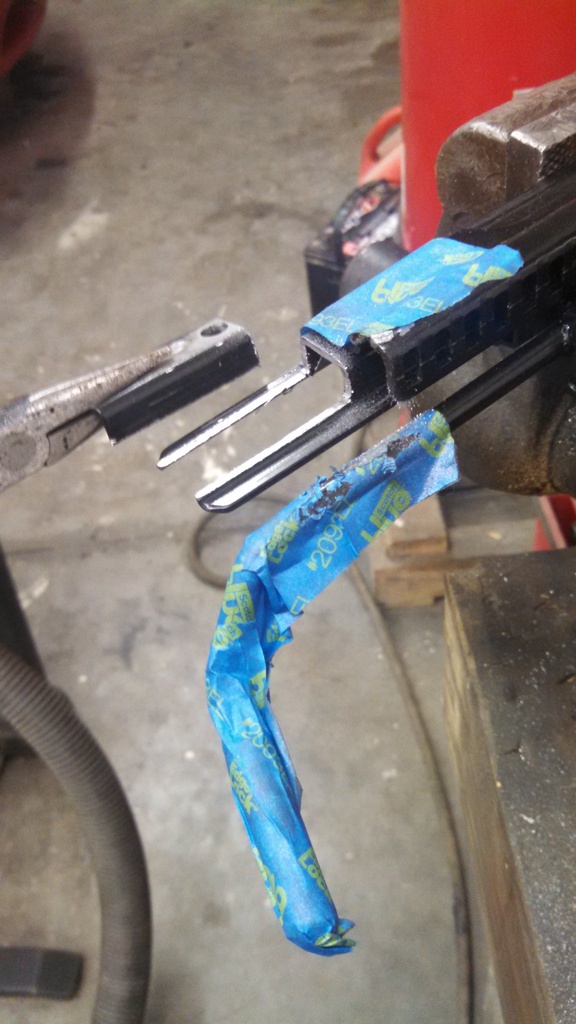
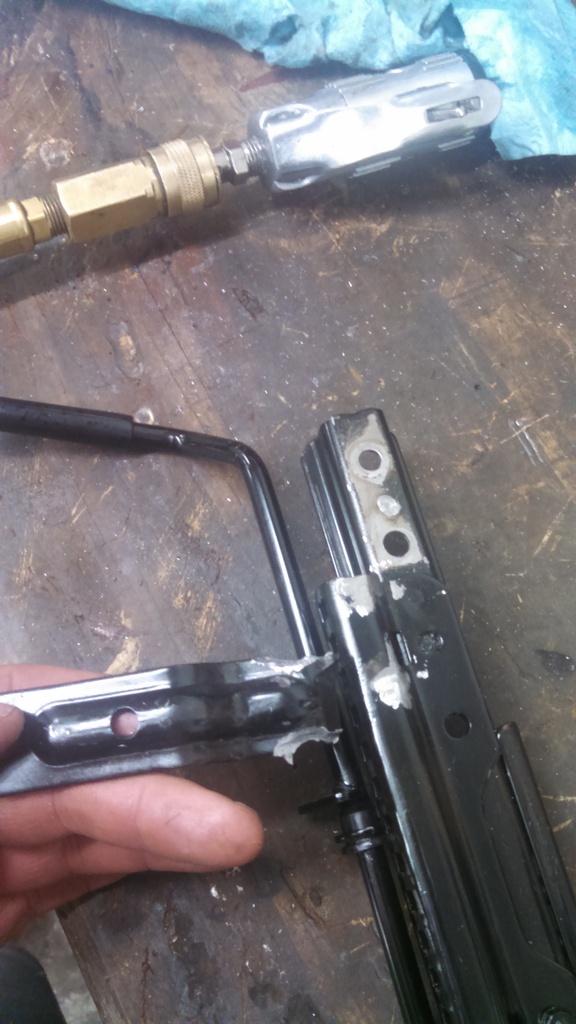
And now. I haven't welded anything yet. I want to mock up the rear first.
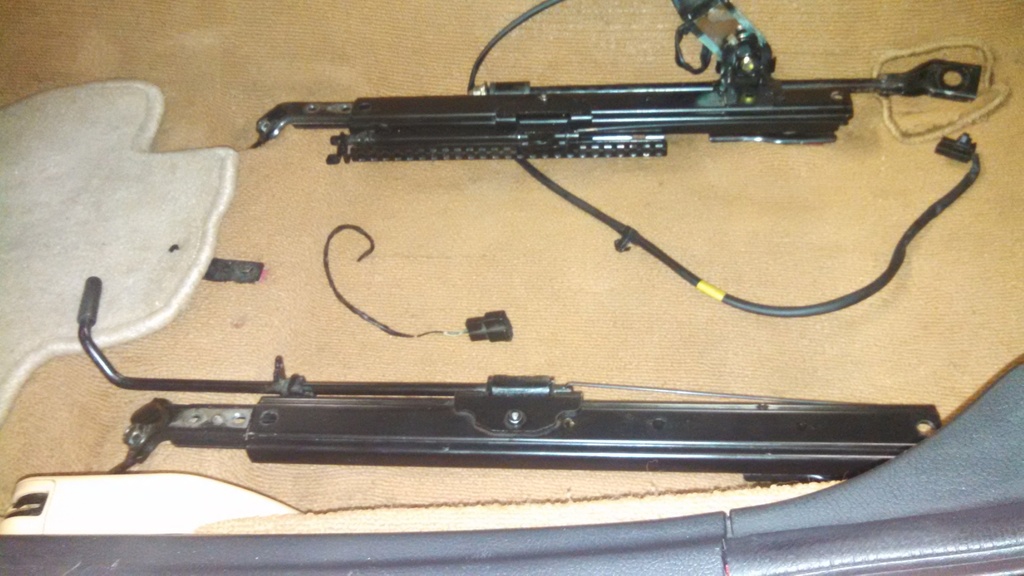
But so far I've lowered the front of the seat about an inch which gives me more steering wheel room. By doing this I do sacrifice how far the seat can slide forward. I also am making it tricky to bolt into the car and to bolt the rails to the bottom of the seat.
For the rear I plan on cutting around the bolt hole on the floor pan. I'll pull the top layer off which has the nut welded to it, then drop it down about 1/4-1/2 inch. I need to figure out removing the carpet first.
Here's a side look with the foam on.
This was it before. I realize the rails weren't exactly lined up front/back when taking these pics, but it gives you an idea.
Edit: Worked on the rear mounts some. My friend is going to stop by later today to see if we should try to re-use the pieces I cut off or just cut new metal and make a 90 degree bend to fill the notch. This is going to give me about 1/2" drop in the rear. It's not a whole lot but every lit bit counts.
Stock rails as is:

I drilled the rivets to remove the front feet.

Removed the little connector bracket that hangs off the bottom

I cut the bottom portion out of the rail where it once bolted to the feet.

And now. I haven't welded anything yet. I want to mock up the rear first.

But so far I've lowered the front of the seat about an inch which gives me more steering wheel room. By doing this I do sacrifice how far the seat can slide forward. I also am making it tricky to bolt into the car and to bolt the rails to the bottom of the seat.
For the rear I plan on cutting around the bolt hole on the floor pan. I'll pull the top layer off which has the nut welded to it, then drop it down about 1/4-1/2 inch. I need to figure out removing the carpet first.
Here's a side look with the foam on.

This was it before. I realize the rails weren't exactly lined up front/back when taking these pics, but it gives you an idea.

Edit: Worked on the rear mounts some. My friend is going to stop by later today to see if we should try to re-use the pieces I cut off or just cut new metal and make a 90 degree bend to fill the notch. This is going to give me about 1/2" drop in the rear. It's not a whole lot but every lit bit counts.


Last edited by fastfalcon94; Jun 28, 2015 at 12:04 PM.
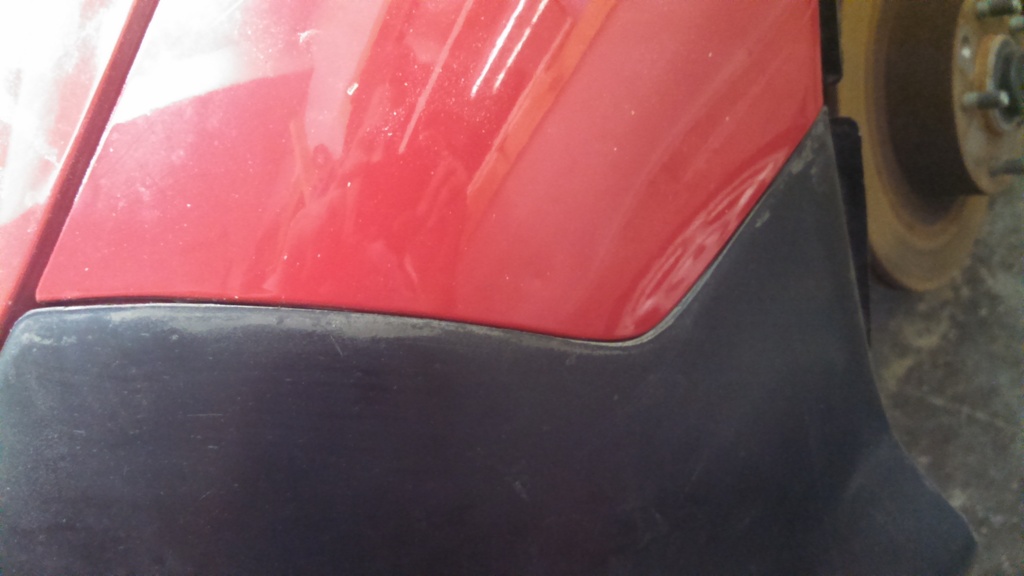
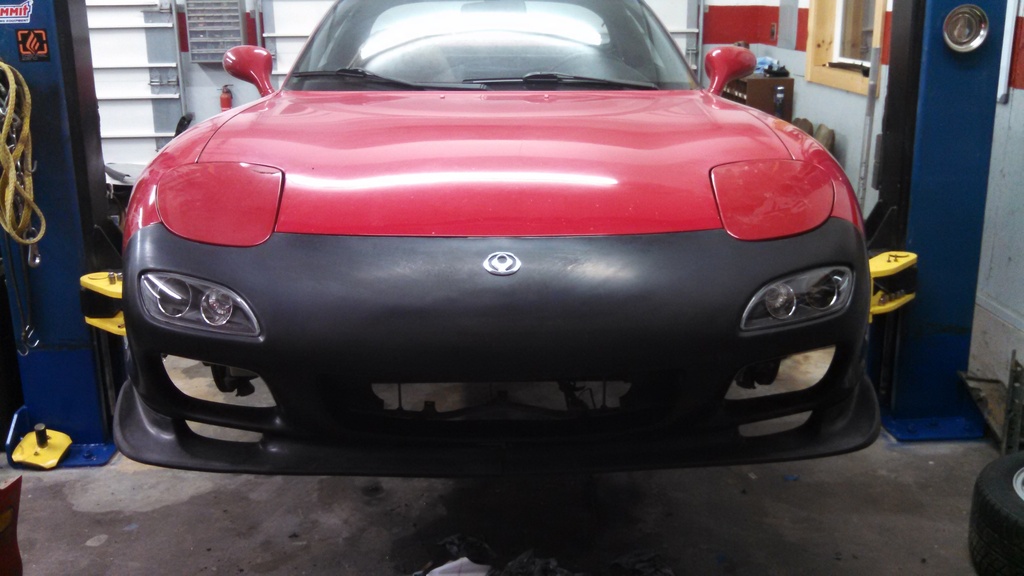
My bumper and turn signals came in. The Urethane is really flexible. I don't think I really like it. I proceeded to mount it anyways. Fitment is alright so far. I think I can make it better. I'm debating ordering the real bumper now and attempting to shave the plate opening or maybe trying to find a stiff fiberglass one. Pettit doesn't have them for sale anymore though.
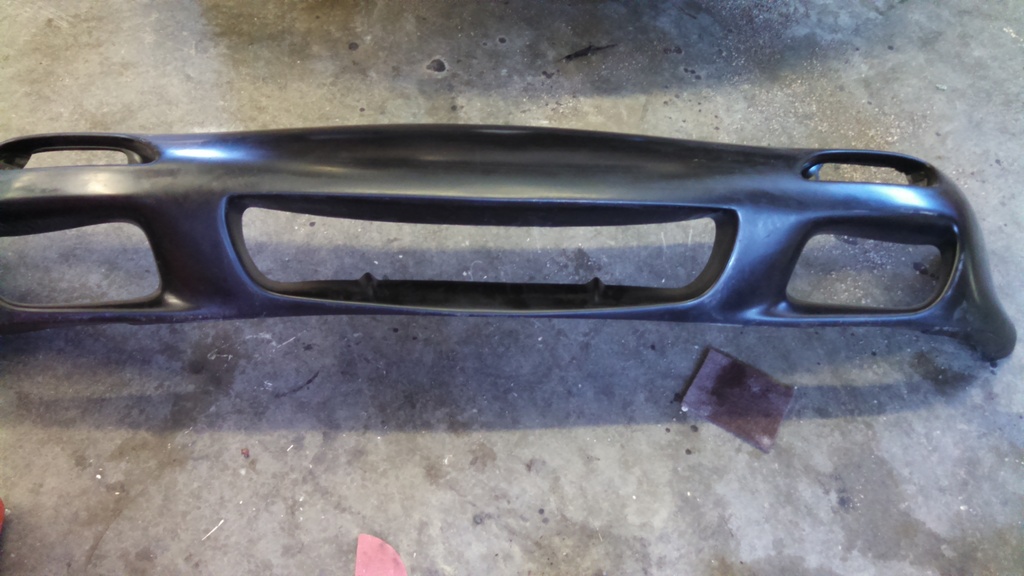
I've only got the sides mounted. I haven't mounted the center section down yet so it sticks up a bit in this pic.
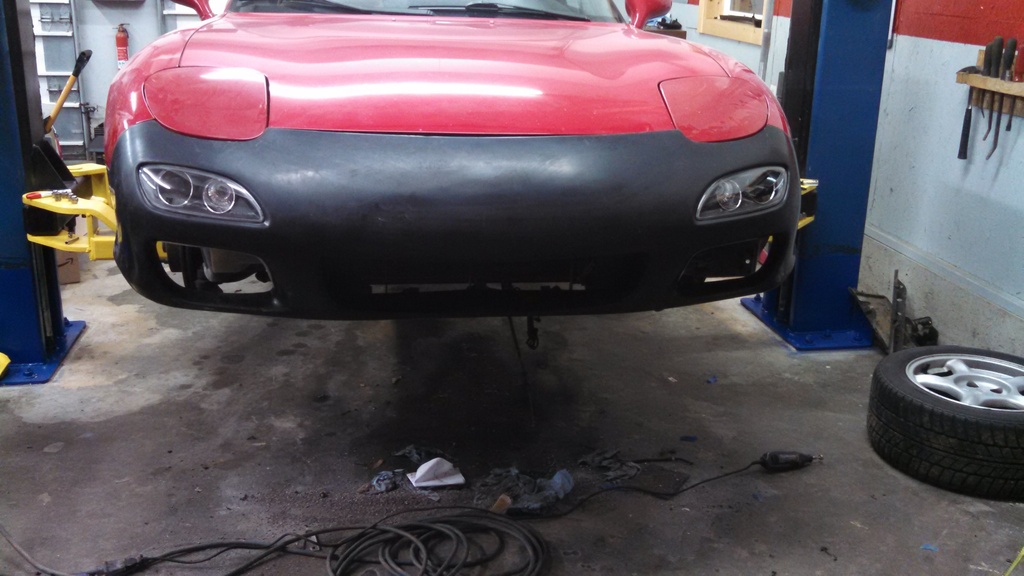
Passenger side fits pretty good.
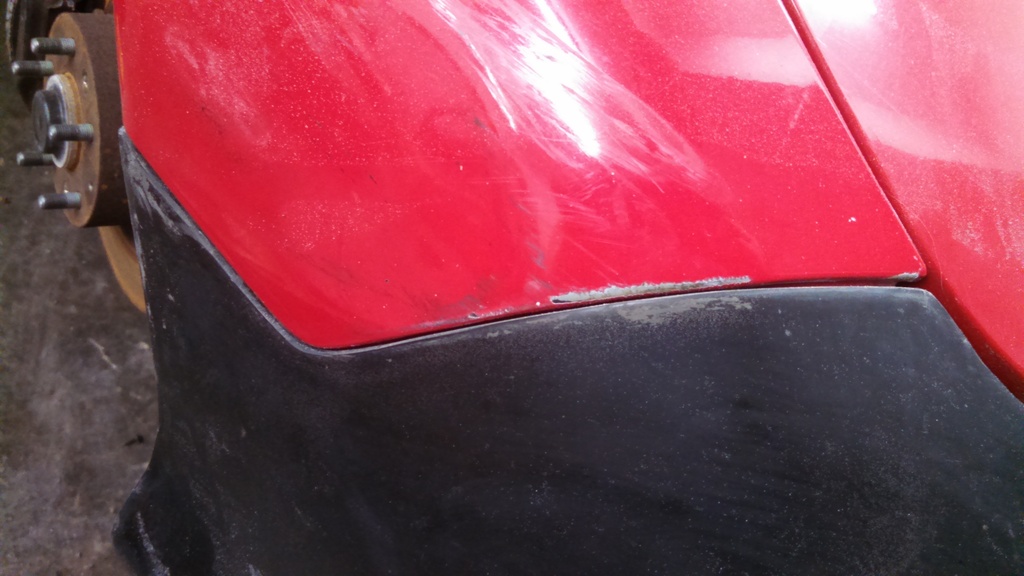
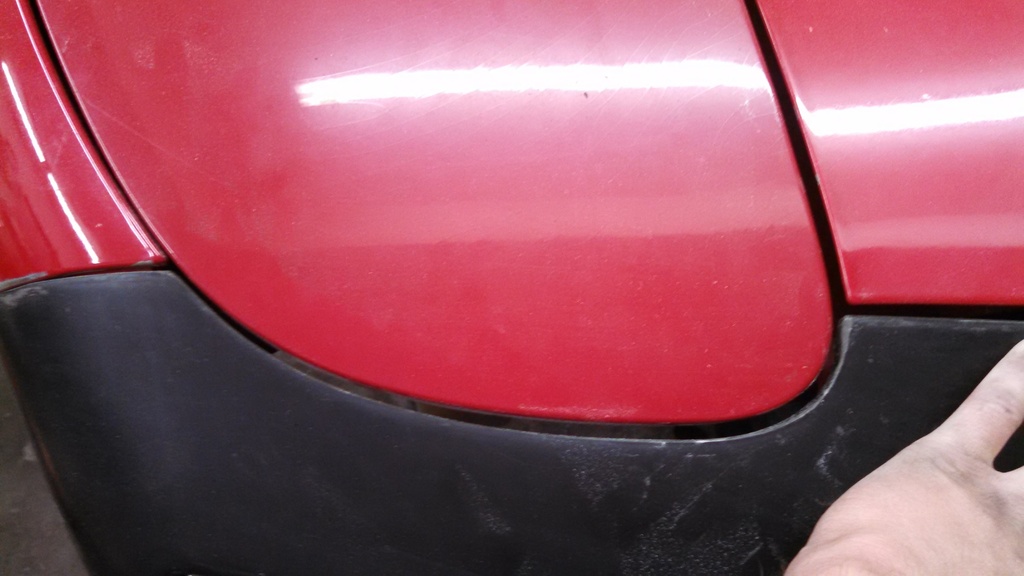
drivers side the light almost touches at one point. I have new headlight covers to put on though. The ones on the car have broken tabs and someone jb welded some metal L brackets on. Who knows how perfectly that was done.
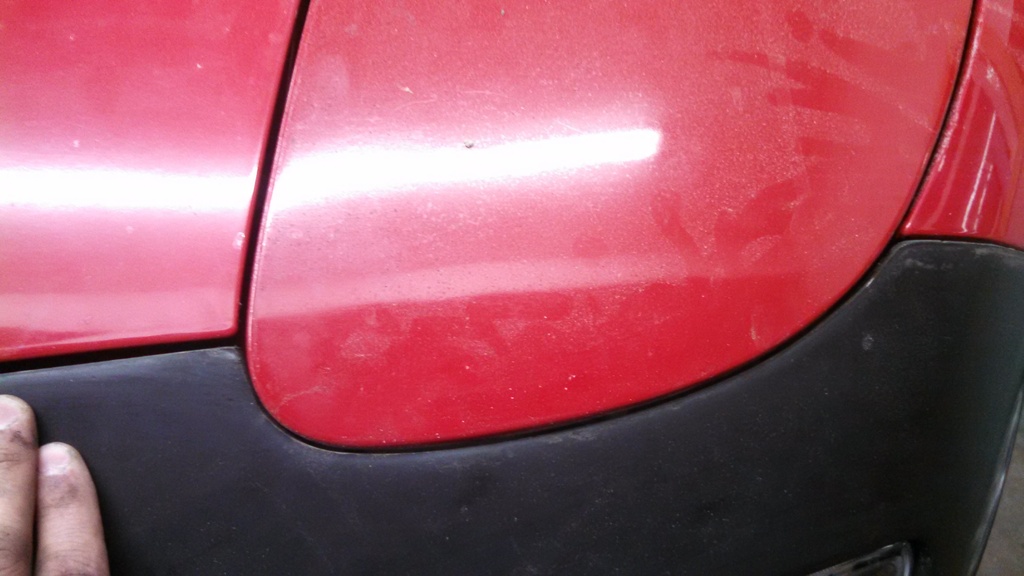
Hard to tell in the pic but it doesn't position itself as well as the other side with the fender. I'm going to enlarge the holes I drilled in the poly to see if I can get it to sit better.

Nice Subi! I also came from a 1st Gen 2.5RS, still one of my favorite cars to drive! I'm in the same boat as you, just bought my first FD 2 months ago, sold my Impreza though.
I finished fitting my bumper the other night. Probably have 10 hours into getting it to fit right. I don't want to shell out $600 on jdm fogs seeing as they wouldn't bolt onto my modified bumper beam. I tried some $35 shipped ebay fogs for now. The paint on them was already chipping when I opened them. I scuffed them up and painted them satin black for now.
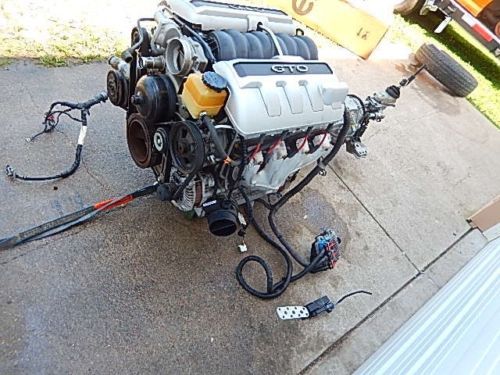
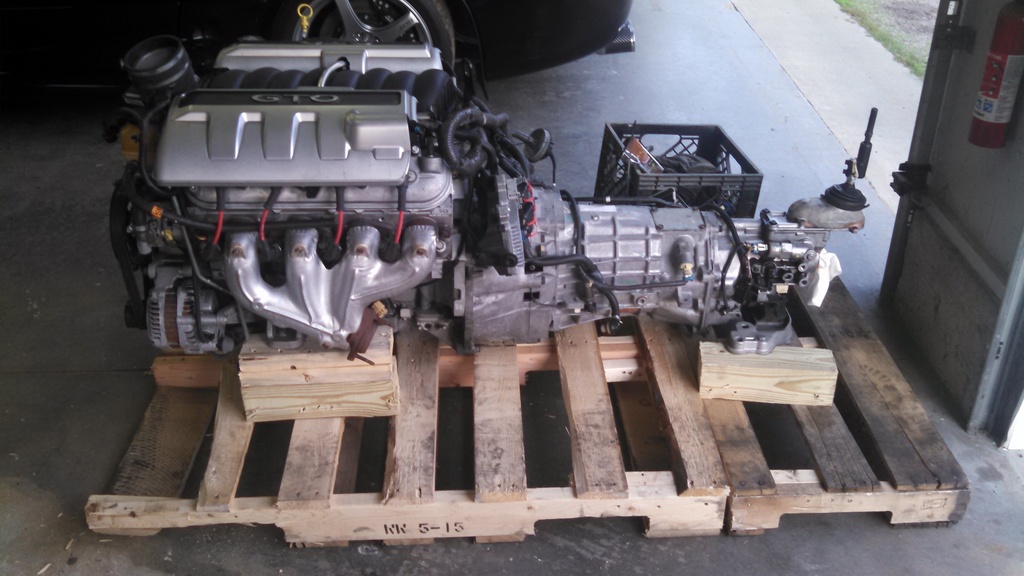
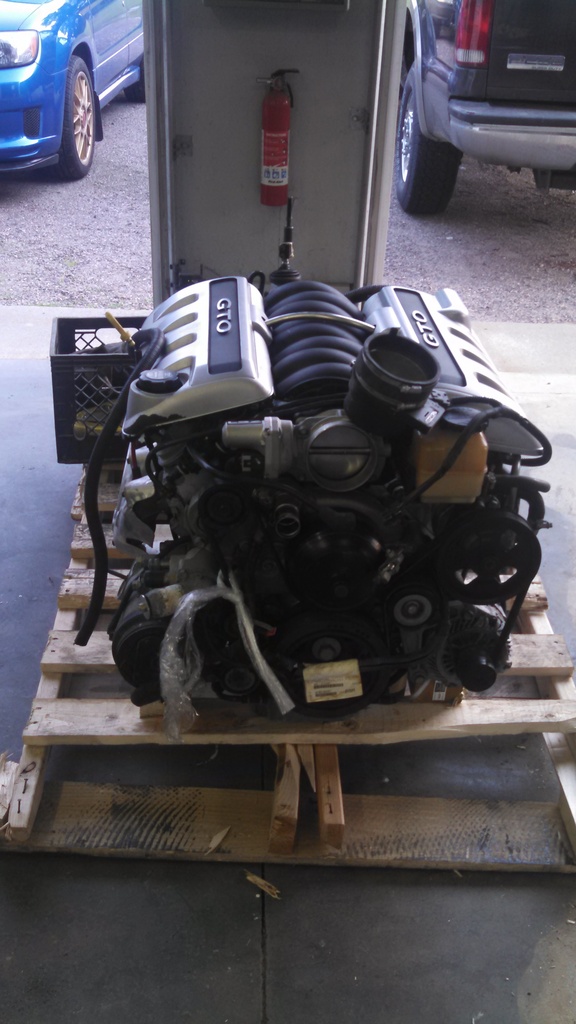
Also picked up my ls2 motor. My samberg kit shipped from Ronin with his explorer rear end kit. I found an 07 explorer rear carrier and axles locally that I'm picking up Wednesday.
Now I need to figure out what I'm going for wheels brakes, and coilovers. Also need to figure out how to keep my a/c and what to do for PS lines. It looks like Pez made lines but is hard to get ahold of now. And Halfspec made a nice a/c kit but they won't be doing it until 2016. I would need an ls1 compressor and it was never mentioned if the lines would clear ls2 manifolds or not.


Trending Topics
I would be interested to see how you mounted the fog lights and a link to the ones you ordered. I have the 99 spec front cover with the original reinforcement so the 99 fog wont bolt up.
These are the lights I ordered. I just screwed the mounting bracket into the 94 bumper beam that I had modified for my turn signals. The fog lights look kind of cheesy in person. The paint was all chipping around them. I scuffed them up and sprayed them satin black. For $35 I think I can live with them for now. I think once the bumper is painted they will look better. There must be a happy medium though that will look better between $35 ebay ones and $600 jdm ones.
For I35 3 5" Round Clear Bumper Driving Fog Light Lamp Switch Harness | eBay
For I35 3 5" Round Clear Bumper Driving Fog Light Lamp Switch Harness | eBay
Agreed, I may give these a shot and tint them slightly to make them not stand out so much in hopes it will make them look less "cheesy". How do they clear the oil coolers?
Thanks!
Thanks!
I know it's been a while and I haven't been updating the thread very well. I've put everything on my website:
802Projects
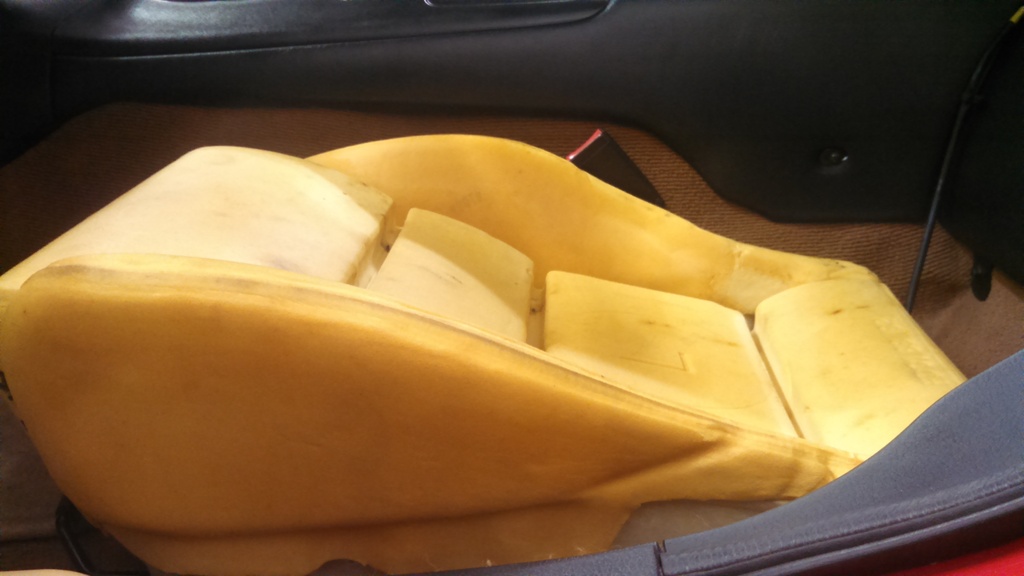
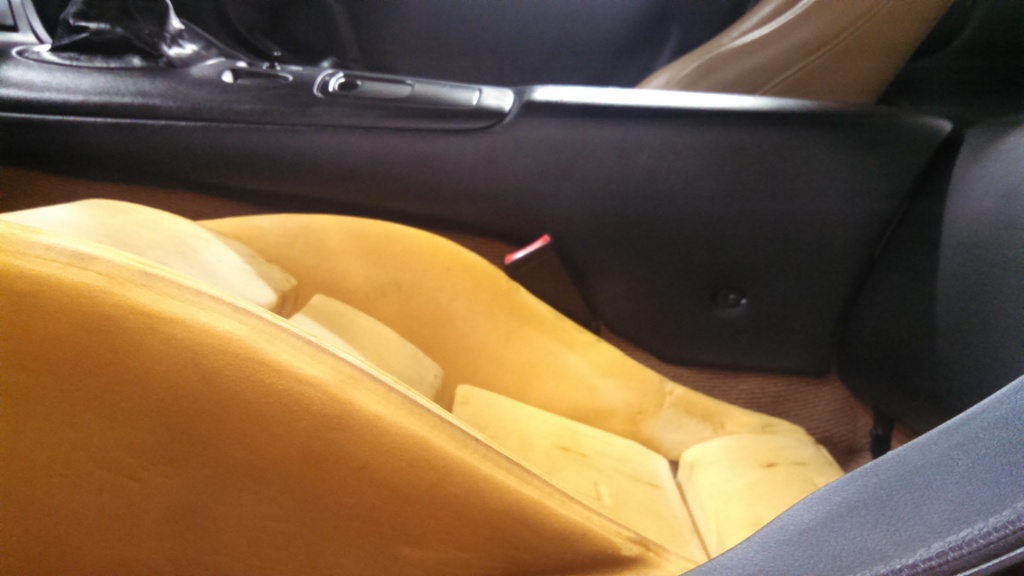
I'm currently working on replacing all the bushings with superpros/jauto pillow ball bushings. Then I'm going to set the coilovers and get an alignment. In the spring it's going in for paint. Until then I'll be working with the interior. I got a jdm mazdaspeed miata wheel that's been recovered with red stitching. I'm waiting for some custom floor mats. I attempted new leather from interiorinnovations.com but it wasn't sewn together correctly so I got a refund. I got some samples from leatherseats.com and I'm debating if I want to spend $650 on recovering my seats now or trying to go with something aftermarket.
.jpg)
.jpg)
.jpg)
802Projects
I'm currently working on replacing all the bushings with superpros/jauto pillow ball bushings. Then I'm going to set the coilovers and get an alignment. In the spring it's going in for paint. Until then I'll be working with the interior. I got a jdm mazdaspeed miata wheel that's been recovered with red stitching. I'm waiting for some custom floor mats. I attempted new leather from interiorinnovations.com but it wasn't sewn together correctly so I got a refund. I got some samples from leatherseats.com and I'm debating if I want to spend $650 on recovering my seats now or trying to go with something aftermarket.

Thread
Thread Starter
Forum
Replies
Last Post
Donald Hampton
2nd Generation Specific (1986-1992)
16
Nov 23, 2022 06:38 PM
rx8volks
Canadian Forum
0
Sep 1, 2015 11:02 PM