
Ellie - From Japan to the UK - my project.


Thread Starter
Senior Member
Joined: Nov 2007
Posts: 251
Likes: 0
From: Warwickshire, UK
Ellie - From Japan to the UK - my project.
This has been running a while, and I've got threads on other forums, but didn't know if people on here would be intersted.
So, since I was about 13 (some 16 years ago!) I've wanted an FD - fell in love for various reasons, and after a string of other cars and cheap hatches, then an S14, I took the plunge.
Scoured the auctions, didn't find anything that suited me, so I looked further, and found the perfect fit on the forecourt of the infamous K's Auto. Fast forward about 6 months to April 2008, and a journey up to the top of the UK then back down, and I now had this:
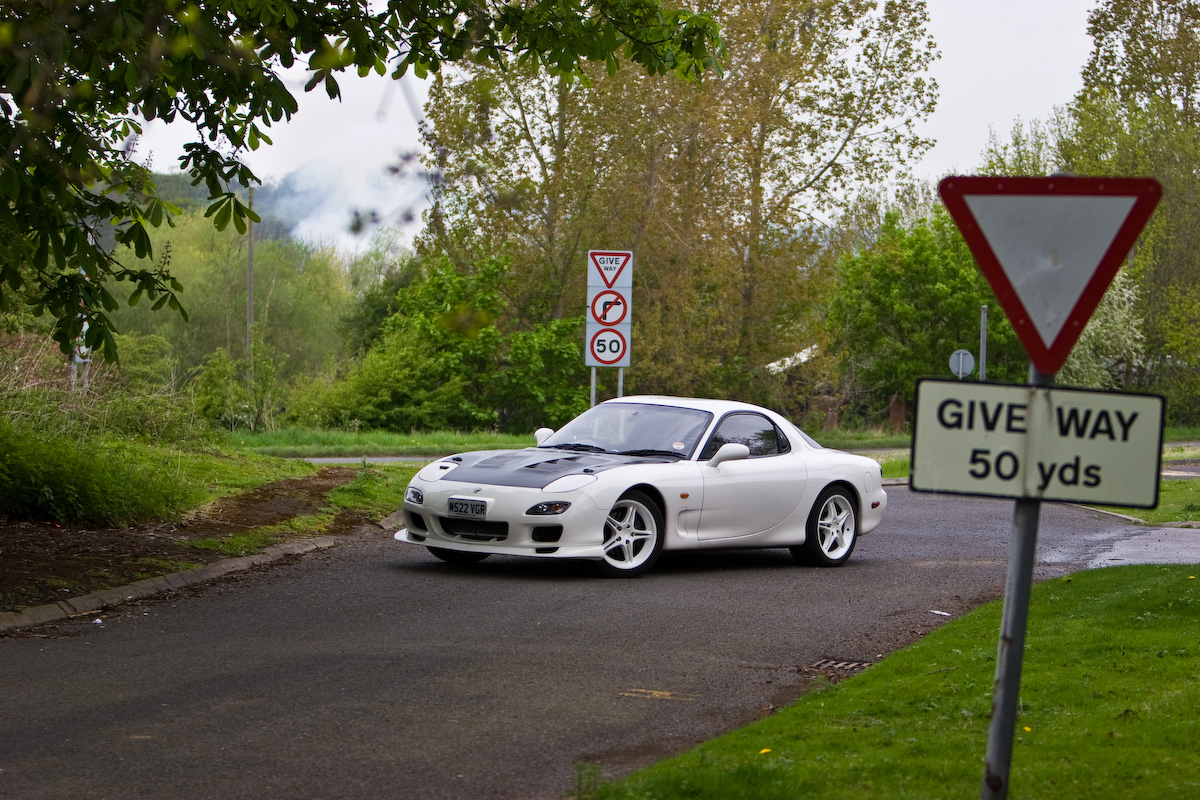
Pretty standardish JDM 1994 Type R2.
Only mods were cat back, MS strut brace, MS front and rear undertrays, MS front ARB/sway bar, RE:A AD9, and a few other bits.
So, got her home, and straight away fitted the PFC, Koyo, Apexi filters, Tiger midpipe, HKS downpipe, and a few other bits I'd collected while waiting for her to land.
Took her for mapping and came back chuffed to bits with the result:
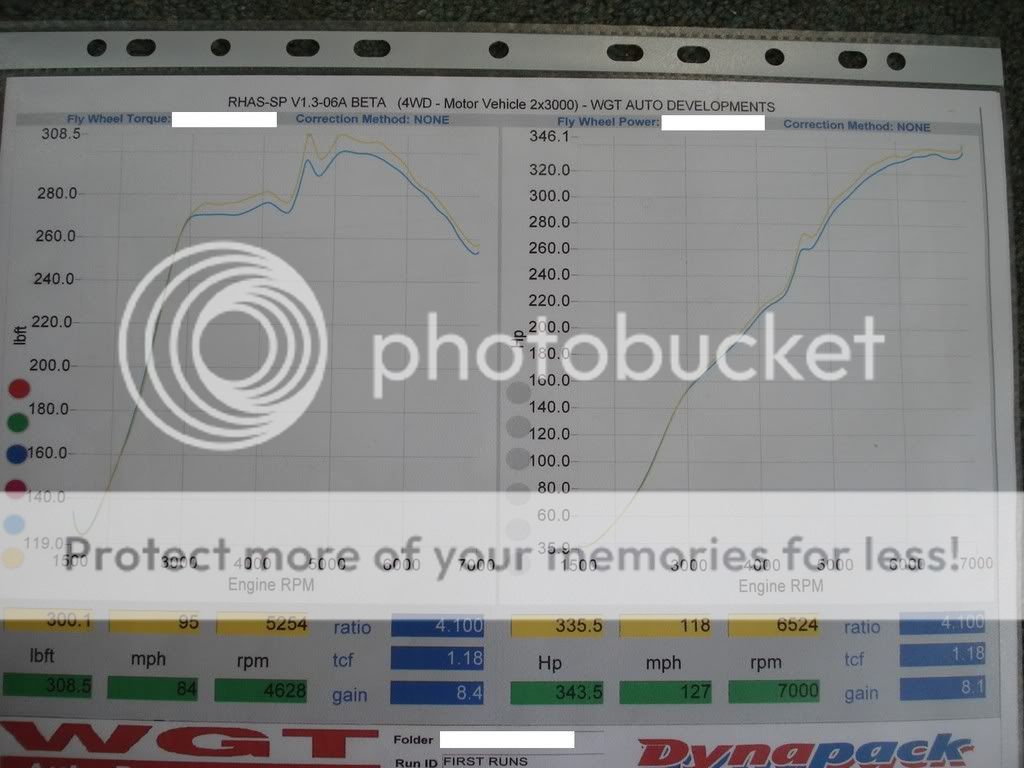
Bear in mind UK dynos tend to read a LOT lower than US ones
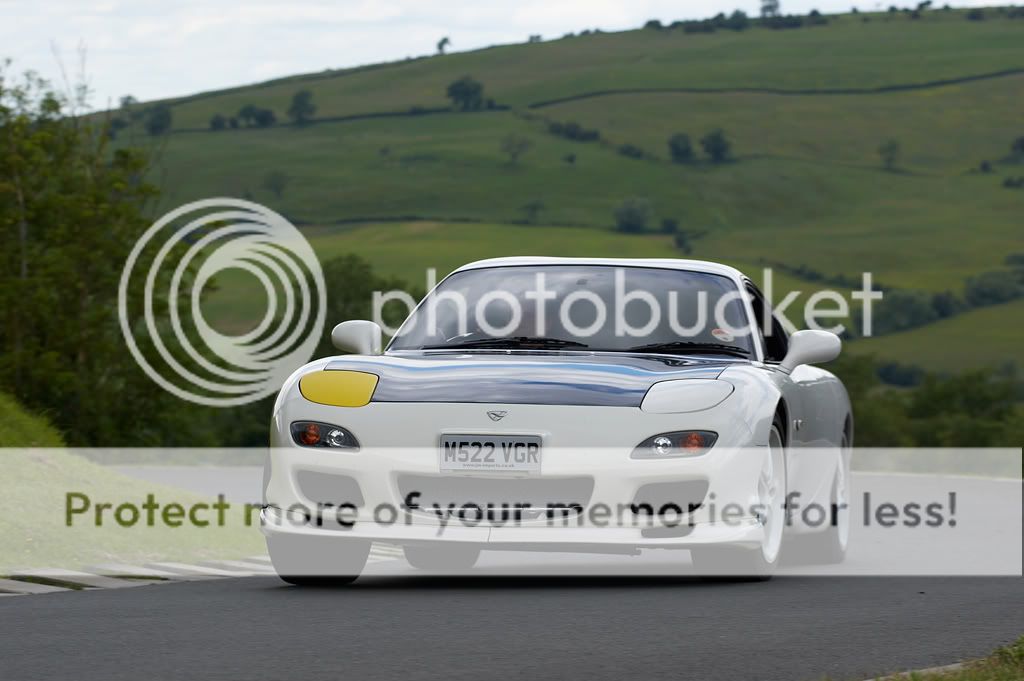
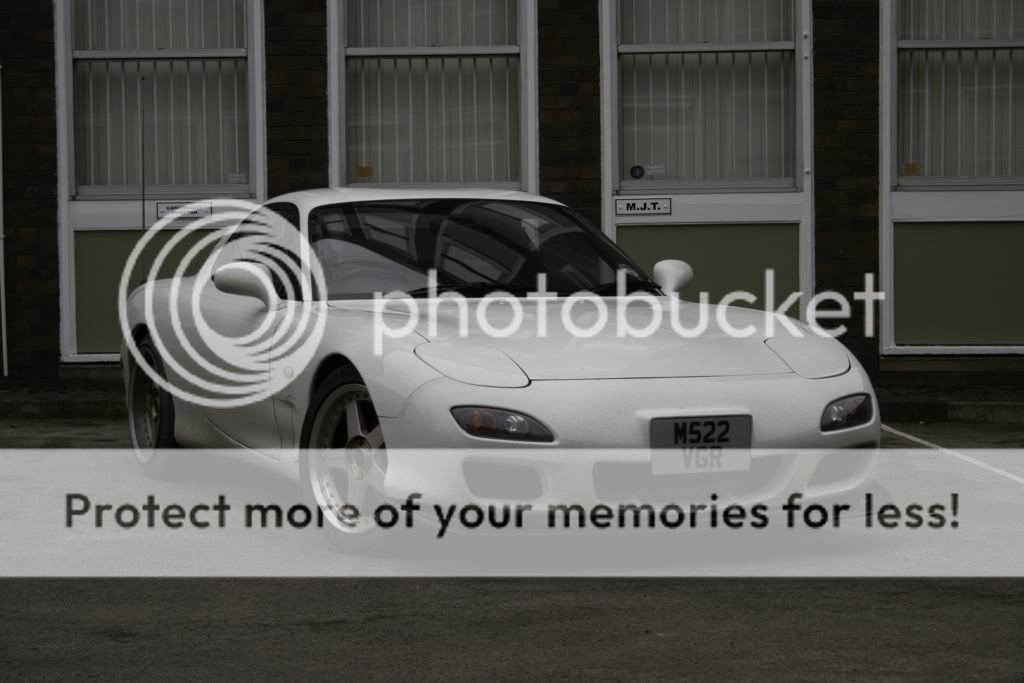
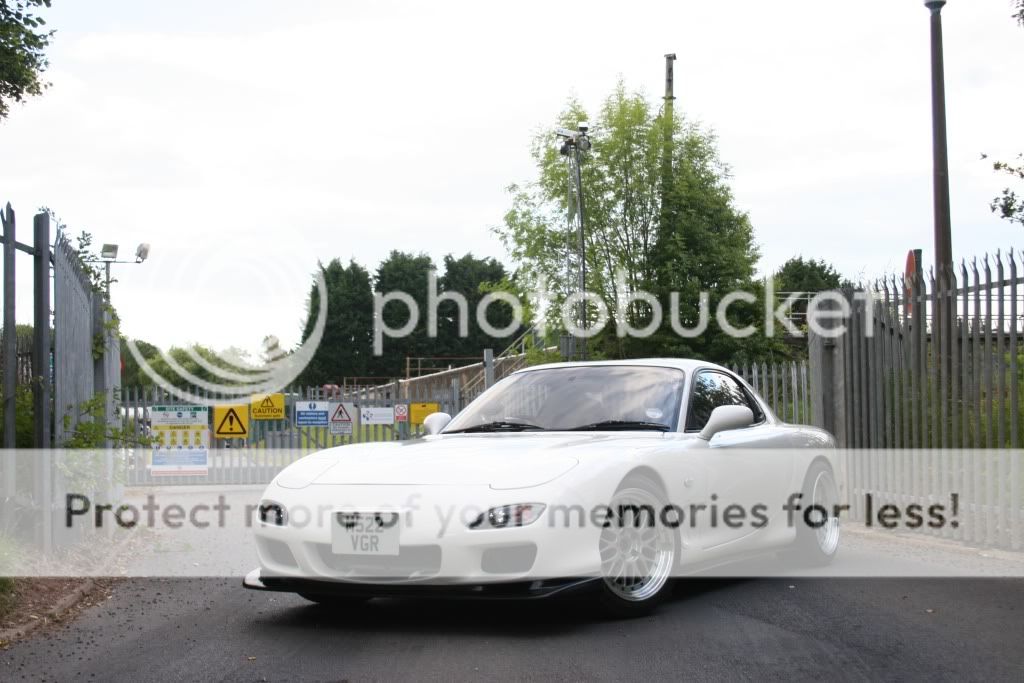
It was at this point that I spent a while looking at the photos I had of her, and some of the inspiration on here, and realised that the car that I had fallen in love with was the stock body 99 spec shape. I'd never been sure about the AD9, so it was time for a change. I sold the AD9, and went all harlequin.
Here she is on a hillclimb circuit:
After that, it was time to go back to OEM:
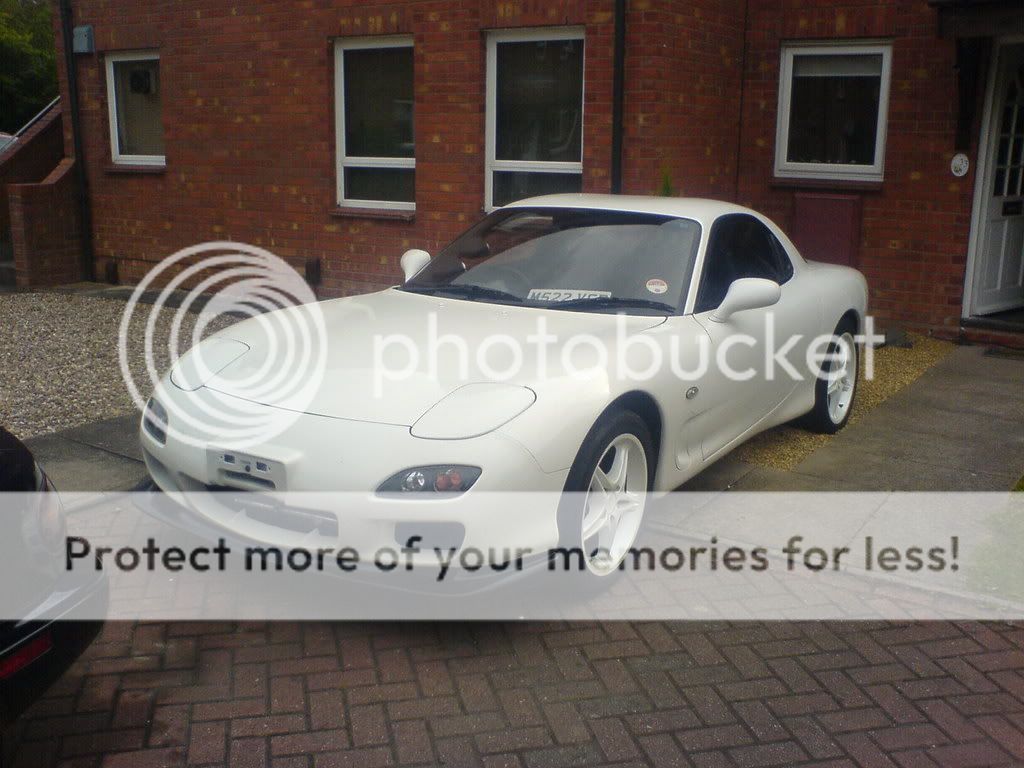
It may seem like a backwards step for some, but that's the look I fell in love with
So, another quick track day:

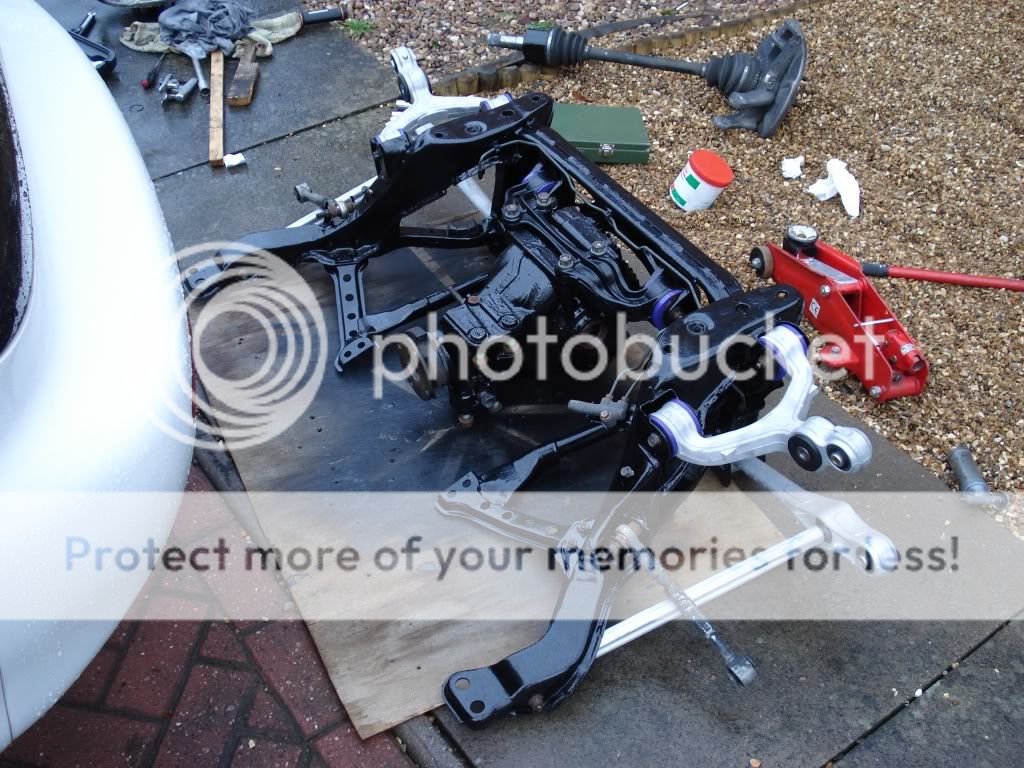
After this, and really starting to get used to the car, I realised the handling was letting it down. Despite having only done 45k miles, the pillowballs were shot, and the bushes sagging. So, new pillowballs, and new polybush time.
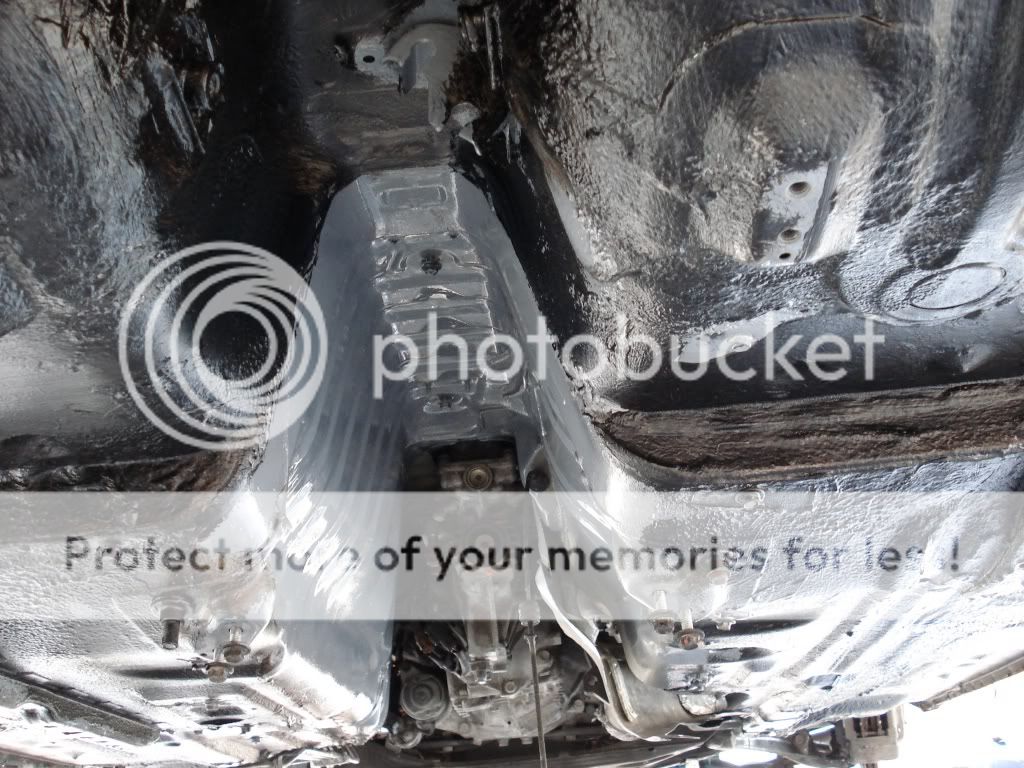
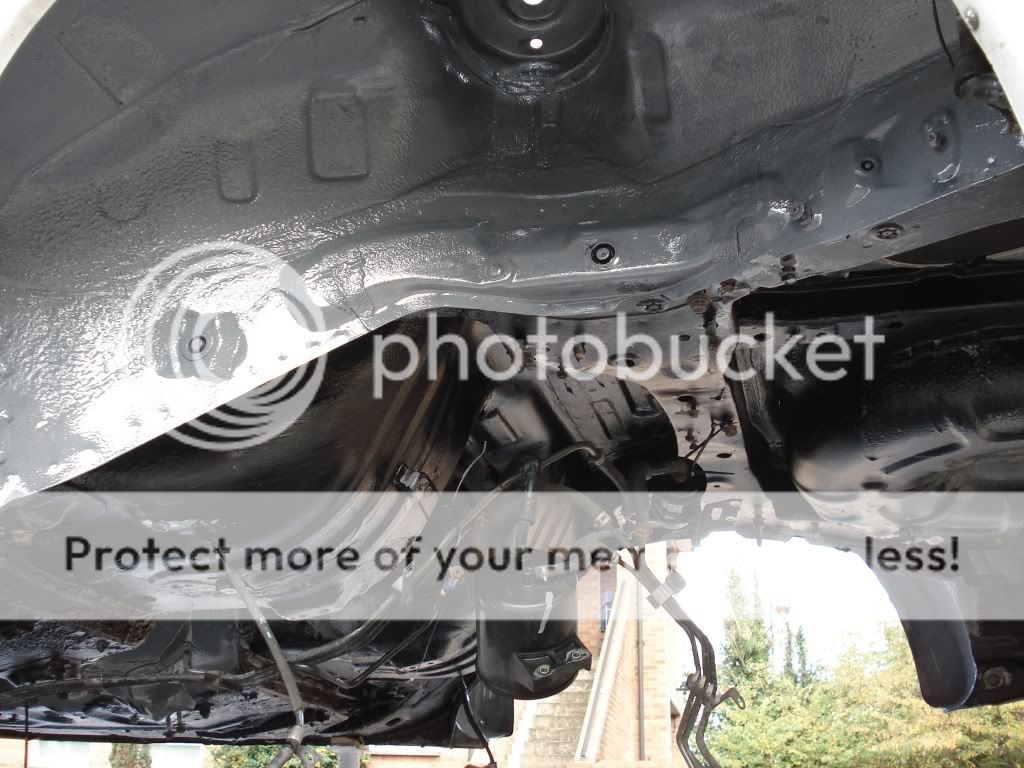
JDM cars don't come with much in the way of underseal, and UK roads and climate are very cruel to cars, so I took the opportunity to strip the underside, clean, and coated with 2 coats of POR15, 2 of chassis black, and a load of underseal.
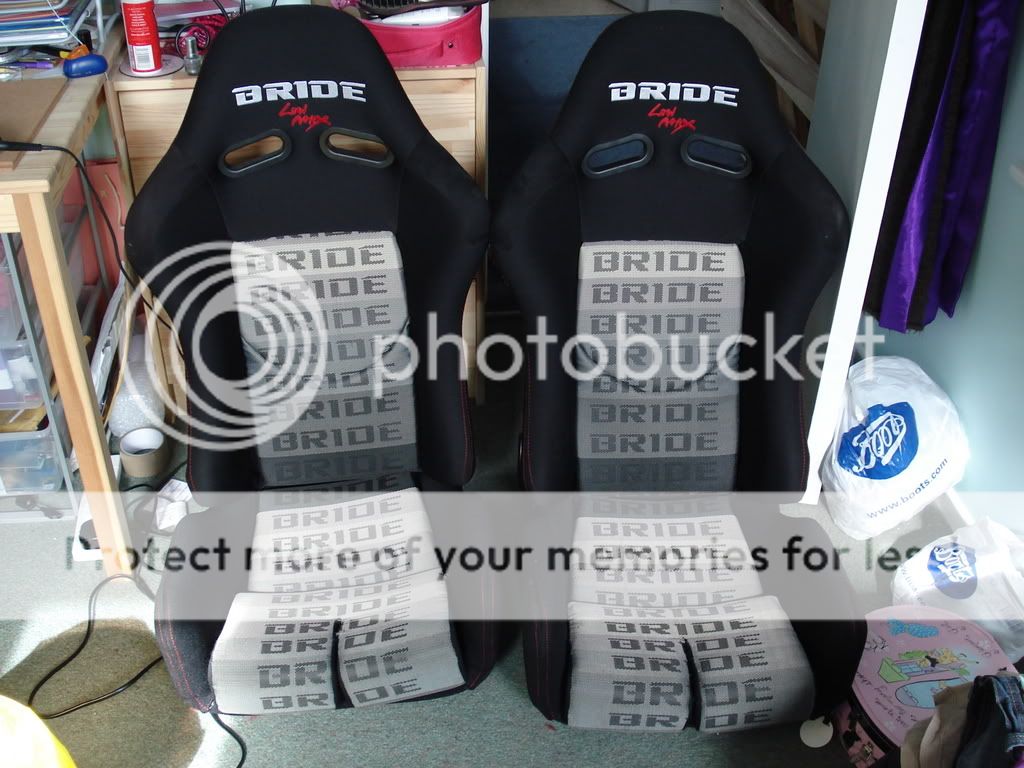
And time to spice the interior up a bit as well:
So, since I was about 13 (some 16 years ago!) I've wanted an FD - fell in love for various reasons, and after a string of other cars and cheap hatches, then an S14, I took the plunge.
Scoured the auctions, didn't find anything that suited me, so I looked further, and found the perfect fit on the forecourt of the infamous K's Auto. Fast forward about 6 months to April 2008, and a journey up to the top of the UK then back down, and I now had this:
Pretty standardish JDM 1994 Type R2.
Only mods were cat back, MS strut brace, MS front and rear undertrays, MS front ARB/sway bar, RE:A AD9, and a few other bits.
So, got her home, and straight away fitted the PFC, Koyo, Apexi filters, Tiger midpipe, HKS downpipe, and a few other bits I'd collected while waiting for her to land.
Took her for mapping and came back chuffed to bits with the result:
Bear in mind UK dynos tend to read a LOT lower than US ones
It was at this point that I spent a while looking at the photos I had of her, and some of the inspiration on here, and realised that the car that I had fallen in love with was the stock body 99 spec shape. I'd never been sure about the AD9, so it was time for a change. I sold the AD9, and went all harlequin.
Here she is on a hillclimb circuit:
After that, it was time to go back to OEM:
It may seem like a backwards step for some, but that's the look I fell in love with
So, another quick track day:
After this, and really starting to get used to the car, I realised the handling was letting it down. Despite having only done 45k miles, the pillowballs were shot, and the bushes sagging. So, new pillowballs, and new polybush time.
JDM cars don't come with much in the way of underseal, and UK roads and climate are very cruel to cars, so I took the opportunity to strip the underside, clean, and coated with 2 coats of POR15, 2 of chassis black, and a load of underseal.
And time to spice the interior up a bit as well:
Thread Starter
Senior Member
Joined: Nov 2007
Posts: 251
Likes: 0
From: Warwickshire, UK
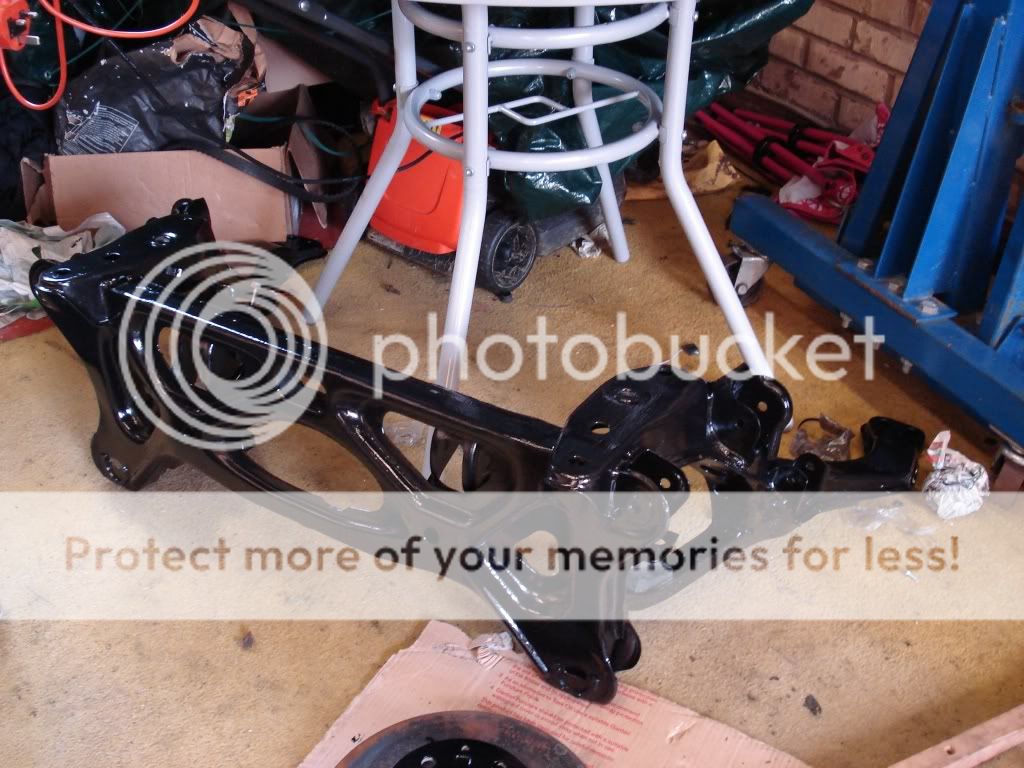
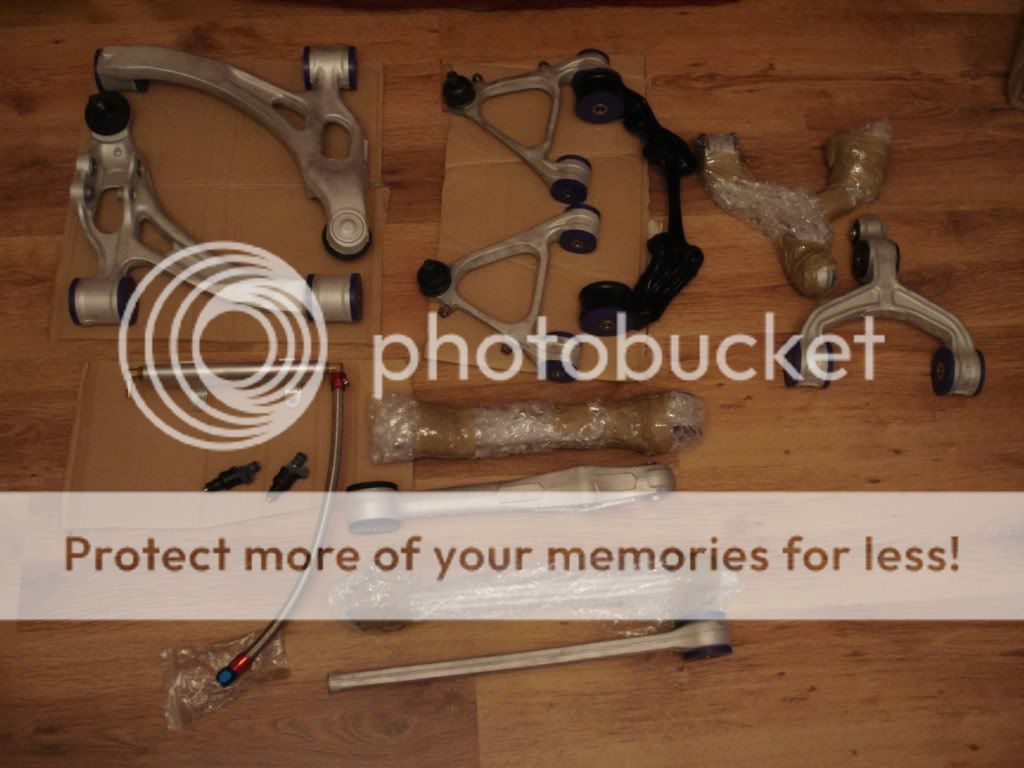
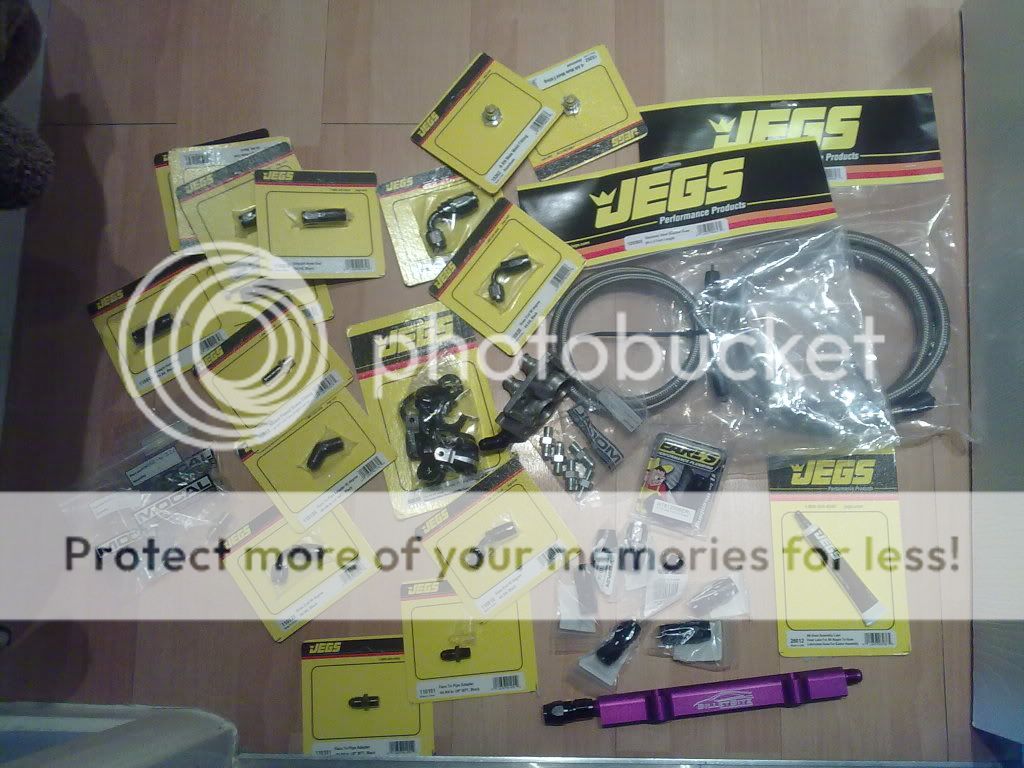
So, then the suspension arms turned up, as well as a few fuel upgrades:
Built it up, put it back on
Hiperlite gauge mod funkyness

All back together, and on the road with new hoops
At the previous mapping, it was running out of fuel, so 1680's, and Aeromotive, and a Walbro, and it was all back together, and off for some more mapping, producing a bit more power, but a MUCH more driveable mid range, totally transformed it.

Props to Pip@WGT.
I'd always fancied different wheels (I'm a bit of a wheel *****), so I picked up a set of Panasport G7 C5C2's. Now I know a lot of you on here hate stretch and sticking out wheels, so I'm aware of the iminent flaming, but I love more hardcore fitment (yes, the car is still used on track), so anyways:


One for the haters

So, another track day, this time cut short by my dodgy V-mount install This put me out for the day:
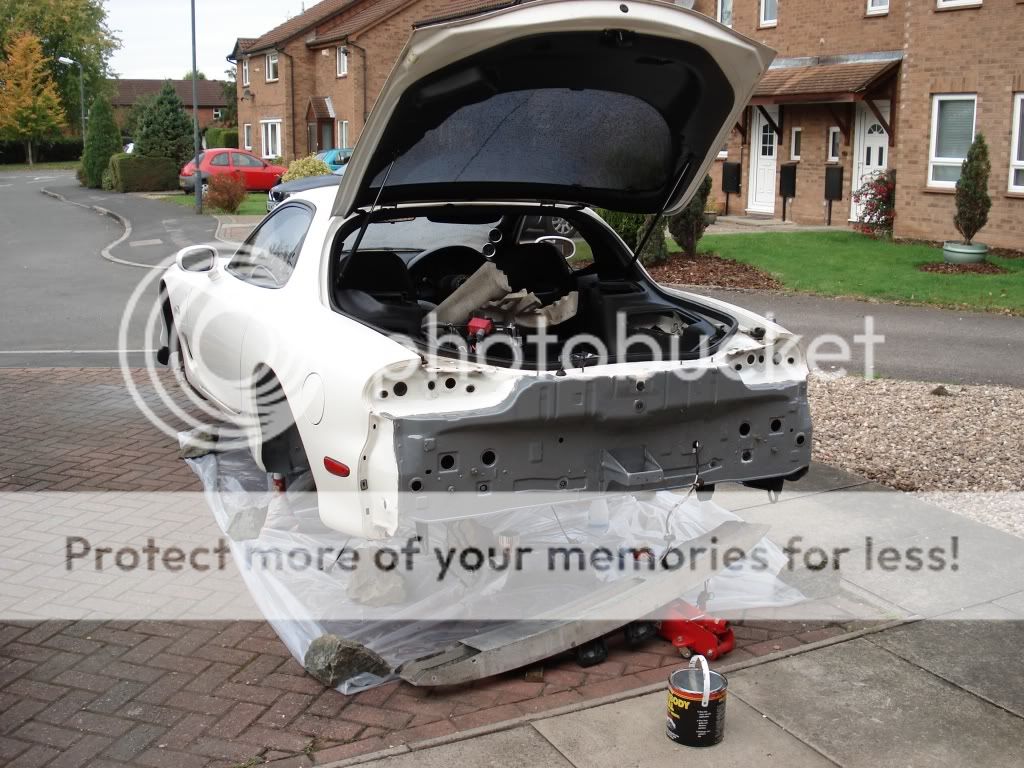
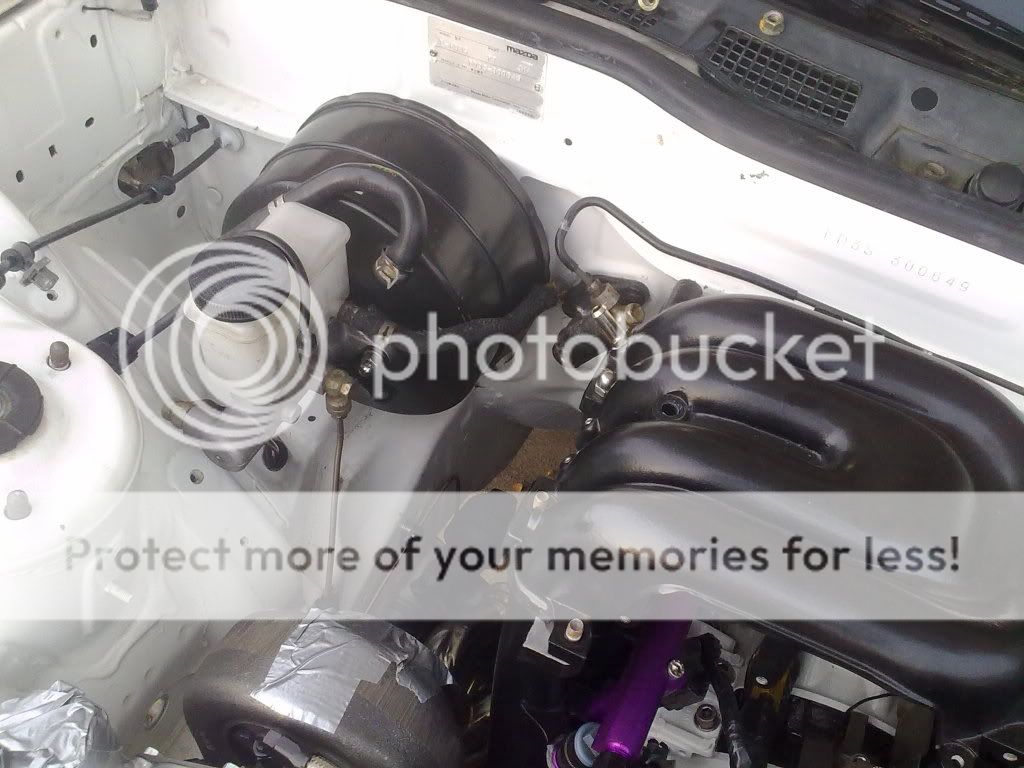
IAt this point, I decided to lay her up, and sort out the wonky VMIC install, tidy up the bay, and ado a few other bits, however, from here on in, it all got a bit out of hand.
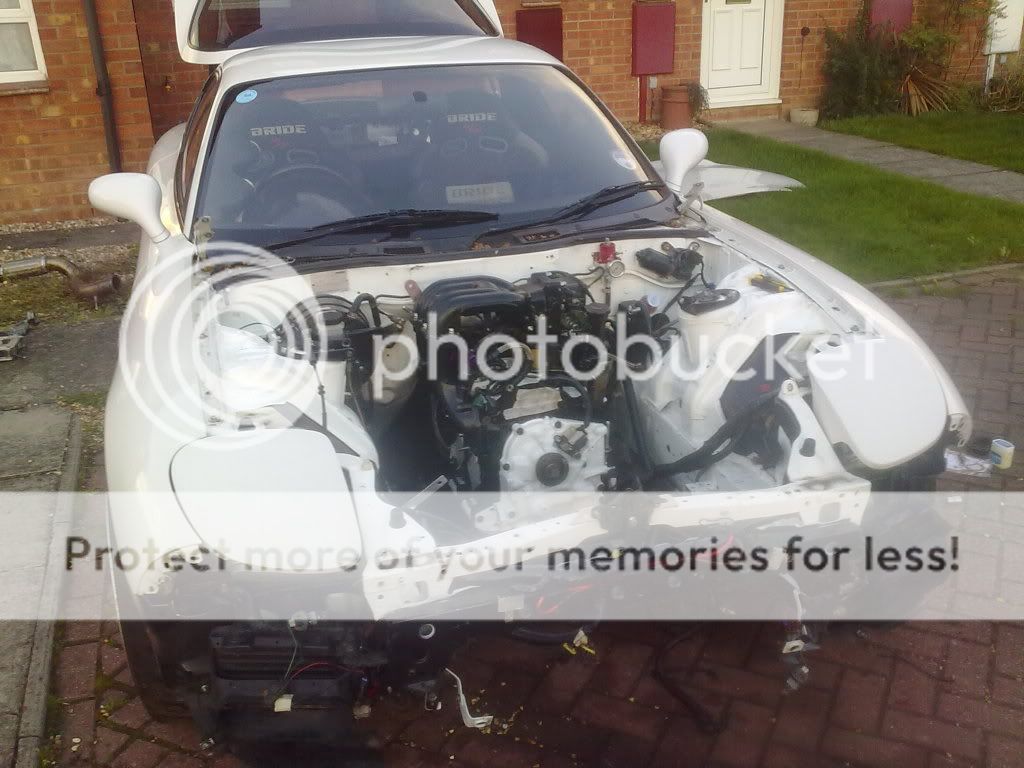
It's turned into a full rebuild, single turbo, and wire tuck :o
This is what I started with
...
Built it up, put it back on
Hiperlite gauge mod funkyness
All back together, and on the road with new hoops
At the previous mapping, it was running out of fuel, so 1680's, and Aeromotive, and a Walbro, and it was all back together, and off for some more mapping, producing a bit more power, but a MUCH more driveable mid range, totally transformed it.
Props to Pip@WGT.
I'd always fancied different wheels (I'm a bit of a wheel *****), so I picked up a set of Panasport G7 C5C2's. Now I know a lot of you on here hate stretch and sticking out wheels, so I'm aware of the iminent flaming, but I love more hardcore fitment (yes, the car is still used on track), so anyways:
One for the haters
So, another track day, this time cut short by my dodgy V-mount install
This put me out for the day:IAt this point, I decided to lay her up, and sort out the wonky VMIC install, tidy up the bay, and ado a few other bits, however, from here on in, it all got a bit out of hand.
It's turned into a full rebuild, single turbo, and wire tuck :o
This is what I started with
...
Thread Starter
Senior Member
Joined: Nov 2007
Posts: 251
Likes: 0
From: Warwickshire, UK
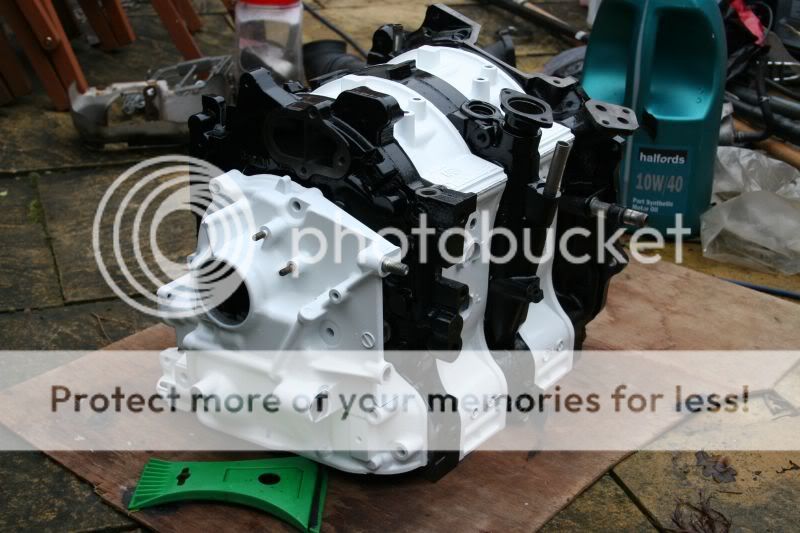
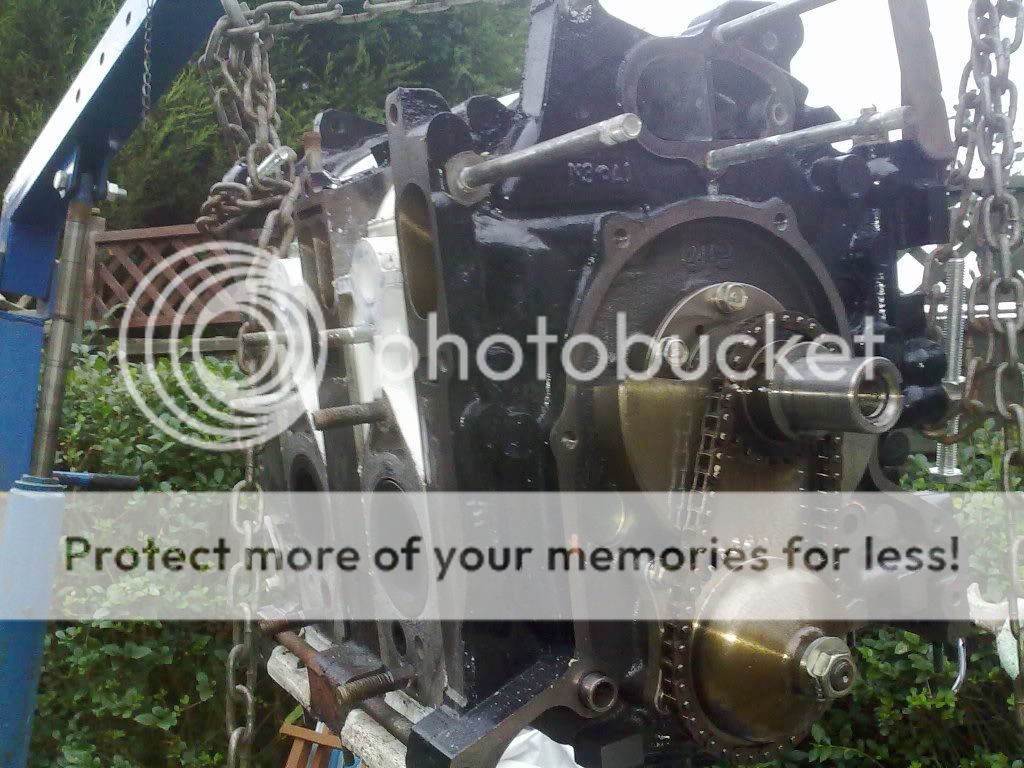
Familiar sight to a lot of FD owners:
1 perfectly working block:
1 less than perfect set of 99 spec twins:
Sad face.
At this point, I sat down and decided what to do. Original plan was to refrsh the ancilliaries, but at this point I realised that what I had was a perfectly good, but 14 year old engine. Compression was still in the 7's, but water seals had to be on borrowed time. I took the decision to strip it down and rebuild it befopre I was forced to.
I also looked at turbo options. Replacement 99 specs were big money, as were BNR's. I wanted similar response, and decent power, I was torn between a T04e, and a GT35r.
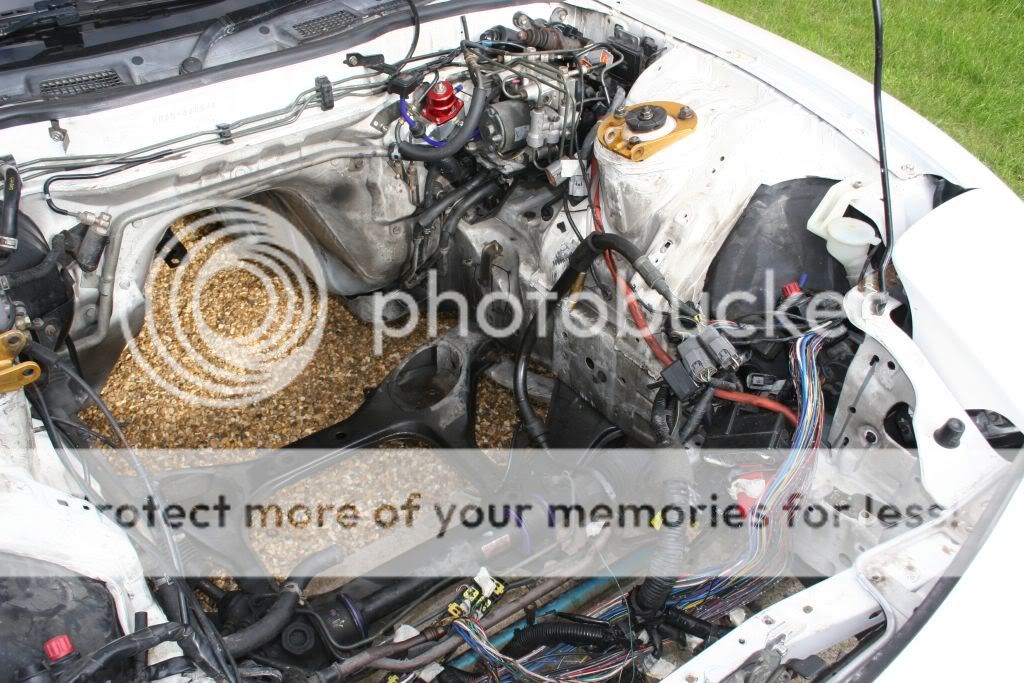
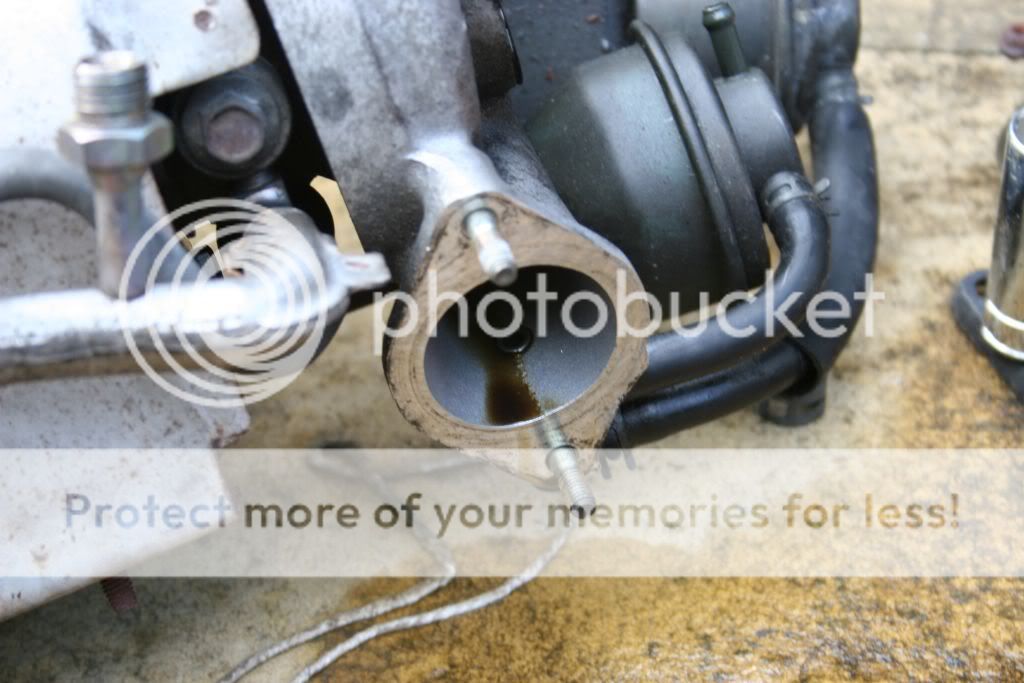
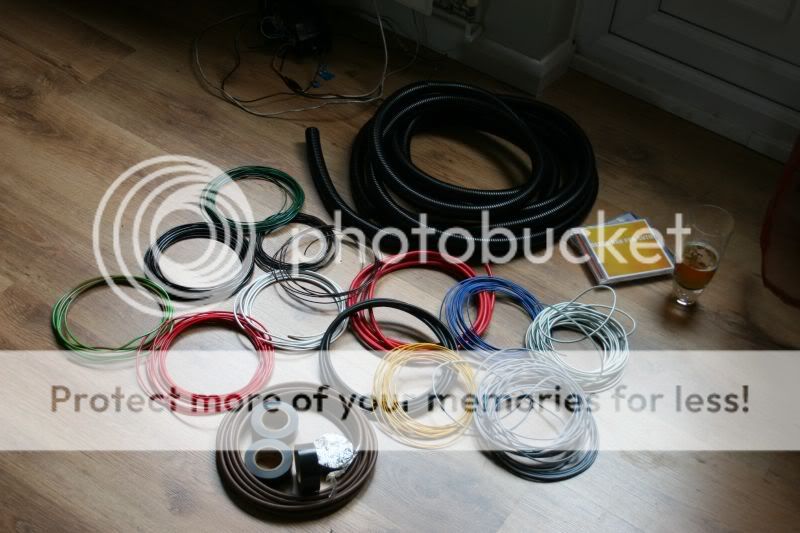
In the meantime, I decided that I wanted to neaten up the bay a bit, so sticky fingers time:
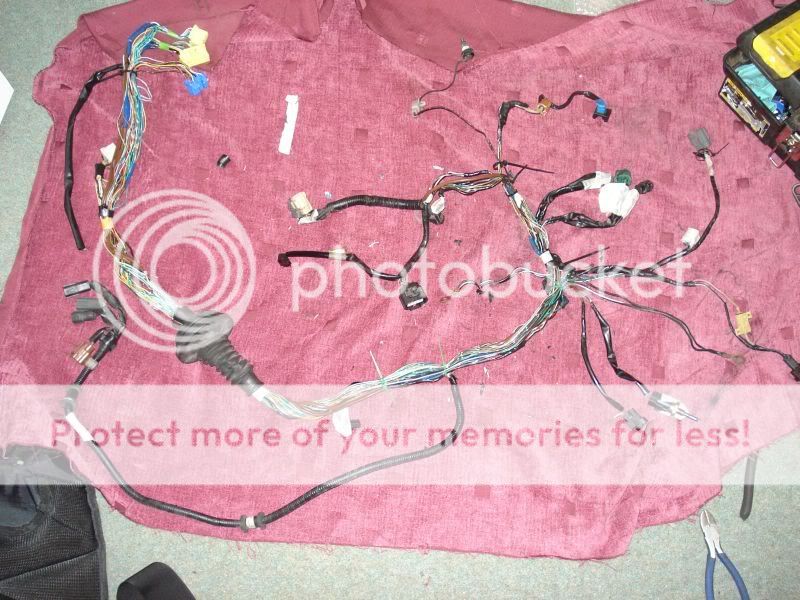
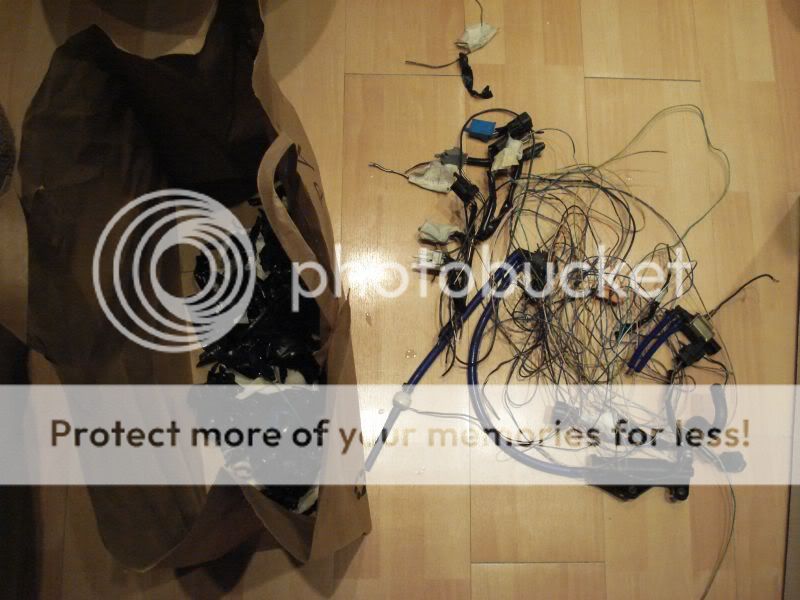
Stripped out all the wiring and emissions junk I didn't need, and hid some of the stuff I did:
Got a few supplies
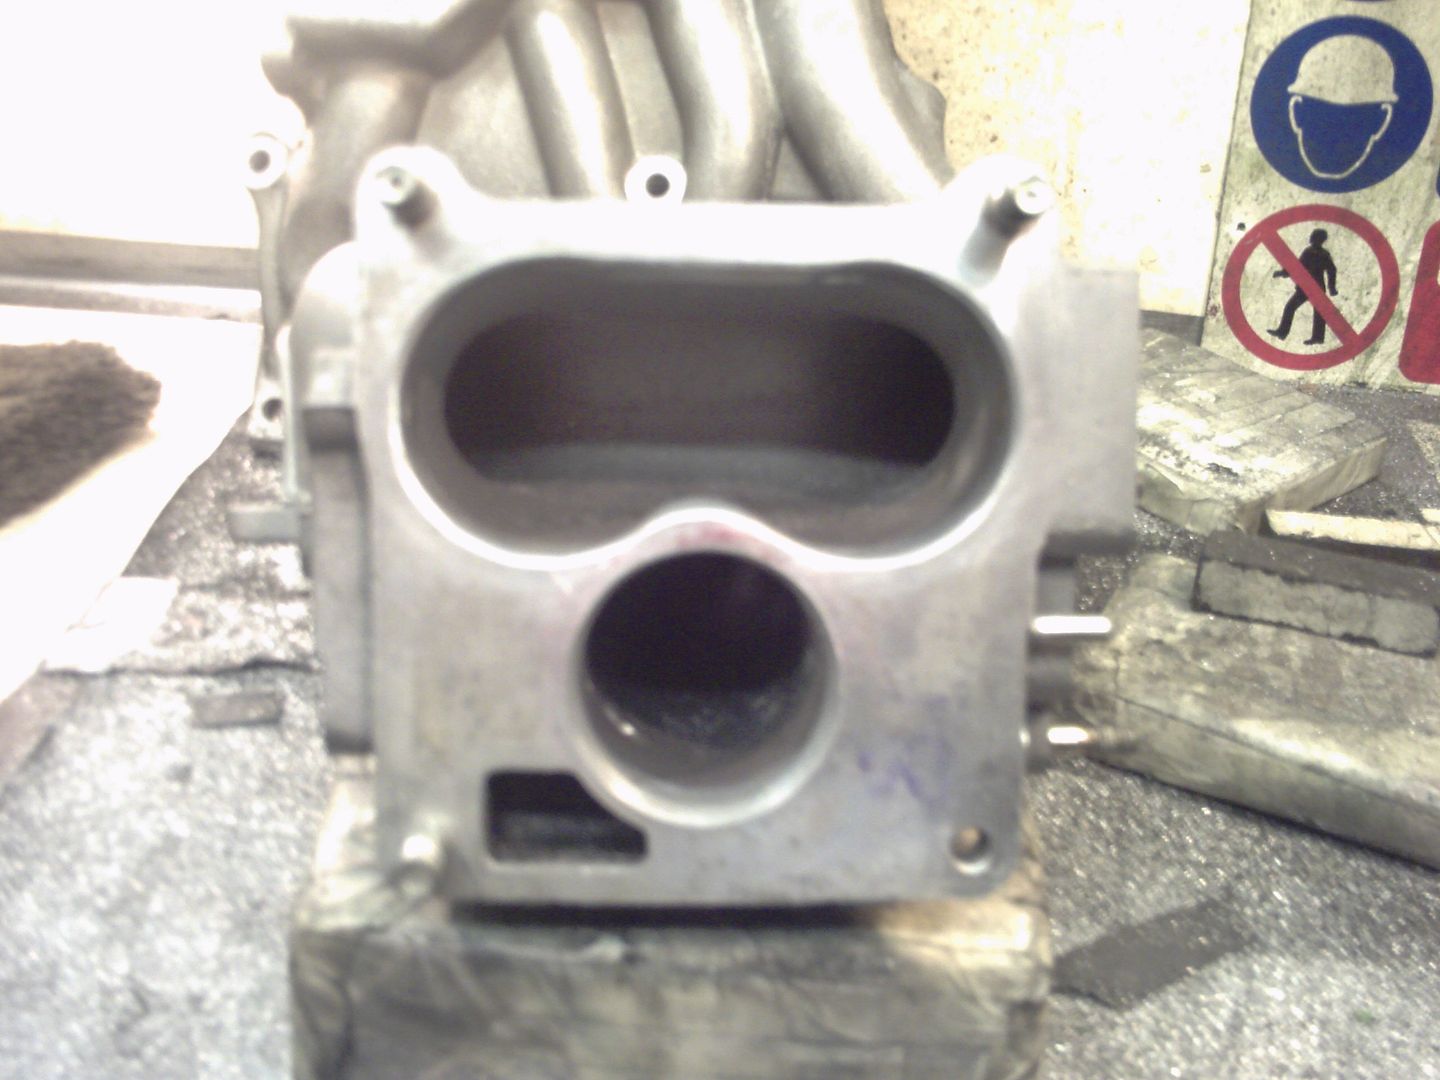
replaced the leaky KG rail that I'd had problems with for this lovely piece from Kev@BilletBitz

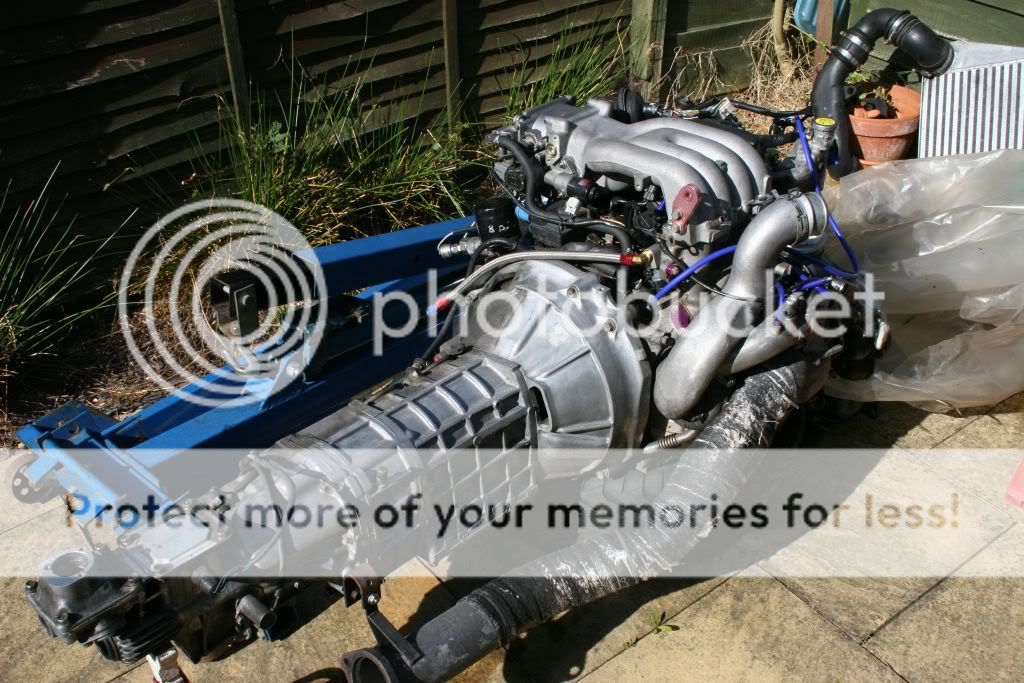
and in the mean time, round to a friend's with her heart
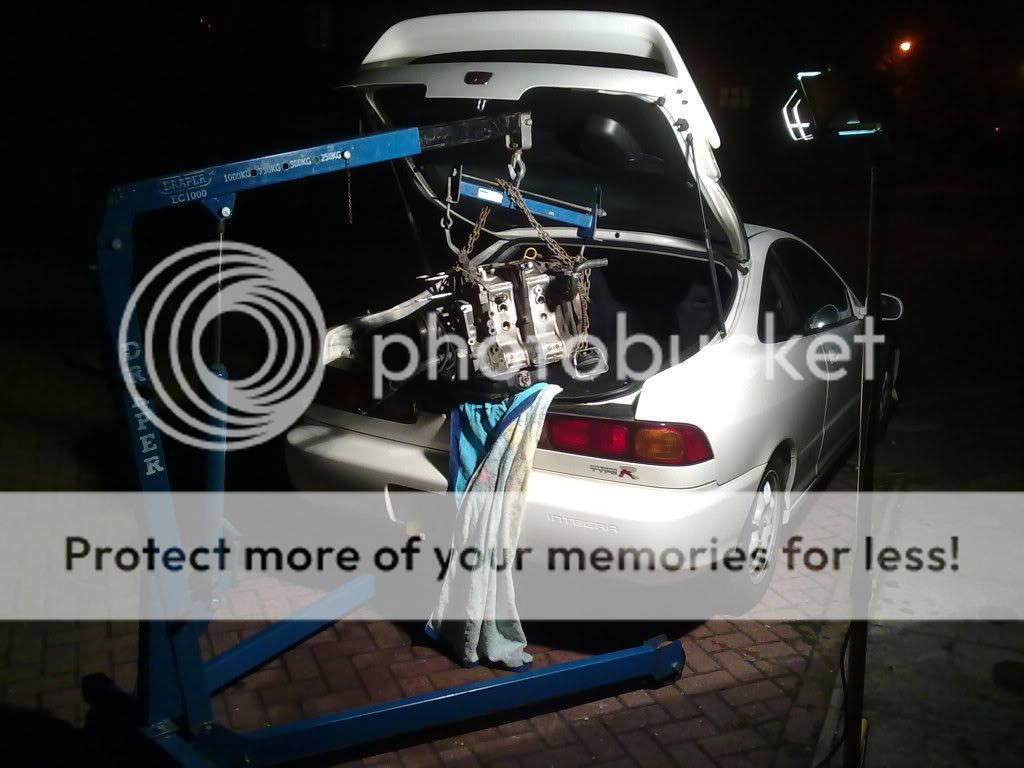
which was then pulled apart, and given a clean bill of health
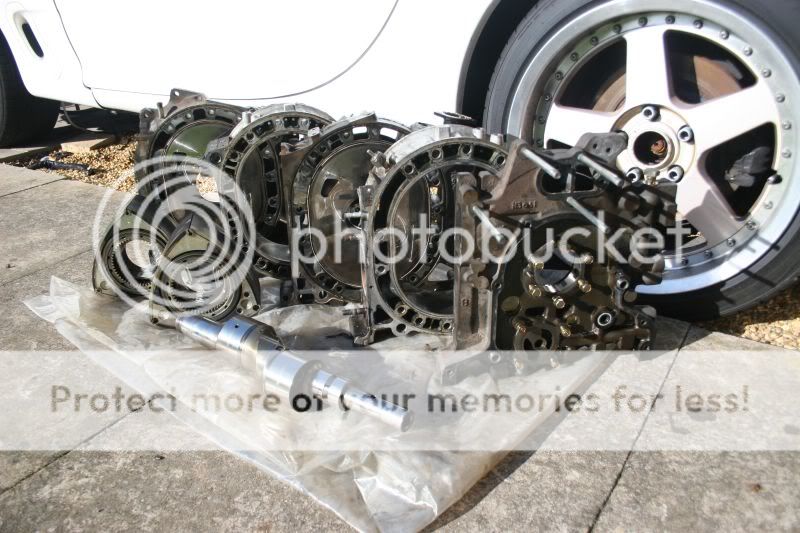
1 perfectly working block:
1 less than perfect set of 99 spec twins:
Sad face.
At this point, I sat down and decided what to do. Original plan was to refrsh the ancilliaries, but at this point I realised that what I had was a perfectly good, but 14 year old engine. Compression was still in the 7's, but water seals had to be on borrowed time. I took the decision to strip it down and rebuild it befopre I was forced to.
I also looked at turbo options. Replacement 99 specs were big money, as were BNR's. I wanted similar response, and decent power, I was torn between a T04e, and a GT35r.
In the meantime, I decided that I wanted to neaten up the bay a bit, so sticky fingers time:
Stripped out all the wiring and emissions junk I didn't need, and hid some of the stuff I did:
Got a few supplies
replaced the leaky KG rail that I'd had problems with for this lovely piece from Kev@BilletBitz
and in the mean time, round to a friend's with her heart
which was then pulled apart, and given a clean bill of health
Thread Starter
Senior Member
Joined: Nov 2007
Posts: 251
Likes: 0
From: Warwickshire, UK
had some magic done by Era de Clerke at OldOne Racing in the UK
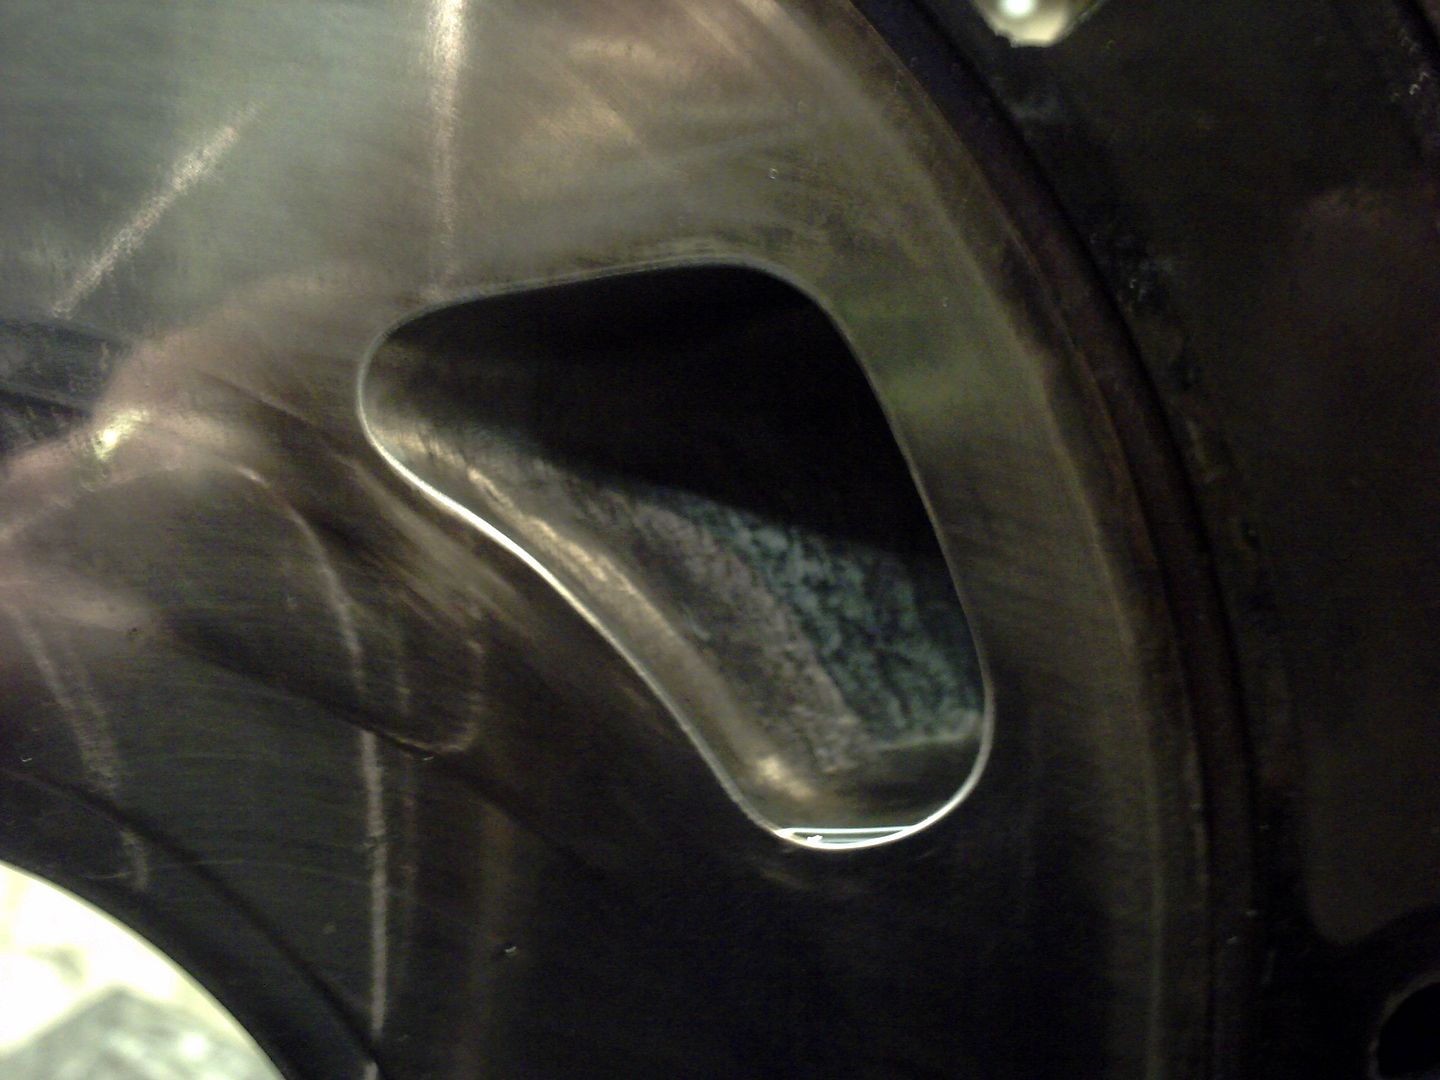
He also port matched LIM and UIM, and of course did the exhaust ports.
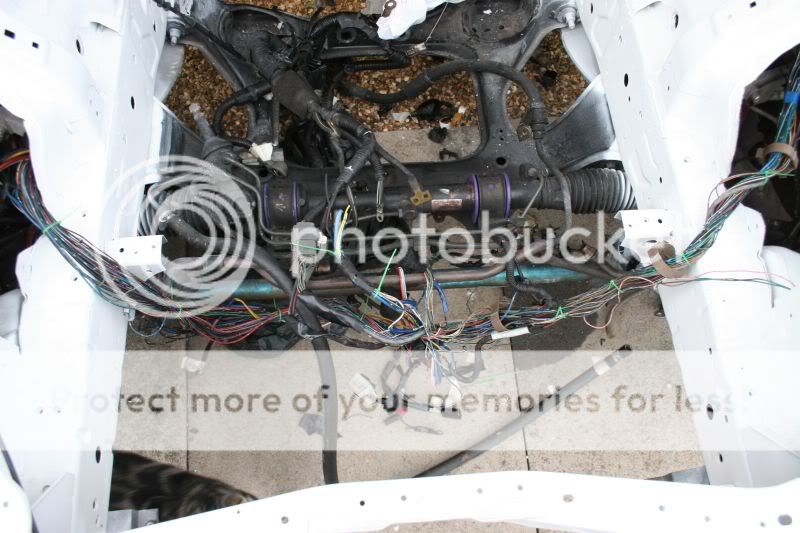
While I was waiting for my rebuild parts to arrive, ripped the loom apart and removed all the junk:
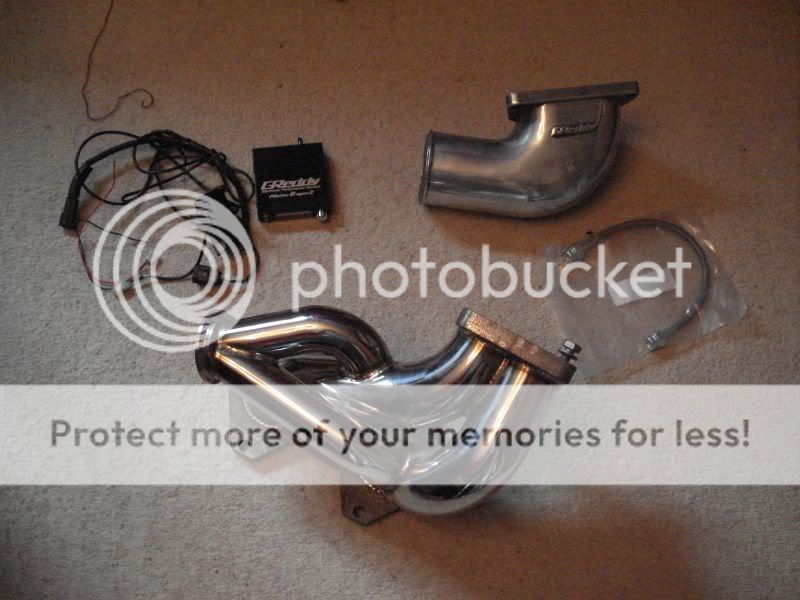
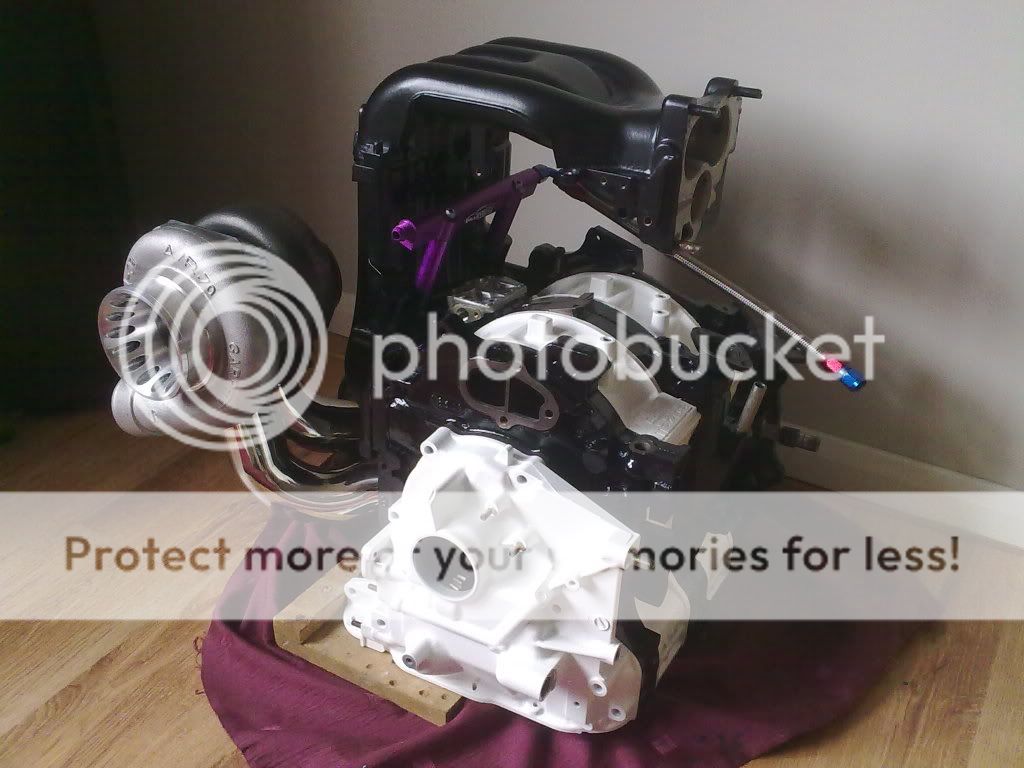
And bought a lovely ASE manifold and shiny elbow
Created my Panda heart
did a bit of grinding
I'd also sent some parts off to be powder coated, came back looking all lovely and satiny
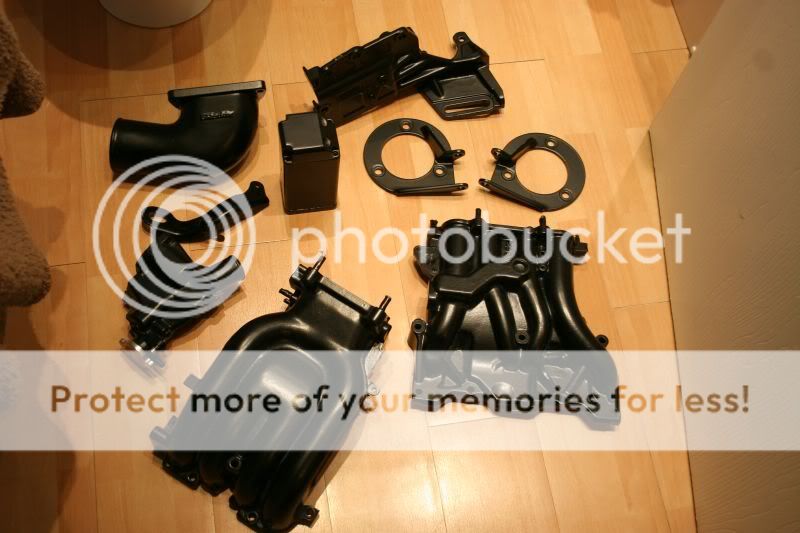
did a mock assembly, with the blower, courtesy of RX7Store
And a nice package turned up from your side of the pond
He also port matched LIM and UIM, and of course did the exhaust ports.
While I was waiting for my rebuild parts to arrive, ripped the loom apart and removed all the junk:
And bought a lovely ASE manifold and shiny elbow
Created my Panda heart
did a bit of grinding
I'd also sent some parts off to be powder coated, came back looking all lovely and satiny
did a mock assembly, with the blower, courtesy of RX7Store
And a nice package turned up from your side of the pond
Thread Starter
Senior Member
Joined: Nov 2007
Posts: 251
Likes: 0
From: Warwickshire, UK
And my new engine mounts turned up

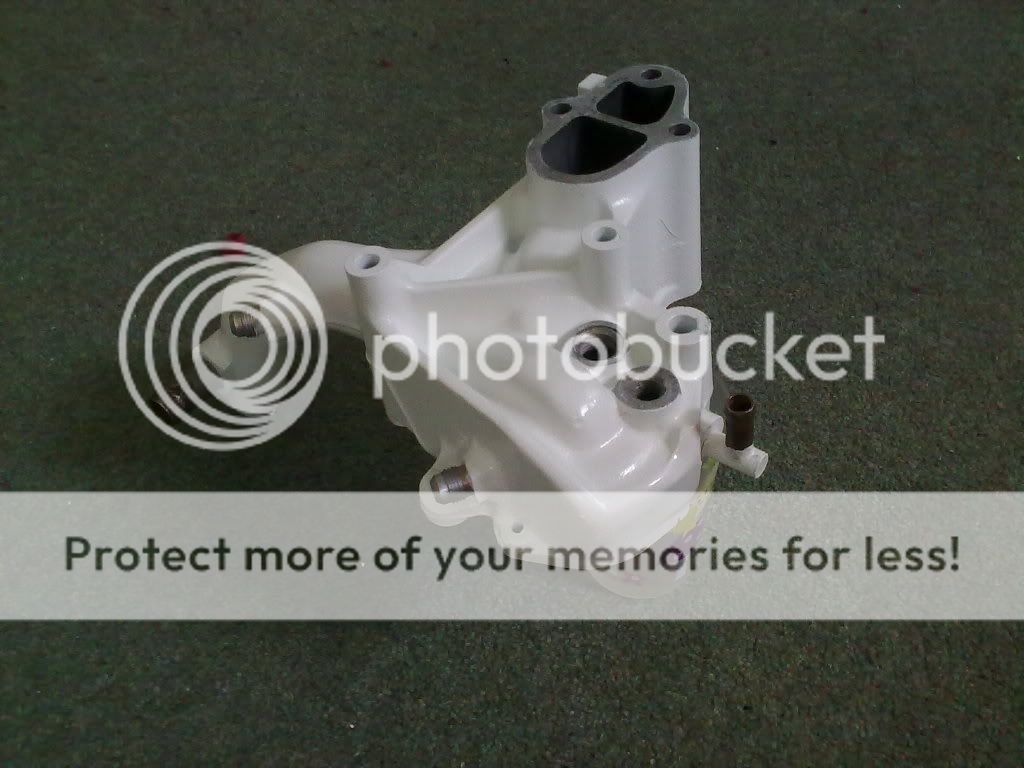
Modified wp housing - Air pump bracket removed, AN fittings welded on
Block back in!
And some custom work by a great friend:
At this point I started getting carried away.
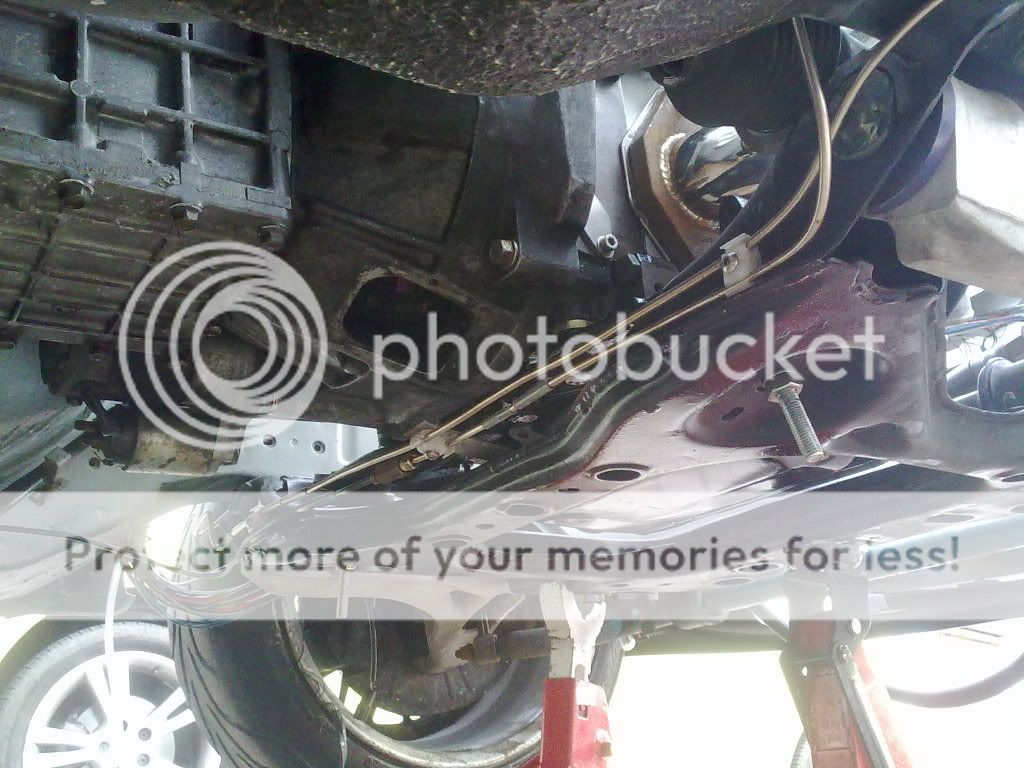
Pulled the ABS as she's mostly track driving, weekends, and fun, and hid the piping a bit:
Got more carried away
Modified wp housing - Air pump bracket removed, AN fittings welded on
Block back in!
And some custom work by a great friend:
At this point I started getting carried away.
Pulled the ABS as she's mostly track driving, weekends, and fun, and hid the piping a bit:
Got more carried away
Thread Starter
Senior Member
Joined: Nov 2007
Posts: 251
Likes: 0
From: Warwickshire, UK
Had the genius that is Craig@Dyno Torque customise a generic core for me
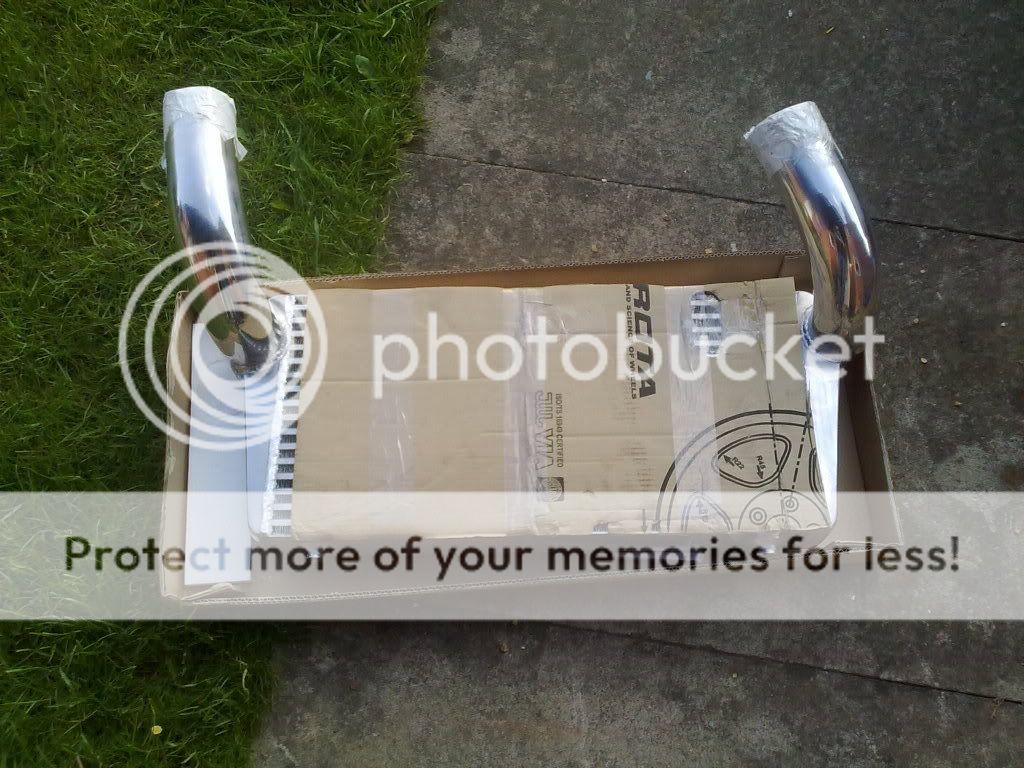
mounted and piped up
Then, the moment came! Fired up on the button!
I couldn't stop grinning! And so began the run in...
In the mean time, had a set of these lying about (love or hate the stretch, it suits my needs, and they are sticky tyres)

Reverse mounted the rears for more dish and less offset

Shock off, jacked up, plenty of clearance
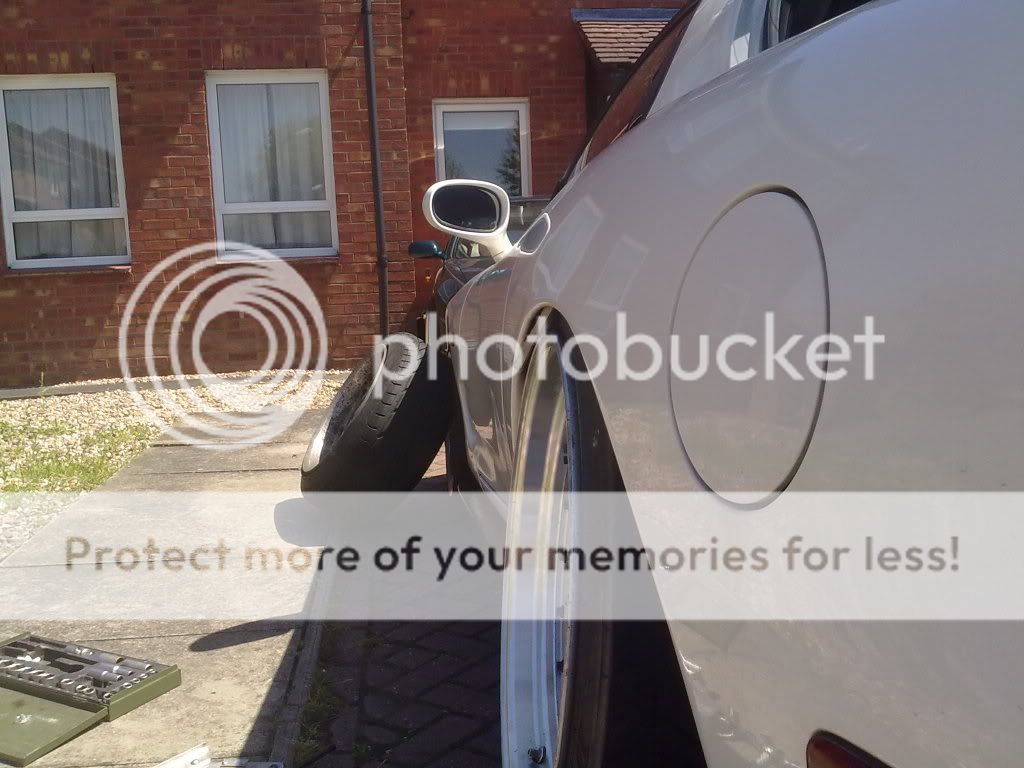
And she started looking like I'd always wanted

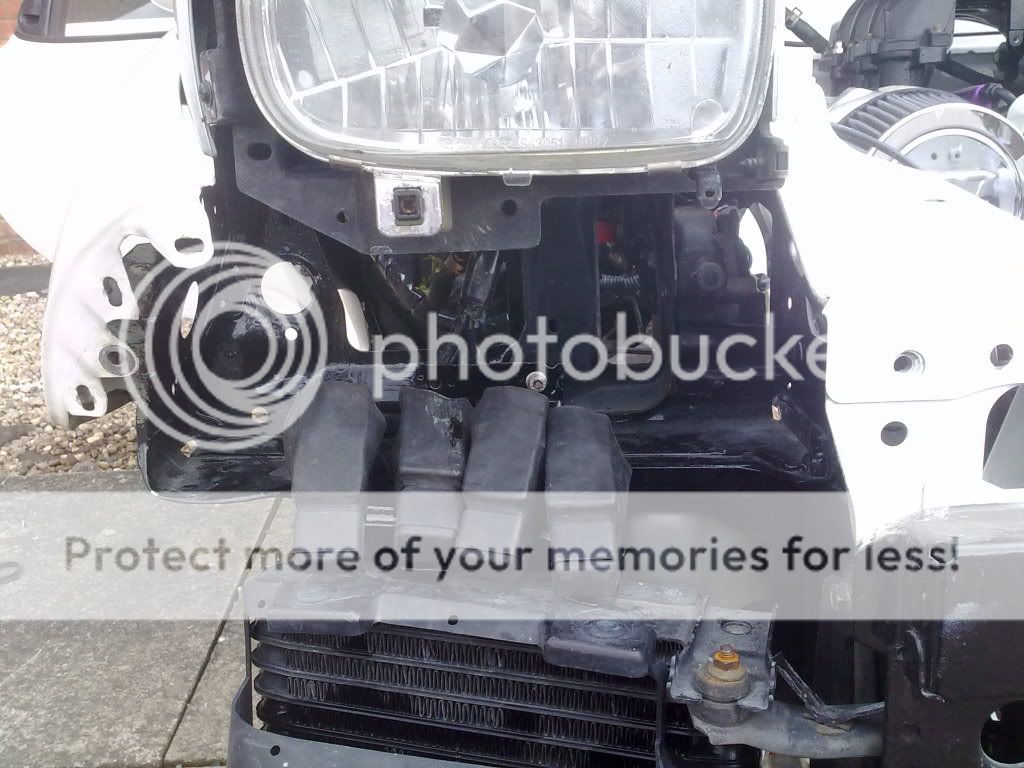
So, run in carried on - modded the rad for a better pipe route
mounted and piped up
Then, the moment came! Fired up on the button!
I couldn't stop grinning! And so began the run in...
In the mean time, had a set of these lying about (love or hate the stretch, it suits my needs, and they are sticky tyres
)Reverse mounted the rears for more dish and less offset
Shock off, jacked up, plenty of clearance
And she started looking like I'd always wanted
So, run in carried on - modded the rad for a better pipe route
Trending Topics
Thread Starter
Senior Member
Joined: Nov 2007
Posts: 251
Likes: 0
From: Warwickshire, UK
At this point, really, really bad stuff happened
After refitting he rad, I took her out for a run. Temps were fine, warming up ok. 60...70...
Then, I hit 81 on the PFC. Stat opened, and all of a sudden the temps skyrocketed
I killed the engien straight away, steam pouring out the rad cap
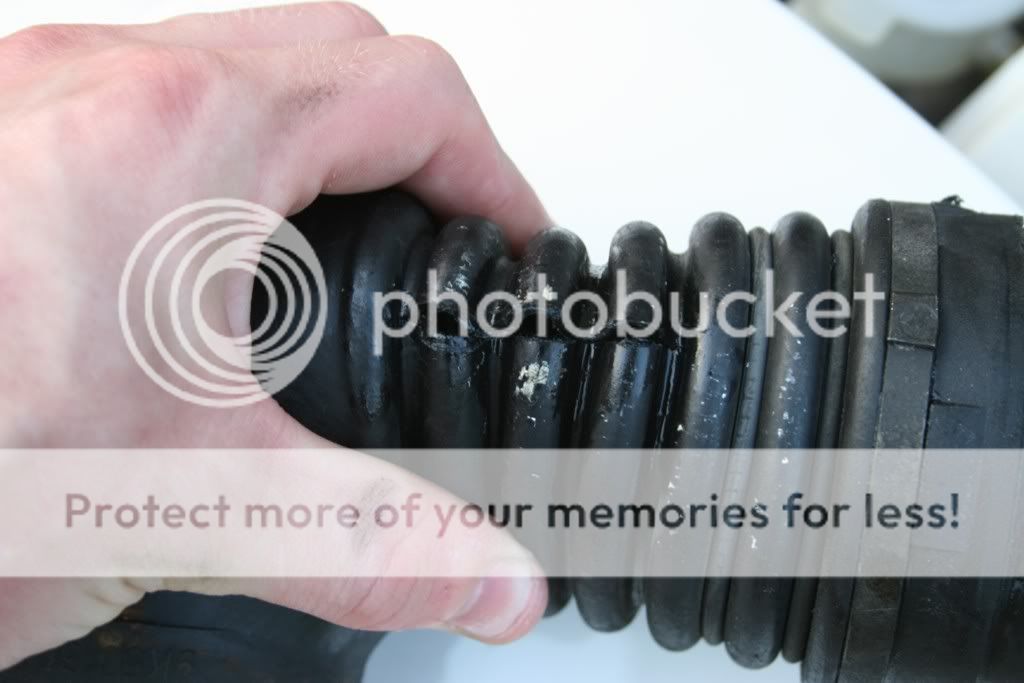
To cut a long story short, a hose was leaking, I didn't spot it, adn the rad had emptied itself When the stat opened it emptied the cooling system into the rad, and temps were through the roof
I nervously did the champagne test, and results were very bad indeed
<object width="425" height="344"><param name="movie" value="http://www.youtube.com/v/lx7Q--hqAj4&hl=en&fs=1"></param><param name="allowFullScreen" value="true"></param><param name="allowscriptaccess" value="always"></param><embed src="http://www.youtube.com/v/lx7Q--hqAj4&hl=en&fs=1" type="application/x-shockwave-flash" allowscriptaccess="always" allowfullscreen="true" width="425" height="344"></embed></object>
So, out it came again...
I took it to a local rotary specialist, who looked it over. It looked like I'd been very lucky.
Plates were straight, no blueing, nothing, all I needed were new soft seals - a cheap rebuild!
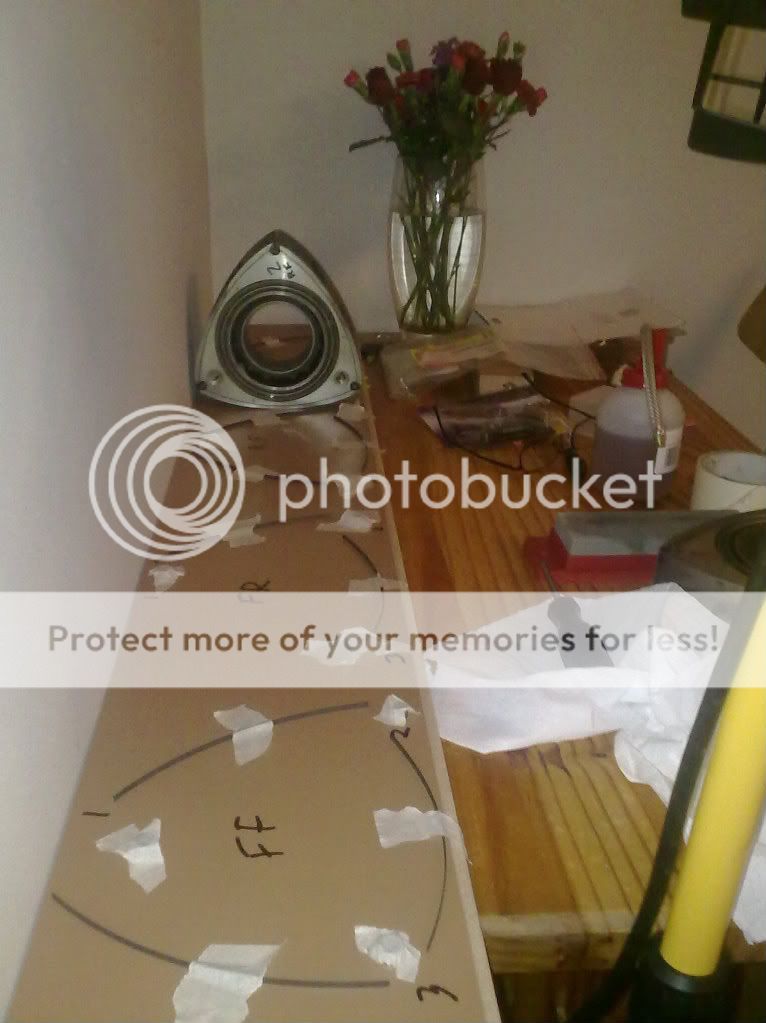
So, this time, I did it all by myself. In my front room...
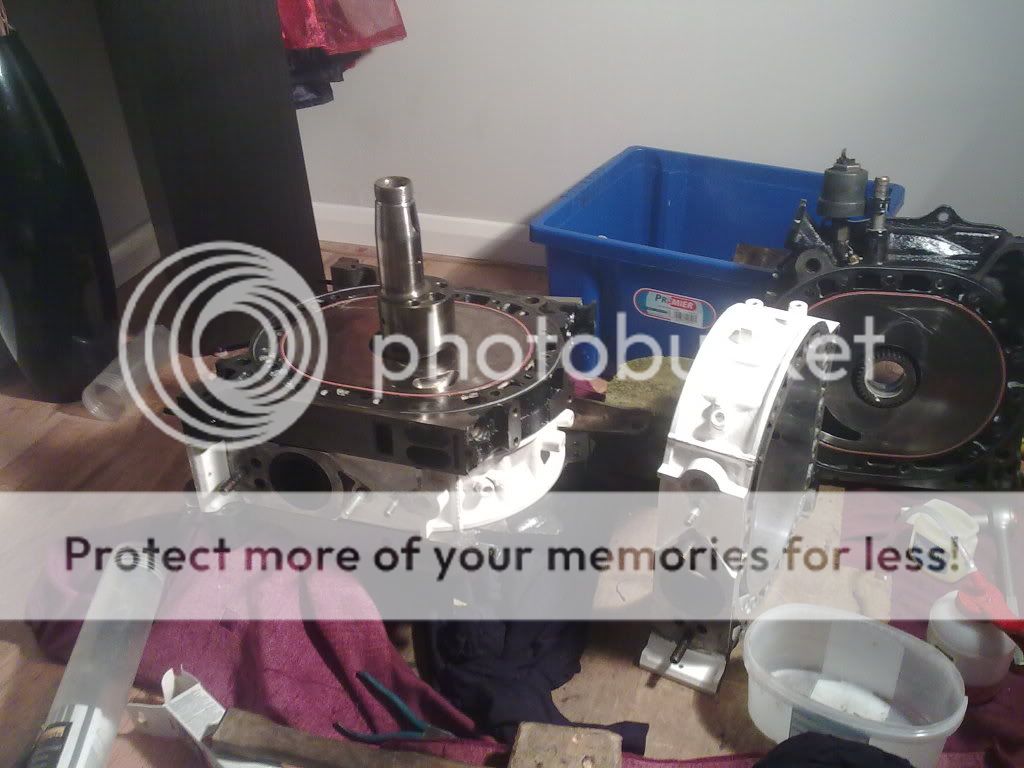
My other half is VERY understanding!

After refitting he rad, I took her out for a run. Temps were fine, warming up ok. 60...70...
Then, I hit 81 on the PFC. Stat opened, and all of a sudden the temps skyrocketed
I killed the engien straight away, steam pouring out the rad cap
To cut a long story short, a hose was leaking, I didn't spot it, adn the rad had emptied itself
When the stat opened it emptied the cooling system into the rad, and temps were through the roof I nervously did the champagne test, and results were very bad indeed
<object width="425" height="344"><param name="movie" value="http://www.youtube.com/v/lx7Q--hqAj4&hl=en&fs=1"></param><param name="allowFullScreen" value="true"></param><param name="allowscriptaccess" value="always"></param><embed src="http://www.youtube.com/v/lx7Q--hqAj4&hl=en&fs=1" type="application/x-shockwave-flash" allowscriptaccess="always" allowfullscreen="true" width="425" height="344"></embed></object>
So, out it came again...
I took it to a local rotary specialist, who looked it over. It looked like I'd been very lucky.
Plates were straight, no blueing, nothing, all I needed were new soft seals - a cheap rebuild!
So, this time, I did it all by myself. In my front room...
My other half is VERY understanding!
Thread Starter
Senior Member
Joined: Nov 2007
Posts: 251
Likes: 0
From: Warwickshire, UK
So, back in again!
Woop!
[img]<object width="425" height="344"><param name="movie" value="http://www.youtube.com/v/TO53lFiGmTE?hl=en&fs=1"></param><param name="allowFullScreen" value="true"></param><param name="allowscriptaccess" value="always"></param><embed src="http://www.youtube.com/v/TO53lFiGmTE?hl=en&fs=1" type="application/x-shockwave-flash" allowscriptaccess="always" allowfullscreen="true" width="425" height="344"></embed></object>
[/img]
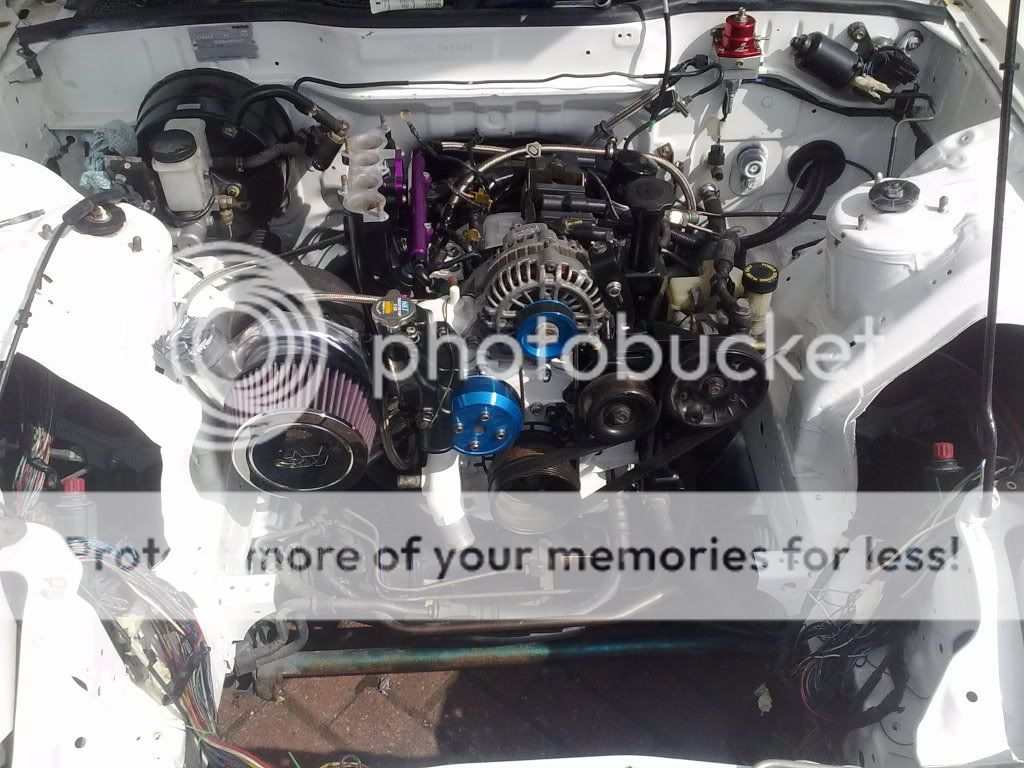
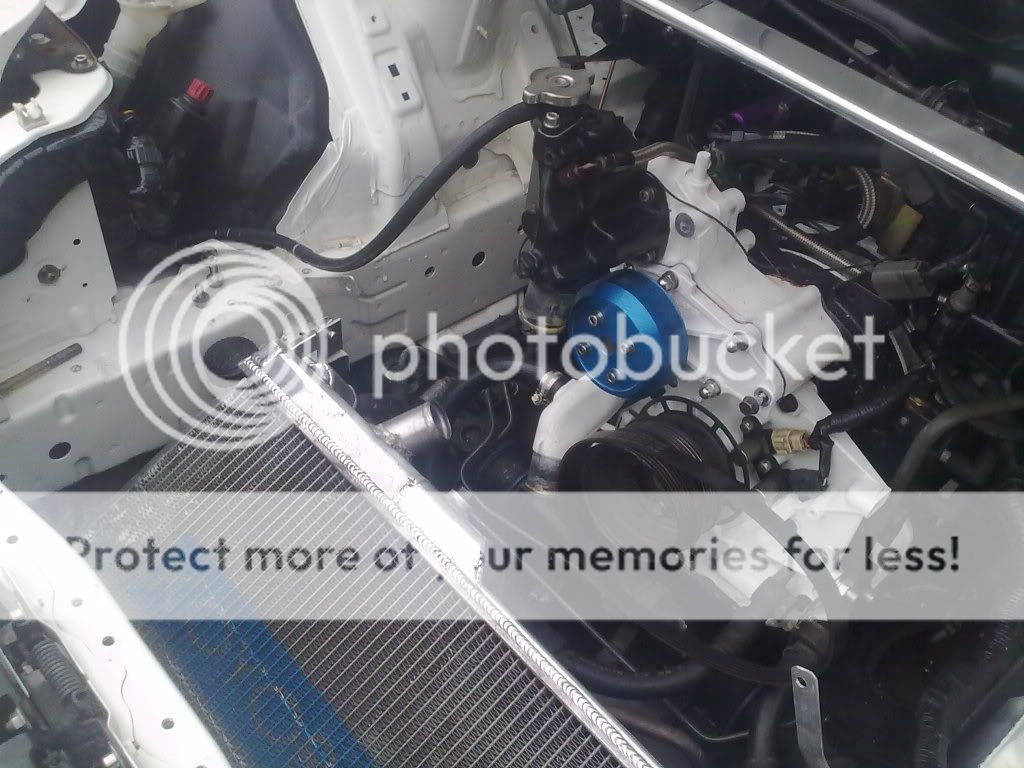
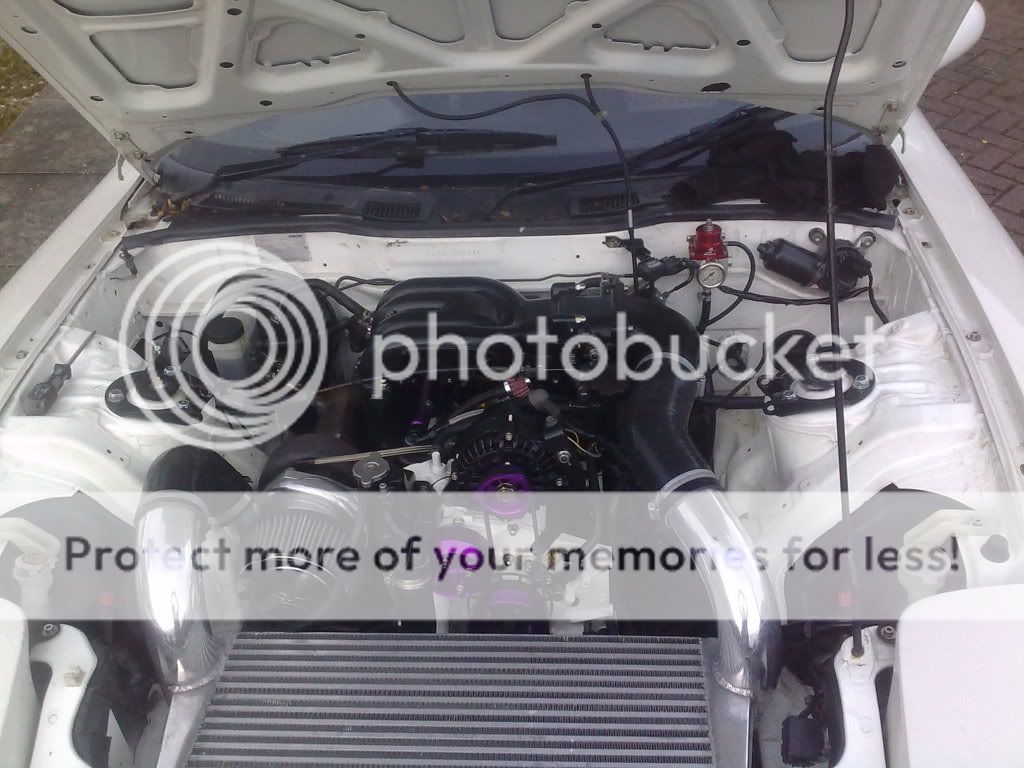
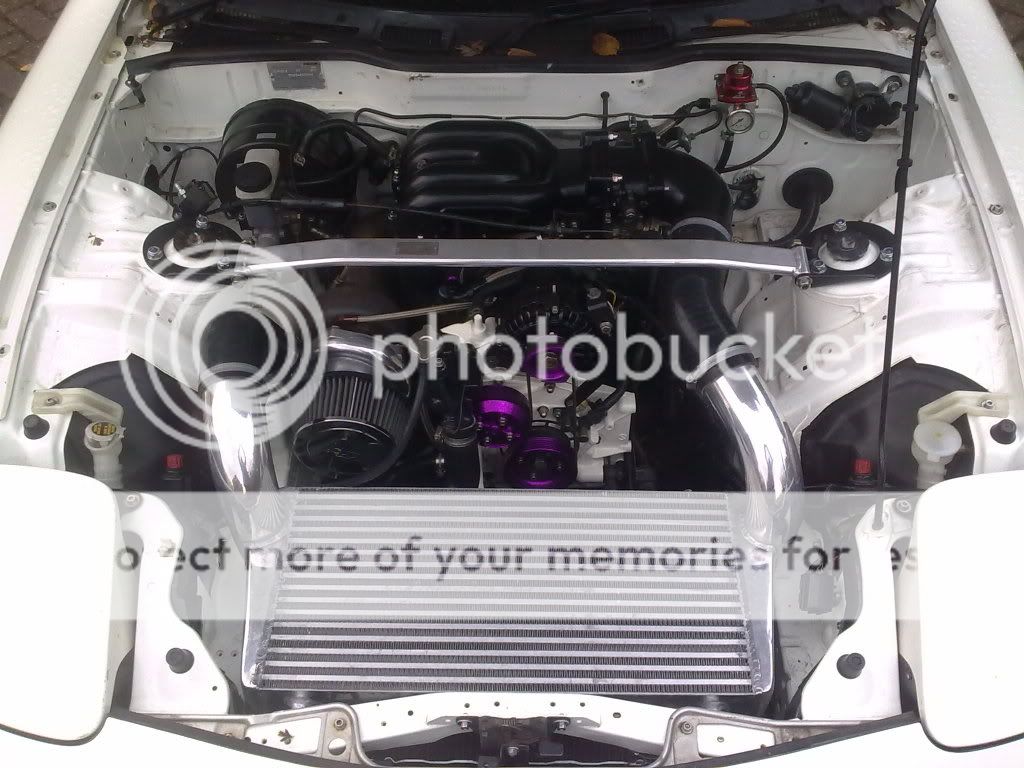
Now featuring custom pulleys - PS has been removed and replaced with an electric pump. More great CNC work by BilletBitz.
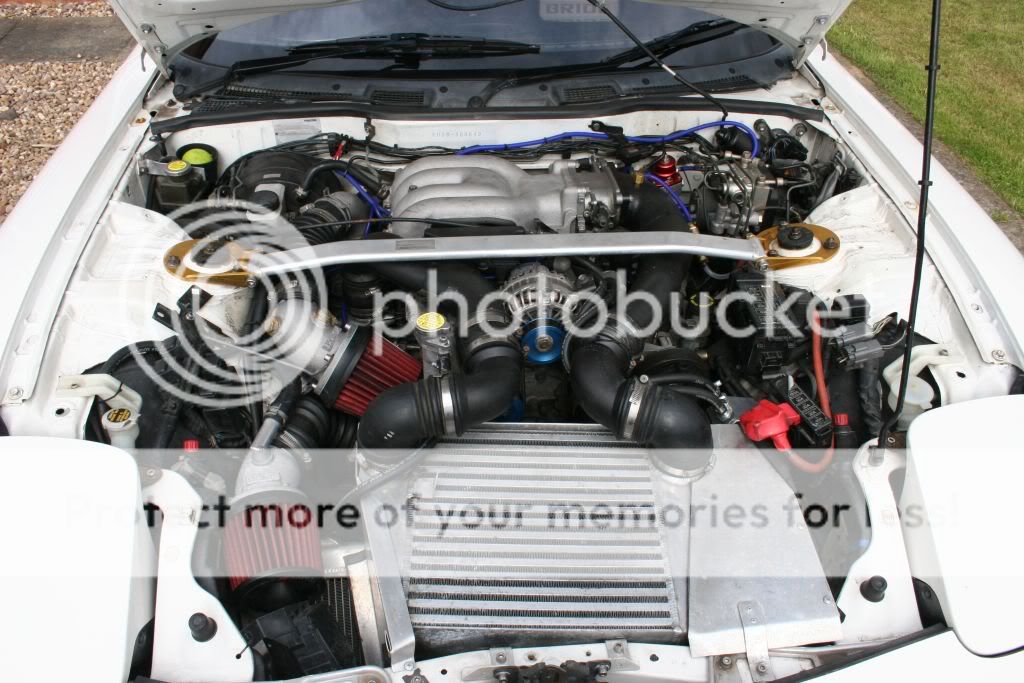
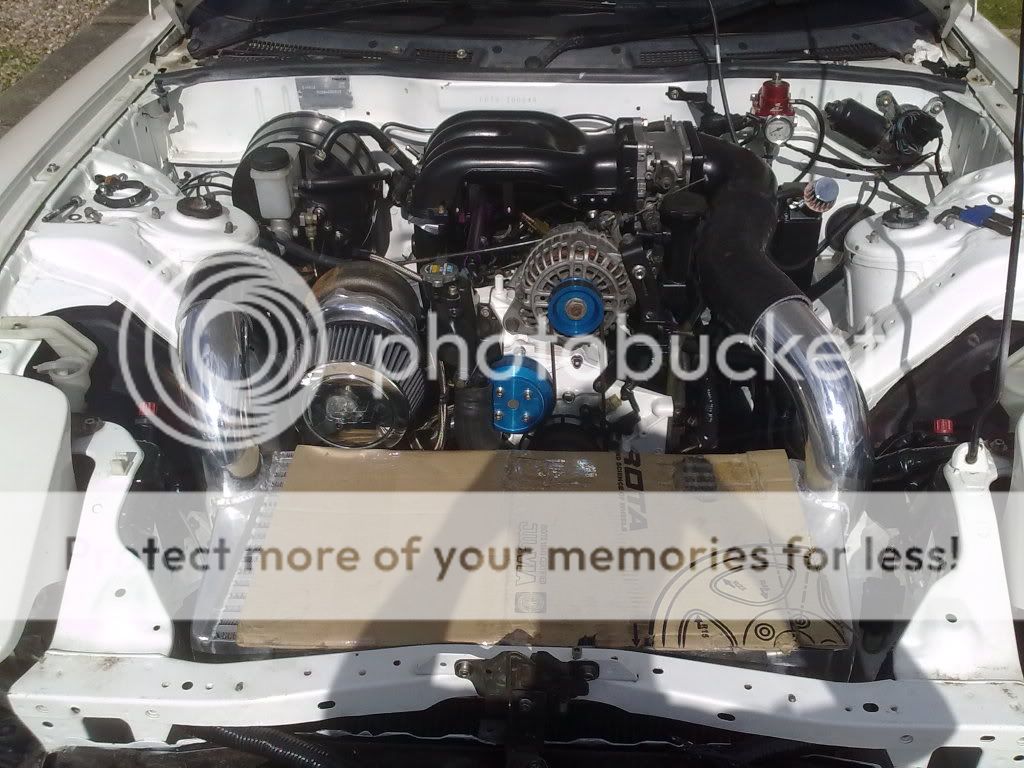
Bay now looks pretty much like this:
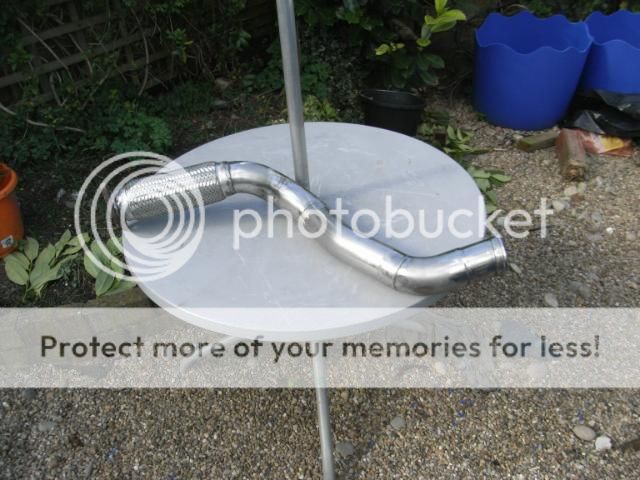
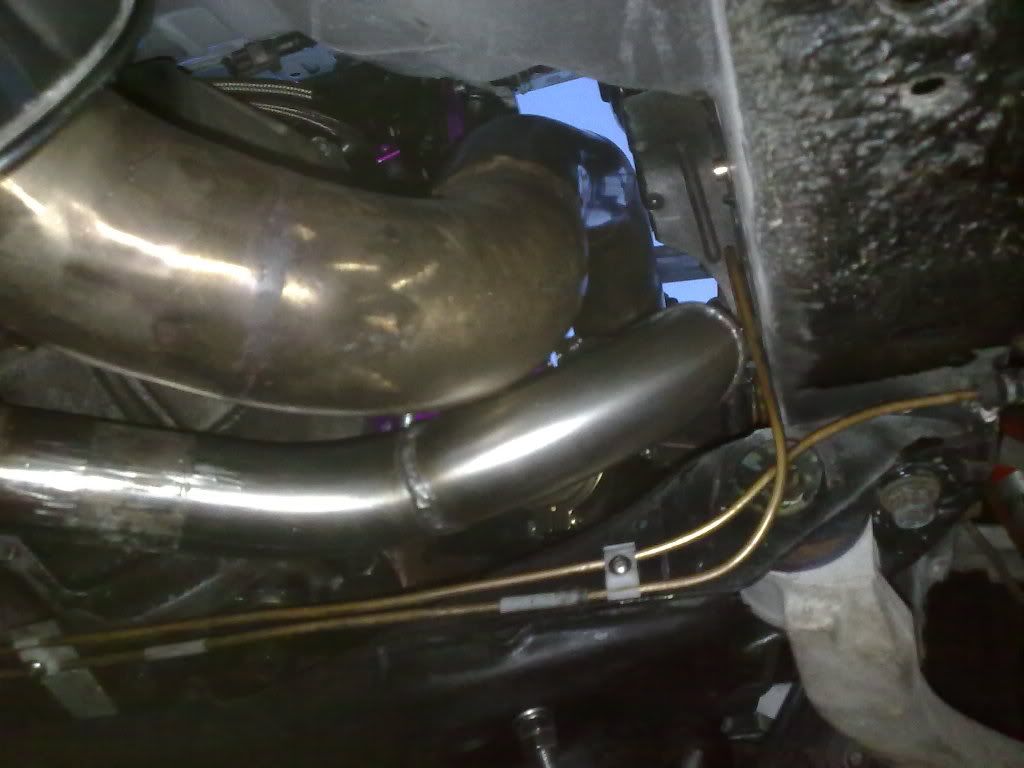
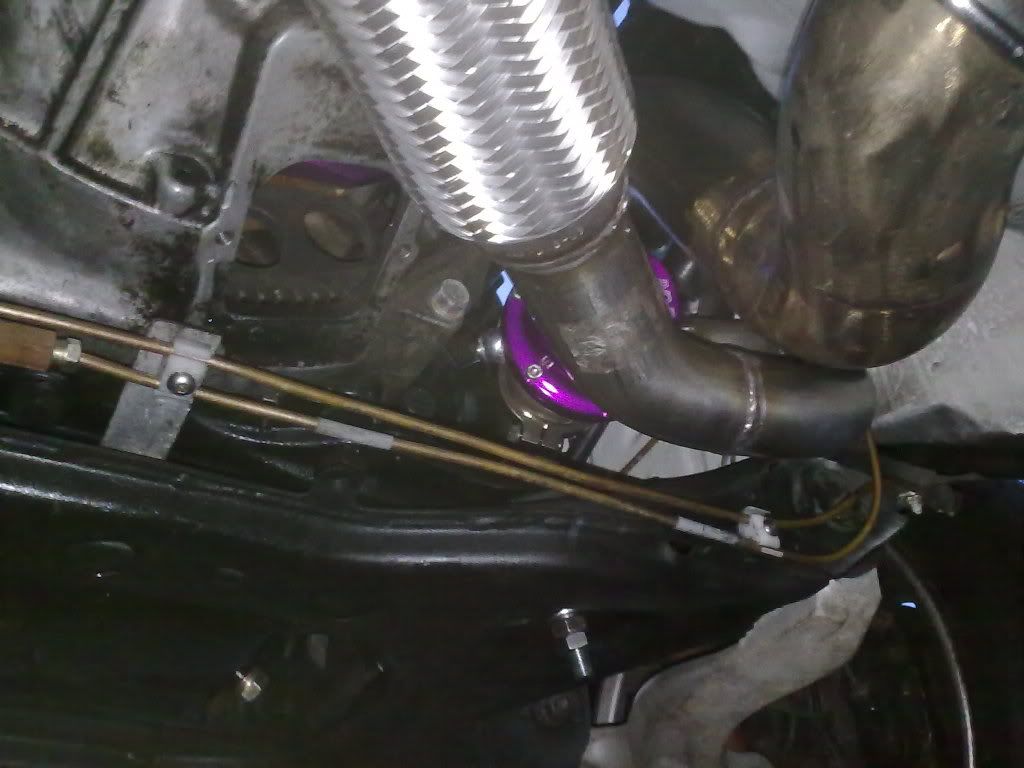
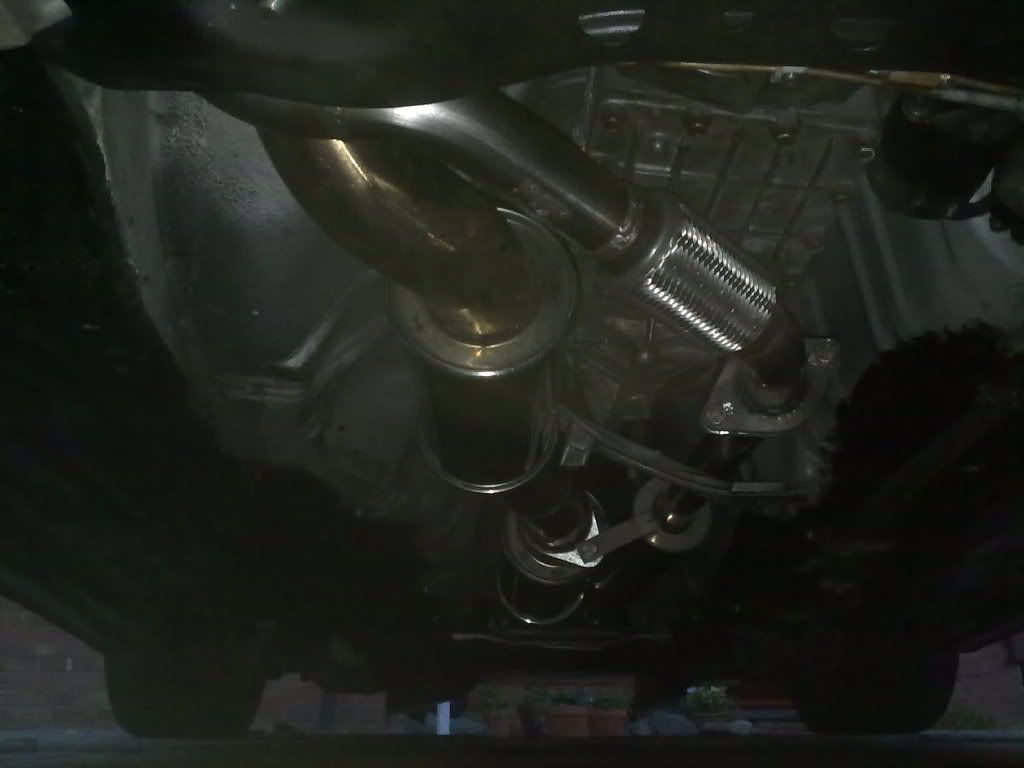
So, onto the exahust.
Again, my good mate Trace agreed to build me a new system. I had decided to run a seperate system for the wastegate, but there wasn't room with the decat silencer in there. so I fitted a straight through mid section.
To be honest, I hated the noise - it was too raspy, so he added in two 12" boxes for me, and created an entirely new system for the wg. The man is a legend!
And the end result is this:
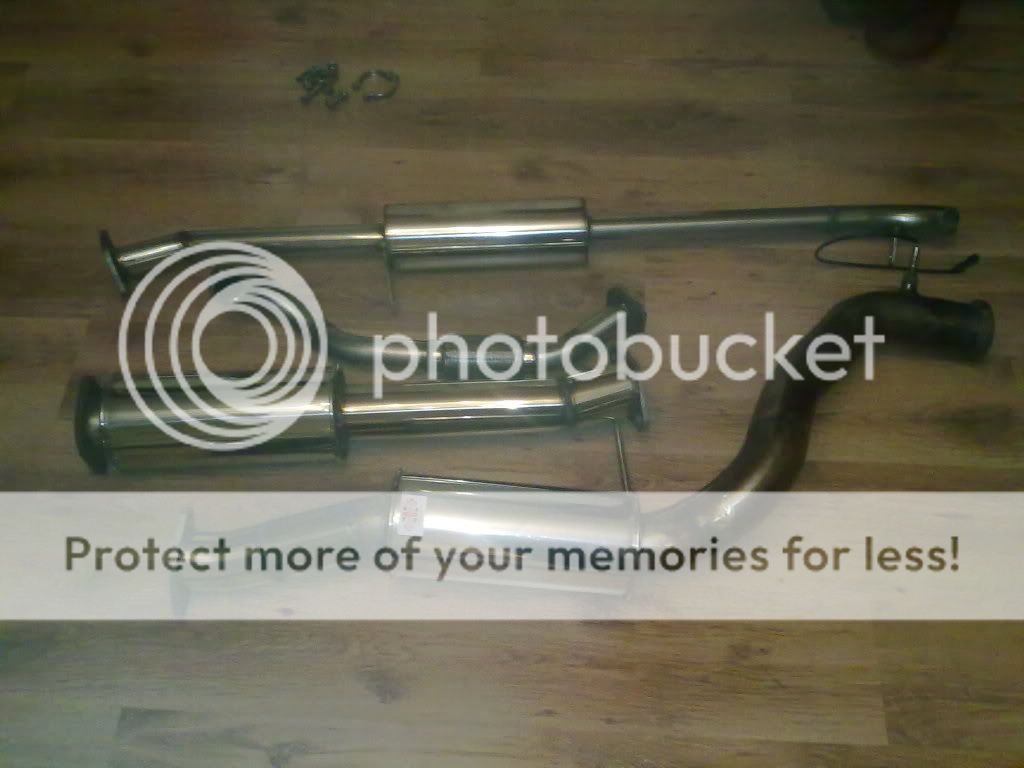
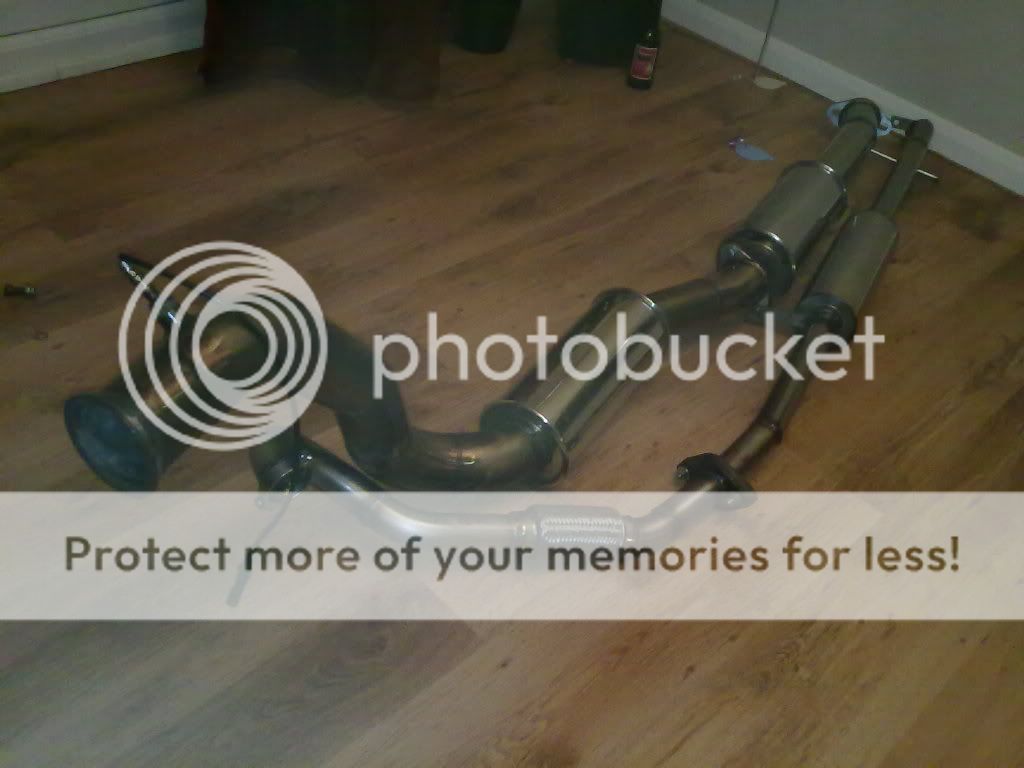

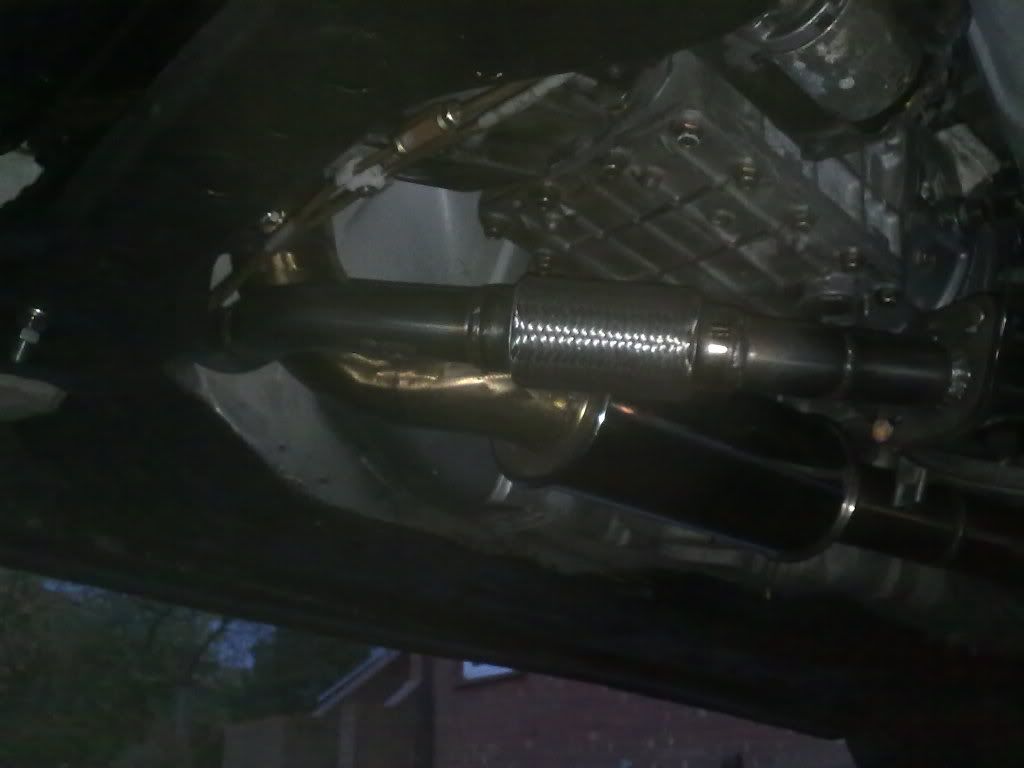
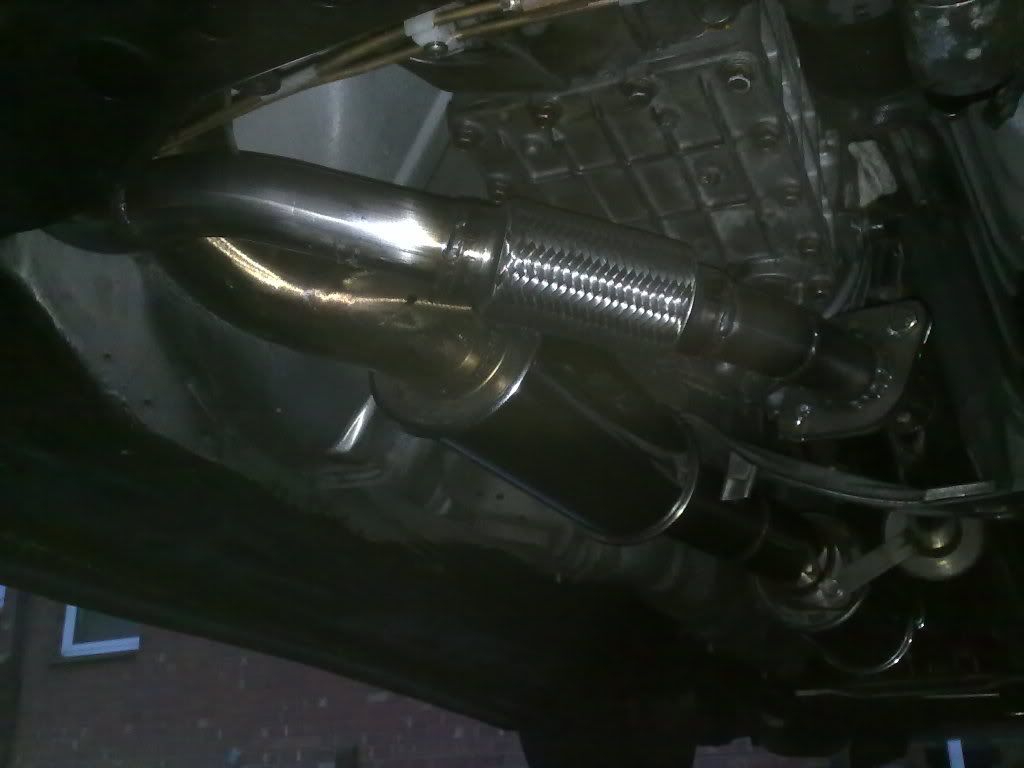

Awesome
So, that brings me to now.
Plans are to sort the ignition system, get the manifold ceramic coated, then take it off for mapping.
All the while I'm hiding more stuff in the bay - I see something ugly, I hide it! Lots of mini projects. I'm getting there slowly .
Sorry for the long read, hope it's of some interest to some people
Si.
Woop!
[img]<object width="425" height="344"><param name="movie" value="http://www.youtube.com/v/TO53lFiGmTE?hl=en&fs=1"></param><param name="allowFullScreen" value="true"></param><param name="allowscriptaccess" value="always"></param><embed src="http://www.youtube.com/v/TO53lFiGmTE?hl=en&fs=1" type="application/x-shockwave-flash" allowscriptaccess="always" allowfullscreen="true" width="425" height="344"></embed></object>
[/img]
Now featuring custom pulleys - PS has been removed and replaced with an electric pump. More great CNC work by BilletBitz.
Bay now looks pretty much like this:
So, onto the exahust.
Again, my good mate Trace agreed to build me a new system. I had decided to run a seperate system for the wastegate, but there wasn't room with the decat silencer in there. so I fitted a straight through mid section.
To be honest, I hated the noise - it was too raspy, so he added in two 12" boxes for me, and created an entirely new system for the wg. The man is a legend!
And the end result is this:
Awesome
So, that brings me to now.
Plans are to sort the ignition system, get the manifold ceramic coated, then take it off for mapping.
All the while I'm hiding more stuff in the bay - I see something ugly, I hide it! Lots of mini projects. I'm getting there slowly .
Sorry for the long read, hope it's of some interest to some people
Si.
oh yes yes yes! this thread is full of win!
1 might have to steal the panda themed engine block =/
2 loved the panspeed rims and the look
3 the ones you have on now look great as well.
4 becareful with your fan relays there, its prone to get wet, especially with the boot facing up. it will fcjdfunaf your relays and your fans wont work as well and over heat (ask me how i know.....)
5 purple looks awesome.
6 interesting with the wg all the way back... never heard of such or seen it before...


excellent build!! love the shot of the little woman (cute socks) sitting on the floor gazing at your rotor power!
since you already had to pull your motor out for a rebuild after overheating, I HIGHLY suggest getting an idler pulley where the air pump was. It put more of belt around the water pump and turns it better. In your video of the 2nd startup, I can see the big purple pulley is slipping even at idle. At higher rpms, it will slip further and contribute to higher water temps.
Do some searches, there are a few out there. Also, dont try to tighten the belt more, that causes damage to internal bearings... look for thread by Chadwick (Tweakit Racing) for all the info.
So, who's gonna win the Premier League this year? Chealsea or Arsenal ? And would love to see Rooney choke big time, lol.
Awesome build! I love the brake lines/wire tucks, really makes it look clean. Interesting idea with the WG all the way back instead of plumbing it in. Where does it exit? The engine block looked awesome, good idea on the colors. The wheels are awesome what kind are they? BBS LM?
Thread Starter
Senior Member
Joined: Nov 2007
Posts: 251
Likes: 0
From: Warwickshire, UK
:o Cheers all, quite flattered
Knock yourself out man
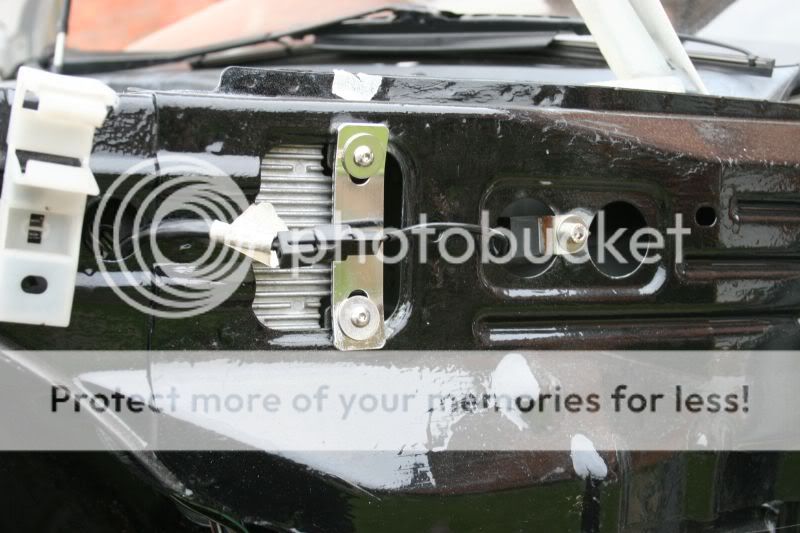
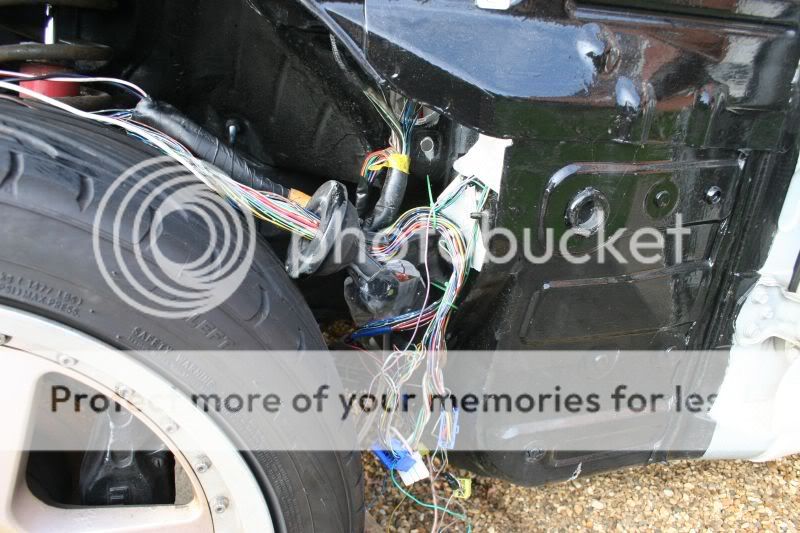
Funny you should say that had to move them after one of them packed up after a week :o They're now at the front of the inner arch - I rewired them to use normal car relays as they are a lot cheaper to replace.
[/QUOTE]
Cheers dude, flattered There are a lot of far, far better FD's over here, it's jsut I don't think you guys see them - mine's small fry, but I've gone a bit mroe OCD than most with the bay. Most of the FD's in the UK are a lot more capable, and work a lot more of the time!
Colum is the man to thank for this - he persuaded me to do it. Exits down to the ground just after the rear most midpipe hanger. I's like to run it all the way to the back of the car, but there's not room without hacking the diffuser. I'm going to go for a more aggressive diffuser at some point which should give me the space to route it out nearer the back.
Cheers man.
Lol! My wife is a wonderful, one of a kind lady - that was only a few months after our wedding,s o I guess I did it at the right time, while she was still in the 'honeymoon period'!
Good call, I was trying to get one to fit from a guy over here (Danny, has done a fair bit for me), but with the way the manifold sits, there just isn't the room, so I've had to run this setup unfortunately
I'm afraid you'd probably have more of an idea than me! I couldn't really care less! Not a man who's into kicking pig's bladders around, more of an adrenaline junkie!
Cheers dude, but I guess the emotional rollercoaster is part of the FD ownership experience!
Cheers Nik! If anyone thinks that my car has tested me, they need to check out Nik's story - mine was a walk in the park compared to the evil luck that he's had! And yes, I may have used a feeler gauge...
Indeed they are - I wouldn't be rollin' on fakies They're actually pretty rare ones originally from a Mine's edition R32GTR. 9.5j et25 all round, however I reverse mounted the rear lips, turning them into something around an et12.
Cheers dude - I got a bit carried away with all the tucks! I keep finding more and more opportunities and then just hiding more stuff. My inspiration was the Honda scene (flame suit on!) and the pink Dragon Performance car over here. They did a brilliant job with theirs.
It's getting to the poitn where I'm getting more and more picky though. Latest purchase was wipers with integrated squirters so I could move the ugly windscreen washer jet lines, hiding the MAP sensor, and sending off the FPR to be re anodized to match!!
Next target is to run the clutch lines through the car and relocate the FPR.
I'm trying to keep stuff as practical as I can, but sometimes I've had to make concessions - TNS relay is, for instance, now hidden under the wing. It's a stupid place to put it though!
Knock yourself out man
4 becareful with your fan relays there, its prone to get wet, especially with the boot facing up. it will fcjdfunaf your relays and your fans wont work as well and over heat (ask me how i know.....)
had to move them after one of them packed up after a week :o They're now at the front of the inner arch - I rewired them to use normal car relays as they are a lot cheaper to replace.[/QUOTE]
Cheers dude, flattered
There are a lot of far, far better FD's over here, it's jsut I don't think you guys see them - mine's small fry, but I've gone a bit mroe OCD than most with the bay. Most of the FD's in the UK are a lot more capable, and work a lot more of the time!
Love the separate WG pipe, where does it exit?
Cheers man.
since you already had to pull your motor out for a rebuild after overheating, I HIGHLY suggest getting an idler pulley where the air pump was. It put more of belt around the water pump and turns it better. In your video of the 2nd startup, I can see the big purple pulley is slipping even at idle. At higher rpms, it will slip further and contribute to higher water temps.
Do some searches, there are a few out there. Also, dont try to tighten the belt more, that causes damage to internal bearings... look for thread by Chadwick (Tweakit Racing) for all the info.
Do some searches, there are a few out there. Also, dont try to tighten the belt more, that causes damage to internal bearings... look for thread by Chadwick (Tweakit Racing) for all the info.
So, who's gonna win the Premier League this year? Chealsea or Arsenal ? And would love to see Rooney choke big time, lol.
Not a man who's into kicking pig's bladders around, more of an adrenaline junkie!Indeed they are - I wouldn't be rollin' on fakies
They're actually pretty rare ones originally from a Mine's edition R32GTR. 9.5j et25 all round, however I reverse mounted the rear lips, turning them into something around an et12.It's getting to the poitn where I'm getting more and more picky though. Latest purchase was wipers with integrated squirters so I could move the ugly windscreen washer jet lines, hiding the MAP sensor, and sending off the FPR to be re anodized to match!!
Next target is to run the clutch lines through the car and relocate the FPR.
I'm trying to keep stuff as practical as I can, but sometimes I've had to make concessions - TNS relay is, for instance, now hidden under the wing. It's a stupid place to put it though!
Senior Member
Joined: Oct 2010
Posts: 255
Likes: 1
From: England
 . Sadly Rooney is living proof that humans share the same number of chromosomes with potatoes
Senior Member
Joined: Nov 2007
Posts: 343
Likes: 0
From: Australia
You're like my English long lost twin.... Sorta lol just as OCD but more motivated. I originally went with satin black everything in the bay but have since changed to all wrinkle finish black with purple annodised accents (ps your fuel rail is awesome) only difference is I couldn't find anyone to annodise my parts for me so I'm now having a go at doing it myself. Anyway man car looks awesome I'll have to pu a build thread up on here sometime when I can be bothered.
Brad.
Brad.

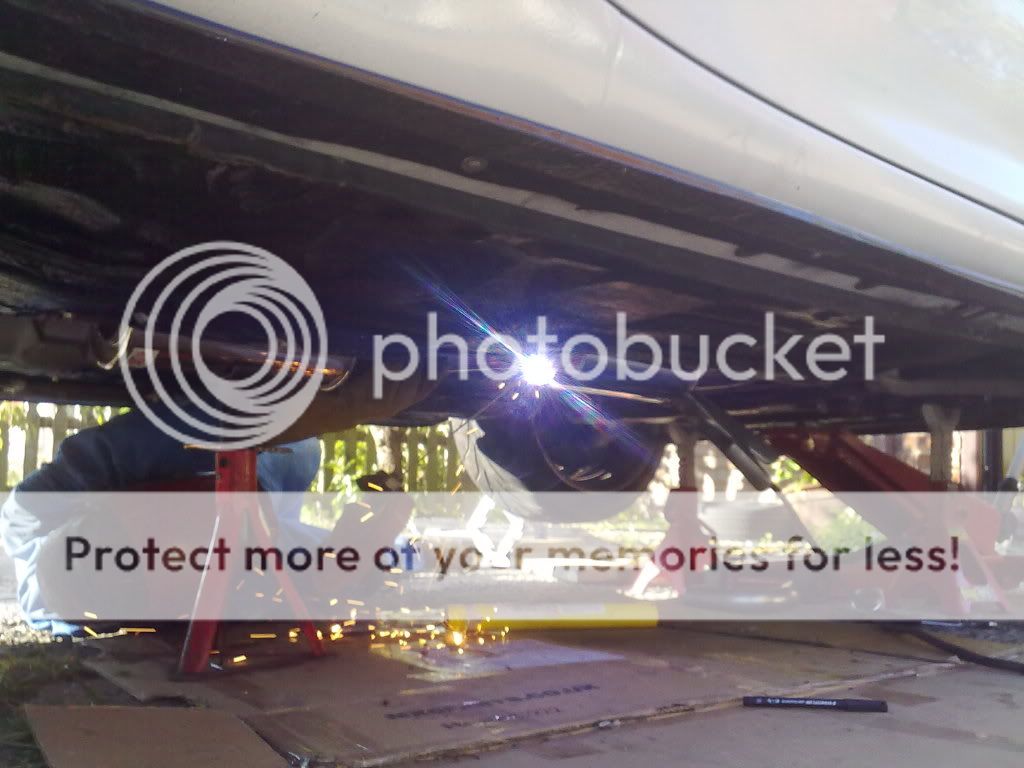
Wow VERY thorough build. I dont think i have the patience to do such a thing. Nor the room.
But you just do it right in front of your house with no private gate or anything lol. I applaud you man.
Can you get more detailed specs on the bbs wheels? And tires? They sit amazing.
And more pics of the blonde
Jk. But it would be nice if you did
But you just do it right in front of your house with no private gate or anything lol. I applaud you man.
Can you get more detailed specs on the bbs wheels? And tires? They sit amazing.
And more pics of the blonde
Jk. But it would be nice if you did