
Countdown to DGRR 2016


I have used SEMs brand paint in their "Landau Black" color in the past for painting interior plastics. After drying, the color/finish/appearance is close to factory. The most important step is the prep work and cleaning, as years of ArmorAll and other protectants have built up into the plastics.
Aside from SEM Soap, did you use anything else to prep and "strip"? Any "primer" stages?
When you say it's close to factory is it lighter, darker, more glossy, less glossy? What's missing that it doesn't quite look factory?
Thanks!
Nick
Thread Starter
Joined: Nov 2011
Posts: 3,425
Likes: 489
From: okinawa to tampa
so i got a pretty big update. through a series of pretty major set backs  i have rebounded and got back on track.
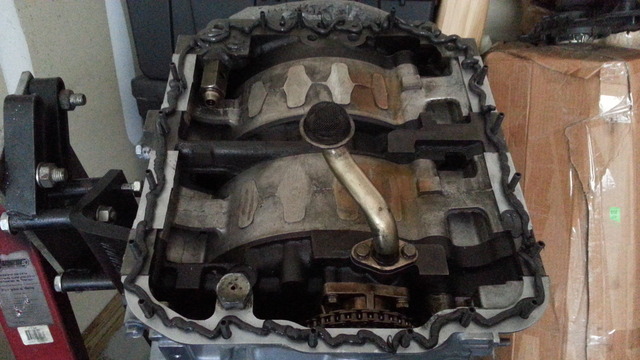
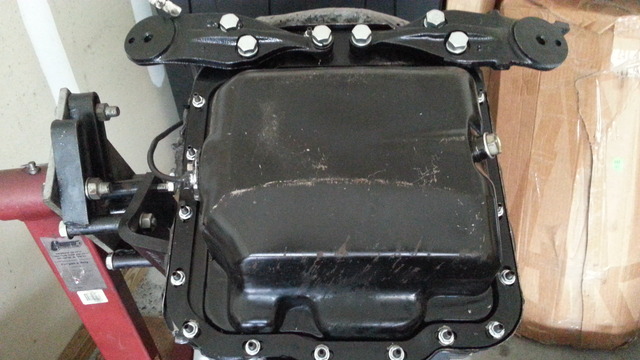
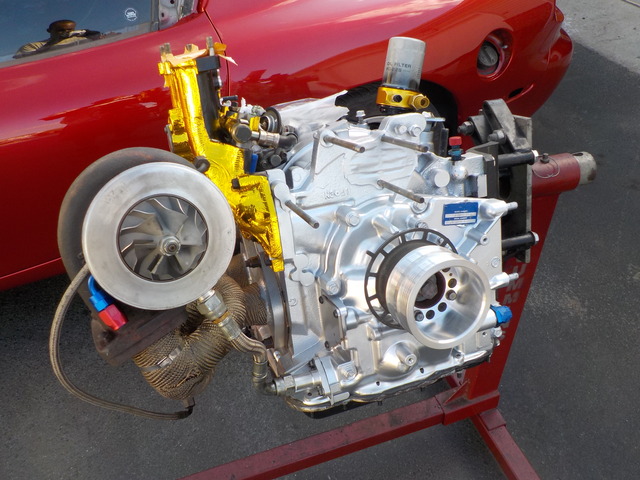
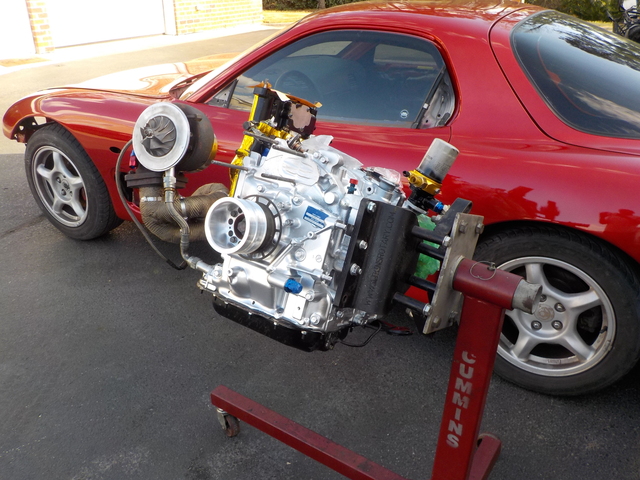
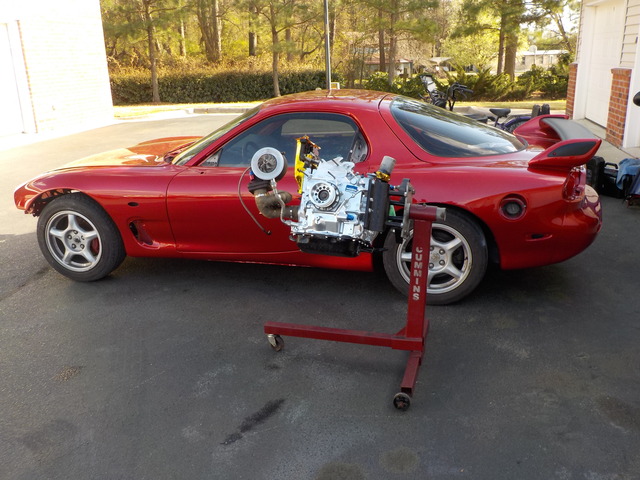
the motor is all painted and looking good. oddly enough i didnt take any pictures of the finished product. not sure why. i probably meant to but just didnt. i put it back on the engine stand and got to putting it back together. the oil pan was cleaned and resealed. i used pematex ultra black for the record. i used an oil pan brace of course. im not sure what brand it is but its doing its job. i used a brand new gasket for the oil pick up as well. i got the IRP motor mounts street compound but didnt get a picture of them on the stand.
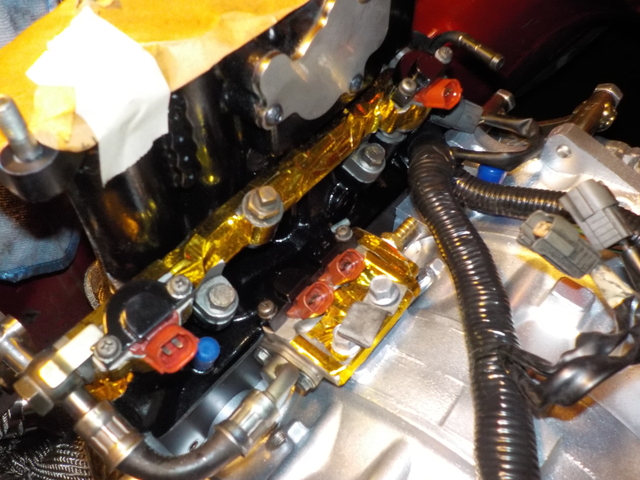
after the oil pan, the next step was to lay the harness so i know how i am going to wrap it. i pulled all the dead wires out and depinned then from the plugs so there are no dead wires in this harness. then i put the intake manifold, turbo, main pulley, fuel rail, oil filter pedestal and the fitting for the oil cooler kit.
i have rebounded and got back on track.the motor is all painted and looking good. oddly enough i didnt take any pictures of the finished product. not sure why. i probably meant to but just didnt. i put it back on the engine stand and got to putting it back together. the oil pan was cleaned and resealed. i used pematex ultra black for the record. i used an oil pan brace of course. im not sure what brand it is but its doing its job. i used a brand new gasket for the oil pick up as well. i got the IRP motor mounts street compound but didnt get a picture of them on the stand.


after the oil pan, the next step was to lay the harness so i know how i am going to wrap it. i pulled all the dead wires out and depinned then from the plugs so there are no dead wires in this harness. then i put the intake manifold, turbo, main pulley, fuel rail, oil filter pedestal and the fitting for the oil cooler kit.


Thread Starter
Joined: Nov 2011
Posts: 3,425
Likes: 489
From: okinawa to tampa
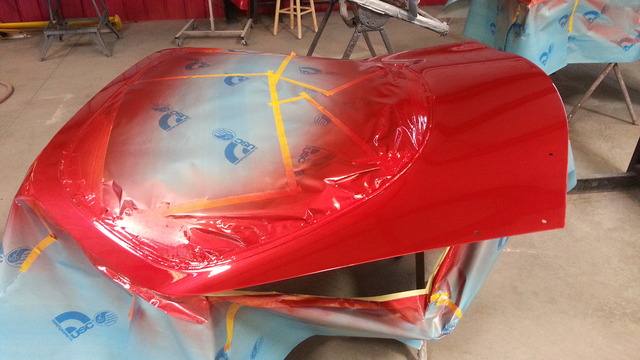
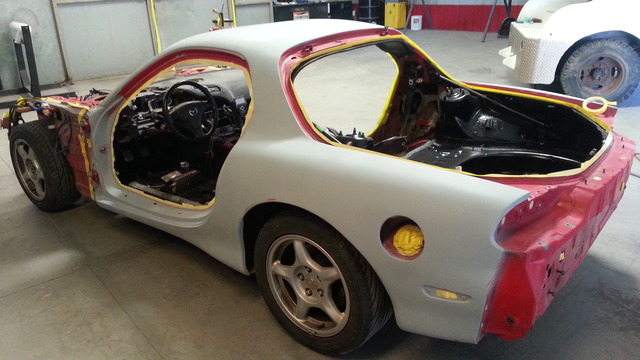
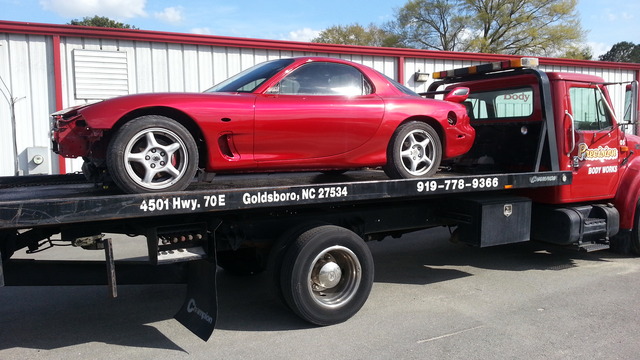
the body shop "finished" the car on the 24th. the color i went with is soul red. its the same color that the new miata comes in. not sure what happened but the paint and everything is incomplete. theres still a bit left to do for them. i went ahead and took the car anyway. they said that once i finish putting it back together to bring it back and they will finish it. kind of strange but its whatever, i agreed. im not making it to DGRR anyway so i guess it doesnt really matter. just to note, the windshield broke when they called safelite out to pull it so i have a new windshield now  . i asked them to black the trunk area since i think thats cool to do. its the same as i did on my integra. its just something i like =\

then being taken home
in the garage
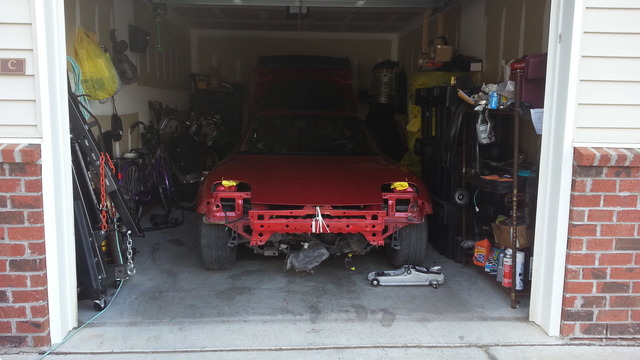
once it was off the trailer, i pulled the engine out of the garage and took a few pictures of them together
that same night it came home, i got to work and put the engine in.
. i asked them to black the trunk area since i think thats cool to do. its the same as i did on my integra. its just something i like =\


then being taken home

in the garage

once it was off the trailer, i pulled the engine out of the garage and took a few pictures of them together


that same night it came home, i got to work and put the engine in.

Last edited by cr-rex; Mar 30, 2016 at 01:52 PM.
Thread Starter
Joined: Nov 2011
Posts: 3,425
Likes: 489
From: okinawa to tampa
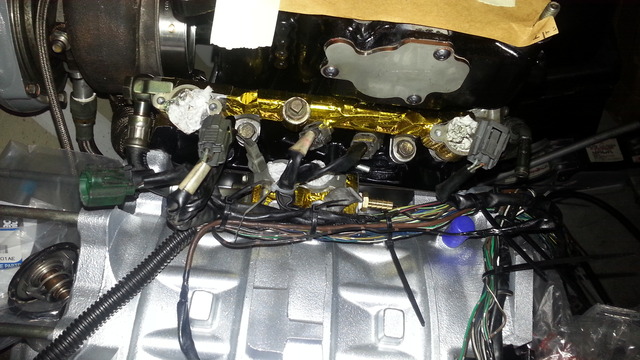
i got to working and didnt take many pictures. fuel rail with the injectors installed. i got the o ring lube from injector rx and they just slid right in.
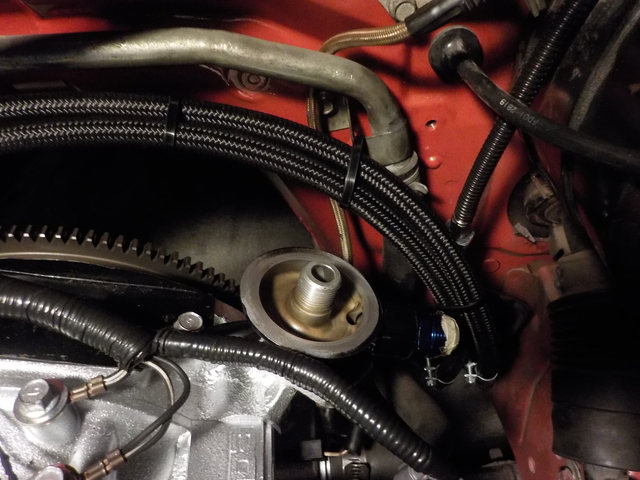
russell pro classic 2 hose with single band clamps. these have no perforations in them so they dont dig into the hose.
harness routed and heat wrapped
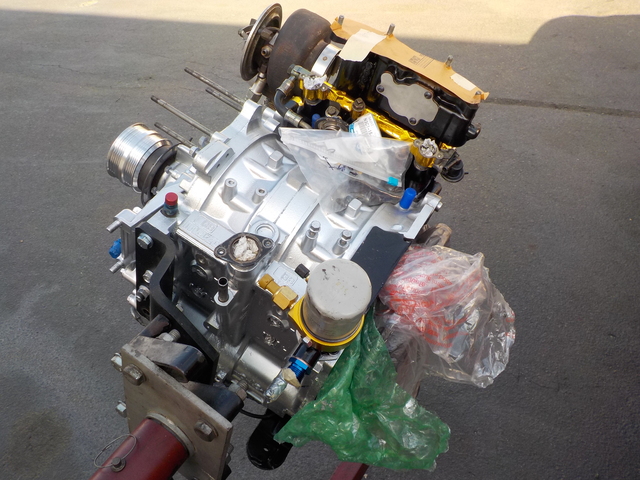
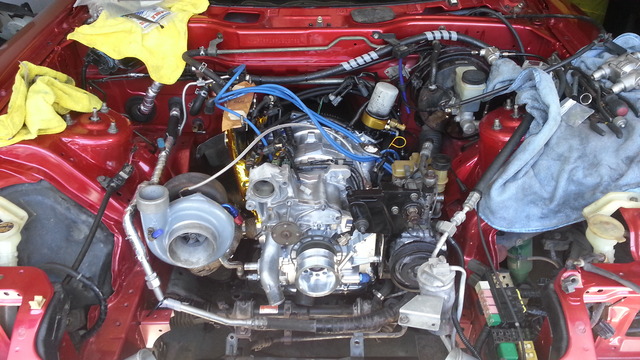
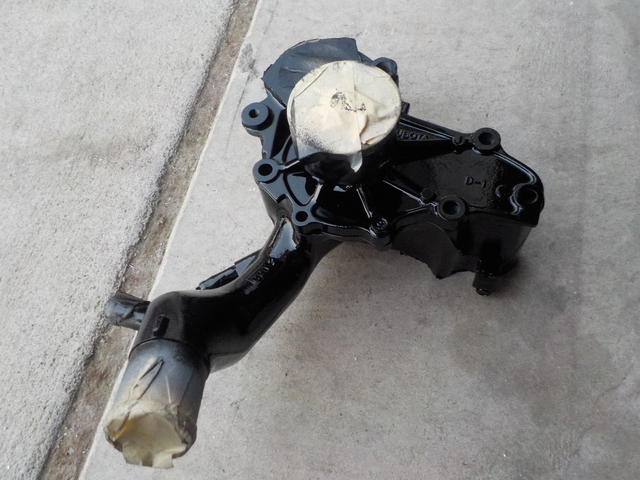
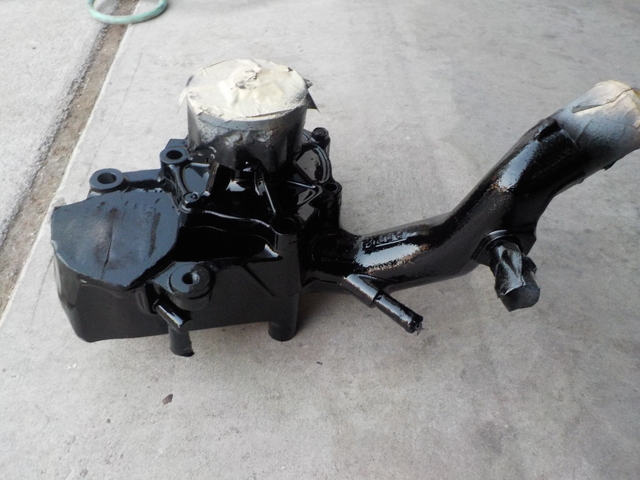
harness installed, power steering pump installed, abs delete installed, ac line heat wrapped, heater hard line installed, clutch slave installed. the compressor housing wont be installed until the transmission is so i can clock it with the engine at the proper angle. the water pump housing is also temp installed since i still have to paint it. i got the air pump "ear" shaved down and the water pipe on top welded shut.

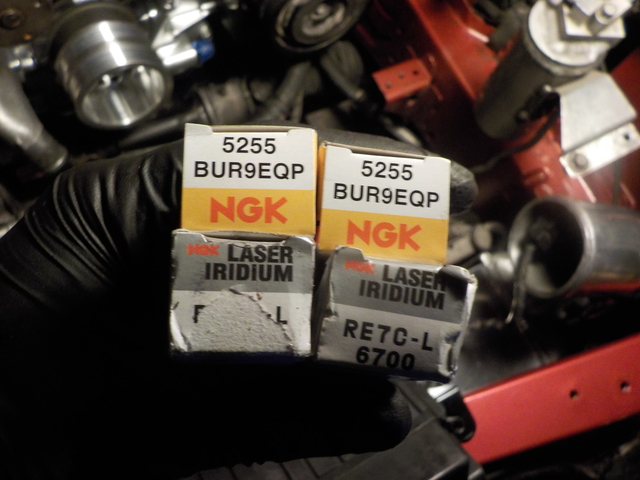
new spark plugs. i just replaced what was already in there
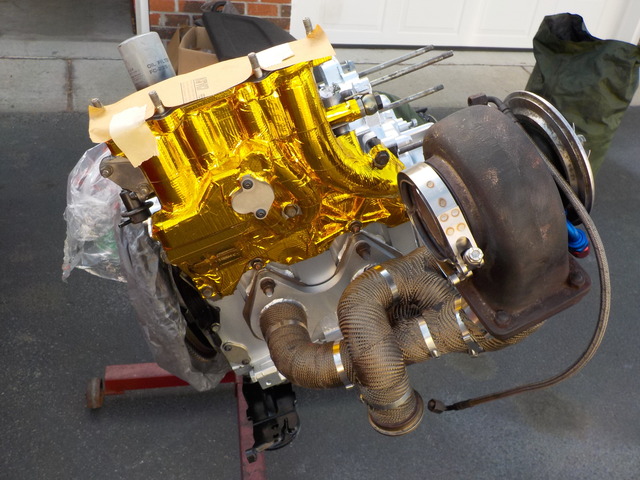
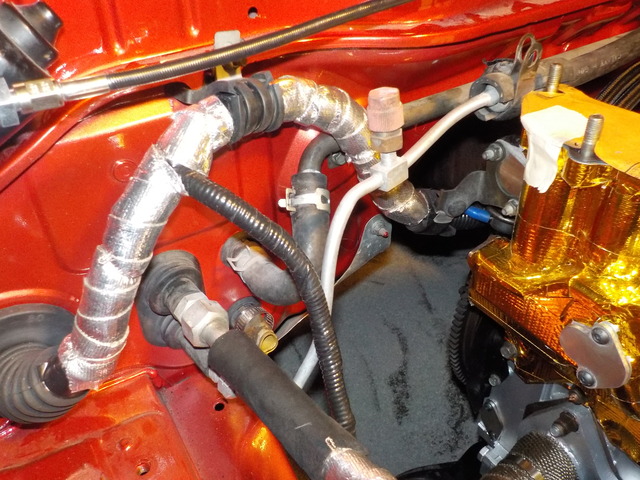
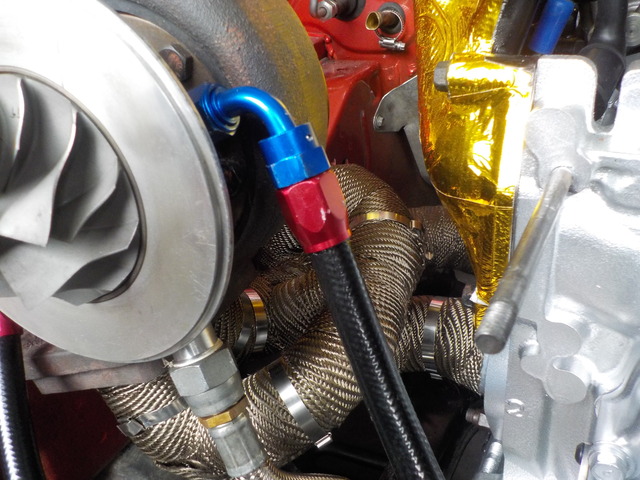
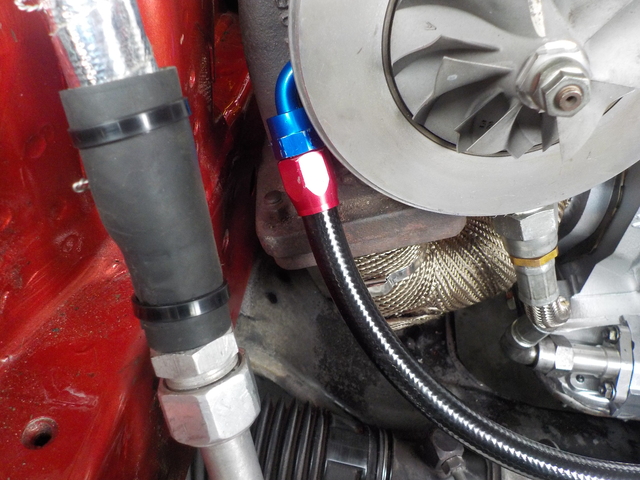
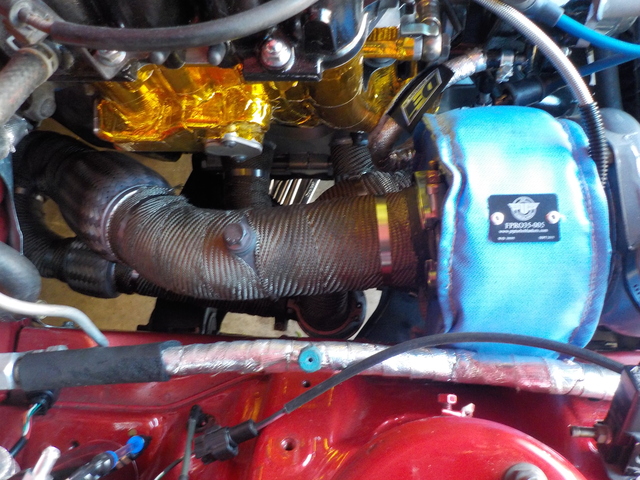
side shot of the turbo side. i painted the manifold flange with the same high temp silver as the block. im using DEI titanium heat wrap with actual cable ties since worm clamps were being used before. i replaced the barbed water line fitting with AN fittings. i will be using silicone line for the coolant feed and return since the rubber doesnt hold up and i want to use ss. the silicone line i will be using is designed for coolant so its going to last a good long while with the heat and everything.
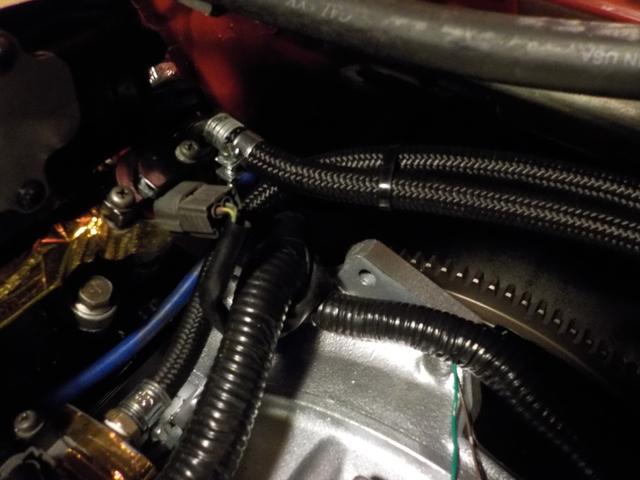
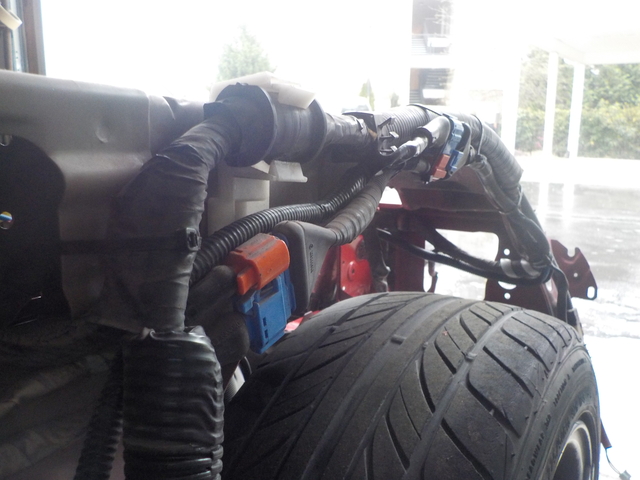
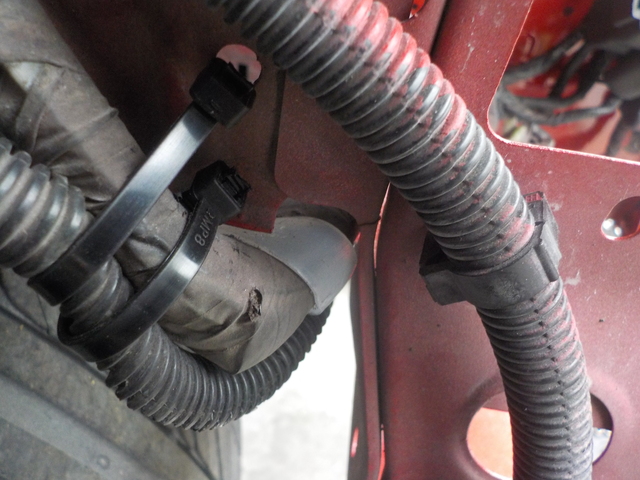
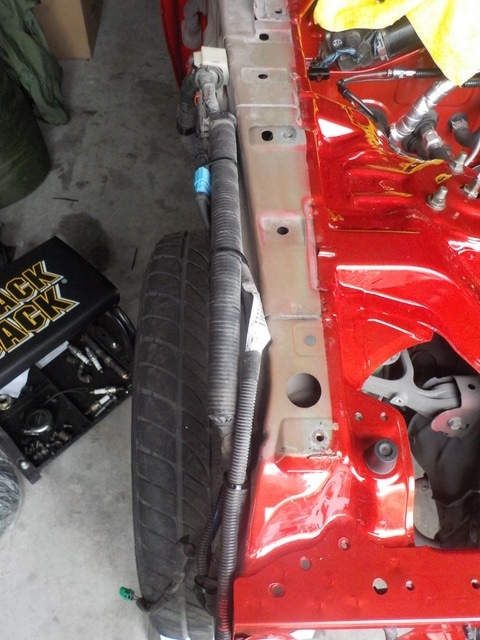
the front harness has be repositioned above the frame rail so that chaffing will not be an issue with the wheels or anything. i noticed there was a sharp corner that had started to dig into the harness so i covered it with this teflon anti chaff stuff i had. the crash sensor harness has also been routed under the fender as well.

russell pro classic 2 hose with single band clamps. these have no perforations in them so they dont dig into the hose.


harness routed and heat wrapped

harness installed, power steering pump installed, abs delete installed, ac line heat wrapped, heater hard line installed, clutch slave installed. the compressor housing wont be installed until the transmission is so i can clock it with the engine at the proper angle. the water pump housing is also temp installed since i still have to paint it. i got the air pump "ear" shaved down and the water pipe on top welded shut.


new spark plugs. i just replaced what was already in there

side shot of the turbo side. i painted the manifold flange with the same high temp silver as the block. im using DEI titanium heat wrap with actual cable ties since worm clamps were being used before. i replaced the barbed water line fitting with AN fittings. i will be using silicone line for the coolant feed and return since the rubber doesnt hold up and i want to use ss. the silicone line i will be using is designed for coolant so its going to last a good long while with the heat and everything.

the front harness has be repositioned above the frame rail so that chaffing will not be an issue with the wheels or anything. i noticed there was a sharp corner that had started to dig into the harness so i covered it with this teflon anti chaff stuff i had. the crash sensor harness has also been routed under the fender as well.


Thread Starter
Joined: Nov 2011
Posts: 3,425
Likes: 489
From: okinawa to tampa
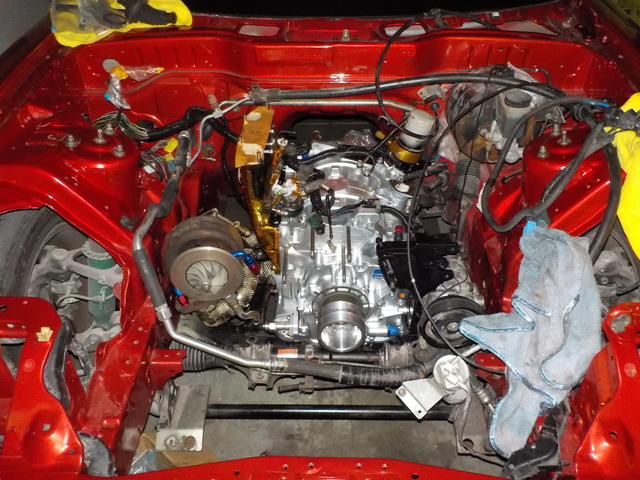
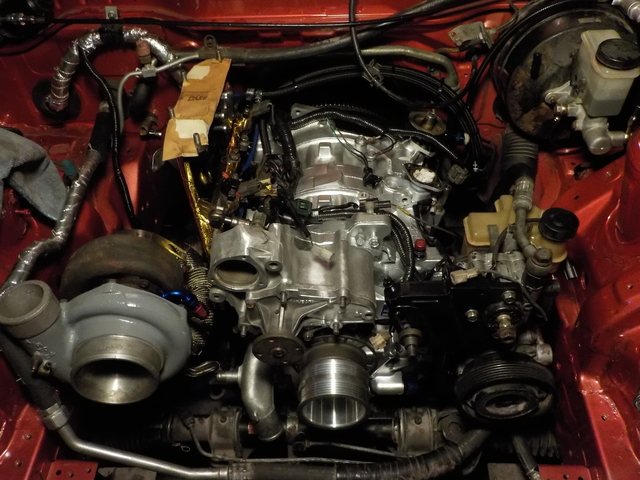
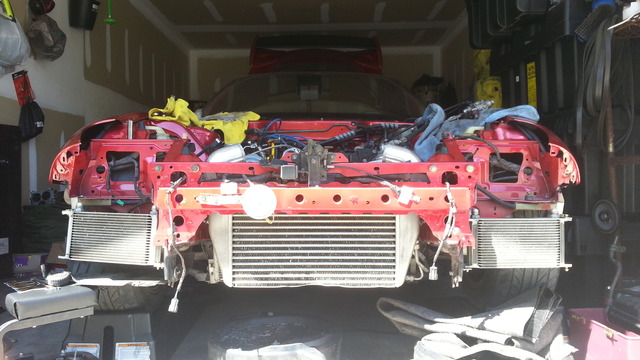
as of today this is what it looks like. ac line is routed and protected in chaff areas, fuse boxes are where they are going to be once i make some brackets for them, boost solenoid is mounted where it will be, overflow and washer bottles are installed, intercooler installed, ac condenser installed, plug wires on (pending coil pack relocation), oil filter sandwich plate installed for oil temp and pressure gauges, tunnel heat shield installed, brake booster vacuum pipe installed, right fender liner and fender installed, oil coolers installed and waiting on the thermostat to be mounted somewhere so that fittings can be chosen and lines made. i would say progress is going well. it will be 1 week tomorrow and this is all that has been done. the driver side cooler isnt all the way mounted yet which is why it looks different.


Thread Starter
Joined: Nov 2011
Posts: 3,425
Likes: 489
From: okinawa to tampa
No. The car wont be ready in time. I thought I could make it but the body shop took longer than projected.
This weekend im expecting to finish the engine bay. I have a bit of fab work to do with mounting the fuse boxes and prop valve for the abs delete. The downpipe and radiator will be in work soon with a friend of mine. I need to get the bung for the wideband welded in and the upper neck on the radiator I need turned 90 degrees to work better with the new filler neck. I will have a good bit of pictures and stuff to update with over the next couple days.
This weekend im expecting to finish the engine bay. I have a bit of fab work to do with mounting the fuse boxes and prop valve for the abs delete. The downpipe and radiator will be in work soon with a friend of mine. I need to get the bung for the wideband welded in and the upper neck on the radiator I need turned 90 degrees to work better with the new filler neck. I will have a good bit of pictures and stuff to update with over the next couple days.
Thread Starter
Joined: Nov 2011
Posts: 3,425
Likes: 489
From: okinawa to tampa
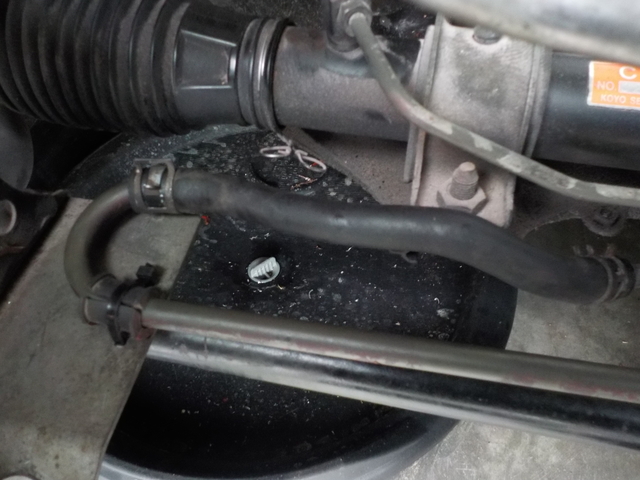
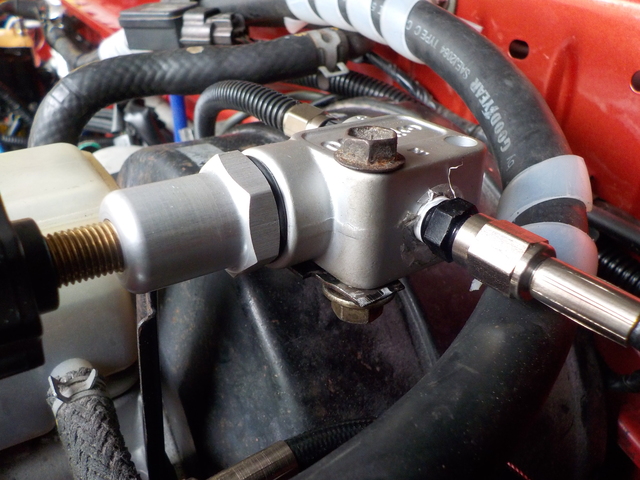
today was a very productive day. i did all the fab stuff i was going to do and it went pretty well considering my tool selection of a small set of drill bits, a dremel and my hands. the goal fro the day was to make all the mounts/brackets for all the parts that needed mounting along with a few other little things. first thing i did was reconnect the power steering. i was on the fence about deleting the power steering cooler or replacing it with some that wasnt so obtrusive. the end result was cutting out one of the loops and using it to reconnect the two lines. i think this was the best compromise for what i wanted: less clutter. the picture pretty much explains what i did. it ended up pretty well i think.
next was to do the coolant lines for the turbo. i got the -6 silicone line from a local shop.
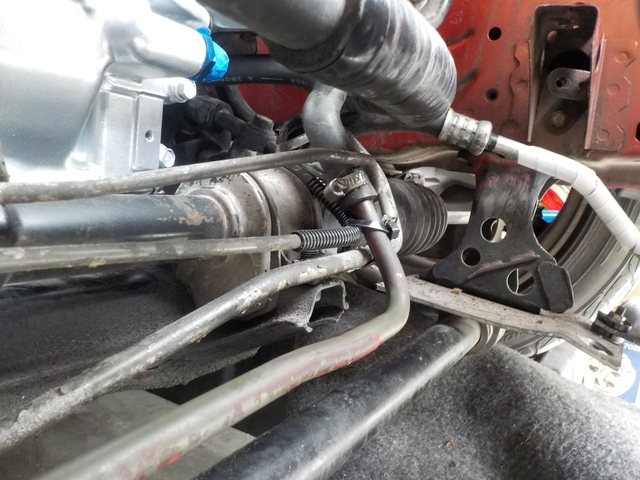
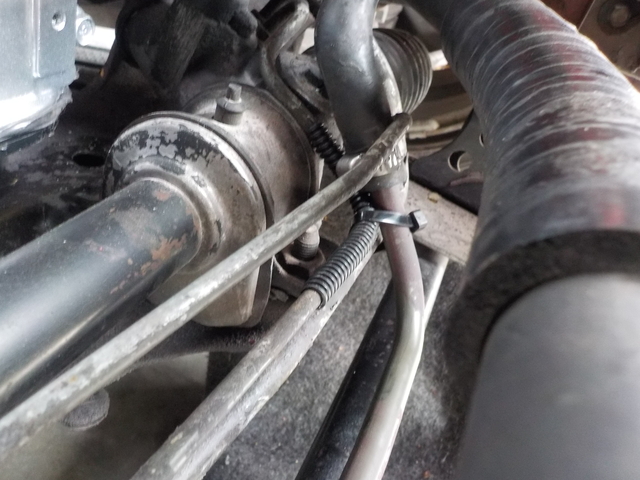
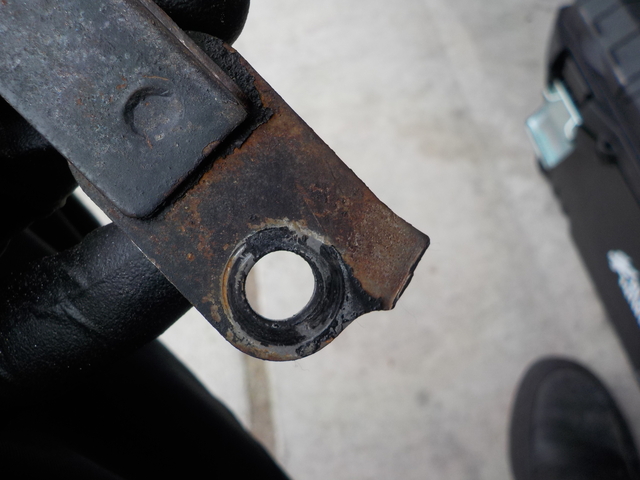
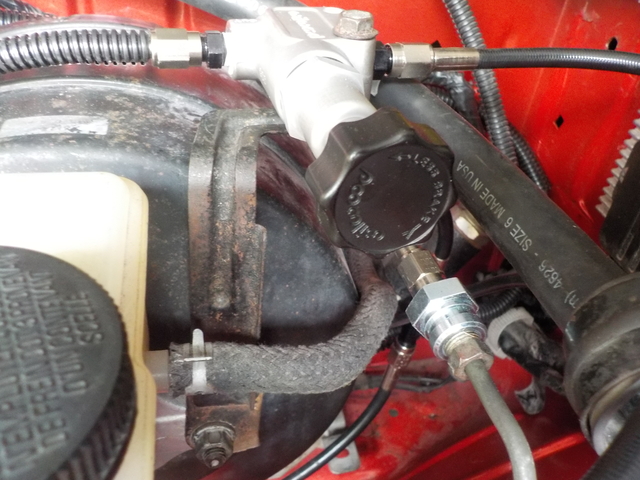
after, i went to work on the prop valve. what i did initially was zip tie it to the ac line. it was secure but i wasnt really happy with it. the original plan was to make and L bracket and mount to the master cylinder but then i got the idea to reuse the crazy U bracket from the ABS stuff. not sure what metal it is but if you bend it back forth, it will break very easily. i broke off the arm that holds the plug that goes into the brake reservoir and drilled the little hole bigger to accept a bolt. i also smoothed the sharp and rough edges. of course the hardware being used now is temporary. i will replace it with something a little more attractive later on.
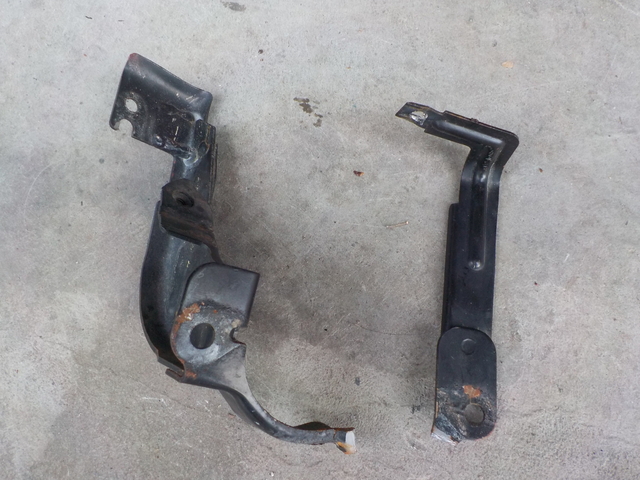
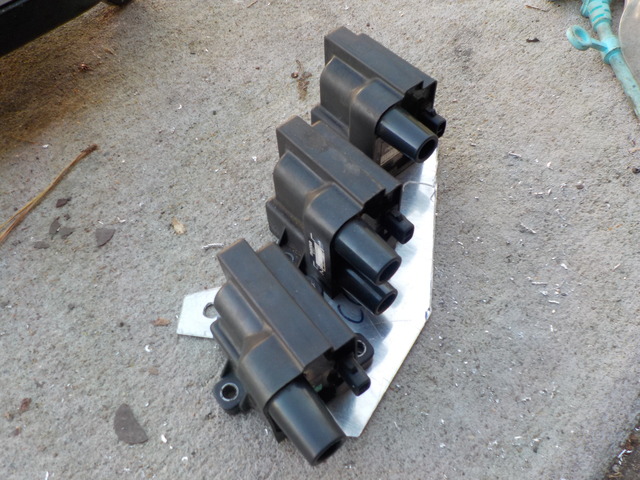
the biggest job of the day was the coil pack relocation. it was a daunting task since i was going to have to figure out a way to put them somewhere practical. unlike my other fd where i mounted them inside the car , i had to find somewhere in the engine bay that they would fit. a lot of the coil pack relocations i saw involved going with the AEM units or some other aftermarket option. one of the relocations i saw included a bracket that mounted to where the AC/PS goes. obviously not an option. another mounted them on the frame between the booster and the fender. that area is a little crowded on my car. so where they are now was the next best solution. the end result was this 2pc bracket. i went through a couple design changes in the course of making this so this is the end product. i will be getting the pieces welded together. of course the relocation was by no means necessary but why the hell not


next was to do the coolant lines for the turbo. i got the -6 silicone line from a local shop.


after, i went to work on the prop valve. what i did initially was zip tie it to the ac line. it was secure but i wasnt really happy with it. the original plan was to make and L bracket and mount to the master cylinder but then i got the idea to reuse the crazy U bracket from the ABS stuff. not sure what metal it is but if you bend it back forth, it will break very easily. i broke off the arm that holds the plug that goes into the brake reservoir and drilled the little hole bigger to accept a bolt. i also smoothed the sharp and rough edges. of course the hardware being used now is temporary. i will replace it with something a little more attractive later on.


the biggest job of the day was the coil pack relocation. it was a daunting task since i was going to have to figure out a way to put them somewhere practical. unlike my other fd where i mounted them inside the car , i had to find somewhere in the engine bay that they would fit. a lot of the coil pack relocations i saw involved going with the AEM units or some other aftermarket option. one of the relocations i saw included a bracket that mounted to where the AC/PS goes. obviously not an option. another mounted them on the frame between the booster and the fender. that area is a little crowded on my car. so where they are now was the next best solution. the end result was this 2pc bracket. i went through a couple design changes in the course of making this so this is the end product. i will be getting the pieces welded together. of course the relocation was by no means necessary but why the hell not

Thread Starter
Joined: Nov 2011
Posts: 3,425
Likes: 489
From: okinawa to tampa


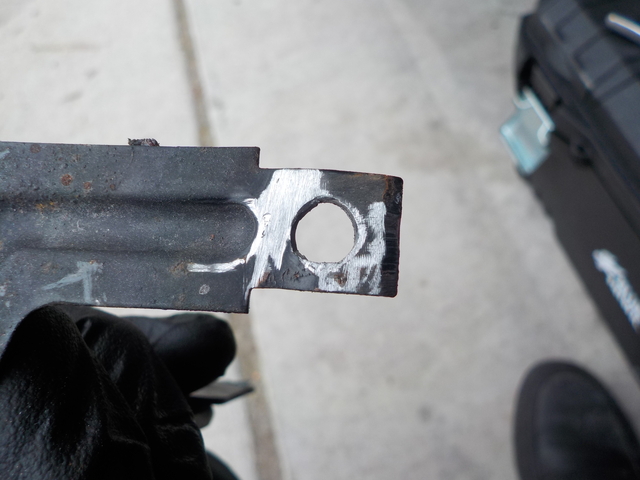
after, the fuse boxes. the brace that goes to the smaller fuse box came of pretty good i think. nice and sturdy and holds the fuse box at an accessible angle. the bracket i made for the larger fuse box im not happy with. in my hand it felt very rigid and useful but when i mounted it, its all flimsy and dumb. as thin as it is, the metal im using is thick. i figured it would be fine but i was wrong. i will be remaking it


Thread Starter
Joined: Nov 2011
Posts: 3,425
Likes: 489
From: okinawa to tampa


next was the cage i wanted to make for the thermostat. running through all the options in my head, a cage was the best way to do this. mounting the thermostat where im mounting is to cut down on the clutter between the engine and radiator. mounting it under the frame like i am leave me with only 2 oil lines in the engine bay and both of them terminate under the frame so very little will be seen. the cooler to cooler and cooler to thermostat line will be routed in front of the car under the bumper re-bar. i will need to get this welded as well. the design is one part that goes around like a belt and he other part is a J.


Thread Starter
Joined: Nov 2011
Posts: 3,425
Likes: 489
From: okinawa to tampa
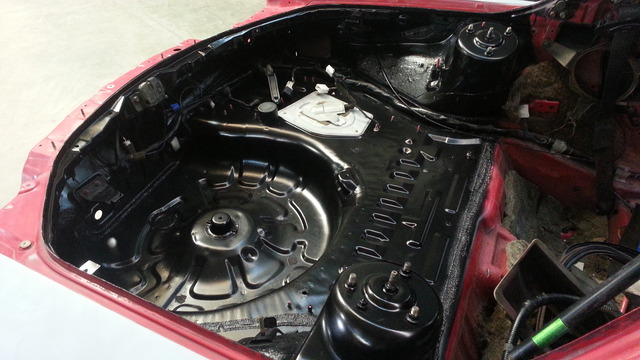
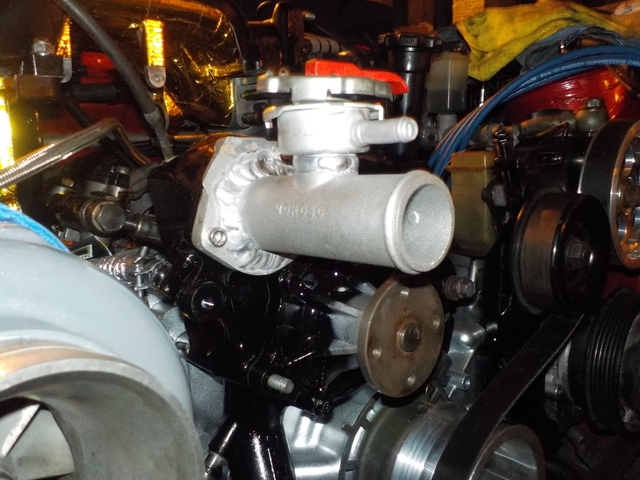
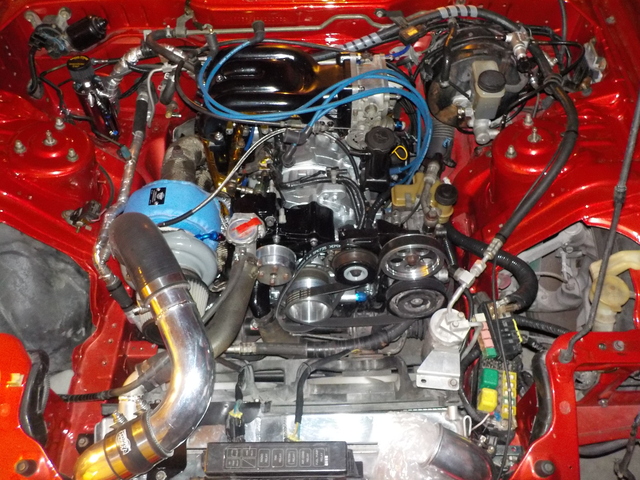
i finally cleaned and painted the water pump housing. i have been putting this for months. literally months. im just happy its done. this was a pretty big part of the engine bay since so many things go to it.
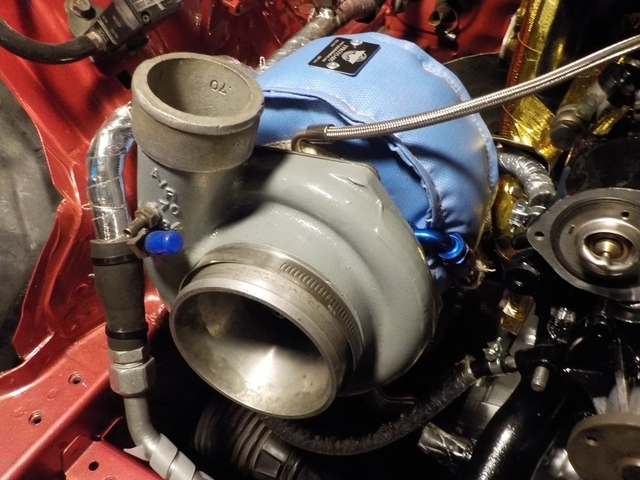
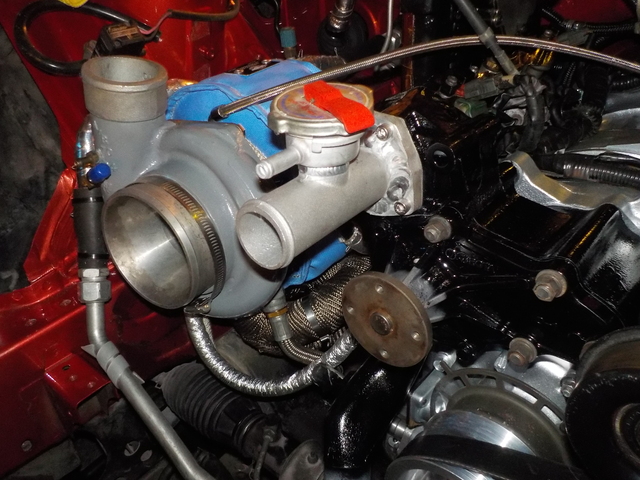
since the water pump housing was installed, i was able to fully install the water lines for the turbo and fully install the compressor housing. i put the new blanket on to replace that 30$ crap ebay blanket that was on there before. i went with blue because i liked the shade. even though the water lines are silicone, i went ahead and put the DEI heat sheath on them anyway. i intended to use it on the russell hose when i thought i was going to use it for the water lines. i didnt want the purchase to go to waste.

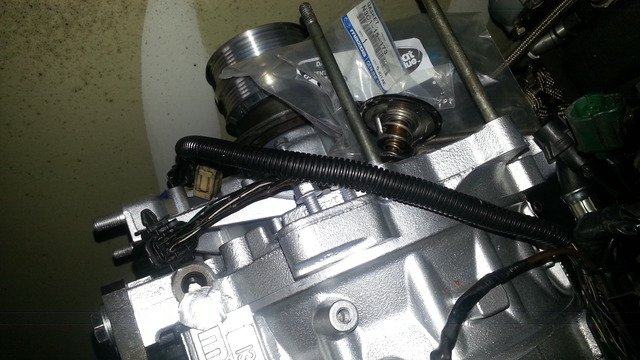
i went ahead and installed the thermostat with a brand new gasket and put the filler neck on. its a moroso neck that has been welded to the flange from a stock filler neck. instead of buying the flange from banzai for crazy $$$, i asked the welder the scavenge the flange from the stock neck and weld it on. it worked out well. it was a perfect fit. i was able to move the cap from the old AST over and it saved me from having to buy a new cap
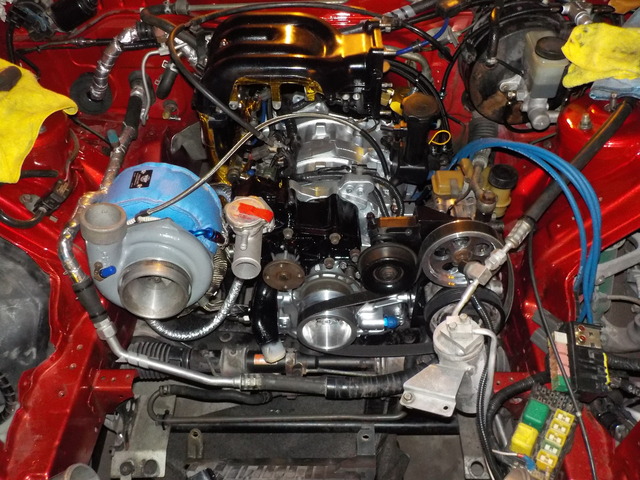
so this is how the bay sits as of tonight. oil neck installed with a new o-ring and uim/tb fully installed with a new lim-uim gasket. tomorrow i will be finishing up the charge harness. i am on the fence about getting the upgraded alternator from IRP so i havent put any time into the one i have now yet. it needs a very good cleaning and paint. the power steering pulled broke in half when i was removing forcing me to buy a whole pulley kit. you know how that goes
i will be dropping off the radiator and downpipe tomorrow to be welded for a wideband bung and neck rotation respectively. with the new filler neck, the neck on the radiator pointing down isnt very efficient. i am getting it cut off and turned 90 degrees. once i get it back then i can bolt down the ac drier, install the filter and charge pipe on the turbo and few other things.


since the water pump housing was installed, i was able to fully install the water lines for the turbo and fully install the compressor housing. i put the new blanket on to replace that 30$ crap ebay blanket that was on there before. i went with blue because i liked the shade. even though the water lines are silicone, i went ahead and put the DEI heat sheath on them anyway. i intended to use it on the russell hose when i thought i was going to use it for the water lines. i didnt want the purchase to go to waste.


i went ahead and installed the thermostat with a brand new gasket and put the filler neck on. its a moroso neck that has been welded to the flange from a stock filler neck. instead of buying the flange from banzai for crazy $$$, i asked the welder the scavenge the flange from the stock neck and weld it on. it worked out well. it was a perfect fit. i was able to move the cap from the old AST over and it saved me from having to buy a new cap


so this is how the bay sits as of tonight. oil neck installed with a new o-ring and uim/tb fully installed with a new lim-uim gasket. tomorrow i will be finishing up the charge harness. i am on the fence about getting the upgraded alternator from IRP so i havent put any time into the one i have now yet. it needs a very good cleaning and paint. the power steering pulled broke in half when i was removing forcing me to buy a whole pulley kit. you know how that goes
i will be dropping off the radiator and downpipe tomorrow to be welded for a wideband bung and neck rotation respectively. with the new filler neck, the neck on the radiator pointing down isnt very efficient. i am getting it cut off and turned 90 degrees. once i get it back then i can bolt down the ac drier, install the filter and charge pipe on the turbo and few other things.


Looking good!
Too bad you won't be ready for DGRR - well, you DO have about 2 weeks, so who knows?
If nothing else, come up Saturday in the daily driver to the car show at the lodge. See everyone's cars, meet people, and get some ideas and inspiration for your car. I'll be the REALLY tall guy there (6'6")
Dale
Too bad you won't be ready for DGRR - well, you DO have about 2 weeks, so who knows?
If nothing else, come up Saturday in the daily driver to the car show at the lodge. See everyone's cars, meet people, and get some ideas and inspiration for your car. I'll be the REALLY tall guy there (6'6")
Dale

Thread Starter
Joined: Nov 2011
Posts: 3,425
Likes: 489
From: okinawa to tampa
thanks man. im super excited to finish and get back to driving it.
Looking good!
Too bad you won't be ready for DGRR - well, you DO have about 2 weeks, so who knows?
If nothing else, come up Saturday in the daily driver to the car show at the lodge. See everyone's cars, meet people, and get some ideas and inspiration for your car. I'll be the REALLY tall guy there (6'6")
Dale
Too bad you won't be ready for DGRR - well, you DO have about 2 weeks, so who knows?
If nothing else, come up Saturday in the daily driver to the car show at the lodge. See everyone's cars, meet people, and get some ideas and inspiration for your car. I'll be the REALLY tall guy there (6'6")
Dale
i thought about just rolling up there in the integra and running the dragon but i just wouldnt feel right
if things go really well and i can finish in time then the car will be done at the very last minute and i dont like the idea of not having the time to work out whatever kinks there may be from all this. i mean, theres always next year right
Since you're so close, I would just drive over for the Saturday car show. Meet everybody, see the cars, say hi. You don't have to take the old Integra on the dragon .
Trust me - I did a "next year, next year" for quite some time, and when I finally went I kicked myself for not going sooner. I would show up in a rental Buick if I had to.
Dale
.Trust me - I did a "next year, next year" for quite some time, and when I finally went I kicked myself for not going sooner. I would show up in a rental Buick if I had to.
Dale
Trust me - I did a "next year, next year" for quite some time, and when I finally went I kicked myself for not going sooner. I would show up in a rental Buick if I had to.
Yeah! Show up.
Perhaps, without a car you will be inclined to catch more rides in peoples 7s and get an idea of what you like and don't like, see new parts and get new ideas and inspiration to finish your project.
Yeah! Show up.
Perhaps, without a car you will be inclined to catch more rides in peoples 7s and get an idea of what you like and don't like, see new parts and get new ideas and inspiration to finish your project.

Thread Starter
Joined: Nov 2011
Posts: 3,425
Likes: 489
From: okinawa to tampa
https://www.rx7club.com/3rd-generati...tails-1093349/
https://www.rx7club.com/power-fc-for...times-1104883/
so.... the above threads are what ive been dealing with for the past few months. i have reached a point where i am calling it quits and taking my "win" and progressing.
this weekend i will be finishing the interior and depending on how the weather is, will be posting a bunch of pictures of the outside now that the body is fully assembled other than the diffuser.
Thread Starter
Joined: Nov 2011
Posts: 3,425
Likes: 489
From: okinawa to tampa
correction to the above link. i meant that one and not the one with the clusters
https://www.rx7club.com/3rd-generati...h-5th-1101940/
any how....
the thread will now continue with activities. theres a lot to cover from the past few months. i'll try and keep it in order the best i can.
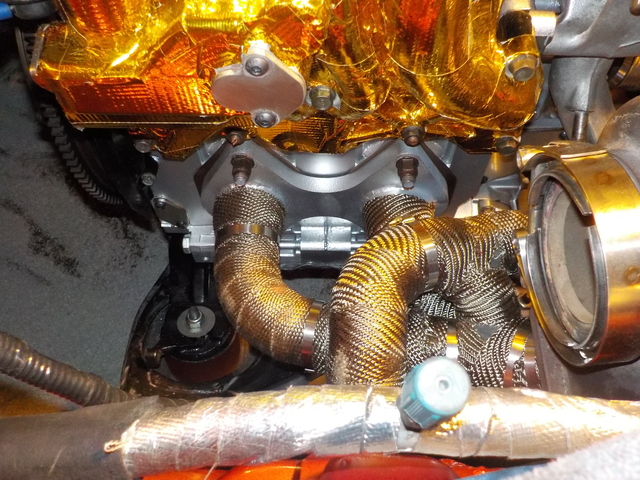
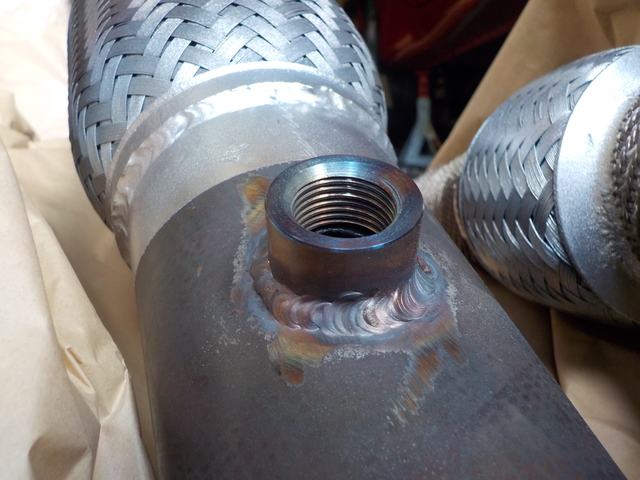
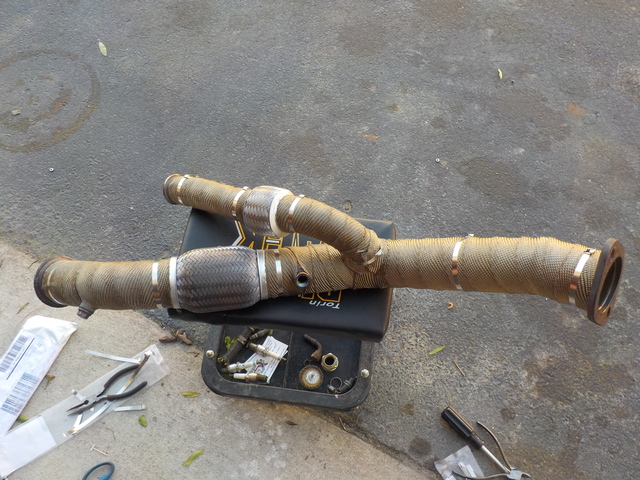
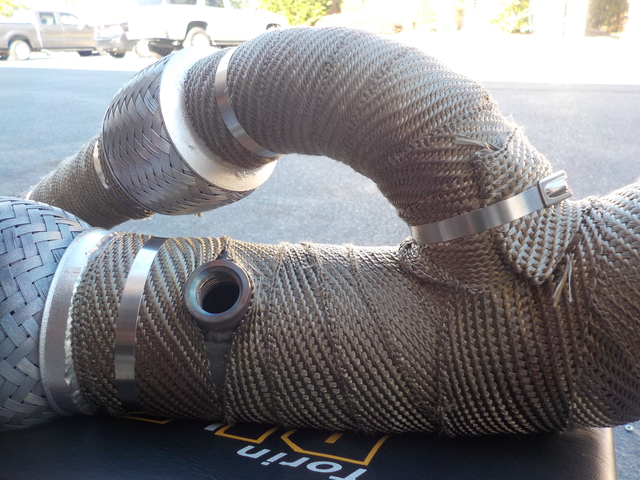
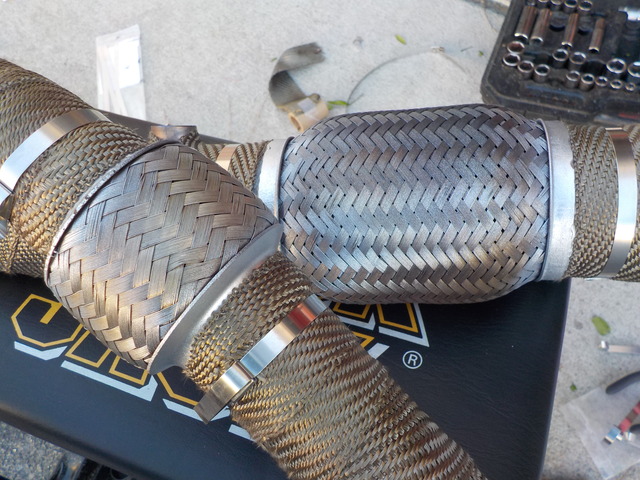
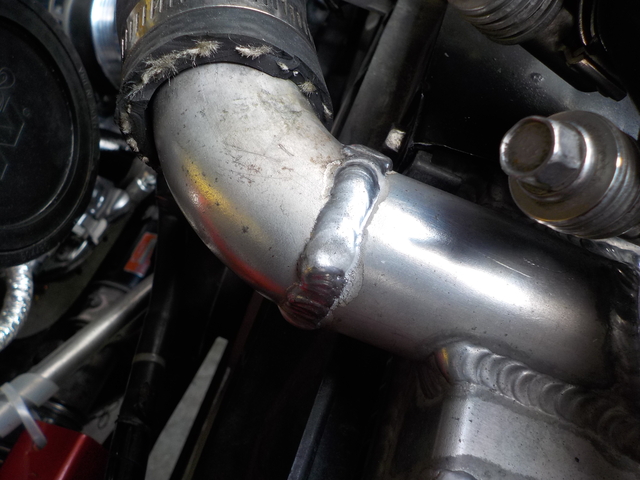
so... picking up where we left off with the downpipe and radiator, i got the bung welded on and wrapped it in DEI titanium wrap along with spraying some high temp sliver paint on the welds. they were looking a little crusty so i hit them with a wire wheel and then painted them. this was my first time handling heat wrap and doing it by yourself is hard. you really do need a second set of hands. i also had to replace the clamp since the original one broke when i was removing the nut.
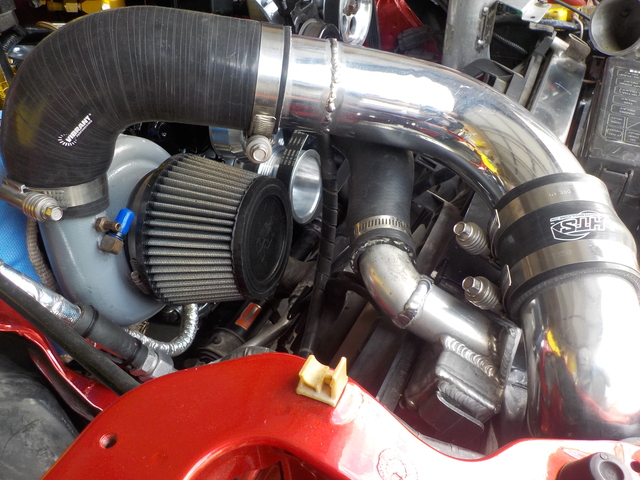
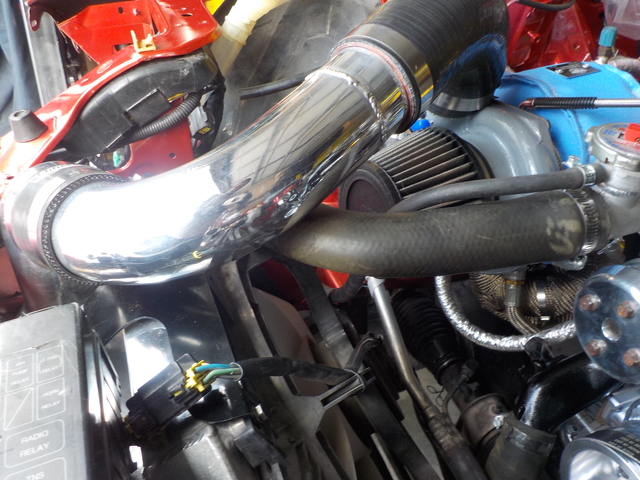
the radiator mod went very well. getting the neck turned 90 degrees was perfect with everything. dropped right in with no alignment issue. i was able to take the stock upper hose and cut the end off it and it worked out. i chose to do it this way since previously the upper hose and the intake filter were resting on each other. this also had to be done since im using a "custom" filler neck that points forward instead of down.
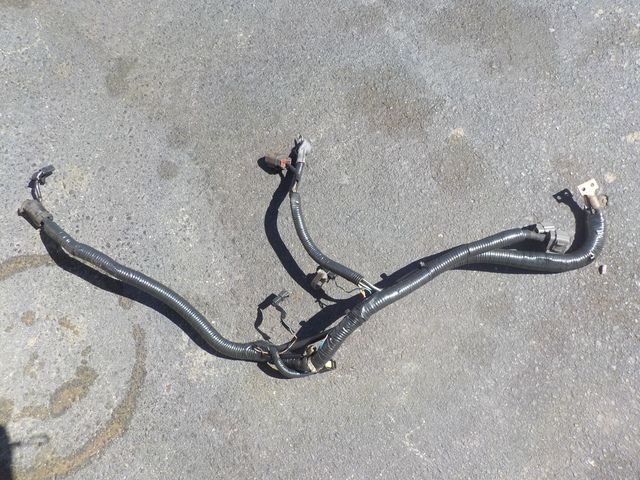
just the same as the engine harness, the charge harness got opened up and re situated. there wasnt anything wrong with it, i just wanted to put the fuse boxes in a different location. all i had to do was de loom it and re loom it the way i wanted. no modification of the wires needed. pretty sure i am going to redo it. it came out alright and isnt any more or less obtrusive that the stock config but it looks a little sloppy installed.
https://www.rx7club.com/3rd-generati...h-5th-1101940/
any how....
the thread will now continue with activities. theres a lot to cover from the past few months. i'll try and keep it in order the best i can.
so... picking up where we left off with the downpipe and radiator, i got the bung welded on and wrapped it in DEI titanium wrap along with spraying some high temp sliver paint on the welds. they were looking a little crusty so i hit them with a wire wheel and then painted them. this was my first time handling heat wrap and doing it by yourself is hard. you really do need a second set of hands. i also had to replace the clamp since the original one broke when i was removing the nut.


the radiator mod went very well. getting the neck turned 90 degrees was perfect with everything. dropped right in with no alignment issue. i was able to take the stock upper hose and cut the end off it and it worked out. i chose to do it this way since previously the upper hose and the intake filter were resting on each other. this also had to be done since im using a "custom" filler neck that points forward instead of down.


just the same as the engine harness, the charge harness got opened up and re situated. there wasnt anything wrong with it, i just wanted to put the fuse boxes in a different location. all i had to do was de loom it and re loom it the way i wanted. no modification of the wires needed. pretty sure i am going to redo it. it came out alright and isnt any more or less obtrusive that the stock config but it looks a little sloppy installed.

Thread Starter
Joined: Nov 2011
Posts: 3,425
Likes: 489
From: okinawa to tampa
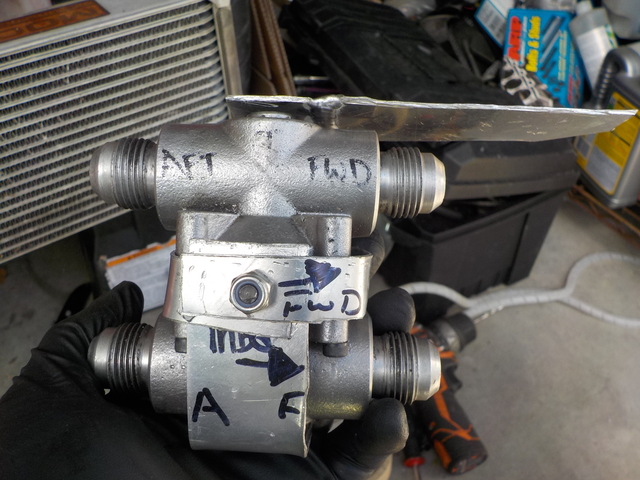
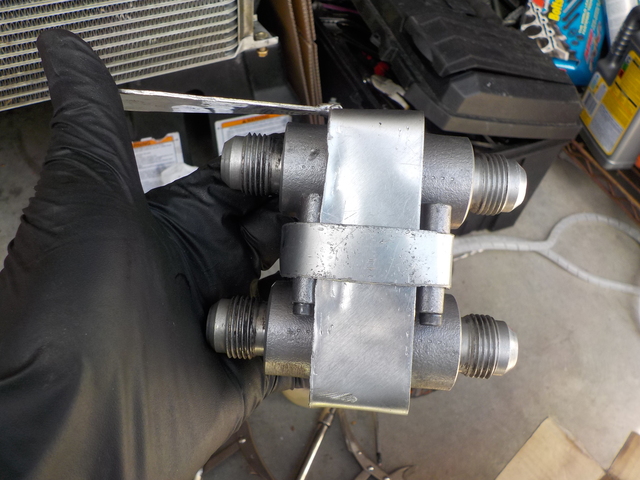
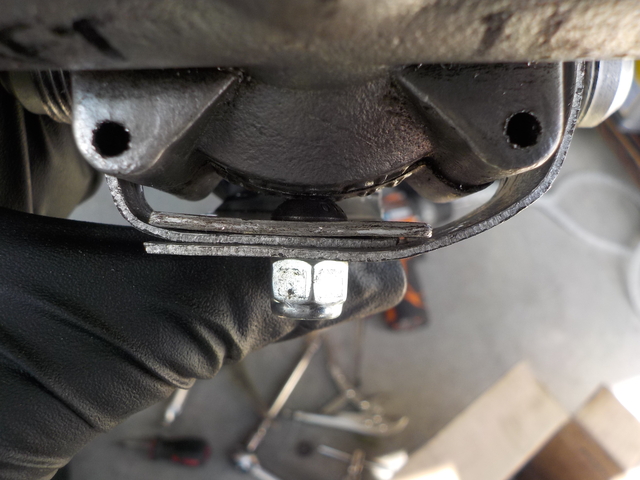
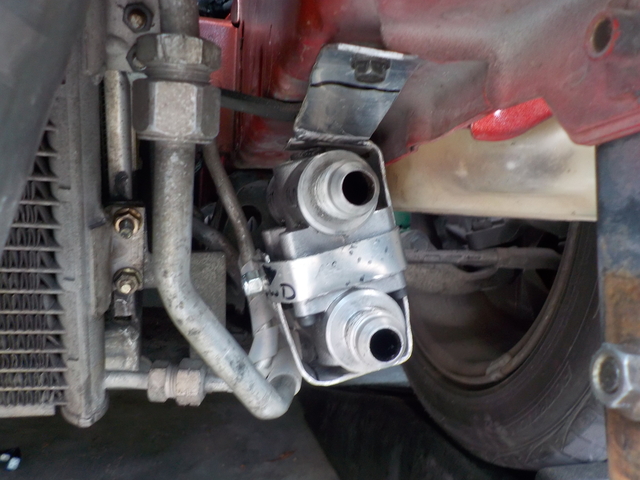
next, the thermostat for the oil cooler. this was a little tricky since the whole point of going with these coolers was to unclutter the bay with the factory oil lines. i wanted the thermostat to be somewhere out of the way and the frame rail seemed like the best place. i showed the bracket in work earlier in the thread but this is the finished product. i was a little worried about putting it here because the location is a little flimsy. with it being so close to the ground and the wheel being right there but after checking around and looking at stuff, this spot is actually pretty good. its somewhere the wheel will never go under any circumstance other than a collision, the undertray im using sits lower than it so its protected from road debris and all that. the cage holds it sturdy and with the lines attached, it doesnt go anywhere.

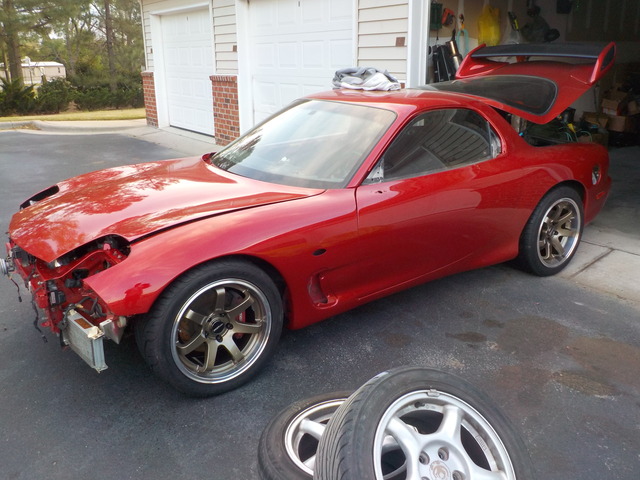
once that was all sorted, i got to work fitting the wheels. i had 3 pairs in 3 sizes: 17x9+30/9.5+15/9.5+30. i had to figure out which two were going to work the best fitment wise. i ended up with a 9+30/9.5+15 square 255/40. the wheels are origin dna01.
then it went off back to the body shop to be......."finished". basically what happened is they painted the car and gave it back to me. all of the post paint work still needed to be done: wetsanding, polsihing, all that stuff. in addition to that, the skirts needed to be put on and the whole front end installed and aligned. i'll come back to this in a little bit....

this is what the bay looked like when it left for the body shop. at this point i was waiting on the lines for the oil coolers to be made by tuning4life here on the forum so i couldnt install the pretty much the whole left side of the engine bay since i needed to route the line from the oil filter.


once that was all sorted, i got to work fitting the wheels. i had 3 pairs in 3 sizes: 17x9+30/9.5+15/9.5+30. i had to figure out which two were going to work the best fitment wise. i ended up with a 9+30/9.5+15 square 255/40. the wheels are origin dna01.


then it went off back to the body shop to be......."finished". basically what happened is they painted the car and gave it back to me. all of the post paint work still needed to be done: wetsanding, polsihing, all that stuff. in addition to that, the skirts needed to be put on and the whole front end installed and aligned. i'll come back to this in a little bit....

this is what the bay looked like when it left for the body shop. at this point i was waiting on the lines for the oil coolers to be made by tuning4life here on the forum so i couldnt install the pretty much the whole left side of the engine bay since i needed to route the line from the oil filter.
