94 R2 N/A 3 Rotor Build


 12-31-14, 08:13 AM
#328
Hey Gordon,
Nope haven't driven the car yet. Last I talked to them he was just putting the diff back together, and there was some slight adjustment to the fuel cell that needed done. I would assume that has all been completed by now. I've been busy for the holidays as I'm sure they have as well. I'd imagine I should be able to go pick her up here very shortly
Nope haven't driven the car yet. Last I talked to them he was just putting the diff back together, and there was some slight adjustment to the fuel cell that needed done. I would assume that has all been completed by now. I've been busy for the holidays as I'm sure they have as well. I'd imagine I should be able to go pick her up here very shortly
02-21-15, 03:30 PM
#329
Junior Member
iTrader: (8)

Join Date: Oct 2013
Location: Halifax, NS
Posts: 43
Likes: 0
Received 0 Likes
on
0 Posts
Just watched vid, it sounds awesome!! I bet your getting anxious to drive it after all this time, but it's worth the wait for sure!!! Sometimes the extra time waiting is ideal to have all the bugs worked out when you finally get the keys back! I'm excited to see more vids, and also see how much the rear end repair affected the hp.
02-21-15, 10:09 PM
#331
Ah, ok. Nope nothing new. I picked up the car 2 weekends ago. But yea it's been a frozen wonderland so I haven't had a chance to drive it at all. It's ok though, gives me a chance to do a lot of misc things that needed done. I've actually spent a ton of time working on it since its been back, will post some more updates when I have a chance. And hopefully a first impression drive won't be too far off
02-22-15, 03:43 PM
#333
Thanks Gordon. And yea over the course of the build it has sort of evolved into a much more track focused machine than the original intent. Which is fine, but now its very loud, rough and stiff. A fun track/weekend toy, but not something Id want to take a road trip in thats for sure. Trust me as is your engine bay looks 100x better than mine. But Im working cleaning alot of things up.
Lenny... You must be happy as hell to have it back and done finally. I think you have the nicest NA 3 rotor motor I've seen. I know you were going for street and track, but the motor and much of the rest is pretty track oriented. You went lux on the interior though. Can't wait for your driving impressions. Congratulations again. Really really sweet.
G
G
03-06-15, 09:32 PM
#334
So, as mentioned above I had picked the car up a couple weeks back. Since Ive had it back Ive been working very hard trying to get everything up to snuff, fixing any issues and putting everything as I think it should be. Ive finally had some time to get some pictures together and post a bit of an update. So, here we go.
First thing was I had wanted to replace all the wheel bearings and install some ARP wheel studs. I figured with me wanting to get out on the track there was no harm in replacing these ~70k mile and 21 year old parts. Some pictures of rear spindles removed and bearing/stud pressing:
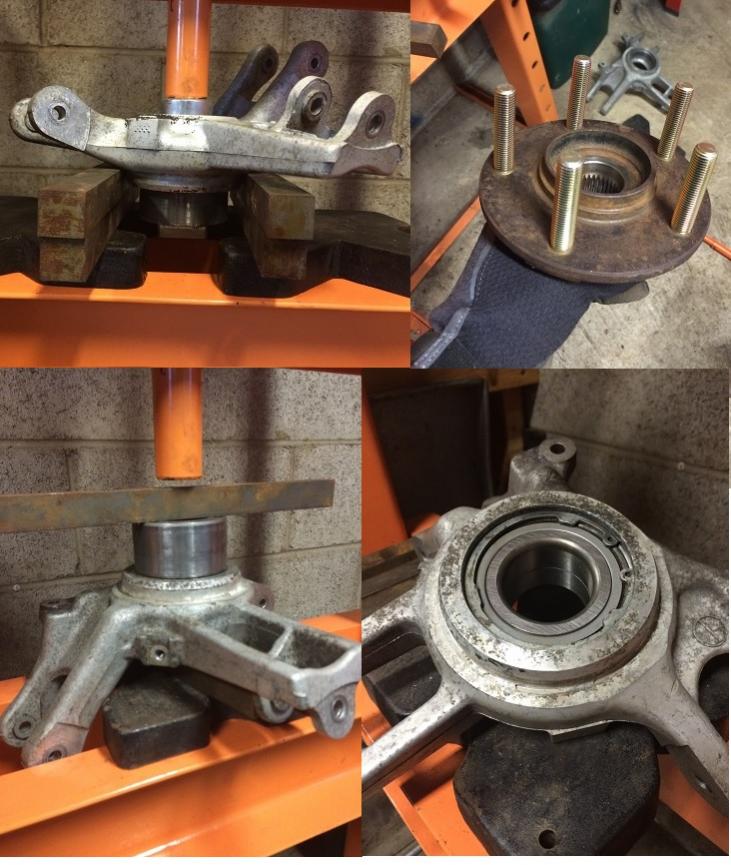
The rear hub with old inner bearing race. For those not sure what all involved in replacing the rear bearings this always is stuck to the hub and will need cut off. Sometimes heating with a torch will loosen it up, but a steady hand and a grinder can get the job done in a few minutes
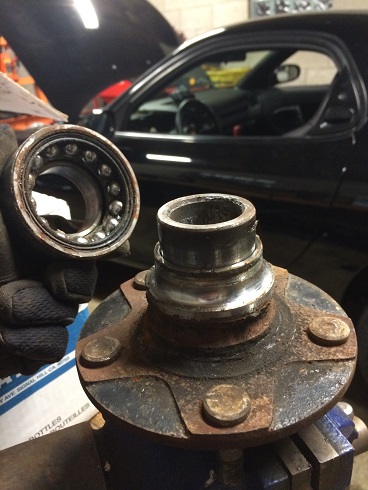
Fronts are easy as pie
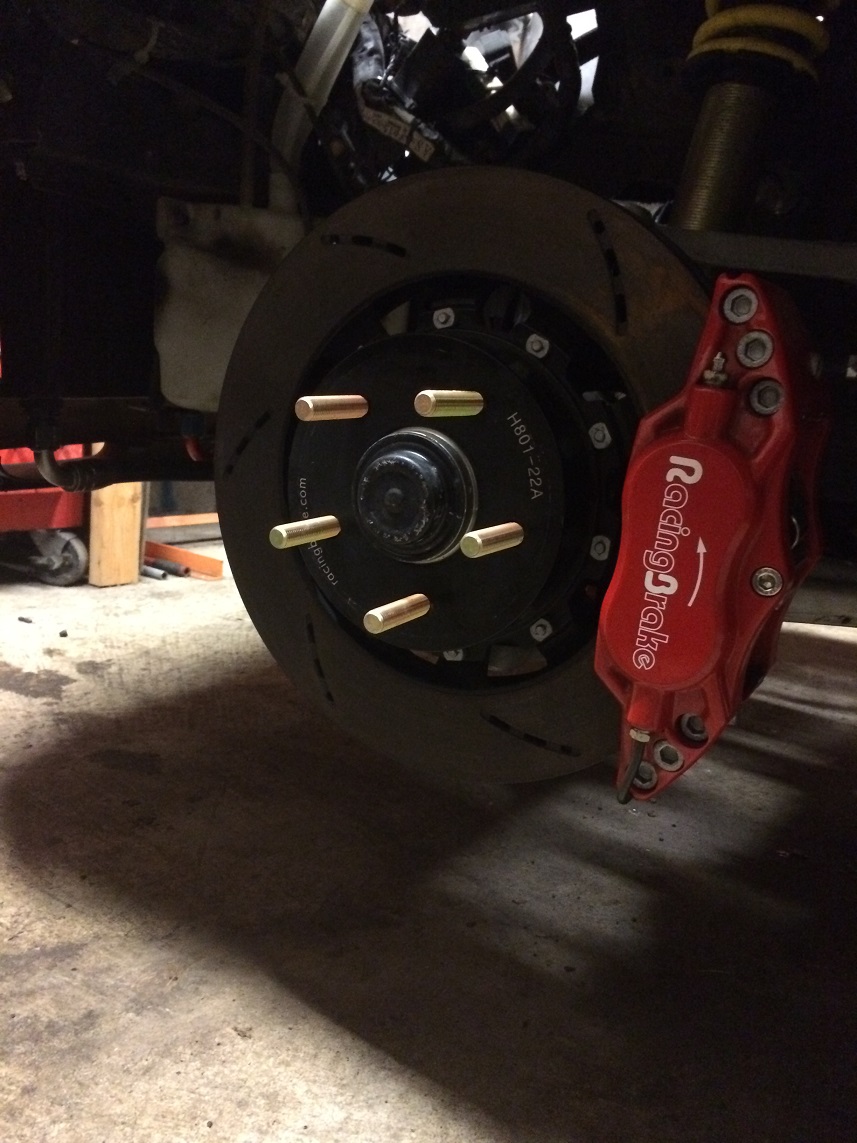
To go with the new bearings and lugs, Ive also got some new kicks. ( I have a bit of a wheel OCD issue..). I have a set of Work M.C.O wheels, in 18x10.5 +47 wrapped in 285/30 dunlop Z2 star specs. Im running a 10mm spacer in the rear just for flushness, but I now will at least be able to rotate front to rear to hopefully extend tire life just a bit. Sorry, no pictures on the car yet , I will try and snap a few shortly as they are mounted right now.


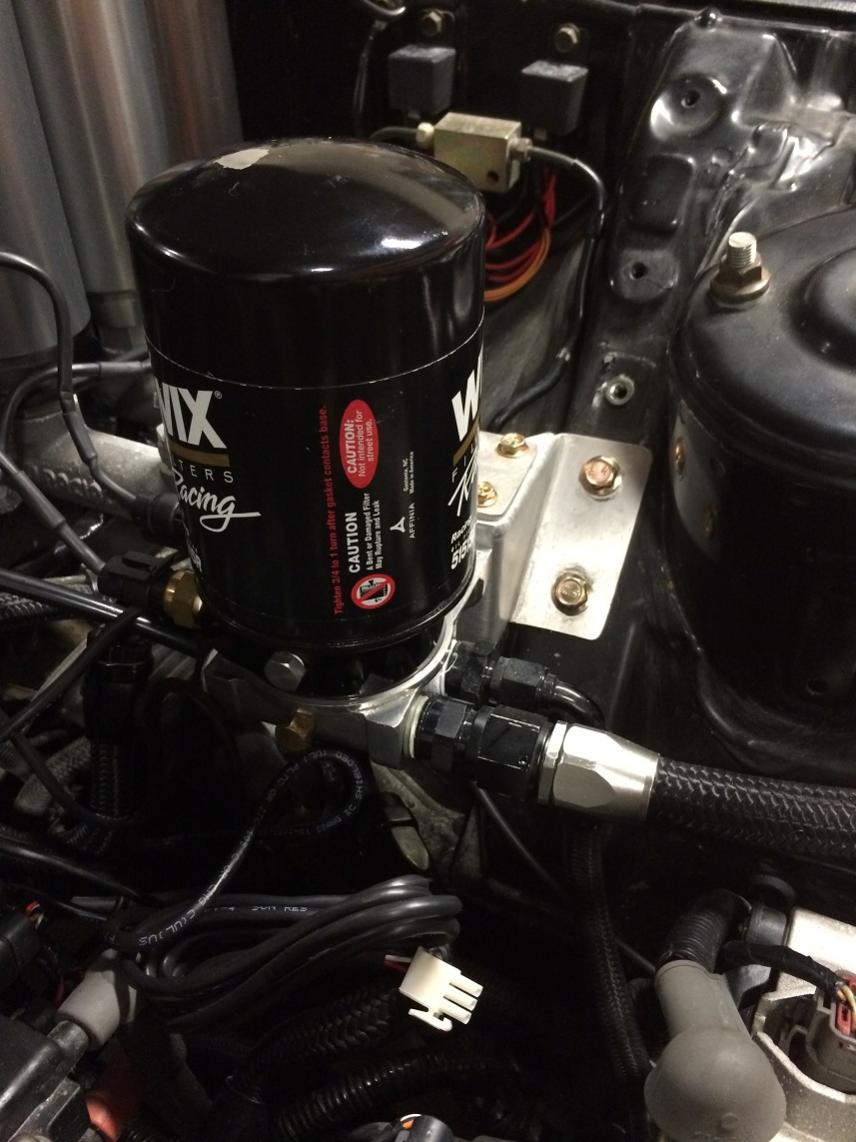
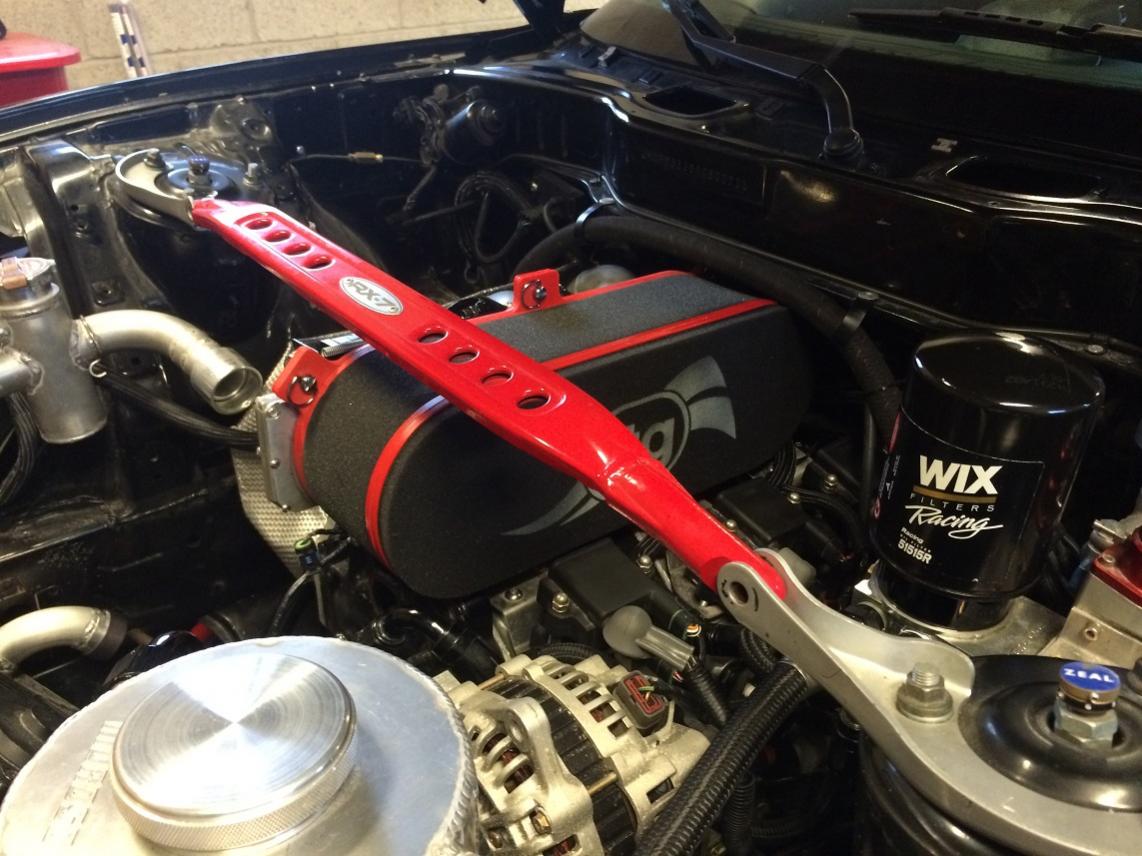
Now onto some mechanicals. First, I noticed that my hood seemed to not be lining up on the drivers side. After looking I had found that the relocated oil filter was sitting too high and hitting my hood when it was shut. You can see the paint scraped off the top of the filter where it was hitting. So, I had relocated the bracket, and even gave myself enough clearance to install a sandwhich plate to install oil pressure and temp sensors.
First thing was I had wanted to replace all the wheel bearings and install some ARP wheel studs. I figured with me wanting to get out on the track there was no harm in replacing these ~70k mile and 21 year old parts. Some pictures of rear spindles removed and bearing/stud pressing:
The rear hub with old inner bearing race. For those not sure what all involved in replacing the rear bearings this always is stuck to the hub and will need cut off. Sometimes heating with a torch will loosen it up, but a steady hand and a grinder can get the job done in a few minutes
Fronts are easy as pie
To go with the new bearings and lugs, Ive also got some new kicks. ( I have a bit of a wheel OCD issue..). I have a set of Work M.C.O wheels, in 18x10.5 +47 wrapped in 285/30 dunlop Z2 star specs. Im running a 10mm spacer in the rear just for flushness, but I now will at least be able to rotate front to rear to hopefully extend tire life just a bit. Sorry, no pictures on the car yet , I will try and snap a few shortly as they are mounted right now.
Now onto some mechanicals. First, I noticed that my hood seemed to not be lining up on the drivers side. After looking I had found that the relocated oil filter was sitting too high and hitting my hood when it was shut. You can see the paint scraped off the top of the filter where it was hitting. So, I had relocated the bracket, and even gave myself enough clearance to install a sandwhich plate to install oil pressure and temp sensors.
03-06-15, 09:46 PM
#335
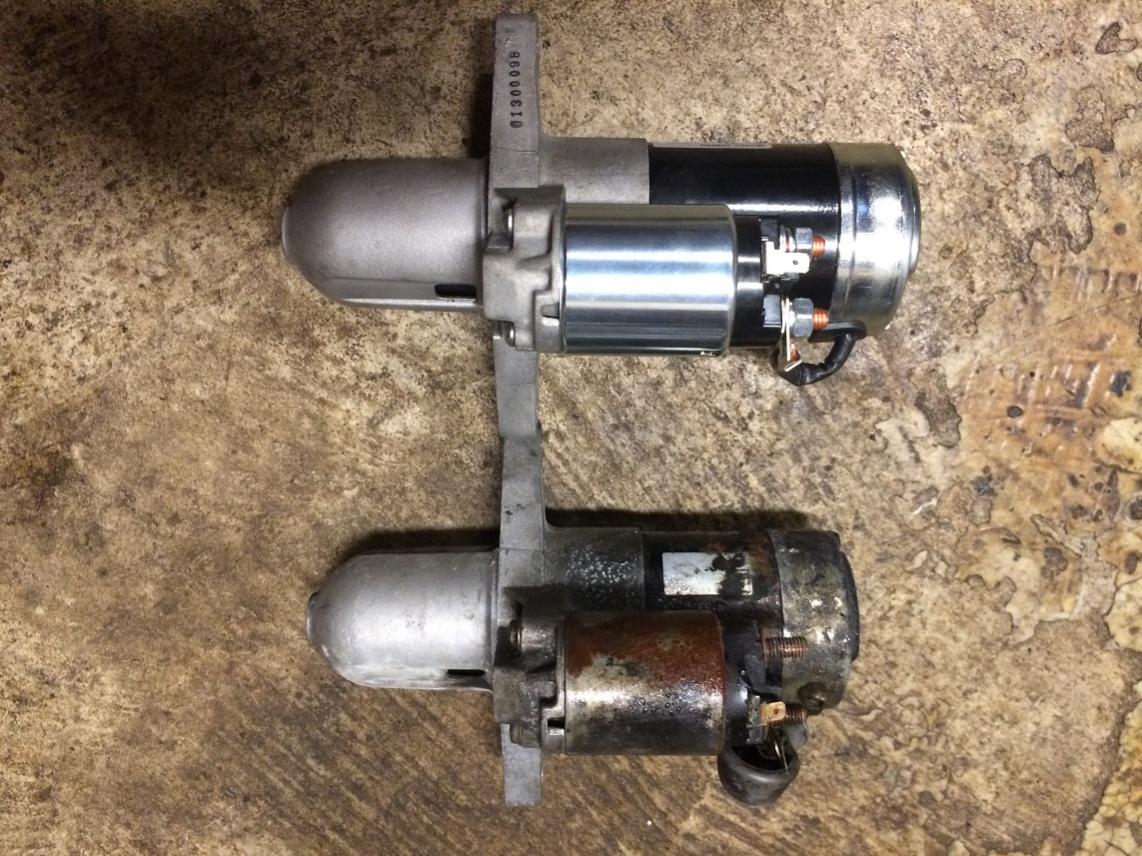
Im also in the process of redoing some wiring and battery relocation. Im low on pictures at this point of this process, but it also involves a new high torque starter purchased from Banzai Racing. This has already been installed, but a quick picture of size difference between it and stock FD starter
In the wiring process, also working on installing the speedhut gauge setup. I was initially going to install them recessed behind the factory cluster glass, and spent a good bit of time doing so..
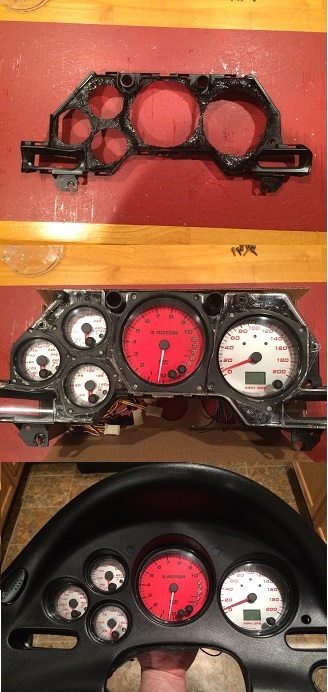
However although I think it looked great from the outside, I wasnt really happy with how everything was mounted internally. Perhaps it was just me and my mounting methods werent the same as others, but I felt like it was a bit janky. So, I have just placed the gauges in a more conventinal way and right into the front of the gauge surround. May not be as slick but much more solid and I think it still looks good..

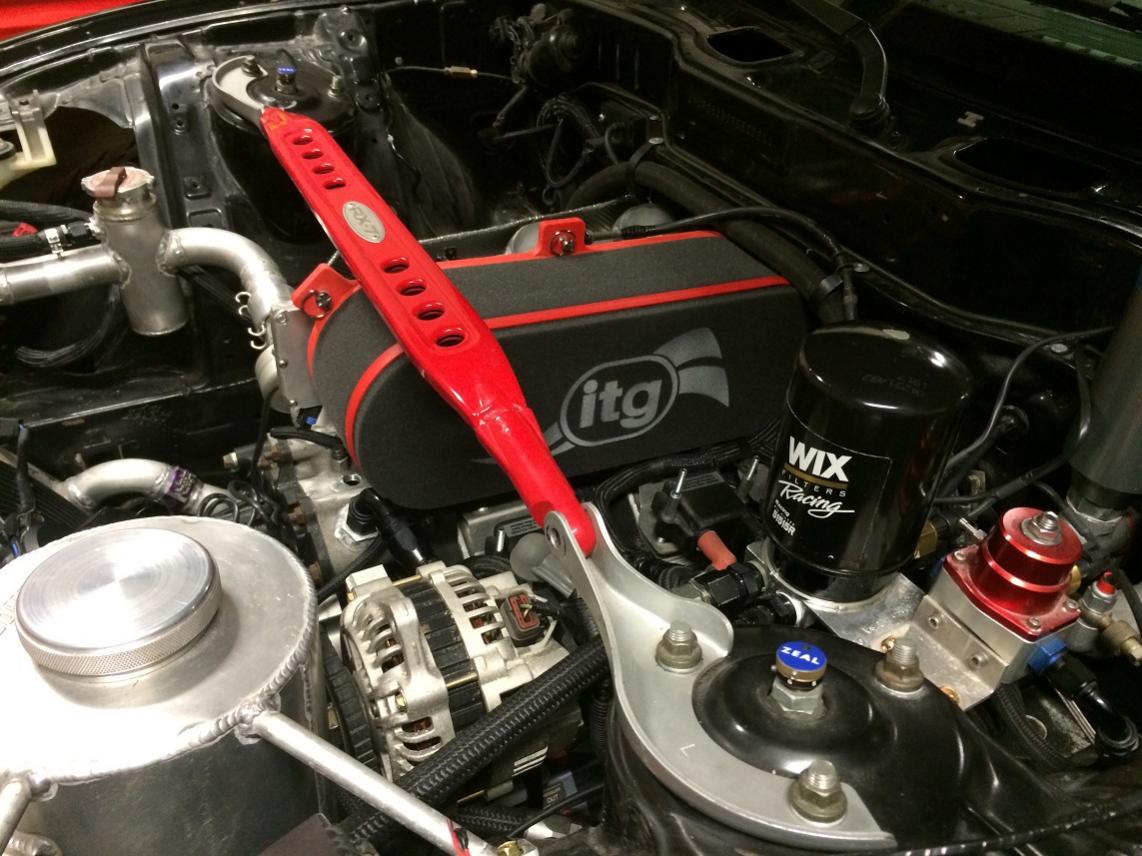
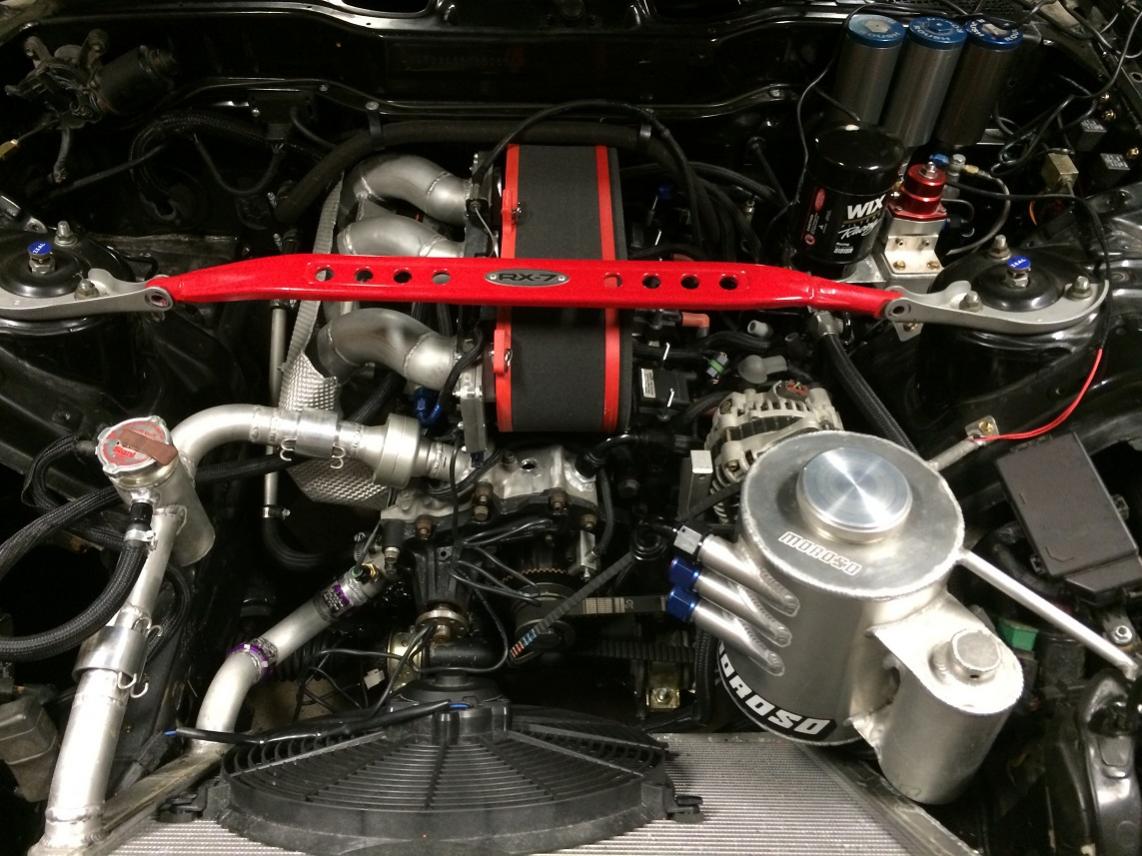
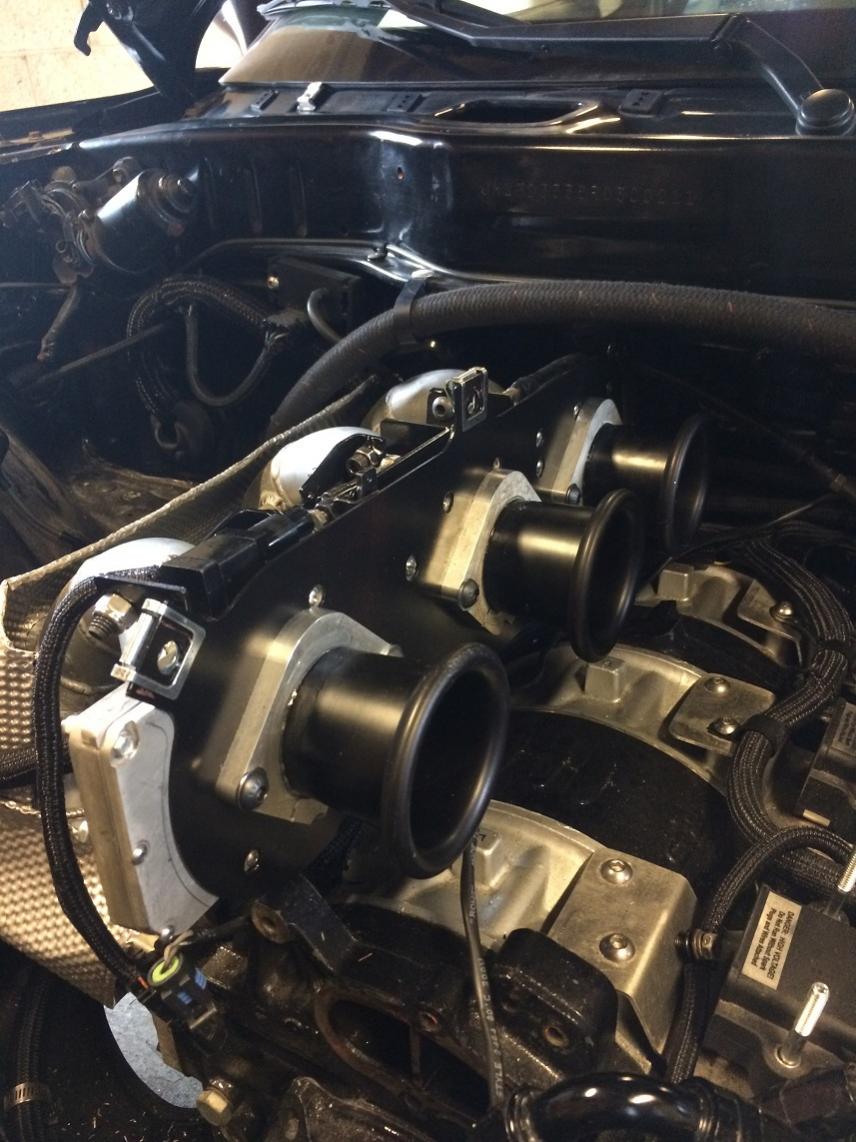
And for now what Ive been spending most time on, and has been my largest concern was air filtration. Ive spent countless hours staring at the engine bay , taking measurements and trying to decide how to tackle this issue. I had originally wanted to build a plenum and duct in outside air, but there is just no room anywhere to do so. So, after some searching I had turned to ITG filters and ended up ordering one of their off the shelf size ITB filters. This is one of, if not the largest one they make as I did not want to create any intake restrictions.

It is about as tight as can be, and I will need to make some modificaions to some other areas on the car, but it will work. This should be complete this weekend, but just a mock up shot to show how it will be.
In the wiring process, also working on installing the speedhut gauge setup. I was initially going to install them recessed behind the factory cluster glass, and spent a good bit of time doing so..
However although I think it looked great from the outside, I wasnt really happy with how everything was mounted internally. Perhaps it was just me and my mounting methods werent the same as others, but I felt like it was a bit janky. So, I have just placed the gauges in a more conventinal way and right into the front of the gauge surround. May not be as slick but much more solid and I think it still looks good..
And for now what Ive been spending most time on, and has been my largest concern was air filtration. Ive spent countless hours staring at the engine bay , taking measurements and trying to decide how to tackle this issue. I had originally wanted to build a plenum and duct in outside air, but there is just no room anywhere to do so. So, after some searching I had turned to ITG filters and ended up ordering one of their off the shelf size ITB filters. This is one of, if not the largest one they make as I did not want to create any intake restrictions.
It is about as tight as can be, and I will need to make some modificaions to some other areas on the car, but it will work. This should be complete this weekend, but just a mock up shot to show how it will be.
03-07-15, 08:18 AM
#336
Thanks Gordon. I have yet to drive the car. I have some starting/idling issues (flooding) which Logan says may be due to a firmware update that was done to the ecu post tune, or because of an attempt to street tune in subzero temps. Also the weather is still poor, so until that is fixed I am occupying my time with getting all the other stuff in order.
03-07-15, 10:21 AM
#337
Really liking the way the car is looking. Clean, simple, and purposeful. That ITB filter looks pretty nice IMO. Don't think I've ever seen something like that on a 3 rotor.
I also like the Seed Hut guages mounted outside of the stock glass. Just looks right.
Been eying one of those Banzai upgraded starters myself
I also like the Seed Hut guages mounted outside of the stock glass. Just looks right.
Been eying one of those Banzai upgraded starters myself
03-07-15, 08:13 PM
#339
Originally Posted by David Hayes
Really liking the way the car is looking. Clean, simple, and purposeful. That ITB filter looks pretty nice IMO. Don't think I've ever seen something like that on a 3 rotor.
I also like the Seed Hut guages mounted outside of the stock glass. Just looks right.
Been eying one of those Banzai upgraded starters myself
I also like the Seed Hut guages mounted outside of the stock glass. Just looks right.
Been eying one of those Banzai upgraded starters myself
03-09-15, 10:10 AM
#342
Junior Member
iTrader: (8)
Join Date: Oct 2013
Location: Halifax, NS
Posts: 43
Likes: 0
Received 0 Likes
on
0 Posts
Love the gauges, looks awesome, and really good idea. I may copy that as some of my factory cluster is not working properly. Car looks awesome, sounds good!! Looking forward to seeing the future progress!
 03-13-15, 05:05 PM
#345
Originally Posted by kylemo
Love the gauges, looks awesome, and really good idea. I may copy that as some of my factory cluster is not working properly. Car looks awesome, sounds good!! Looking forward to seeing the future progress!
Originally Posted by gracer7-rx7
Very, very nice 
Originally Posted by ZE Power MX6
Really like the gauge setup, what are you doing for fuel level?
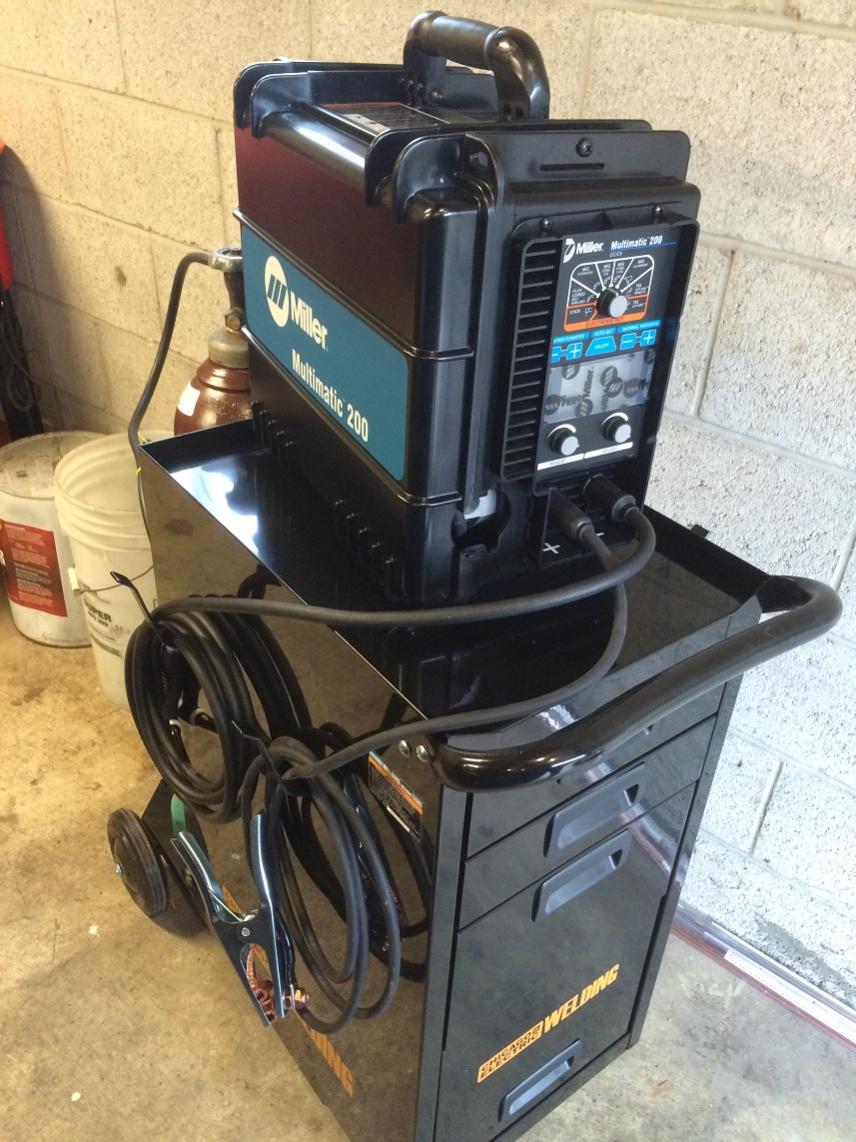
And no picture updates for now, hopefully Ill get a good handle on wrapping some things up this weekend. I did however pick up a new tool in which Ive been eyeing for a while. No longer will I need to ask for favors on welding
Last edited by Rxmfn7; 03-13-15 at 05:12 PM.

 03-17-15, 11:57 AM
#347
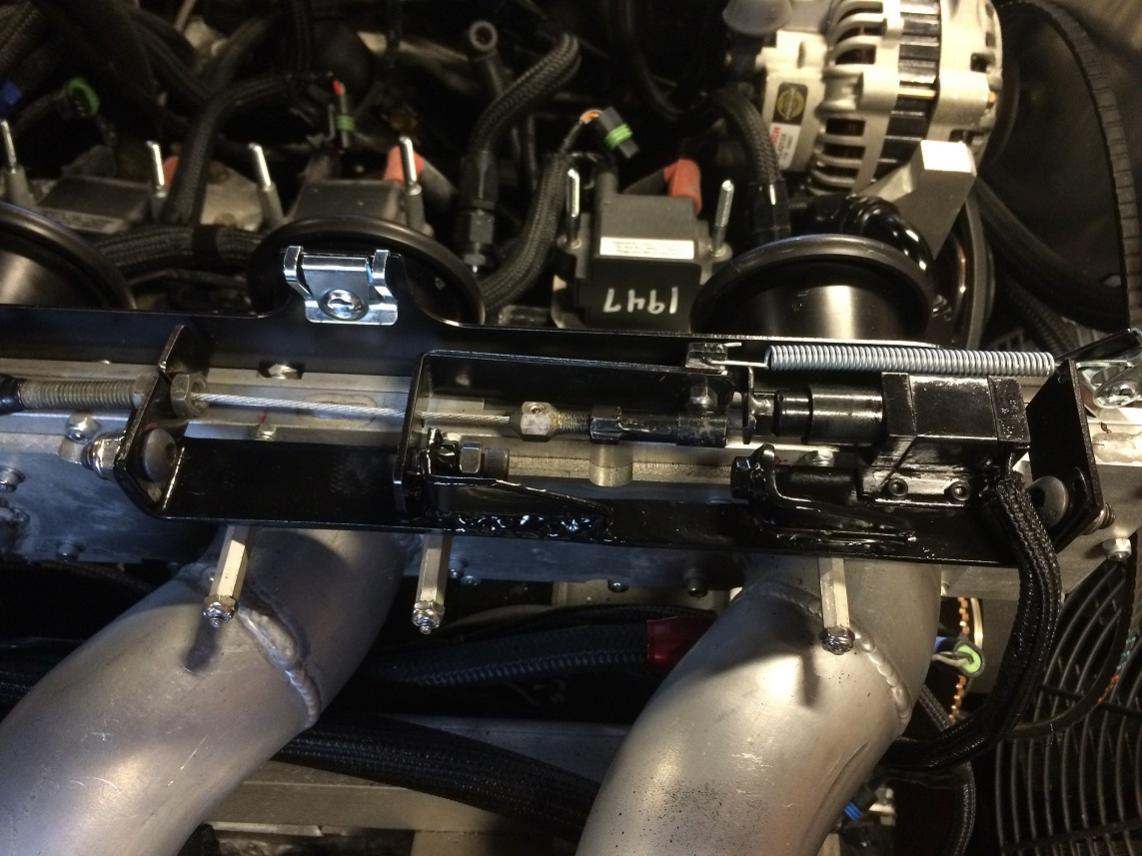
Not quite as much progress as Id have liked. Been busy with other things, plus this air filter situation was kicking my ***. The backing plate needed drilled for clearance to sit flush around all the little screws of the slide throttle assembly. Then, the entire throttle bracket needed to be remade so that it would sit offset to the left side of filter. Wasnt all that bad all said and done, but required a bit of tinkering and trial and error. But, just about all buttoned up and I think it turned out well.

Last edited by Rxmfn7; 03-17-15 at 01:33 PM.