93 VR parking lot find....

 05-12-13, 11:42 AM
#52
Junior Member

Join Date: May 2013
Location: California
Posts: 1
Likes: 0
Received 0 Likes
on
0 Posts
Nice build, nice dog, nice work
Seeing this type of meticulous work in order to do something correctly motivates me more and more everyday to seeing a fully built and restored rx7 in my driveway
Seeing this type of meticulous work in order to do something correctly motivates me more and more everyday to seeing a fully built and restored rx7 in my driveway

 06-27-13, 06:35 PM
#55
Alrighty....
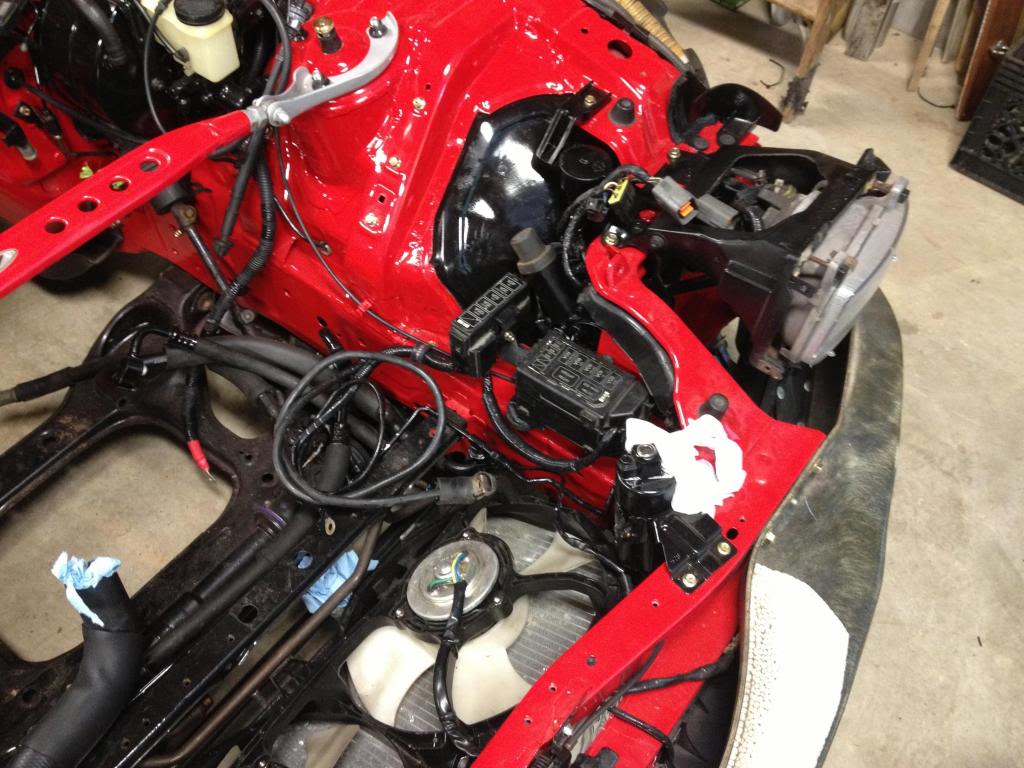
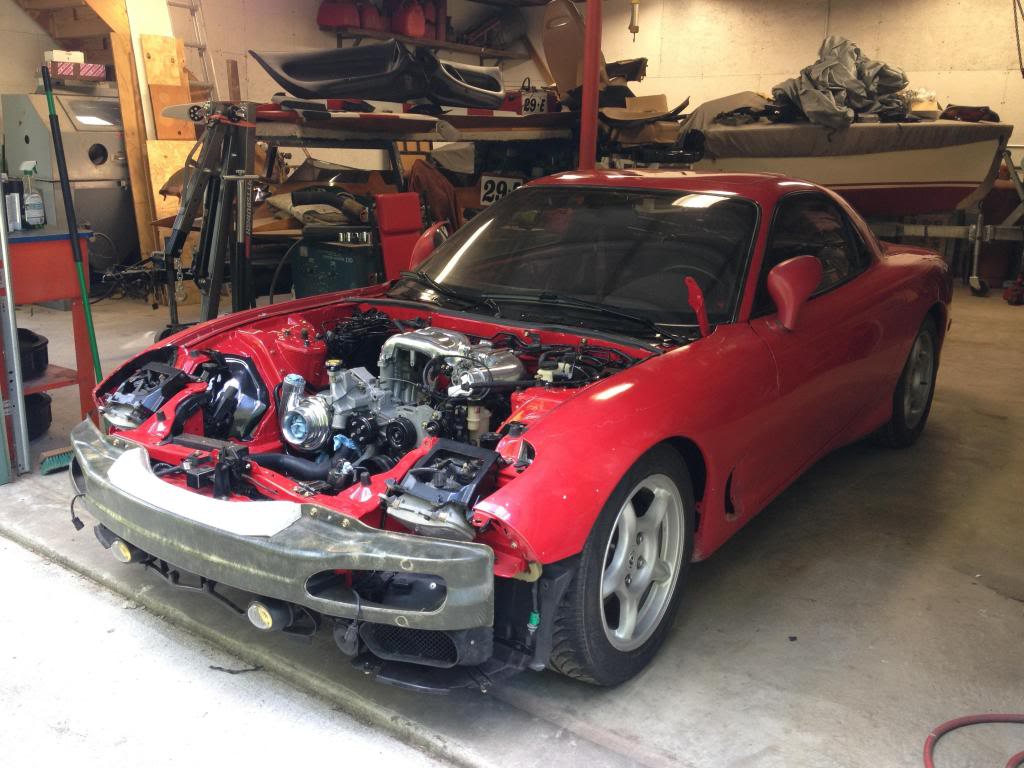
Work has been in a slow patch again (go figure) so I've had some spare time to finish up a few things and dive into some others. Finished reworking my fuse boxes to the lower rail to clean things up a bit. Still have a few wires to rework on the starter harness tho.
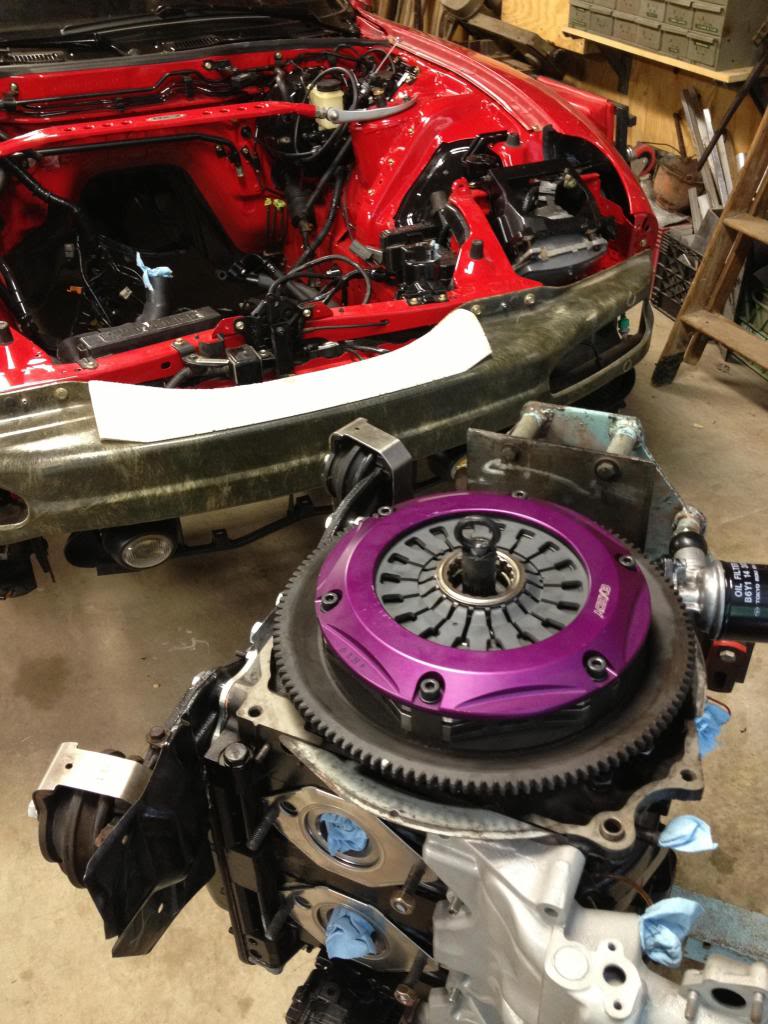
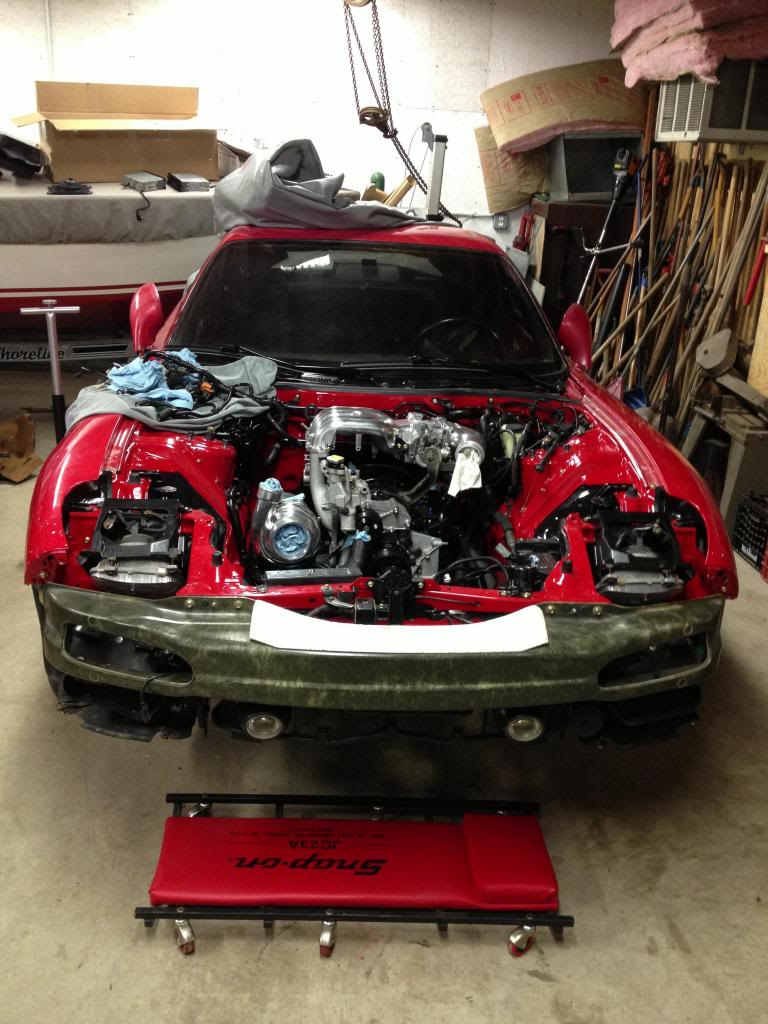
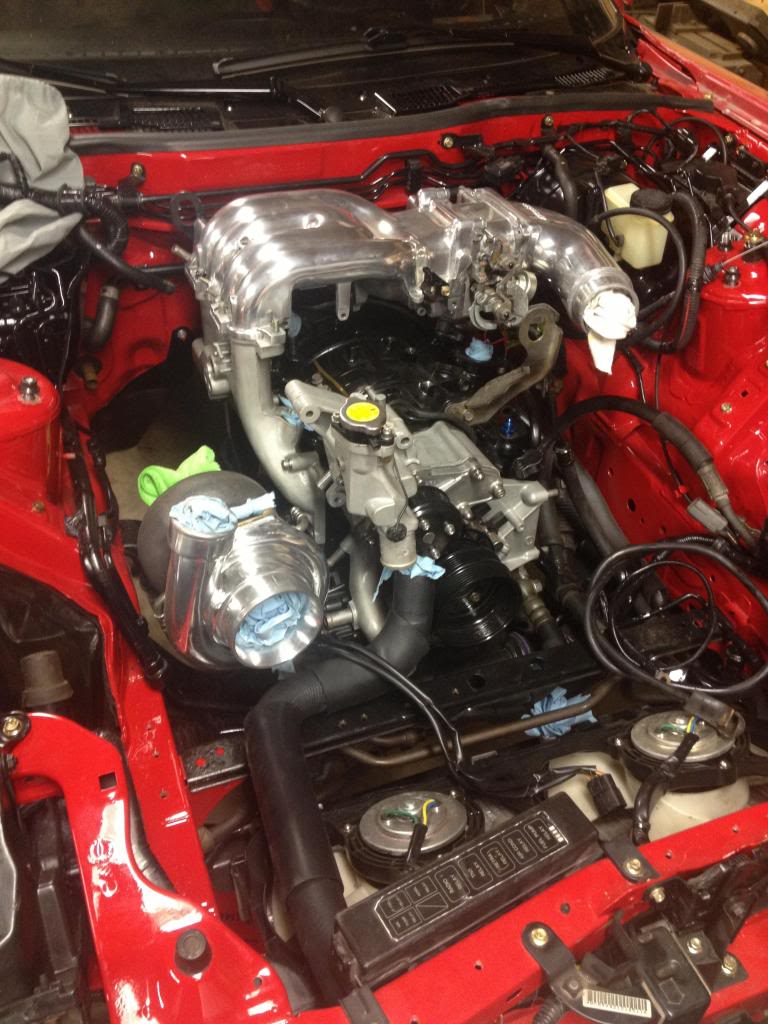
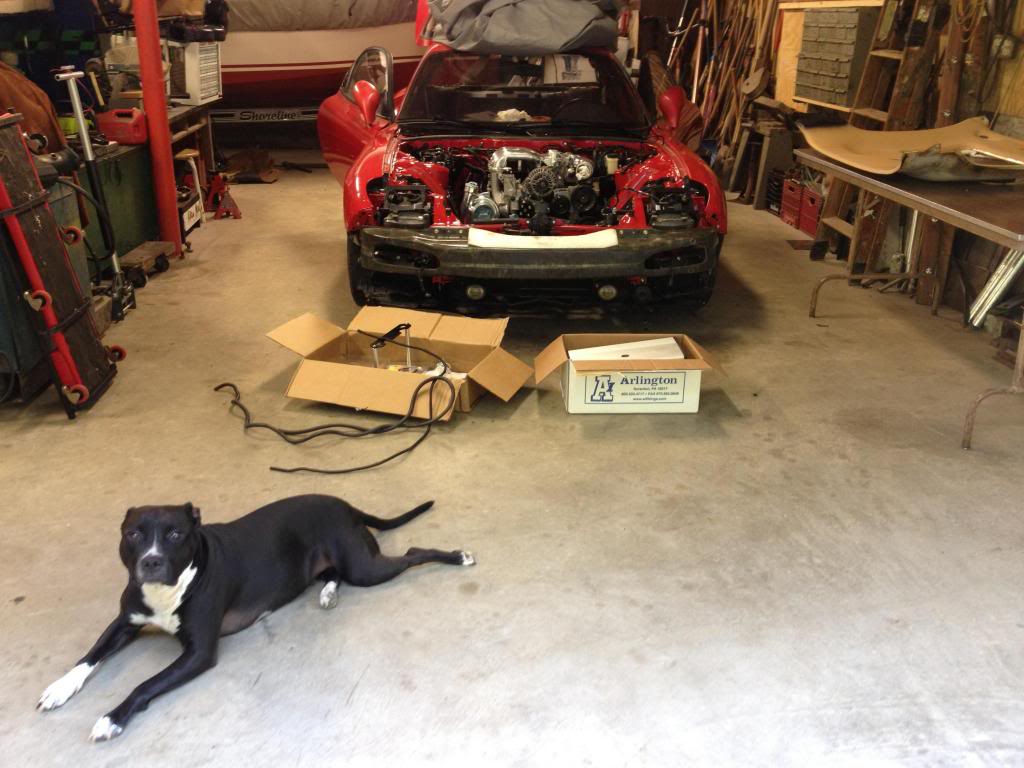
Picked up a clutch from a forum member just by dumb luck. After i broke my tool to hold the flywheel from moving....Got that all squared away then assembled the engine and trans together. Oh yeah and the drive train somehow found its way into the car
Work has been in a slow patch again (go figure) so I've had some spare time to finish up a few things and dive into some others. Finished reworking my fuse boxes to the lower rail to clean things up a bit. Still have a few wires to rework on the starter harness tho.

Picked up a clutch from a forum member just by dumb luck. After i broke my tool to hold the flywheel from moving....Got that all squared away then assembled the engine and trans together. Oh yeah and the drive train somehow found its way into the car


 06-27-13, 07:02 PM
#57
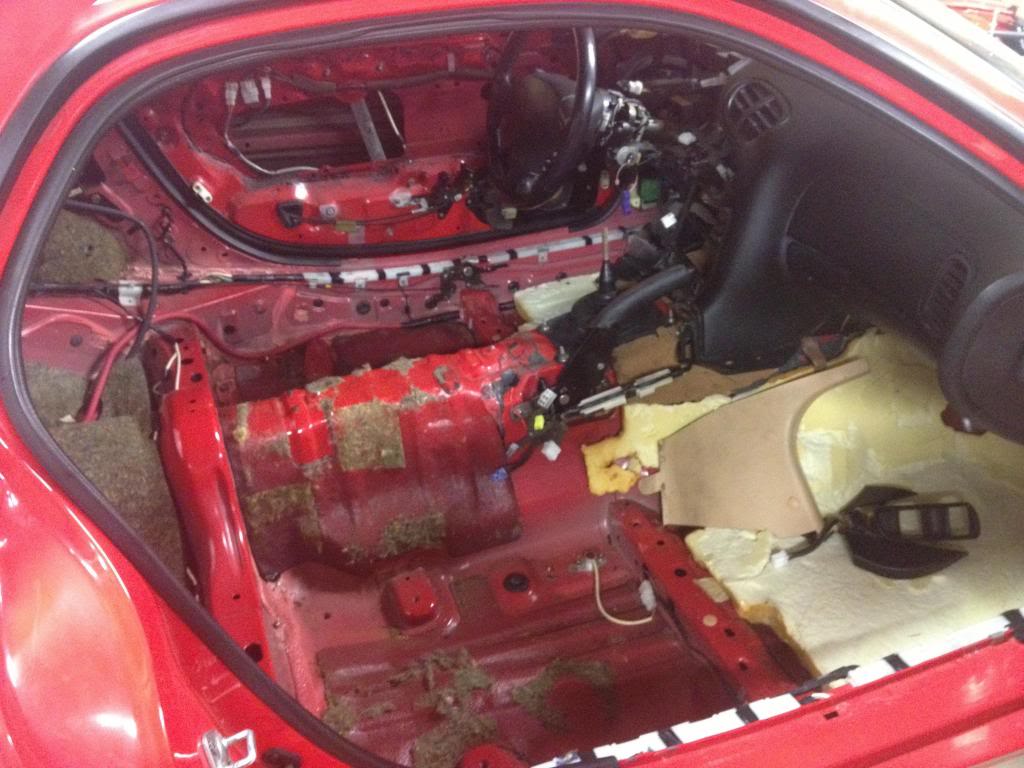
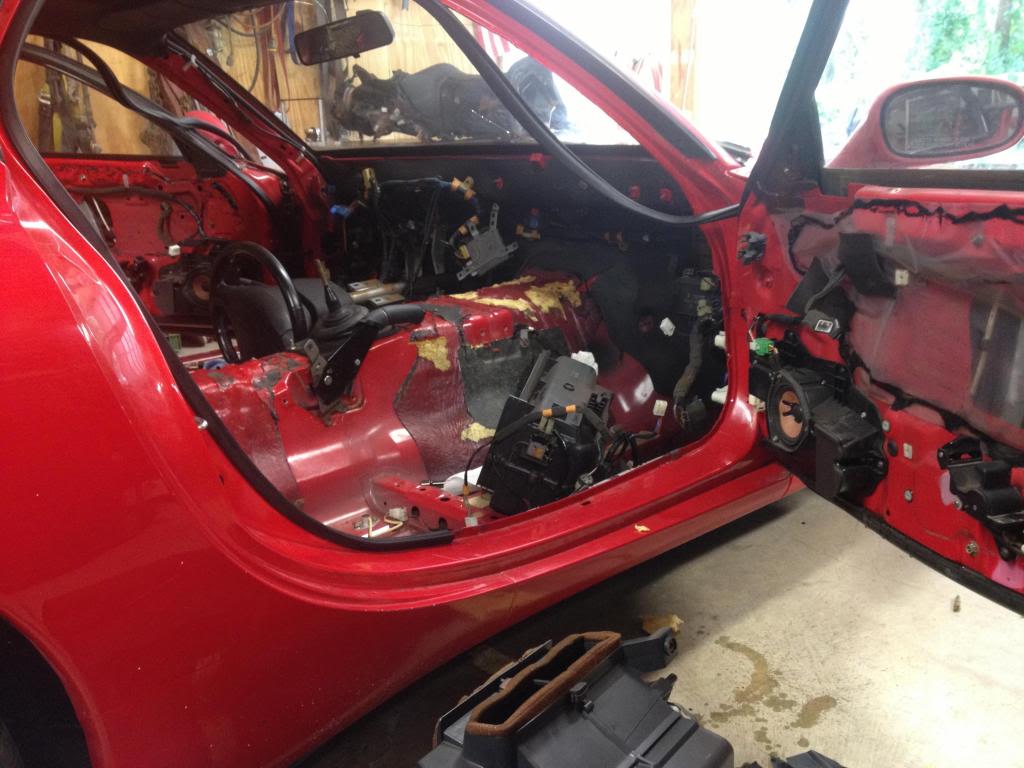
While i had to time i started to work on my interior along with the battery relocation to the rear bin. I pulled out the door panels, seats, center console, most of the dash, carpet, and plastics. I still have to pull the dash to remove the remainder of the carpet before the new goes. From the car sitting so long with a broken drivers window the mold under the carpet was noticeable. Nothing a lil simple green and time couldn't clean up. The interior plastics are pretty standard ratty looking mess. I got a big bin from the store and a few gallons of simple green. Scrubbed and scrubbed each plastic panel till all the rubbery mess was off then repainted them.. Came out better then i thought too. I also scrubbed my door panels with the hope to re-spray them with black vht paint, tho i am not sure how its going to turn out yet. A while back redline leathers was having a group buy. I hoped on and grabbed a few items to clean up and tie together my interior a bit.
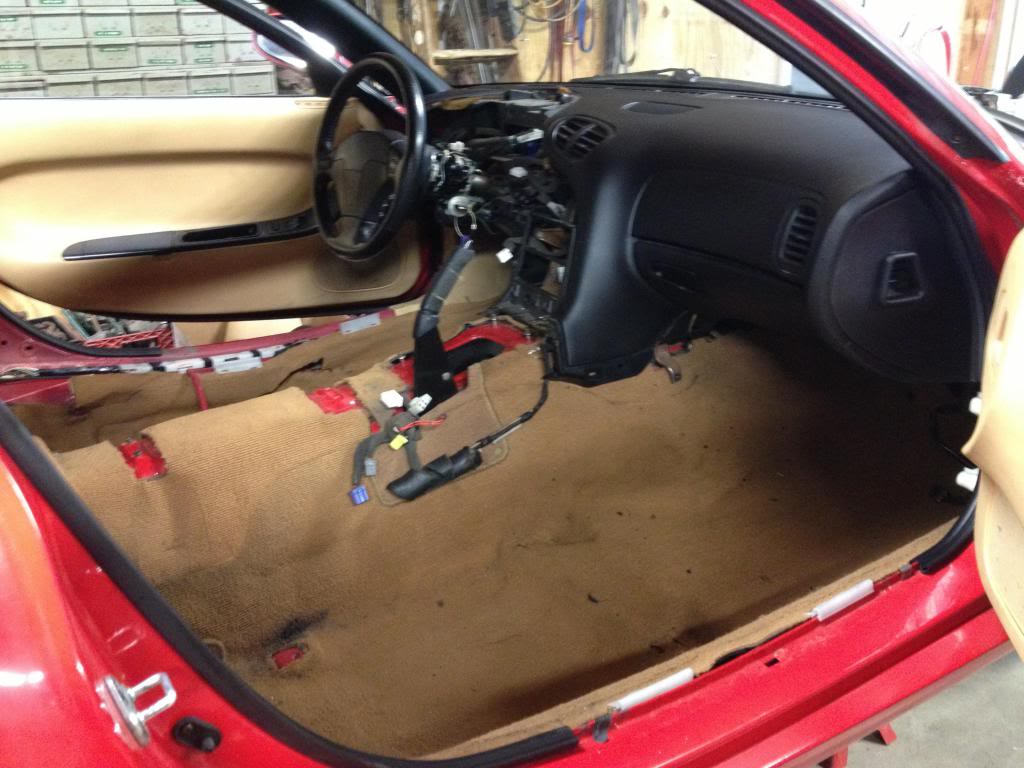

I'm looking for a really nice black carpet either used oem or i was checking out an aftermarket company that people on the forum seem to like. If you have any experience with aftermarket carpets let me know, just looking for info before i buy.


I'm looking for a really nice black carpet either used oem or i was checking out an aftermarket company that people on the forum seem to like. If you have any experience with aftermarket carpets let me know, just looking for info before i buy.
 06-28-13, 12:22 PM
#64
thank you
i like the way it came out, kinda ties in my red paint.
06-28-13, 02:01 PM
#65
This is a great thread for sure. I find it ironic because I am working with a very similar situation. I found a VR with expired tags in Virginia and snagged it up and I am in the process of restoring mine as well, although I will not be keeping the red paint. I will be reading along and watching the progress.
Great jarb thus far!
-Dave
Great jarb thus far!
-Dave
07-08-13, 07:34 PM
#67
Junior Member

Join Date: Jun 2010
Location: Canada
Posts: 8
Likes: 0
Received 0 Likes
on
0 Posts
Love the thread. It's great to see some one doing such detailed work restoring every aspect of the car. Very motivational. Can't wait to see more of the wire tuck.
Cheers
Cheers
 07-30-13, 02:49 PM
#69
This is a great thread for sure. I find it ironic because I am working with a very similar situation. I found a VR with expired tags in Virginia and snagged it up and I am in the process of restoring mine as well, although I will not be keeping the red paint. I will be reading along and watching the progress.
Great jarb thus far!
-Dave
Great jarb thus far!
-Dave
no problem man, thanks again for the ac clip.
thank you !
07-30-13, 03:19 PM
#70
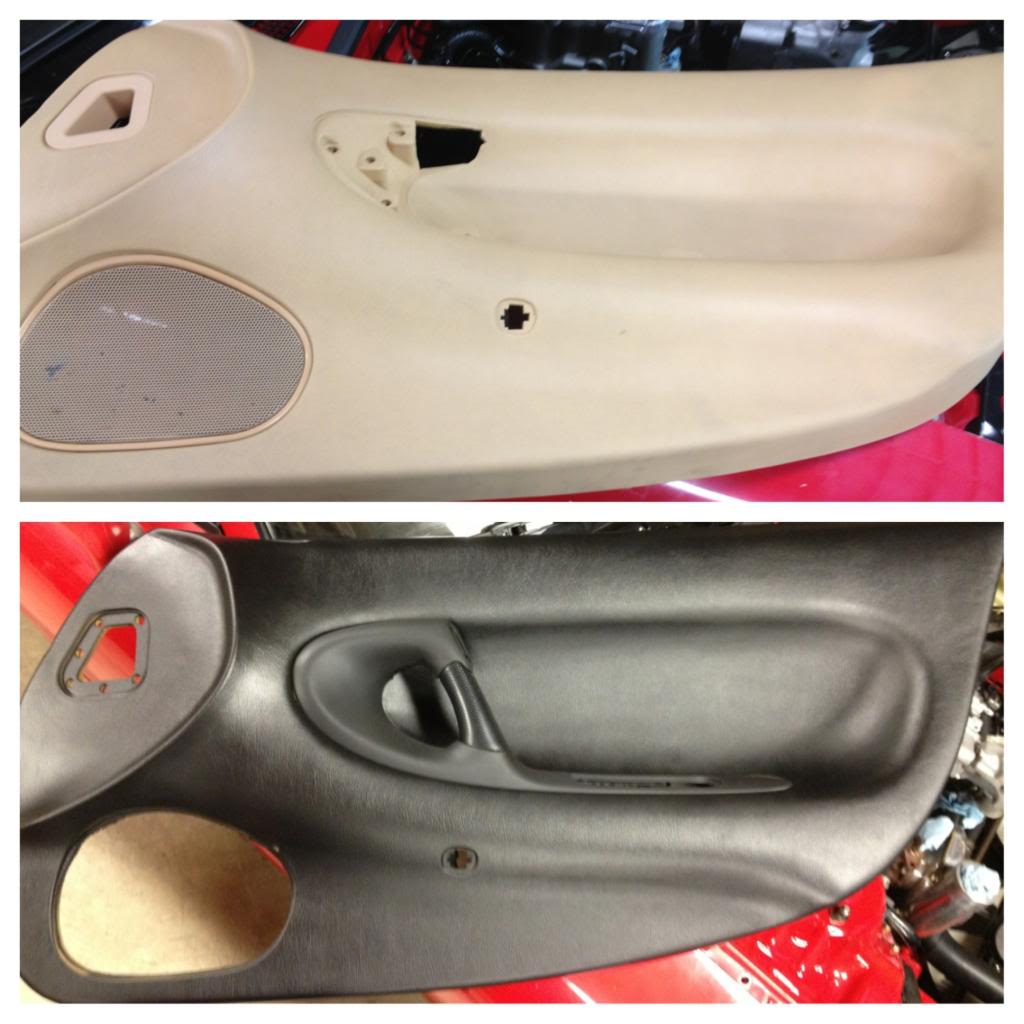
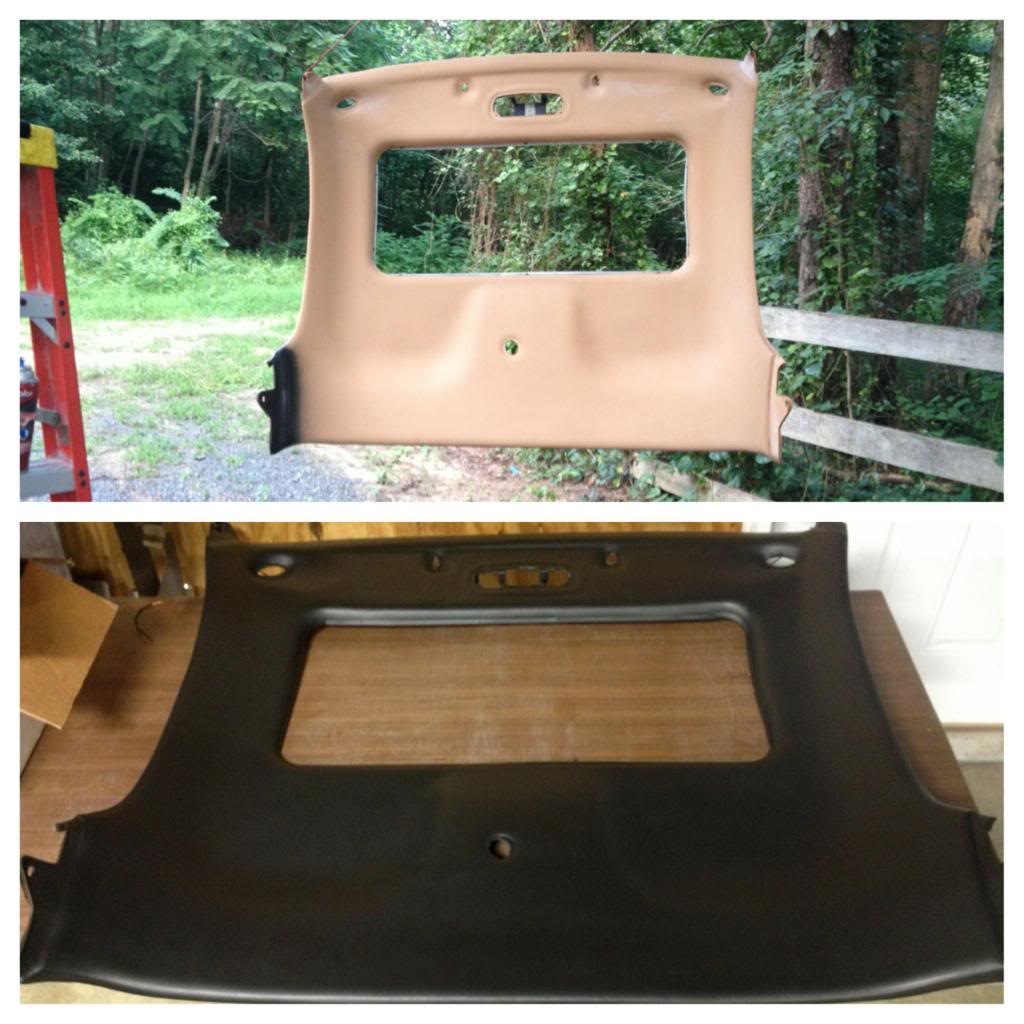
Alrighty..... I've been working on the interior lately to give my brain a rest from the engine bay. After cruzin the forum for some idea on what to do with my beat tan interior i decided to try out vht vinyl paint/dye. Now to be honest i was extremely hesitant to do this. But now i am very happy i did. Once you figure out how to prep it correctly the panels look brand new. Here is what i did.
Firstly i took the door panels apart completely and decreased them with super clean along with a scotch bright pad (red). Secondly i let them sit over night to dry thoroughly. Thirdly i wiped them down with duplicolor grease and wax remover, again letting them dry out over night. Then next day sprayed them with the duplicolor adhesion promoter ( this is one of the most important steps). I then gave them 3-4 very light coats and by light i do mean light with around 10 min in between coats with heavy shaking of the can during application. If you give it to heavy of a coat the finish product will come out with lines in it. Make sure you a spraying in less then 50% humidity too this stuff is sensitive to it. I used the flat black which turned out like a satin color after its dry. This satin color seems to match the original pretty well also so its a win win in my book. The glossy is a bit shinny for me. This stuff is tough too, i could not scrap it away with my fingernail and believe me i tried.
Here is a shot of the before and after. Not a bad way to redo a set of panels most would just spend the money to change out
oh i did my head liner, sun shades and sunroof trim too....
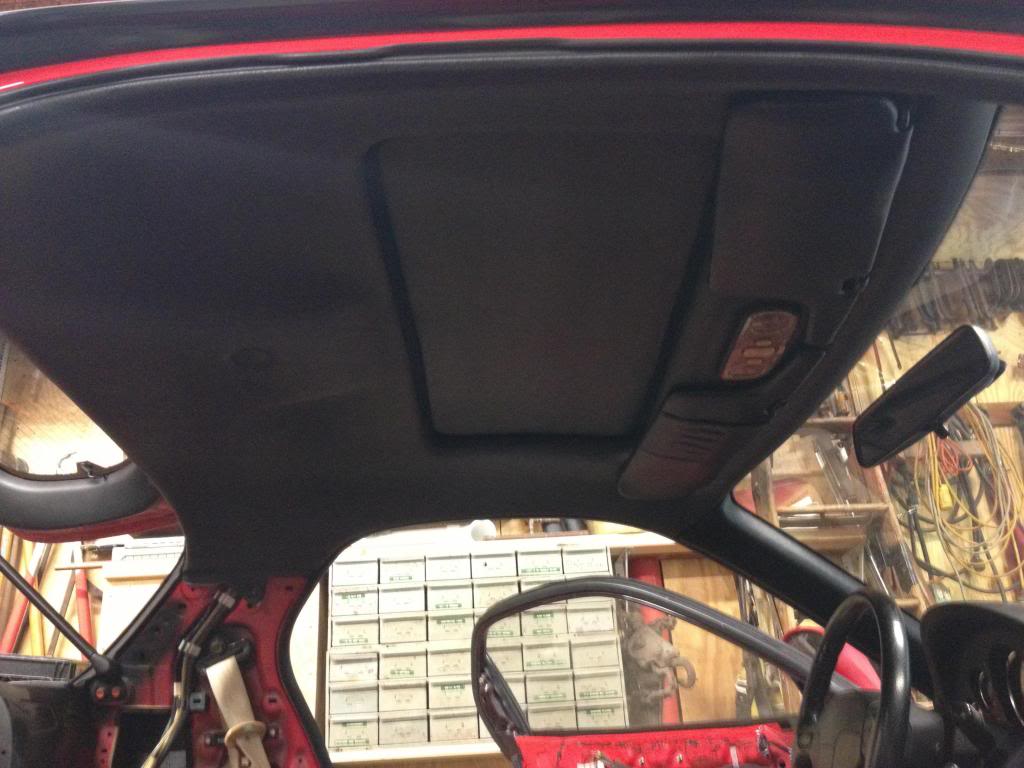
picture of it installed

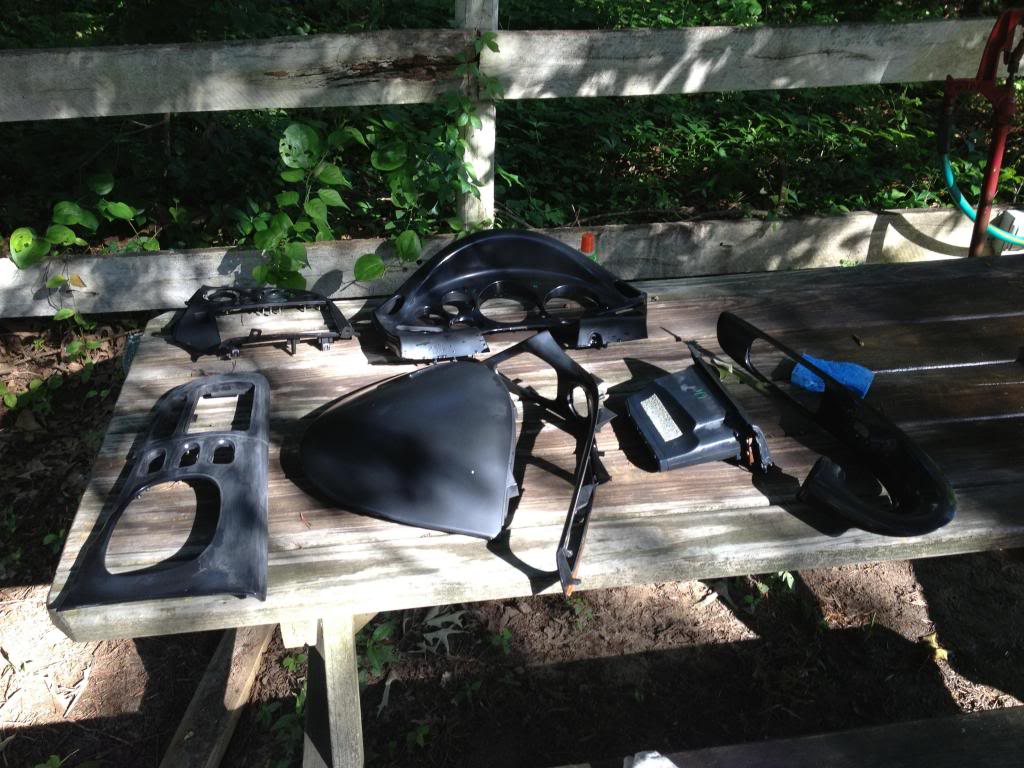
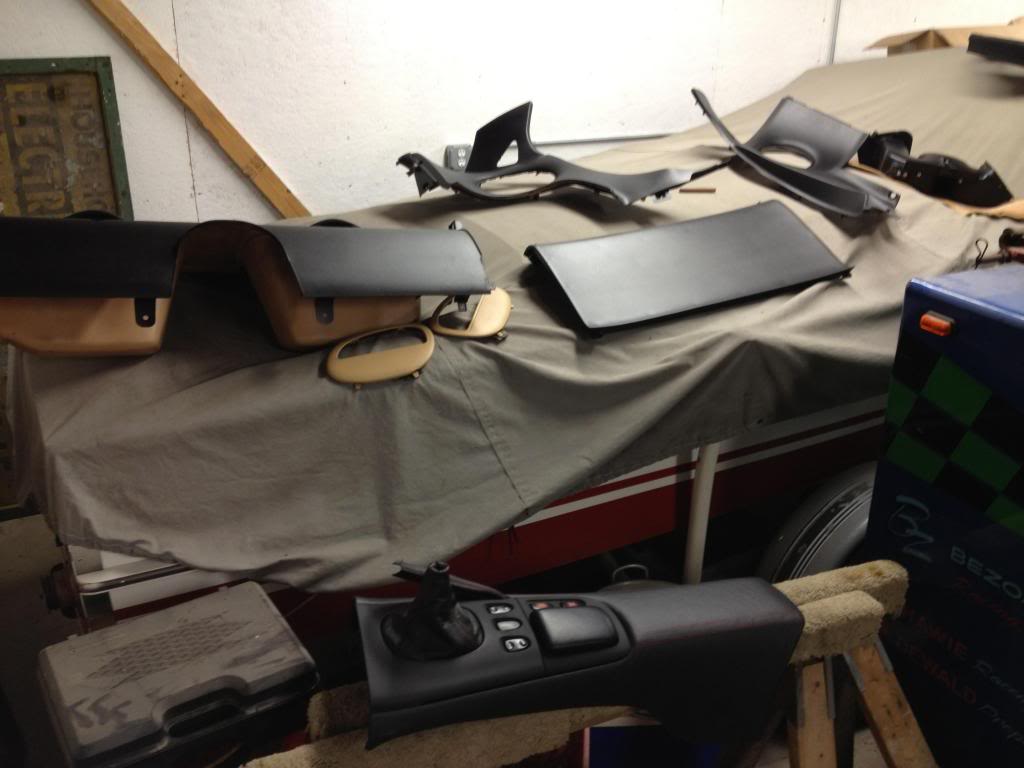
The rest of my interor plastics got the same treatment tan to black.
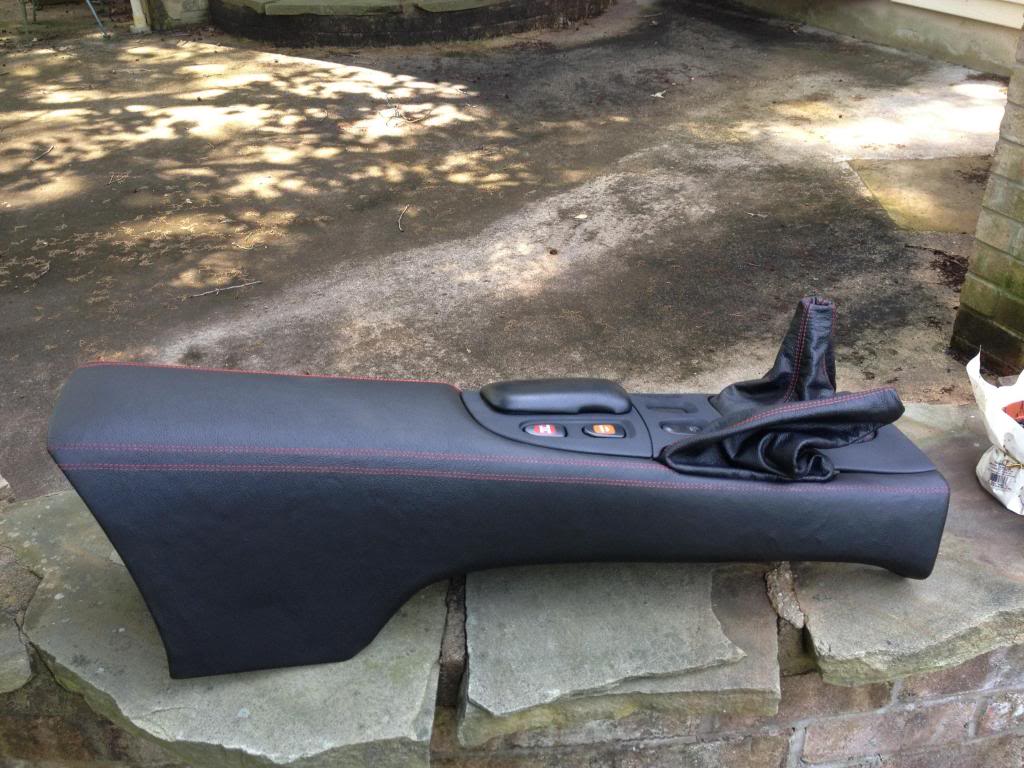
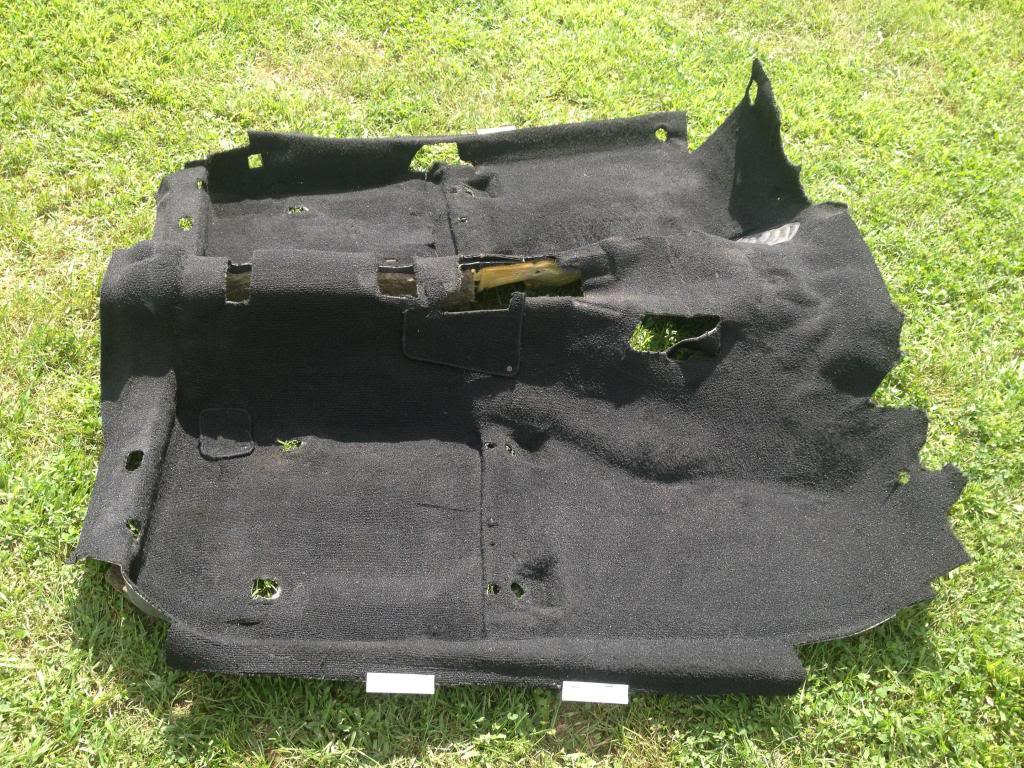
i Picked up a mint oem black carpet from Flynn, could not be more happy about it either. I've bought numerous thing from him and they always come as described. He In MD to so i luck out with fast shipping.
Got a set of black seat belts off the forum and ive noticed a difference between my 93's and these. The newer ones have a two wire plug. Tho my care doesn't have any female connectors in the wiring harness for it. Must of been an update on later models im guessing.

Firstly i took the door panels apart completely and decreased them with super clean along with a scotch bright pad (red). Secondly i let them sit over night to dry thoroughly. Thirdly i wiped them down with duplicolor grease and wax remover, again letting them dry out over night. Then next day sprayed them with the duplicolor adhesion promoter ( this is one of the most important steps). I then gave them 3-4 very light coats and by light i do mean light with around 10 min in between coats with heavy shaking of the can during application. If you give it to heavy of a coat the finish product will come out with lines in it. Make sure you a spraying in less then 50% humidity too this stuff is sensitive to it. I used the flat black which turned out like a satin color after its dry. This satin color seems to match the original pretty well also so its a win win in my book. The glossy is a bit shinny for me. This stuff is tough too, i could not scrap it away with my fingernail and believe me i tried.
Here is a shot of the before and after. Not a bad way to redo a set of panels most would just spend the money to change out

oh i did my head liner, sun shades and sunroof trim too....

picture of it installed


The rest of my interor plastics got the same treatment tan to black.

i Picked up a mint oem black carpet from Flynn, could not be more happy about it either. I've bought numerous thing from him and they always come as described. He In MD to so i luck out with fast shipping.

Got a set of black seat belts off the forum and ive noticed a difference between my 93's and these. The newer ones have a two wire plug. Tho my care doesn't have any female connectors in the wiring harness for it. Must of been an update on later models im guessing.
 07-30-13, 03:30 PM
#71
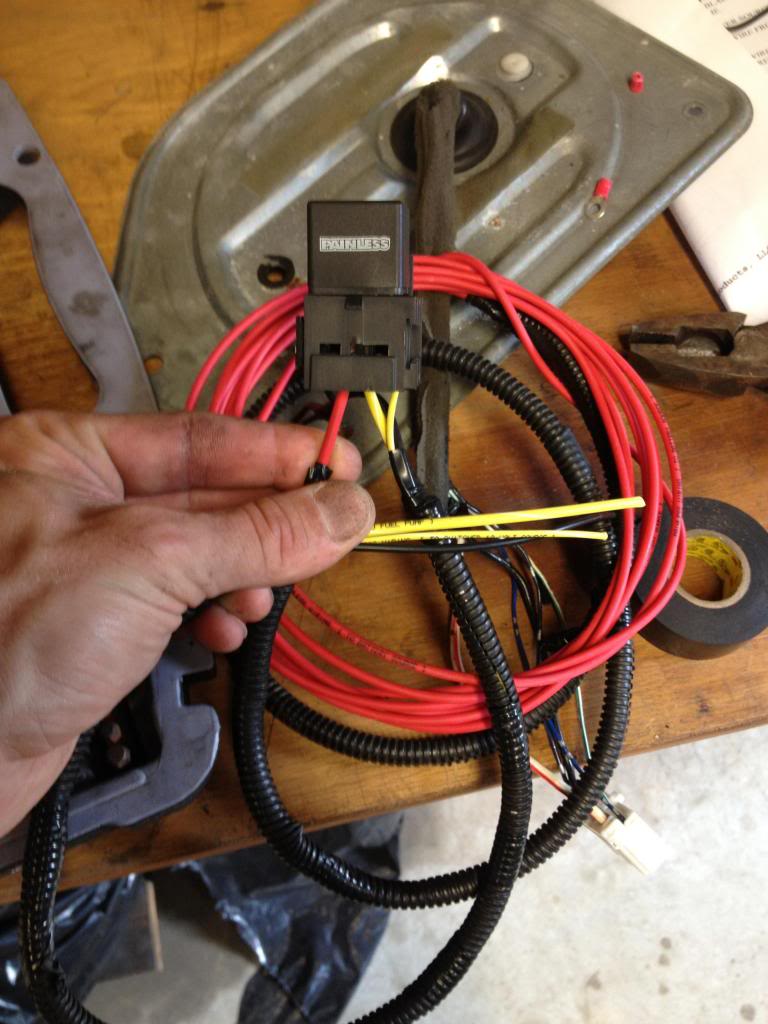
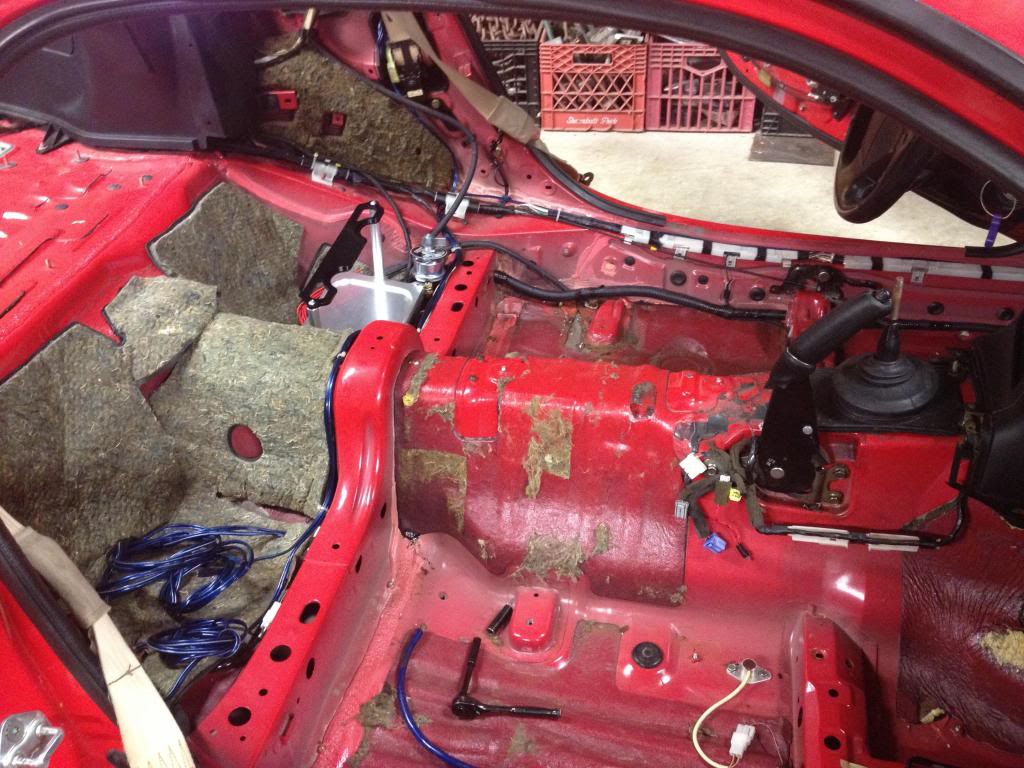
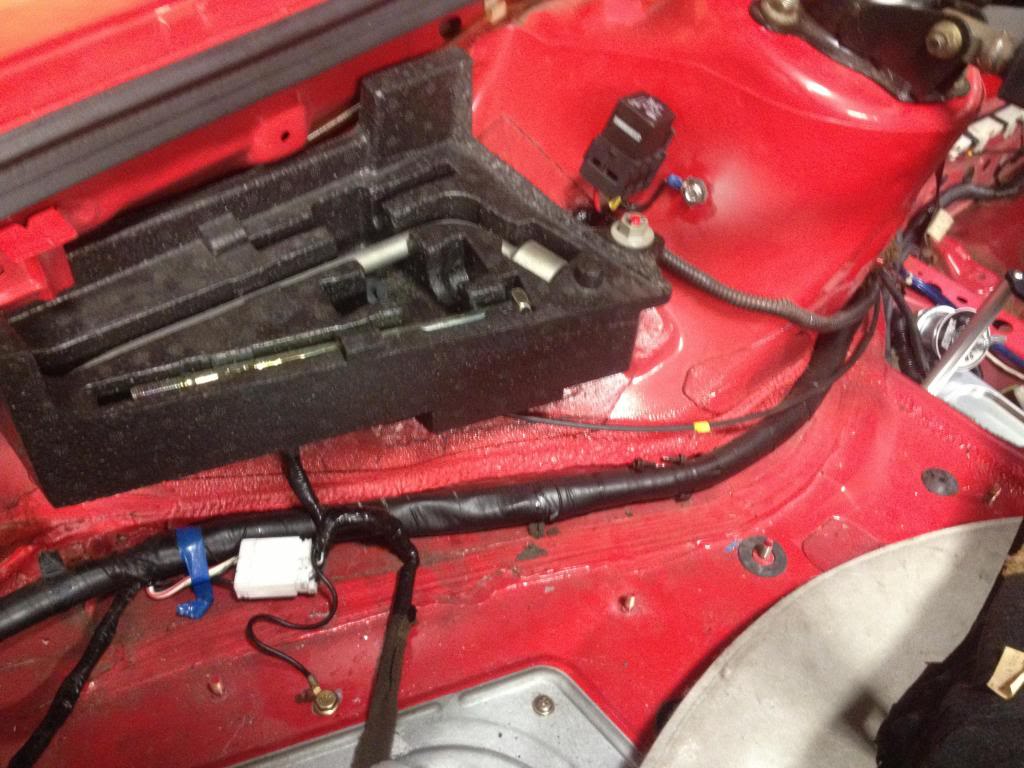
While my interior is apart i mounted my fuel pump rewire relay and finished running that to the relocated battery location.
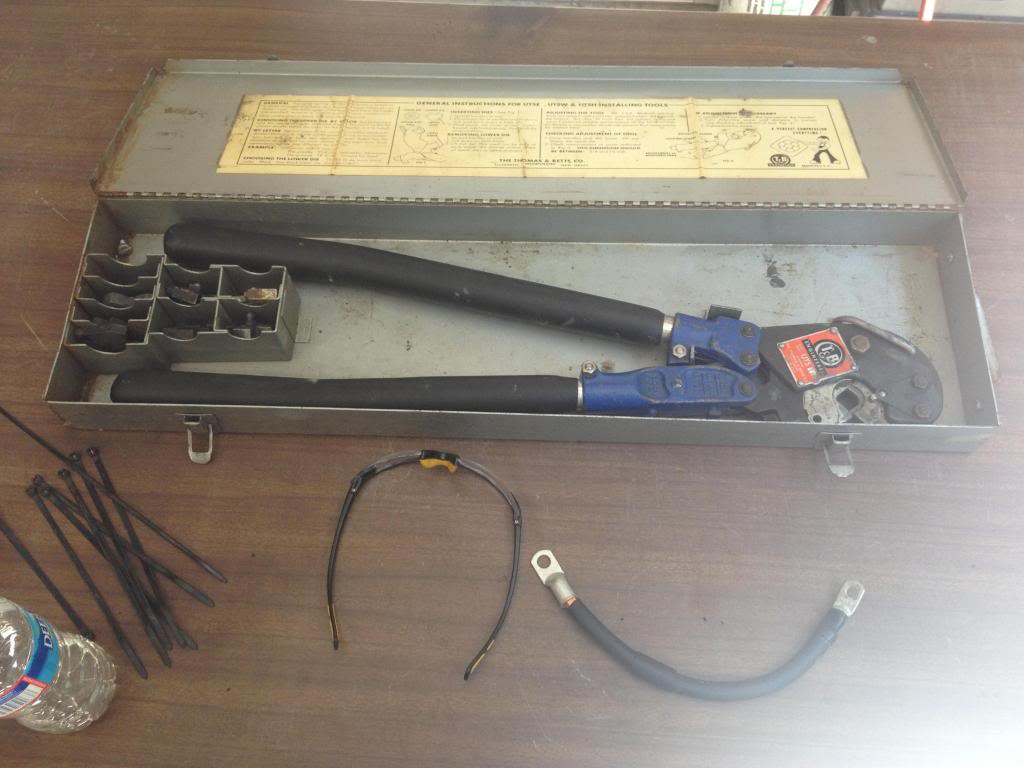
as to reworking the battery to the rear bin i also made some new grounding cables to address any grounding issues that ive heard have plagued many other. I did have to dig out my work crimp to get the job done tho...
Slowly but surely its coming together. I have a slammed work week this week, With 73 hours in for 4 days and still have to work thu sunday i plan to get some of this knocked out next week when i actually have time to. Enjoy


as to reworking the battery to the rear bin i also made some new grounding cables to address any grounding issues that ive heard have plagued many other. I did have to dig out my work crimp to get the job done tho...


Slowly but surely its coming together. I have a slammed work week this week, With 73 hours in for 4 days and still have to work thu sunday i plan to get some of this knocked out next week when i actually have time to. Enjoy
 08-01-13, 11:29 AM
#72
looking great! i have been looking forward to your updates.
i had great luck with the duplicolor dye/spraypaint on a previous FD of mine. i had one tiny spot on my driver door that you could barely tell was rubbing down to the tan (where my elbow rested on the top of the door while driving). granted, i didn't do nearly as much prep work as you did. i think this stuff is perfect for door and roof panels that don't get too much action/wear (like a seat or steering wheel does).
i had great luck with the duplicolor dye/spraypaint on a previous FD of mine. i had one tiny spot on my driver door that you could barely tell was rubbing down to the tan (where my elbow rested on the top of the door while driving). granted, i didn't do nearly as much prep work as you did. i think this stuff is perfect for door and roof panels that don't get too much action/wear (like a seat or steering wheel does).
08-01-13, 01:02 PM
#73
looking great! i have been looking forward to your updates.
i had great luck with the duplicolor dye/spraypaint on a previous FD of mine. i had one tiny spot on my driver door that you could barely tell was rubbing down to the tan (where my elbow rested on the top of the door while driving). granted, i didn't do nearly as much prep work as you did. i think this stuff is perfect for door and roof panels that don't get too much action/wear (like a seat or steering wheel does).
i had great luck with the duplicolor dye/spraypaint on a previous FD of mine. i had one tiny spot on my driver door that you could barely tell was rubbing down to the tan (where my elbow rested on the top of the door while driving). granted, i didn't do nearly as much prep work as you did. i think this stuff is perfect for door and roof panels that don't get too much action/wear (like a seat or steering wheel does).
08-01-13, 02:58 PM
#74
Small update. Wound up with a few hours between working day shift and night shift to put my carpet in.... Put new carpet in it they said, it will be EASY they said. Well it wasn't the hardest job, but i wasn't a fun one either. Expecially trying to pull the dash by yourself tho i figured it out rather quickly. Hats off to the guys who do this on a regular basis.
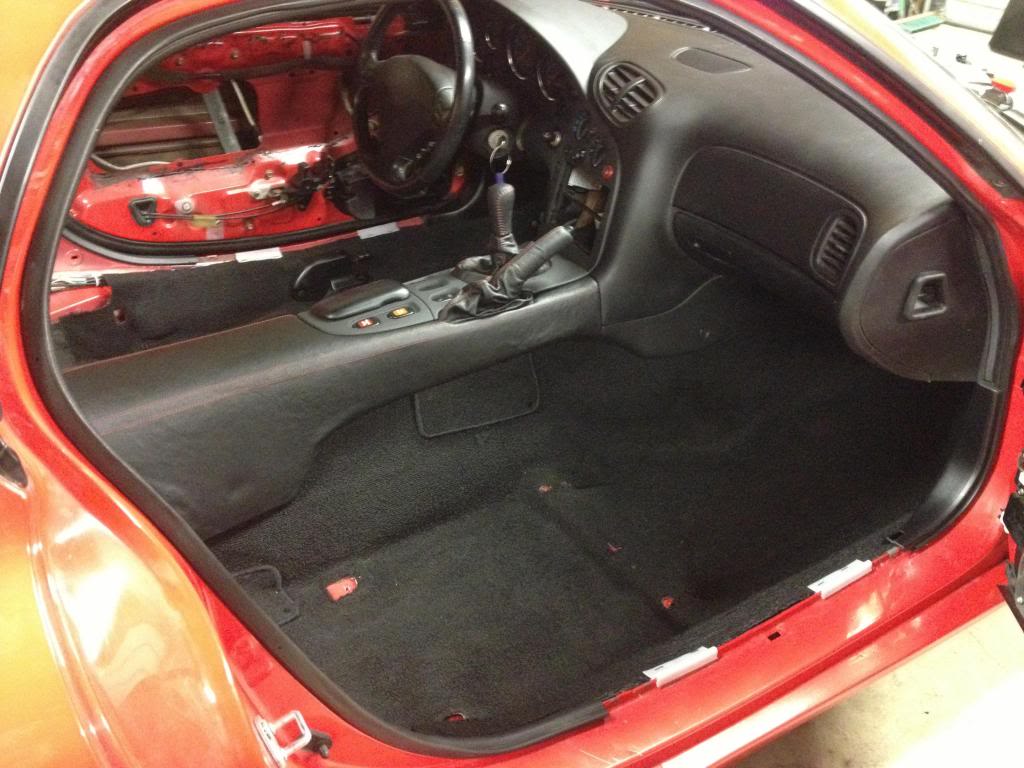
It looks night and day different from when i started. Its actually starting to look like a car again, go figure
Started reworking my rear bin to accommodate the relocated battery. I would really prefer to use a full size optima 34 series battery but we will have to see how it works out. Most people seem to like the mini batteries i am just not sure how they work out in the long run tho I've heard arguments both ways.
Future plans consist of finishing the battery relocation and put the interior plastics back in, returning to the engine bay for the fuel system, wiring harness, Intercooler, some sorta water injection ( after following xlr8's thread i am really leaning toward pre turbo mechanical) and all the other small tid bits to get her running. After she will run consistently its off the the body shop for some much needed love.
08-02-13, 11:33 PM
#75
your interior is coming along great. i'm in the process of changing mine as well. unfortunately the previous owner tried painting it all but the finish came out way too glossy. I'm looking for a more oem look. I'm using duplicolor bumper coating on the trim pieces as I've seen used before on the forum, but i'm not sure exactly what paint to use on the rear bins and panels. yours look comparable to the OEM finish. what are you using on the bins and all? did you also use an adhesive promoter on those parts? also, what'd you use to color the little liner around the hole for the sunroof?
the door panels actually look pretty good in my car but if i decide to redo them i'm definitely gonna go the same route as you.
i know painting the pieces is tedious and time consuming. you just wanna keep adding another coat. you've definitely had the patience it takes to do a great job tho. keep up the great, detailed work.