
93 MB Resurrection


93 MB Resurrection
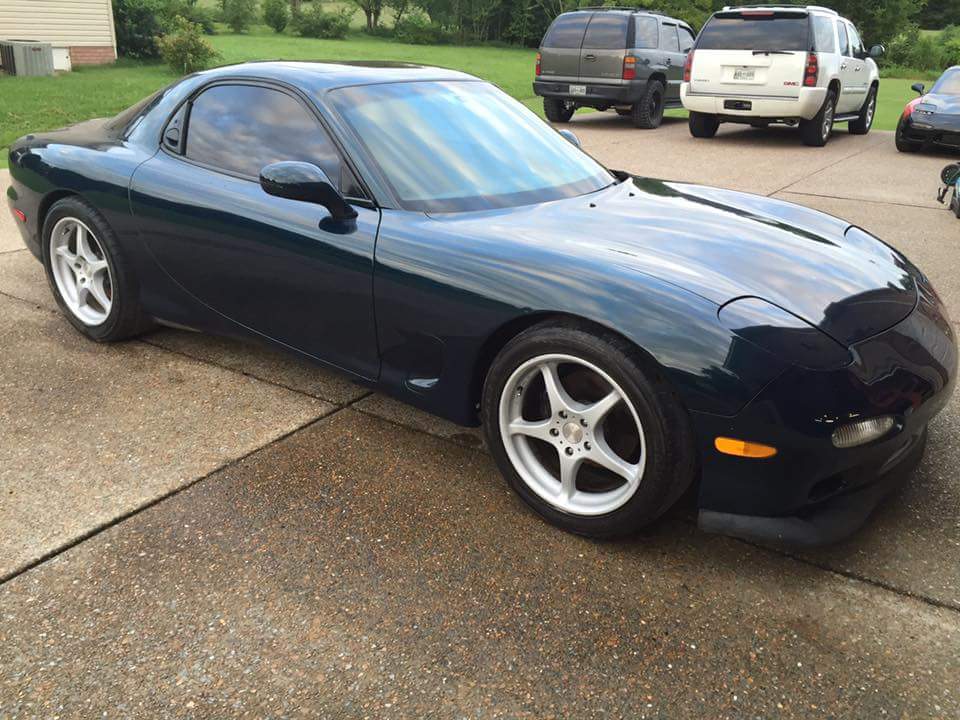
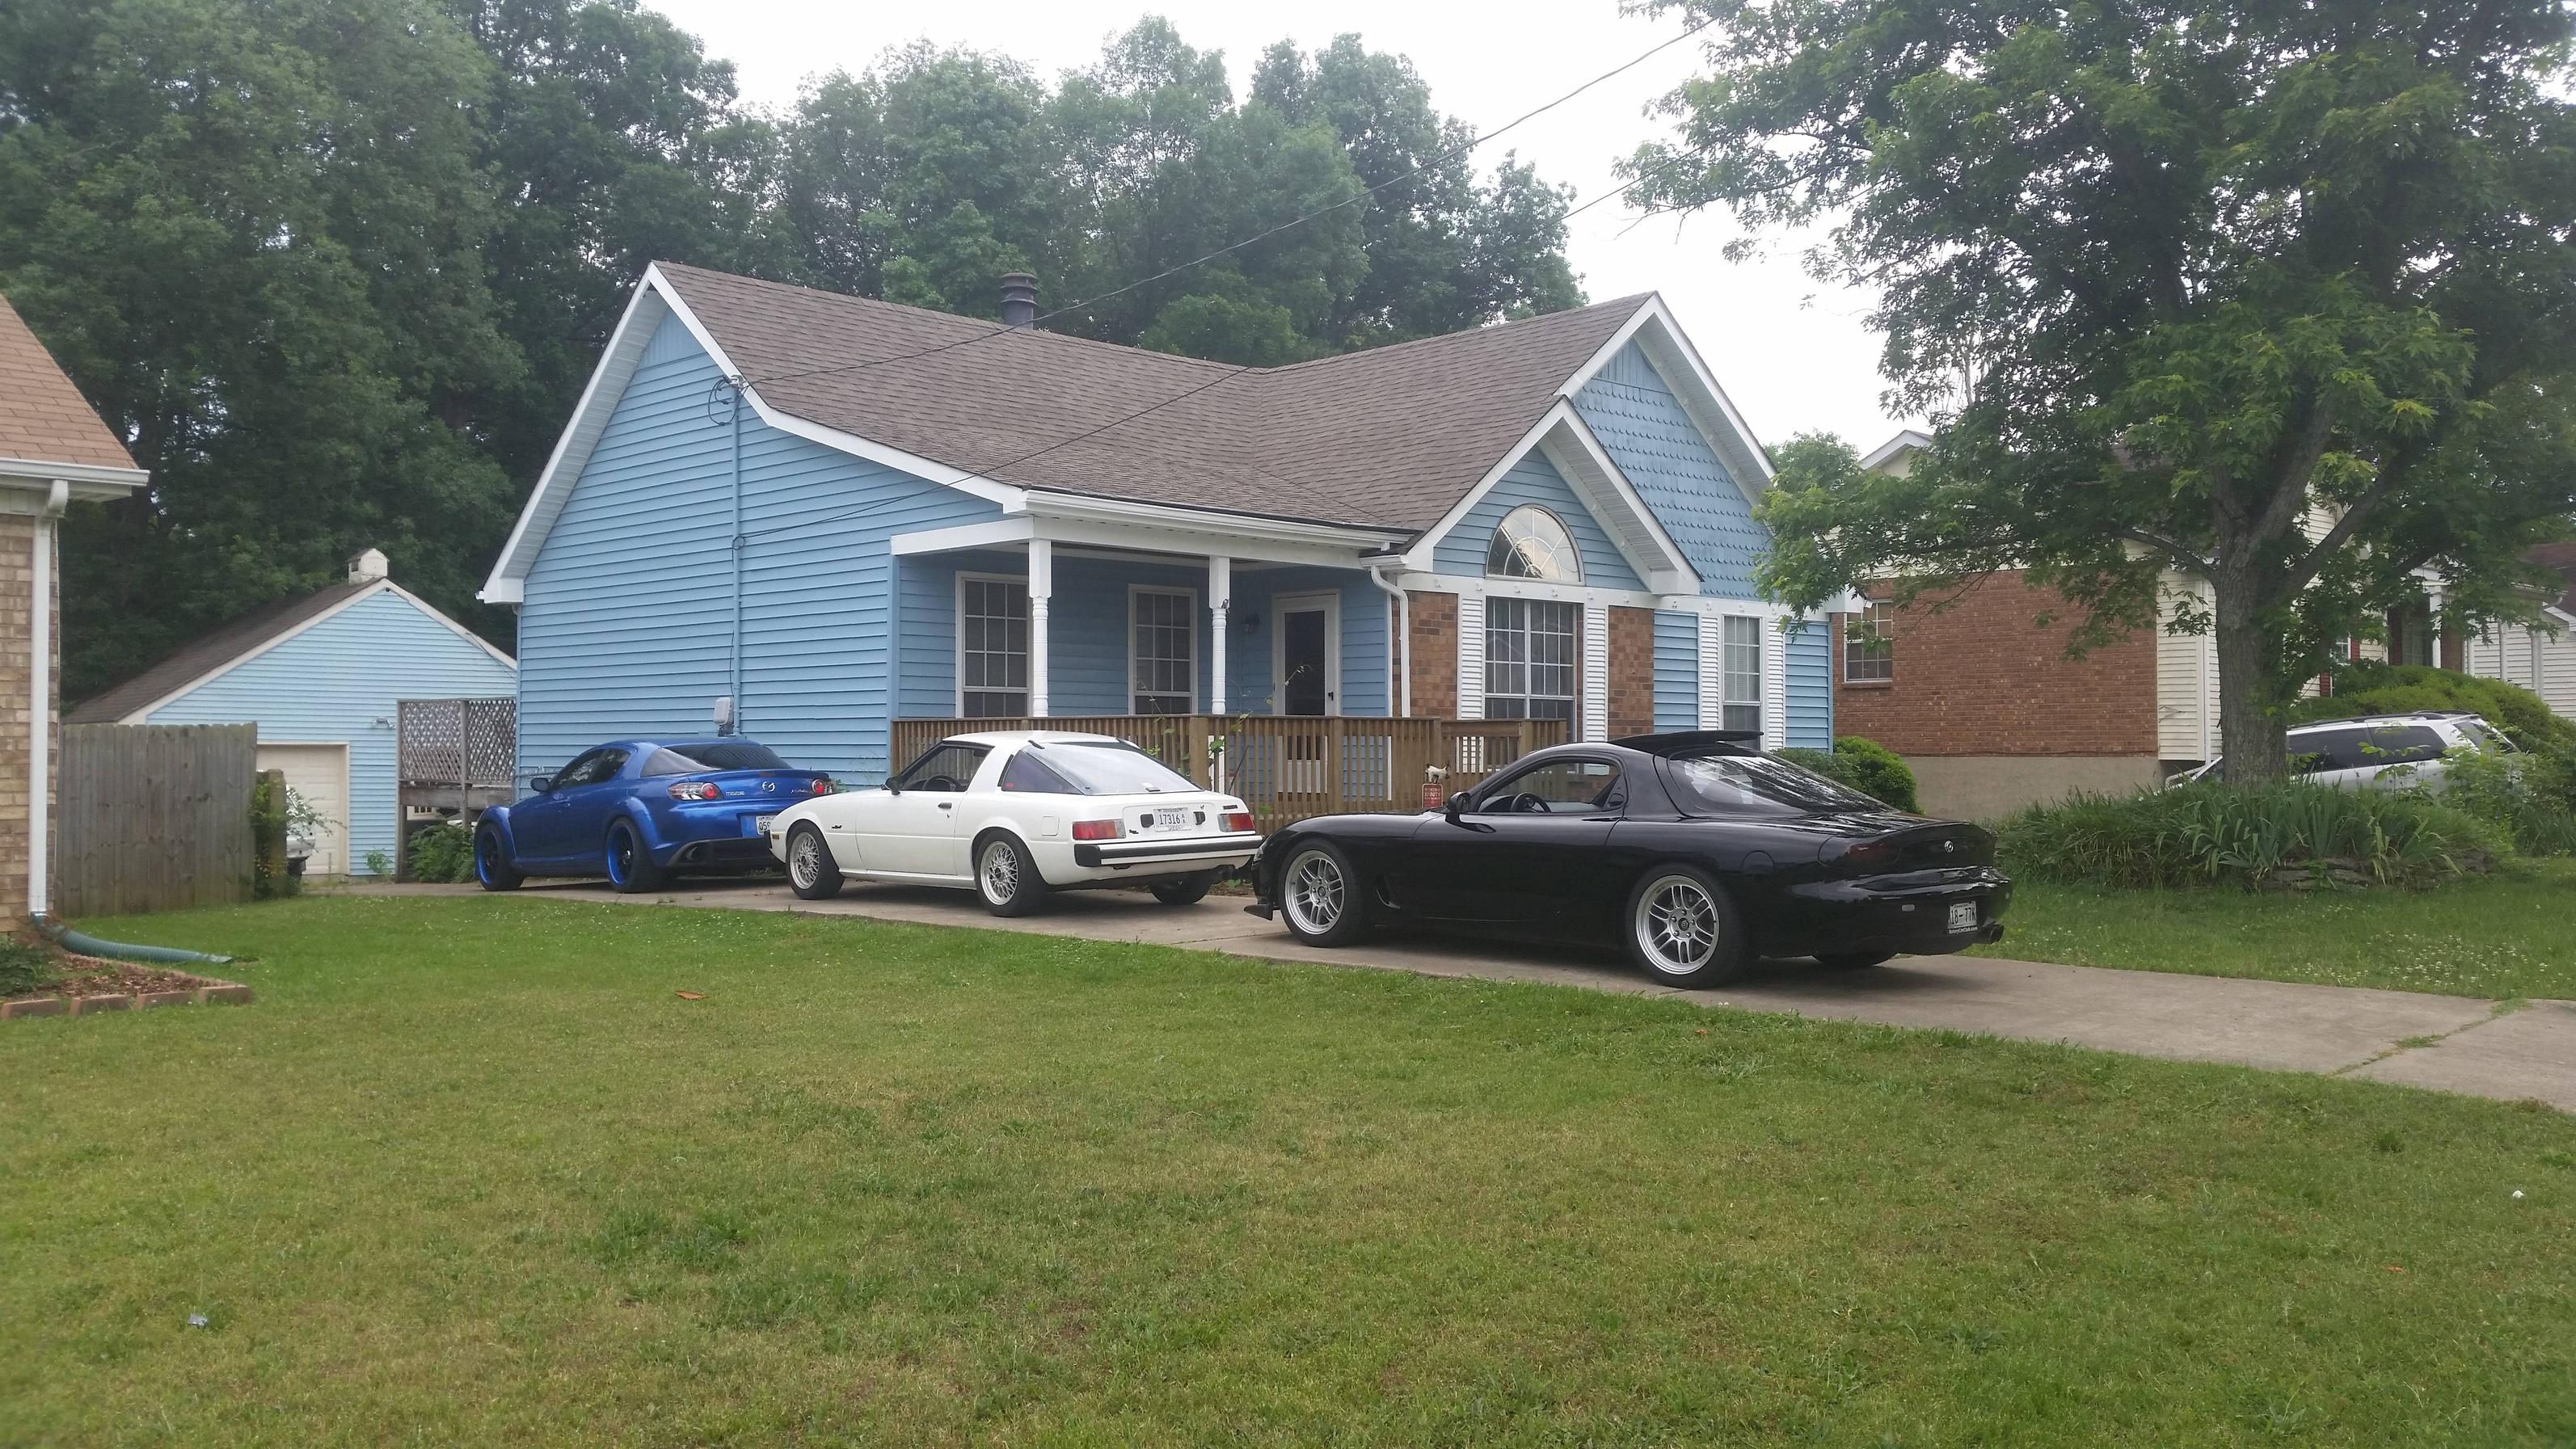
Picked up this MB FD for the wife.
It was really nice when djseven had it back in 201 but it has been through a few owners since then and now a big ol project that i get to tackle.
Car probably has 60k miles on it.
It's missing both seats, gauge cluster and hood. Missing plastic door panels and HVAC. No rear carpet and has cheap ebay carpet.
Previous owner removed ABS, main front harness and a bunch of stuff for the engine bay and painted it and i guess gave up on the build.
I plan on bring it back to life and get it up and going with sequential twins first. The plan is to build a nice street car that the wife can take to local car meets, rip through the dragon on twice a year and have a car that she can have fun at the track with.
9/2
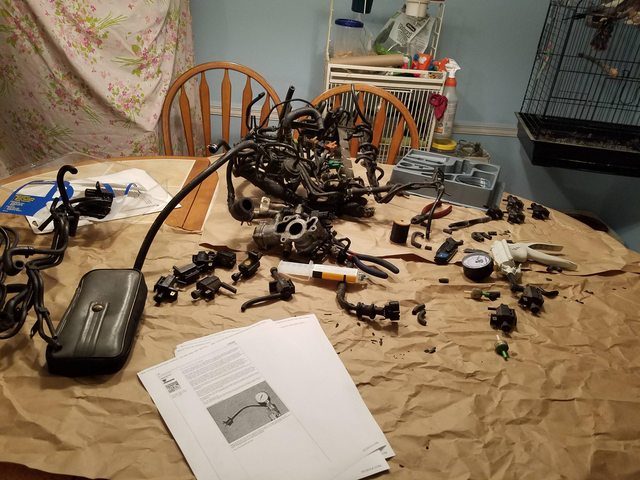
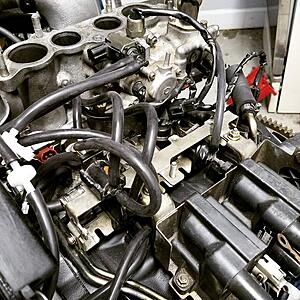
I knew i was planning on getting the car so here i am testing the solenoids and prepping for simplified sequential setup.

9/3
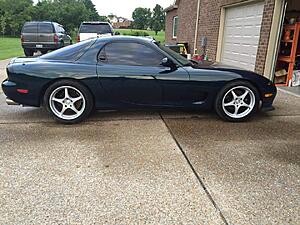
Exterior. I purchased the car with stock wheels

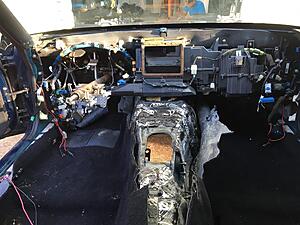
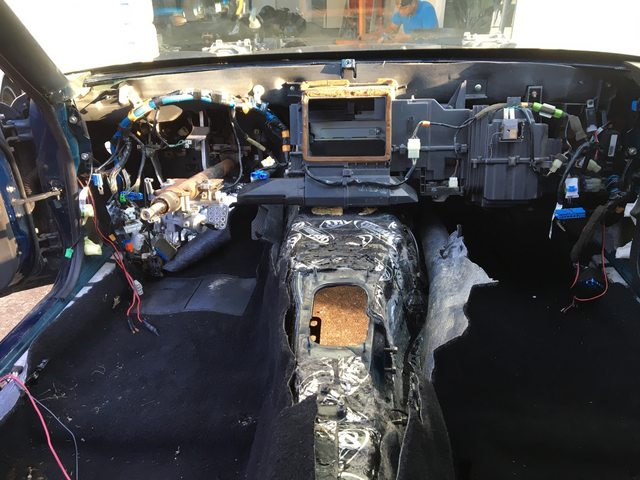
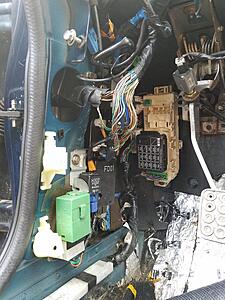
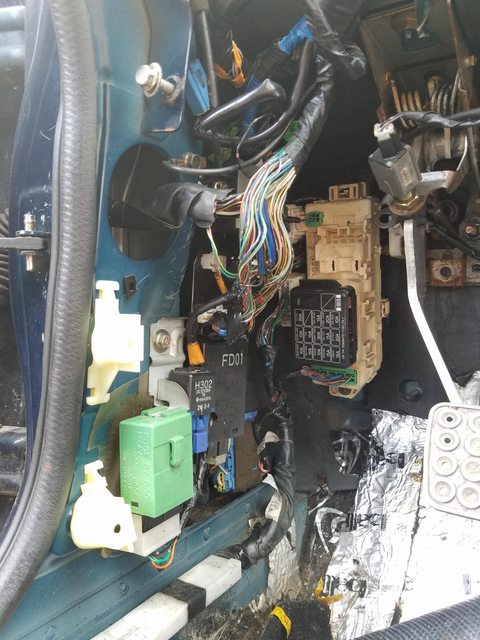
Interior after i removed the dash to assess the situation
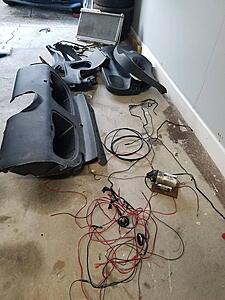
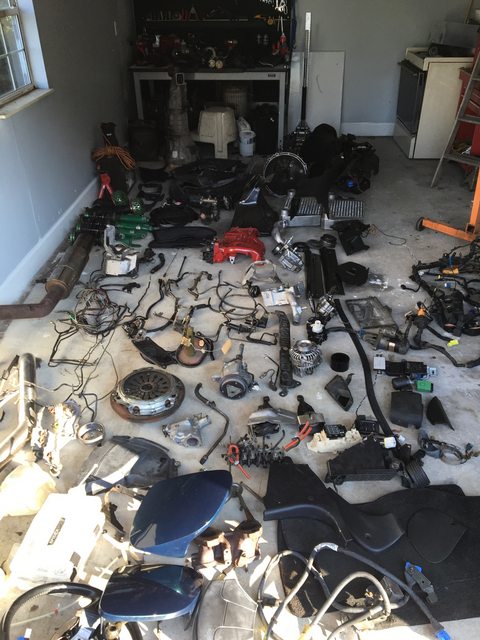
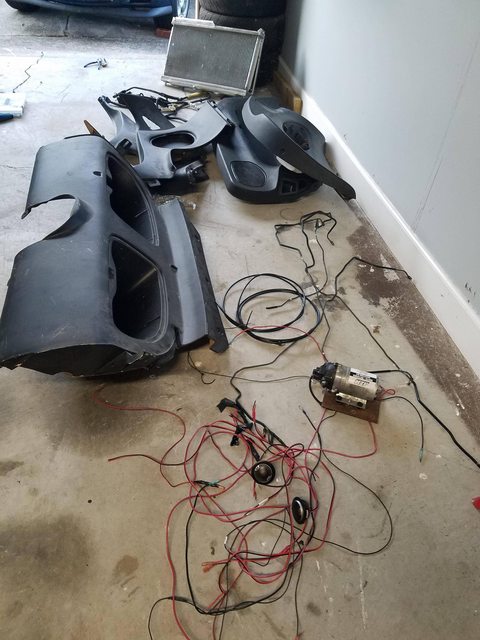
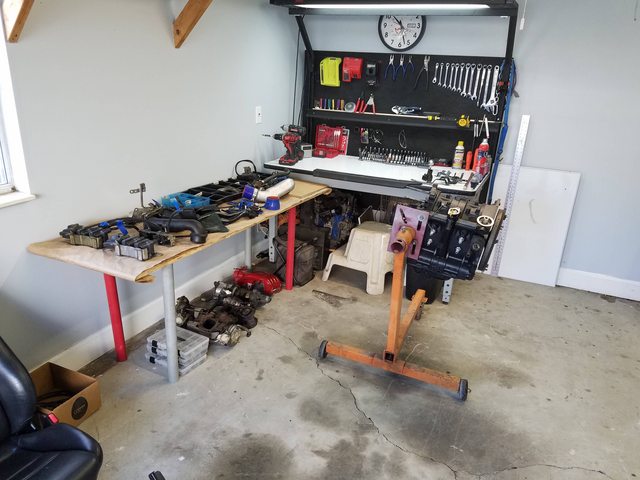
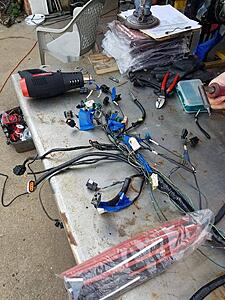
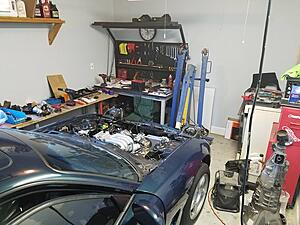
1st step for me was to unload the car and box to determine what i have and dont have

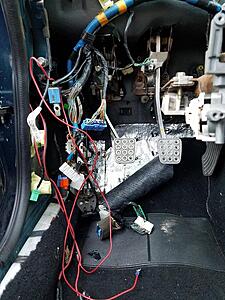
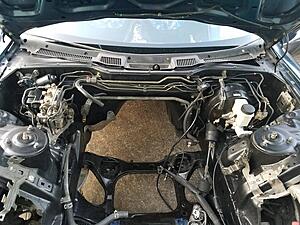
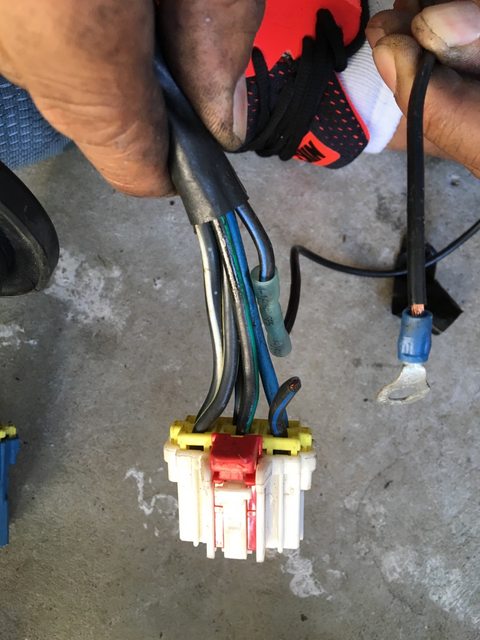
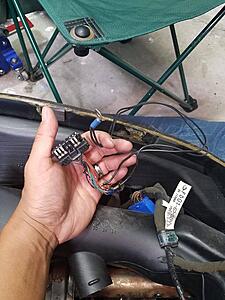
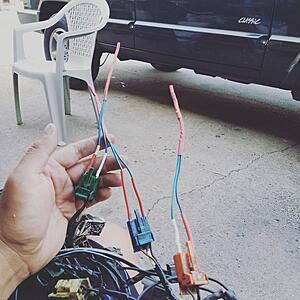
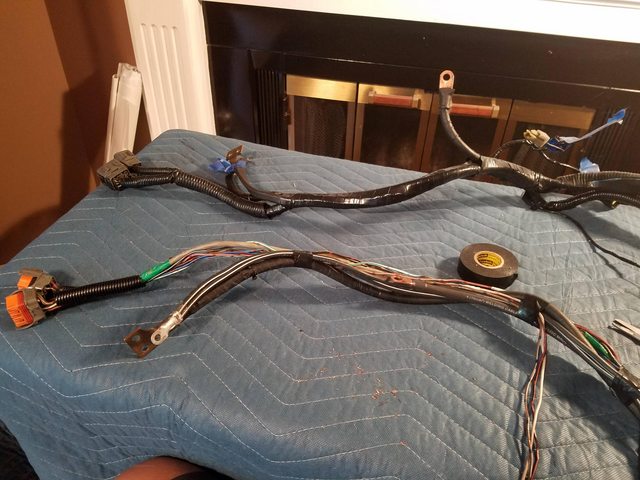
2nd step was to remove front main harness as i saw that it was hacked up and determine what needed to be fixed. Lucky parts seller Jim Thompson had a harness that was already out that i could compare to
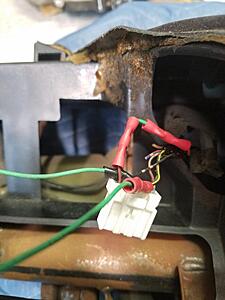
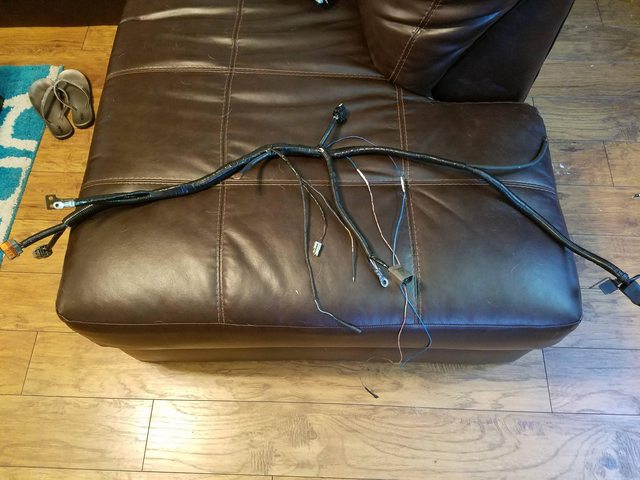
Not sure why they did this.

Cut air bag wire and modified wire for the security relay
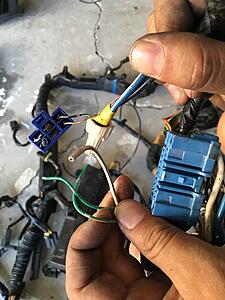
Cut ignition switch plug and custom ground wire.

9/4
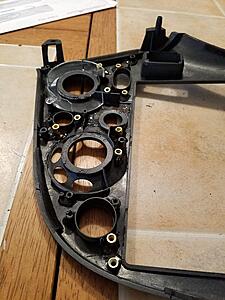
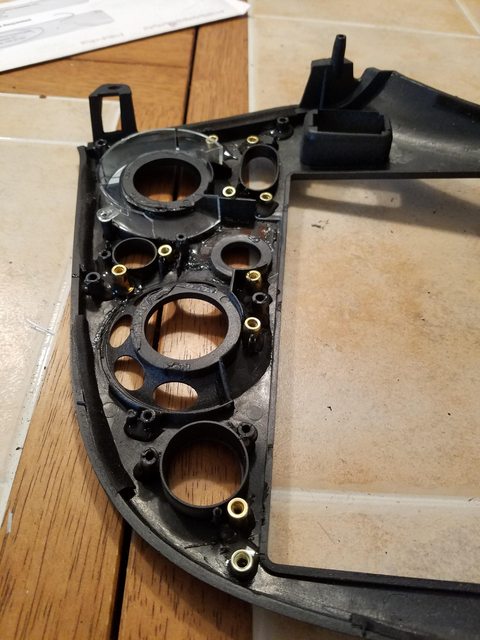
Fixing extra interior parts that i have. Reinforced the good mounting tabs with JB weld and thread. Cut the broken tabs with a dremel and JB welded in riv-nuts.
9/7
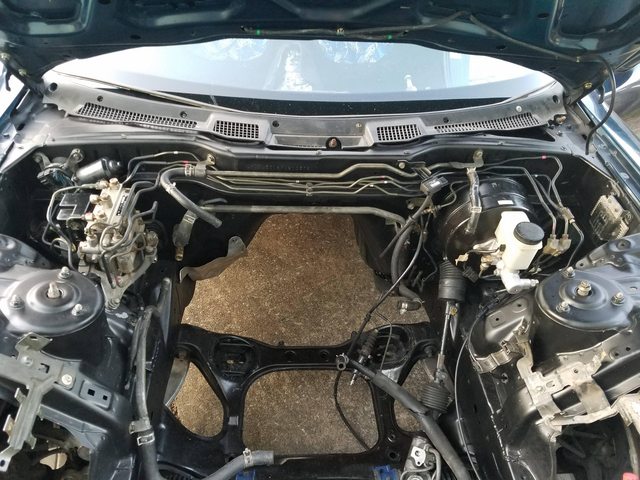
Removed more stuff from the car
Installed ABS, clutch master, and abs line on the rack
Will post more stuff later.
It was really nice when djseven had it back in 201 but it has been through a few owners since then and now a big ol project that i get to tackle.
Car probably has 60k miles on it.
It's missing both seats, gauge cluster and hood. Missing plastic door panels and HVAC. No rear carpet and has cheap ebay carpet.
Previous owner removed ABS, main front harness and a bunch of stuff for the engine bay and painted it and i guess gave up on the build.
I plan on bring it back to life and get it up and going with sequential twins first. The plan is to build a nice street car that the wife can take to local car meets, rip through the dragon on twice a year and have a car that she can have fun at the track with.
9/2
I knew i was planning on getting the car so here i am testing the solenoids and prepping for simplified sequential setup.
9/3
Exterior. I purchased the car with stock wheels

Interior after i removed the dash to assess the situation

1st step for me was to unload the car and box to determine what i have and dont have
2nd step was to remove front main harness as i saw that it was hacked up and determine what needed to be fixed. Lucky parts seller Jim Thompson had a harness that was already out that i could compare to
Not sure why they did this.

Cut air bag wire and modified wire for the security relay
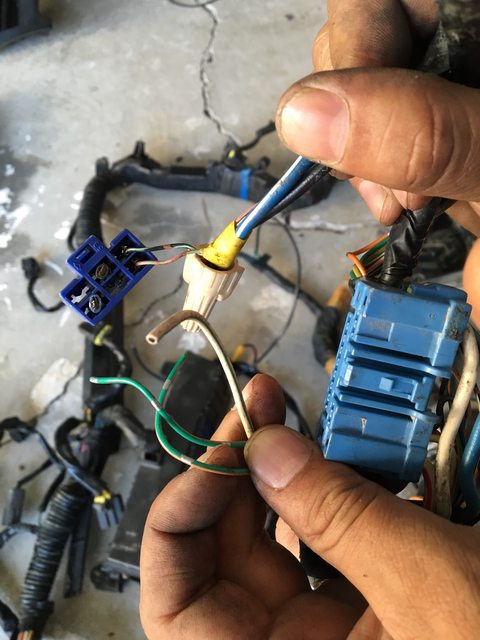
Cut ignition switch plug and custom ground wire.
9/4
Fixing extra interior parts that i have. Reinforced the good mounting tabs with JB weld and thread. Cut the broken tabs with a dremel and JB welded in riv-nuts.
9/7
Removed more stuff from the car
Installed ABS, clutch master, and abs line on the rack
Will post more stuff later.


Ha yea i questioned why i was getting another fd but the wife thought it better to get another fd instead of putting a 3 rotor in mine.
Mocked up the parts and think i figured out the simplified sequential setup. The plastic ts are there for mock up. I have some brass ones coming.
Hoping all i need are the following solenoid
- Turbo Control
- Charge Control
- Turbo Control that is on the ACV
Plan on keeping ACV and air pump and removing pressure regulator that goes to FPR
Did a compression check
100 on the rear and 110 on the front rotor
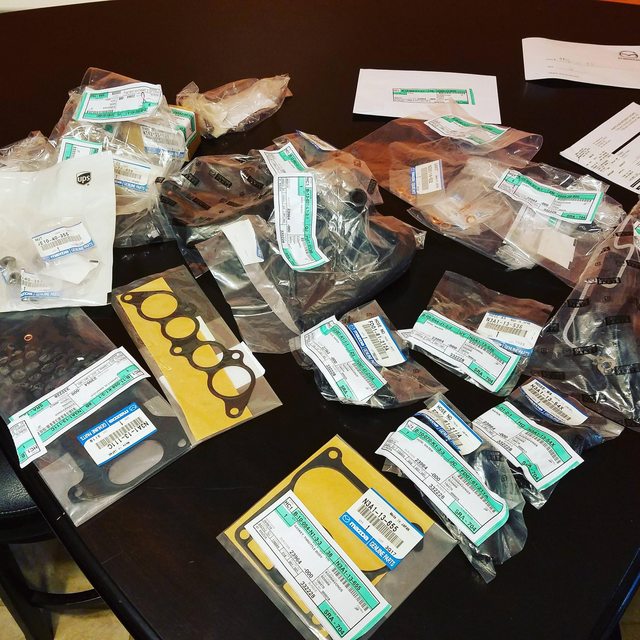
Dissembled and organize the parts

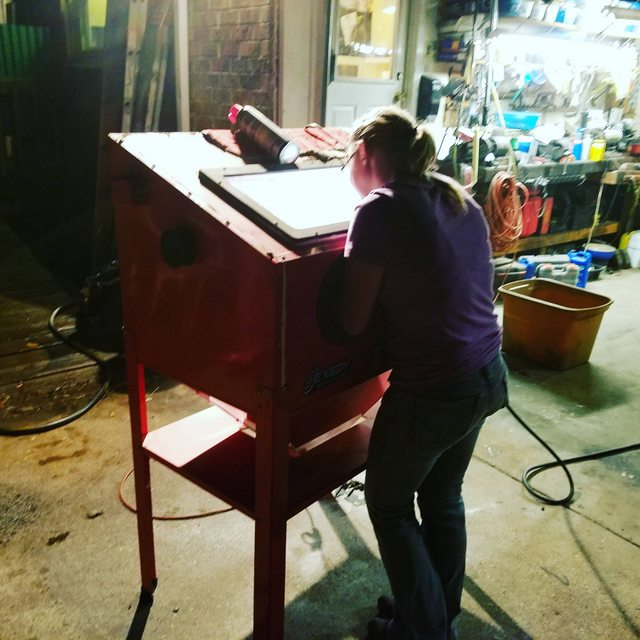
Wife soda blasting the aluminum pieces


Hoping all i need are the following solenoid
- Turbo Control
- Charge Control
- Turbo Control that is on the ACV
Plan on keeping ACV and air pump and removing pressure regulator that goes to FPR
Did a compression check
100 on the rear and 110 on the front rotor
Dissembled and organize the parts
Wife soda blasting the aluminum pieces


Trending Topics
Thanks. I wouldn�t say I�m a builder but I enjoy tinkering with cars. Luckily I�m surrounded by very knowledgeable and capable people. The forum has a ton of information and my local friends have been a lot of help.
And luckily my father in law really enjoys tinkering to. He helps me a ton. I usually come up with an idea, talk through it with him and he does like 75% of the work while I assist.
Thanks.
Yes, it�s a normal HF cabinet and it works pretty good. For stuff that is stubborn and don�t want to come off, I use another blasting cabinet that has sand, I then take it to soda blasting cabinet to finish it off.
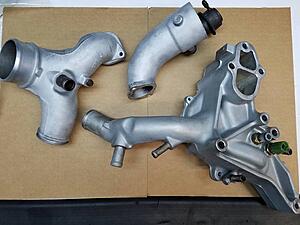
The parts came out pretty good. I could paint them and make them look even newer but I know the paint will eventually flake off so I�m leaving these parts unpainted.
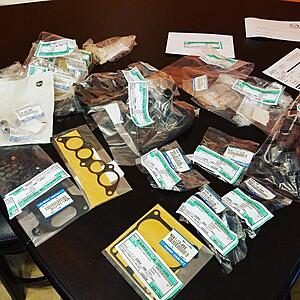
Got some parts in yesterday, sadly I still need a few more things
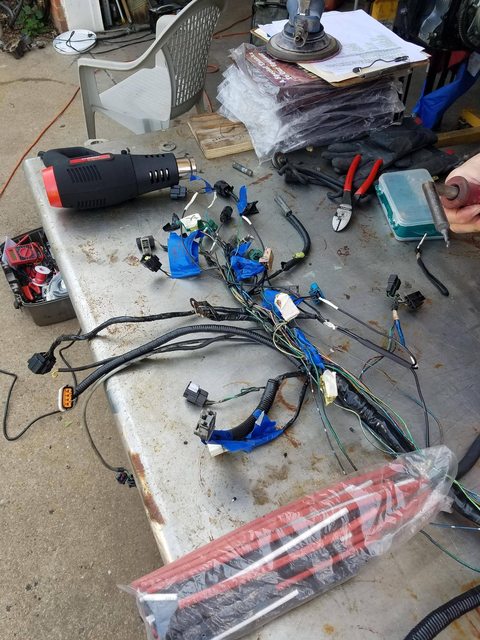
More wiring mess I have to fix.
And luckily my father in law really enjoys tinkering to. He helps me a ton. I usually come up with an idea, talk through it with him and he does like 75% of the work while I assist.
Yes, it�s a normal HF cabinet and it works pretty good. For stuff that is stubborn and don�t want to come off, I use another blasting cabinet that has sand, I then take it to soda blasting cabinet to finish it off.
The parts came out pretty good. I could paint them and make them look even newer but I know the paint will eventually flake off so I�m leaving these parts unpainted.

Got some parts in yesterday, sadly I still need a few more things
More wiring mess I have to fix.


Cleaned up the fuel hard line and added new fuel hose and clamps.
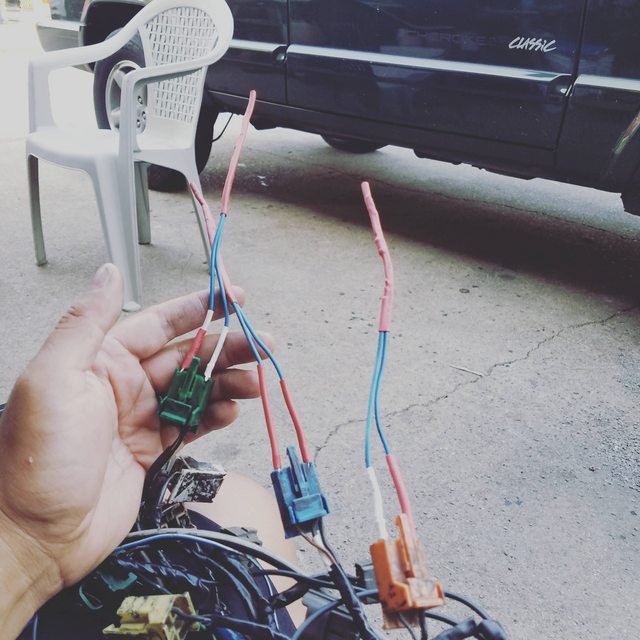
Redid the charge harness. Added a new ground wire and added some new connectors.


Redid an old harness that I had and added some resistors.
Was able to connect the fuse box and relays to the body harness. This was not fun. I did retape the exposed wiring.
Engine installed on 9/27.
Need to bleed the clutch and see if this bad boy will start.
After 25 days of ownership, I think I have around 80 hours in this thing. A lot of time was spent organizing, finding nuts and bolts and redoing the body, charge and engine harness. Also a lot of time spent figuring out how to do a simplified sequential setup and figuring out how the ACV is setup and works.

Redid the charge harness. Added a new ground wire and added some new connectors.
Redid an old harness that I had and added some resistors.
Was able to connect the fuse box and relays to the body harness. This was not fun. I did retape the exposed wiring.
Engine installed on 9/27.
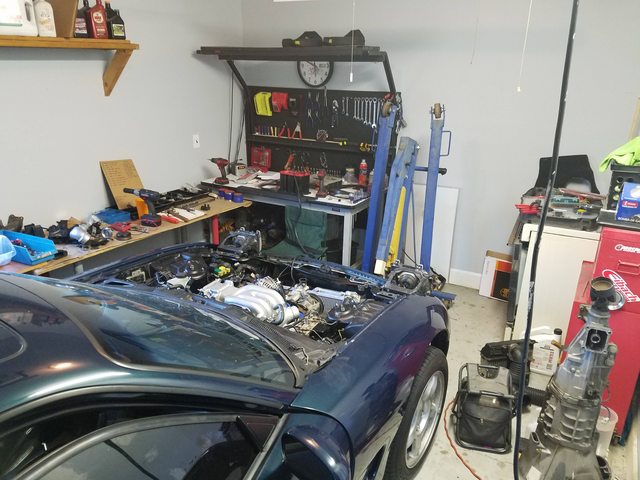
Need to bleed the clutch and see if this bad boy will start.
After 25 days of ownership, I think I have around 80 hours in this thing. A lot of time was spent organizing, finding nuts and bolts and redoing the body, charge and engine harness. Also a lot of time spent figuring out how to do a simplified sequential setup and figuring out how the ACV is setup and works.
So I installed the twins and tried to go simplified sequential but ran into in some wiring issues. Fix one of the issues and still had trouble with the car so I said the heck with it and went with a single kit and haltech ps1000 with a new harness.
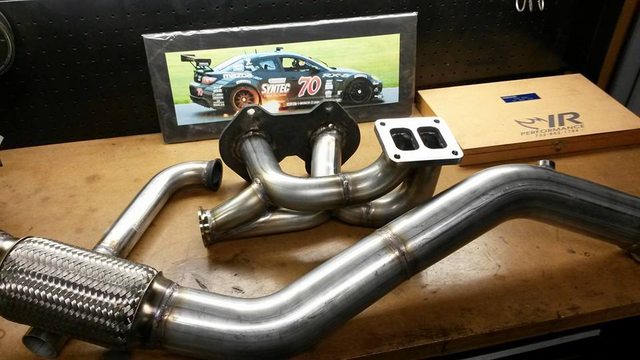
IR Performance had a black Friday sale on their GT61 single WG kit so I went with it. I wanted to support someone who supported the community. Ihor has always helped me with my questions and builds a quality product.
As for the haltech PS1000, I picked up a local buddies setup. It had a new flying lead and wired up for LS1 coils.
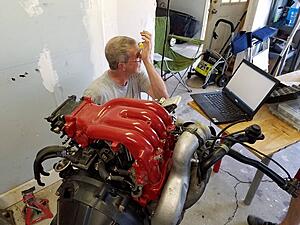
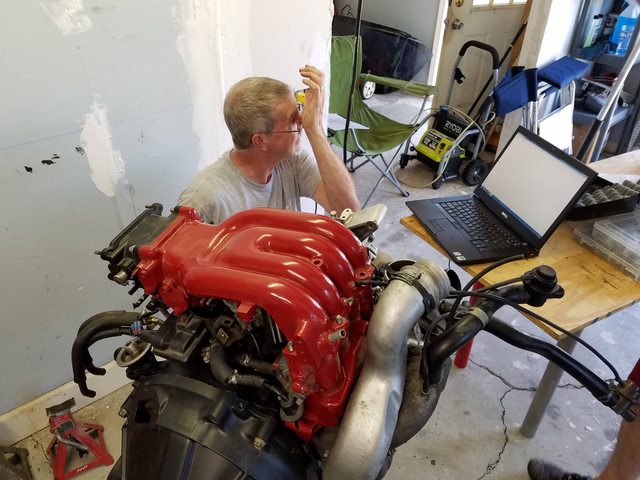
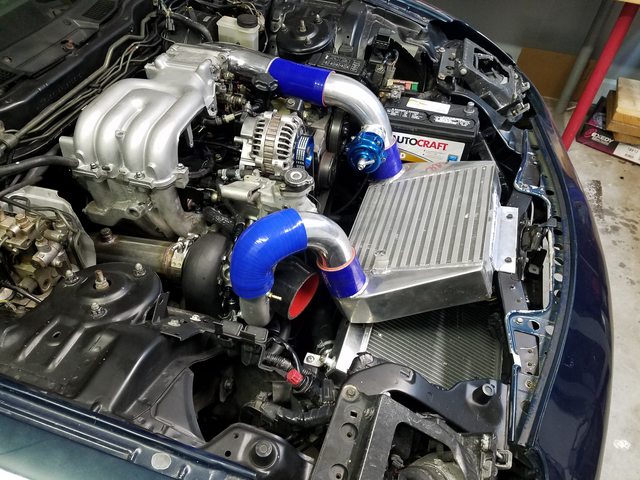
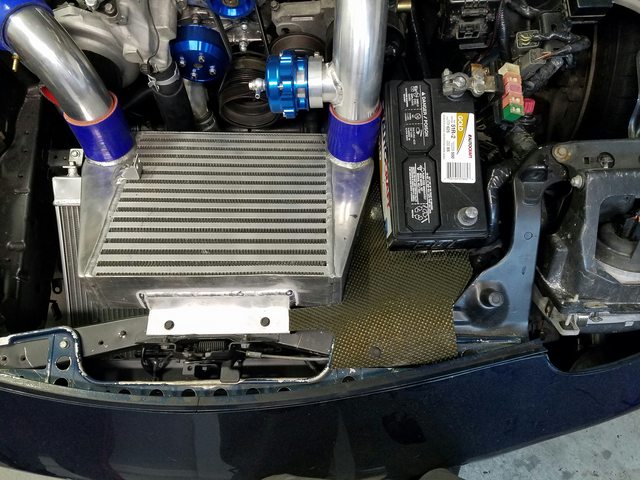
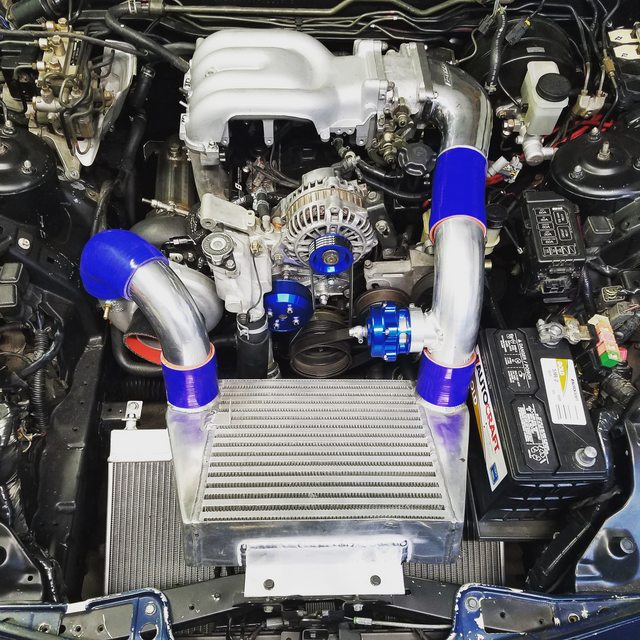
Over the weekend I mocked up my custom VMIC. I am using a CX racing style SMIC and 3-Row V-Mount Aluminum Radiator by Auto Dynasty that I picked up on Amazon. I basically copied my buddies setup so I’m hoping the install is strait forward. Will be getting few pieces for it welded over the next couple of days.
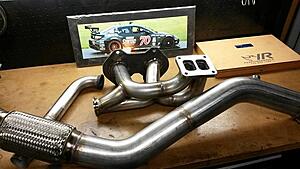
Turbo kit unboxing video
Stay tuned for the turbo kit install video and VMIC install.
IR Performance had a black Friday sale on their GT61 single WG kit so I went with it. I wanted to support someone who supported the community. Ihor has always helped me with my questions and builds a quality product.
As for the haltech PS1000, I picked up a local buddies setup. It had a new flying lead and wired up for LS1 coils.
Over the weekend I mocked up my custom VMIC. I am using a CX racing style SMIC and 3-Row V-Mount Aluminum Radiator by Auto Dynasty that I picked up on Amazon. I basically copied my buddies setup so I’m hoping the install is strait forward. Will be getting few pieces for it welded over the next couple of days.
Turbo kit unboxing video
Stay tuned for the turbo kit install video and VMIC install.

lol
Yea I'm a fan on single WG. One less WG and line. I have a cast HKS manifold setup on my BB.
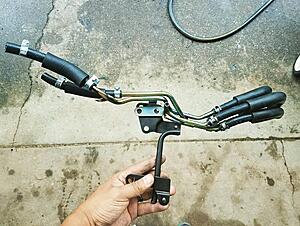
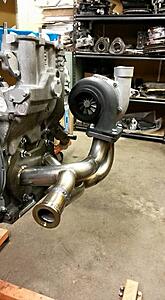
Few pics of the turbo kit.

My process on installing the turbo kit
• Get the car up on some jack stands
• Remove 14mm engine mount nut
• Jack up the engine carefully. This tilts the engine to the drive side allowing more room to install turbo kit on the right side
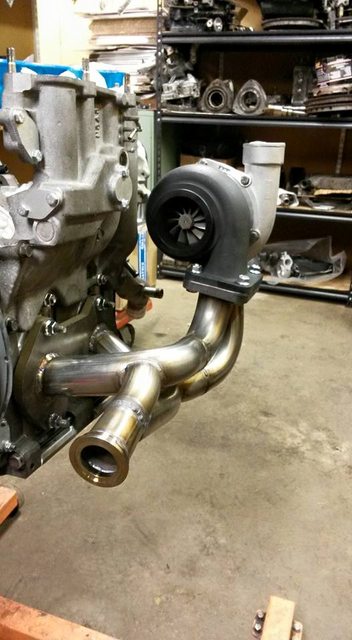
• Mock up the manifold and turbo to see what you are working with
• Remove manifold from car and mount turbo to manifold on a bench
• Ensure coolant lines are nicely snug on the turbo
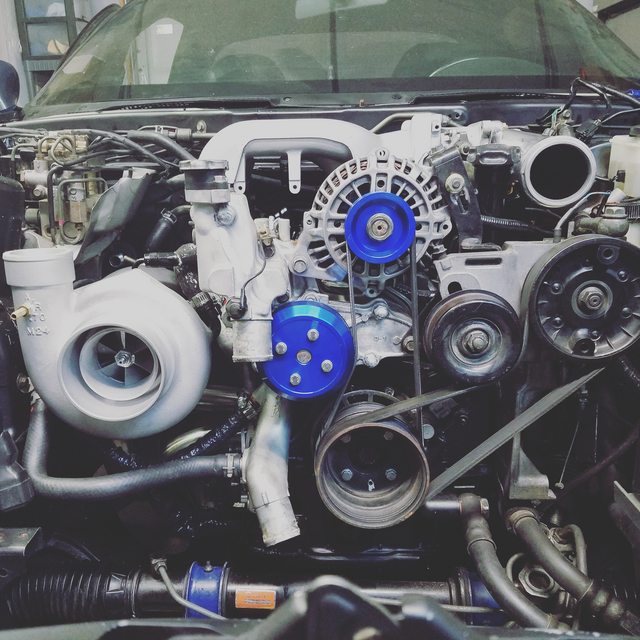
• Install manifold and turbo in the car. I had someone else pull the engine towards driver frame rail for additional clearance
• Connect coolant lines to engine
• Remove stock oil feed hardline and banjo bolt
• Install supplied oil feed fitting and line to block to turbo
• Remove stock hard pipe connector thing on oil drain
• Remove 12mm bolt on engine by the oil drain
• Install supplied alien head bolt which has a smaller head than the 12mm bolt
• Connect oil lines to turbo and engine
• Install rear oil block off plate
• Install down pipe. It helps if you have someone under the car supporting the down pipe while you clamp down the down pipe to the turbo
• Install wastegate
• I wanted to make sure the oil from the block was going through the line so I removed EGi fuse and cranked over the car while I had the oil feed line in a container. I verified that oil was going through the line then connected the feed line to the turbo
I know this is pretty strait forward and instructions probably aren’t needed but I wanted to share my process.
Next up VMIC
Yea I'm a fan on single WG. One less WG and line. I have a cast HKS manifold setup on my BB.
Few pics of the turbo kit.
My process on installing the turbo kit
• Get the car up on some jack stands
• Remove 14mm engine mount nut
• Jack up the engine carefully. This tilts the engine to the drive side allowing more room to install turbo kit on the right side
• Mock up the manifold and turbo to see what you are working with
• Remove manifold from car and mount turbo to manifold on a bench
• Ensure coolant lines are nicely snug on the turbo
• Install manifold and turbo in the car. I had someone else pull the engine towards driver frame rail for additional clearance
• Connect coolant lines to engine
• Remove stock oil feed hardline and banjo bolt
• Install supplied oil feed fitting and line to block to turbo
• Remove stock hard pipe connector thing on oil drain
• Remove 12mm bolt on engine by the oil drain
• Install supplied alien head bolt which has a smaller head than the 12mm bolt
• Connect oil lines to turbo and engine
• Install rear oil block off plate
• Install down pipe. It helps if you have someone under the car supporting the down pipe while you clamp down the down pipe to the turbo
• Install wastegate
• I wanted to make sure the oil from the block was going through the line so I removed EGi fuse and cranked over the car while I had the oil feed line in a container. I verified that oil was going through the line then connected the feed line to the turbo
I know this is pretty strait forward and instructions probably aren’t needed but I wanted to share my process.
Next up VMIC


looking very nice, sir (and familiar).
i would love to see some comparisons of the $500 cartmill VMIC vs a $3000 greddy kit.
i would love to see some comparisons of the $500 cartmill VMIC vs a $3000 greddy kit.
Last edited by jacobcartmill; Feb 9, 2017 at 12:32 AM.

Ha, yea. Many thanks to Jacob on figuring out how to make this VMIC setup. I copied his setup and only have like hour in fab work.
It looks like 87FCturboII has a similar setup and it looks like it�s working well for him at the track and you had a similar setup in your red FD.
Don�t think we talked about aftermarket hoods yet. I like them but since the car won�t always be parked in the garage we will probably use a stock hood for most of the time. I do have an aftermarket hood mazda speed style hood that we could use for track days and DGRR.
Looks good Johnny! Is there enough room to route the WG back to the DP? This IRP kit is at the top of the list if I go single, but I need to be able to route the WG back in. Also, any reason you pick the GT61 instead of BW360/362SXE?
No sure on re routing the WG into the DP, haven't looked it that closely. Been trying to start the car the past 2 nights. Not getting spark.
I talked to Ihor and told him i was looking for a simple setup that would be mostly street and back rds driven and wanted something that would be fun at Deals Gap. Told him i planned on doing 2-3 track events a year and wanted around 350 WHP and this is what he recommended.
Maybe he will chime in on the difference between this turbo and the BW360/362SXE.

Rotary Enthusiast
Joined: Jan 2005
Posts: 846
Likes: 14
From: hsv al
I know jack about haltechs, but every one of my no start situations always had something to do with the crank sensors.
If your haltech is seeing RPM, but not getting spark, double check your coils and wiring/grounding and however the ls1 coils are set up on the haltech.
If your haltech is seeing RPM, but not getting spark, double check your coils and wiring/grounding and however the ls1 coils are set up on the haltech.