Build Threads The place to discuss complete builds

6766 Rocket Bunny FD!

Thread Tools
 
Search this Thread
 
Old Mar 14, 2016 | 06:46 AM
  #51  
TurbosaurusRX's Avatar
Thread Starter
Loading...
Tenured Member 15 Years
iTrader: (3)
 
Joined: May 2006
Posts: 79
Likes: 0
From: PA
Originally Posted by TwinCharged RX7
What did you use for fasteners on the kit? Rivnuts or sheet metal screws.
I used rivnuts to mount the kit. The sheet metal screws that come with the kit seemed a bit cheap. The head of an M6 domed bolt fills up the dimpled spots on the kit very well.
Reply
Old Mar 14, 2016 | 07:29 PM
  #52  
TwinCharged RX7's Avatar
Built Not Bought
Tenured Member: 15 Years
Top Answer: 1
iTrader: (14)
 
Joined: May 2008
Posts: 4,389
Likes: 964
From: Stamford, CT
Thanks. Good to know about m6 fasteners. Did you use washers as well? Just don't want to mess up the paint when screwing them on.
Reply
Old Mar 14, 2016 | 08:25 PM
  #53  
TurbosaurusRX's Avatar
Thread Starter
Loading...
Tenured Member 15 Years
iTrader: (3)
 
Joined: May 2006
Posts: 79
Likes: 0
From: PA
Originally Posted by TwinCharged RX7
Thanks. Good to know about m6 fasteners. Did you use washers as well? Just don't want to mess up the paint when screwing them on.
I used some black rubber washers. You could probably get some m6 washers with neoprene or rubber on one side from Mcmaster Carr that would keep the paint from getting messed up. I'm probably going to switch to that once the car is painted.
Reply
Old Mar 29, 2016 | 10:01 AM
  #54  
ALwAyS4SaLe's Avatar
Junior Member
 
Joined: Oct 2015
Posts: 5
Likes: 0
From: Philadelphia
Those are some meaty tires. Congrats on the kit; subscribed.
Reply
Old Mar 29, 2016 | 03:36 PM
  #55  
Narfle's Avatar
Rx7 Wagon
Tenured Member: 20 Years
Liked
Loved
Community Favorite
iTrader: (16)
 
Joined: Nov 2002
Posts: 6,978
Likes: 888
From: California
Every time you don't update this thread I die a little inside.
Reply
Old Mar 30, 2016 | 06:38 AM
  #56  
rollcoal's Avatar
Senior Member
iTrader: (5)
 
Joined: Jul 2014
Posts: 274
Likes: 0
From: Ontario, Canada
leave the red and black like that! looks badass
Reply
Old Mar 31, 2016 | 09:54 AM
  #57  
WINTERBEAST's Avatar
Junior Member
 
Joined: Mar 2016
Posts: 12
Likes: 0
From: Misawa, Japan
nice build. subscribed
Reply
Old Dec 30, 2016 | 05:18 PM
  #58  
TurbosaurusRX's Avatar
Thread Starter
Loading...
Tenured Member 15 Years
iTrader: (3)
 
Joined: May 2006
Posts: 79
Likes: 0
From: PA
2016: The Year of Few Updates


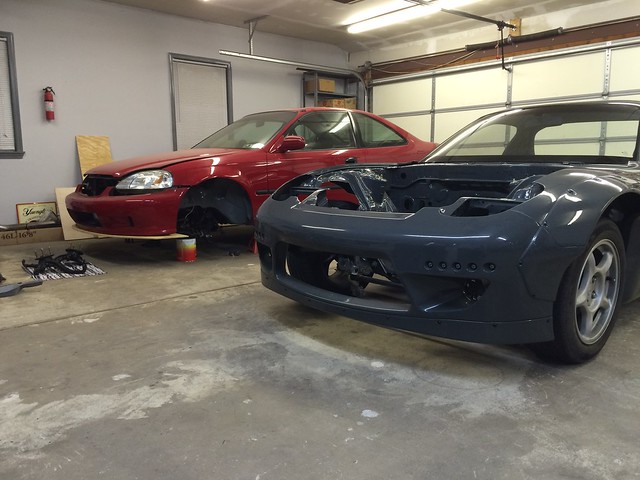
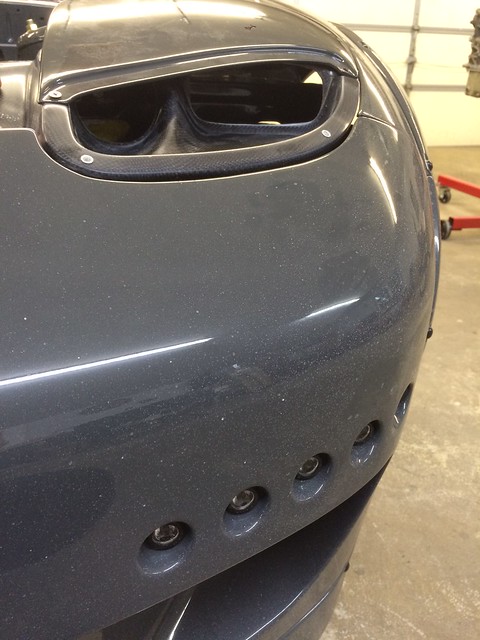
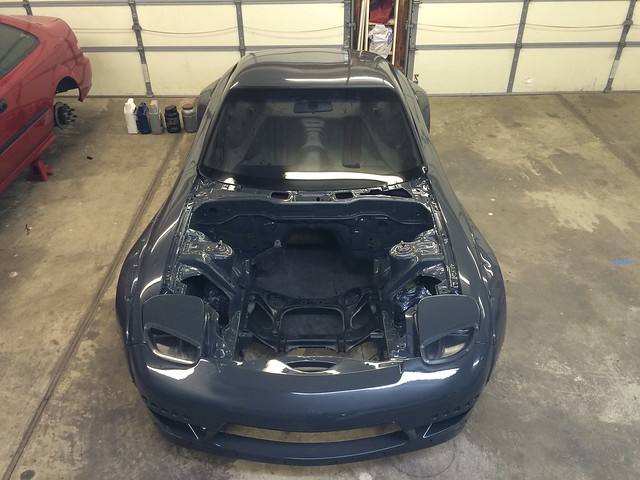
I haven't really had many updates since I dropped my car off for paint with a buddy back in March and I've been keeping busy with my first house purchase! However, I finally received some progress pictures the Monday following Christmas. The car will have titanium and carbon bits throughout, so I figured I needed to choose an exotic color to boot... Grigio Telesto from Lamborghini seemed like the right color to tie the whole car together. Some of you may notice, this car started life as a sunroof car and is now a slicktop.


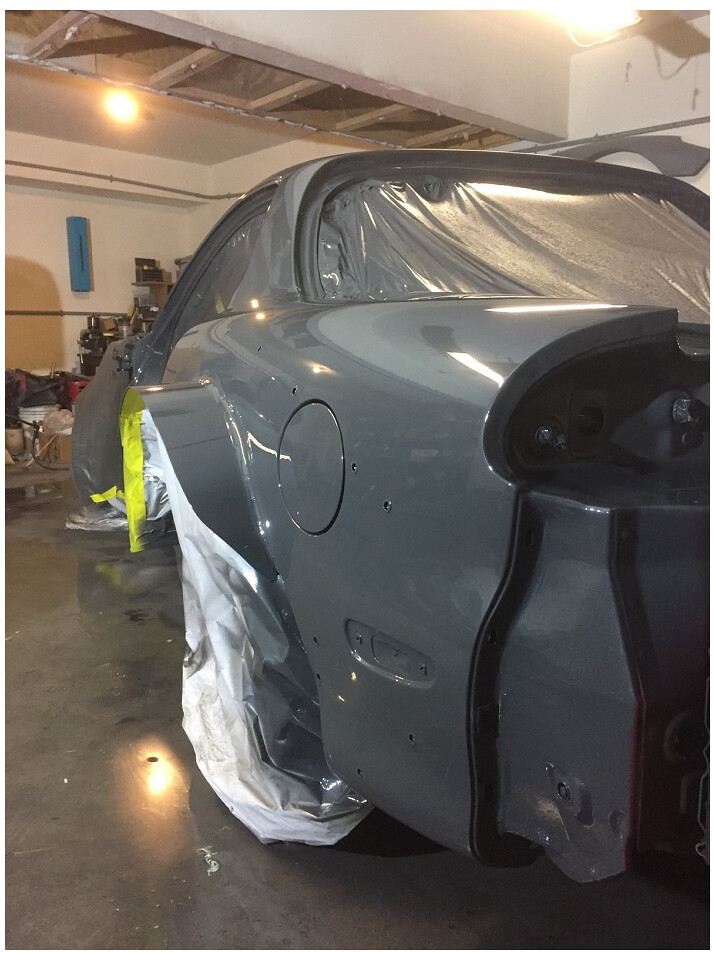
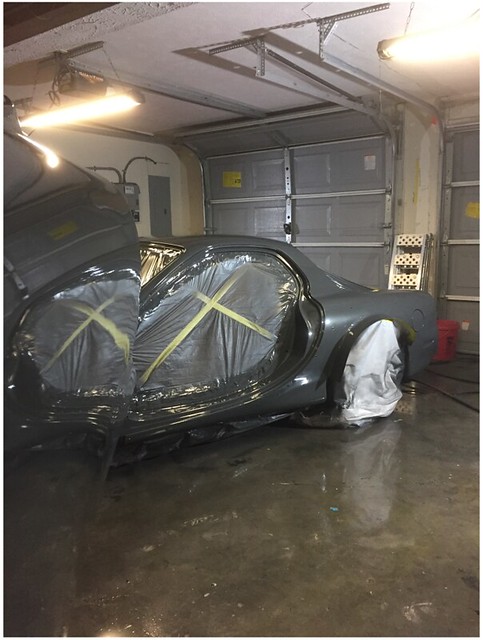
Unfortunately, this is all I've got for now, but the last info I got was a January finish date for paint. Fingers crossed I'll have it back in early 2017 and I can start pulling the rest of my ideas together!
Reply
Old Dec 30, 2016 | 05:55 PM
  #59  
TwinCharged RX7's Avatar
Built Not Bought
Tenured Member: 15 Years
Top Answer: 1
iTrader: (14)
 
Joined: May 2008
Posts: 4,389
Likes: 964
From: Stamford, CT
Nice. What did you use to space the rear wheels back from the side skirt curvature? Are adjustable trailing arms enough?
Reply
Old Jan 2, 2017 | 06:52 PM
  #60  
BLUE TII's Avatar
Rotary Motoring
Tenured Member: 25 Years
Liked
Loved
Community Favorite
iTrader: (9)
 
Joined: Mar 2001
Posts: 8,479
Likes: 932
From: CA
That color will suit the RB kit very well!

I have seen RB NSX, Z33 and FR-S RB all done the same or similar gray (gloss dark gray Avery wrap).

Hot Rod suede without the cheap-out factor.
Reply
Old Jan 3, 2017 | 08:27 PM
  #61  
eraxpres's Avatar
Junior Member
 
Joined: Sep 2016
Posts: 14
Likes: 0
From: Bay Area
cant wait to see this color in the sun!
Reply
Old Feb 17, 2017 | 11:58 AM
  #62  
TurbosaurusRX's Avatar
Thread Starter
Loading...
Tenured Member 15 Years
iTrader: (3)
 
Joined: May 2006
Posts: 79
Likes: 0
From: PA
Finally home!

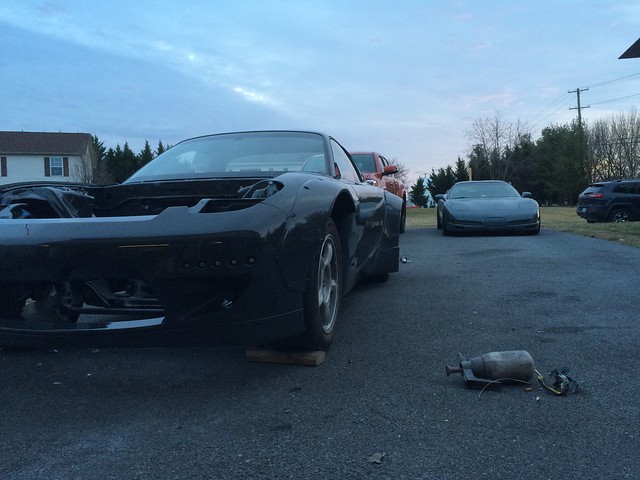
For the past year, I felt like my parents probably felt the first year I went away to college (at least this is how I like to think they probably felt). With my new house, I found projects to keep me occupied, but there was always something missing. After eagerly awaiting the rest of the bodywork to be finished up and the paint to be laid down, I finally got the call that the car was being wrapped up. This past weekend, I was able to secure a trailer from work and drove with a buddy down to Virginia to pick the car up from paint. Alas, it was time to take the FD home!


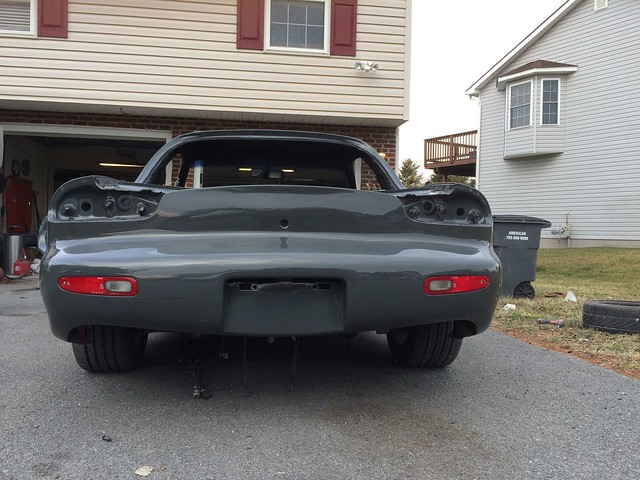
Unfortunately, the hardware for the hatch got mixed up and a bolt that was just slightly too long made it's way into the bunch... needless to say, I left the hatch with my buddy who was doing the work, so he could fix the small dent and correct the paint. Lesson learned, label and stay organized!

After a 4 hour drive back up to PA, I finally got the car off the trailer and into my garage around 10:30 or so on Sunday night.


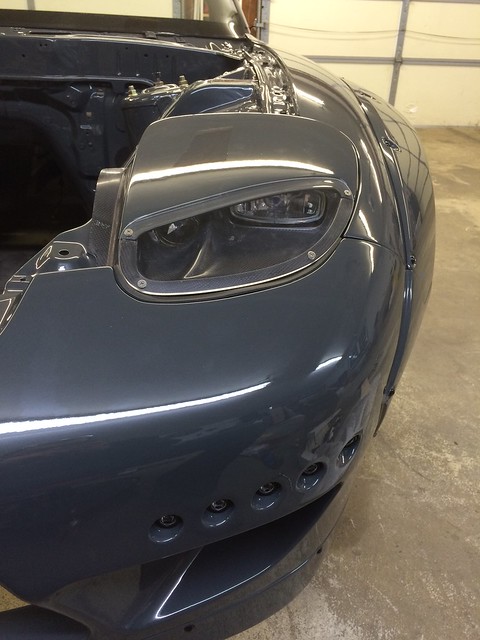
During the week, I couldn't wait to get started... so I knocked out test fitting the carbon fiber R-Magic headlights.


With the new front bumper on, the gap in front of the headlights left something to be desired. I hopped onto McMaster Carr and grabbed some adhesive-back rubber/foam strips to fill the void.


They managed to fit the bill perfectly!


At this point, there's still some more work to be done on the exterior. I'll be knocking out the wing supports next, followed by some carbon side skirt/splitters, and a carbon front splitter.
Reply
Old Feb 17, 2017 | 05:37 PM
  #63  
jinstacee's Avatar
Junior Member
Tenured Member 10 Years
iTrader: (1)
 
Joined: Dec 2012
Posts: 16
Likes: 0
From: Bay Area
Nice to see the progress!

Subbed
Reply
Old Feb 17, 2017 | 06:40 PM
  #64  
BLUE TII's Avatar
Rotary Motoring
Tenured Member: 25 Years
Liked
Loved
Community Favorite
iTrader: (9)
 
Joined: Mar 2001
Posts: 8,479
Likes: 932
From: CA
So much POTENTIAL in this shot-


Color looks great!
Reply
Old Feb 17, 2017 | 06:50 PM
  #65  
4g63rotary's Avatar
That one guy
Tenured Member 05 Years
iTrader: (5)
 
Joined: Feb 2012
Posts: 203
Likes: 0
From: SoCal
I hate that kit but I like this build, keep up the good work! Your project is looking pretty clean!

Reply
Old Apr 17, 2017 | 01:37 PM
  #66  
TurbosaurusRX's Avatar
Thread Starter
Loading...
Tenured Member 15 Years
iTrader: (3)
 
Joined: May 2006
Posts: 79
Likes: 0
From: PA
Wing Update


With the car back in my possession, my mind was starting to wander as far as which projects I wanted to tackle next. I figured I needed to make a list, so I could keep things in order and start getting more organized.

First up, was finishing was mounting the wing. Early on (and after drilling holes in my hatch and mounting the Rocket Bunny wing on the car... d'oh) I started to think about getting more aggressive with the wing. I had planned to make side splitters and a front splitter from the beginning, but with the drop vent cut in the hood I felt the rear was missing something. I hadn't seen many "bumper mount" wings on FD's at the time, but I decided it was a project I wanted to tackle. I ordered a Voltex in August of 2015 and waited about 6-7 months until it finally showed up in Early 2016. Fast forward to getting the car back from paint (by this time bumper mounted setups had been done) I had a pretty good idea in my head of how I wanted to mount the wing, so I got to work:

First, I mocked up some brackets:


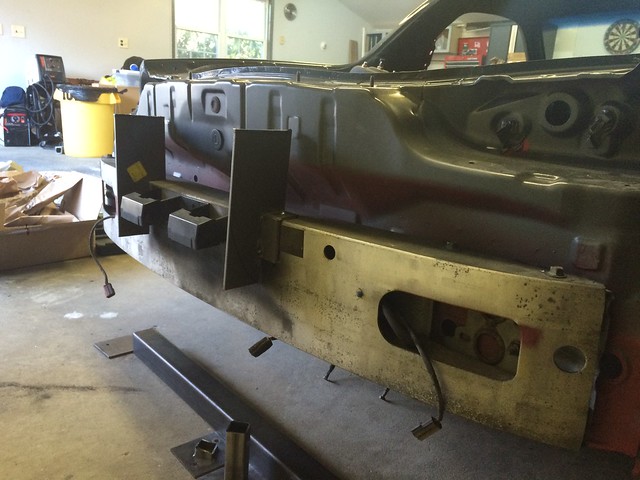
Then I cut out some rough templates to get everything aligned with the wing bolted up:


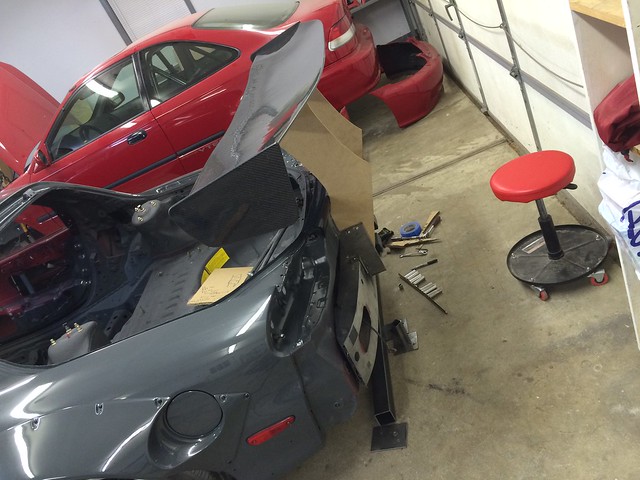
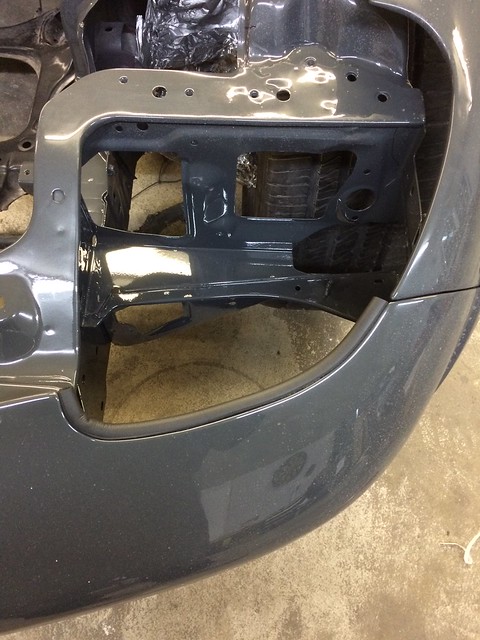
I trimmed the brackets up to get a better shape and cut the slits in the bumper to get it mounted up as well:


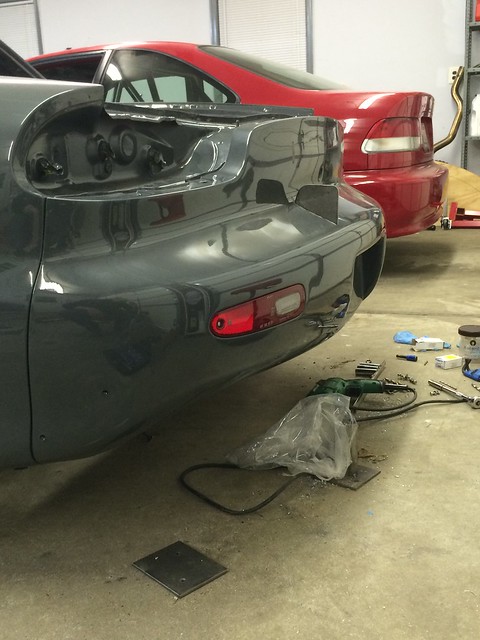
With the brackets shaped and the bumper cut, I threw everything back on to see that everything fit the way I wanted it to... it did:


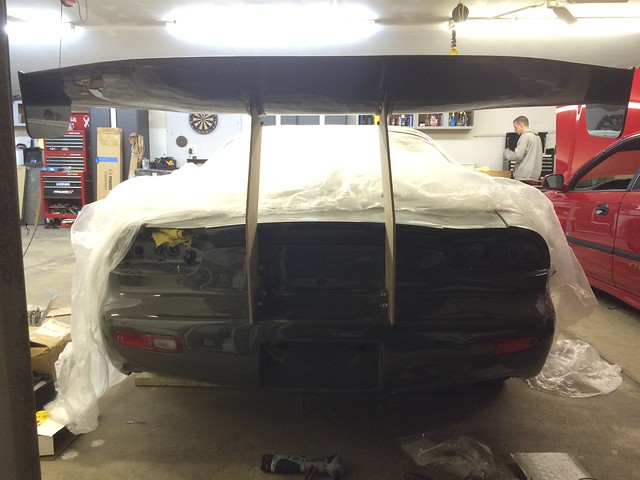
Overall, I'm happy with the way it turned out. What's left now is to cut the final pieces out from some solid aluminum stock. I built a better mockup of the stand out of MDF and will pass it off to a buddy's dad to be scanned and a CAD file created. The final pieces will be cut on a waterjet from 6061 aluminum.


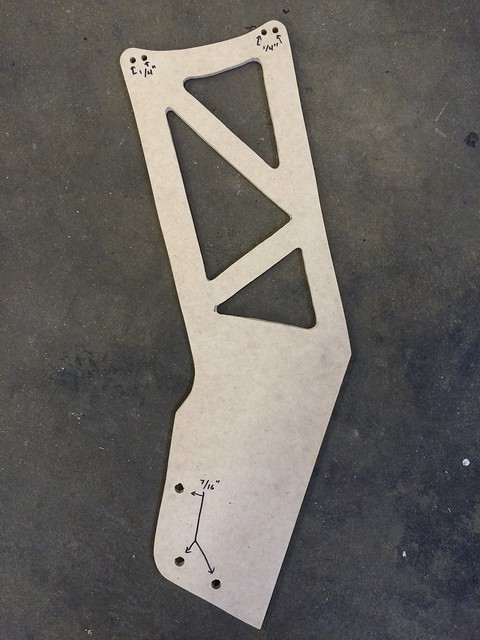
When those are finished, the stands and brackets will be off to get powdercoated, so I can finally cross this off my list!
Reply
Old Apr 26, 2017 | 06:18 PM
  #67  
4g63rotary's Avatar
That one guy
Tenured Member 05 Years
iTrader: (5)
 
Joined: Feb 2012
Posts: 203
Likes: 0
From: SoCal
Hey quick question whats the item number for the Foam Stripes you used for your headlights?

Looking good by the way.
Reply
Old Apr 27, 2017 | 06:38 PM
  #68  
TurbosaurusRX's Avatar
Thread Starter
Loading...
Tenured Member 15 Years
iTrader: (3)
 
Joined: May 2006
Posts: 79
Likes: 0
From: PA
Originally Posted by 4g63rotary
Hey quick question whats the item number for the Foam Stripes you used for your headlights?

Looking good by the way.
Thanks! For the foam strips, I used part # 93085K11 from McMaster Carr. It should be a 3/8 width x 7/16 height D-shaped EPDM adhesive back strip.
Reply
Old Sep 9, 2018 | 09:23 AM
  #69  
TwinCharged RX7's Avatar
Built Not Bought
Tenured Member: 15 Years
Top Answer: 1
iTrader: (14)
 
Joined: May 2008
Posts: 4,389
Likes: 964
From: Stamford, CT
Any update on this?
Reply
Related Topics
Thread
Thread Starter
Forum
Replies
Last Post
NJ-JDM
3rd Generation Specific (1993-2002)
43
Aug 23, 2015 11:02 PM


All times are GMT -5. The time now is 05:36 PM.