
6766 Rocket Bunny FD!


Full Member
Joined: Apr 2009
Posts: 88
Likes: 0
From: New Mexico
You and I are very similar paths- 20B, air cups and rocket bunny. I ordered my kit back in June or July and it's finally suppose the be here by mid March, in theory. It has been extended delays since the original timeframe of August.

See below (finally!)
Progress!
I've been really slacking on the updates here, but I've still been making progress on the car. I've got a few major updates to share with everyone; the most important being the arrival of the body kit!
After waiting for the better part of a year (I think it was a total of 8 months) I was getting some mixed information on the arrival of my body kit. I wasn�t sure when it was done in until I took a stroll into my company�s warehouse to this sight:

I went straight home from work that evening and rushed to get the front bumper on

At this point I started trying to plan out what I felt needed to happen before I could get the car in for paint:
- Fit body kit on the car / cut wheel wells / rivnut body
- Powdercoat the suspension / hubs / knuckles
- Press in Superpro bushings
- Remove sound deadening
- Finish routing the air lines / tank mounting / compressor mounting for cup setup
Fitting the kit
**I didn�t completely stick to the list in order and you�ll notice this by some of the picturesThe fitment of the body kit was spectacular. Going into this project, I had no experience with body work (In fact, I still wouldn�t say I have much body work experience, but I have more experience now with a cutoff wheel). I spent a good bit of time on the first fender while the measure twice, cut once mantra rang through my head. I must have measured a hundred times and cut about fifty before I finally got the first overfender mocked up successfully. My first few cuts ended up with:

The rocket bunny fender wouldn�t fit, so I went back at it for hours until I had finally cut off enough to fit the overfender. Turns out, I had to remove the vent and essentially cut it out completely:

After swiss-cheesing the fender, my focus turned to lining up the edges. It would seem the edge of this overfender should line up with the edge of the stock fender, but in reality this wasn�t the case. I struggled with this and looked up some already completed cars to use as reference photos. None of these cars had the edge closest to the door lining up completely where I thought it should be and I realized why. The inside of the fender, where the wiring exits the comes through into the door, is rounded slightly towards the front of the car. Running a bolt/screw through at the edge would be an issue. For reference:

The perfectionist in me had to deal with this, so I did the best I could to at least create an even gap from the rocket bunny piece to the body line:

It finally came together and matched up well with the front bumper. Here�s the final result after getting the overfender attached:


I know MotoIQ is designing a new set of upper control arms for their Rocket Bunny RX-7 and I think they are planning to run an 11� wide wheel in the front.
LOL tell them to stop being pussies!
11" up front is stock body fitment for the FD and RX-8. My car with 18x11 +45 295 for reference.

The perfectionist in me had to deal with this, so I did the best I could to at least create an even gap from the rocket bunny piece to the body line:
That is a NICE fit up on the front overfender to front fender! I have high expectations for the fit and finish of your build now
LOL tell them to stop being pussies!
11" up front is stock body fitment for the FD and RX-8. My car with 18x11 +45 295 for reference.
The perfectionist in me had to deal with this, so I did the best I could to at least create an even gap from the rocket bunny piece to the body line:
That is a NICE fit up on the front overfender to front fender! I have high expectations for the fit and finish of your build now
Quick Teaser
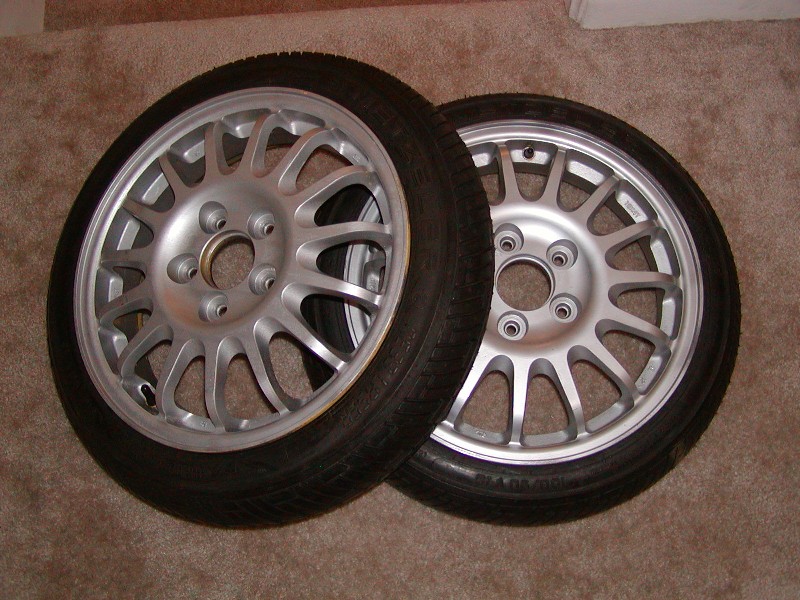
I've had these on order for quite a bit, but these finally arrived stateside:

Will update soon with more body kit pics!
Any problems with with 295 and 18x11?
Yes, with the +45 offset to fit it under stock fenders I had to get a 1" shorter tube on my Tripoint front sway bar or it would rub the swaybar arms at full steering lock.
Yes, with the +45 offset to fit it under stock fenders I had to get a 1" shorter tube on my Tripoint front sway bar or it would rub the swaybar arms at full steering lock.

Full Member
Joined: Apr 2009
Posts: 88
Likes: 0
From: New Mexico
My kit FINALLY arrived so I will be taking close notes on your progress- very nice work BTW.
Let me ask you this, would using carbon fiber fenders make the cutting and shaping easier? Or do you think stock metal is better. I have a set of each so I can go either way. My initial thought is that I could finish up the CF fenders a little more nicely with a little filer and epoxy.
Cheers,
Steven

I hate you OP. I hate everyone with rocket bunny kits.....cause I'm jealous. All seriousness, I'm waiting to see the end result! I'll just continue to reach for my stress ***** before I check back into this thread haha.

Body Updates!
Well I've gone back to lurking a bit as I finish up the body work and gather more parts. I hope to get this car featured in a magazine some day, so my posts may start to become more infrequent as the car nears completion (which should be later next year). However, I hope my thread can help others who are putting together Rocket Bunny cars.
Gumd02000 had asked about wheel fitment. I'm running 18x13 -22 in the rear and 18x10 -14 up front. The look is awesome, but the negative offset causes contact with the bumper with the wheel turned. I have a very over the top solution that includes a splitter, but I'll elaborate more when I hit that point.
For this update, I figured I'd focus on some of the body work. After cutting away the rear wheel arches, i couldn't allow myself to just bolt on the overfender. The gap between the new over fender and the original quarter bothered me, so I decided to create a sheetmetal extension to fill in the gap. Now, you'll never see this with the car on the ground, but I couldn't bring myself to leave this sort of "unfinished"product.
It started with a simple cardboard mock-up:
<a data-flickr-embed="true" href="https://www.flickr.com/photos/135943654@N03/21912130692/in/dateposted-public/" title="IMG_0620"><img src="https://farm6.staticflickr.com/5619/21912130692_0780f995f0_z.jpg" width="480" height="640" alt="IMG_0620"></a>
And evolved into this:
<a data-flickr-embed="true" href="https://www.flickr.com/photos/135943654@N03/21736303708/in/dateposted-public/" title="IMG_0814"><img src="https://farm1.staticflickr.com/679/21736303708_bc34b55e26_z.jpg" width="480" height="640" alt="IMG_0814"></a>
<a data-flickr-embed="true" href="https://www.flickr.com/photos/135943654@N03/21301410844/in/dateposted-public/" title="IMG_0815"><img src="https://farm1.staticflickr.com/683/21301410844_ac702f58a3_z.jpg" width="480" height="640" alt="IMG_0815"></a>
After completing this on both sides of the car, it was time to clean and scuff up the wheel wells to get them ready for paint:
<a data-flickr-embed="true" href="https://www.flickr.com/photos/135943654@N03/21912129852/in/dateposted-public/" title="IMG_0819"><img src="https://farm6.staticflickr.com/5836/21912129852_2ef59e3ecd_z.jpg" width="480" height="640" alt="IMG_0819"></a>
I hit it first with a few coats of primer:
<a data-flickr-embed="true" href="https://www.flickr.com/photos/135943654@N03/21924142465/in/dateposted-public/" title="IMG_0821"><img src="https://farm1.staticflickr.com/579/21924142465_0c3f910101_z.jpg" width="480" height="640" alt="IMG_0821"></a>
Then closed the gap between the extension and original quarter with a bit of SEM Seam Sealer:
<a data-flickr-embed="true" href="https://www.flickr.com/photos/135943654@N03/21301409514/in/dateposted-public/" title="IMG_0826"><img src="https://farm1.staticflickr.com/605/21301409514_55a4432ede_z.jpg" width="480" height="640" alt="IMG_0826"></a>
Then finally hit it with a couple coats of some Duplicolor Bumper Coating. This stuff is solid and the slight texture really gives an OEM finished looked. Pictures really don't do it justice... but I'll let them try:
<a data-flickr-embed="true" href="https://www.flickr.com/photos/135943654@N03/21933869881/in/dateposted-public/" title="IMG_0830"><img src="https://farm6.staticflickr.com/5781/21933869881_f19d843da1_z.jpg" width="480" height="640" alt="IMG_0830"></a>
<a data-flickr-embed="true" href="https://www.flickr.com/photos/135943654@N03/21897988526/in/dateposted-public/" title="IMG_0833"><img src="https://farm6.staticflickr.com/5665/21897988526_5753990d8d_z.jpg" width="480" height="640" alt="IMG_0833"></a>
Now beyond completing these fender extensions, I've been spending most of my time lately collecting other parts, chipping up the factory sound deadening, and getting as much removed from the interior as I can. I'm hoping to get the car down to a buddy in Virginia within the next 2 months, so he can start the paint. During this time, I'll be having everything in the interior wrapped in alcantara with accent stitching to match the stitching on the Bride seats. I'll keep from boring everyone with the sound deadening updates and leave my latest update with this recent shot of the car finally back on the ground after over a year of being up on stands:
<a data-flickr-embed="true" href="https://www.flickr.com/photos/135943654@N03/21897987986/in/dateposted-public/" title="IMG_1056"><img src="https://farm1.staticflickr.com/645/21897987986_ae9b3d4a1e_z.jpg" width="640" height="480" alt="IMG_1056"></a>
This project is coming together very well
Those wheels are beautiful - I really like the color combination. I considered a set of ISS Forged FI-15s before settling on the TE37s in this exact color combo. Looking at your set up might be the first time I've regretted my decision... looks ridiculously good
I am considering ditching my carpet and sound deadening over the winter to cut some weight, so I wouldn't mind a small update on the sound deadening removal if you get the chance. What technique are you going with? Soda blasting?
Best of luck with the project - you are doing a phenomenal job! I'm looking forward to it all coming together

Let me play devil's advocate. FD's are pretty bad on road noise. And, the sound deadening is like 15-20lbs at the very bottom the the car. There's almost no benefit for removing it, and your car will have more nvh. If anything the FD needs more sound deadening around the rear wheel wells. Maybe consider lizard skin etc?
This project is coming together very well
Those wheels are beautiful - I really like the color combination. I considered a set of ISS Forged FI-15s before settling on the TE37s in this exact color combo. Looking at your set up might be the first time I've regretted my decision... looks ridiculously good
I am considering ditching my carpet and sound deadening over the winter to cut some weight, so I wouldn't mind a small update on the sound deadening removal if you get the chance. What technique are you going with? Soda blasting?
Best of luck with the project - you are doing a phenomenal job! I'm looking forward to it all coming together
Those wheels are beautiful - I really like the color combination. I considered a set of ISS Forged FI-15s before settling on the TE37s in this exact color combo. Looking at your set up might be the first time I've regretted my decision... looks ridiculously good
I am considering ditching my carpet and sound deadening over the winter to cut some weight, so I wouldn't mind a small update on the sound deadening removal if you get the chance. What technique are you going with? Soda blasting?
Best of luck with the project - you are doing a phenomenal job! I'm looking forward to it all coming together
Let me play devil's advocate. FD's are pretty bad on road noise. And, the sound deadening is like 15-20lbs at the very bottom the the car. There's almost no benefit for removing it, and your car will have more nvh. If anything the FD needs more sound deadening around the rear wheel wells. Maybe consider lizard skin etc?
Thanks!
I can't wait either! This build has really snowballed, but I'm hoping to have the car out sometime next year.
Funny you mentioned this! I don't think I ever touched on it so far in my thread, but my plan was to get rid of the old sound deadening, then coat the floor and underbody with Lizard Skin (Sound Control on the interior and the Ceramic Coat on the underbody). It may be overkill to scrape up the old stuff first, but after pulling up the carpet (and it coming up in pieces in some sections) I figured it would be better to start with a clean surface. Luckily, my girlfriend's brother was willing to help with the sound deadening... so you can bet I took him up on that offer!


Newbie
Joined: Apr 2008
Posts: 4
Likes: 0
From: Florida
Nice man very exciting build cant wait to see more I love the attention to detail on the kit and props to you on getting out of that comfort zone and going for your own fabrication I hope I can reach this level when I start my next build.
We'll I've been in hibernation a bit and just gathering some parts for the build, but it's still going! The latest project is below...the cardboard in the bay is my cardboard intercooler for mockup 
<a data-flickr-embed="true" href="https://www.flickr.com/photos/135943654@N03/24899687916/in/dateposted-public/" title="RX7 Drop Vent"><img src="https://farm2.staticflickr.com/1672/24899687916_7cc258abcf_z.jpg" width="640" height="639" alt="RX7 Drop Vent"></a>
<a data-flickr-embed="true" href="https://www.flickr.com/photos/135943654@N03/24832764001/in/dateposted-public/" title="RX7 Drop Vent 2"><img src="https://farm2.staticflickr.com/1475/24832764001_5bf7d5020b_z.jpg" width="481" height="640" alt="RX7 Drop Vent 2"></a>
This build really snowballed since the start, but I'm just about finished with changes to the exterior. I have one more slight change planned, but it shouldn't set me back too far. The build has been a fun process, but I'm sure it could have been planned a bit better (at least so I didn't let it get so out of control!). My plan for the next two weekends is to try to finish up the drop vent, finish riv-nutting the body, then send the car off to paint. I don't have any obligations to get the car finished by a certain time, but my hope is to have it running and out to a show or two before the year is up. Time will tell!

