
1993 RX-7 R1 Revival


Thread Starter
Full Member
Joined: Apr 2015
Posts: 140
Likes: 5
From: Great Falls, MT
Congrats on the baby! My wife and I just had ours in October and it changes your life! I had my engine all rebuilt and my build squared away before he was born... and then 900 miles later it let go and my car has been in pieces ever since. Hopefully you have better luck!
And now for the typical advise... get your sleep now! lol
And now for the typical advise... get your sleep now! lol
Yeah I plan to put down a tarp/plastic all around the engine bay. It seems to be the lesser of two evils when stripping the bay (other option is aircraft paint remover which is extremely messy)
Thread Starter
Full Member
Joined: Apr 2015
Posts: 140
Likes: 5
From: Great Falls, MT
Alrrigghhtt. Update time.
Over the winter months my basement became more and more full of parts. First from the leftover dsm parts I had, then from parting out the rotary stuff, then from acquiring more lsx based parts. So it was a mess. Finally had enough of it and straightened up one of the rooms.
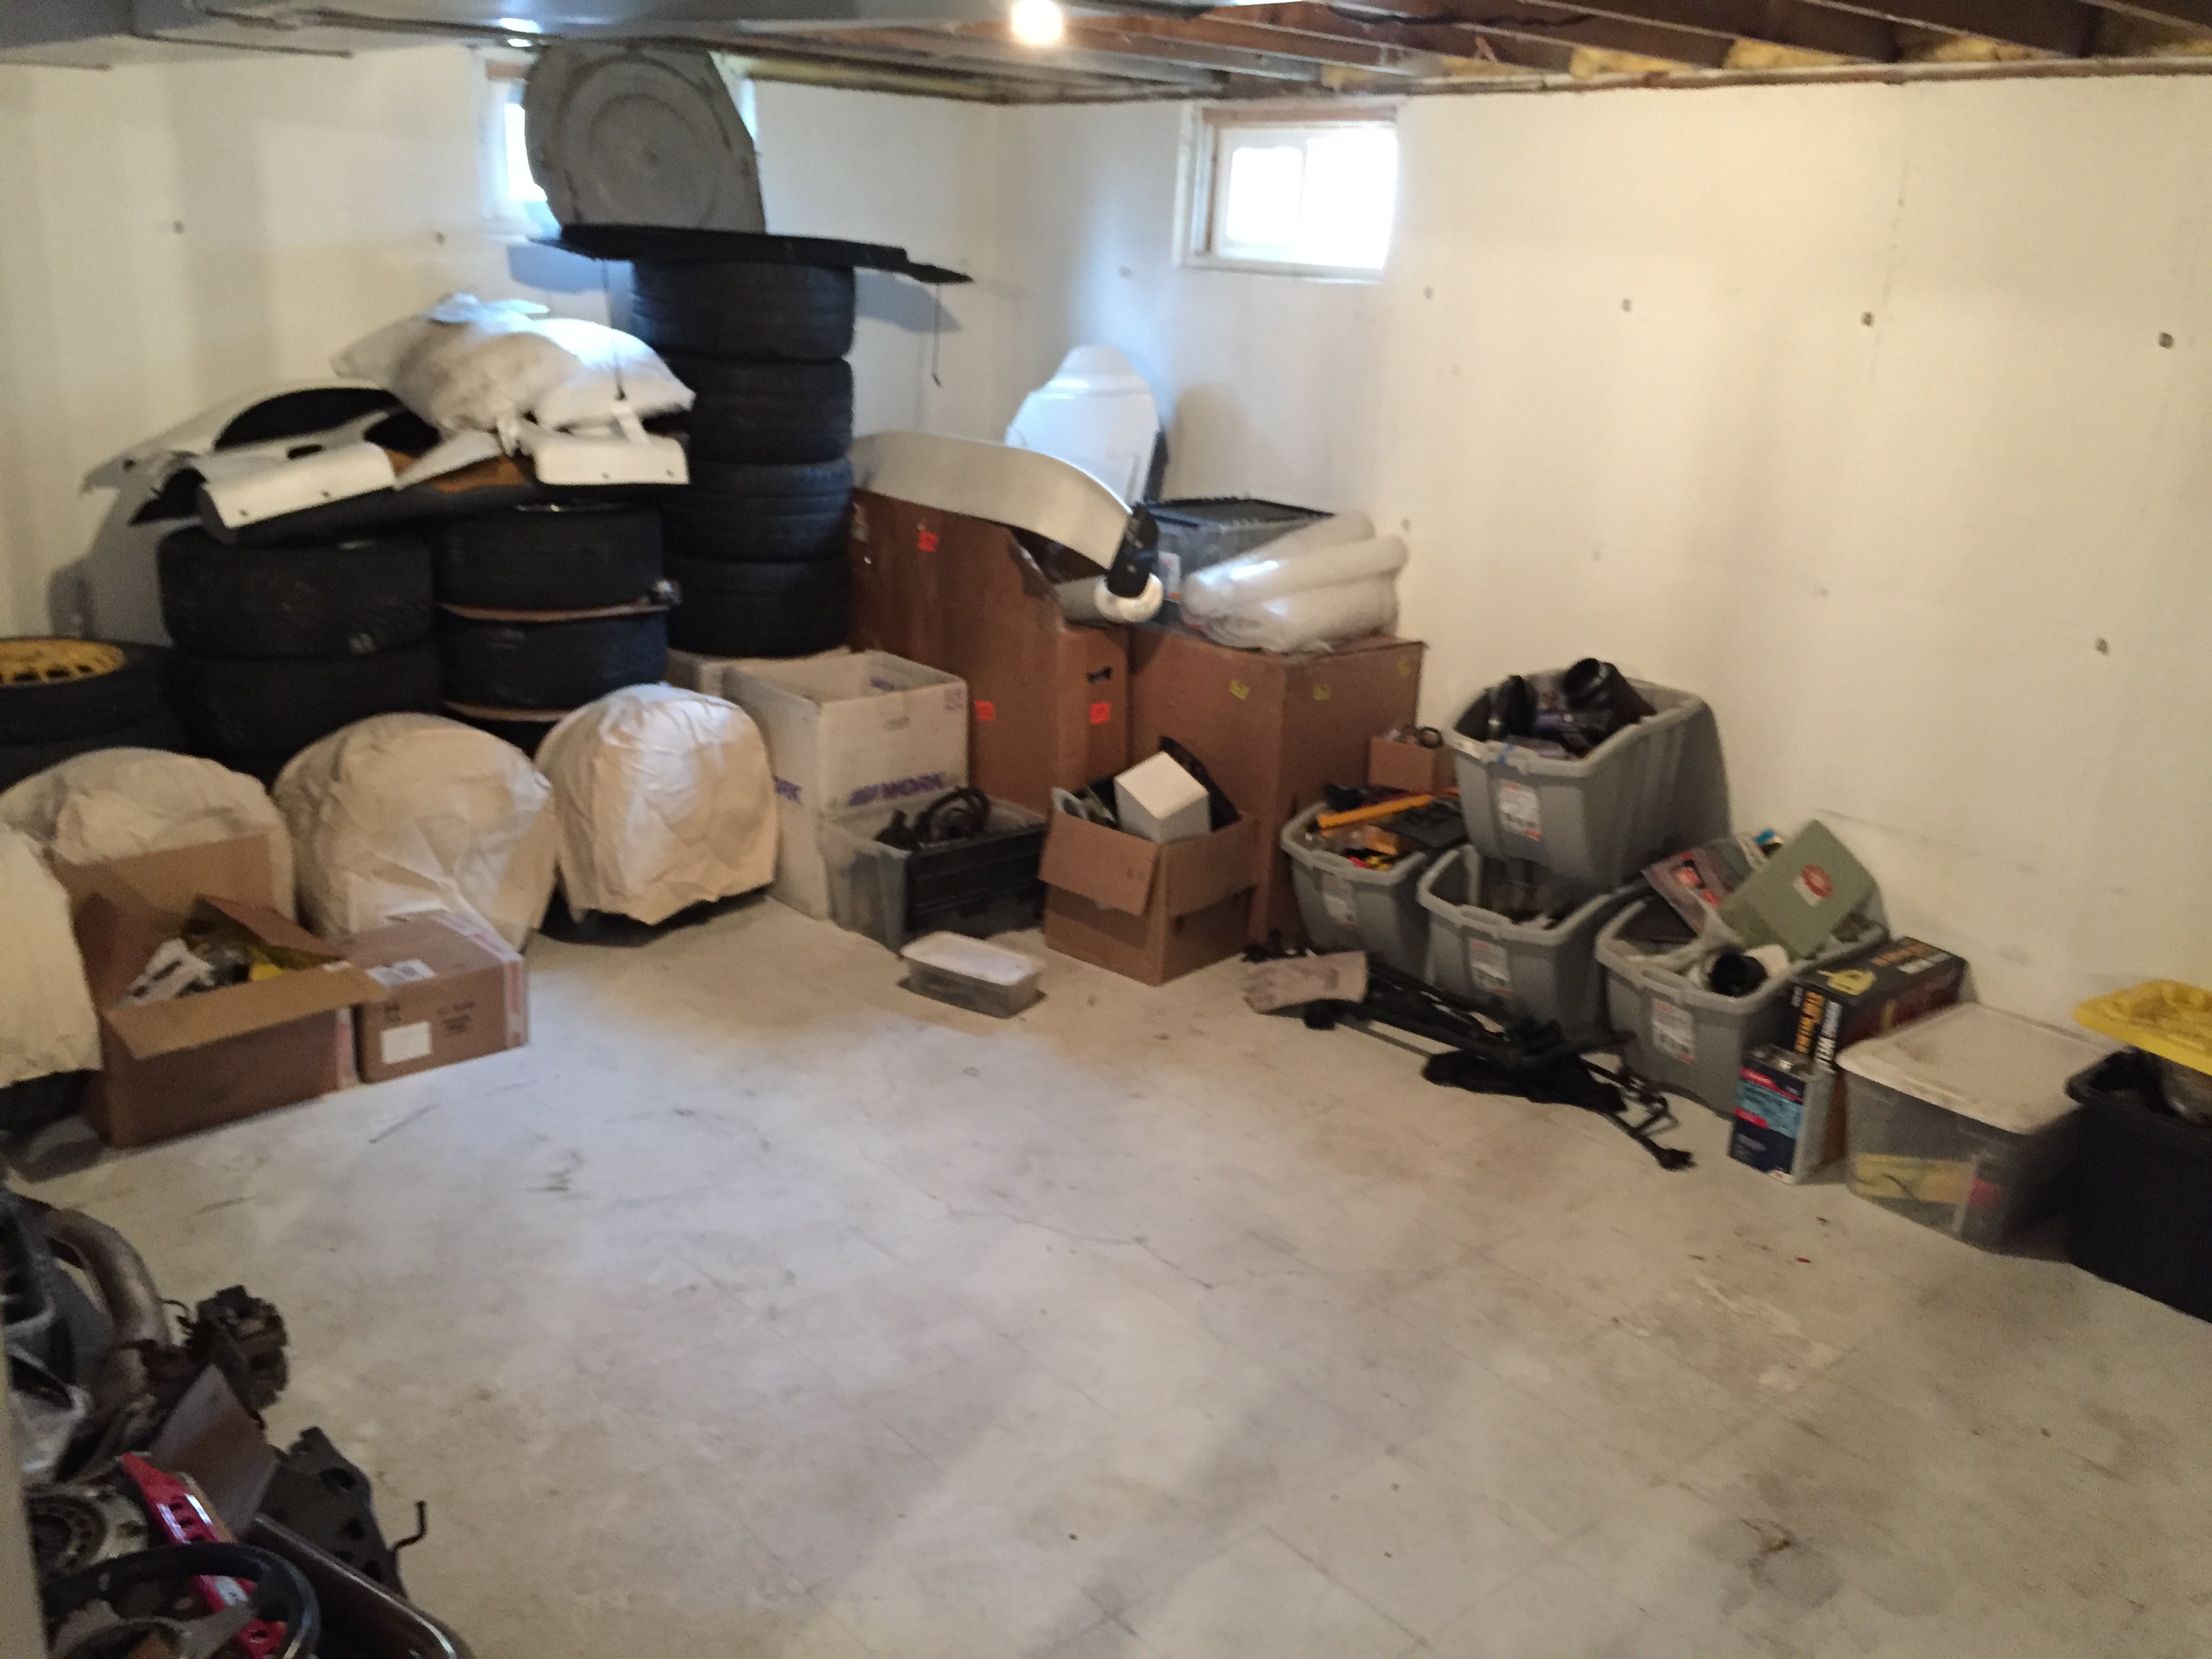
And then I had to put more **** in the room to get it out of another one, so whatever lol.
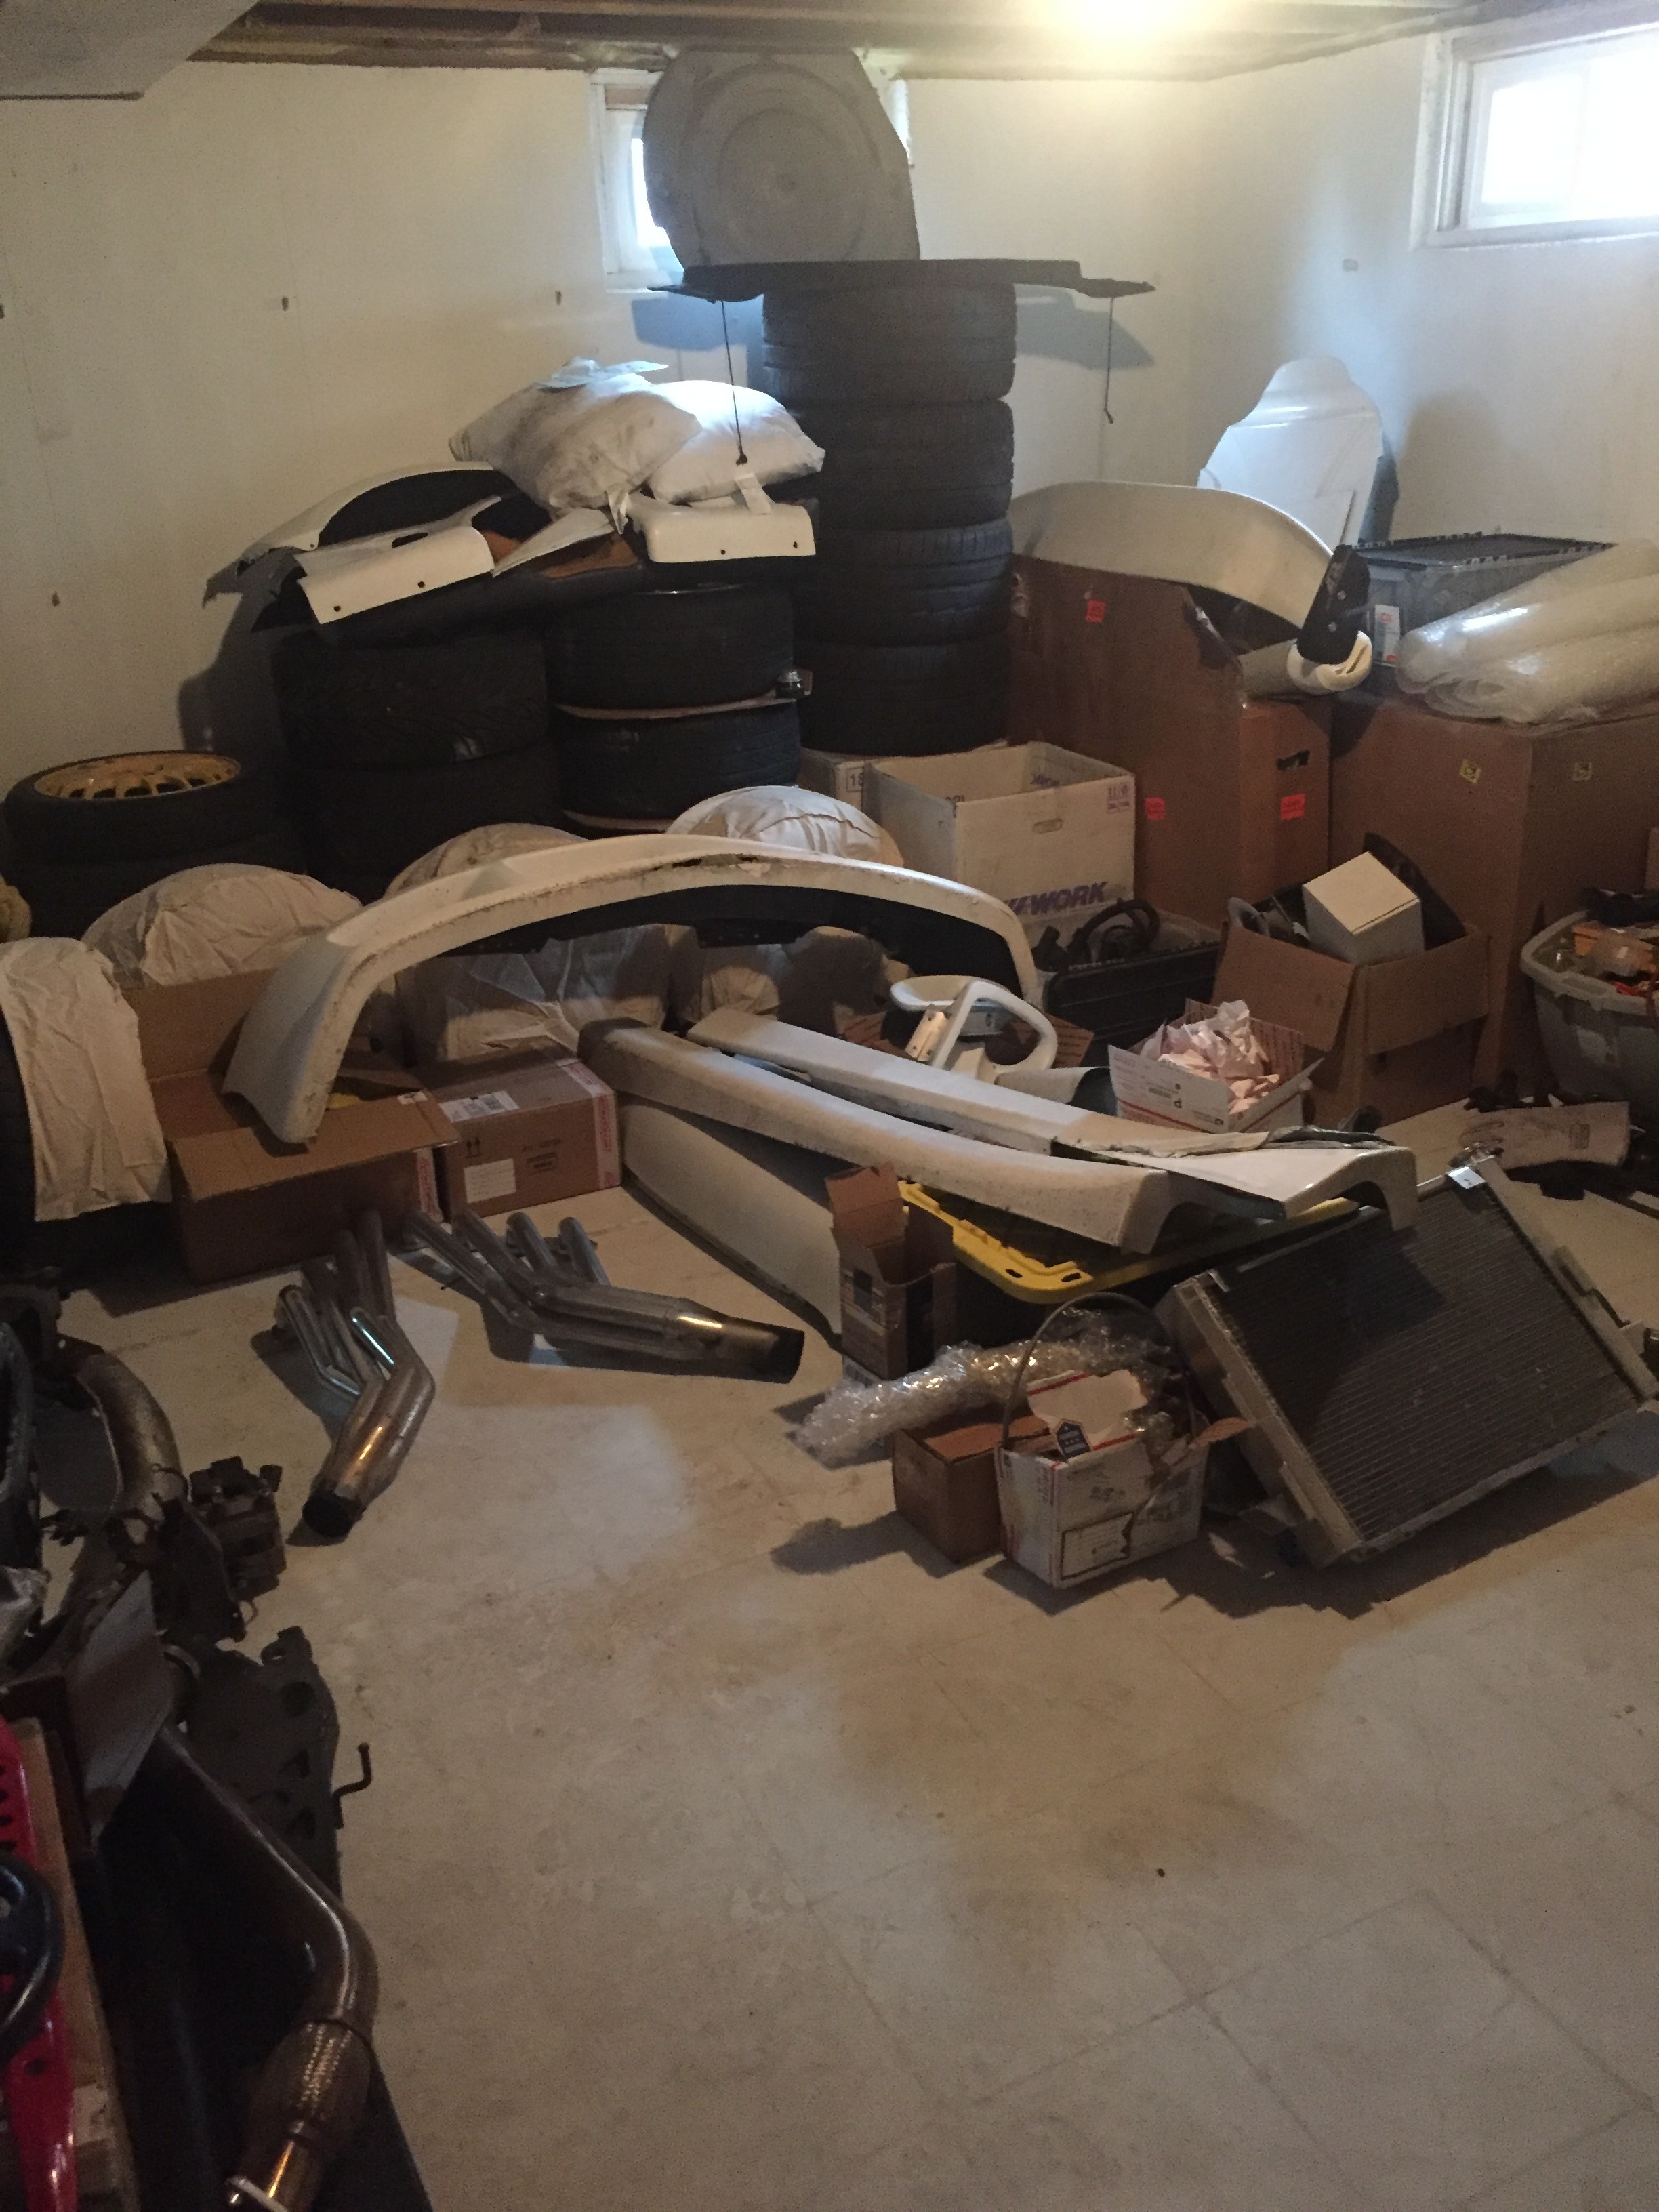
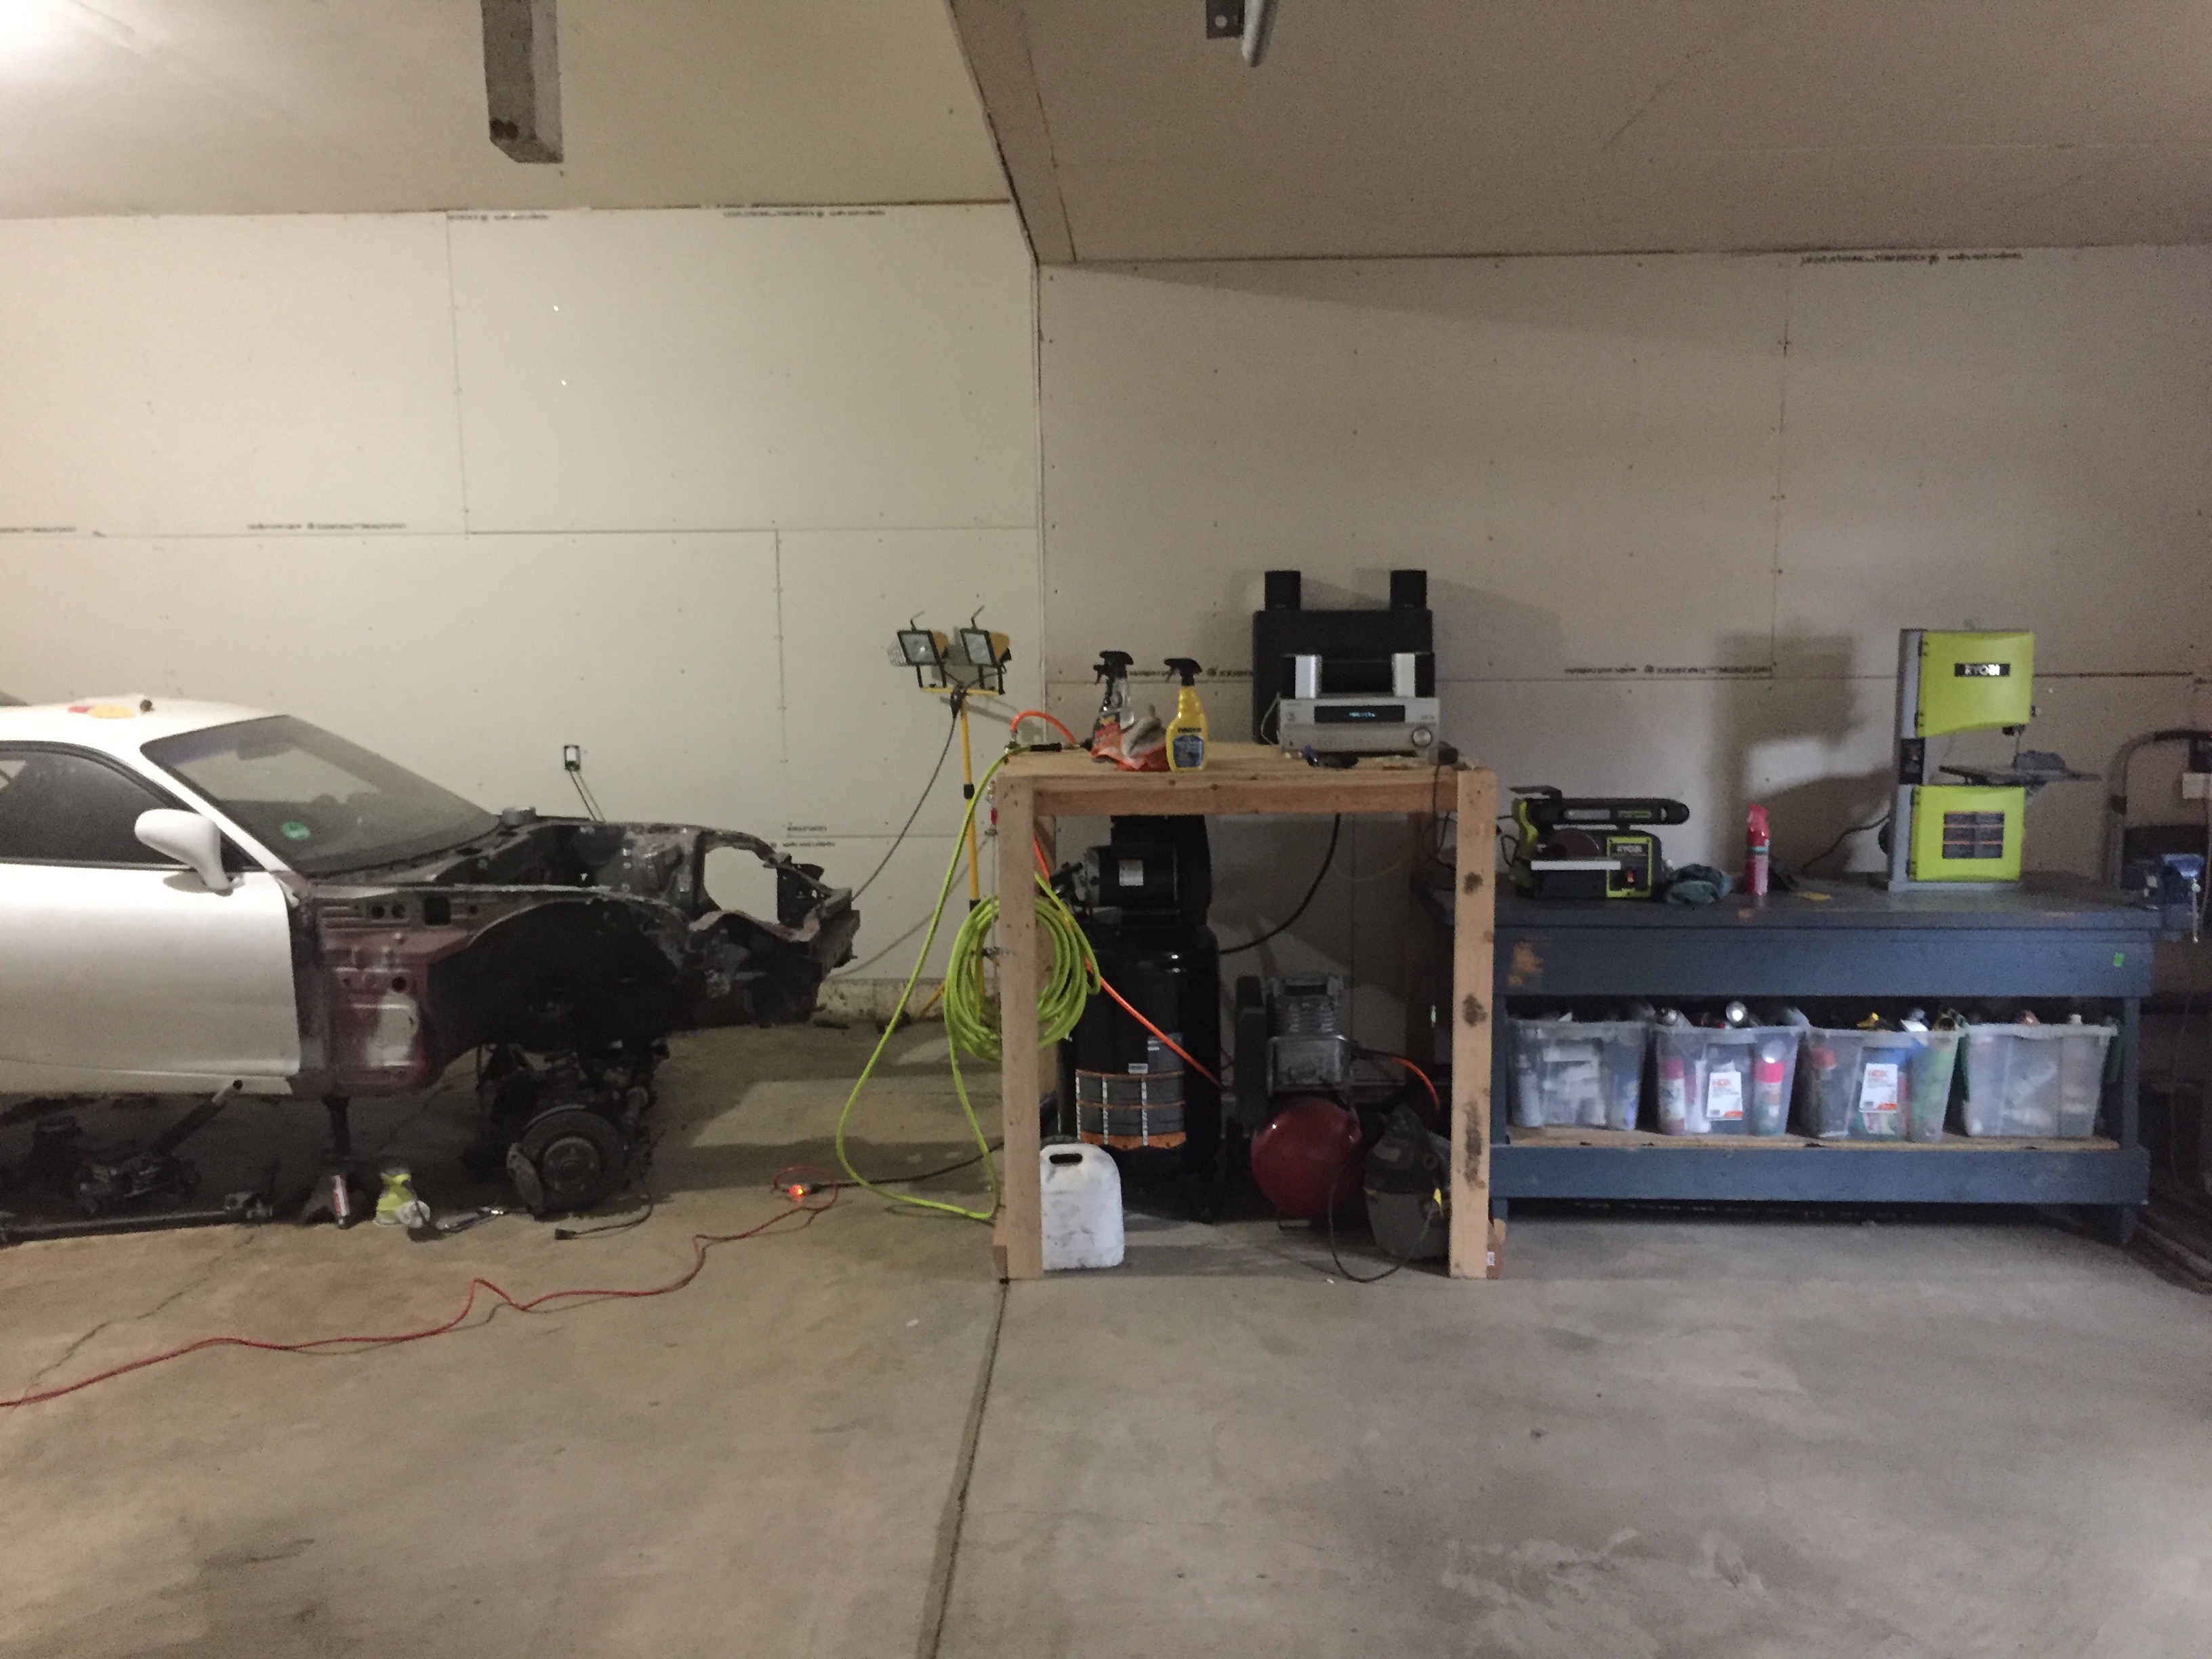
So the same could be said for my garage. I had been neglecting it over the months and focusing on acquiring parts for the rx7. Decided I had enough of it too and built a couple shelves and acquired various parts.
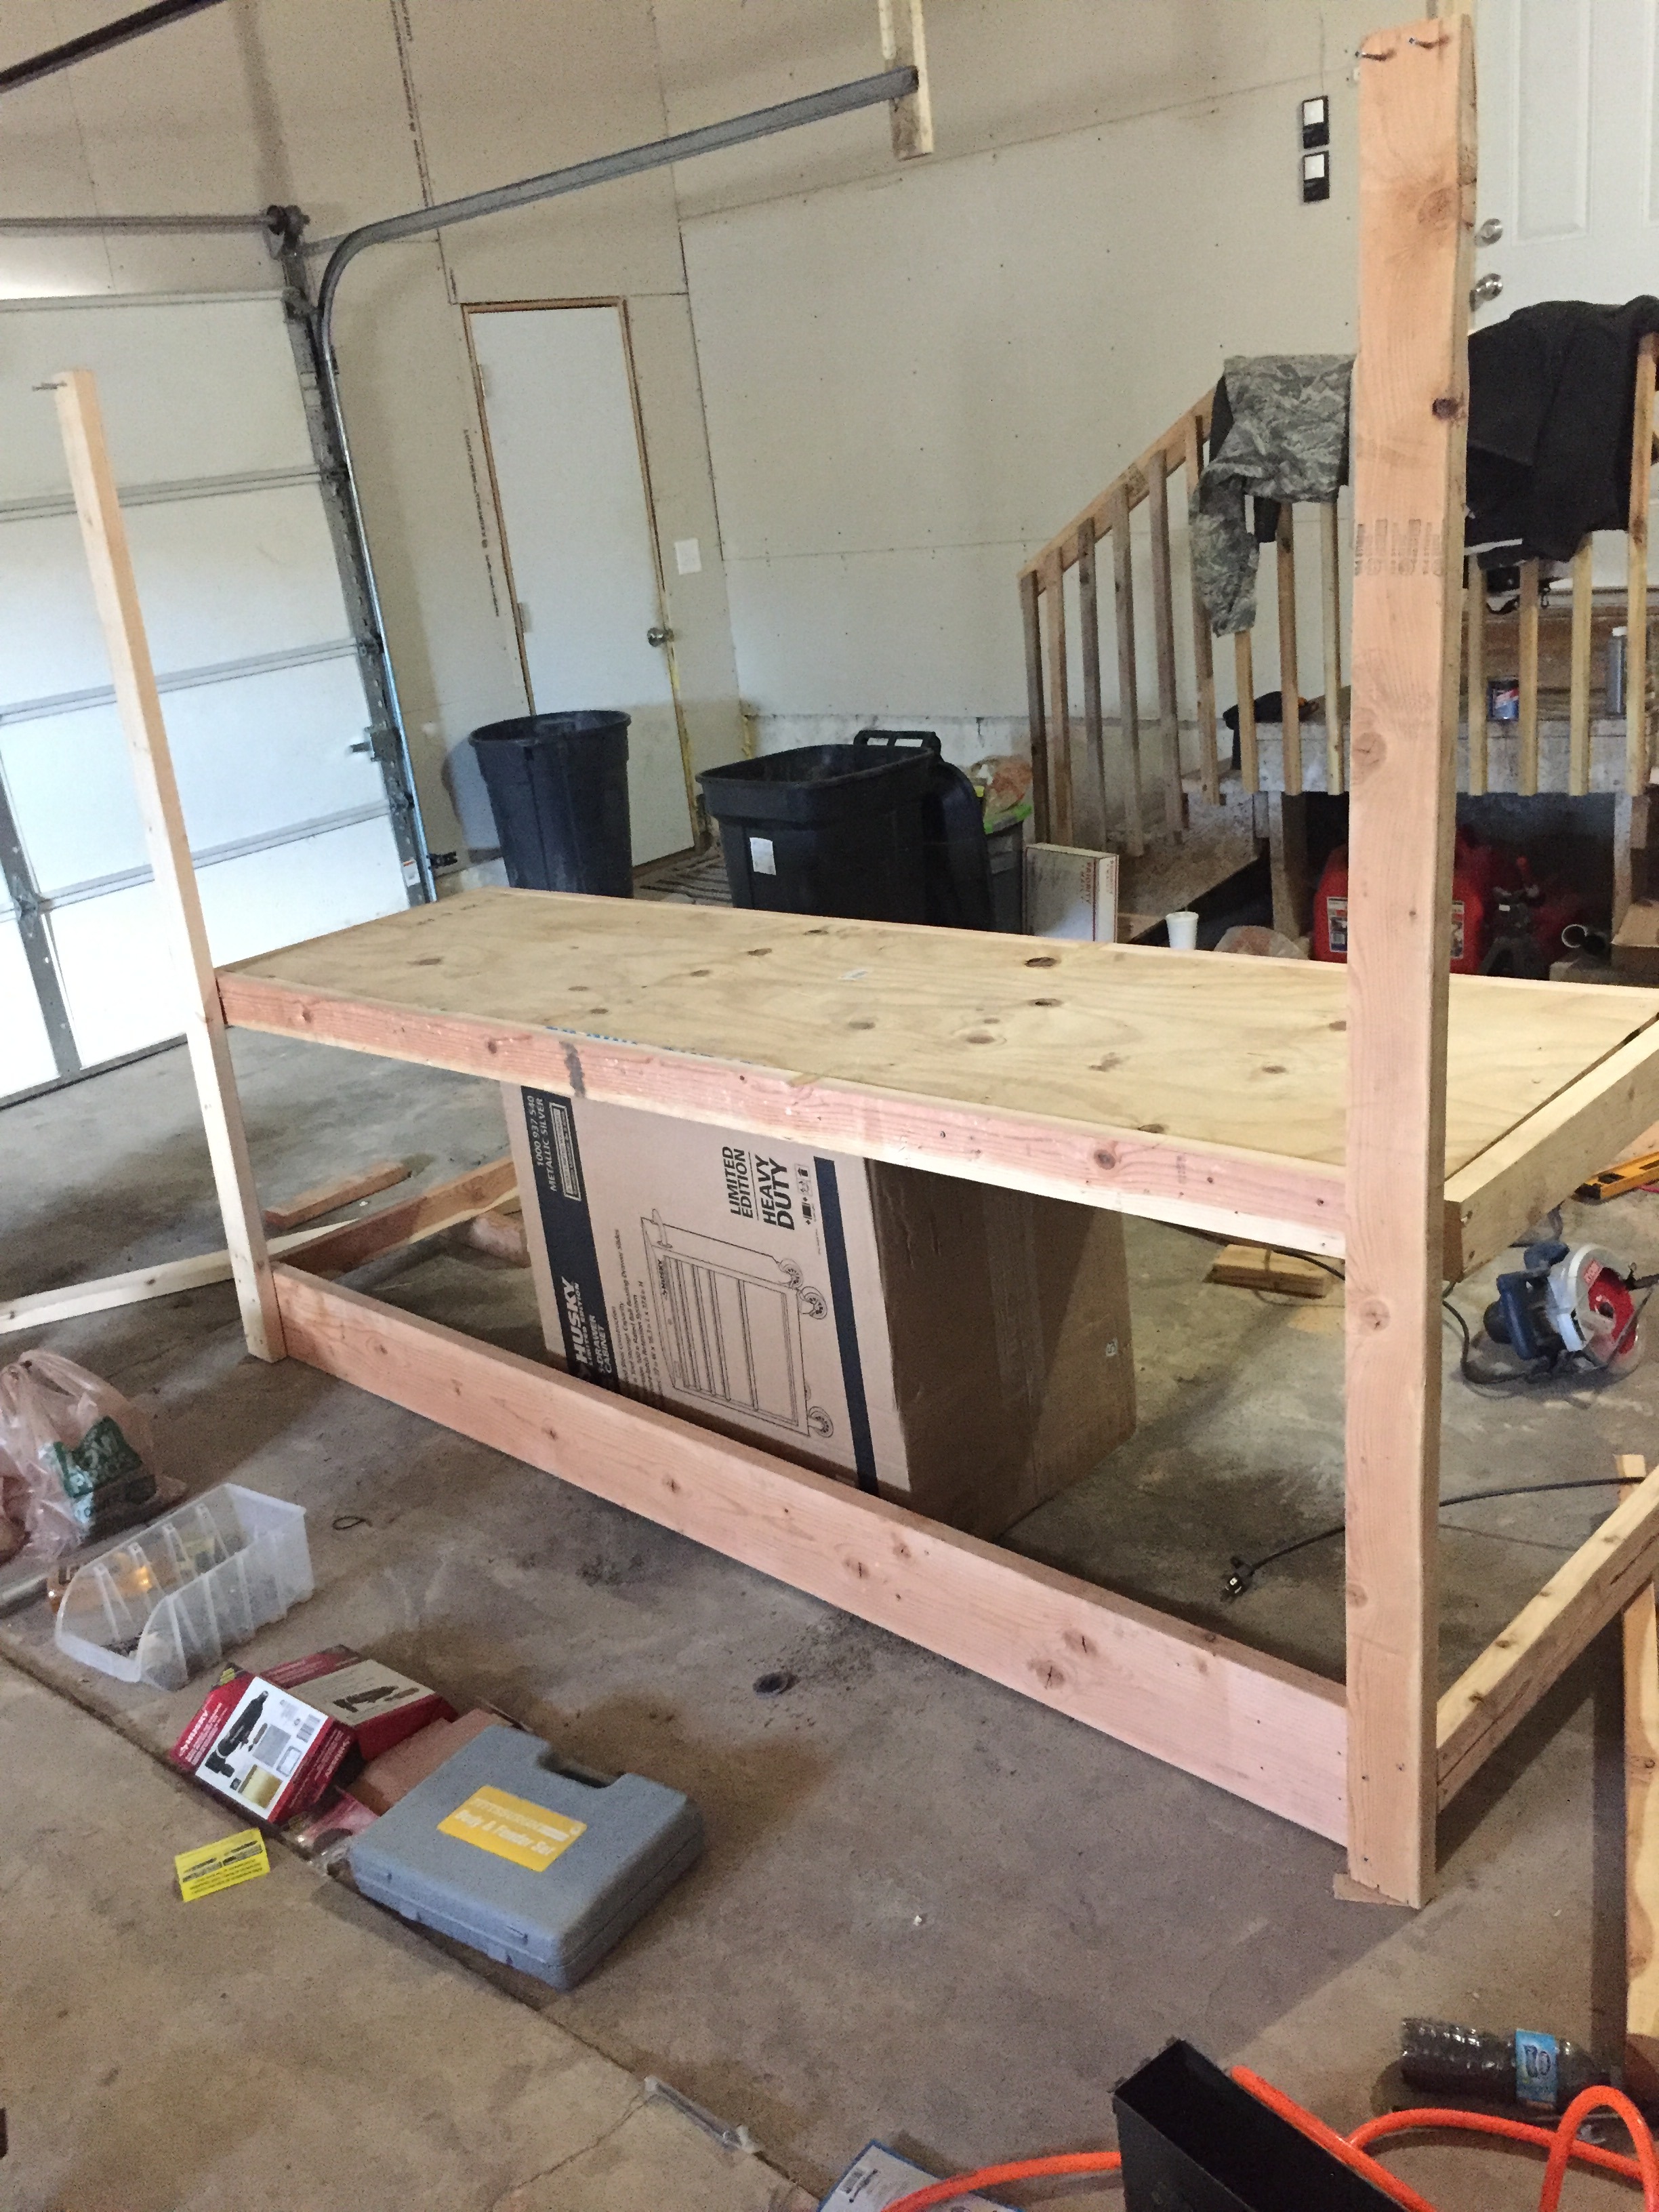
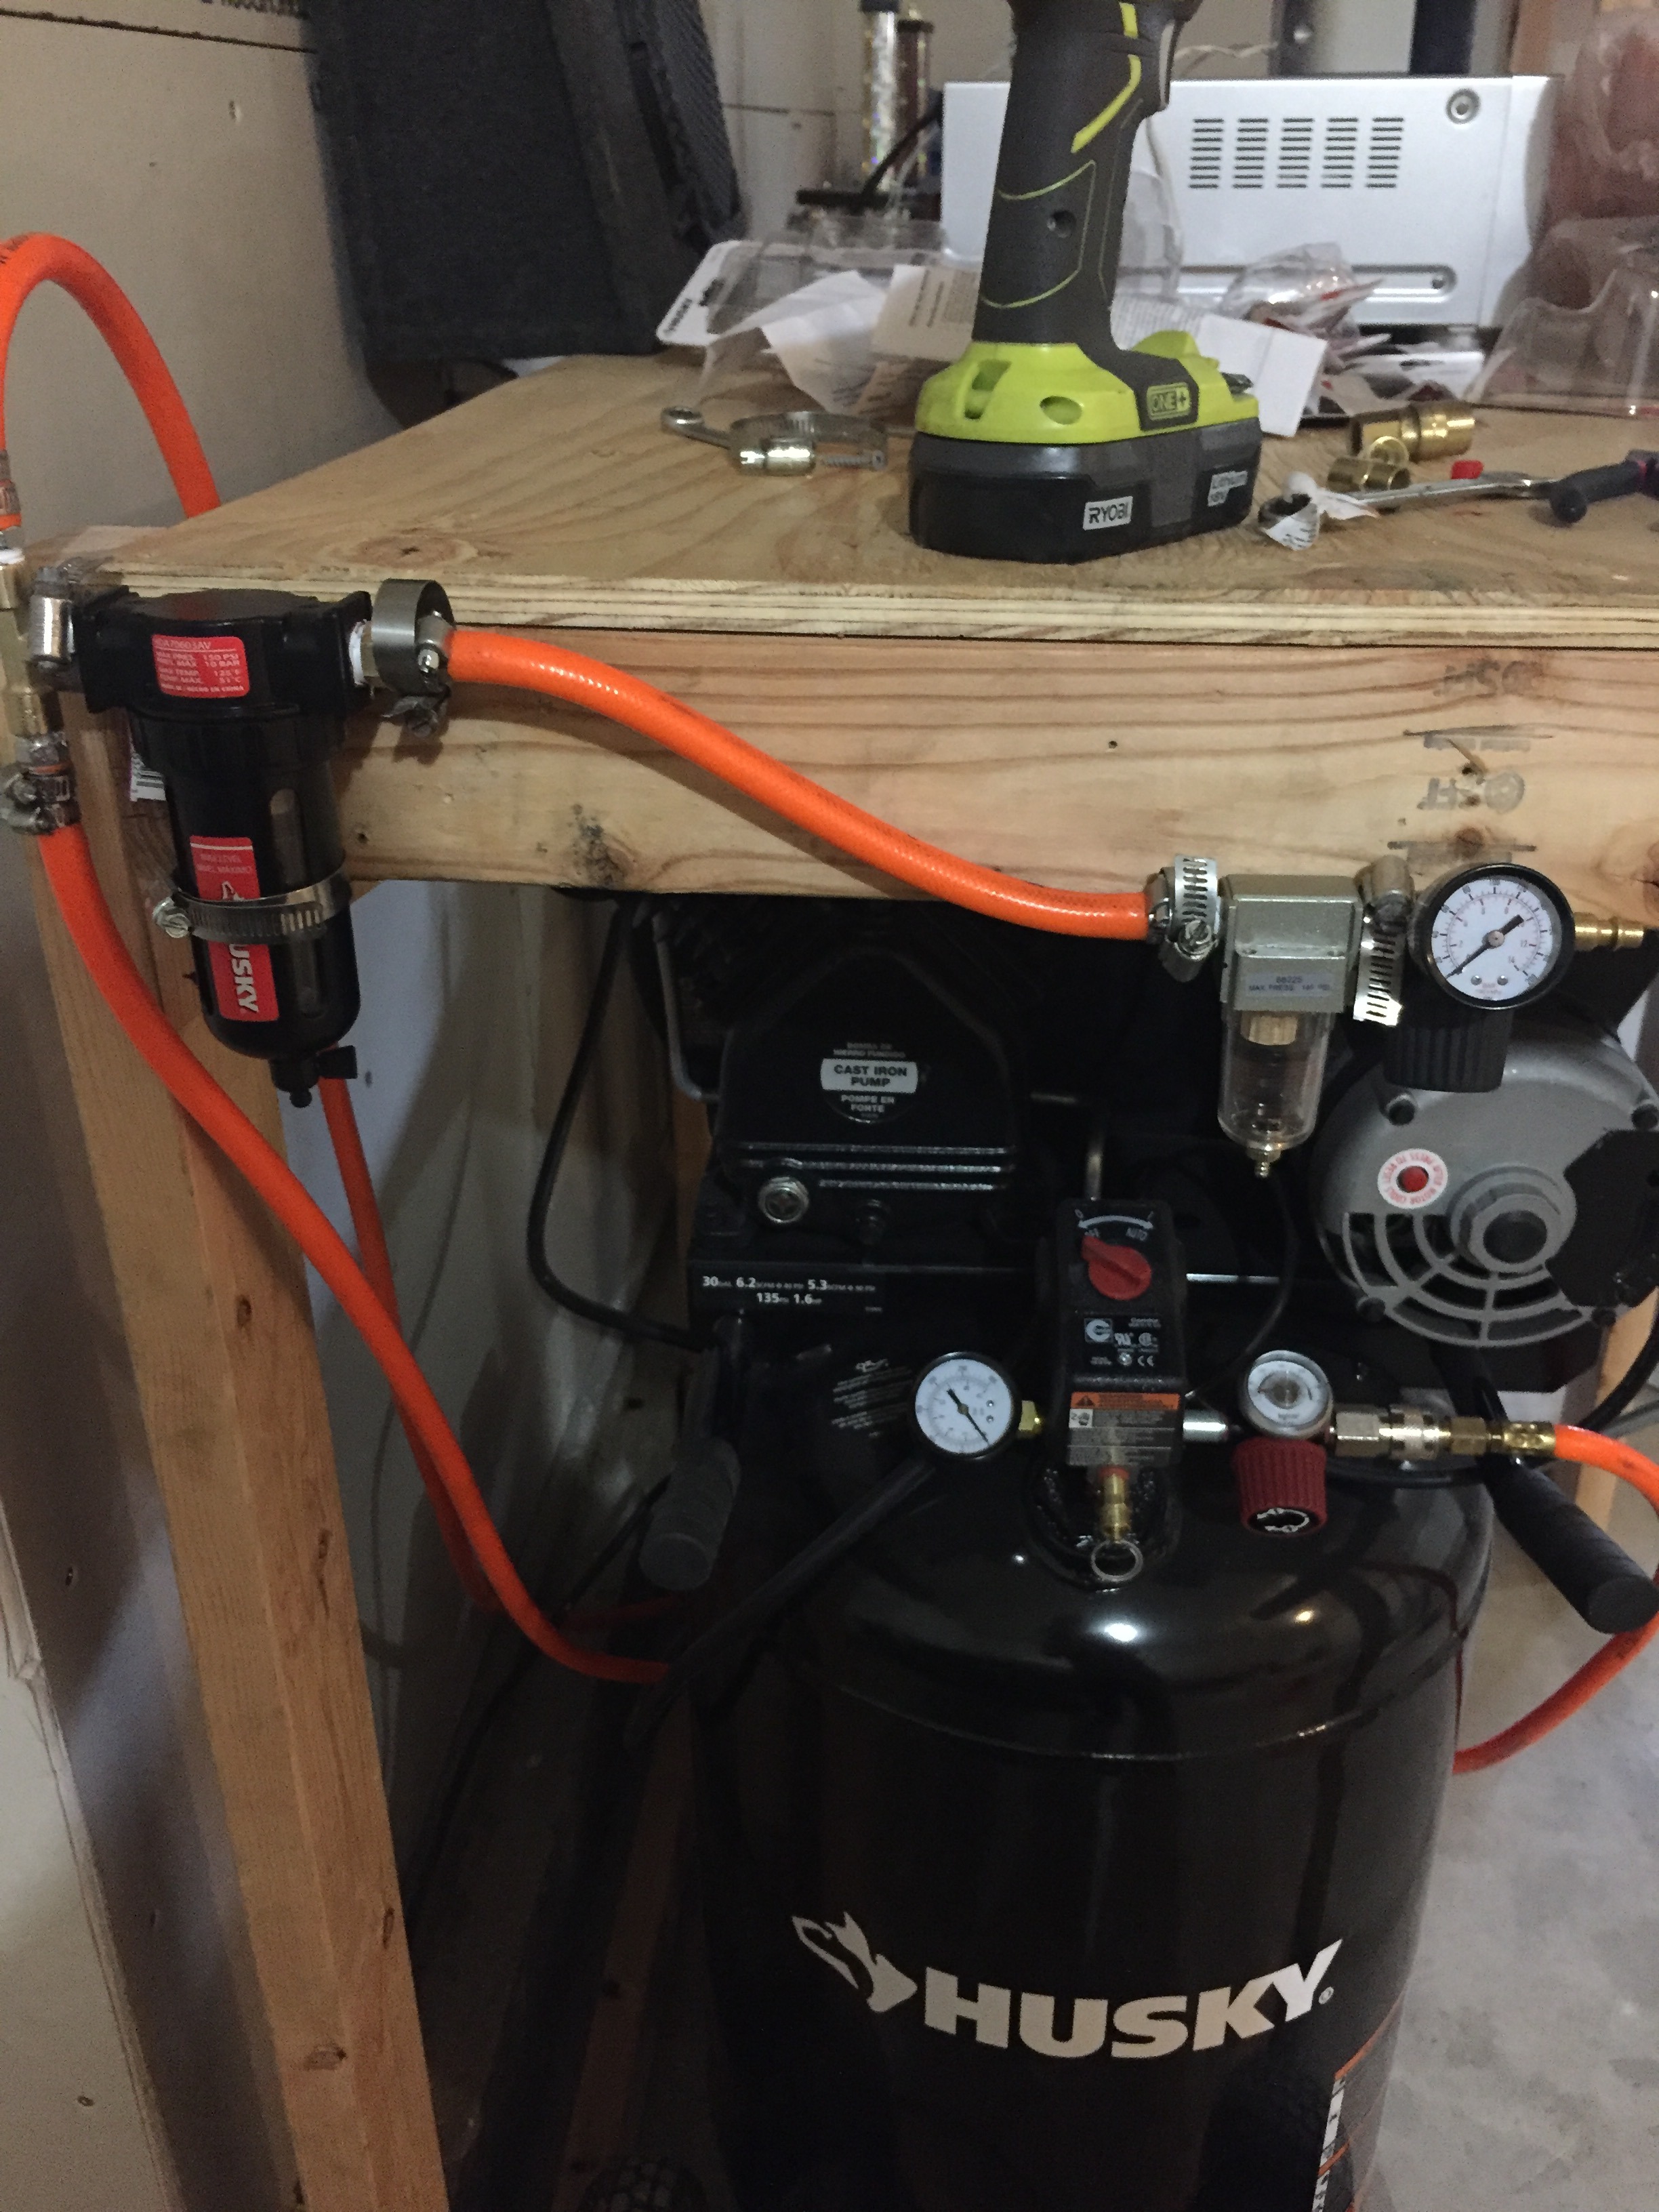
Made a shelf to put over my air compressors. The house I am renting doesn't have 220 ran to the garage, so I decided to run two compressors in parallel. This provides more than enough scfm for the future painting I plan on doing.
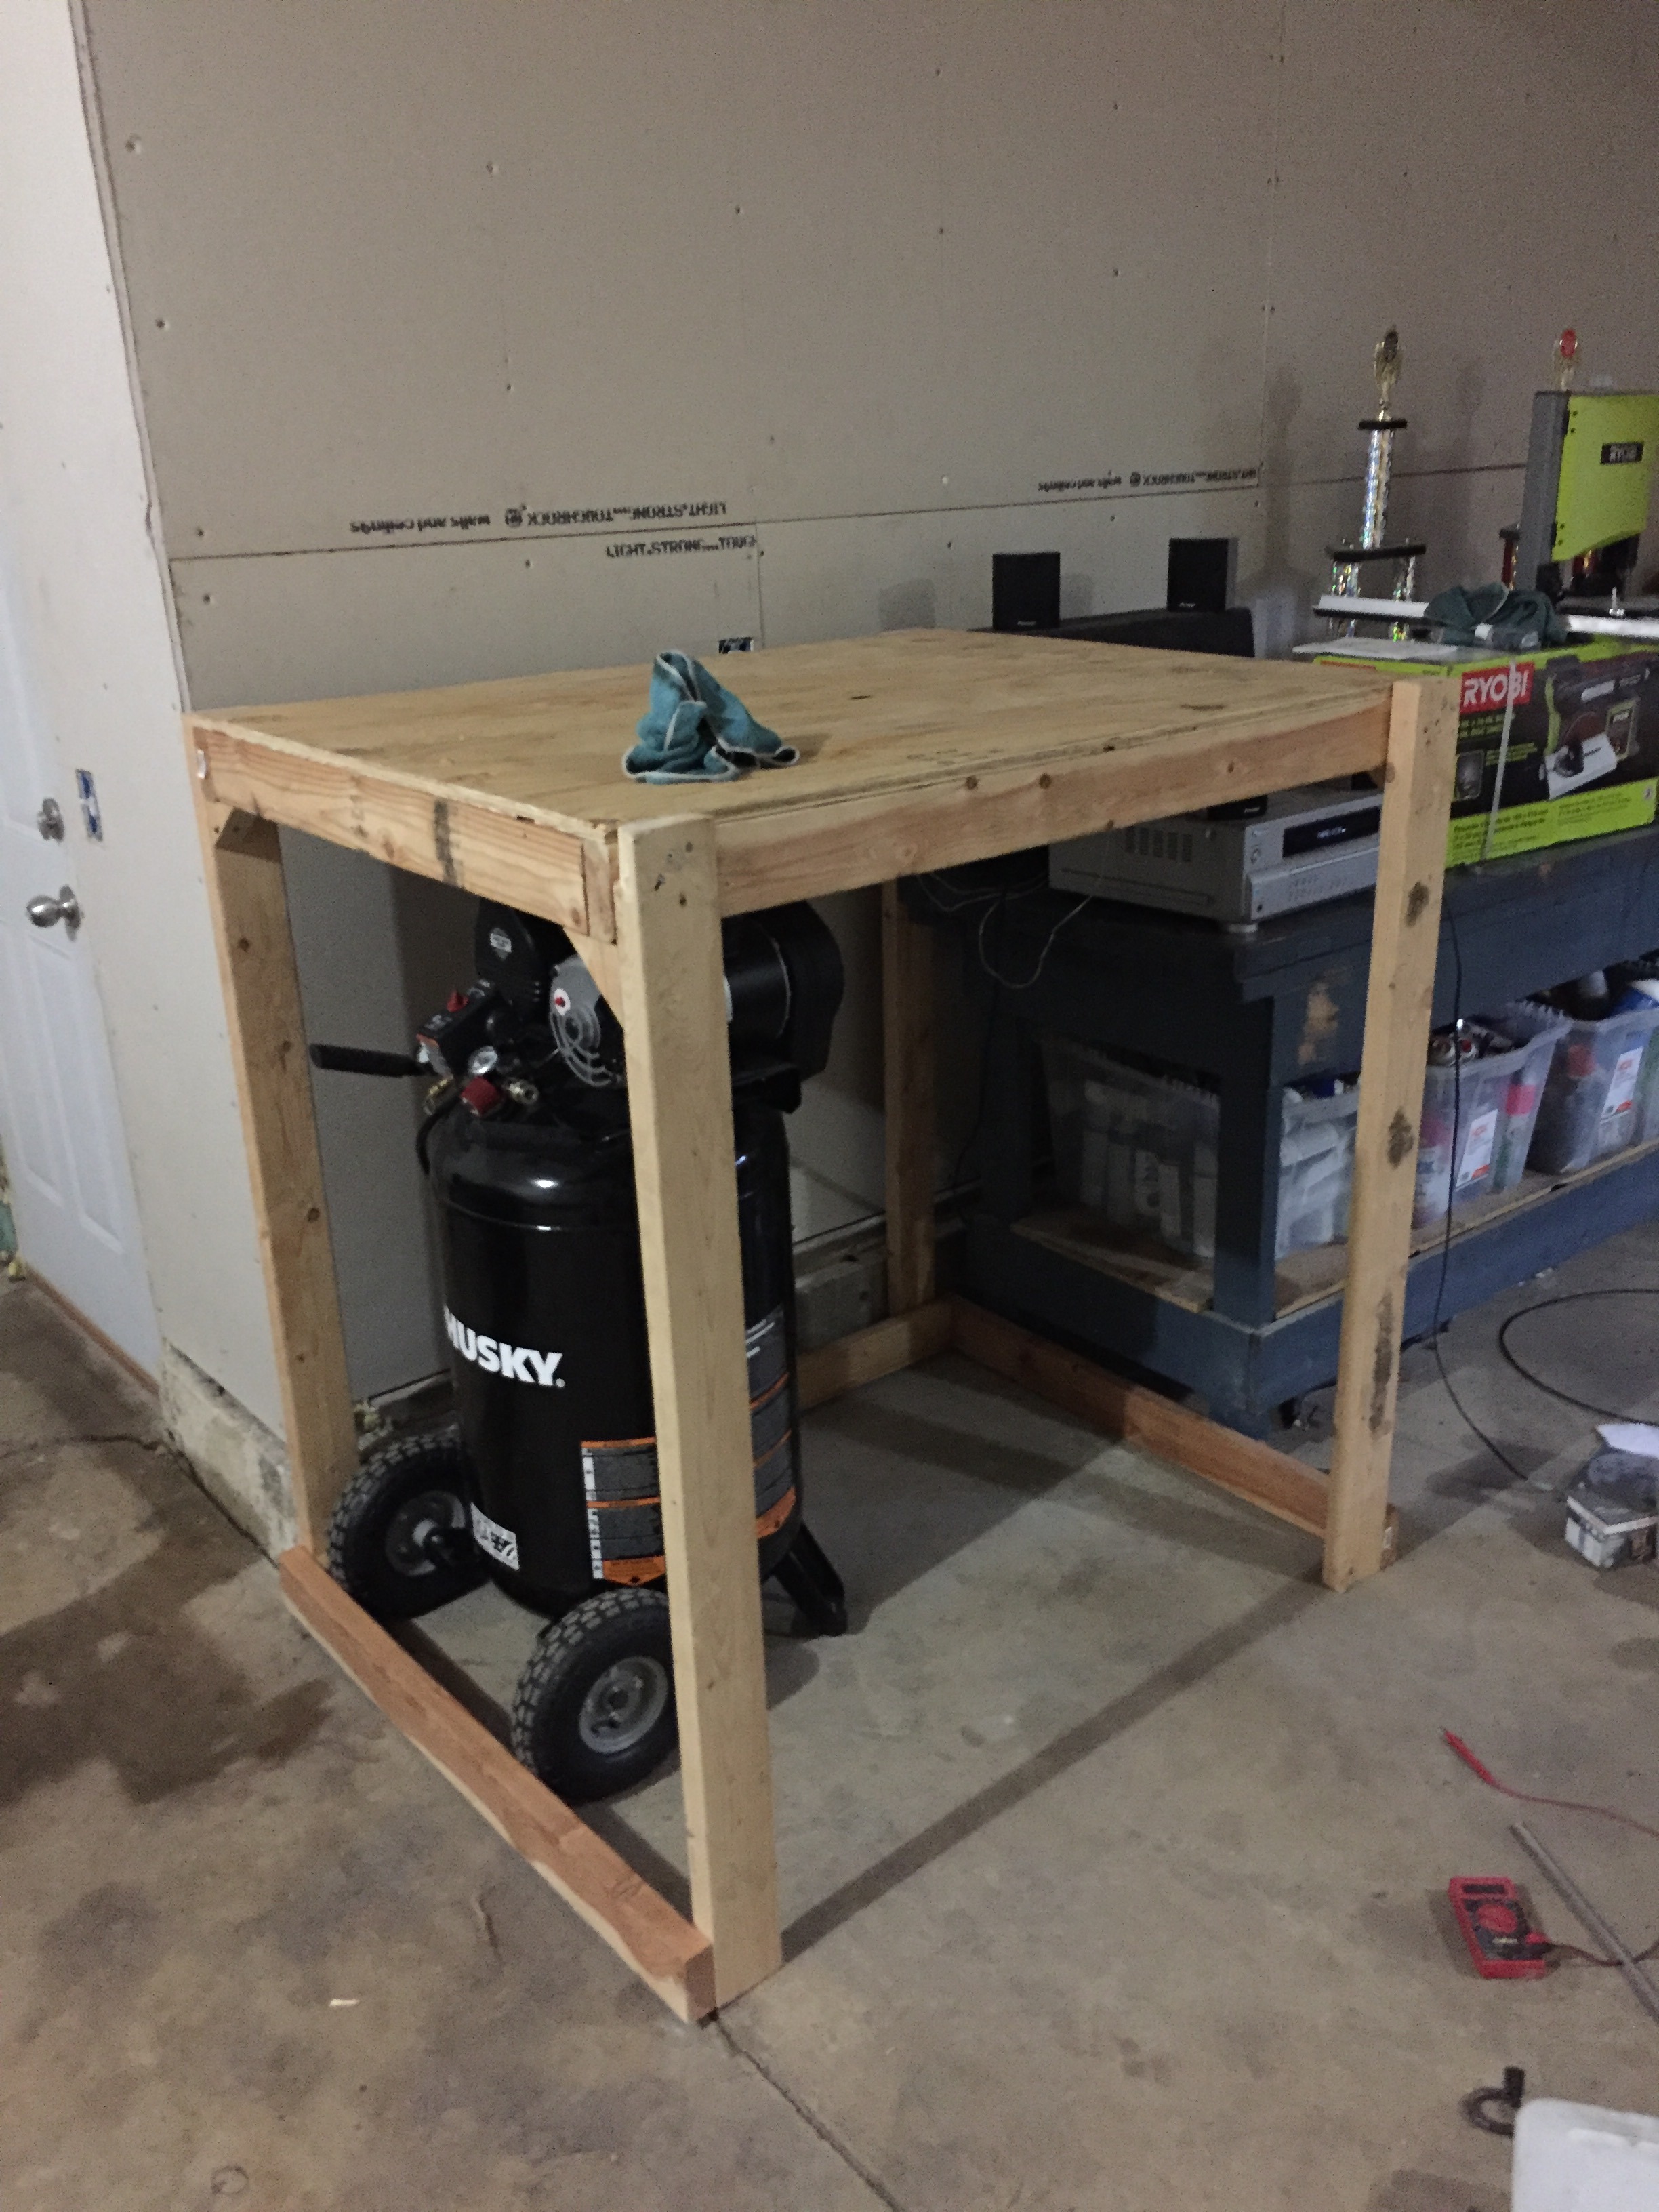
I have a regulator coming off of each air compressor to prevent each one from getting too much air in the tank, then they tee into the large air/water filter, then go into a smaller air/water filter, and then to the final regulator. Once I start painting I will likely run one more regulator/filter right off of the gun. I really don't want to mess up the paint lol.
And all organized
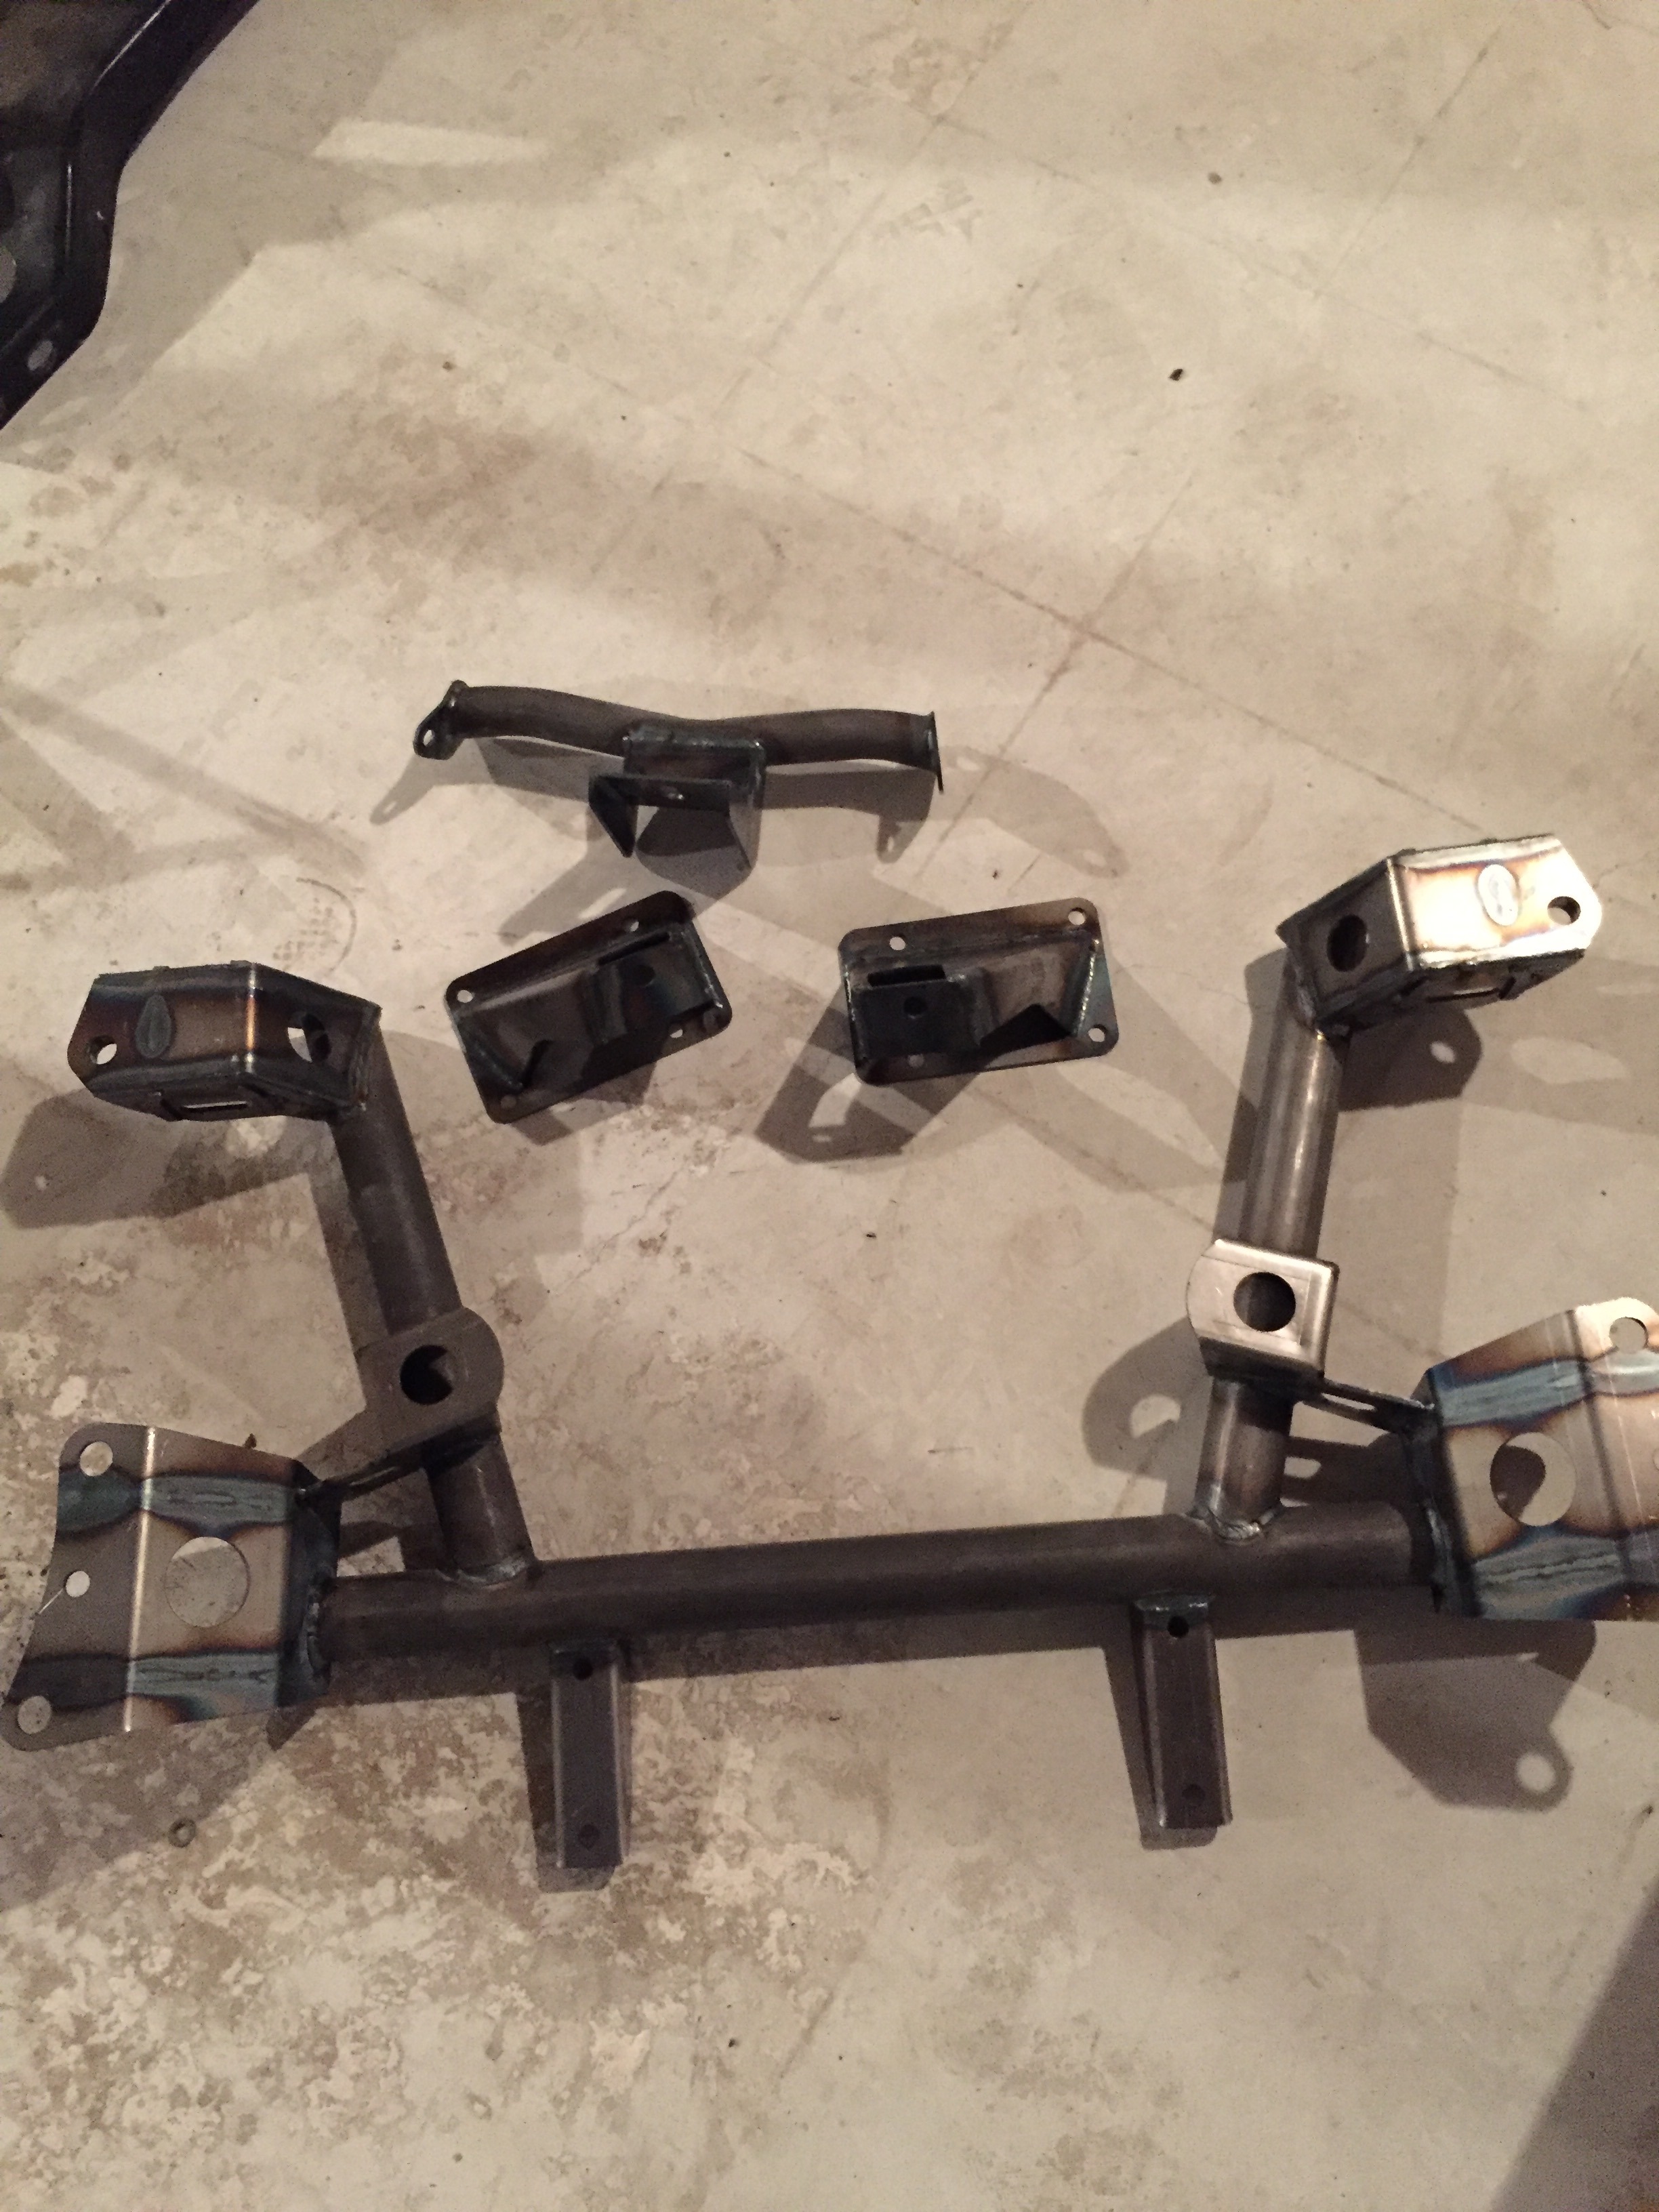
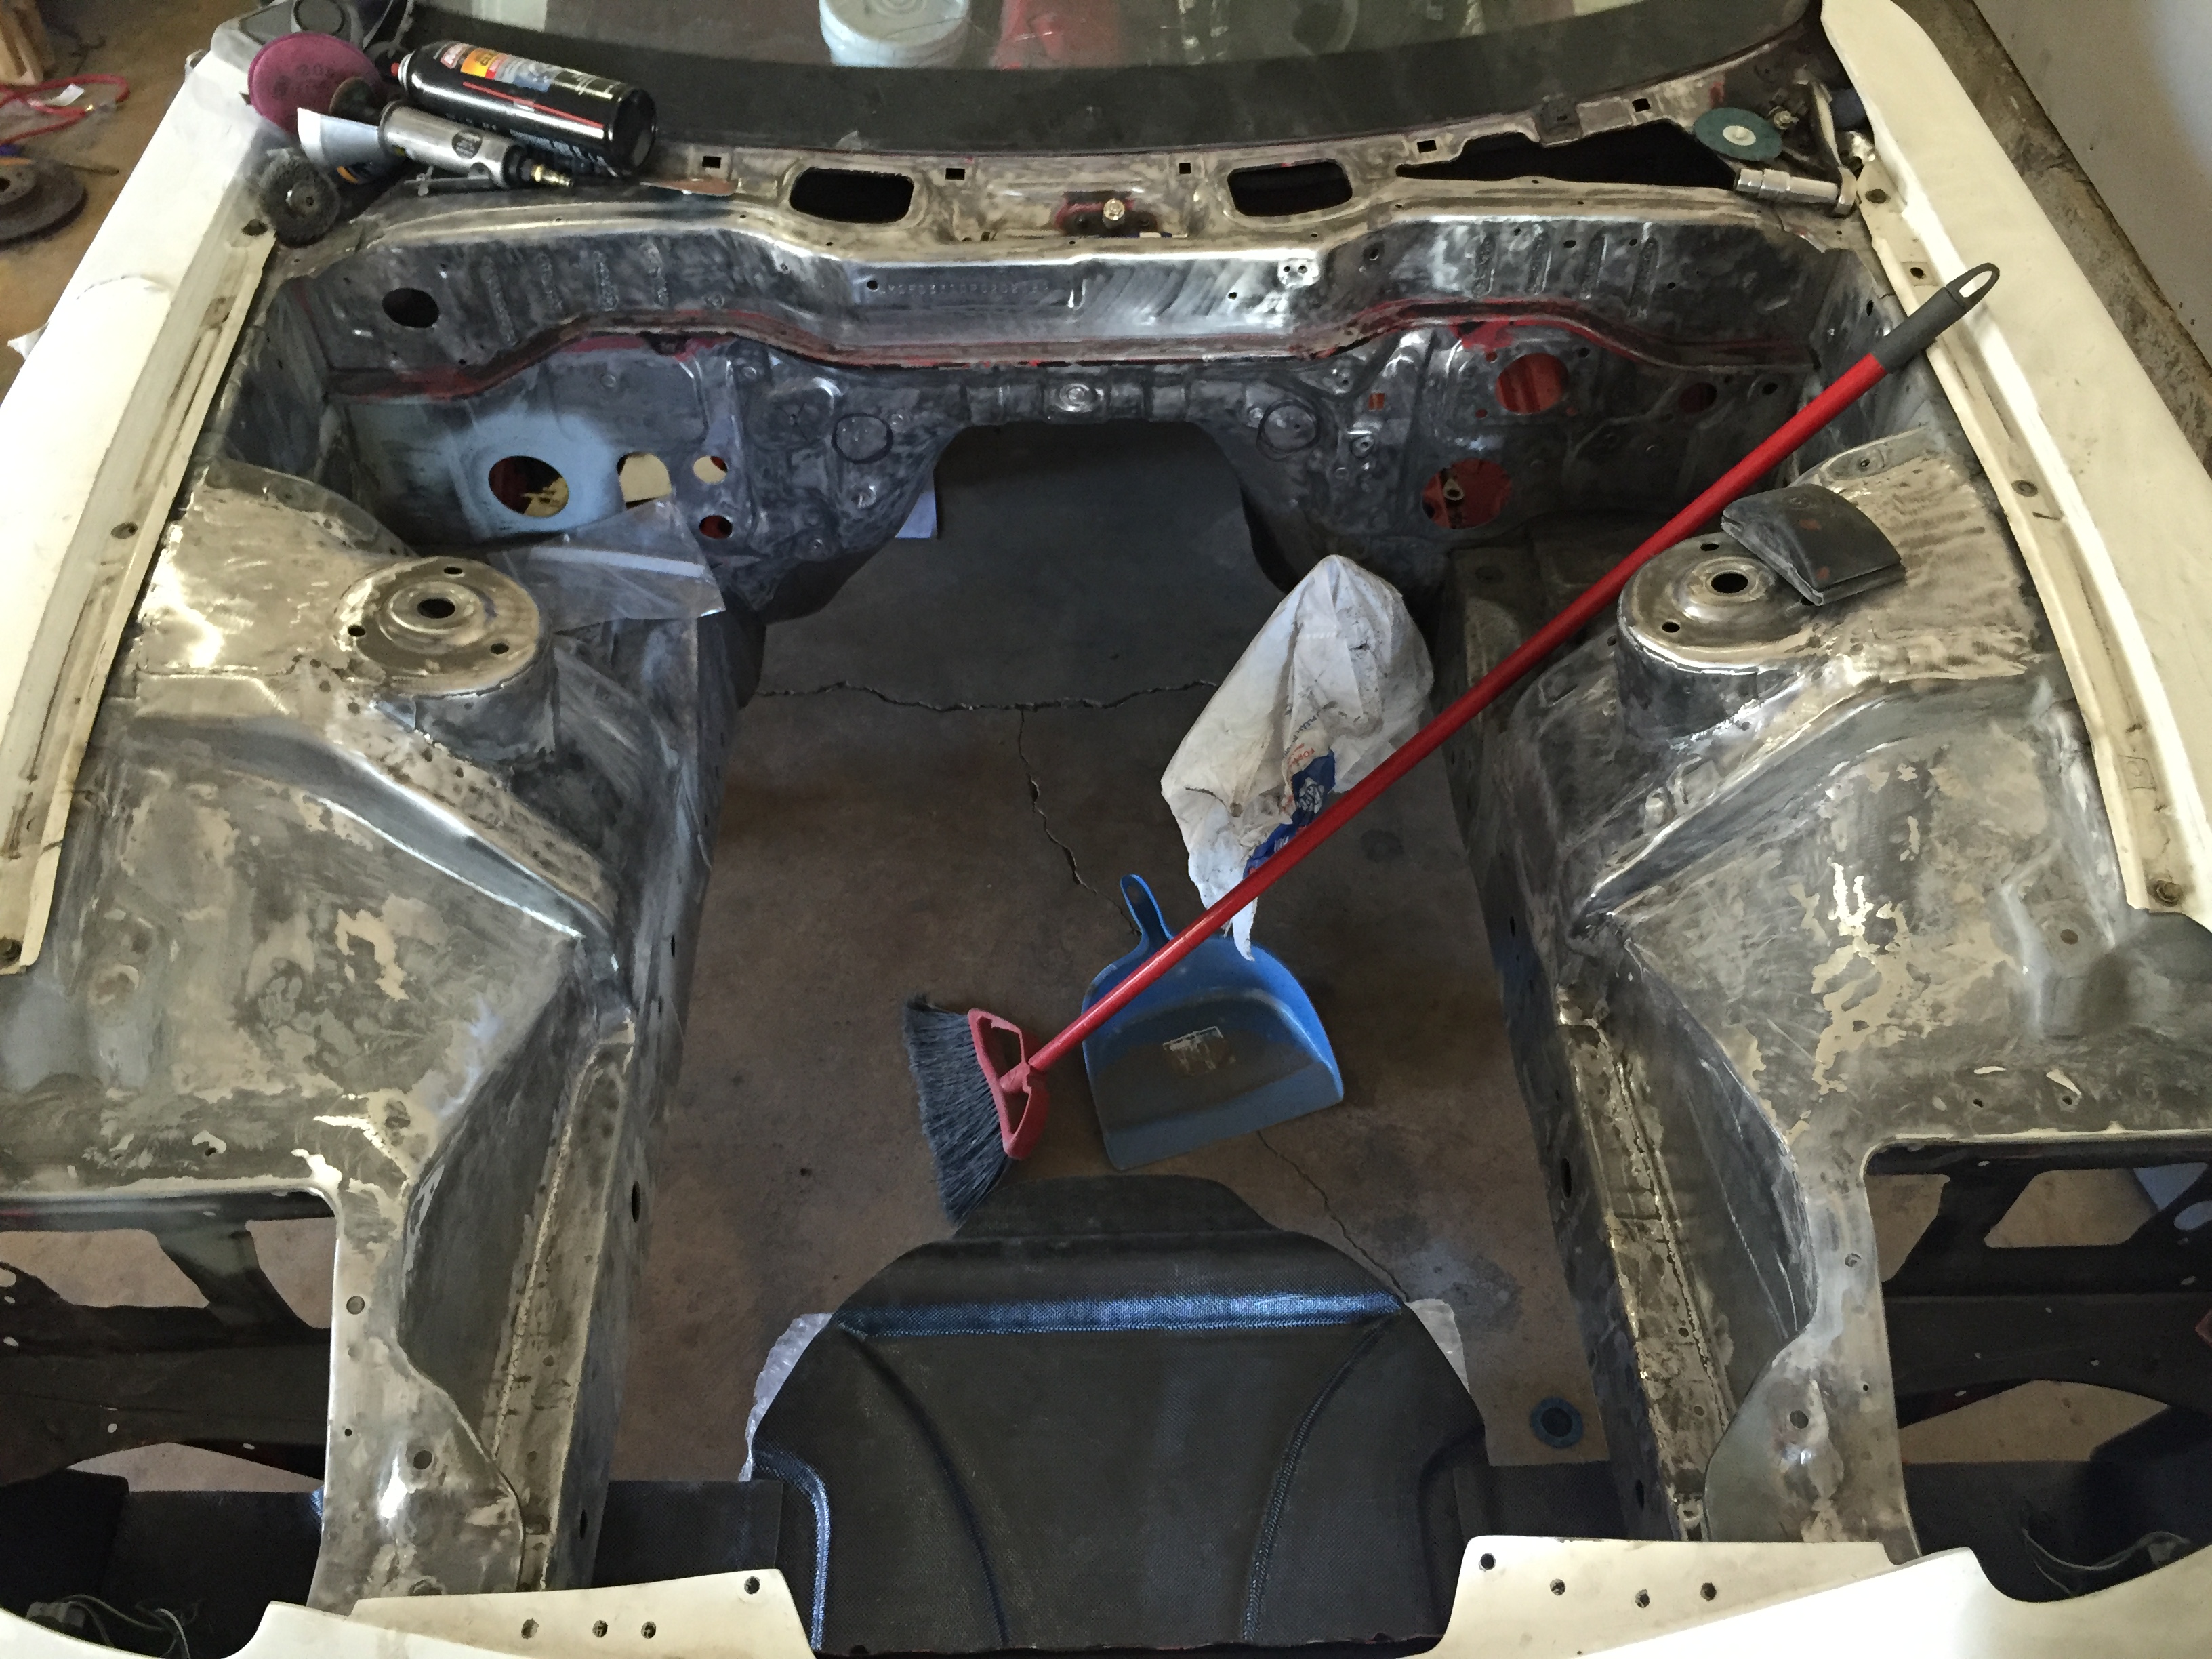
So anyhow, onto the car. First, I'll start with the engine bay progress. I'll keep all of these in order to give you an idea of how the progress went.
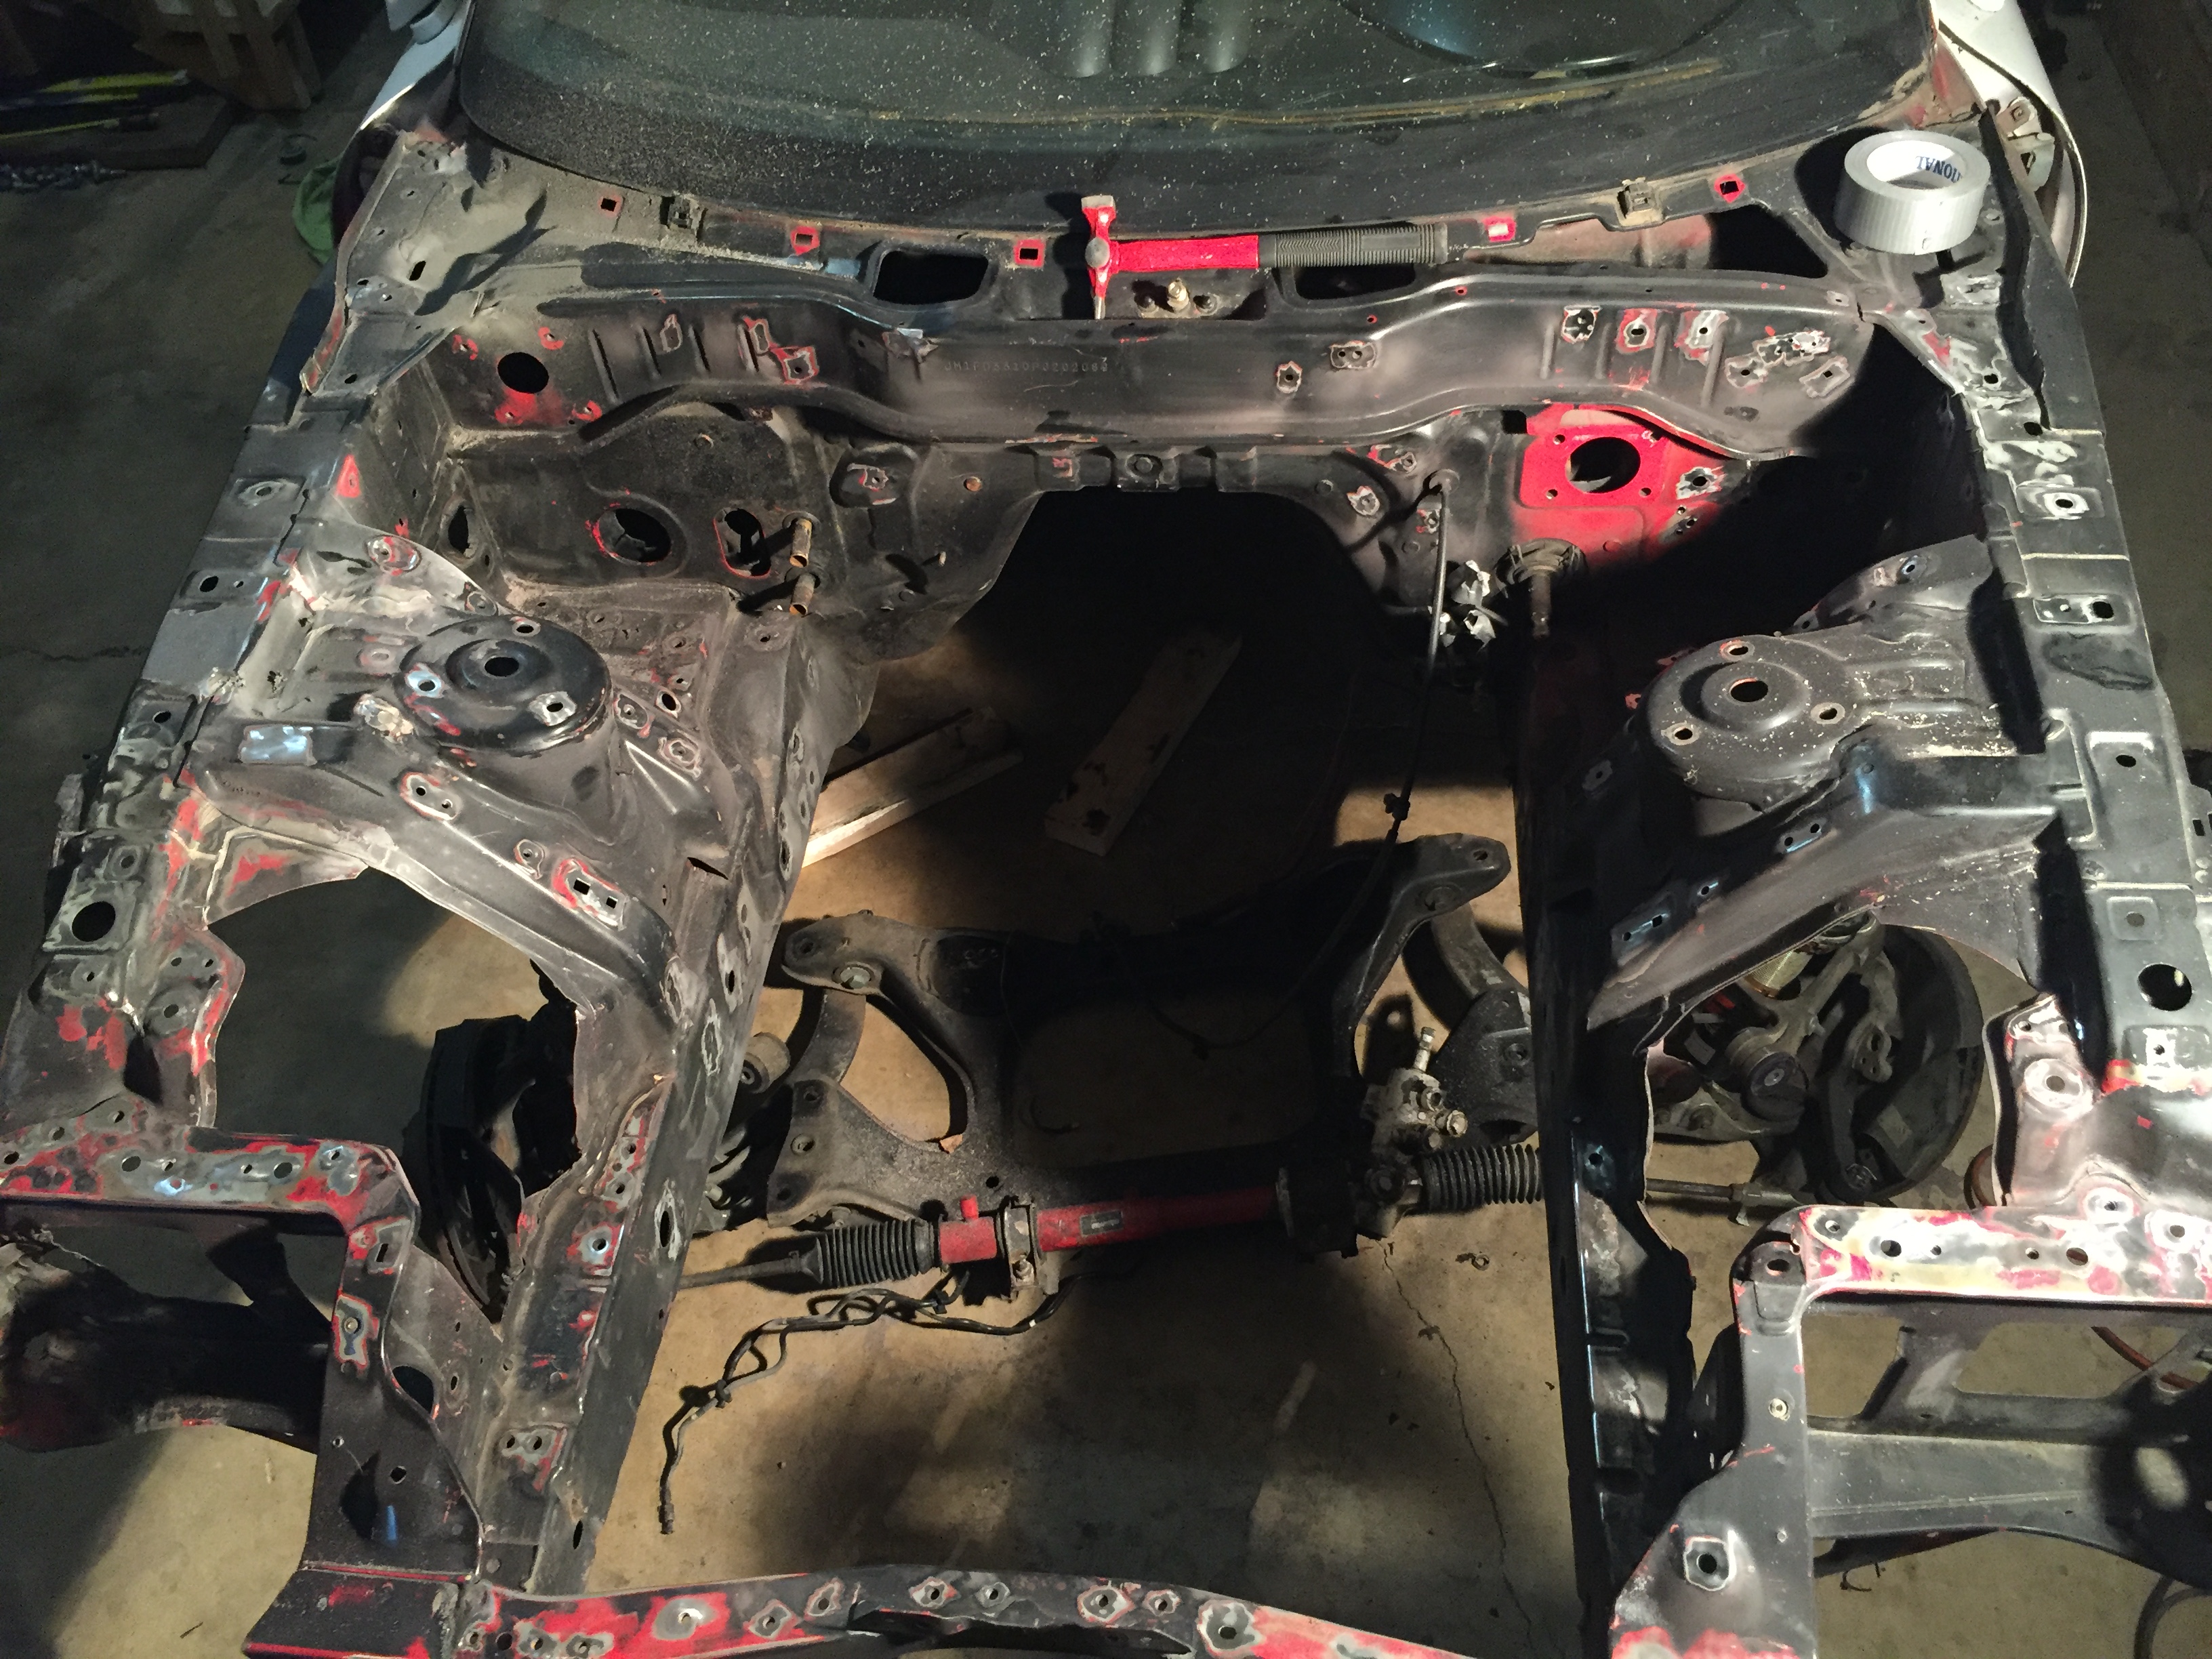
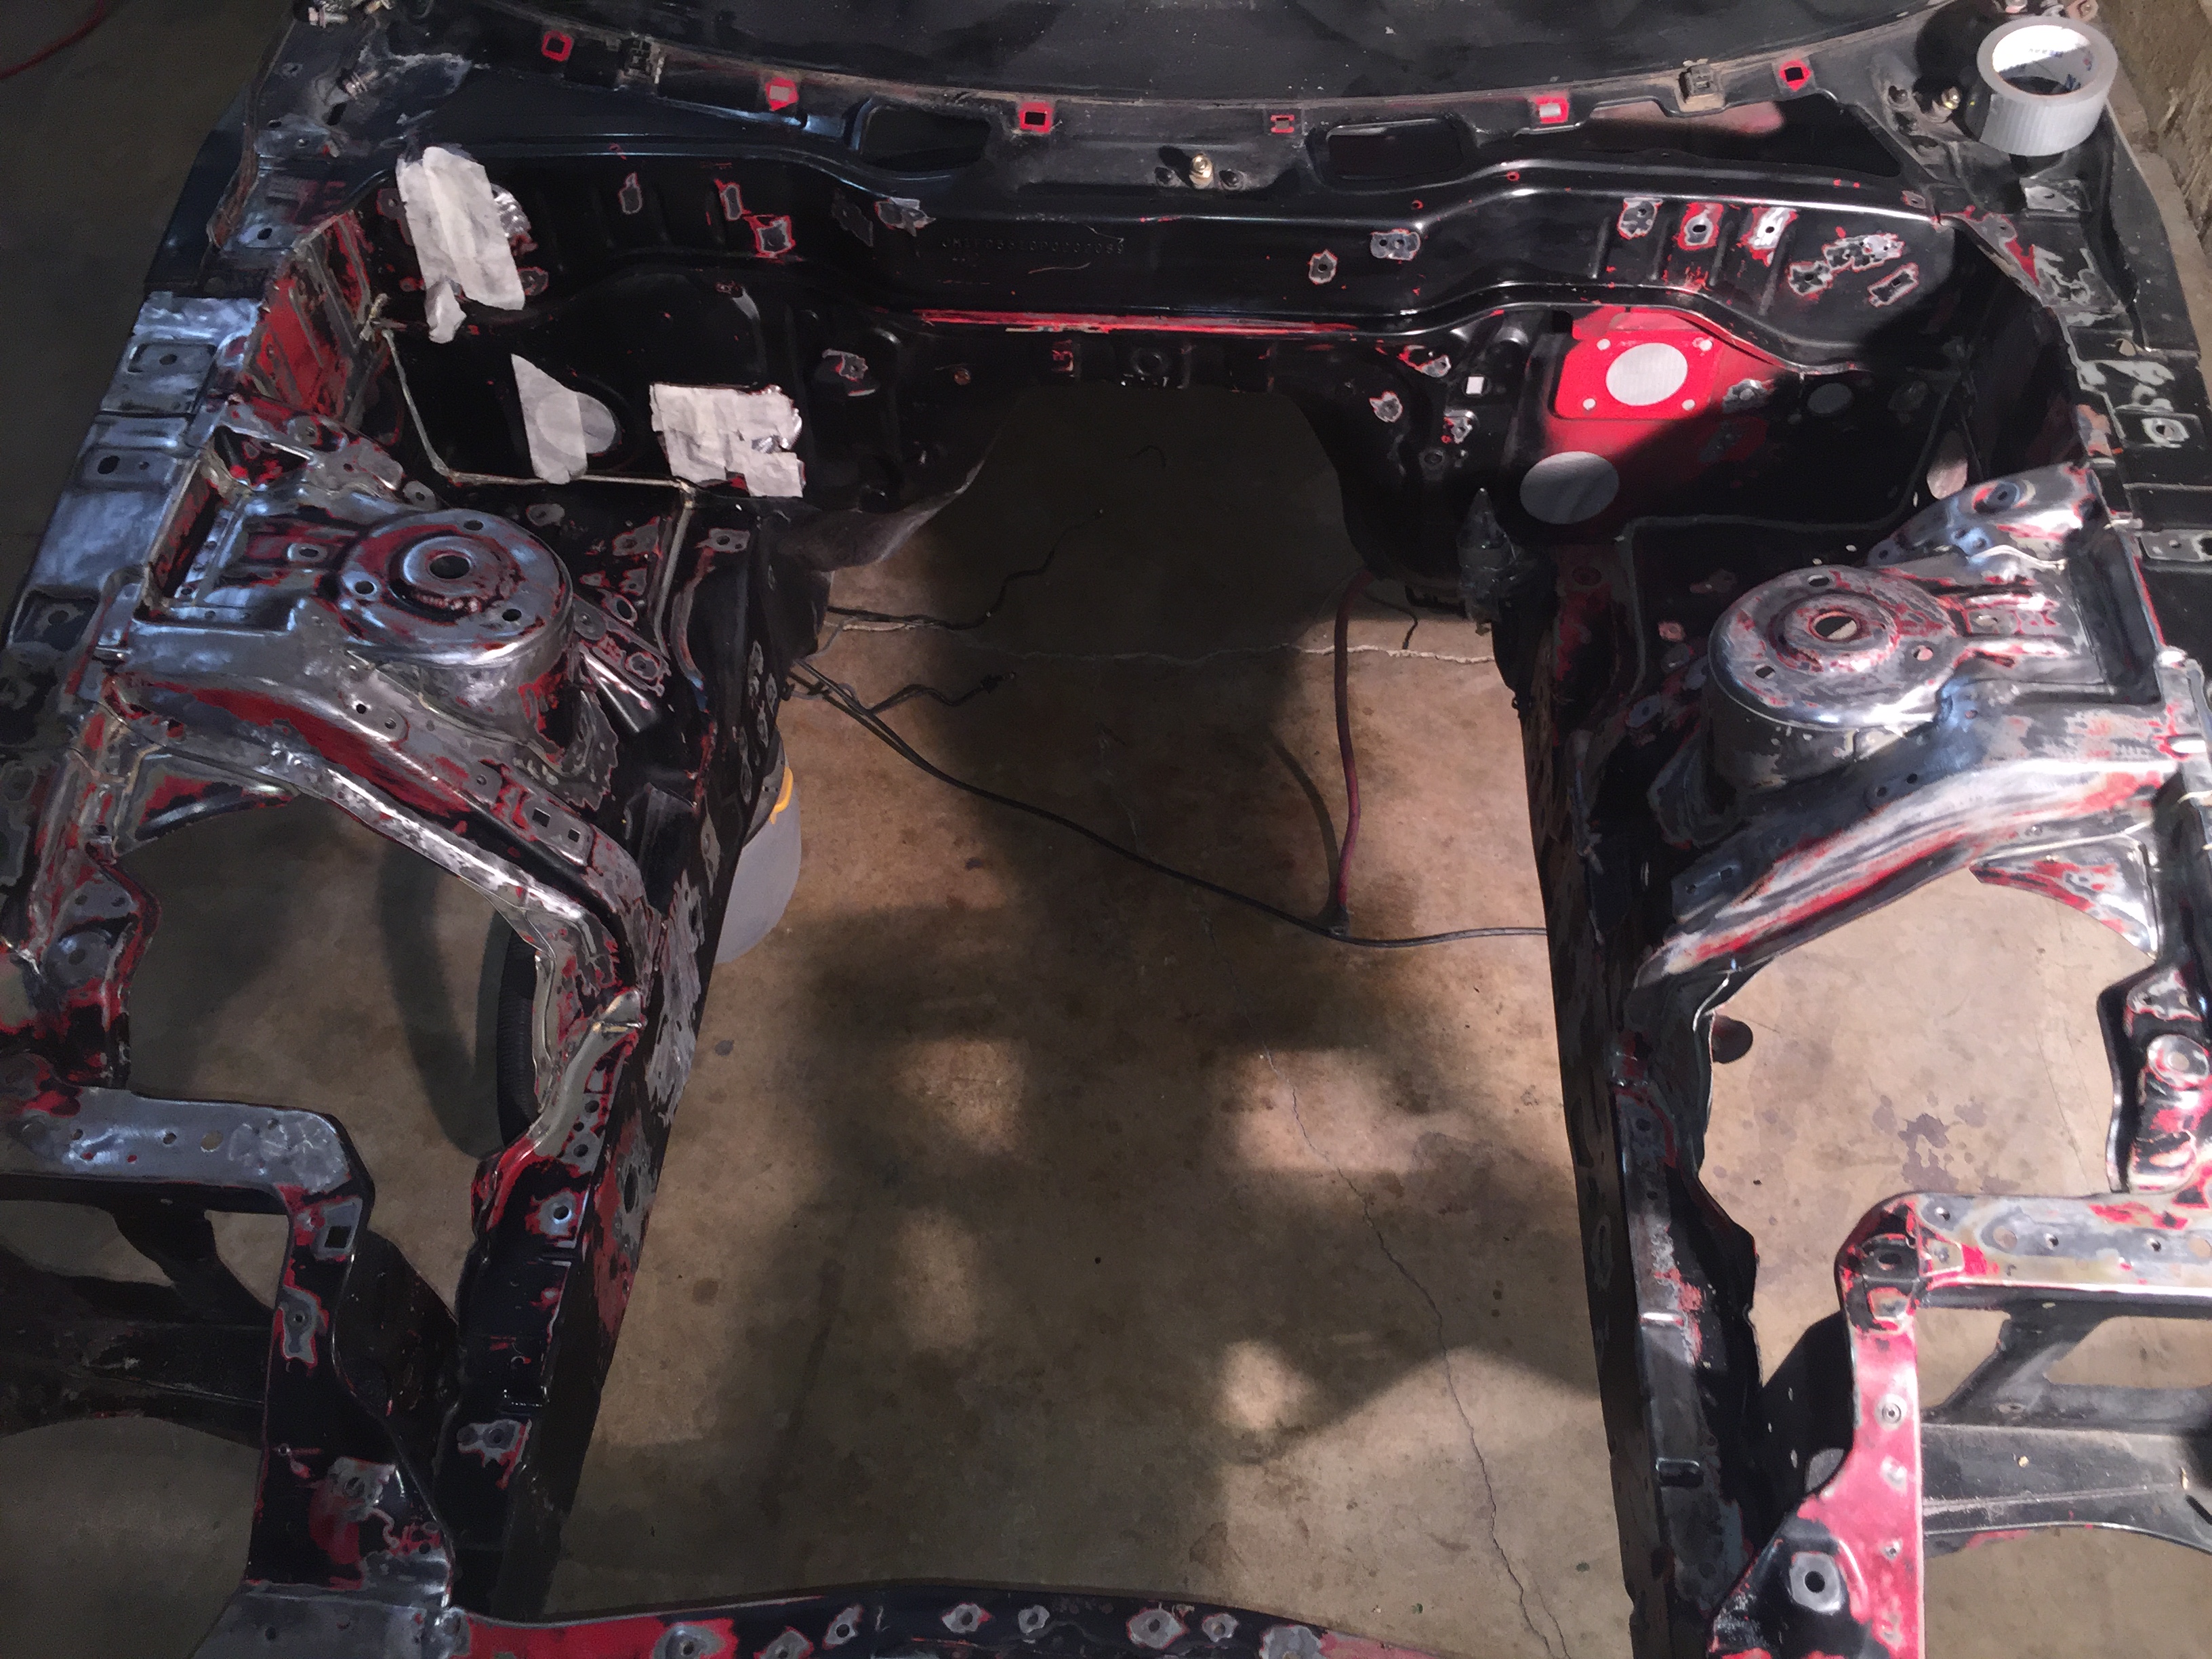
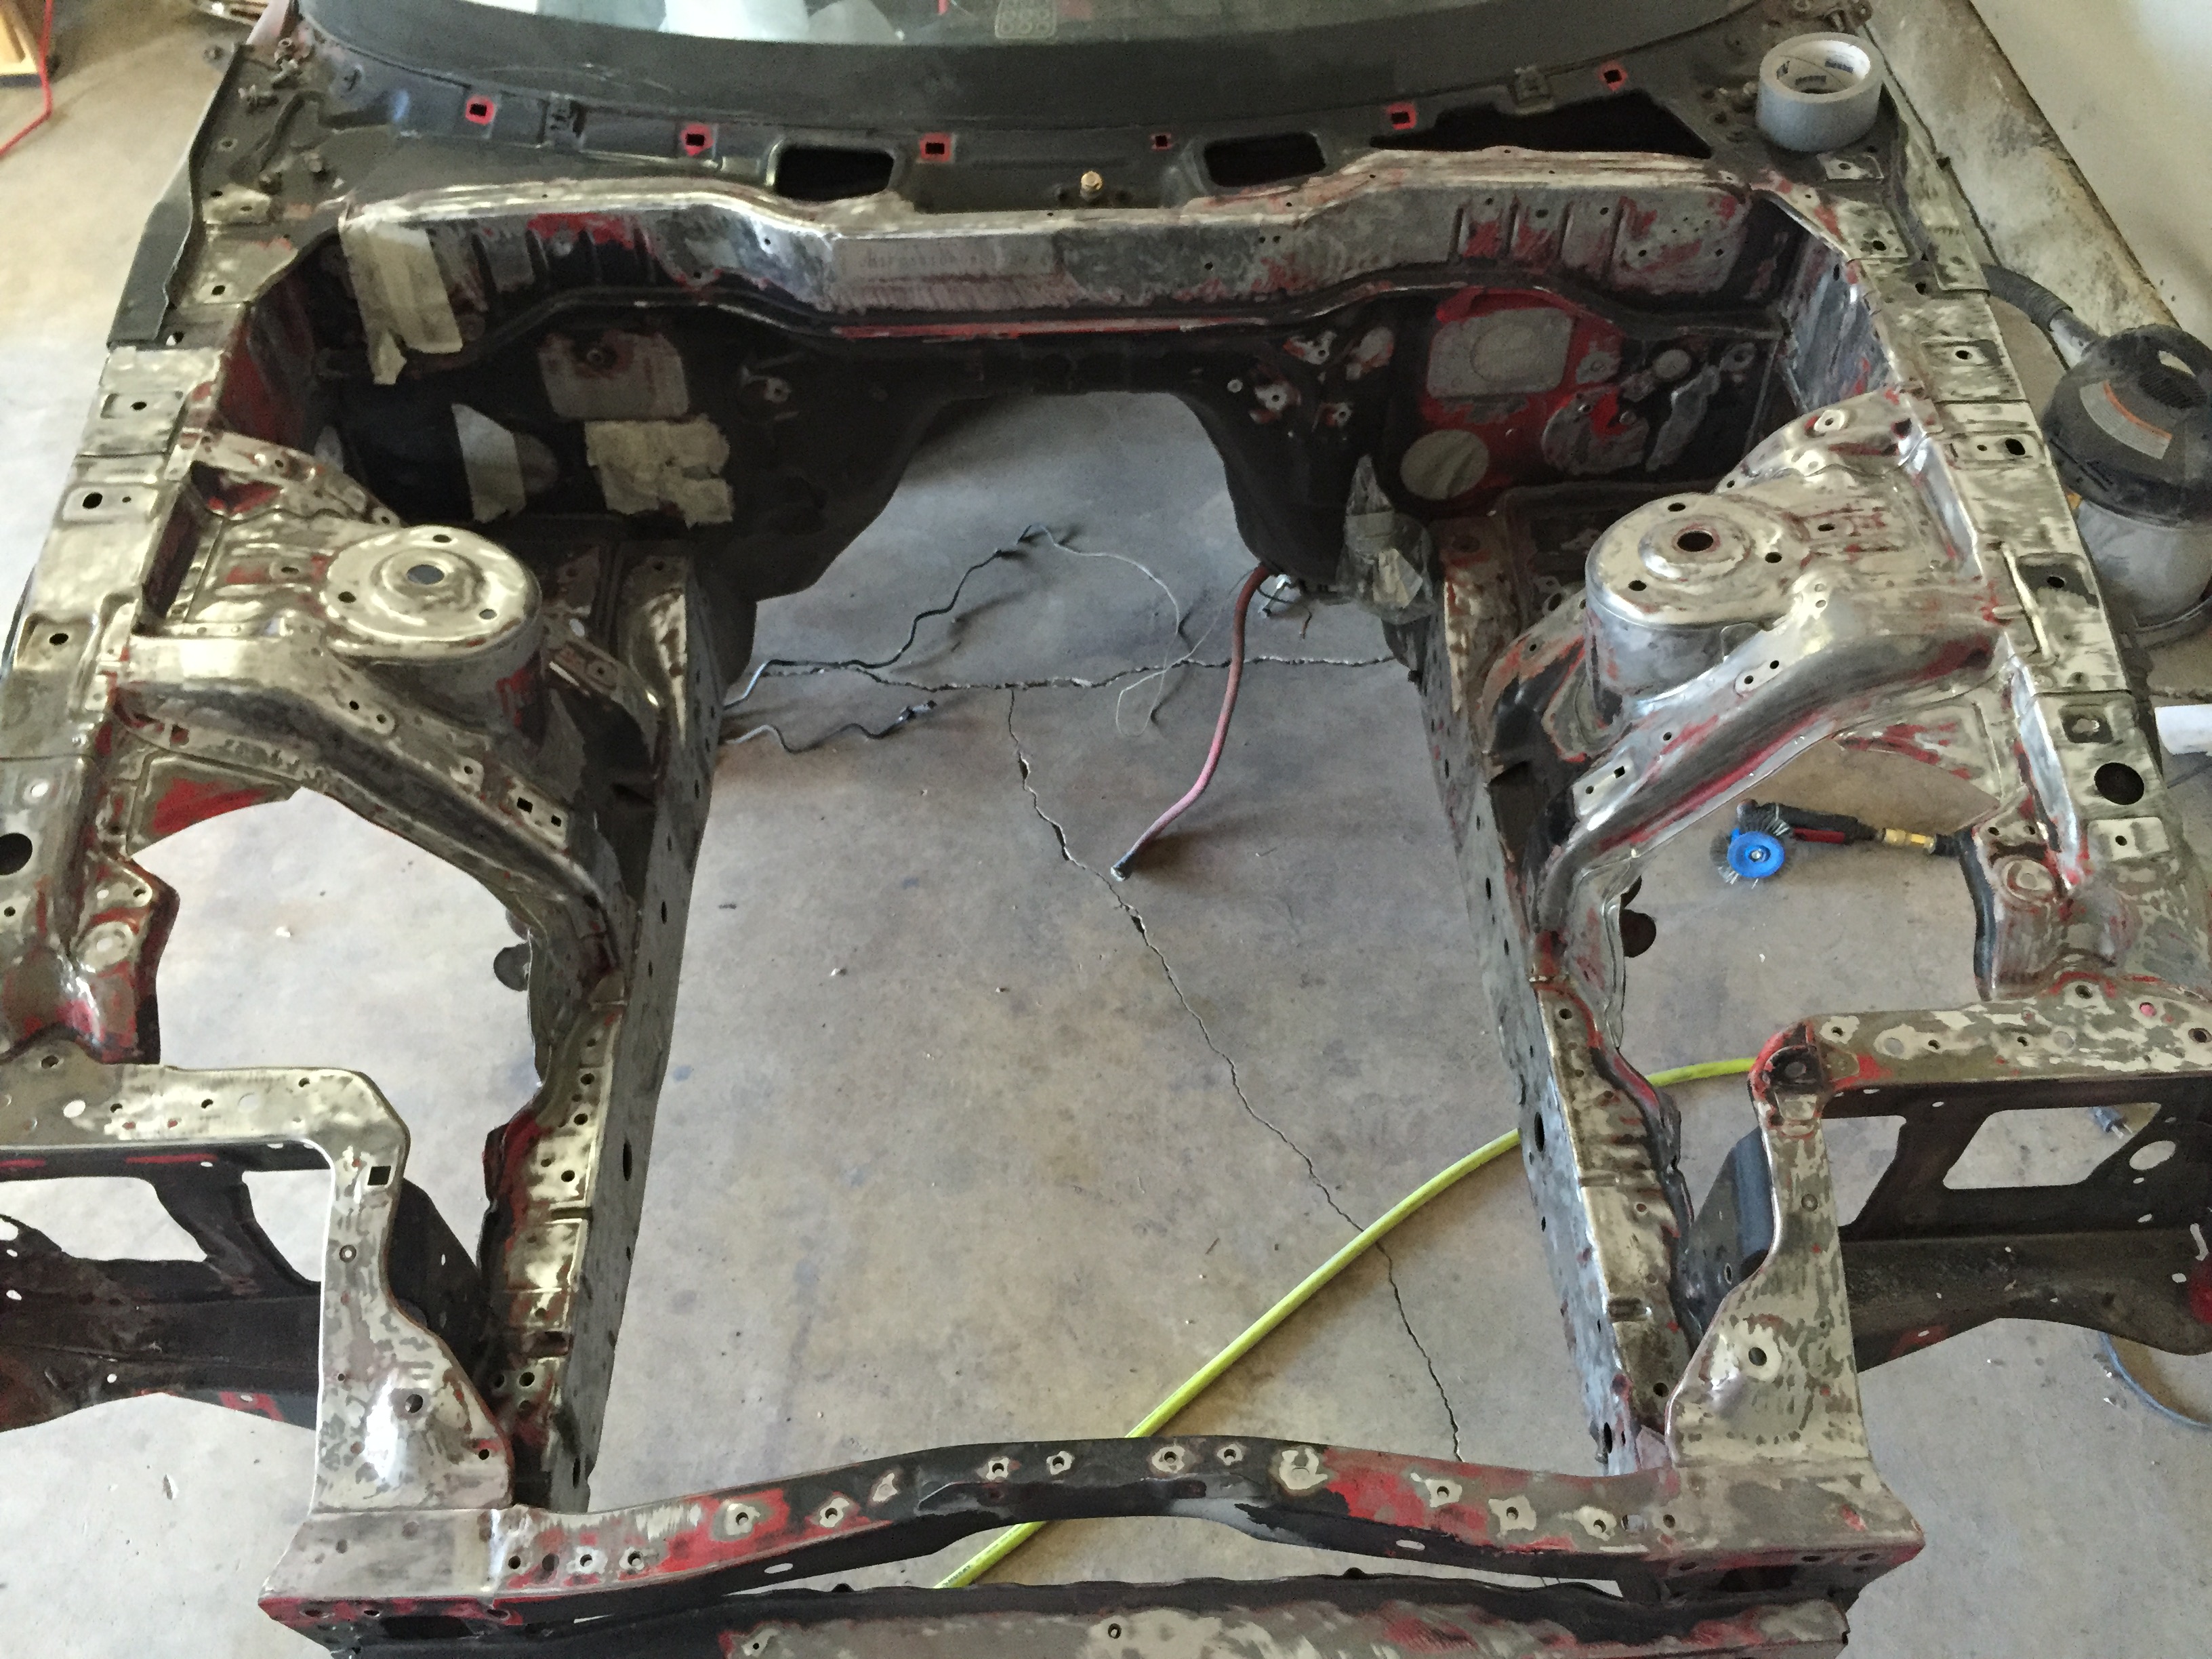
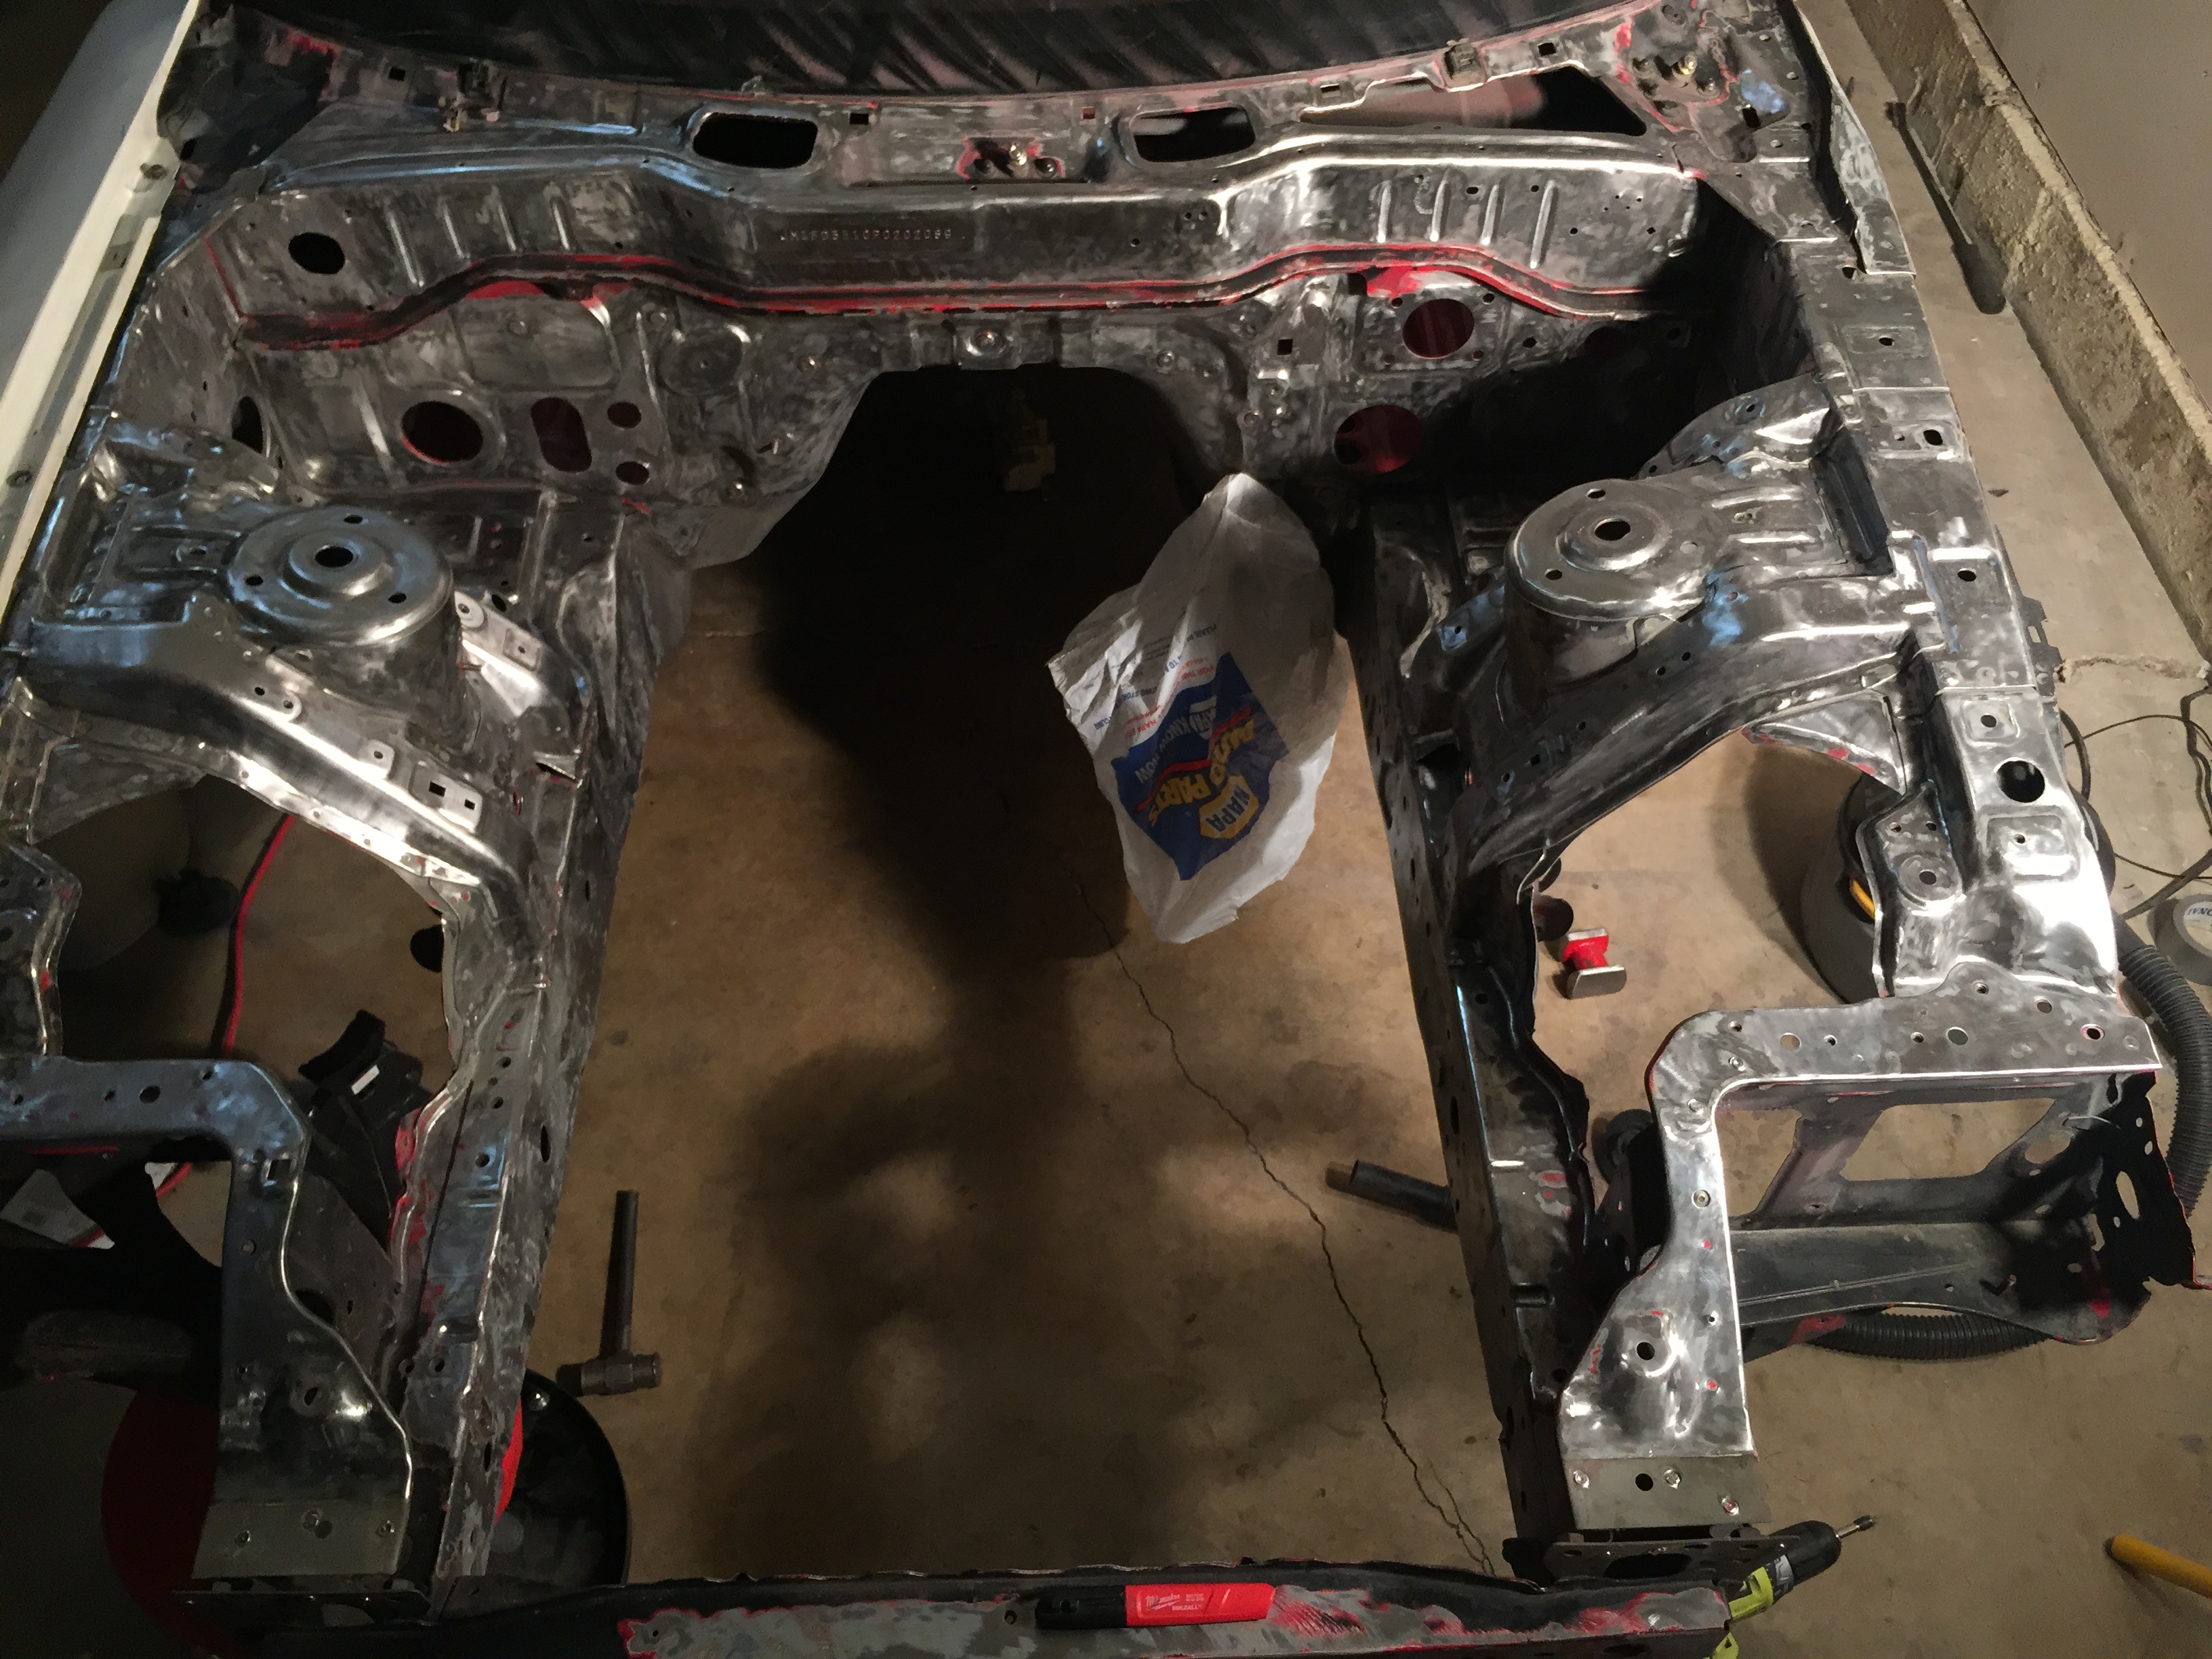
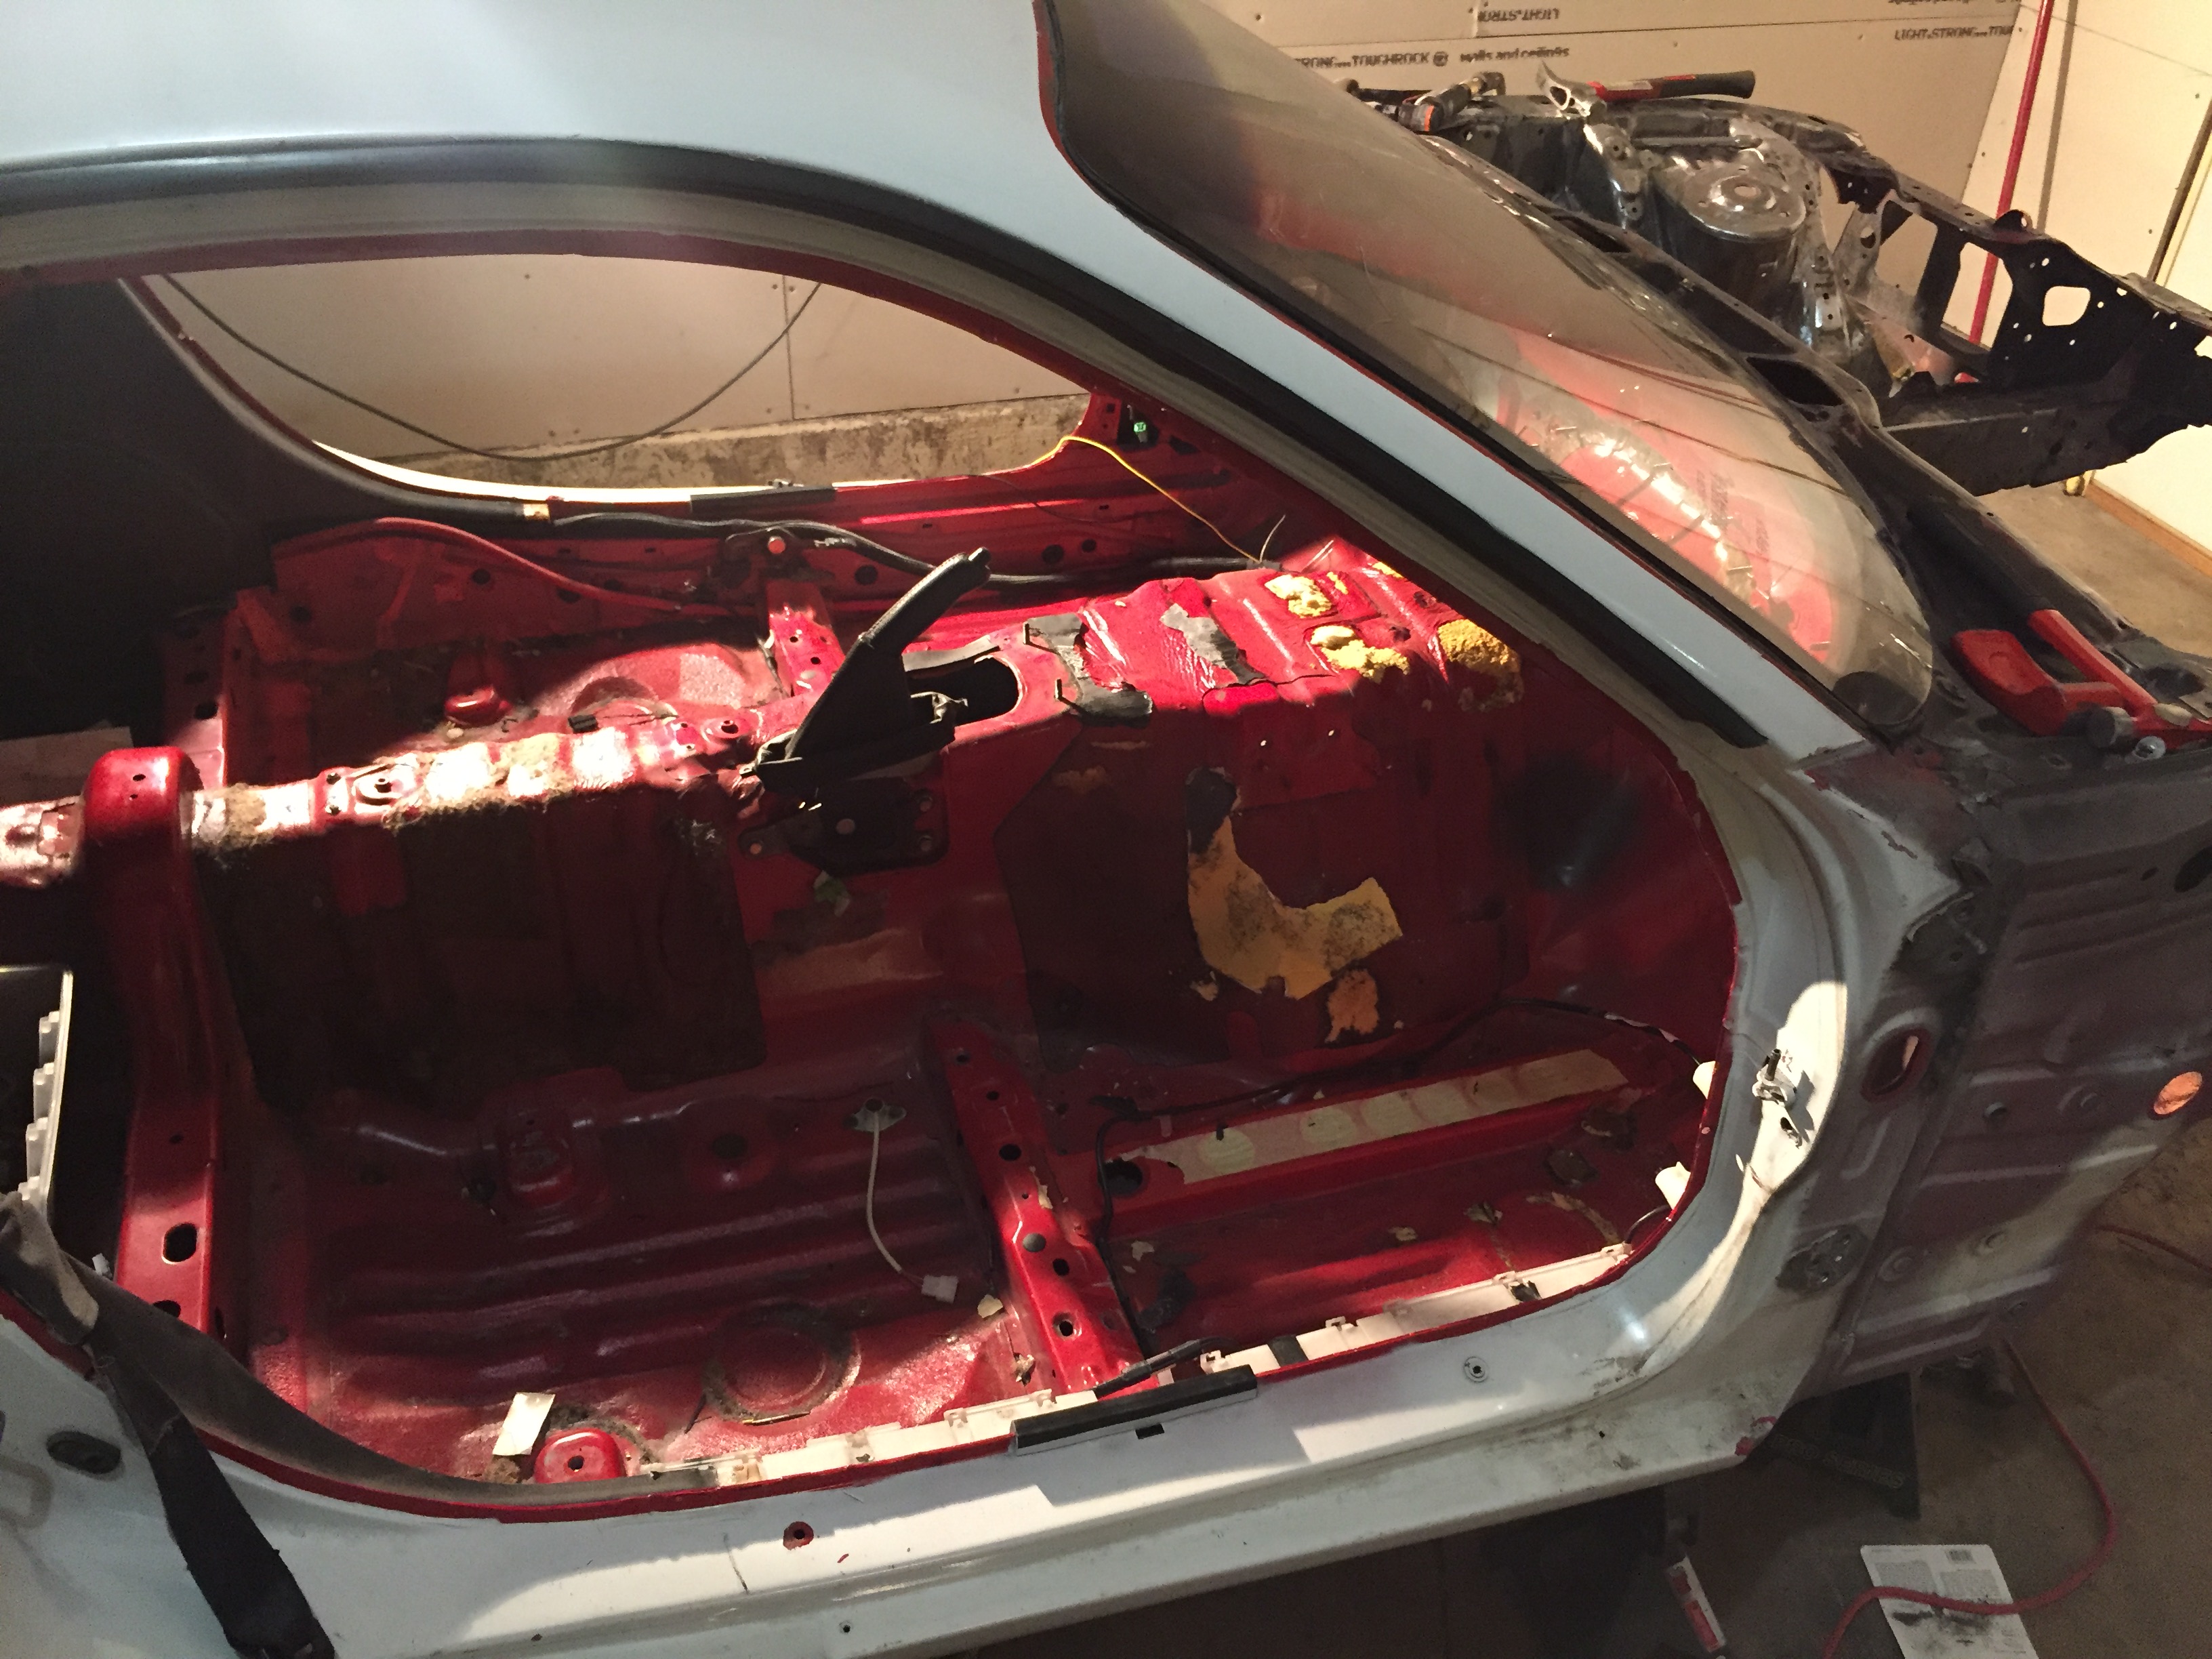
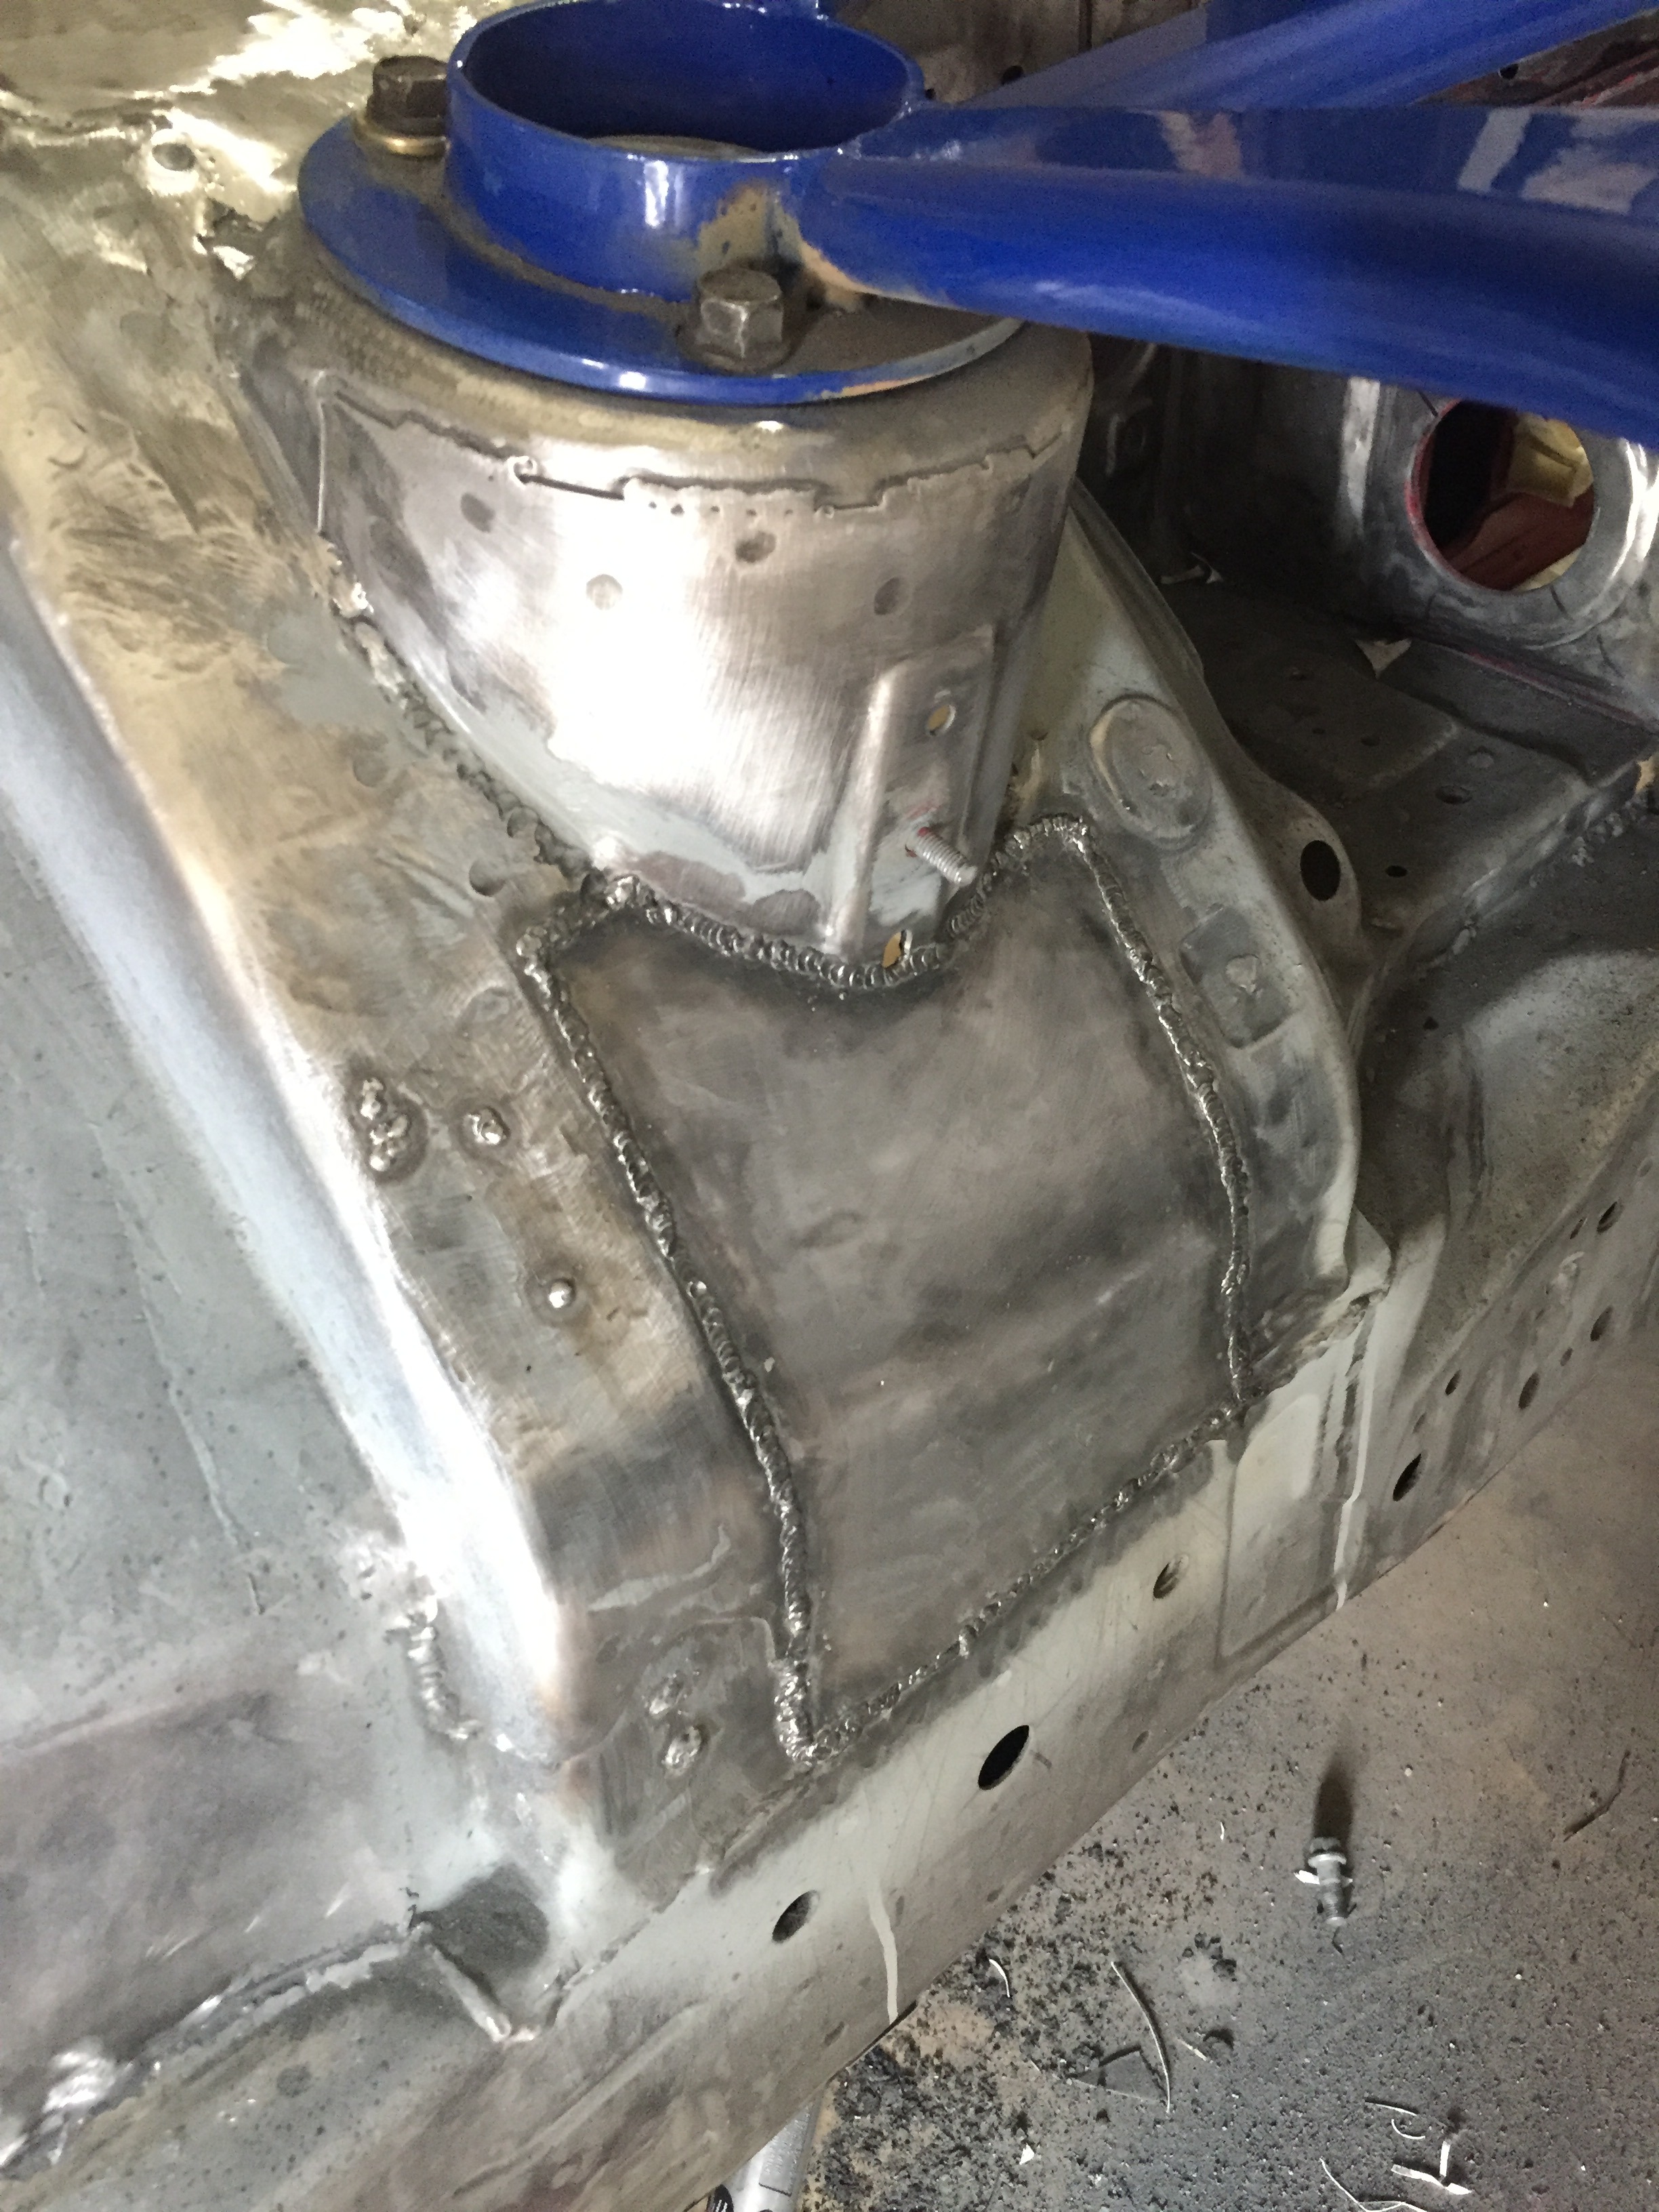
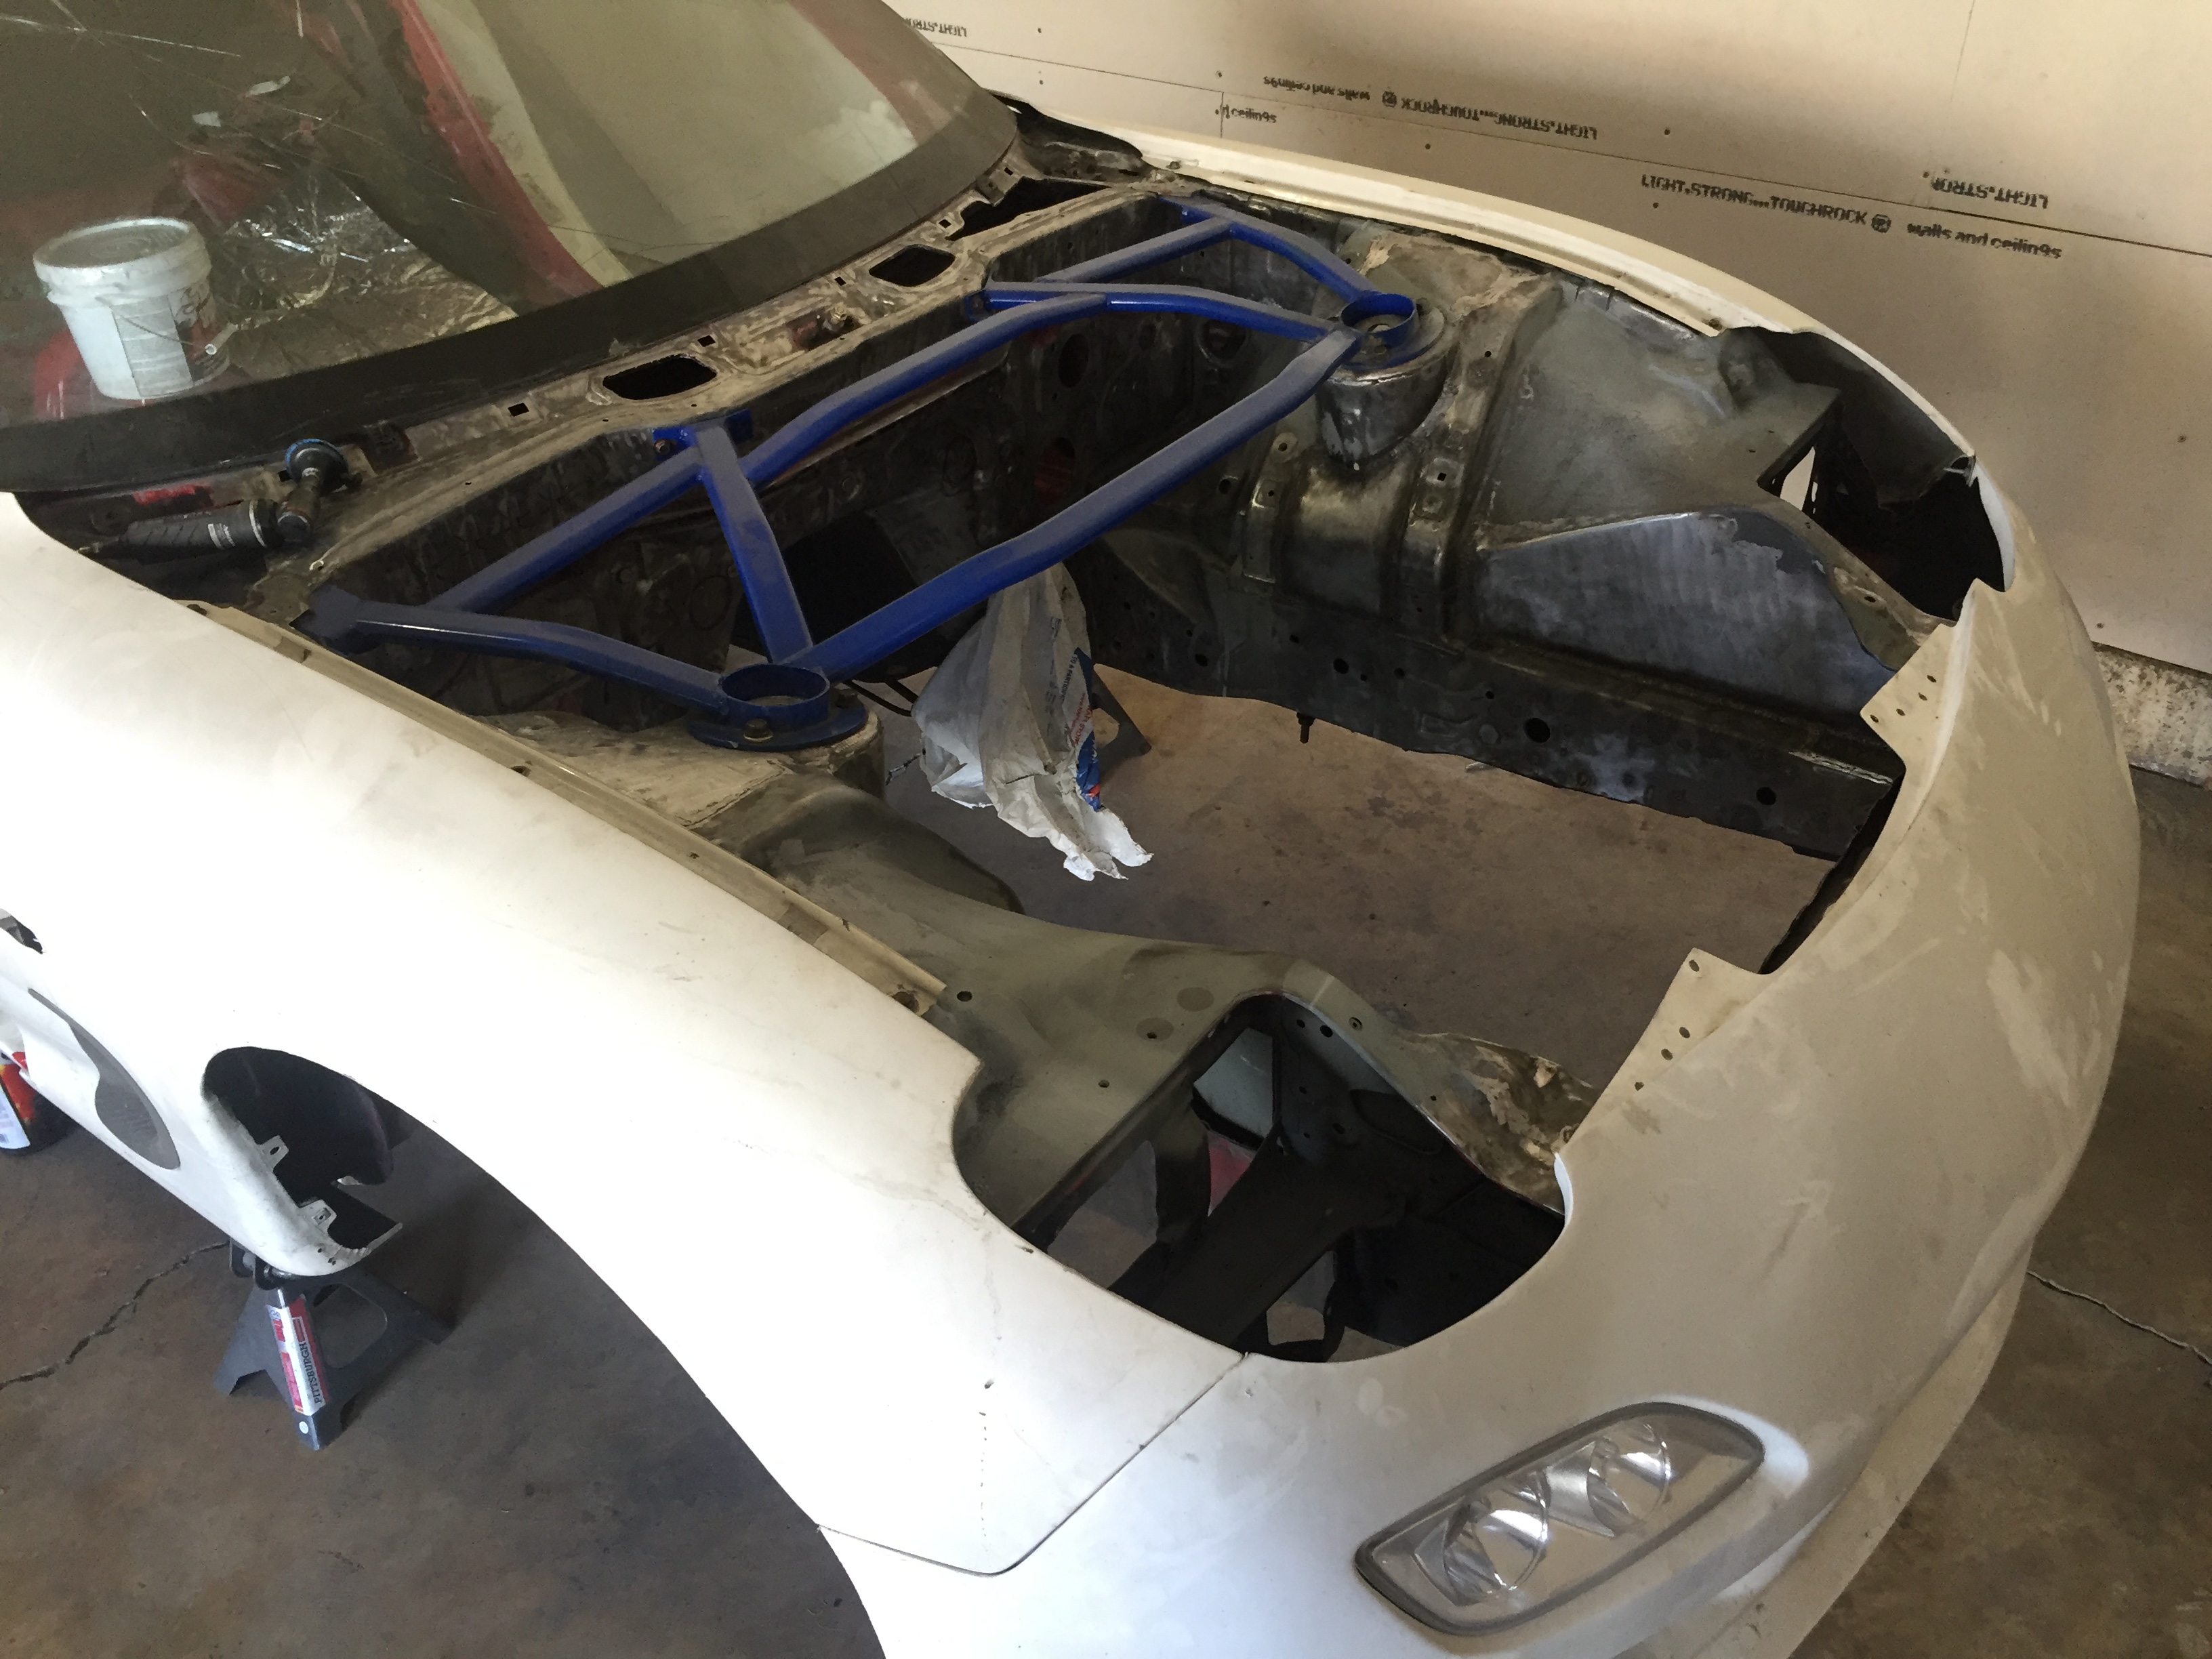
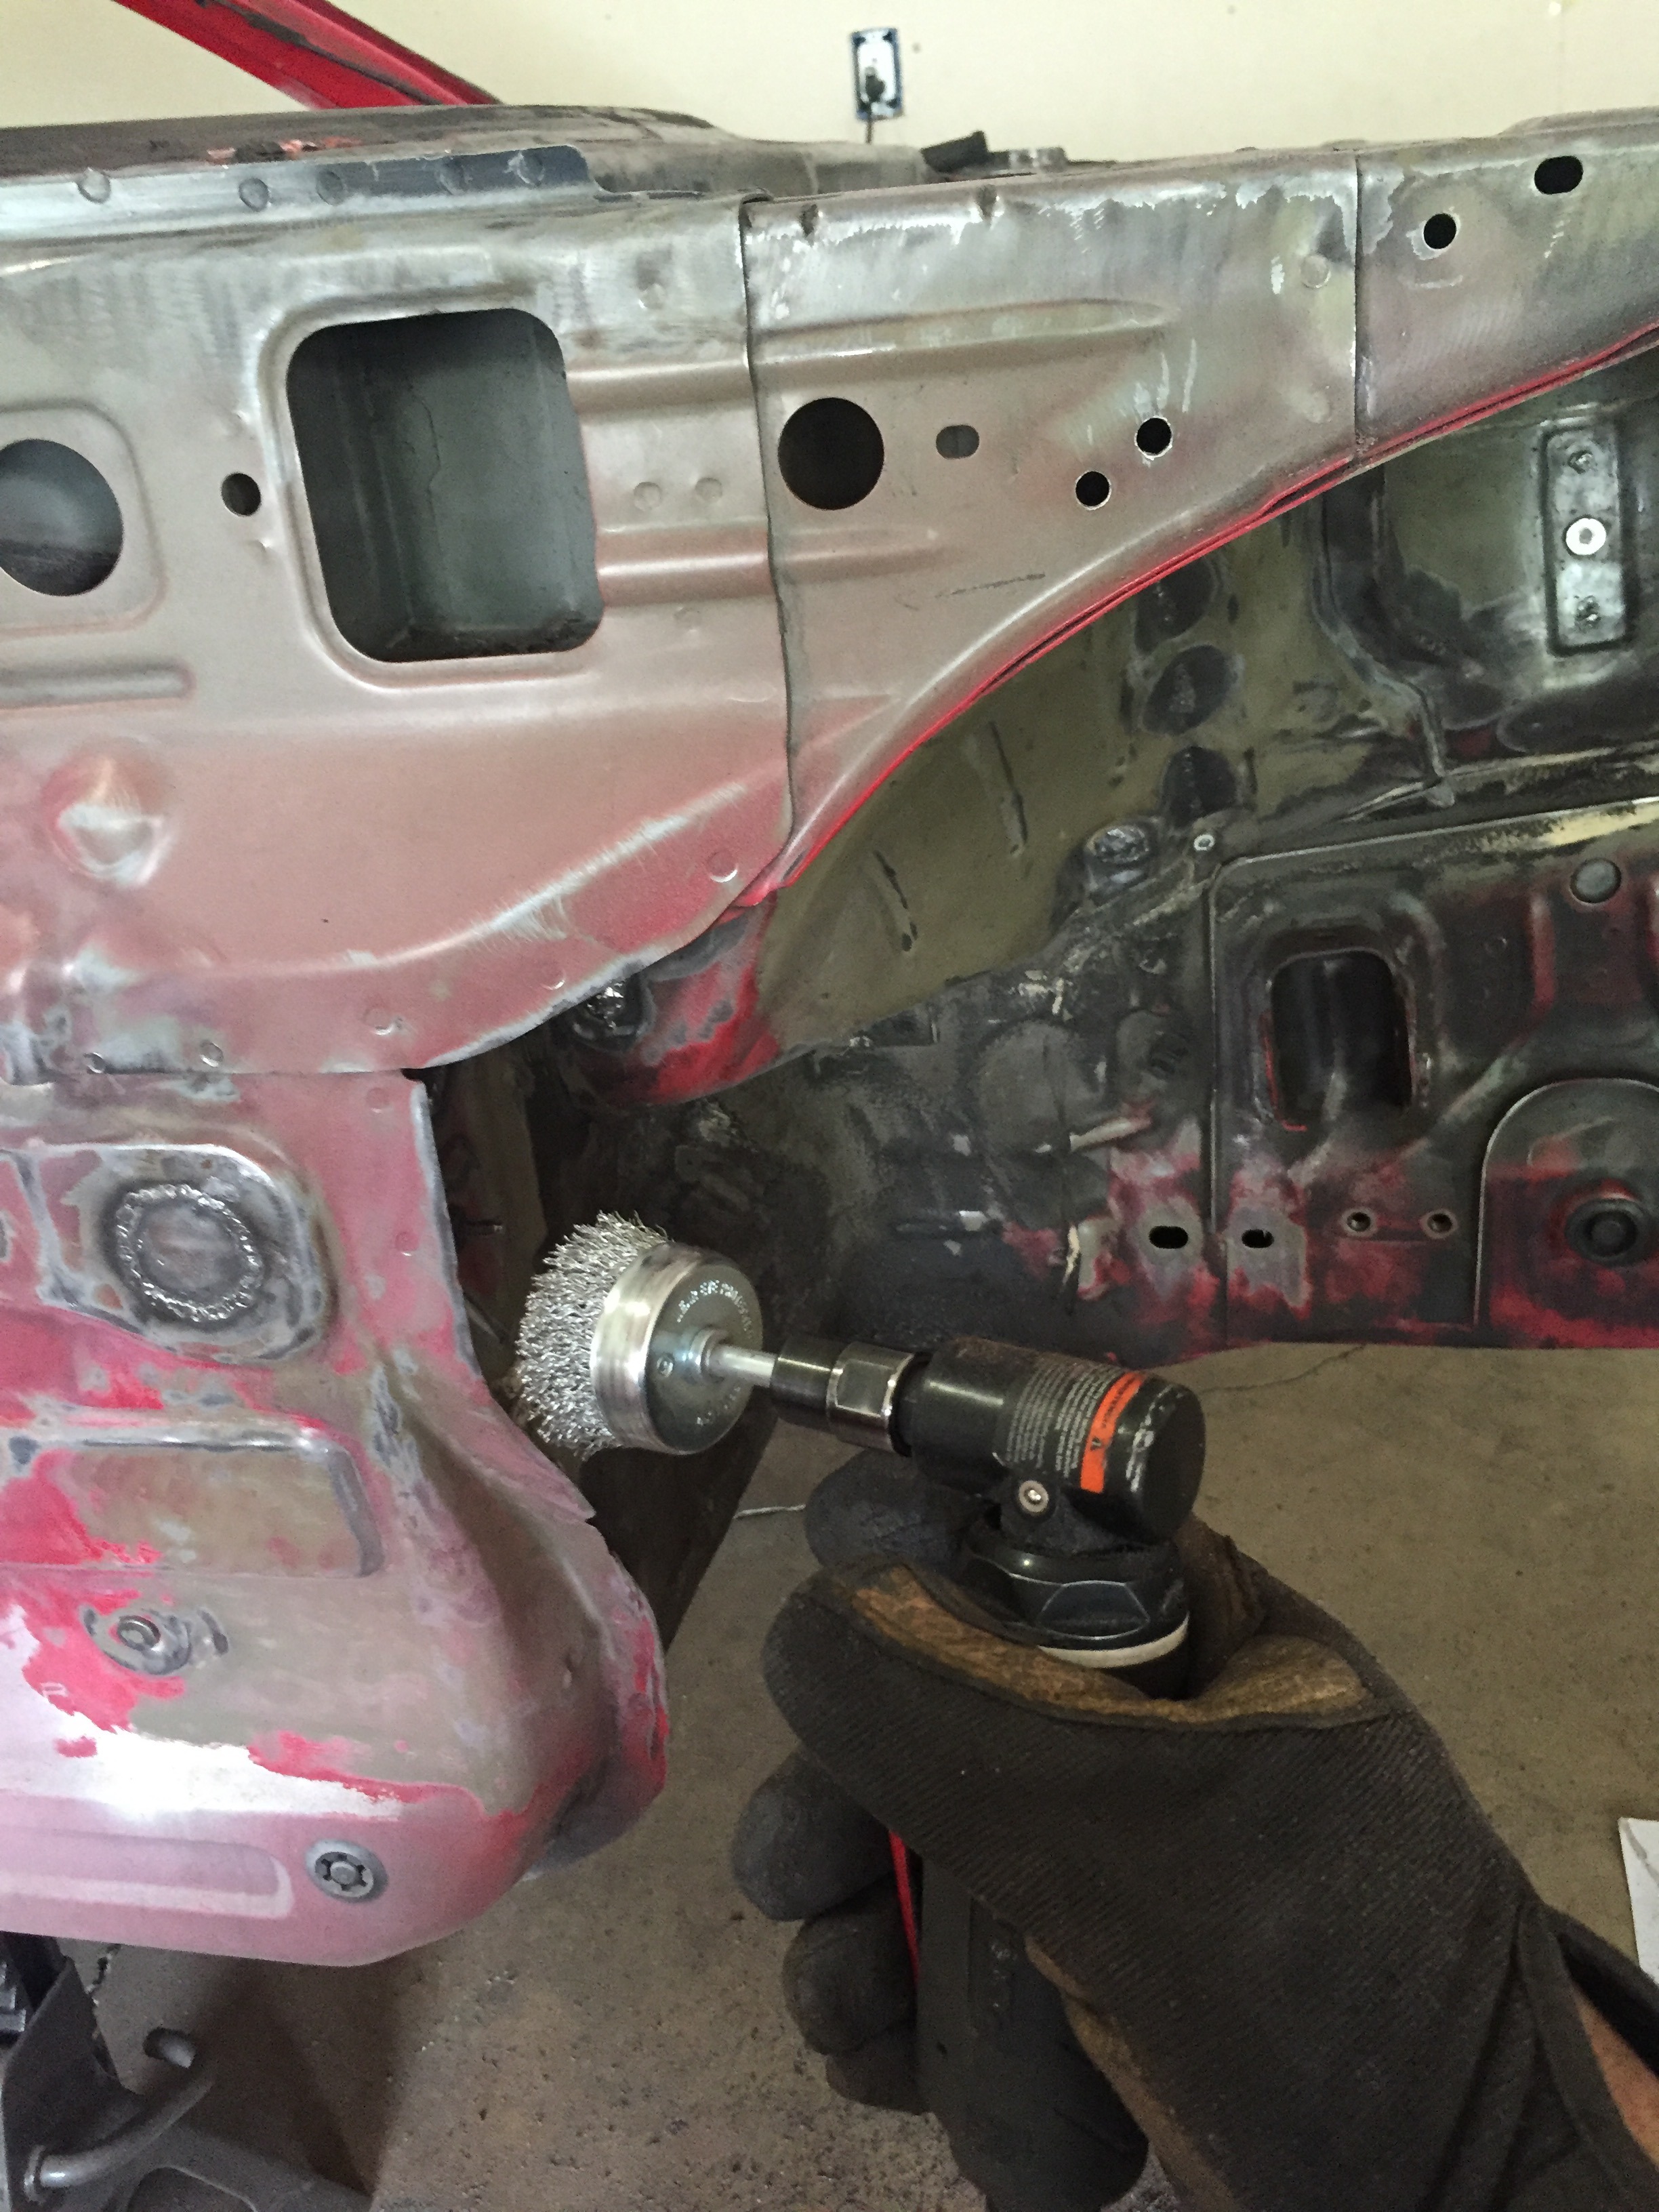
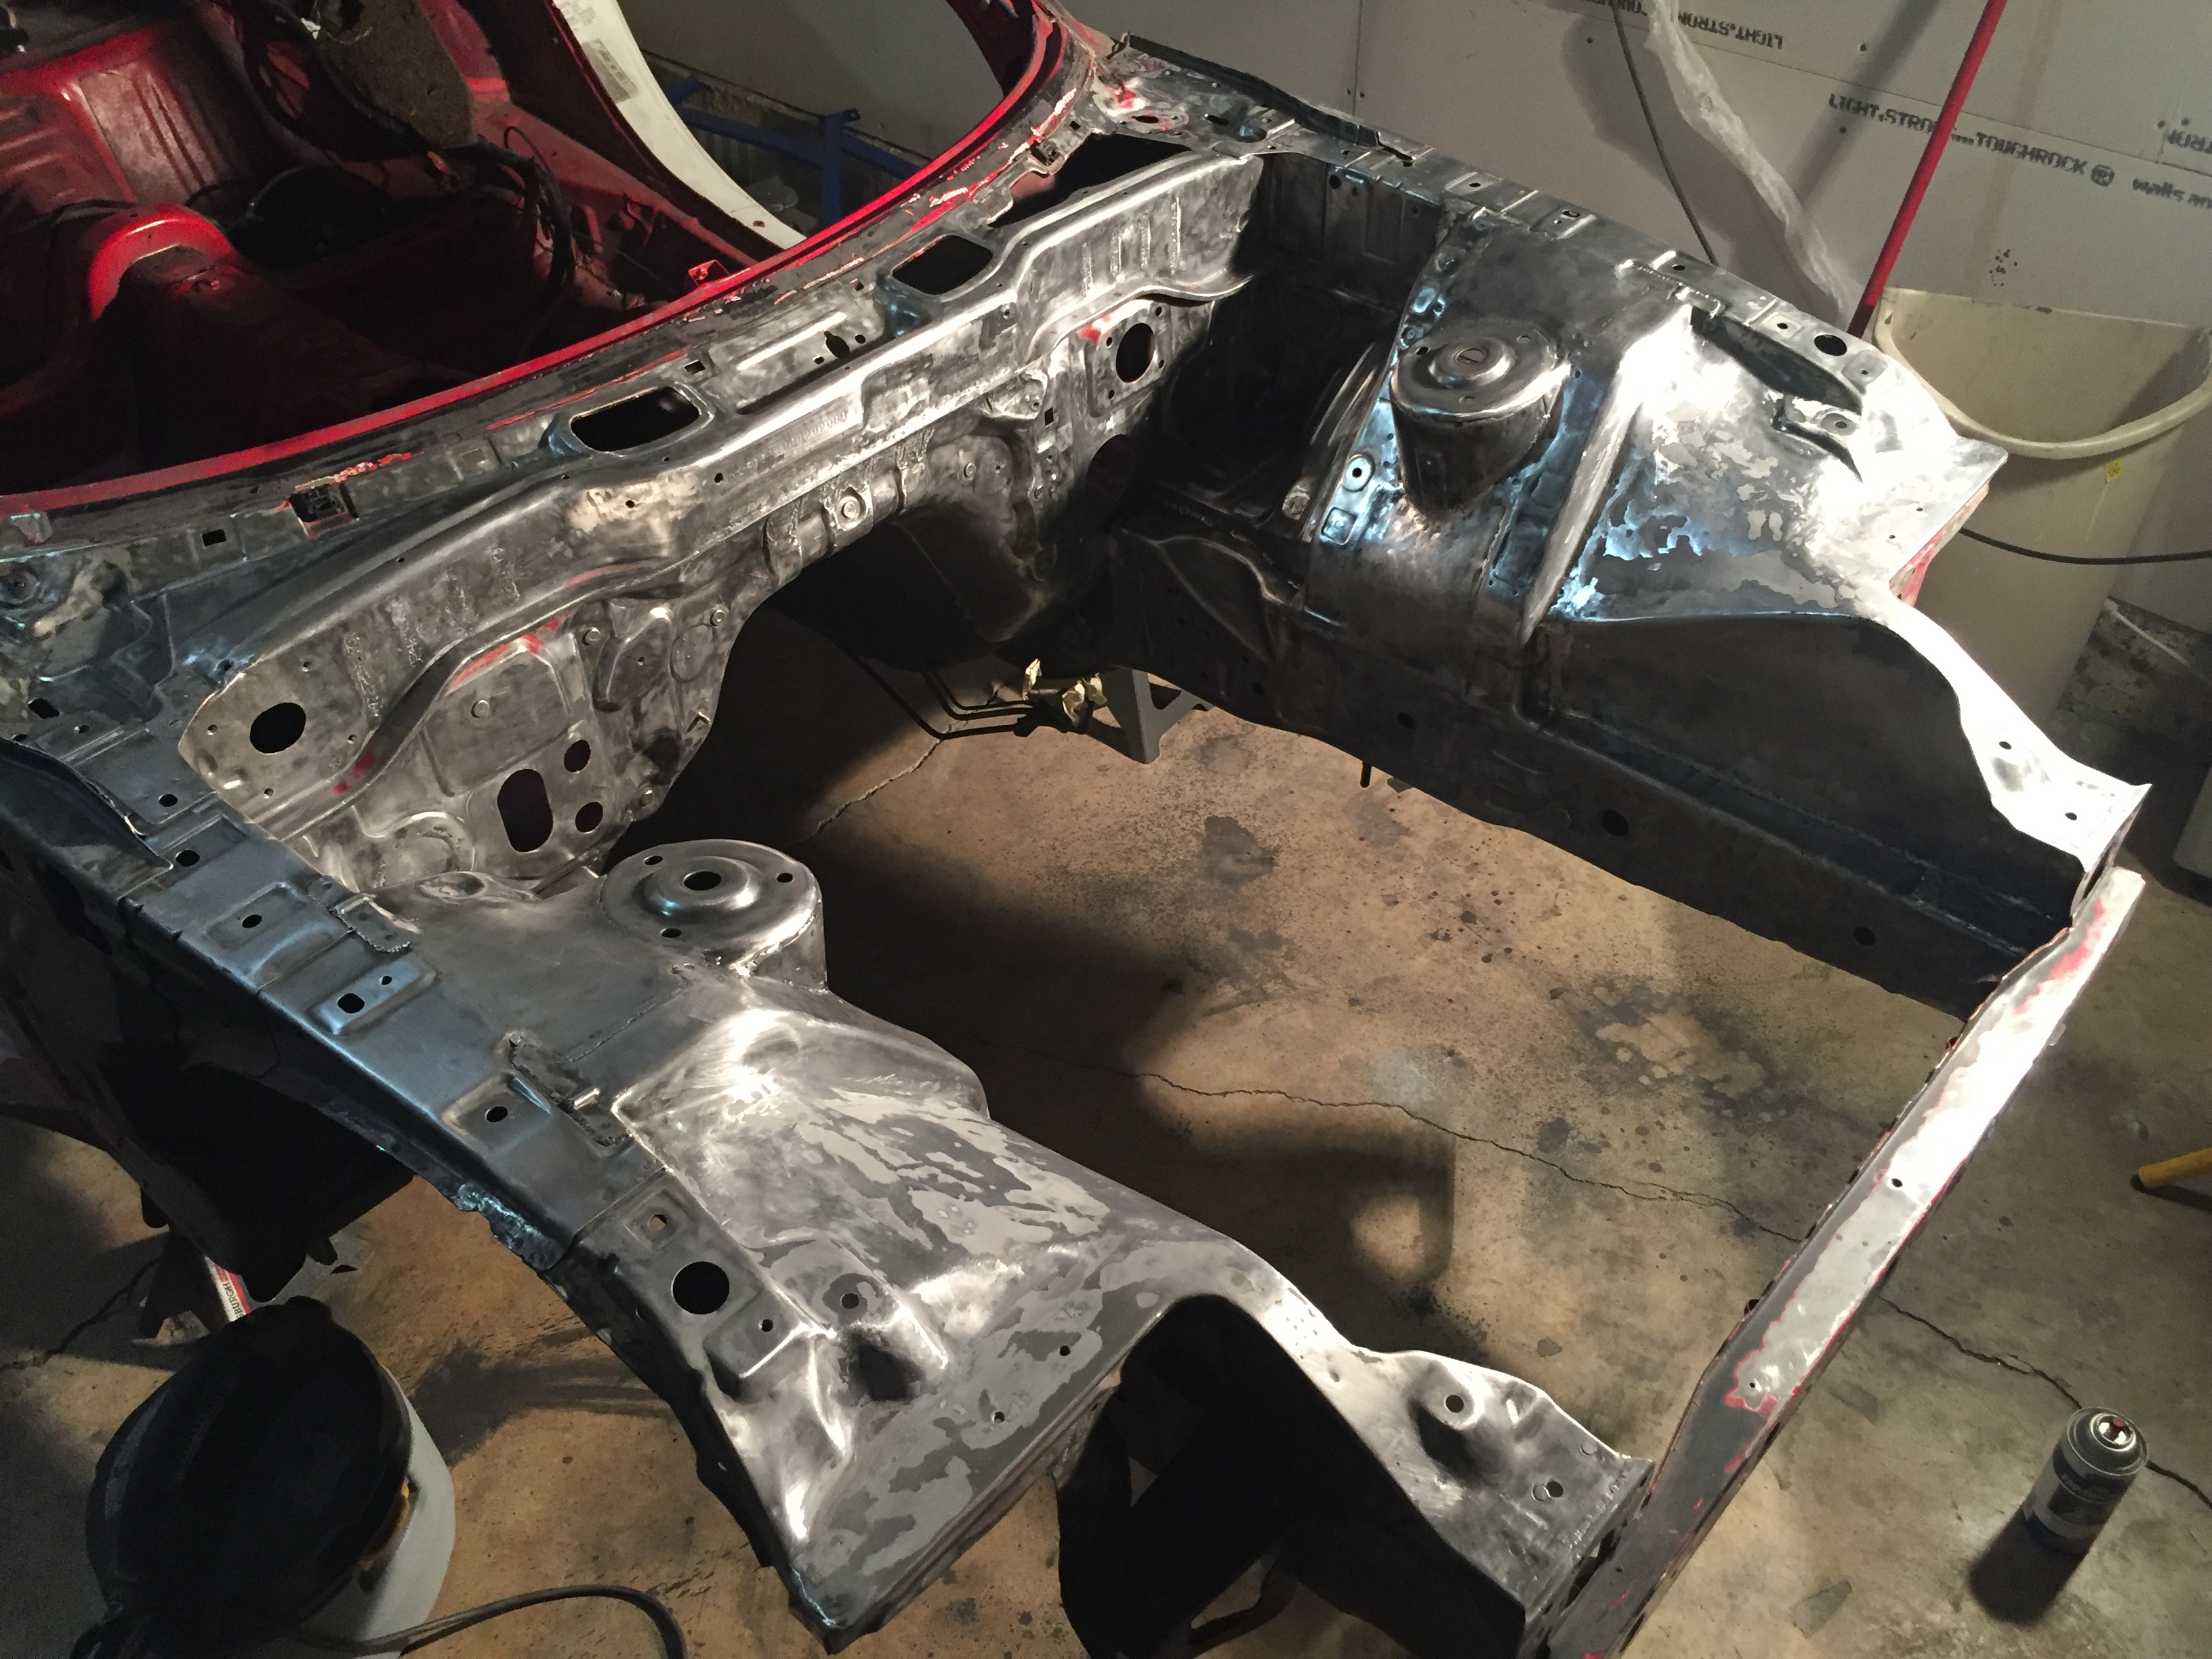
As you can see, the engine bay is basically stripped all the way down, so you can plan on future updates including lots of metal/bondo work and such. I am going to stitch weld everything while it's apart, cut out the middle firewall lip, smooth out all of the firewall indentions, smooth out the strut towers, and fill in the wheel well holes. It should be a good time...
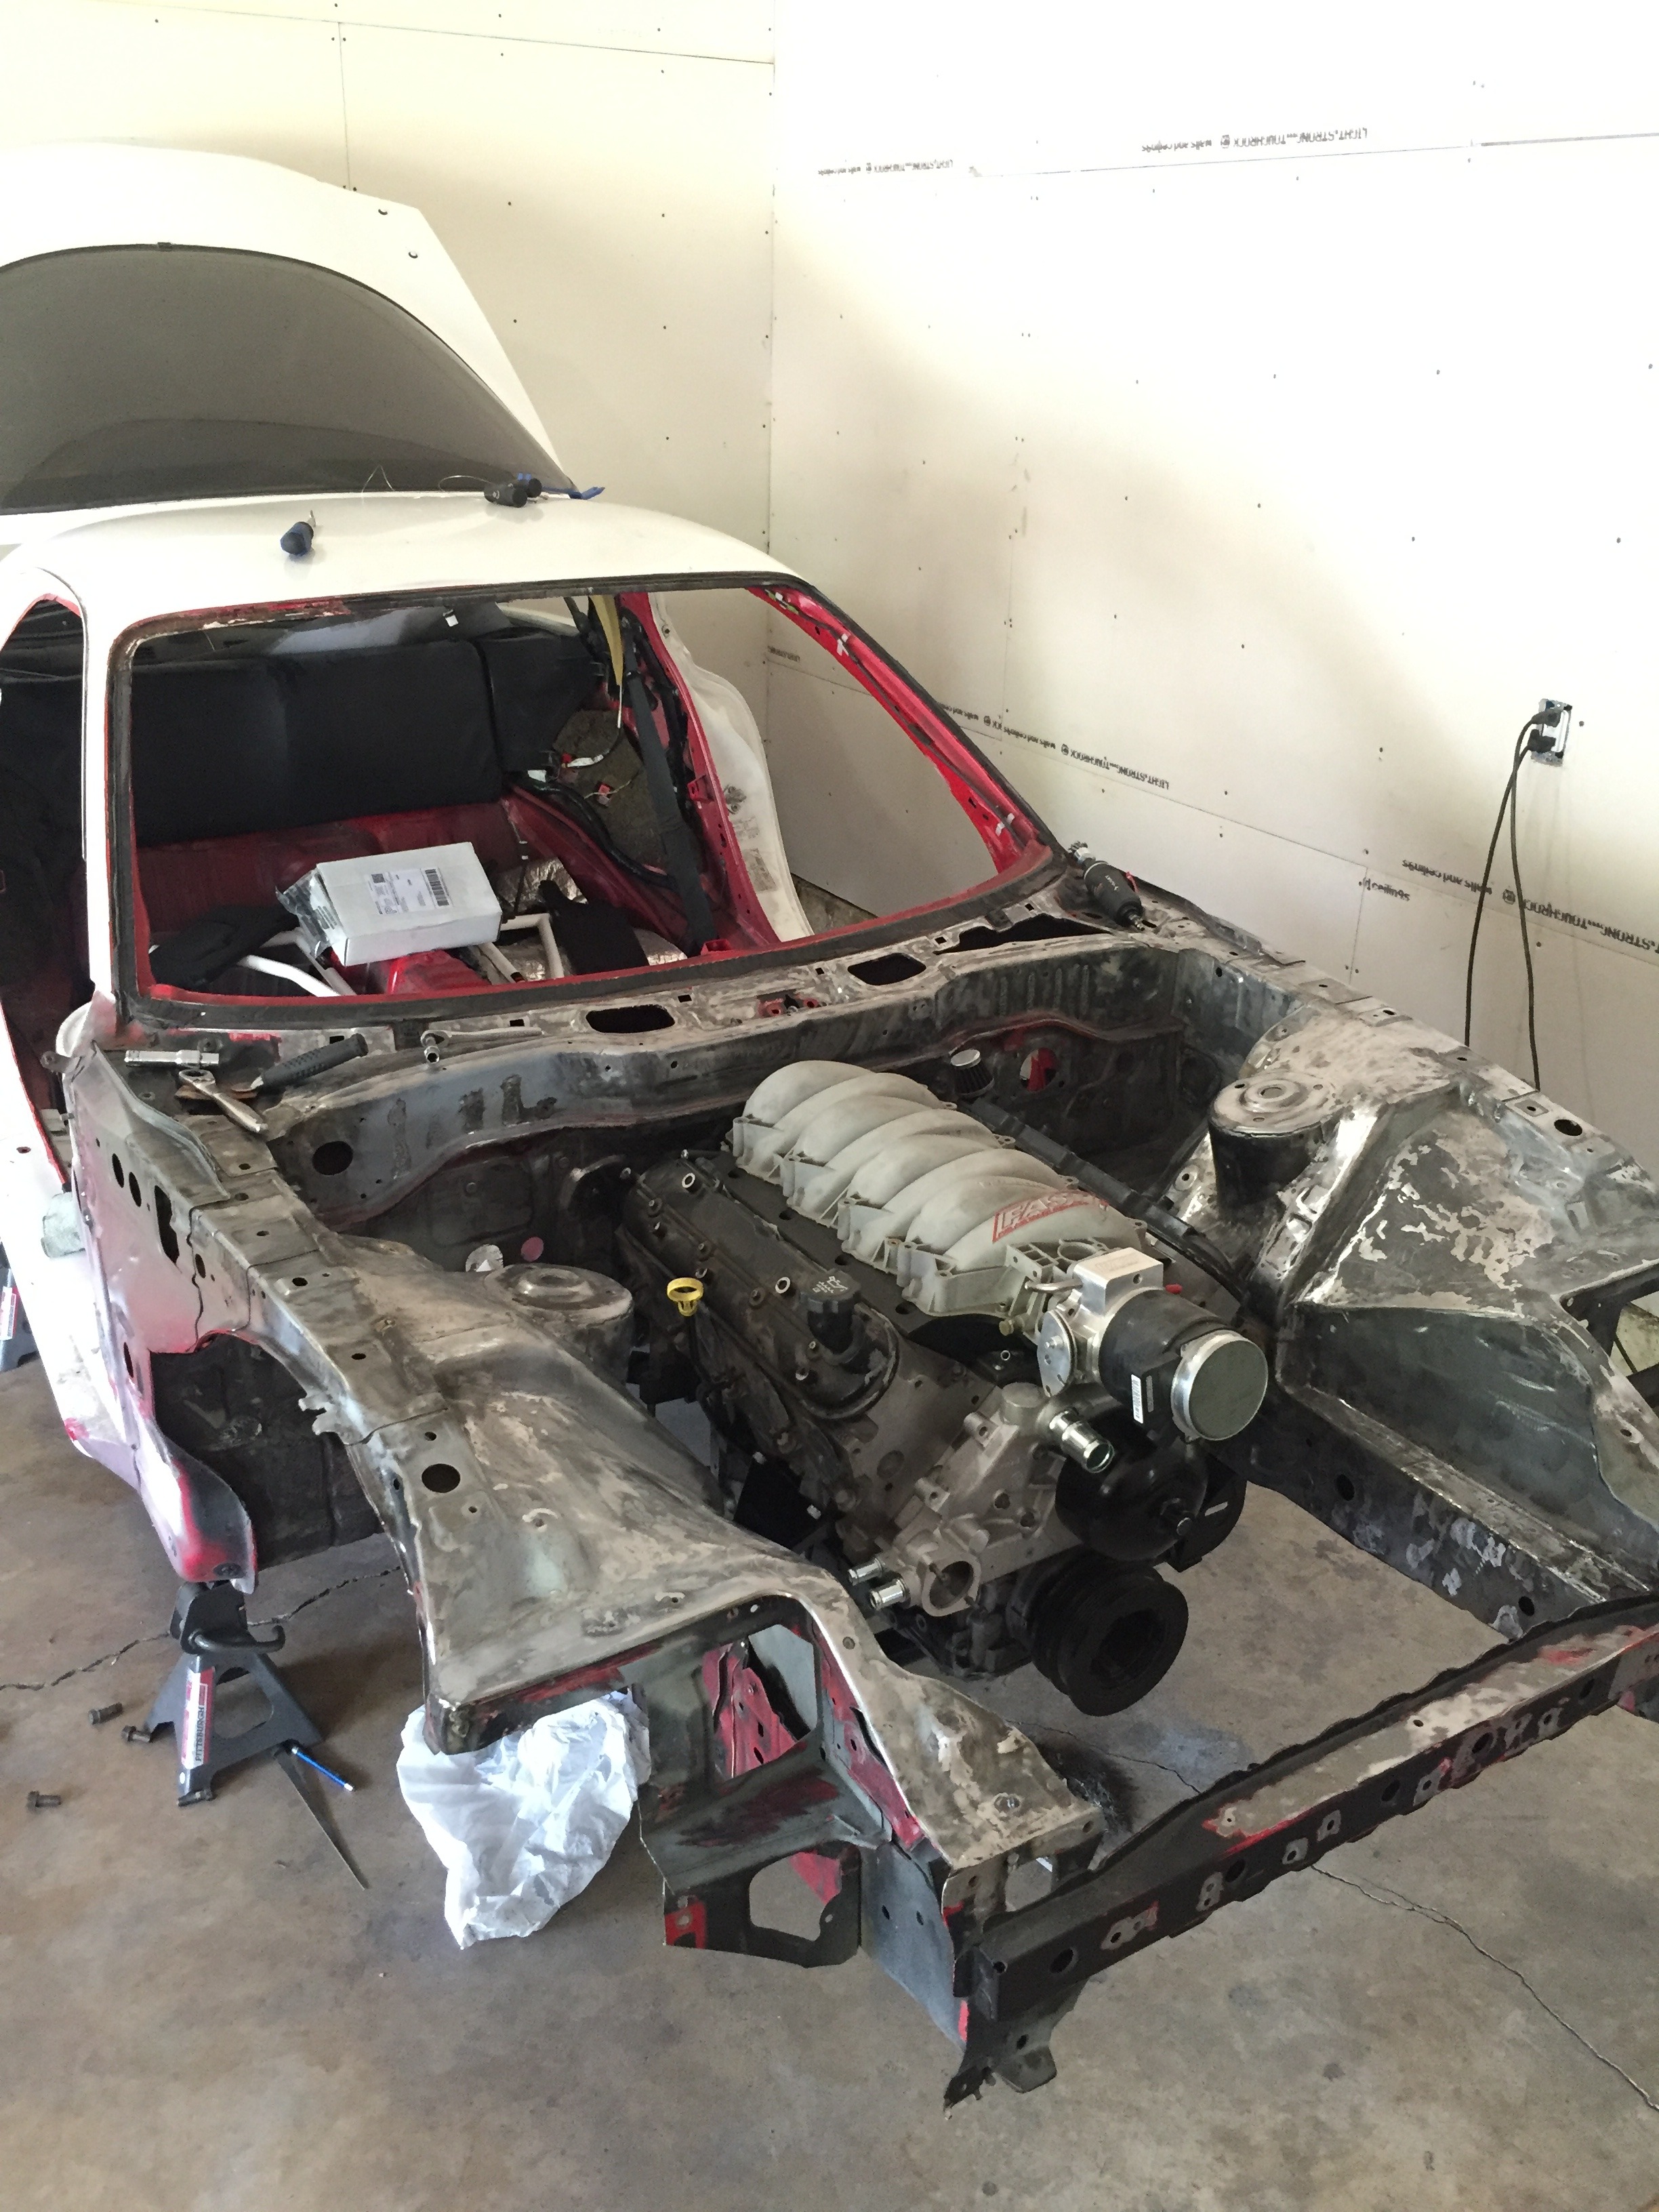
I was set on using the sikky kit for a while, but the purchase of the fast intake ruined that plan. After searching for a used samberg setup, I finally just decided to buy new. I only have a few more parts to buy now. Some sensors and fluids really.
Over the winter months my basement became more and more full of parts. First from the leftover dsm parts I had, then from parting out the rotary stuff, then from acquiring more lsx based parts. So it was a mess. Finally had enough of it and straightened up one of the rooms.

And then I had to put more **** in the room to get it out of another one, so whatever lol.

So the same could be said for my garage. I had been neglecting it over the months and focusing on acquiring parts for the rx7. Decided I had enough of it too and built a couple shelves and acquired various parts.


Made a shelf to put over my air compressors. The house I am renting doesn't have 220 ran to the garage, so I decided to run two compressors in parallel. This provides more than enough scfm for the future painting I plan on doing.

I have a regulator coming off of each air compressor to prevent each one from getting too much air in the tank, then they tee into the large air/water filter, then go into a smaller air/water filter, and then to the final regulator. Once I start painting I will likely run one more regulator/filter right off of the gun. I really don't want to mess up the paint lol.

And all organized

So anyhow, onto the car. First, I'll start with the engine bay progress. I'll keep all of these in order to give you an idea of how the progress went.


As you can see, the engine bay is basically stripped all the way down, so you can plan on future updates including lots of metal/bondo work and such. I am going to stitch weld everything while it's apart, cut out the middle firewall lip, smooth out all of the firewall indentions, smooth out the strut towers, and fill in the wheel well holes. It should be a good time...
I was set on using the sikky kit for a while, but the purchase of the fast intake ruined that plan. After searching for a used samberg setup, I finally just decided to buy new. I only have a few more parts to buy now. Some sensors and fluids really.

Thread Starter
Full Member
Joined: Apr 2015
Posts: 140
Likes: 5
From: Great Falls, MT
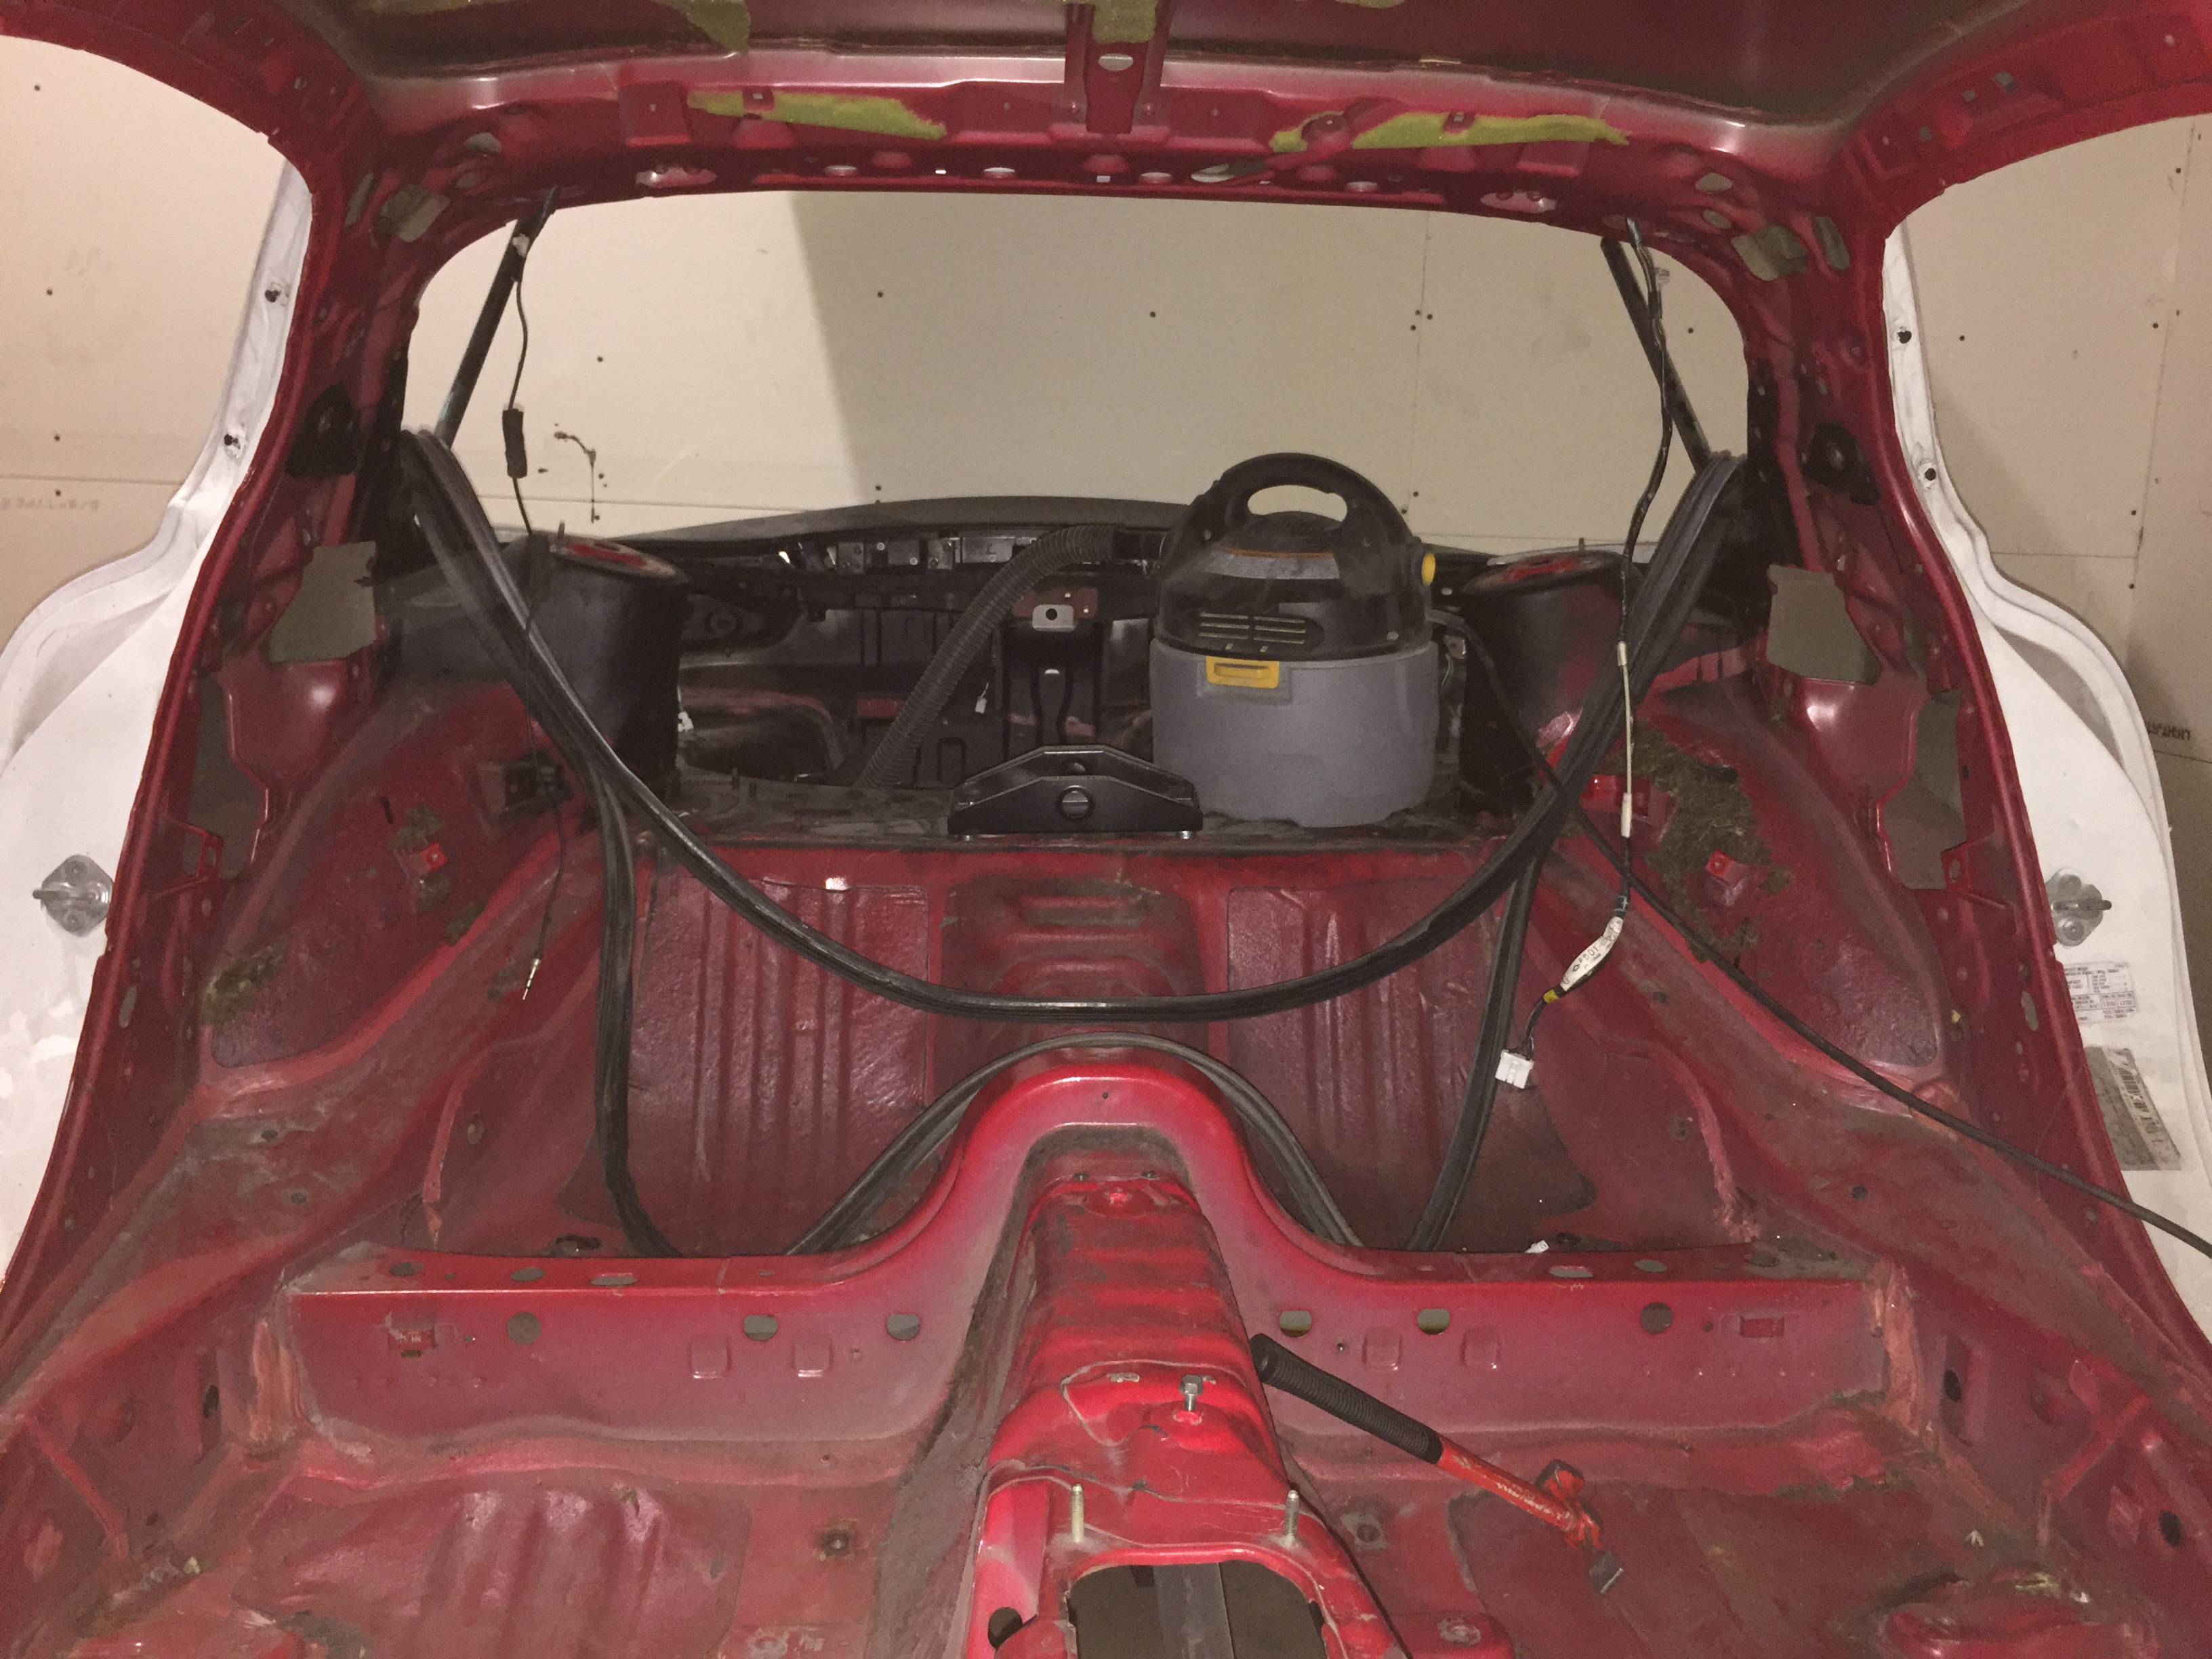
Finally got around to pulling the interior since Ill be rewiring the car and also welding on the firewall.
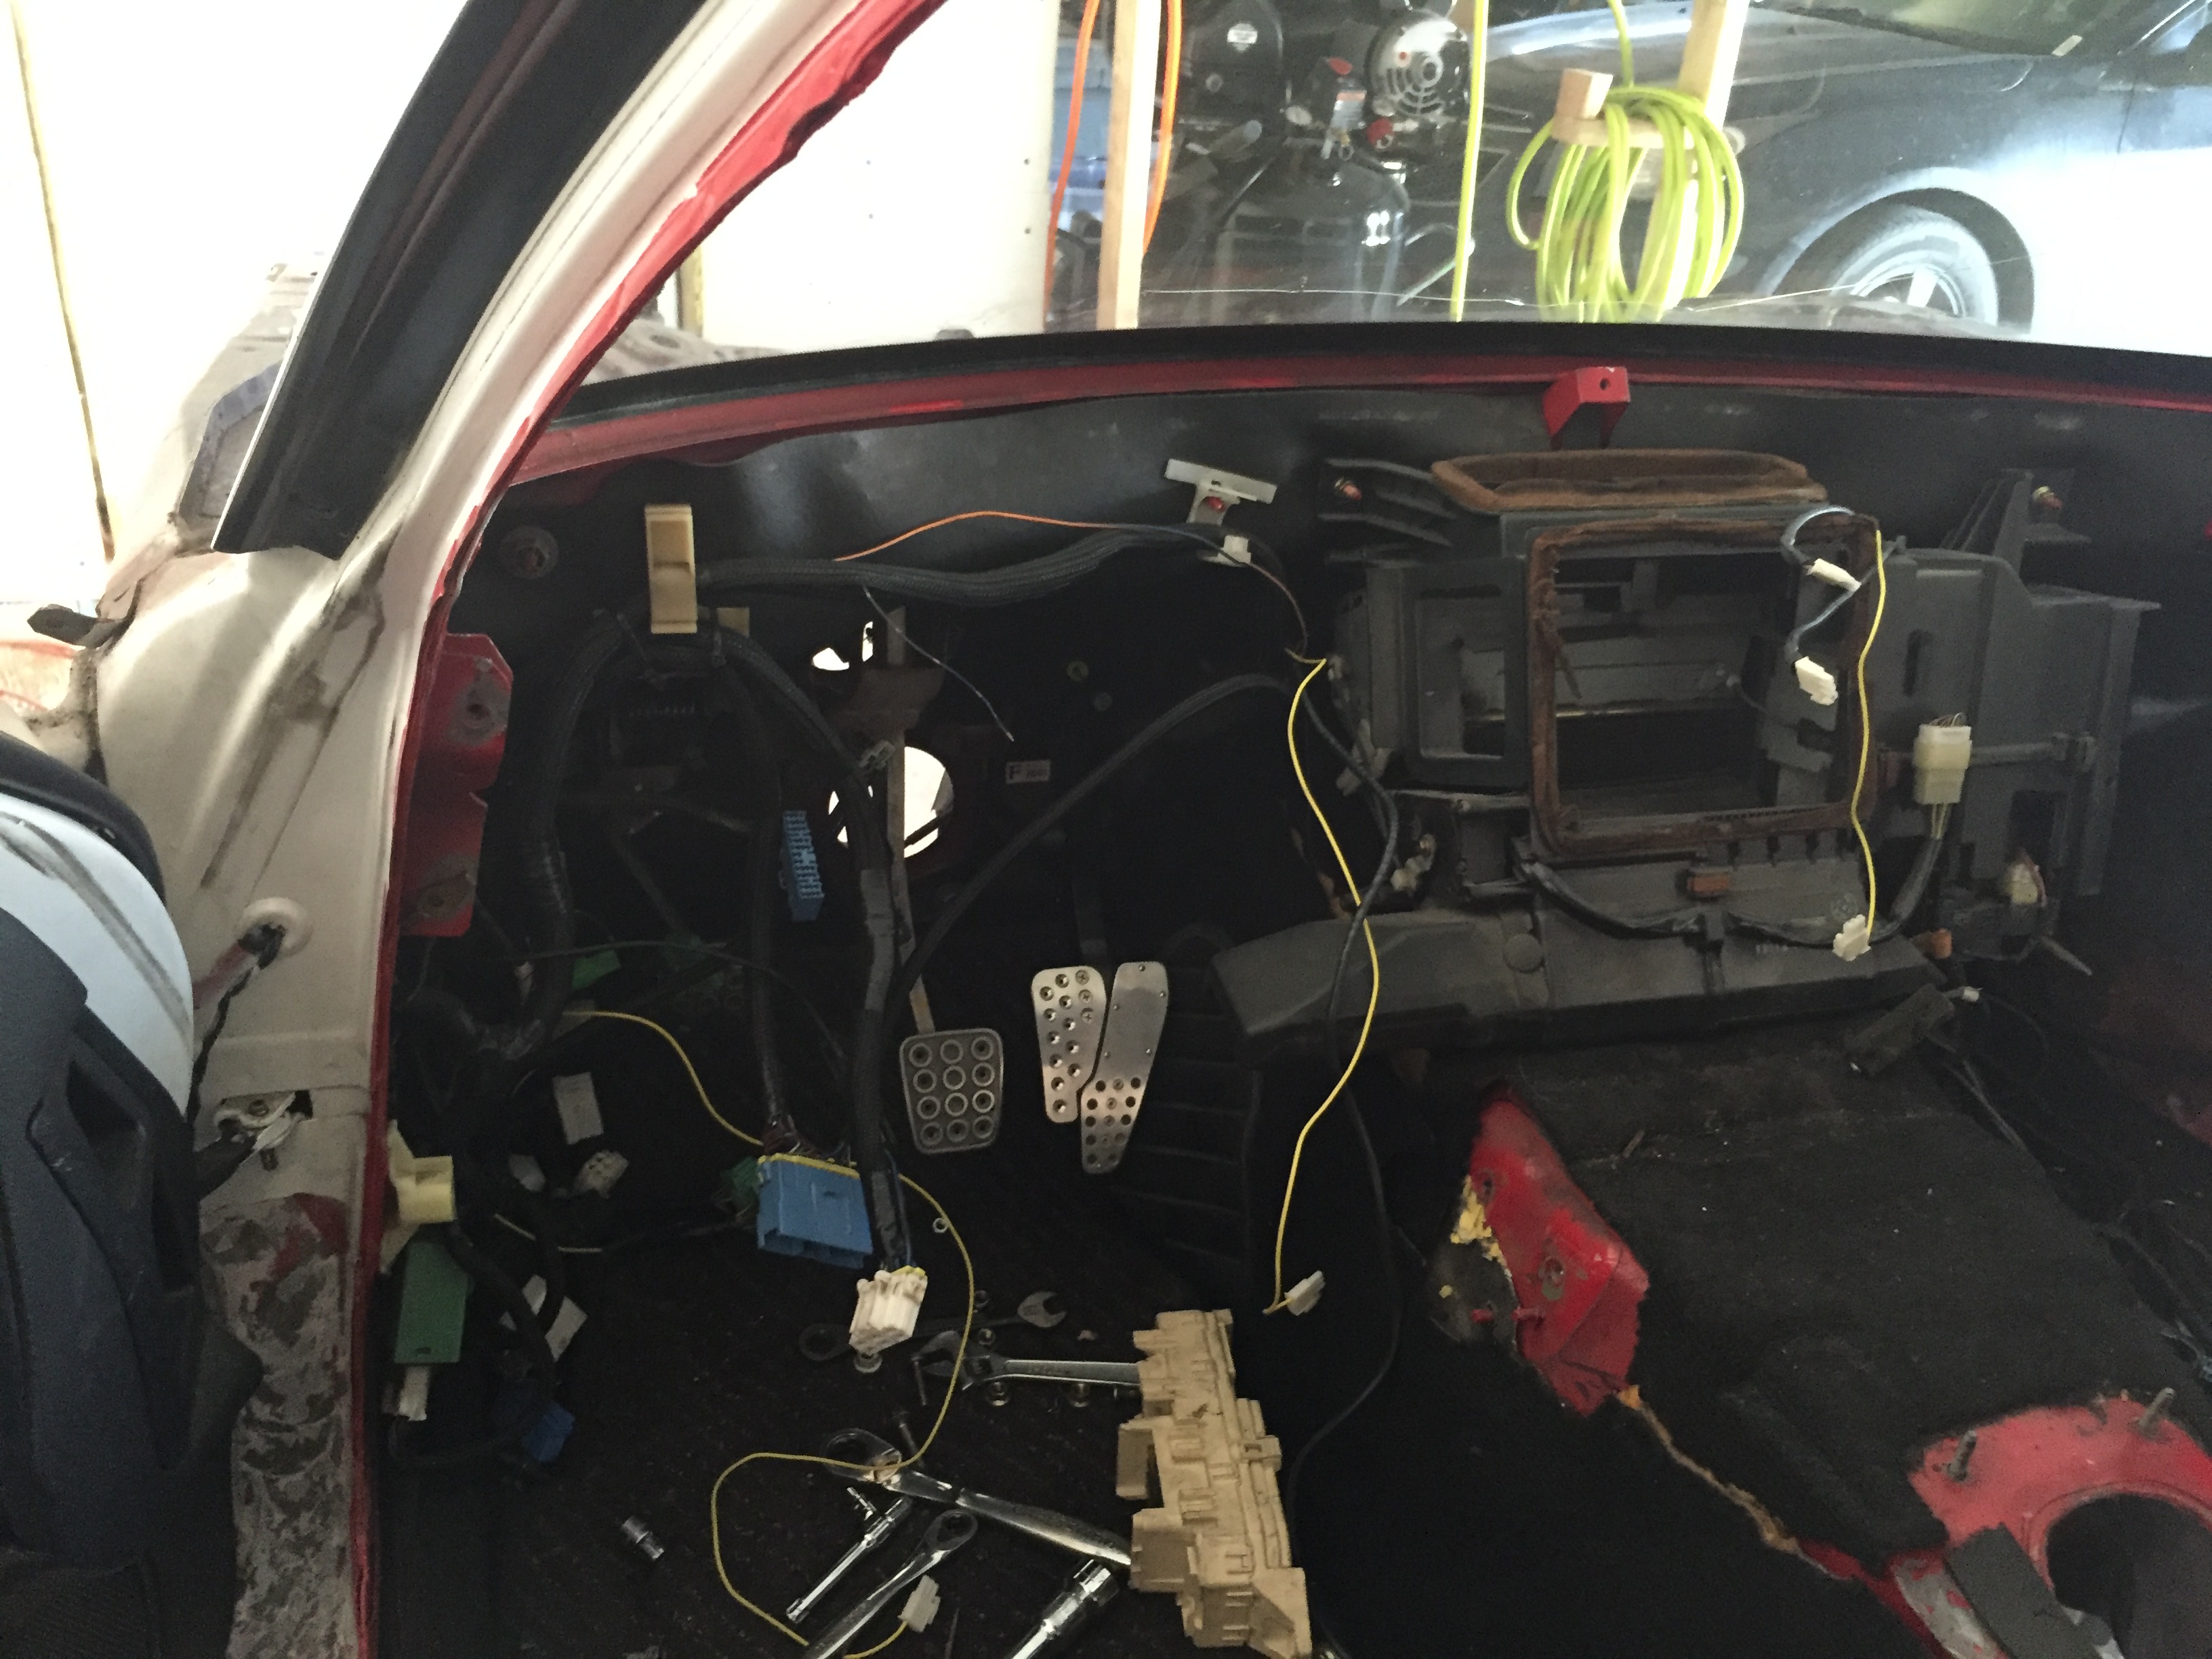
I really didn't like the idea of leaving the interior red when the car will definitely not be red, but I didn't want to go through stripping the interior paint and all that jazz. So, I decided that I would put in some sound deadener while it's apart. This allows me to quieten down the interior while also getting rid of the red. I won't have to clean the surfaces nearly as much to get it to look nice either. So it's a win win imo. Decided on the Second Skin Spectrum in case anyone is wondering. Ordered 2 gallons, which will only add 20 pounds if I use all of it. Since I will be painting the interior anyhow, I think I may put the subframes back in and get the car on the ground so I can stitch weld the interior seams too. May as well right?
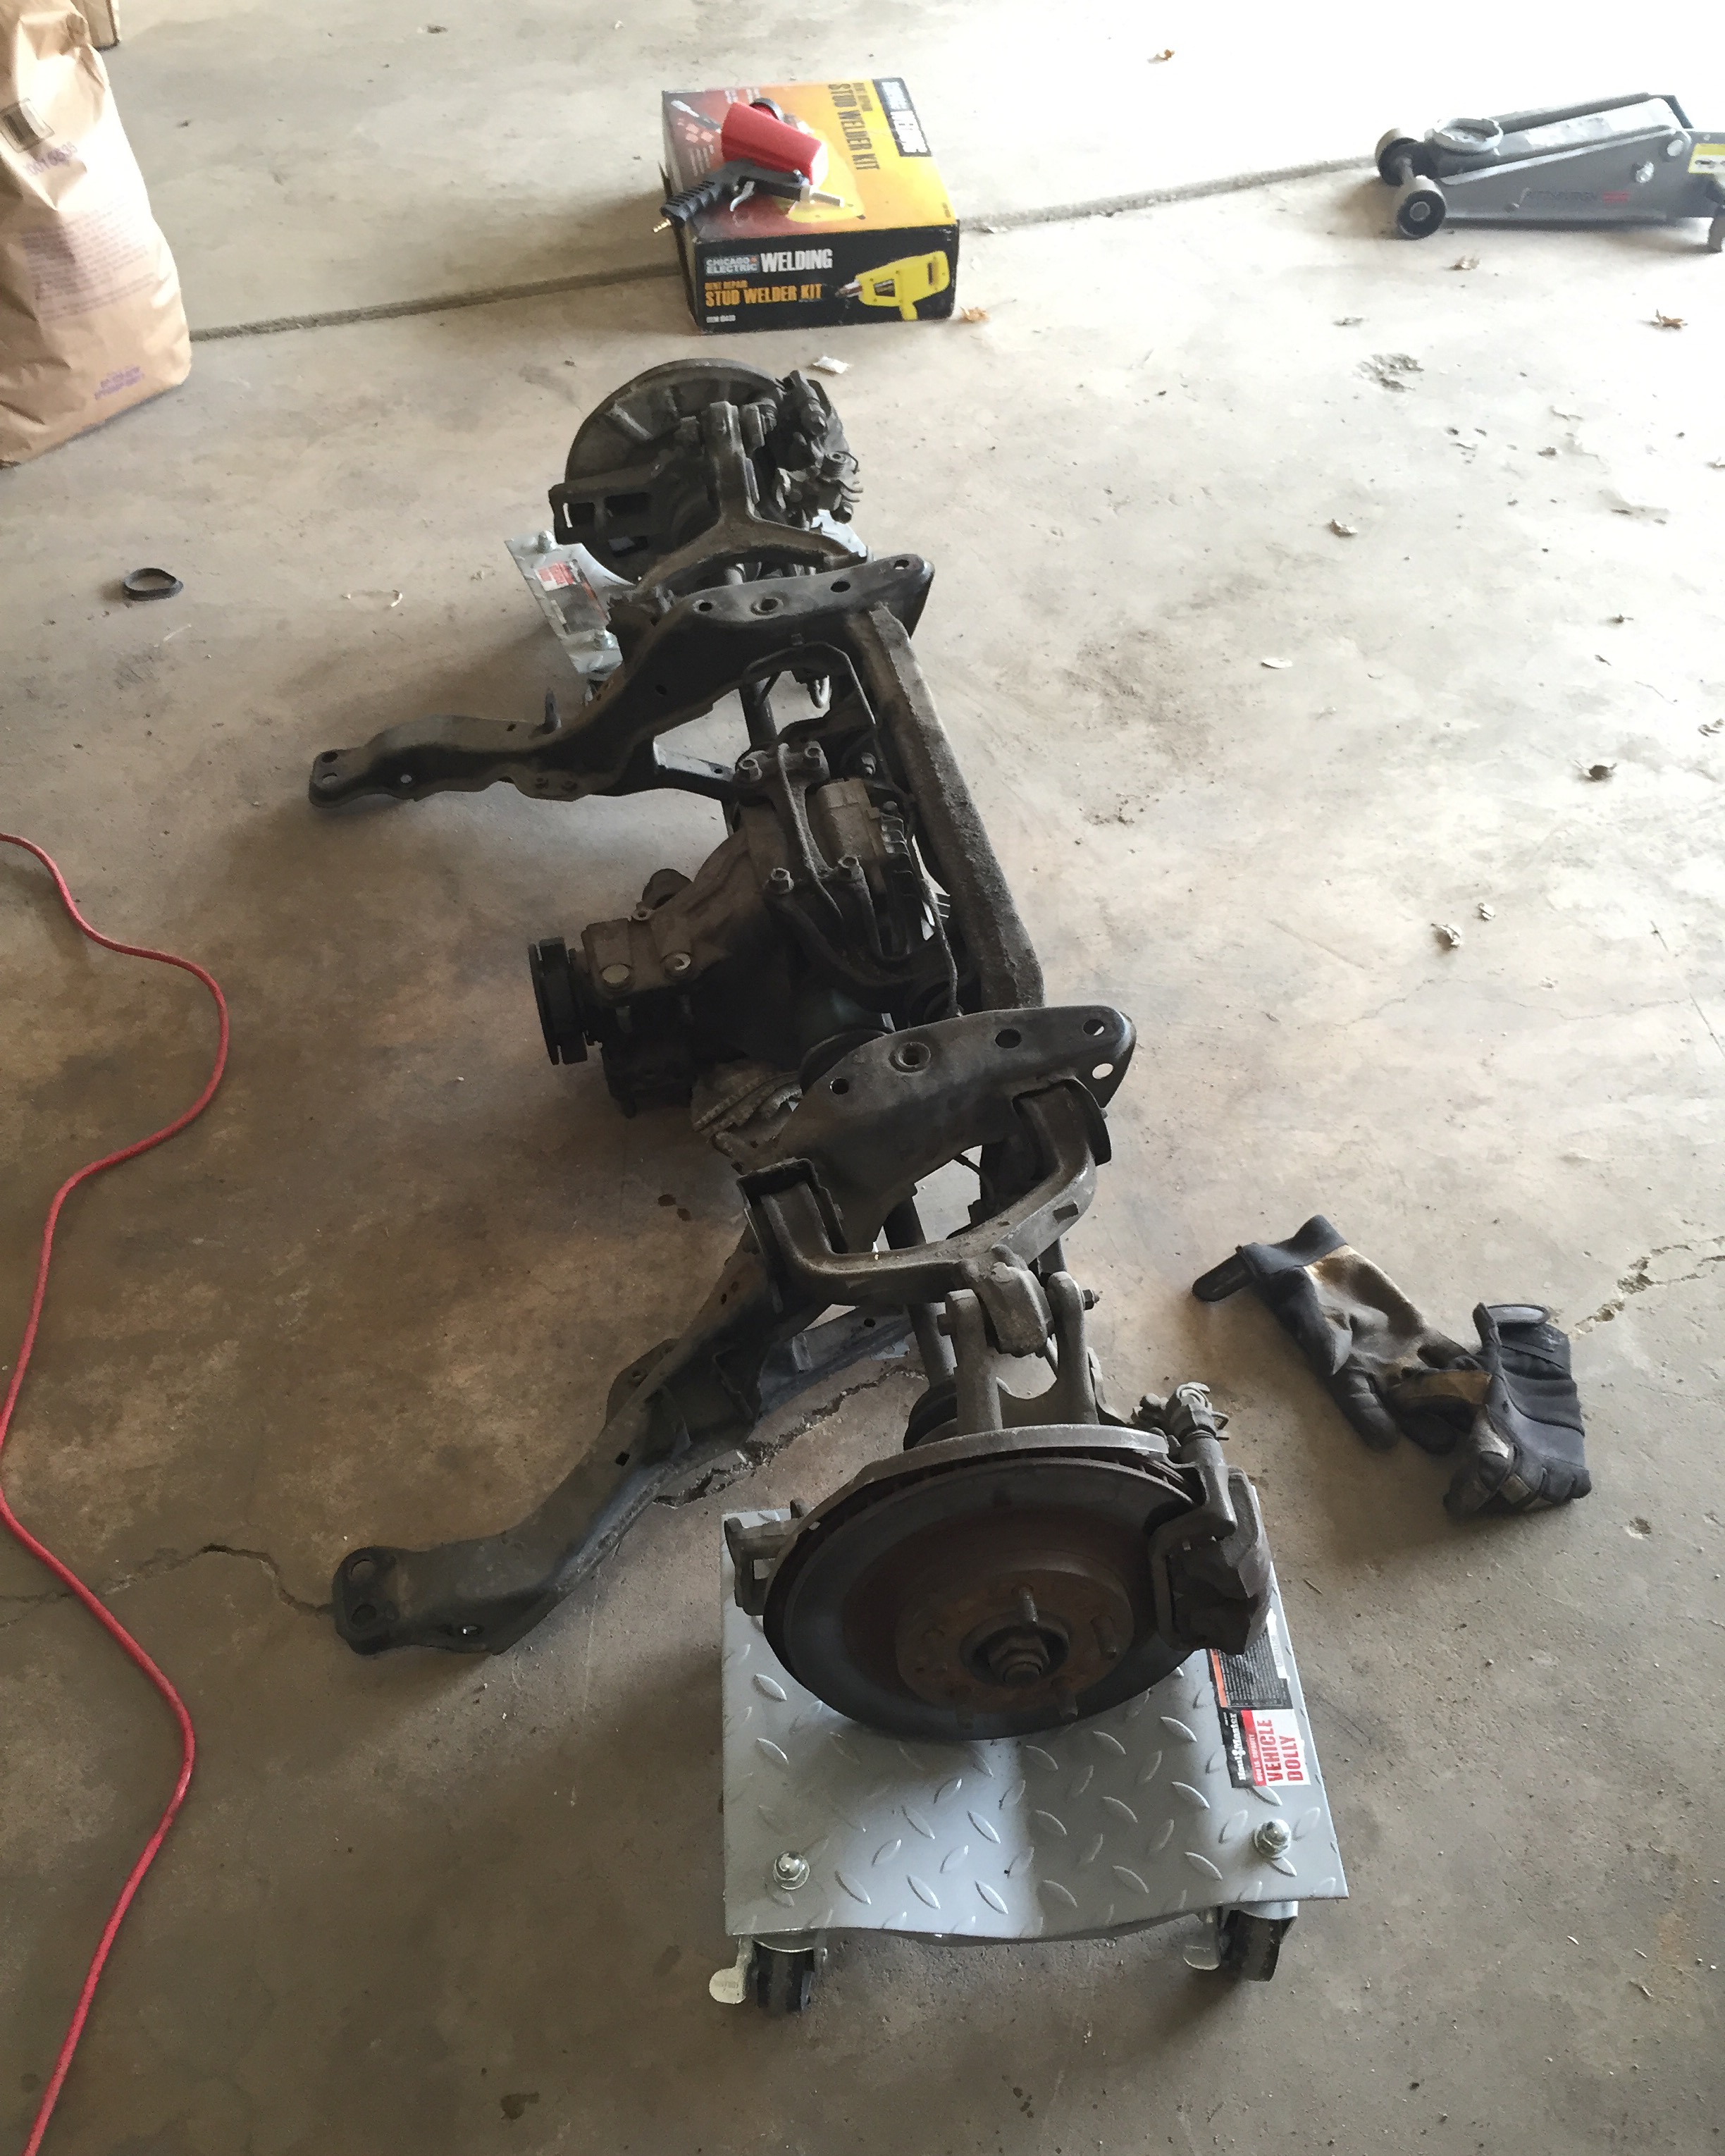
Speaking of putting subframes back in, I pulled out the rear subframe. I'm putting in a Kaaz 1.5 way diff I picked up along with all new pillowballs. While it's apart I'll be cleaning/painting everything.
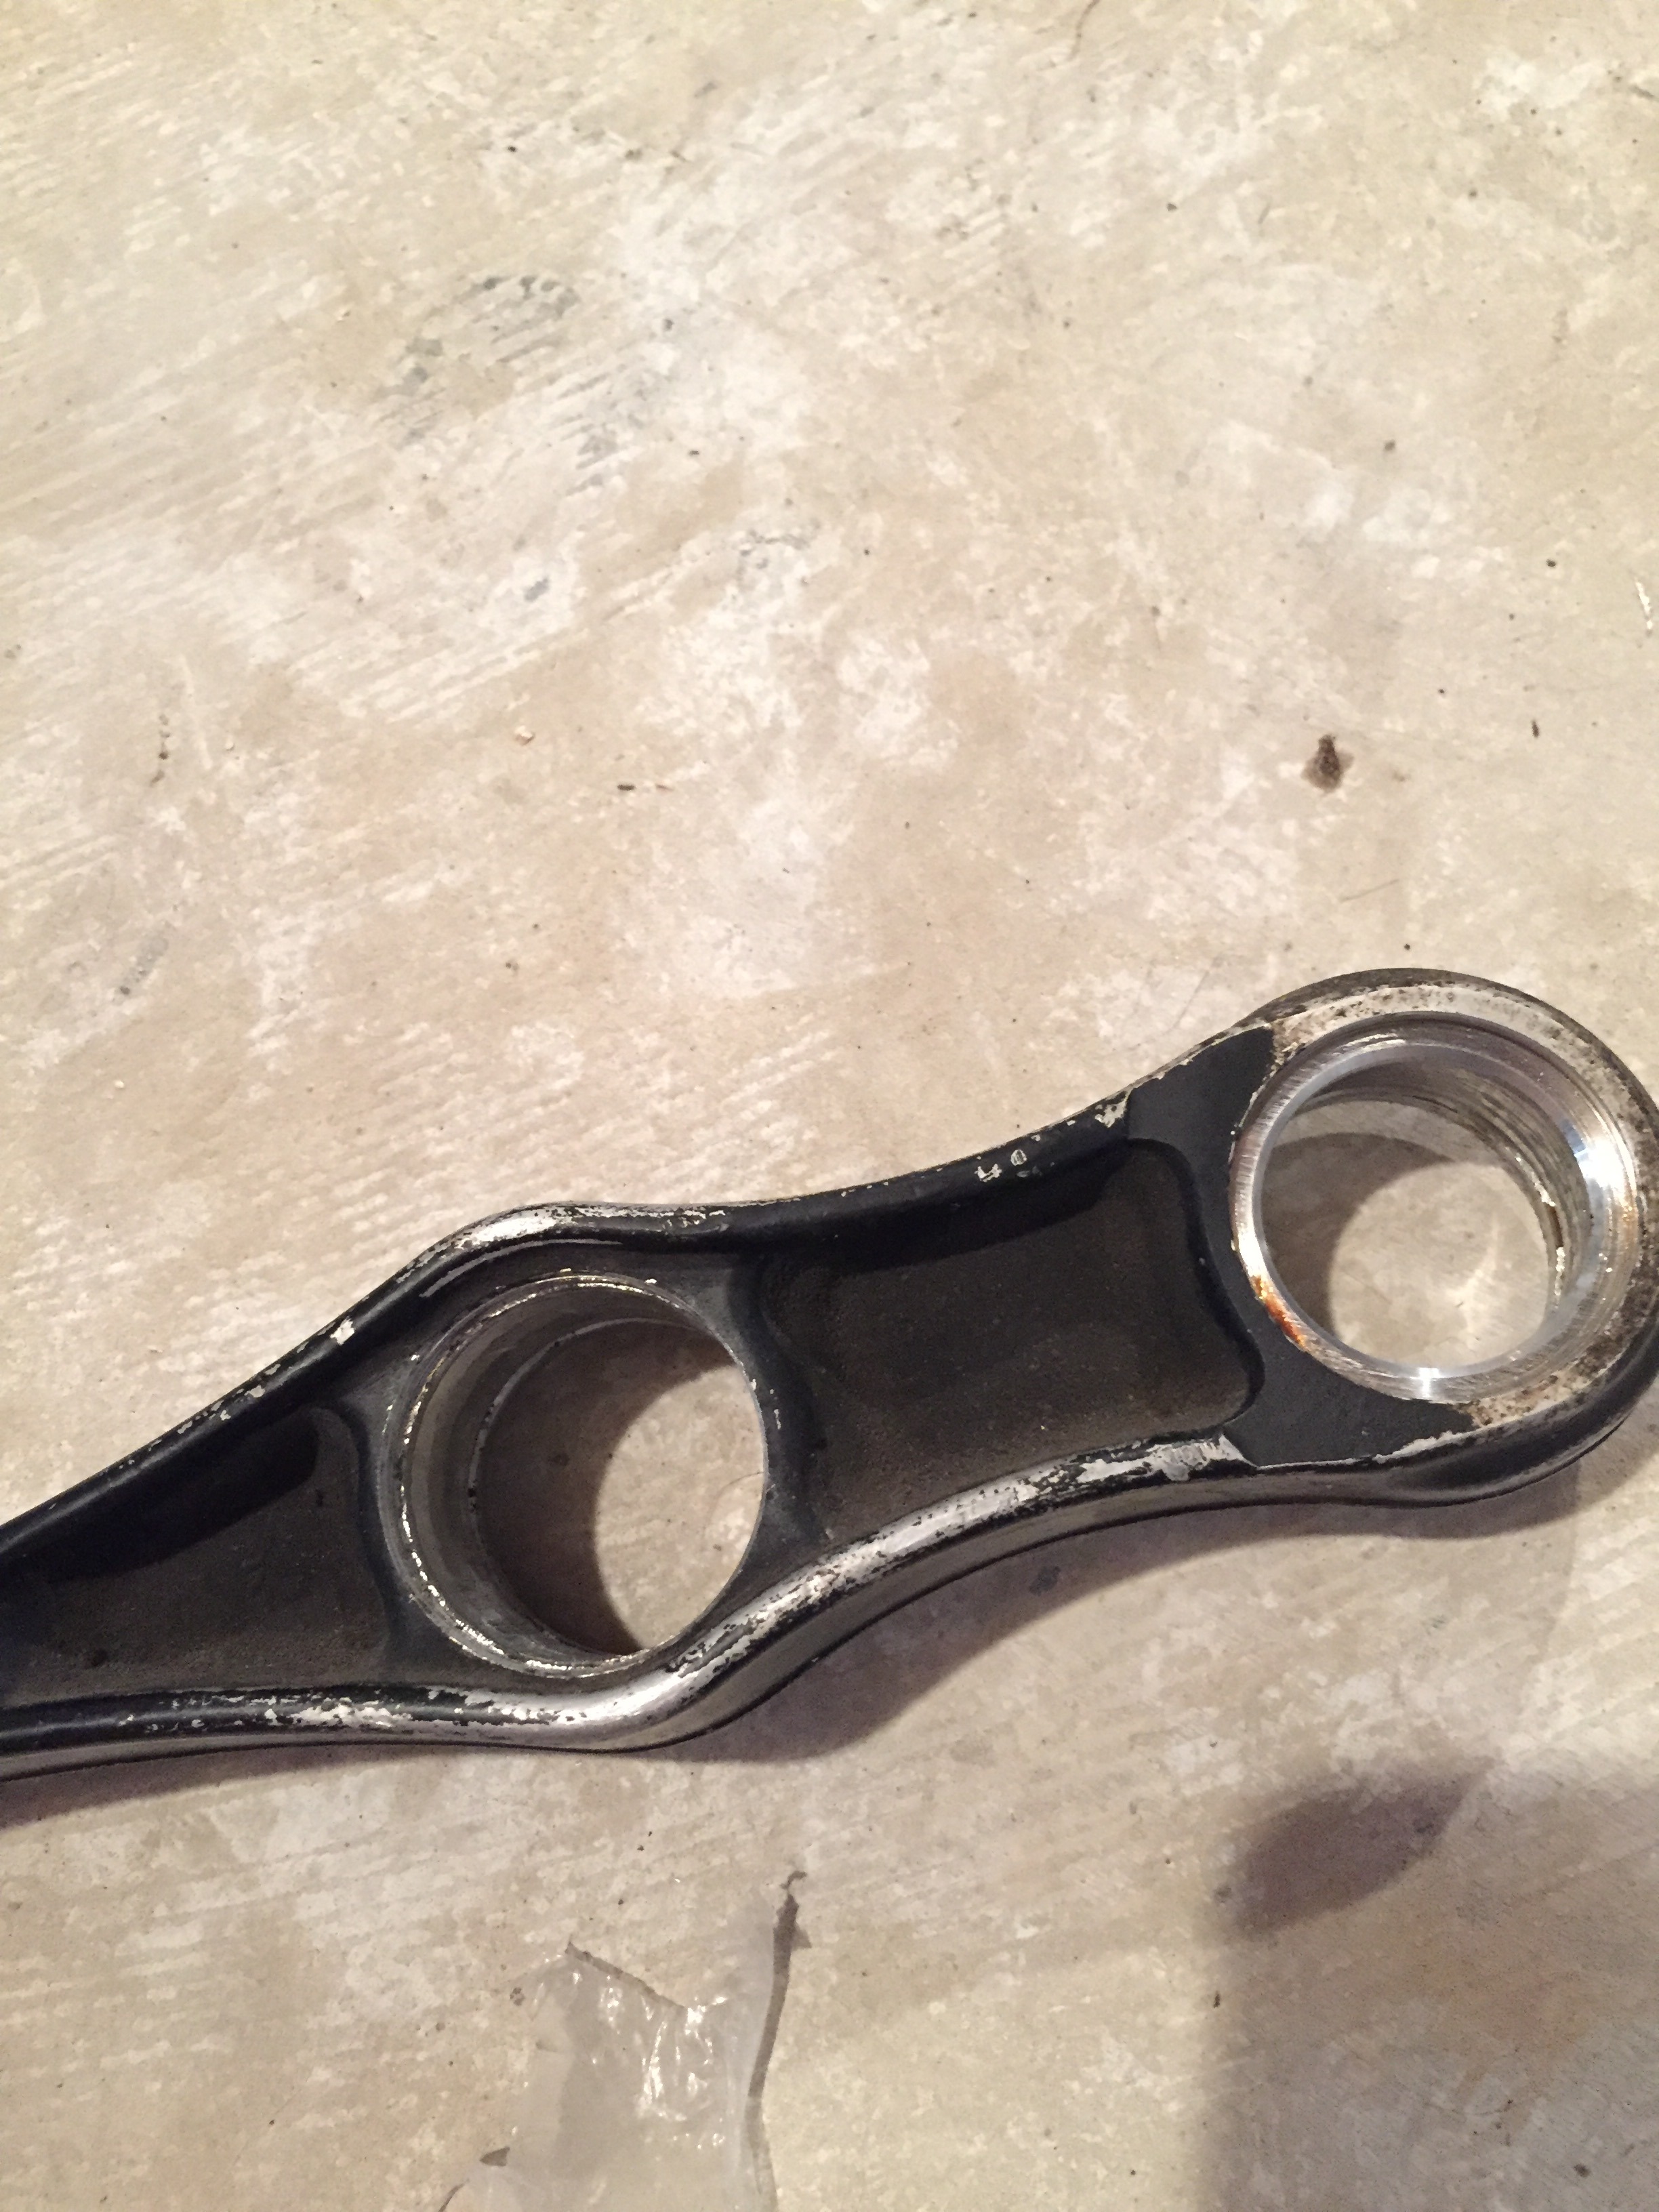
While pushing out the first pillowball I made a stupid mistake -_- Didn't realize it wasn't the same diameter all the way through and pressed out the inside lip. So a new arm is on its way.
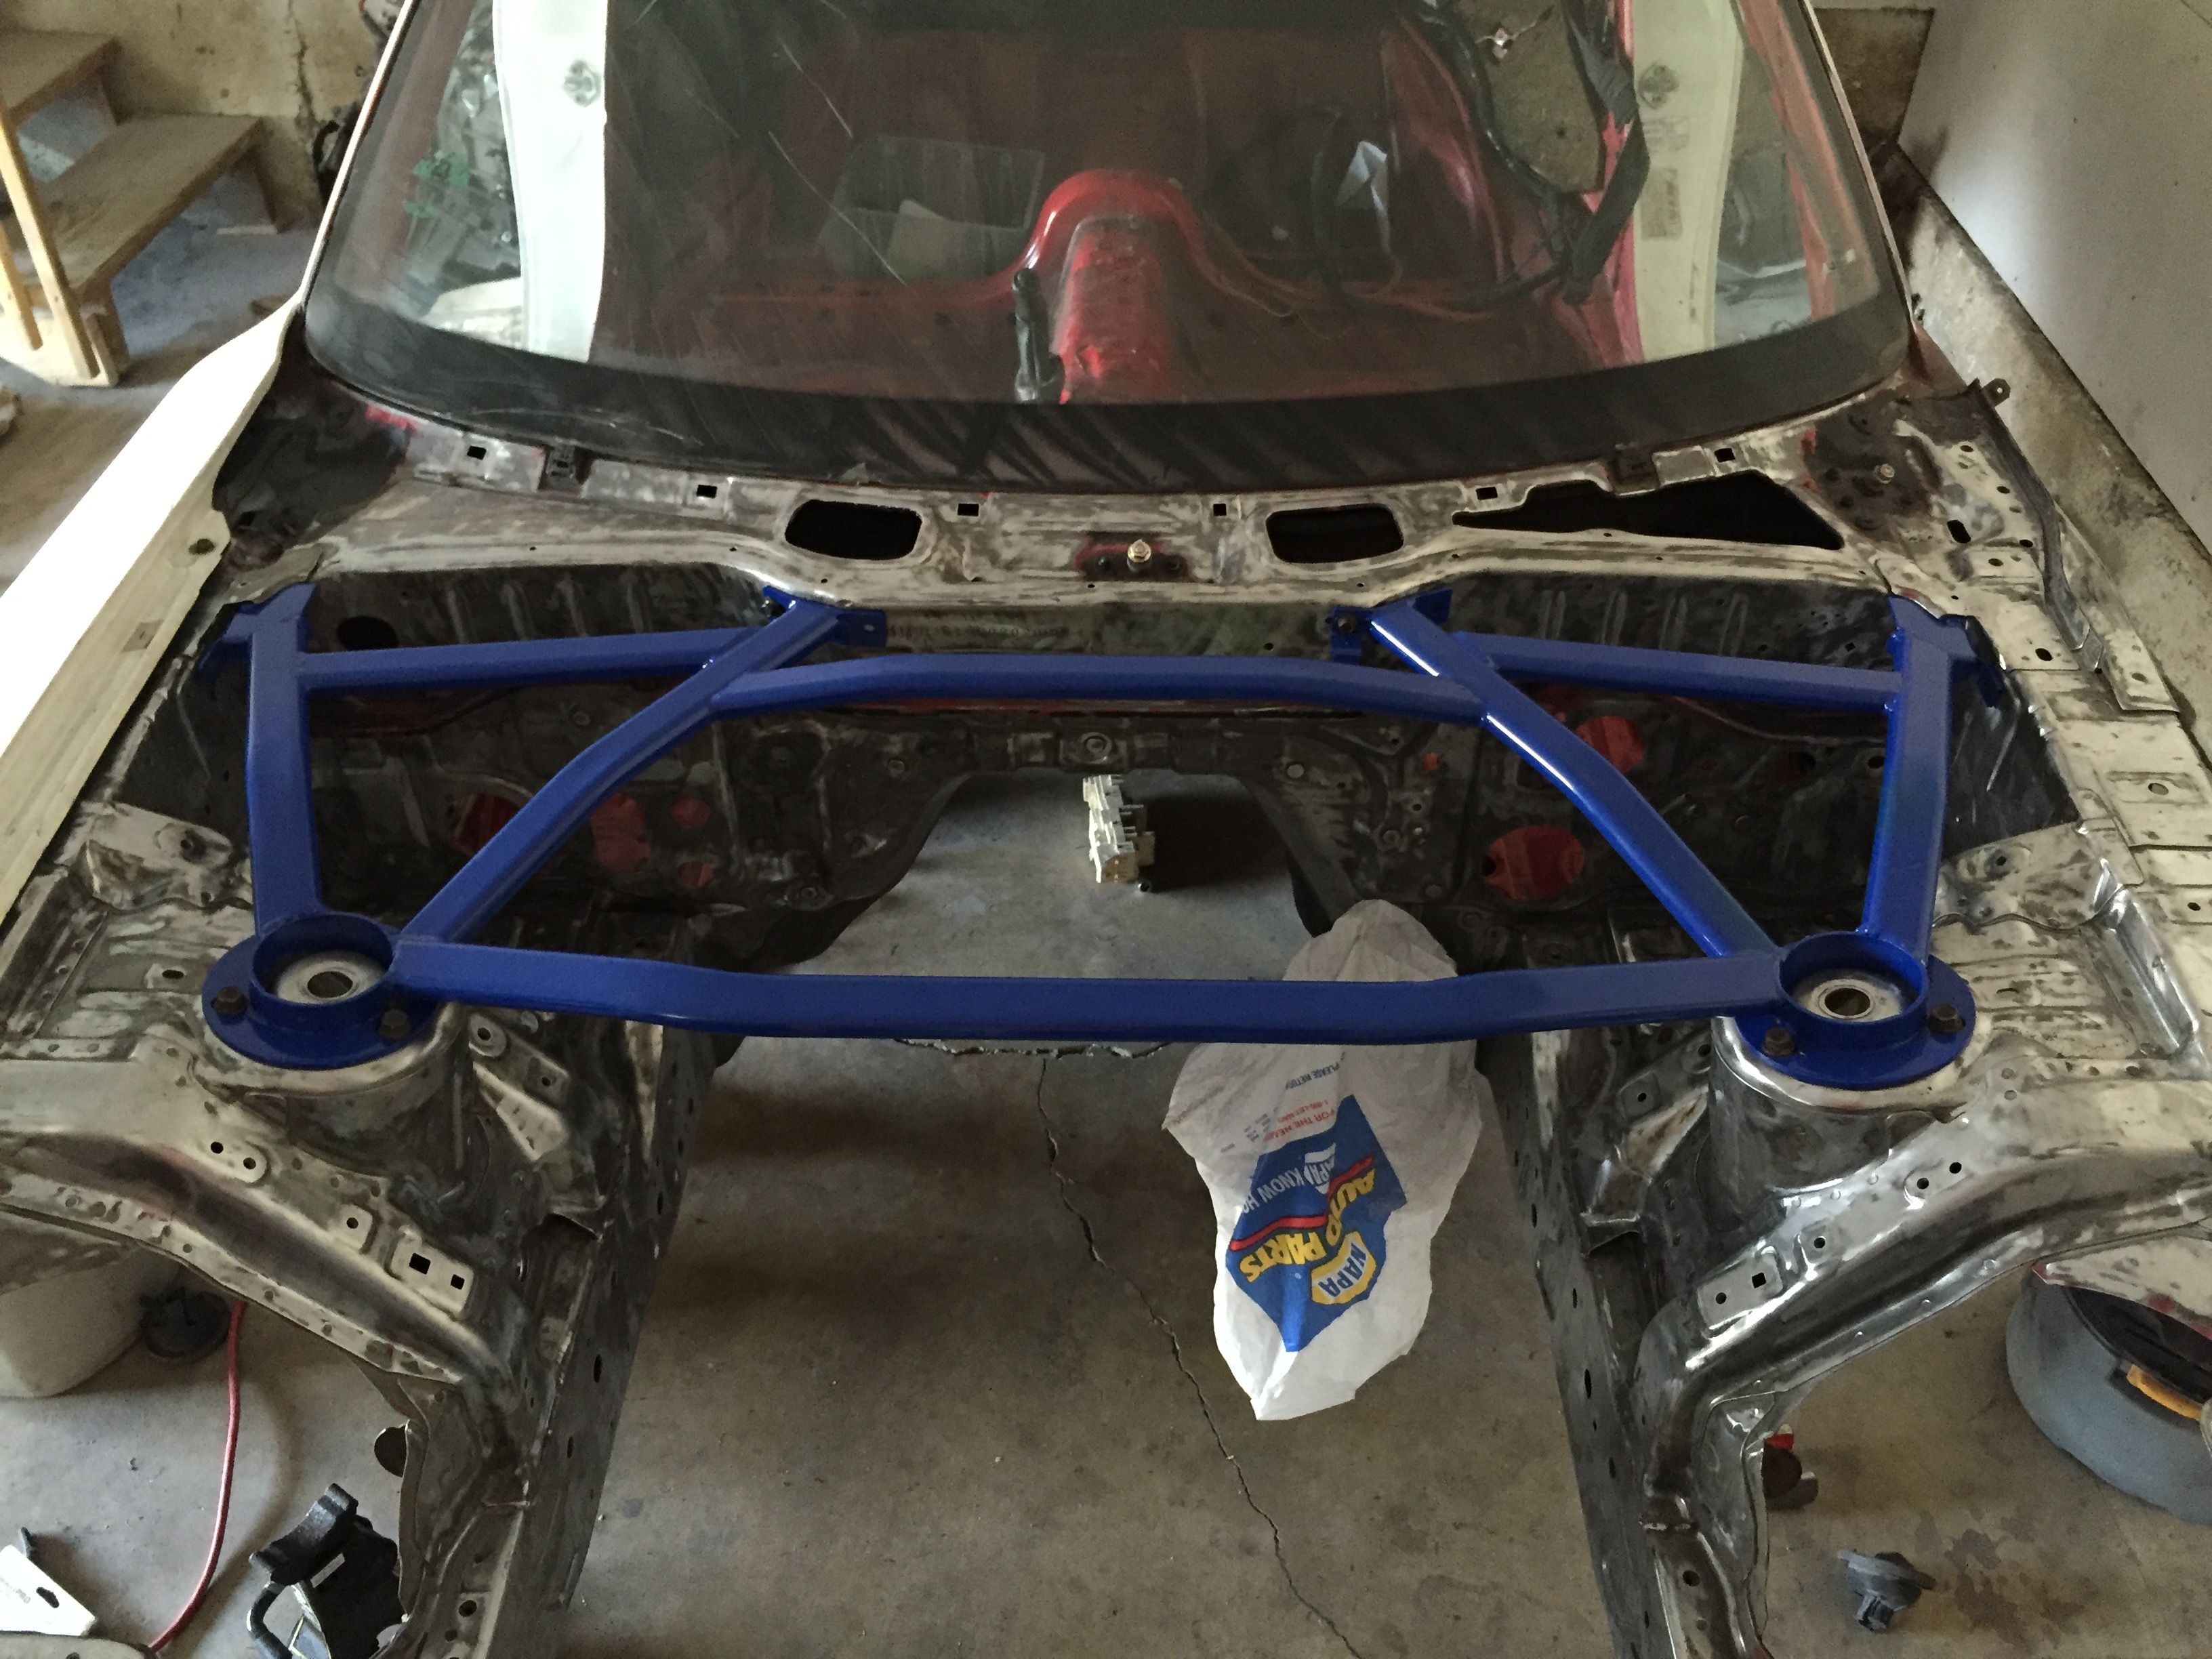
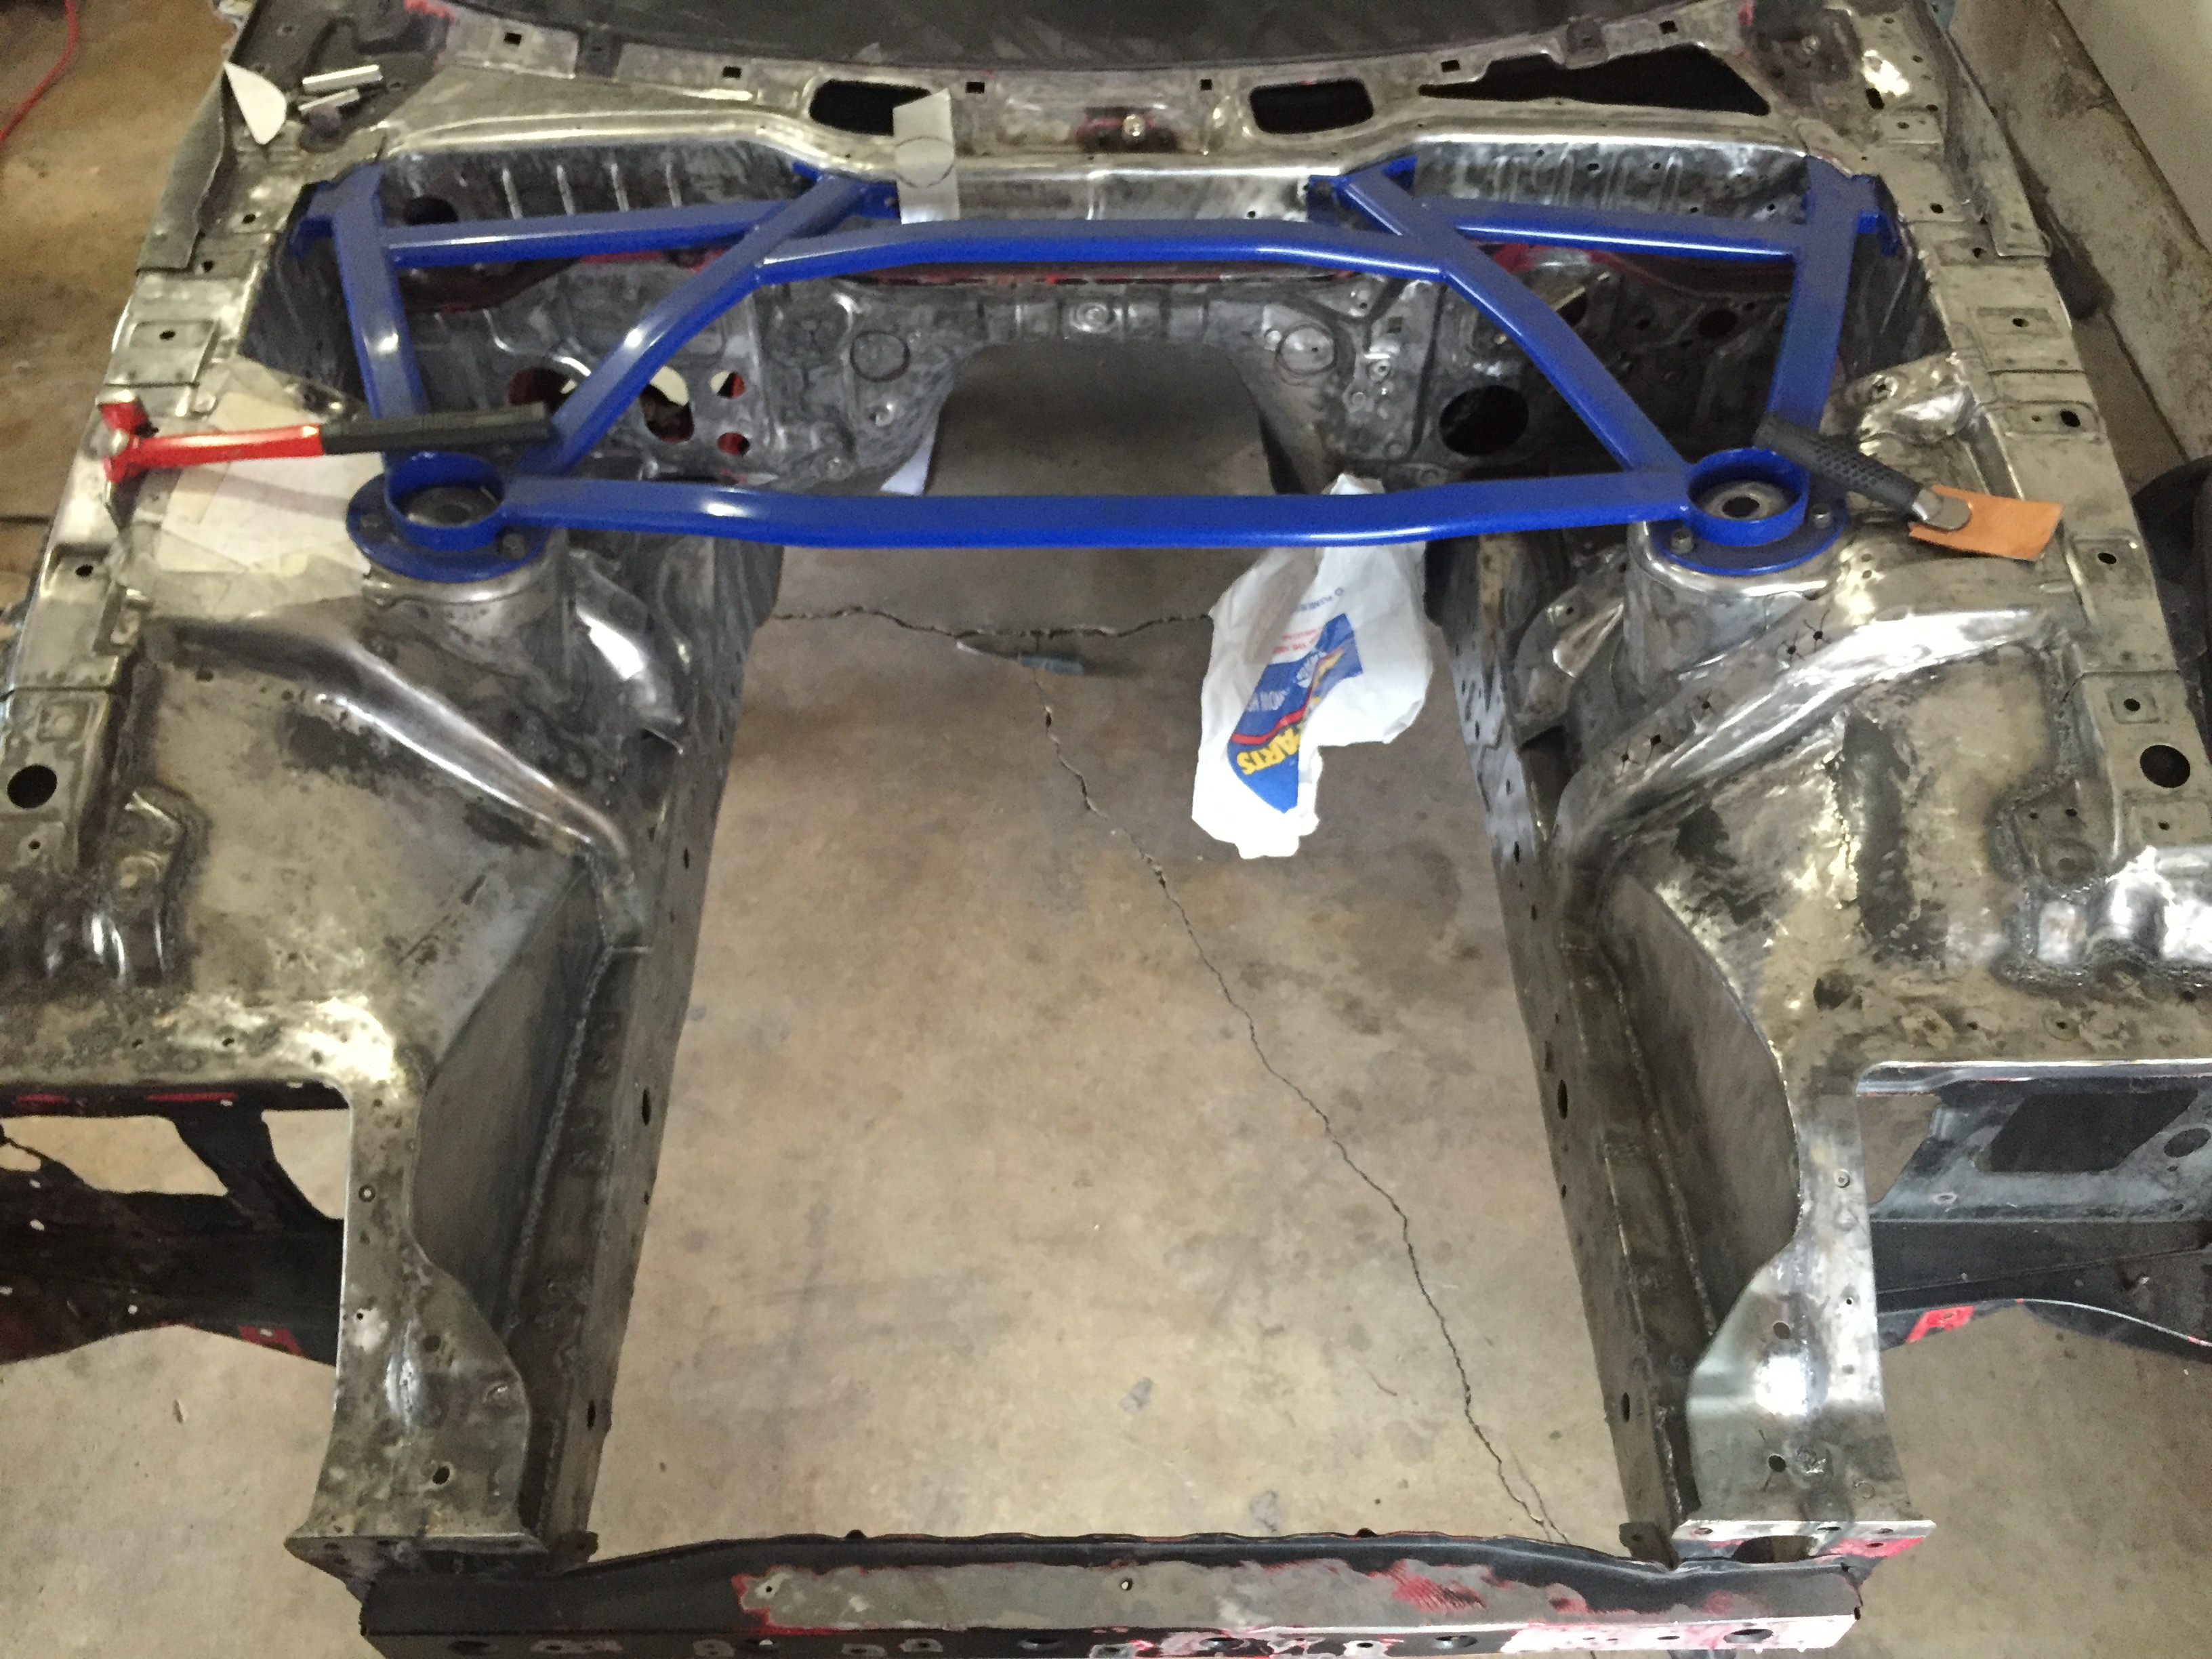
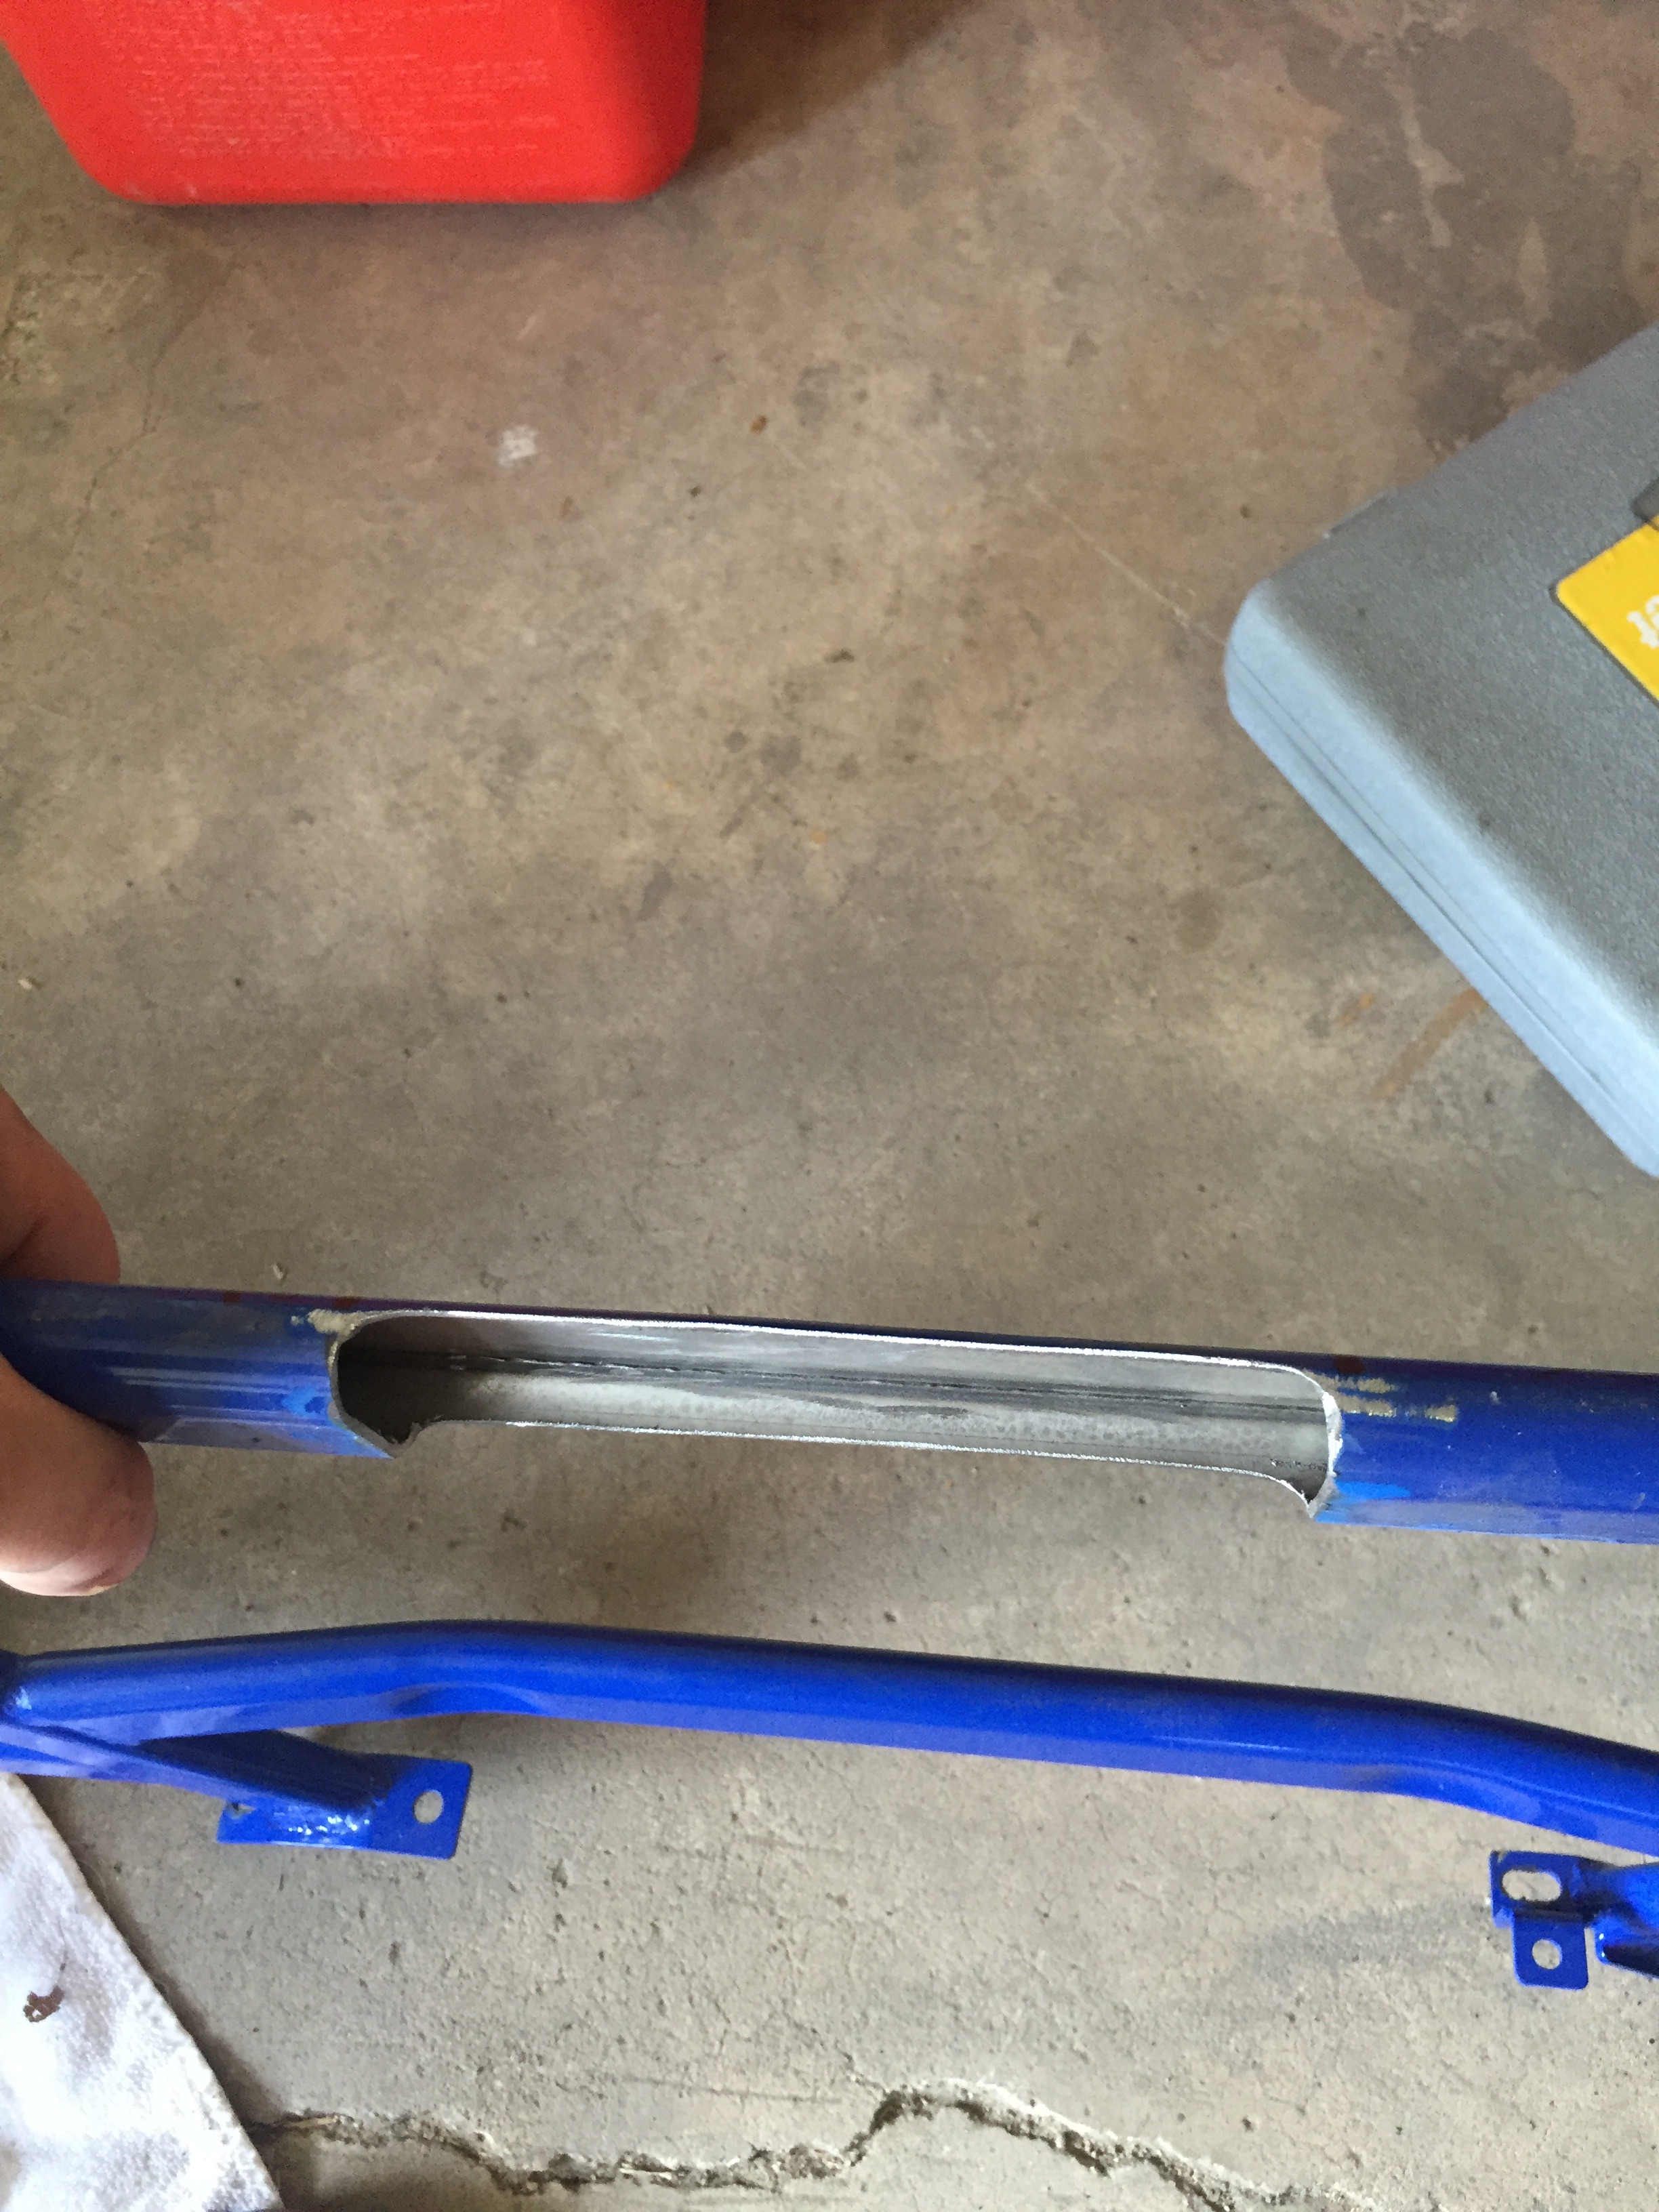
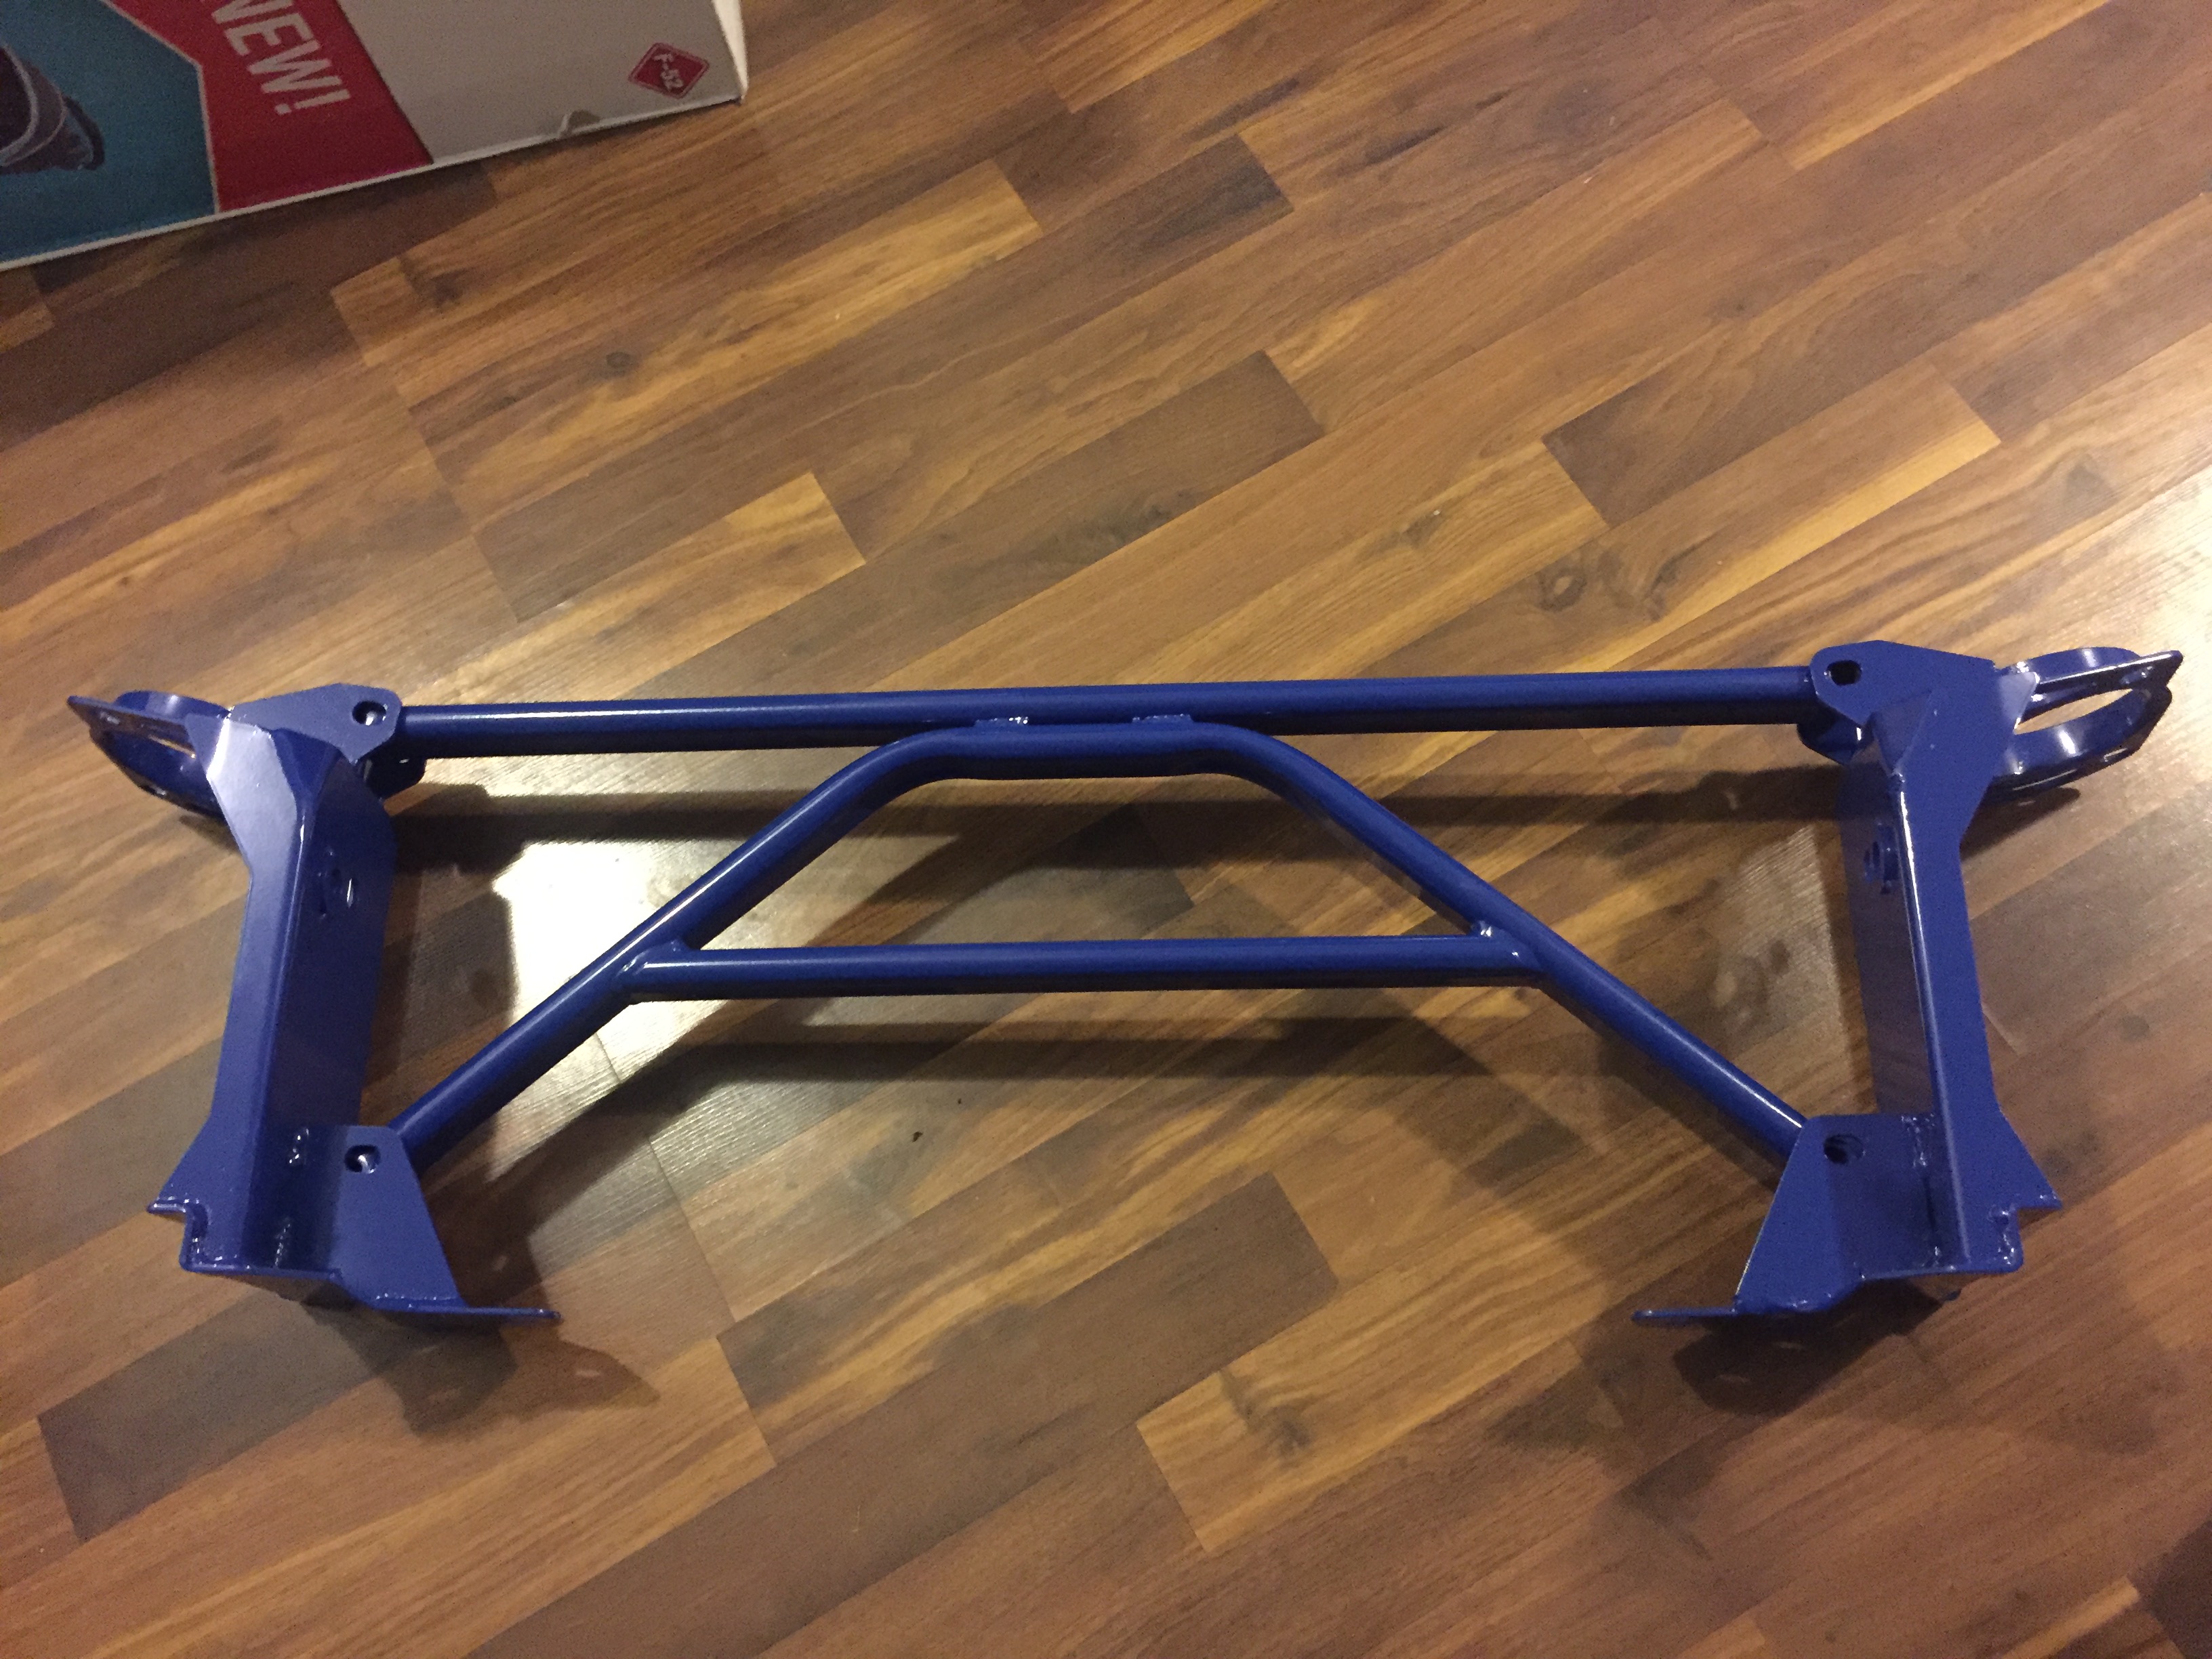
Two more things here and then I'm finished. Picked up the KTS front strut bar and it was well worth the money (autoexe copy). I have very cool plans to modify this and can't wait to do it. Not sure if the motor will fit under the front part, but I'll tackle that problem when it comes.
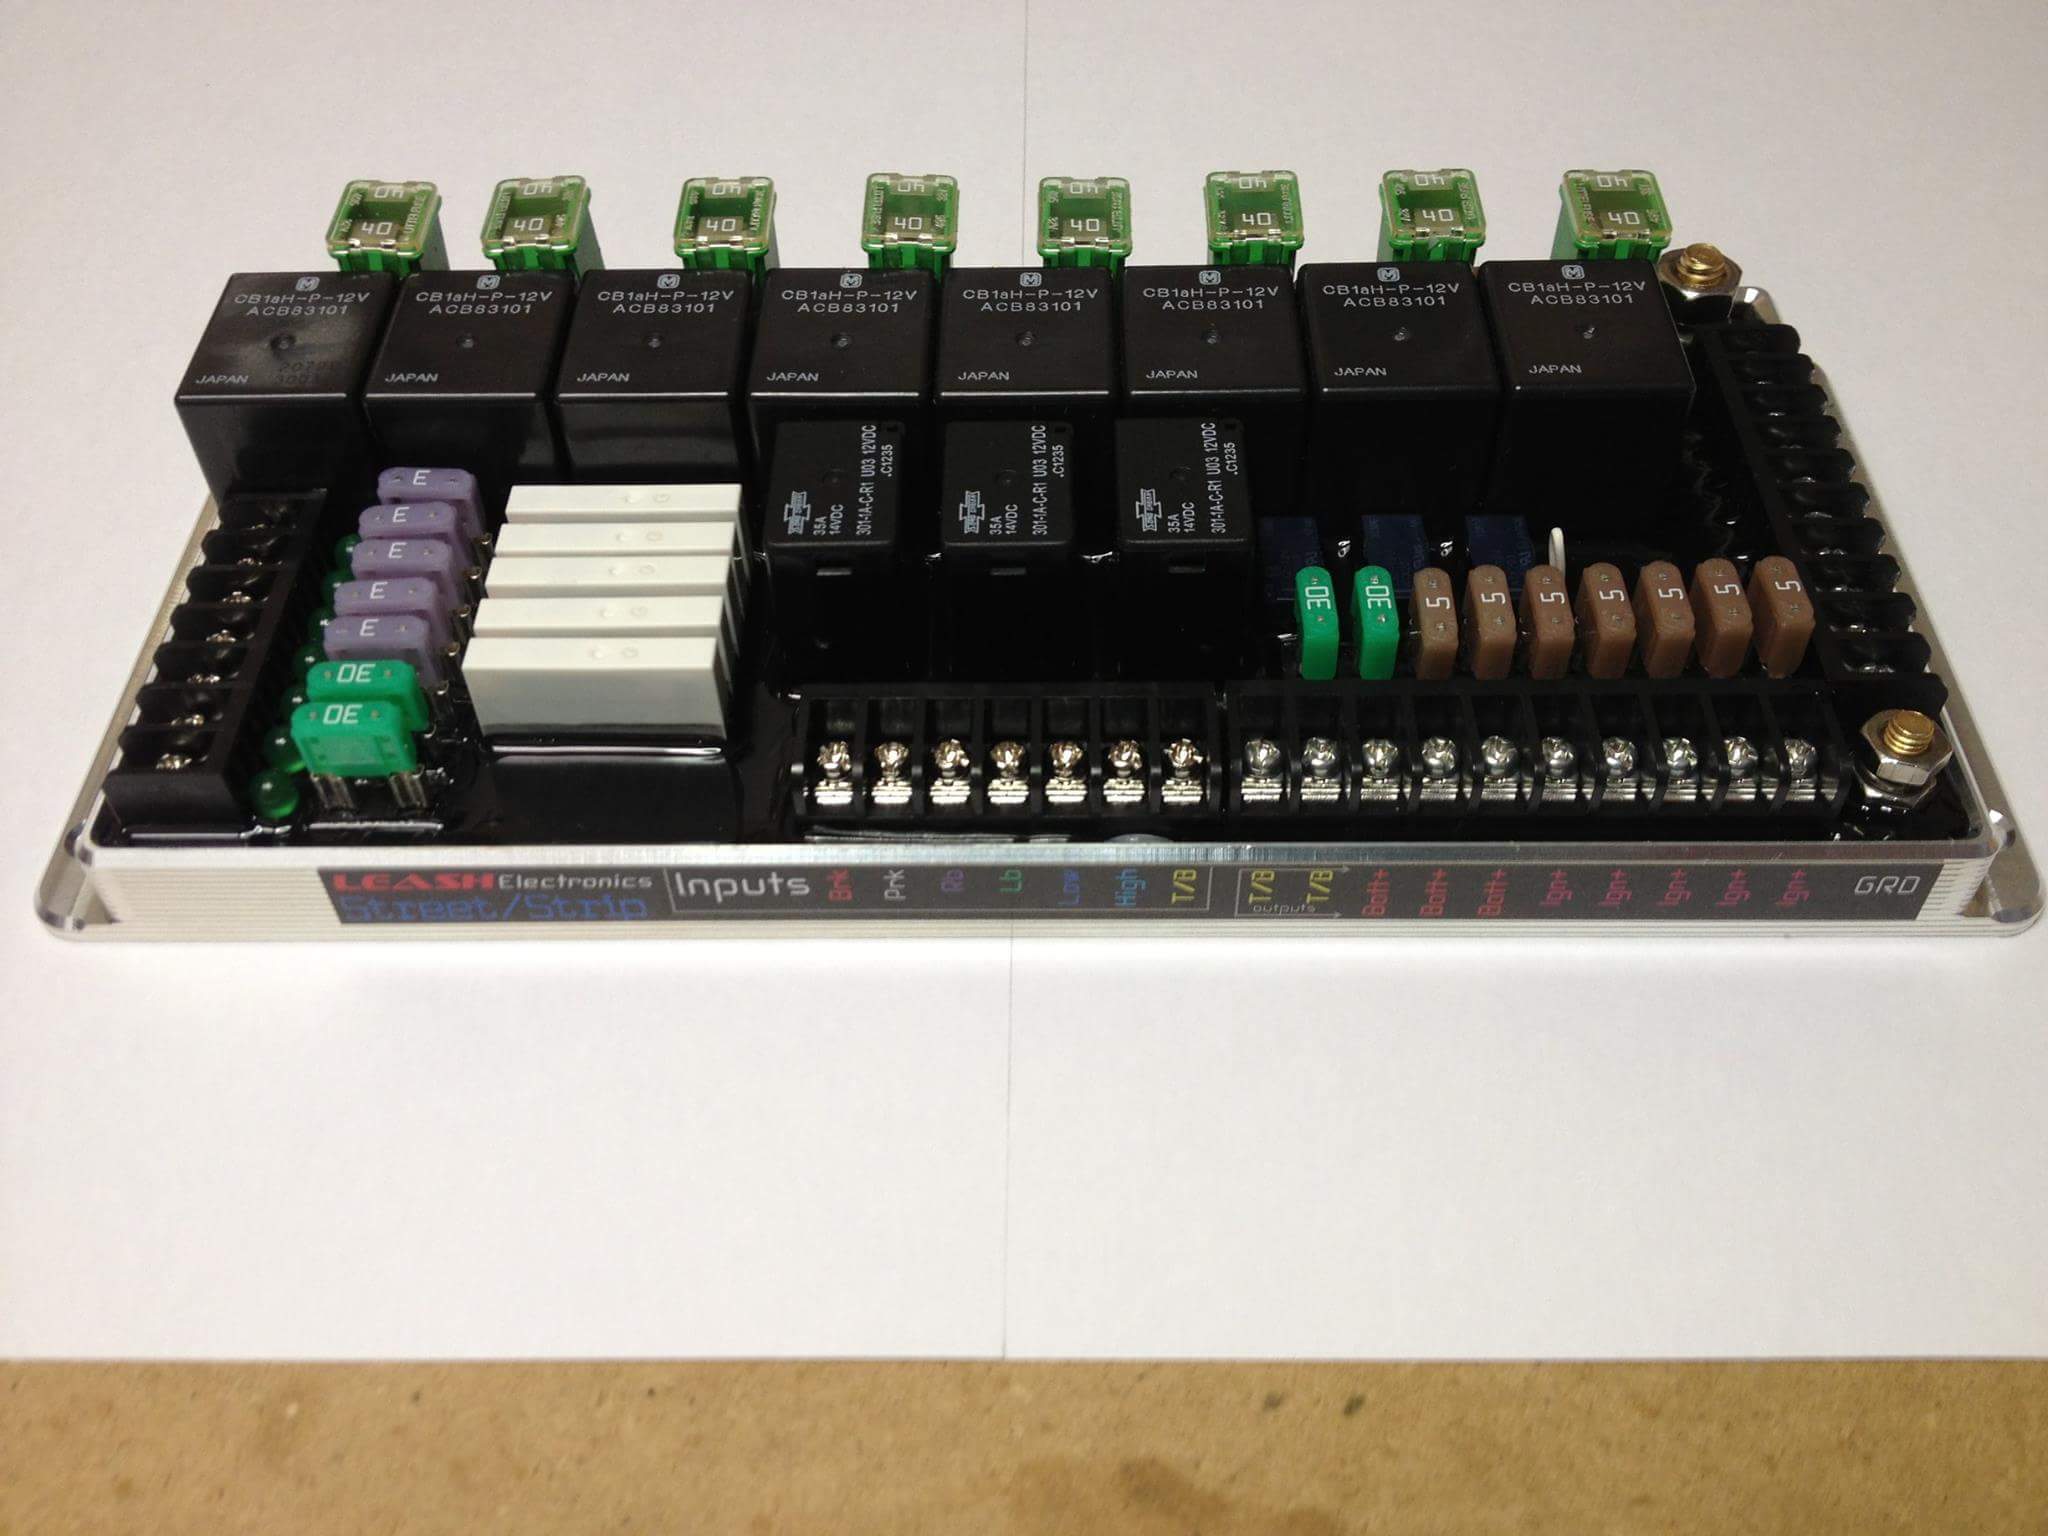
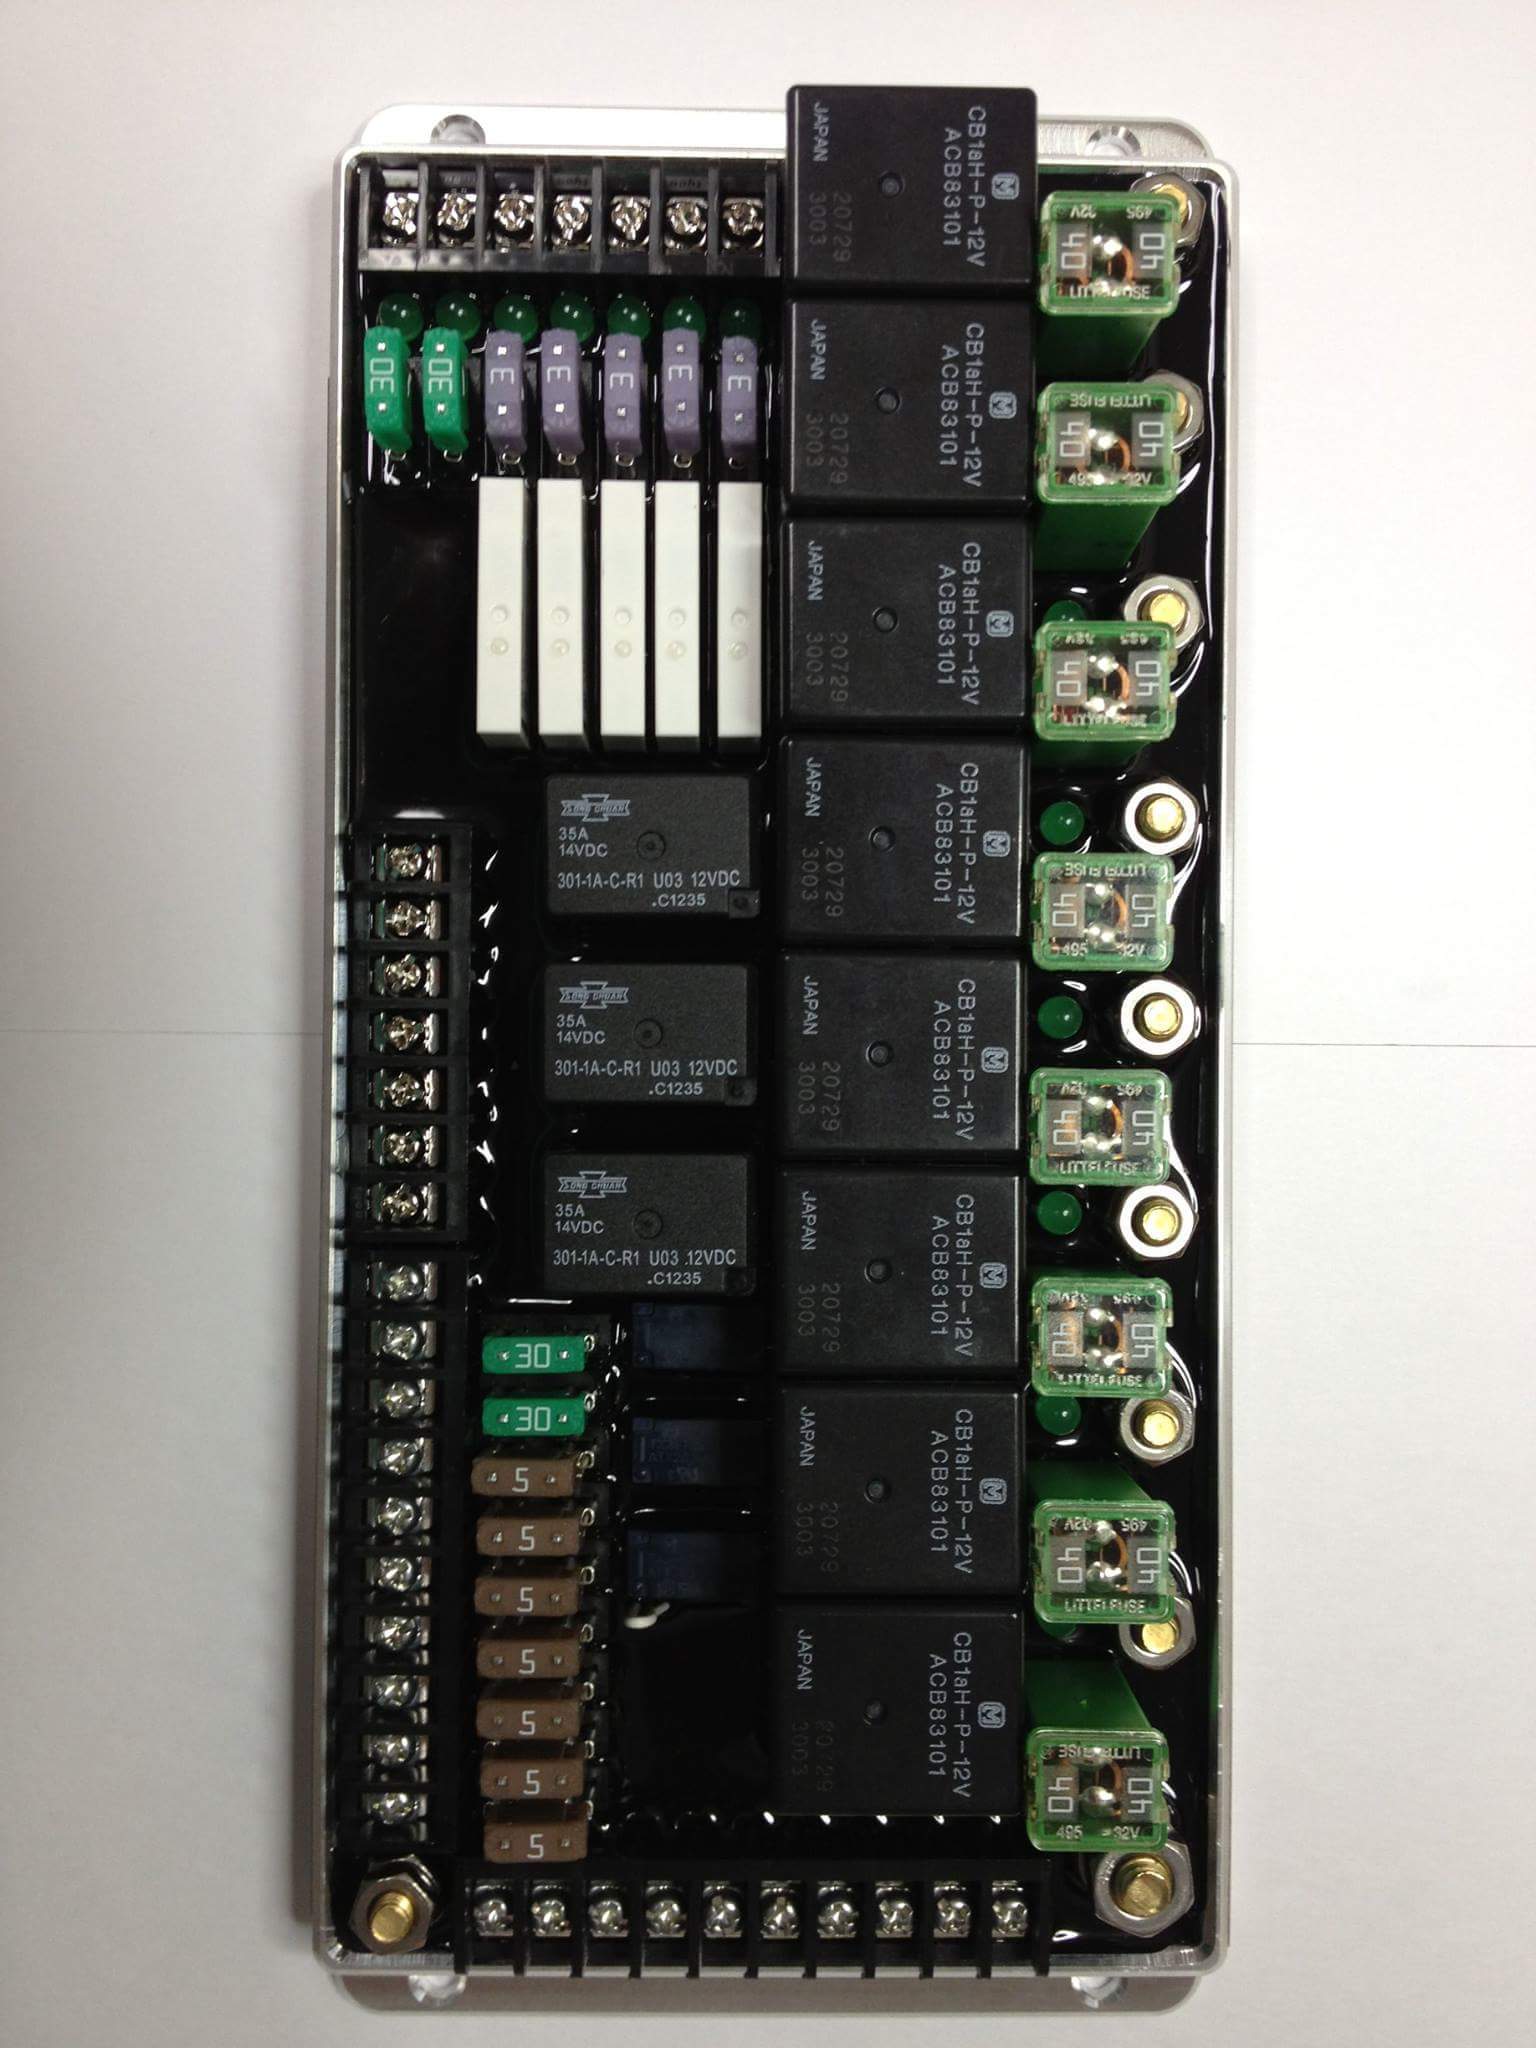
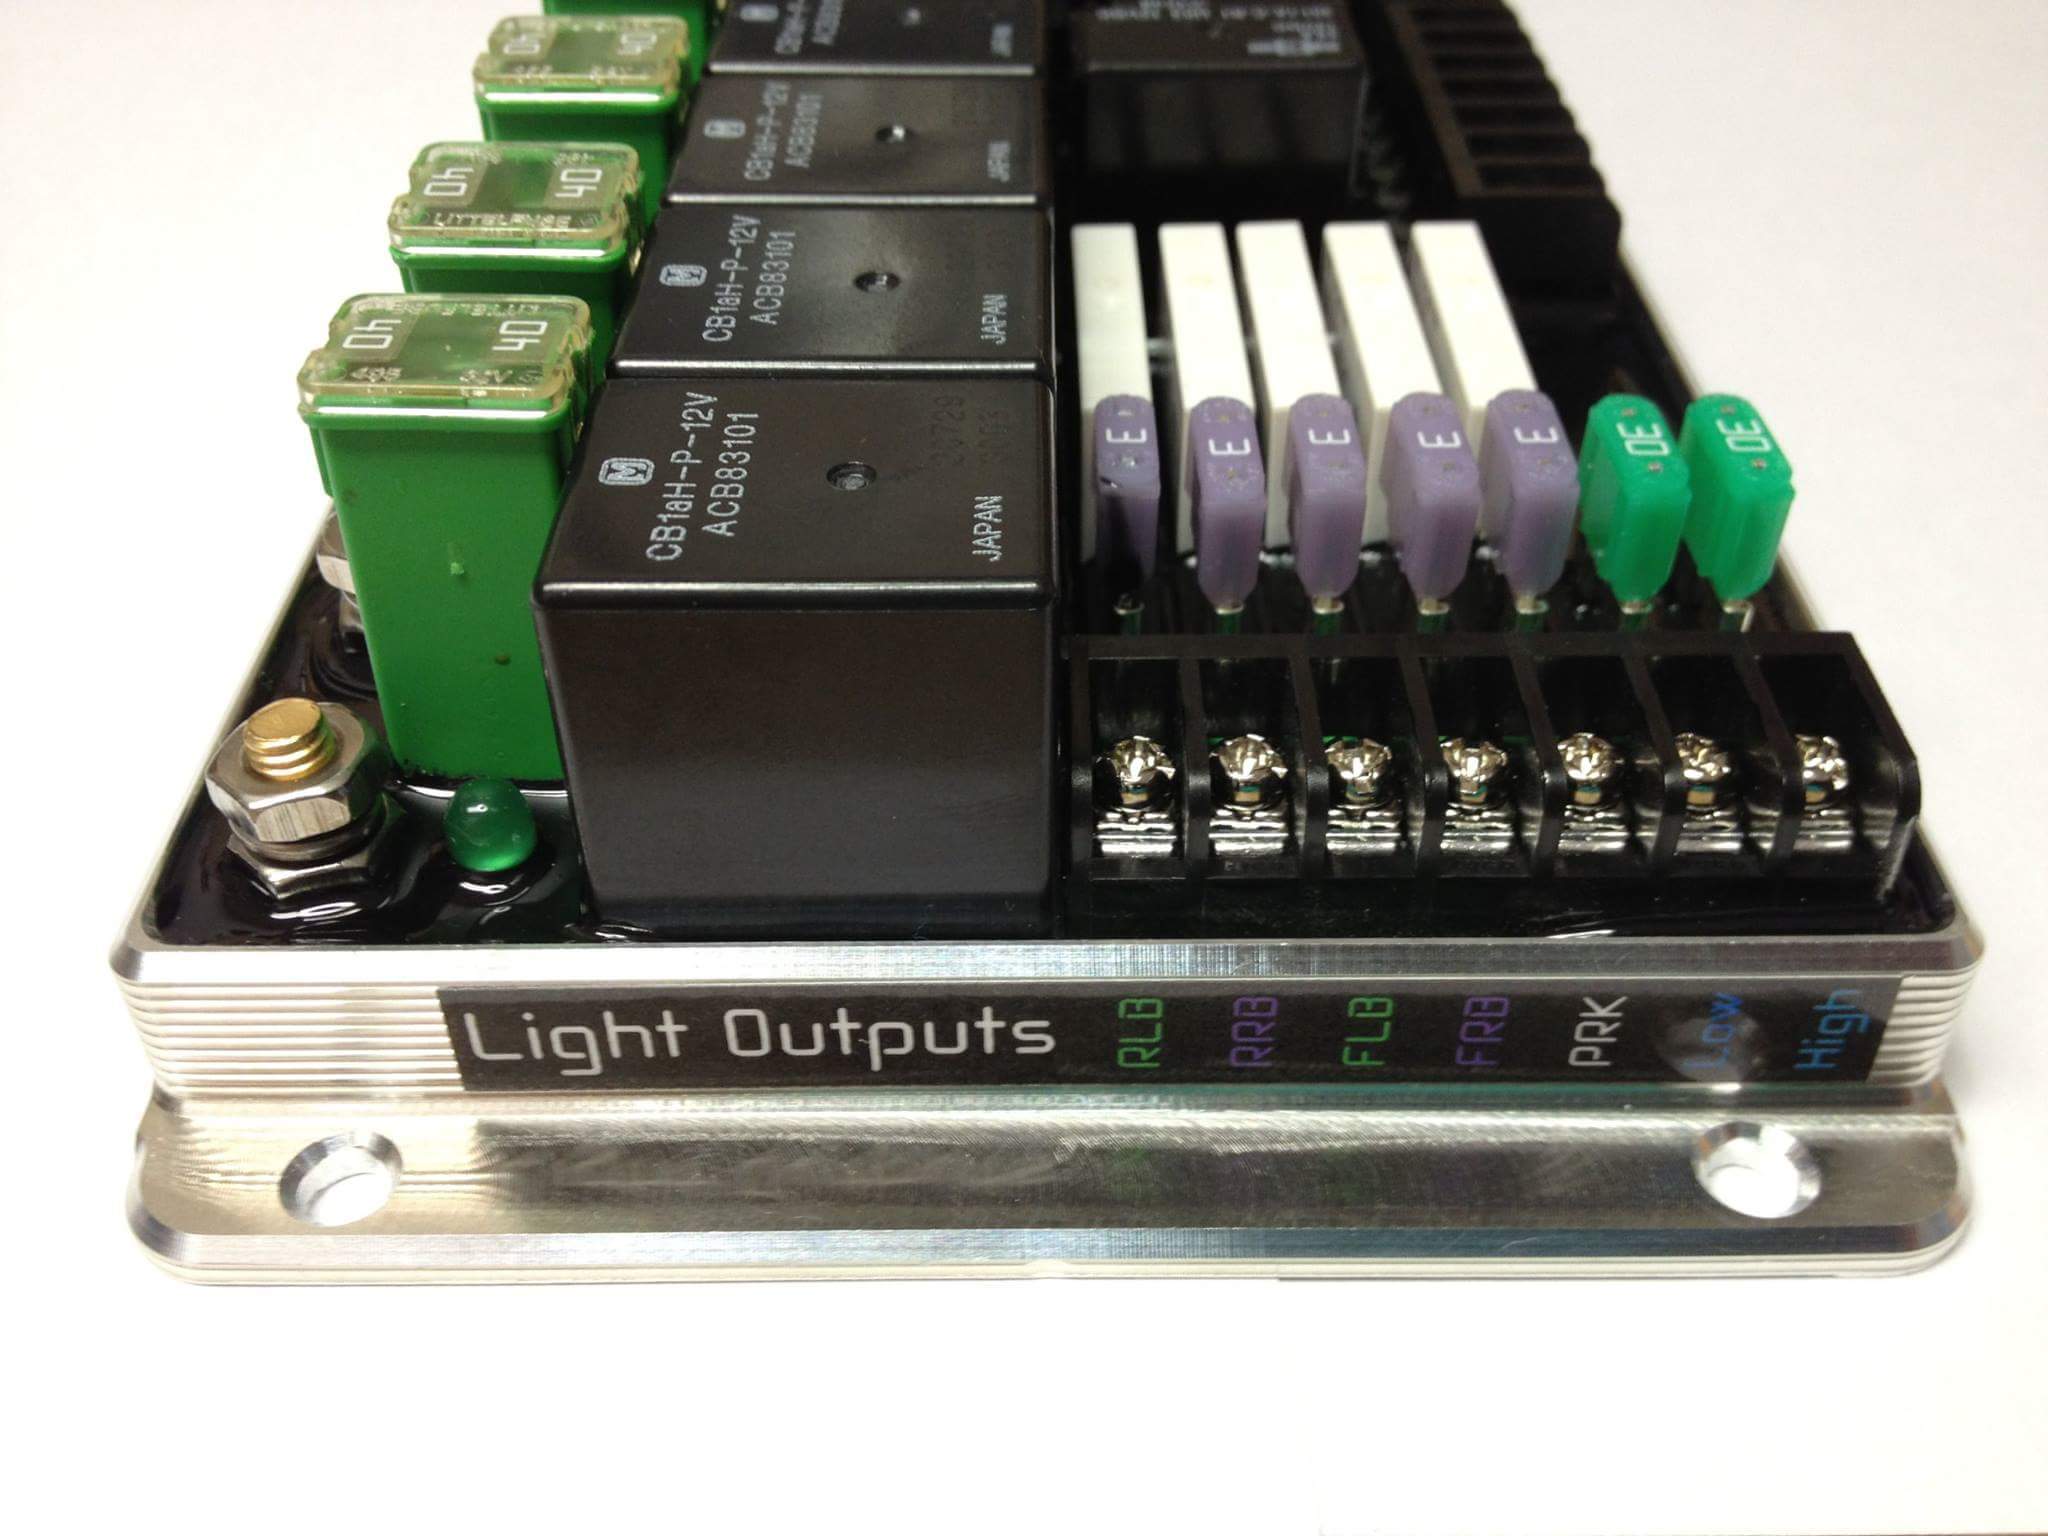
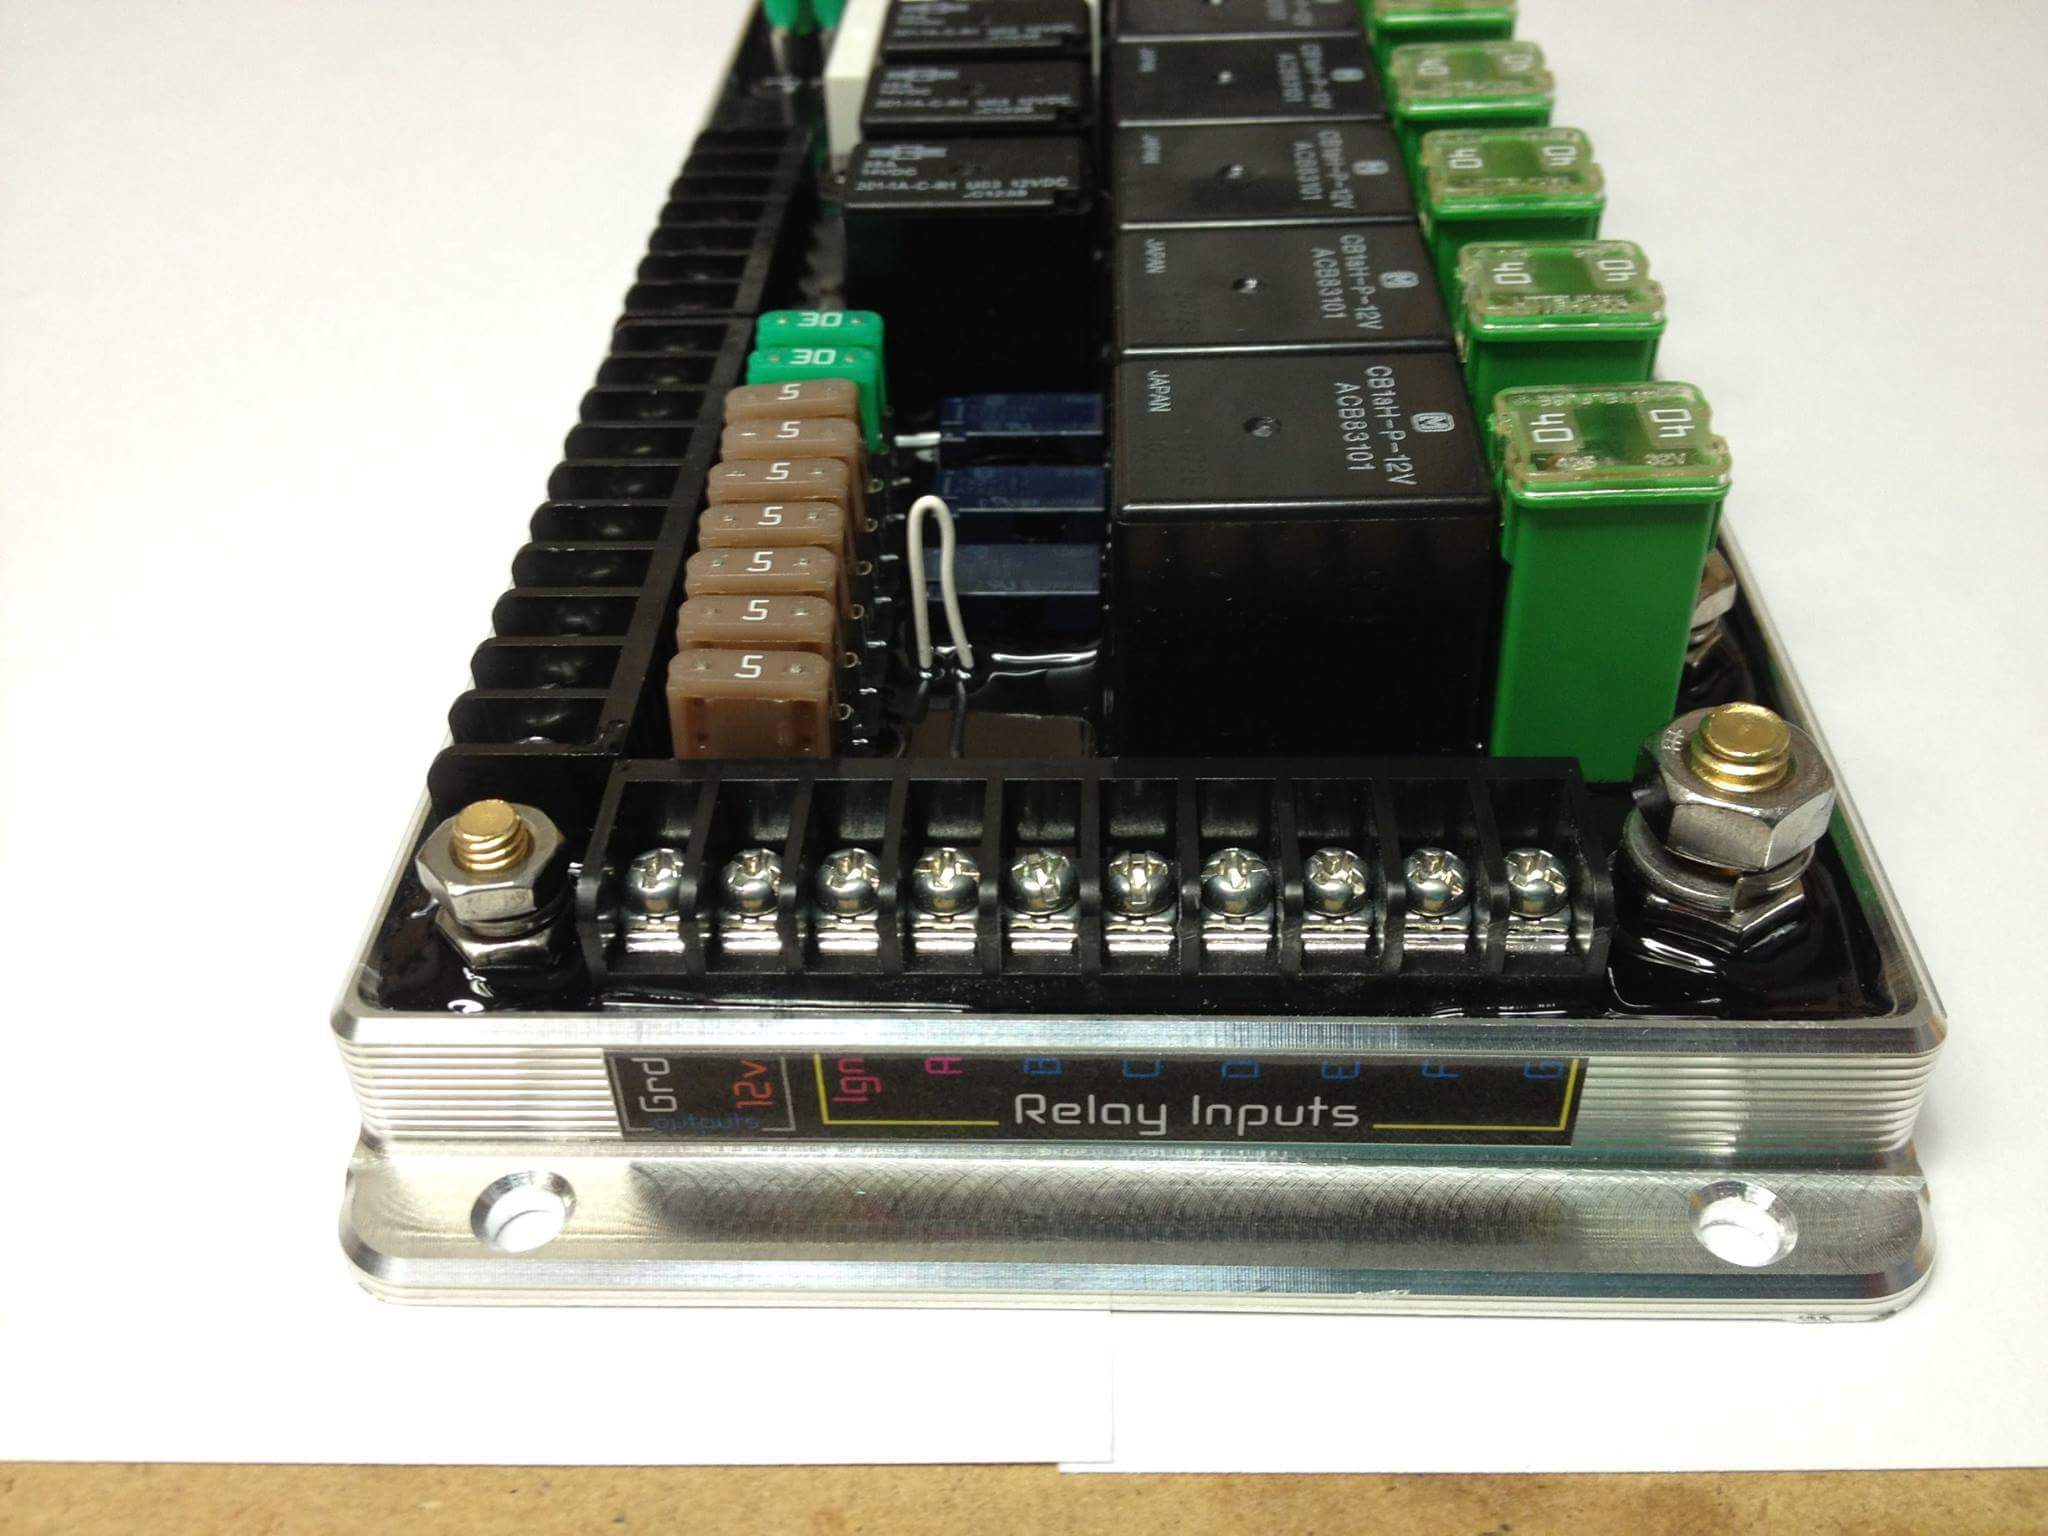
The last thing that I did 30 minutes ago was order my Leash Electronics Street/Strip wiring board. This thing is amaazziinngg in my opinion. Has inputs/outputs for basically everything you could need. Everything should be ran off of this one board (fuel pump, ecu, fans, headlights, doors, radio, injectors, ac, heater, security system, air lift management etc).


I really didn't like the idea of leaving the interior red when the car will definitely not be red, but I didn't want to go through stripping the interior paint and all that jazz. So, I decided that I would put in some sound deadener while it's apart. This allows me to quieten down the interior while also getting rid of the red. I won't have to clean the surfaces nearly as much to get it to look nice either. So it's a win win imo. Decided on the Second Skin Spectrum in case anyone is wondering. Ordered 2 gallons, which will only add 20 pounds if I use all of it. Since I will be painting the interior anyhow, I think I may put the subframes back in and get the car on the ground so I can stitch weld the interior seams too. May as well right?
Speaking of putting subframes back in, I pulled out the rear subframe. I'm putting in a Kaaz 1.5 way diff I picked up along with all new pillowballs. While it's apart I'll be cleaning/painting everything.

While pushing out the first pillowball I made a stupid mistake -_- Didn't realize it wasn't the same diameter all the way through and pressed out the inside lip. So a new arm is on its way.

Two more things here and then I'm finished. Picked up the KTS front strut bar and it was well worth the money (autoexe copy). I have very cool plans to modify this and can't wait to do it. Not sure if the motor will fit under the front part, but I'll tackle that problem when it comes.

The last thing that I did 30 minutes ago was order my Leash Electronics Street/Strip wiring board. This thing is amaazziinngg in my opinion. Has inputs/outputs for basically everything you could need. Everything should be ran off of this one board (fuel pump, ecu, fans, headlights, doors, radio, injectors, ac, heater, security system, air lift management etc).


Thread Starter
Full Member
Joined: Apr 2015
Posts: 140
Likes: 5
From: Great Falls, MT
Yeah it will be nice to simplify even more. I hate the clutter in the driver foot well
Thread Starter
Full Member
Joined: Apr 2015
Posts: 140
Likes: 5
From: Great Falls, MT
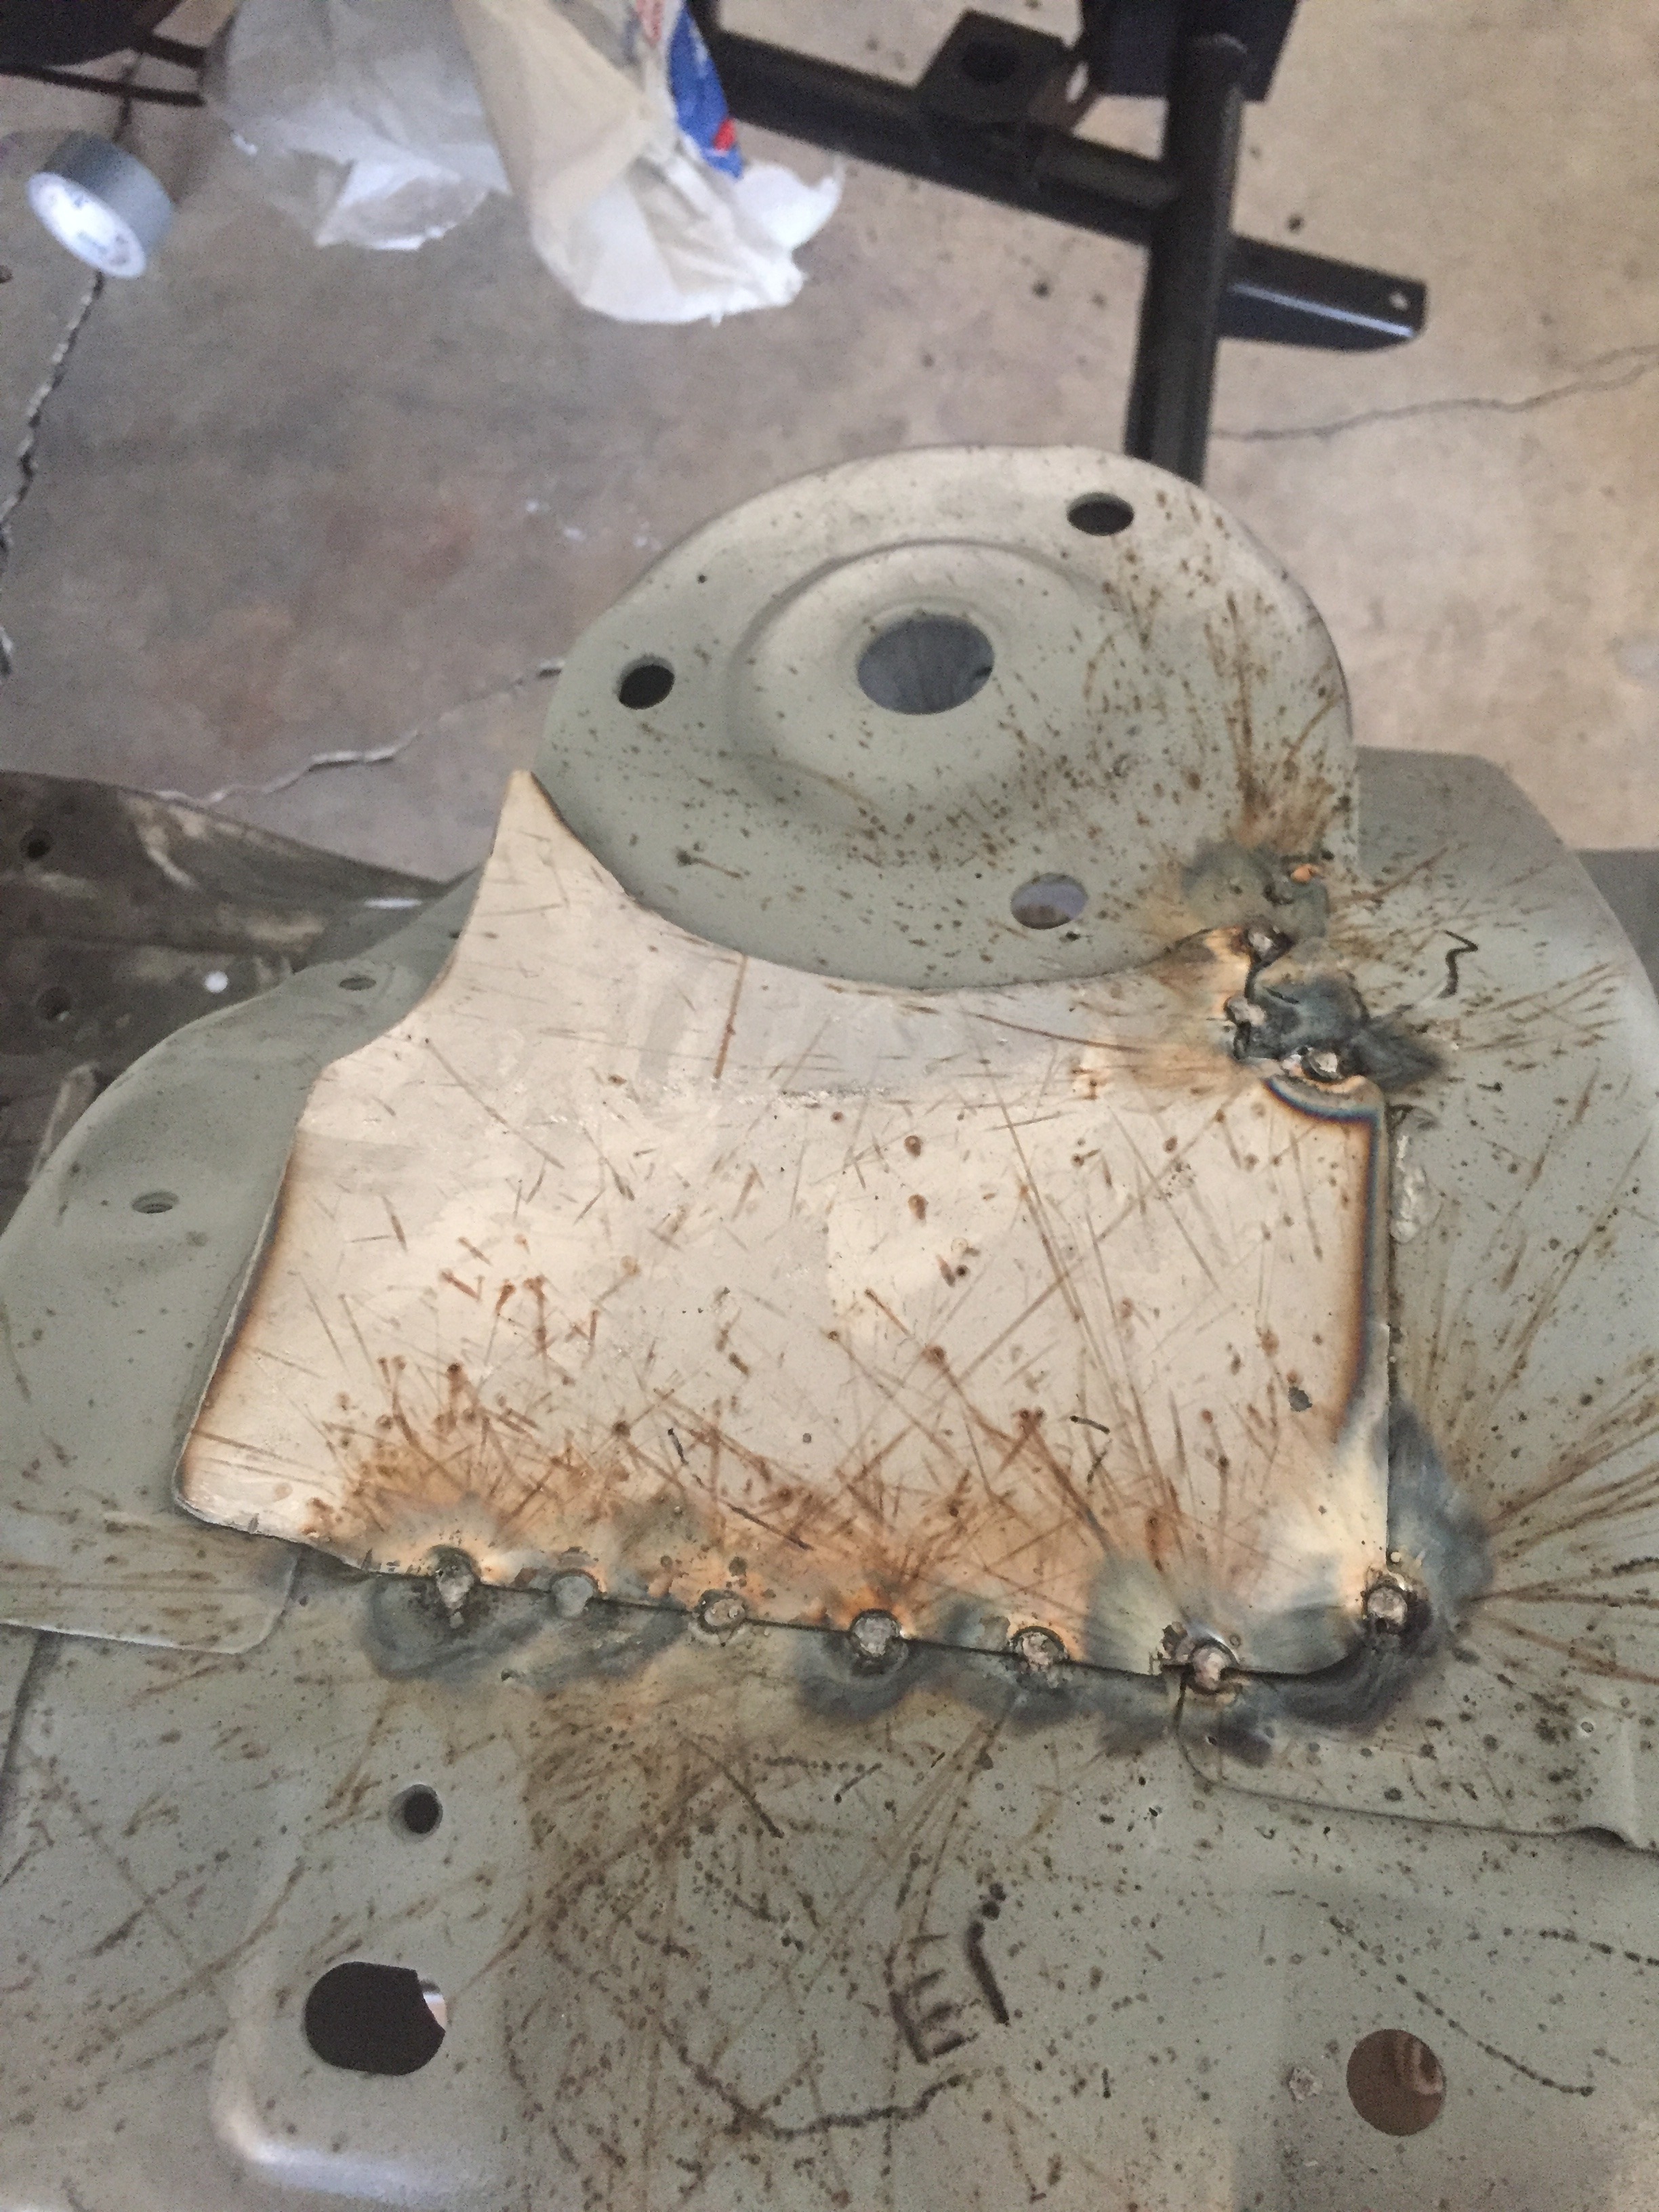
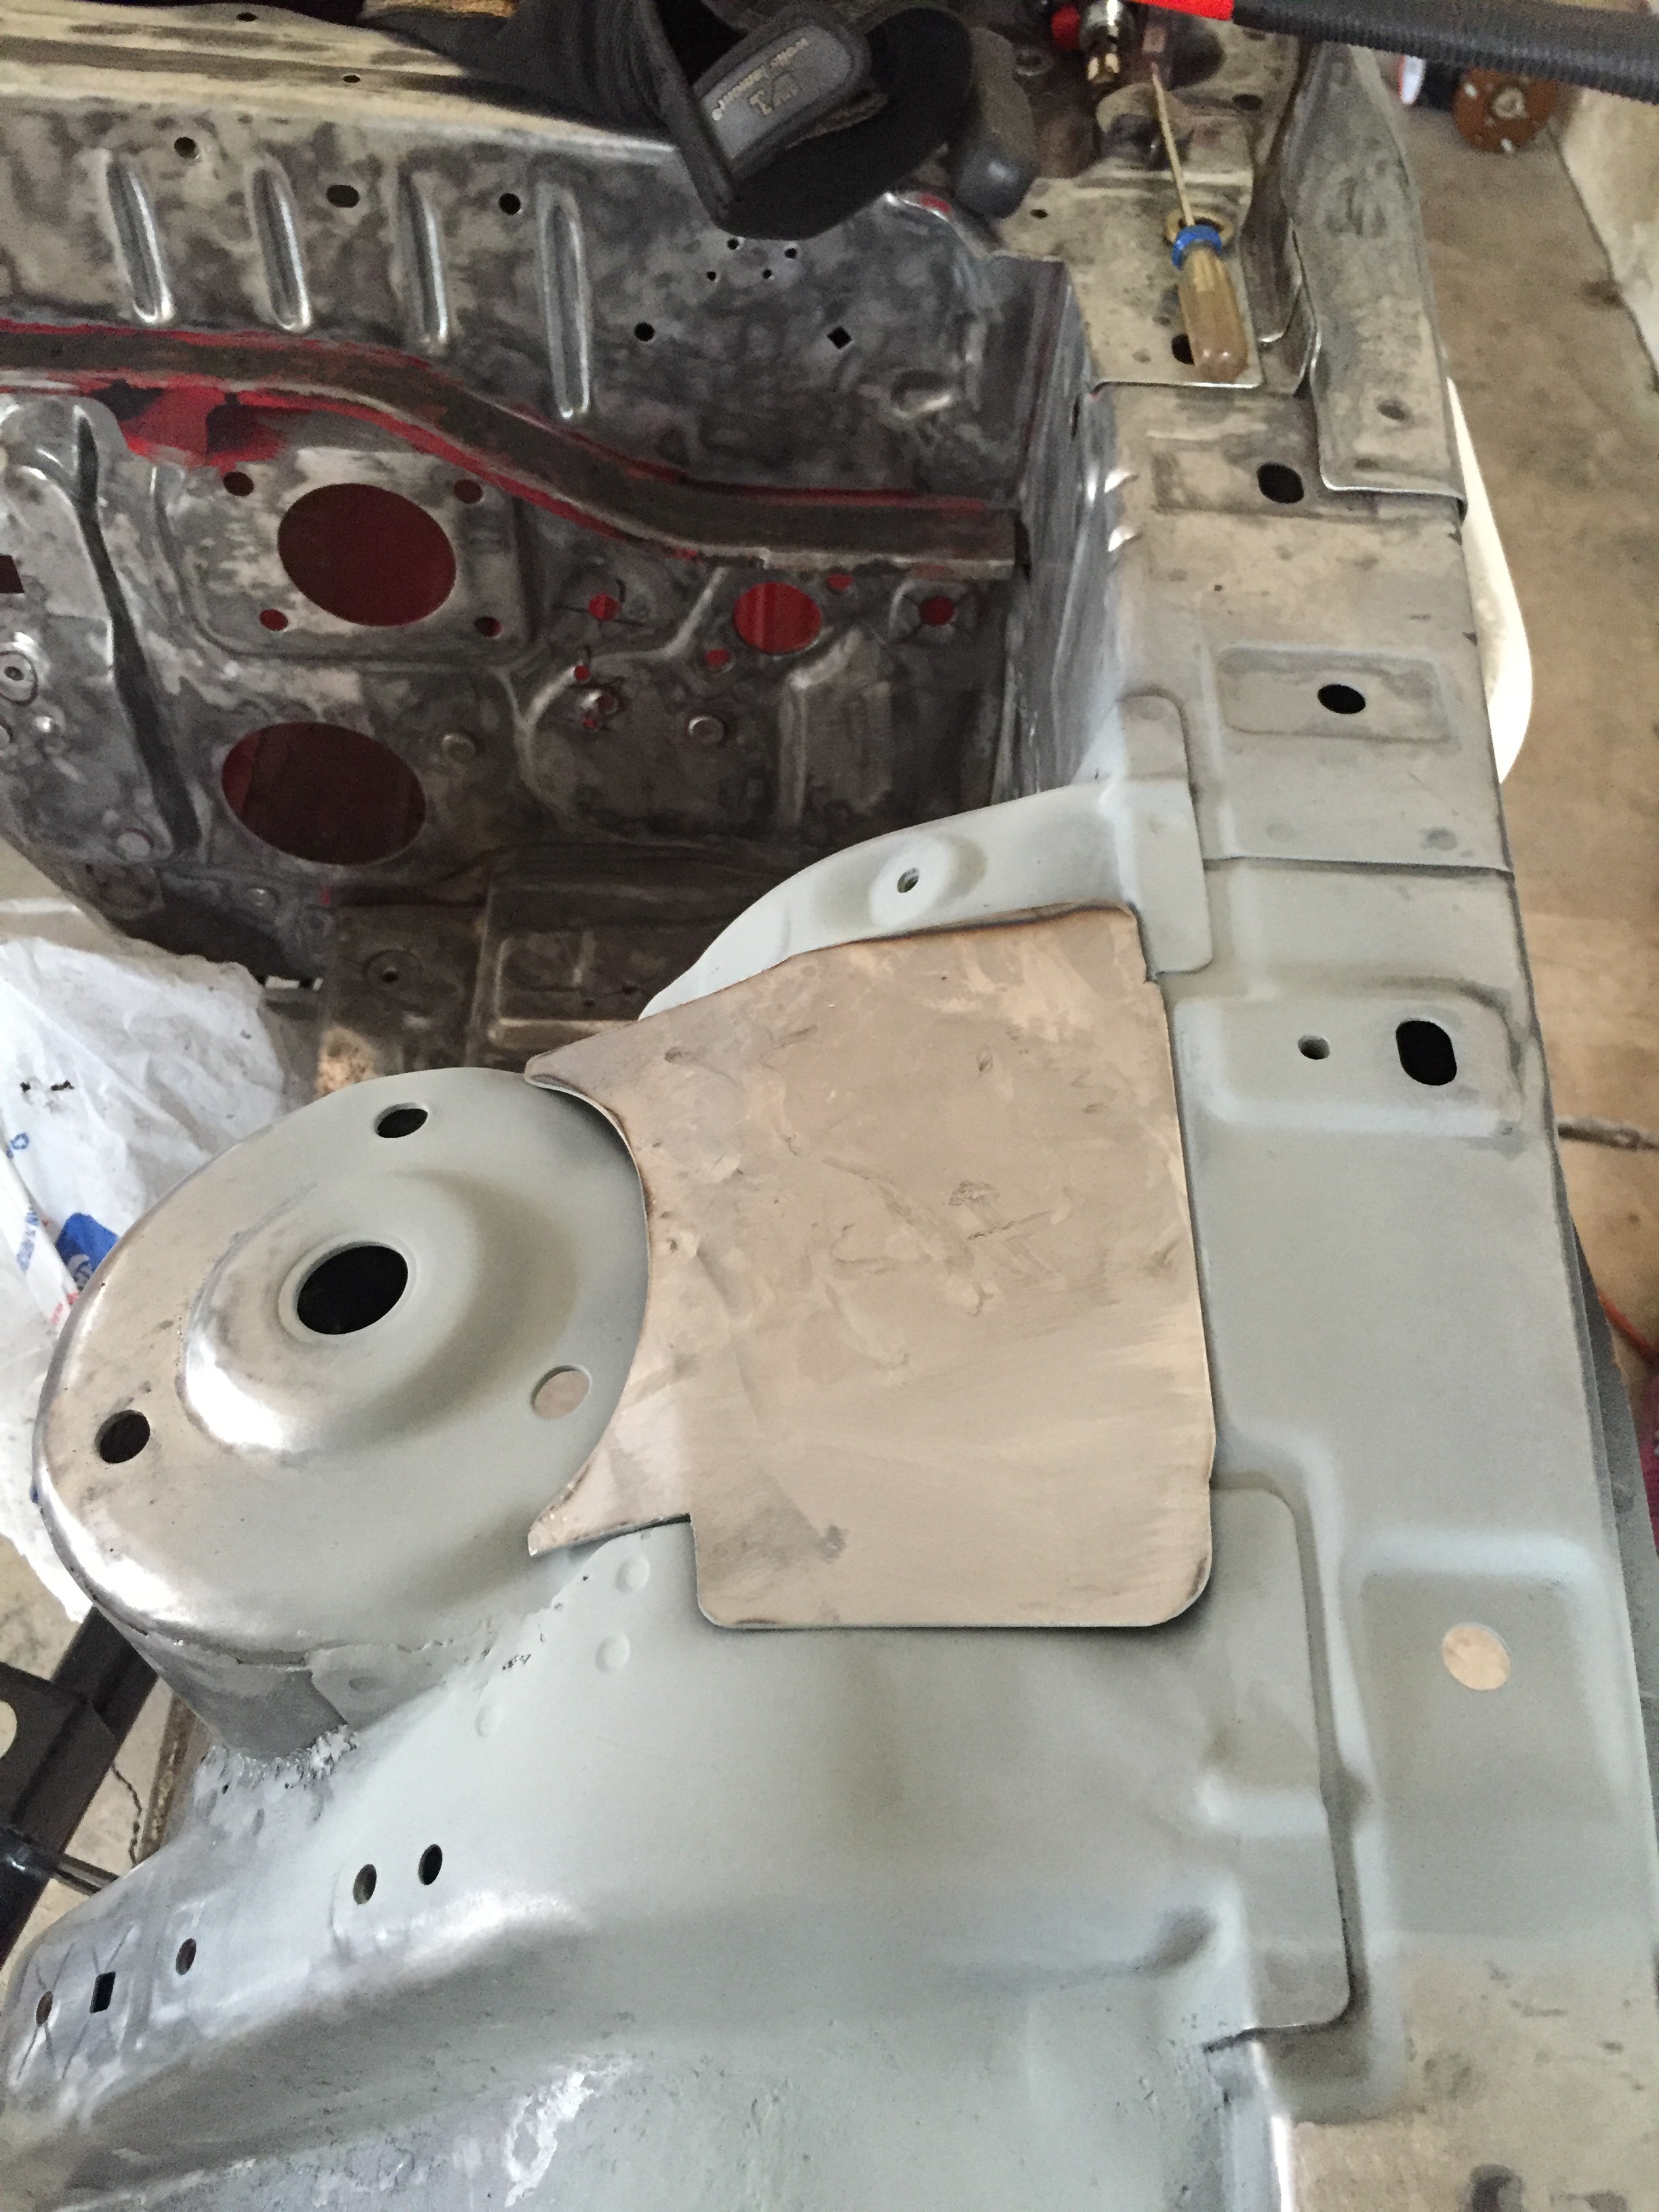
Started mocking up and working on one of the wheel well holes.
Mock up one
Mock up two
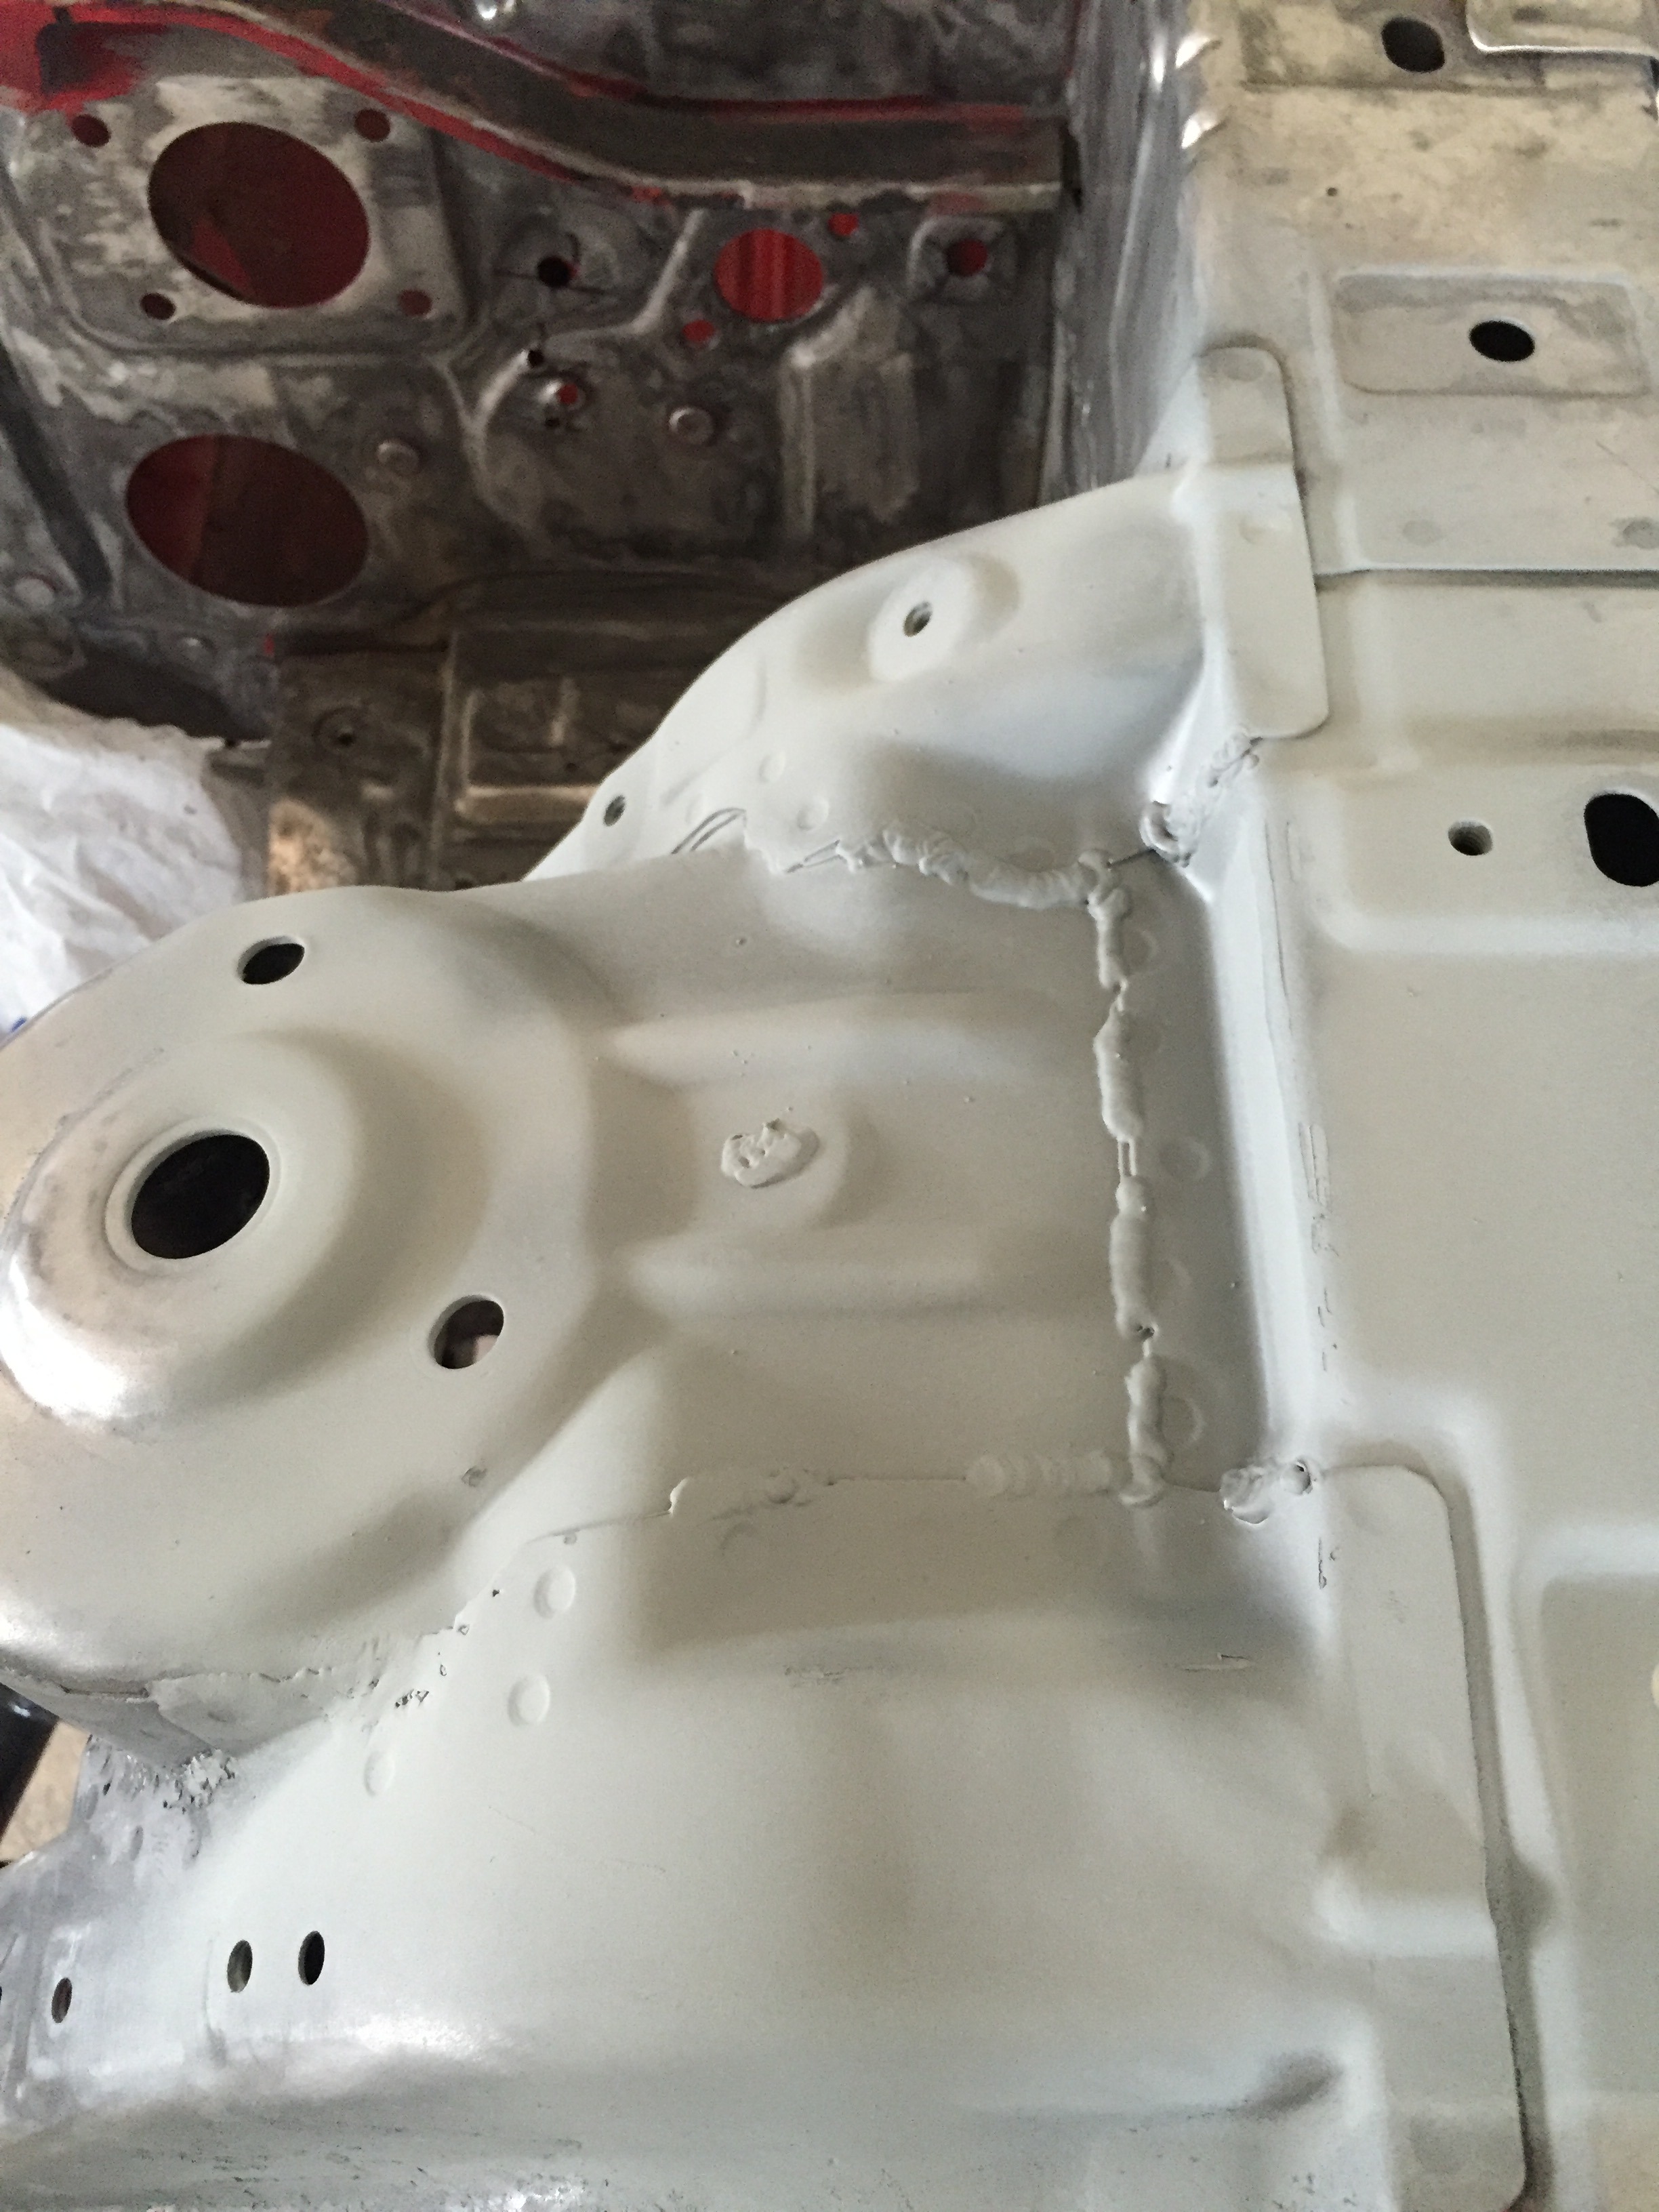
Made up three shapes after the third revision. Transferred pattern to metal and cut it all out. Sprayed self etching primer on to help prevent rust

And this is where I stopped today. Have them all tacked in, just need to make another pass and grind down the crappy welds. Also need to weld together the three pieces in the middle. Hopefully I'll get that done tomorrow
Mock up one

Mock up two

Made up three shapes after the third revision. Transferred pattern to metal and cut it all out. Sprayed self etching primer on to help prevent rust

And this is where I stopped today. Have them all tacked in, just need to make another pass and grind down the crappy welds. Also need to weld together the three pieces in the middle. Hopefully I'll get that done tomorrow


Thread Starter
Full Member
Joined: Apr 2015
Posts: 140
Likes: 5
From: Great Falls, MT
Thread Starter
Full Member
Joined: Apr 2015
Posts: 140
Likes: 5
From: Great Falls, MT
Well I ordered a few pieces to help with the engine bay welding, so while I am waiting for those to arrive I decided to work on the motor a bit and finally get it on the engine stand.
Started out by replacing the rear cover gasket and rear main seal, then put it on the stand and took the oil pan off.
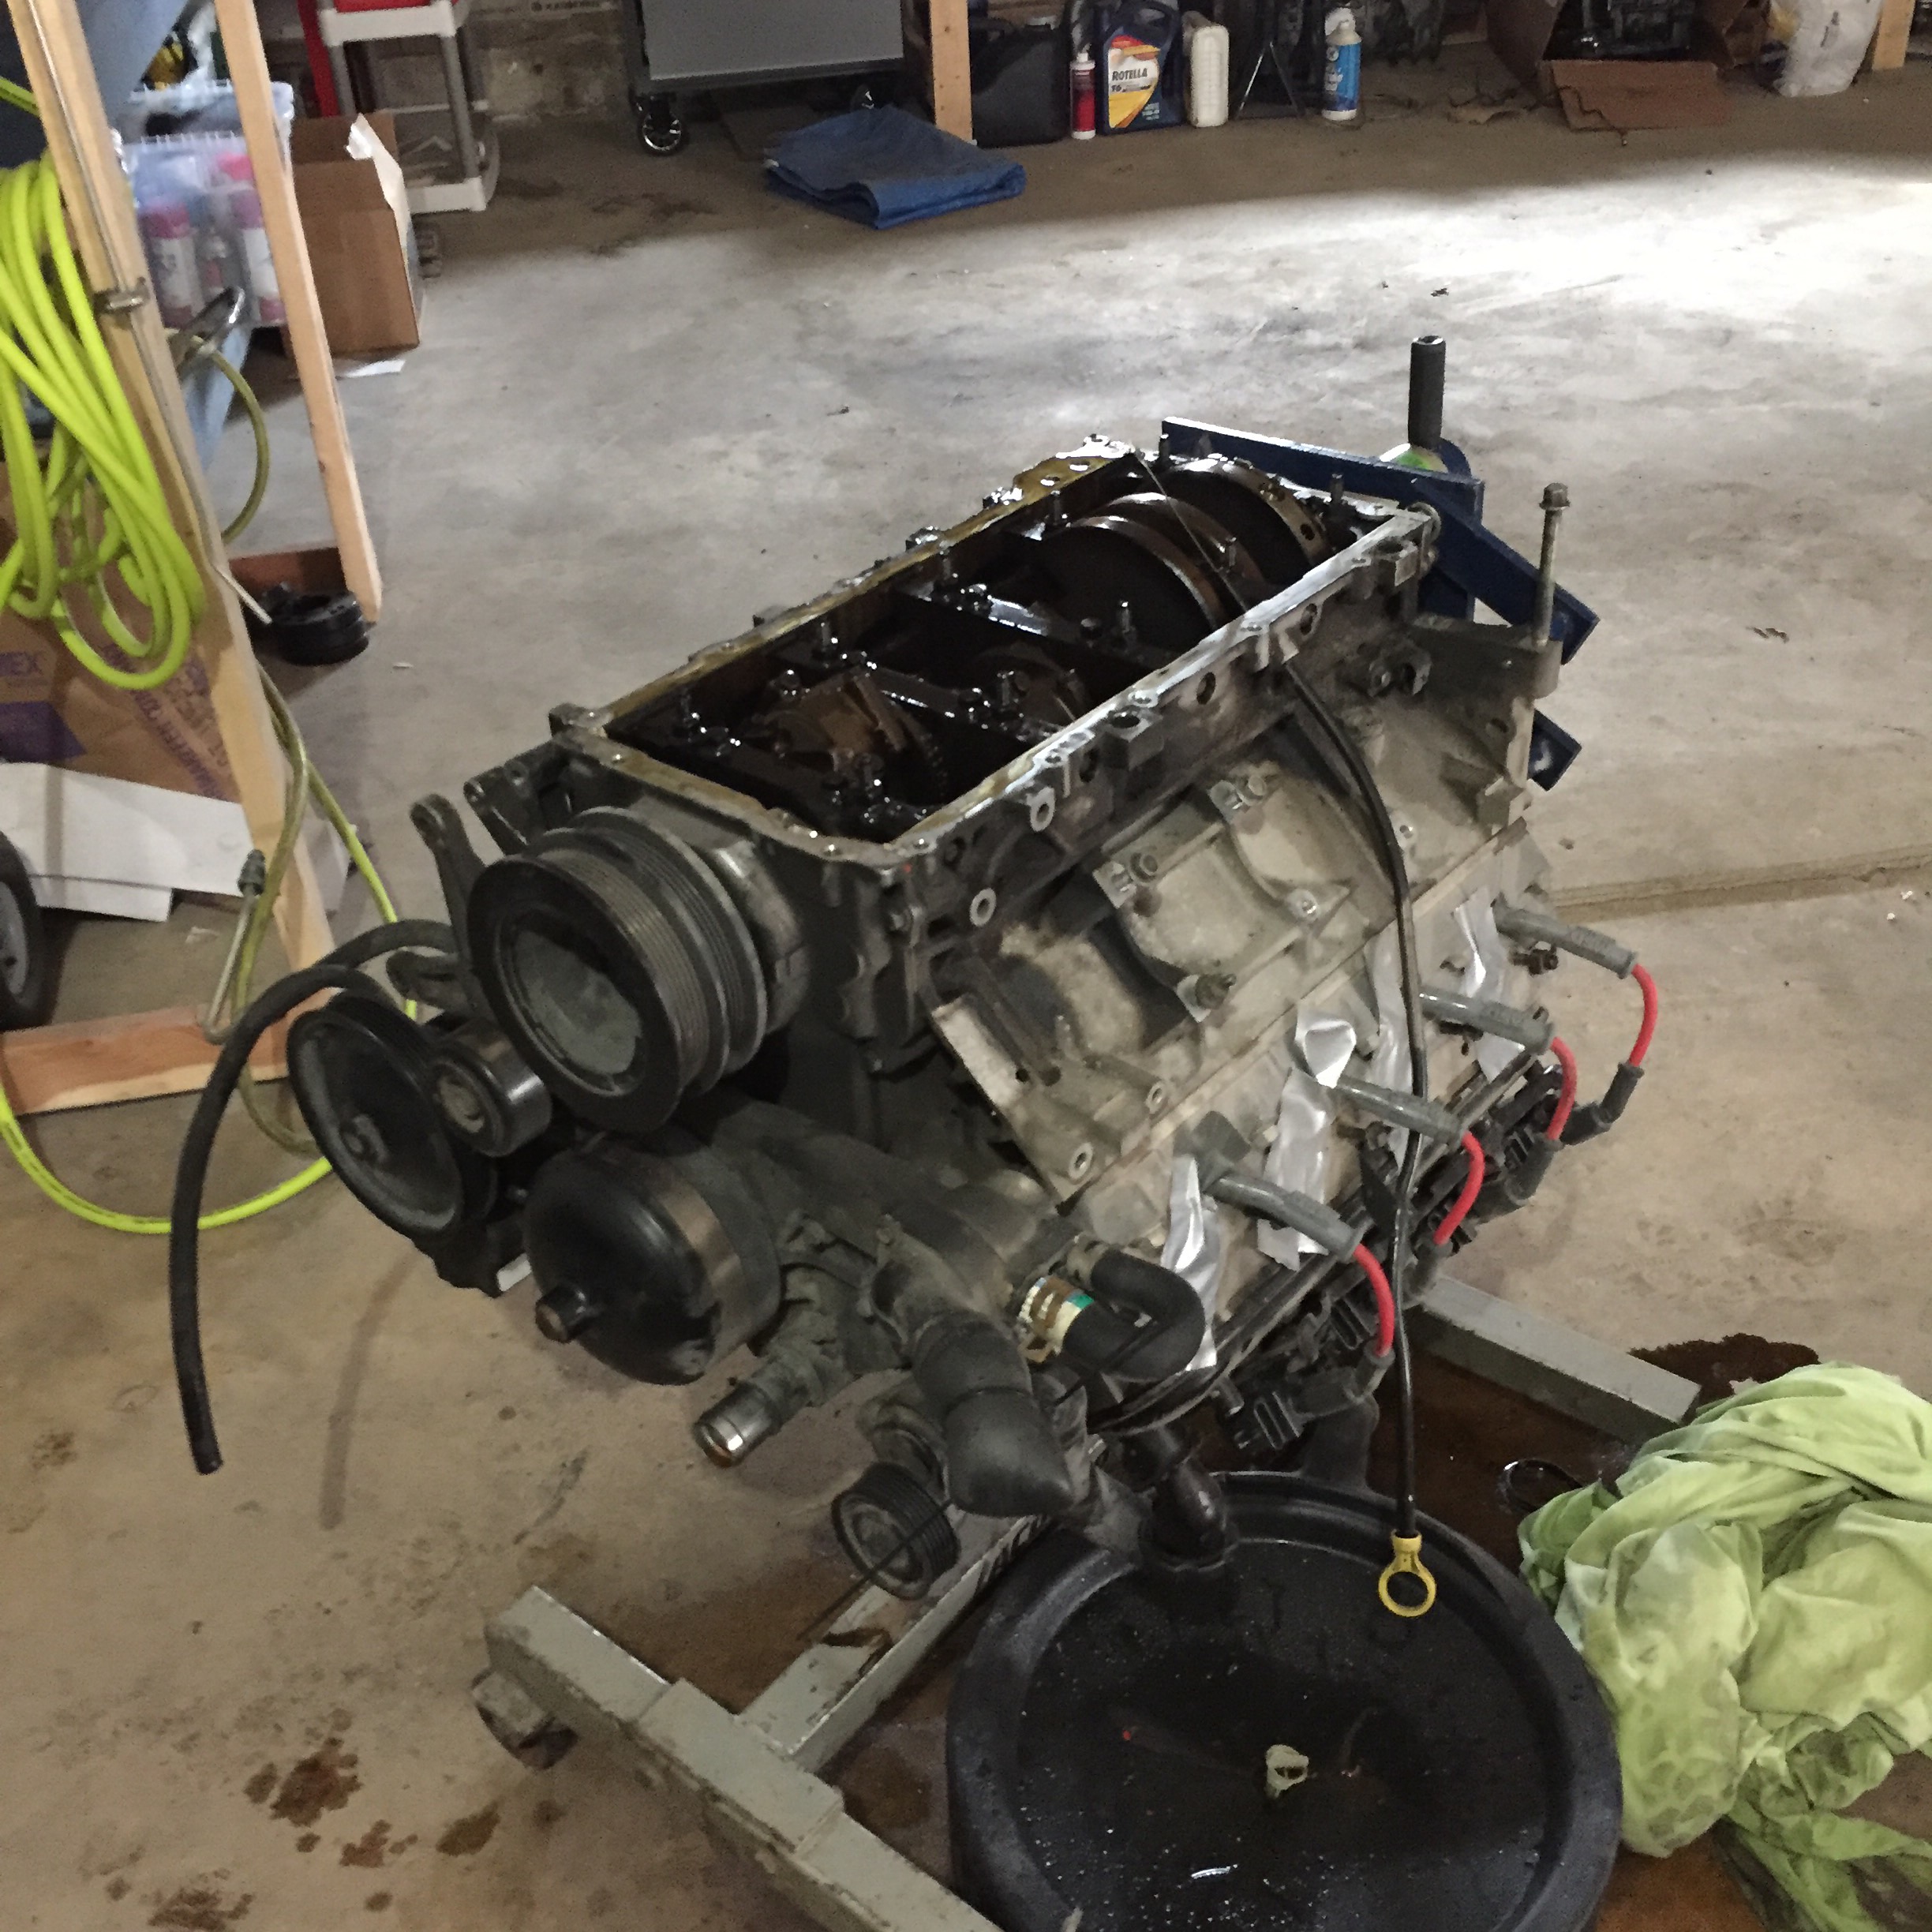
Cleaned up the windage tray and such since a friend and I took it off to check the bearings (they are all solid, no play thank god)

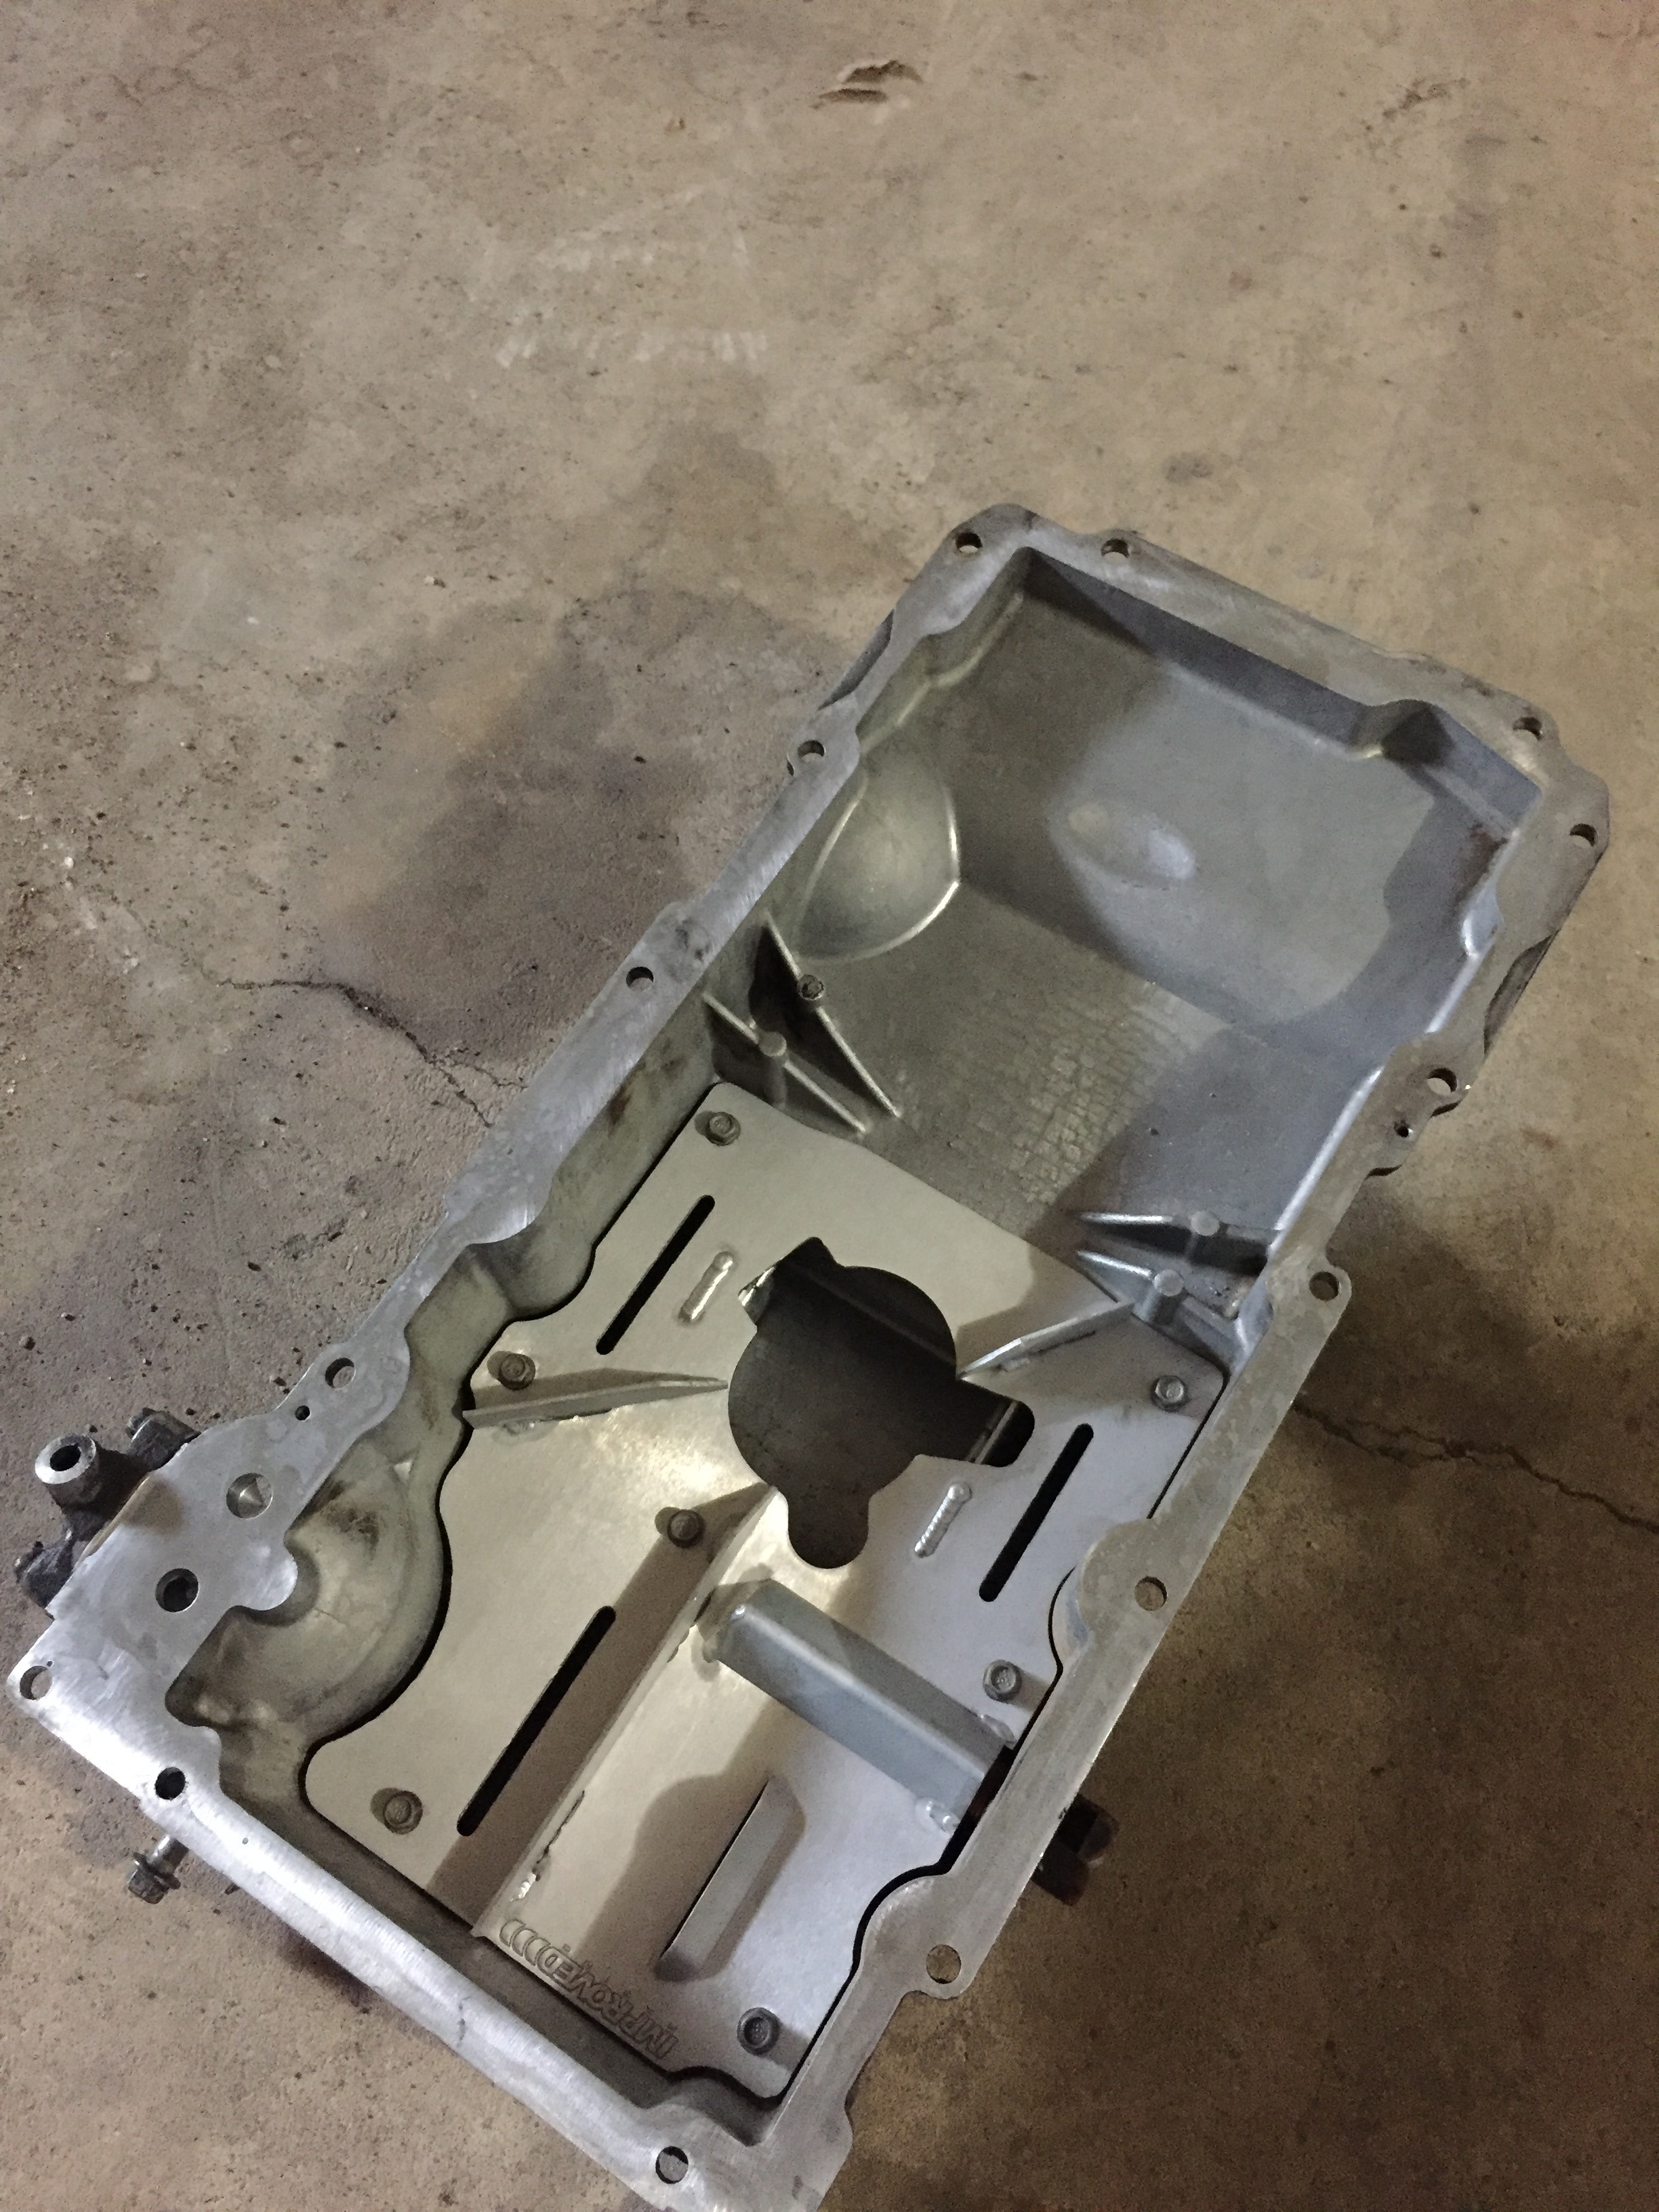
Also cleaned out the oil pan and installed my improved racing baffle. All nice and pretty!
Flipped the motor over and started getting some pieces off to clean up and paint
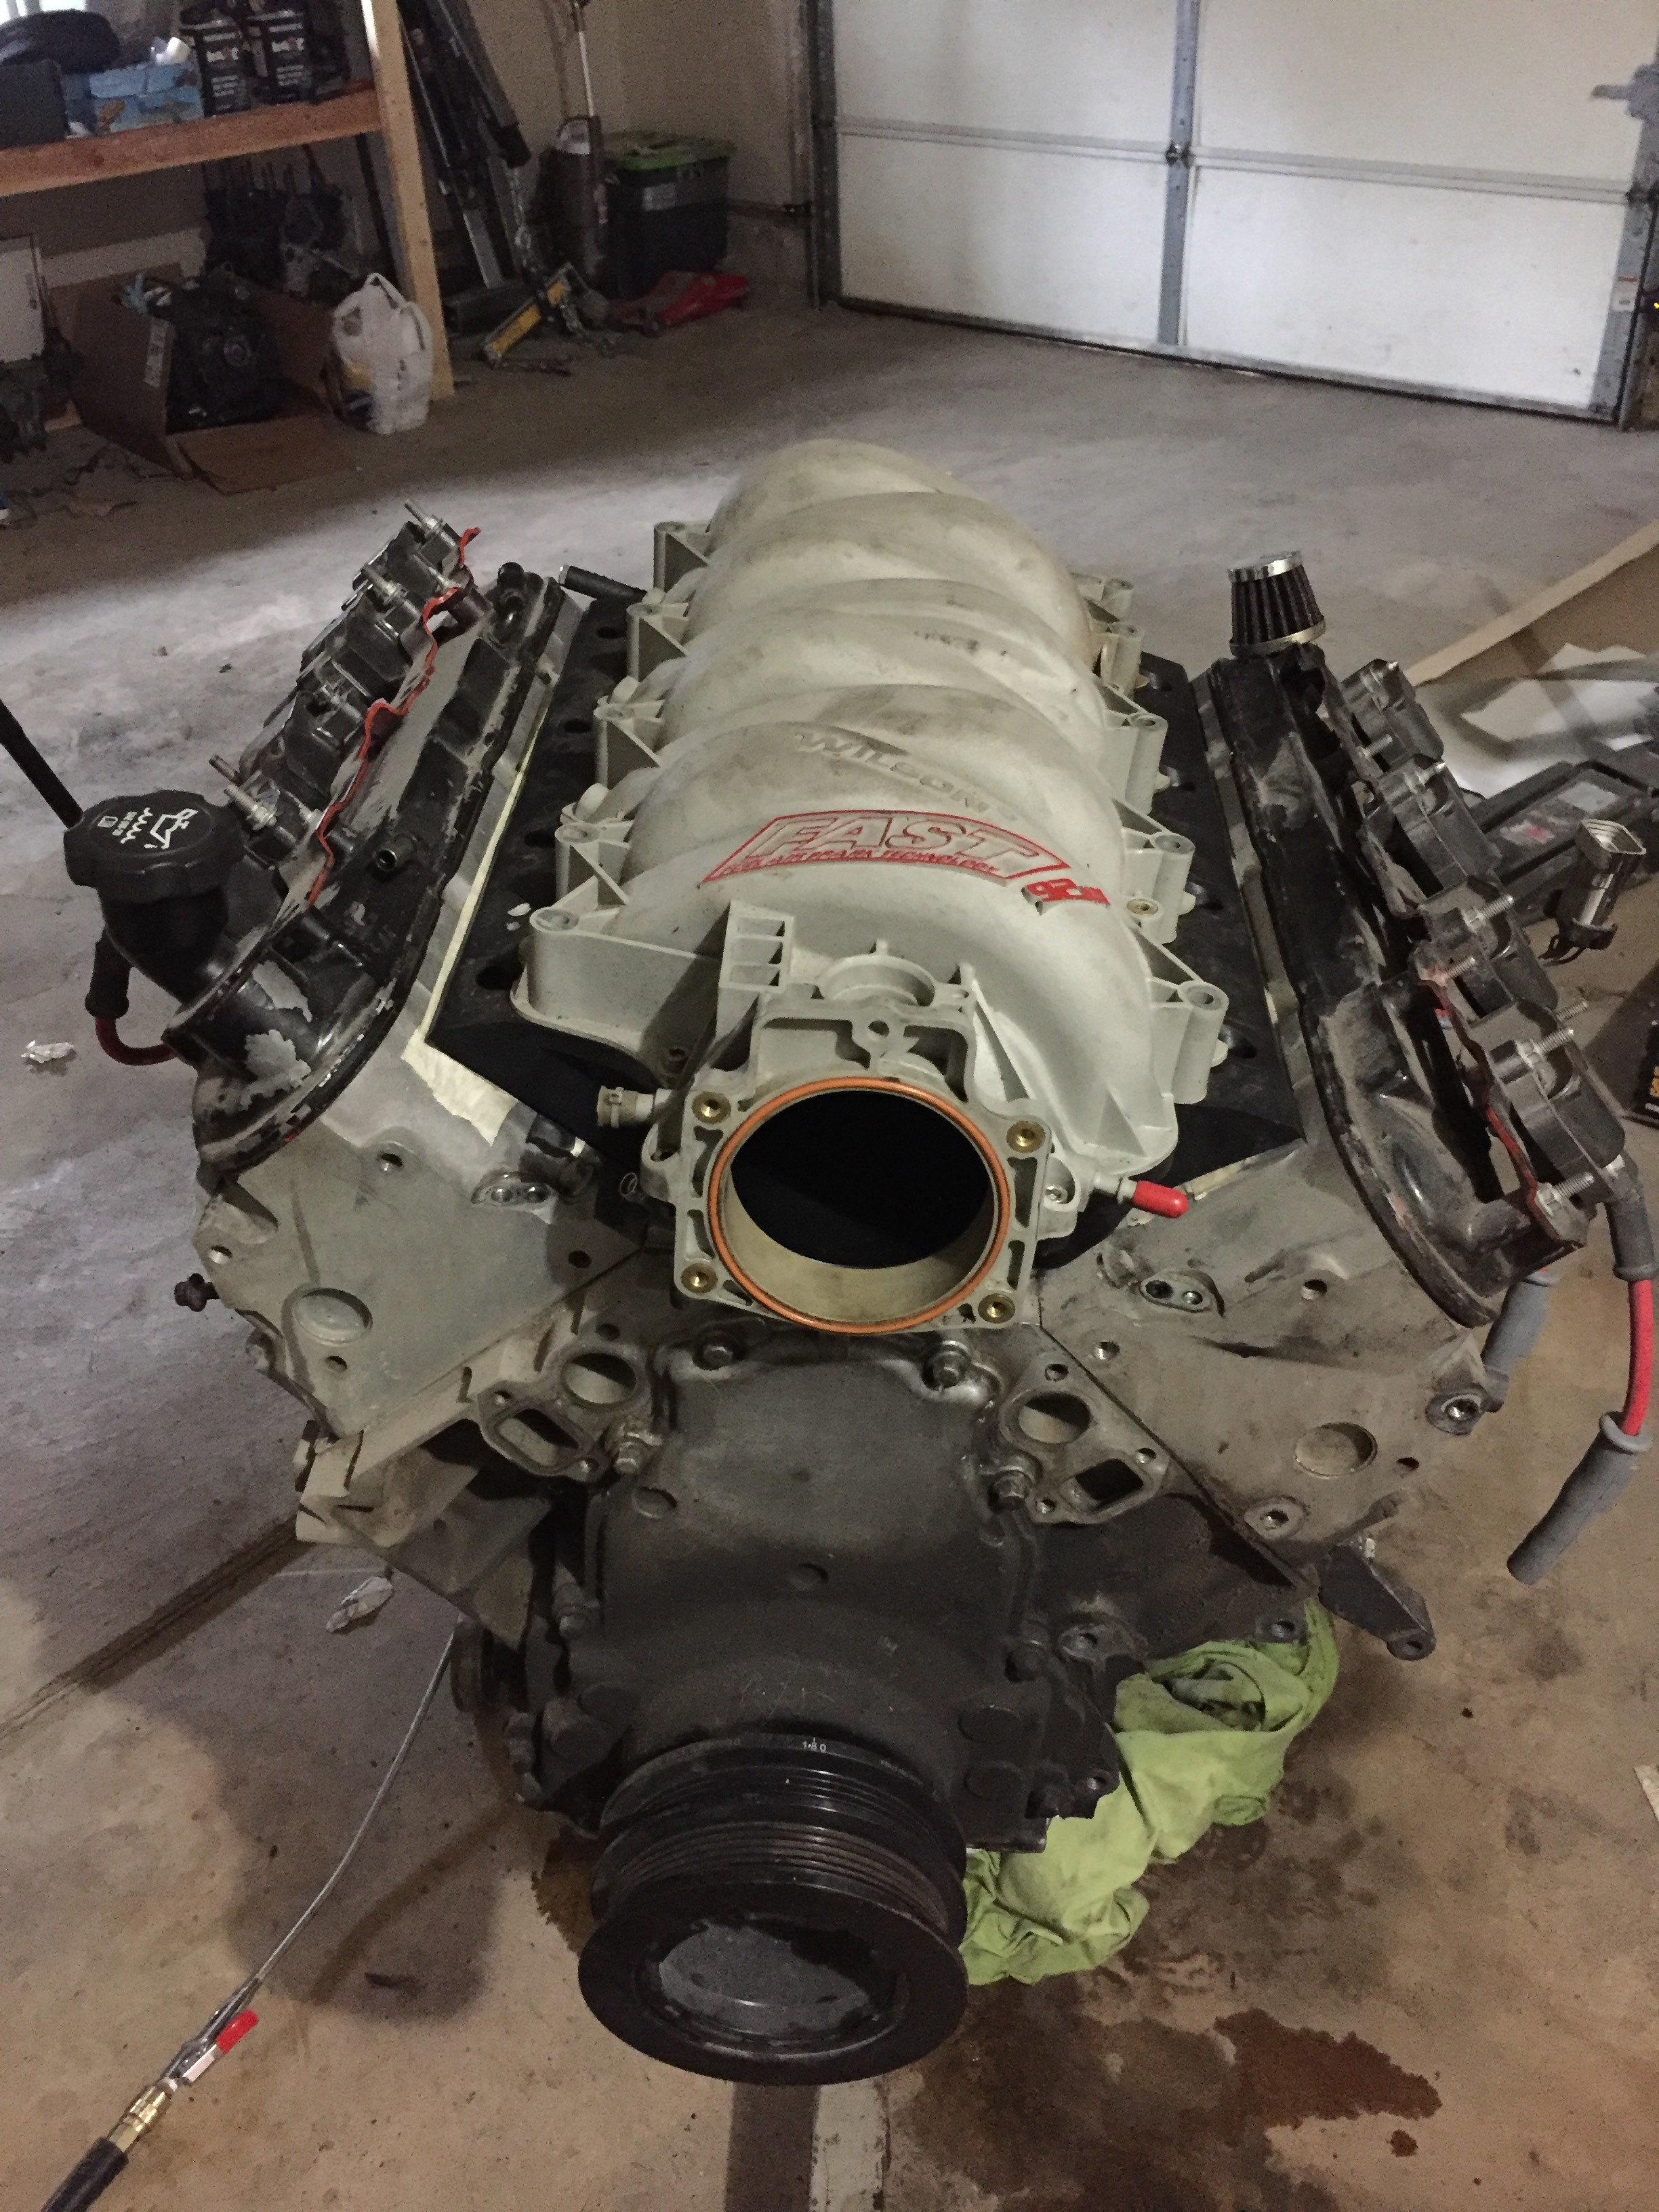

Going to get a new water pump, clean up the block/heads, paint the valve covers, and replace the valve springs. Is it recommended to put the fuel rails/intake on after the motor is already in or before? Or does it matter?
Started out by replacing the rear cover gasket and rear main seal, then put it on the stand and took the oil pan off.

Cleaned up the windage tray and such since a friend and I took it off to check the bearings (they are all solid, no play thank god)

Also cleaned out the oil pan and installed my improved racing baffle. All nice and pretty!

Flipped the motor over and started getting some pieces off to clean up and paint


Going to get a new water pump, clean up the block/heads, paint the valve covers, and replace the valve springs. Is it recommended to put the fuel rails/intake on after the motor is already in or before? Or does it matter?
Thread Starter
Full Member
Joined: Apr 2015
Posts: 140
Likes: 5
From: Great Falls, MT
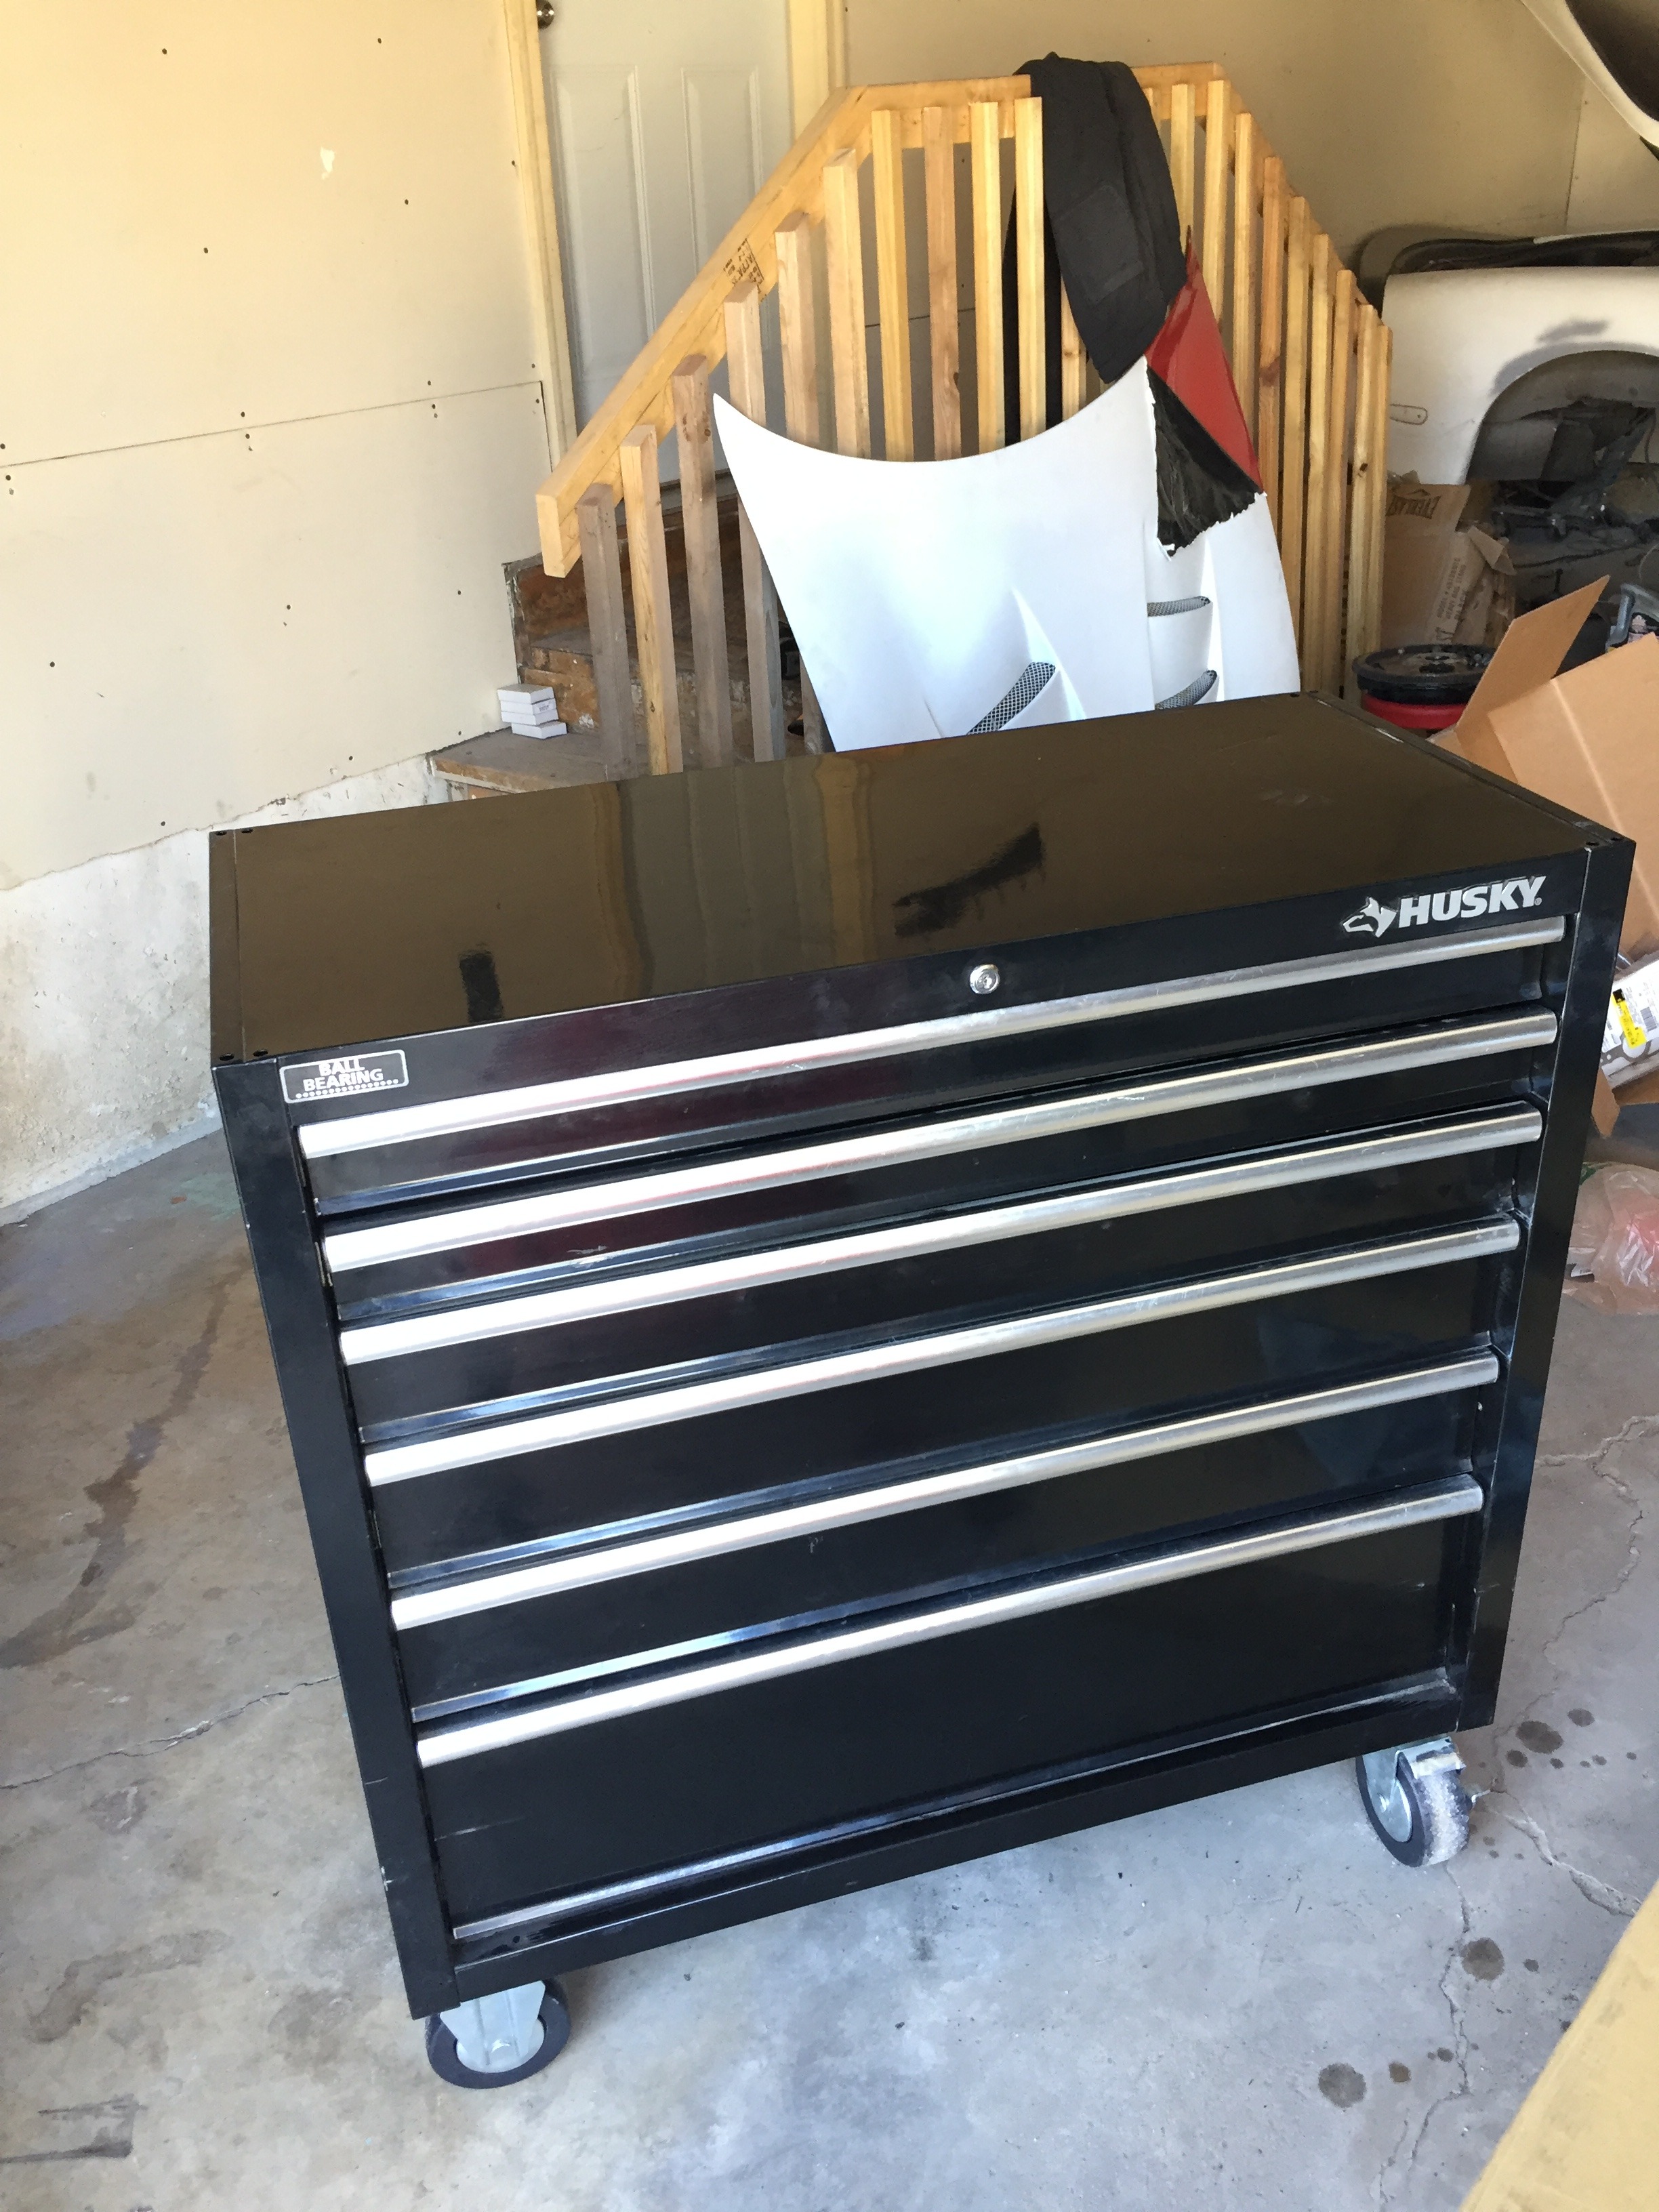
Haven't updated in a while, but I have done a decent amount of work on the car lately. First off, I ran out of room for all of my tools so I picked up another toolbox locally for cheap
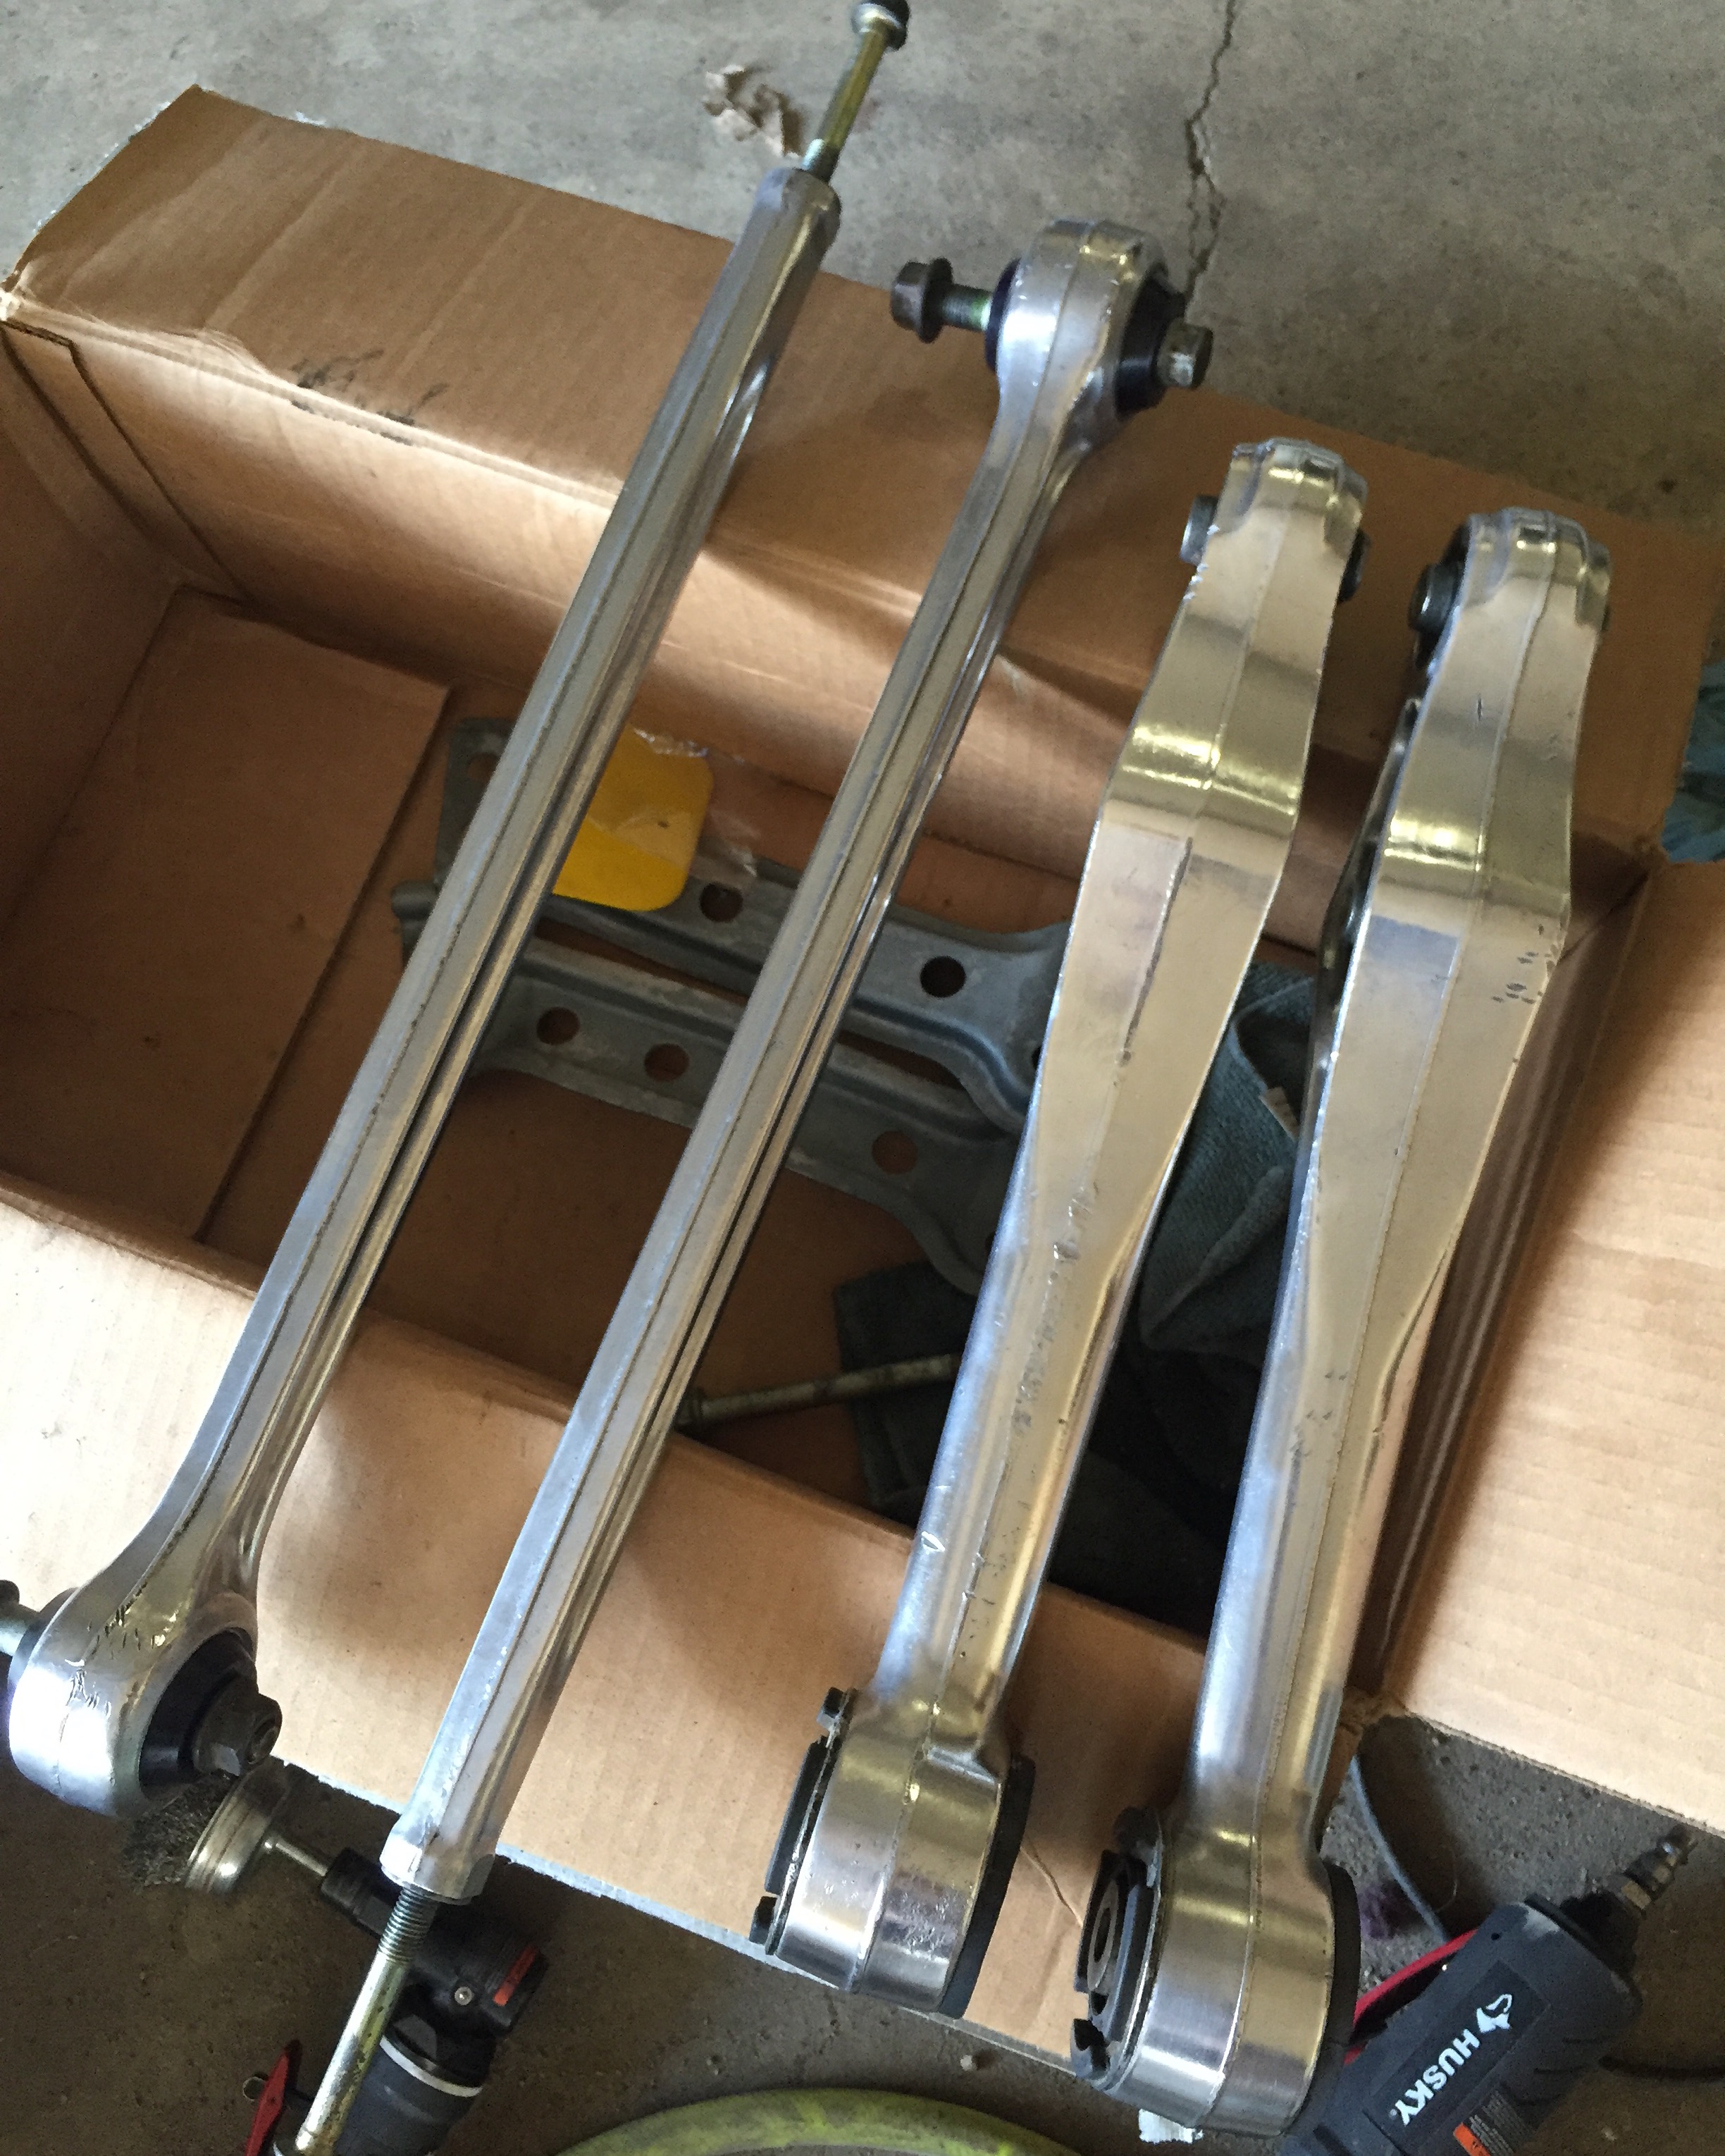
I got around to cleaning up the rear end parts. May have gotten a bit carried away on the rear control arms...
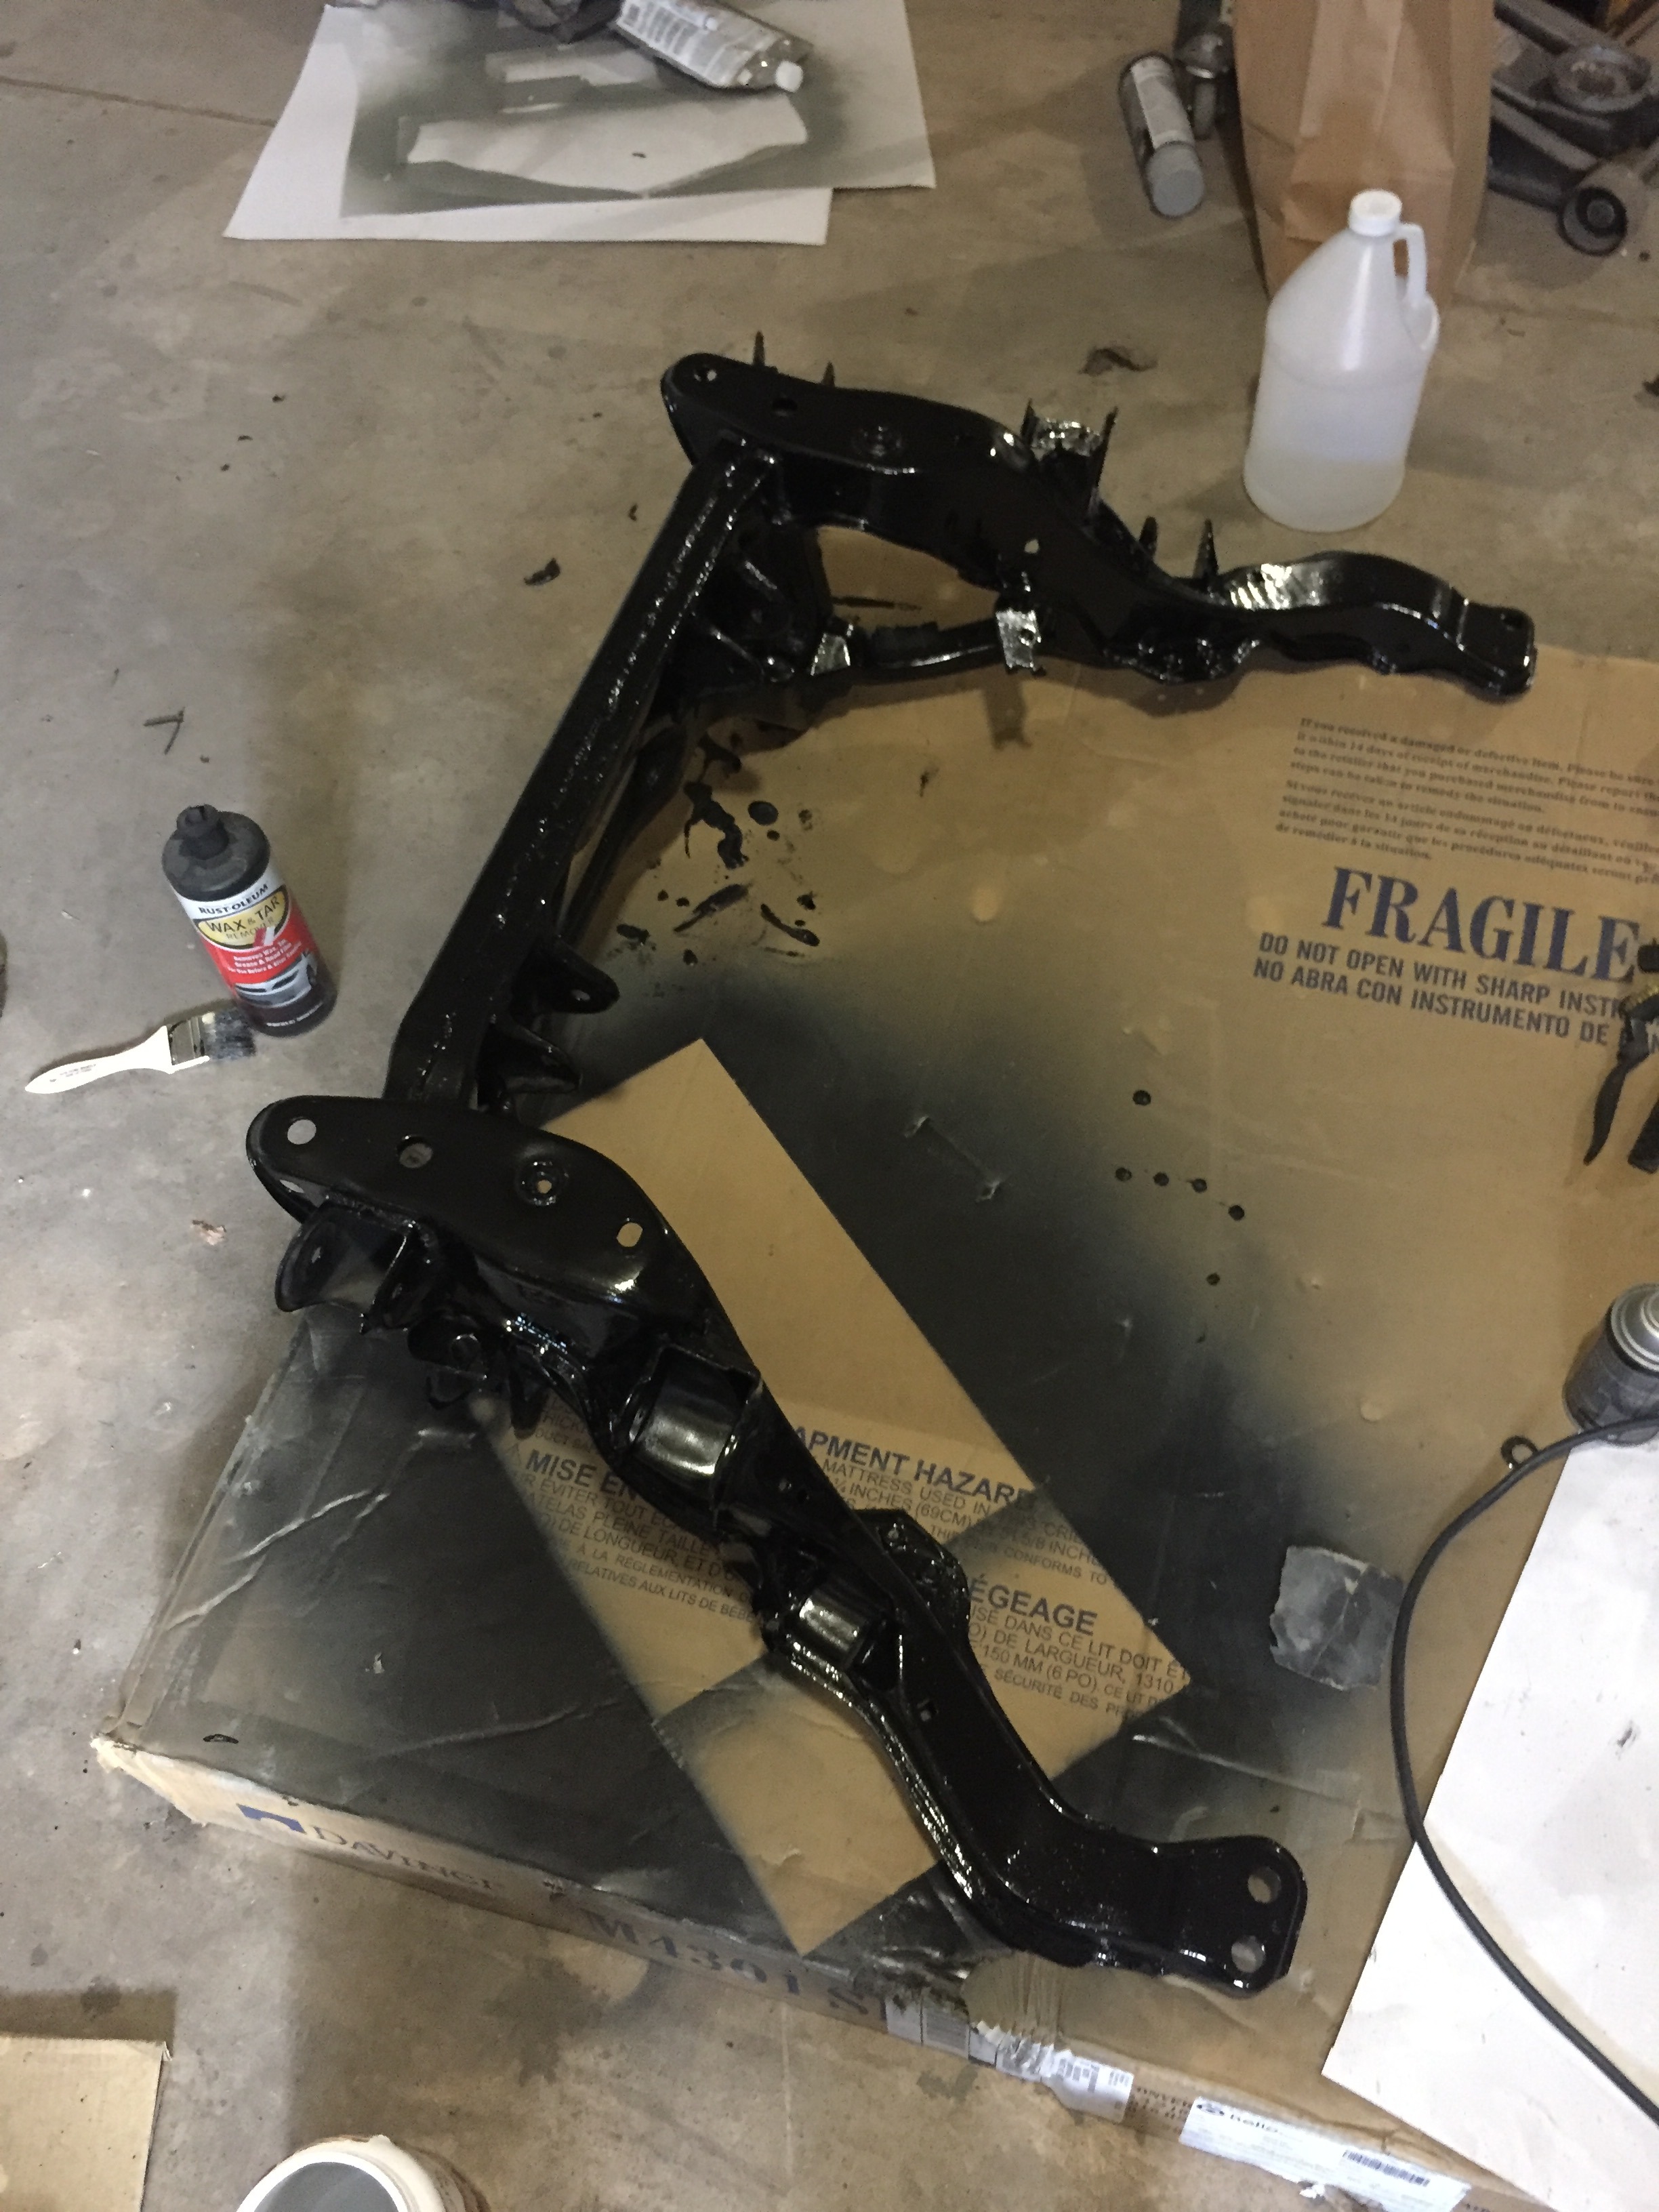
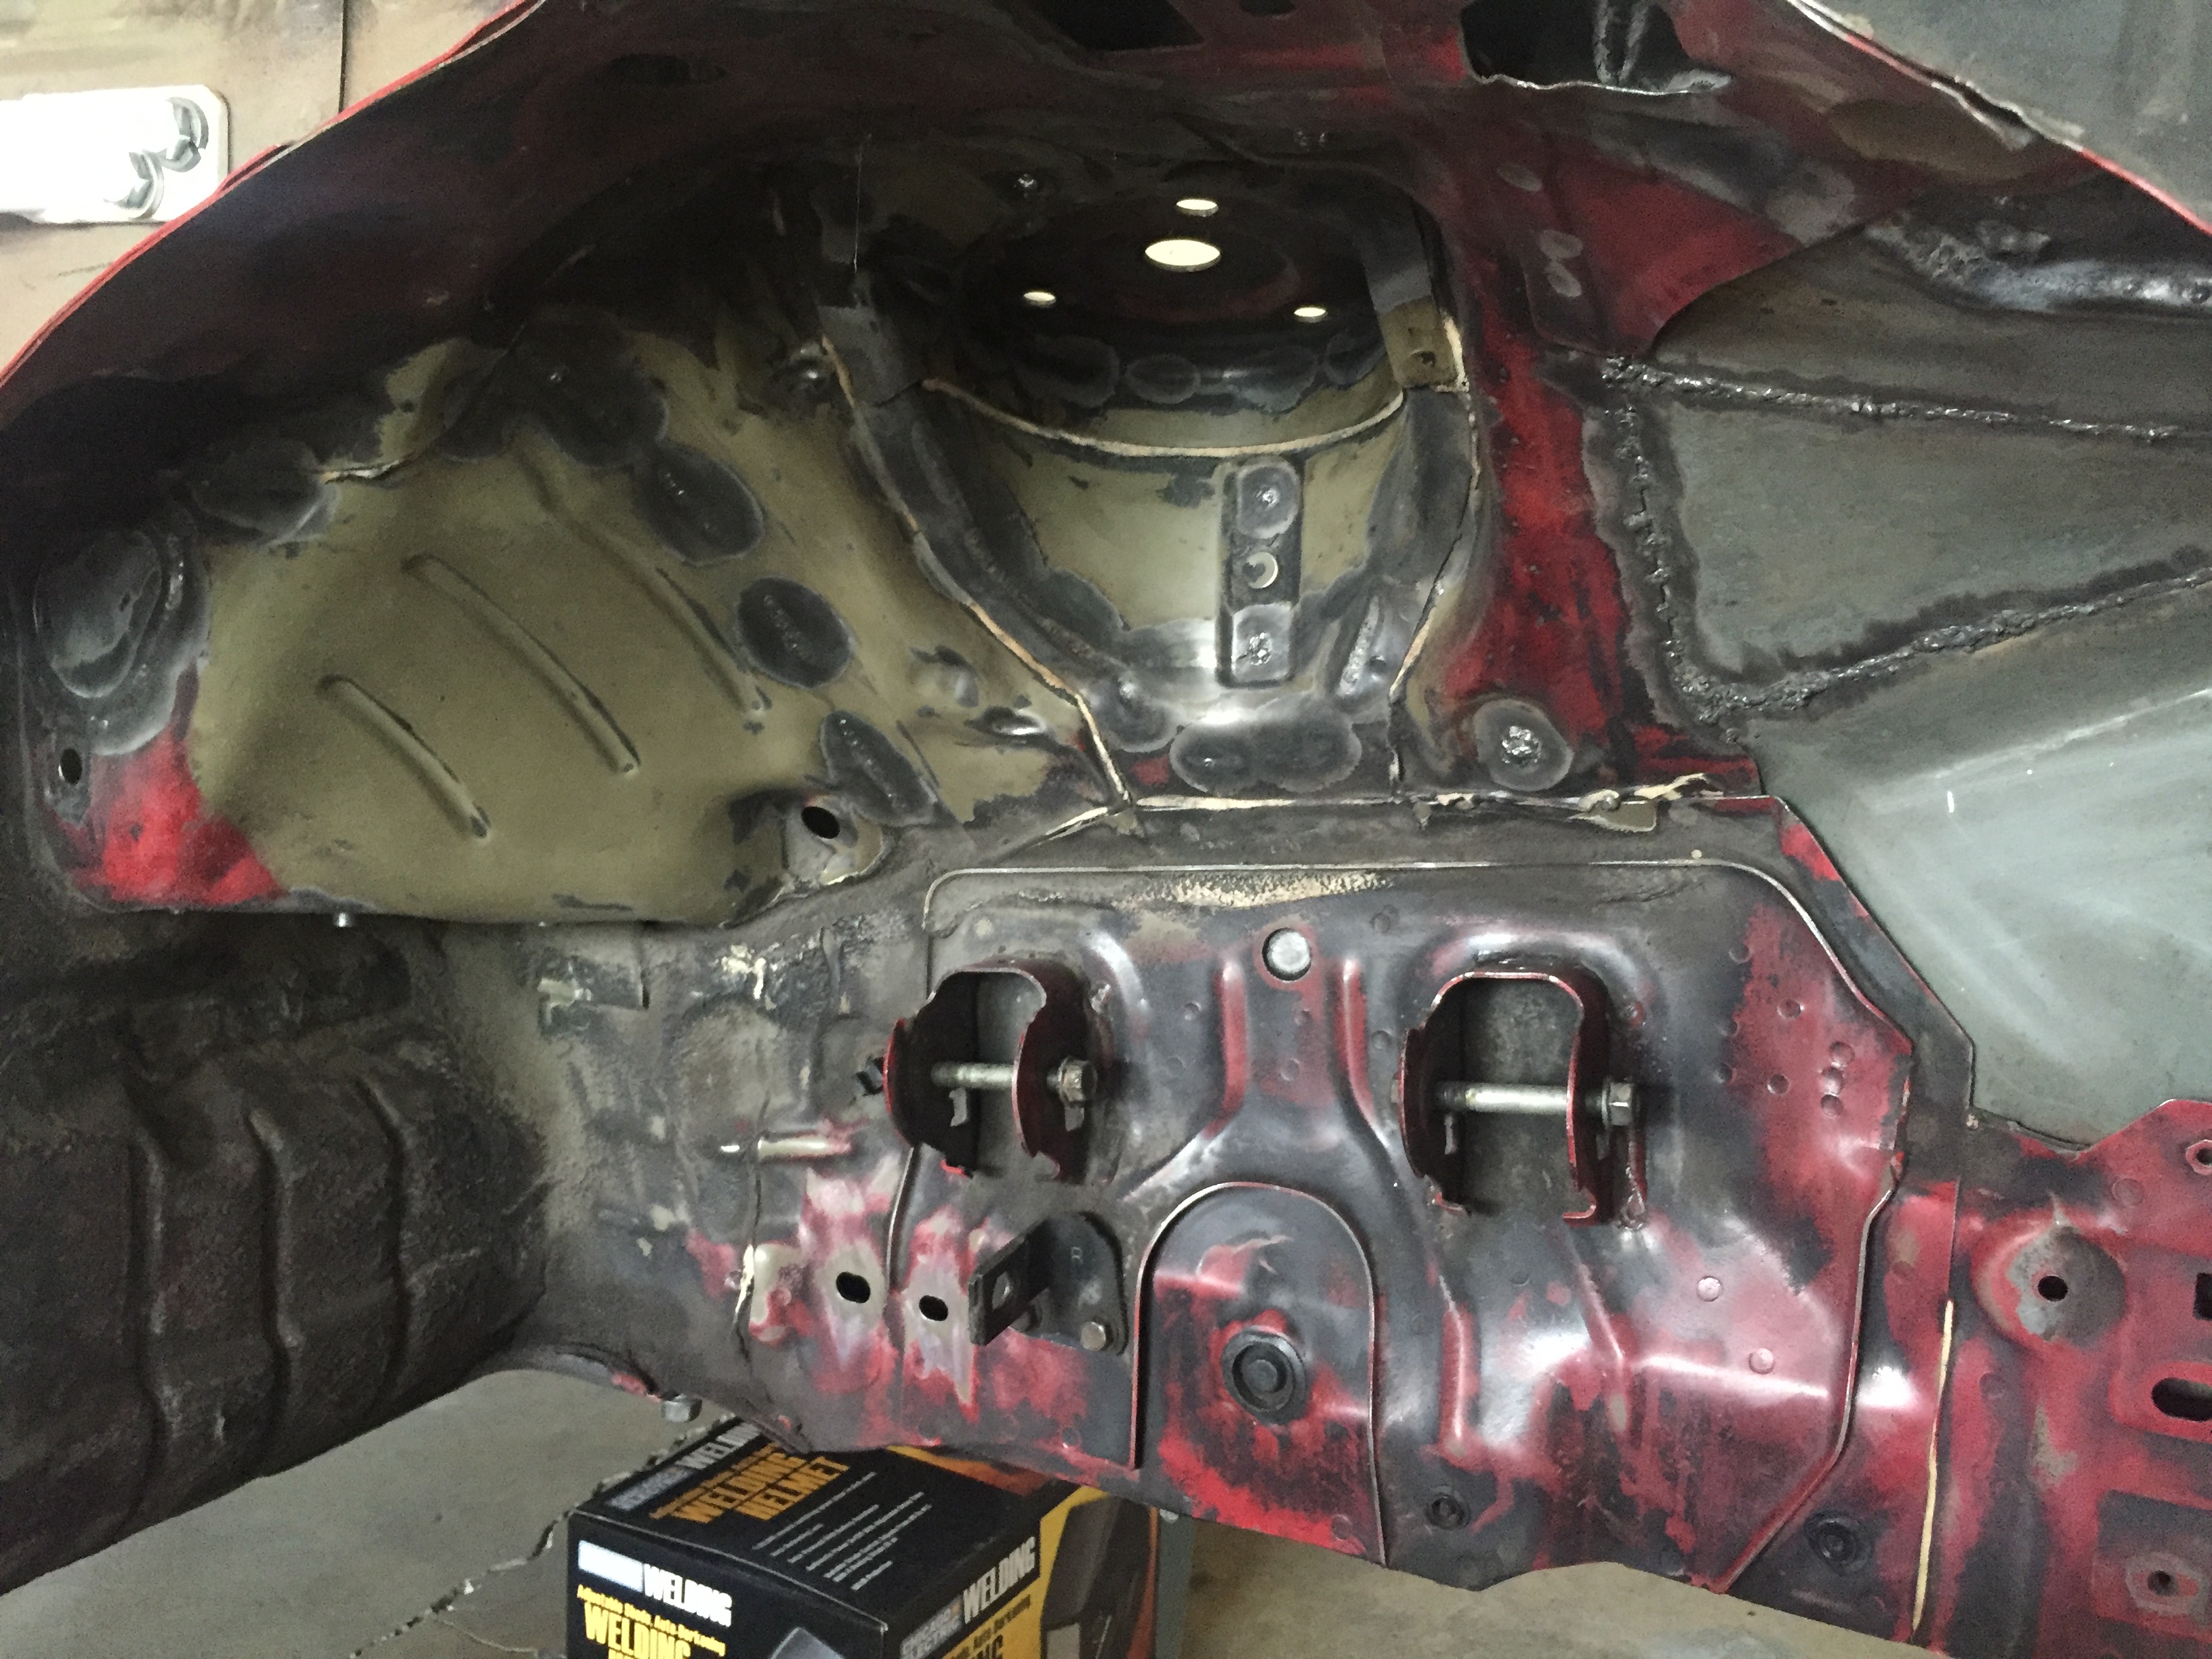
The rear subframe had a couple rust spots so I went ahead and put down a rough coat of POR15.
I went to get the new rear diff ready to put in the car and found some interesting stuff in it...
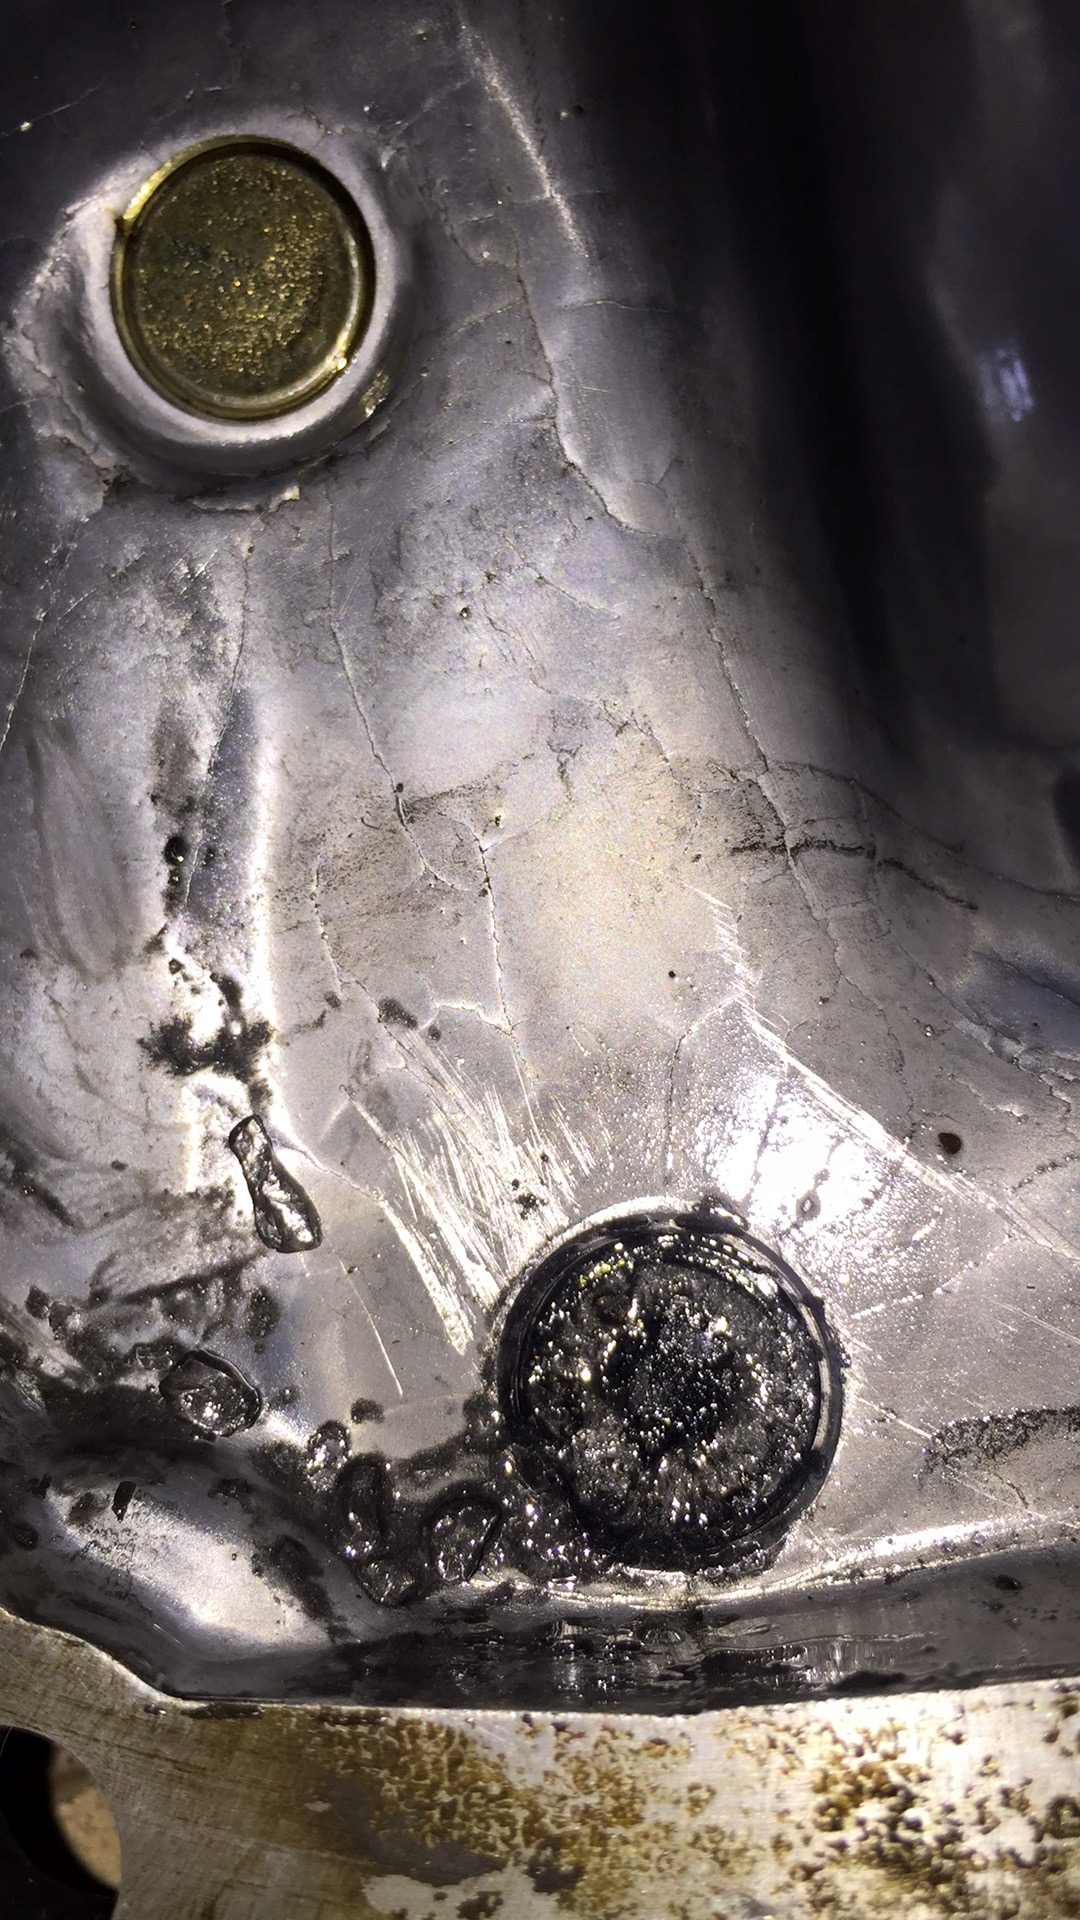
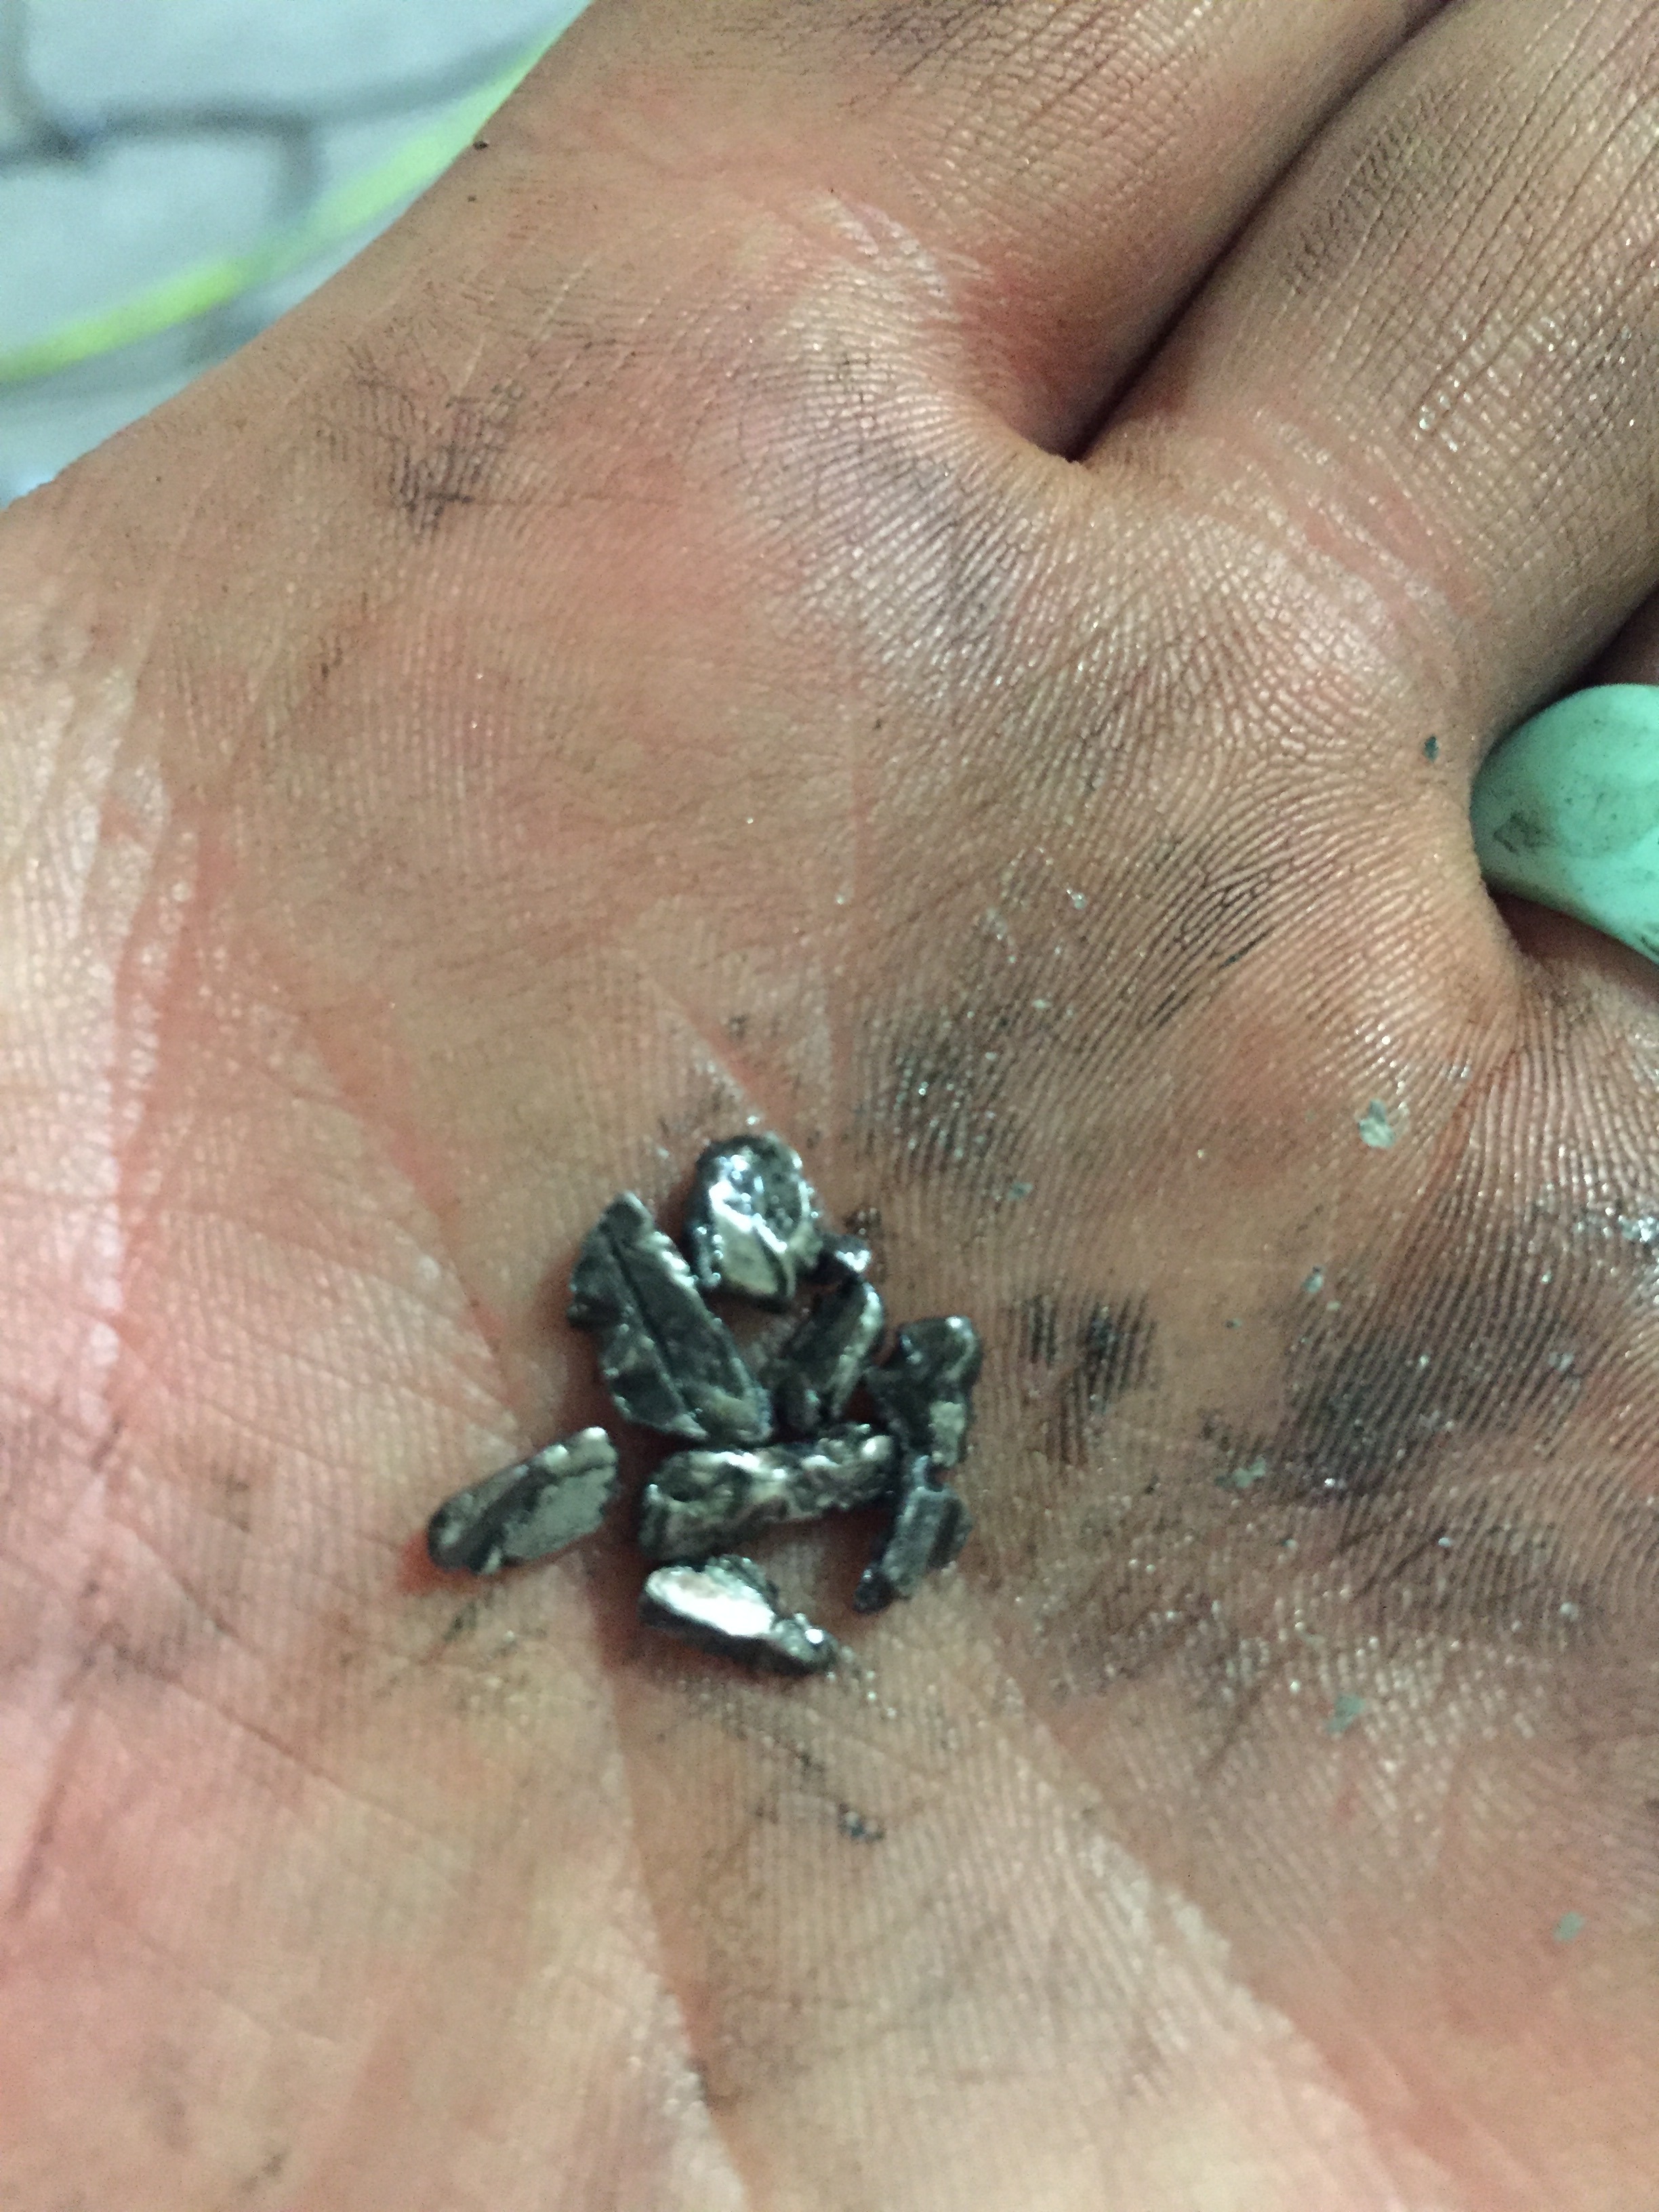
It's a KAAZ 1.5 way that the previous owner took out in perfect working order...I saw no gouged teeth or anything of that sort, so I came up with the reasoning that the tiny metal pieces were left over from the stock diff and the previous previous owner didn't clean out the diff well enough.
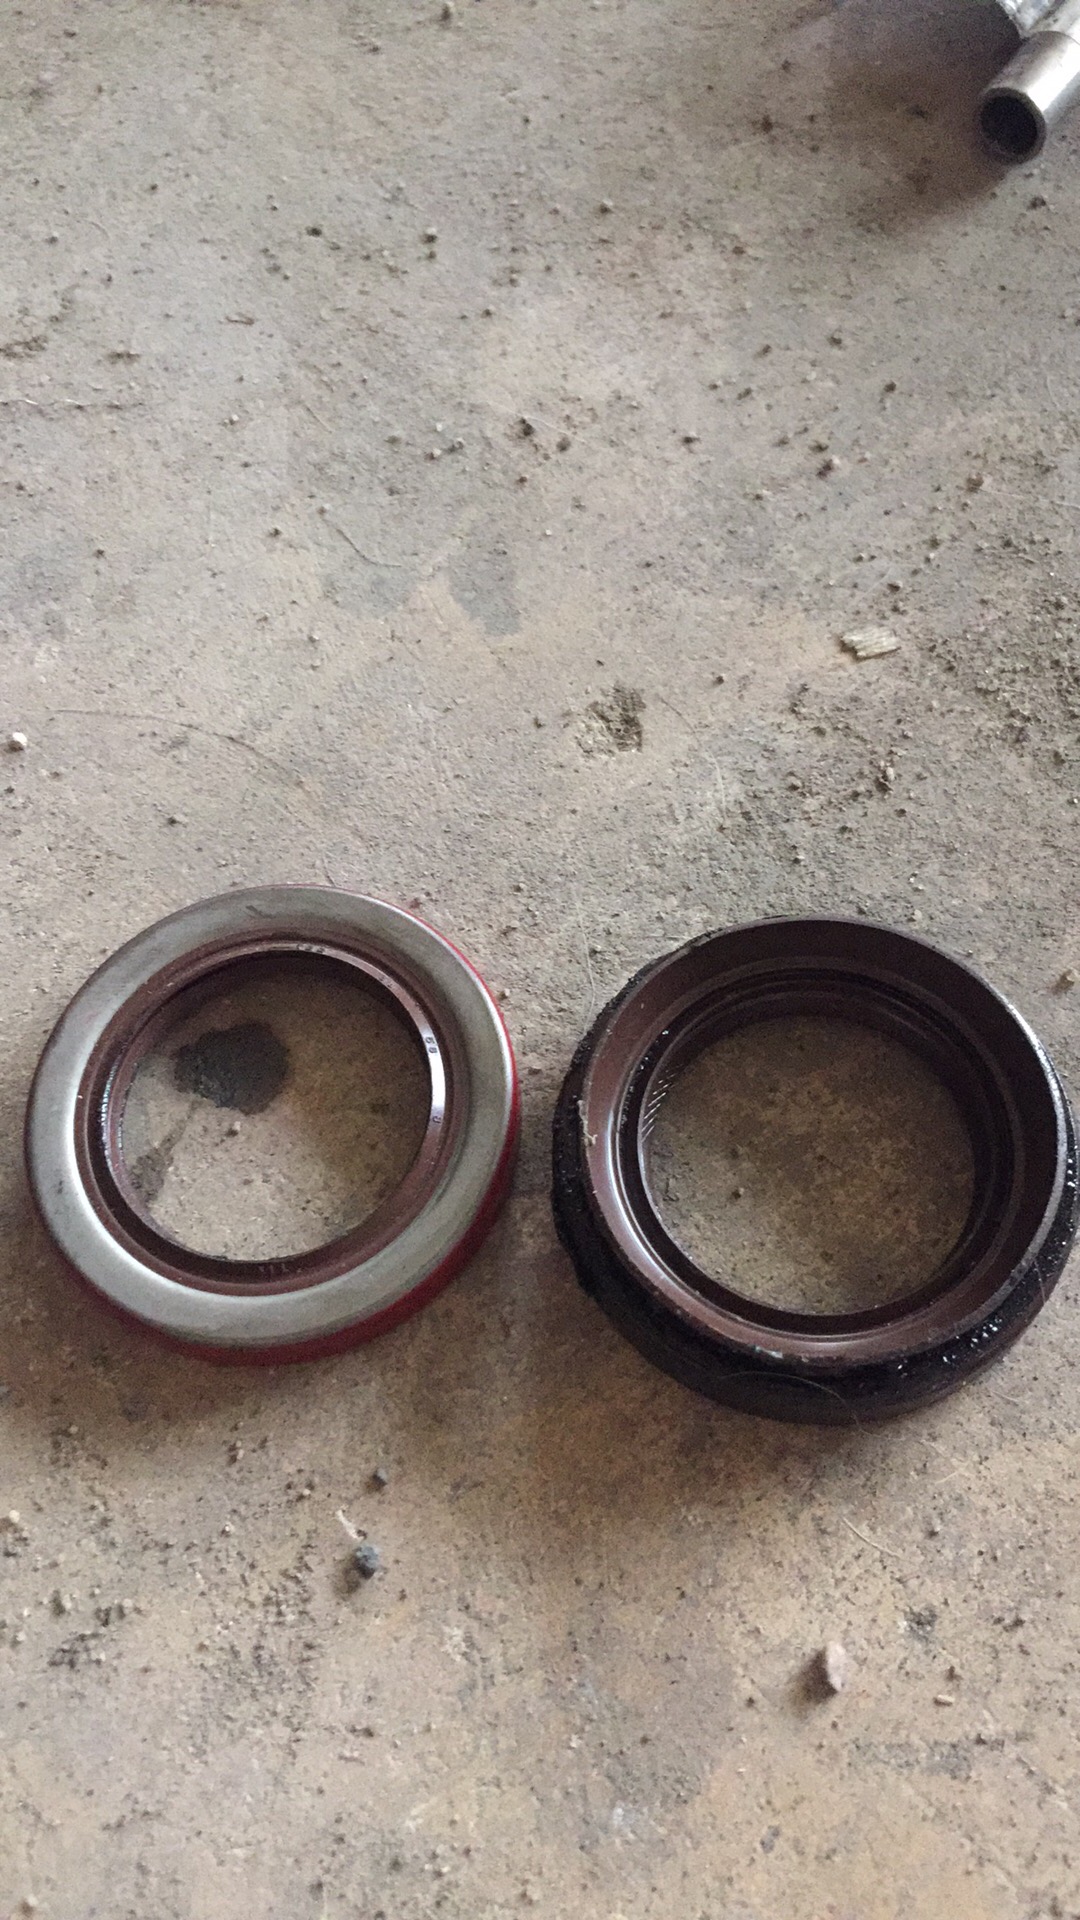
After getting the diff cover back on I went to put the new seals I ordered into it...but they looked different than stock, so I just ordered some new new ones from Atkins Rotary that were the correct style. The metal version probably would have worked fine, but I didnt want to take a chance.

I got around to cleaning up the rear end parts. May have gotten a bit carried away on the rear control arms...


The rear subframe had a couple rust spots so I went ahead and put down a rough coat of POR15.

I went to get the new rear diff ready to put in the car and found some interesting stuff in it...


It's a KAAZ 1.5 way that the previous owner took out in perfect working order...I saw no gouged teeth or anything of that sort, so I came up with the reasoning that the tiny metal pieces were left over from the stock diff and the previous previous owner didn't clean out the diff well enough.
After getting the diff cover back on I went to put the new seals I ordered into it...but they looked different than stock, so I just ordered some new new ones from Atkins Rotary that were the correct style. The metal version probably would have worked fine, but I didnt want to take a chance.

Thread Starter
Full Member
Joined: Apr 2015
Posts: 140
Likes: 5
From: Great Falls, MT
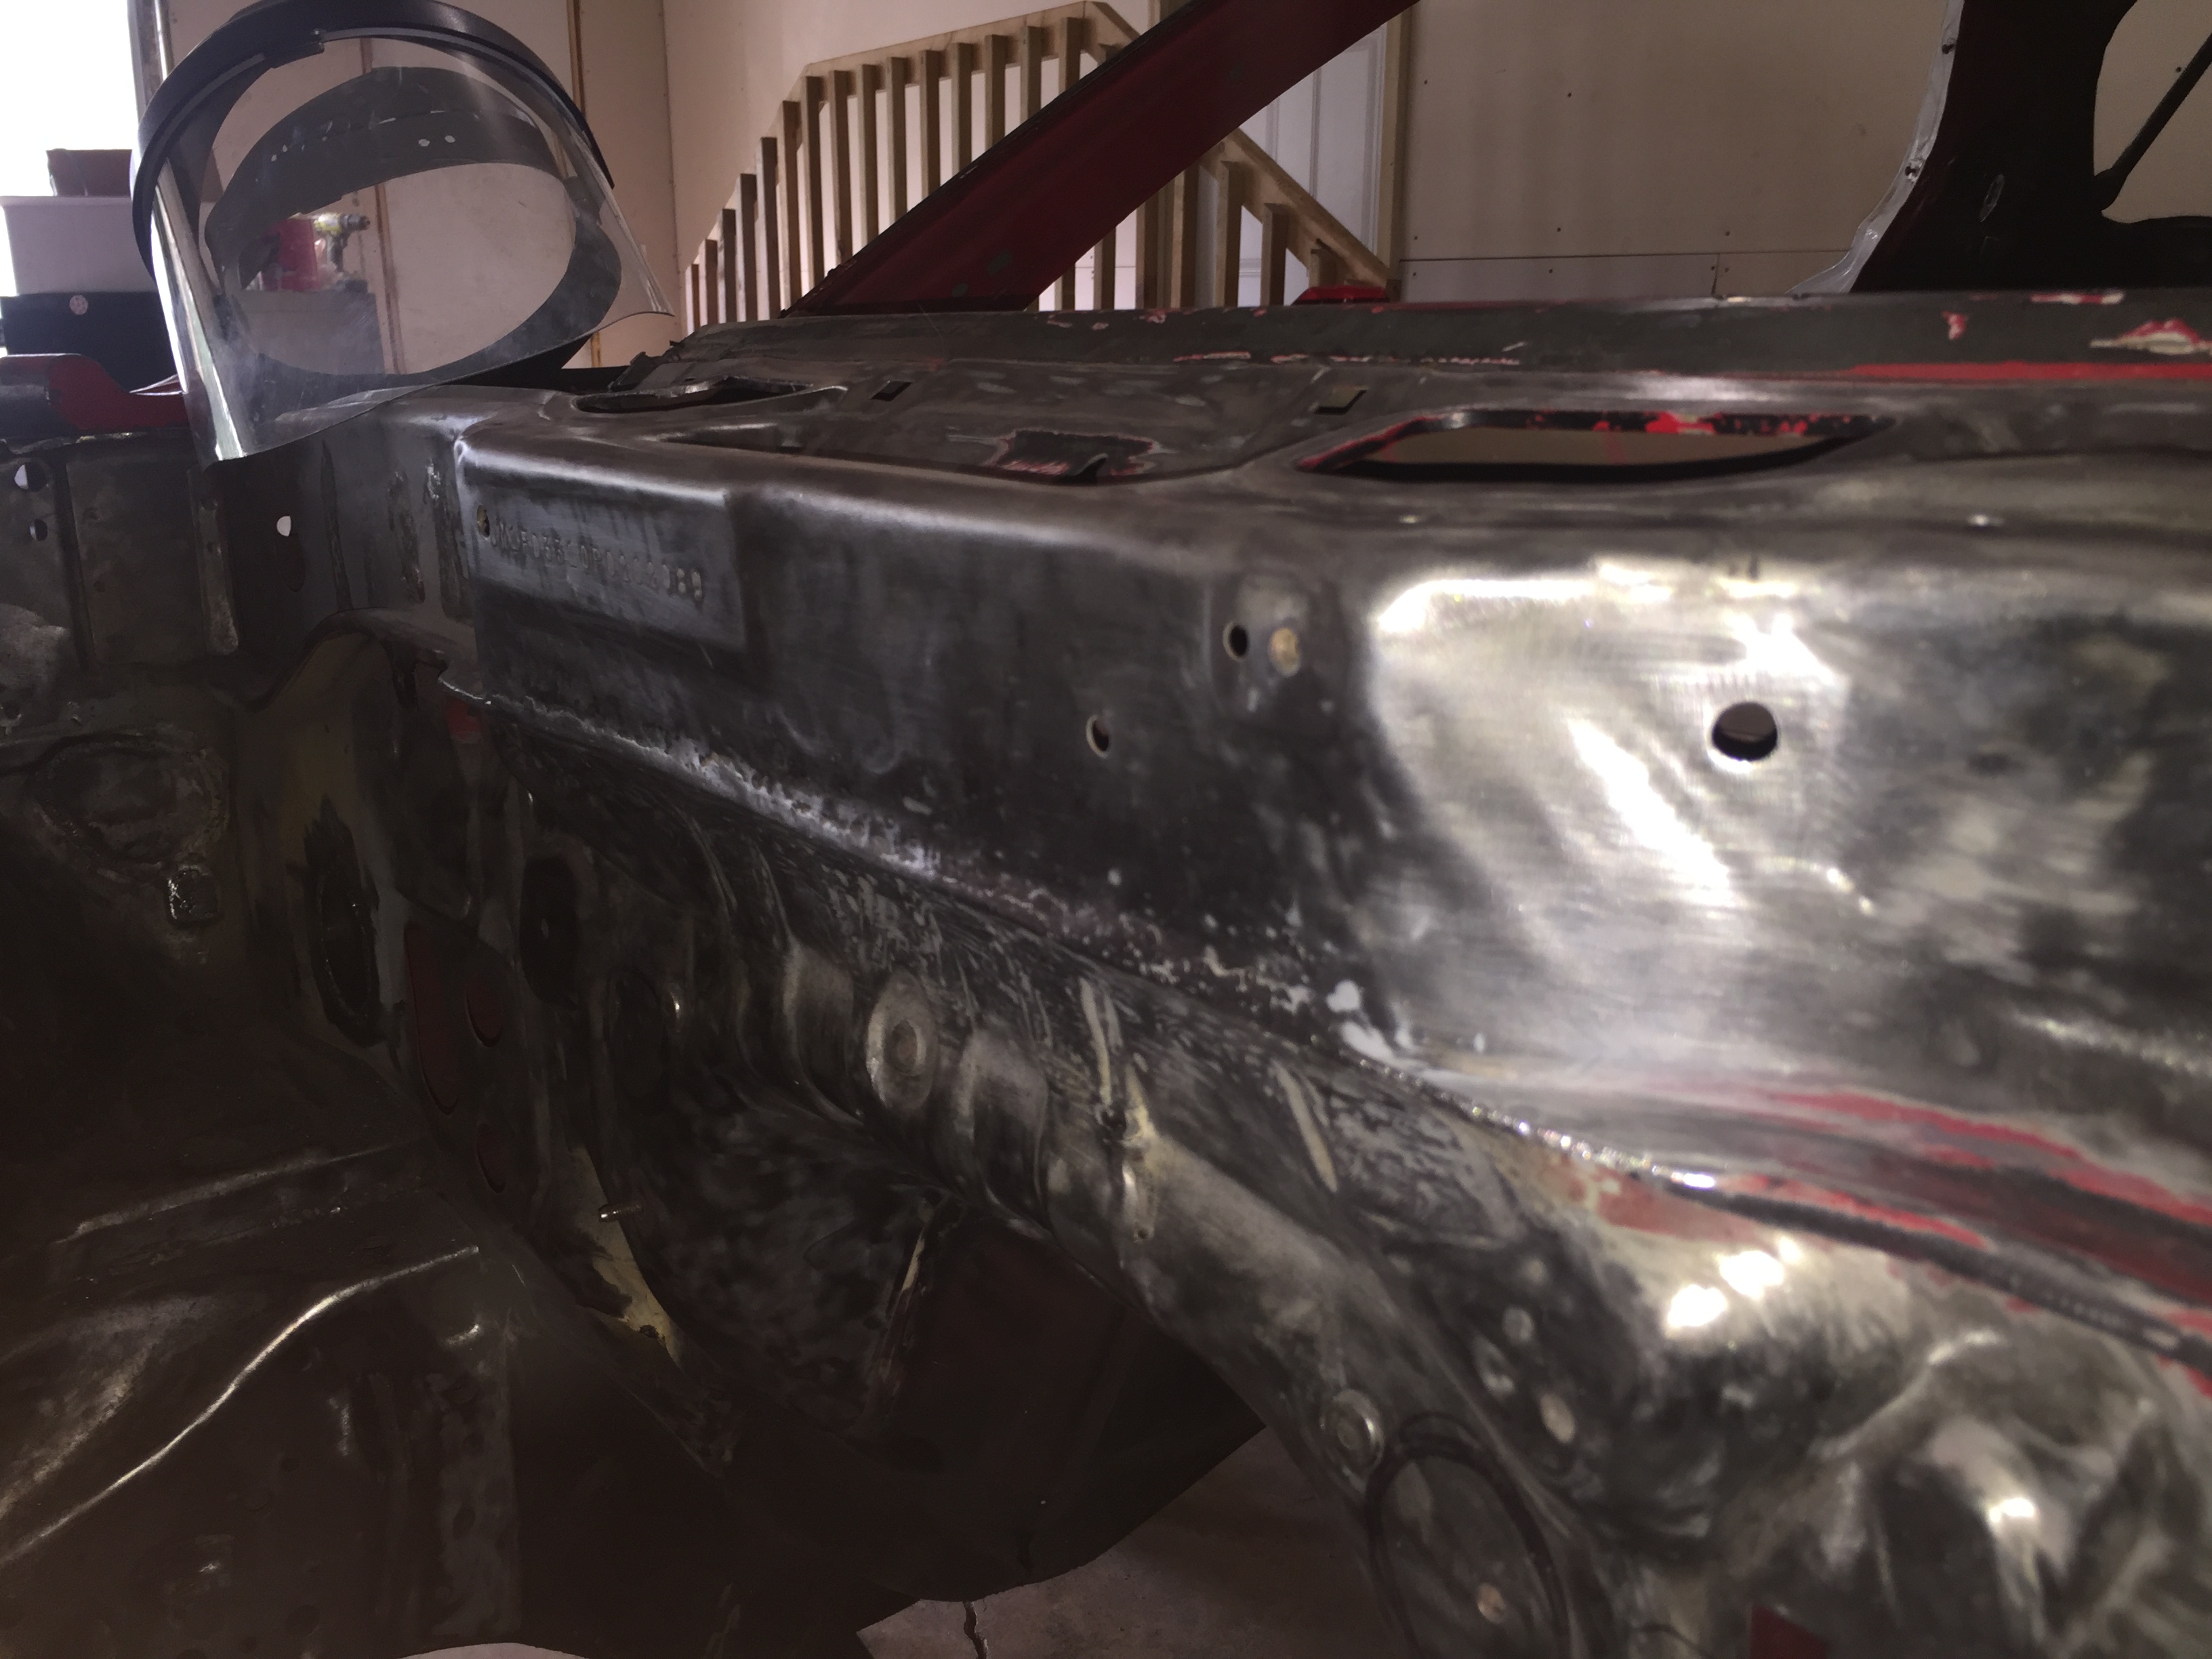
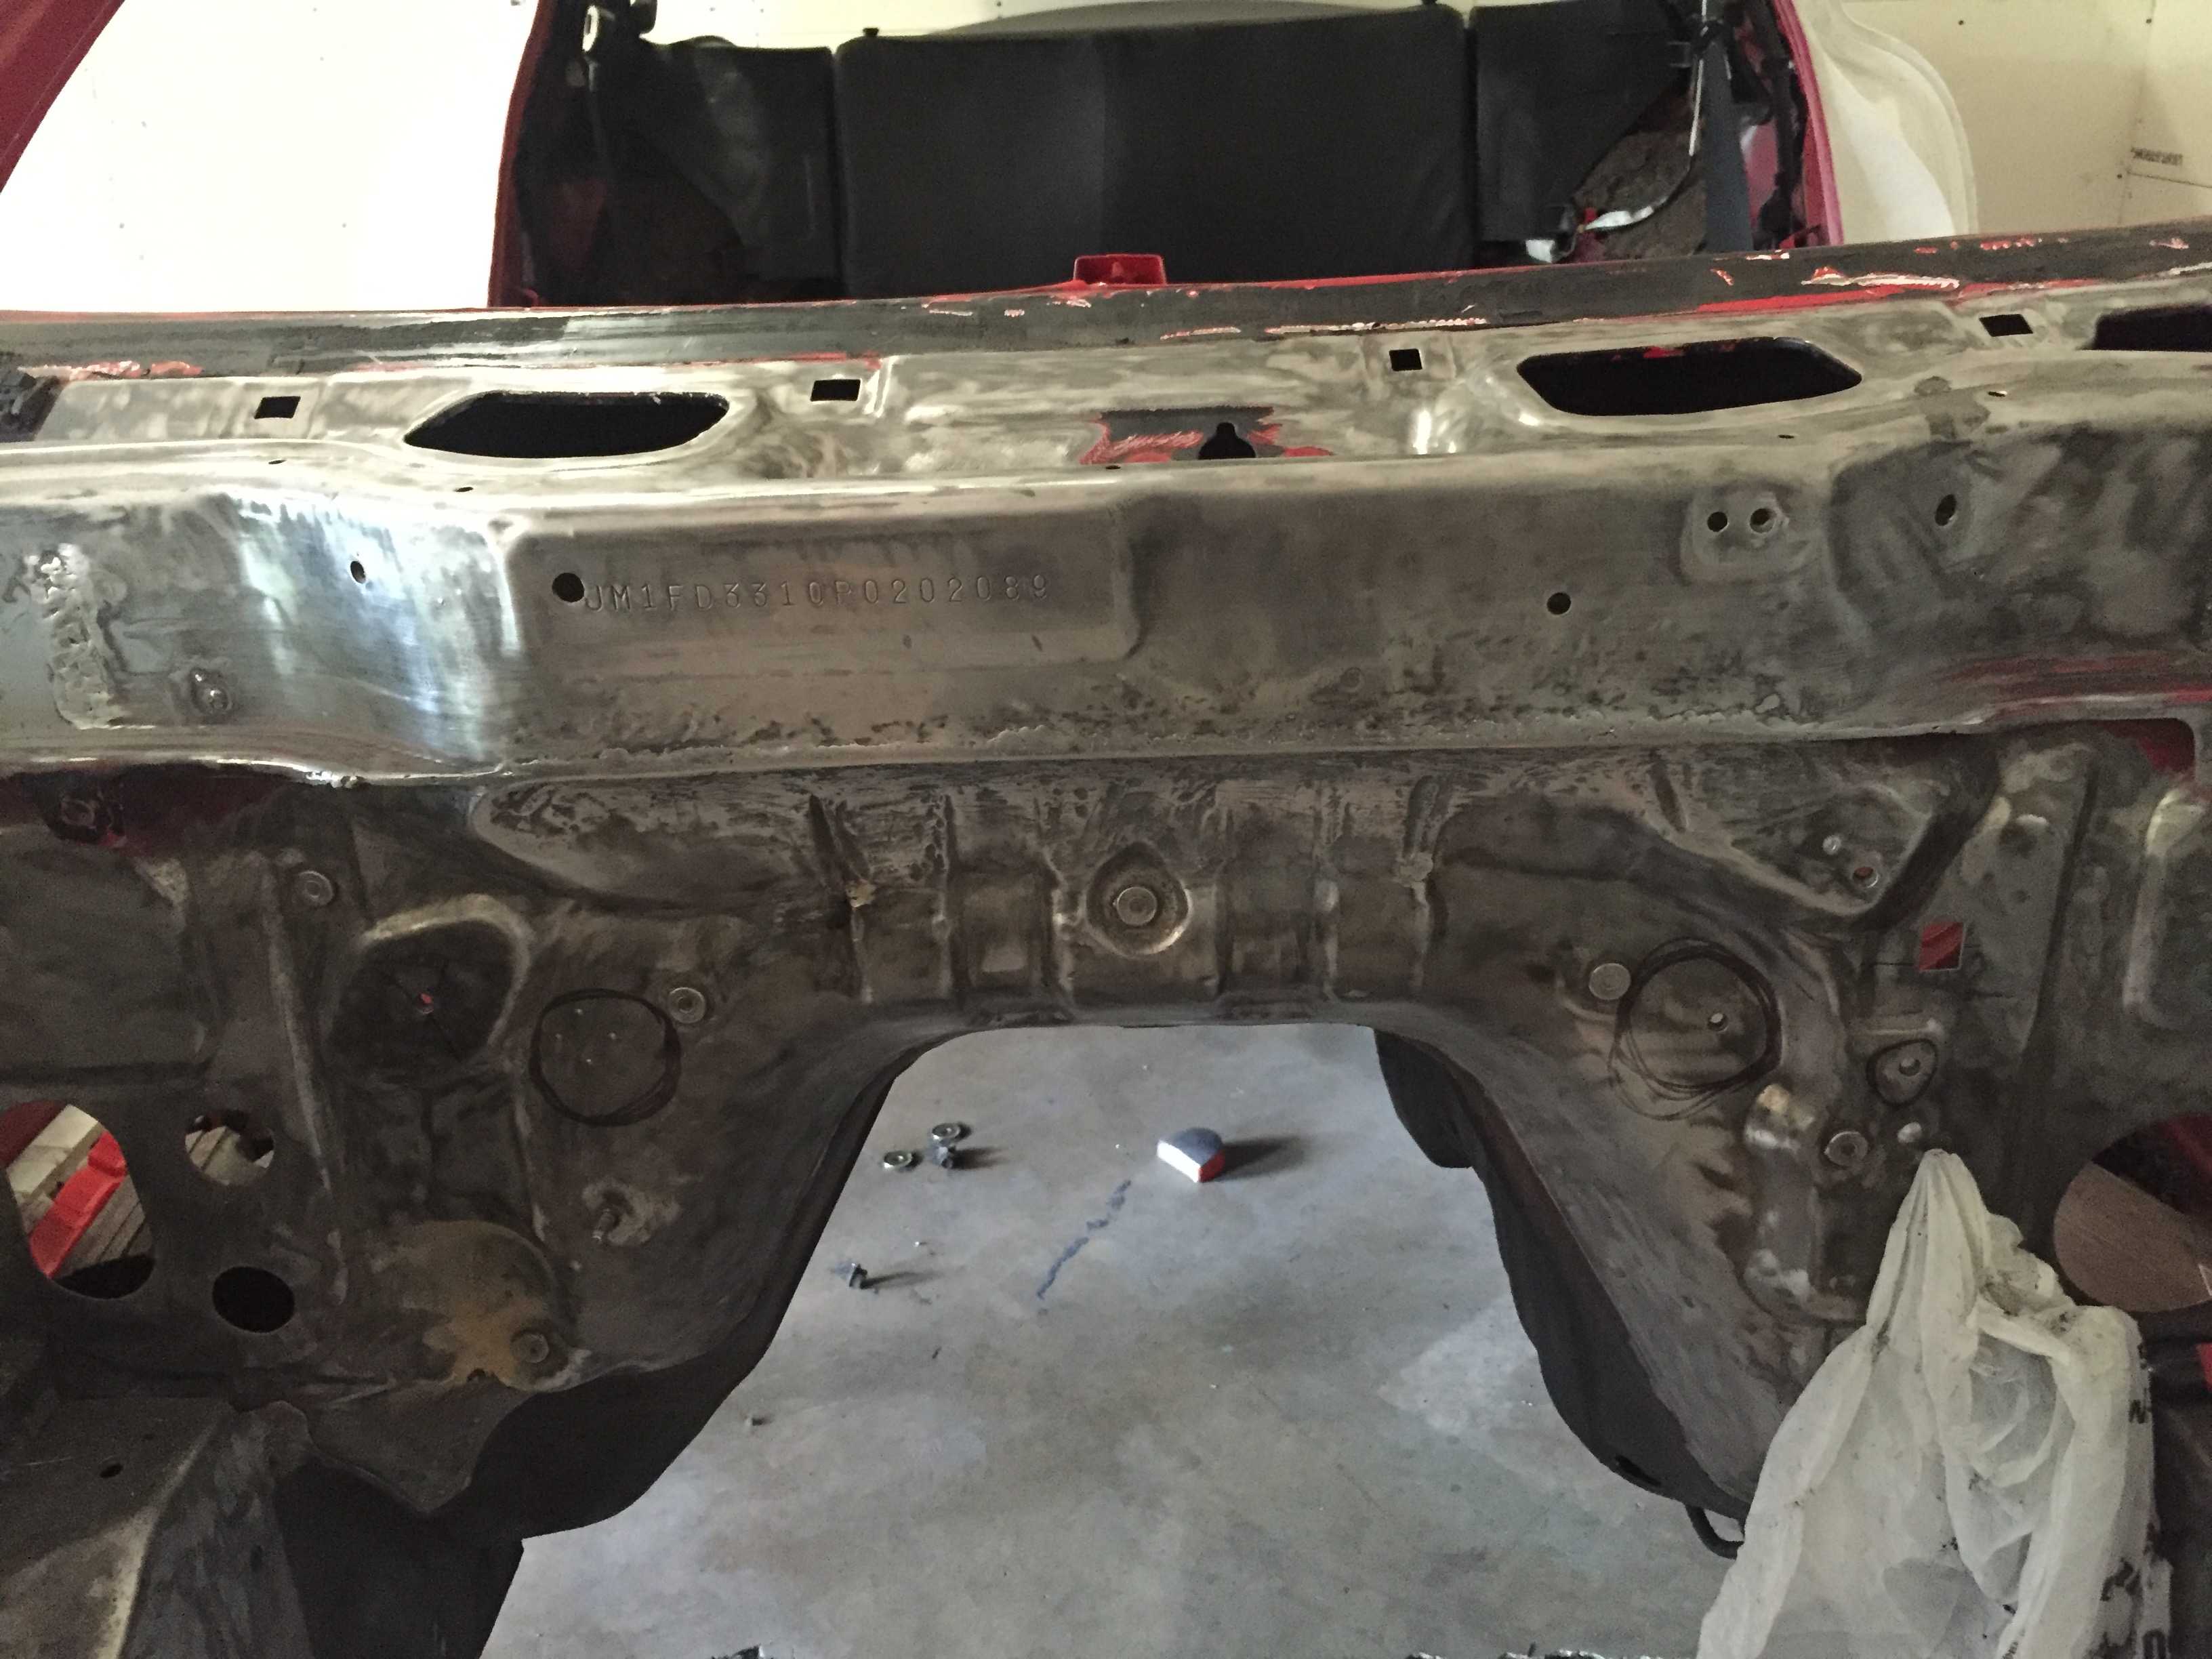
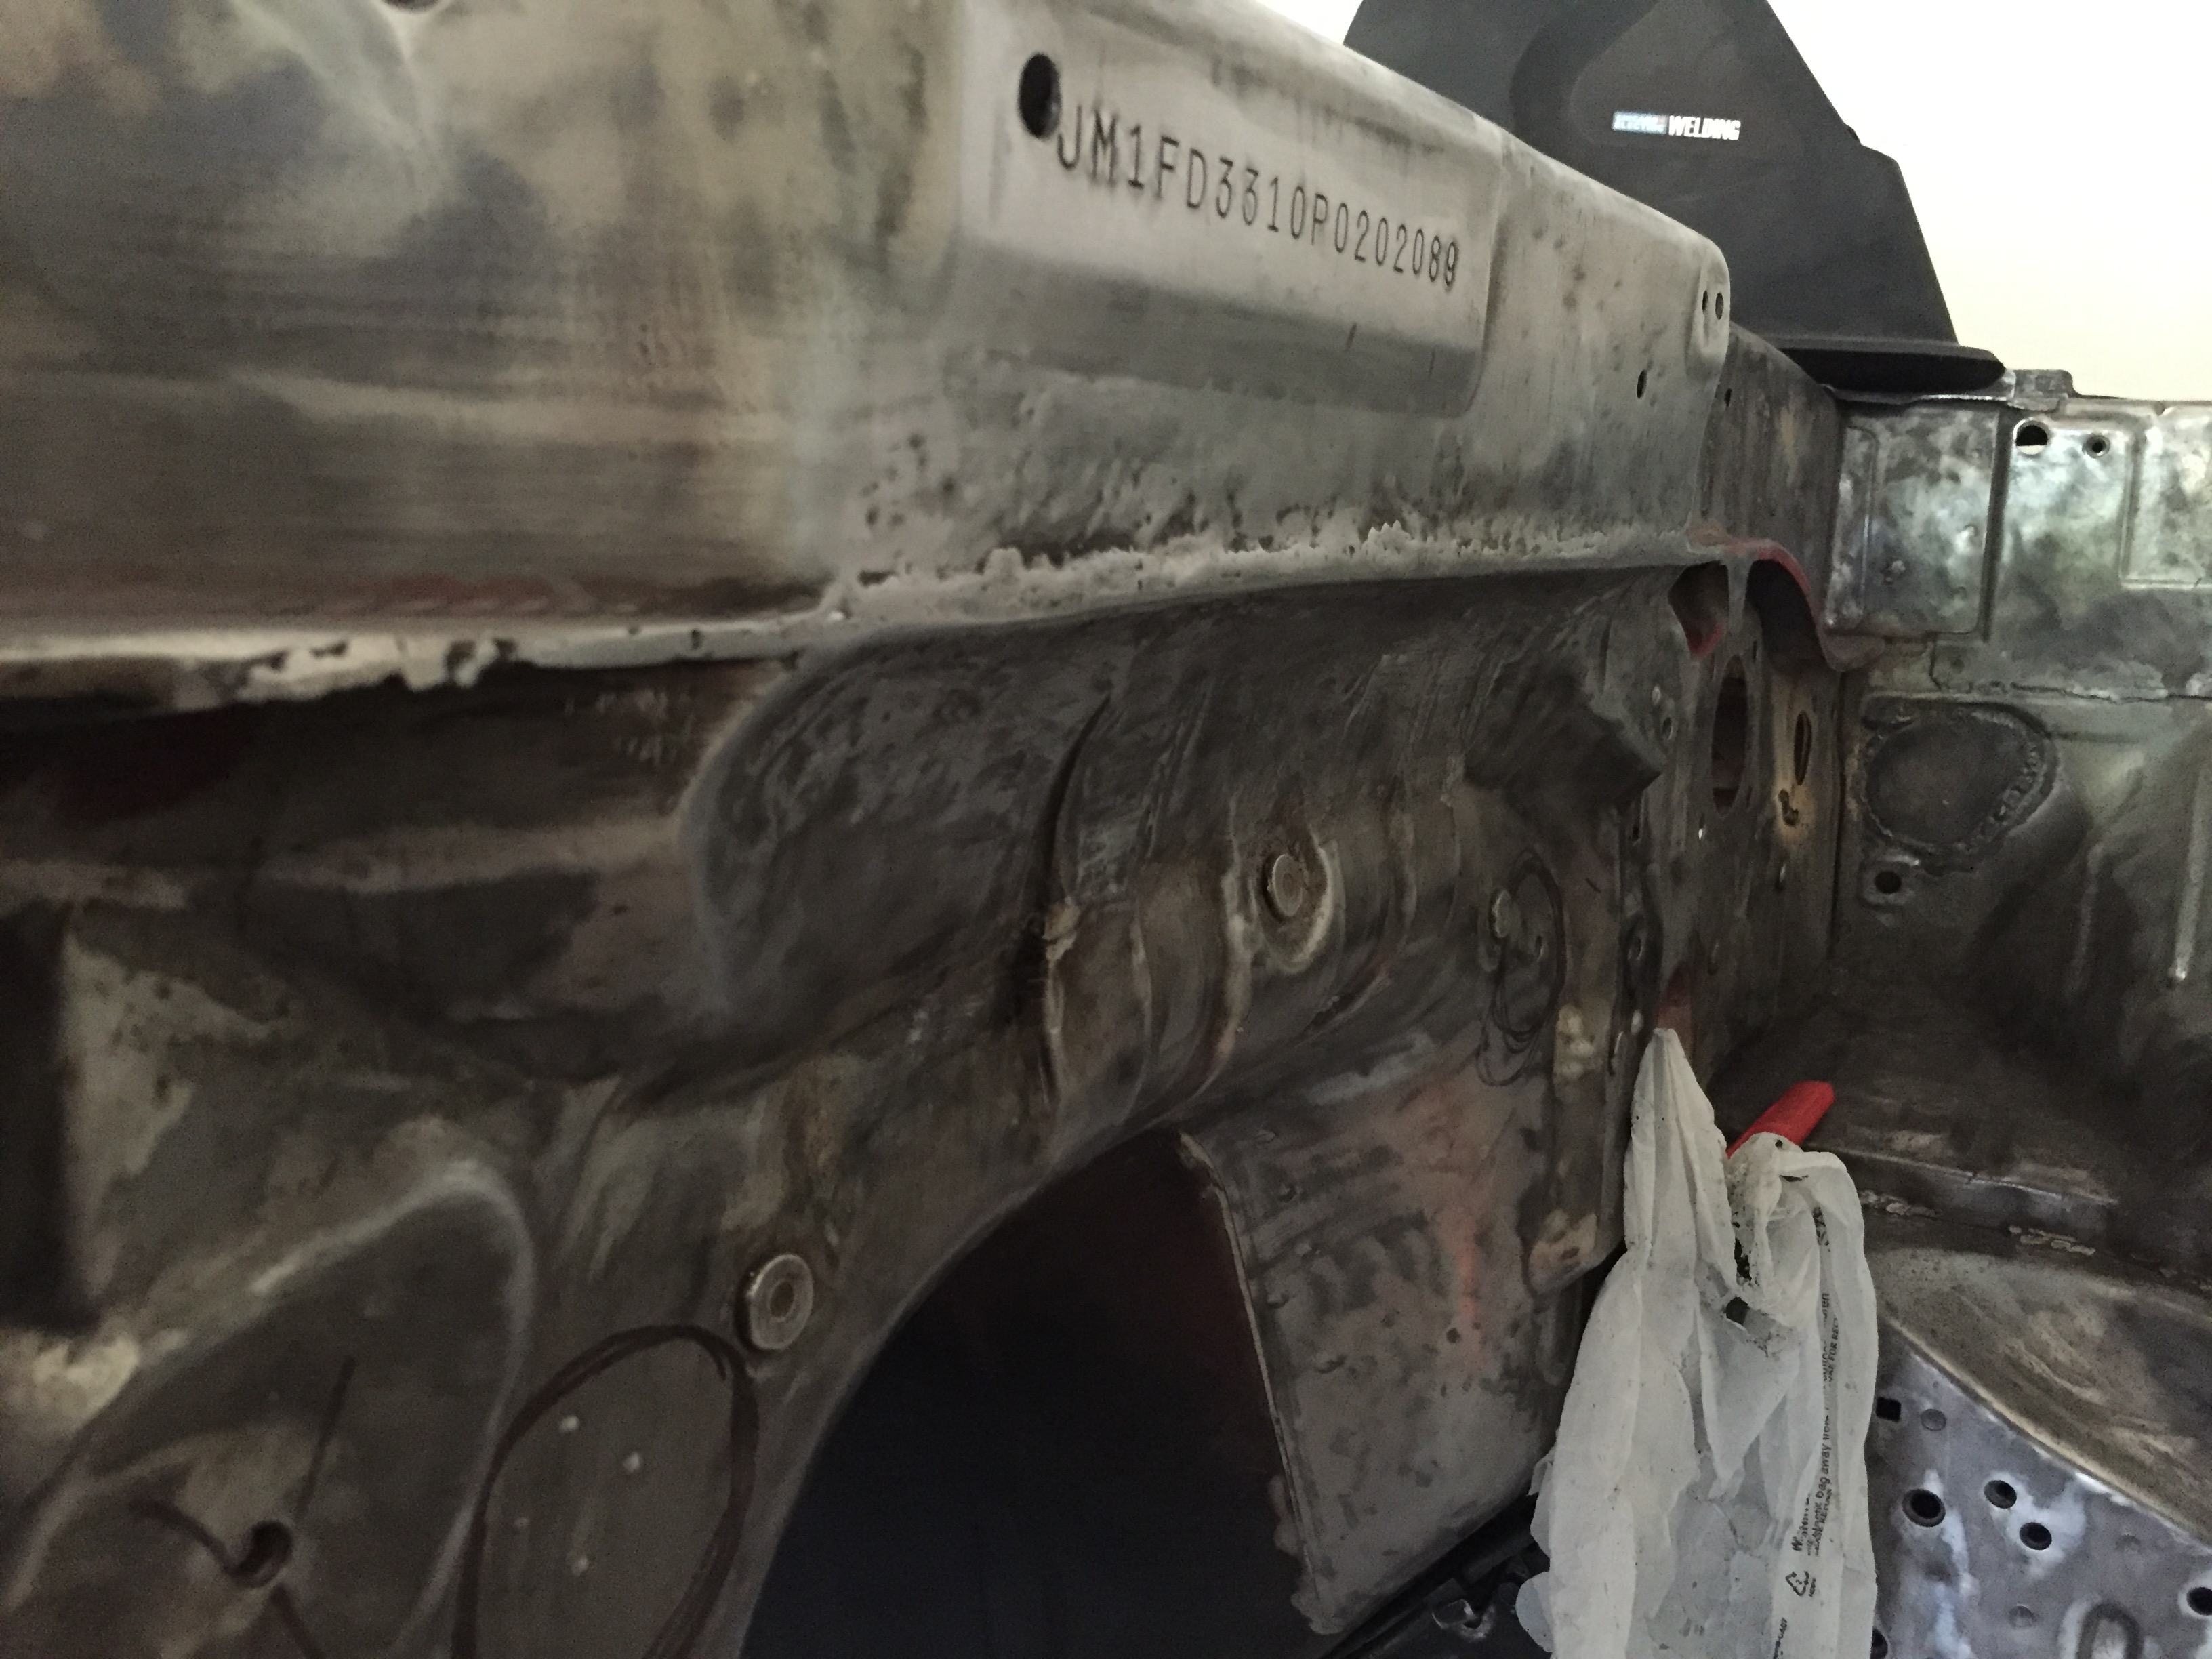
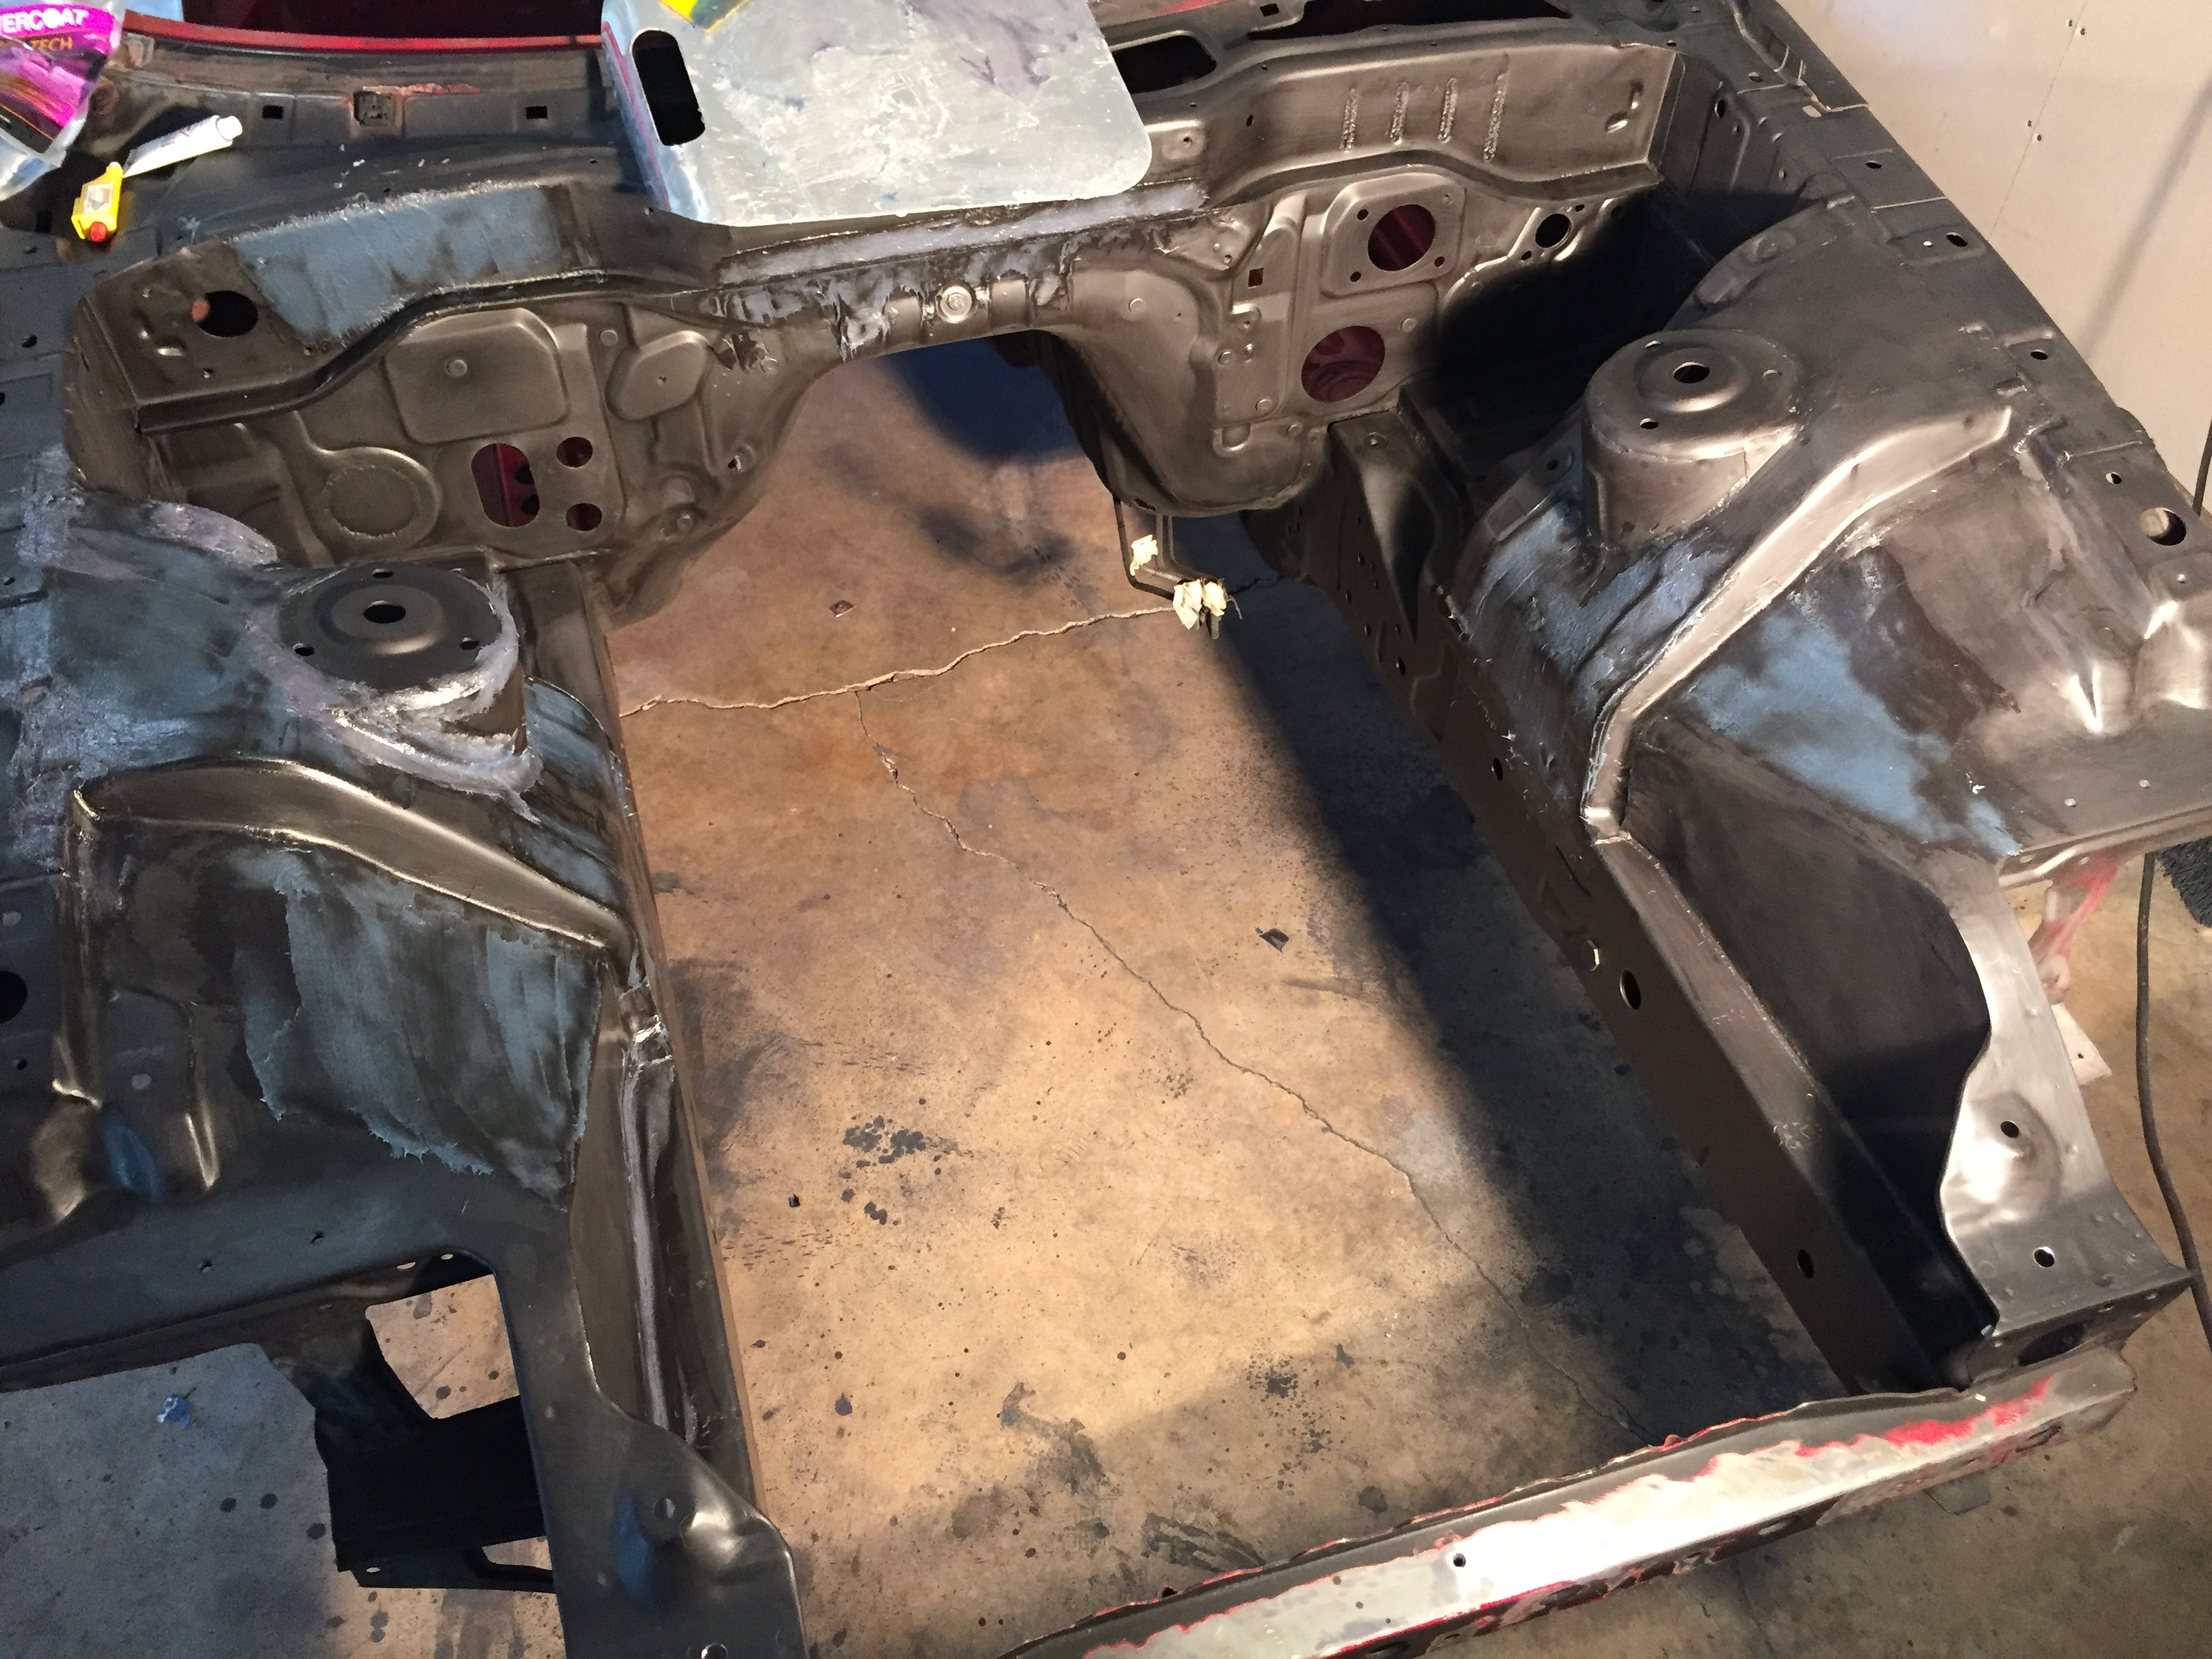
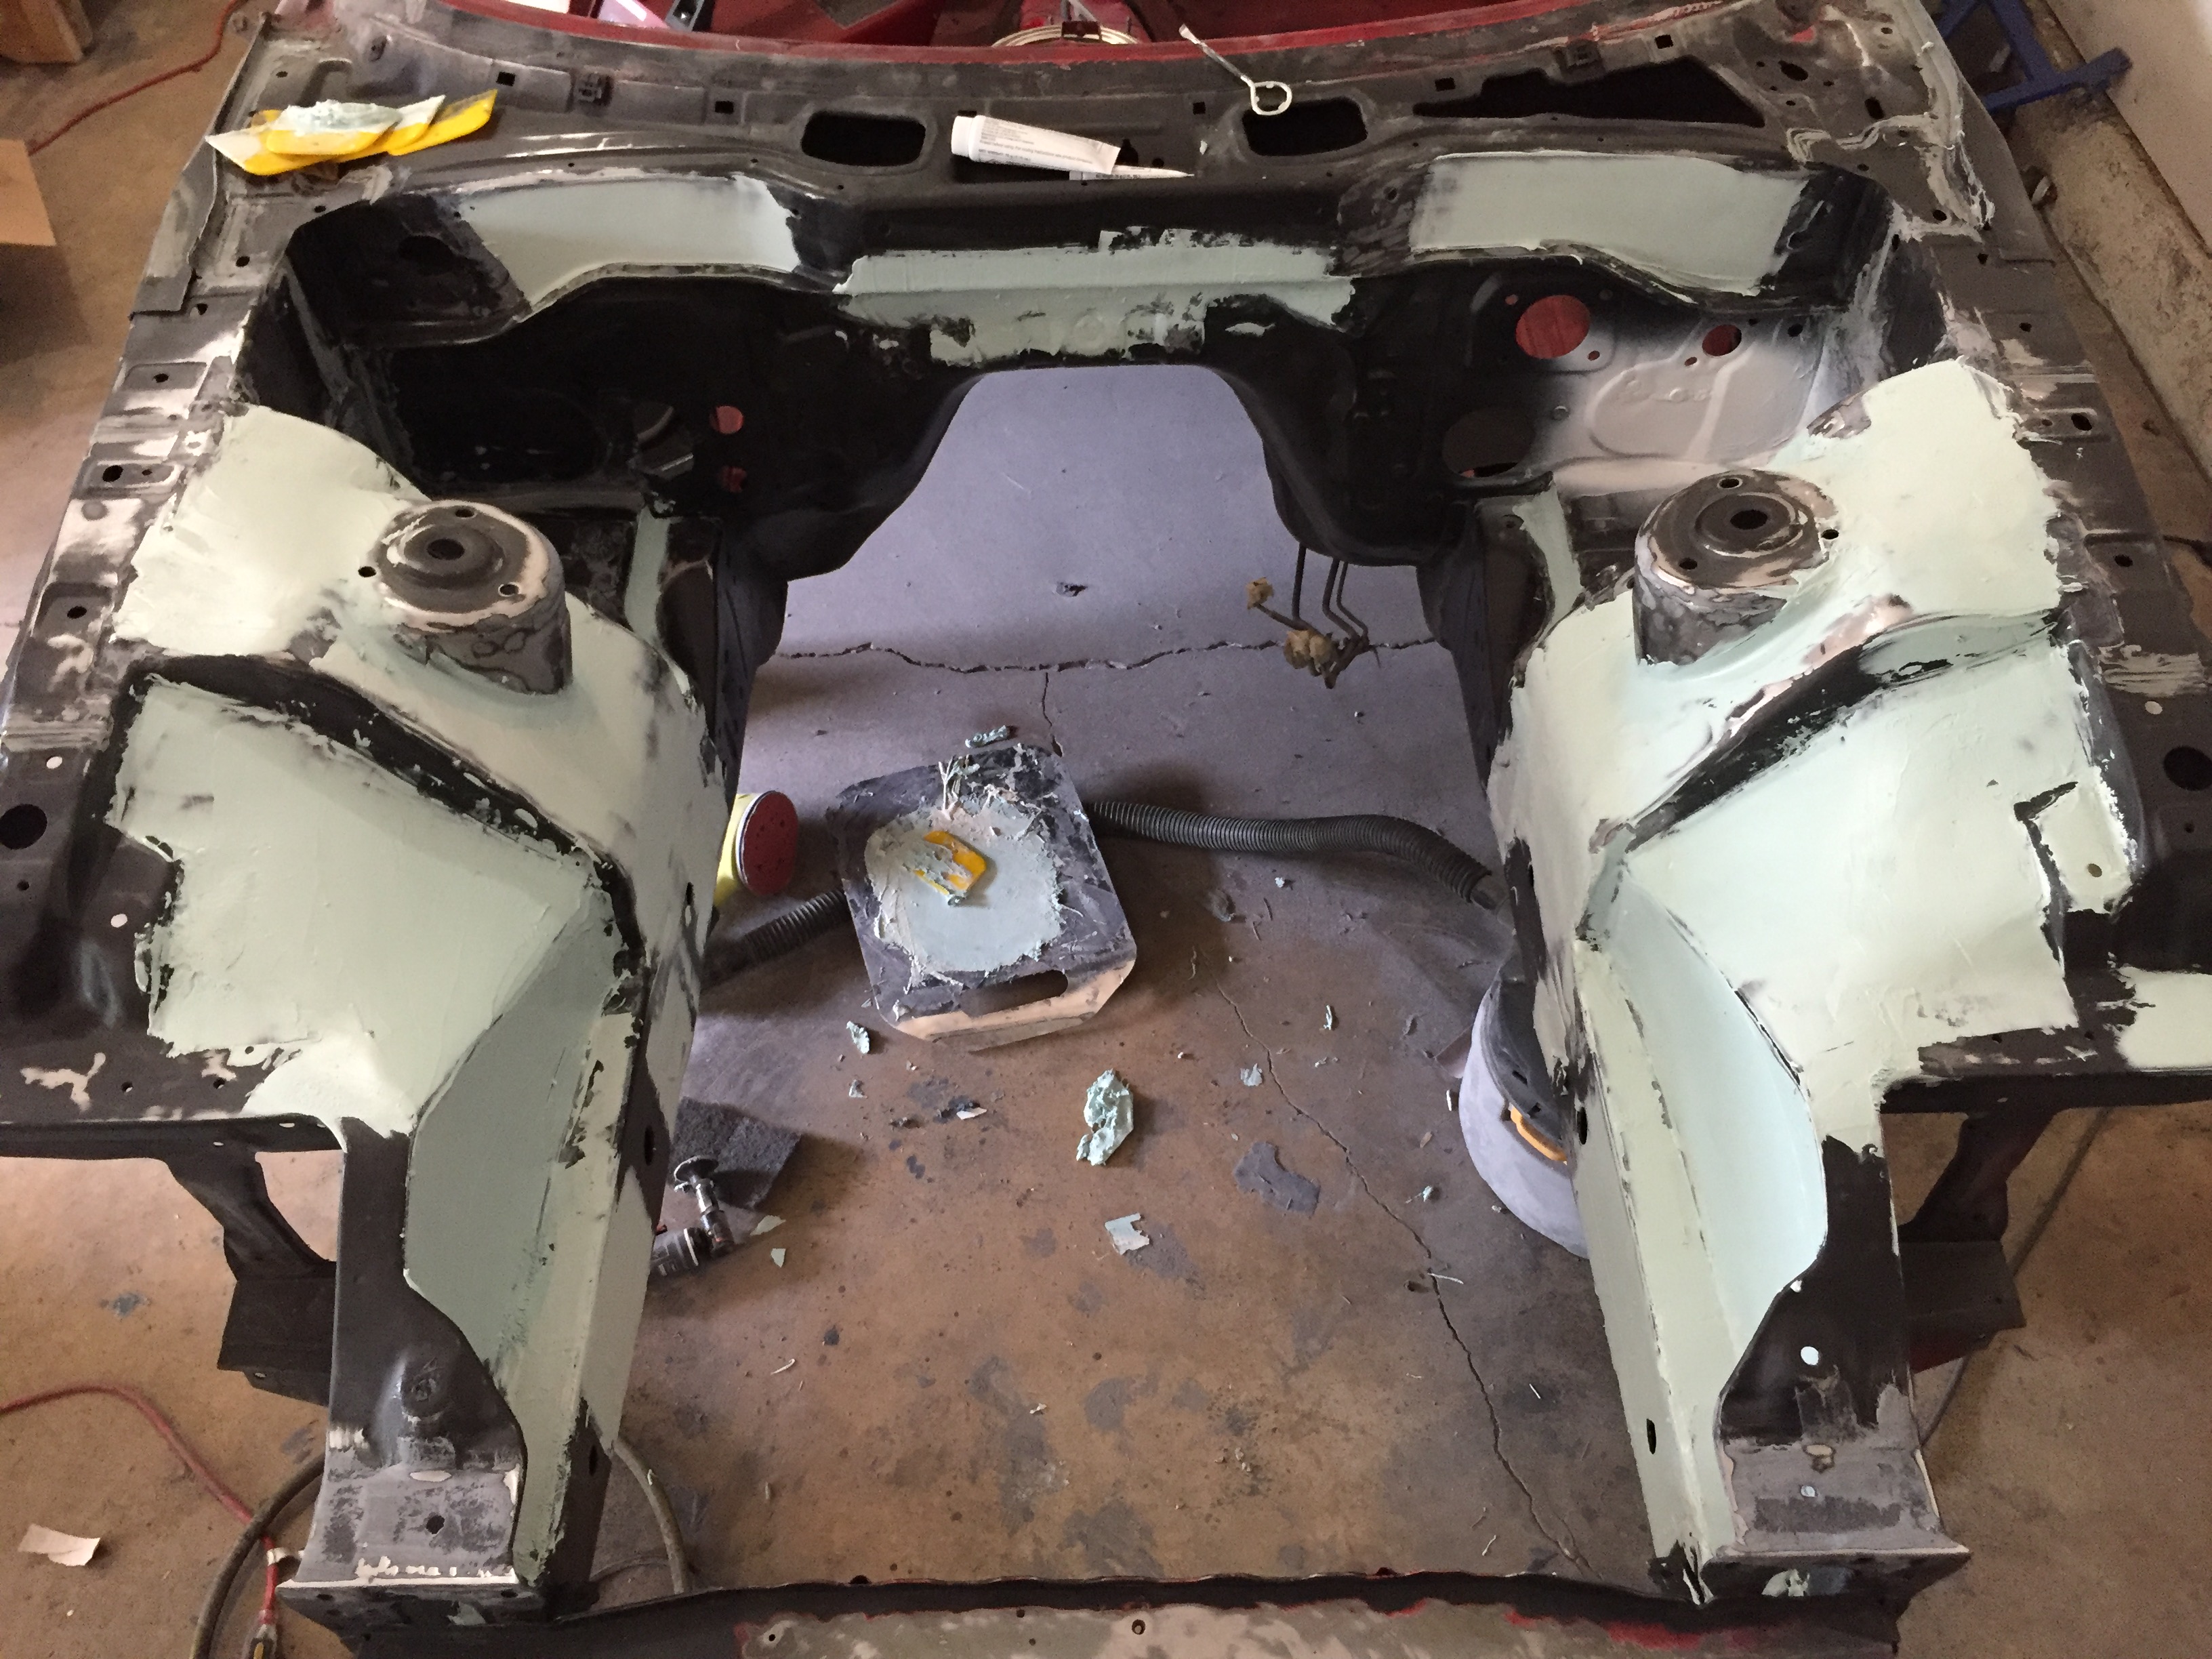
I worked on the engine bay a lot more. The progress pictures make it look a bit rough, but don't judge it by the progress! You have to wait until it's actually finished lol.
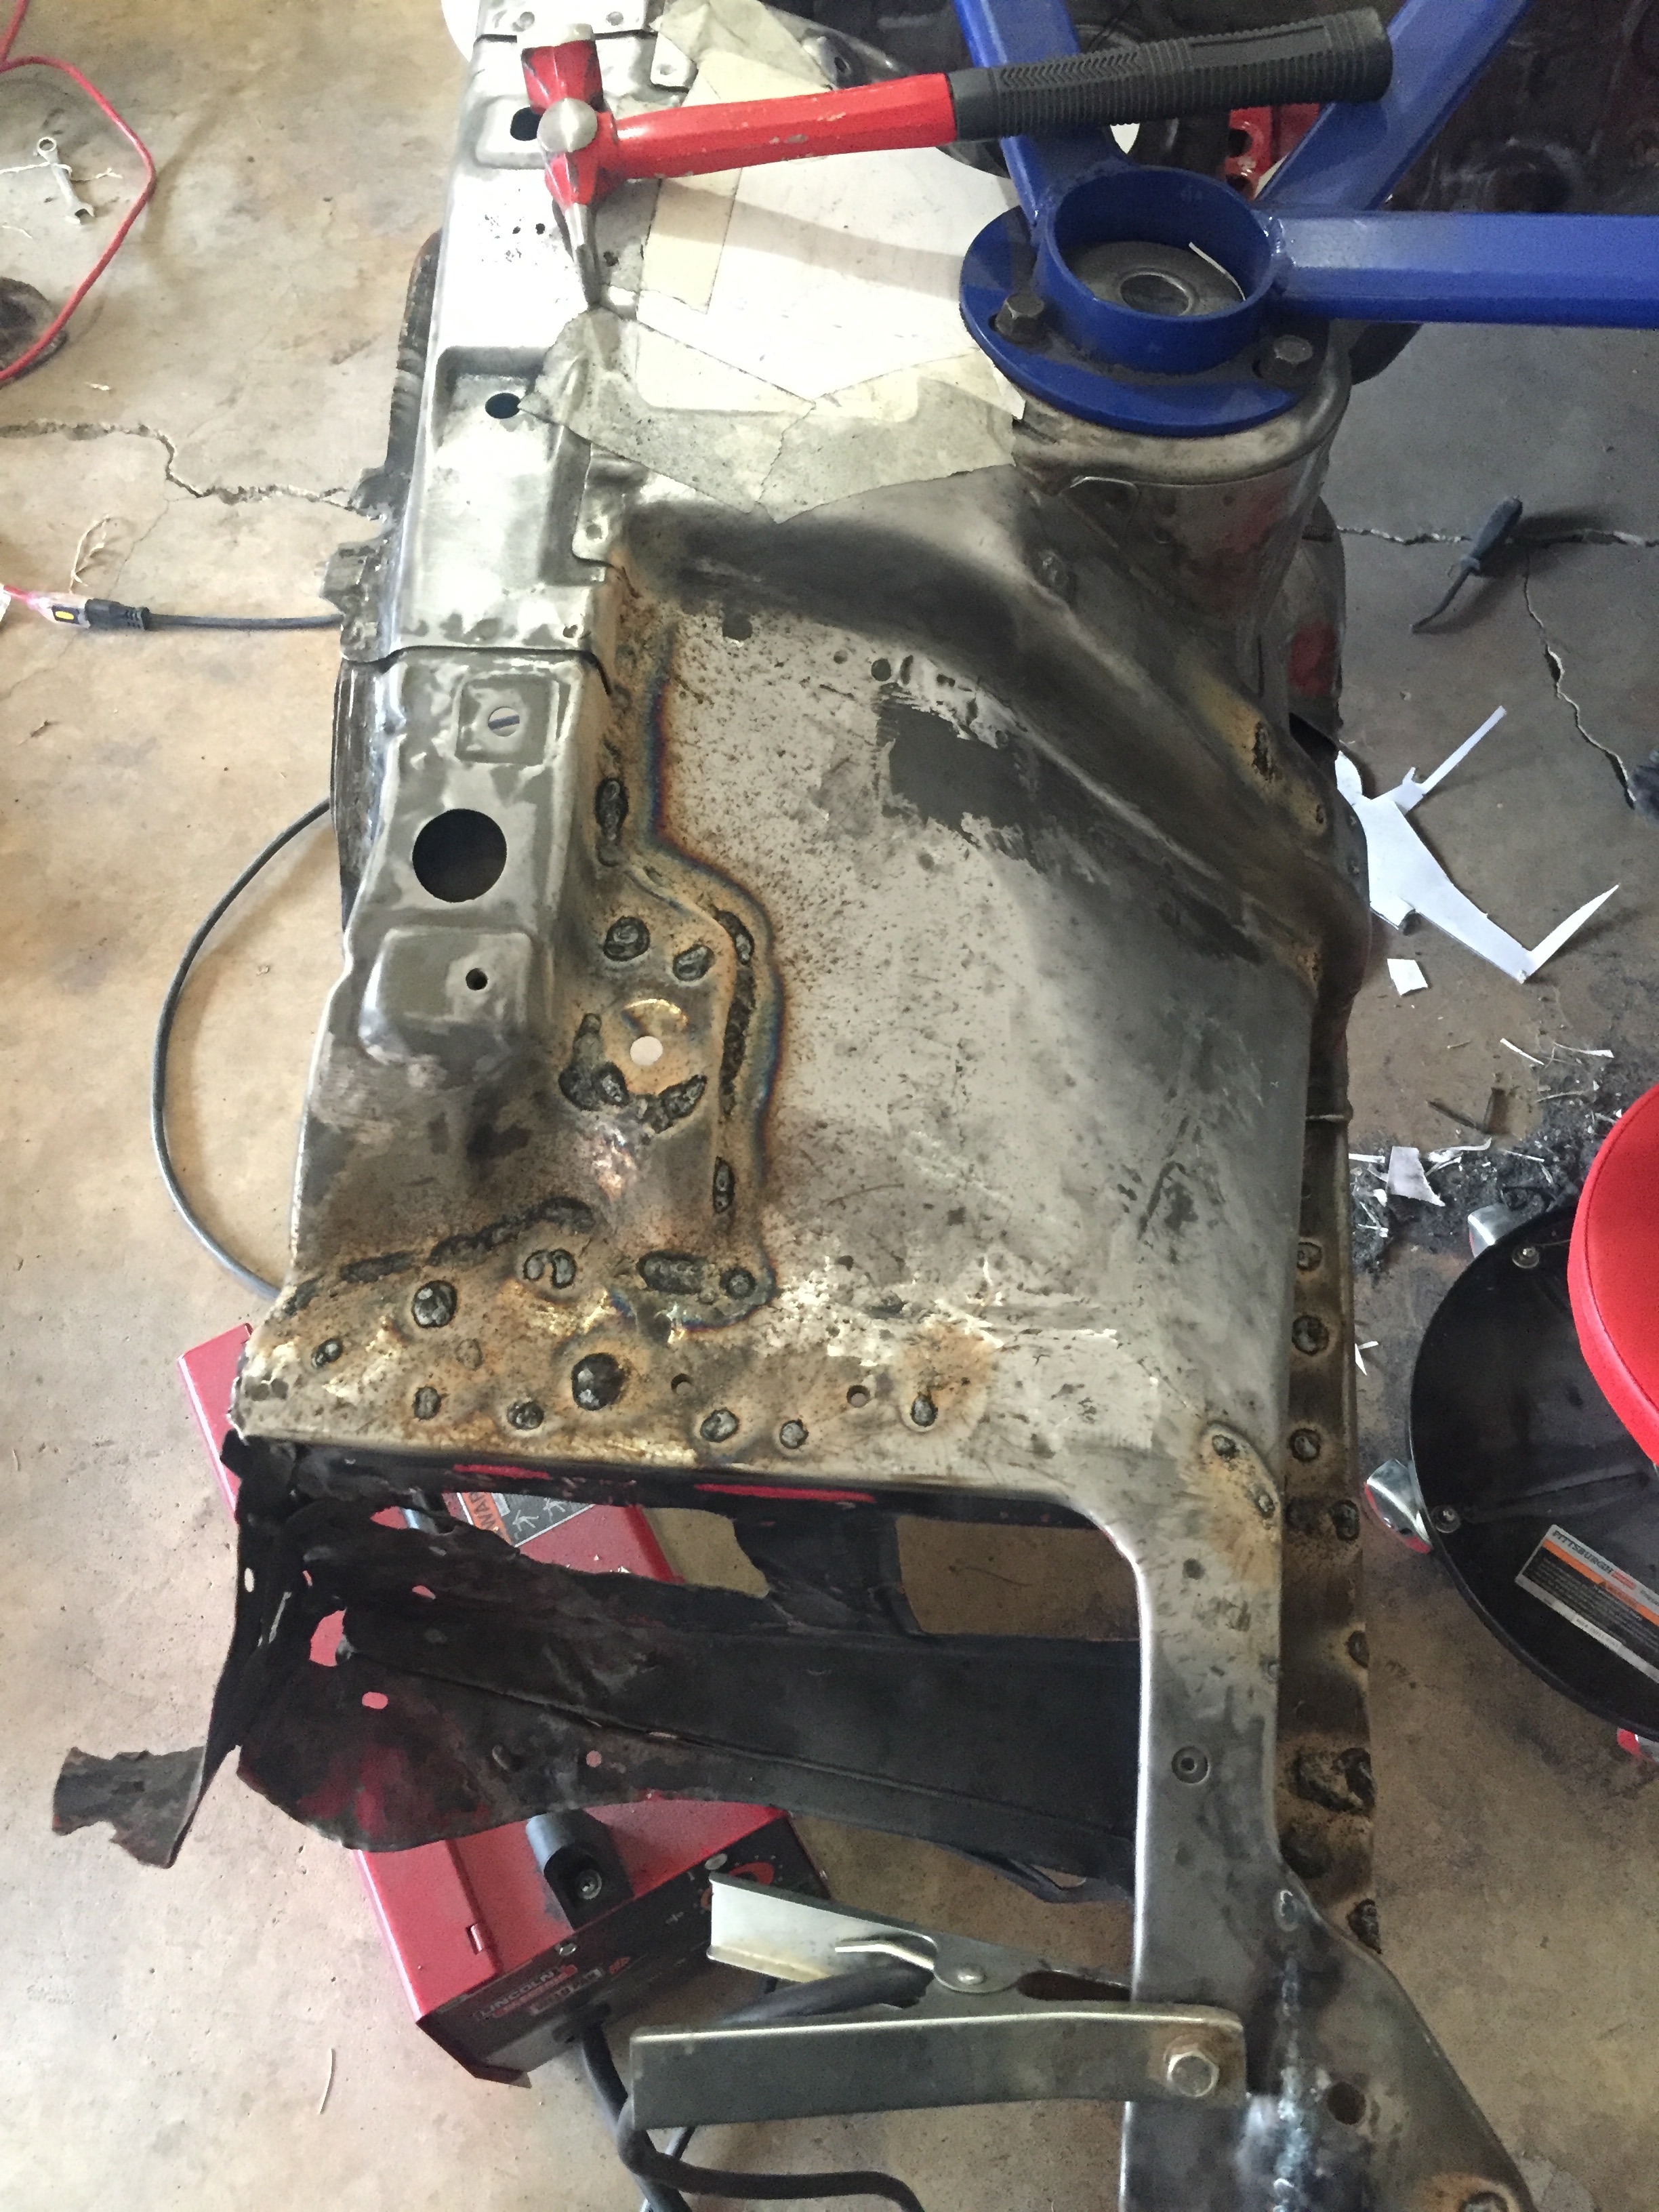
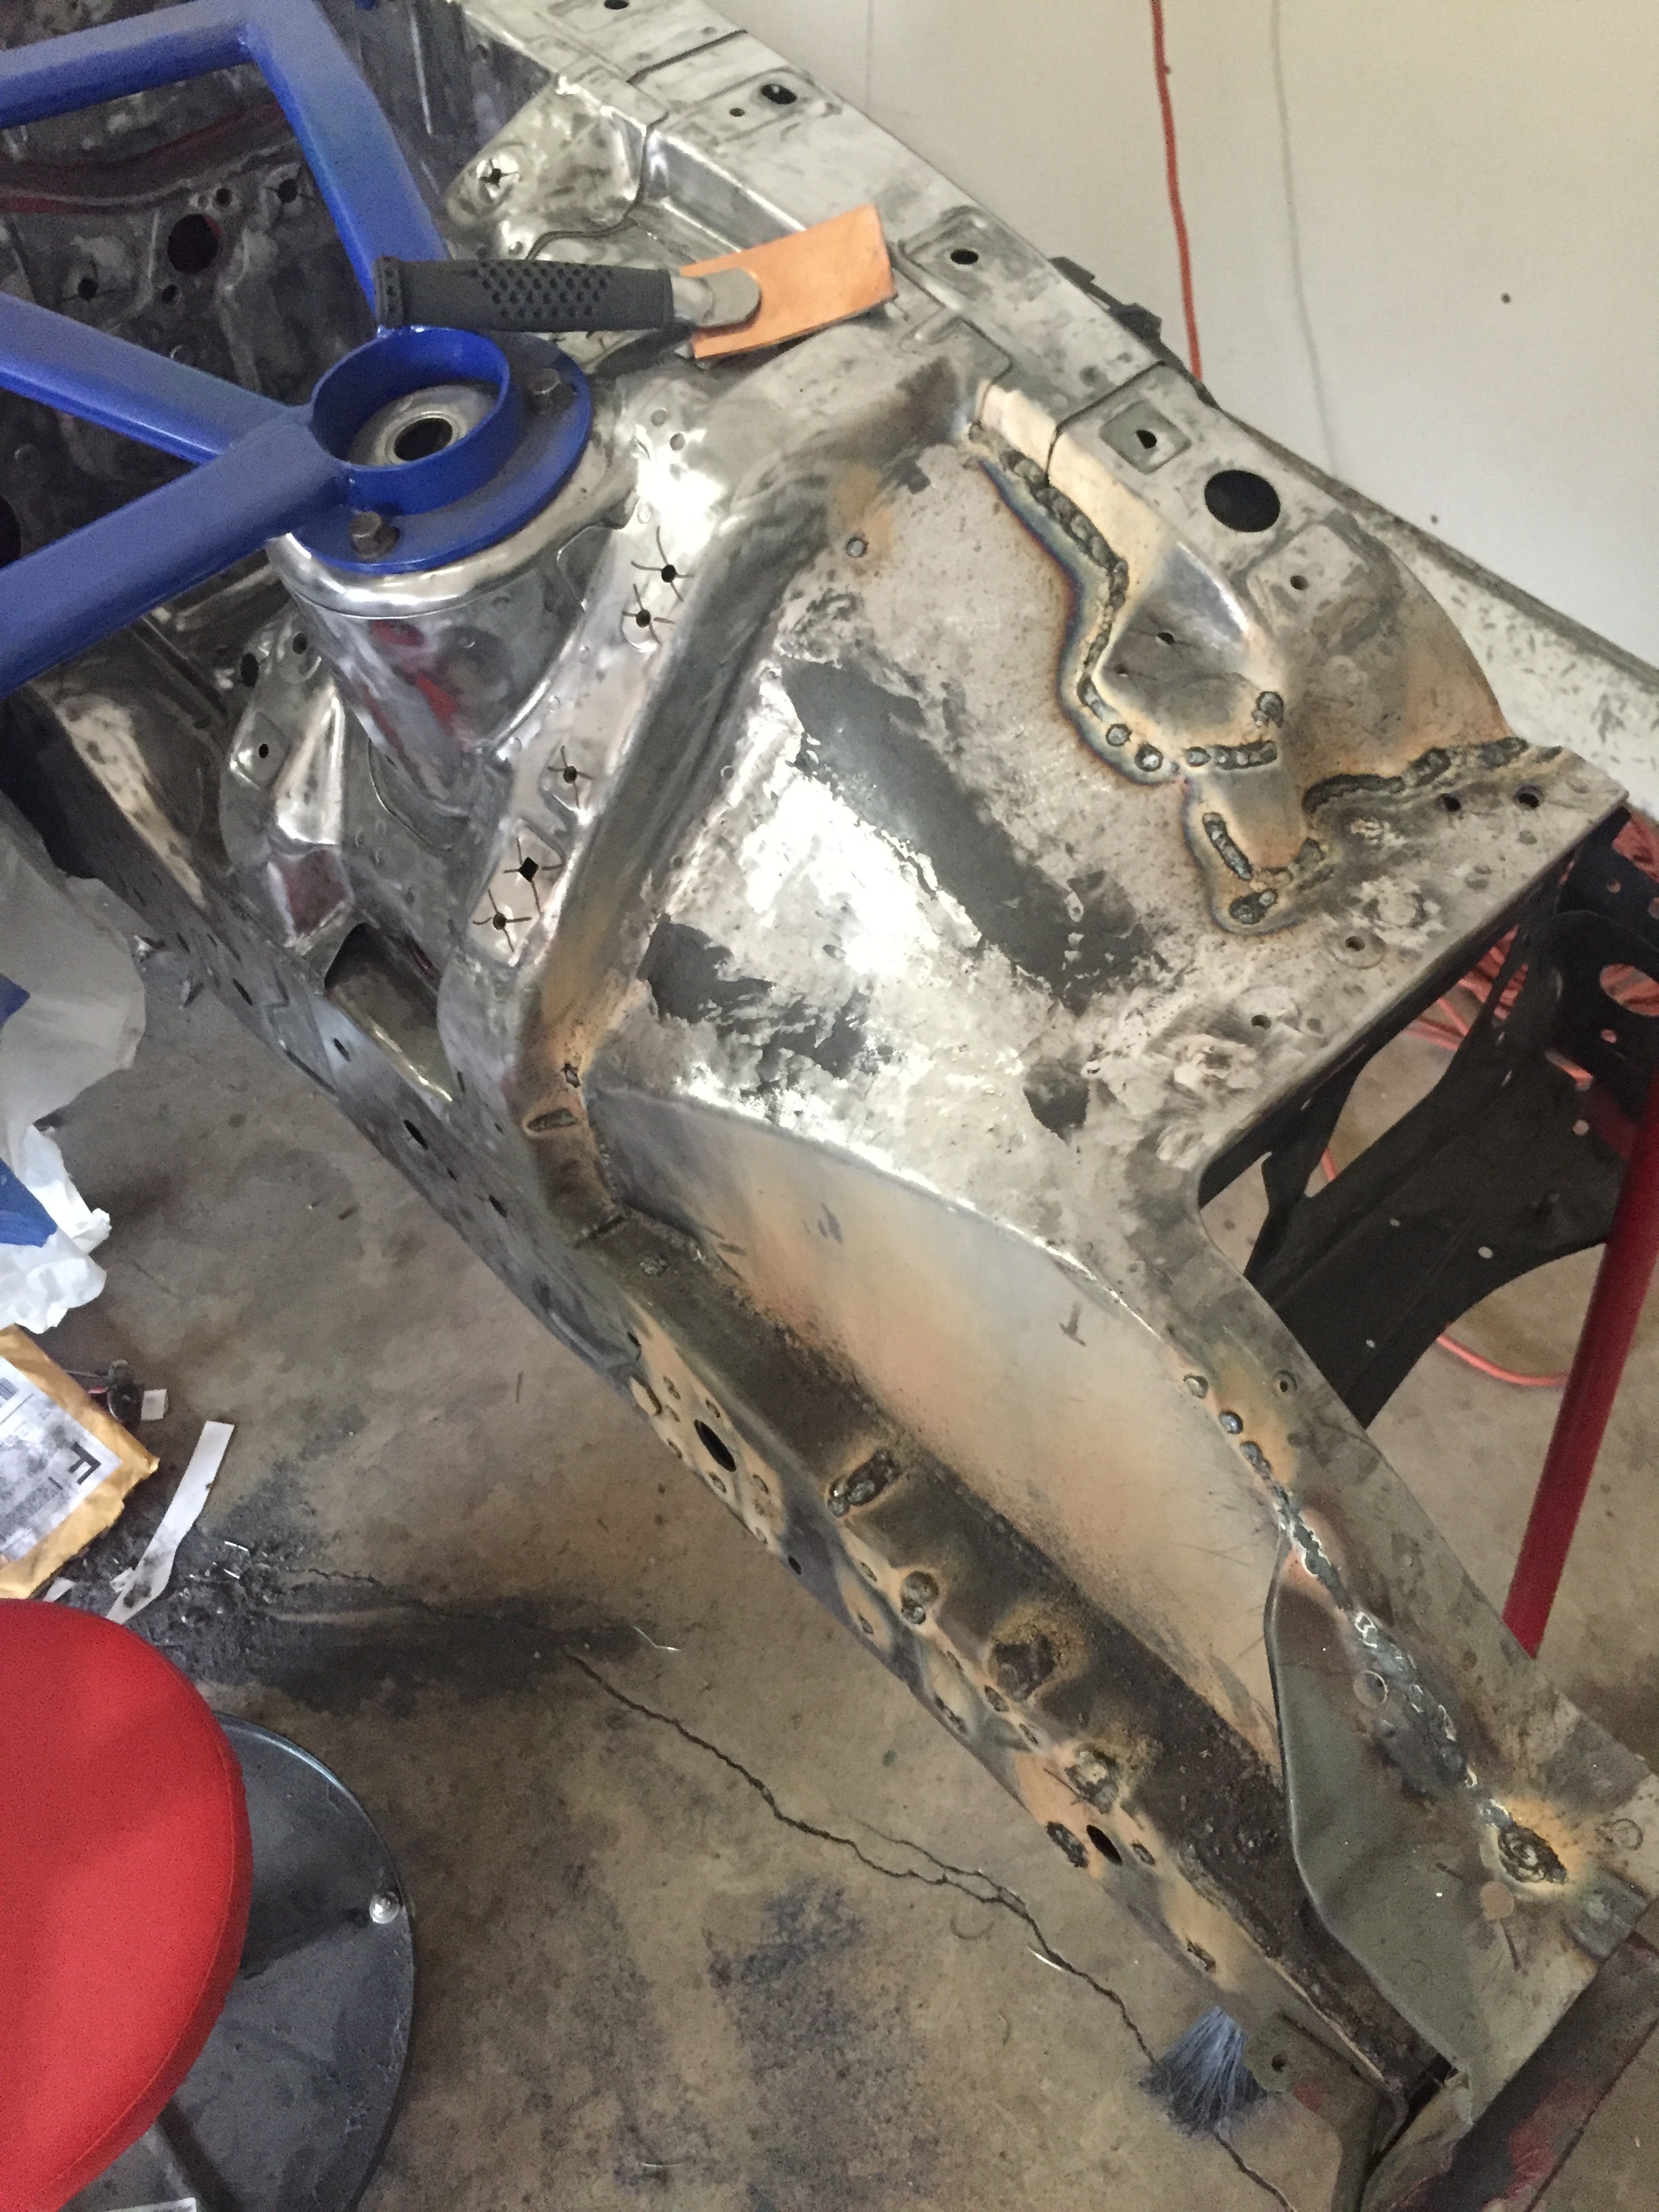
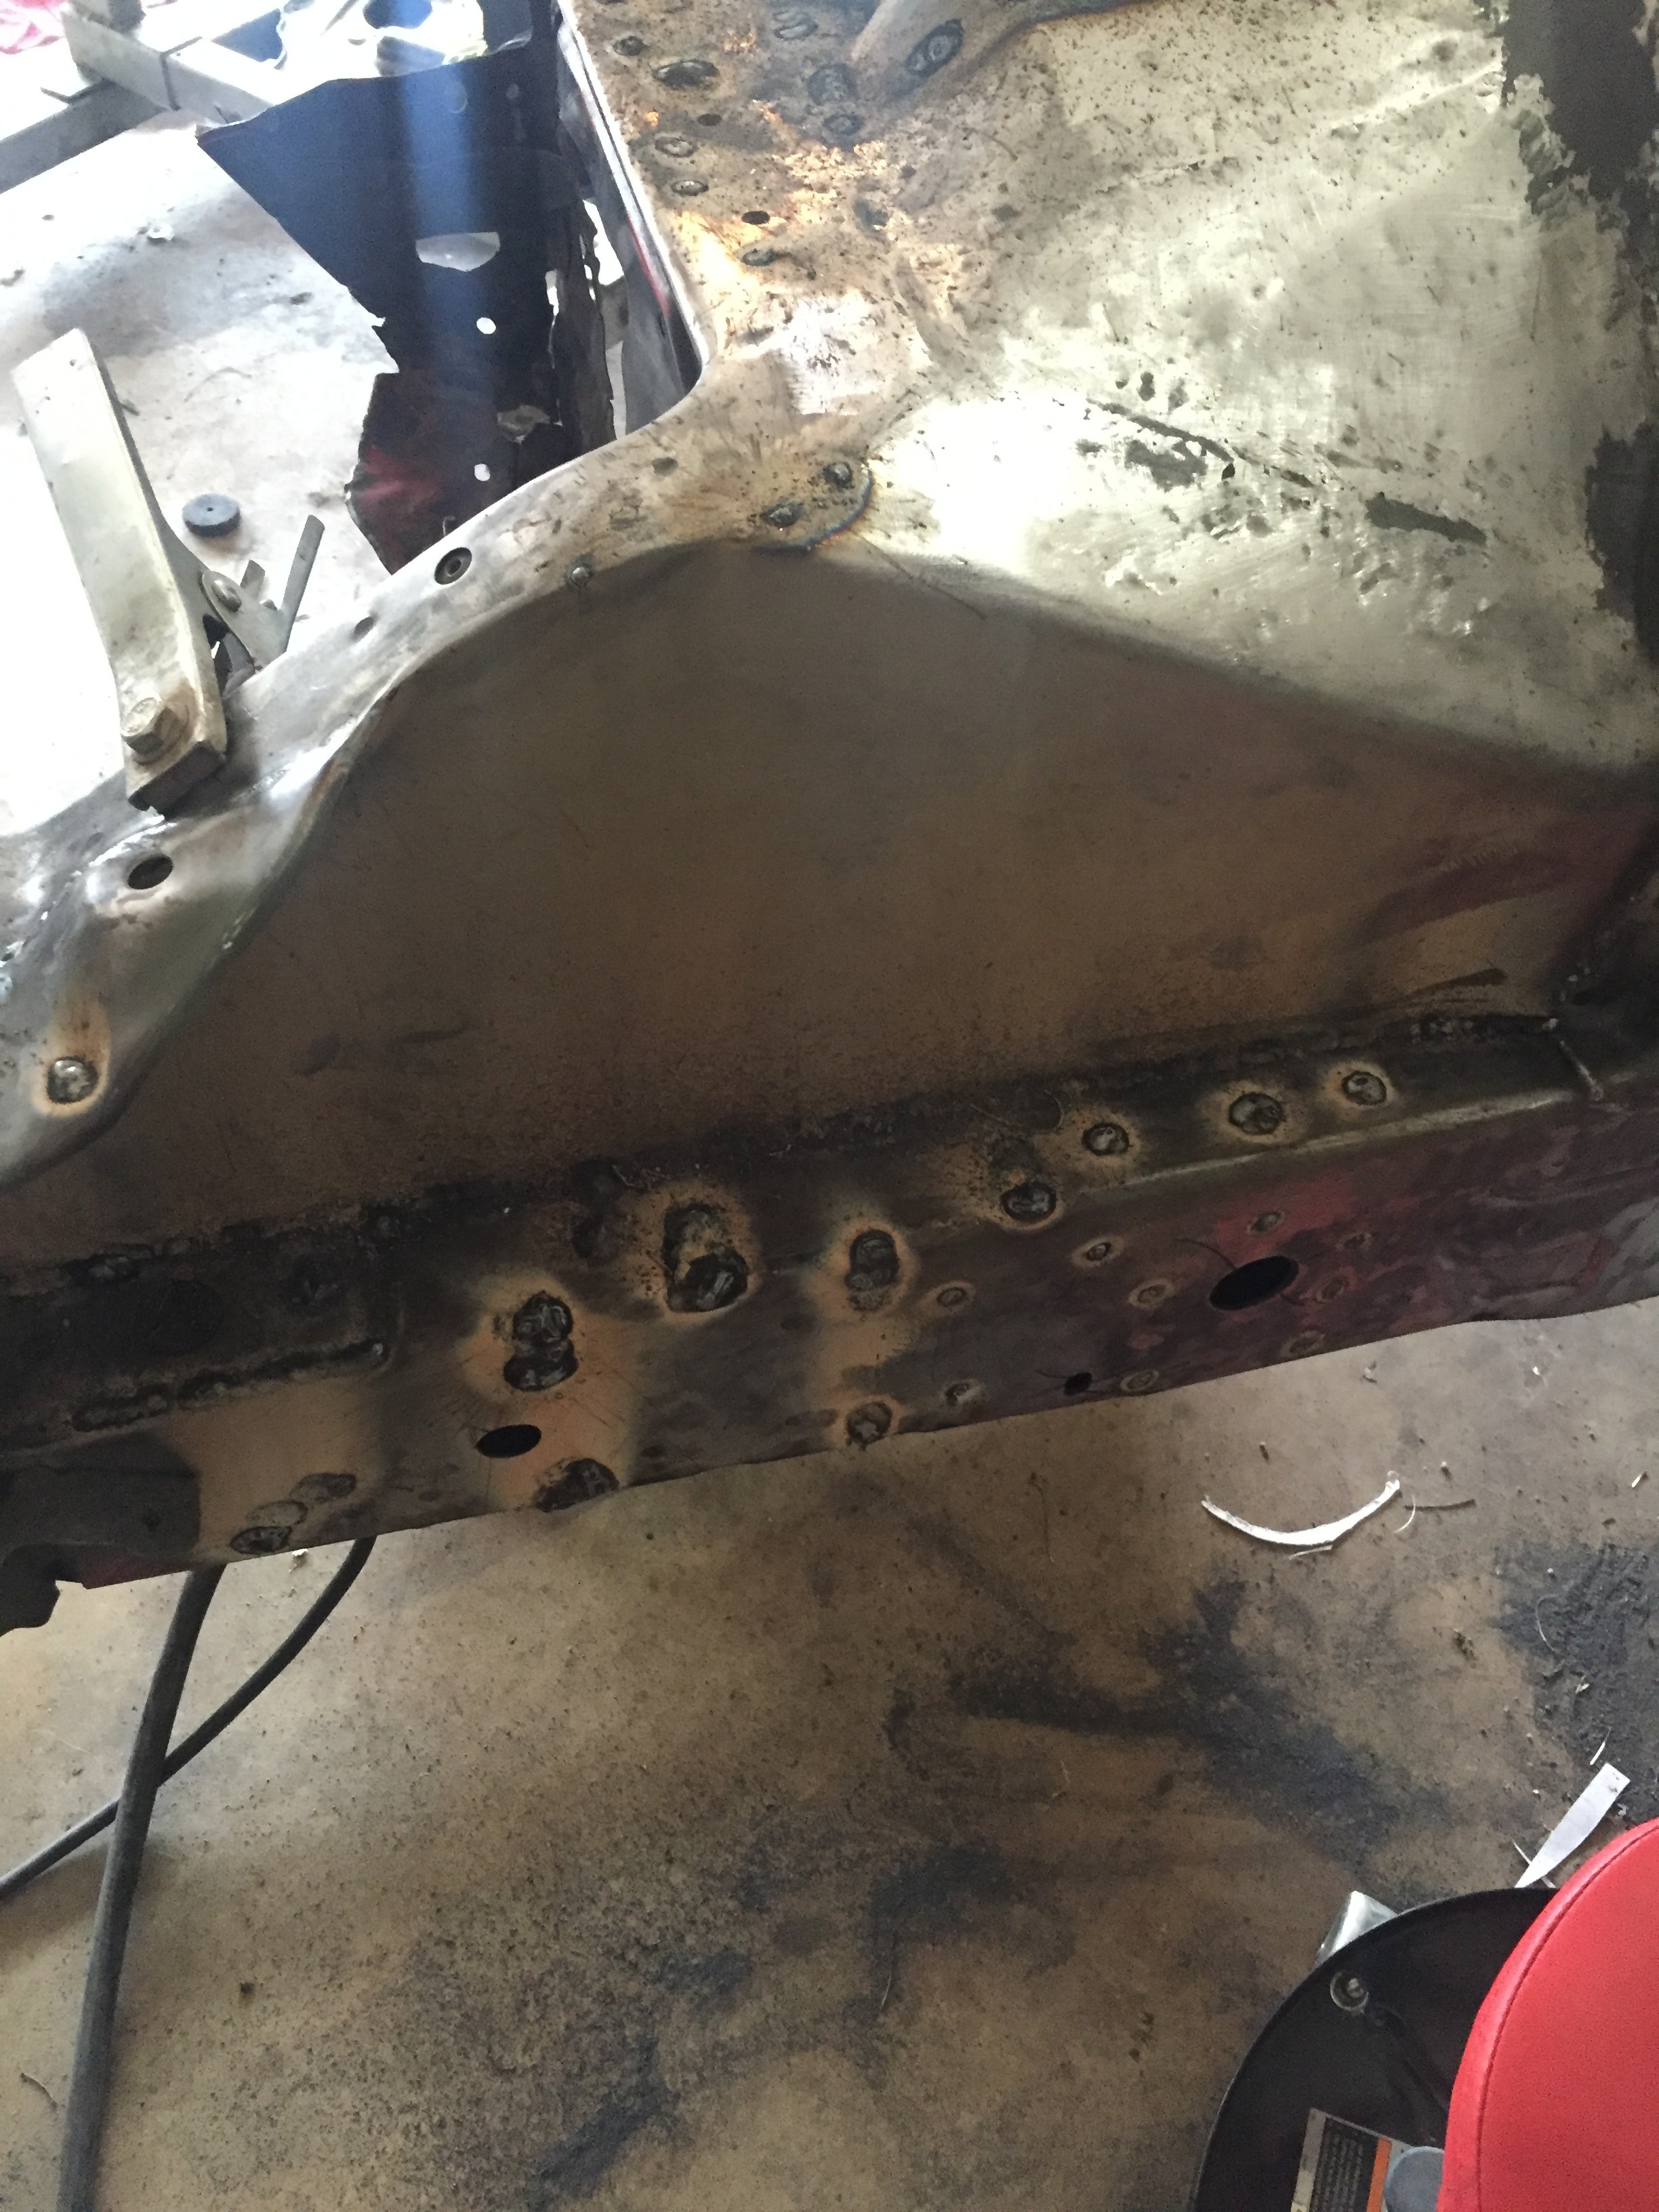
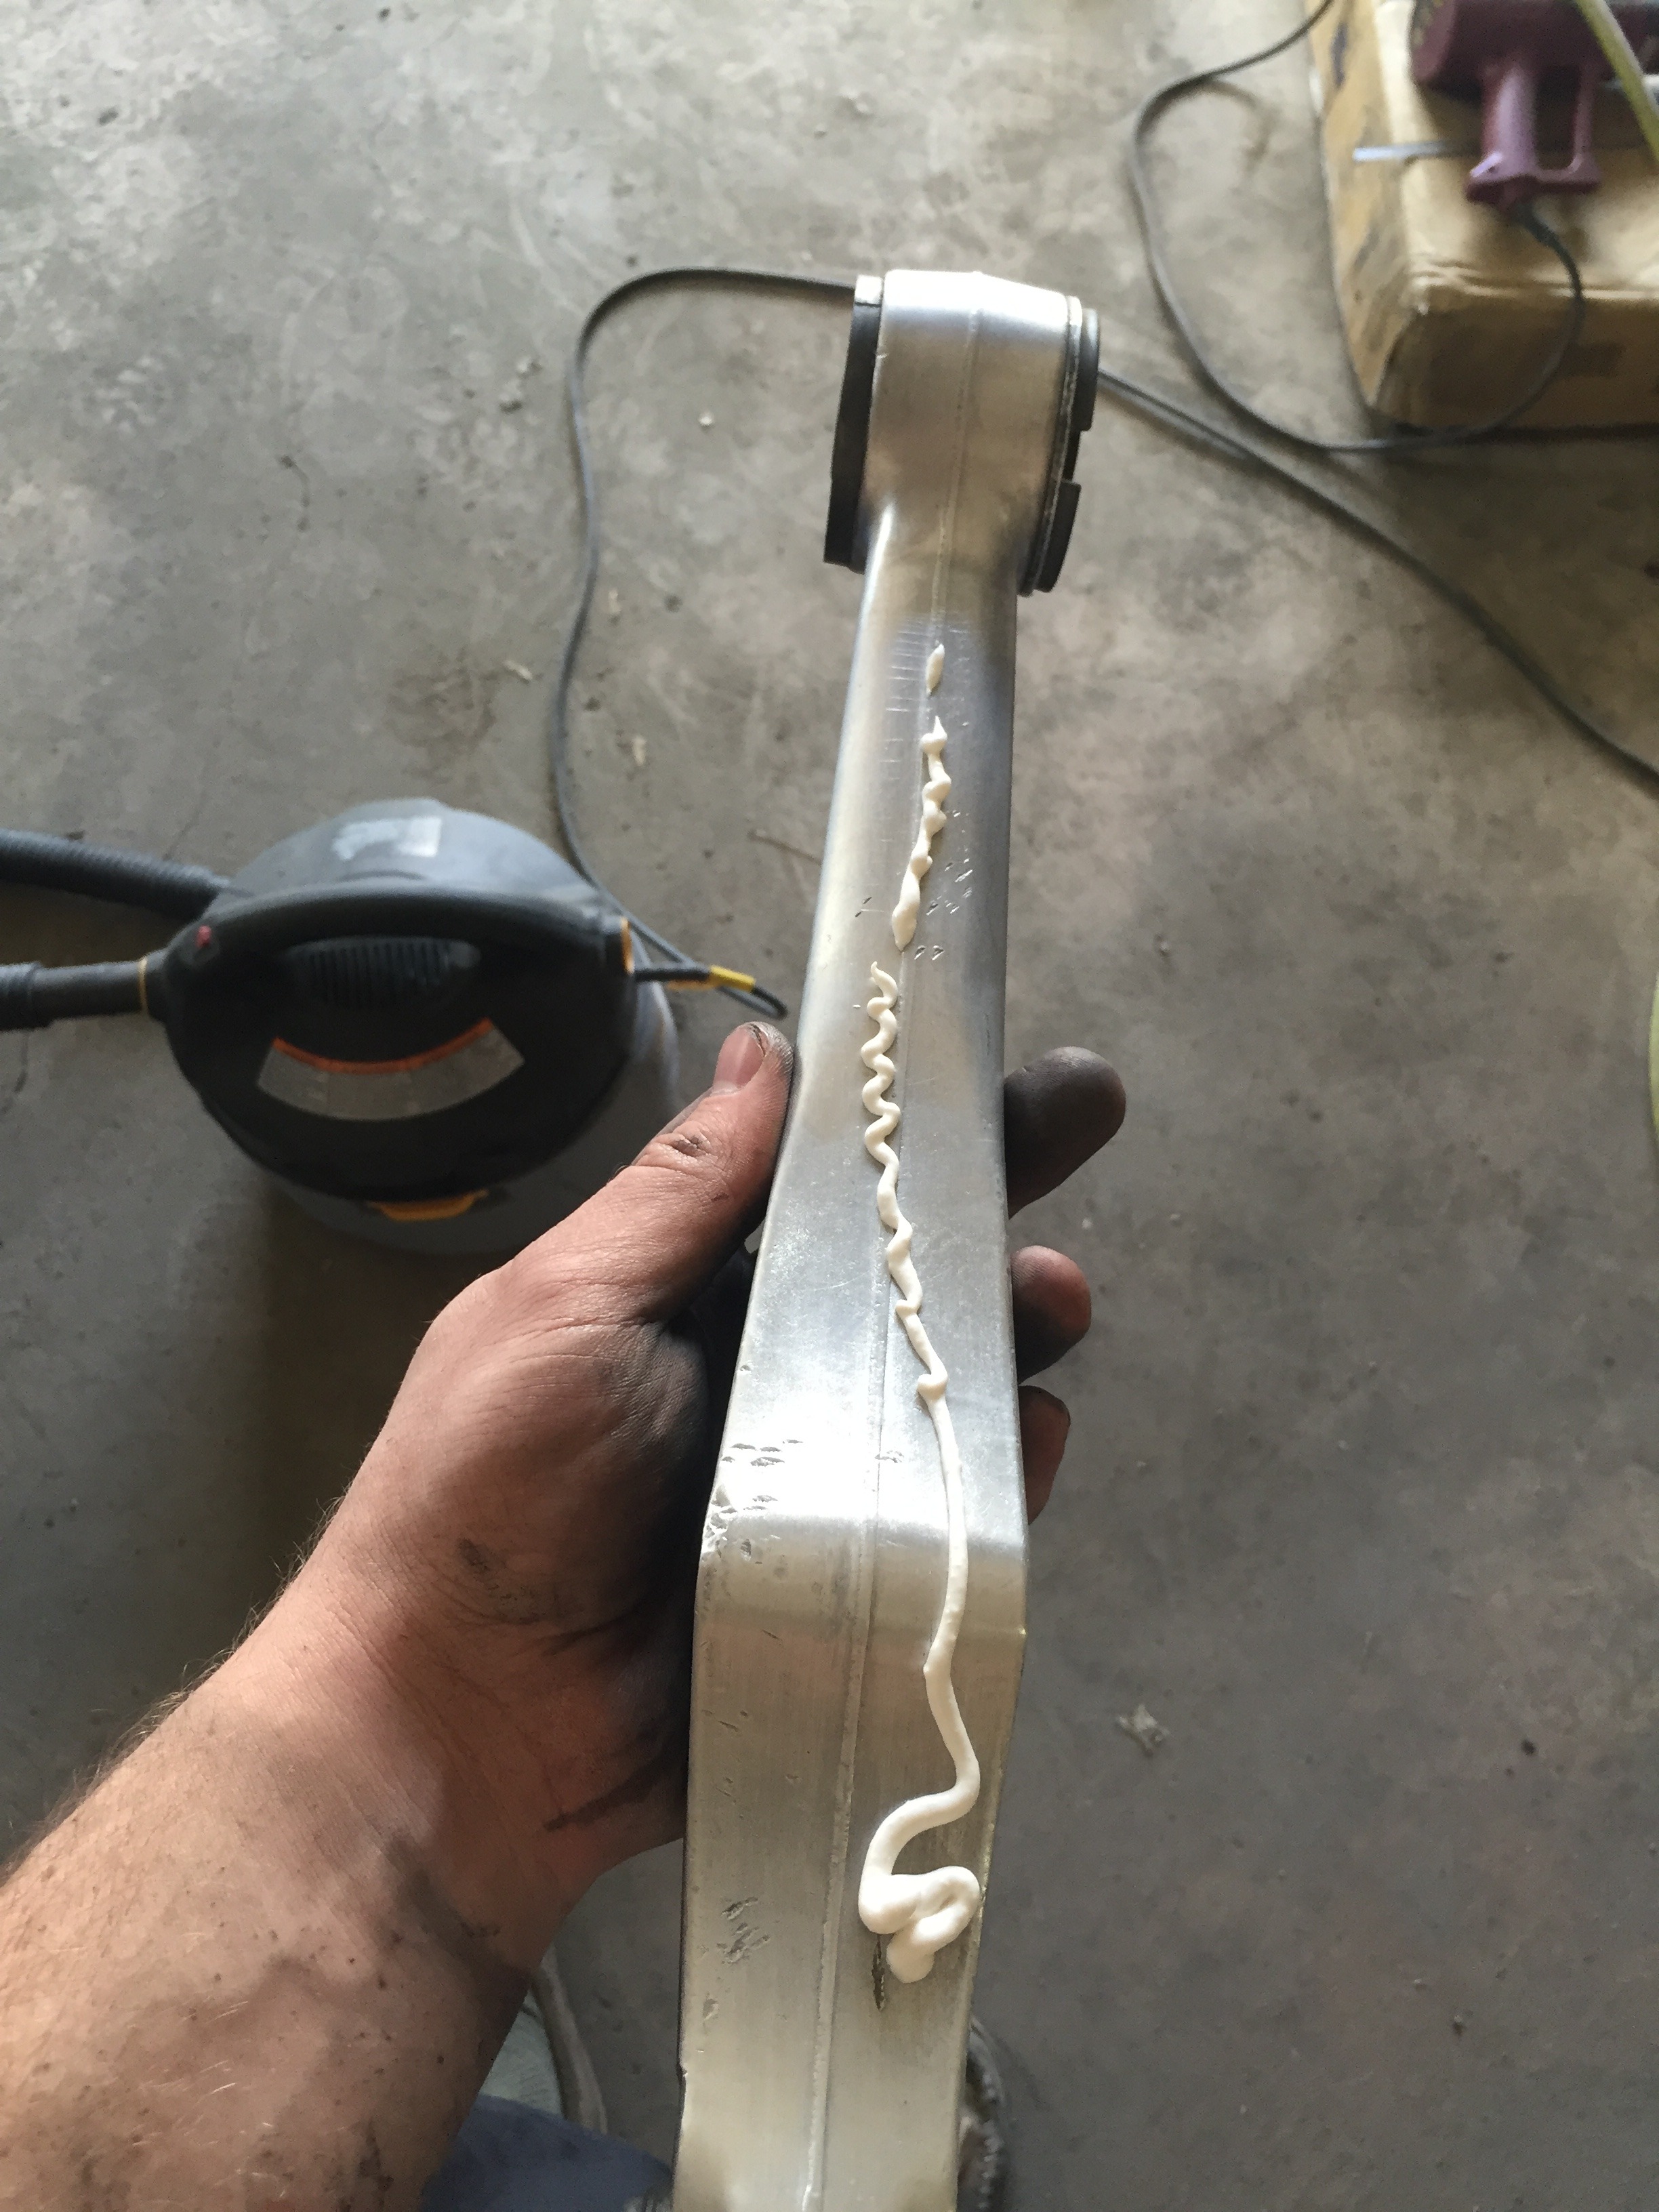
I received some advice in regards to filling in the pinholes from welding (which sucks the big wiener by the way, never doing another engine bay with a flux core welder...too easy to burn through thin metal). They suggested using jb weld so I went ahead and used it over all of the seams. I also put some on to flatten out the part where the headlight bolts onto, as it was already warped beforehand and welding it didnt help that issue. I figure jbweld is better than filler on that part.


I received some advice in regards to filling in the pinholes from welding (which sucks the big wiener by the way, never doing another engine bay with a flux core welder...too easy to burn through thin metal). They suggested using jb weld so I went ahead and used it over all of the seams. I also put some on to flatten out the part where the headlight bolts onto, as it was already warped beforehand and welding it didnt help that issue. I figure jbweld is better than filler on that part.


Thread Starter
Full Member
Joined: Apr 2015
Posts: 140
Likes: 5
From: Great Falls, MT
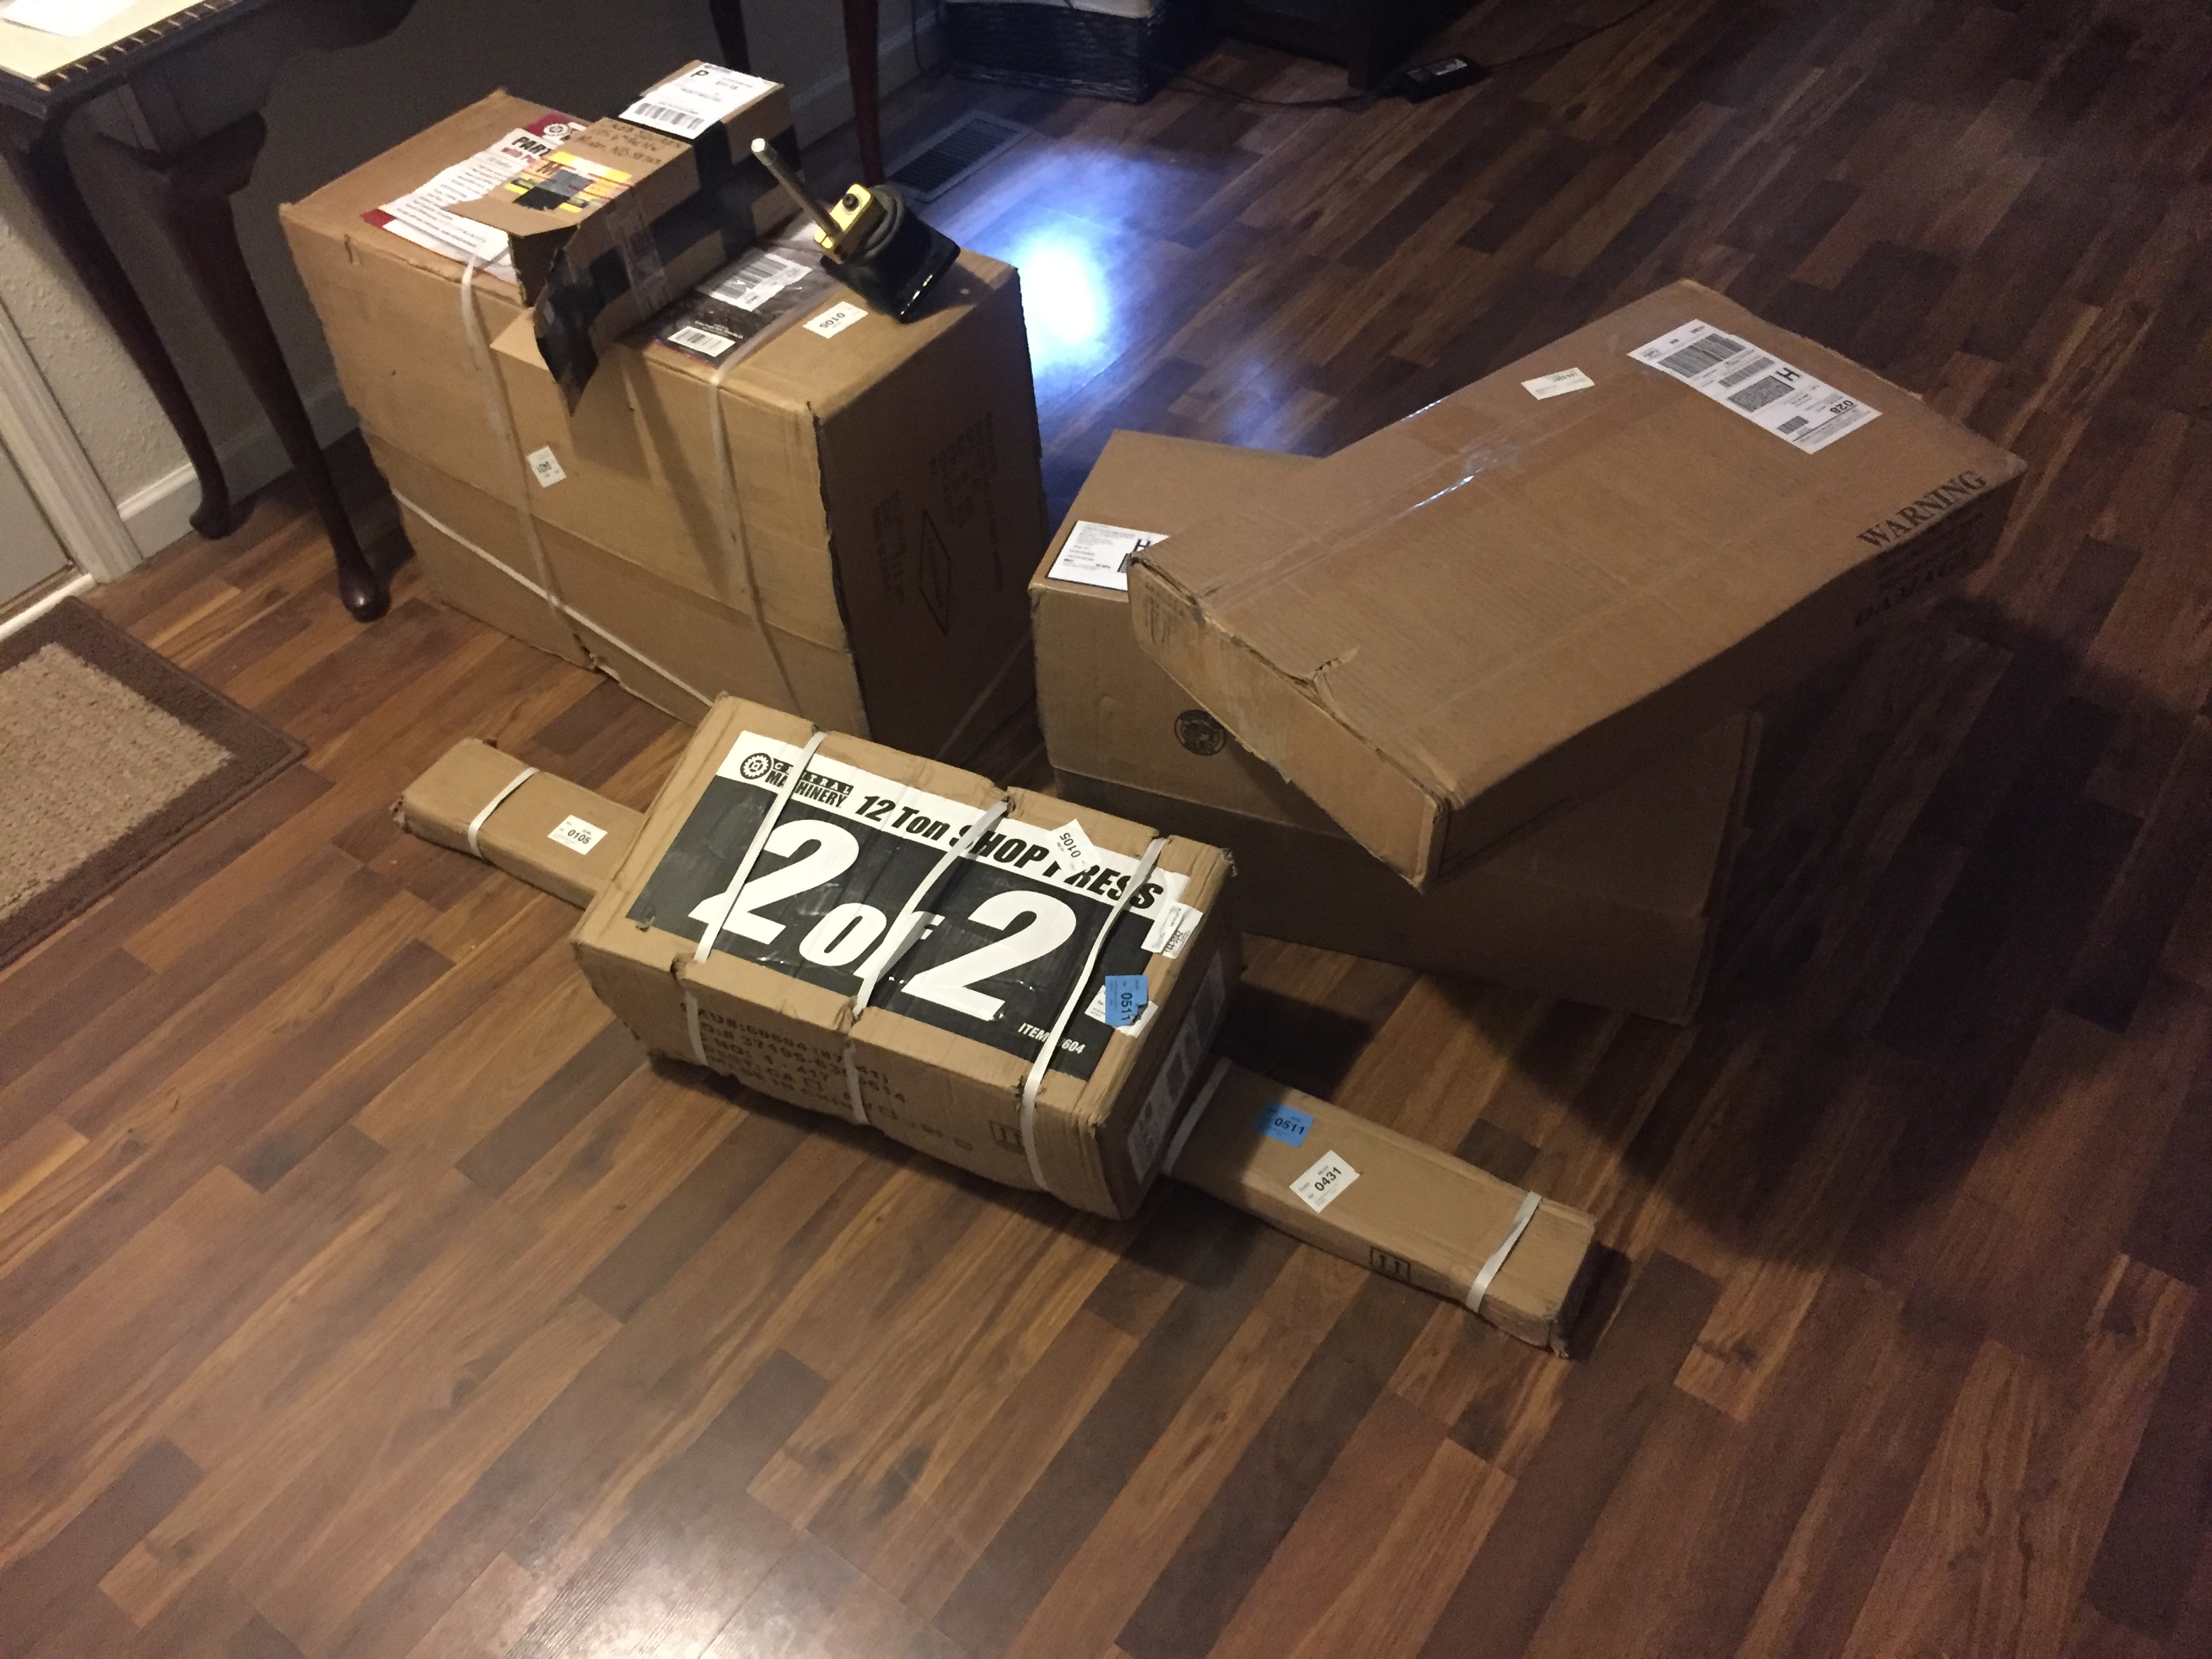
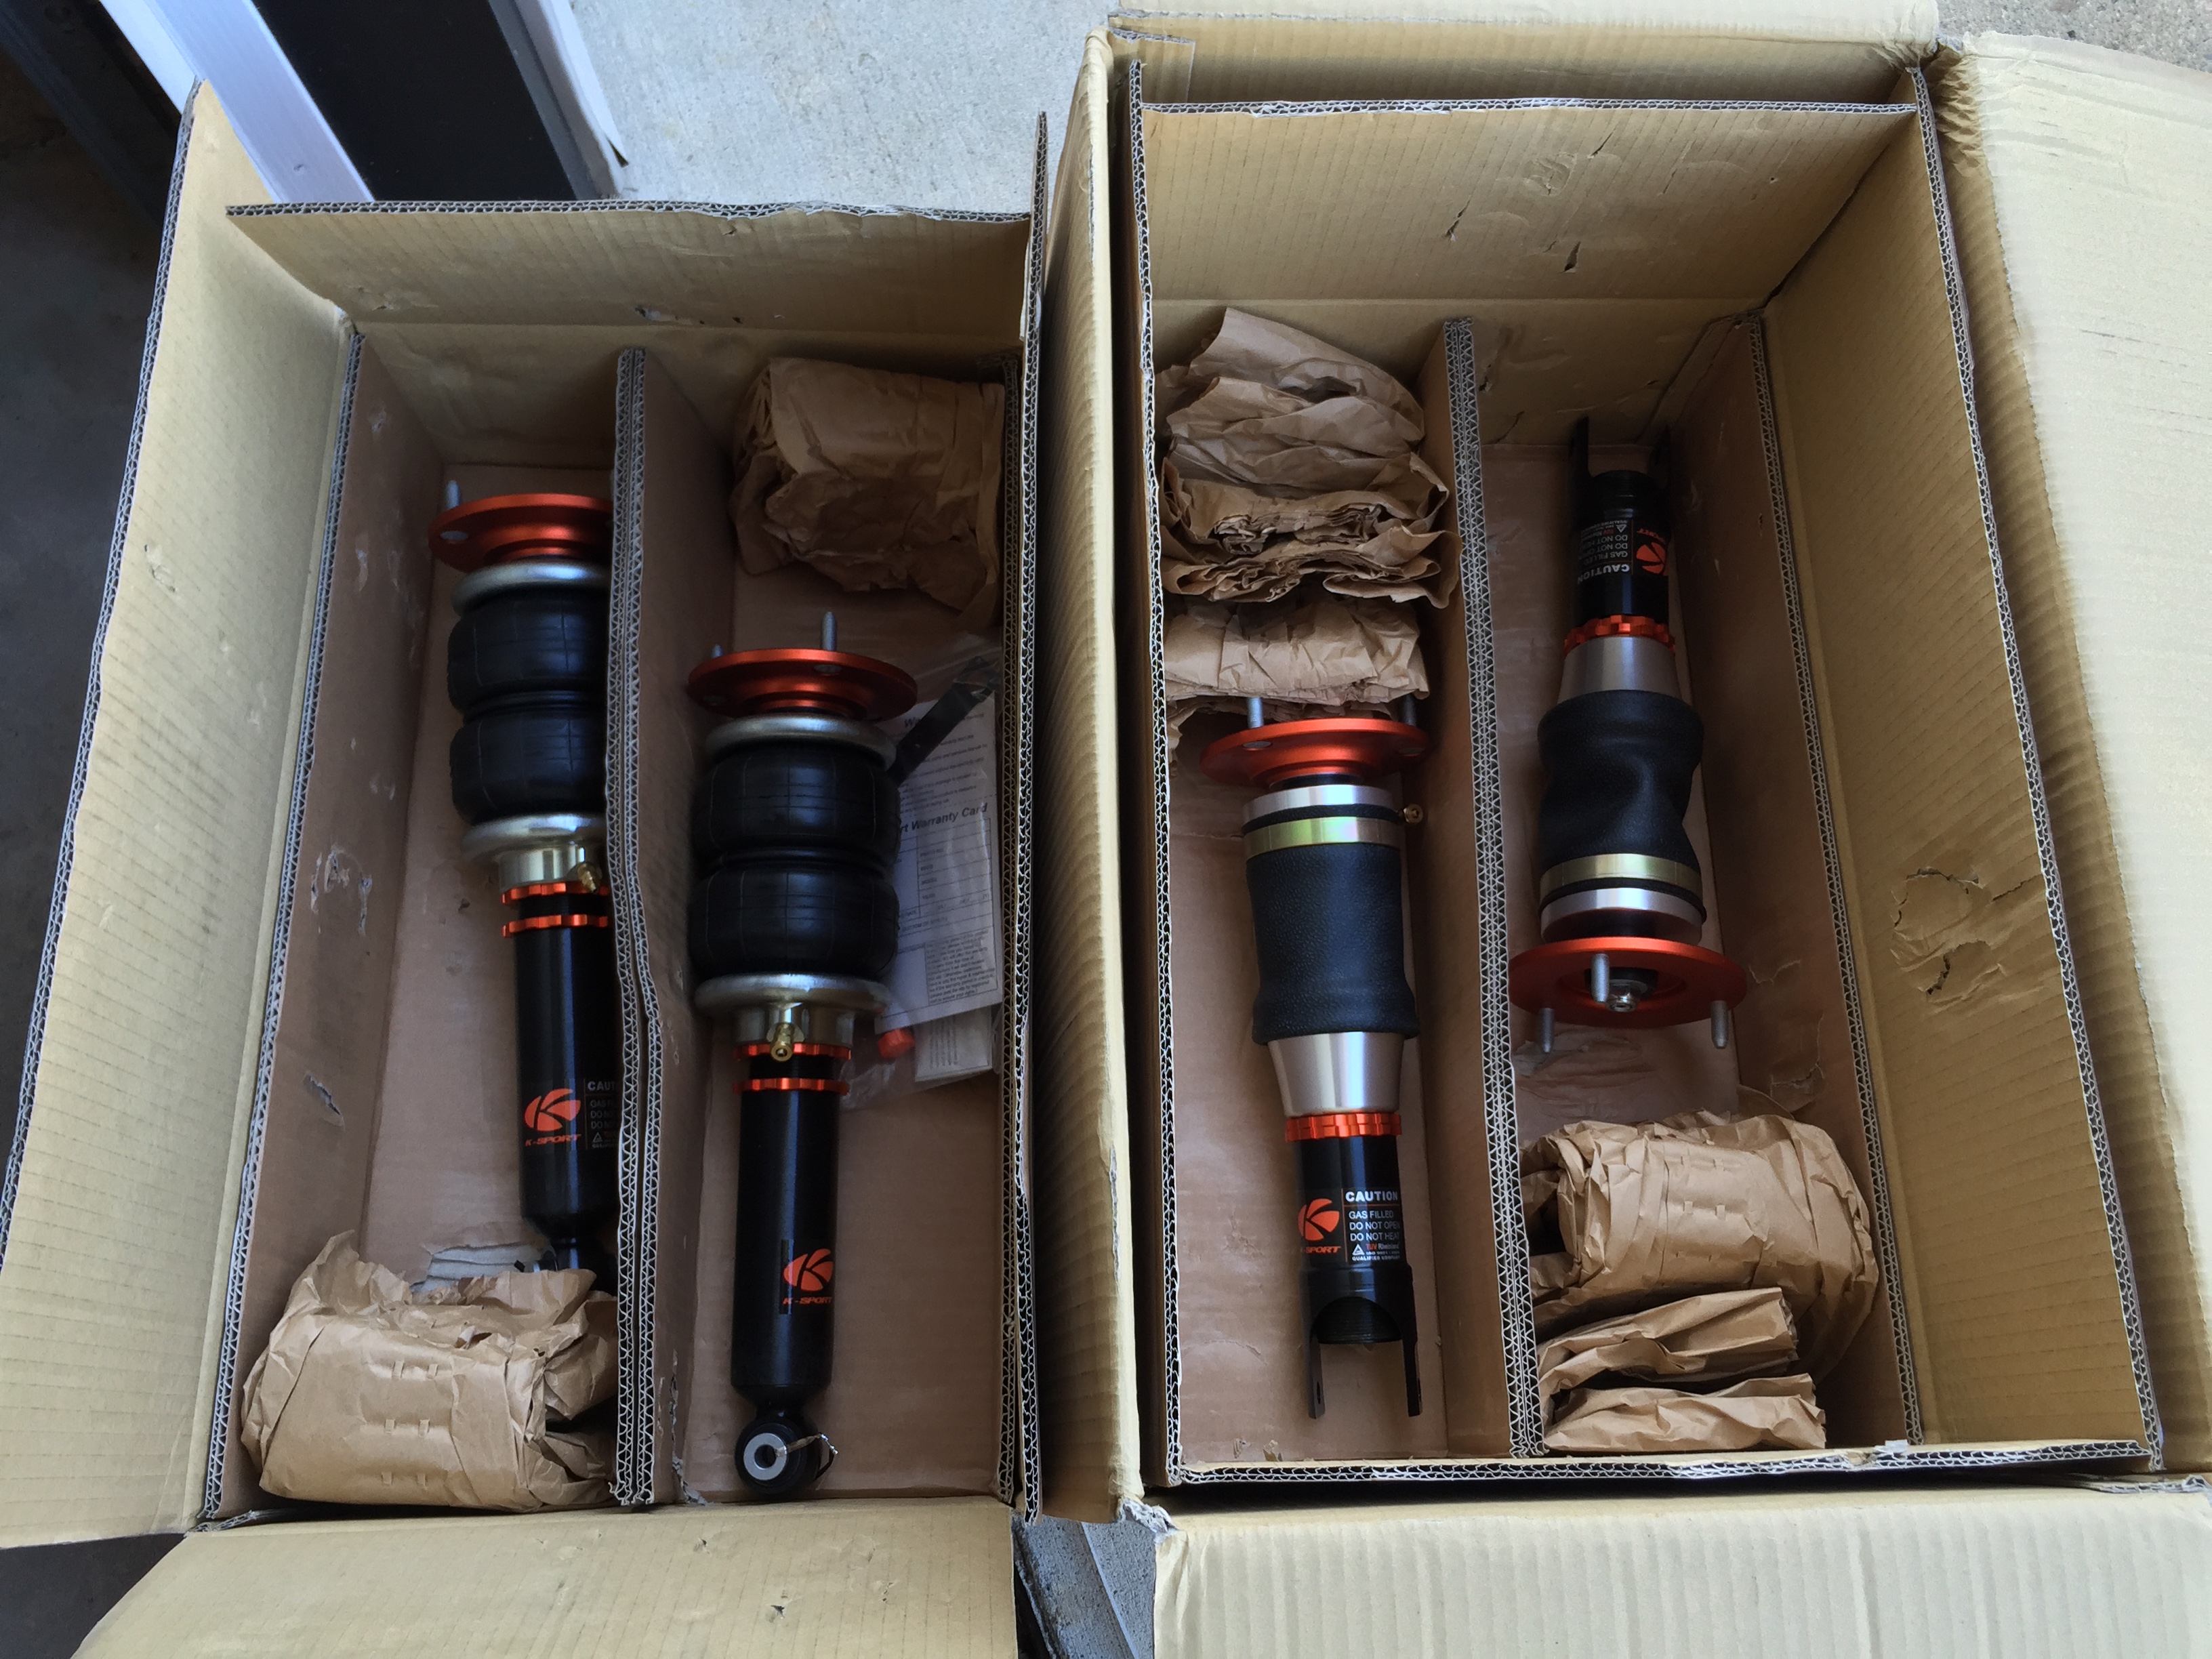
One of my last big purchases arrived the other day! Went with Ksport for the air struts. I figure that if they do happen to blow down the road, I will just have FEAL rebuild/revalve them and move on. Everything I read gave great reviews of their air struts though, so I'm not too worried.
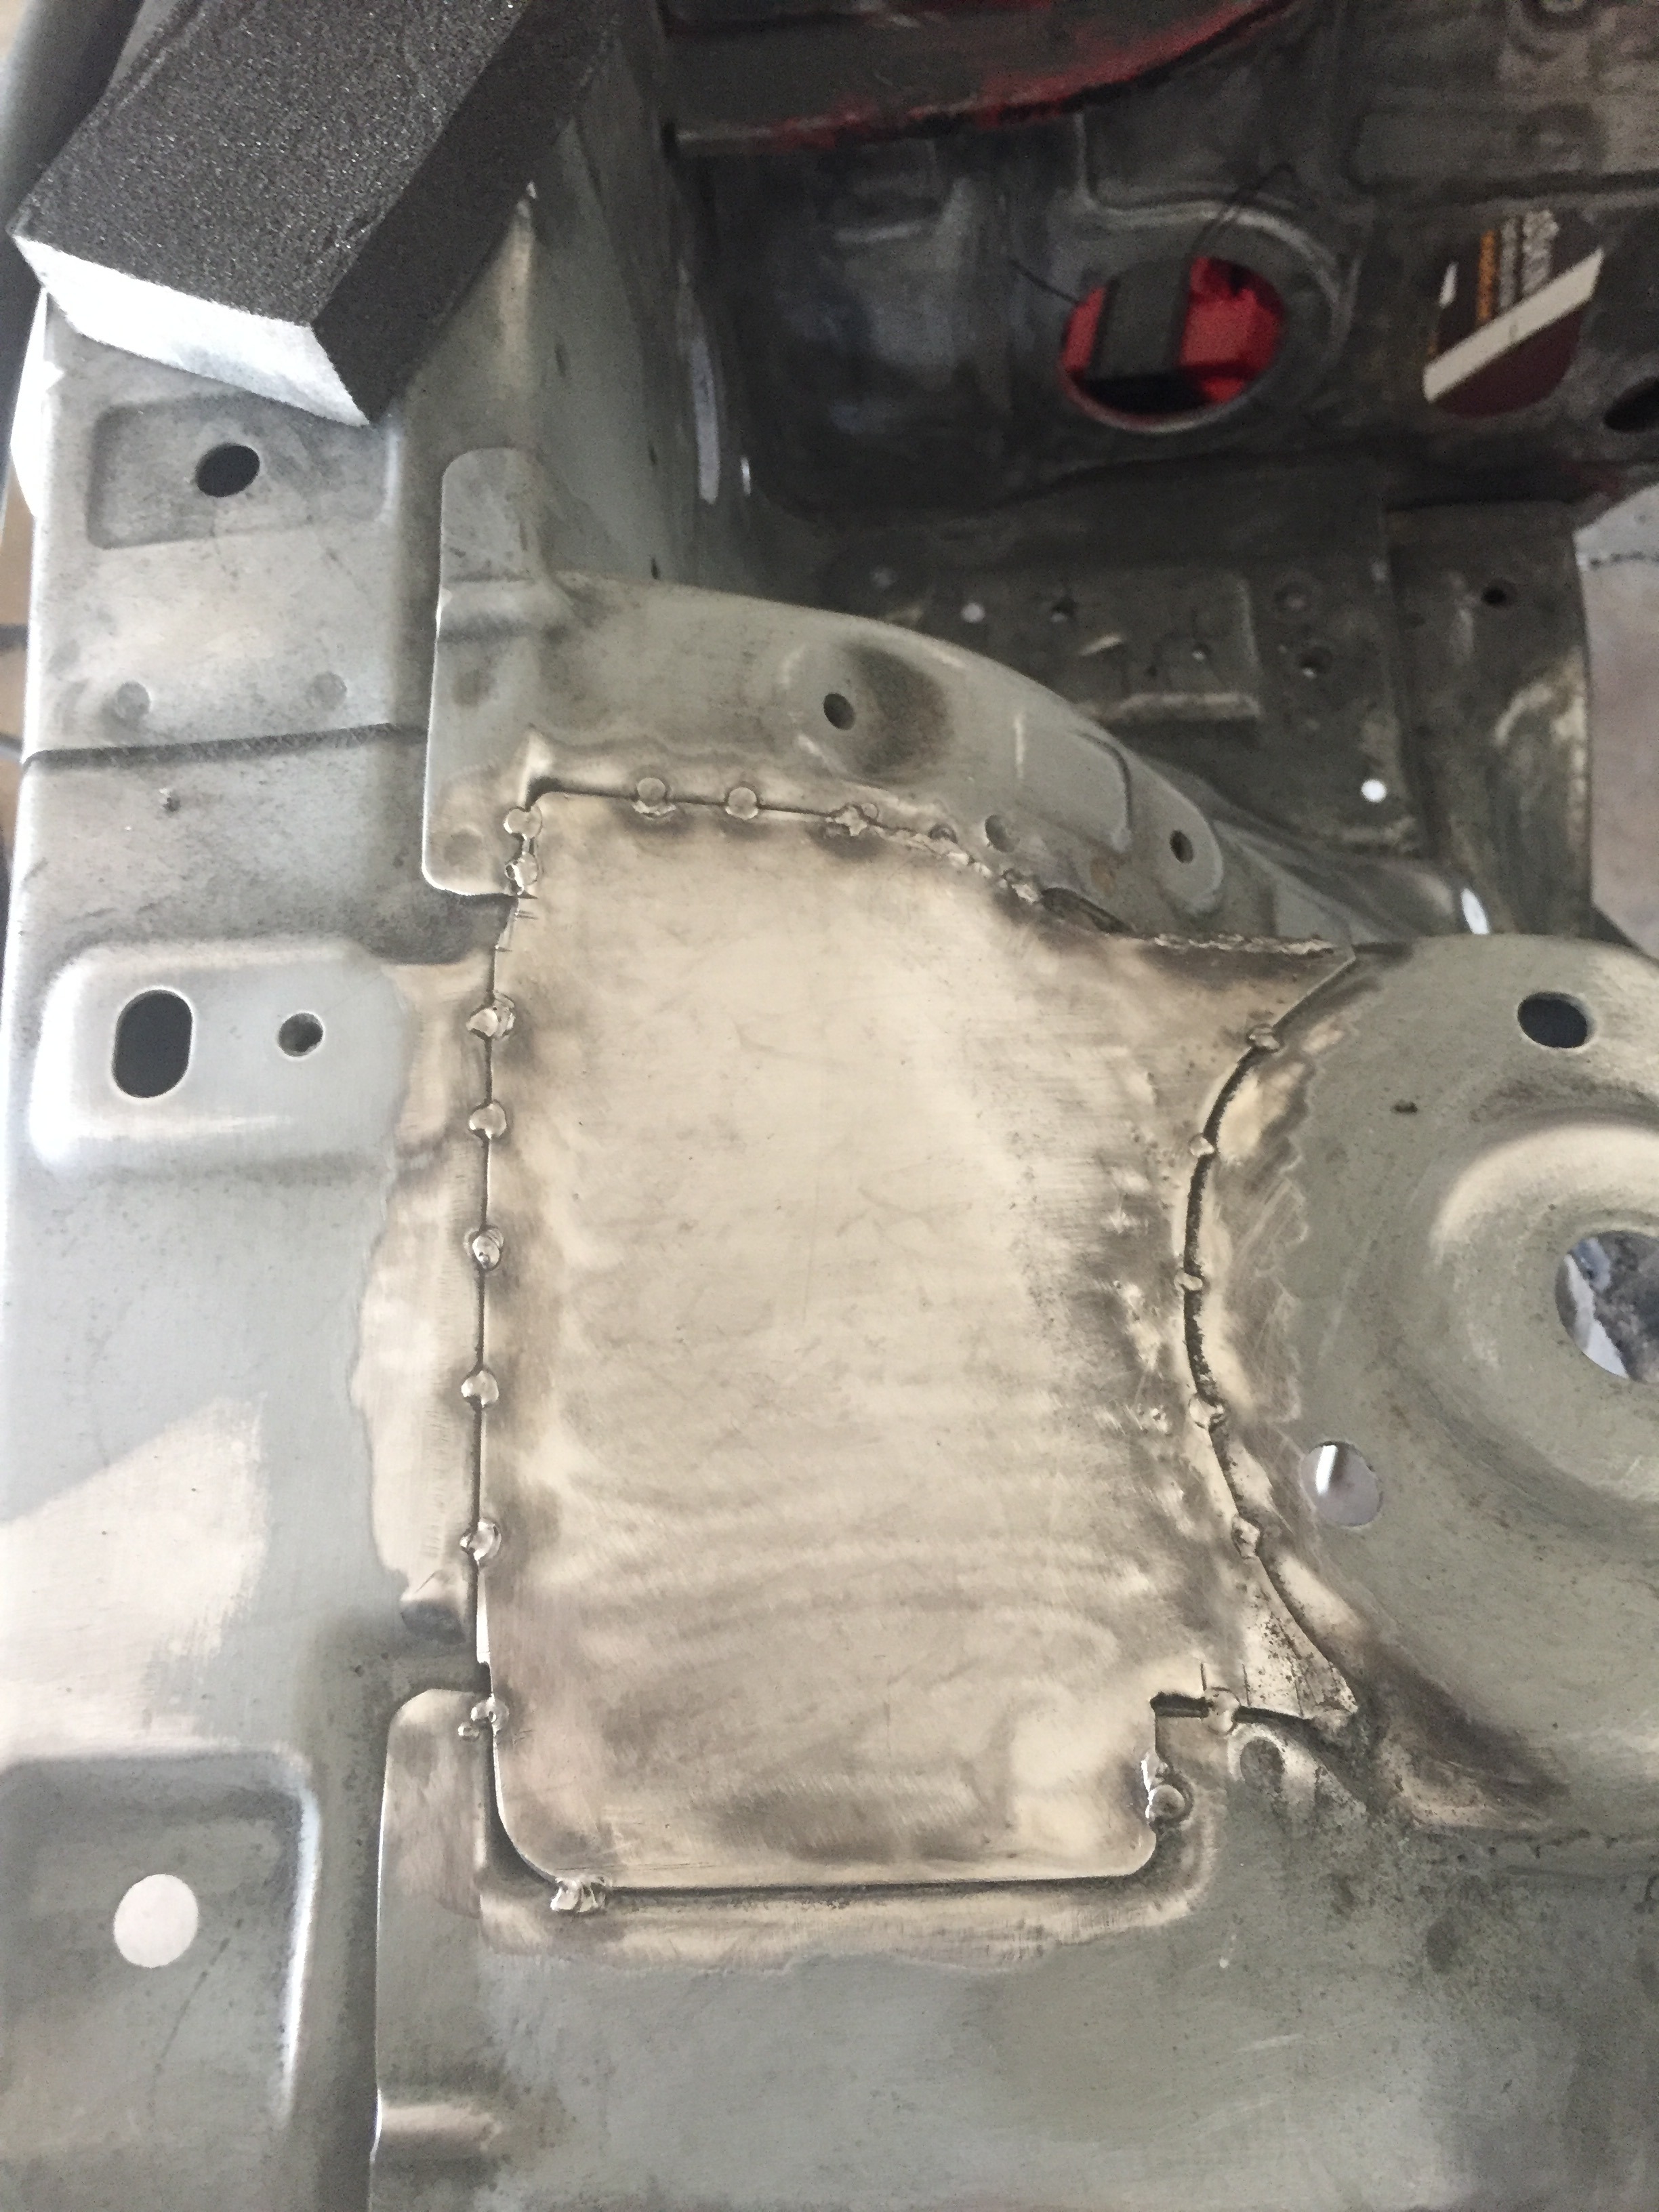
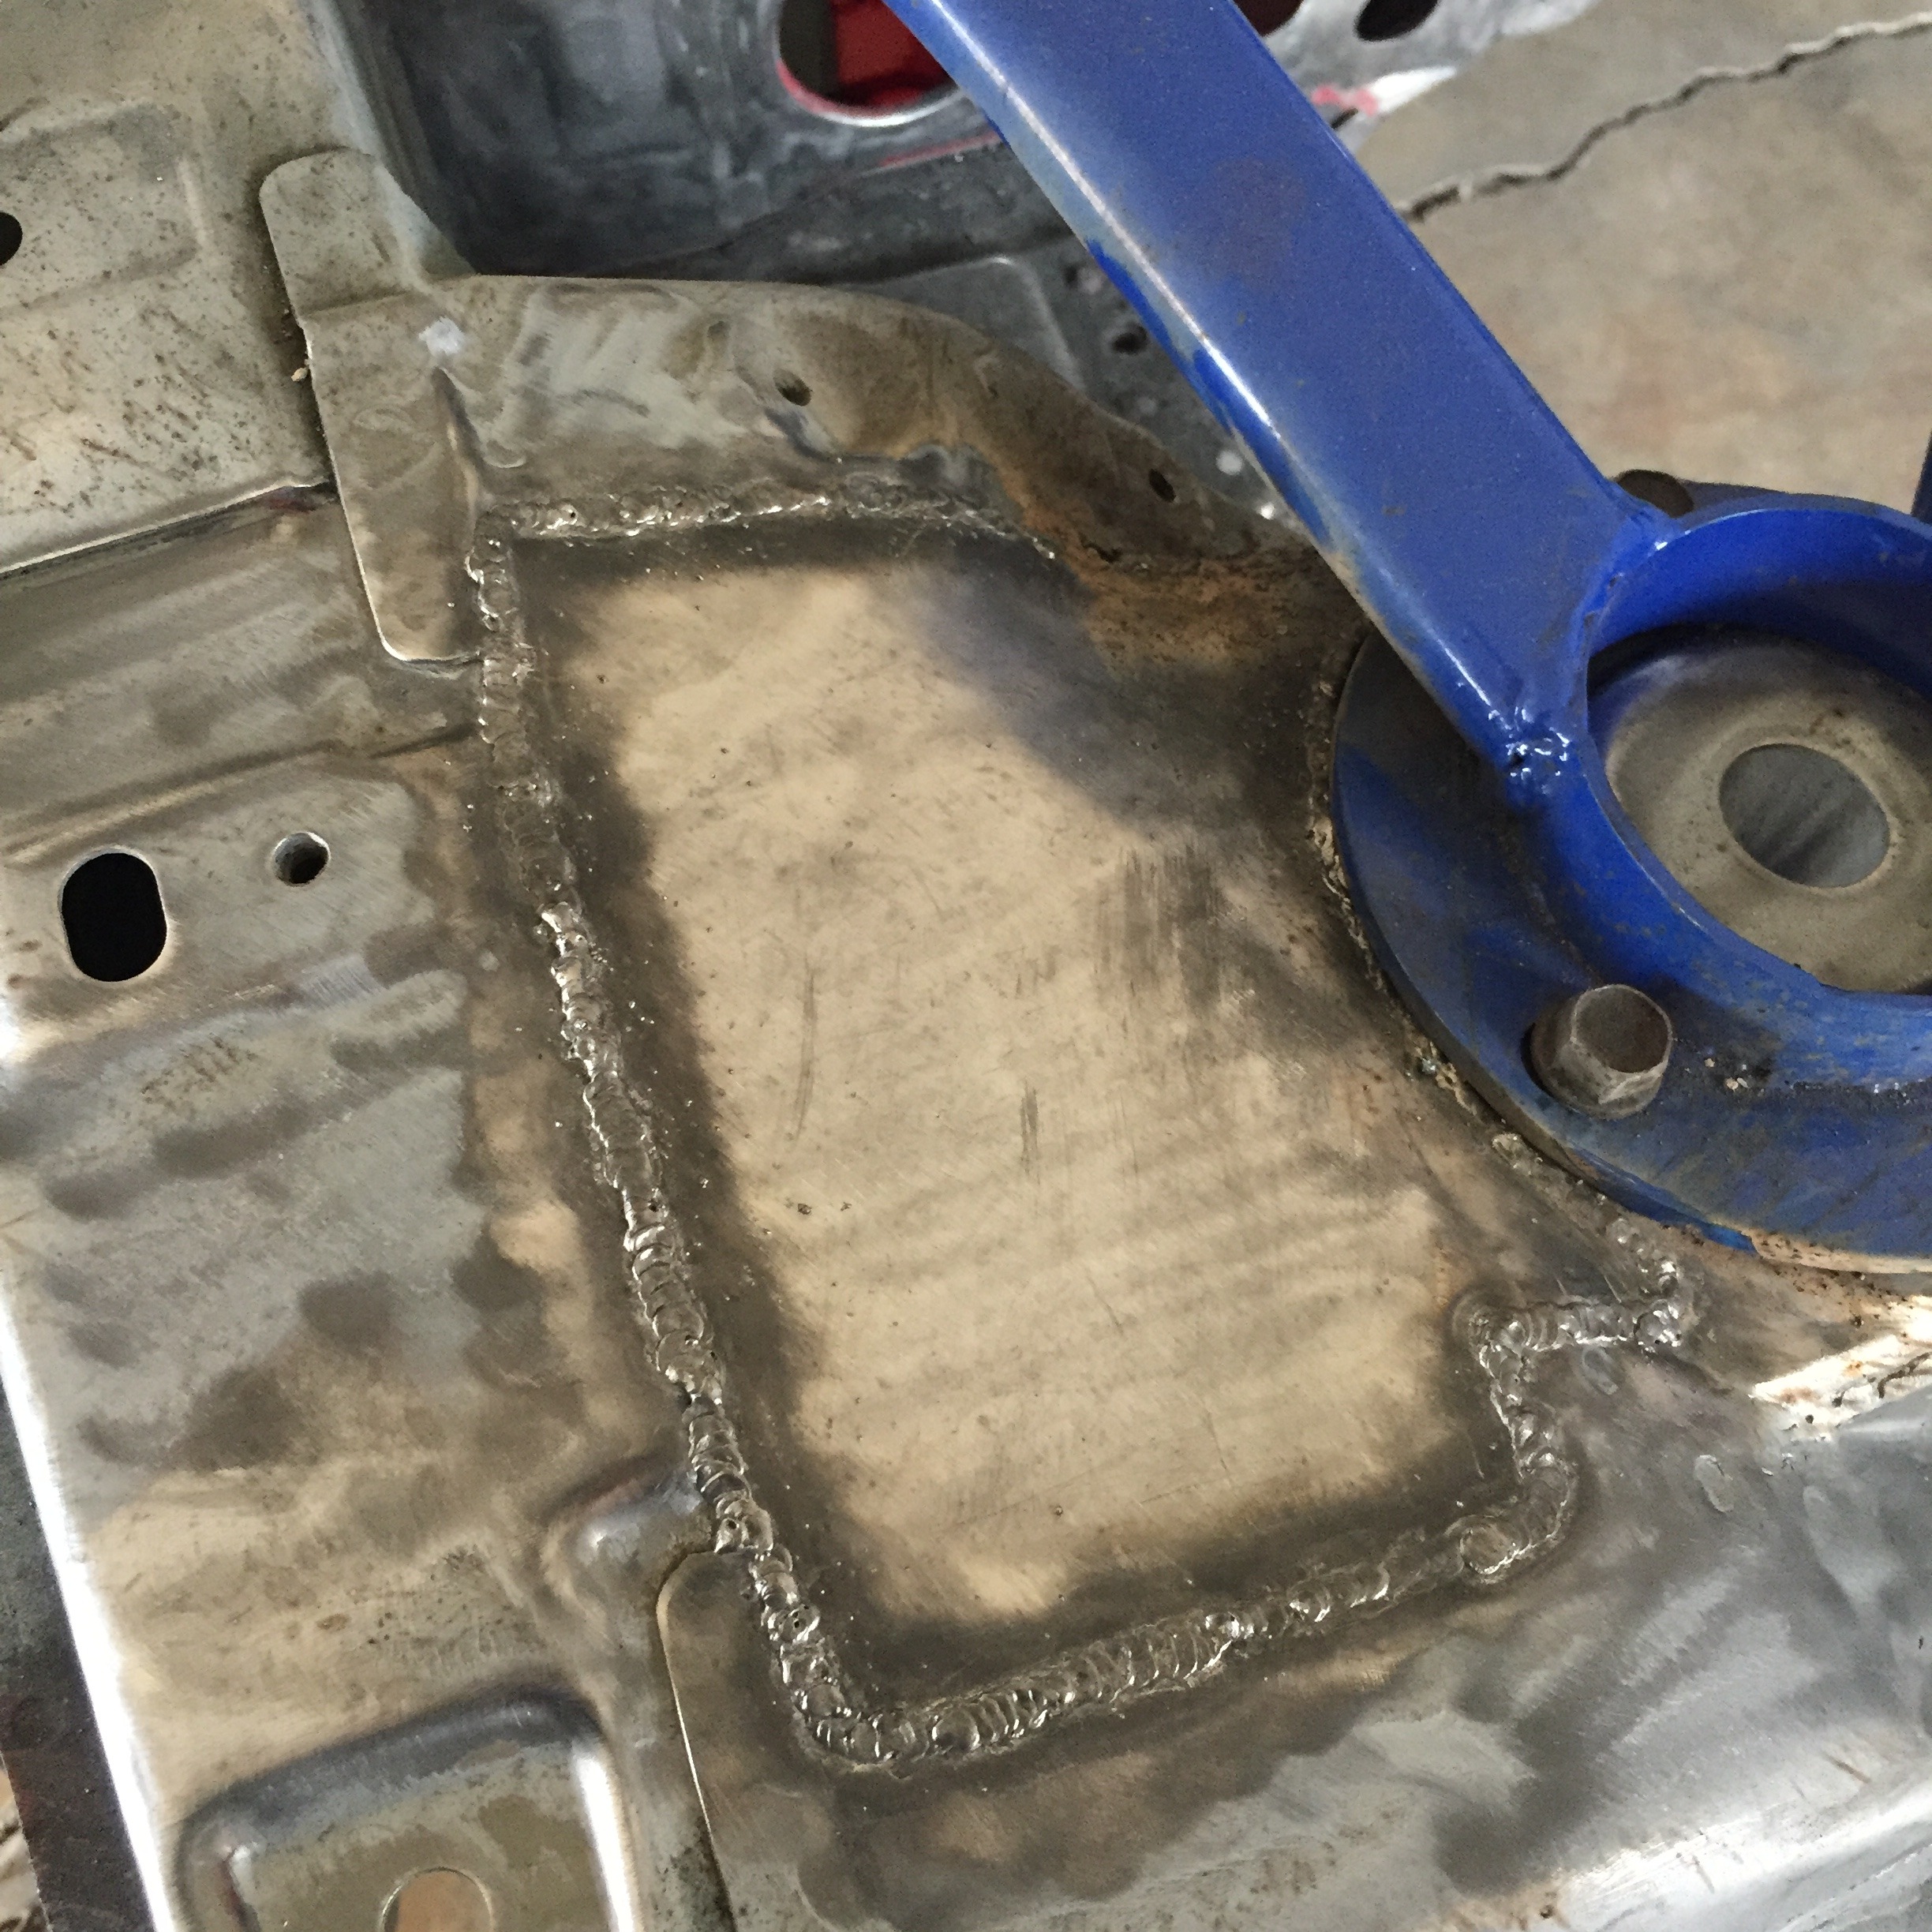
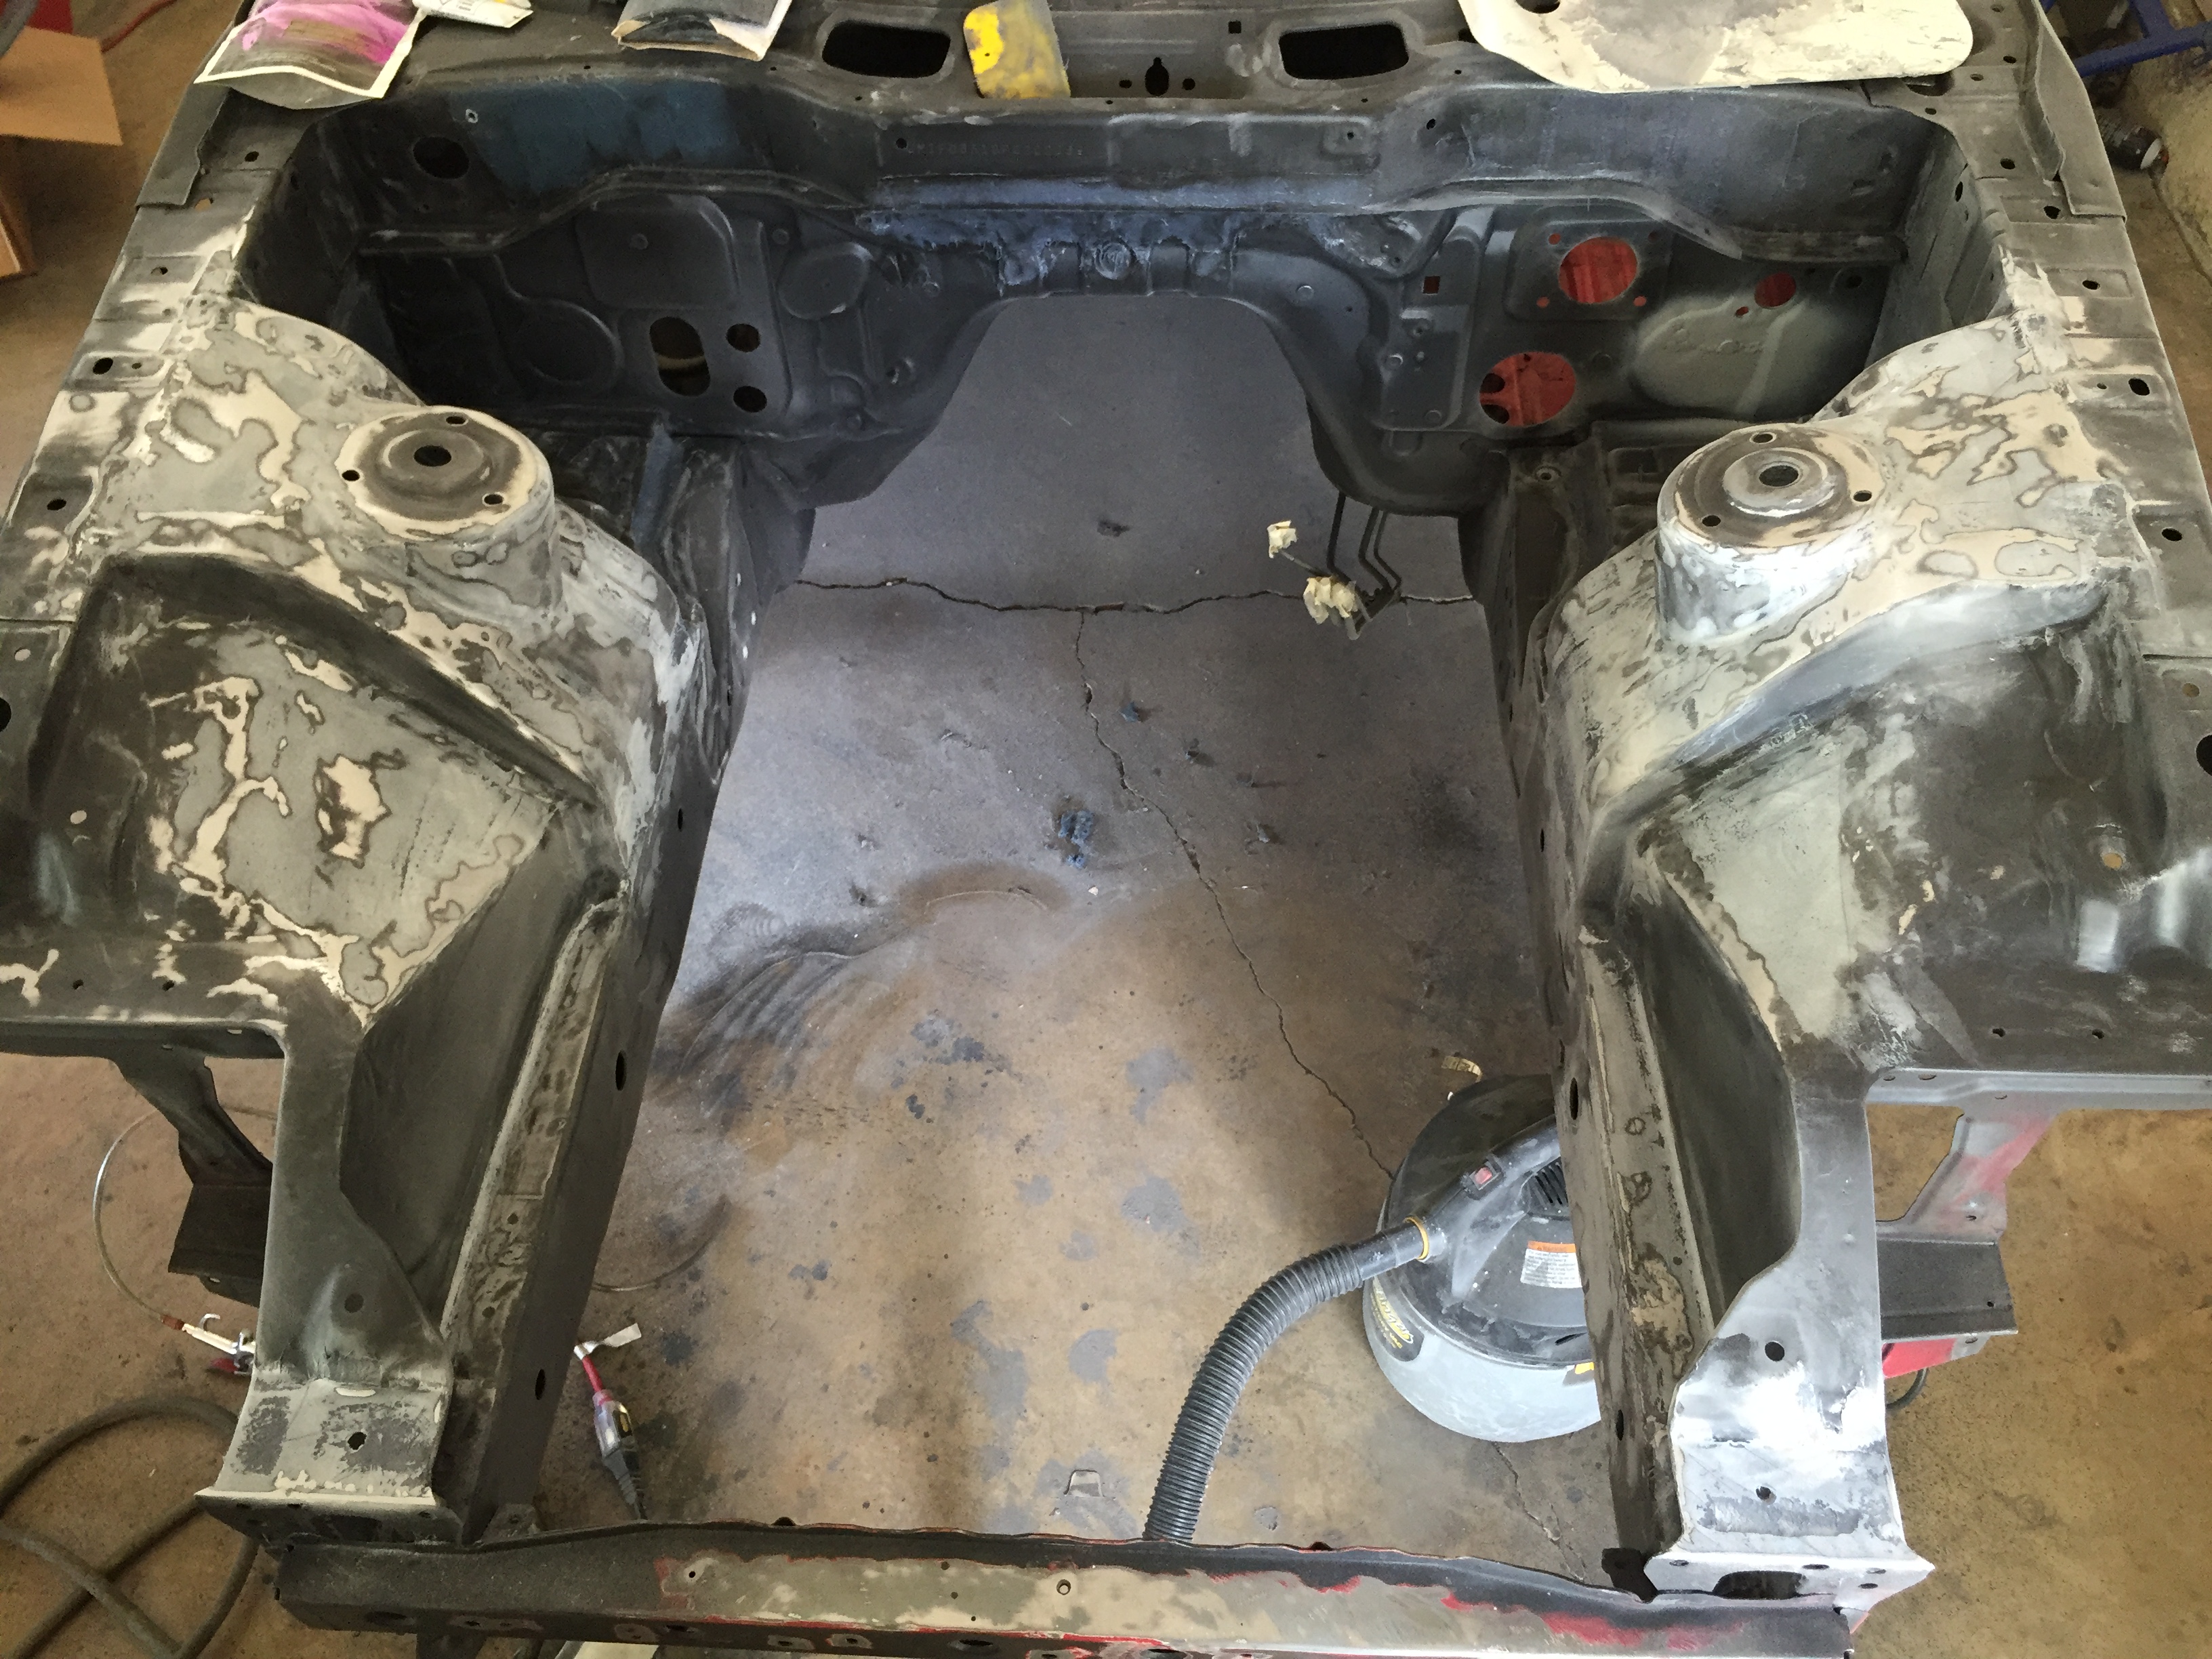
Next big thing-started stitch welding the engine bay!
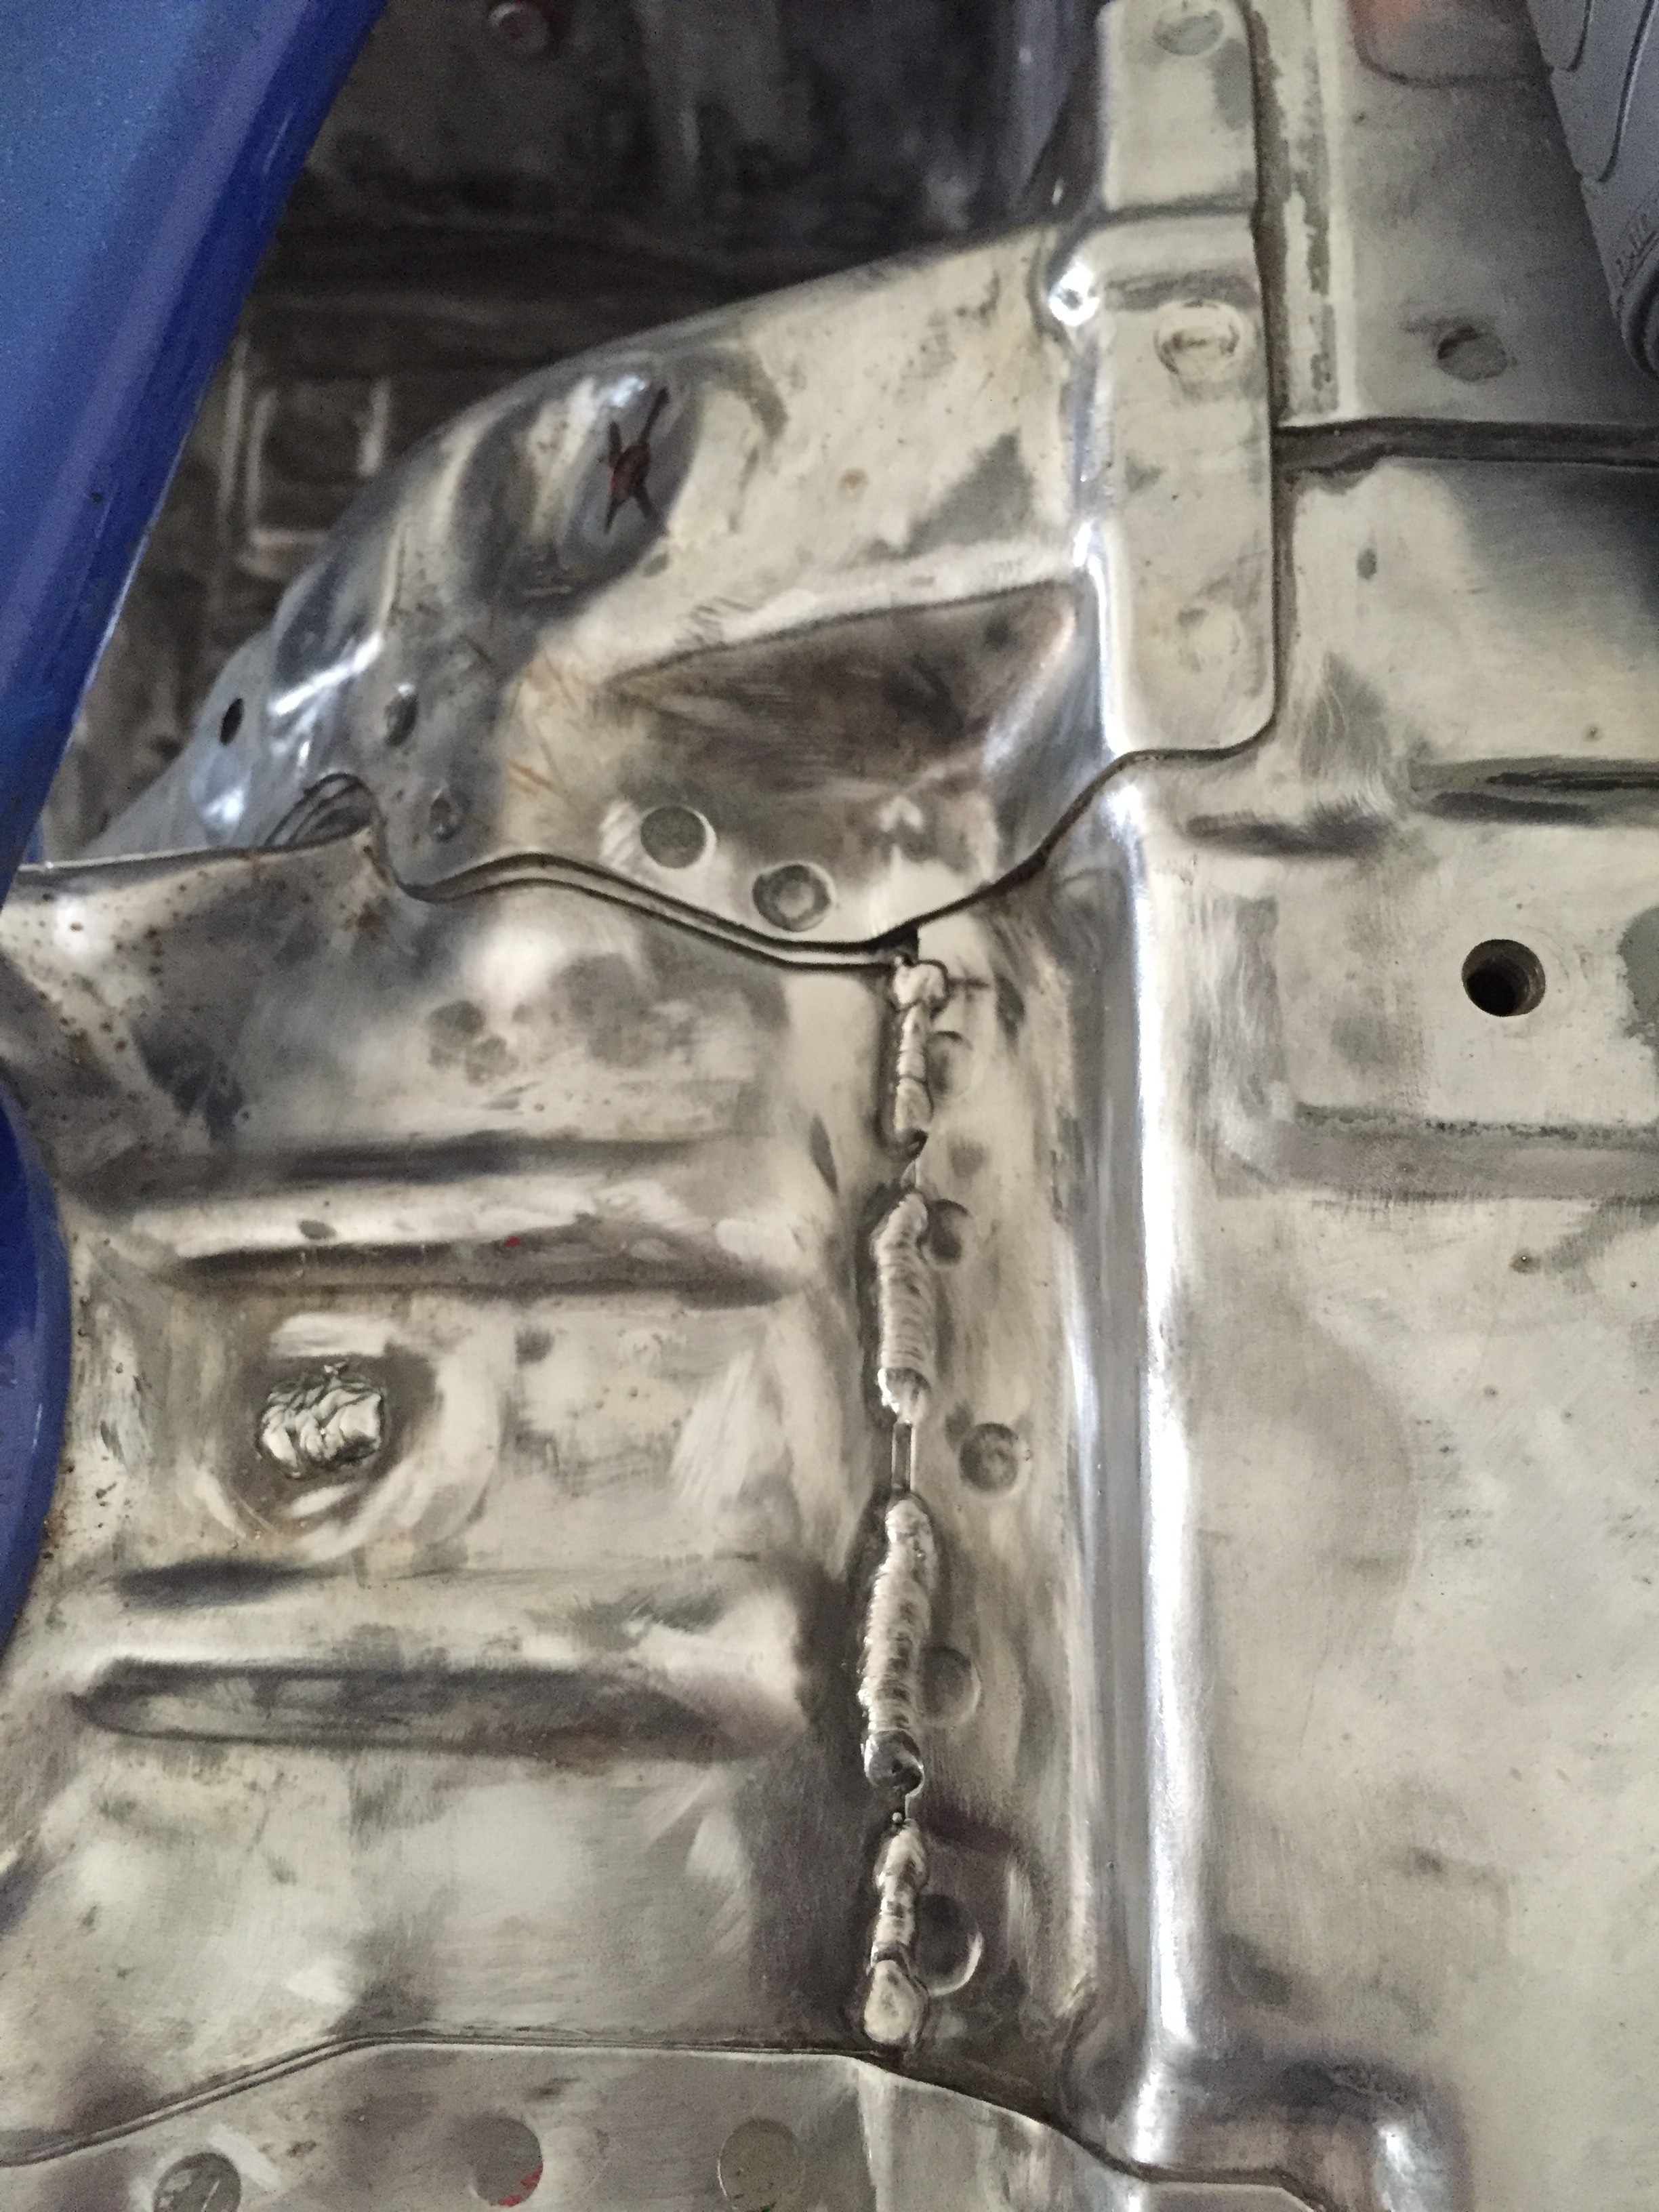
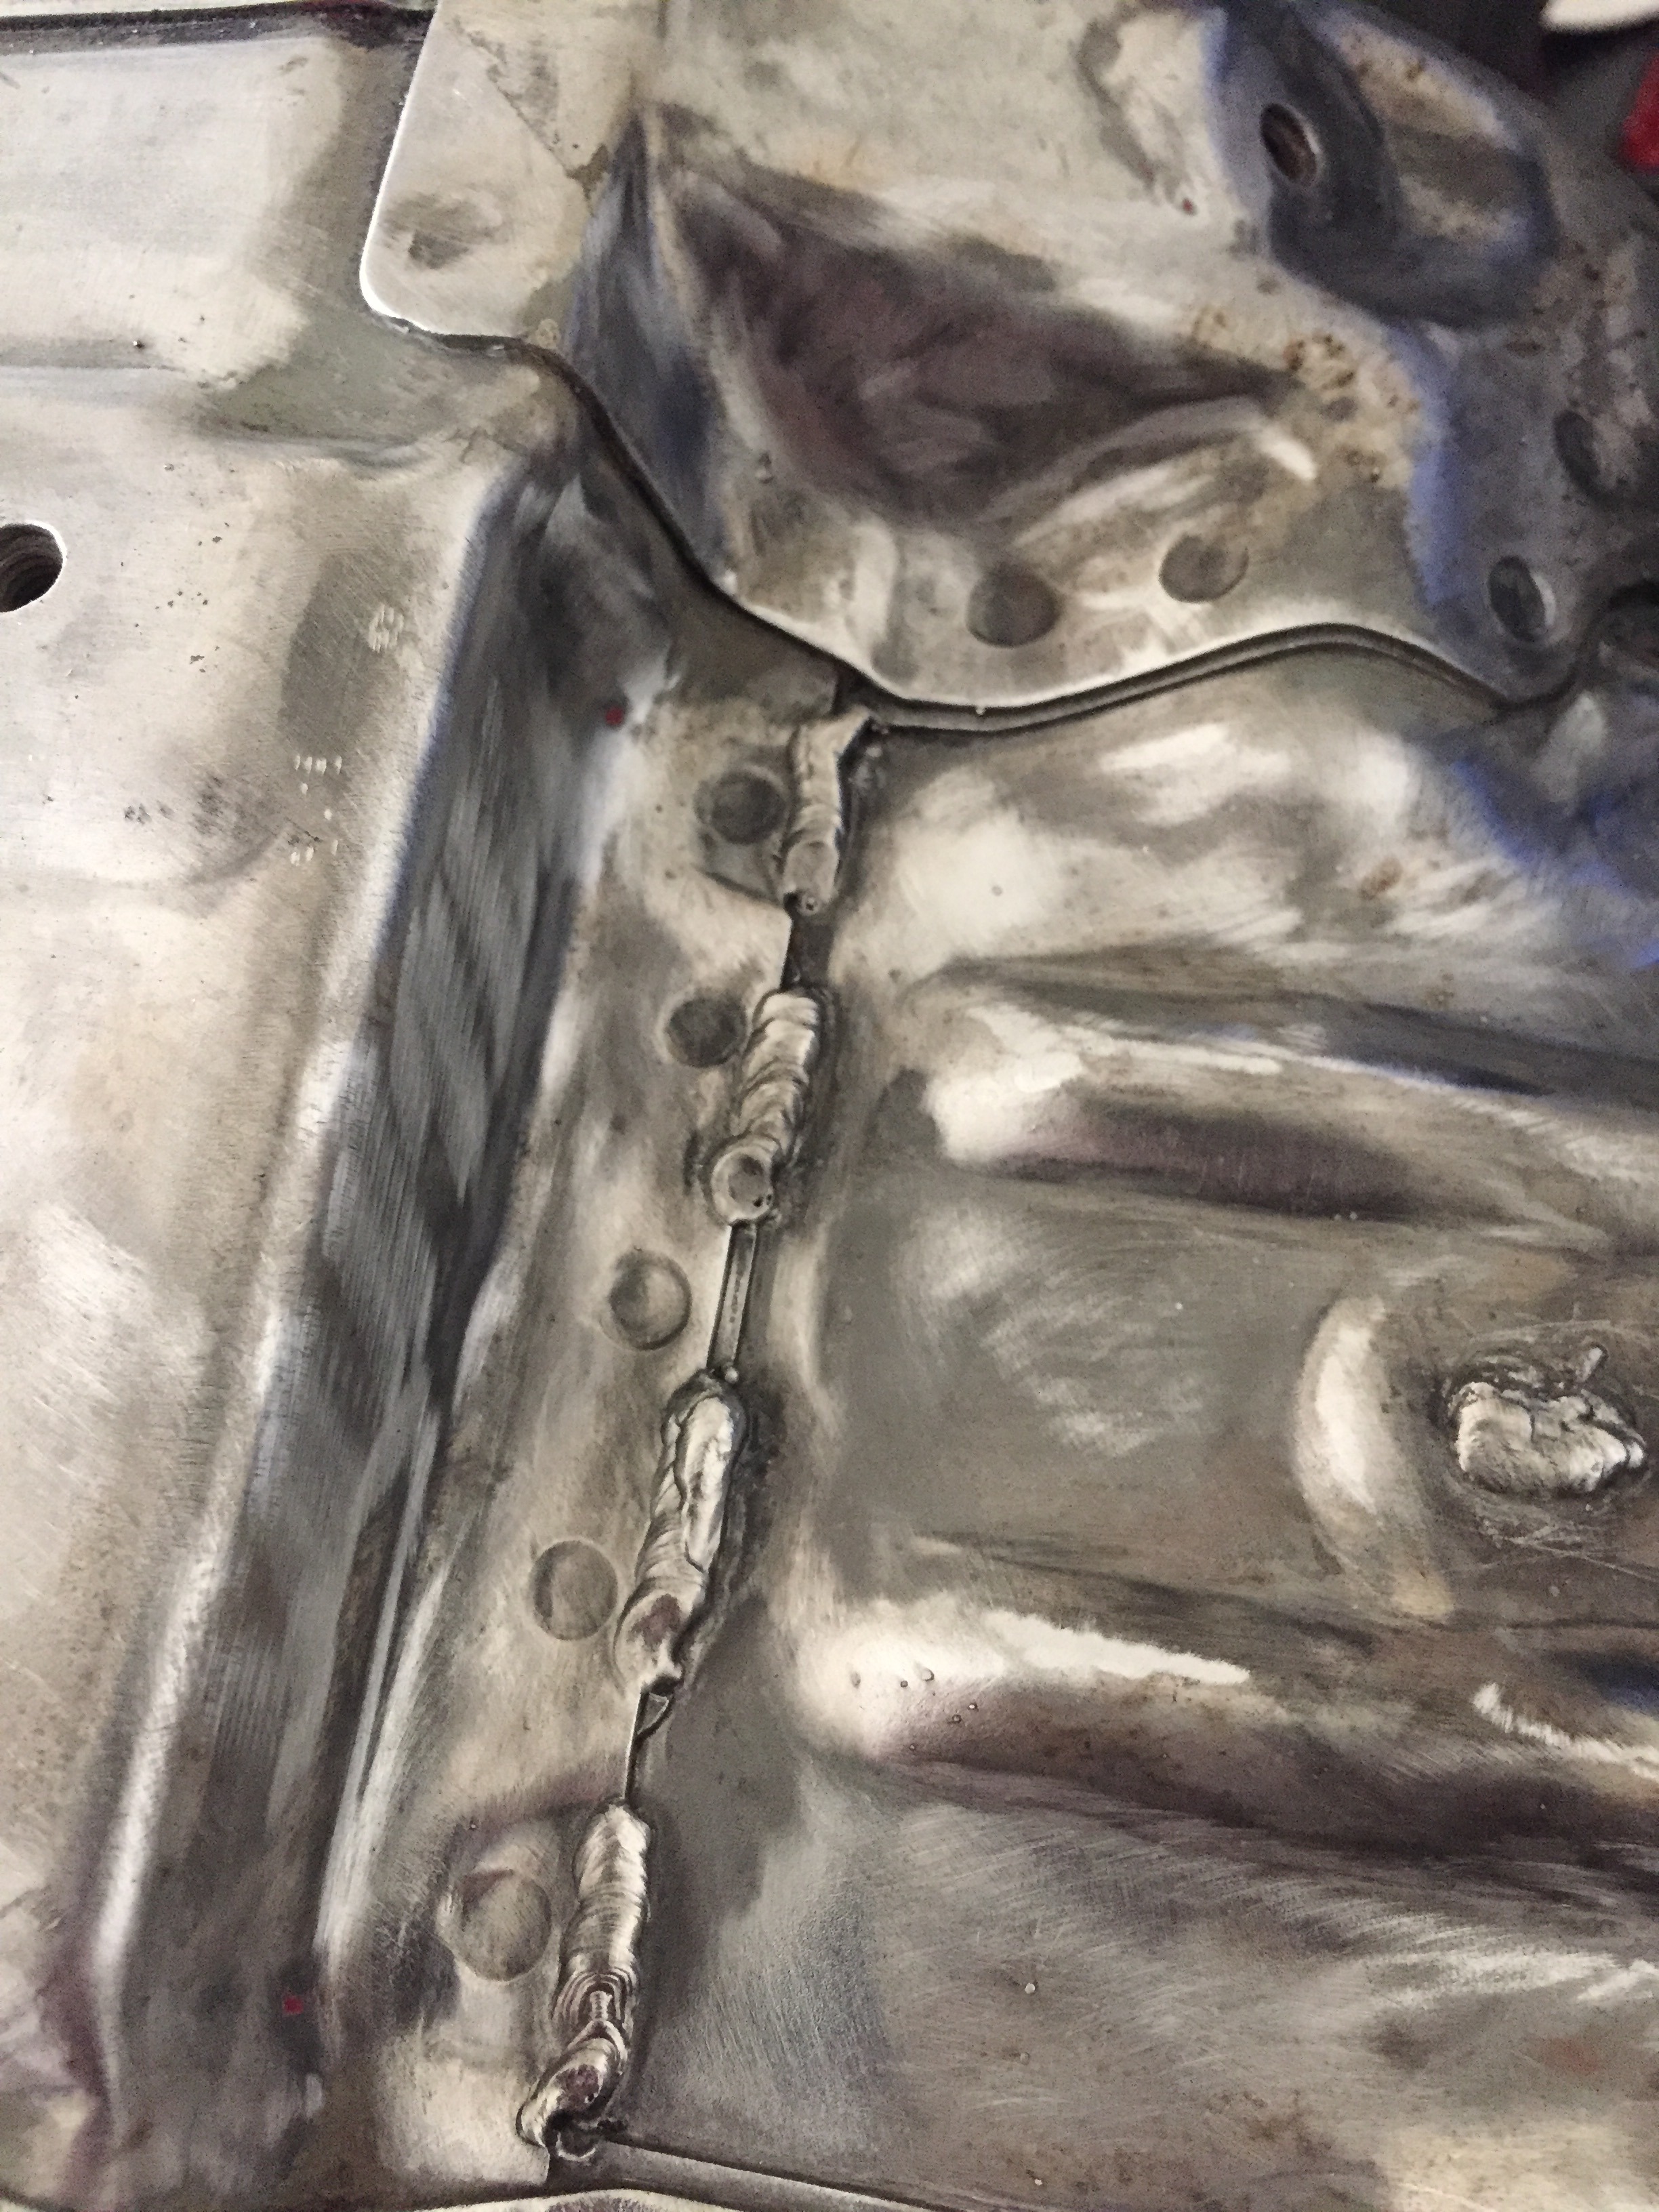

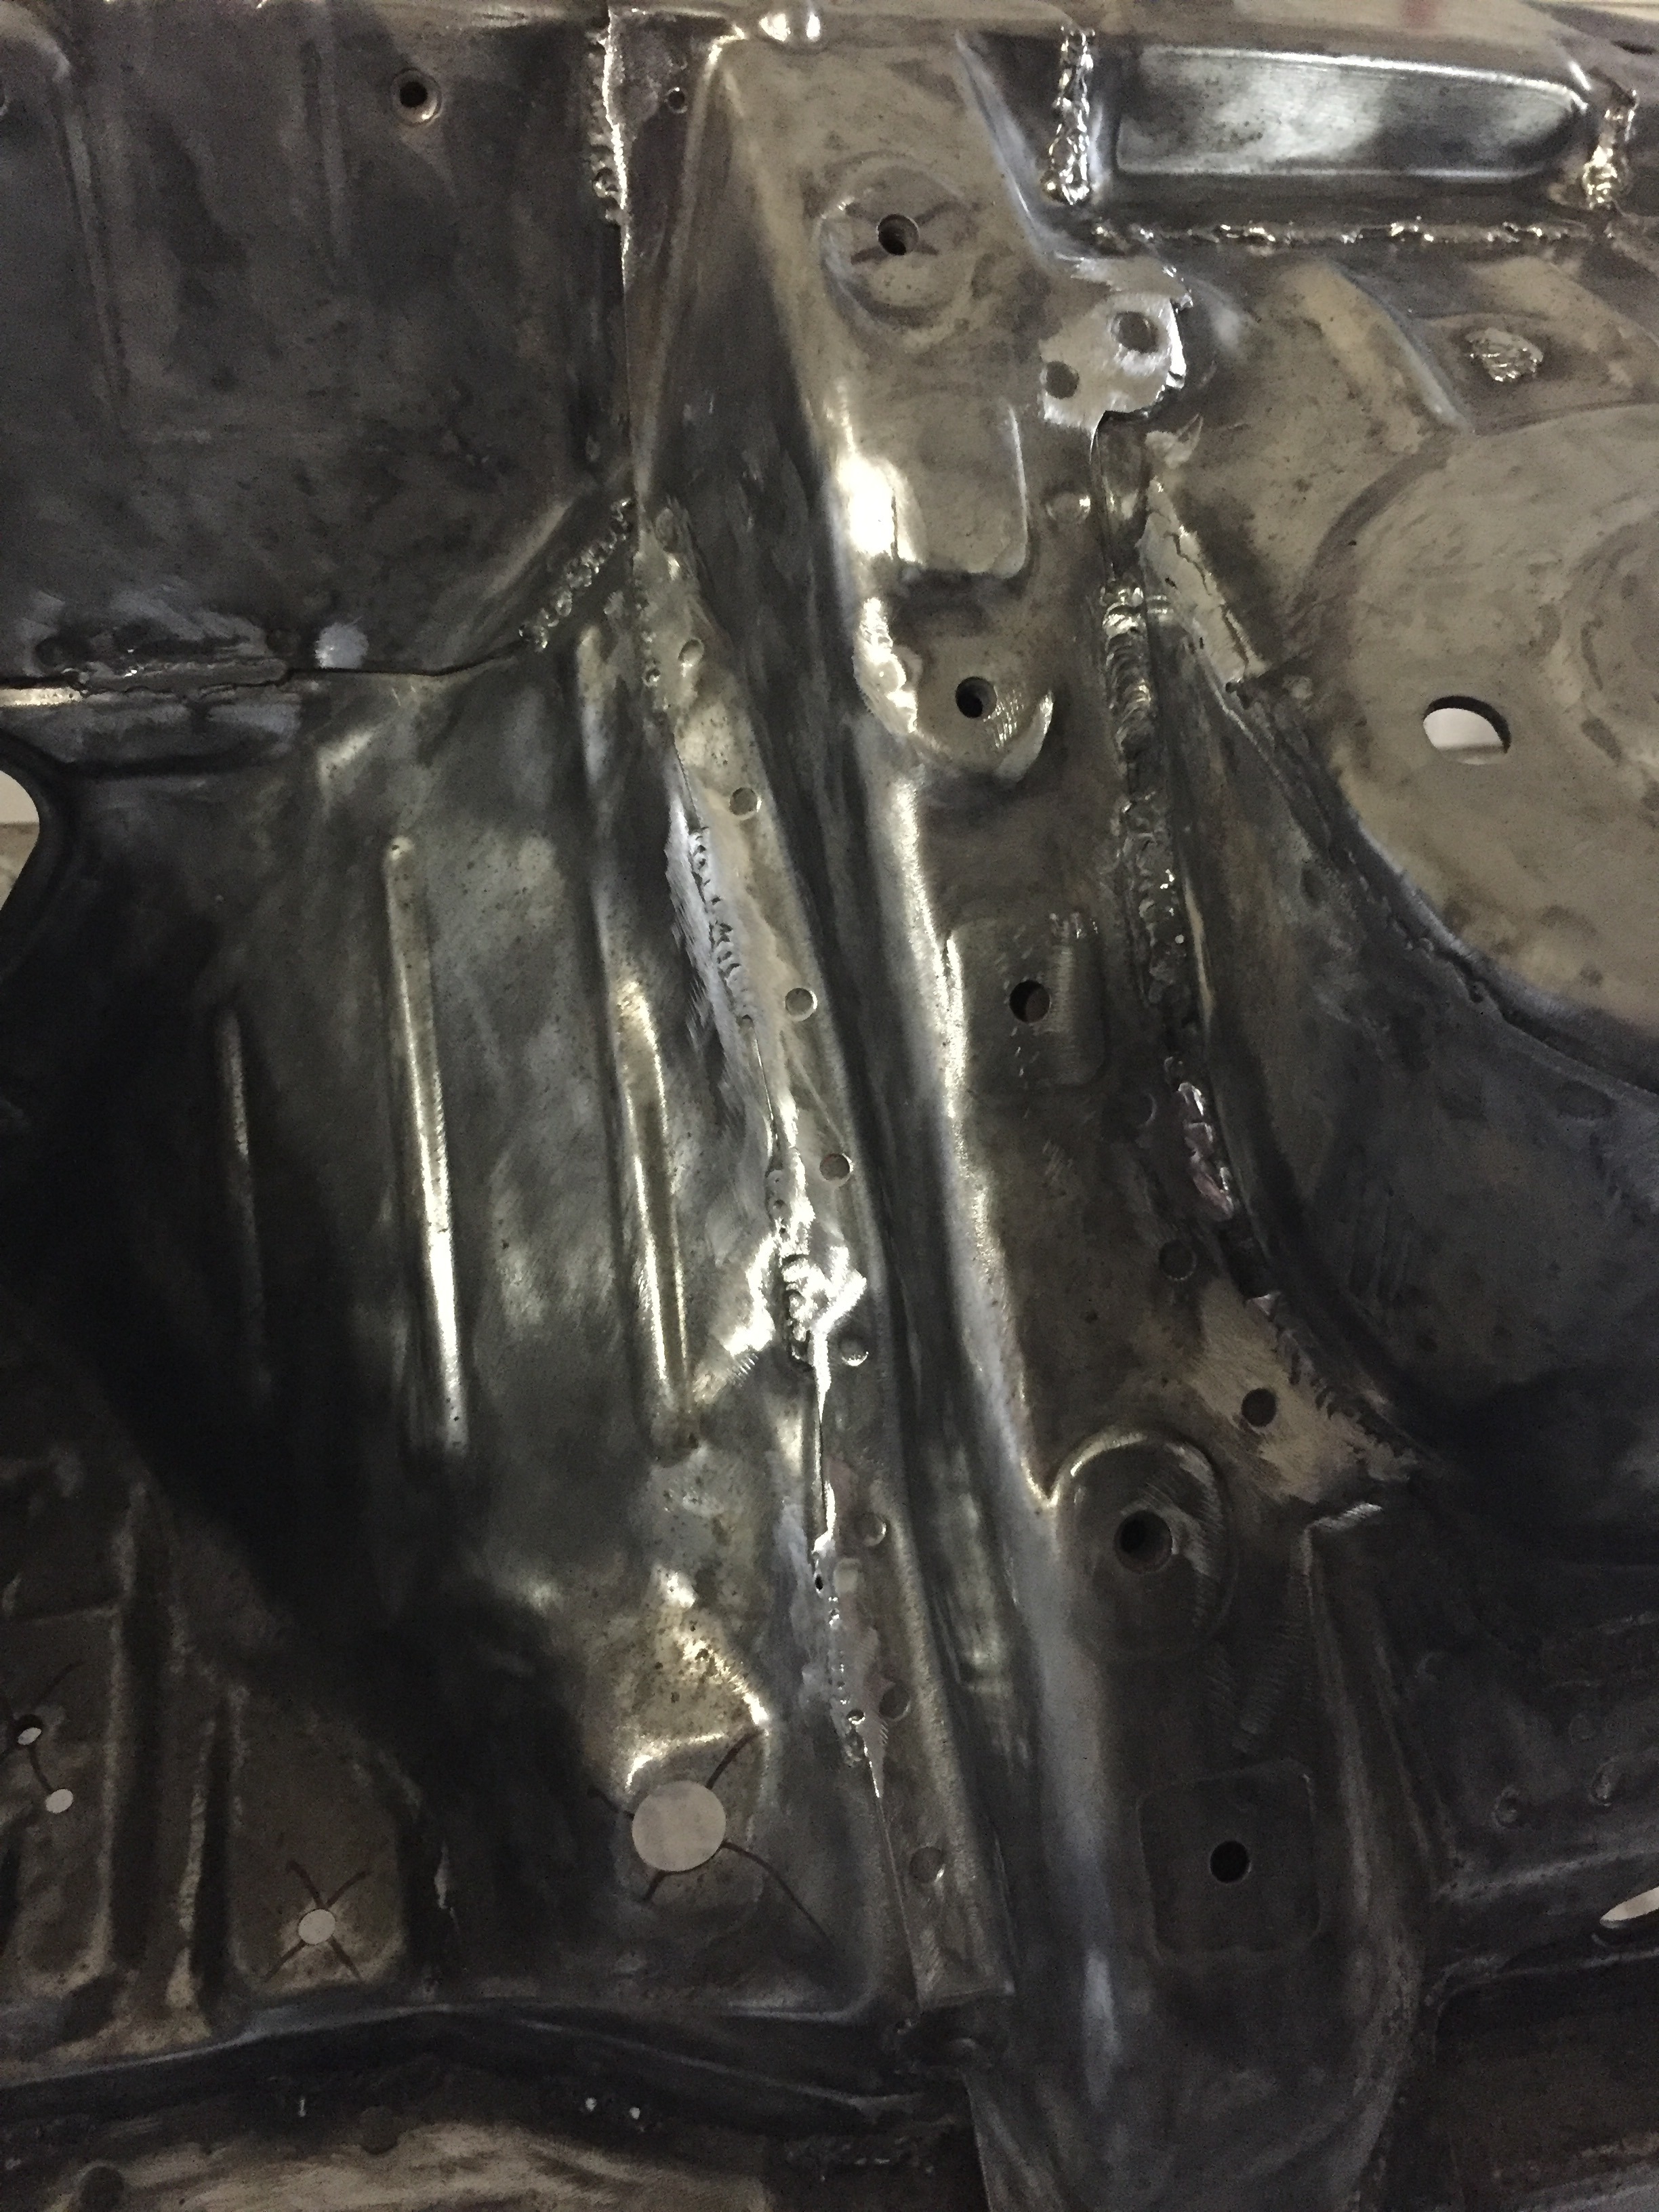
Everything will be getting a coating of filler to smooth out the seams, so I went ahead and ground down the welds a bit too so it would sit flat.
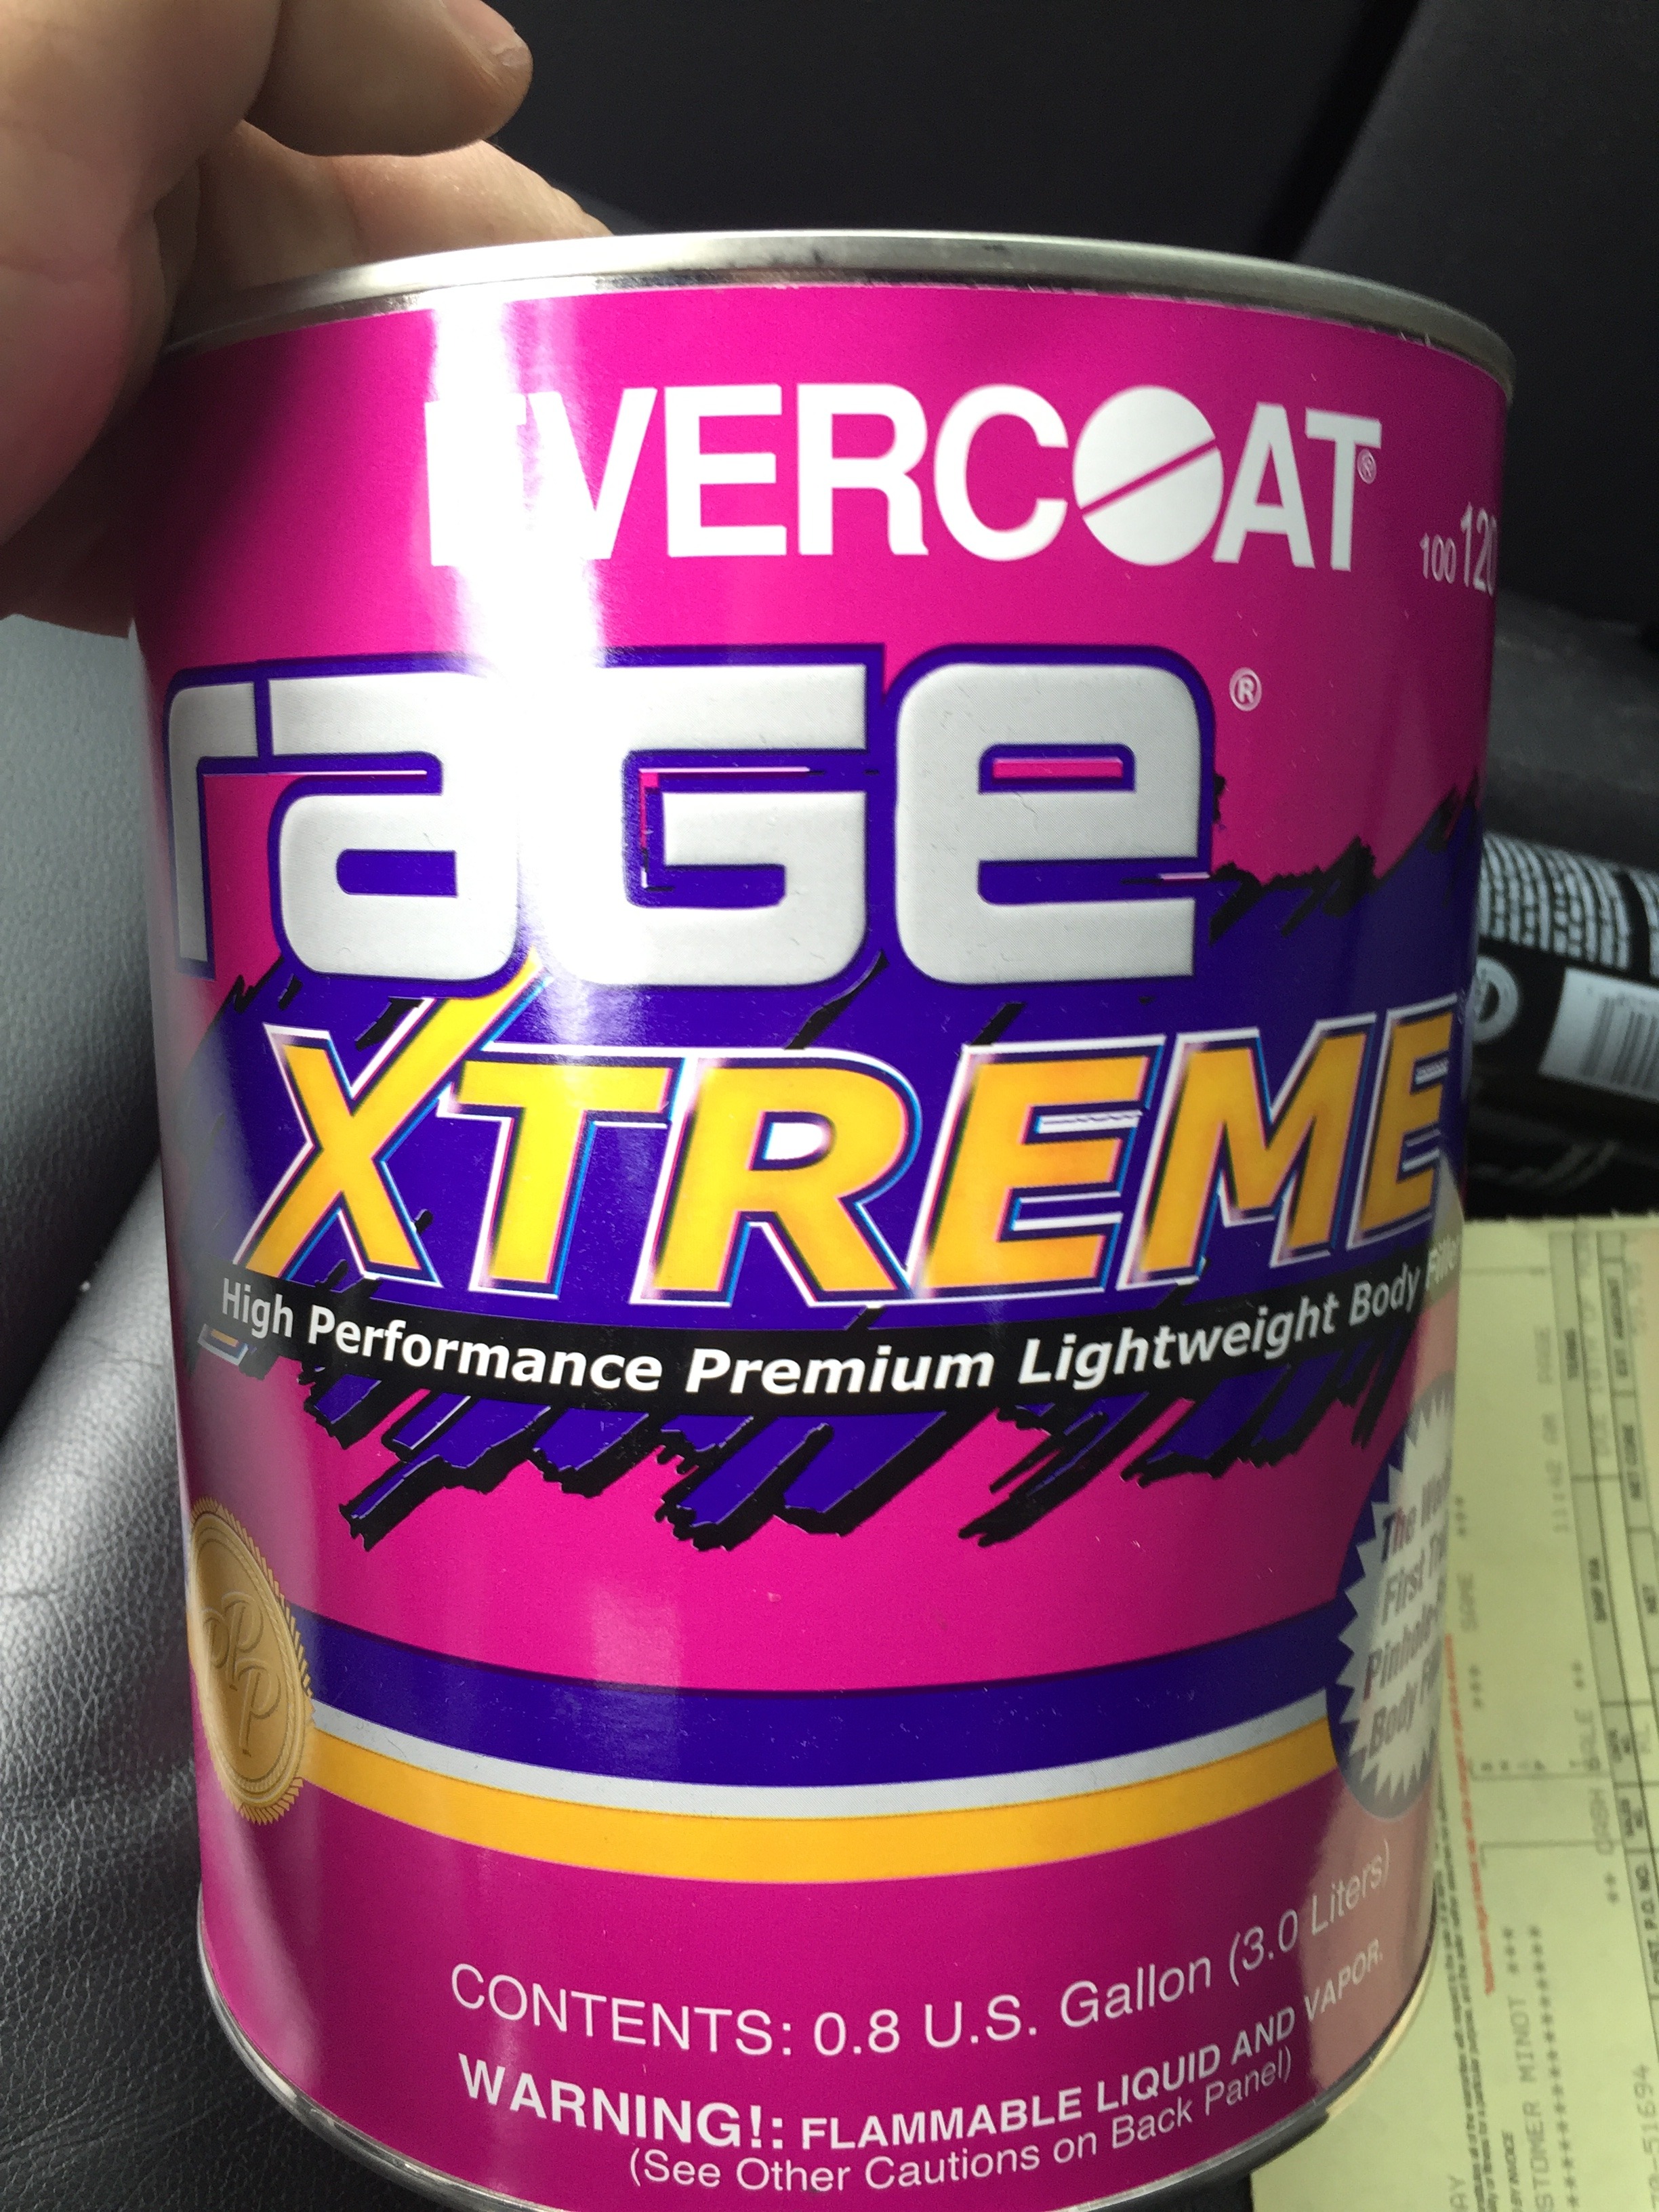
And part of that filler will be Rage Extreme. I read good reviews on it and quite a few people use it on their engine bays, so figured I would give it a shot. Hopefully it works well because it sure wasn't cheap! I'll be using FiberTech on the seams and this as a finisher
I forgot to mention that when I put the rear diff/axles in the passenger axle seemed like it went in a bit stiff (my first mistake here...live and learn). Anyhow, it sat in further than the driver side and that bothered me so I tried pulling it back out to see why it sat further in. Anndd that's where things got complicated. The damn thing WOULD NOT come out. It took a big fat chisel and a large crescent wrench to pry that thing back out...and here is why
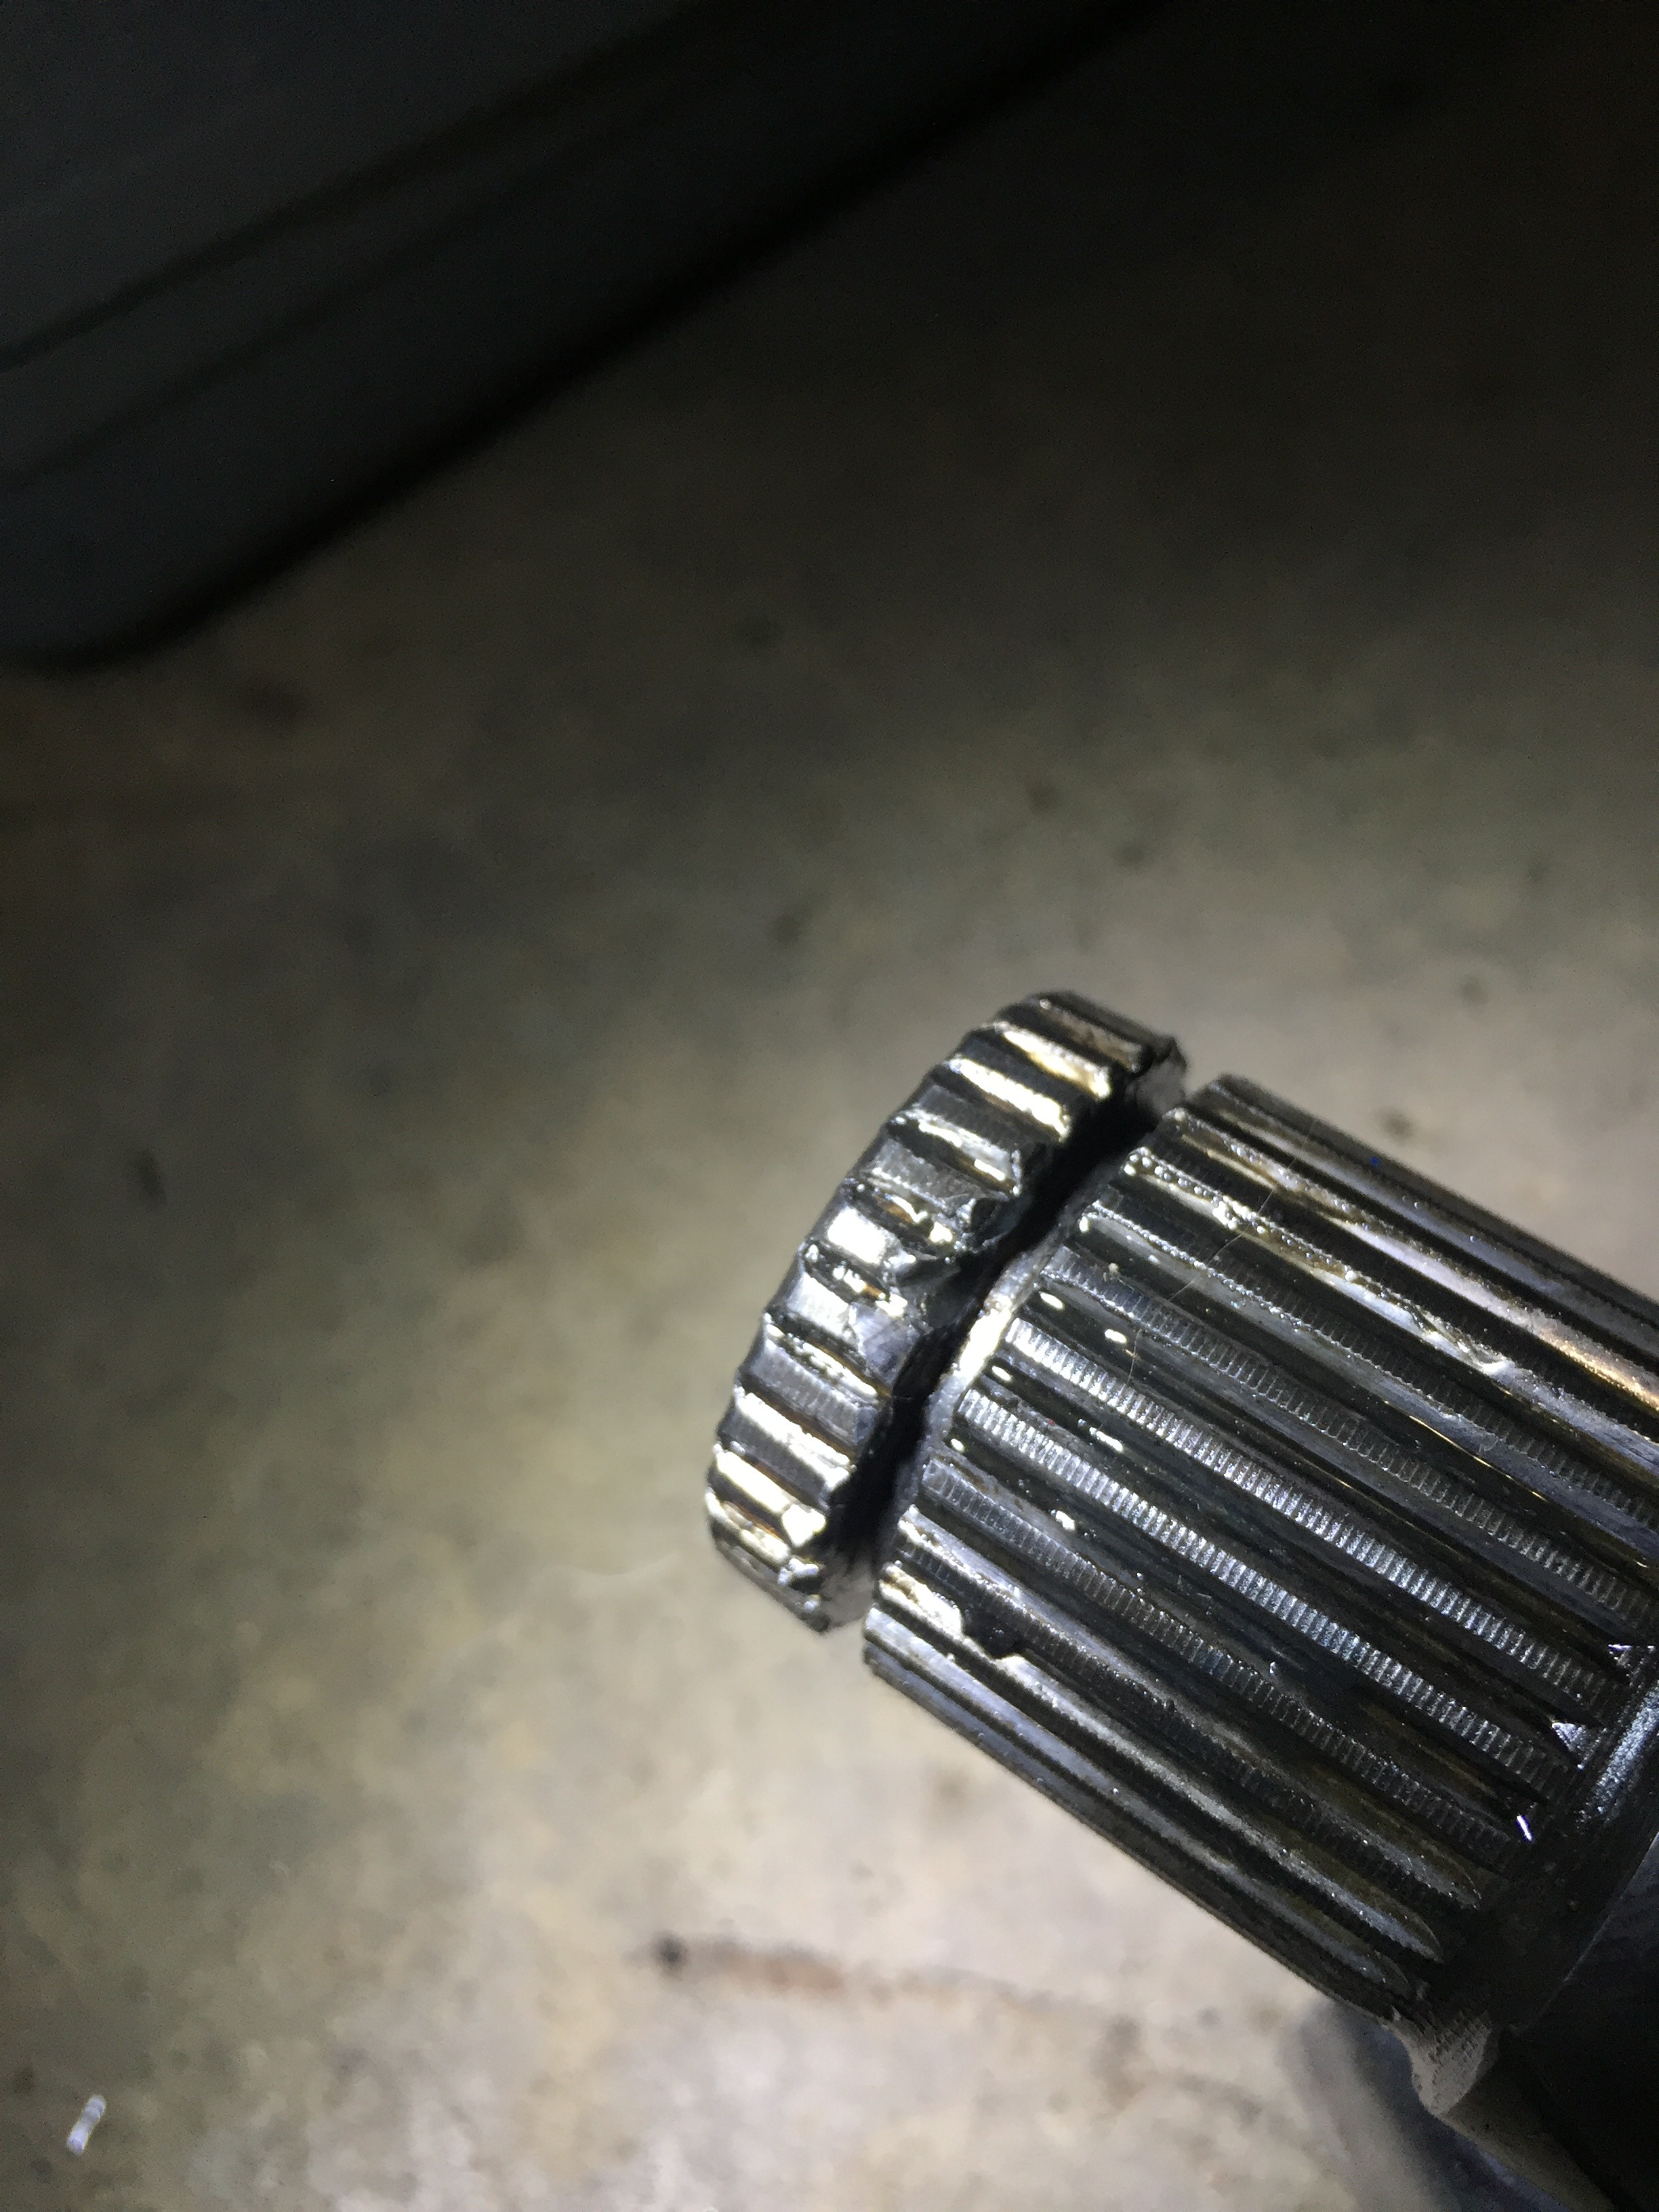
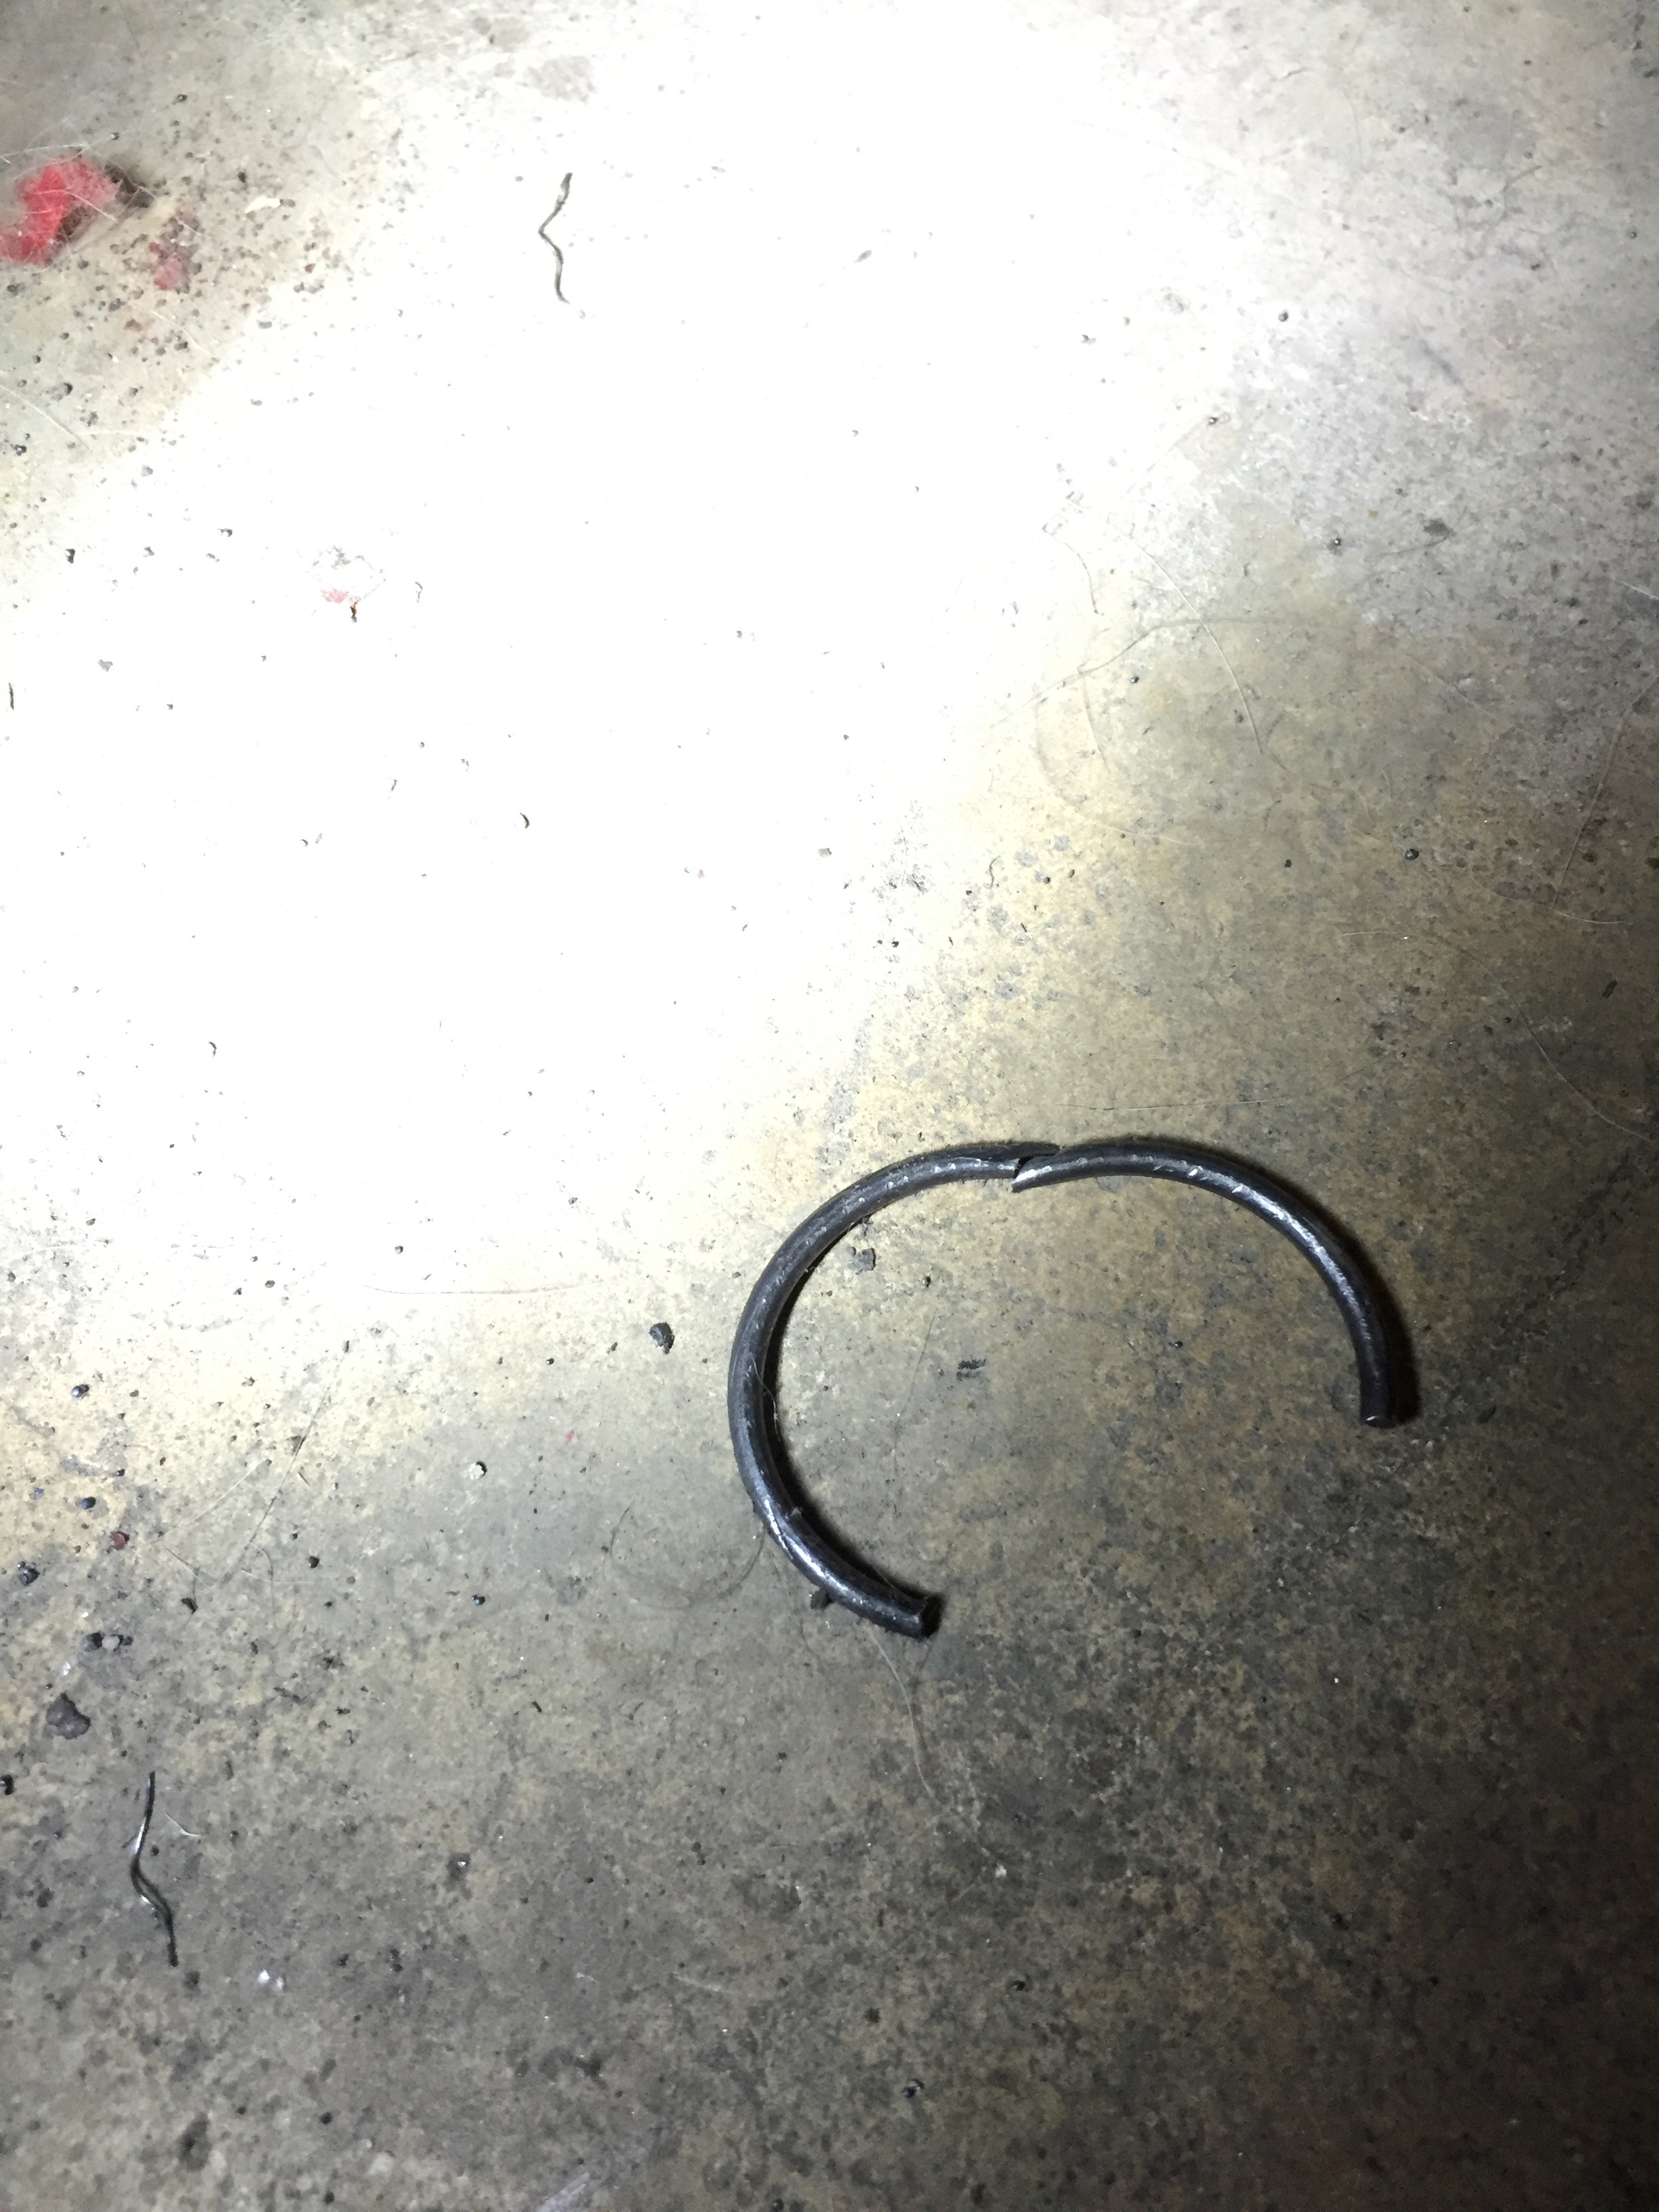
Stupid clip decided to be a little hoe and get snagged in the diff. Messed up the threads on the shaft a little, but the diff appears to be fine. I guess the clip I used was a little too large (although it was the same size as the stock one). Also, I did install it the correct way up. I used a magnet to get out the metal pieces from the clip, cleaned up the shaft, put on a new clip, and put it back in the diff. Done deal. More updates to come once I get pictures

Next big thing-started stitch welding the engine bay!


Everything will be getting a coating of filler to smooth out the seams, so I went ahead and ground down the welds a bit too so it would sit flat.
And part of that filler will be Rage Extreme. I read good reviews on it and quite a few people use it on their engine bays, so figured I would give it a shot. Hopefully it works well because it sure wasn't cheap! I'll be using FiberTech on the seams and this as a finisher

I forgot to mention that when I put the rear diff/axles in the passenger axle seemed like it went in a bit stiff (my first mistake here...live and learn). Anyhow, it sat in further than the driver side and that bothered me so I tried pulling it back out to see why it sat further in. Anndd that's where things got complicated. The damn thing WOULD NOT come out. It took a big fat chisel and a large crescent wrench to pry that thing back out...and here is why


Stupid clip decided to be a little hoe and get snagged in the diff. Messed up the threads on the shaft a little, but the diff appears to be fine. I guess the clip I used was a little too large (although it was the same size as the stock one). Also, I did install it the correct way up. I used a magnet to get out the metal pieces from the clip, cleaned up the shaft, put on a new clip, and put it back in the diff. Done deal. More updates to come once I get pictures
Thread Starter
Full Member
Joined: Apr 2015
Posts: 140
Likes: 5
From: Great Falls, MT
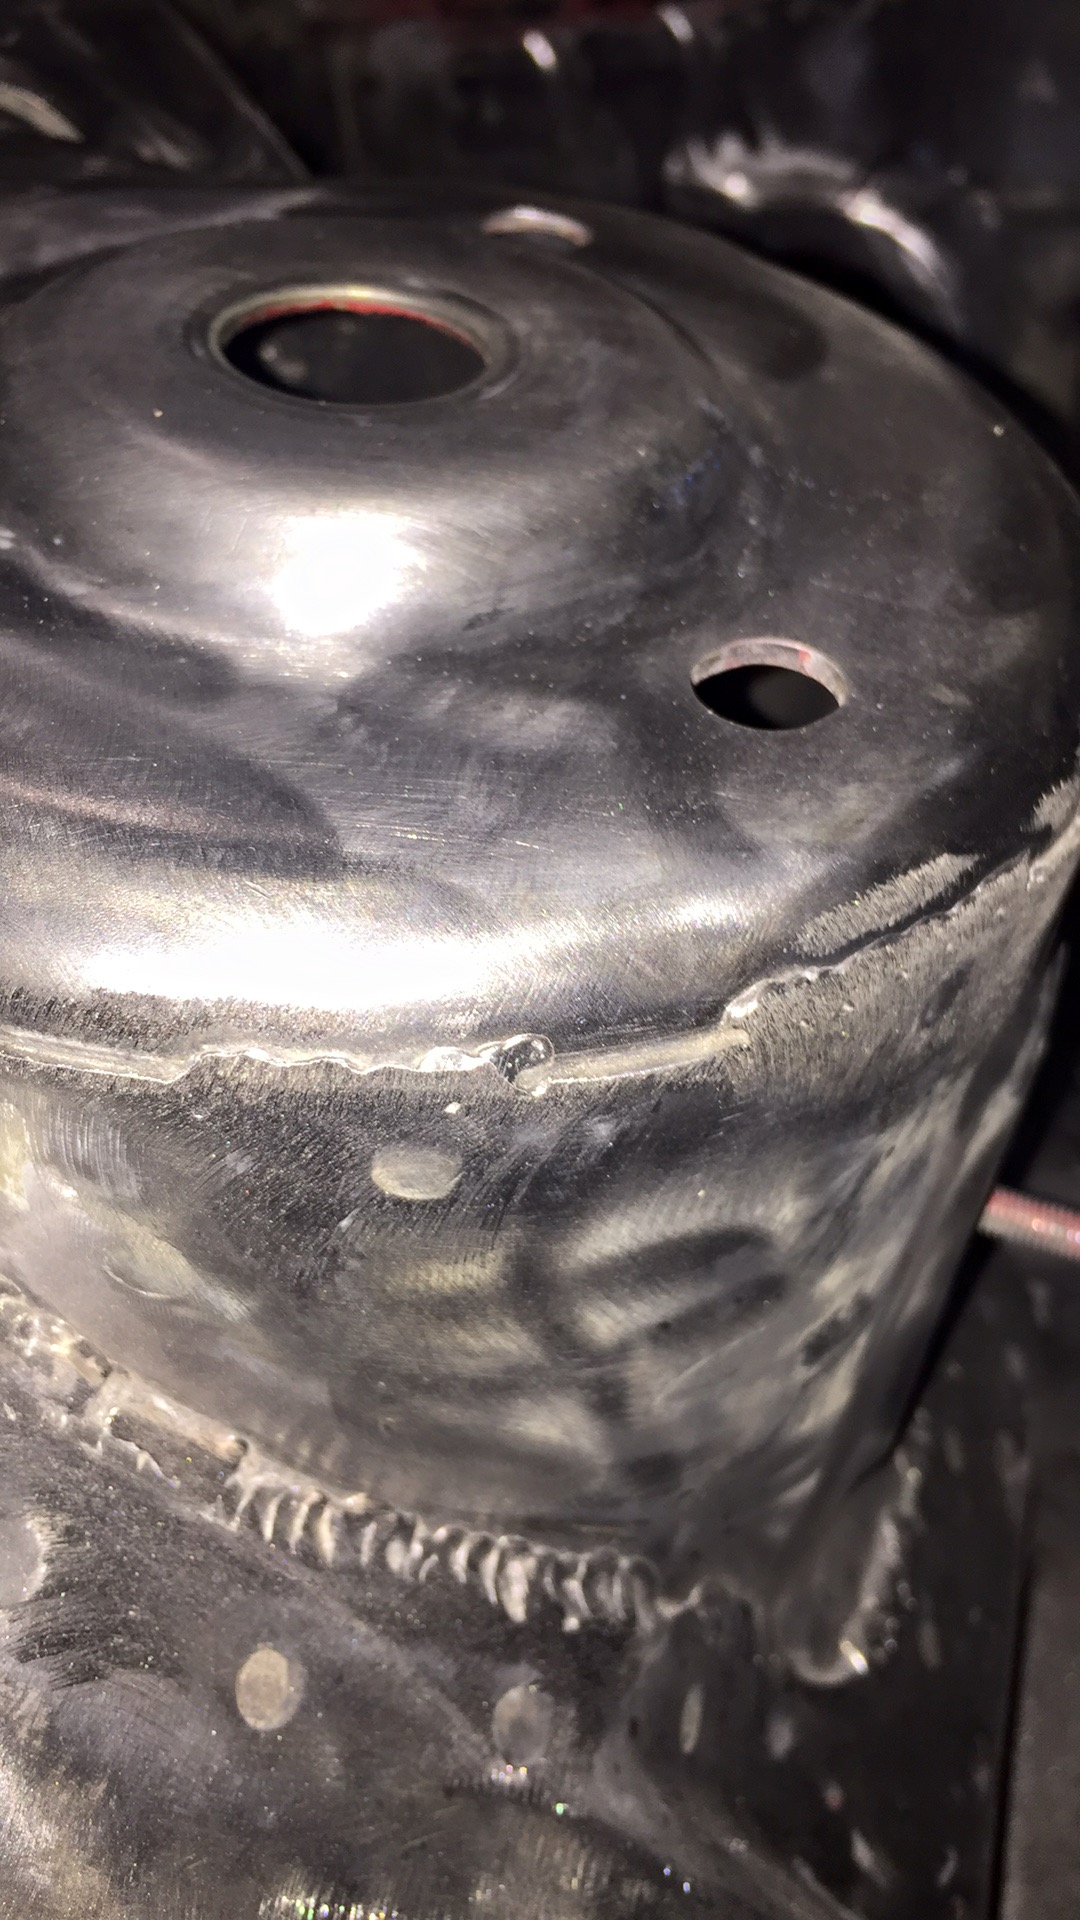
Got the covers for the strut towers made up this week. It's a good feeling to see it coming together! The only issue I have now is how I will seal underneath the covers. I sprayed self etching primer and weld through primer onto both pieces before welding, but I still feel like it needs something else in there. I was thinking of drilling a hole in the top and using a syringe to put POR15 inside, then use my air hose to spray in the hole and hopefully spread it out...but idk if that would work. Worth a try though unless someone has some suggestions. Anyhow, on to the pictures!
Started by tacking it into place, working my way around and hammering it down to fit flush
All tacked up
Put the strut bar back into place before I welded it all around. I took my time doing 1" beads and letting the metal cool in between, but I wanted to be sure the strut towers wouldn't move with the heating and cooling
Sanded down and almost ready for filler
Same process on the other side
Gotta be safe!
It's coming together Finished up the bottom cover on one side
I still have to sand down the welds on one side and figure out how to seal underneath the covers. From there I will fill in some more holes behind the strut towers and move on to the firewall. I'll have to drop the motor in so I modify the firewall enough to clear my intake, so while I have it in I will go ahead and run my wiring as well since I dont plan to use the factory spot.
Started by tacking it into place, working my way around and hammering it down to fit flush

All tacked up

Put the strut bar back into place before I welded it all around. I took my time doing 1" beads and letting the metal cool in between, but I wanted to be sure the strut towers wouldn't move with the heating and cooling

Sanded down and almost ready for filler

Same process on the other side


Gotta be safe!

It's coming together
Finished up the bottom cover on one side

I still have to sand down the welds on one side and figure out how to seal underneath the covers. From there I will fill in some more holes behind the strut towers and move on to the firewall. I'll have to drop the motor in so I modify the firewall enough to clear my intake, so while I have it in I will go ahead and run my wiring as well since I dont plan to use the factory spot.
Thread Starter
Full Member
Joined: Apr 2015
Posts: 140
Likes: 5
From: Great Falls, MT
So it's basically the same thing going on. Still working on the engine bay and such with some other stuff mixed in occasionally. I wanted to see if I needed the side bumper/fender brackets so I mocked up the front bumper/fenders onto the car
It looks like my plan will work. I will have a frame mounted splitter that will hold up the bumper (while doubling as a splitter of course) and do away with the side brackets since they are mangled from a previous hit or two. Ill be using this PVC material from Home Depot to make the front splitter and the side skirt extensions. Only cost $75 for a 4x8 piece that is 1/2 inch thick. The full splitter sheet (74x30) weighs 24 pounds, but I will be cutting that weight in half most likely since Ill be integrating it with my Shine undertray. The splitter will only go back far enough to properly mount to the frame, then the undertray will extend from the splitter back to the subframe...if that makes sense. Anyhow, pictures of materials

Engine bay is slowly getting more complete
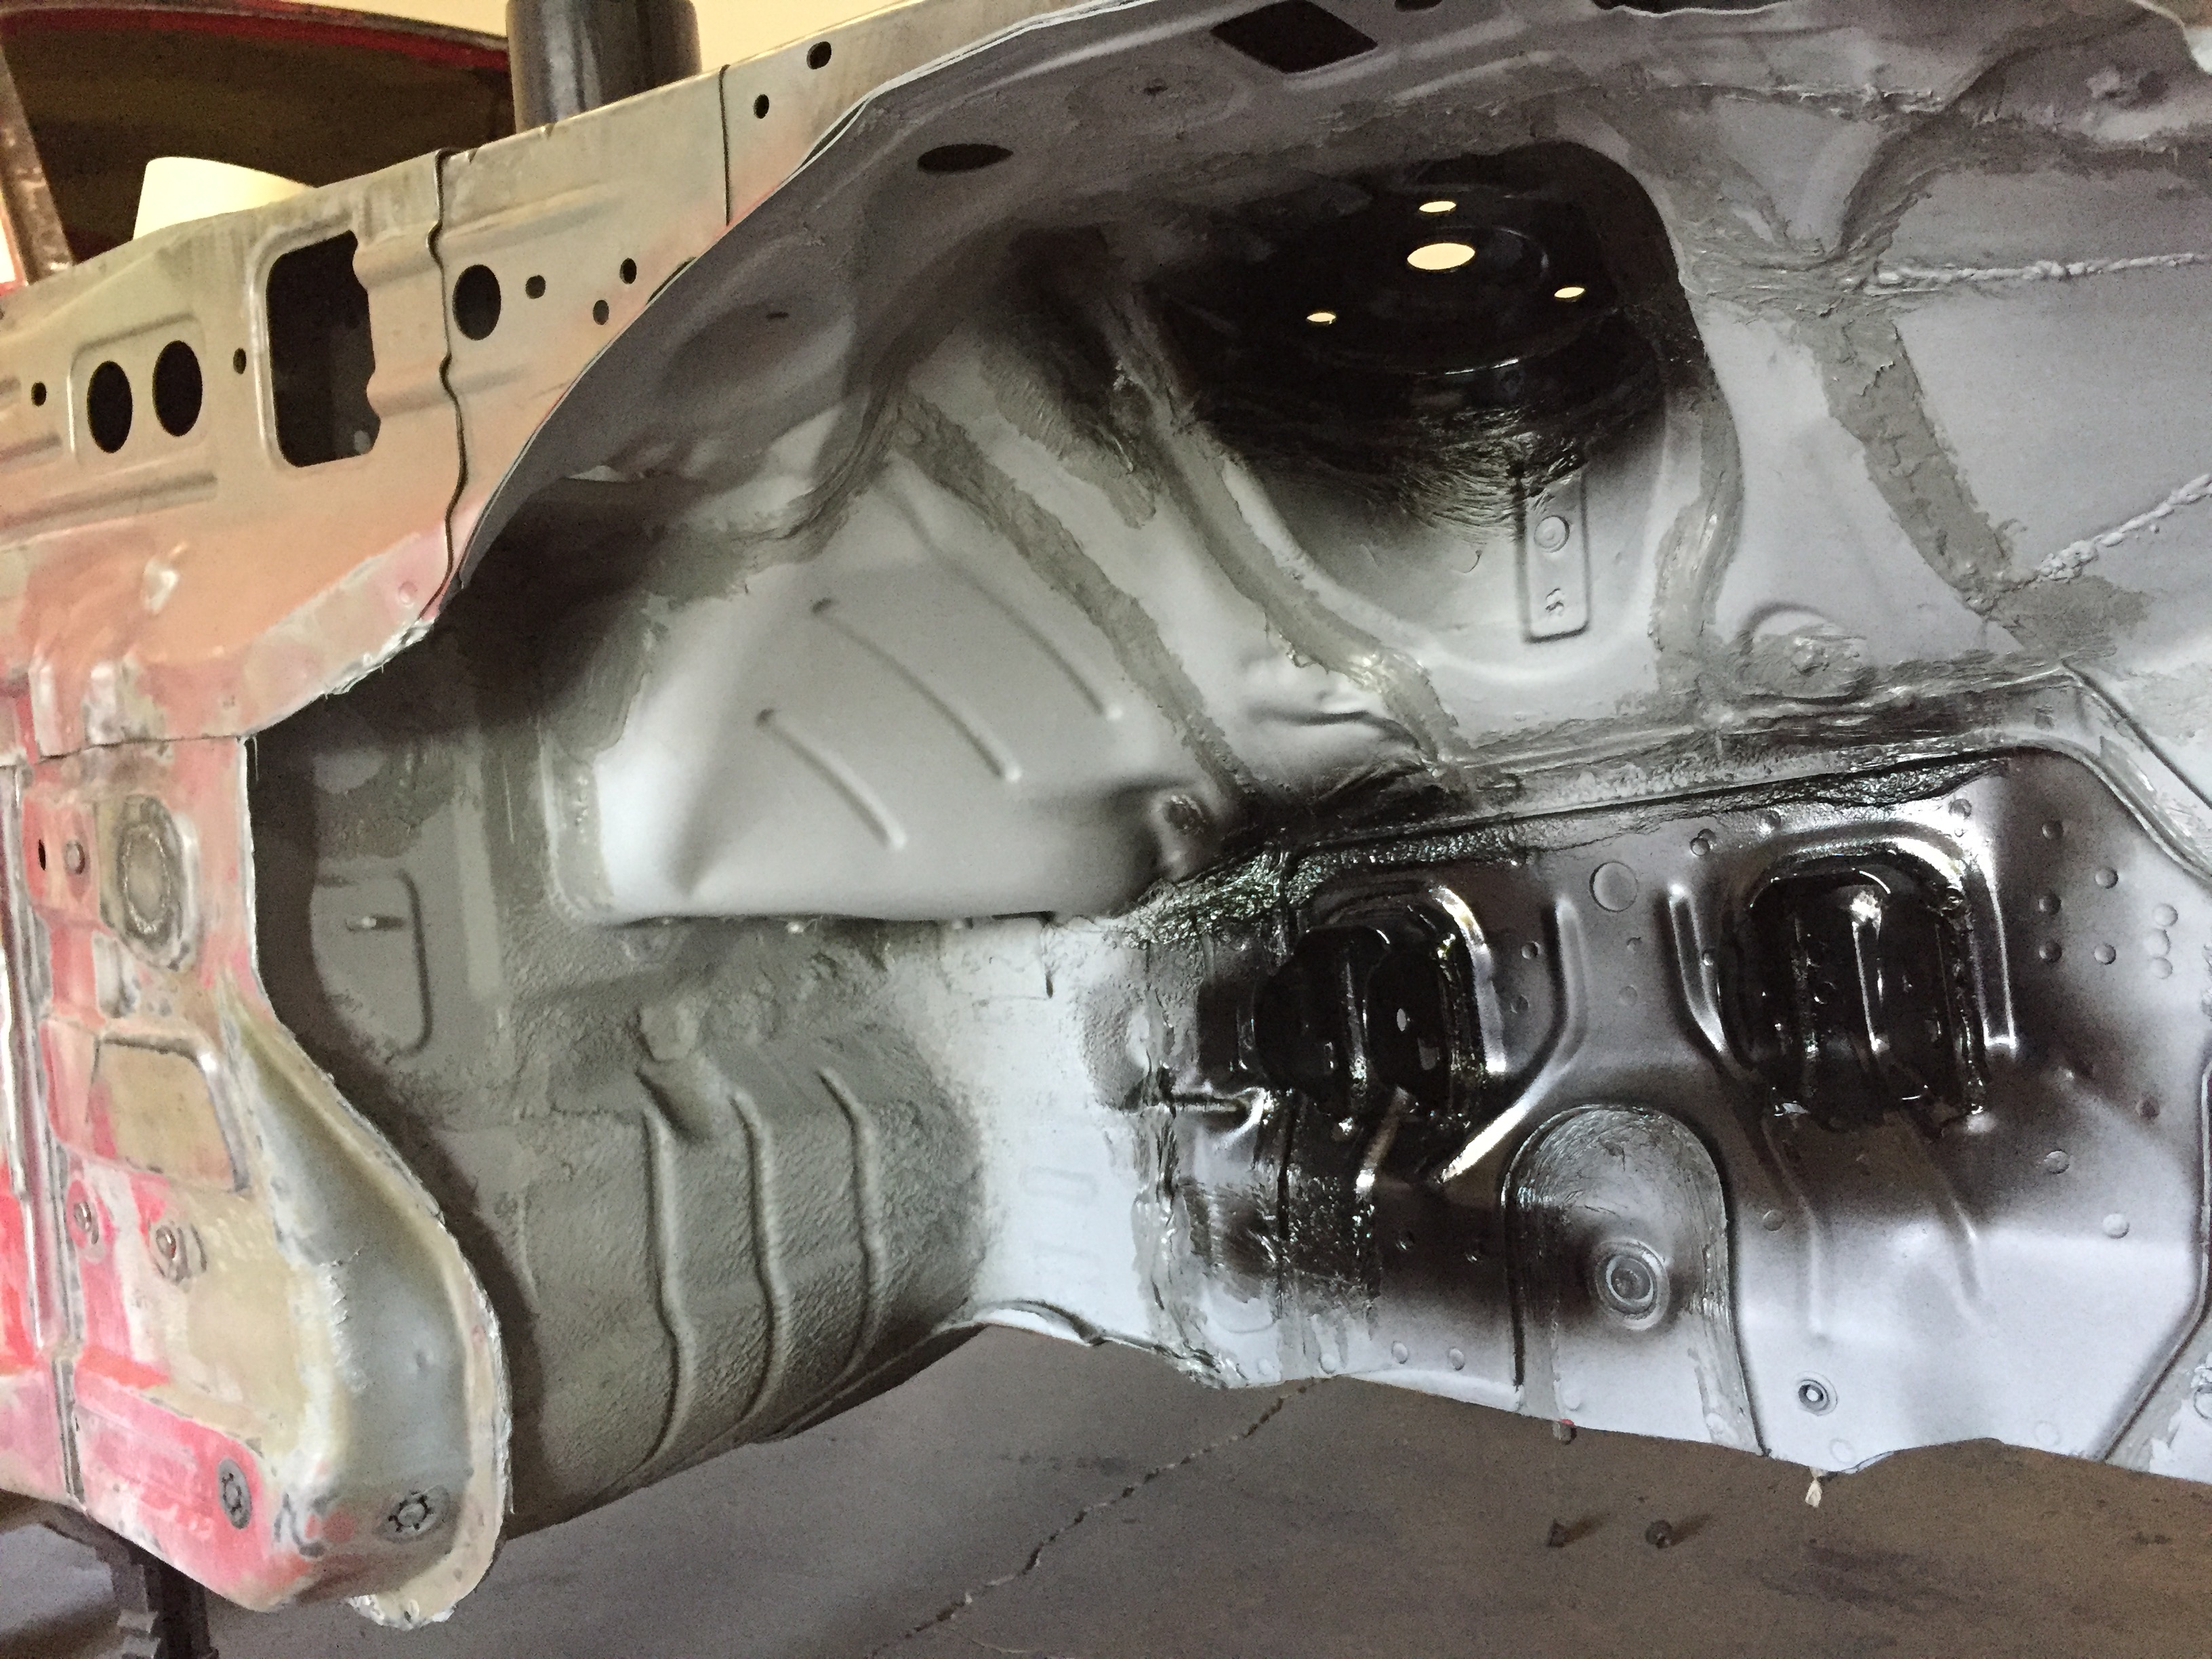
Started working on the wheel wells since the welds fried off the paint due to the heat. I'm going to apply self etching primer over the bare metal and seams, then scuff, then regular primer, then seam sealer, and then underbody spray over the whole thing.
This pissed me off...
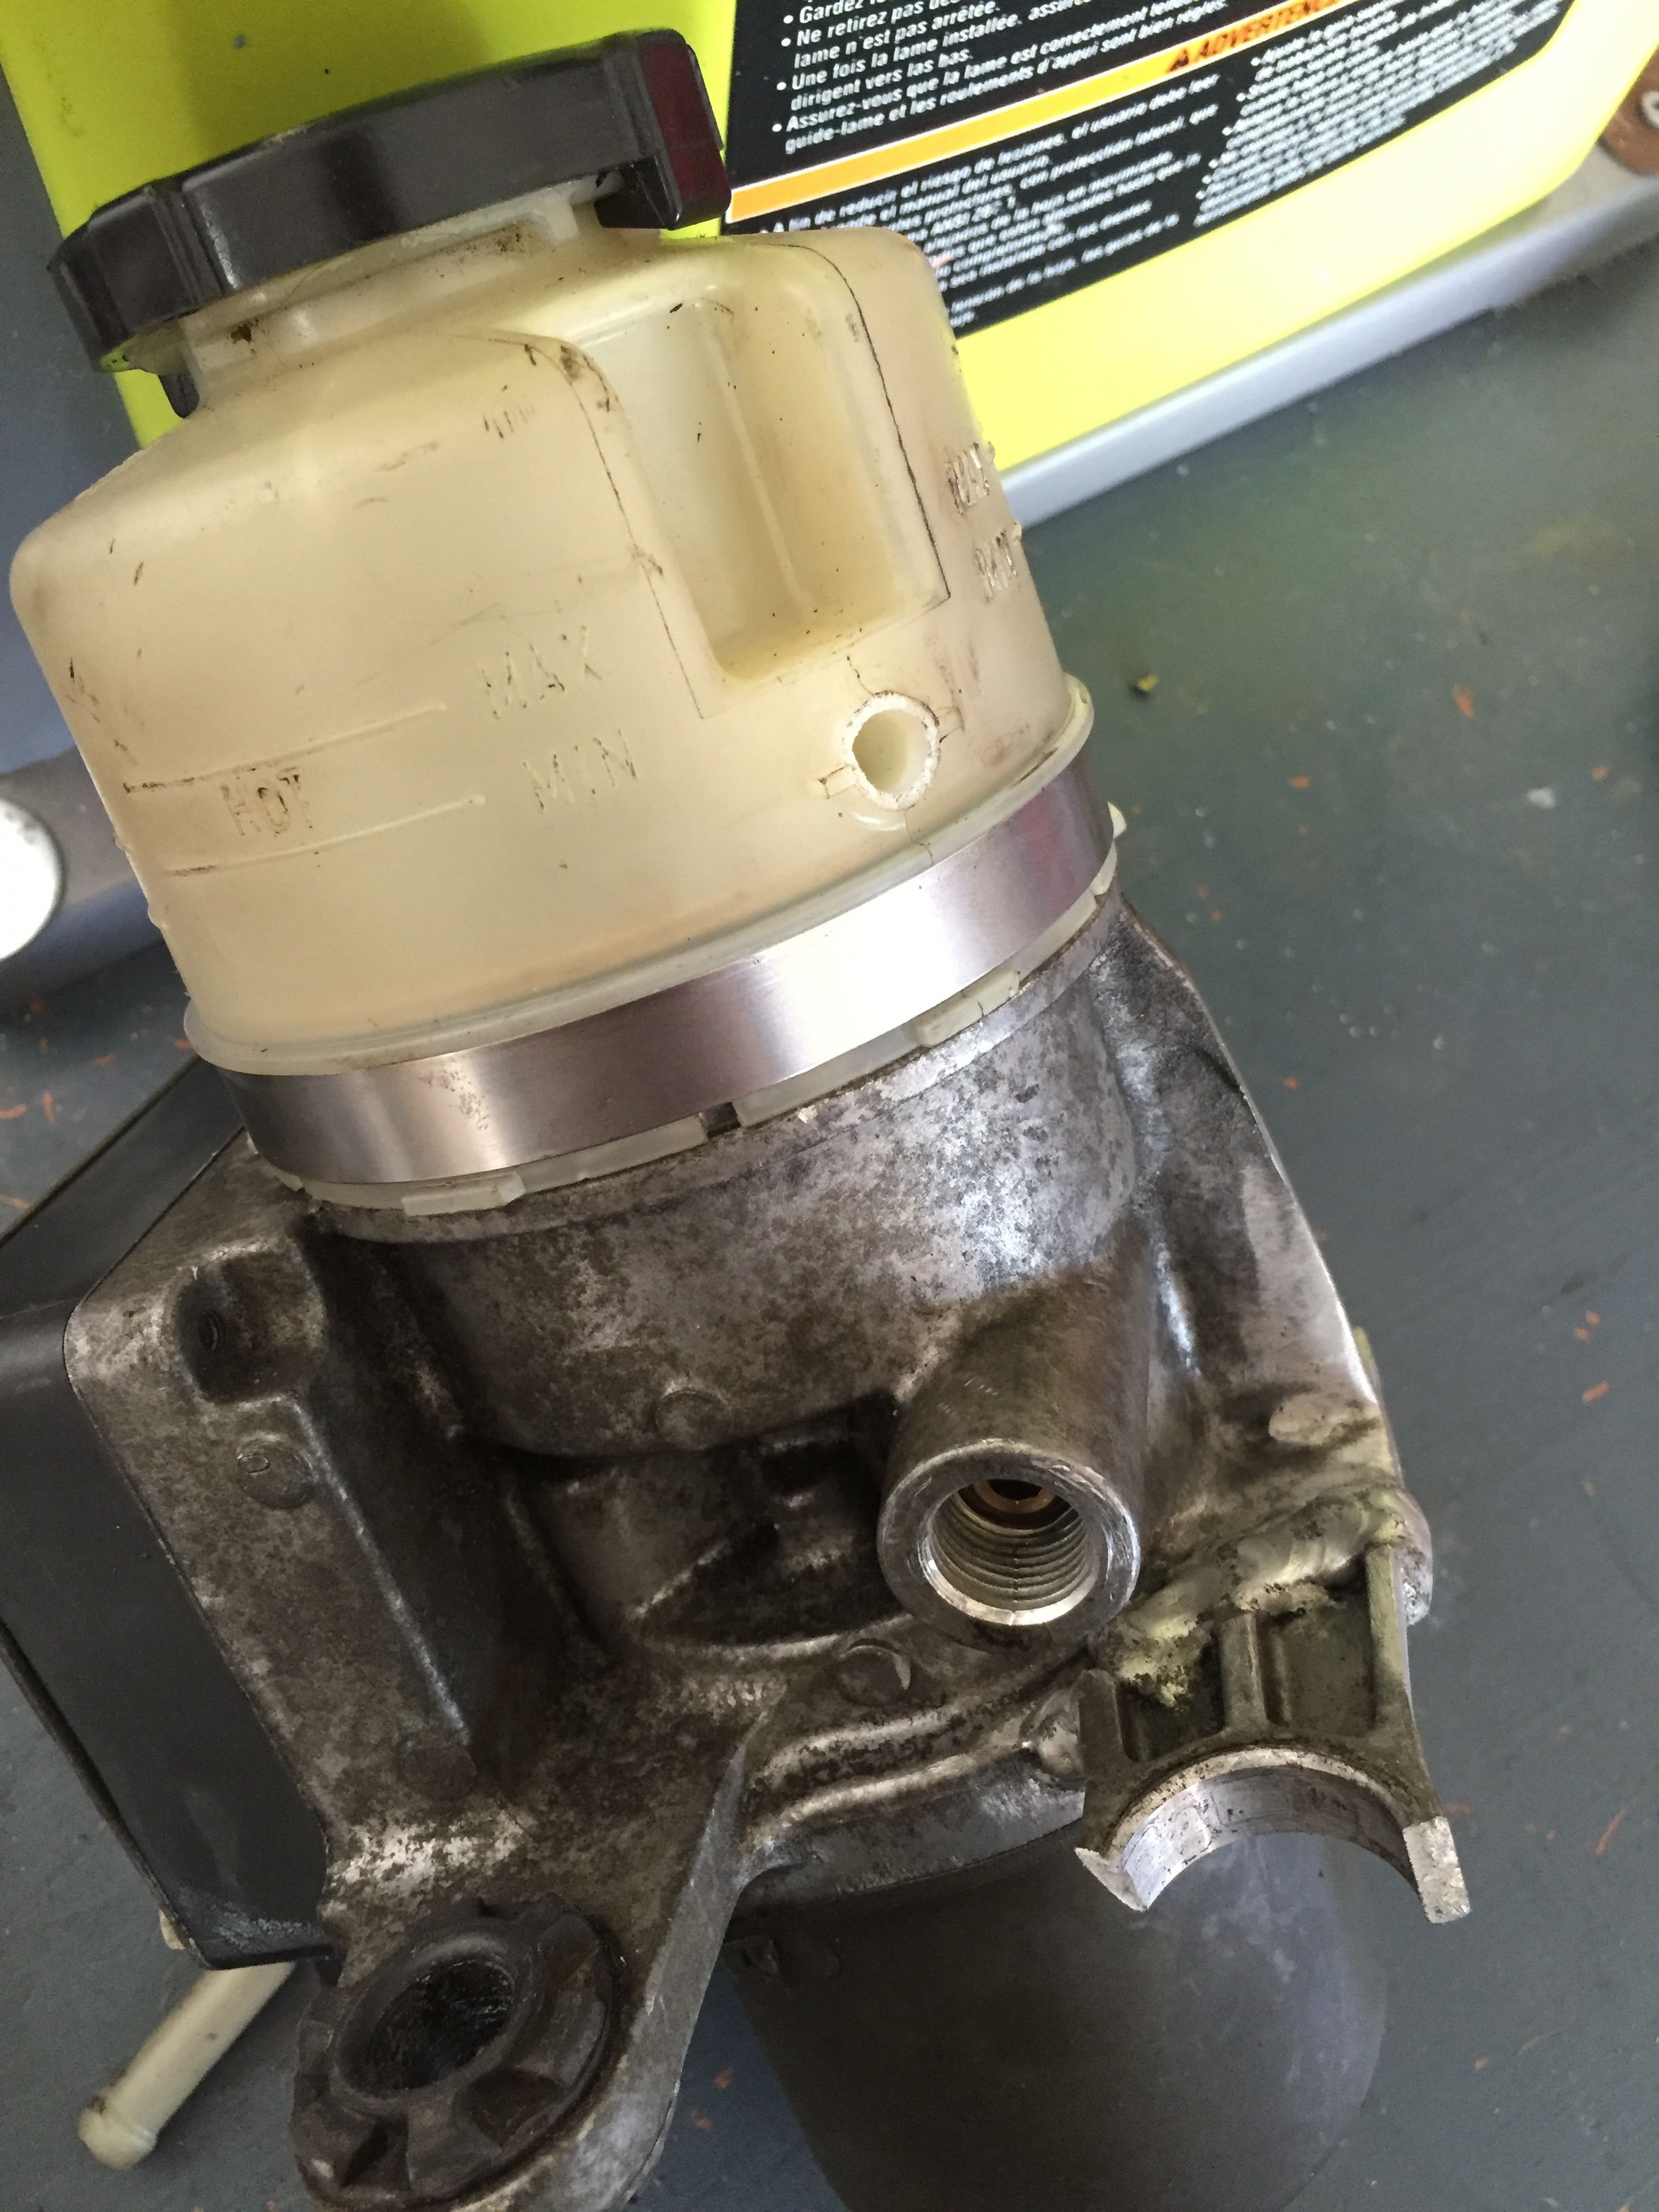
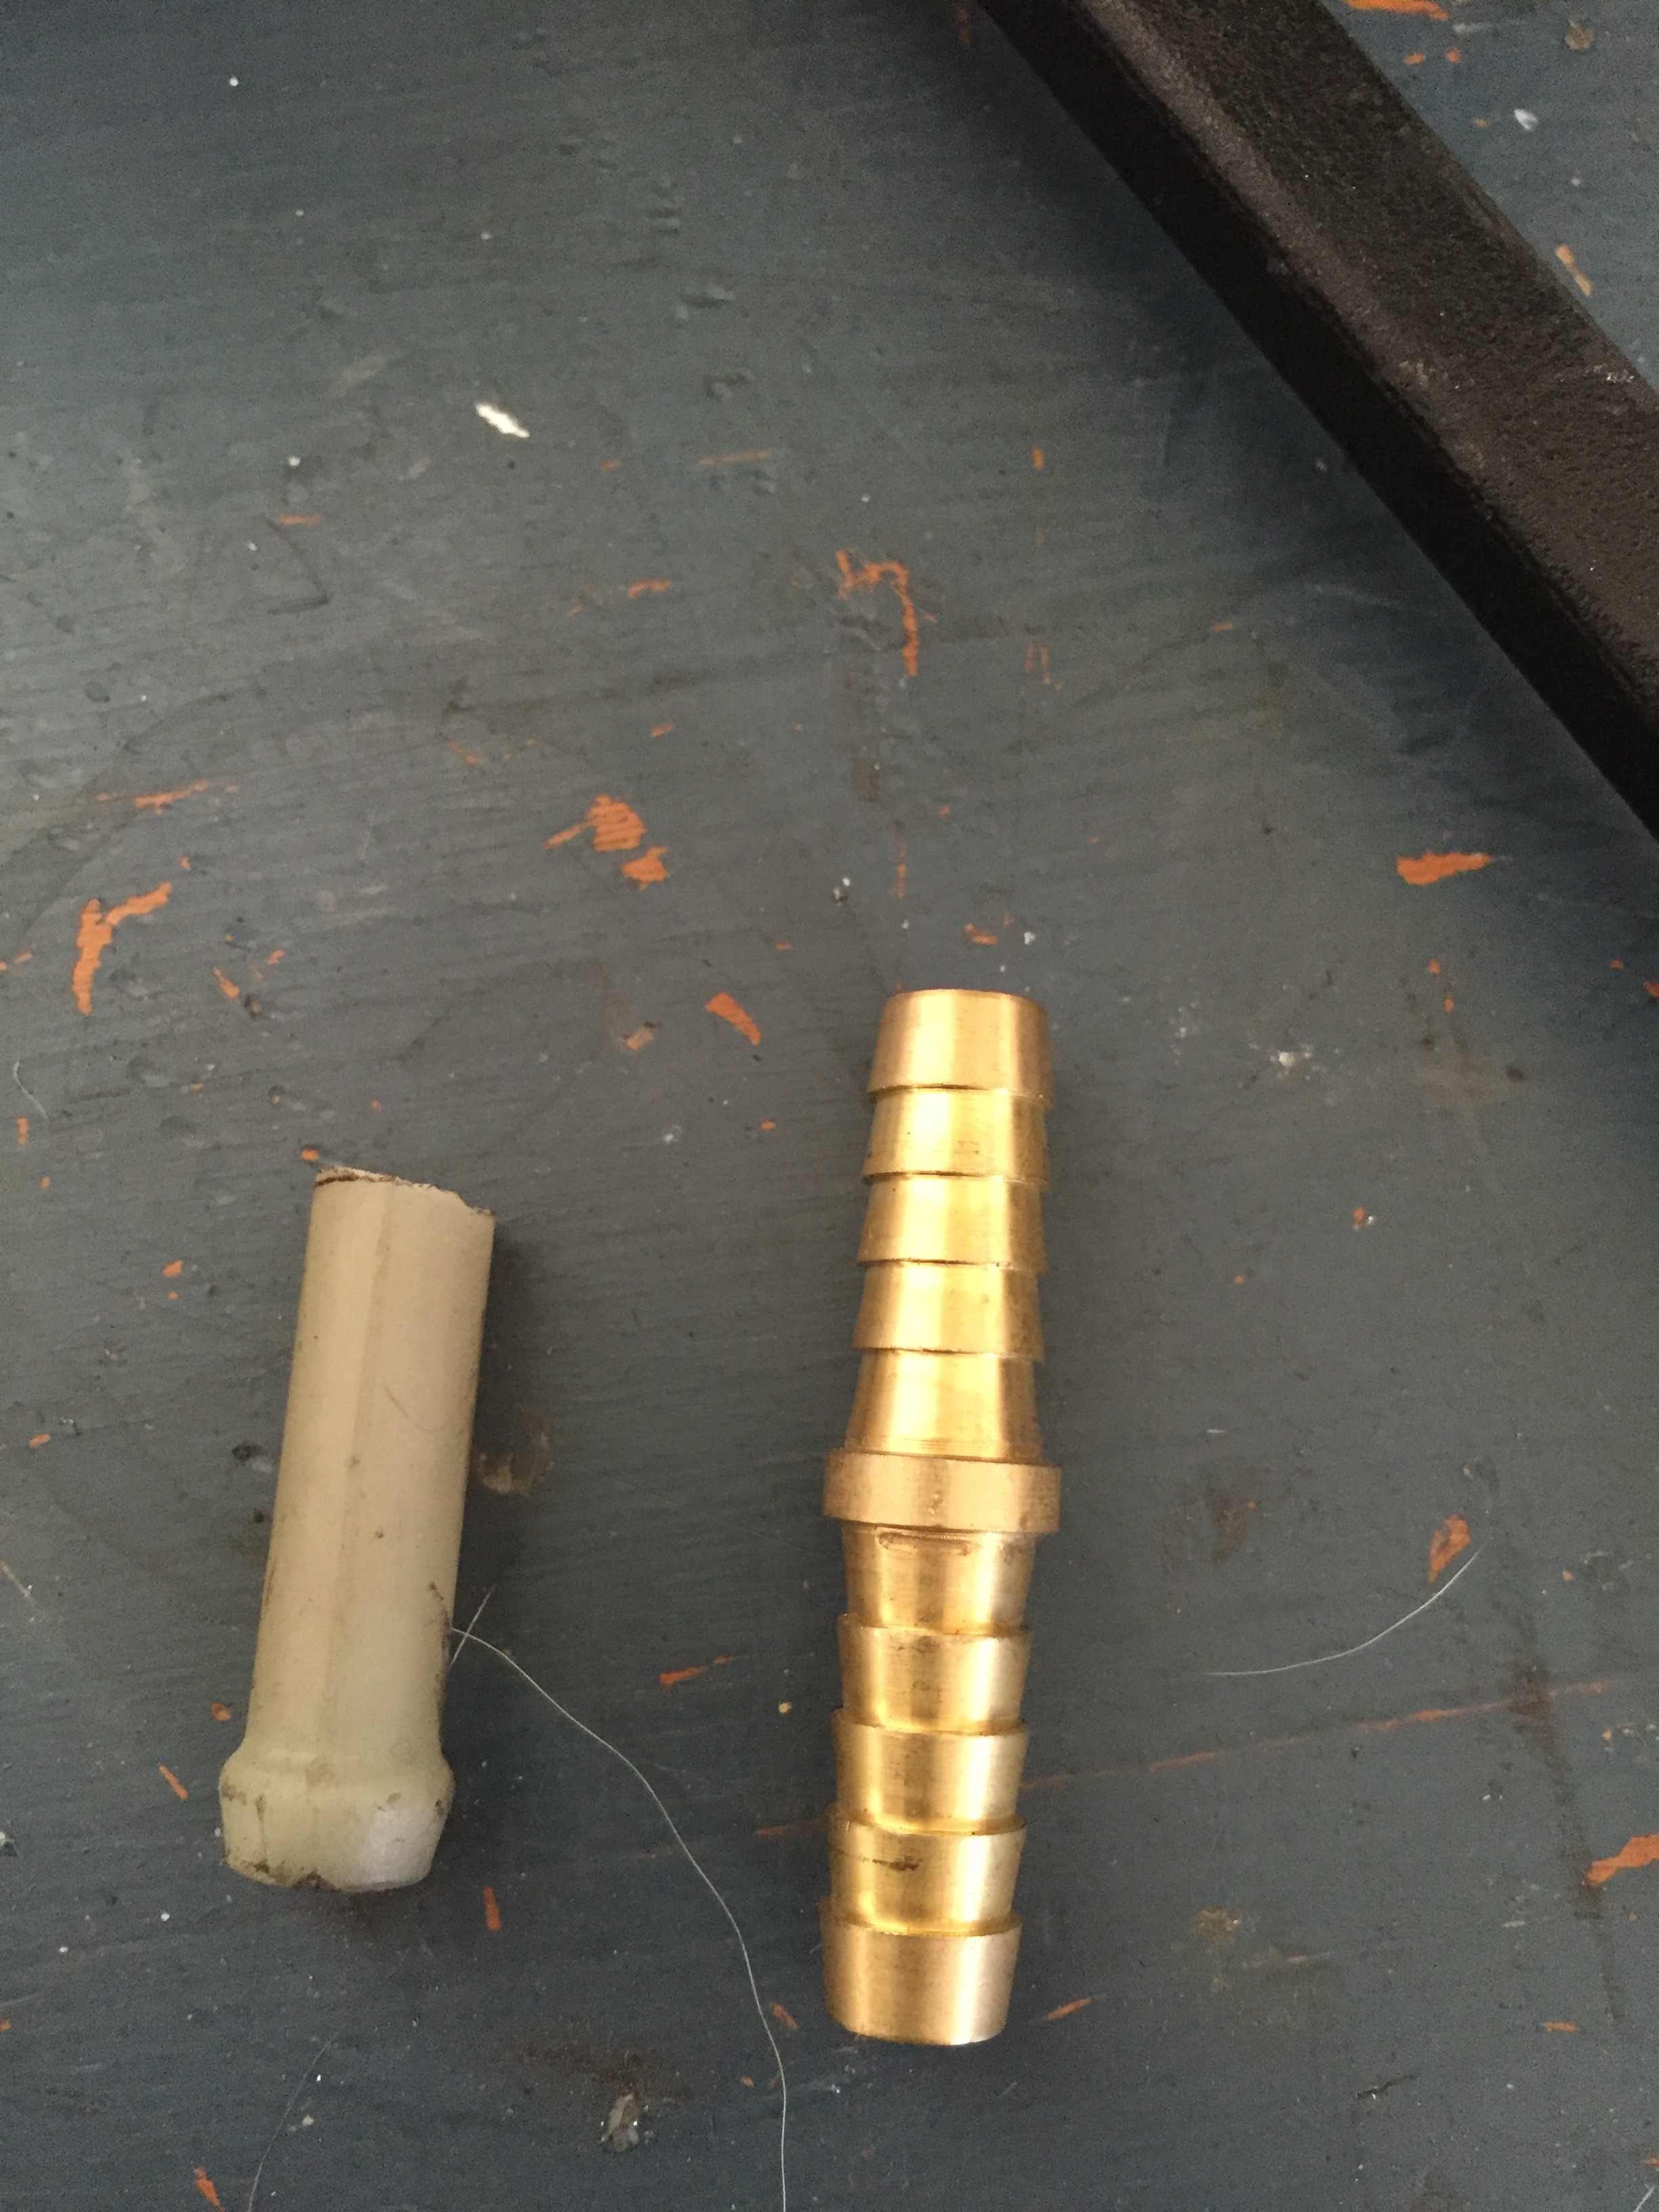
I was breaking a bolt loose on the rear caliper and the reservoir fell off of my table. Broke the bracket and nipple off of the reservoir. Sweet. They only cost 200-300 for new ones. Ill see if I can find someone to tig the bracket back on and if not Ill just use jbweld. As for the nipple, my plan is to drill out the hole a bit and insert this metal fitting and then epoxy around that. I think that would be far more solid than just epoxying the nipple back on. At least with the metal part being inside the reservoir if the epoxy breaks loose I won't dump power steering fluid everywhere
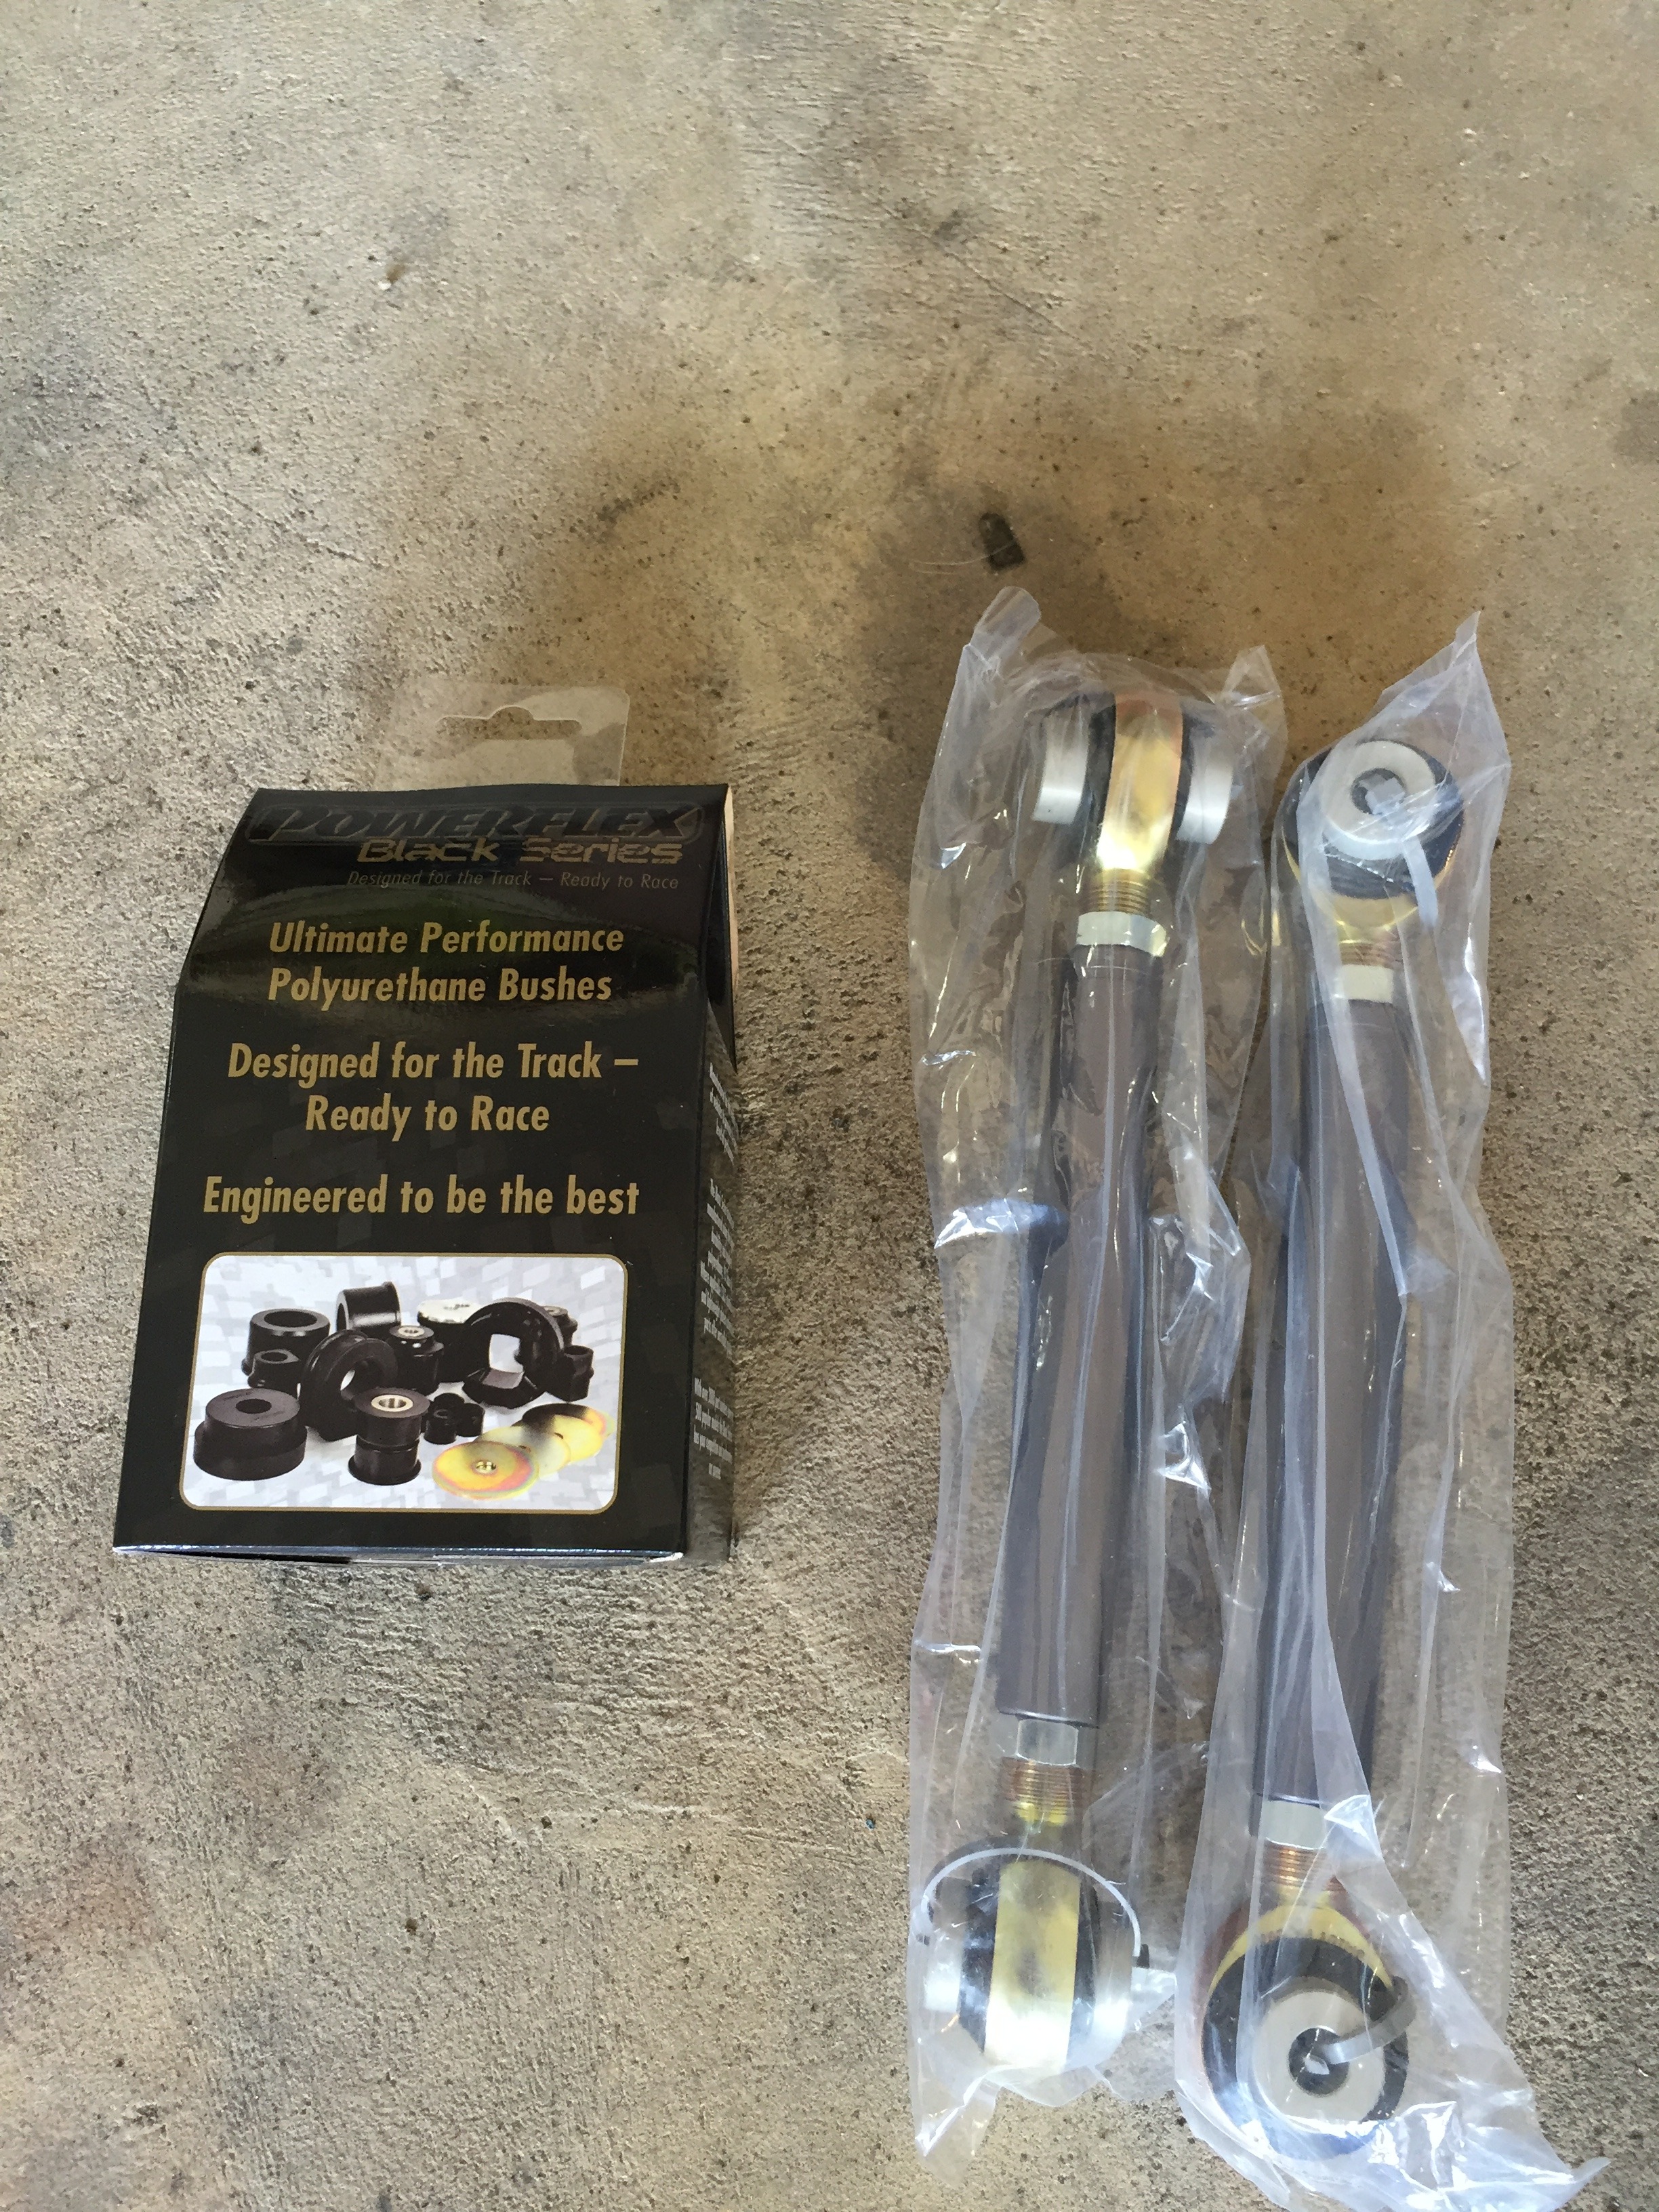
And lastly, I got my J-Auto toe links in along with my power steering rack bushings.

It looks like my plan will work. I will have a frame mounted splitter that will hold up the bumper (while doubling as a splitter of course) and do away with the side brackets since they are mangled from a previous hit or two. Ill be using this PVC material from Home Depot to make the front splitter and the side skirt extensions. Only cost $75 for a 4x8 piece that is 1/2 inch thick. The full splitter sheet (74x30) weighs 24 pounds, but I will be cutting that weight in half most likely since Ill be integrating it with my Shine undertray. The splitter will only go back far enough to properly mount to the frame, then the undertray will extend from the splitter back to the subframe...if that makes sense. Anyhow, pictures of materials


Engine bay is slowly getting more complete

Started working on the wheel wells since the welds fried off the paint due to the heat. I'm going to apply self etching primer over the bare metal and seams, then scuff, then regular primer, then seam sealer, and then underbody spray over the whole thing.

This pissed me off...

I was breaking a bolt loose on the rear caliper and the reservoir fell off of my table. Broke the bracket and nipple off of the reservoir. Sweet. They only cost 200-300 for new ones. Ill see if I can find someone to tig the bracket back on and if not Ill just use jbweld. As for the nipple, my plan is to drill out the hole a bit and insert this metal fitting and then epoxy around that. I think that would be far more solid than just epoxying the nipple back on. At least with the metal part being inside the reservoir if the epoxy breaks loose I won't dump power steering fluid everywhere

And lastly, I got my J-Auto toe links in along with my power steering rack bushings.


Got the covers for the strut towers made up this week. It's a good feeling to see it coming together! The only issue I have now is how I will seal underneath the covers. I sprayed self etching primer and weld through primer onto both pieces before welding, but I still feel like it needs something else in there. I was thinking of drilling a hole in the top and using a syringe to put POR15 inside, then use my air hose to spray in the hole and hopefully spread it out...but idk if that would work. Worth a try though unless someone has some suggestions. Anyhow, on to the pictures!
Thread Starter
Full Member
Joined: Apr 2015
Posts: 140
Likes: 5
From: Great Falls, MT
I think you're looking for this: Internal Frame Coating w/Spray Nozzle | Eastwood
Definitely buying the frame coating. Almost everything in the engine bay will be gone over with Evercoat fibertech. The only place I may put the sealer is behind the strut tower bars where the frame meets the firewall
Thread Starter
Full Member
Joined: Apr 2015
Posts: 140
Likes: 5
From: Great Falls, MT
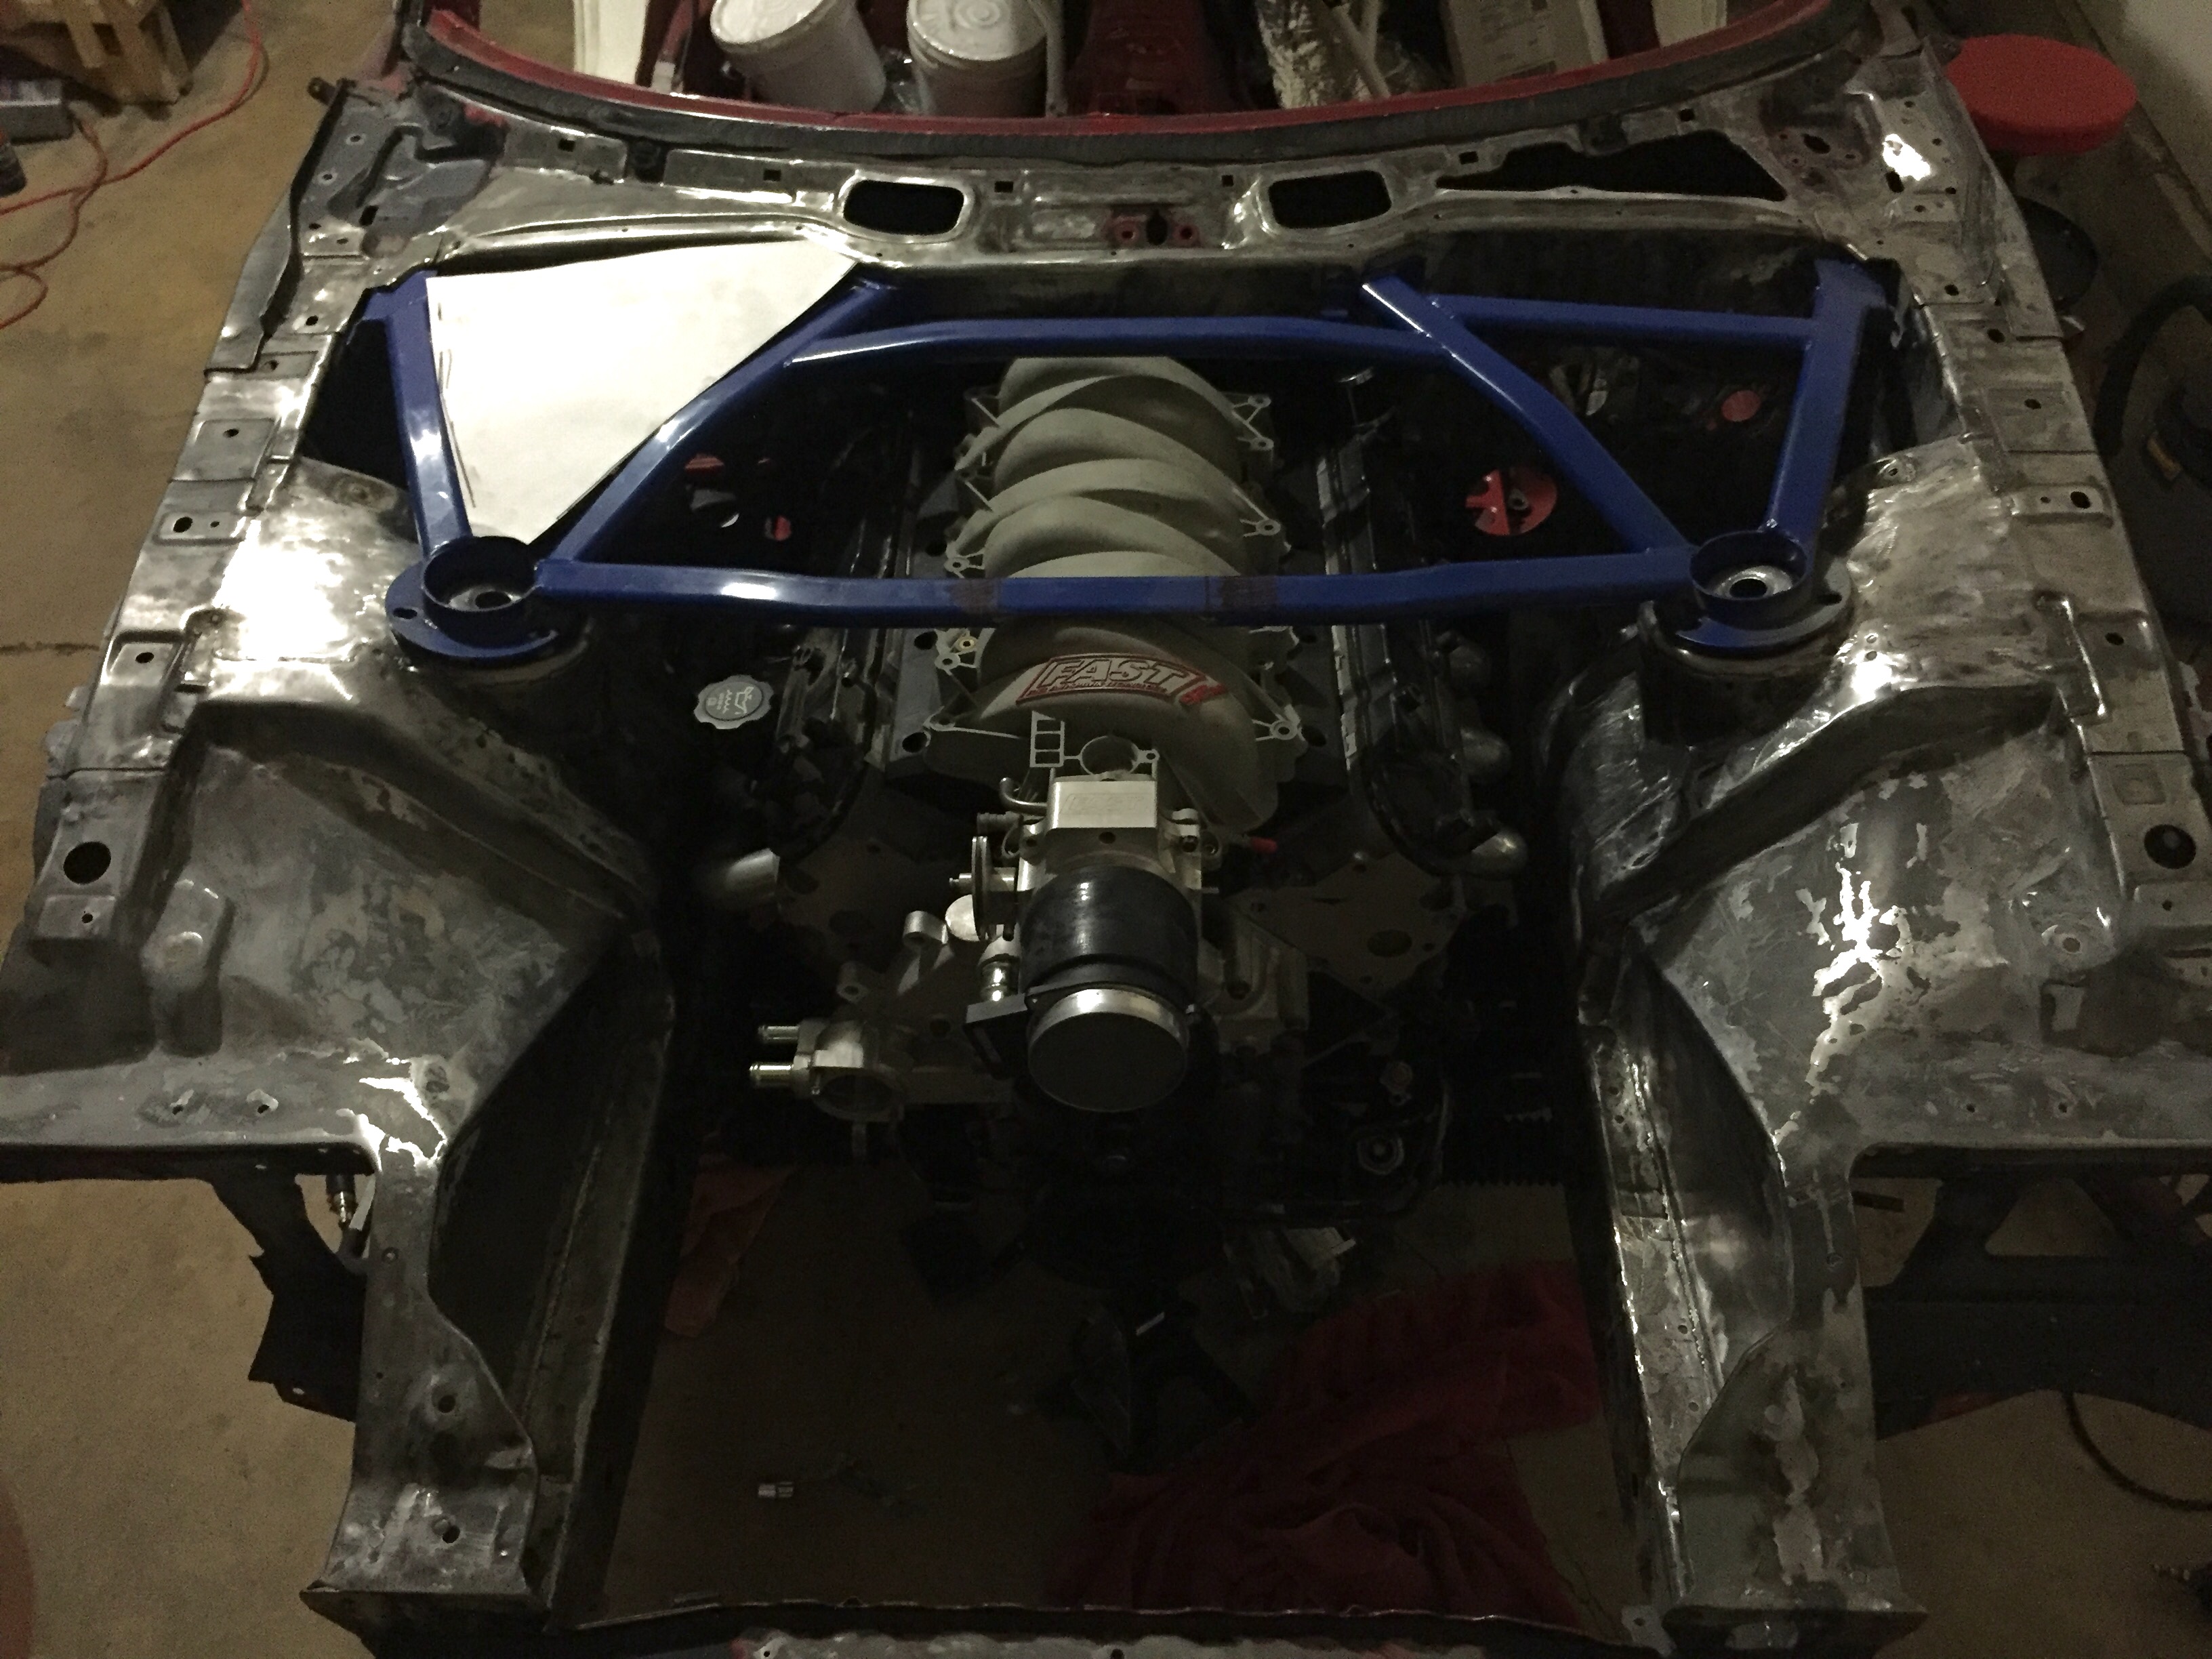
Motor is in!
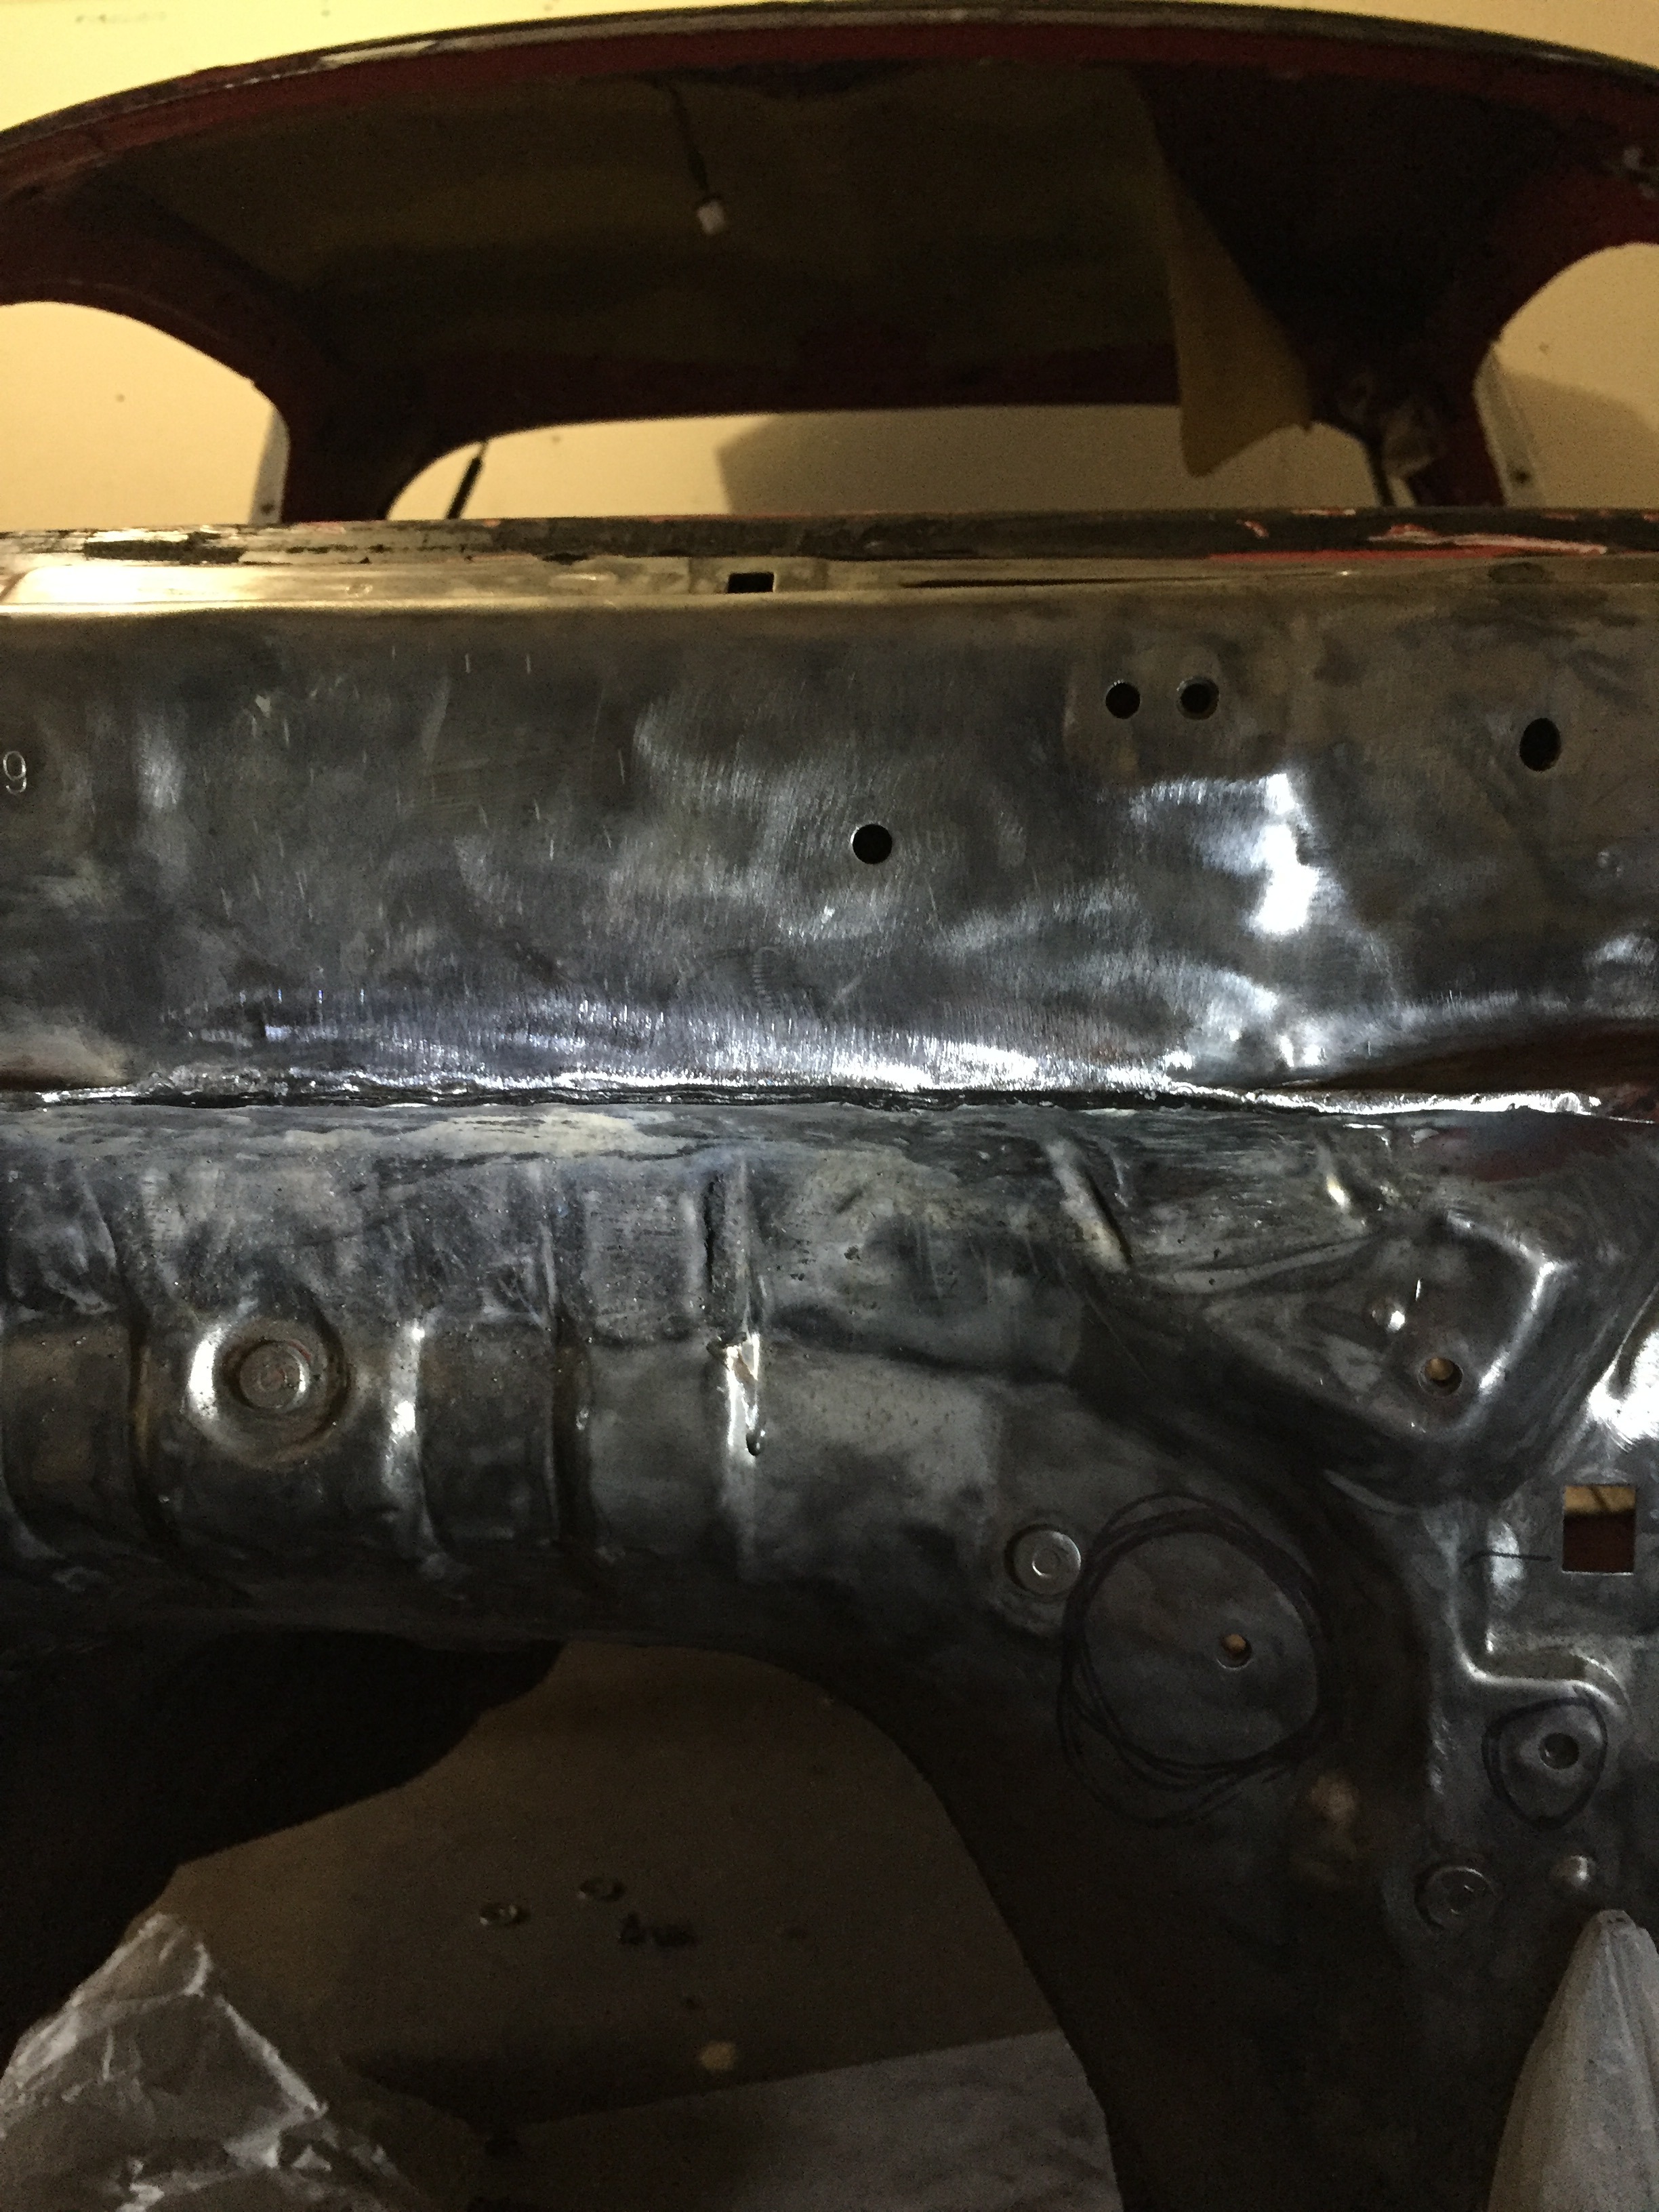
Sike. Not really I went ahead and mounted up the motor so I could modify the firewall as needed. Decided to try out the strut bar while I had it in
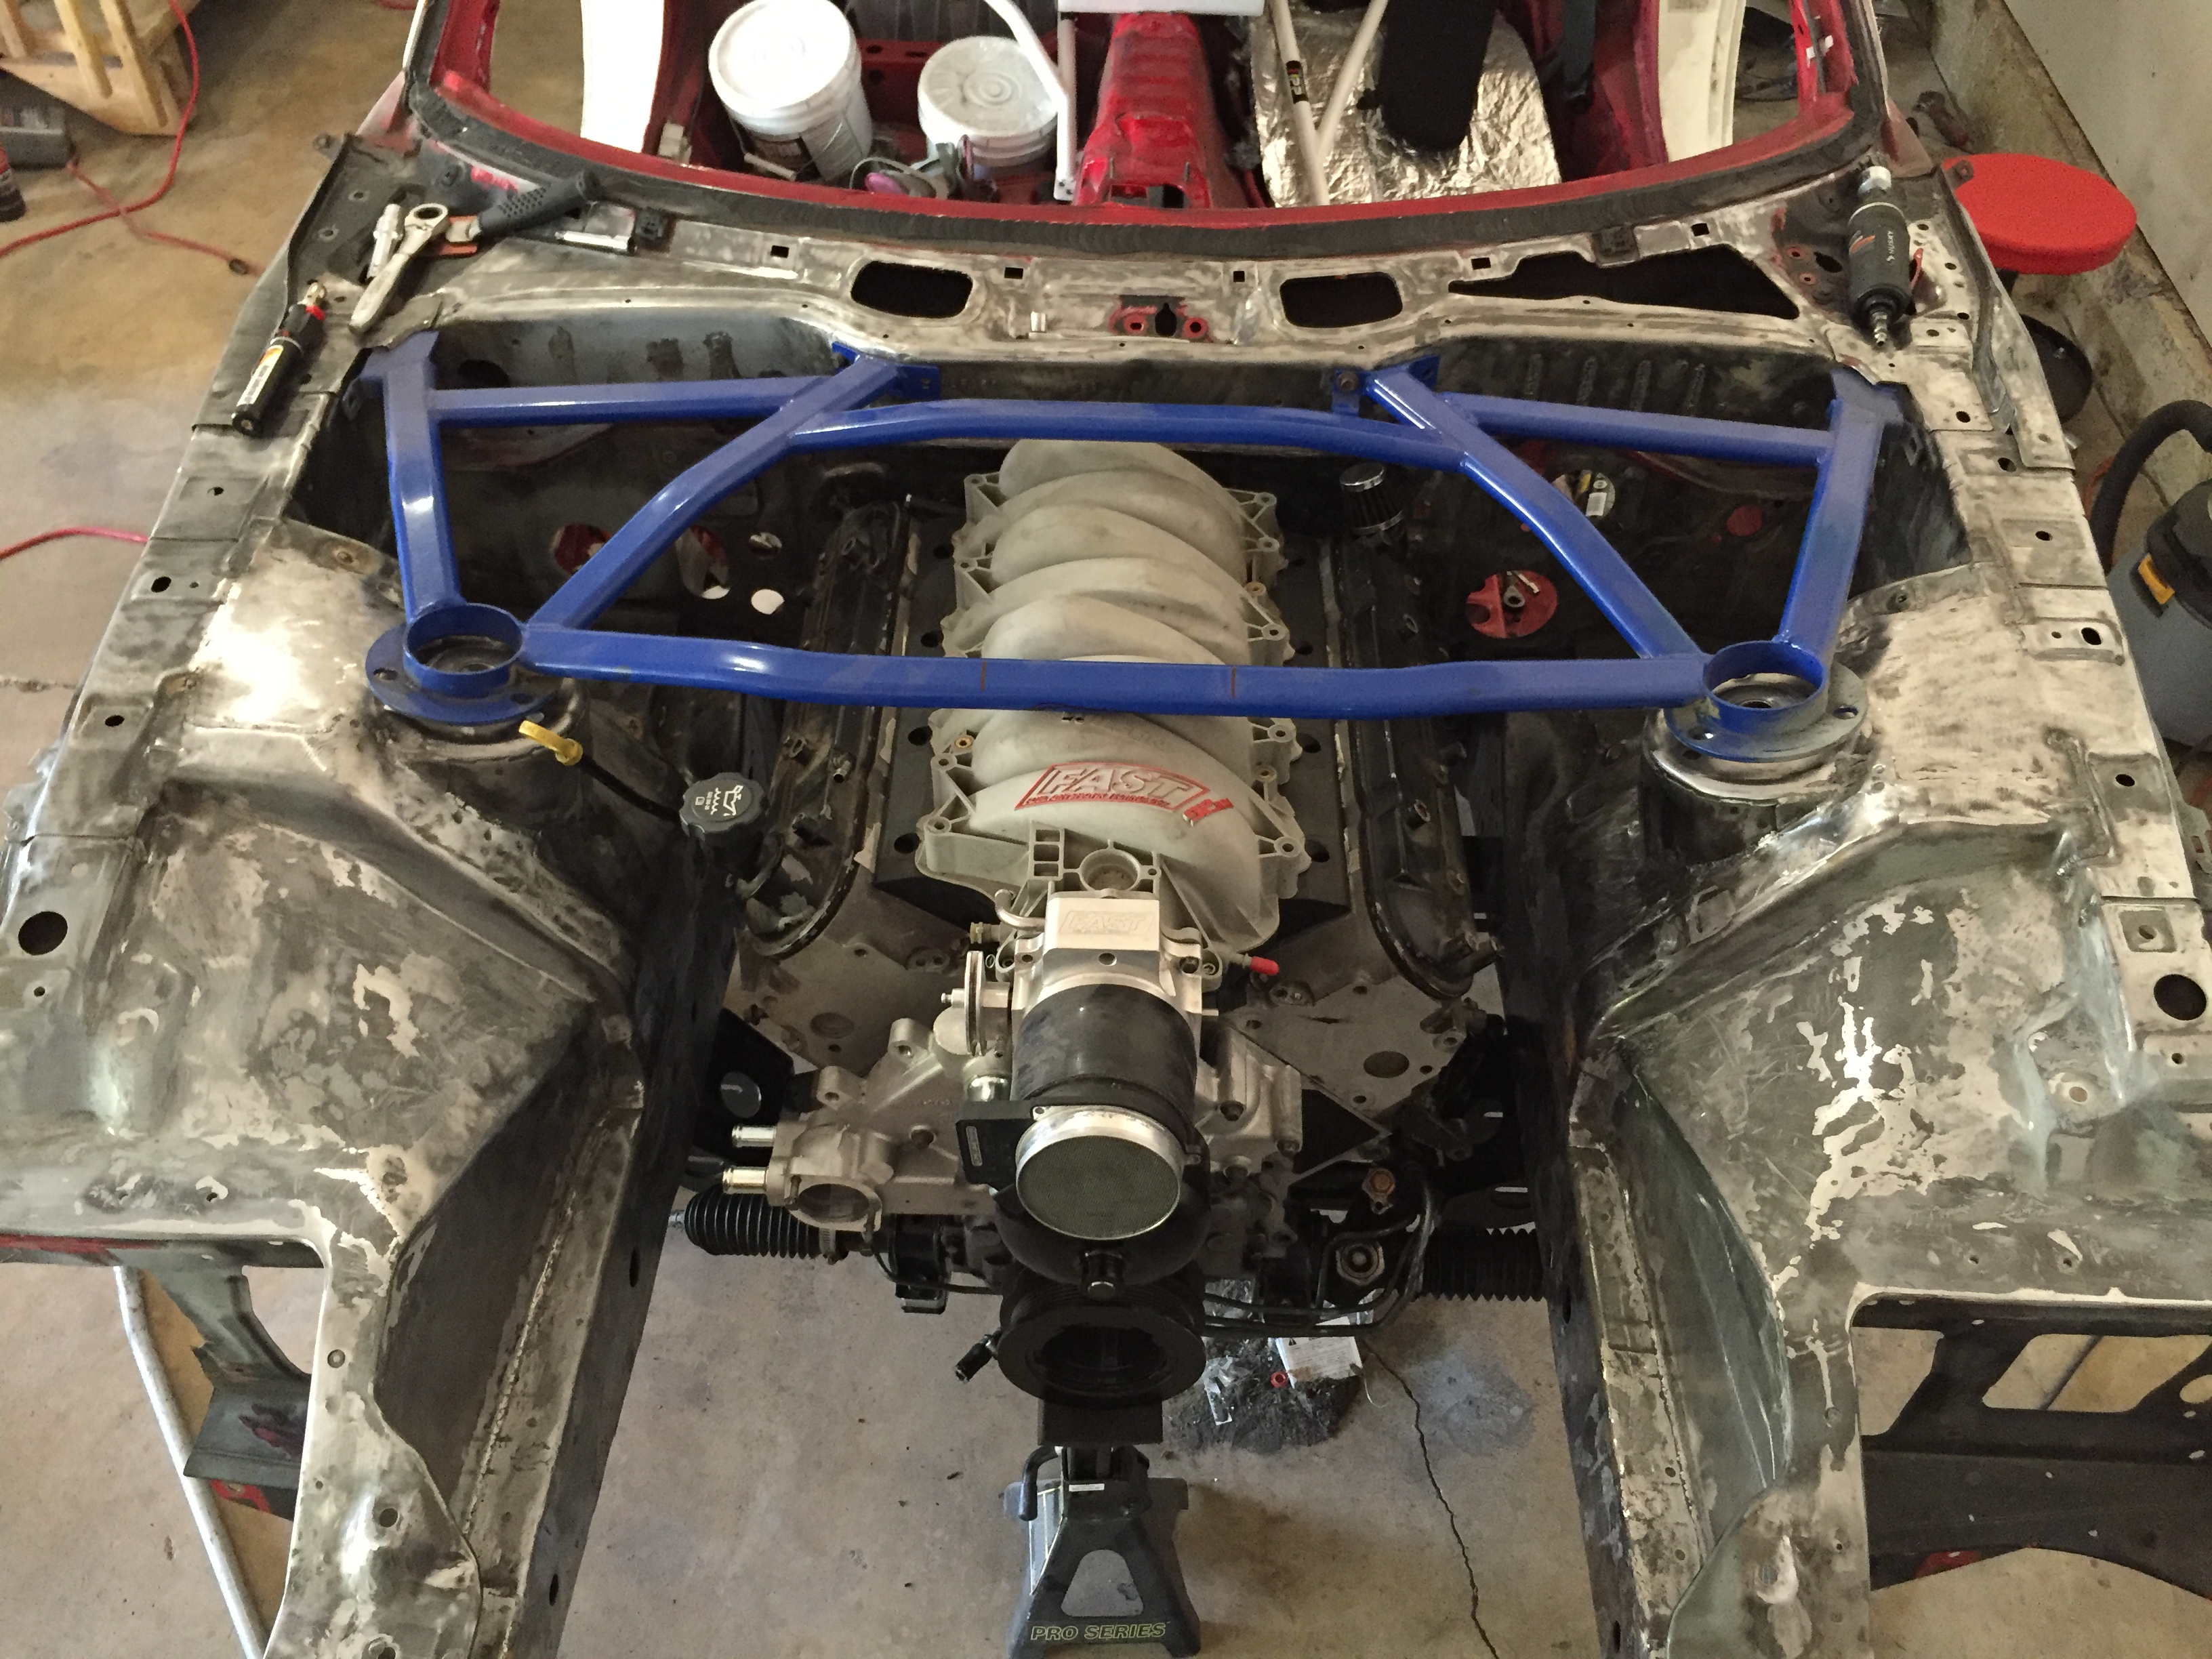
Good news is it fits with some cutting! Pretty excited about that. I'm going to have a plate made to go over the area I cut out to reinforce it again. Not much material left to prevent flex, but I believe a plate on top will solve that issue. Either way, it was worth it. I'll make a small cover to seal the bar back up so water and such doesn't get in there
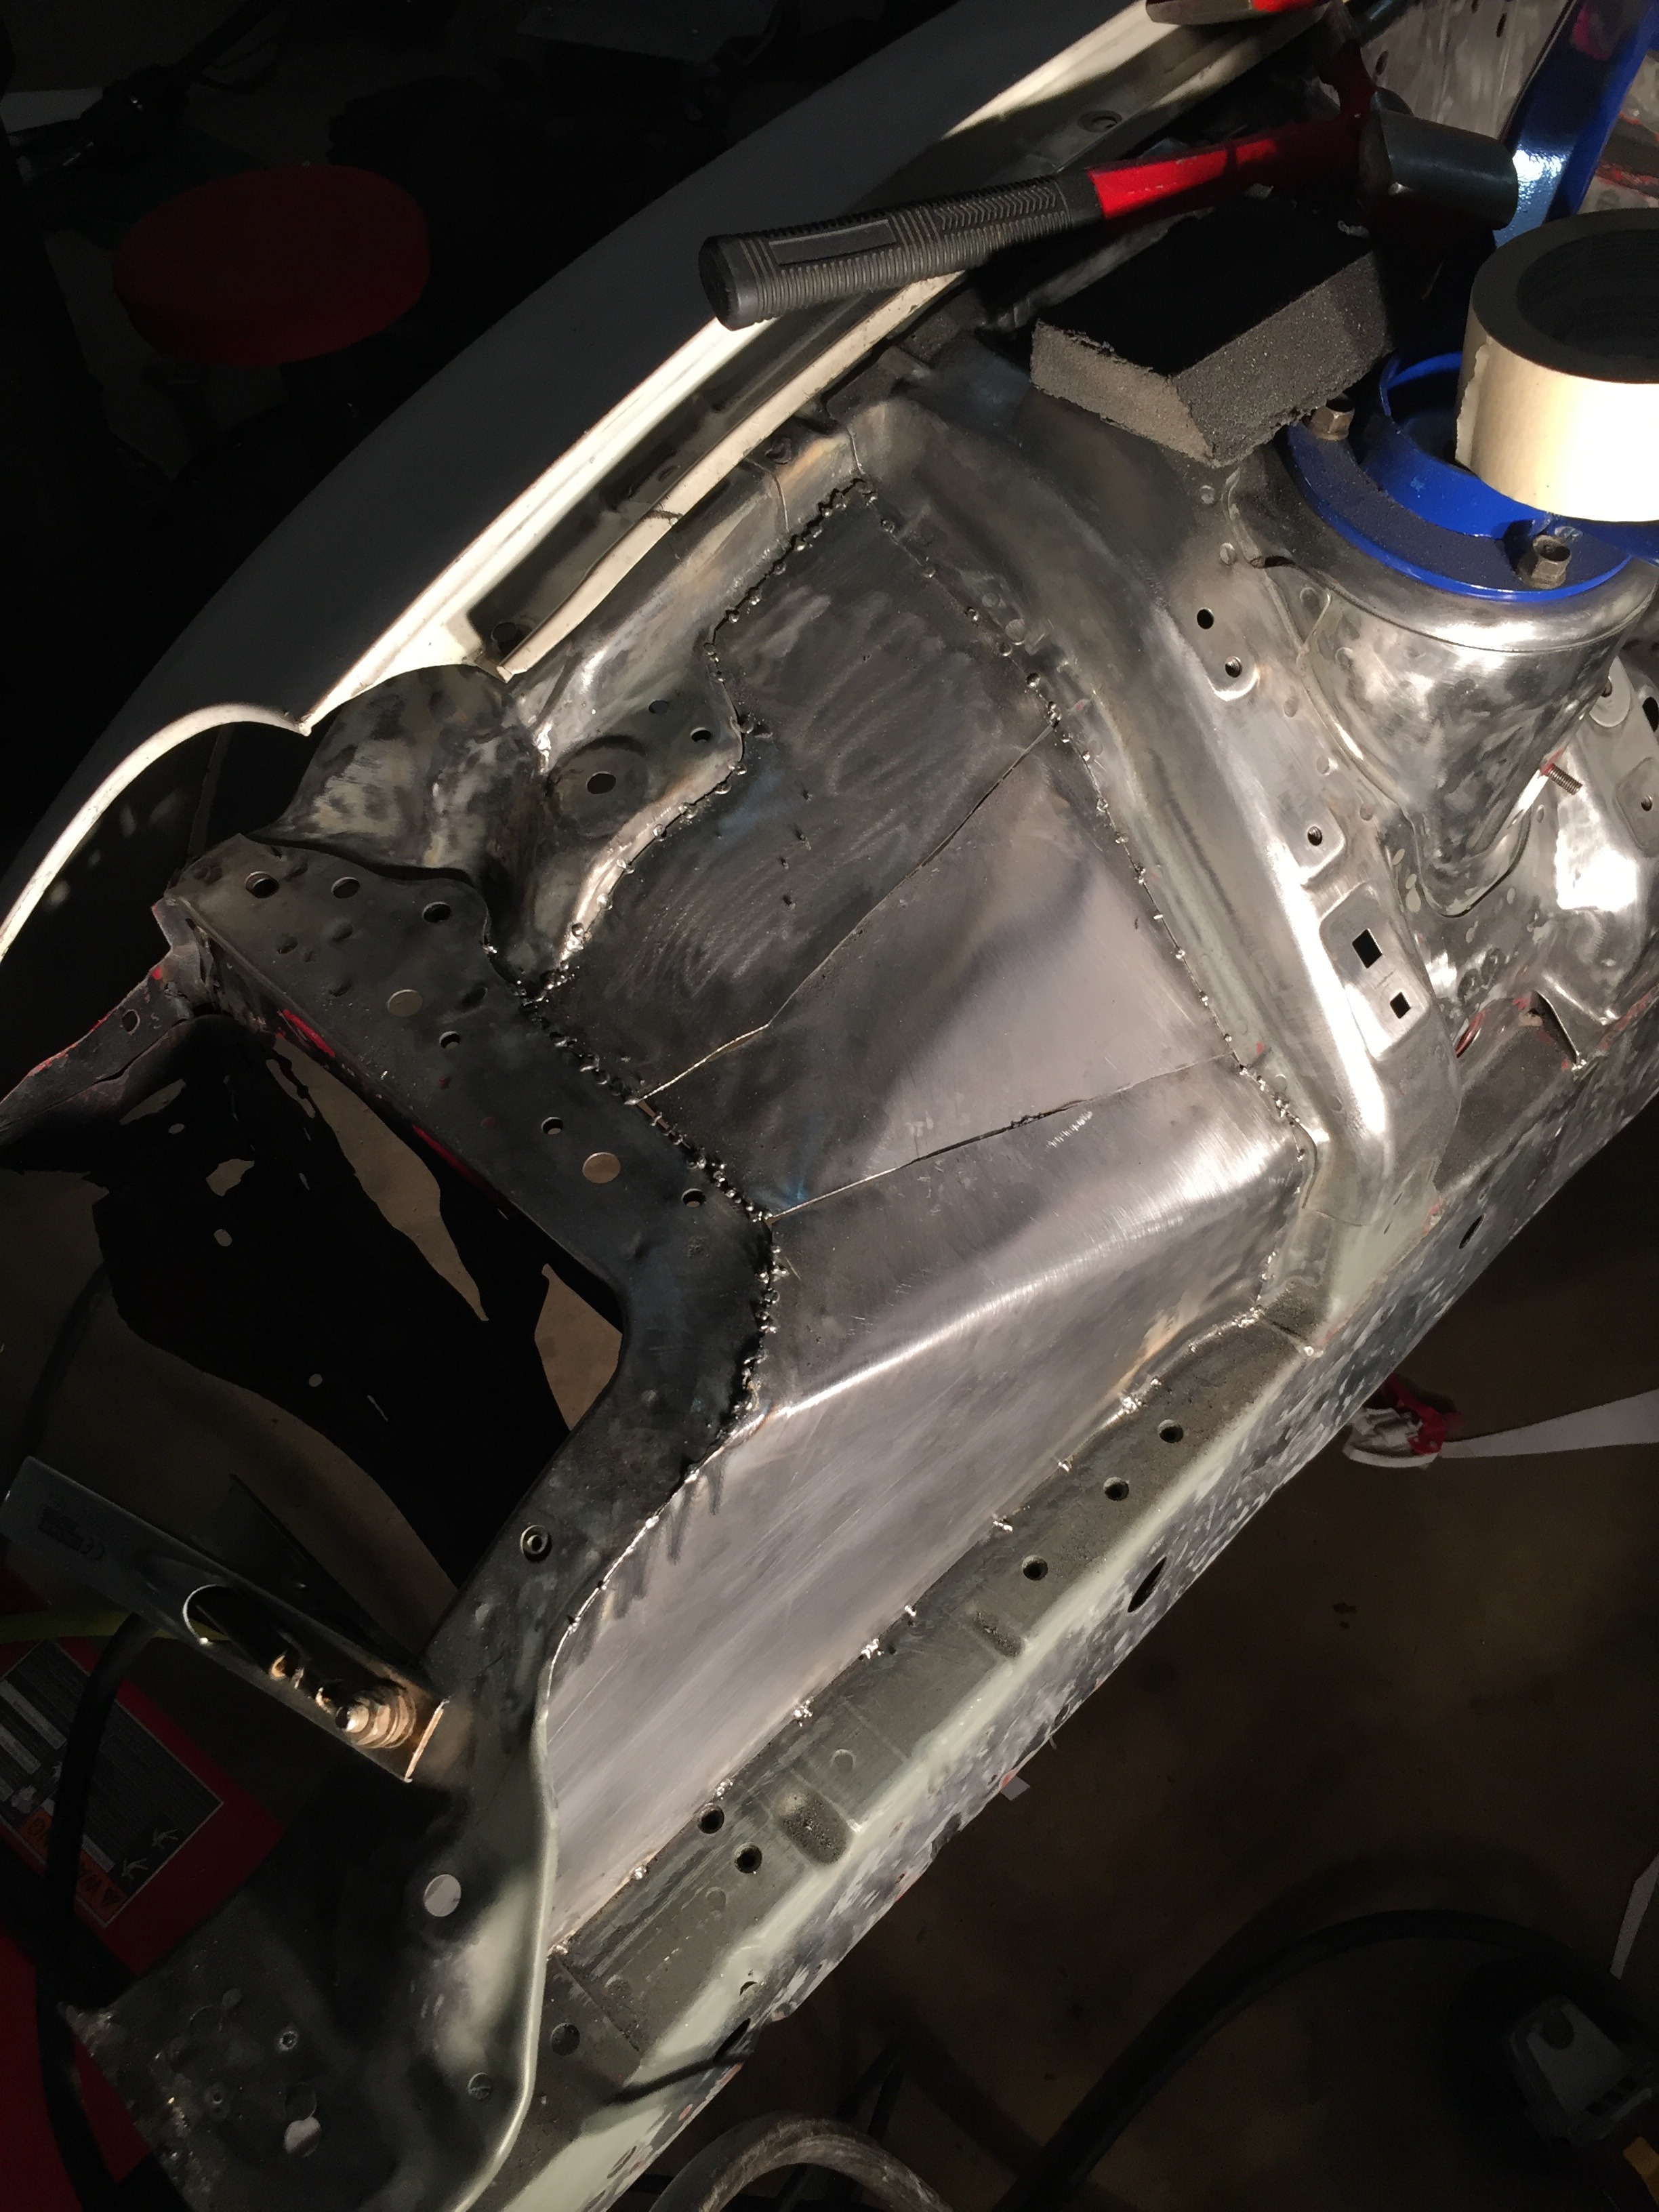
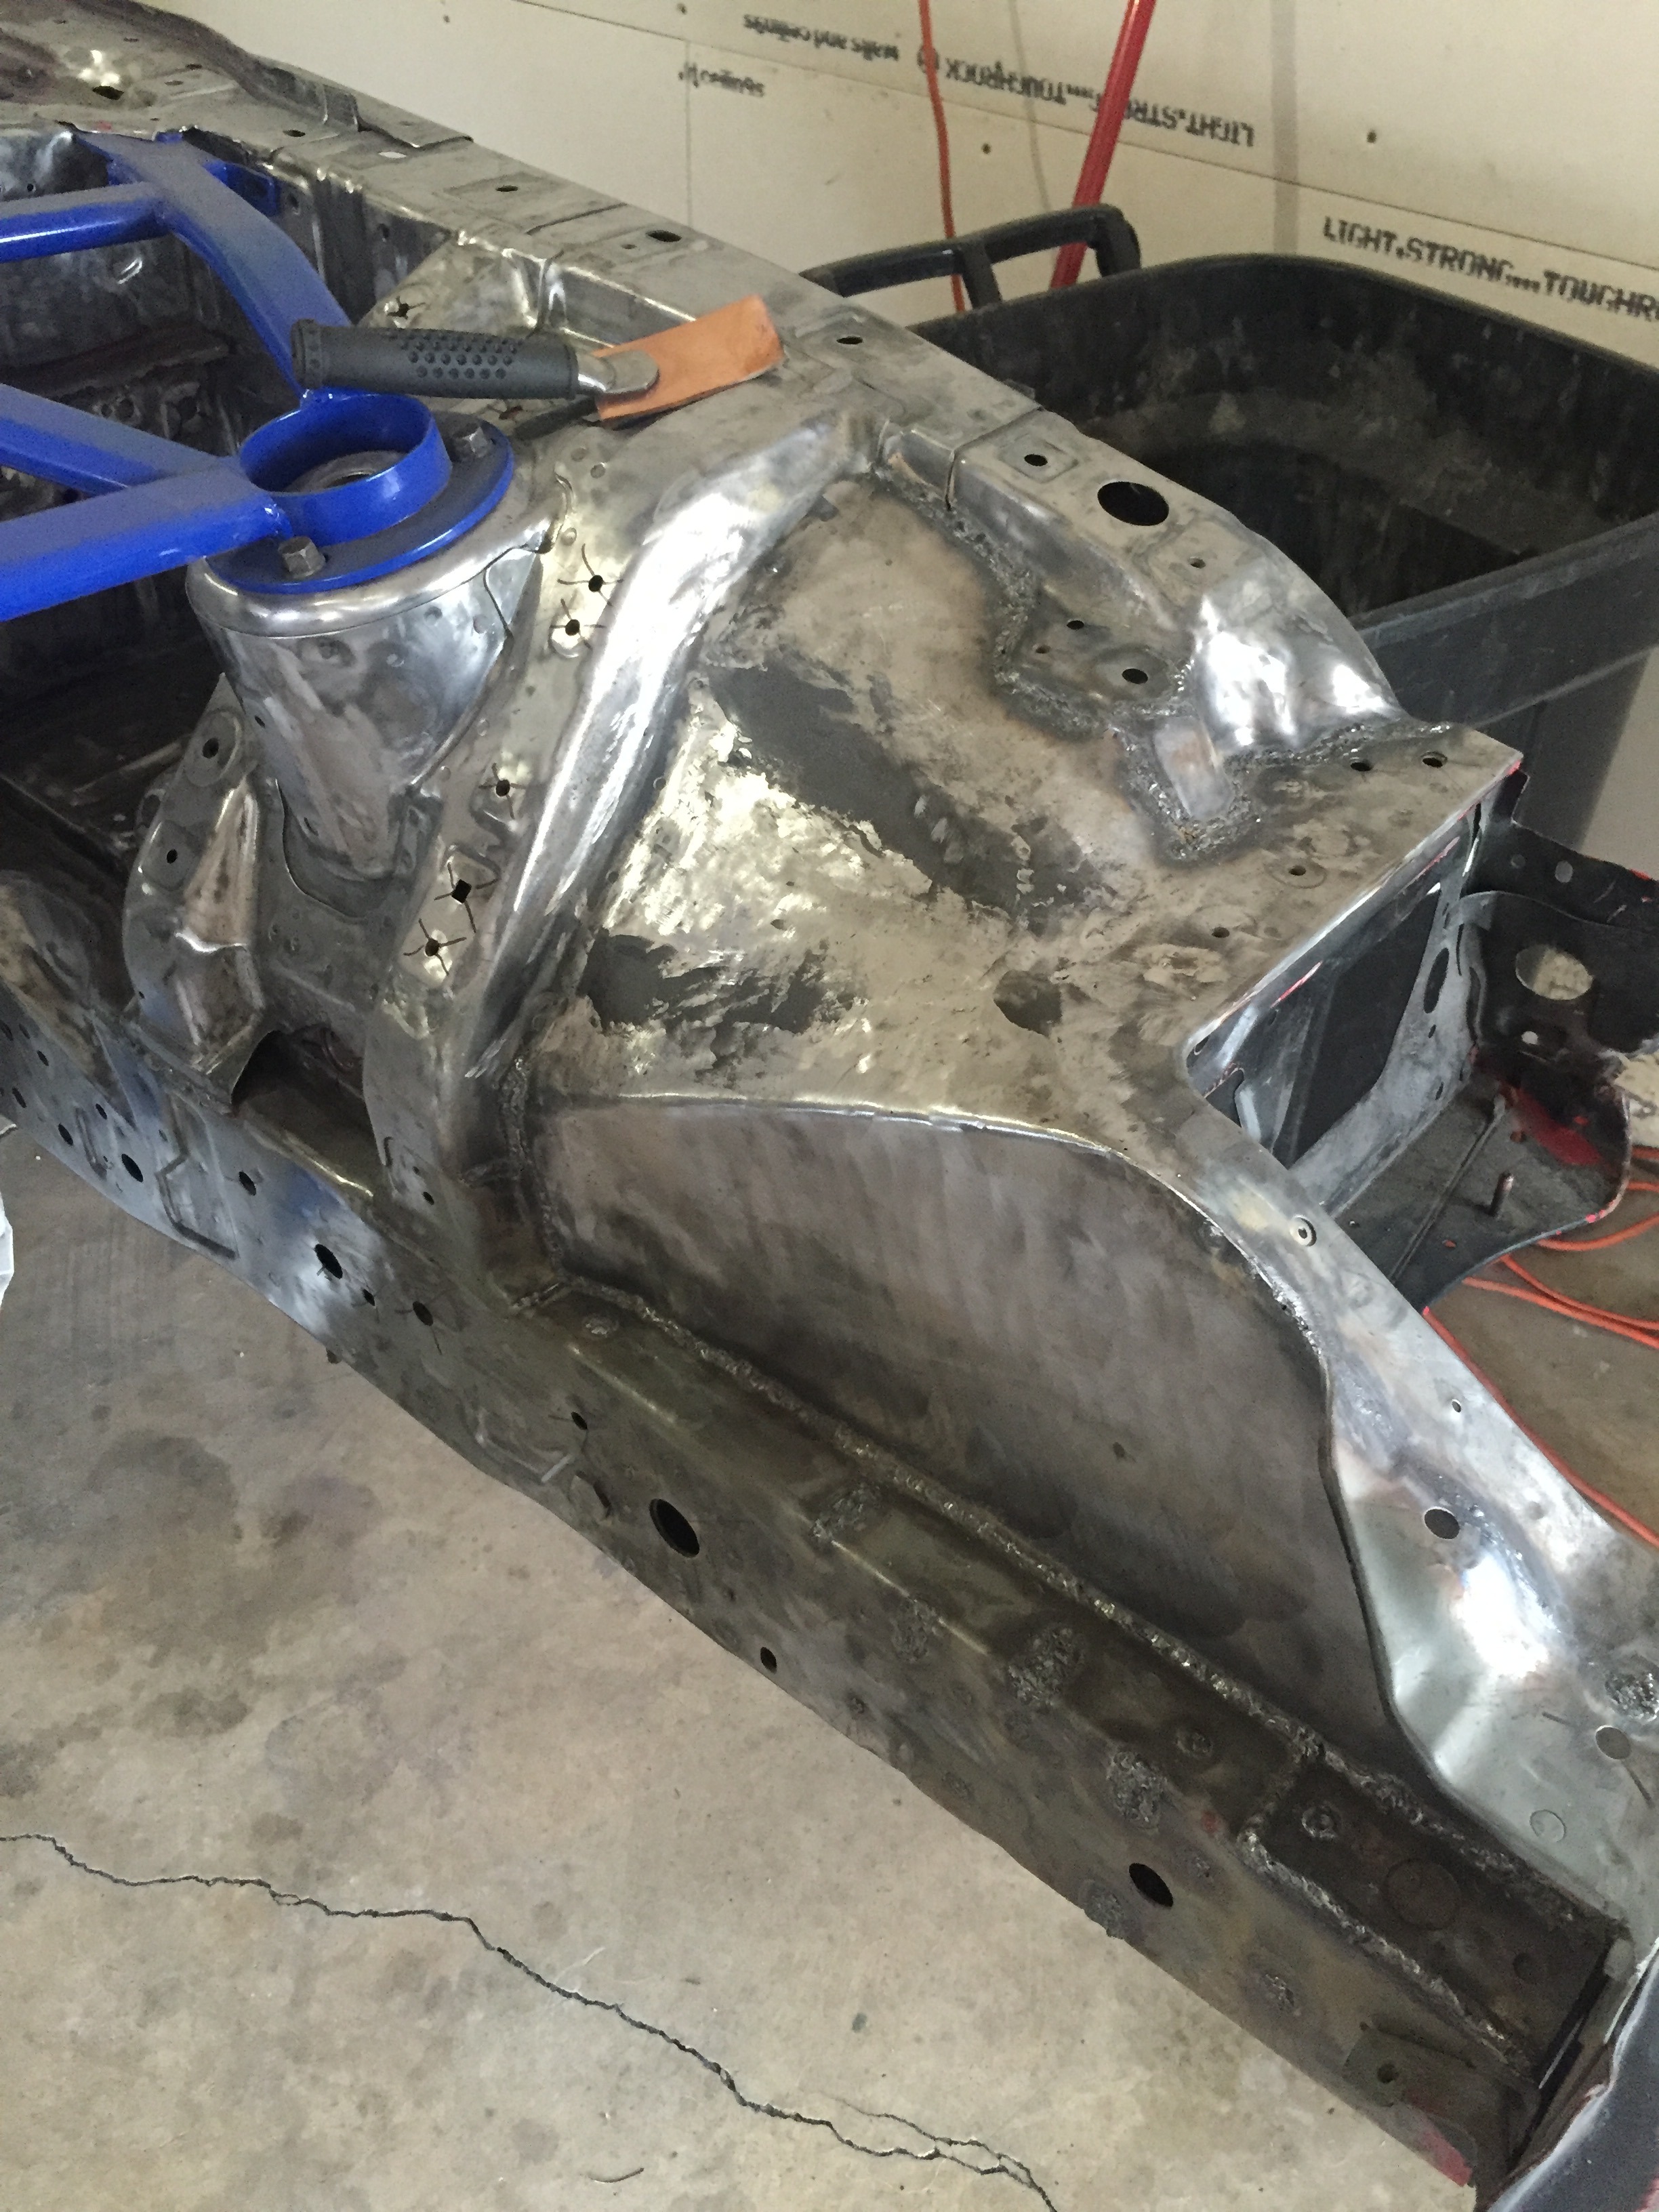
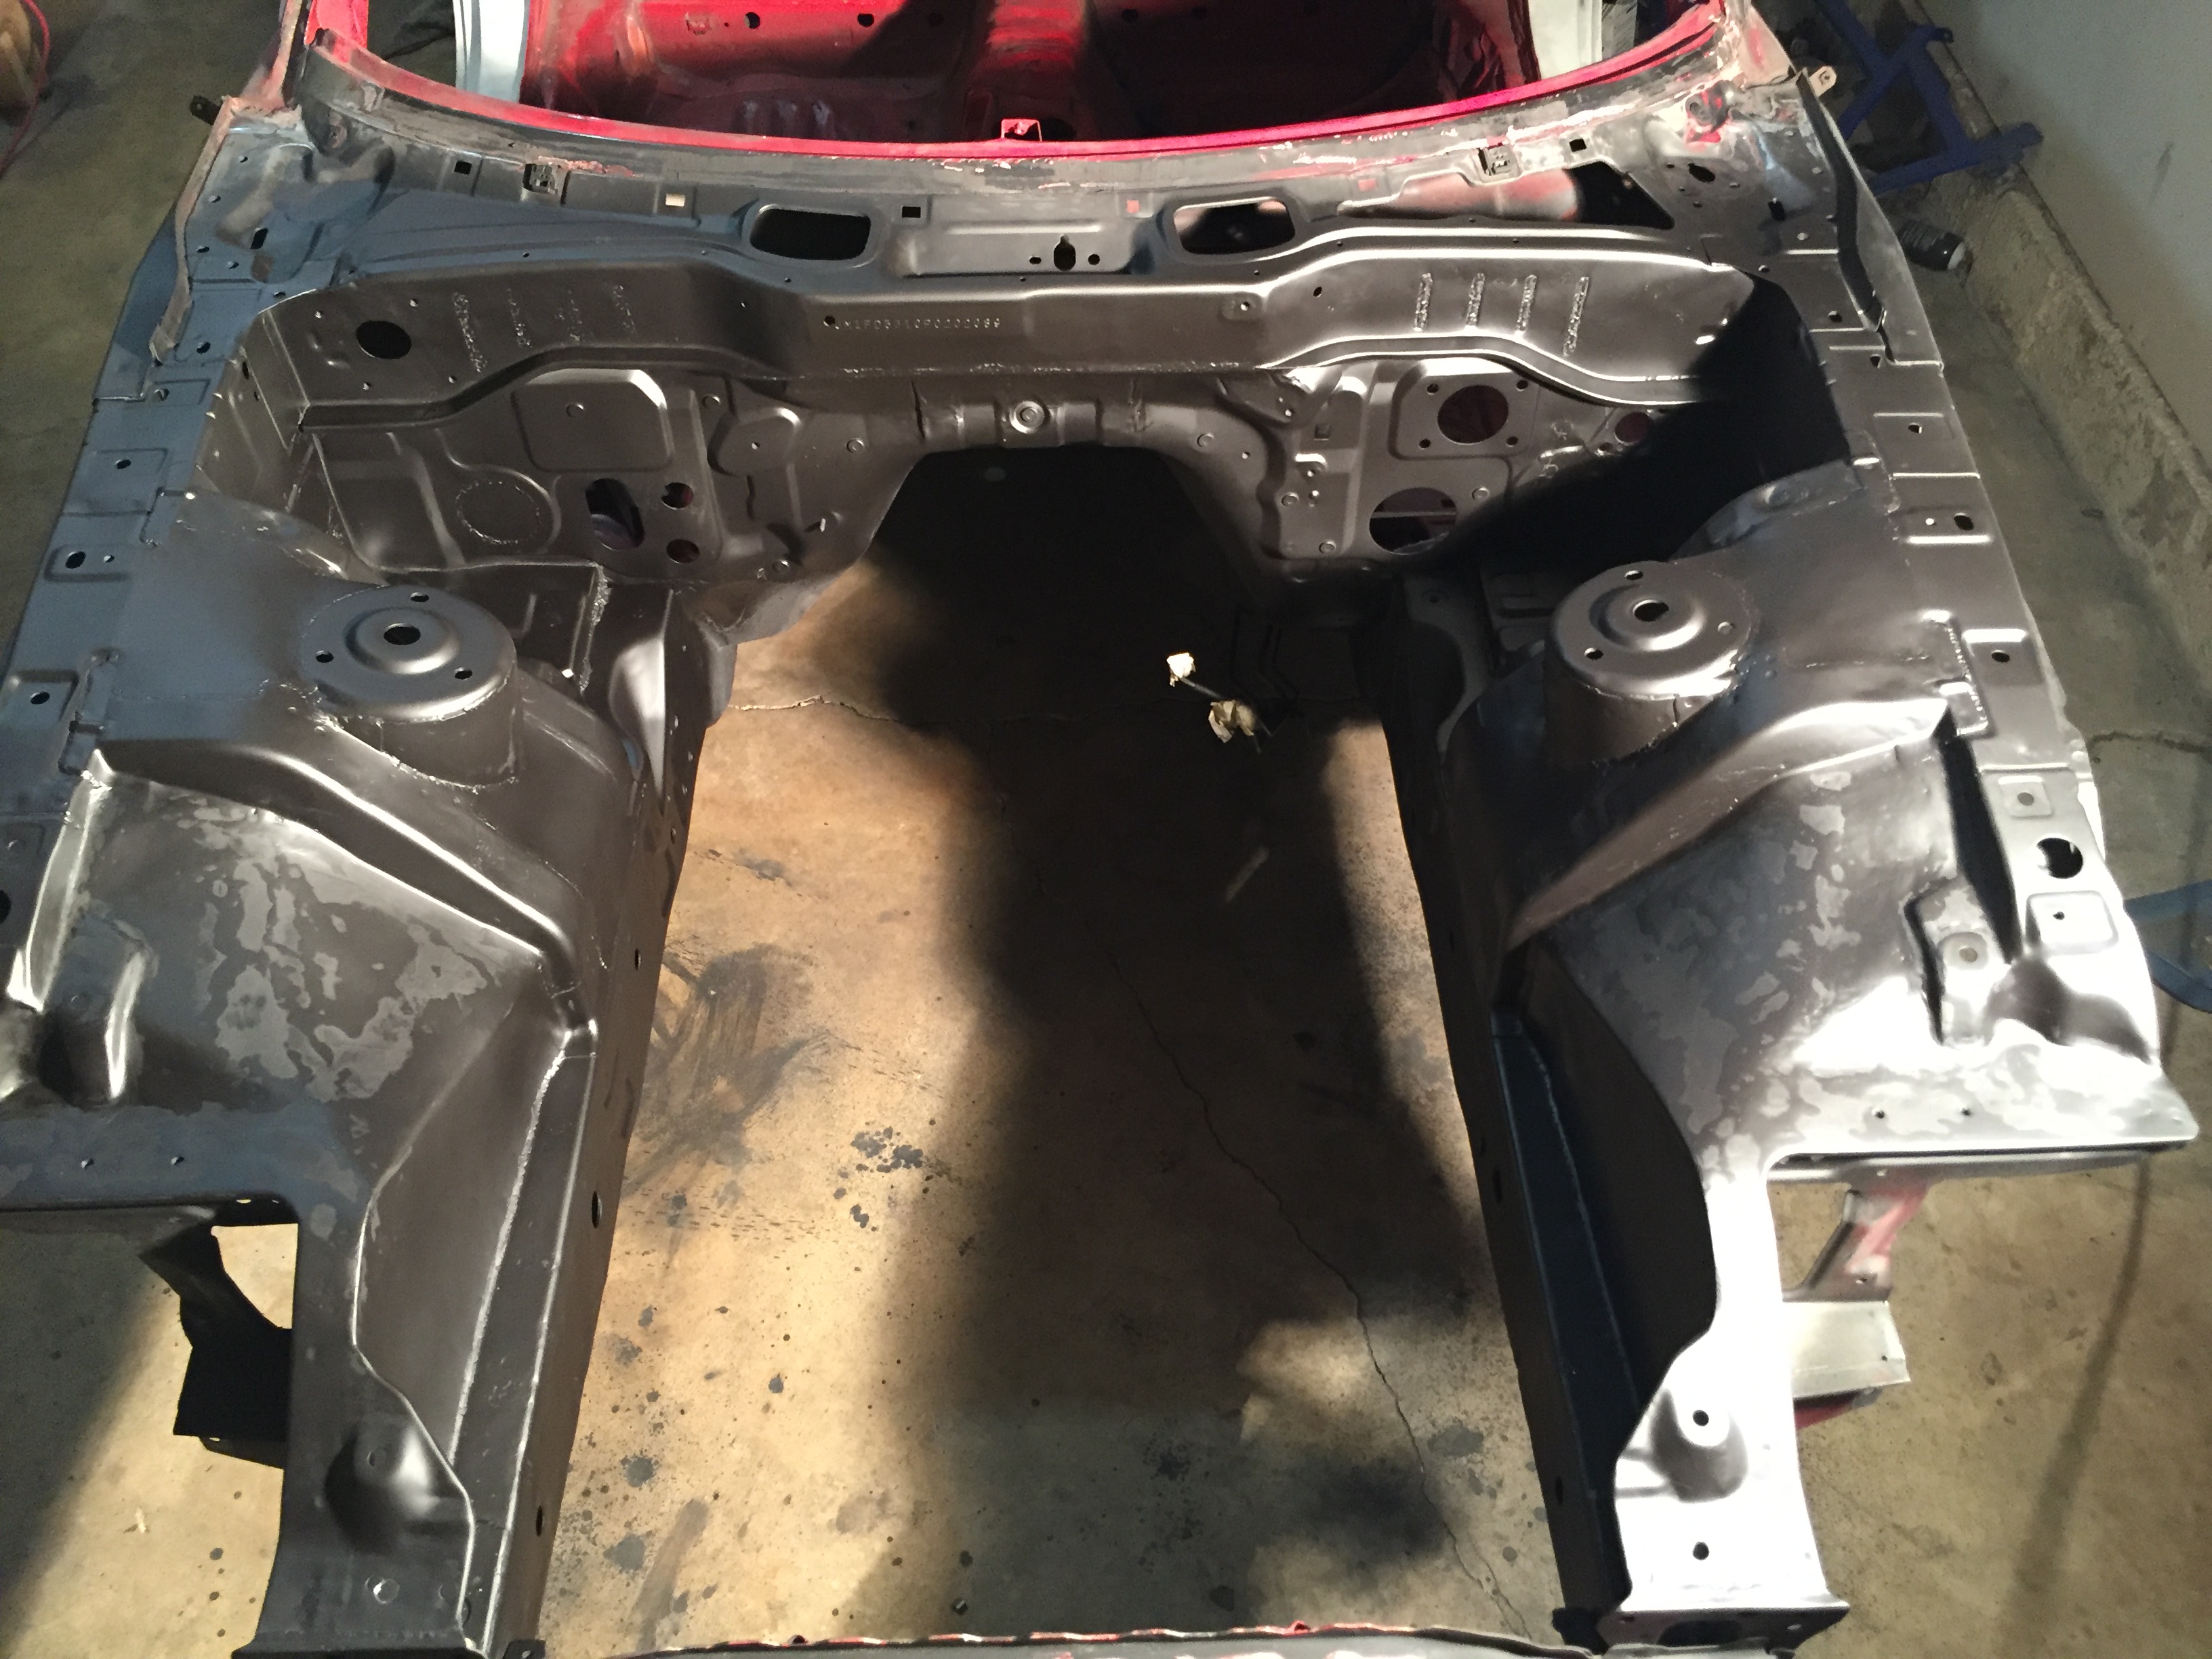
On to the firewall modding. I just did a small section at a time to prevent it from splitting up too much. It was still a pain though. I don't see how anyone could do this cleanly without using filler afterwards to smooth it back out. Good thing I'll have filler all over my engine bay anyhow
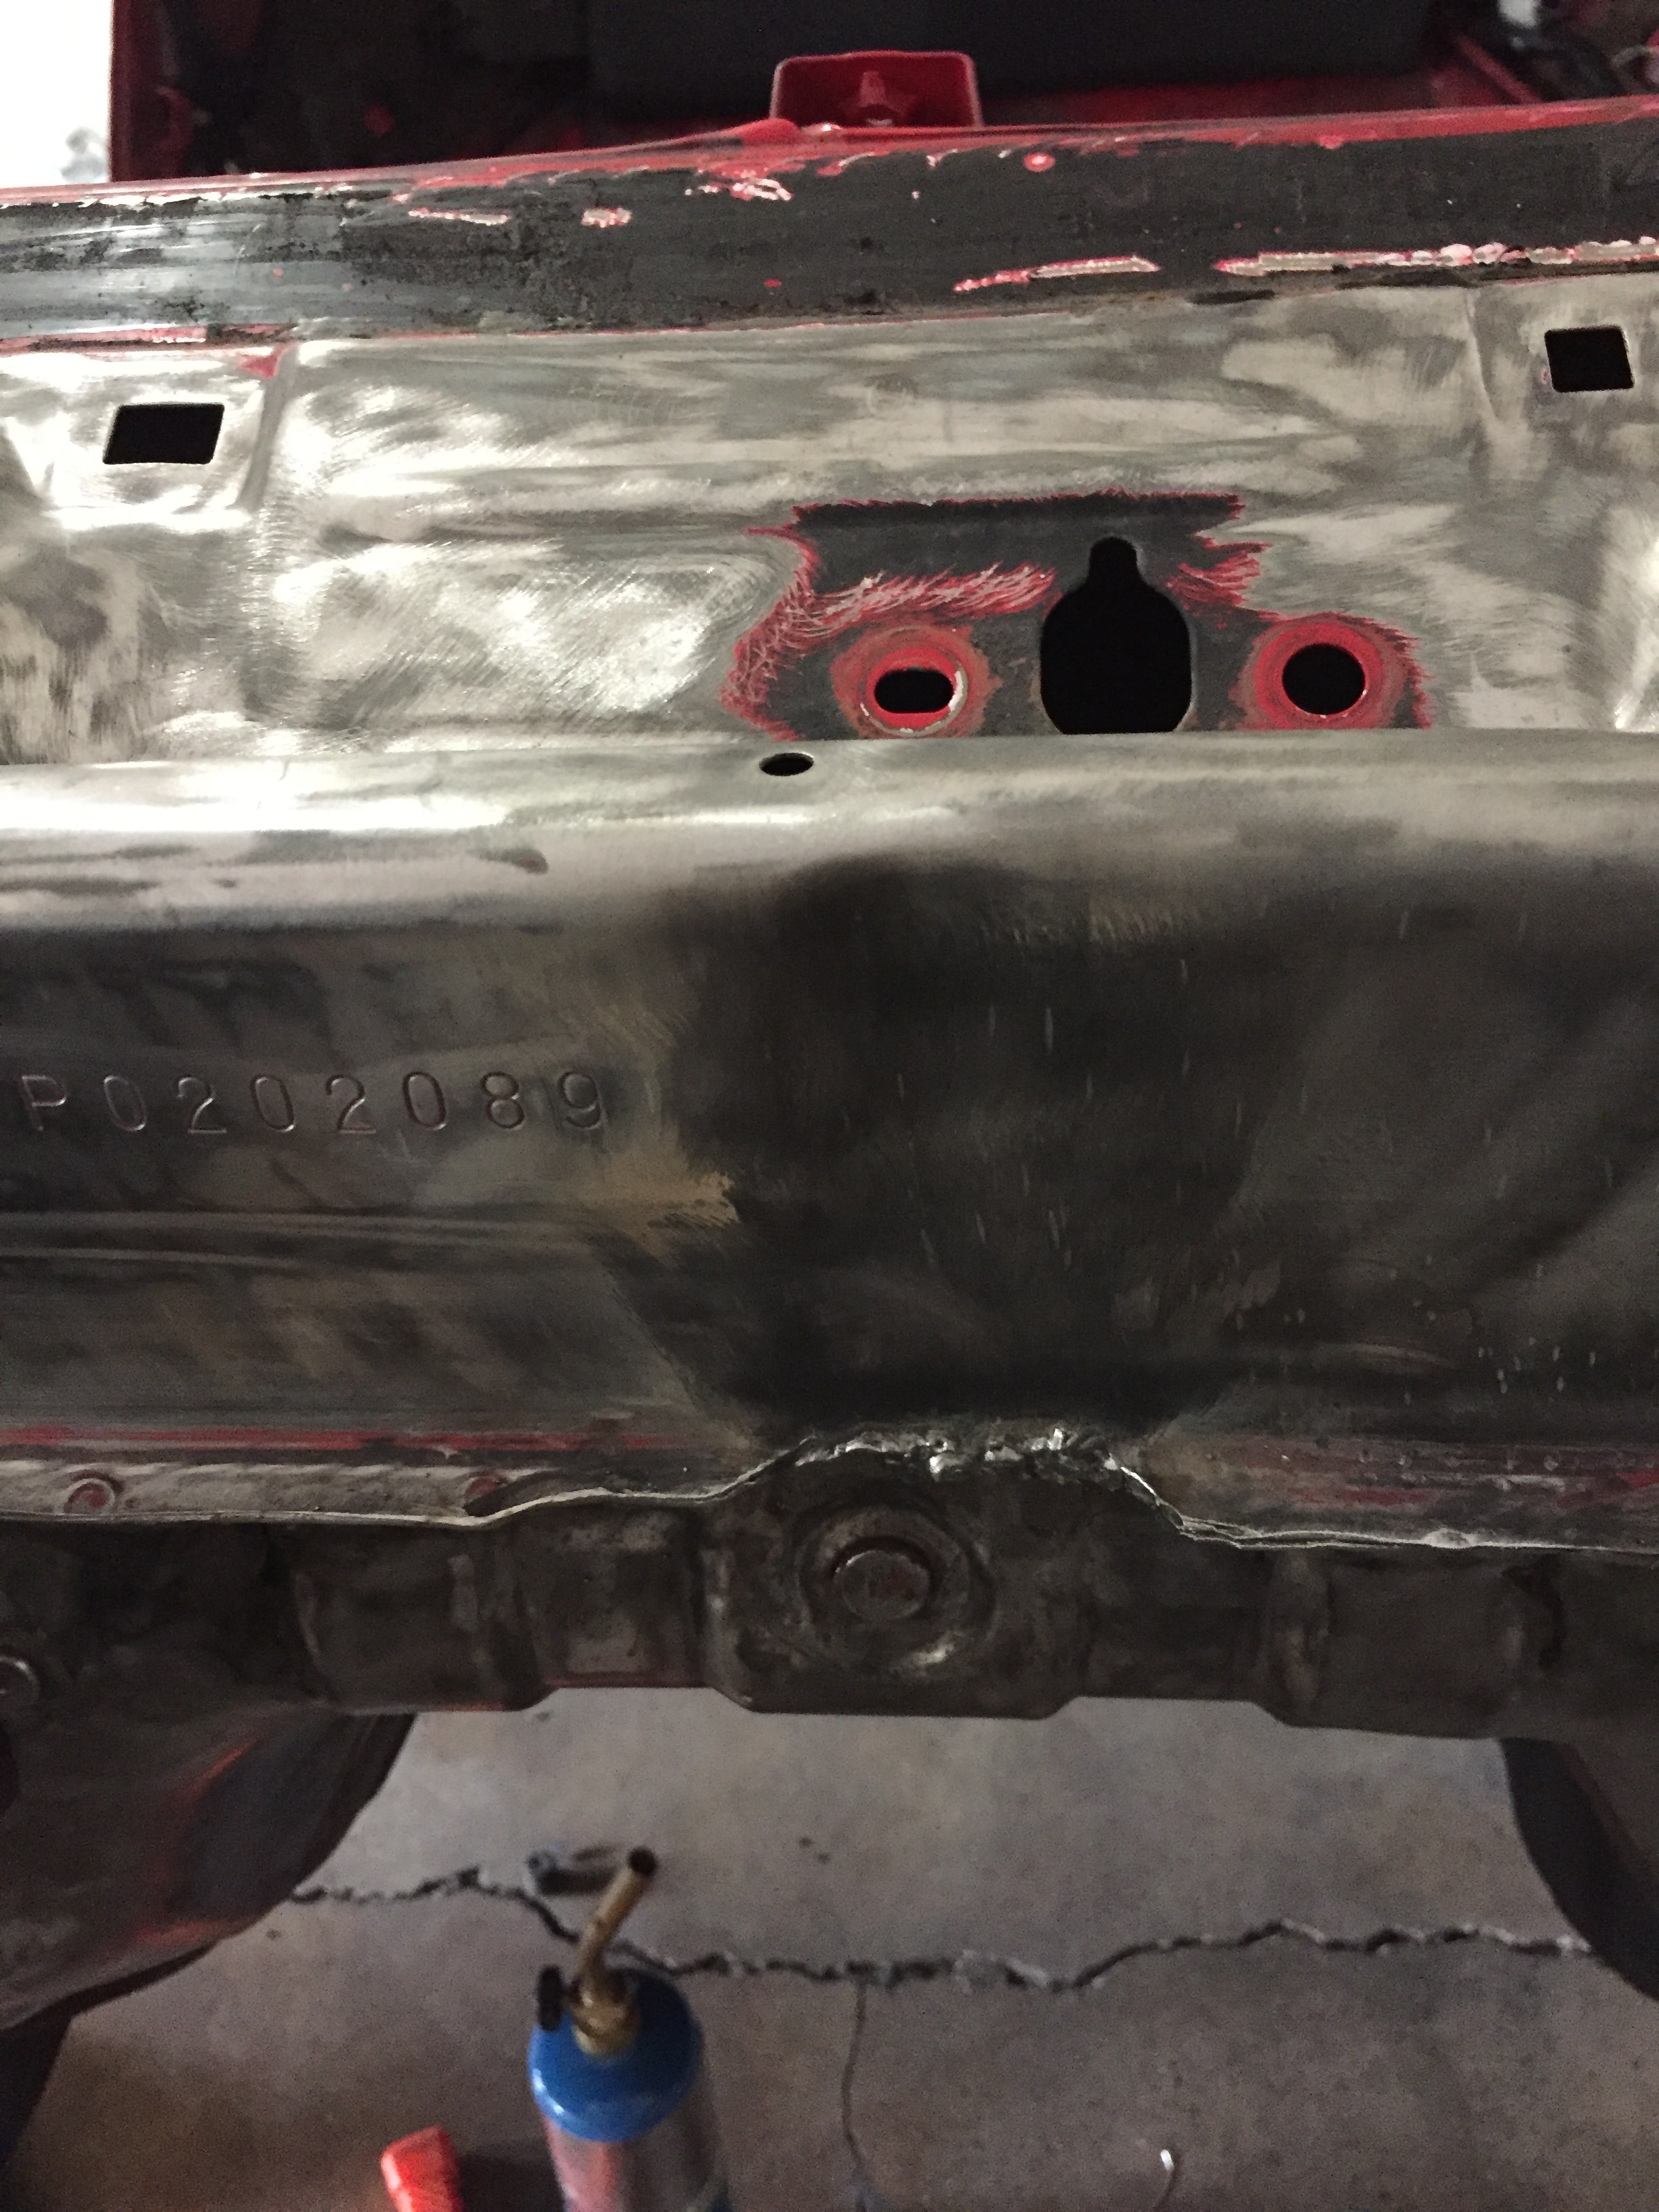
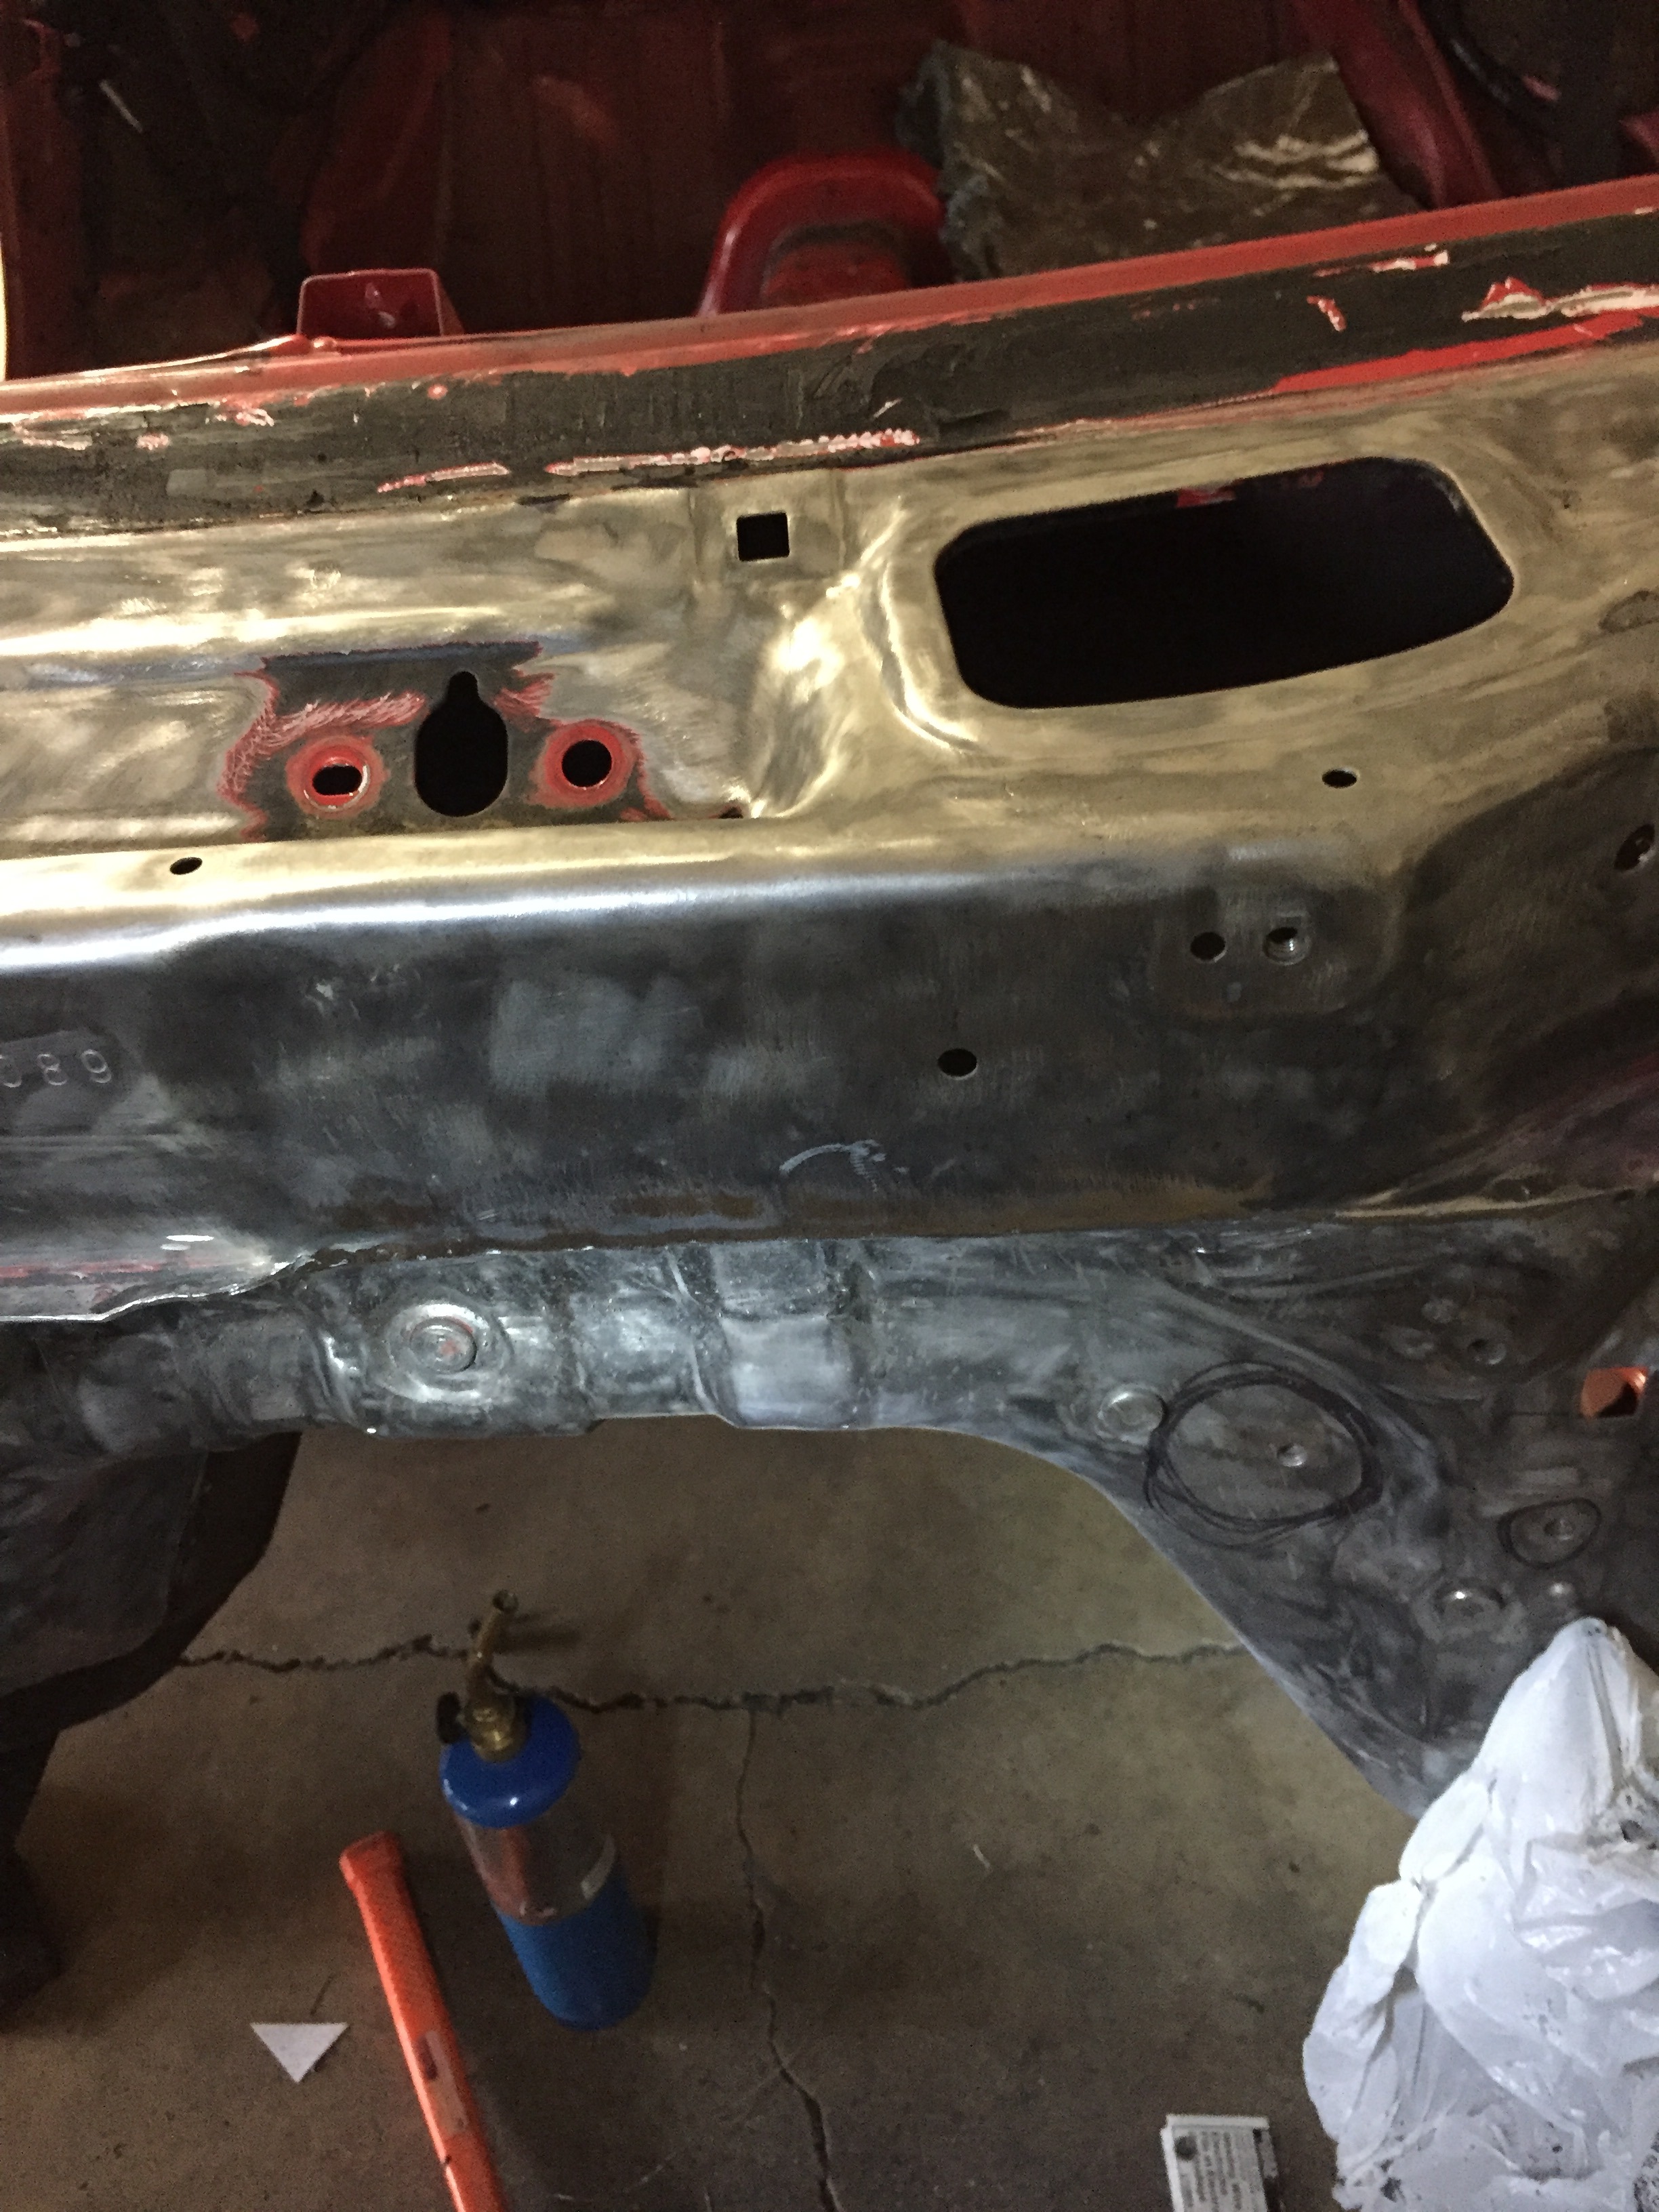
I made sure there would be plenty of clearance all the way across so I can run various intakes if I so choose. I was going to eliminate the lip all the way across, but after doing this one section I think I will just leave it as is. I feel like the factory seam is more solid than the section I cut out and welded, so I don't want to mess up the structural integrity of the firewall more than I already did. The section I did may be more sturdy, idk, but I dont want to take a chance at this point. Ill be making a plate for the strut bar that covers up the sides so you wont see that area anyhow.
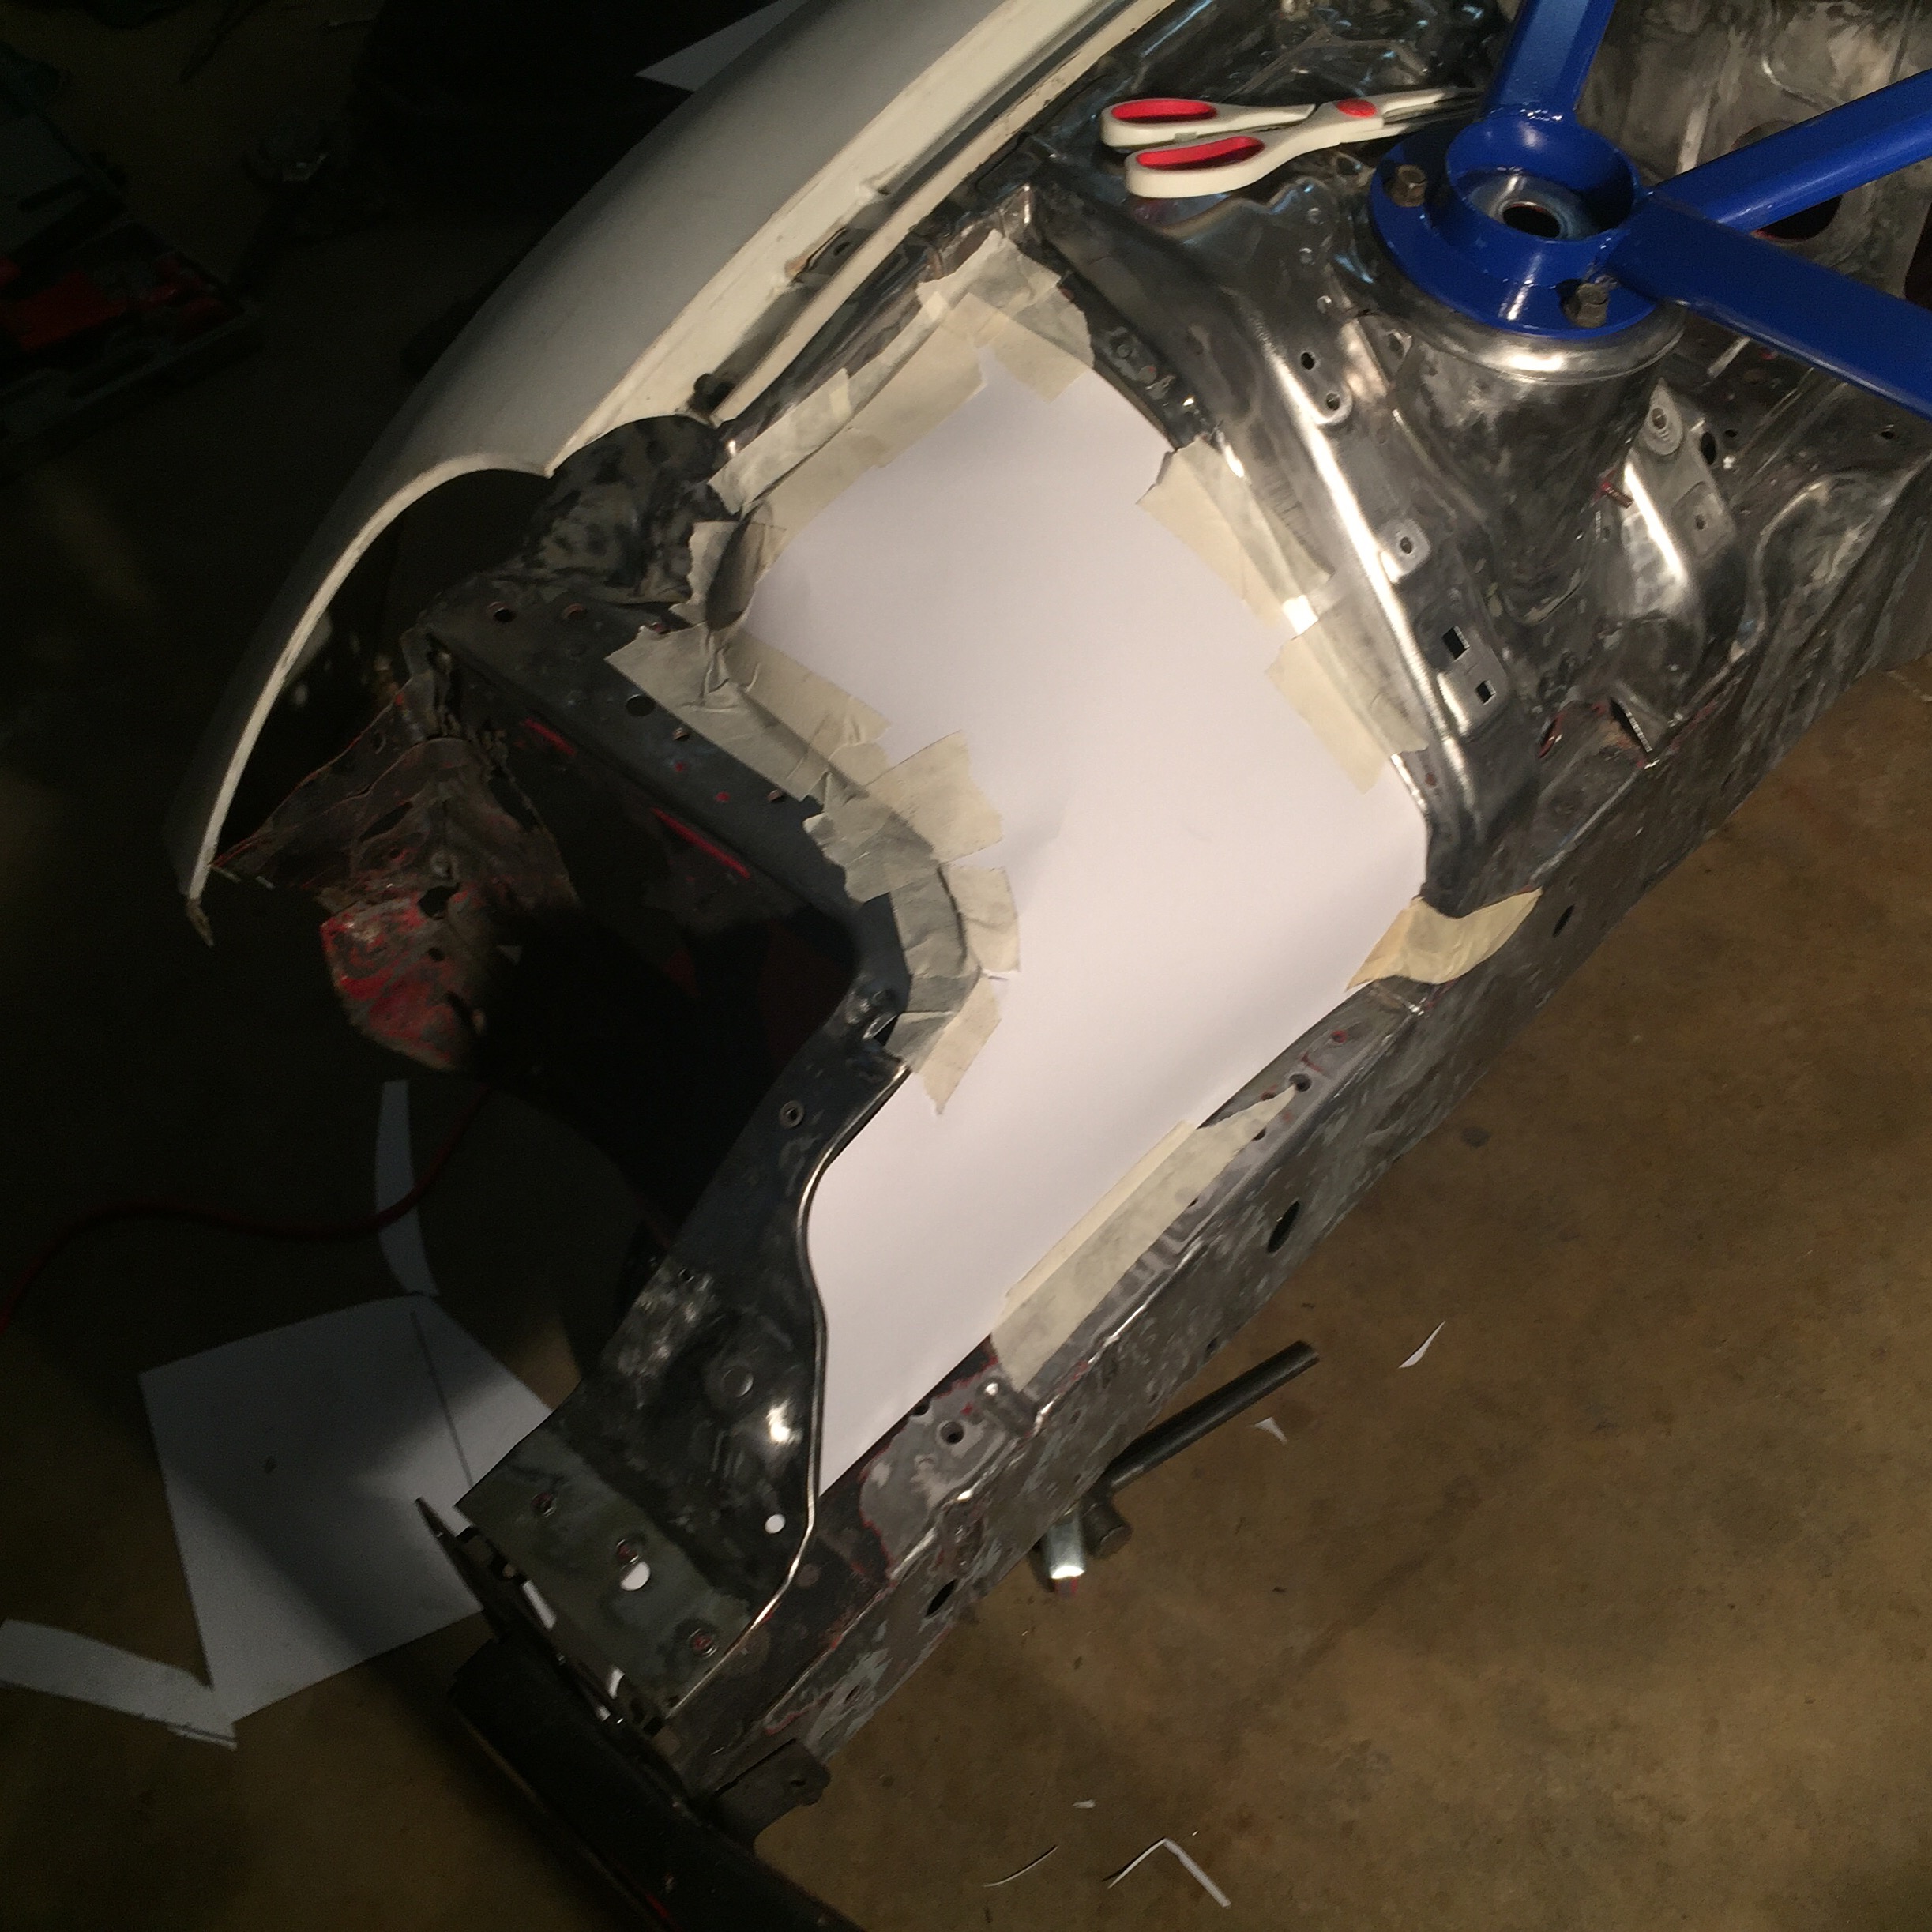
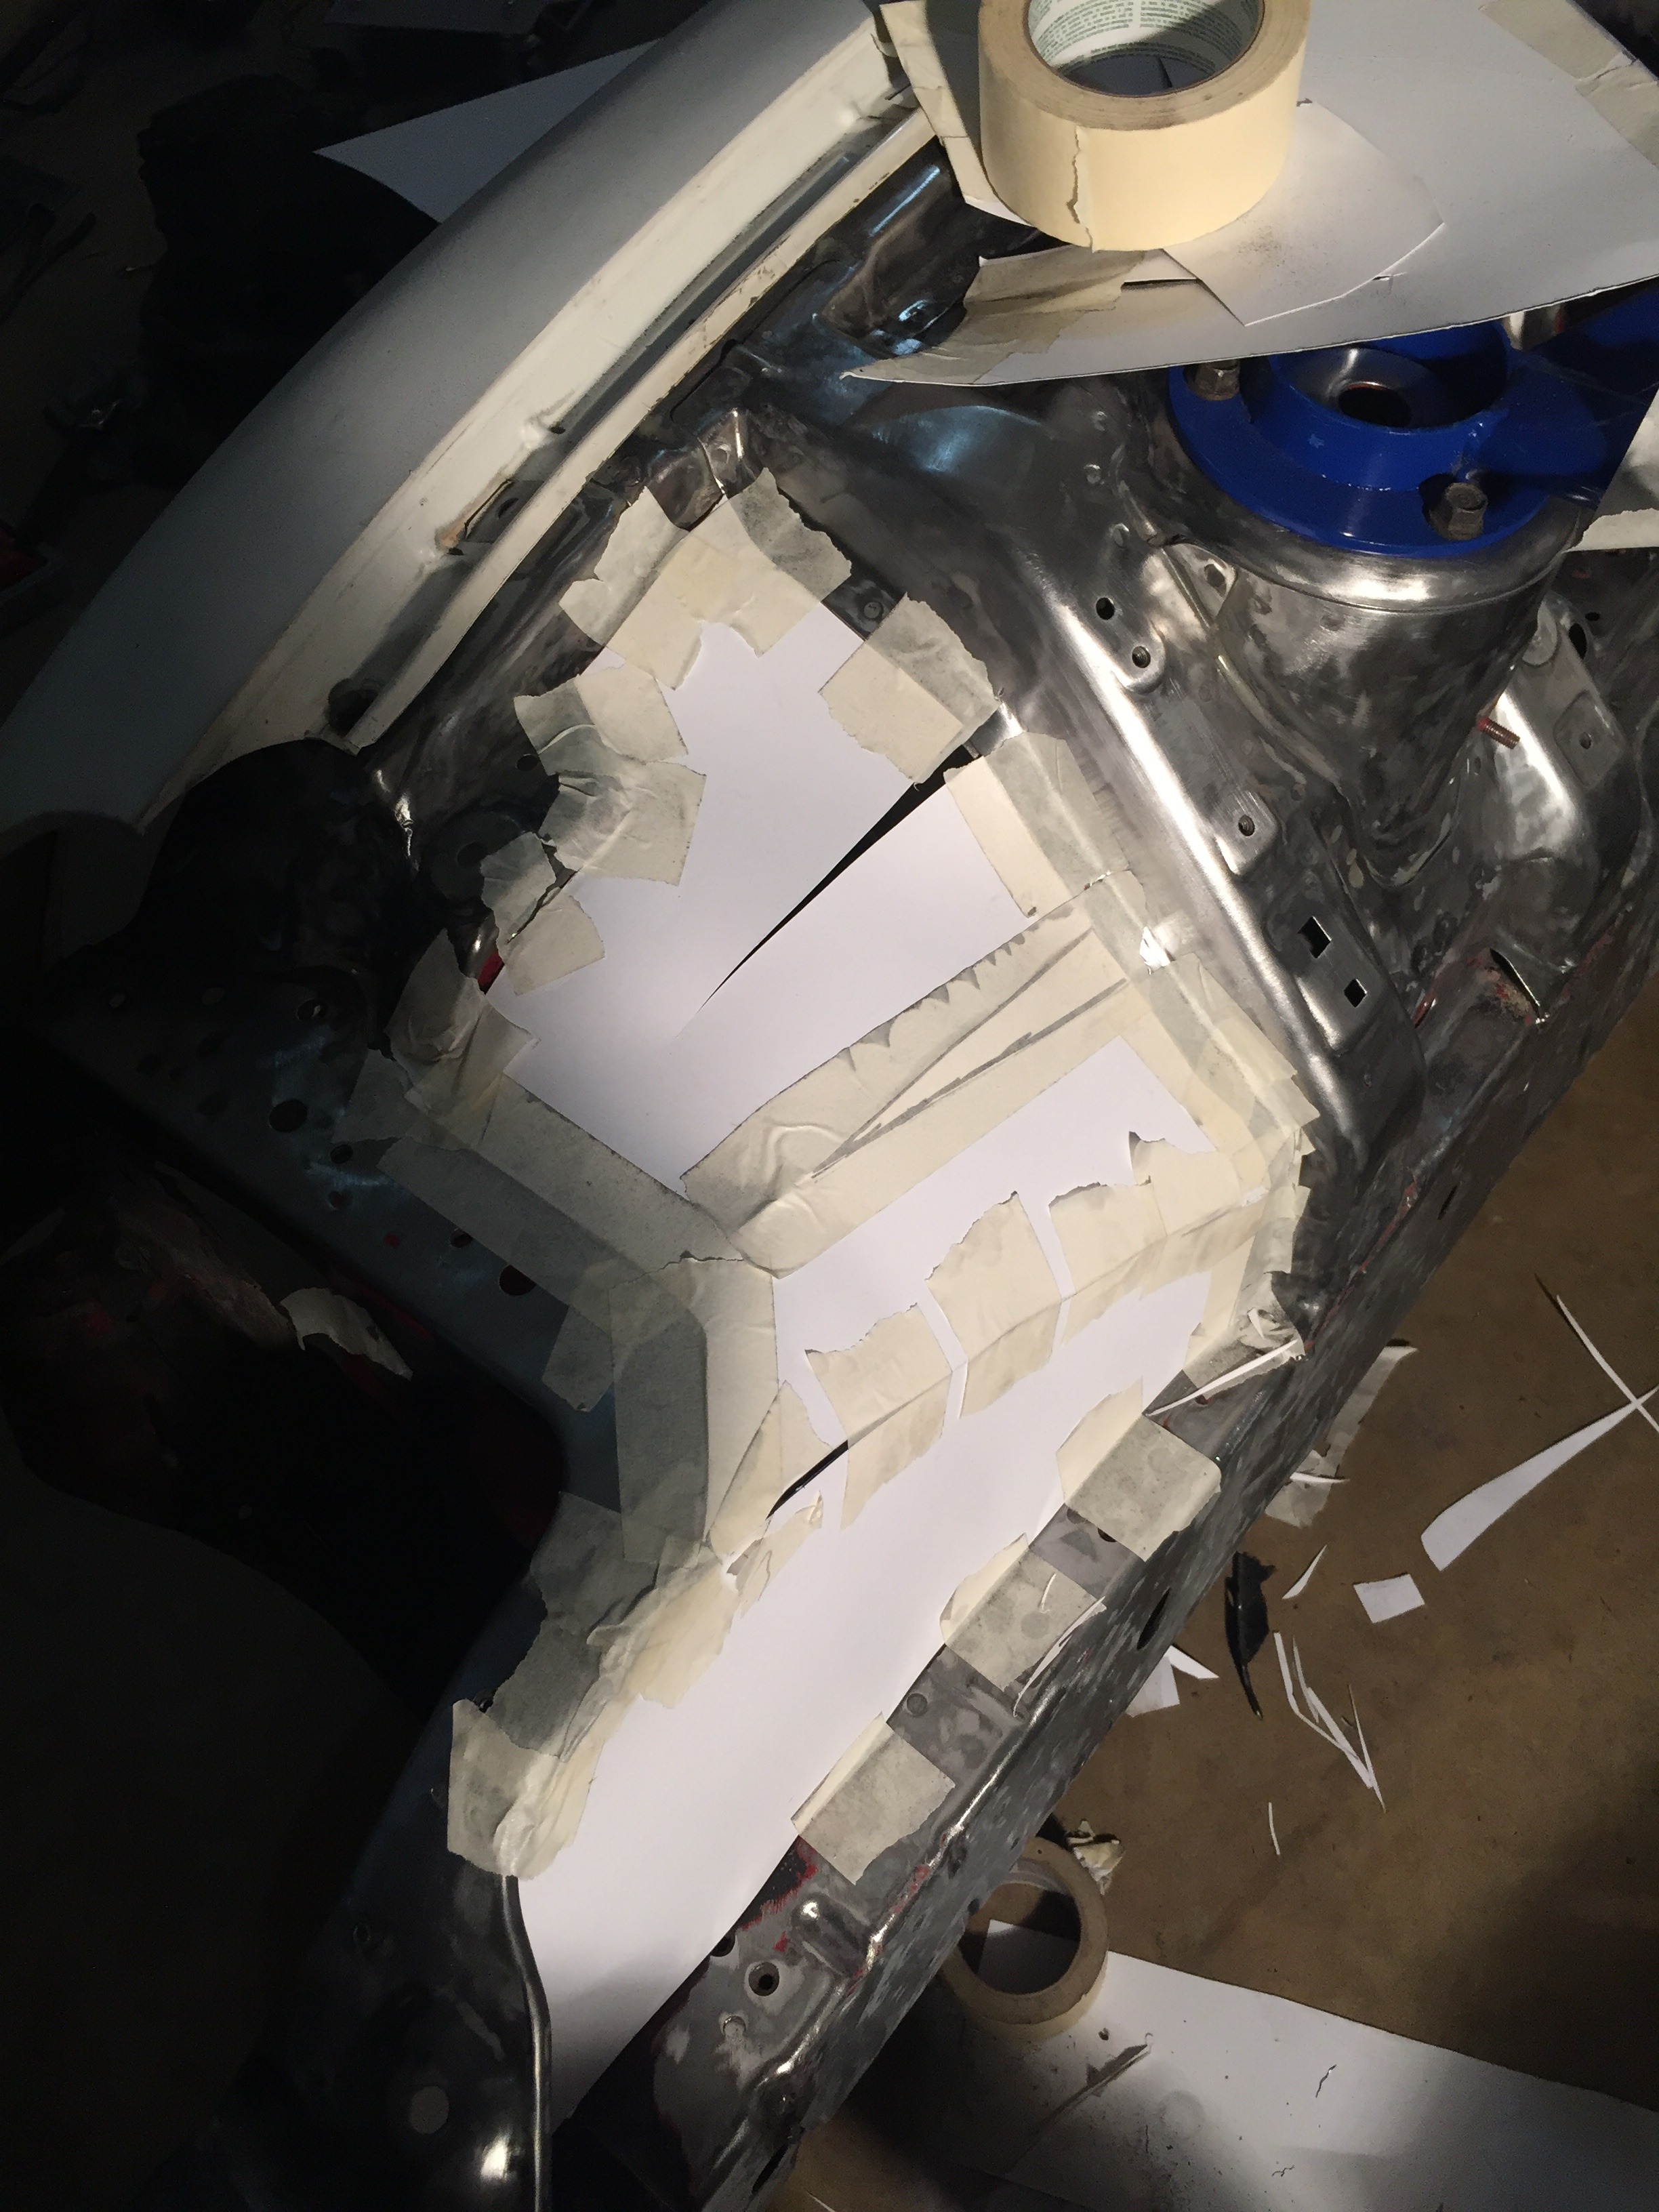
(See white paper. There will be a cover there and directly to the left of that on both sides)

Sike. Not really I went ahead and mounted up the motor so I could modify the firewall as needed. Decided to try out the strut bar while I had it in

Good news is it fits with some cutting! Pretty excited about that. I'm going to have a plate made to go over the area I cut out to reinforce it again. Not much material left to prevent flex, but I believe a plate on top will solve that issue. Either way, it was worth it. I'll make a small cover to seal the bar back up so water and such doesn't get in there


On to the firewall modding. I just did a small section at a time to prevent it from splitting up too much. It was still a pain though. I don't see how anyone could do this cleanly without using filler afterwards to smooth it back out. Good thing I'll have filler all over my engine bay anyhow


I made sure there would be plenty of clearance all the way across so I can run various intakes if I so choose. I was going to eliminate the lip all the way across, but after doing this one section I think I will just leave it as is. I feel like the factory seam is more solid than the section I cut out and welded, so I don't want to mess up the structural integrity of the firewall more than I already did. The section I did may be more sturdy, idk, but I dont want to take a chance at this point. Ill be making a plate for the strut bar that covers up the sides so you wont see that area anyhow.
(See white paper. There will be a cover there and directly to the left of that on both sides)

Thread Starter
Full Member
Joined: Apr 2015
Posts: 140
Likes: 5
From: Great Falls, MT
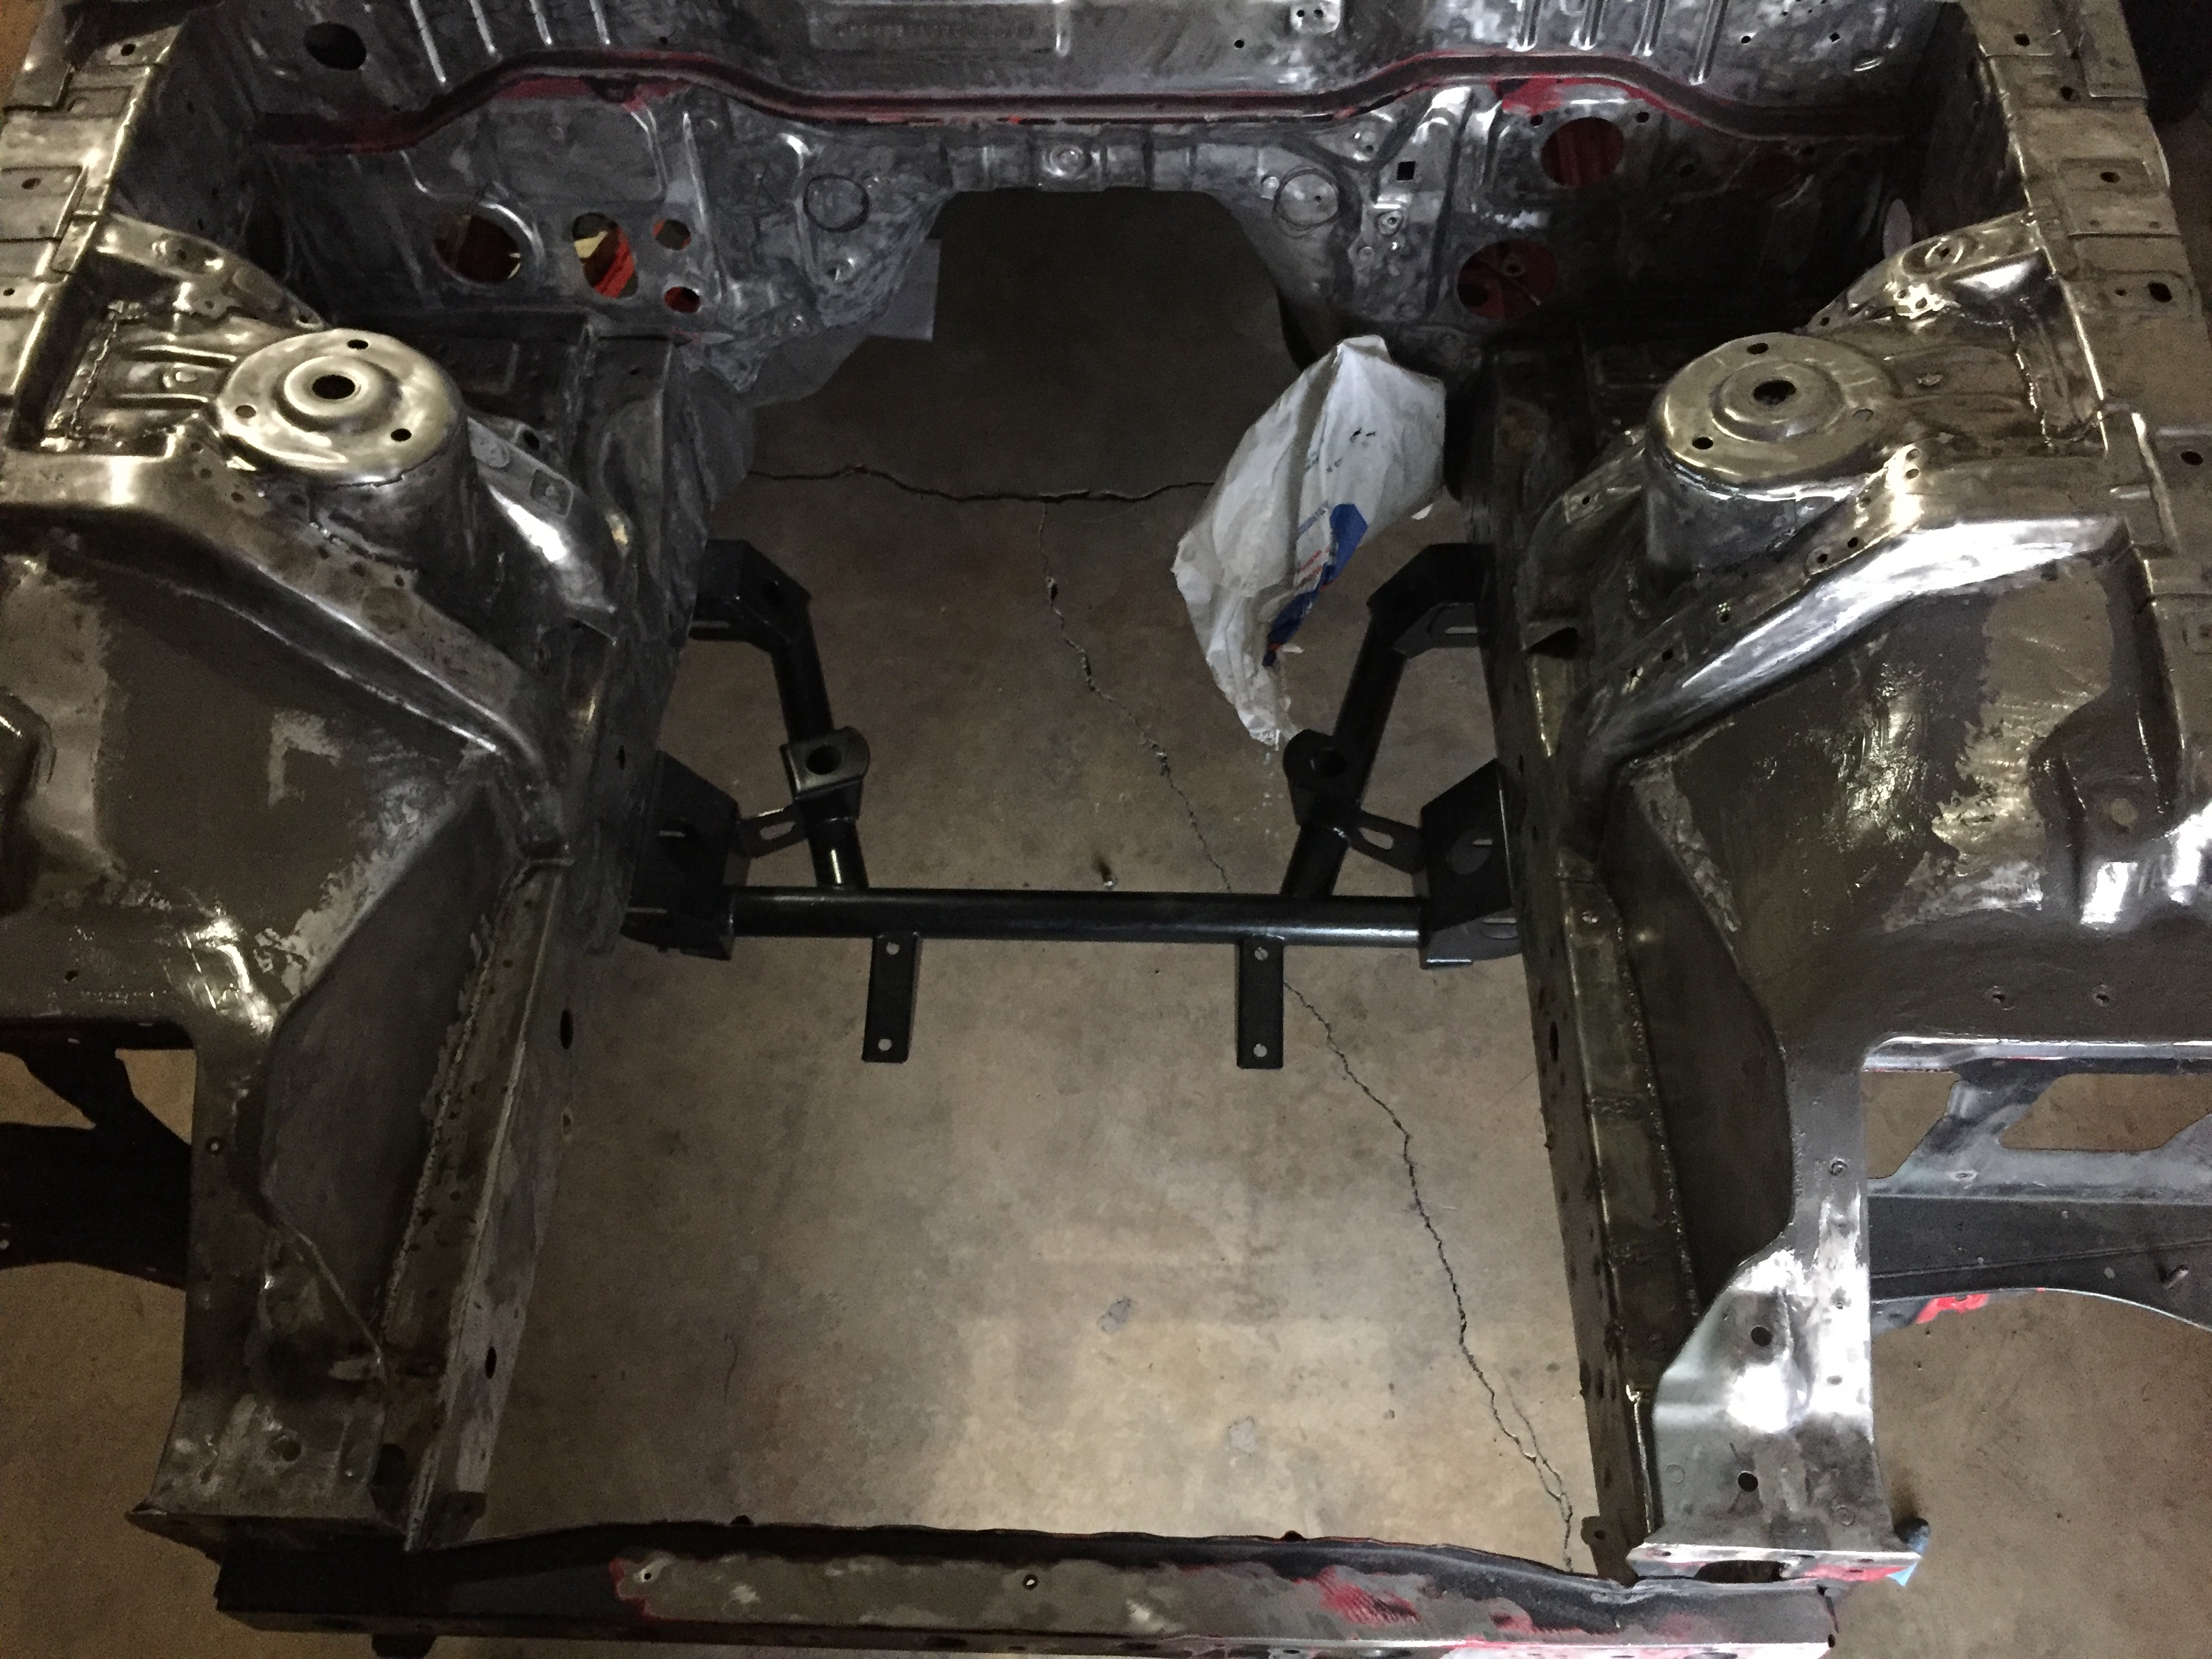
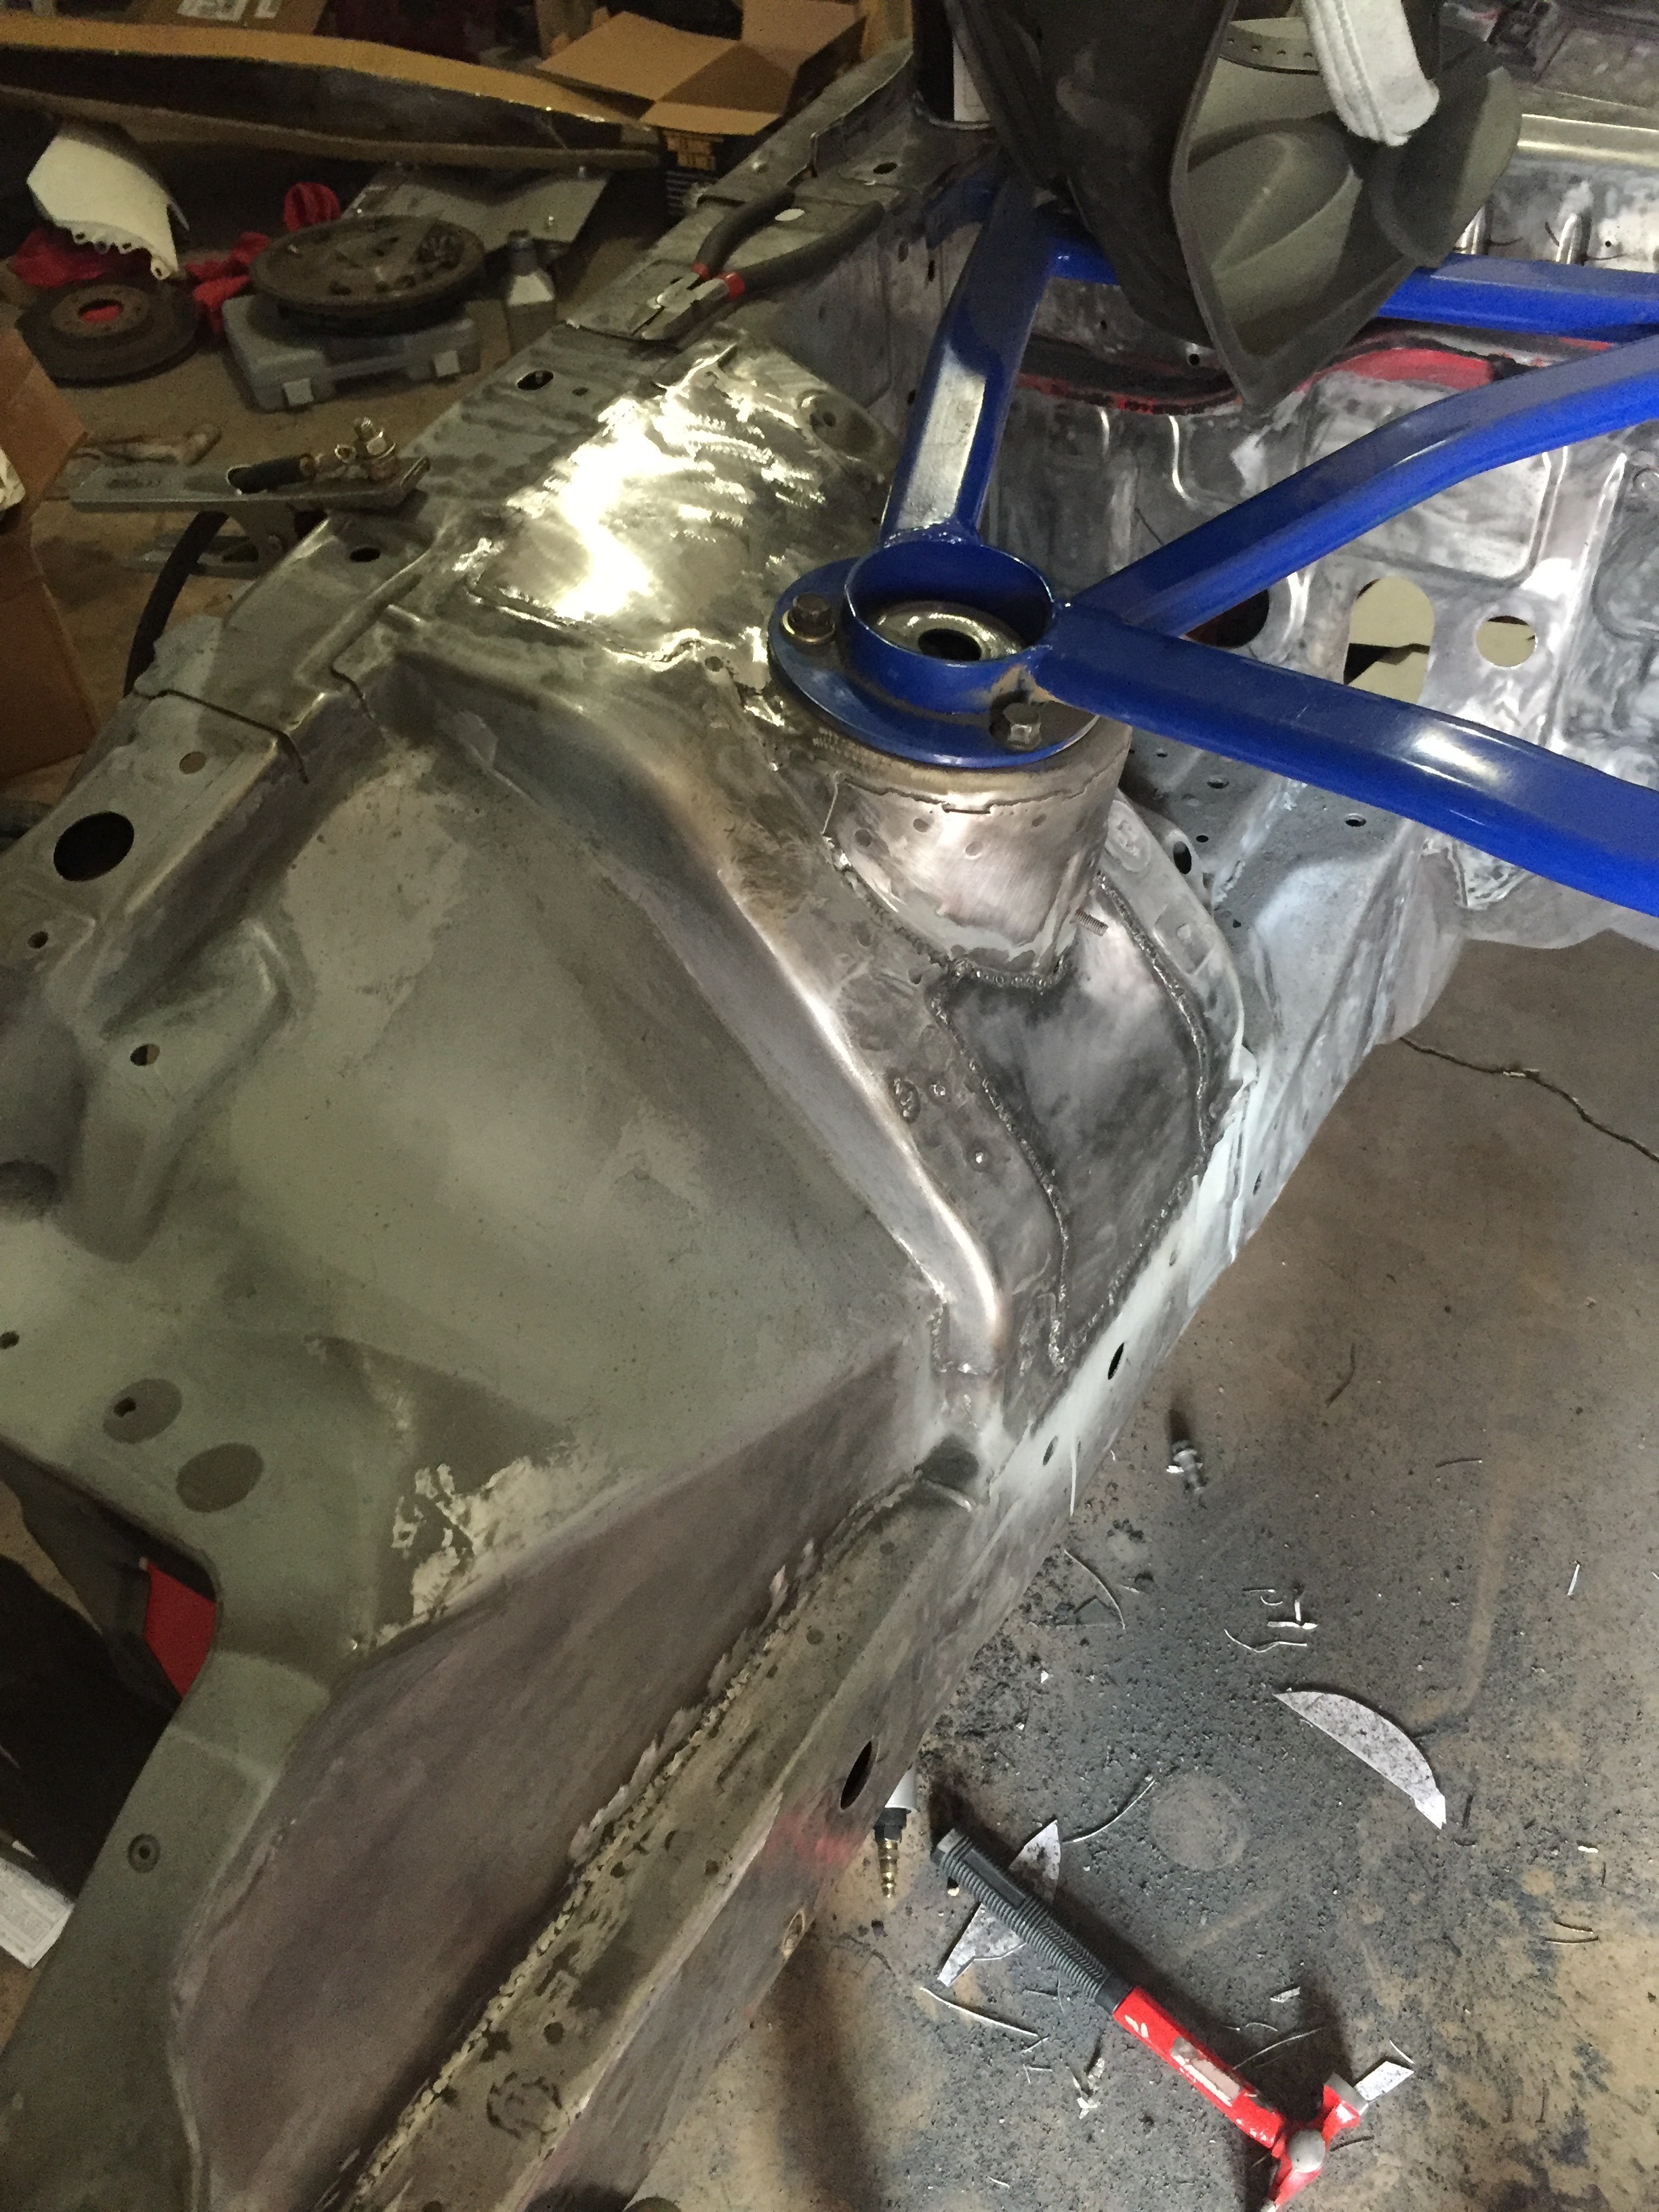
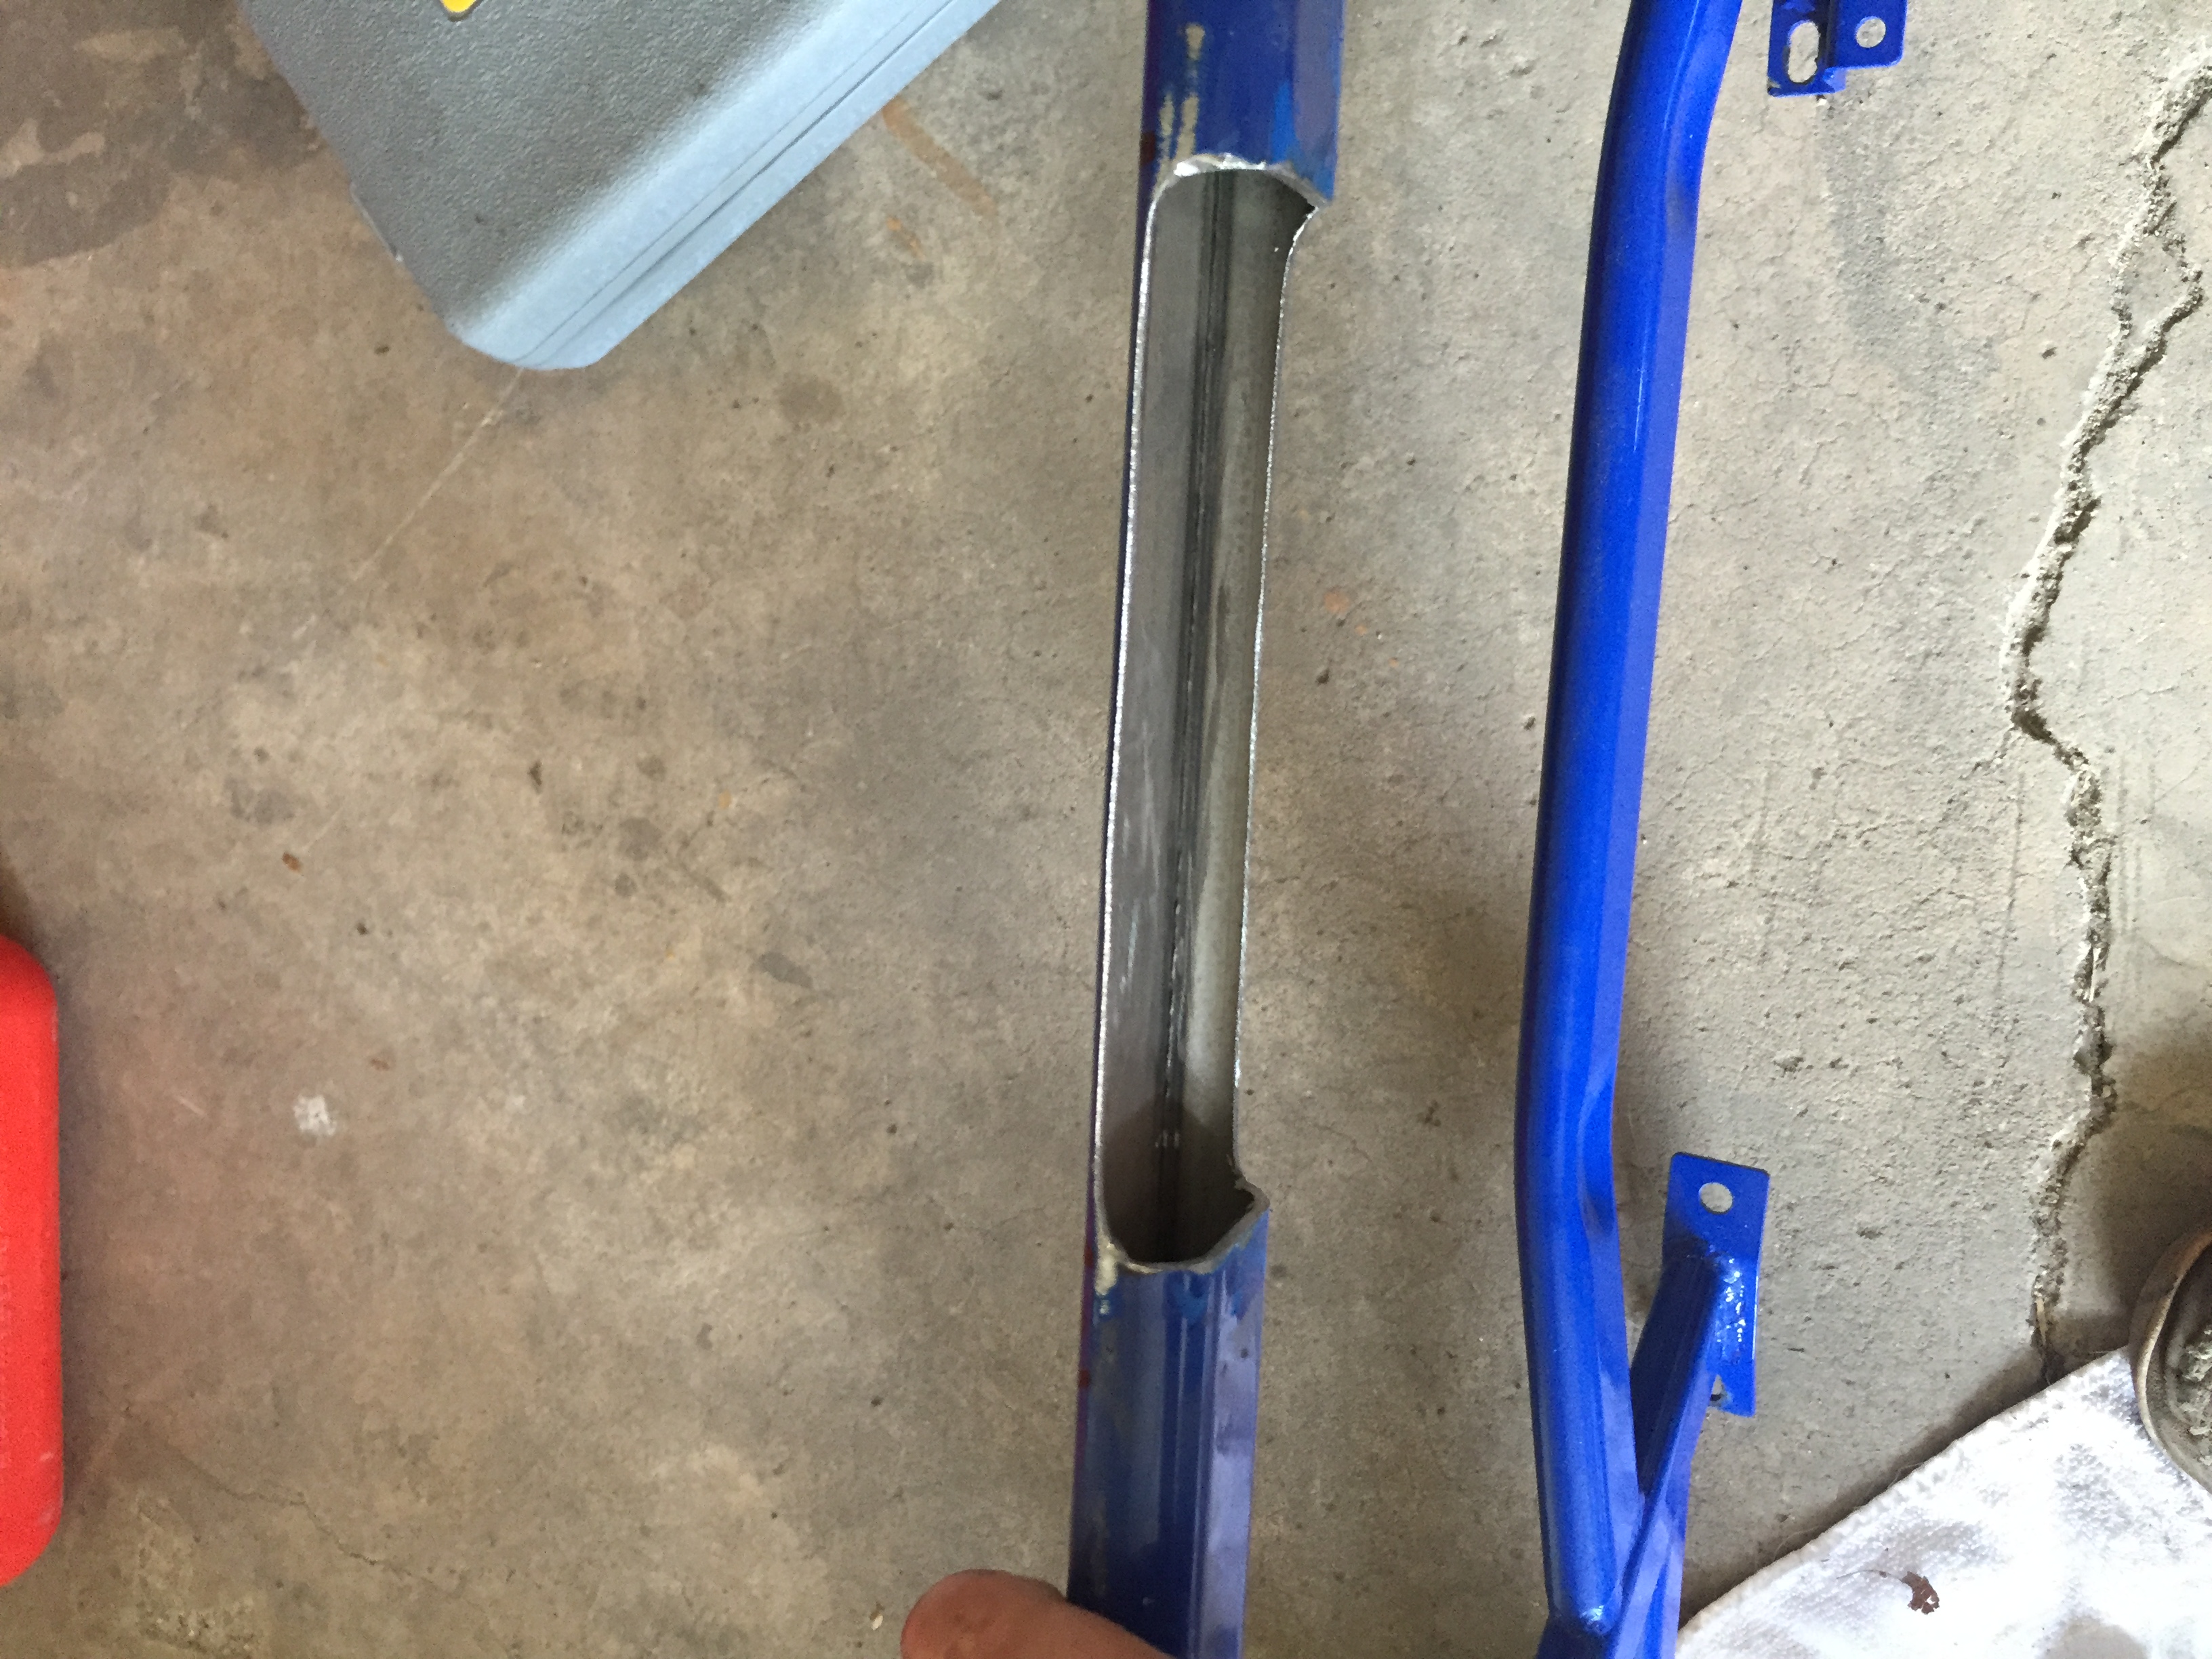
My rear strut bar arrived the other day. Ill be mounting my air tank on the top bar and the compressors in the center...or the battery, I'm not positive yet. The tank will for sure be on the top though...no seeing out the back window ftw
Worked on the wheel wells some more. I needed to get them coated so I can put all of the suspension back in and start routing the air and brake lines
Self etching primer after cleaning
Then regular primer
Then seam sealer (I used a lot lol) and paint over the areas I didnt want undercoating
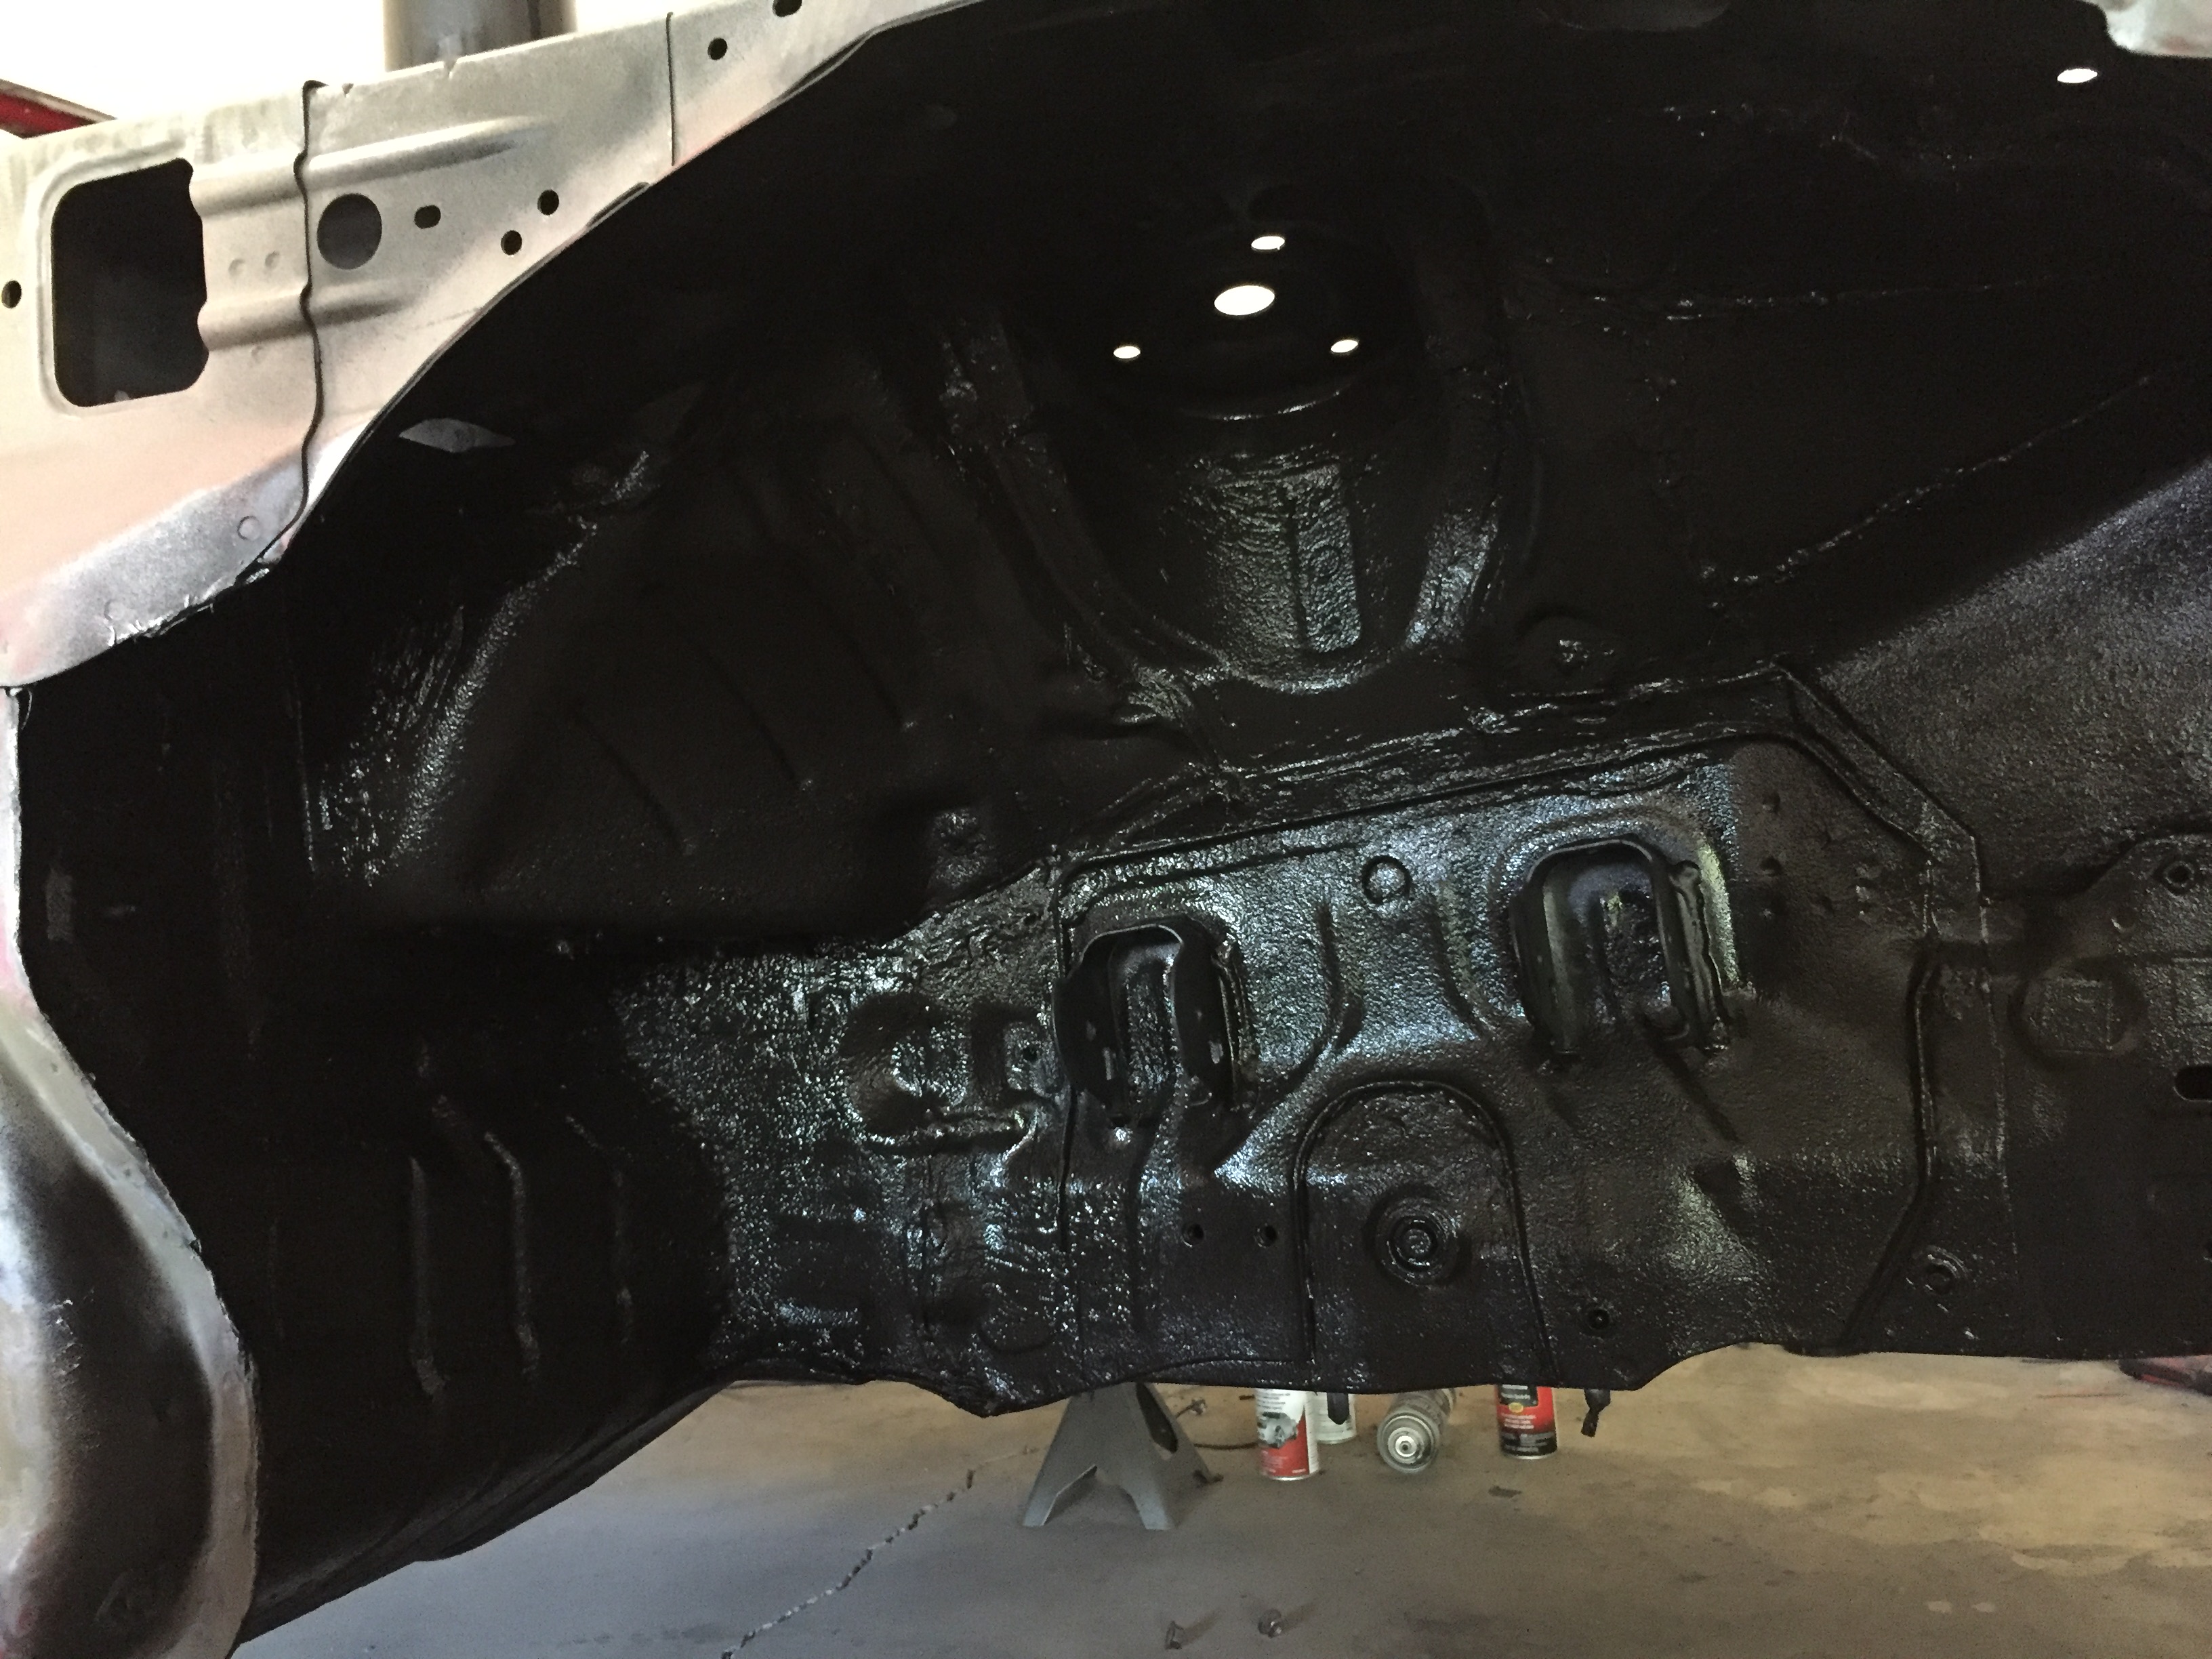
And finally the undercoating
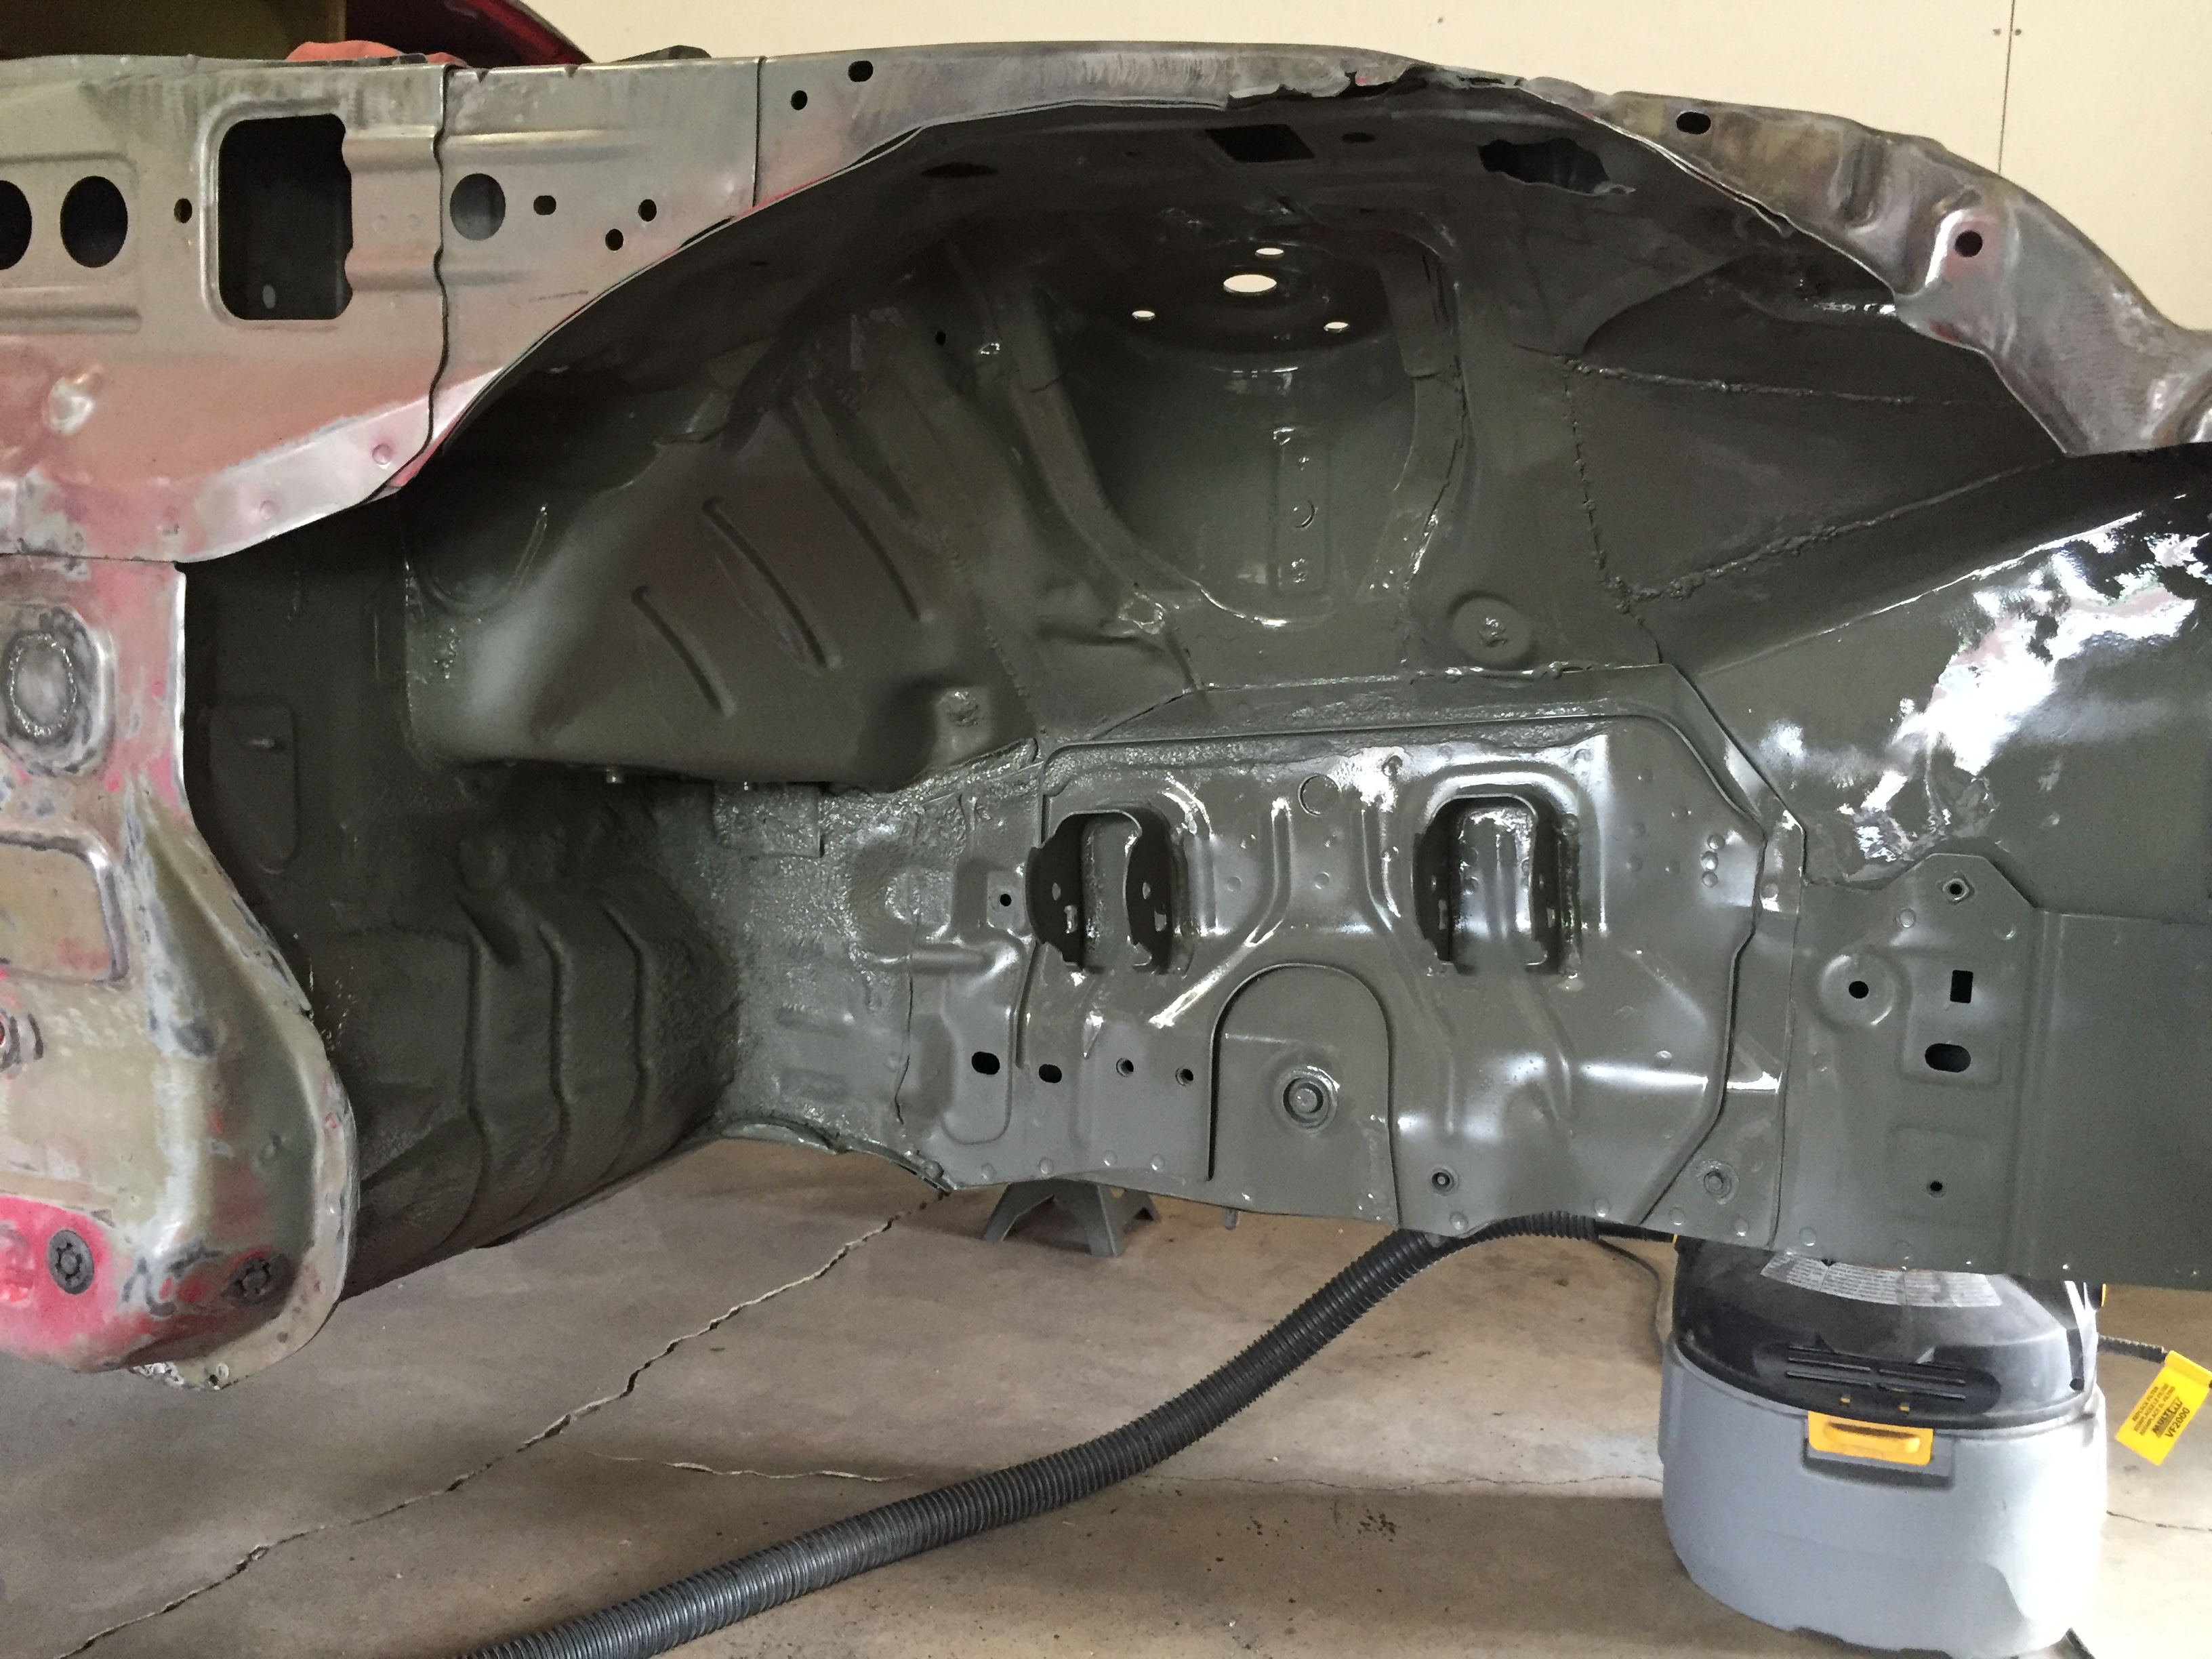
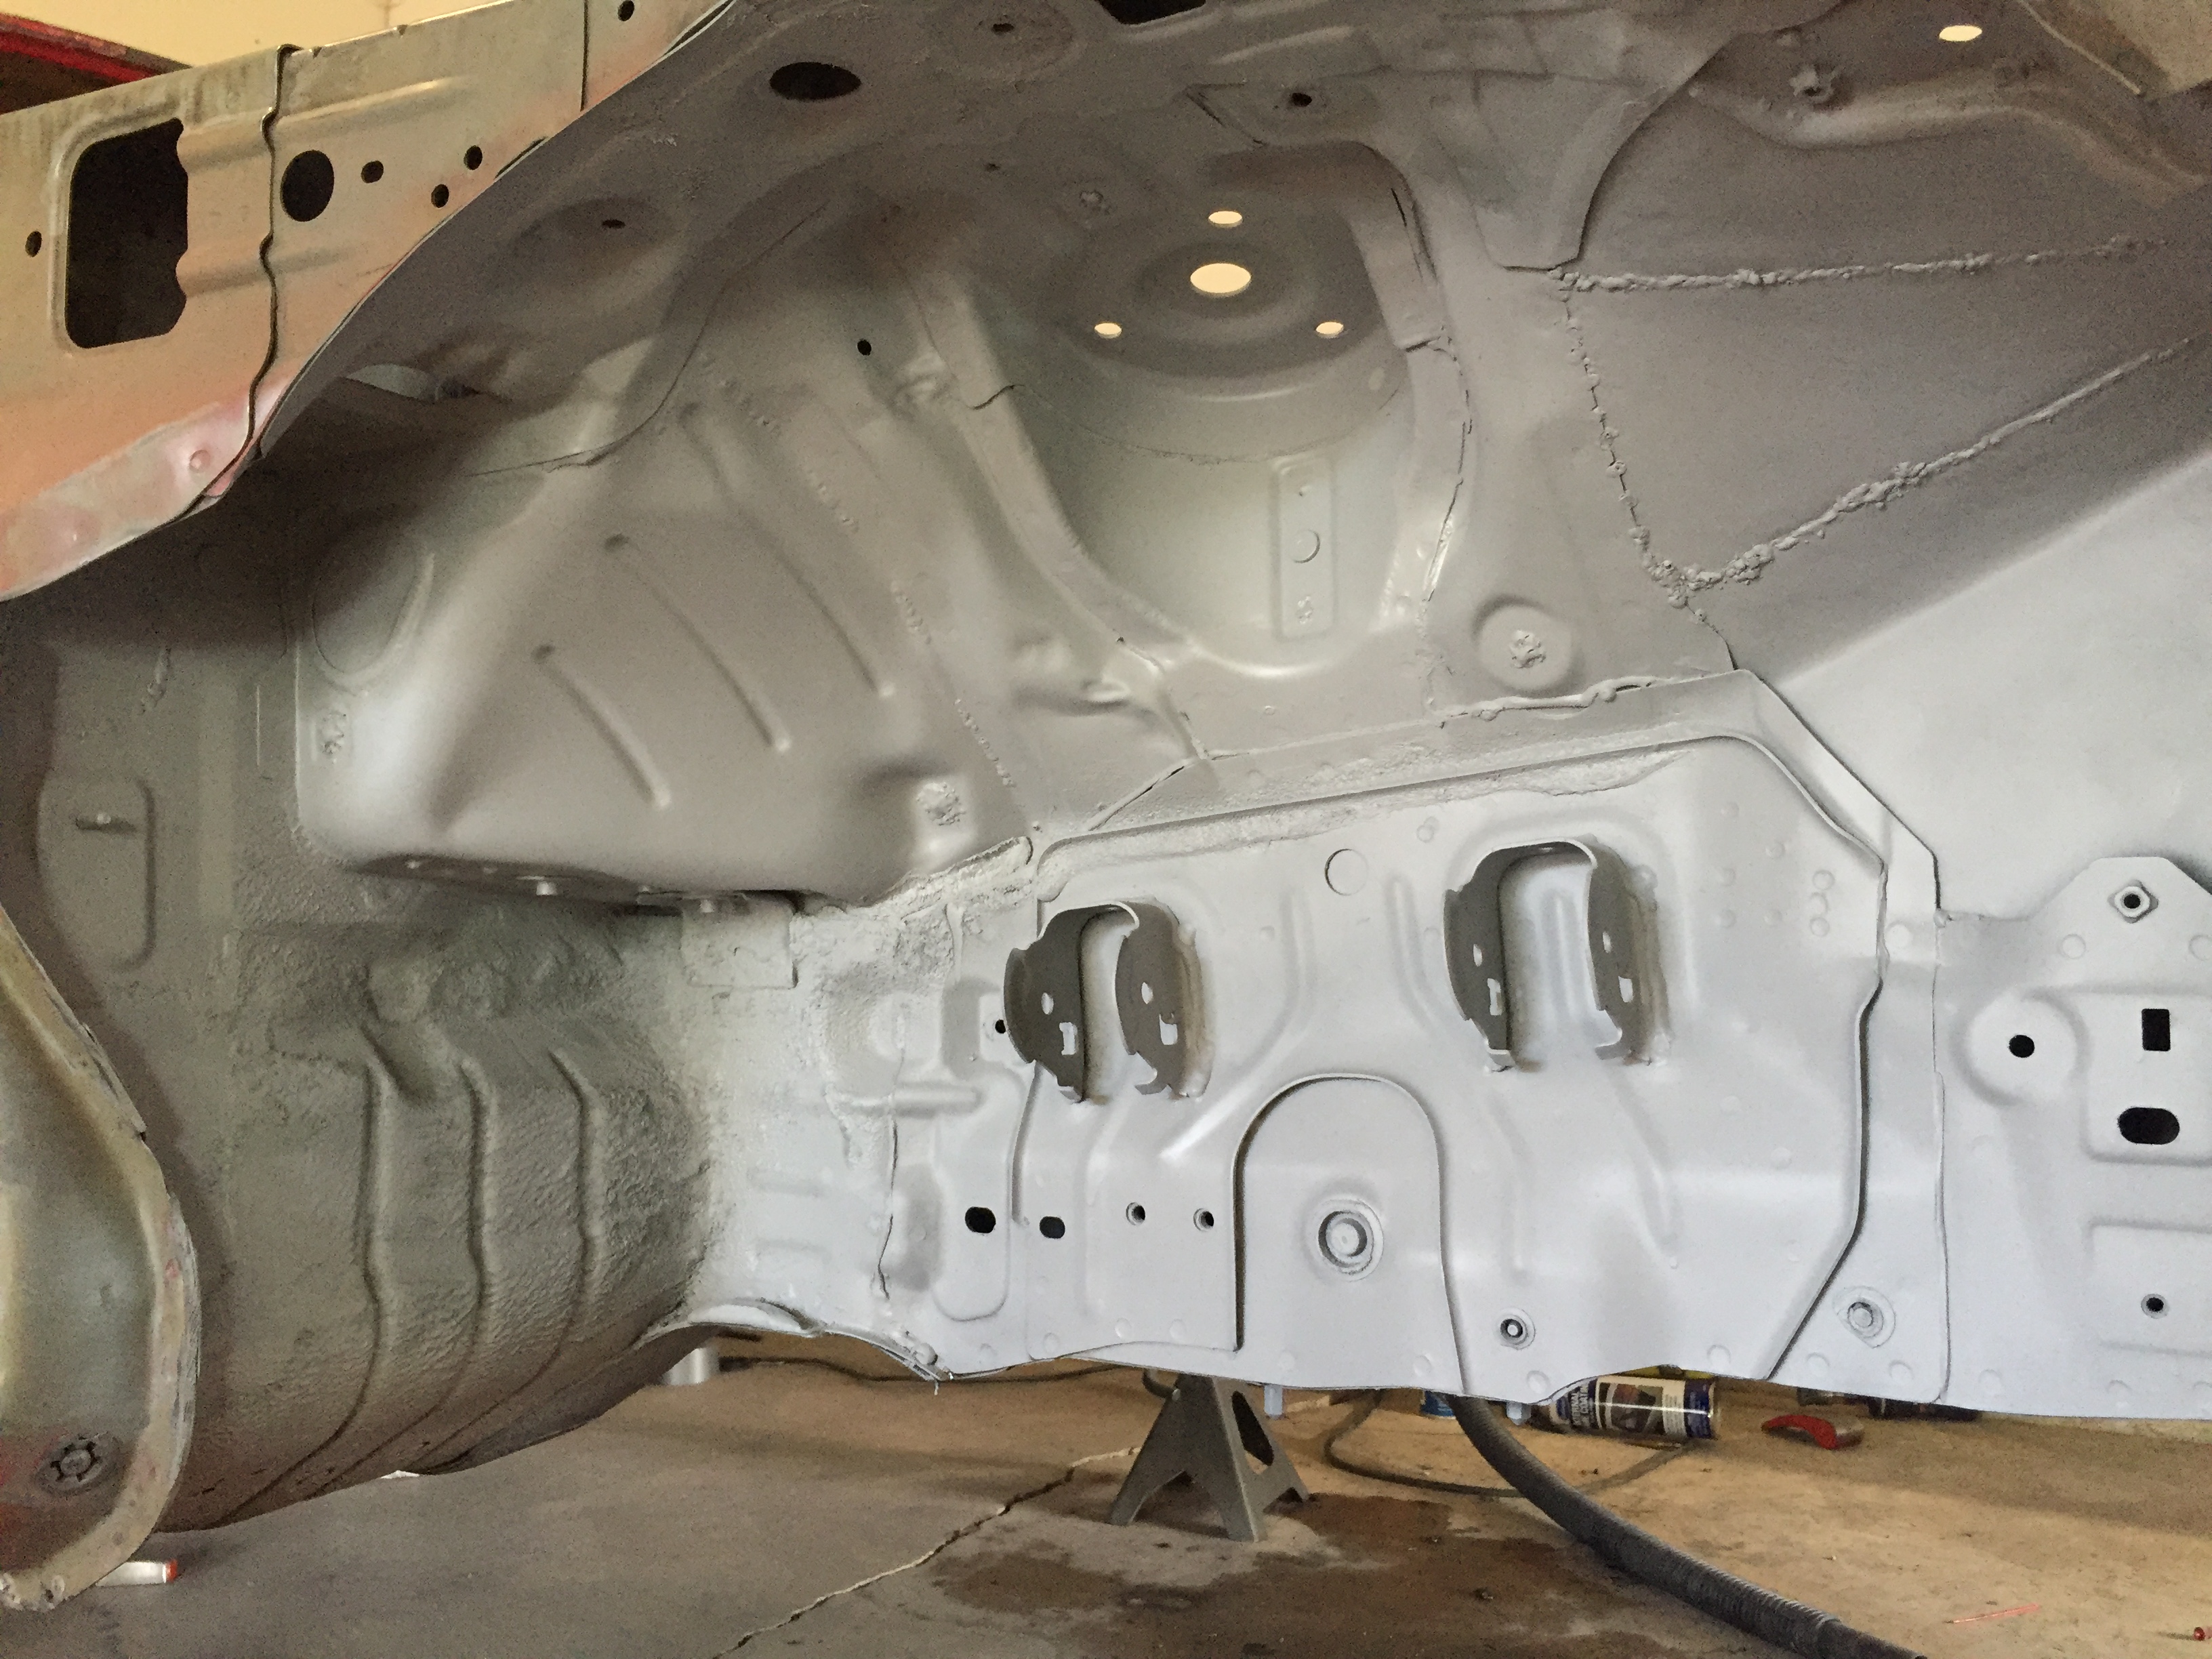
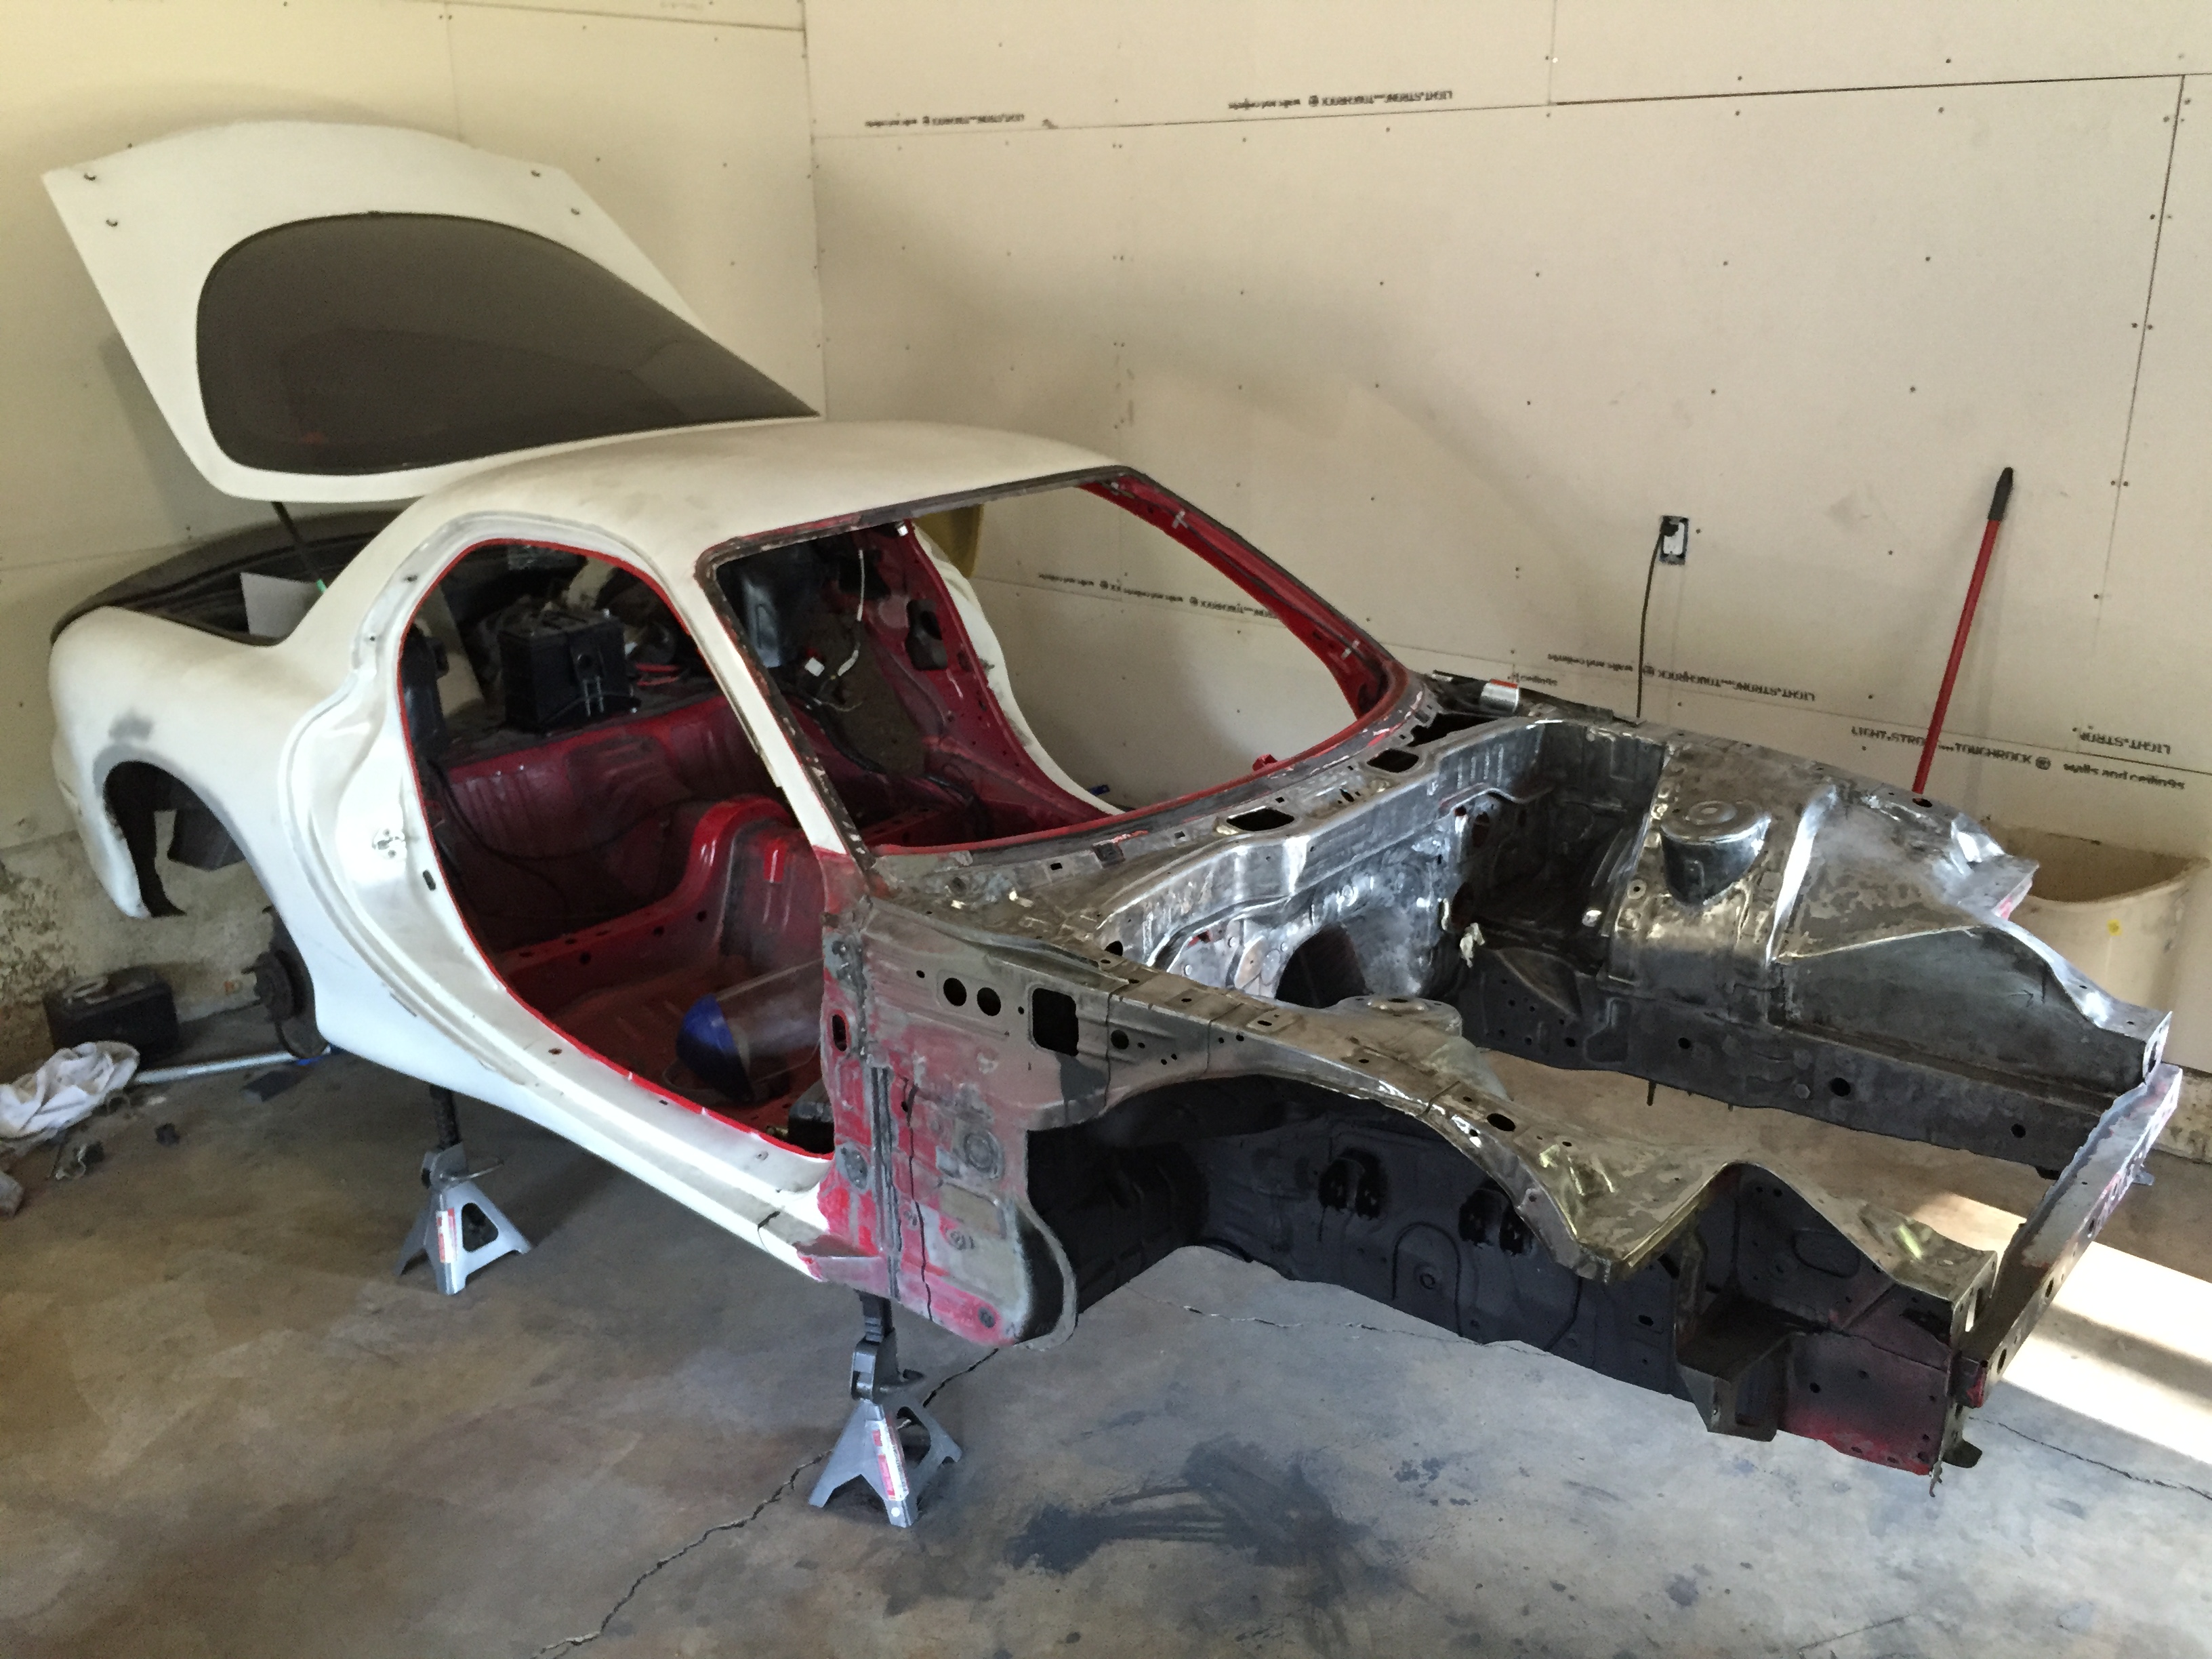
This is how the car sits as of now. Hopefully going to prime the engine bay this week and start laying down the filler. Also going to get the interior completely stripped and ready for the sound deadener to be sprayed.
Oh! And the eastwood frame coating stuff worked great. I did the rails and underneath everywhere I welded

Worked on the wheel wells some more. I needed to get them coated so I can put all of the suspension back in and start routing the air and brake lines

Self etching primer after cleaning

Then regular primer

Then seam sealer (I used a lot lol) and paint over the areas I didnt want undercoating

And finally the undercoating

This is how the car sits as of now. Hopefully going to prime the engine bay this week and start laying down the filler. Also going to get the interior completely stripped and ready for the sound deadener to be sprayed.

Oh! And the eastwood frame coating stuff worked great. I did the rails and underneath everywhere I welded

Thread Starter
Full Member
Joined: Apr 2015
Posts: 140
Likes: 5
From: Great Falls, MT
So it fiinnnaaalllyyy happened. I primered the engine bay! It was my first time shooting paint with a gun and it was actually pretty awesome. So much better than a spray can. I used eastwood epoxy primer
Prep work (ie cleaned up around the car and used prep clean on the bay)

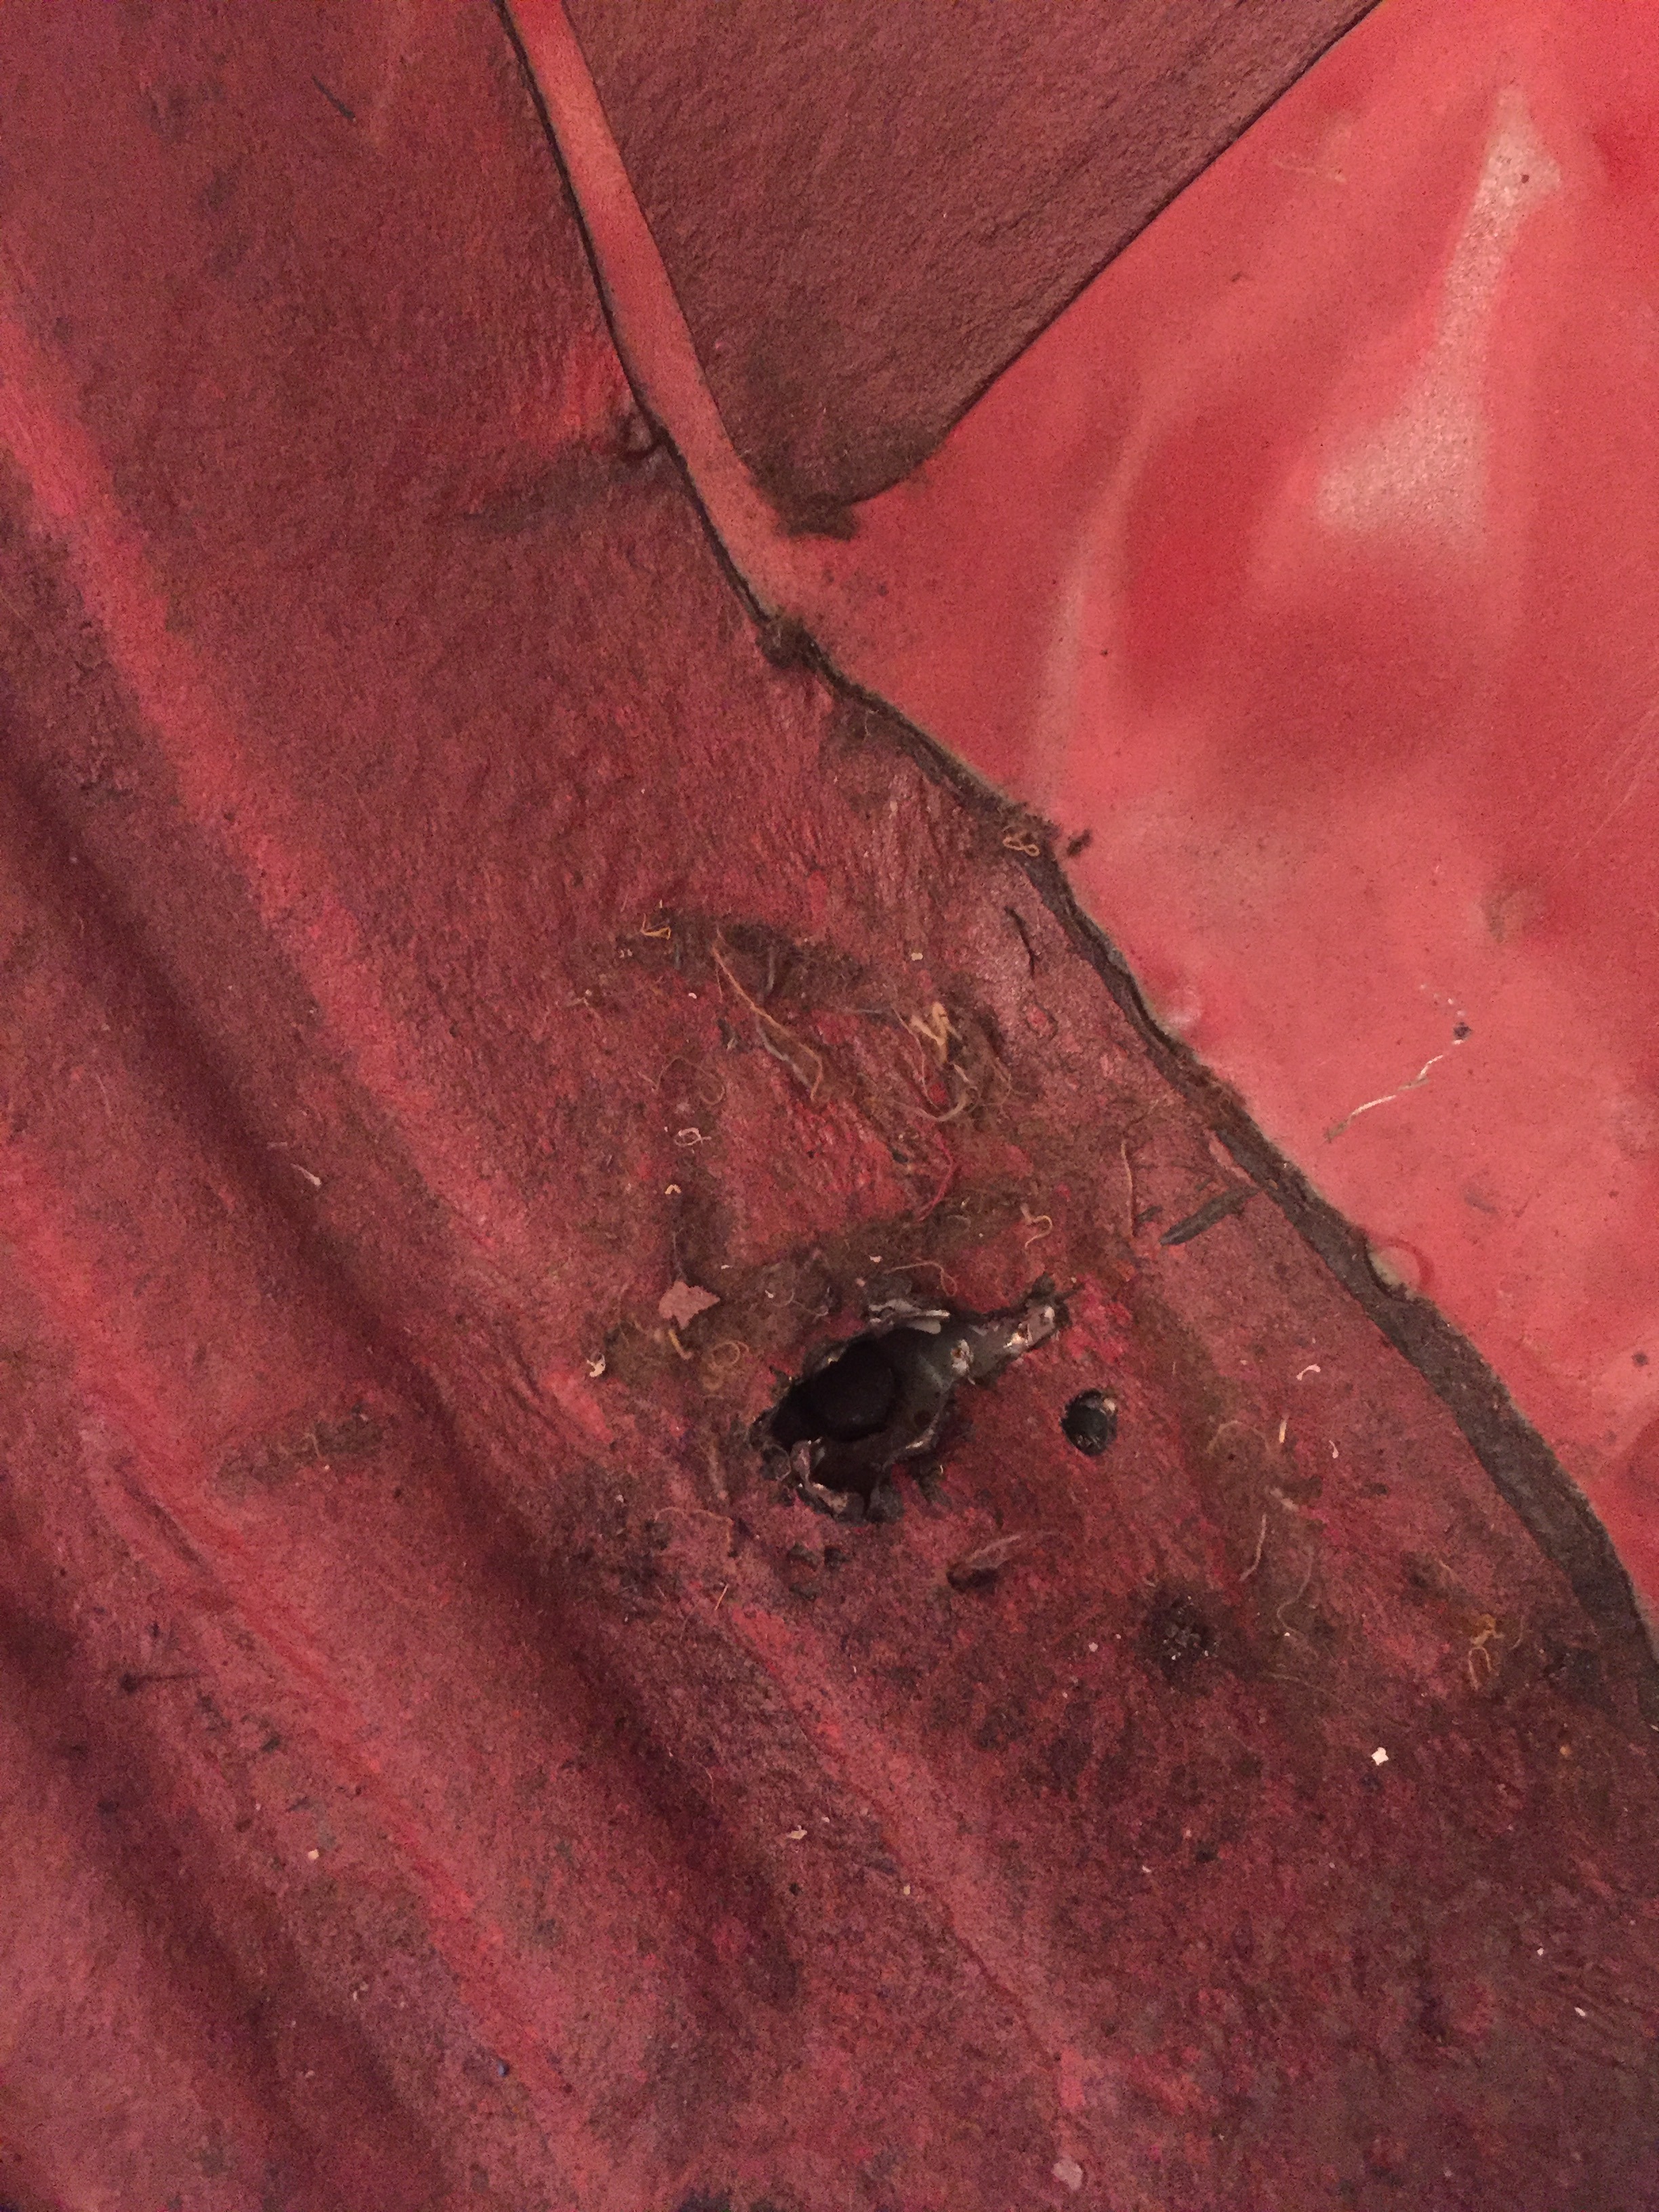
Sprayed! Just one coat for now. I wanted to get some primer in all of the cracks and such for when I lay down the filler in the seams. Found this little guy after paint -_- Not cool. Oh well, I sanded around it and welded it up (rather terribly I might add, I really need a mig welder and practice...in my defense though, the metal there is very thin and is some sort of weird double layer)
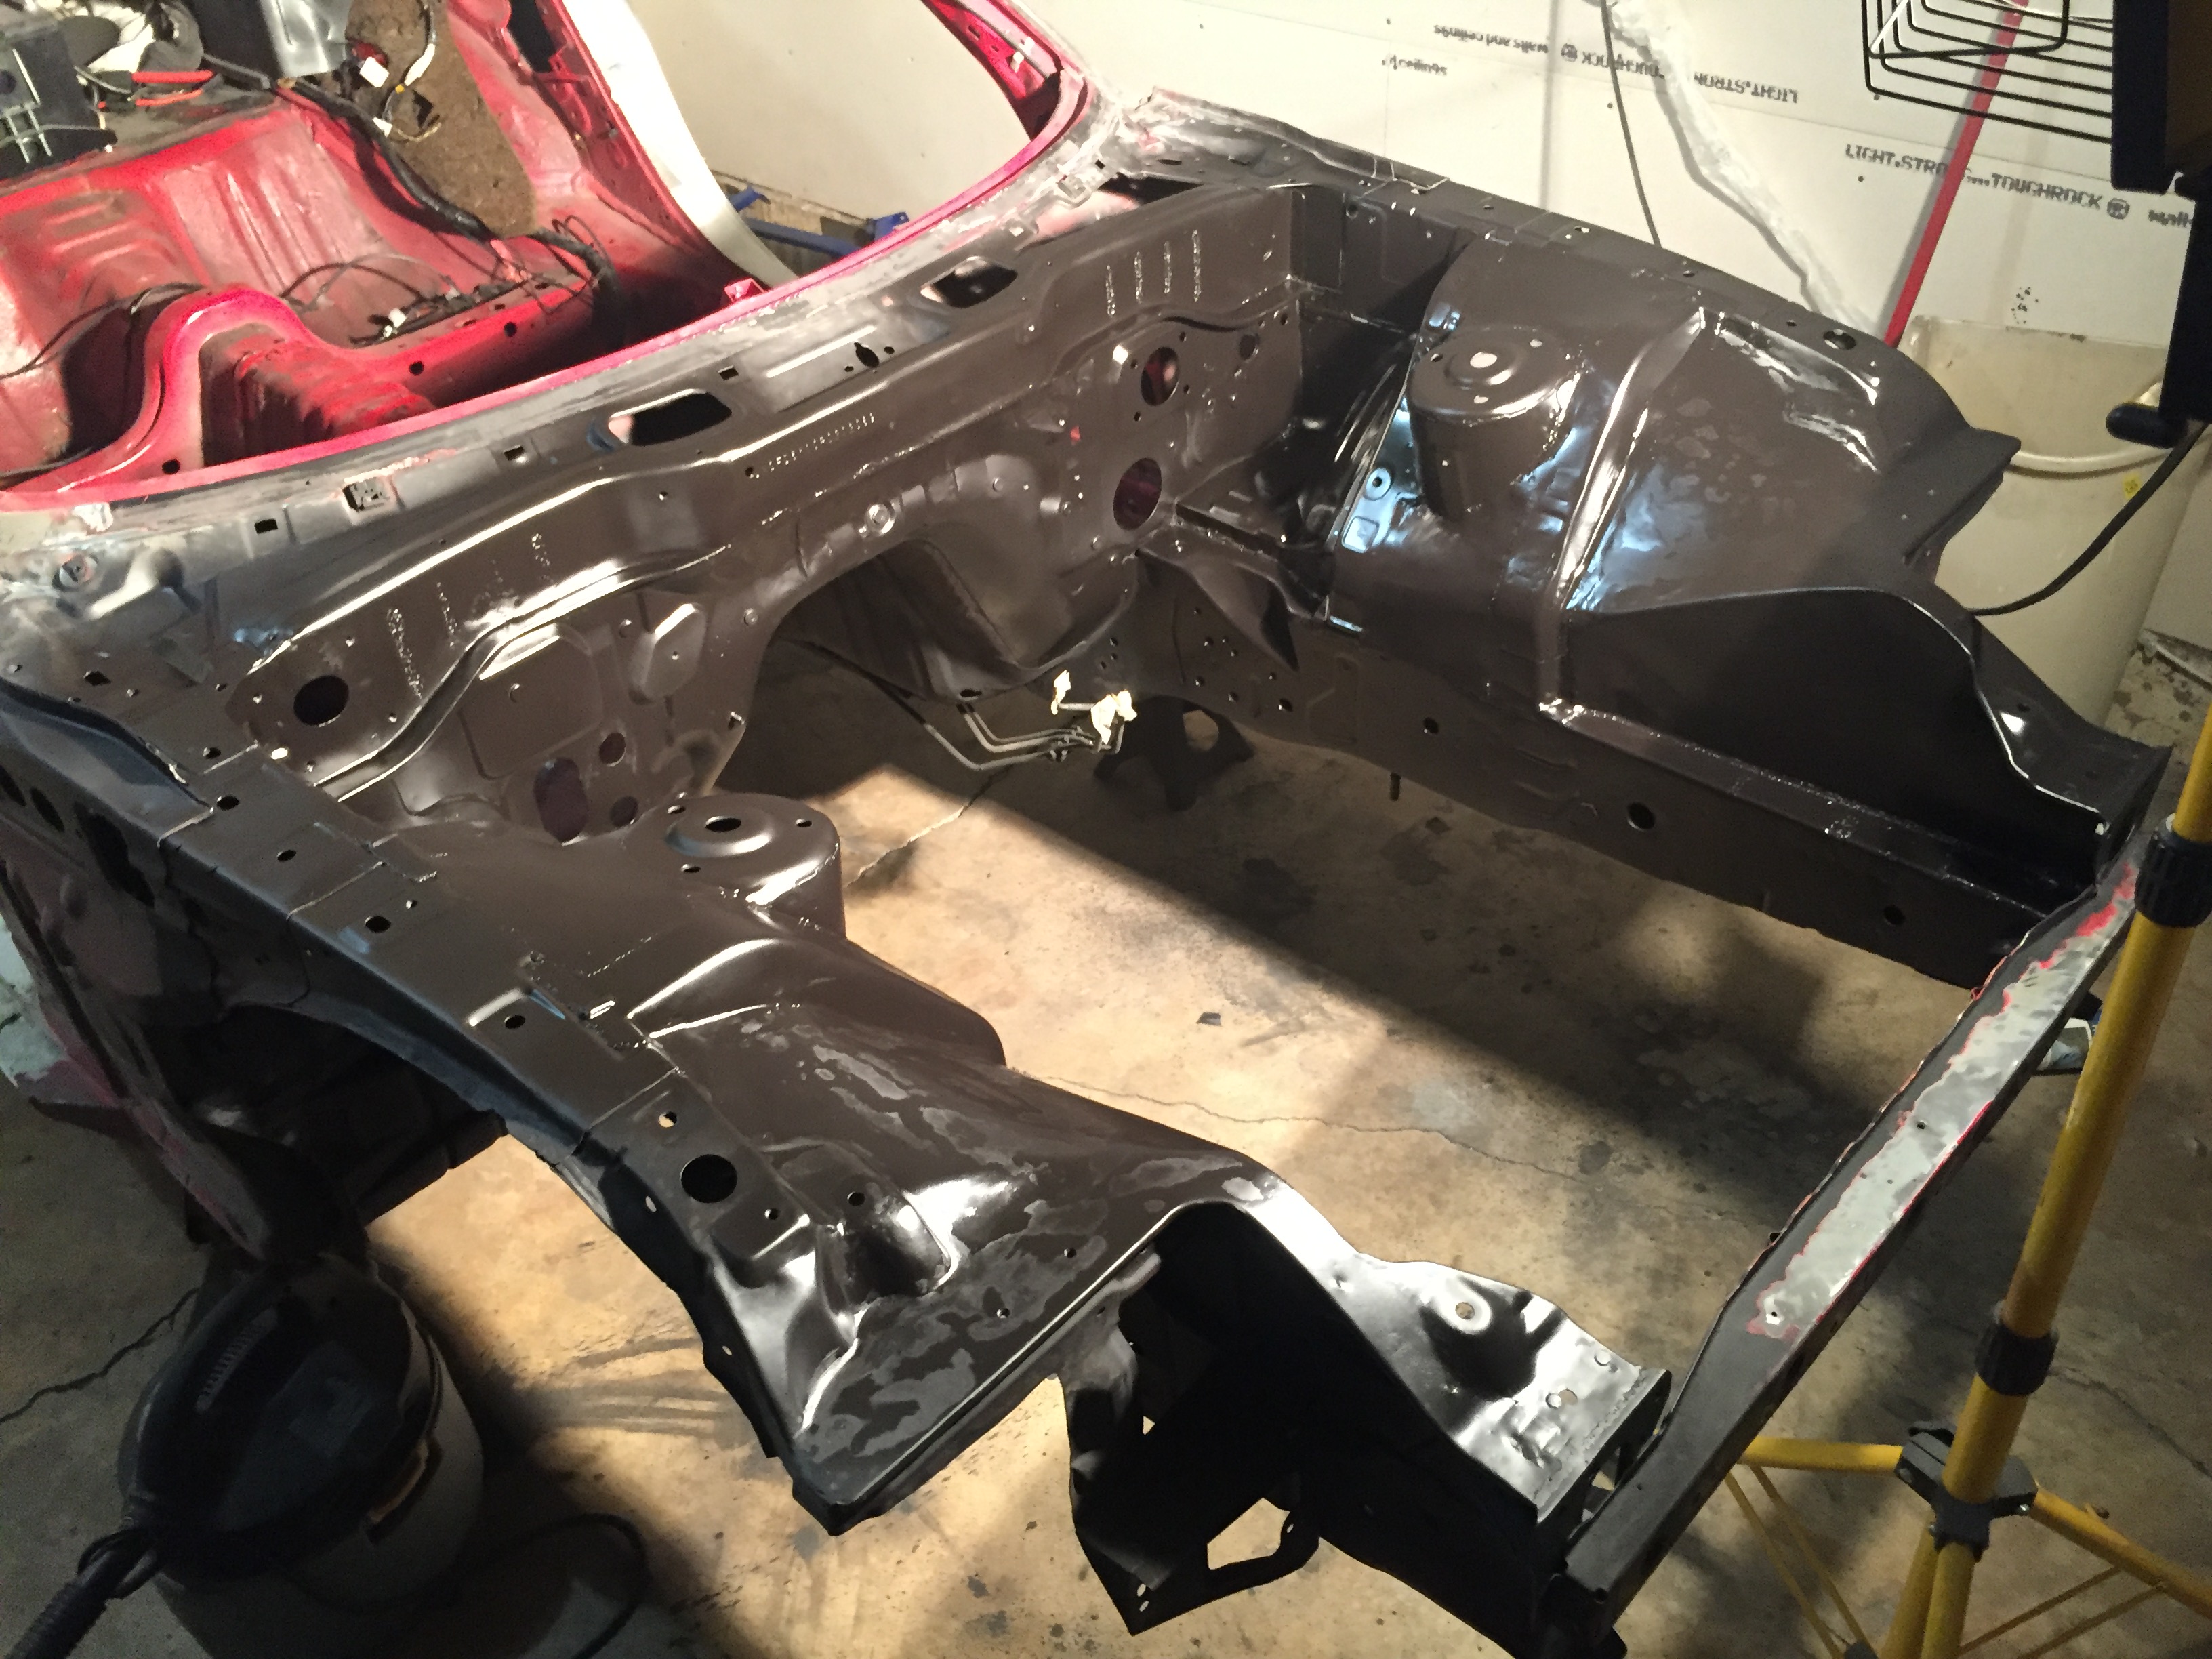
^This is right below the clutch master cylinder. I'm not really sure how that even happens, but oh well. Fixed now
So something that really annoys me and that I will get to in a bit is this. Some previous owner decided it would be good to be a caveman and used a drill/pliers to pry back the metal very crudely to get at a nut that broke off (one of the ones where the subframe brace and hpp 2in1 bolts up to) I'll probably use a hole saw over the area to clean it up a bit looks wise and to provide easy access for if the other nut comes loose
Interior is stripped and almost ready for sound deadening. Have to go through and clean everything still
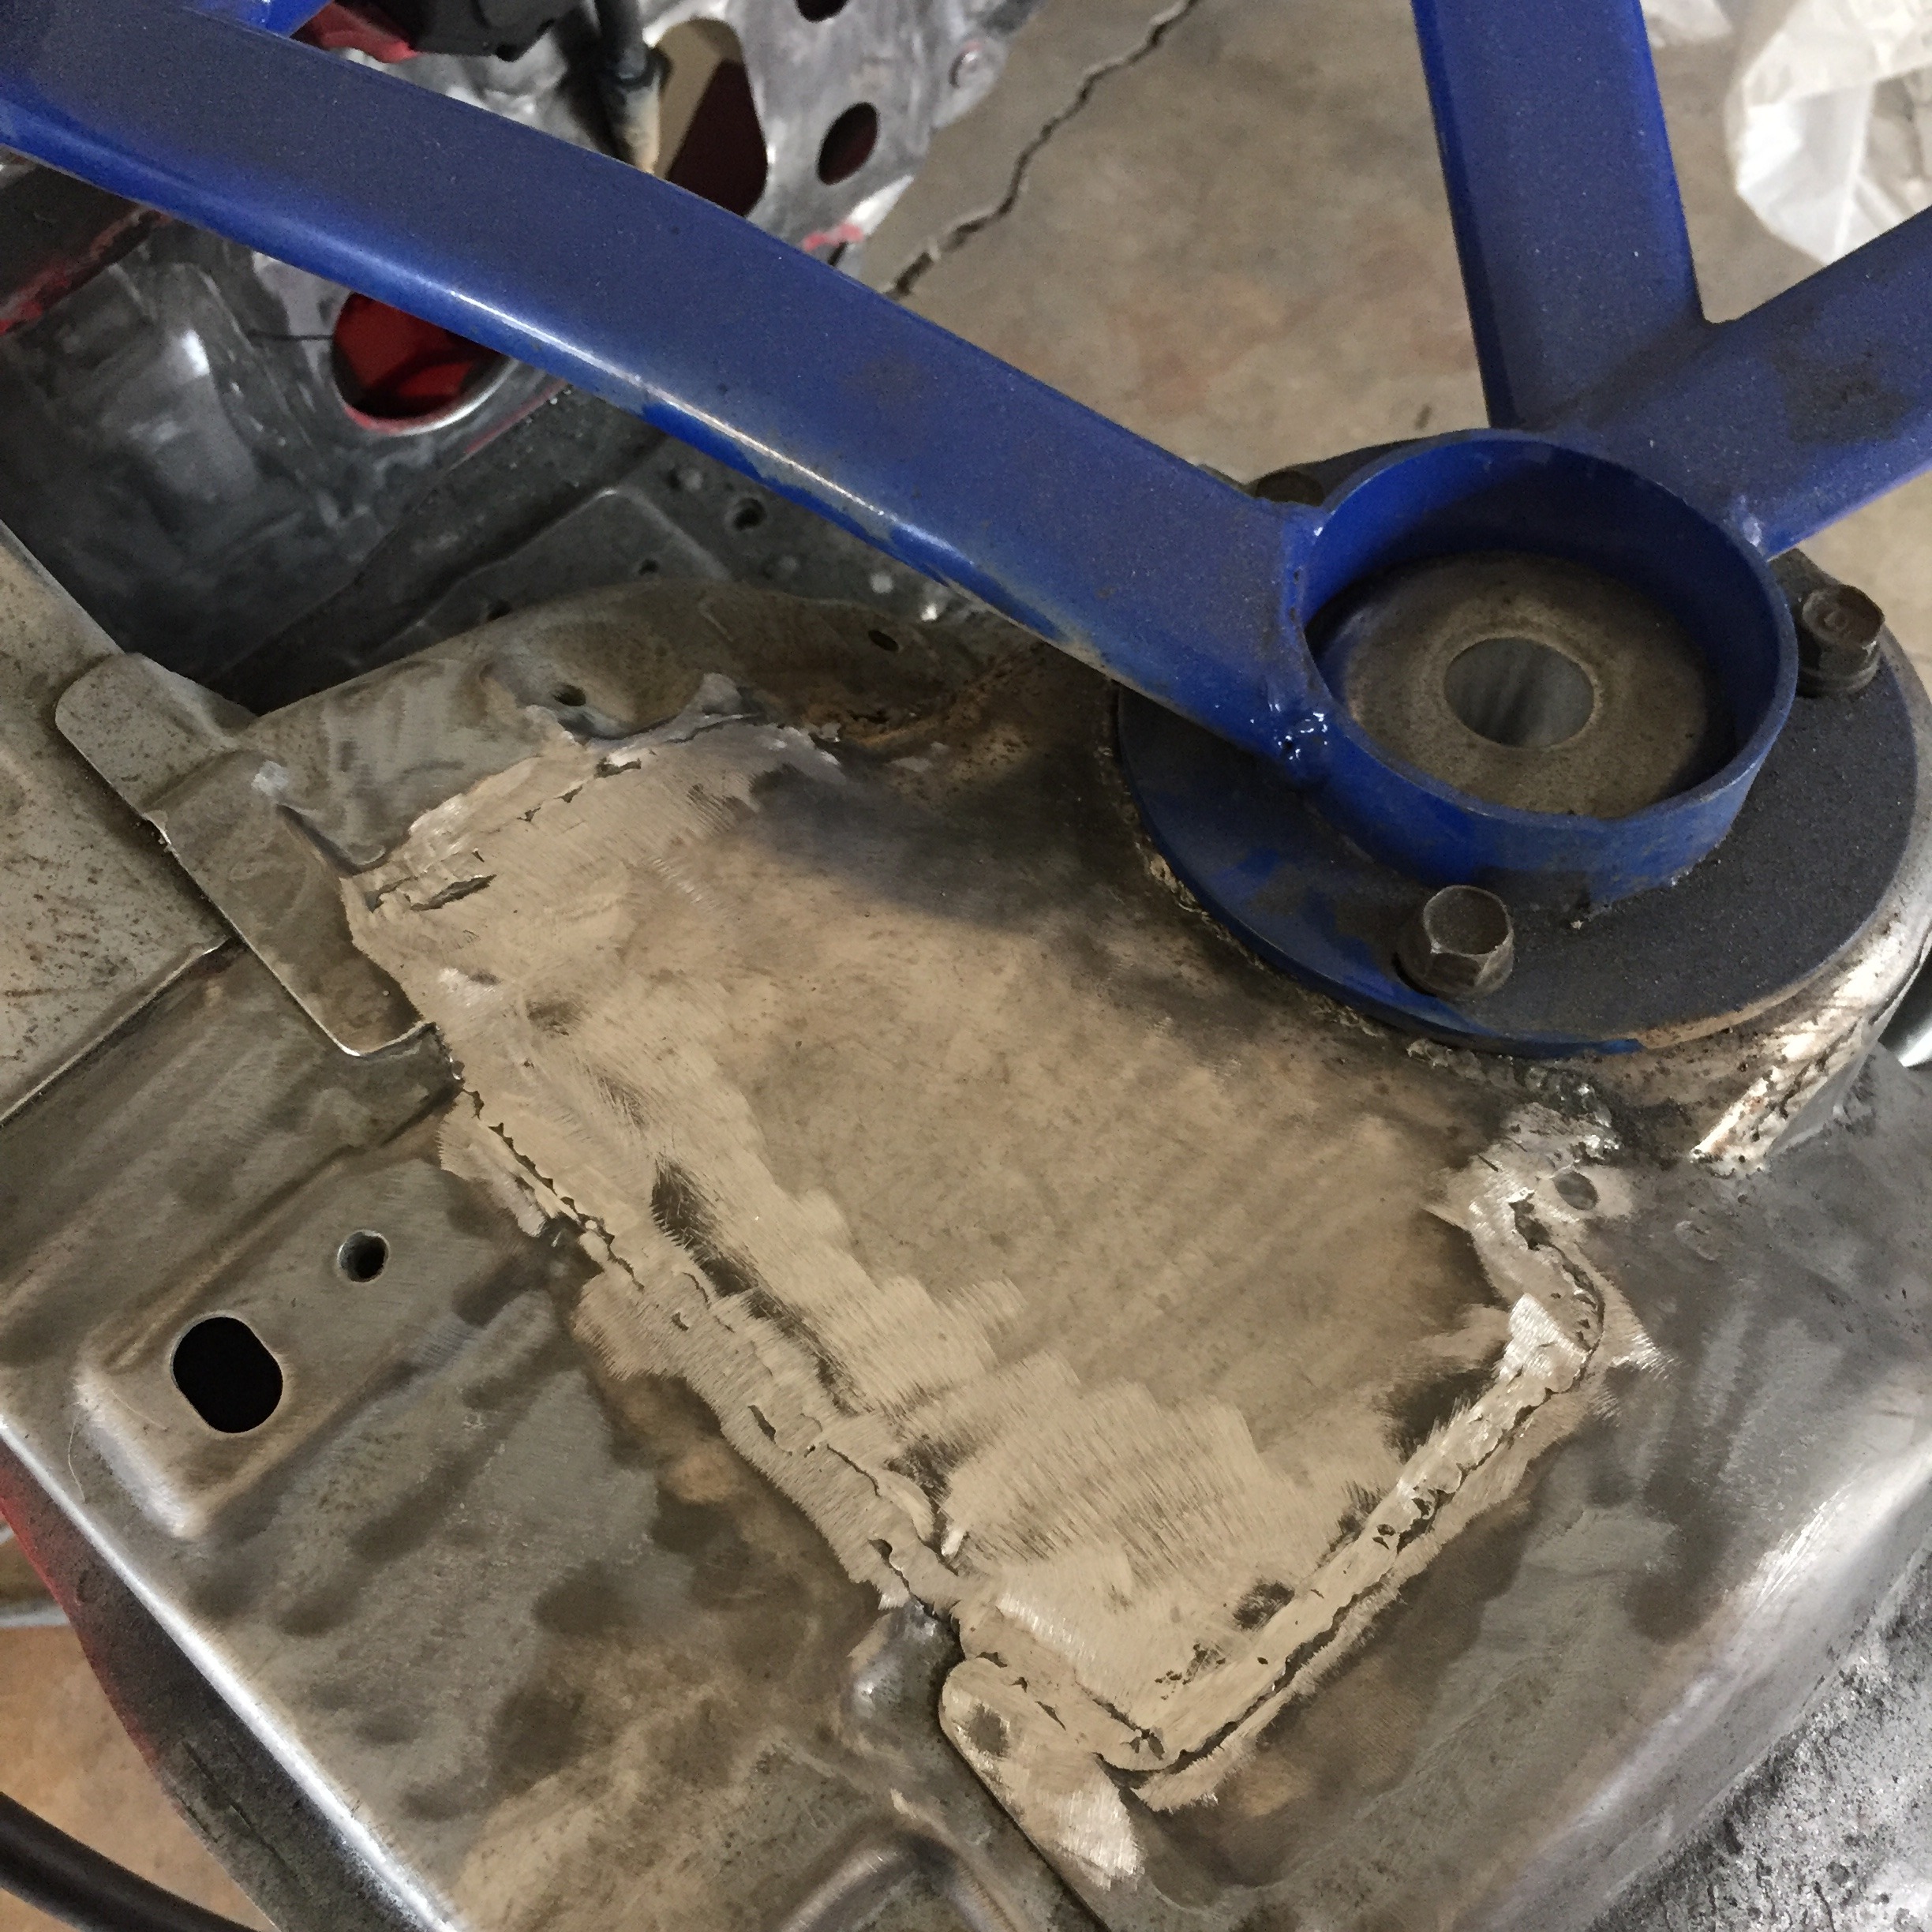
First coat of filler. I used Fibertech to fill all seams and deepish imperfections
Then sanded it all down
And then a layer of Rage Extreme for the smoothing layer. Laid it on about 1/16" thick to make sure I have enough to make it smooth with one layer
Oh, and I decided to go ahead and add the height sensors to my air management now. Figure I should go ahead and run the wiring/drill the holes while the car is apart
Prep work (ie cleaned up around the car and used prep clean on the bay)

Sprayed! Just one coat for now. I wanted to get some primer in all of the cracks and such for when I lay down the filler in the seams. Found this little guy after paint -_- Not cool. Oh well, I sanded around it and welded it up (rather terribly I might add, I really need a mig welder and practice...in my defense though, the metal there is very thin and is some sort of weird double layer)


^This is right below the clutch master cylinder. I'm not really sure how that even happens, but oh well. Fixed now
So something that really annoys me and that I will get to in a bit is this. Some previous owner decided it would be good to be a caveman and used a drill/pliers to pry back the metal very crudely to get at a nut that broke off (one of the ones where the subframe brace and hpp 2in1 bolts up to) I'll probably use a hole saw over the area to clean it up a bit looks wise and to provide easy access for if the other nut comes loose

Interior is stripped and almost ready for sound deadening. Have to go through and clean everything still

First coat of filler. I used Fibertech to fill all seams and deepish imperfections

Then sanded it all down

And then a layer of Rage Extreme for the smoothing layer. Laid it on about 1/16" thick to make sure I have enough to make it smooth with one layer

Oh, and I decided to go ahead and add the height sensors to my air management now. Figure I should go ahead and run the wiring/drill the holes while the car is apart
