
02 Type R Bathurst


Thread Starter
Joined: Mar 2008
Posts: 2,212
Likes: 282
From: Somerset, England
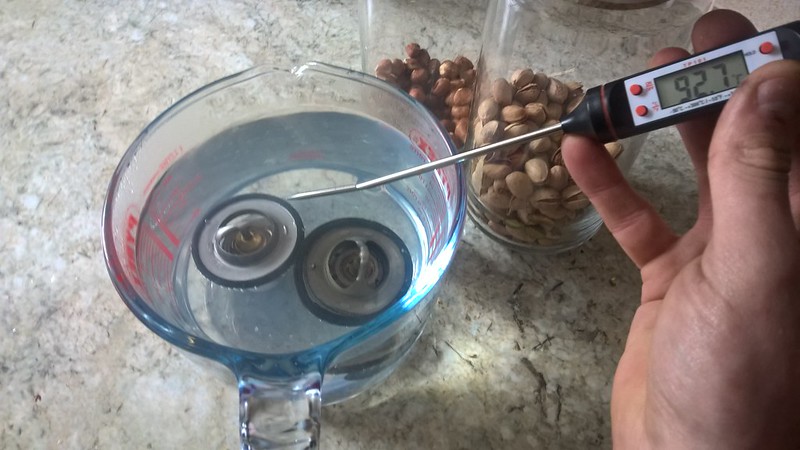
Thermostat and belts swapped out:
Good thing too as my original Mazda one was sticking closed and open in testing!
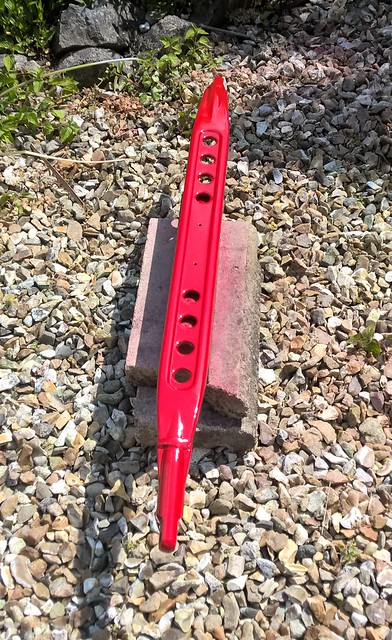
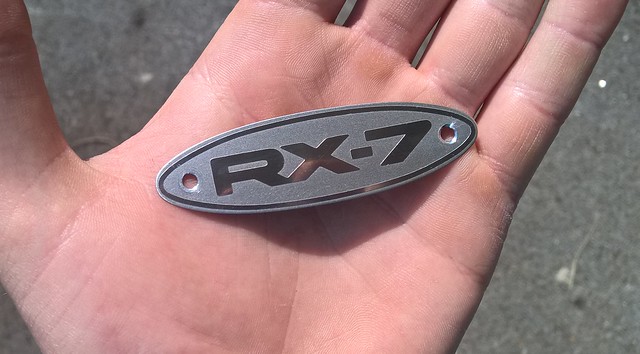
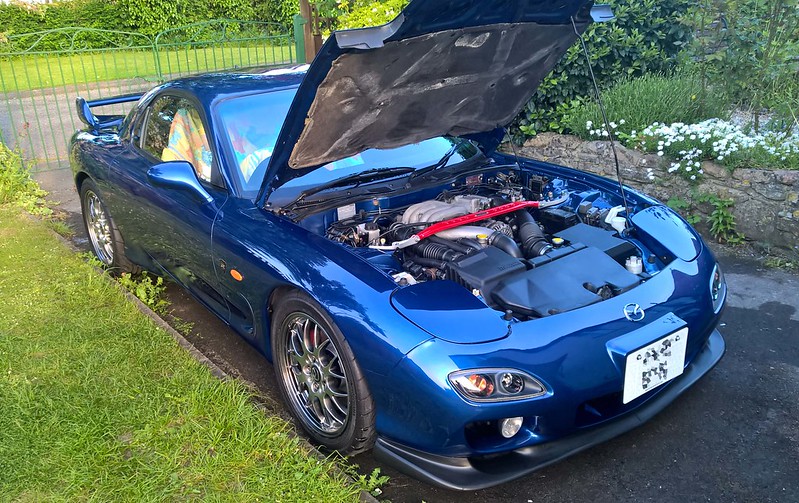
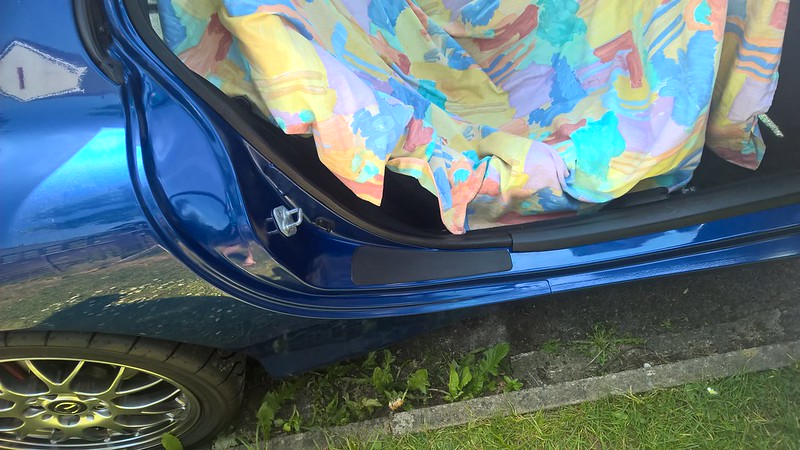
Painted an oem brace up to replace the badgeless black brace the late models have standard:
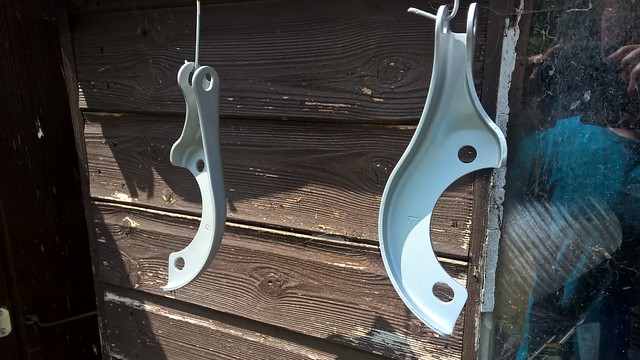
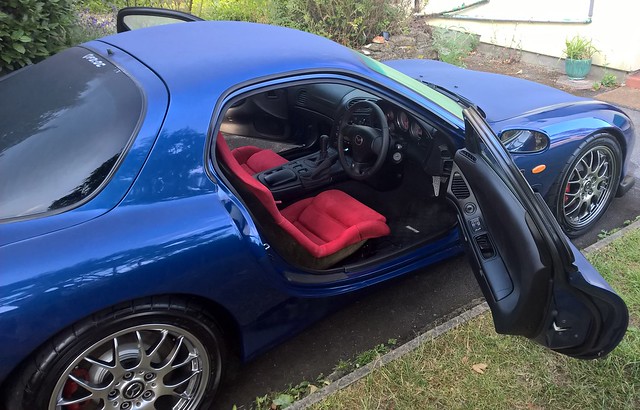
Also fitted the oem optional grippy sill protectors, they're quite a handy place to plant your hand when falling out of the buckets on exit
 .
.
Last edited by Ceylon; May 22, 2018 at 03:33 AM.
Thread Starter
Joined: Mar 2008
Posts: 2,212
Likes: 282
From: Somerset, England
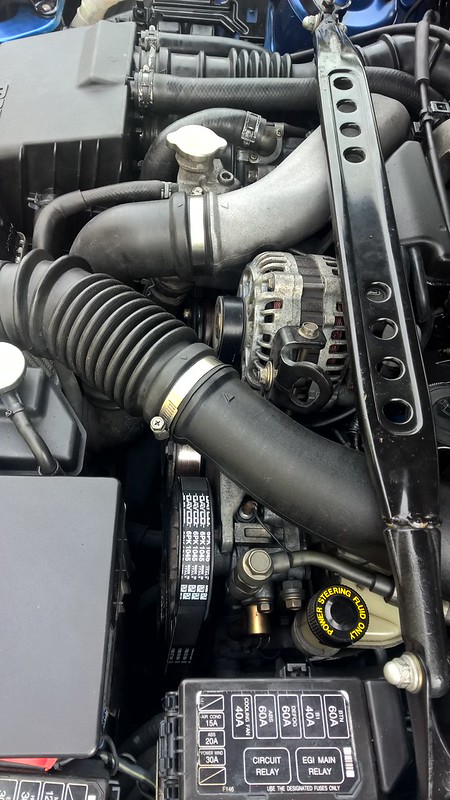
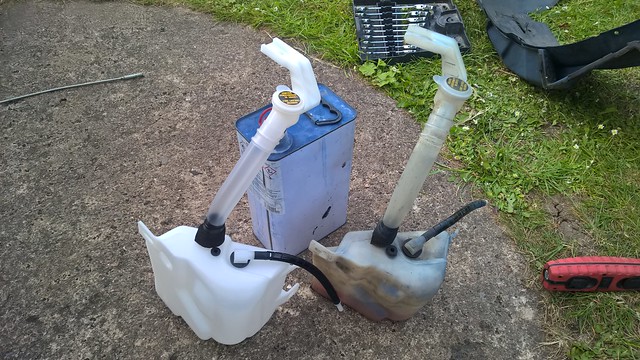
Haven't updated this one for a while. Swapped out a few bits, washer tank, expansion tank, arch liners, ABV, CRV, duty solenoids, lots of random small bits. Finally gave in and bought a new black box for the car, after testing around 70 solenoids for resistance, hot, cold, cleaned and lubricated then building what should have been a perfect black box.. To have 4 solenoid failures within a few months was the last straw, was getting bored of splitting them down! Also changed the power feed to the fuel pump in X02 as I noticed the voltage drop to the pump was pretty bad, the car performs noticeably better in the top end now!

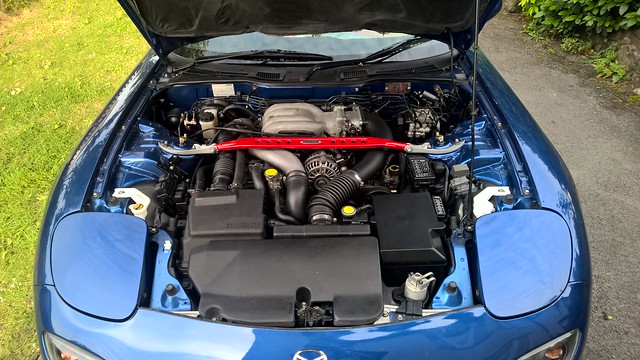
Ran her up to Northampton last weekend for a dyno day. The car was pretty heat soaked from the three-hour drive and made 289HP with 245ft/lb. Pretty pleased with that being that it's on the stock ECU still with the only performance mods being a backbox and K&N panel filter.
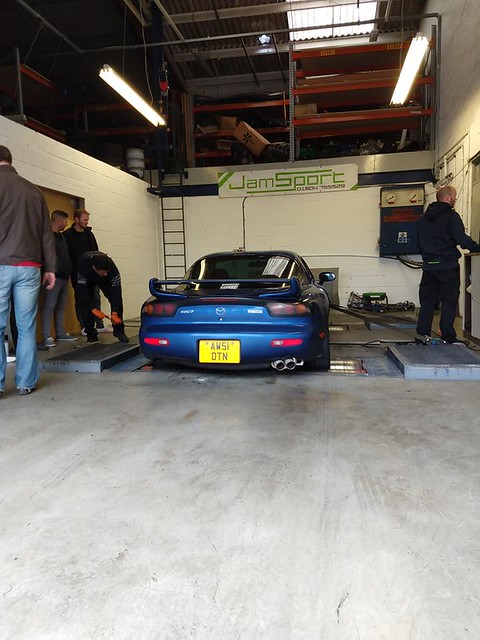
The dyno operator got the ratios slightly wrong, so this whole graph is about 350rpm too far to the right but you get the idea.
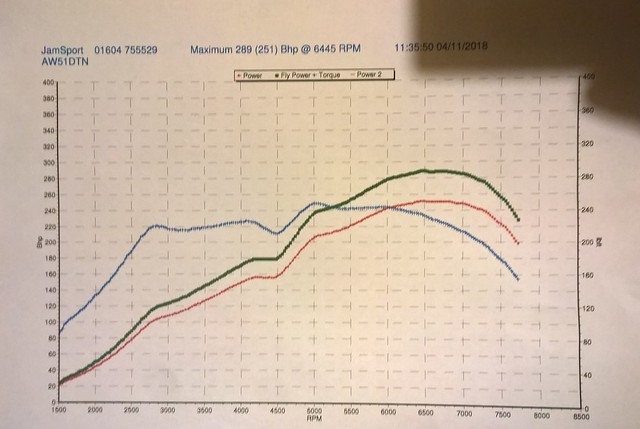
Taken her off the road for the winter as the gritters are out in the UK now. I'm thinking of fitting a larger diameter downpipe and an smic, seeing how far I can push the power while staying within the parameters of the stock ecu. I certainly don't want to change the ECU, the drivability of the late ECU's is fantastic compared to any other FD I've tried, she still seems plenty safe enough AFR wise to take a few more mods.
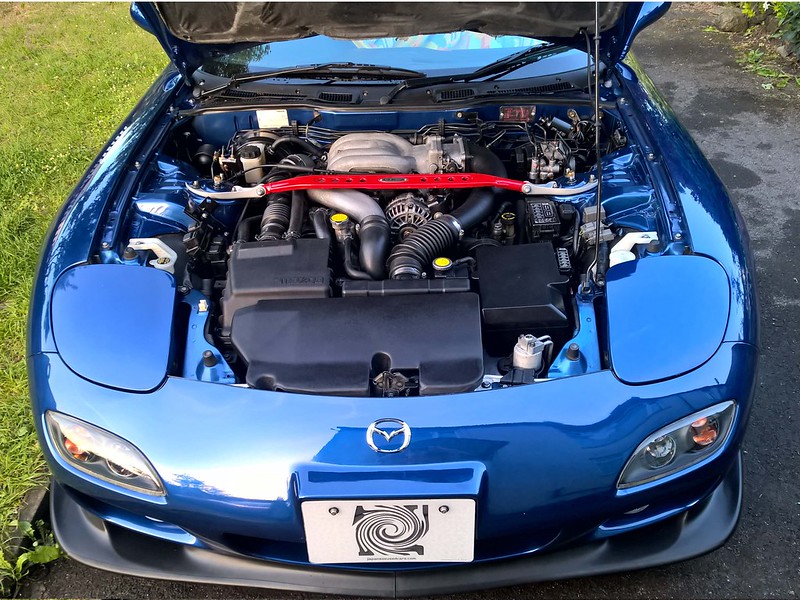
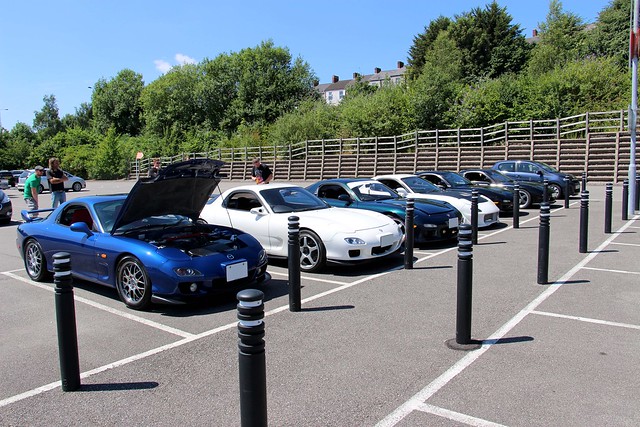
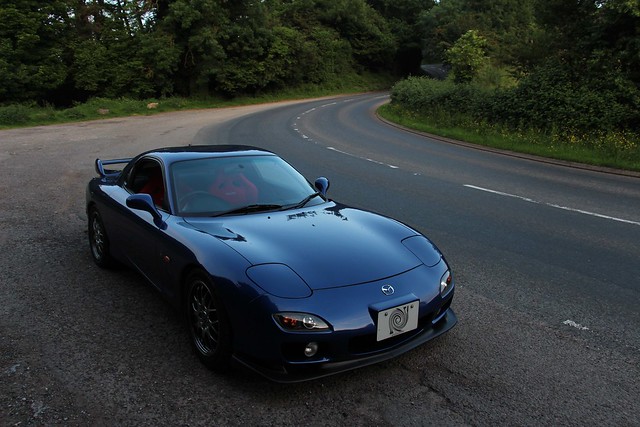
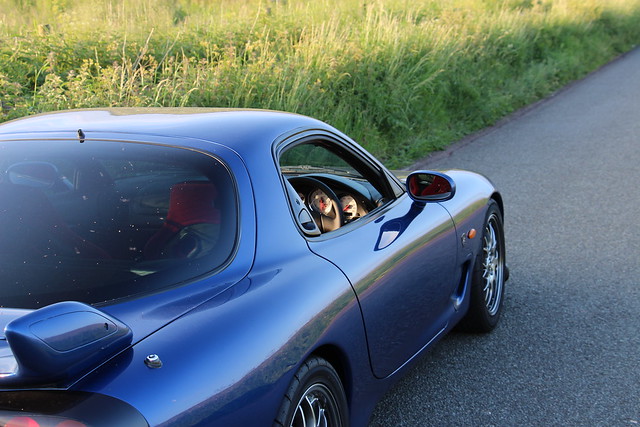
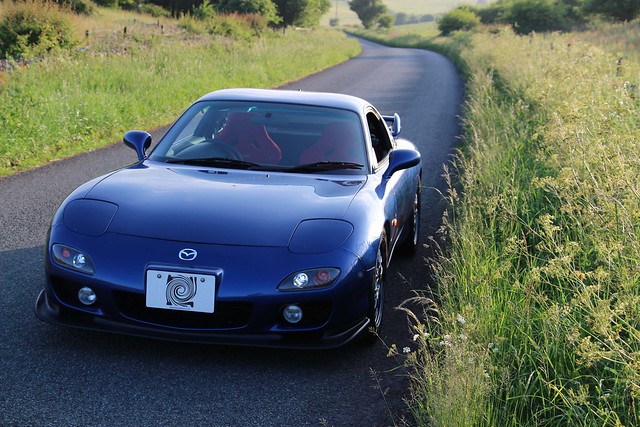
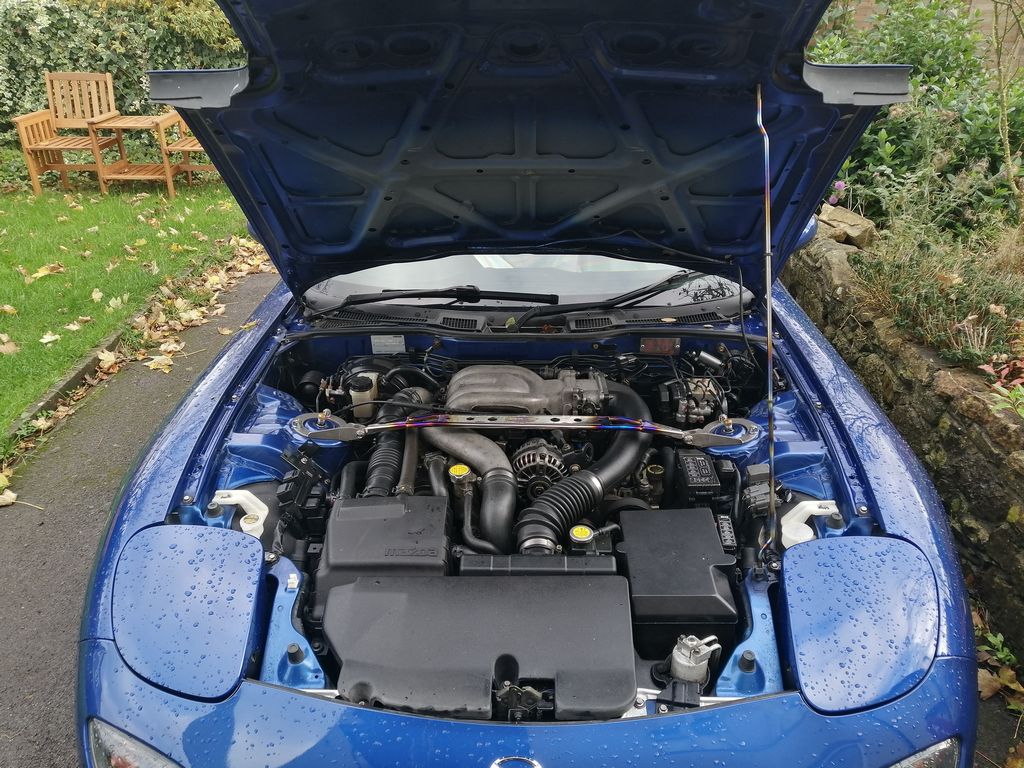
Couple of pics from earlier in the year when the weather was better:

Ran her up to Northampton last weekend for a dyno day. The car was pretty heat soaked from the three-hour drive and made 289HP with 245ft/lb. Pretty pleased with that being that it's on the stock ECU still with the only performance mods being a backbox and K&N panel filter.
The dyno operator got the ratios slightly wrong, so this whole graph is about 350rpm too far to the right but you get the idea.
Taken her off the road for the winter as the gritters are out in the UK now. I'm thinking of fitting a larger diameter downpipe and an smic, seeing how far I can push the power while staying within the parameters of the stock ecu. I certainly don't want to change the ECU, the drivability of the late ECU's is fantastic compared to any other FD I've tried, she still seems plenty safe enough AFR wise to take a few more mods.
Couple of pics from earlier in the year when the weather was better:
Last edited by Ceylon; Nov 11, 2018 at 04:58 AM.


Thread Starter
Joined: Mar 2008
Posts: 2,212
Likes: 282
From: Somerset, England
Not sure on which SMIC, I'm tempted to make my own twin core, sort of like a Knightsports on but hopefully less ugly and with better welds.
Nice. I bought new charge relief, charge control and turbo control solenoids and was planning on testing and reusing some old ones I had. Wondering if I should just go ahead and get all new solenoids. Would not want to have to redo the sequential and emissions stuff multiple times.
Thread Starter
Joined: Mar 2008
Posts: 2,212
Likes: 282
From: Somerset, England
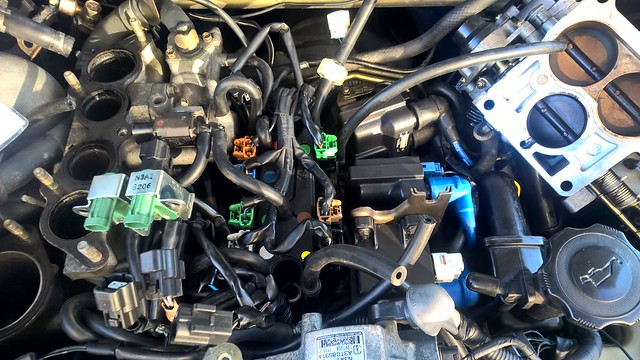
If you've got good working ones, may as well use them. Although the peace of mind of a new set is pretty attractive. The only solenoid I haven't replaced is my turbo 2 control now... It's behaving at the moment so I'll probably leave it be.... It does bother me a bit that it isn't very shiny though. They seem to last longer than the ones in the rack.
Got to say, it's so much easier working on the later cars, can pull and swap the black box in 10 minutes. I've been working a lot on my '92 FD recently, I can see why they changed it out haha.
Got to say, it's so much easier working on the later cars, can pull and swap the black box in 10 minutes. I've been working a lot on my '92 FD recently, I can see why they changed it out haha.
Last edited by Ceylon; Nov 12, 2018 at 04:28 PM.
Thread Starter
Joined: Mar 2008
Posts: 2,212
Likes: 282
From: Somerset, England
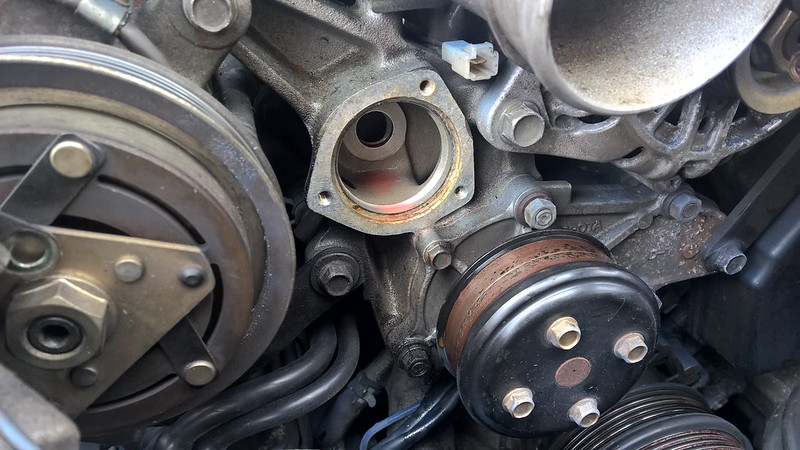
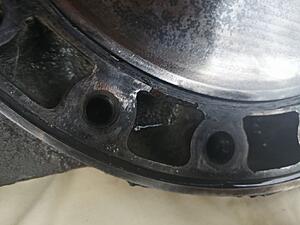
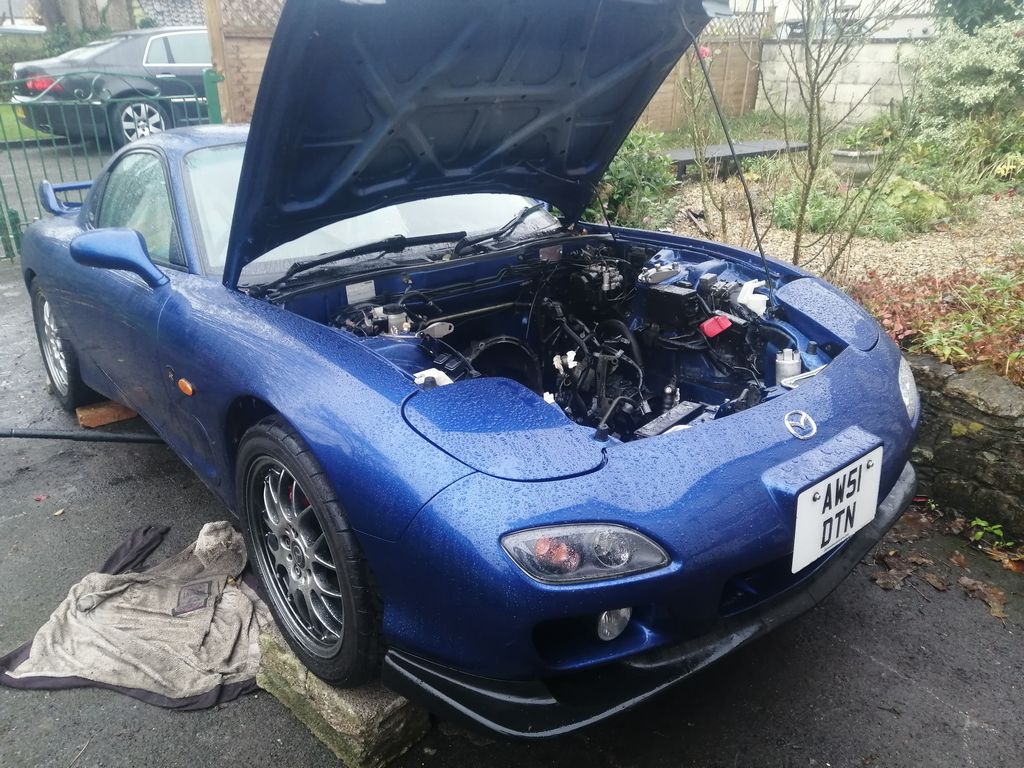
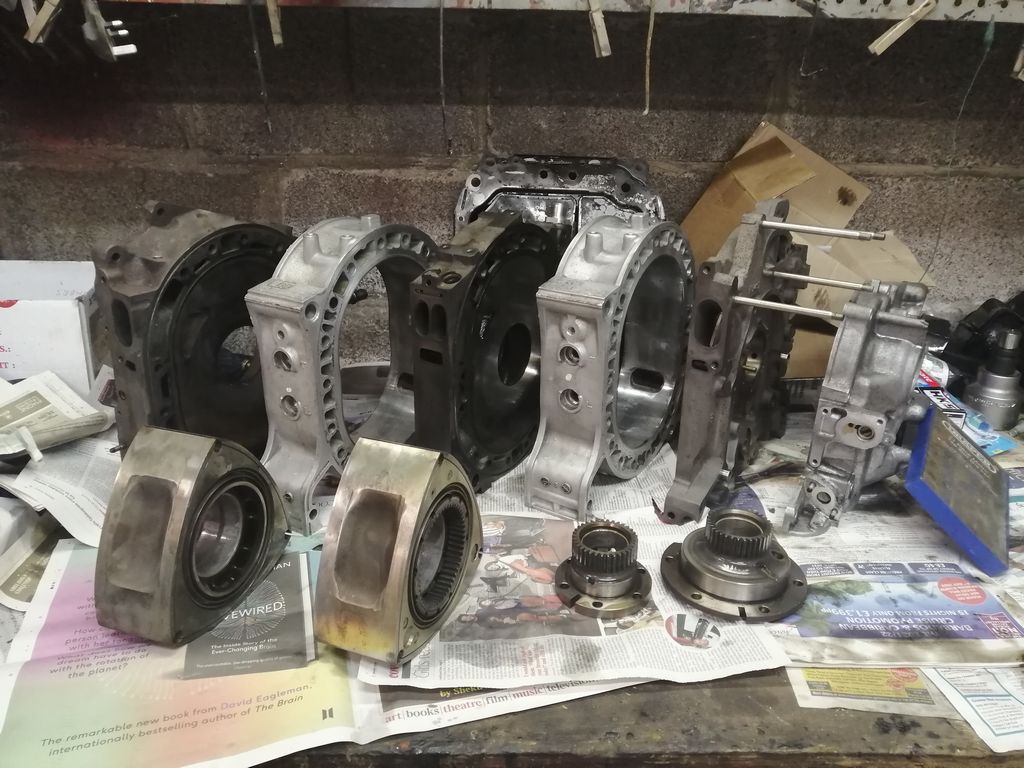
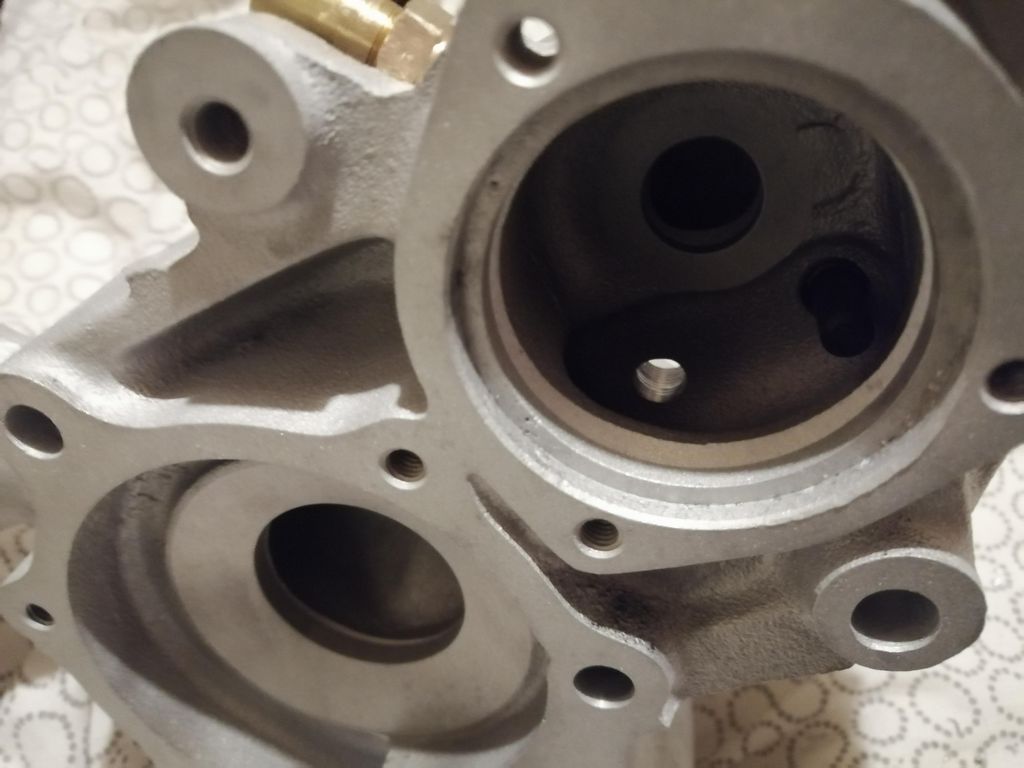
So the car started smoking on start up and using coolant. It was the original motor so wasn't a huge surprise, but it was time to investigate.


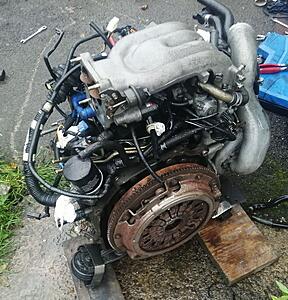
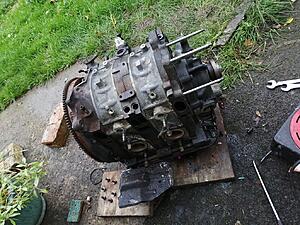
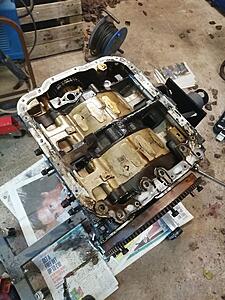

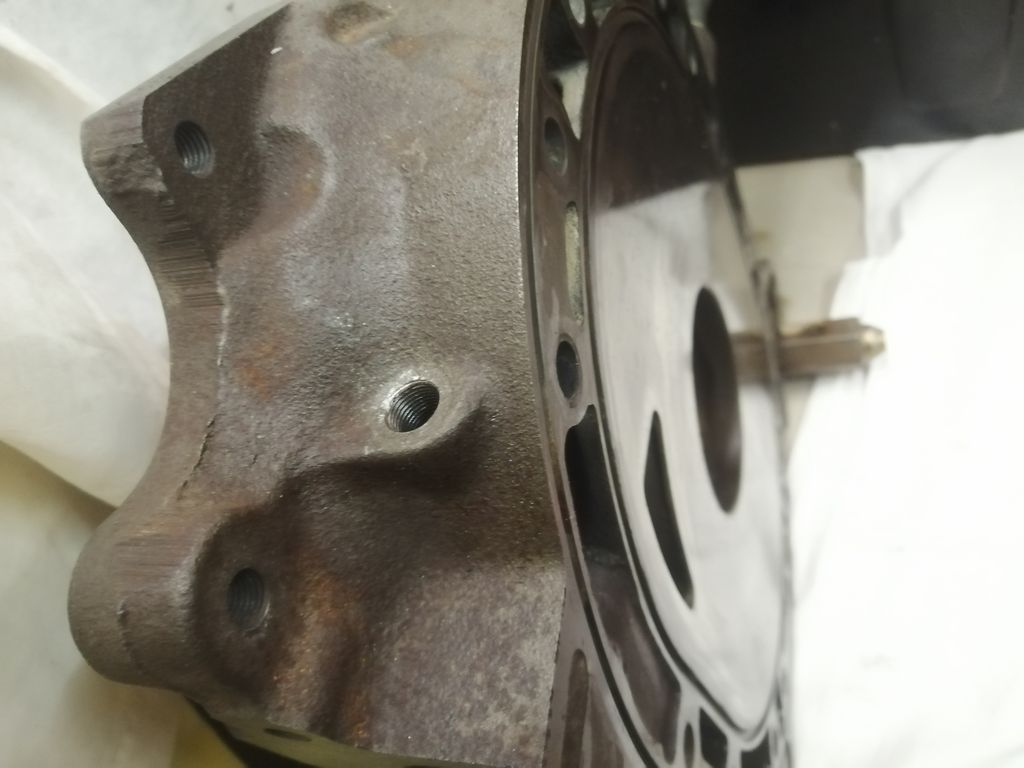
The issue was a failed coolant wall on the front plate:
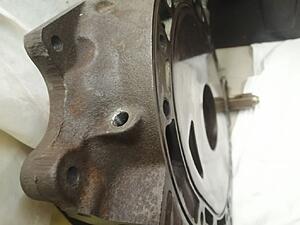
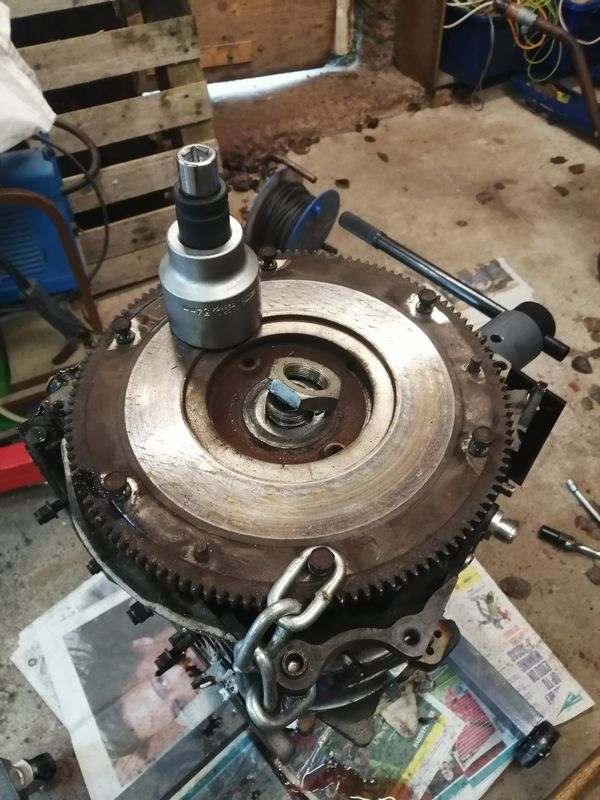
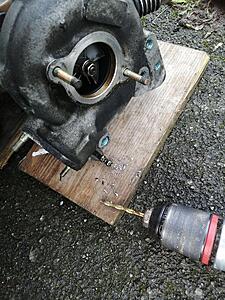
Rear iron tapped for an aluminium fitting:
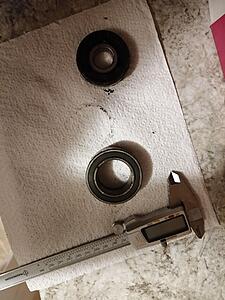
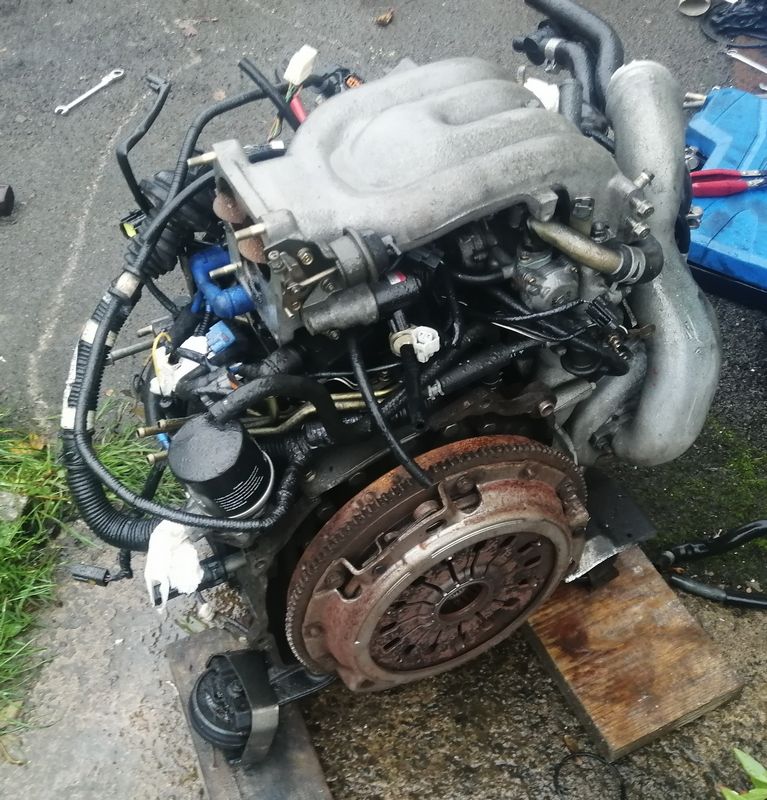
Air pump and aux belt idler bearings removed for replacement:

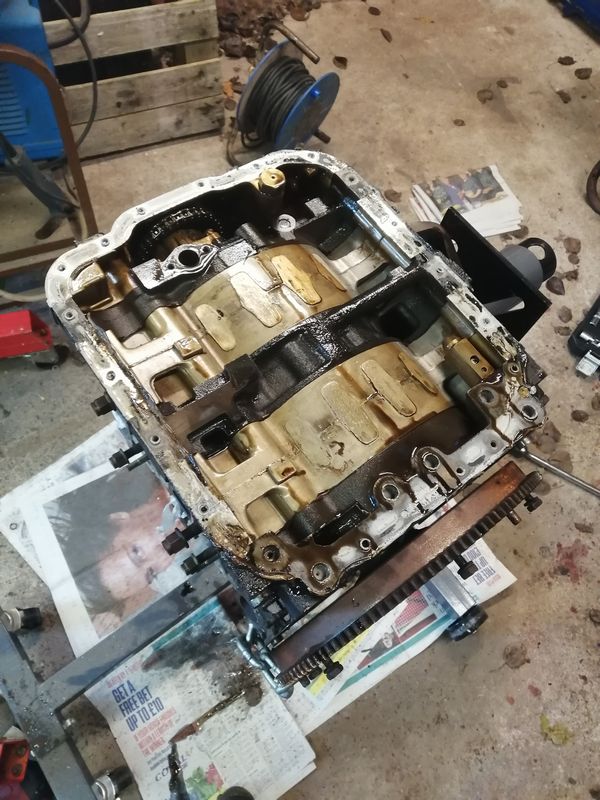

The issue was a failed coolant wall on the front plate:

Rear iron tapped for an aluminium fitting:
Air pump and aux belt idler bearings removed for replacement:

Thread Starter
Joined: Mar 2008
Posts: 2,212
Likes: 282
From: Somerset, England
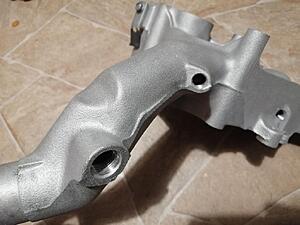
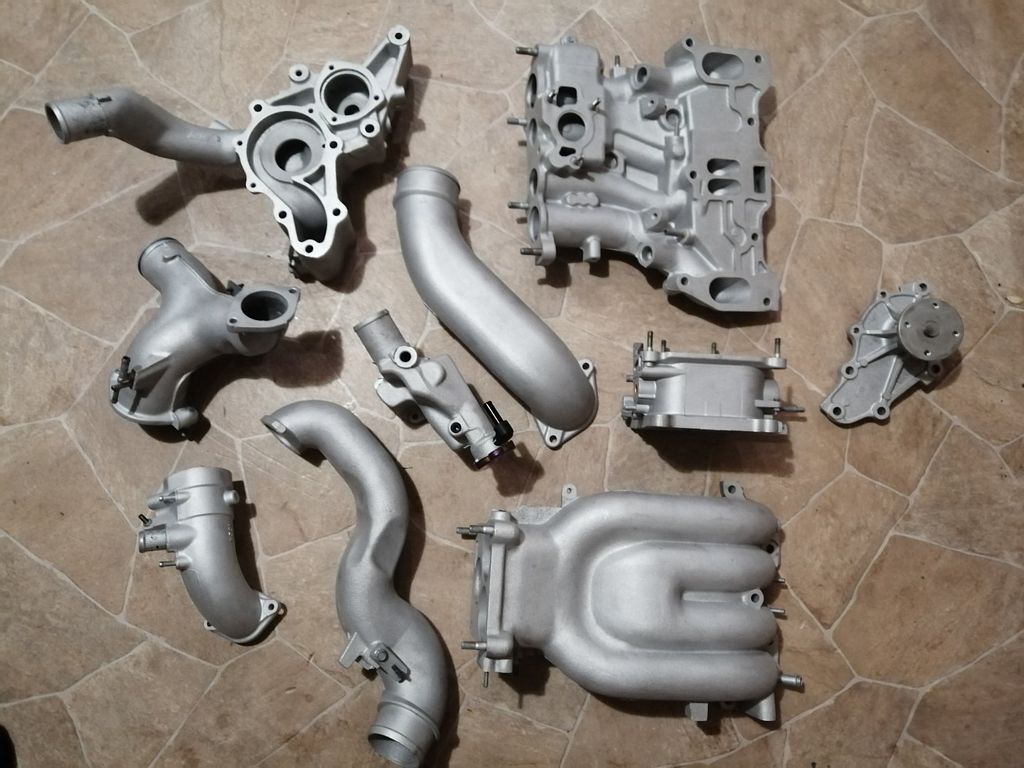
Aluminium parts vapour blasted:

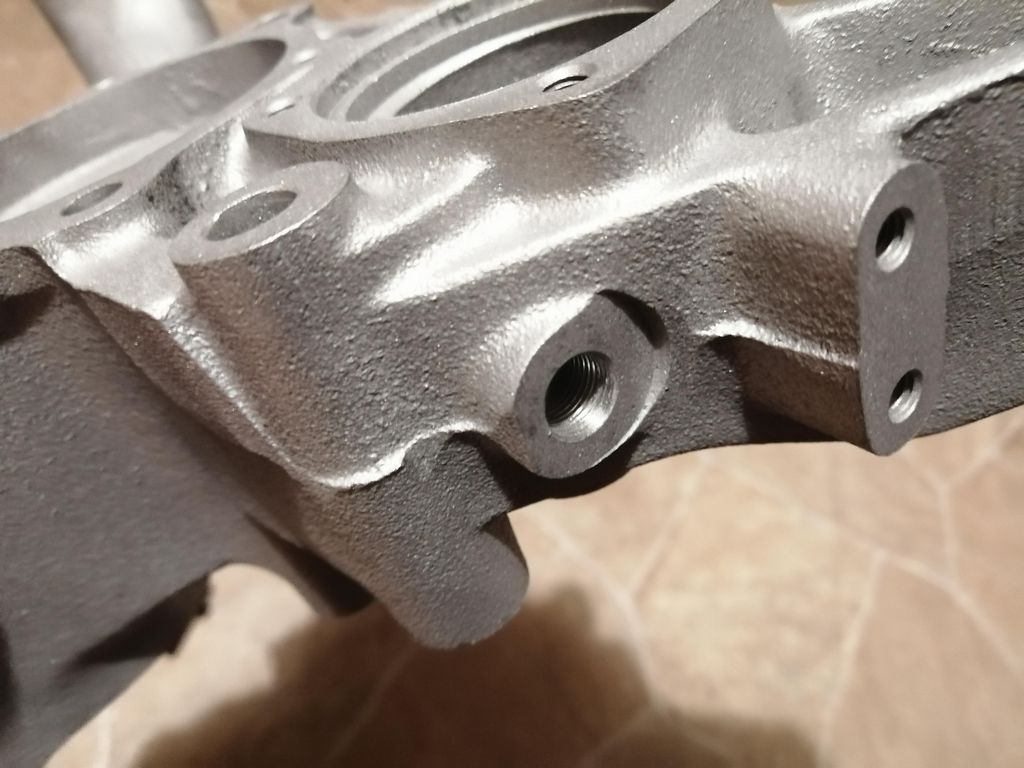
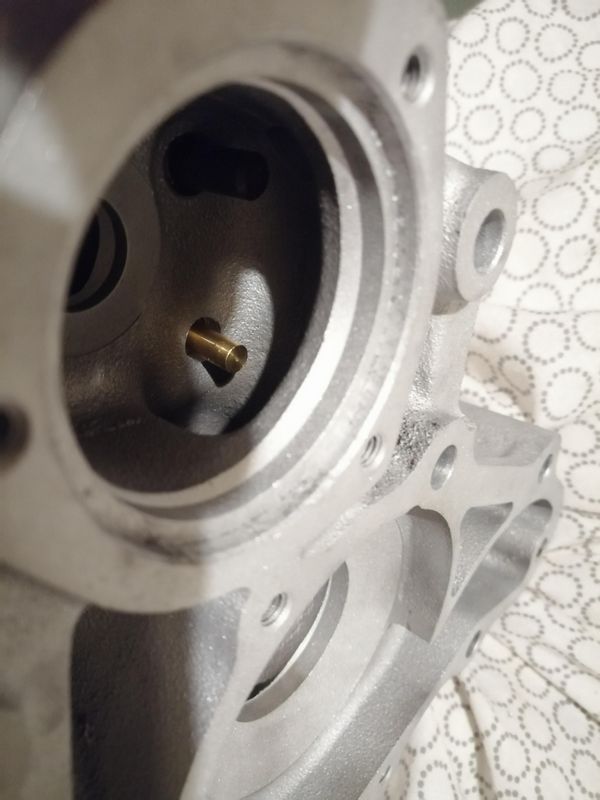
AST removed and new fittings drilled and tapped into filler neck.

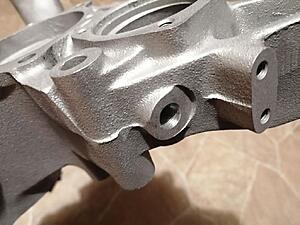
Everything is being tapped to receive aluminium fittings to reduce any potential corrosion areas:
Couple of bits from Banzai, I will be retaining the oem crank pulley as I don't want to under-drive my auxiliaries:

Going old school with a manual boost controller with this build. I'm sticking with the late oem ecu as the car runs so good on it.

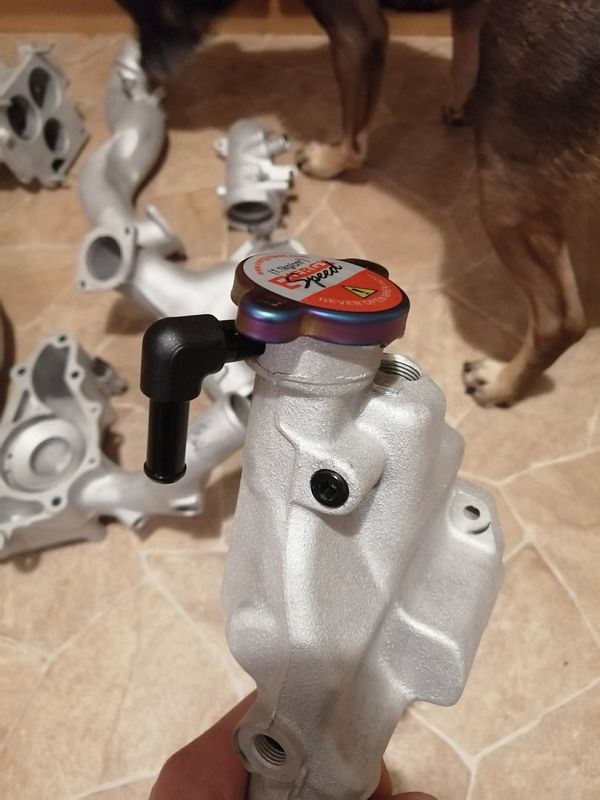
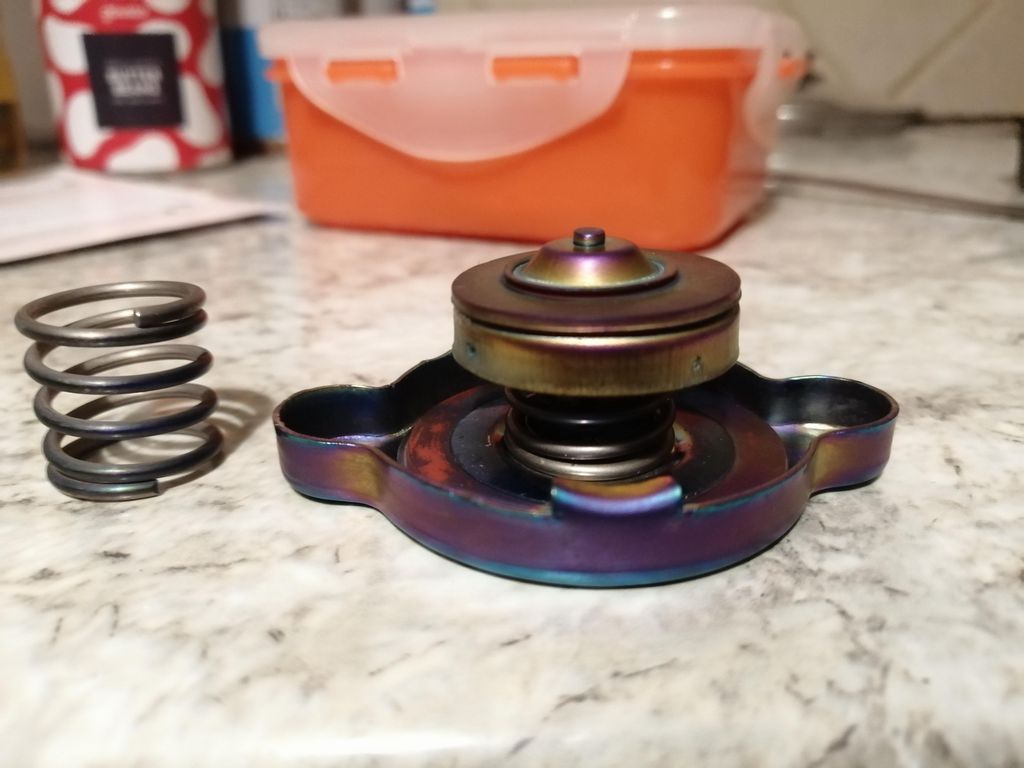
Titanium radiator cap. Swapped in a 0.9bar spring

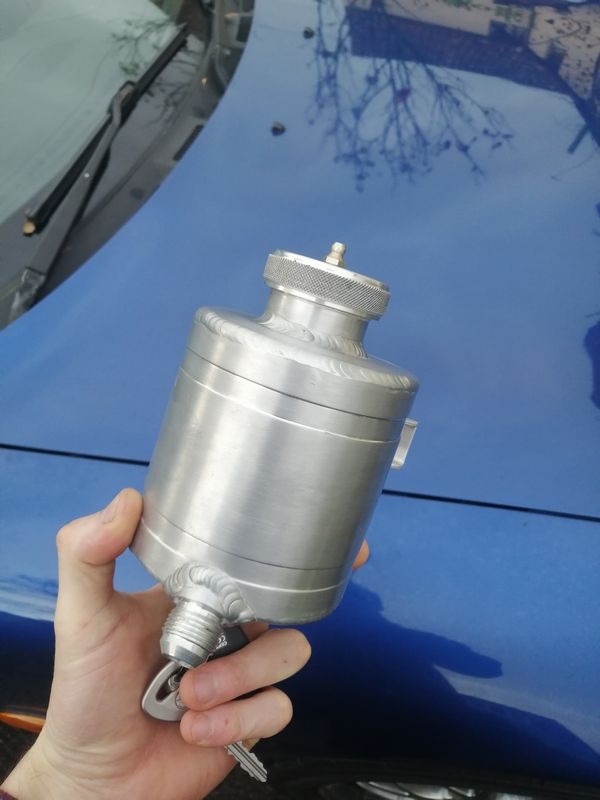
You may have noticed the fitting where the filler neck should be on the block...I'm not going to run a filler neck and it'll be connected to this. A sort of self draining filler/catch can that is breathable and baffled:

AST removed and new fittings drilled and tapped into filler neck.
Everything is being tapped to receive aluminium fittings to reduce any potential corrosion areas:

Couple of bits from Banzai, I will be retaining the oem crank pulley as I don't want to under-drive my auxiliaries:
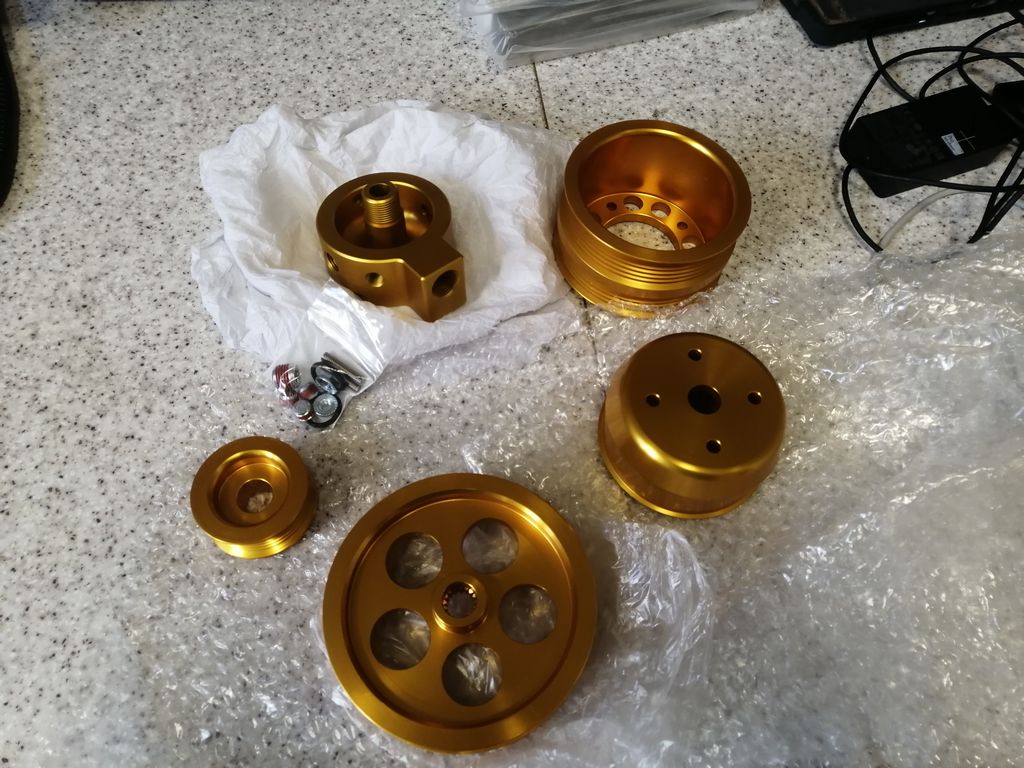
Going old school with a manual boost controller with this build. I'm sticking with the late oem ecu as the car runs so good on it.
Titanium radiator cap. Swapped in a 0.9bar spring
You may have noticed the fitting where the filler neck should be on the block...I'm not going to run a filler neck and it'll be connected to this. A sort of self draining filler/catch can that is breathable and baffled:
Last edited by Ceylon; Nov 24, 2020 at 03:58 AM.


Thread Starter
Joined: Mar 2008
Posts: 2,212
Likes: 282
From: Somerset, England
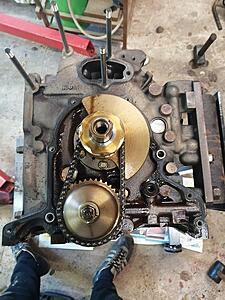
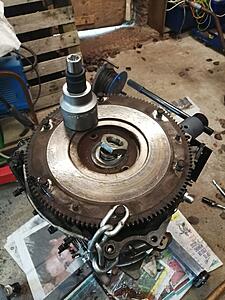
The engine has little corrosion so my guess would be a fault in the cast from new that eventually let go maybe? The step wear really is minimal, the plates are very good otherwise so I'm getting it laser welded and machined so it can be reused.


Thread Starter
Joined: Mar 2008
Posts: 2,212
Likes: 282
From: Somerset, England
Thanks!
Cheers. Yes you could make it work providing you don't have EGR, you'd need to swap the loom plugs as they are different and re-plumb all the vac hosing but it's doable. Not sure it's worth the hassle though? If a solenoid dies in the box it's much more of a faff to swap out than if it's a separate easy access solenoid on the rack. For speed to rebuilding a motor the black box is good though, much faster and less pipework to set up when dressing the block.
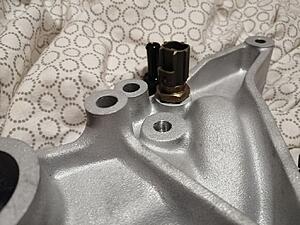
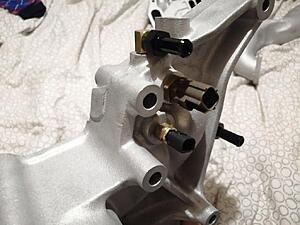
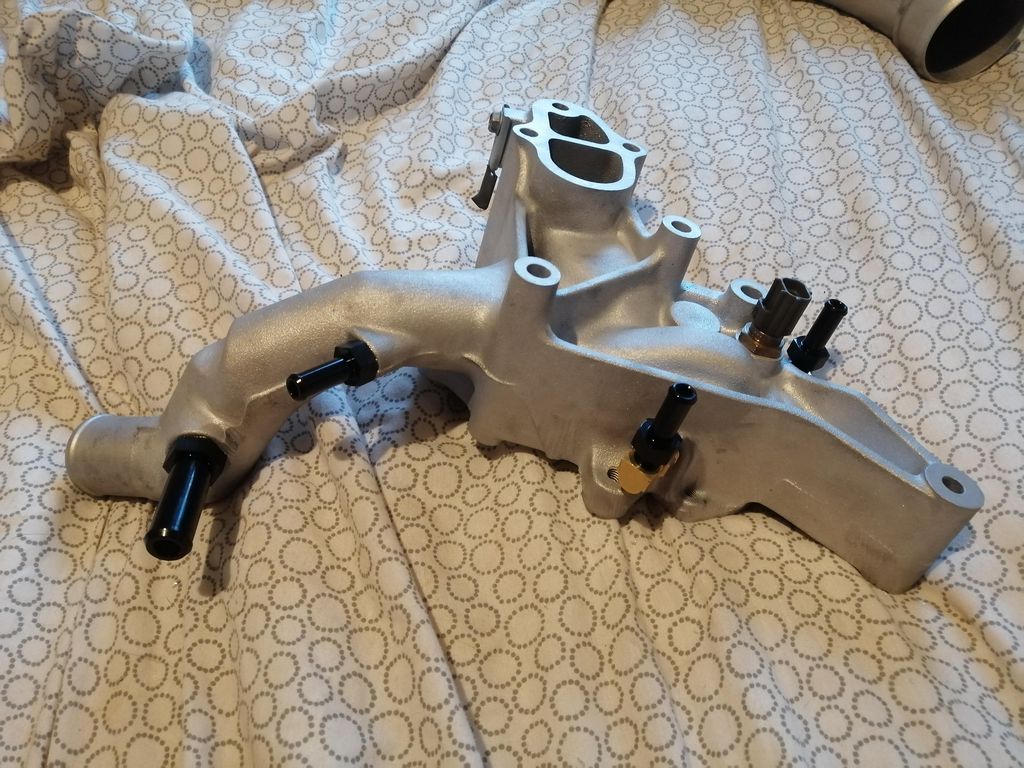
Not got much to update on yet as I've got lots of parts to plate before I can make much more progress, but I've been getting on with reassembling and pressure testing the aluminium parts.
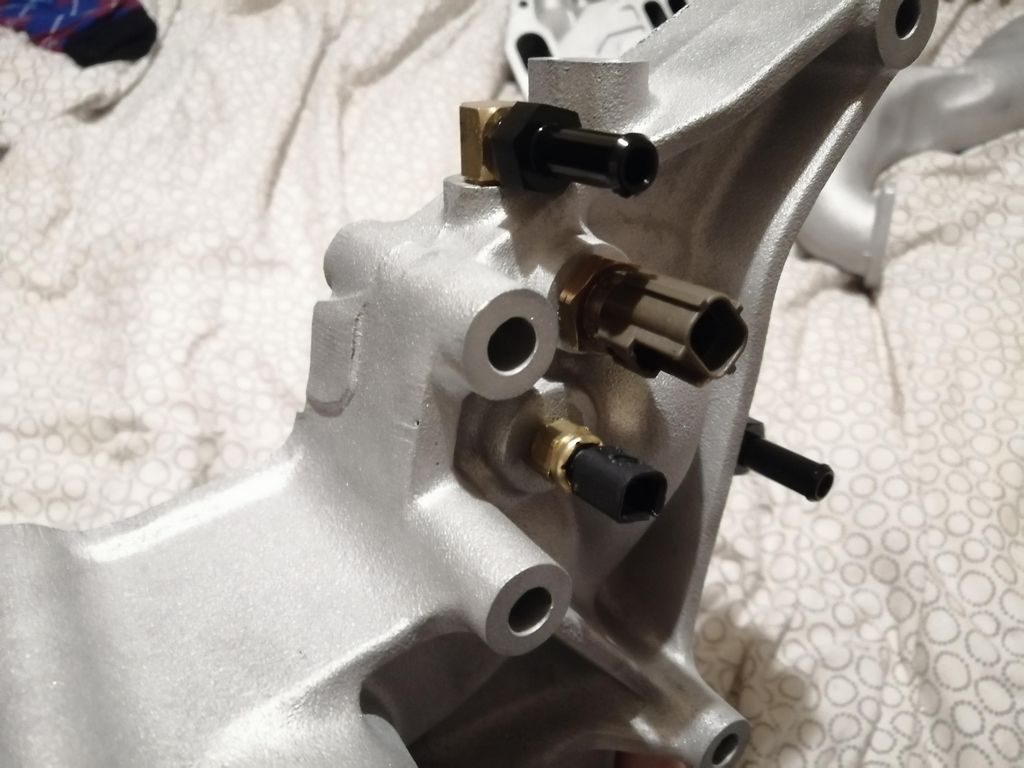
Anodised fittings replaced all the steel fittings on the WP housing:
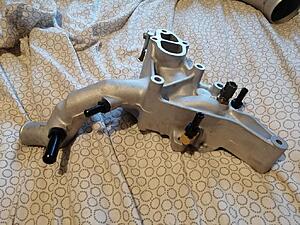
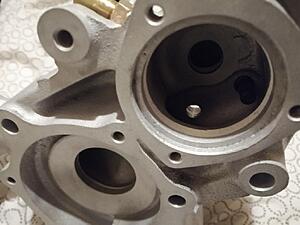
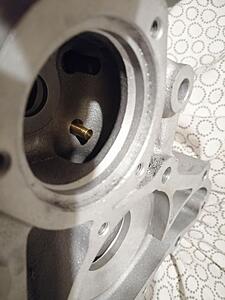
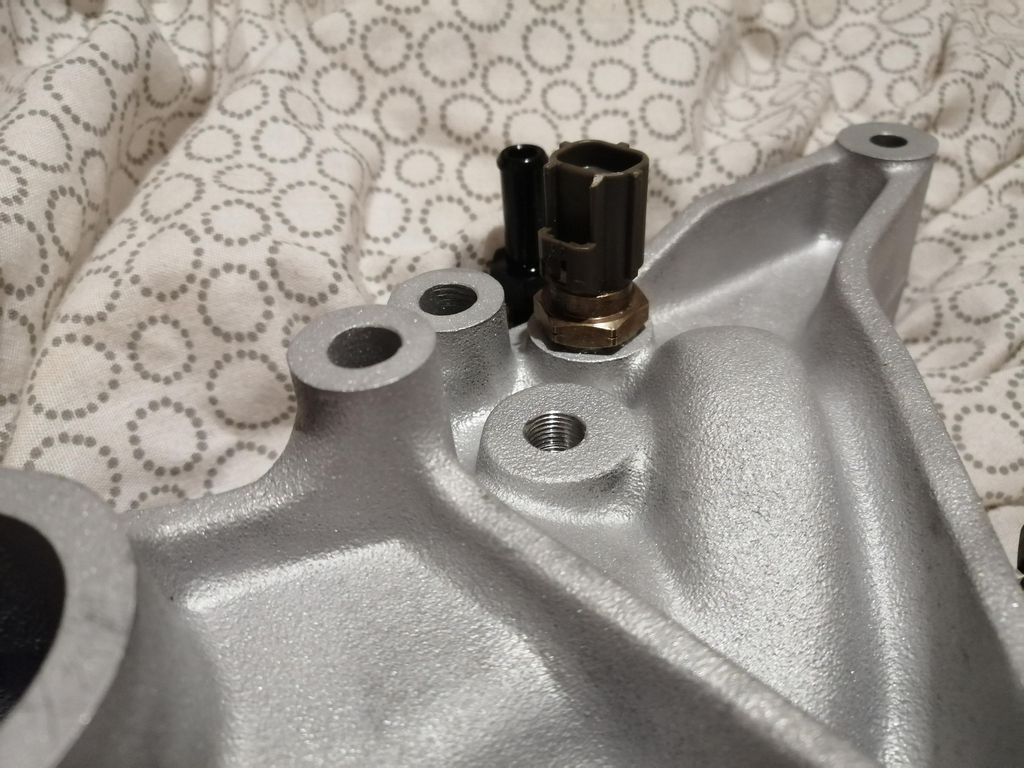
Being a late car, it has no thermosensor. The later cars had an extra ECU triggered fan input, freeing up this space:
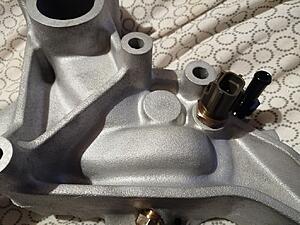
Perfect for me to drill and tap for my Stack gauge sensor!
Double throttle cleaned up and refit, it's nice having clean enough parts to do the re-assembly on the sofa :
:
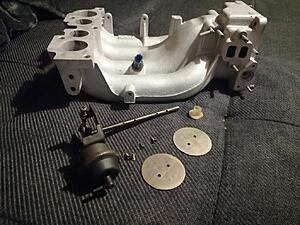
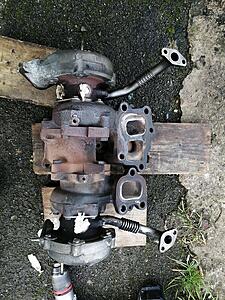
Started work on the turbos. Pulled them apart to port the wastegate and I've drilled out the restrictors in the front housing (As they're N3G1's). I'll gets pics of it going back together.
Not got much to update on yet as I've got lots of parts to plate before I can make much more progress, but I've been getting on with reassembling and pressure testing the aluminium parts.
Anodised fittings replaced all the steel fittings on the WP housing:
Being a late car, it has no thermosensor. The later cars had an extra ECU triggered fan input, freeing up this space:

Perfect for me to drill and tap for my Stack gauge sensor!
Double throttle cleaned up and refit, it's nice having clean enough parts to do the re-assembly on the sofa
:
Started work on the turbos. Pulled them apart to port the wastegate and I've drilled out the restrictors in the front housing (As they're N3G1's). I'll gets pics of it going back together.
Last edited by Ceylon; Nov 30, 2020 at 02:28 AM.
Thread Starter
Joined: Mar 2008
Posts: 2,212
Likes: 282
From: Somerset, England


Thread Starter
Joined: Mar 2008
Posts: 2,212
Likes: 282
From: Somerset, England
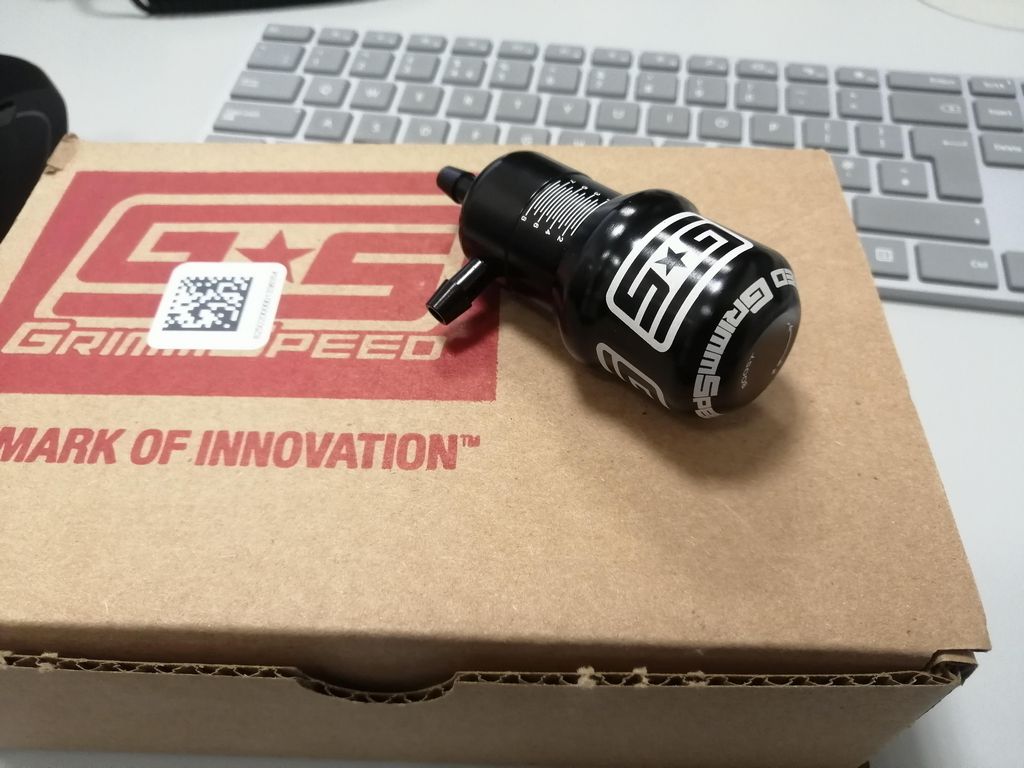
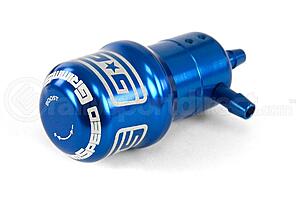
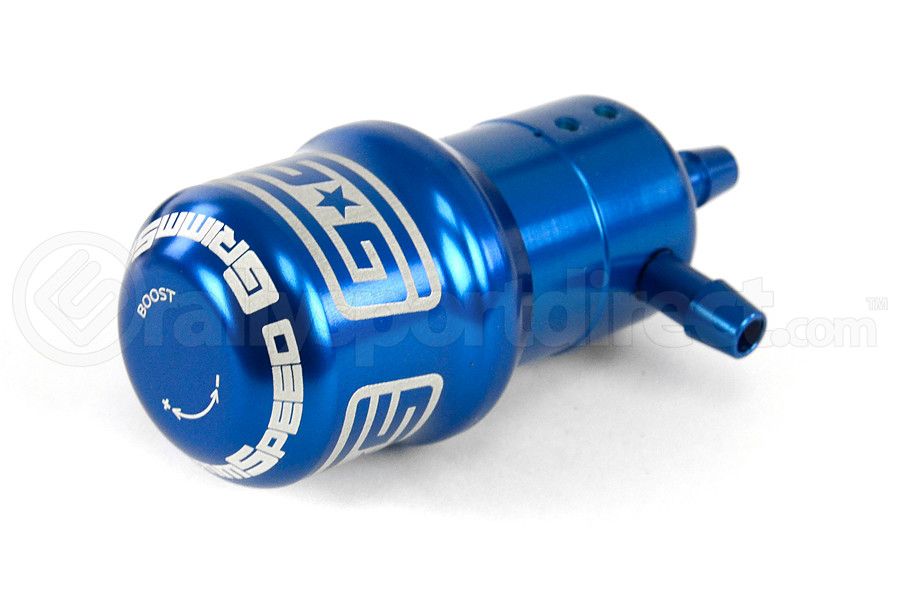
I've bought another Grimmspeed boost controller in blue this time for pre-control. The amount I've spent on manual controllers I could have gone for a decent EBC, but I really want control over exactly what is happening to fine tune it all so this way works for me. These controllers have 250 clicks of adjustment, are super reliable and great quality. Likely will still be around and working long after my FD isn't! Should be able to fine tune it to give a really smooth transition with a minimal dip in boost.
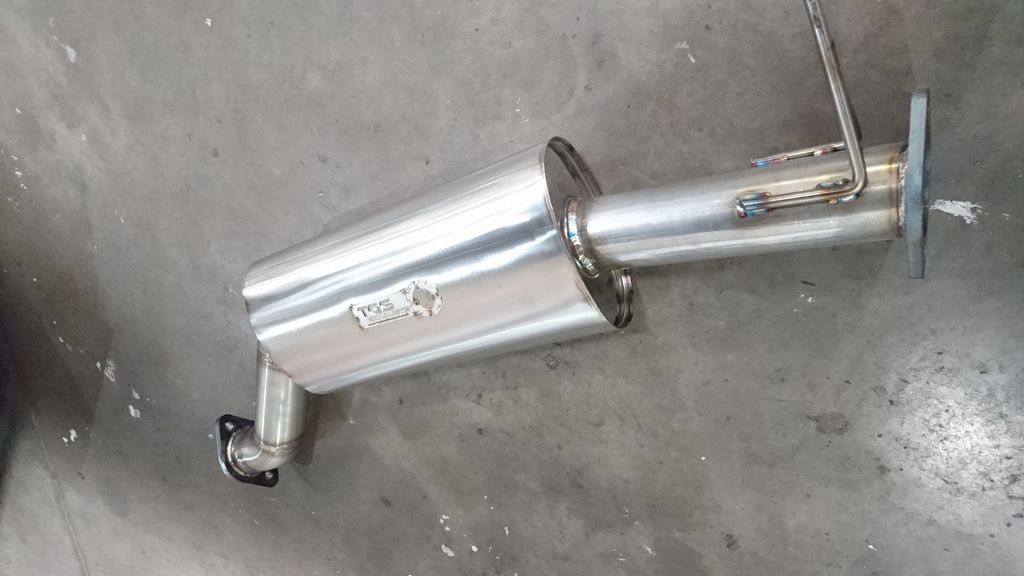
Gone with a TGS 3" silenced midpipe to mate up to my TGS backbox:
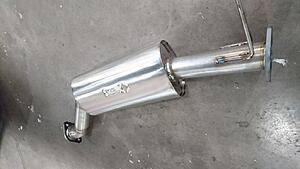
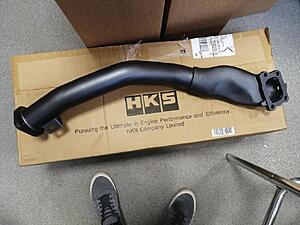
HKS downpipe. This will be wrapped in magma wrap to try and keep the heat in. Went with the HKS as the fitment is excellent and I wanted to retain the oem gearbox brace:
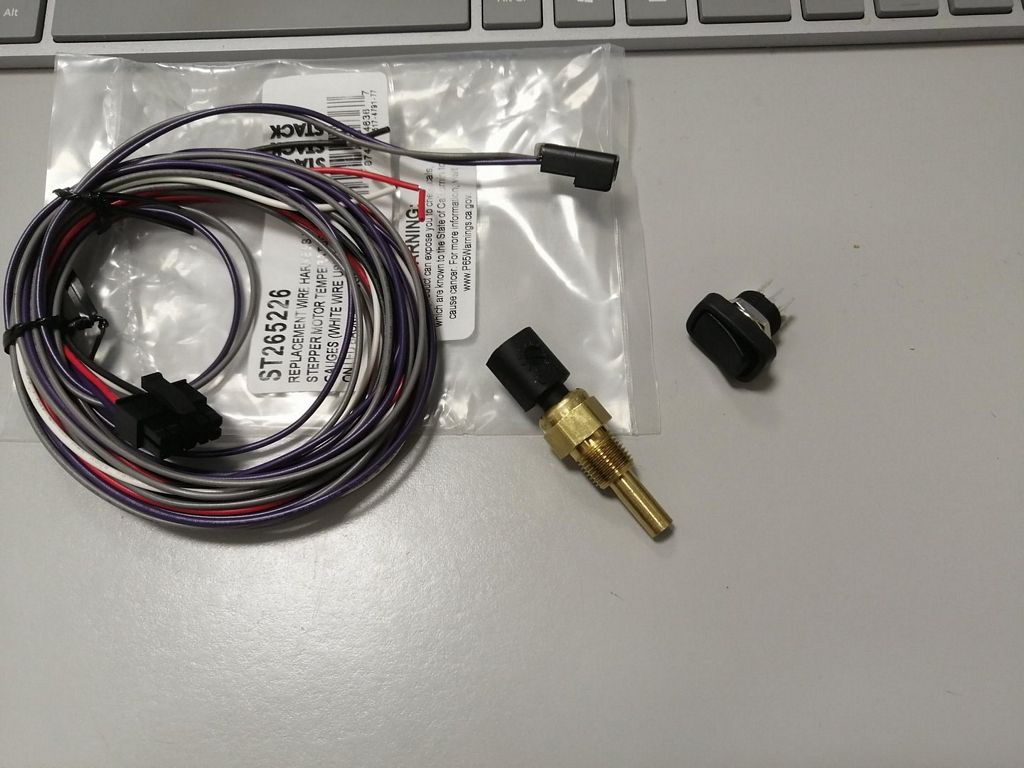
Stack pro control boost and coolant temp gauges. These gauges are really quite cool being multi-colour with peak, warn and each having 2 programable relays. I'll be using the high relay output from the coolant gauge to give me a programmable fan trigger input to bring the fans in sooner. No more hitting the AC button when queuing at the McDonald's drive thru.
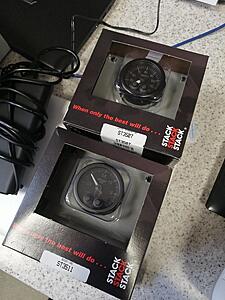
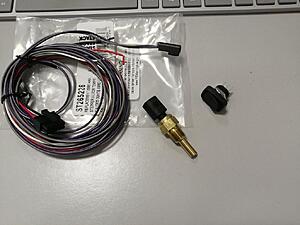
I've also bought an extra sensor kit for the coolant temp gauge to plumb into the oil system. Then I'll use a mini DPDT switch to enable me to swap this gauge between oil and coolant temps as I don't want to litter my dash with gauges but it'll be handy to be able to monitor both.
Excuse the grubby turbos, they need a good clean.
Restrictor pills drilled out, I may remove this completely and drill and tap for some larger anodised fittings as I really want good flow to my manual controllers... In fact in the time it took to type this I've convinced myself I need to go this route haha.

No signs of any cracks here! Just needs a good clean. I'll port the wastegate while they're out just in case I need any extra flow.
Gone with a TGS 3" silenced midpipe to mate up to my TGS backbox:
HKS downpipe. This will be wrapped in magma wrap to try and keep the heat in. Went with the HKS as the fitment is excellent and I wanted to retain the oem gearbox brace:

Stack pro control boost and coolant temp gauges. These gauges are really quite cool being multi-colour with peak, warn and each having 2 programable relays. I'll be using the high relay output from the coolant gauge to give me a programmable fan trigger input to bring the fans in sooner. No more hitting the AC button when queuing at the McDonald's drive thru
.
I've also bought an extra sensor kit for the coolant temp gauge to plumb into the oil system. Then I'll use a mini DPDT switch to enable me to swap this gauge between oil and coolant temps as I don't want to litter my dash with gauges but it'll be handy to be able to monitor both.
Excuse the grubby turbos, they need a good clean.
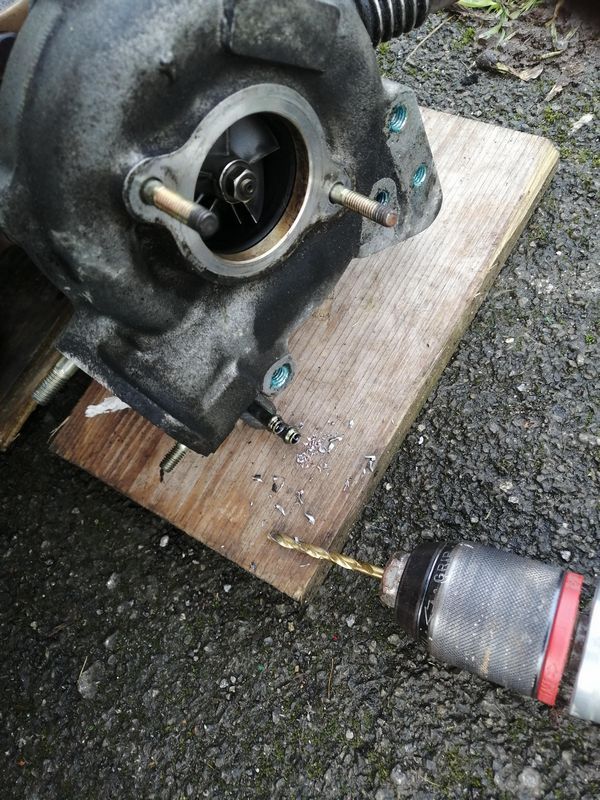
Restrictor pills drilled out, I may remove this completely and drill and tap for some larger anodised fittings as I really want good flow to my manual controllers... In fact in the time it took to type this I've convinced myself I need to go this route haha.
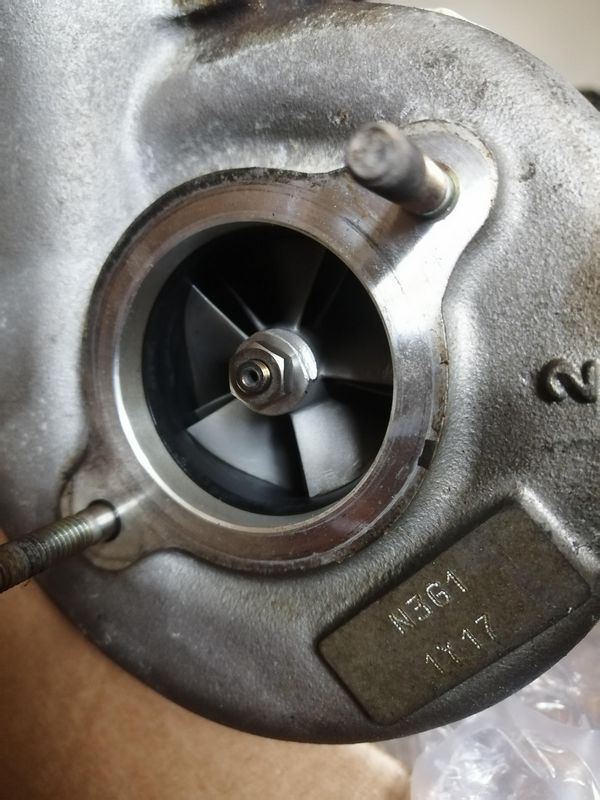
No signs of any cracks here! Just needs a good clean. I'll port the wastegate while they're out just in case I need any extra flow.

Thanks for posting the black box diagram. I recently completely redid my US spec rats next and it was a challenge but fun at the same time. I like that the black box is easier to diagnose and work on but I cant help but think there has to be a lot going on in the ECU to control this because there are literally 1/3 of the vacuum lines. Anyone have a 16 bit ECU and harness I can play with? 
Keep it up, I'm in for updates.
Keep it up, I'm in for updates.
Thread Starter
Joined: Mar 2008
Posts: 2,212
Likes: 282
From: Somerset, England
Haha, It's actually the same complexity, just a lot of the connections between the solenoids and shared vacuum sources etc are managed within the black box as per the diagram above. ECU wise it's the same so you could run an early ecu with the black box.
Thread Starter
Joined: Mar 2008
Posts: 2,212
Likes: 282
From: Somerset, England
You really wouldn't want an S8 harness for an early car unless converting to 16 bit. Way easier to swap the plugs solenoid side and use your existing harness. There is no thermosensor and a bunch of other changes in the late harnesses like different ECU plugs etc. If you just want a black box you could swap it all easy in a day

Full Member


Joined: Aug 2020
Posts: 246
Likes: 90
From: Arizona
I've bought another Grimmspeed boost controller in blue this time for pre-control. The amount I've spent on manual controllers I could have gone for a decent EBC, but I really want control over exactly what is happening to fine tune it all so this way works for me. These controllers have 250 clicks of adjustment, are super reliable and great quality. Likely will still be around and working long after my FD isn't! Should be able to fine tune it to give a really smooth transition with a minimal dip in boost.

Gone with a TGS 3" silenced midpipe to mate up to my TGS backbox:

HKS downpipe. This will be wrapped in magma wrap to try and keep the heat in. Went with the HKS as the fitment is excellent and I wanted to retain the oem gearbox brace:

Stack pro control boost and coolant temp gauges. These gauges are really quite cool being multi-colour with peak, warn and each having 2 programable relays. I'll be using the high relay output from the coolant gauge to give me a programmable fan trigger input to bring the fans in sooner. No more hitting the AC button when queuing at the McDonald's drive thru.

I've also bought an extra sensor kit for the coolant temp gauge to plumb into the oil system. Then I'll use a mini DPDT switch to enable me to swap this gauge between oil and coolant temps as I don't want to litter my dash with gauges but it'll be handy to be able to monitor both.

Excuse the grubby turbos, they need a good clean.

Restrictor pills drilled out, I may remove this completely and drill and tap for some larger anodised fittings as I really want good flow to my manual controllers... In fact in the time it took to type this I've convinced myself I need to go this route haha.

No signs of any cracks here! Just needs a good clean. I'll port the wastegate while they're out just in case I need any extra flow.

Gone with a TGS 3" silenced midpipe to mate up to my TGS backbox:
HKS downpipe. This will be wrapped in magma wrap to try and keep the heat in. Went with the HKS as the fitment is excellent and I wanted to retain the oem gearbox brace:
Stack pro control boost and coolant temp gauges. These gauges are really quite cool being multi-colour with peak, warn and each having 2 programable relays. I'll be using the high relay output from the coolant gauge to give me a programmable fan trigger input to bring the fans in sooner. No more hitting the AC button when queuing at the McDonald's drive thru
.I've also bought an extra sensor kit for the coolant temp gauge to plumb into the oil system. Then I'll use a mini DPDT switch to enable me to swap this gauge between oil and coolant temps as I don't want to litter my dash with gauges but it'll be handy to be able to monitor both.
Excuse the grubby turbos, they need a good clean.
Restrictor pills drilled out, I may remove this completely and drill and tap for some larger anodised fittings as I really want good flow to my manual controllers... In fact in the time it took to type this I've convinced myself I need to go this route haha.
No signs of any cracks here! Just needs a good clean. I'll port the wastegate while they're out just in case I need any extra flow.
www.AusRotary.com
Joined: Apr 2003
Posts: 905
Likes: 273
From: Melbourne, Australia
Overheating. The way most FD engines go.
Thread Starter
Joined: Mar 2008
Posts: 2,212
Likes: 282
From: Somerset, England
It hasn't overheated in my ownership and it definitely failed in my ownership! The late cars don't really suffer from overheating, the cooling systems are significantly improved. I don't think my fans speeds have ever got past the low trigger haha.
Speaking of cooling systems...I've quickly thrown together a modified diagram for my fan relays showing how I'll be using my Stack coolant gauge to give me two adjustable fan temp triggers. I'll use the low and high relay outputs to trigger relays 2, 3 & 4. Relay 1 will be left as nature intended, so if I press the AC button it'll give me low fan speed or raise the fan speed by one level if the fans are already running. Relay 1 will also be triggered by the ECU if the coolant temps reach 101 degrees which shouldn't really be possible without something failing first, I'd be hitting the AC button way before then anyway!
The Stack gauges work using 3 zones. So the Low Zone is from the bottom of the gauge until the beginning of Normal Zone, then the Normal Zone runs up to the beginning of the High zone. The low relay is triggered for the duration of the Low Zone and the high relay is triggered for the duration of the High Zone.
So wired like this it'll work like the below table:

I've left the relay coil side wiring blank for the Stack relays as it's all internal to the gauge so not a concern to me. I'll leave the oem coil ground wiring connected to the ECU also as a fail safe in case of gauge relay failure so that if the gauge did fail, oem fan speed triggers will still operate.
Standard operation temps for an S8 are 97 for relays 2 & 4 and 101 for relay 3. Not ideal, but better than nothing!
Speaking of cooling systems...I've quickly thrown together a modified diagram for my fan relays showing how I'll be using my Stack coolant gauge to give me two adjustable fan temp triggers. I'll use the low and high relay outputs to trigger relays 2, 3 & 4. Relay 1 will be left as nature intended, so if I press the AC button it'll give me low fan speed or raise the fan speed by one level if the fans are already running. Relay 1 will also be triggered by the ECU if the coolant temps reach 101 degrees which shouldn't really be possible without something failing first, I'd be hitting the AC button way before then anyway!
The Stack gauges work using 3 zones. So the Low Zone is from the bottom of the gauge until the beginning of Normal Zone, then the Normal Zone runs up to the beginning of the High zone. The low relay is triggered for the duration of the Low Zone and the high relay is triggered for the duration of the High Zone.
So wired like this it'll work like the below table:
I've left the relay coil side wiring blank for the Stack relays as it's all internal to the gauge so not a concern to me. I'll leave the oem coil ground wiring connected to the ECU also as a fail safe in case of gauge relay failure so that if the gauge did fail, oem fan speed triggers will still operate.
Standard operation temps for an S8 are 97 for relays 2 & 4 and 101 for relay 3. Not ideal, but better than nothing!
Last edited by Ceylon; Dec 1, 2020 at 08:24 AM.