
Windshield Washer Tank - pump removal

Thread Starter

Joined: May 2008
Posts: 4,389
Likes: 965
From: Stamford, CT
Windshield Washer Tank - pump removal
Hey everyone, I'm installing a fluid level sensor and bulkhead for meth injection in my windshield washer tank.
I removed the tank, and was thinking about just leaving the pump in it so the hole would always be sealed, and thought without the wire attached the pump would never turn on and squirt fluid.
Well after removing the tank, and moving it around a little, the pump lets fluid out even with no power to it. So my question is, how have others sealed it up?
Also, another option is to use the hole that the pump uses for the fluid level sensor (only problem is its a bit lower than I would like). How do you remove the pump, my just seems like its stuck in there.
And if I remove it and decide not to use the hole for the level sensor, whats the best way to plug it up? (needs to be methanol safe)
Thanks in advance.


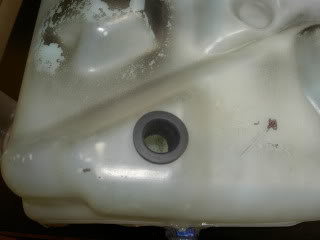
You can just pop the pump out. The tank has two small "wings" that hold the pump into place. Get a flathead screwdriver and start working the pump out of there.
The pump seals to the tank with a grommet. I just recently changed out my tank with a new one, and the grommet was SHOT. New one from Mazda was just a few bucks.
Dale
The pump seals to the tank with a grommet. I just recently changed out my tank with a new one, and the grommet was SHOT. New one from Mazda was just a few bucks.
Dale

The pump leaks because the outlet is below the fluid level. It will leak whether it has power or not. Just leave the hose hooked up to it and it won't leak. Look at my AEM water injection install thread for some ideas. By all means, leave the pump in there so you still have working windshield washers. There are ways to make a fluid level sensor and pickup bulkhead fit, it just takes some time.
https://www.rx7club.com/showthread.p...&highlight=aem
https://www.rx7club.com/showthread.p...&highlight=aem
Thread Starter
Joined: May 2008
Posts: 4,389
Likes: 965
From: Stamford, CT
I'll be documenting the whole process. All of my black nylon hose and AN fittings came from jegs today, only they sent me the wrong fittings, I ordered black ones and then sent me standard blue/red ones  So that will delay the project until next week.
I'll either be plugging the stock pump or removing it and using that hole for the level sensor as I'm running 100% meth and don't want to be spraying my windshield with straight alcohol haha.
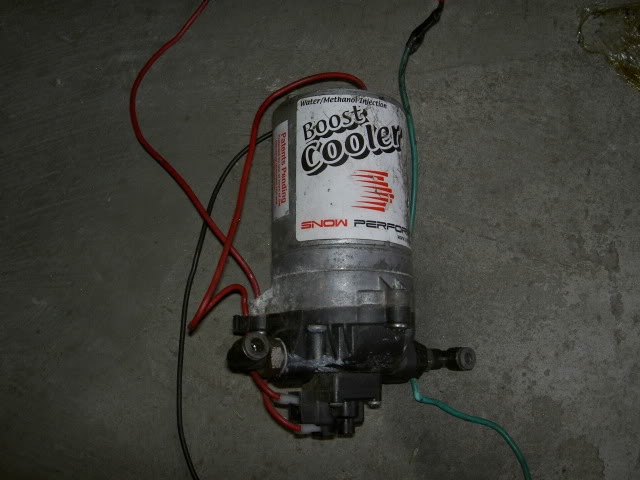
A quick bit of background on why i'm doing this: I've got an old snow performance universal kit, 2 625 ml/min nozzles, a 150lb shurflo pump, and a 1 gallon go-cart type fuel cell.
I've got the pump mounted by the driverside rear axle just like Howard Coleman's setup, but i had the fuel cell mounted to the crossmember on my rollcage just above the driver side bin. I've been cleaning up my interior and now no longer want the fuel cell in the cabin. So the stock washer fluid tank is really only place I can go to.
Also, I have noticed that the tubing and easy push in style connectors have leaked/come loose on multiple occasions and I no longer trust them. So I'm going Nylon braided (alcohol/fuel safe) hose with AN fittings. Should look pretty sweet too.
And I'll be relocating the pump to the driver side tow hook just like how Goodfella did it in his write up.
So that will delay the project until next week.I'll either be plugging the stock pump or removing it and using that hole for the level sensor as I'm running 100% meth and don't want to be spraying my windshield with straight alcohol haha.
A quick bit of background on why i'm doing this: I've got an old snow performance universal kit, 2 625 ml/min nozzles, a 150lb shurflo pump, and a 1 gallon go-cart type fuel cell.
I've got the pump mounted by the driverside rear axle just like Howard Coleman's setup, but i had the fuel cell mounted to the crossmember on my rollcage just above the driver side bin. I've been cleaning up my interior and now no longer want the fuel cell in the cabin. So the stock washer fluid tank is really only place I can go to.
Also, I have noticed that the tubing and easy push in style connectors have leaked/come loose on multiple occasions and I no longer trust them. So I'm going Nylon braided (alcohol/fuel safe) hose with AN fittings. Should look pretty sweet too.
And I'll be relocating the pump to the driver side tow hook just like how Goodfella did it in his write up.
Last edited by TwinCharged RX7; Mar 25, 2010 at 10:40 PM.
Thread Starter
Joined: May 2008
Posts: 4,389
Likes: 965
From: Stamford, CT
I just posted this in my project build, but i'll post it here to help others when they are searching for this specific topic.
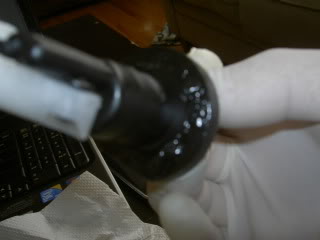
Here is the pump (shurflo 150lb from and old snow performance kit):
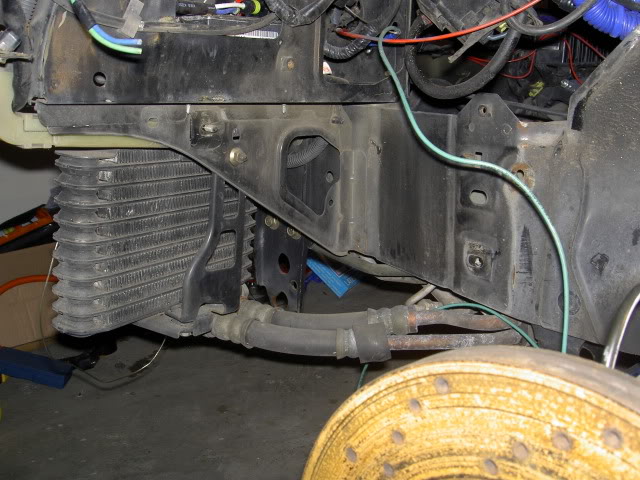
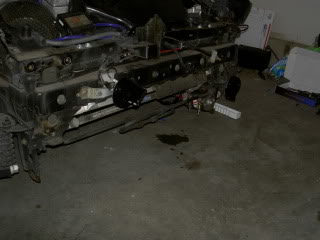
Where it will soon reside:
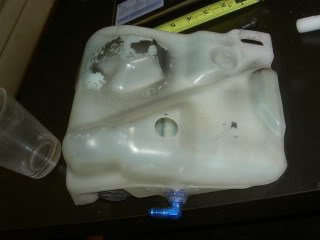
Modifying the washer tank:
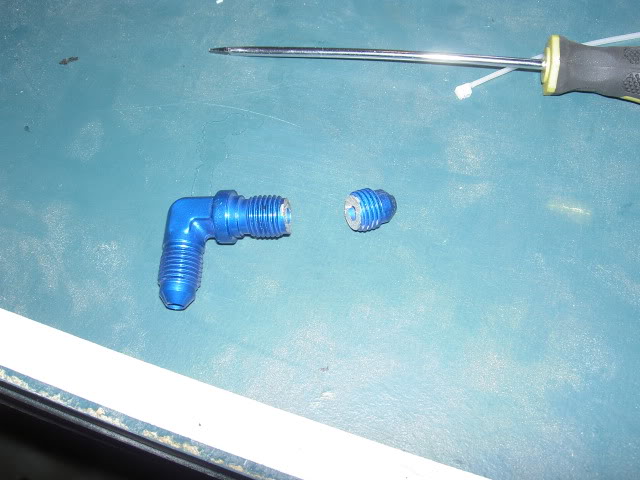
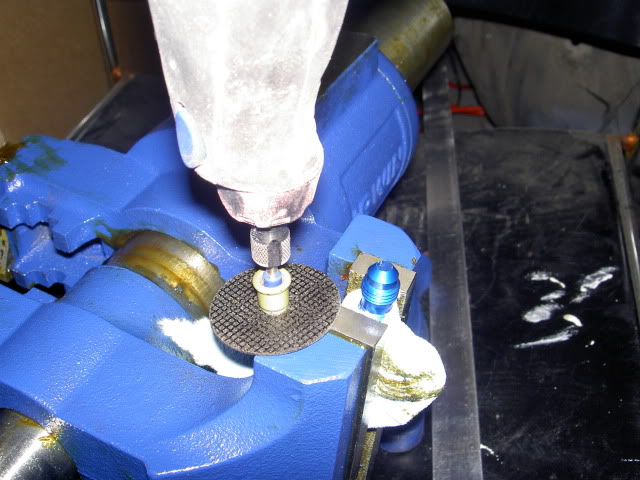
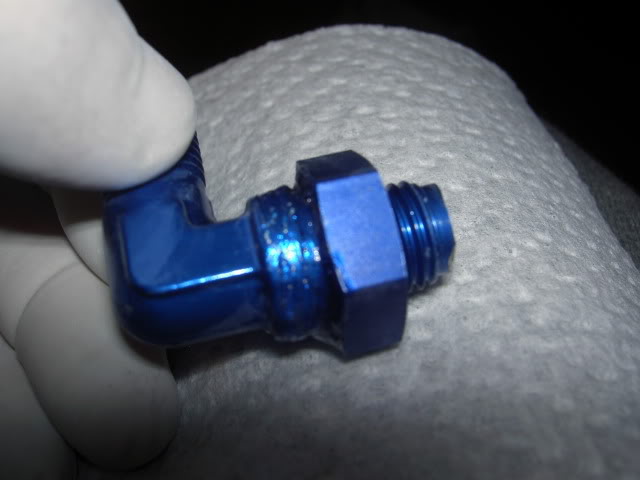
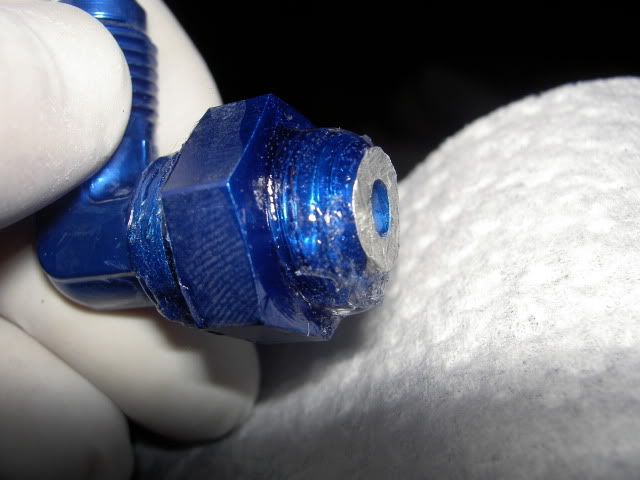
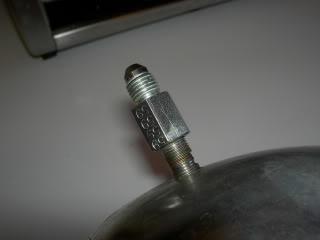
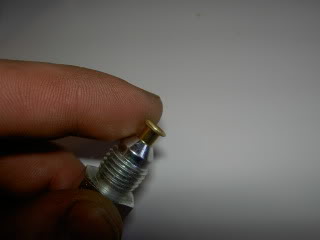
Buy a bulkhead with at least one side being -4AN: its too long so I cut it:
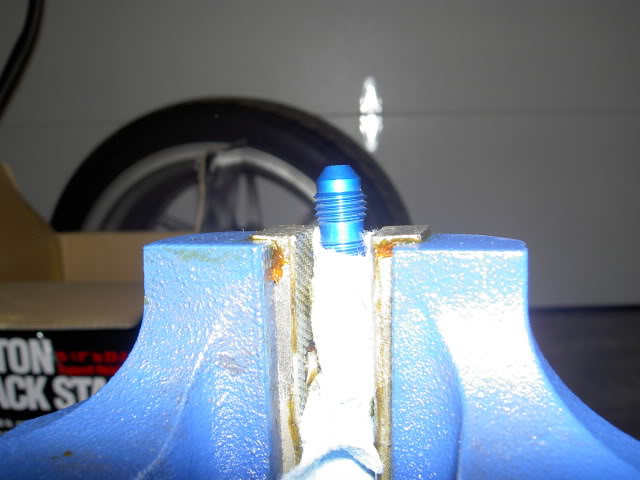
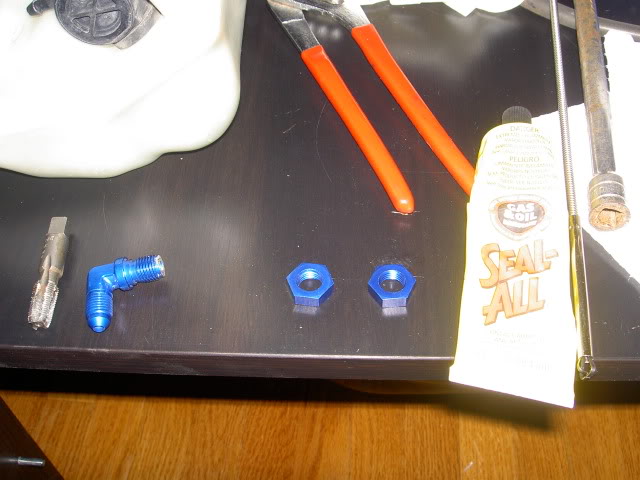
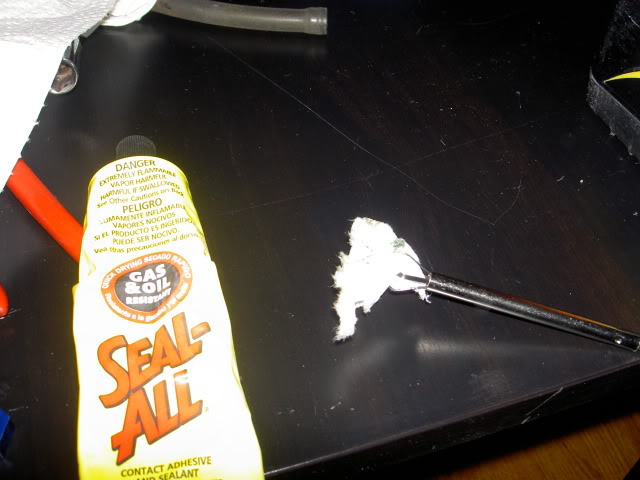
Parts (90 degree bulkhead, 2 bulkhead washers, 1/8NPT tap, fuel/alcohol safe sealant:
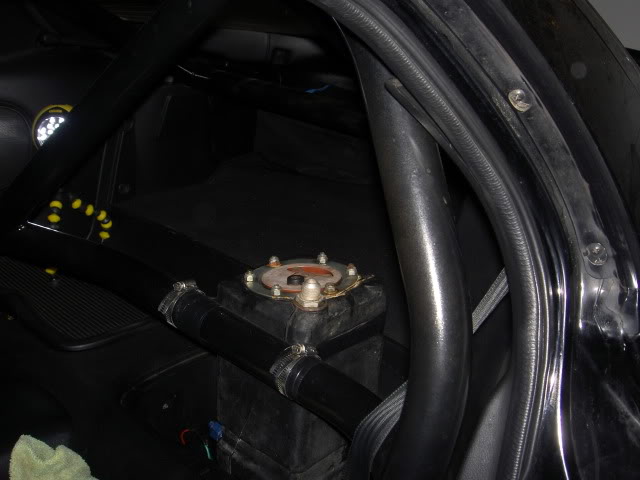
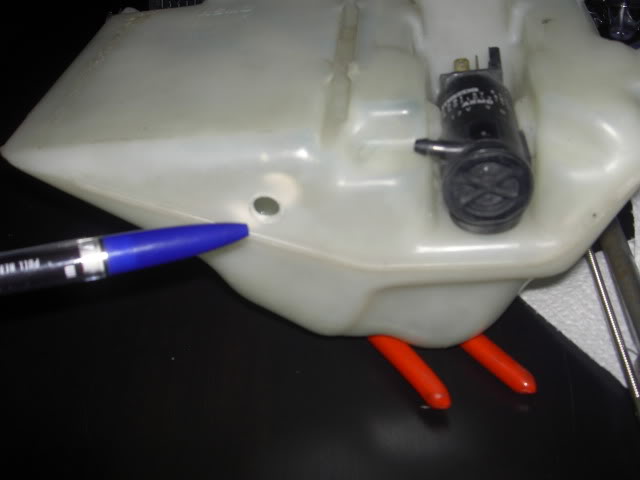
Drill a hole in the bottom (rear of tank, directly under the filling hole at the top of the tank so you have a straight shot to put a nut on the bulkhead inside of the tank:
Clean everything really well:
Put first nut on (on a standard fuel tank application you wouldnt have to do this, but because the wall of the tank is so thin i needed a spacer between the bottom of the bulhead and the tank, note that i put sealant on threads before i screwed down the nut:
Prep nut for the inside of the tank with sealant:

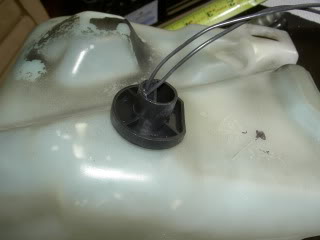
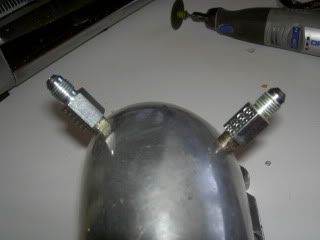
Tapped the hole i drilled, then screwed in the bulkhead with sealant on it (it was really tight and tightened down really nicely.
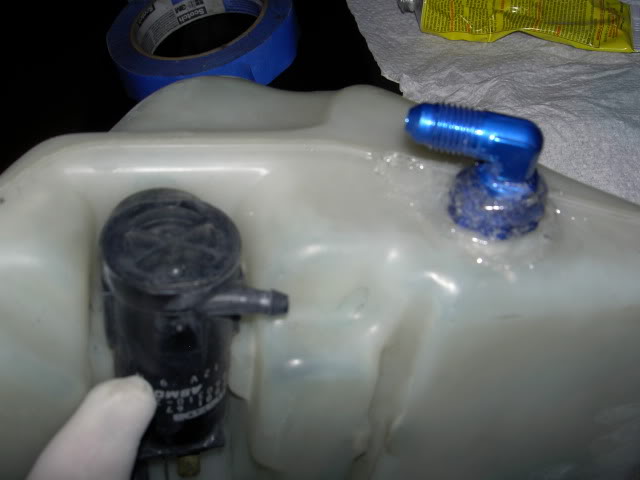
I then put a nut on the inside of the tank, unfortunately i couldnt really tighten it that well (couldnt get a big enough socket into the tank, but I think between the really tight fit of screwing the bulkhead into the tank itself and all of the sealant I should be safe.
Here is the pump (shurflo 150lb from and old snow performance kit):
Where it will soon reside:
Modifying the washer tank:
Buy a bulkhead with at least one side being -4AN: its too long so I cut it:
Parts (90 degree bulkhead, 2 bulkhead washers, 1/8NPT tap, fuel/alcohol safe sealant:
Drill a hole in the bottom (rear of tank, directly under the filling hole at the top of the tank so you have a straight shot to put a nut on the bulkhead inside of the tank:
Clean everything really well:
Put first nut on (on a standard fuel tank application you wouldnt have to do this, but because the wall of the tank is so thin i needed a spacer between the bottom of the bulhead and the tank, note that i put sealant on threads before i screwed down the nut:
Prep nut for the inside of the tank with sealant:
Tapped the hole i drilled, then screwed in the bulkhead with sealant on it (it was really tight and tightened down really nicely.
I then put a nut on the inside of the tank, unfortunately i couldnt really tighten it that well (couldnt get a big enough socket into the tank, but I think between the really tight fit of screwing the bulkhead into the tank itself and all of the sealant I should be safe.
Thread Starter
Joined: May 2008
Posts: 4,389
Likes: 965
From: Stamford, CT
I'll be using 2 of these to hold the pump, they will be bolted to the inside of the driver's side tow hook.

Once those come in, I'll make all of the new lines and post up the pics.
Once those come in, I'll make all of the new lines and post up the pics.
Trending Topics
Thread Starter
Joined: May 2008
Posts: 4,389
Likes: 965
From: Stamford, CT
I'm getting everything at Jegs, just search for fuel pump clamps. I only knew about them because I bought a used Aeromotive pump and it came with them (but they are too small for the meth pump), Jegs happens to have 3" clamps which should be perfect. They are pricey though, about $22 each, but this way i can mount the pump and then rotate it just the way I want so that the fittings are in the right spots.
My cheap used meth kit is quickly becoming expensive haha. all of the AN fittings, "Y" splitter, braided line, and adapters quickly add a lot to the cost. But I think eliminating the risk of the push in style fittings leaking will be well worth it. I see so many people using them, doesn't anyone else have leaks? I swapped out the tubing twice already (and i cut the ends nice and square just like you are supposed to) so I'm not sure why i'm the only one that found leaks.
My cheap used meth kit is quickly becoming expensive haha. all of the AN fittings, "Y" splitter, braided line, and adapters quickly add a lot to the cost. But I think eliminating the risk of the push in style fittings leaking will be well worth it. I see so many people using them, doesn't anyone else have leaks? I swapped out the tubing twice already (and i cut the ends nice and square just like you are supposed to) so I'm not sure why i'm the only one that found leaks.
Thread Starter
Joined: May 2008
Posts: 4,389
Likes: 965
From: Stamford, CT
Found them much cheaper at http://www.jerrybickel.com/fuel-syst...unt-clamp.html
Part number: BG170030 $12.50
Part number: BG170030 $12.50
Thread Starter
Joined: May 2008
Posts: 4,389
Likes: 965
From: Stamford, CT
My level sensor finally came. I got it from Snow Performance ($40)
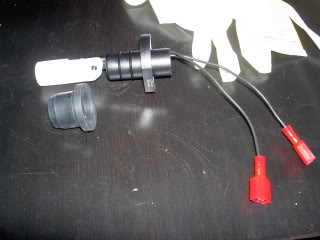
Here is how you install it:
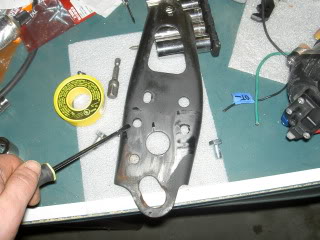
The only place it would really fit and clear the brackets that hold the tank is here:

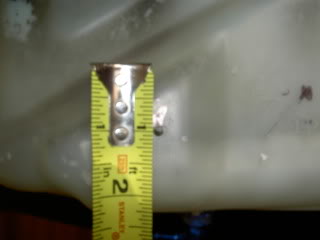
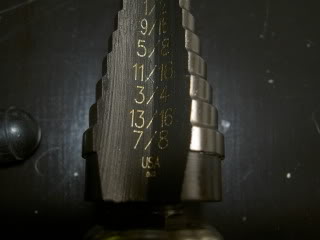
Drilled a pilot hole, then a 13/16" hole:
Insert the rubber gromet:
I then added a little sealant to the flange on the sensor to seal against the rubber grommet just in case:
Insert sensor into grommet (make sure you have it orientated in the correct direction.
Now I just have to make the lines and mount everything.
Here is how you install it:
The only place it would really fit and clear the brackets that hold the tank is here:
Drilled a pilot hole, then a 13/16" hole:
Insert the rubber gromet:
I then added a little sealant to the flange on the sensor to seal against the rubber grommet just in case:
Insert sensor into grommet (make sure you have it orientated in the correct direction.
Now I just have to make the lines and mount everything.
Thread Starter
Joined: May 2008
Posts: 4,389
Likes: 965
From: Stamford, CT
So I finally finished it today. There were a few unexpected events that came up but now it all works.
I was planning on using the 625ml/min nozzles that i already have. They are 1/8npt fittings, but they have screens on the backs of them, so I needed a long adapter to the -4 AN fittings.

Doesn't work:
I couldn't find one anywhere. I was just going to take the screens off, but after taking them off i found that there is a spring and what must be something that helps to atomize the meth, all held in by the back for the screen
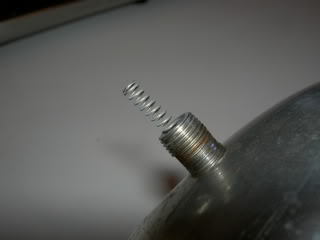
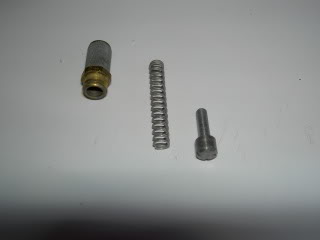
And as you can see here, the adapter for the AN lines lets the spring go right through:
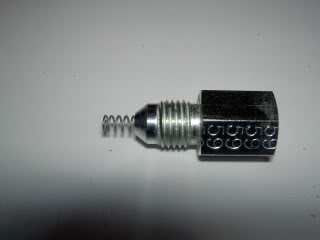
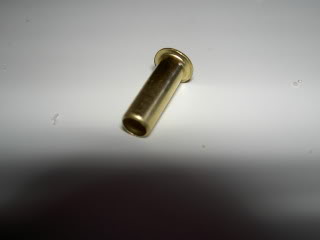
So i go to the hardware store looking for other adapters, no luck at all. I'm just about to leave and check the compression fitting drawer. And look what i found, a sleeve, its the perfect size, slides into the adapter but not through, and the spring cant go through it.
Here's an illustration of how it won't go through the adapter (i installed it in the other end, this is just so you can see the fit:
So I trimmed the spring down a little so that it was compressed the same distance as it originally was (the adapter and sleeve caused the spring to be compressed more than when the screen was being used to keep it all together)
And now I'm all set for AN lines:
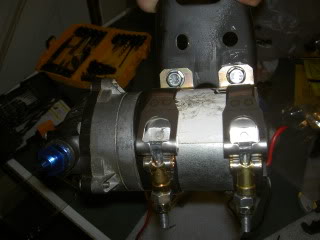
Clamps installed on the pump:
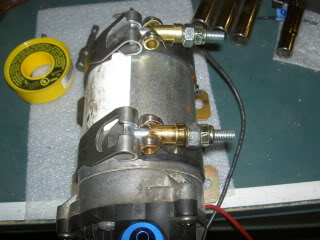
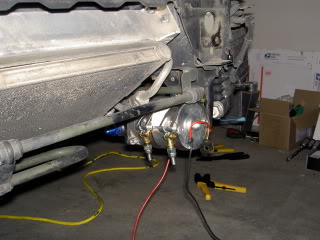
I was getting worried about how to attach it to the tow hook because i couldnt get straight on with a drill due to the oil cooler. Then I stopped being stupid and saw that I could just unbolt the tow hook haha:
And installed:
I was planning on using the 625ml/min nozzles that i already have. They are 1/8npt fittings, but they have screens on the backs of them, so I needed a long adapter to the -4 AN fittings.
Doesn't work:
I couldn't find one anywhere. I was just going to take the screens off, but after taking them off i found that there is a spring and what must be something that helps to atomize the meth, all held in by the back for the screen
And as you can see here, the adapter for the AN lines lets the spring go right through:
So i go to the hardware store looking for other adapters, no luck at all. I'm just about to leave and check the compression fitting drawer. And look what i found, a sleeve, its the perfect size, slides into the adapter but not through, and the spring cant go through it.
Here's an illustration of how it won't go through the adapter (i installed it in the other end, this is just so you can see the fit:
So I trimmed the spring down a little so that it was compressed the same distance as it originally was (the adapter and sleeve caused the spring to be compressed more than when the screen was being used to keep it all together)
And now I'm all set for AN lines:
Clamps installed on the pump:
I was getting worried about how to attach it to the tow hook because i couldnt get straight on with a drill due to the oil cooler. Then I stopped being stupid and saw that I could just unbolt the tow hook haha:
And installed:
Thread Starter
Joined: May 2008
Posts: 4,389
Likes: 965
From: Stamford, CT
Then I made all my AN lines. It was my first time, but I found it really easy to do, and definitely worth the effort.
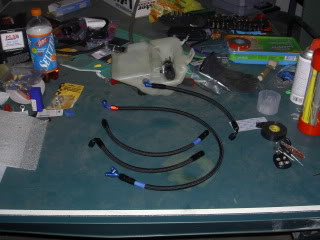
(And yes I know there is one red&blue fitting, but i broke one of the black ones, it was my first try and i didn't reallize you can't tighten them with all your might haha, but its on the bottom of the car and can't be seen anyways)
Here they are, too bad my engine bay is disgusting
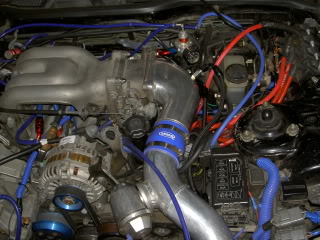
Finished:
(And yes I know there is one red&blue fitting, but i broke one of the black ones, it was my first try and i didn't reallize you can't tighten them with all your might haha, but its on the bottom of the car and can't be seen anyways)
Here they are, too bad my engine bay is disgusting
Finished:
Last edited by TwinCharged RX7; Apr 4, 2010 at 09:12 PM.

Thread
Thread Starter
Forum
Replies
Last Post
Skeese
Adaptronic Engine Mgmt - AUS
65
Mar 28, 2017 03:30 PM
KAL797
Test Area 51
0
Aug 11, 2015 03:47 PM