The Return of my 20b Project

Thread Starter
Joined: May 2003
Posts: 4,150
Likes: 0
From: CA (Bay Area)
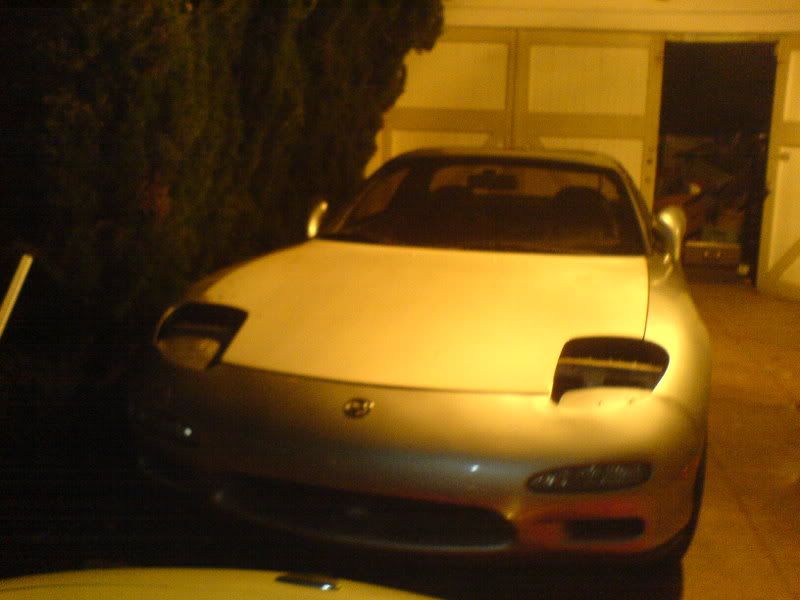
Hey everyone. So its been a few years since i last posted anything about my 20b project car. a few years, some parts collecting, and a couple moves around northern California later, i'm attempting to pick up where i left off.
Actually where i left off was pretty close to where i started 4 years ago with a 20b on an engine stand in the garage, an engine fire damaged chassis under a car cover, a storage room with some interior parts and an unorganized box of wires and bolts. Ever since then ive been slowly accumulating parts (not in any logical order) to (re)build this poor car into how i imagine mazda would have released the ultimate version of the FD. That being said, ive always wanted to build the car somewhat stock (or at least how i imagine a 3 rotor would roll out of the factory stock), and while my tastes have changed slightly over the years i still try to hold to that principle. anyway long story short, i've started digging through my storage room and dusting off all of my parts in an attempt to get this show on the road finally (no pun intended).
This thread is meant to be a how-not-to do a 20b project. I am quite aware that i have not chosen the easiest, or cheapest way to do this. I started off buying a chassis that had an engine fire, and its all been one mistake after another from there on out. ive loosely been documenting costs of everything so i can realize what a mistake this whole endeavor was if it ever ends . anyhoo im using this post to update my progress, ask questions, get opinions, and most importantly to try to motivate myself to stick with it and not throw everything on a dusty shelf for 4 more years.
Heres a quick synopsis of the last 4 years and where im at now: bought a front clip of a cosmo for the motor. a year later i found a chassis with a bad engine fire for sale.... i thought all i would have to deal with was the engine bay, turns out i was wrong. it was my biggest mistake so far. nearly every system needs to be repaired or replaced and basically im starting from scratch.

ever since i have been slowly buying parts and doing bits of work here and there on the car. last week something came over me, a year ago i completely emptied the engine bay called a tow truck and brought in in for paint. i just got it back and have begun to rewire it with parts that i bought a few years back. im finding that not everything is there so ill see how it goes.

So here we go...
Actually where i left off was pretty close to where i started 4 years ago with a 20b on an engine stand in the garage, an engine fire damaged chassis under a car cover, a storage room with some interior parts and an unorganized box of wires and bolts. Ever since then ive been slowly accumulating parts (not in any logical order) to (re)build this poor car into how i imagine mazda would have released the ultimate version of the FD. That being said, ive always wanted to build the car somewhat stock (or at least how i imagine a 3 rotor would roll out of the factory stock), and while my tastes have changed slightly over the years i still try to hold to that principle. anyway long story short, i've started digging through my storage room and dusting off all of my parts in an attempt to get this show on the road finally
(no pun intended).This thread is meant to be a how-not-to do a 20b project. I am quite aware that i have not chosen the easiest, or cheapest way to do this. I started off buying a chassis that had an engine fire, and its all been one mistake after another from there on out. ive loosely been documenting costs of everything so i can realize what a mistake this whole endeavor was if it ever ends
. anyhoo im using this post to update my progress, ask questions, get opinions, and most importantly to try to motivate myself to stick with it and not throw everything on a dusty shelf for 4 more years. Heres a quick synopsis of the last 4 years and where im at now: bought a front clip of a cosmo for the motor. a year later i found a chassis with a bad engine fire for sale.... i thought all i would have to deal with was the engine bay, turns out i was wrong. it was my biggest mistake so far. nearly every system needs to be repaired or replaced and basically im starting from scratch.
ever since i have been slowly buying parts and doing bits of work here and there on the car. last week something came over me, a year ago i completely emptied the engine bay called a tow truck and brought in in for paint. i just got it back and have begun to rewire it with parts that i bought a few years back. im finding that not everything is there so ill see how it goes.
So here we go...

Thread Starter
Joined: May 2003
Posts: 4,150
Likes: 0
From: CA (Bay Area)
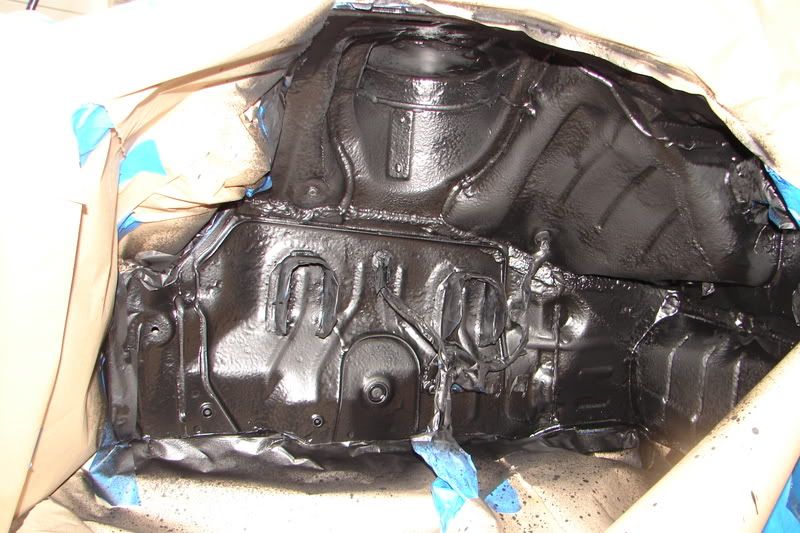
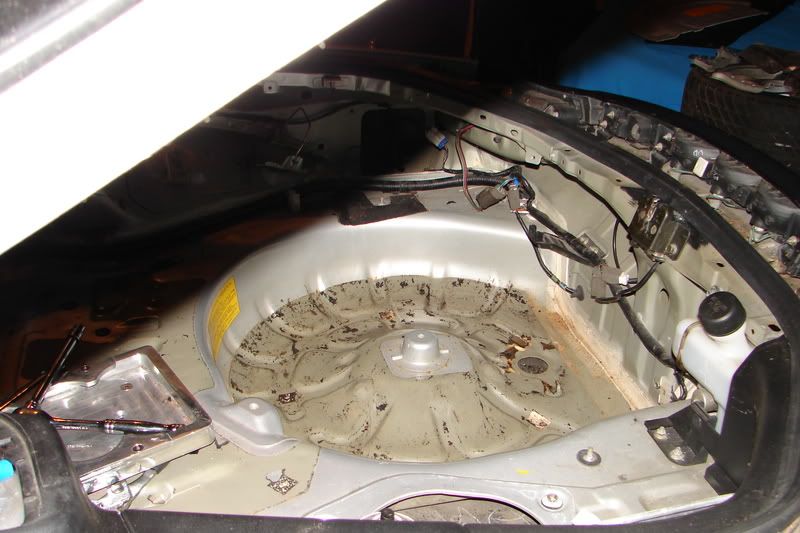
well its been awhile so i think im over due for an update. the engine bay is coming together nicely... most of the hydraulics and wiring is back in. 
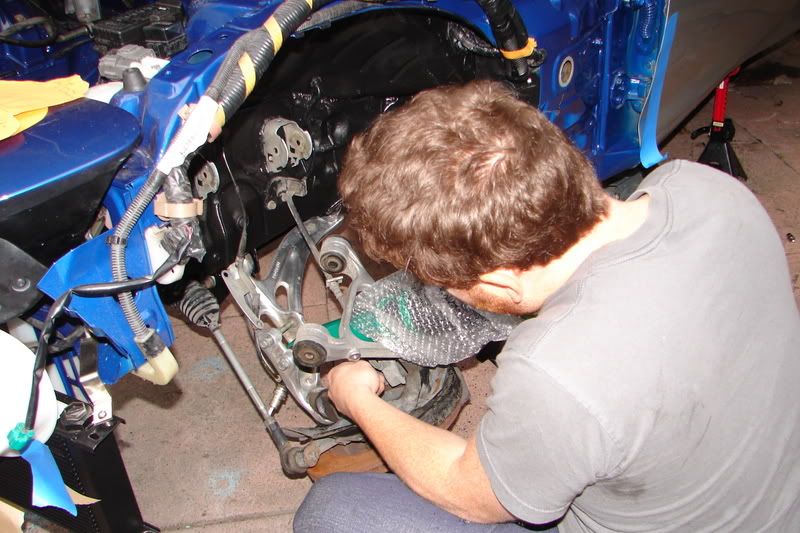
i pulled the old subframe out, and decided to do some cleaning while everything was apart (as it looked like it hadent been cleaned since the car was new . brake cleaner and a scotchbright pad really cleaned up the suspension components. i happened to have some 0000 steel wool lying around so i thought id spiff up the lower arms a bit. they came out really well surprisingly, so when i stumbled across some aluminum polish the next morning i spent a half hour on them. this is probably the least amount work for the most payoff ive experienced on the FD to date .
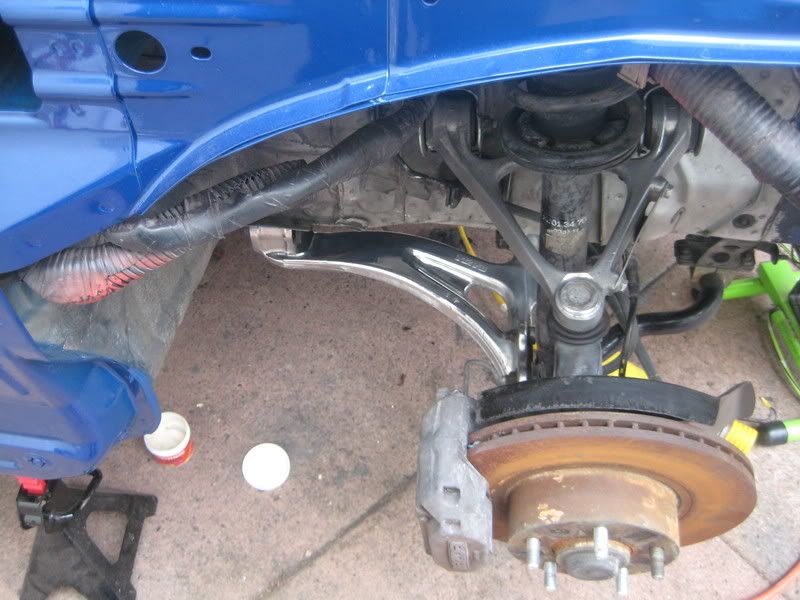
i also just got the pettit subframe back from the powder coaters last week. i 'wrasseled' that sucker in last night. what a pain in the ***! and im still having problems getting everything to line up properly. at least its in now and i can fine tune/adjust it . more on that to come.

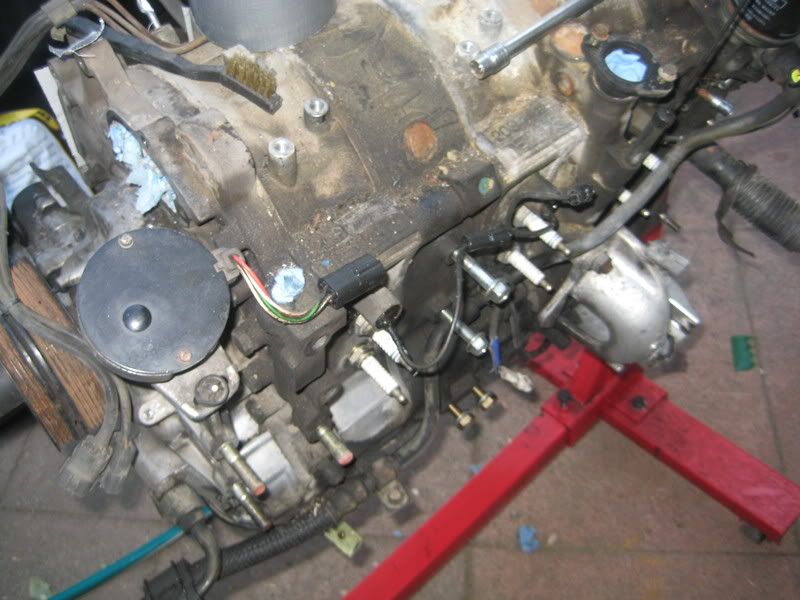
i also got my haltech e11v2 in the mail recently. ive got all the housings tapped for the sensors. next step is getting the motor cleaned up and rewired. anyway thats the update for now. -Heath
i pulled the old subframe out, and decided to do some cleaning while everything was apart (as it looked like it hadent been cleaned since the car was new
. brake cleaner and a scotchbright pad really cleaned up the suspension components. i happened to have some 0000 steel wool lying around so i thought id spiff up the lower arms a bit. they came out really well surprisingly, so when i stumbled across some aluminum polish the next morning i spent a half hour on them. this is probably the least amount work for the most payoff ive experienced on the FD to date . i also just got the pettit subframe back from the powder coaters last week. i 'wrasseled' that sucker in last night. what a pain in the ***! and im still having problems getting everything to line up properly. at least its in now and i can fine tune/adjust it . more on that to come.
i also got my haltech e11v2 in the mail recently. ive got all the housings tapped for the sensors. next step is getting the motor cleaned up and rewired. anyway thats the update for now. -Heath


Thread Starter
Joined: May 2003
Posts: 4,150
Likes: 0
From: CA (Bay Area)
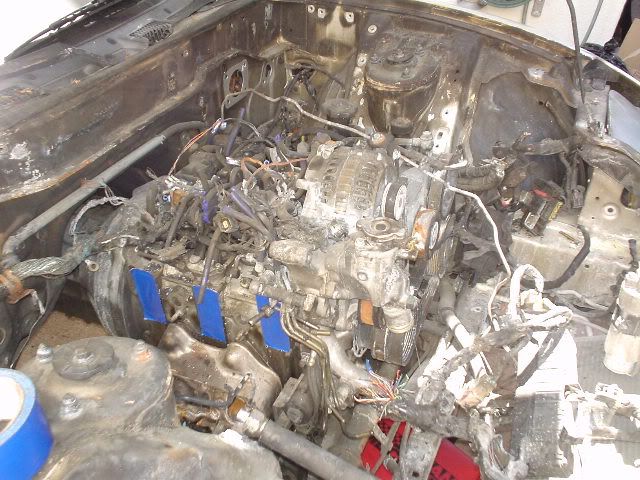
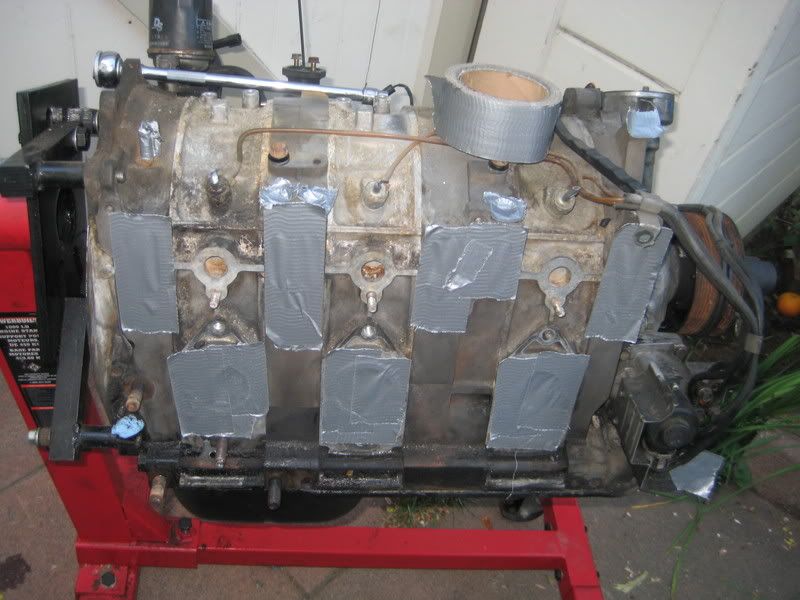
some progress on the motor *finally*

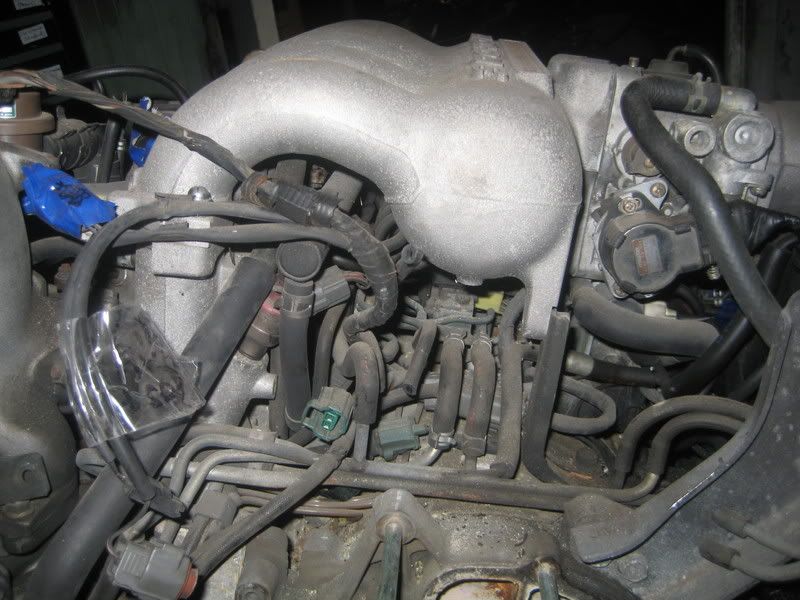
stripped down. its dirtier than i expected sadly... its an ugly mess
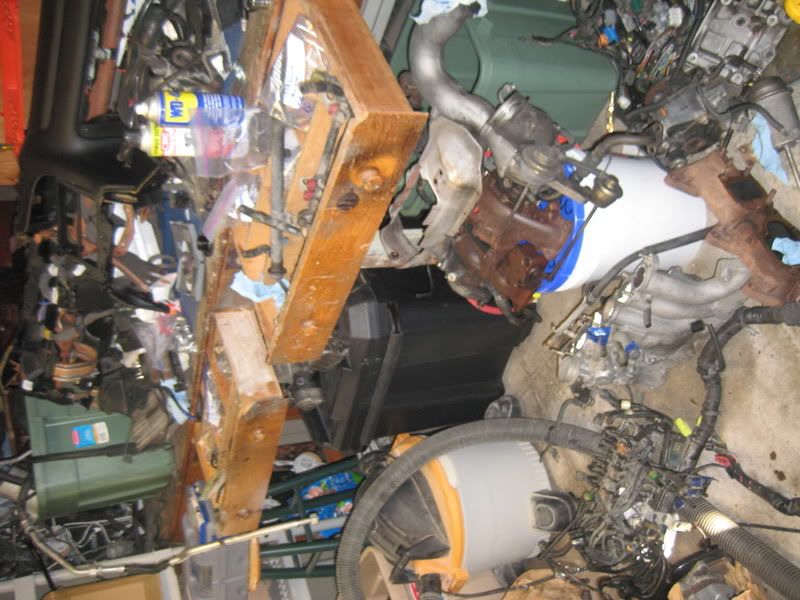
and one of my destroyed garage. i am absolutely out of space from this project. my storage space is completely full, a spare room in my house, and the garage. Besides the cost of this project, the lack of space is really wearing on me as well. ill be really happy when this is all over, but i know it wont be any time soon
-heath
stripped down. its dirtier than i expected sadly... its an ugly mess
and one of my destroyed garage. i am absolutely out of space from this project. my storage space is completely full, a spare room in my house, and the garage. Besides the cost of this project, the lack of space is really wearing on me as well. ill be really happy when this is all over, but i know it wont be any time soon
-heath
Trending Topics


Senior Member
Joined: Oct 2007
Posts: 453
Likes: 0
From: New Zealand
One little question, how much was your 20b engine cradle? I am thinking of putting a 20b in my next FD.
Thread Starter
Joined: May 2003
Posts: 4,150
Likes: 0
From: CA (Bay Area)
WOW looks like a great project!!! What colour is that blue? Your car (and your garage) looks just like mine does at the moment and I think its even the same colour (mazda RX7 1999 innocent blue mica)!! I get my car back from the panel shop today after some chassis repairs thank god as its been away for a month now, I have a 2 car, car port that can only fit one car at the moment due to my car being in a million pieces! there is NO interior, no wiring, no engine or box and engine bay is completely stripped!!! Hopefully I will have it driving again in a week or two.
One little question, how much was your 20b engine cradle? I am thinking of putting a 20b in my next FD.
One little question, how much was your 20b engine cradle? I am thinking of putting a 20b in my next FD.
the cradle was $1500 from pettit, however im not sure that i would recommend it as im having some major troubles with it at the moment... maybe their new one is better?? -heath
Thread Starter
Joined: May 2003
Posts: 4,150
Likes: 0
From: CA (Bay Area)
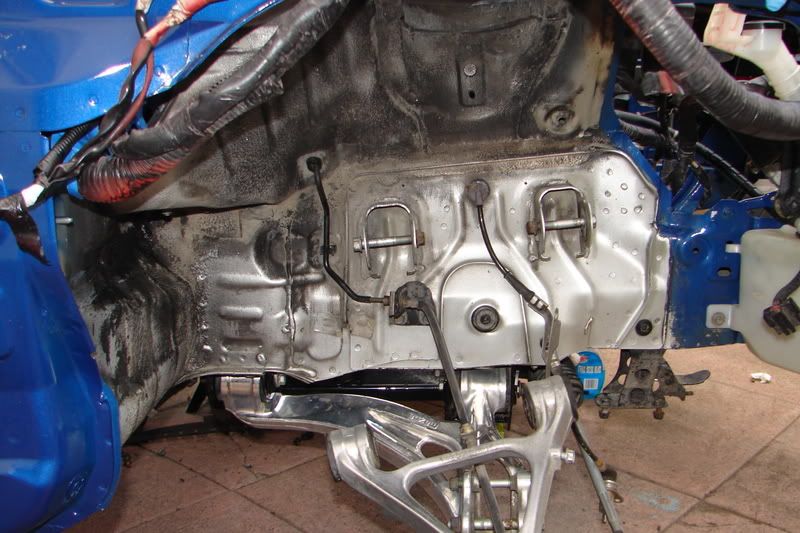
its been about 3 months, so i guess im due for an update. ive been getting lots of little things done on the car, and ive spent alot of time hanging out with my powdercoater . anyway, ive decided to redo the rubberized undercoating under the car to refresh everything now that its very much apart. im also now going to be adding sound insulation to the interior while the interior is out. after alot of reading i settled on second skin for the insulation. im going to try to use it sparingly as its rather heavy. ok pics
Before:
After:

Prepping for the second skin damplifier. (fyi, the dry ice method works REALLY well )

-Heath
. anyway, ive decided to redo the rubberized undercoating under the car to refresh everything now that its very much apart. im also now going to be adding sound insulation to the interior while the interior is out. after alot of reading i settled on second skin for the insulation. im going to try to use it sparingly as its rather heavy. ok pics Before:
After:
Prepping for the second skin damplifier. (fyi, the dry ice method works REALLY well
)-Heath
Thread Starter
Joined: May 2003
Posts: 4,150
Likes: 0
From: CA (Bay Area)


Check out the results I got in this thread:
https://www.rx7club.com/showthread.p...at#post8351378
Thread Starter
Joined: May 2003
Posts: 4,150
Likes: 0
From: CA (Bay Area)
update time: some sound insulation is in (i need to finish up the front half of the car), rear wheels are out to be widened, front and rear seats are in the interior shop being recovered, tires are ordered, and ive finally got a battery and tray (but i still need to make a nice mounting bracket for the battery and rear amp). slow progress as usual. maybe ill upload some pictures soon when something exciting happens or arrives at my door
Thread Starter
Joined: May 2003
Posts: 4,150
Likes: 0
From: CA (Bay Area)
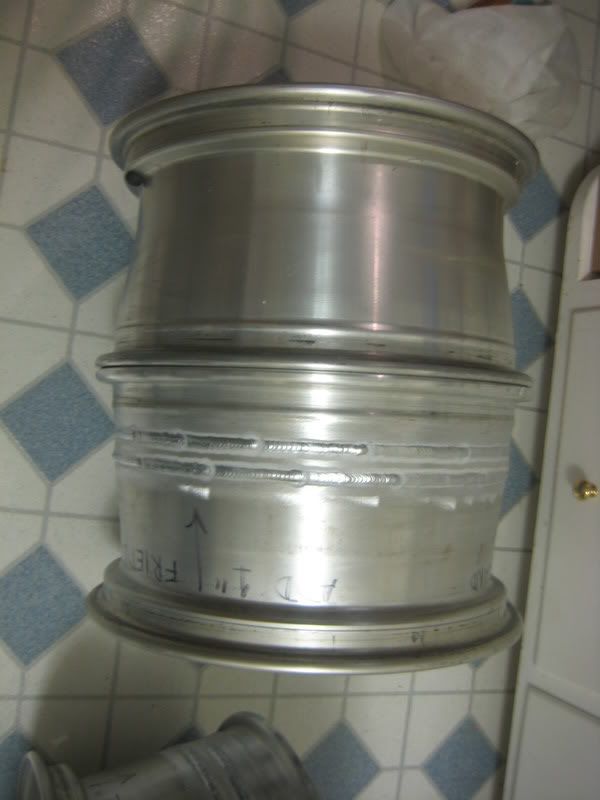
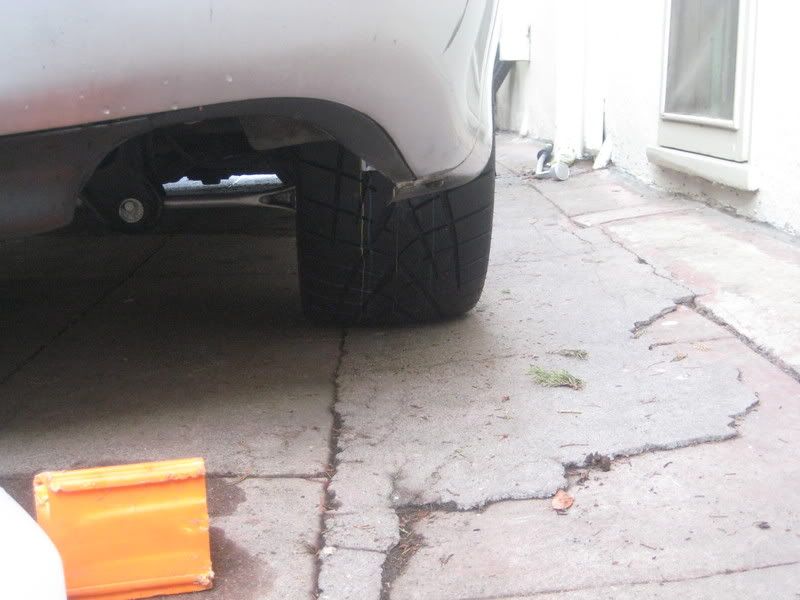
ive been making a little progress... and i thought id update the thread. i have the wheels widened and tires on. the 8.5" back is on the front, and the 8" front is on the back (and is now widened to 9") . Toyo R1R's 275 back, 255 front. i still need to add the spacer for the rear.

Ive finished the sound insulation (basically) ... still have to do the doors and some trunk. Ive run the audio cables, 0ga wire for the battery in the trunk, and fuel pump signal wire. with all of that done i thought i could have a little fun this weekend with some interior work.
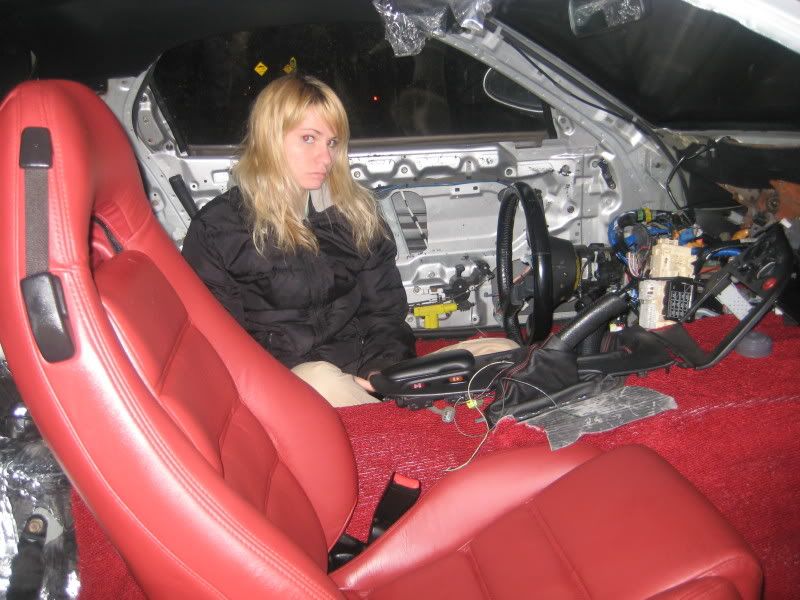
my girlfriend (who normally hates "that damn car" as she calls it) was willing to spend some time helping me get the new carpet fitted and some of the holes cut (cause knowing myself, given a brand new carpet and a sharp new box cutter, i would ruin it without a doubt ) . at this point it fits, but we need to add some extra padding to a few areas and cut a few more holes. the seats also came back from the interior shop so we put one in for fun to get an idea of what it will look like. what you dont see in this picture is the box cutter shes has in her hand waiting to stab me
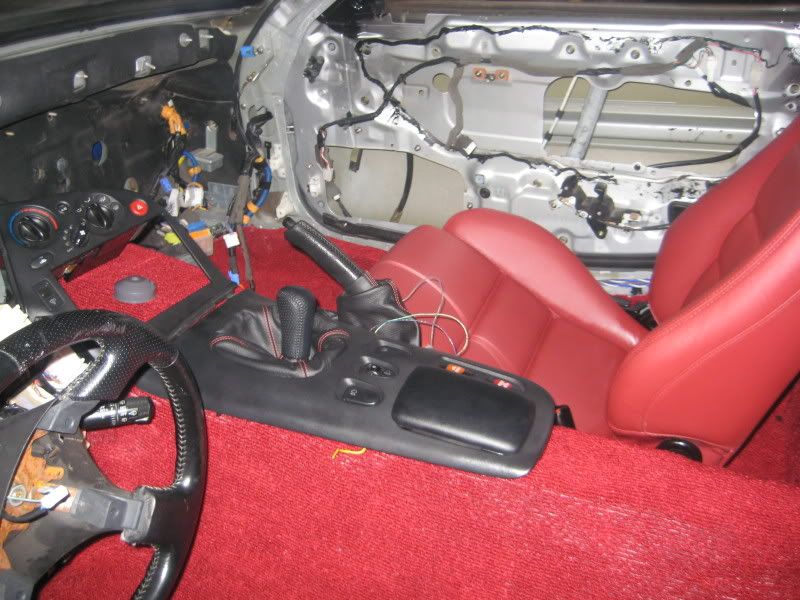
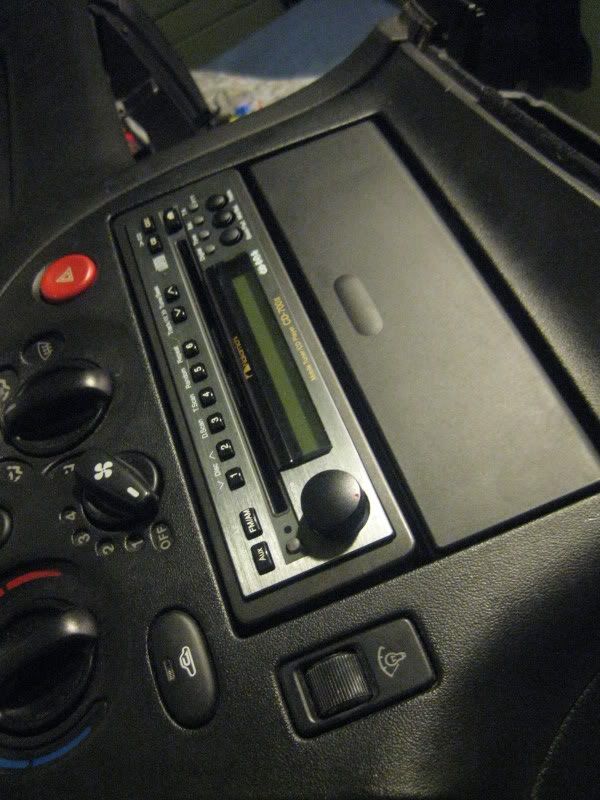
and lastly i finally brought the dash in to do some work on it before it goes back in the car. the head unit took a considerable amount of work to get mounted flush with the dash... im still not done with it, but at least it fits now
thats all for now. expect another update in 1-2 years
Ive finished the sound insulation (basically) ... still have to do the doors and some trunk. Ive run the audio cables, 0ga wire for the battery in the trunk, and fuel pump signal wire. with all of that done i thought i could have a little fun this weekend with some interior work.
my girlfriend (who normally hates "that damn car" as she calls it) was willing to spend some time helping me get the new carpet fitted and some of the holes cut (cause knowing myself, given a brand new carpet and a sharp new box cutter, i would ruin it without a doubt
) . at this point it fits, but we need to add some extra padding to a few areas and cut a few more holes. the seats also came back from the interior shop so we put one in for fun to get an idea of what it will look like. what you dont see in this picture is the box cutter shes has in her hand waiting to stab meand lastly i finally brought the dash in to do some work on it before it goes back in the car. the head unit took a considerable amount of work to get mounted flush with the dash... im still not done with it, but at least it fits now
thats all for now. expect another update in 1-2 years
Last edited by RotorMotor; Dec 8, 2008 at 10:22 PM.
Thread Starter
Joined: May 2003
Posts: 4,150
Likes: 0
From: CA (Bay Area)

Thread Starter
Joined: May 2003
Posts: 4,150
Likes: 0
From: CA (Bay Area)