
Rats nest for Christmas.. yay!


Rats nest for Christmas.. yay!
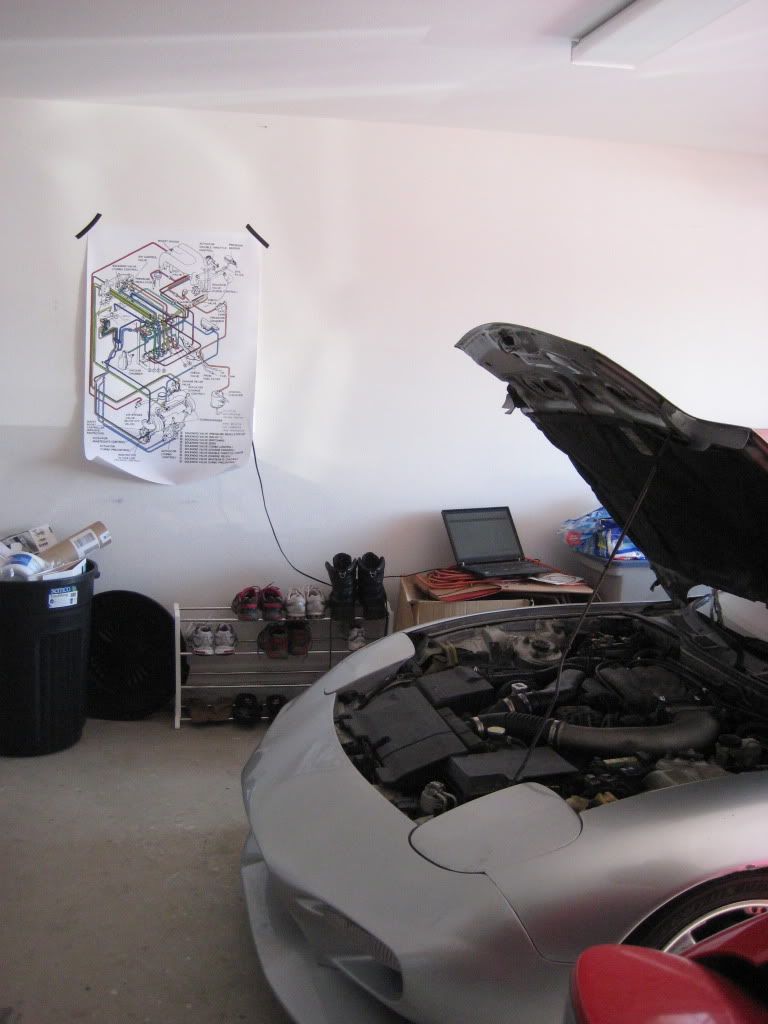
Hey Guys, I finally entered the rats nest! I've been following this guide http://rx7.voodoobox.net/ but I'm totally stumped. According do that, I took off my air box, intercooler hoses, air pump, alternator, coil/sparkplug thingy and upper intake manifold. However his first step was to take of the air control valve. He only shows a picture, but doesn't say how to do it. Is the air control valve in the way of taking off the solenoid rack? I Can't see to find the screws for the air control valve either. This job is so frustrating. I don't remember half the things I took off =(. If there's anyone in san jose near mckee, I wouldn't mind help hahaha.
Hi Cloudz,
I suggest looking up the air control valve in the factory service manual. If I recall at least one of the 10mm nuts that holds it on has to be removed blindly. a 1/4" 10mm socket, extension and ratchet ... I think ... maybe a universal joint.
If you haven't already I suggest that you print out the attached diagram on a color printer.
James


Trending Topics
Link to plotter size it's 40'x28'
http://www.megaupload.com/?d=UPBVEC6O
Take pictures, get some plastic bags and label everything as it comes off and you wont have this problem.
http://www.megaupload.com/?d=UPBVEC6O
Take pictures, get some plastic bags and label everything as it comes off and you wont have this problem.
I think I'm going to have that problem =(. I have screws everywhere. At first I tried to keep it organized with bags or screwing it back on after i took off the parts lol. So the ACV is in the factory service manual? I'll try looking for it in there. How do you guys read that diagram haha it's so confusing.

If you're going to be replacing all the hoses for the solenoids you will need to remove the ACV, some of them on the left side you just can't get to. The ACV also makes it difficult to unclip the solenoids from the rack.
Recently I removed my ACV and rats nest and went with upgraded solenoids, in the pictures in the thread below you can clearly see where I removed it and the location of the studs sticking out from the LIM.
https://www.rx7club.com/group-buy-product-dev-fd-rx-7-269/custom-solenoid-rack-968956/page6/
Two of them I think are visible, one is as mentioned above: a 1/4 and a small extension you can get to it. You'll just need to mostly by feel instead of sight. Some bright lights in there does help you kind of line it up though.

The ACV(air control valve) is held by 3 flanged nuts (m10). Two are visible but the bottom one is the tricky one, you will an extension to get to it and just feel it pop into place. You can also put some tape around the inside of the socket so you don't end up dropping the nut.
I'm pretty sure I removed the nest without touching the ACV though I did end up removing it later on to replace the oil metering lines and to remove the secondary fuel rail.
What I ended up doing is removing the entire nest with fuel hardlines and coolant hard lines in place. I think its held by 4 large bolts and everything was much easier after that and I didn't want to risk stripping one of the phillips screws. I'm not sure if you want to go that route though as I think you are only replacing vacuum lines and nothing fuel related. Though I must say that if you want to replace all of them you will need to remove the secondary fuel rail since two vacuum lines go to the oil metering lines and another one is down low on the lower intake manifold.
You also might want to replace those old phillips head screws with some hex cap bolts and anything that looks sketchy and rusted, the last thing you want is drilling out a broken bolt.
I think the majority of the rats nest is held by m8 bolts and nuts. I have a lot of left overs from when I replaced mine.
I did this not too long ago so I know what you're going through. Take your time, look at all the diagrams and all the write-ups out there. I wish I could help, I'm about 45mins away but I will be kind of busy with the holidays and such.
The rat's nest is scary until you understand how the turbo system works and how to read the diagram. Just slow down a bit and study it.
Maybe it's because this is the first thing that I ever tackled on the car but I think that it's the easiest to get right.
Pick up a vacuum / pressure pump and test everything out while your in there.
Maybe it's because this is the first thing that I ever tackled on the car but I think that it's the easiest to get right.
Pick up a vacuum / pressure pump and test everything out while your in there.
Thanks twinside for the pics. Sephek that was a lot of info and thanks for the thought of coming out haha, that means a lot. Hope you and the other members all have a great holiday. James you are right haha. I'm just scared of how i'm going to put everything back together. Today wasn't very productive, i'll try to post up what I do tomorrow.
I don't recall if there are sensor things on the ACV but it sounds like you should slow down!
Either this or I'm misunderstanding you. You shouldn't have to cut any wires. Everything should unplug from the engine harness. If you cut things instead of unplugging you'll make a lot of extra work for yourself when you start putting it back together.
The vacuum hoses are another story. Your only choice may be to cut these in some cases. Trying to pull on them will break the plastic solenoid nipples.
One other thought. If you post pictures of what you are talking about I'm sure that we can all identify the "sensor like" stuff.
Happy Holidays,
James
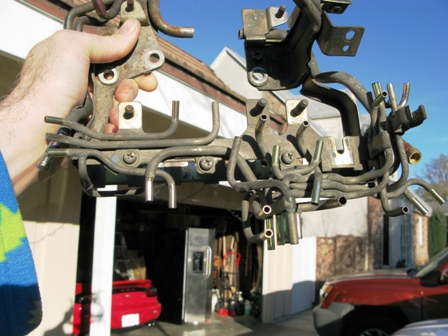
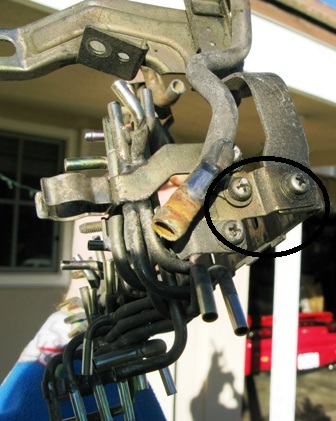
This First picture is of the acv. I tried to circle the sensor things I was talking about in green

This 2nd pic is about the solenoid rack which I still can't get off. The green circles in this picture are of the screws I took off. The one in red is where I see more screws, but not sure if it's related

This 2nd pic is about the solenoid rack which I still can't get off. The green circles in this picture are of the screws I took off. The one in red is where I see more screws, but not sure if it's related

Full Member
Joined: Dec 2011
Posts: 44
Likes: 0
From: bc
hey that color coded vacuum line diagram is exactly what i need for my 88na.
i have my haynes manual and some other black and white online manuals but i dont have enough 13b knowledge to actually follow their not so colorful and descriptive illustrations.
help?
i have my haynes manual and some other black and white online manuals but i dont have enough 13b knowledge to actually follow their not so colorful and descriptive illustrations.
help?
I'm not sure if theres one for the fc, but I'll see if I can find one for you.
I'm trying to take off my bumper to give myself more room to work on the car without risk of damaging the bumper. I took off the 3 nuts on each side where the wheel liner is, But the bumper wont come off. I looked where a Front mount would be and Took of one screw. The one to the left is stripped or something it keeps spinning. Is it even related to taking off the bumper? Here's a picture of what i mean, I think previous owner broke it while painting bumper. I Still need help with the acv and solenoid rack from the pictures i posted above too.

I'm trying to take off my bumper to give myself more room to work on the car without risk of damaging the bumper. I took off the 3 nuts on each side where the wheel liner is, But the bumper wont come off. I looked where a Front mount would be and Took of one screw. The one to the left is stripped or something it keeps spinning. Is it even related to taking off the bumper? Here's a picture of what i mean, I think previous owner broke it while painting bumper. I Still need help with the acv and solenoid rack from the pictures i posted above too.
i see you broke a check valve.. green and white valve thing.. i have 3 of them for sale.. lmk if you are interested with a pm. as far as removing the bumper there are 4 screws on top, and 3 screws per side of the bumper which are up where the fender meets the bumper.. you must remove the fender liner and tires to see what im talking about. also you have to unscrew the undertray from underneath the bumper..
I bought the check vales from Dale Clark already, but thanks though. Yeah I took all the screws you mentioned but the undertray one. Is the undertray screw the one I have a picture of? Do you know how to take off the acv and solenoid rack?
Where to start... The ACV connectors are on the harness itself. There are 3 connectors in total, 2 black and 1 white. They are not hard to disconnect, you just need follow them to see where they lead and also don't worry about labeling them as there is no way to get them wrong.
The solenoid rack has several screws on the side. You will need to remove these if you want to remove the upper nest. The section below where the solenoids attach has 2 screws holding it together. I think you will have to remove them in parts. The ones you labeled green are only part of what holds the hard vacuum lines together but shouldn't be removed. Try to remove all the ones you can see on the sides facing the firewall and the ones you can see labeled in red.
The solenoid rack has several screws on the side. You will need to remove these if you want to remove the upper nest. The section below where the solenoids attach has 2 screws holding it together. I think you will have to remove them in parts. The ones you labeled green are only part of what holds the hard vacuum lines together but shouldn't be removed. Try to remove all the ones you can see on the sides facing the firewall and the ones you can see labeled in red.
Oh okay thanks Sephek. So for the ACV connectors I just have to follow the 3 connectors to the harness to disconnect them? Then take off the 3 screws and remove the vacuum hoses connected to the ACV to be able to remove the ACV itself? Should I put the screws i labeled in green back onto the solenoid rack?
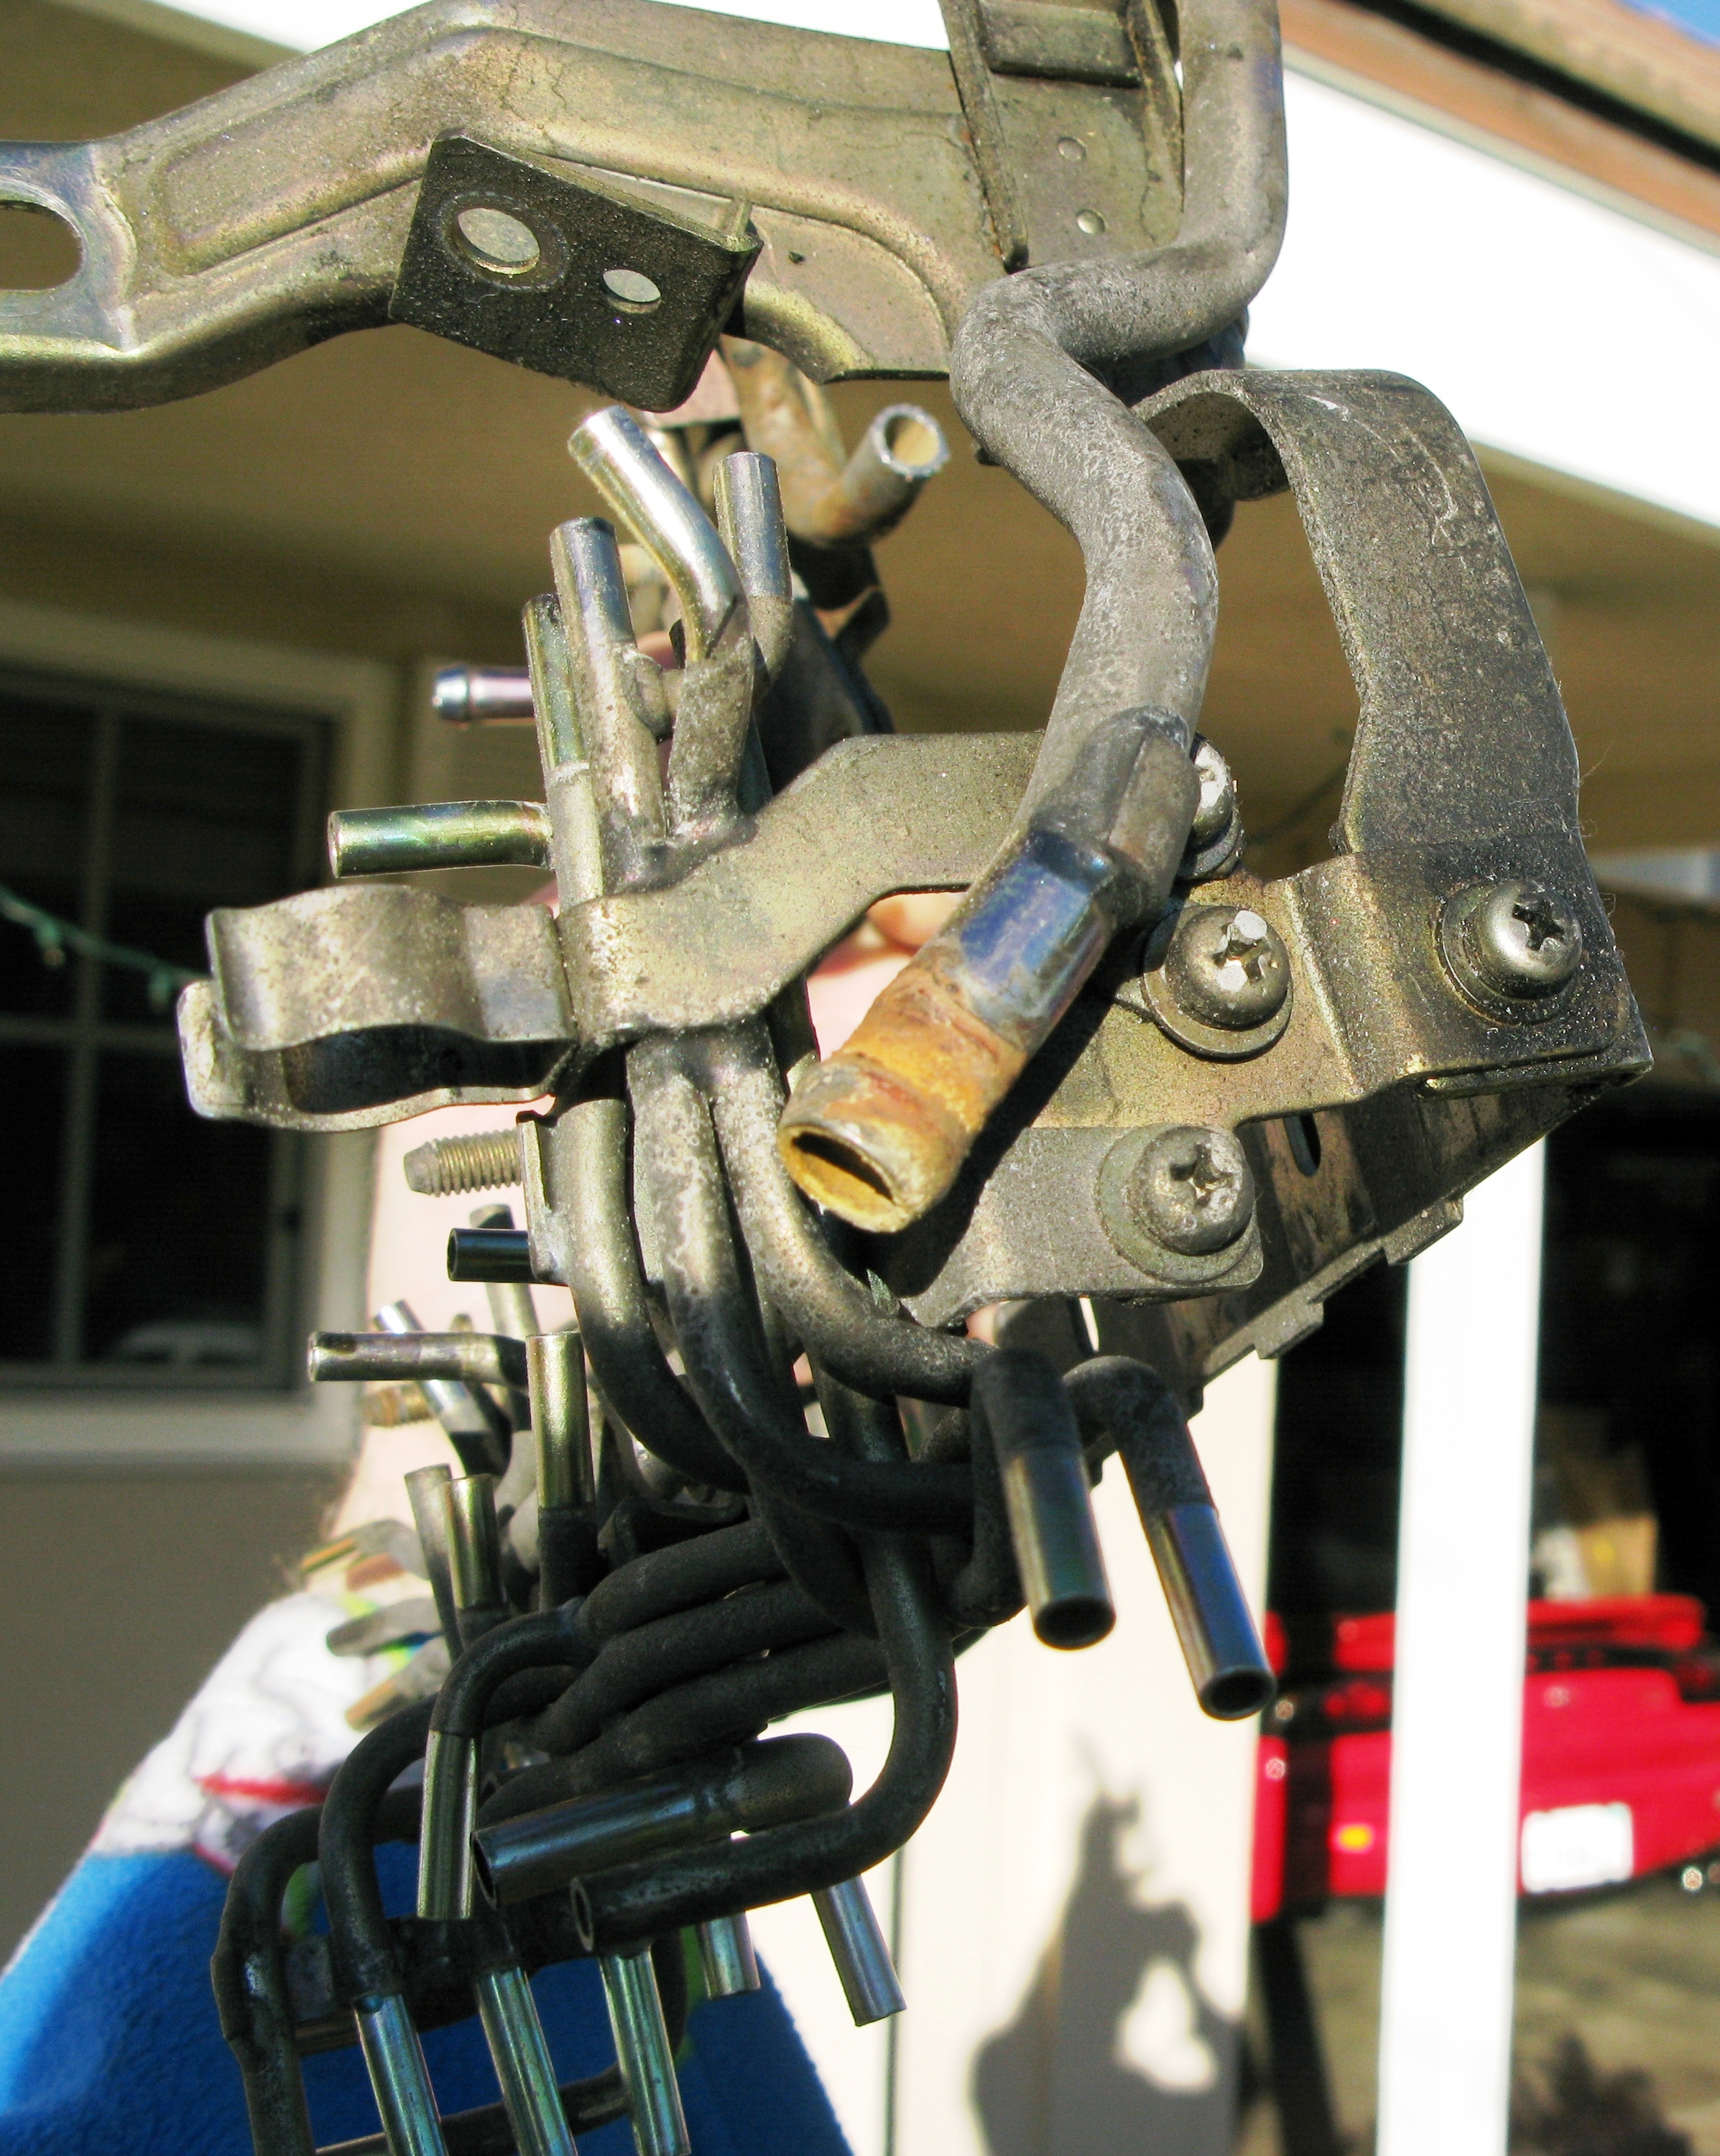
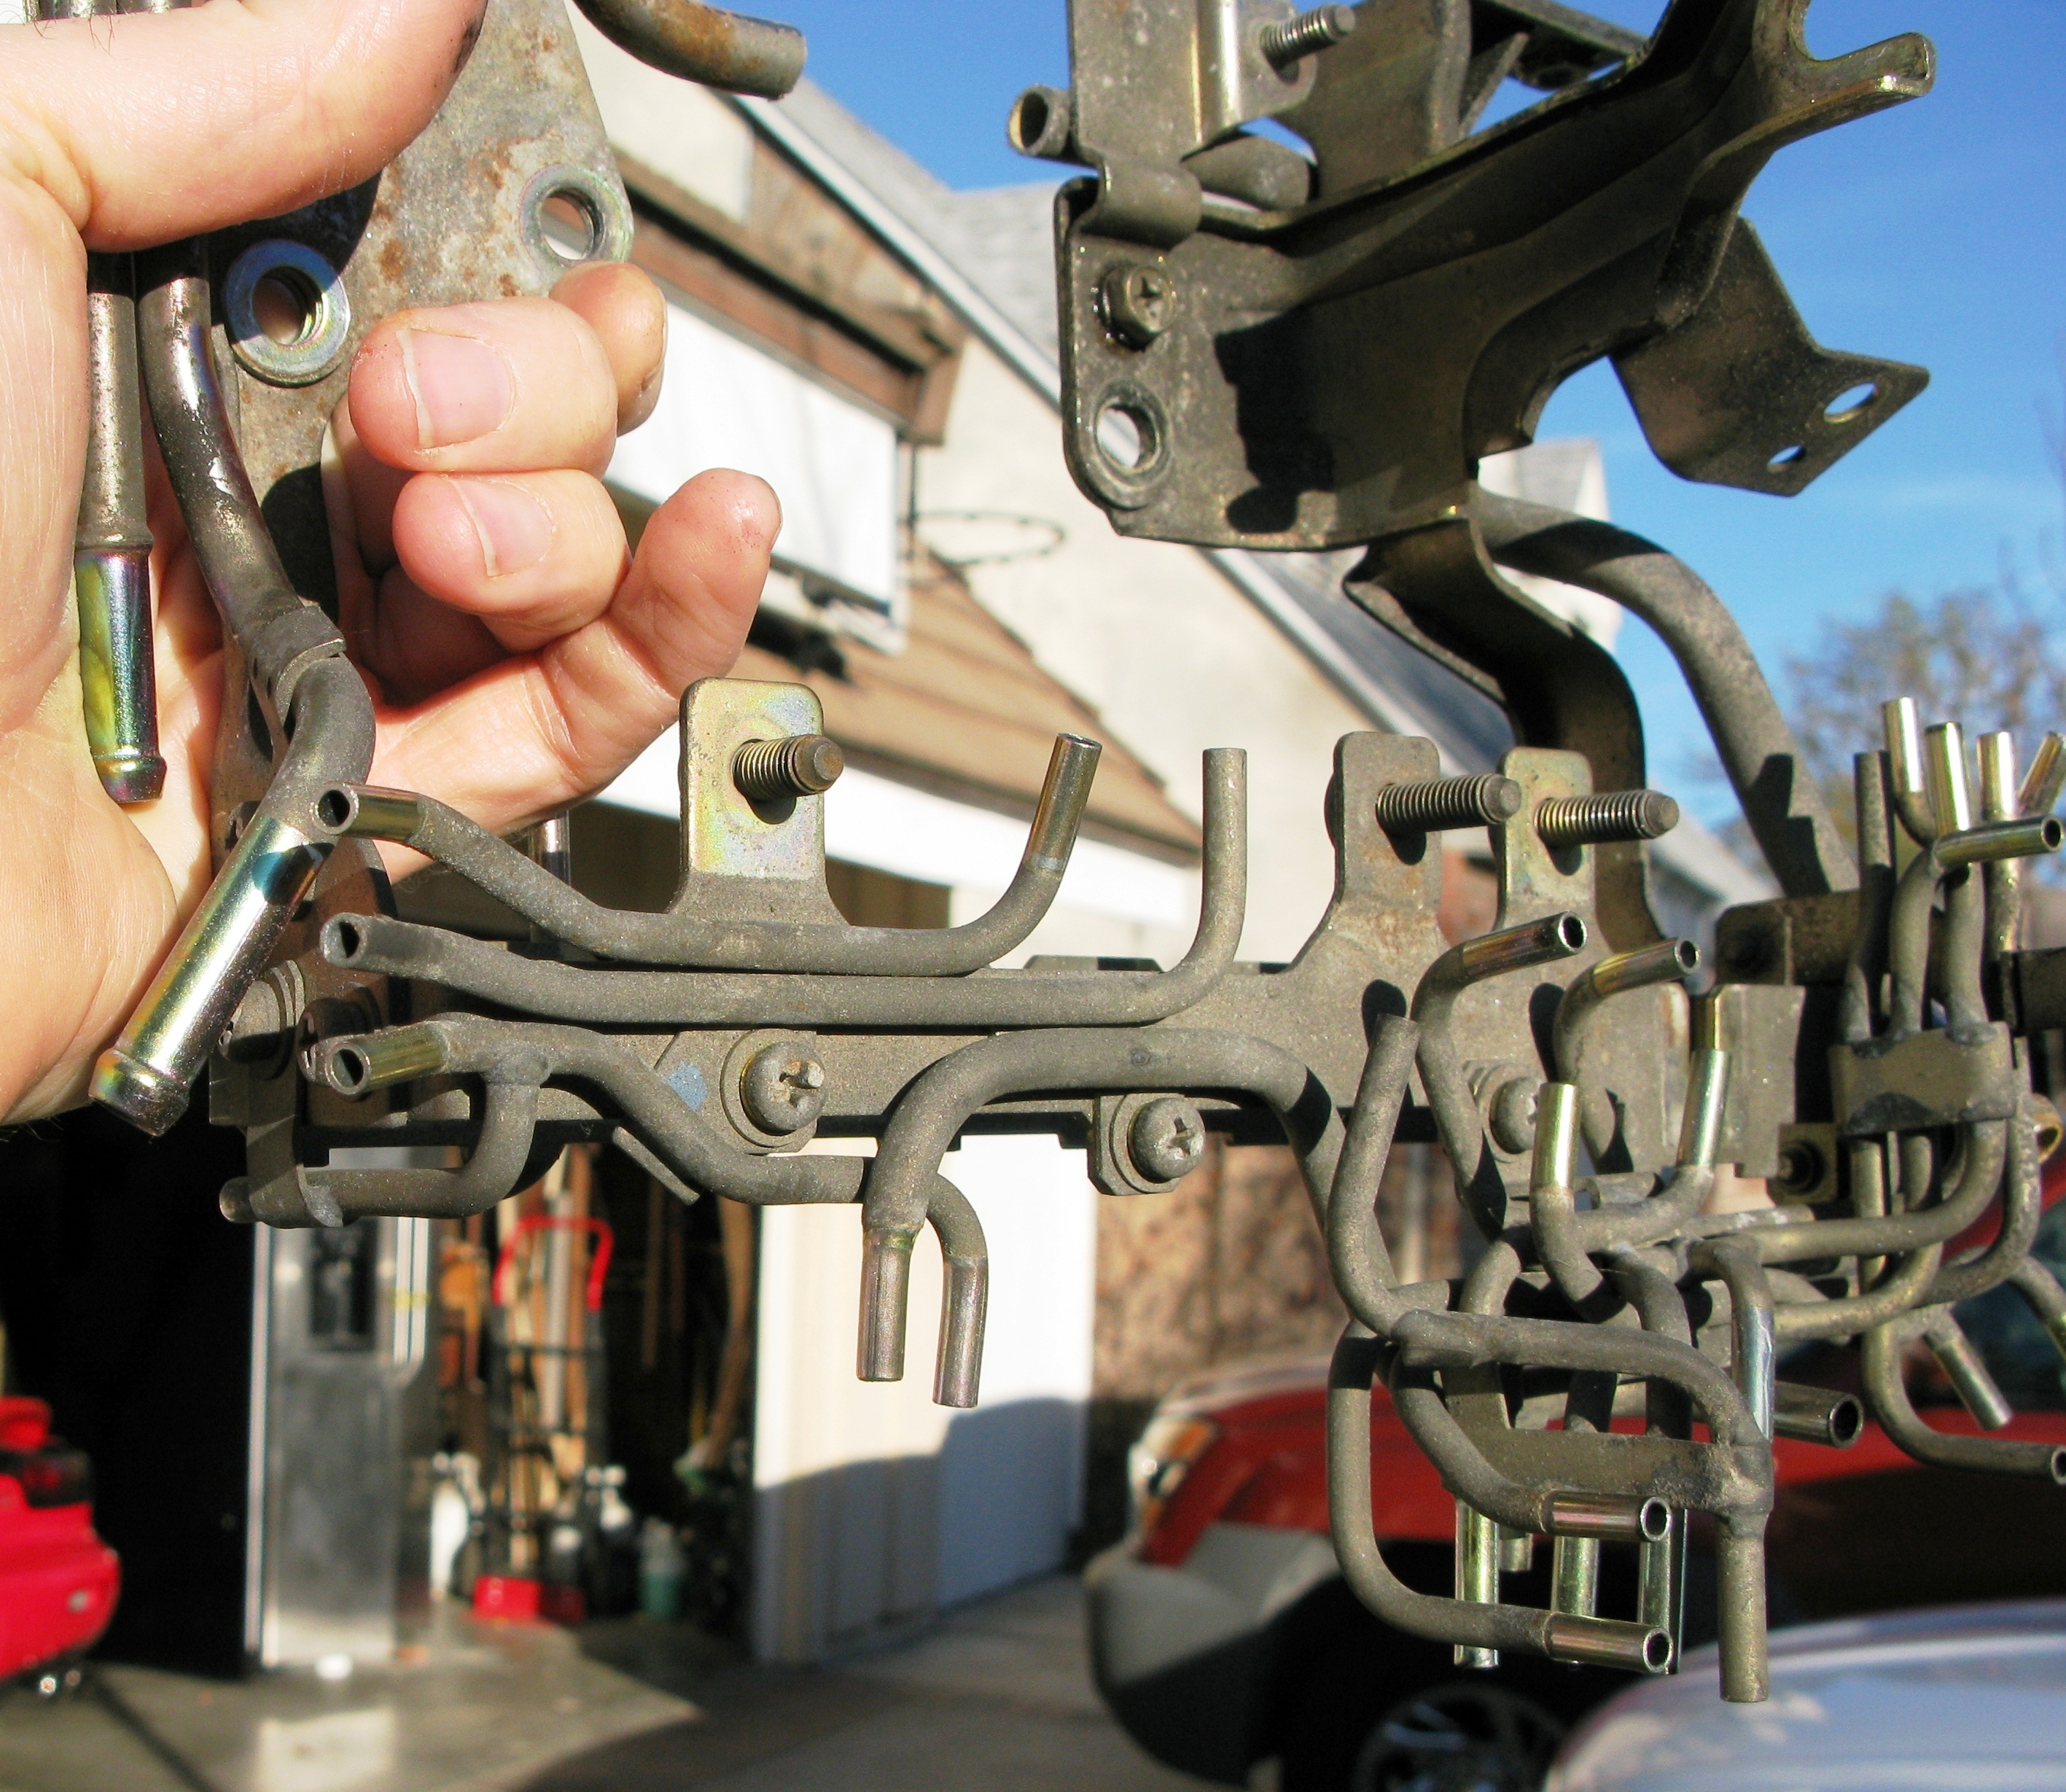
rats nest out of the car
See if these pics help. This is the skeleton of a used rat's nest that I picked up from Japan2LA. Great source for used parts by the way ... he can be a bit slow to ship but always delivers good stuff.

You can definitely put the screws that you asked Sephak about back in. It's the ones in my second and third pic that you need to remove. Three of them face the front of the car and I think that the alternator has to come off to remove them. The other three face the firewall. I suggest a Philips tip with a 1/4" ratchet.
+1 on Dale's check valves ... good stuff!
Let us know if you figure the bumper out. I'm curious how it comes off.