
radiatorworld / CSF Race Radiator

radiatorworld / CSF Race Radiator
Alright, well I have a few questions for who ever has this radiator. I purchased this radiator from http://www.radiatorworld.com/radiato...no=15107&cat=1 It is the third one down, and at that price I figured why not!
The radiator arived here today, and going to install it on sunday along with AST removal. My current temps are 200-210 city driving.. and When I get on it in the cayons.. they quickly get out of control to the point where I have to pull over and let if cool off for a few min.They creep up to 230 within 2 min of hard up hill boosting. So going to see how much of a difference this radiator makes in temperature.
The specs on the radiator are:
12 1/2 x 24 3/4 x 2 1/16
Which is 1" Thicker then stock.
Questions are:
1. What did you modifiy to make it fit?
2.Did it it fit with stock IC and air box?
Any pictures of what you did?
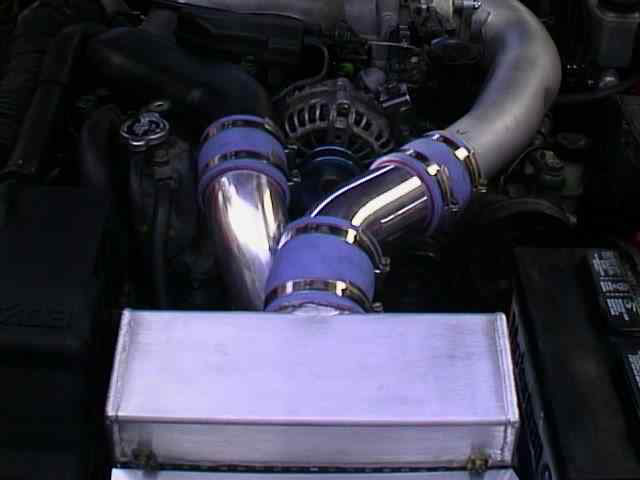
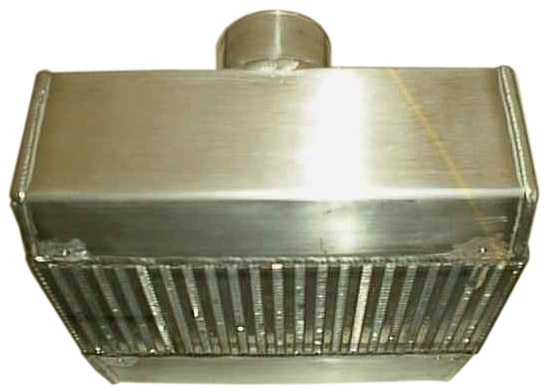
Here are some pics:


Welds look good... I will update this with some pictures of the install and some feedback on the radiator once I get it in.
The radiator arived here today, and going to install it on sunday along with AST removal. My current temps are 200-210 city driving.. and When I get on it in the cayons.. they quickly get out of control to the point where I have to pull over and let if cool off for a few min.They creep up to 230 within 2 min of hard up hill boosting. So going to see how much of a difference this radiator makes in temperature.
The specs on the radiator are:
12 1/2 x 24 3/4 x 2 1/16
Which is 1" Thicker then stock.
Questions are:
1. What did you modifiy to make it fit?
2.Did it it fit with stock IC and air box?
Any pictures of what you did?
Here are some pics:
Welds look good... I will update this with some pictures of the install and some feedback on the radiator once I get it in.

Good luck. Here's what I did:
1. Removed rubber stoppers on the rail (they just screw out)
2. Grinded that same mount out to allow the radiator to sit further down
3. Trimmed the plastic to allow the radiator to drop onto the mounts where the rubber stops used to be
Now, here's the problem. I still needed about 1/4" of room for the radiator. You can probably cut back the the brace where the rubber stops were to allow the radiator to move. Don't cut so much that you can't use the holes to where the rubber stoppers were to bolt down the radiator. I also installed the Widefoot Billet Swaybar Mounts which gave me the room that I needed so I didn't do anymore grinding/cutting on the bracket.
You'll have to move the A/C and P/S junk down about 1/2-1" to allow the radiator to sit lower. I would recommend getting some long bolts, then cutting some small piping to make spacers to hold the A/S and P/S equipment below the radiator.
Lastly, if you got this radiator just to drive around the street; chances are you are either
a) not going to see any cooling improvement
b) probably run hotter in stop and go traffic
The larger radiators are more effective when the car is constantly moving (i.e. for road racing).
Thanks for the info Mahjik
And I do plain on road racing this car, been road racing my prevous FC for about 2 years.. finnally got a FD and when I beat on it in the cayons.. it just gets HOT, goes from 210 to 230F in about 2 min of up hill boosting.
So this should definitly help, and with there prices.. really worth a shot.
For your #2, what exactly did yuo grind?
Thanks once again.
I don't have my digital camera to take pictures right now (wife has it and is out of town).
There are two welded on brackets that the mounts for the radiator bolt to. Once you remove the mounts, you'll see the rubber mount. Where the rubber mount is screwed into is the welded bracket. That's what you'll have to grind. It will be obvisous the first time you try to drop it in.
Make sure to cover the fins with cardboard so you don't damage them with the test fits. Also, if you have a die grinder with carbine bits, it will make short work of the brackets. You'll just have to grind, test fit, grind, test fit, etc... until it can fit.
Trending Topics


Here's a thread that details someone's install of this exact radiator:
https://www.rx7club.com/3rd-generation-specific-1993-2002-16/im-guinea-pig-cheap-race-radiator-421067/
-s-
https://www.rx7club.com/3rd-generation-specific-1993-2002-16/im-guinea-pig-cheap-race-radiator-421067/
-s-
Im also running this radiator. Mahjik pretty much said it all. I installed it a little different but overall its the same procedure. If you want you can come down to take a look at my FD. The engine is out right now and you can see my radiator perfectly. I think you bought a hood or something from my brother not too long ago.
^ The rad was clean, so no problem. 
Alright I installed the radiator, and this is what I did to get it to fit:
1.Those tabs on the bottom on the car that hold the stock rad in place, I cut them off.
2.The stock mounting tab on the left (passanger) side had to cut off a corner of it, pretty much everything till the actually nut welded in place.
3. I bent the tabs on the side of the radiator itself to clear the AC/PS lines.
4. I pushed the AC condensor down about 1".
The radiator fit fine afterwards, just needed to use longer bolts to tie it down. It fit fine with the stock IC and air box. The stock IC ducting was a bit tough to sqeeze in since the rad sits a bit higher, but after moving it for a min is sliped into place.
Now for the test drive:
I drove it city and temps never got over 184*F, didn't even hear the fans kick on.
I took it to a local cayons and beat on it for about 5 min on the uphill, full boost WOT action. And highest temp I saw was 195*F. Going down hill they quickly droped back down to 184*F in about 2 min. On the stock radiator my city temps would be ~200. And driving that same cayon road, my temps would skyrocket to 225-230*F in about 2 min of hard up hill boosting, I would have to pull off and let it idle with the hood open and AC on to bring it back down. Admitily the radiator was original so might have also been partially clogged.
I think this radiator was deffiently worth it for the price, good welds, comes with a metel drain screw which is good as it won't strip. sorry I didnt' take any pics.. didn't want to get my camera dirty.
Senior Member
Joined: Aug 2002
Posts: 587
Likes: 0
From: DC
Originally Posted by trainwreck517
^ The rad was clean, so no problem.
Alright I installed the radiator, and this is what I did to get it to fit:
1.Those tabs on the bottom on the car that hold the stock rad in place, I cut them off.
2.The stock mounting tab on the left (passanger) side had to cut off a corner of it, pretty much everything till the actually nut welded in place.
3. I bent the tabs on the side of the radiator itself to clear the AC/PS lines.
4. I pushed the AC condensor down about 1".
The bottom is of rad is being held by the stock mounting holes. After I tied everything down, the rad did not move at all. Its such a tight fit, the radiator really has no place to go.


Do you think this radiator will work with a SR Motorsports SMIC, that's about 3-inches thick ?
Or should I go for a thinner Fluidyne or AWR/Mazdacomp radiator ?
Yes, I track the car.
TIA,
:-) neil
Or should I go for a thinner Fluidyne or AWR/Mazdacomp radiator ?
Yes, I track the car.
TIA,
:-) neil
Originally Posted by silverTRD
good job man and im glad you got that cooling bug fixed...
Originally Posted by M104-AMG
Do you think this radiator will work with a SR Motorsports SMIC, that's about 3-inches thick ?
Or should I go for a thinner Fluidyne or AWR/Mazdacomp radiator ?
Or should I go for a thinner Fluidyne or AWR/Mazdacomp radiator ?
The IC will fit, I'm pretty sure. The tuff thing to fit is the actuall ducing for the IC, since the rad is a bit taller there is a smaller opening to fit the ducing, the stock one was a really thight fit. If the SR motorsport has a bigger opening, not sure if it will work. But if its the same as stock opening, I don't see why it wouldn't work. There is still plenty of clearance from the rad fans and the stock IC.
And if it is a bit wider, you can always grind down the mounting tabs on the car to get a bit more clearance, or even weld in your own mounting brackets.
Any reason to spend the extra money on a Koyo N-flow ?
I do track it for 30-minute sessions in 95-100F+ heat plus 80-90% humidity.
TIA,
:-) neil
I do track it for 30-minute sessions in 95-100F+ heat plus 80-90% humidity.
TIA,
:-) neil
Last edited by M104-AMG; Jul 17, 2006 at 08:49 PM.
Not sure, but I will be tracking the car next month, 08/11/06 for 30 minutes sessions as well.. so I will update once the track day is over... Now I just need to get a oil temp guage and maybe rig up a small sprayer on the oil cooler that I can activate if oil temps start getting out of hand.
Originally Posted by trainwreck517
Thanks MIke, you able to get that tps fixed?
i'll be wanting to hear your plans for the oil cooler sprayer, sounds like a good idea. i wonder if it will hold up for 30mins of track time? only time will tell...hehe
Senior Member
Joined: Aug 2002
Posts: 587
Likes: 0
From: DC
Originally Posted by trainwreck517
The bottom is of rad is being held by the stock mounting holes. After I tied everything down, the rad did not move at all. Its such a tight fit, the radiator really has no place to go.
So "1.Those tabs on the bottom on the car that hold the stock rad in place, I cut them off." refers to the mounting tabs that hold the top left and right of the radiator?
Originally Posted by jayk
So "1.Those tabs on the bottom on the car that hold the stock rad in place, I cut them off." refers to the mounting tabs that hold the top left and right of the radiator?
Wrong, on the bottom where the bottom of the radiator mounts there is a tab with a hole, then a tab that extends out of it. That part that extends out of it.. thats what I cut off.
The tabs on the top, I had to grind down all they way to the actuall bolt thats welded there.
Senior Member
Joined: Aug 2002
Posts: 587
Likes: 0
From: DC
Originally Posted by trainwreck517
Wrong, on the bottom where the bottom of the radiator mounts there is a tab with a hole, then a tab that extends out of it. That part that extends out of it.. thats what I cut off.
The tabs on the top, I had to grind down all they way to the actuall bolt thats welded there.
The tabs on the top, I had to grind down all they way to the actuall bolt thats welded there.
Ah, I see what you mean. I just hammered the tab that extends out of it flat.
Originally Posted by jayk
Ah, I see what you mean. I just hammered the tab that extends out of it flat.
Much easier IMO.
Originally Posted by trainwreck517
Not sure, but I will be tracking the car next month, 08/11/06 for 30 minutes sessions as well.. so I will update once the track day is over... Now I just need to get a oil temp guage and maybe rig up a small sprayer on the oil cooler that I can activate if oil temps start getting out of hand.
Trying to decide on the Koyo N-Cool vs. this one.
TIA,
:-) neil