
My Vmount build


Thread Starter
Full Member
Joined: Mar 2011
Posts: 149
Likes: 1
My Vmount build
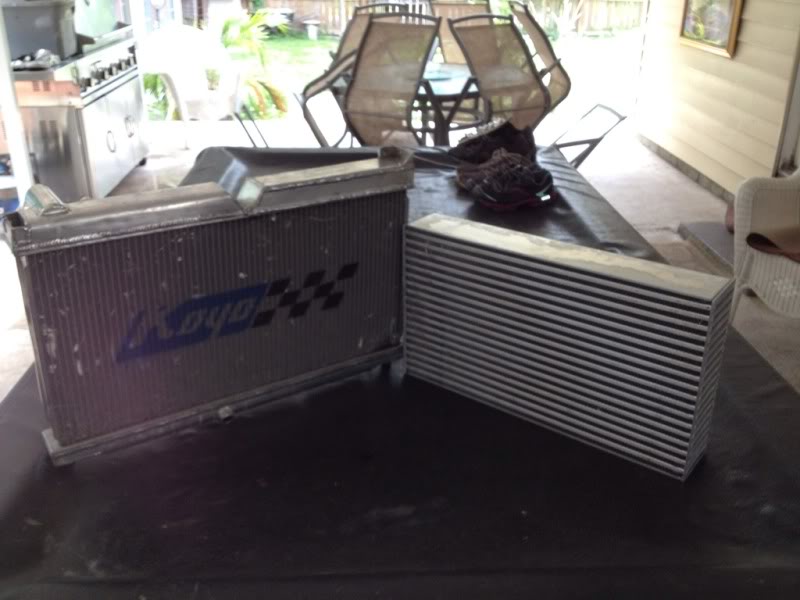
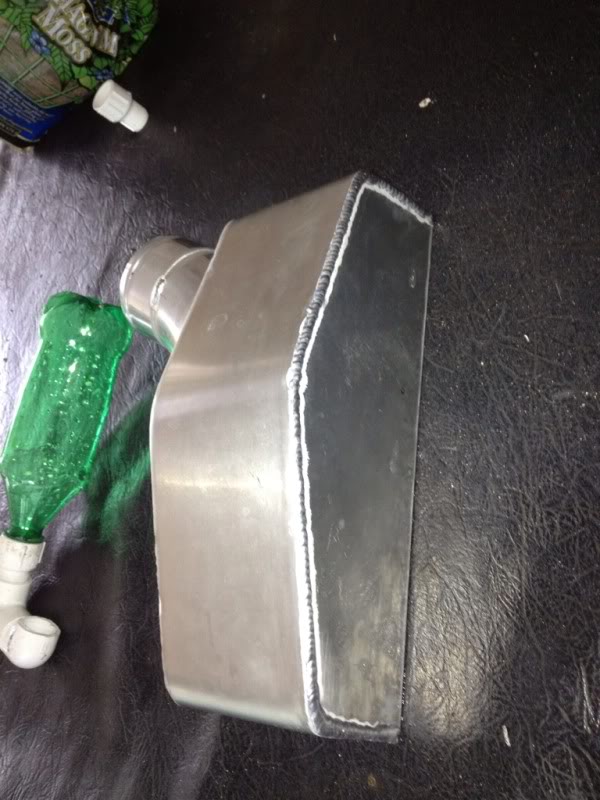
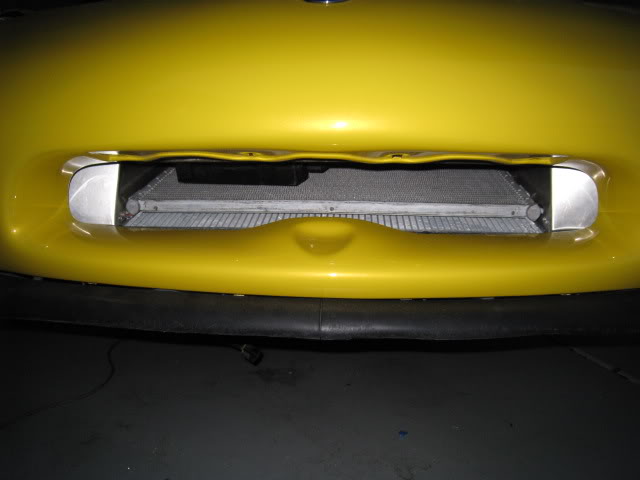
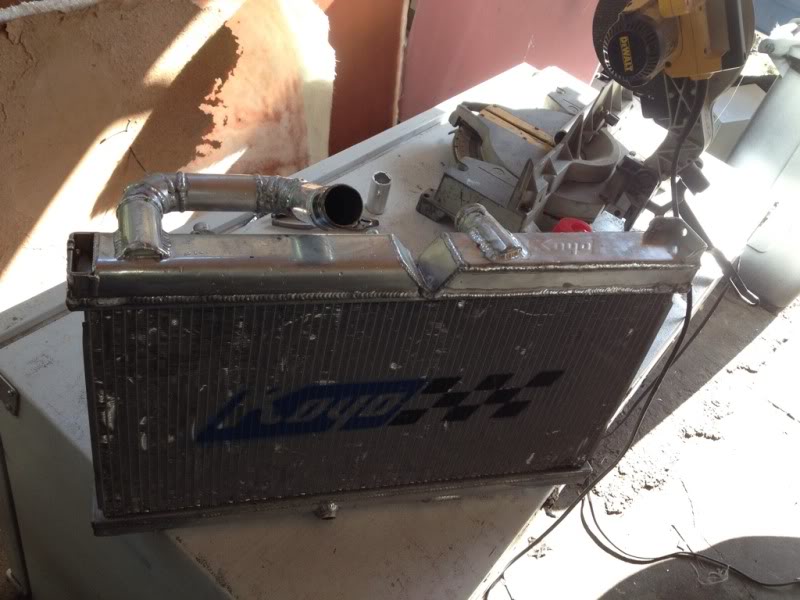
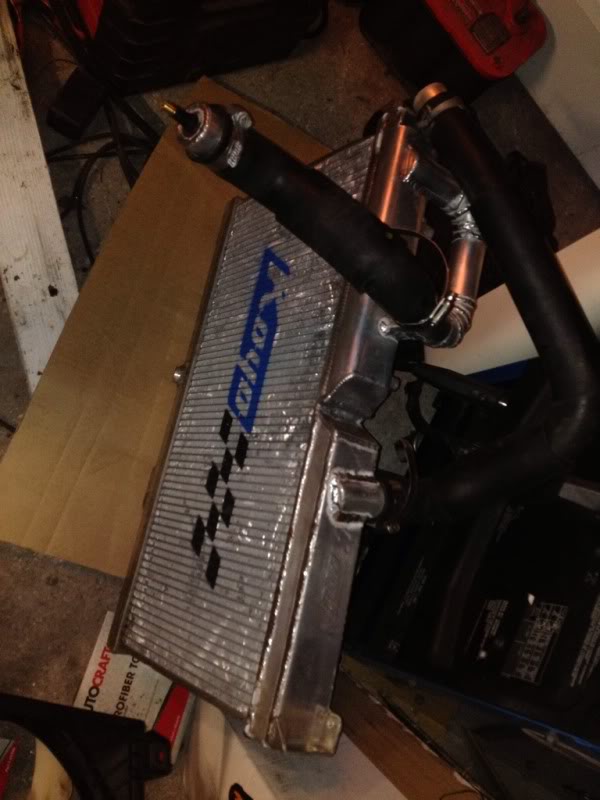
I was hoping to get this completed this weekend, but I have not been able to work under this awesome Florida rain. I bought a core and decided to make my own custom Vmount setup.
I have been tog welding for about 5 months now and I am getting better the more I do it so please don't critique my weld too bad :-)
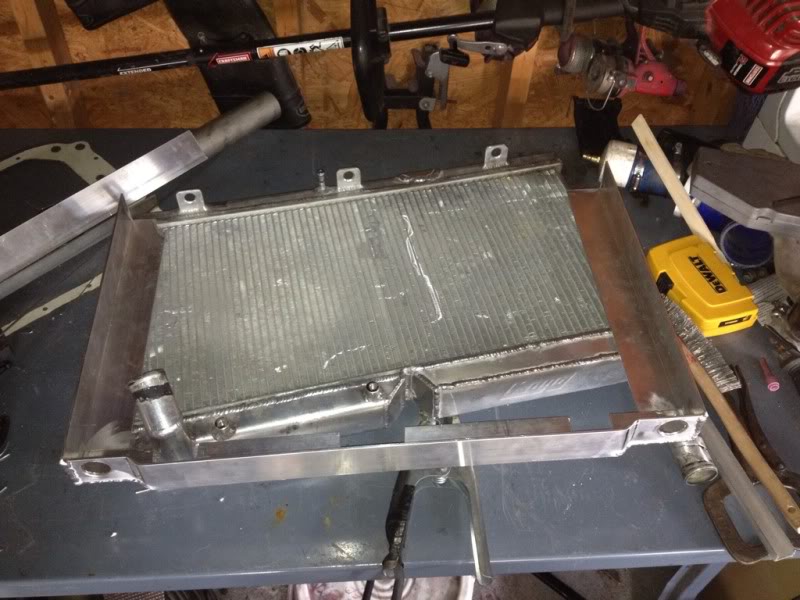
I made a cage around the radiator out of 1/8 in aluminum because I was afraid to make 2 little side pieces and run the risk of something on the road ripping a hope in my rad. I am also trying to find a throttle body elbow if not I will make one.
------ Also for people that talk without knowing what they are talking about need to check what they say before giving other people incorrect information.
Well here are the pics and it is still in progress.


I have been tog welding for about 5 months now and I am getting better the more I do it so please don't critique my weld too bad :-)
I made a cage around the radiator out of 1/8 in aluminum because I was afraid to make 2 little side pieces and run the risk of something on the road ripping a hope in my rad. I am also trying to find a throttle body elbow if not I will make one.
------ Also for people that talk without knowing what they are talking about need to check what they say before giving other people incorrect information.
Well here are the pics and it is still in progress.


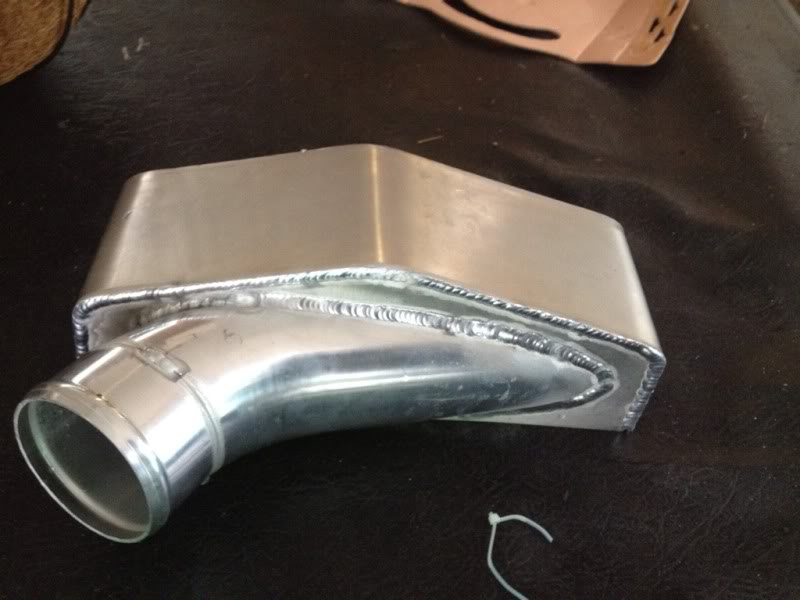
Progress looks good so far. I like that you did the end-tank outlet with the large/smoothed internal opening - should help out with flow. 
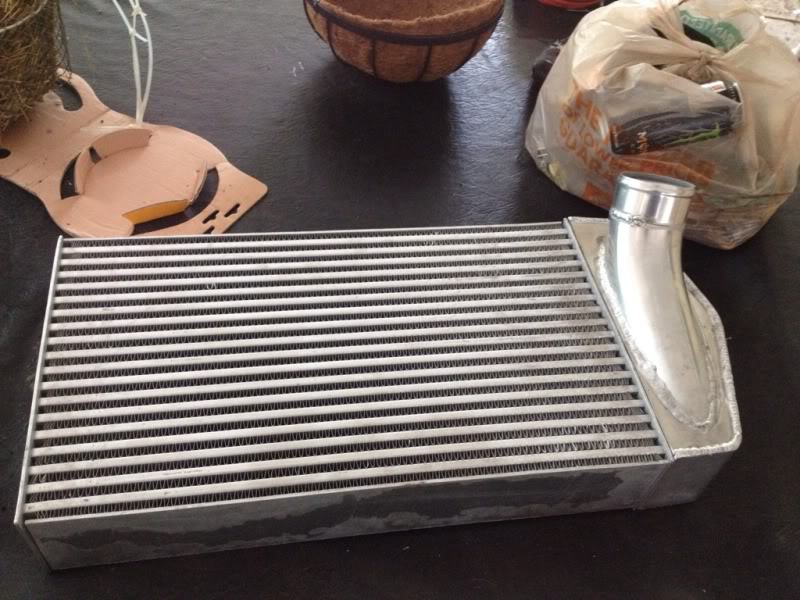
Only problem I see is that you have your rad inlet/outlet on the wrong side - your rad drain plug is going to be on the top instead of the bottom, meaning you'll never be able to fully drain your rad. Common mistake, I've seen quite a few V-Mount setups with the rad drain plug on the top.
 I assume this is a jab at me since your previous thread was closed after your hissy fit. Not sure what "incorrect information" you're referring to, since everything I provided for you was 100% spot-on accurate for what you needed to do w/ the rad to make it 2-pass. Apparently you forgot that I've already helped you out in a few other threads you started (e.g. the one about oil cooler ducting and the one about fabbing an oil filler neck).
Don't be so sensitive. Learn to use the forum the right way: search/read/post (in existing threads) before starting new threads. The forum is full of already-there information, and "regulars" and "old timers" are generally more than happy to help out as long as you aren't cursing them out because you don't like what they're saying.
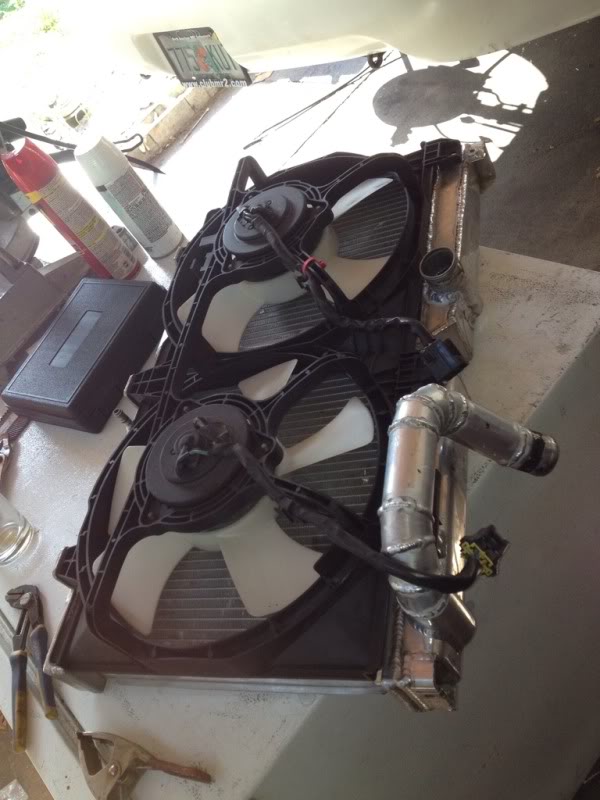
Keep up the good work on the IC and keep those pictures coming. Make sure you build some nice side-ducting to make sure you get all the airflow though the rad/IC instead of around them.
Cheers.
Only problem I see is that you have your rad inlet/outlet on the wrong side - your rad drain plug is going to be on the top instead of the bottom, meaning you'll never be able to fully drain your rad. Common mistake, I've seen quite a few V-Mount setups with the rad drain plug on the top.
I assume this is a jab at me since your previous thread was closed after your hissy fit. Not sure what "incorrect information" you're referring to, since everything I provided for you was 100% spot-on accurate for what you needed to do w/ the rad to make it 2-pass. Apparently you forgot that I've already helped you out in a few other threads you started (e.g. the one about oil cooler ducting and the one about fabbing an oil filler neck).Don't be so sensitive. Learn to use the forum the right way: search/read/post (in existing threads) before starting new threads. The forum is full of already-there information, and "regulars" and "old timers" are generally more than happy to help out as long as you aren't cursing them out because you don't like what they're saying.
Keep up the good work on the IC and keep those pictures coming. Make sure you build some nice side-ducting to make sure you get all the airflow though the rad/IC instead of around them.
Cheers.
Thread Starter
Full Member
Joined: Mar 2011
Posts: 149
Likes: 1
Thanks guys. The weather look ok for now so its time to make it outside.
Theorie - I realized I over reacted on the last thread, but what I was talking about was the tab that needed to be welded in order to keep the water separate. I spoke to the guy that owned the thread and he told me that you only weld three sides because the bottom is where the fins were. I followed your instructions and welded it all the way around so its all good :-)
Also what do you mean my rad won't drain? I though when someone made a double pass rad both inlet and outlet are on the top? The reason I wanted to do this is because I didn't want a huge radiator hose running on the bottom of the car.
Also I really do appreciate your help when I have asked for it in the past. To be completely honest I suck when it comes to searching. Not because I don't search, but because I don't know what to enter to search for.
Ill keep you guys updated on how it goes today.
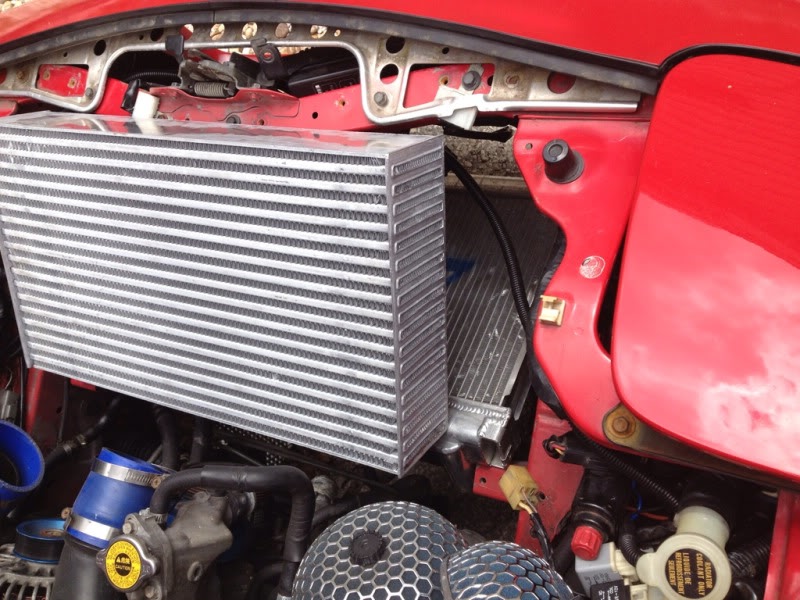
you might want to wrap the cores with cardboard and tape, or your core fins will be all bent by the time you finish, im also doing my own v mount. I also like what you did with the tank outlets, that should provide a nice flow.
sample pic of cores with cardboard to protect them.
sample pic of cores with cardboard to protect them.
Last edited by BLACK MAMBA; Jun 25, 2012 at 02:55 PM.

Trending Topics

No worries man.
Yes you did the inlet/outlet correctly - looks great. What I was talking about was the drain-plug for the radiator.
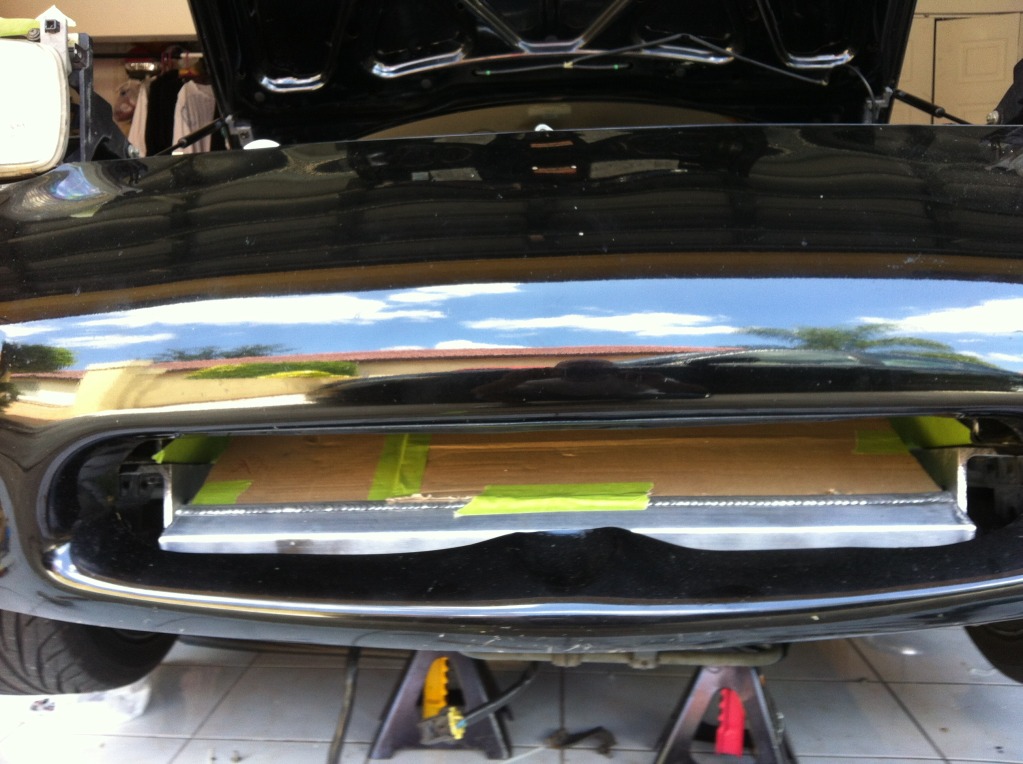
The black thing that screws in right here:

You have the drain plug on the top-side of the single lower endtank. You should have relocated it to the bottom side. Because it is on the Top side of the radiator, you'll never be able to drain the last inch or so of coolant.
Like this:

Like I said, common mistake - I've seen a number of V-mount setups where people have the drain-plug in the same spot.
Overall everything looks awesome so far. Should be a very nice setup when you're done.
The black thing that screws in right here:
You have the drain plug on the top-side of the single lower endtank. You should have relocated it to the bottom side. Because it is on the Top side of the radiator, you'll never be able to drain the last inch or so of coolant.
Like this:
Like I said, common mistake - I've seen a number of V-mount setups where people have the drain-plug in the same spot.
Overall everything looks awesome so far. Should be a very nice setup when you're done.
Thread Starter
Full Member
Joined: Mar 2011
Posts: 149
Likes: 1
No worries man.
Yes you did the inlet/outlet correctly - looks great. What I was talking about was the drain-plug for the radiator.
The black thing that screws in right here:
You have the drain plug on the top-side of the single lower endtank. You should have relocated it to the bottom side. Because it is on the Top side of the radiator, you'll never be able to drain the last inch or so of coolant.
Like this:
Like I said, common mistake - I've seen a number of V-mount setups where people have the drain-plug in the same spot.
Overall everything looks awesome so far. Should be a very nice setup when you're done.
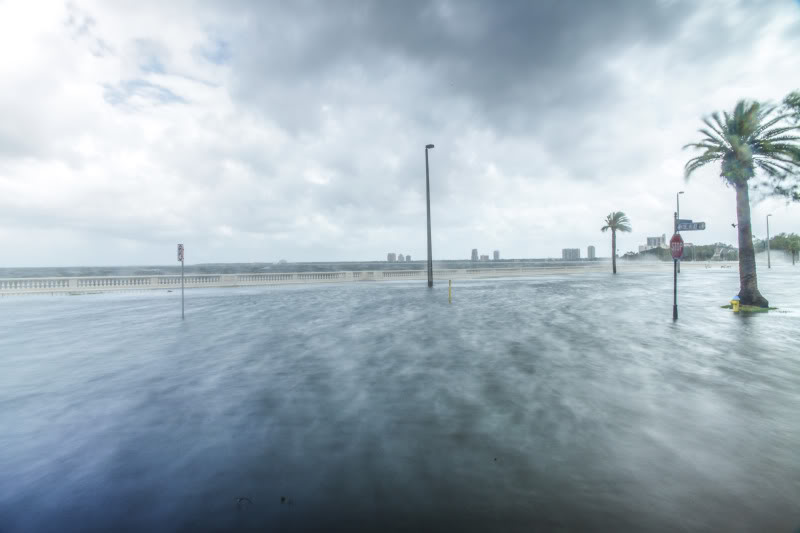
Thanks everyone for the kind words. Yeah Gringo grande - Working in this weather is kind a crazy check out this pic of bayshore

Thread Starter
Full Member
Joined: Mar 2011
Posts: 149
Likes: 1
Yeah bro, but this has been the worse ever from just a tropical storm. Bayshore has 3 feet of water. South Tampa is also flooded and also other parts of Tampa. I heard that they were going to shut down 275 because of the strong winds and waves crashing into cars.

I remember seeing your car in the hotel parking lot garage the night before 7sotck one year haha. I laid on the ground to check out the ducting then peeked through the hood as best I could
-Dan
PS:
My drain plug was on the wrong side of my old v-mount setup (original Rotary Extreme kit), you could drain most of the coolant out but it was a HUGE PITA.
-Dan
PS:
My drain plug was on the wrong side of my old v-mount setup (original Rotary Extreme kit), you could drain most of the coolant out but it was a HUGE PITA.
Thread Starter
Full Member
Joined: Mar 2011
Posts: 149
Likes: 1
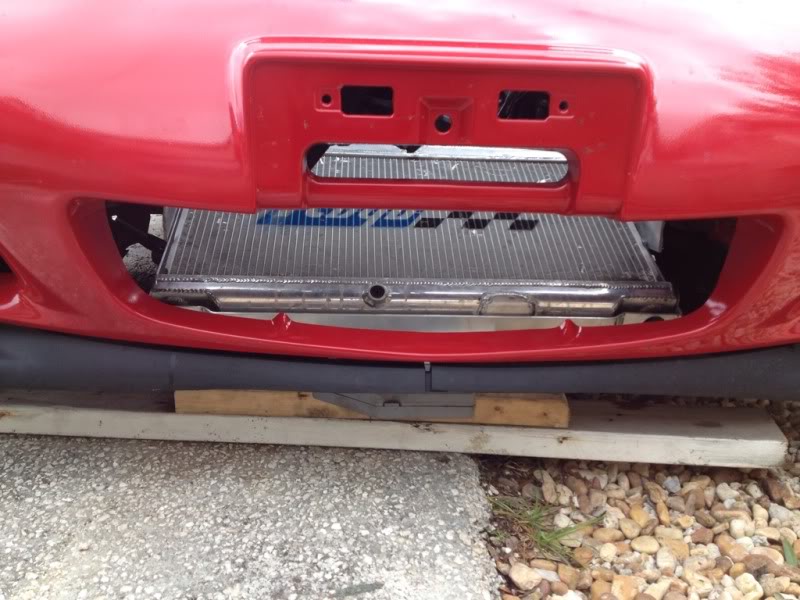
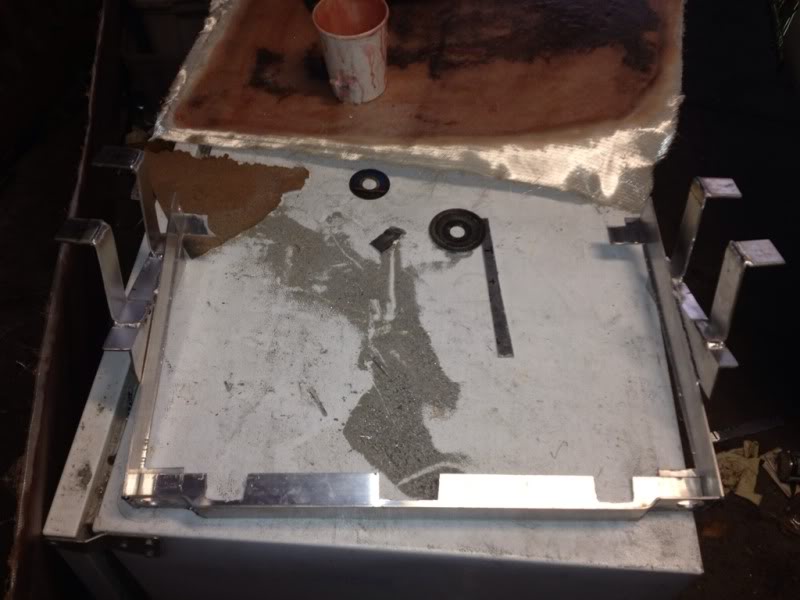
So it is finally dried out and I am getting around to the placement of the radiator. I want to make it so that you can step on it, but if anything hits it from below the rad frame will take the hit and flex a bit and not make a hole in my radiator. Here is Tampa the pot holes and road damage sucks and I would really take to rip off the radiator. I have designed these brackets that hold the frame from above. Let me know what you think of my drawing lol
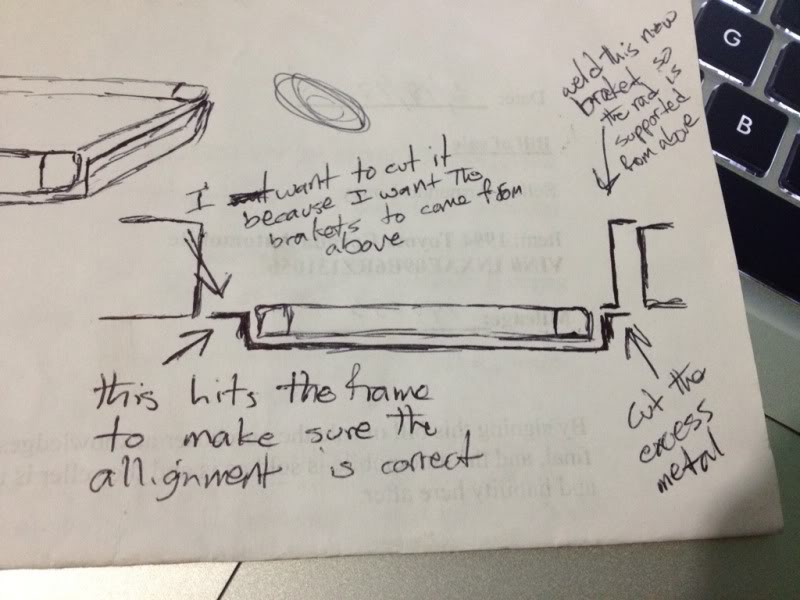
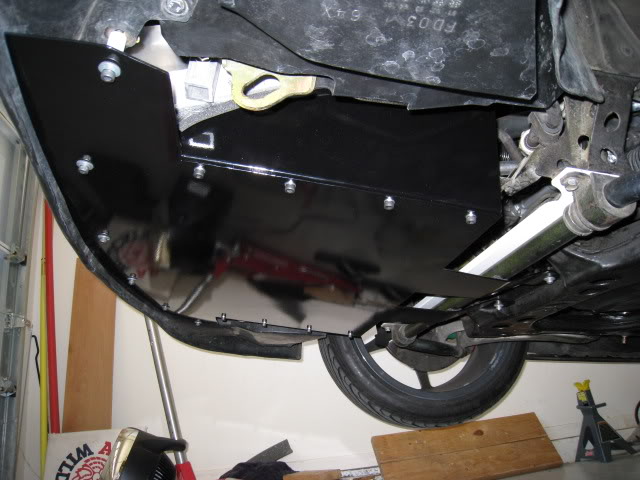
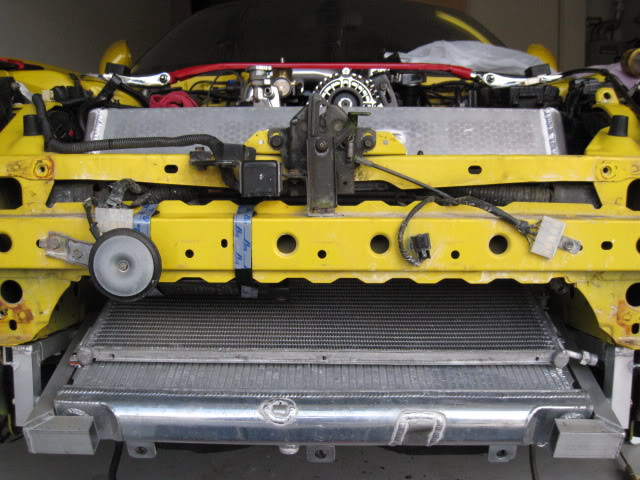
I agree with you're concern for protecting the radiator. My FD is primarily a DD which I take on frequent road trips and so I designed mine with a similar frame concept to be as robust as possible. It has, in fact, saved my butt on a couple of occasions. Having the radiator sitting up higher does not present a functional problem, however some do not feel it looks as slick. I covered the lower tank with a brushed stainless angle which subdues its appearance. I suggest using (steel) tube for the frame material and sure your setup is ducted/sealed for best performance.
View of my radiator mounting bracket setup. Granted, your 99 spec front end has a much narrower bottom edge, which makes a lower radiator position a bit of a challenge!
Thread Starter
Full Member
Joined: Mar 2011
Posts: 149
Likes: 1
Awesome frame dude!!! I didn't have enough room to do that, as you mentioned the 99 front bumper get really slim in the middle. Plus I had to trim my bumper a bit to fit the Apexi Front mount I had.
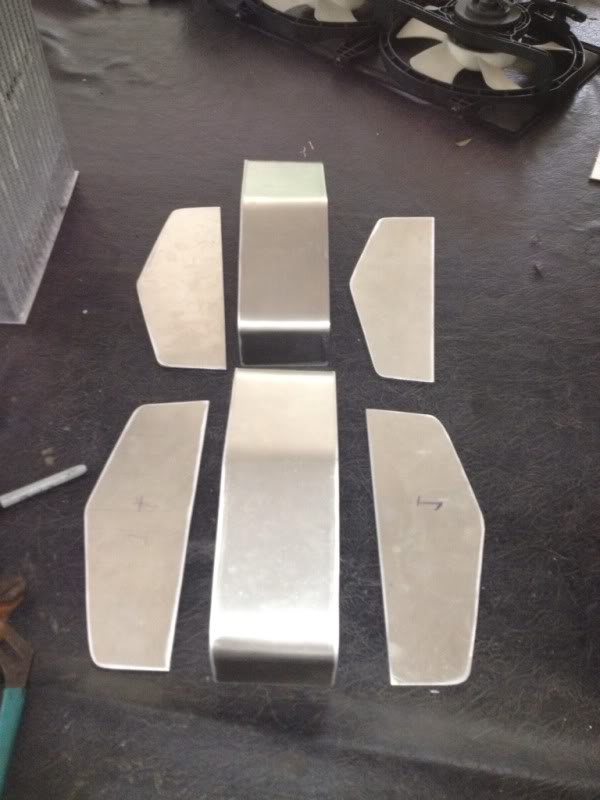
Yeah I made a thick as plate of fiberglass to use it as my splitter/ under tray.
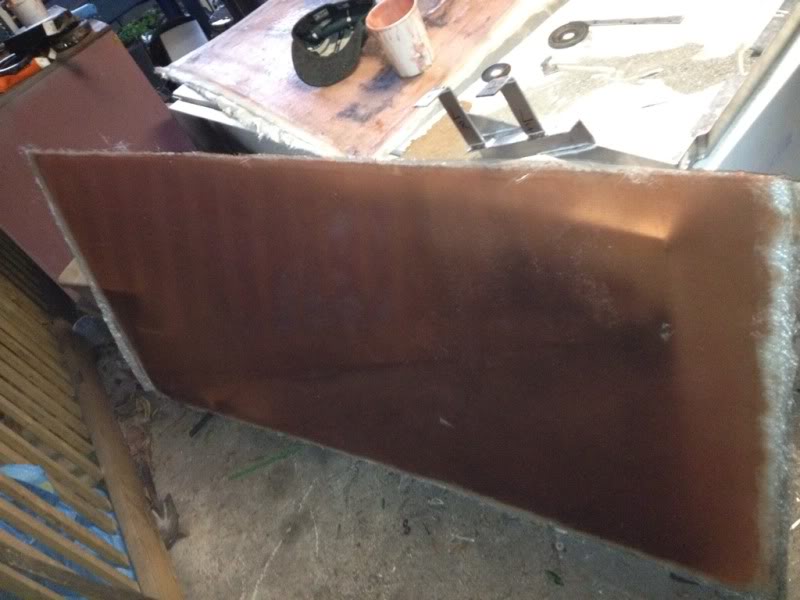
This is the bracket. I am not sure if I am going to make a top bar as well
Yeah I made a thick as plate of fiberglass to use it as my splitter/ under tray.
This is the bracket. I am not sure if I am going to make a top bar as well
Thread Starter
Full Member
Joined: Mar 2011
Posts: 149
Likes: 1
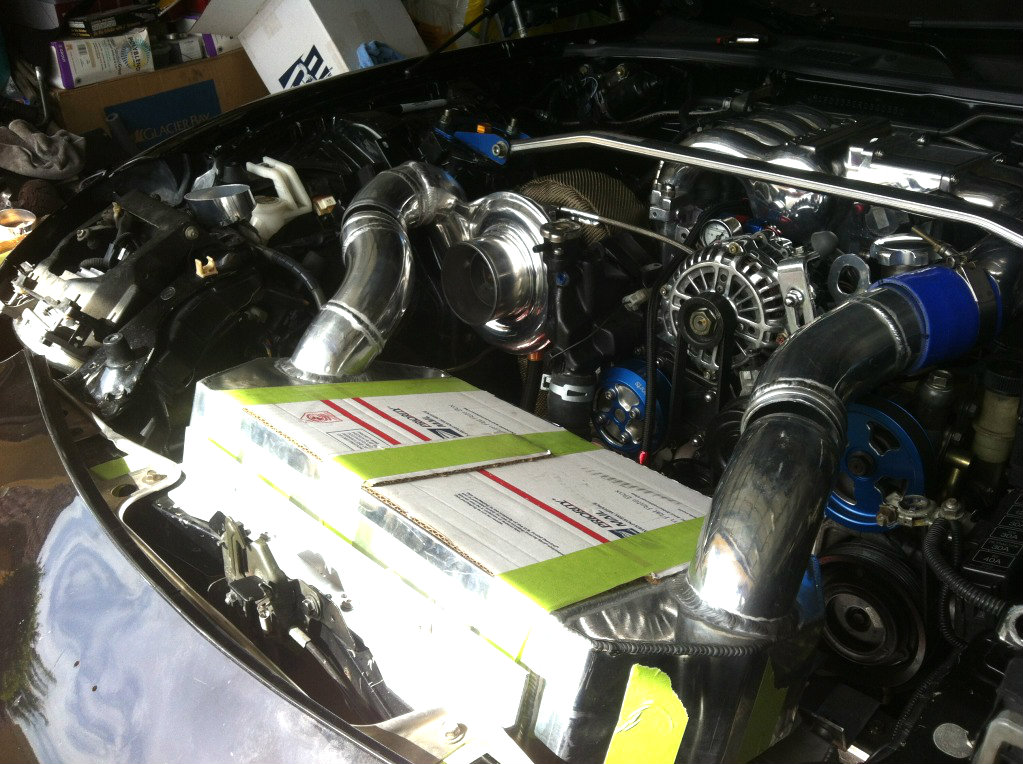
I have not had much time to work on this but I pretty much got the radiator pipes made the way that would be best for my setup. Here are some pics up to the pressure testing.
I did found out that I have to seal 2 cooling lines on the other side of the radiator because when I divided the end tanks the cooling tubes lost the zealand and kept leaking.
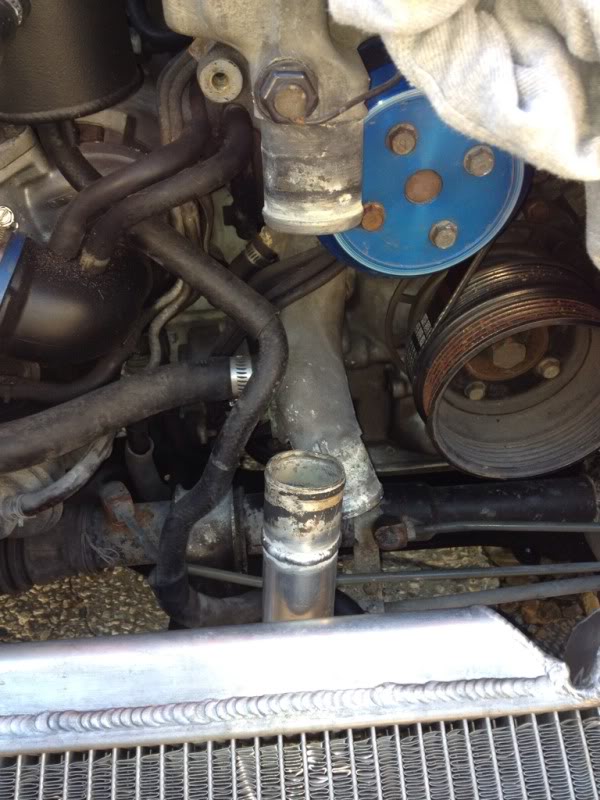
I did found out that I have to seal 2 cooling lines on the other side of the radiator because when I divided the end tanks the cooling tubes lost the zealand and kept leaking.