
How To Install JDM Rear Seats Into US FD3S

How To Install JDM Rear Seats Into US FD3S
Hello all!
I have yet to find/locate a thread on Rx7Club that shows an individual how to install the rear JDM seats into a US rx7.
Therefore, I have made the decision to make one for those of us who would like to install the rear seats instead of the storage bins.

I hope this is in the correct location
First, the pics did not turn out as well as I expected them to. So if anyone would like I can remove everything and retake pics of anything. Second, I have never done a "how to" thread so please any tips/advice for future threads of this nature would help.
A couple things to consider before doing this conversion are as follows:
1) do you want to lose the storage bins?
2) do you want to drill in your shock towers? (I will explain this later in the thread)
3) can you source a JDM arm rest? (I will explain this later in the thread also)
4) do you have all the parts to the conversion?
Now the US version Rx7 (FD3S) have all the necessary applications in order for a jdm rear seat conversion to be installed with exception of the two spots on rear shock towers. Not that big of a deal, but still something to consider as I mentioned above.
Parts needed: 10mm socket and 17mm socket, ratchet w/ extension.
So on to the the removal of the OEM storage bins:

1) Remove the center cargo divider: On mine there were no bolts/nuts holding it in. Just the two levers that clip it into the top.
2) Remove the storage bins: Using a 10mm socket, remove the nuts that are holding the rear storage bins on (towards the hatch) and the bolts that are holding the front of the bins to the "frame" of the car. Also, remove the pins that are inserted into the rear bins/pillars

*note* if your car had the battery relocated to one of the storage bins please use common sense and remove the battery cables before you try to remove the bins
On my car I was able to remove the bins after removing those parts

More to come shortly...Have a limit to how many images I can upload
I have yet to find/locate a thread on Rx7Club that shows an individual how to install the rear JDM seats into a US rx7.
Therefore, I have made the decision to make one for those of us who would like to install the rear seats instead of the storage bins.
I hope this is in the correct location
First, the pics did not turn out as well as I expected them to. So if anyone would like I can remove everything and retake pics of anything. Second, I have never done a "how to" thread so please any tips/advice for future threads of this nature would help
A couple things to consider before doing this conversion are as follows:
1) do you want to lose the storage bins?
2) do you want to drill in your shock towers? (I will explain this later in the thread)
3) can you source a JDM arm rest? (I will explain this later in the thread also)
4) do you have all the parts to the conversion?
Now the US version Rx7 (FD3S) have all the necessary applications in order for a jdm rear seat conversion to be installed with exception of the two spots on rear shock towers. Not that big of a deal, but still something to consider as I mentioned above.
Parts needed: 10mm socket and 17mm socket, ratchet w/ extension.
So on to the the removal of the OEM storage bins:
1) Remove the center cargo divider: On mine there were no bolts/nuts holding it in. Just the two levers that clip it into the top.
2) Remove the storage bins: Using a 10mm socket, remove the nuts that are holding the rear storage bins on (towards the hatch) and the bolts that are holding the front of the bins to the "frame" of the car. Also, remove the pins that are inserted into the rear bins/pillars
*note* if your car had the battery relocated to one of the storage bins please use common sense and remove the battery cables before you try to remove the bins
On my car I was able to remove the bins after removing those parts
More to come shortly...Have a limit to how many images I can upload
part 2
3) At this point you can remove either the front seat belt bolt that screws to the floor of the car on both sides (passenger and driver side) OR gently pop the side pillars off. When I say gently I mean try to pull evenly so you do not cause stress cracks or break anything when popping them off. You may have to remove pushpins that are in the side pillars...I only had a couple left in there


4) you will need to slide the seat belt through the belt spot on the pillars, which is why in step 3 you have the option to do either of those steps in any particular order.
Now, I had my front seats out when I did this so I had more room, but you do not need to remove the front seats.
After completing step 1-4 you will have something that looks like this:

These are the parts you will have taken out in case you did not follow:

4) you will need to slide the seat belt through the belt spot on the pillars, which is why in step 3 you have the option to do either of those steps in any particular order.
Now, I had my front seats out when I did this so I had more room, but you do not need to remove the front seats.
After completing step 1-4 you will have something that looks like this:
These are the parts you will have taken out in case you did not follow:
part 3
Now on to the installation:
Steps:
1) remove the rear speaker brackets by removing the 3 10mm bolts holding the bracket in place:


On the driver side location you will need to remove one bracket thing holding a wire.


The rear seat belts have those little clips already integrated into its brackets.

That should expose the location on each side where the rear seat belts will be installed

By installing the rear belt in the little spot for it you will install either the 10mm bolt or 17mm bolt first. I did the 10mm bolt to hold it up while I installed the lower 17mm bolt.


Steps:
1) remove the rear speaker brackets by removing the 3 10mm bolts holding the bracket in place:
On the driver side location you will need to remove one bracket thing holding a wire.
The rear seat belts have those little clips already integrated into its brackets.
That should expose the location on each side where the rear seat belts will be installed
By installing the rear belt in the little spot for it you will install either the 10mm bolt or 17mm bolt first. I did the 10mm bolt to hold it up while I installed the lower 17mm bolt.
part 4
Now, to give you an idea of where everything is....there are little rubber plugs in the center of the tunnel and the side where the speakers are that you will need to remove in order to get the rear seat belt and buckles installed.


You wont install the seat belt bolts in at this point for the lower ones, but i just did it to keep it from hanging.
Step 2? I think lol) you will now install the seat belts on each sides of the tunnel:

Step 3ish) If you haven't done so already, install the rear seat belts.
Step 4ish) Now you will install the rear seat side pillars. To do so you will need to remove the seat belt bolt (if you haven't already) and slide the pillars into place.
*note* you will put the driver and passenger side front seat belts through the seat belt spots in the rear seat pillars.
Step 5ish) Clip the side pillars into place (should have no problem with fitment and should clip right in to place)
You wont install the seat belt bolts in at this point for the lower ones, but i just did it to keep it from hanging.
Step 2? I think lol) you will now install the seat belts on each sides of the tunnel:
Step 3ish) If you haven't done so already, install the rear seat belts.
Step 4ish) Now you will install the rear seat side pillars. To do so you will need to remove the seat belt bolt (if you haven't already) and slide the pillars into place.
*note* you will put the driver and passenger side front seat belts through the seat belt spots in the rear seat pillars.
Step 5ish) Clip the side pillars into place (should have no problem with fitment and should clip right in to place)
part 5
Step 6ish) take the side lower seat parts and clip them into the side pillars.


Step 7ish) you may now install both top and bottom 17mm bolts that hold the rear seat belt in. The top bolt will be installed on the outside of the pillar and the lower will be installed on the outside of the lower seat piece.
Step 8ish) Now the fun part....Installing the bottom seat cushion. You will need to fit your hand under the seat and work the two rear seat belt buckles through the cushion.
after you do that, you will then clip the seats down (should have a spot in the front to do so and then it should just sit right down. Problem you will have is the side pieces of the seats are going to be annoying to fit if you run a battery cable to the rear).
Step 9ish) installing the rear seat back: There should be 4 10mm bolts you will use. I found some I had laying around.
There are 4 rubber plugs again that you will need to remove.


At this point, after installing the four bolts you will have something that looks like this:

My rear seat conversion came with rear carpet.
Step 7ish) you may now install both top and bottom 17mm bolts that hold the rear seat belt in. The top bolt will be installed on the outside of the pillar and the lower will be installed on the outside of the lower seat piece.
Step 8ish) Now the fun part....Installing the bottom seat cushion. You will need to fit your hand under the seat and work the two rear seat belt buckles through the cushion.
after you do that, you will then clip the seats down (should have a spot in the front to do so and then it should just sit right down. Problem you will have is the side pieces of the seats are going to be annoying to fit if you run a battery cable to the rear).
Step 9ish) installing the rear seat back: There should be 4 10mm bolts you will use. I found some I had laying around.
There are 4 rubber plugs again that you will need to remove.
At this point, after installing the four bolts you will have something that looks like this:
My rear seat conversion came with rear carpet.
part 6
NOW the part I warned you about .
.
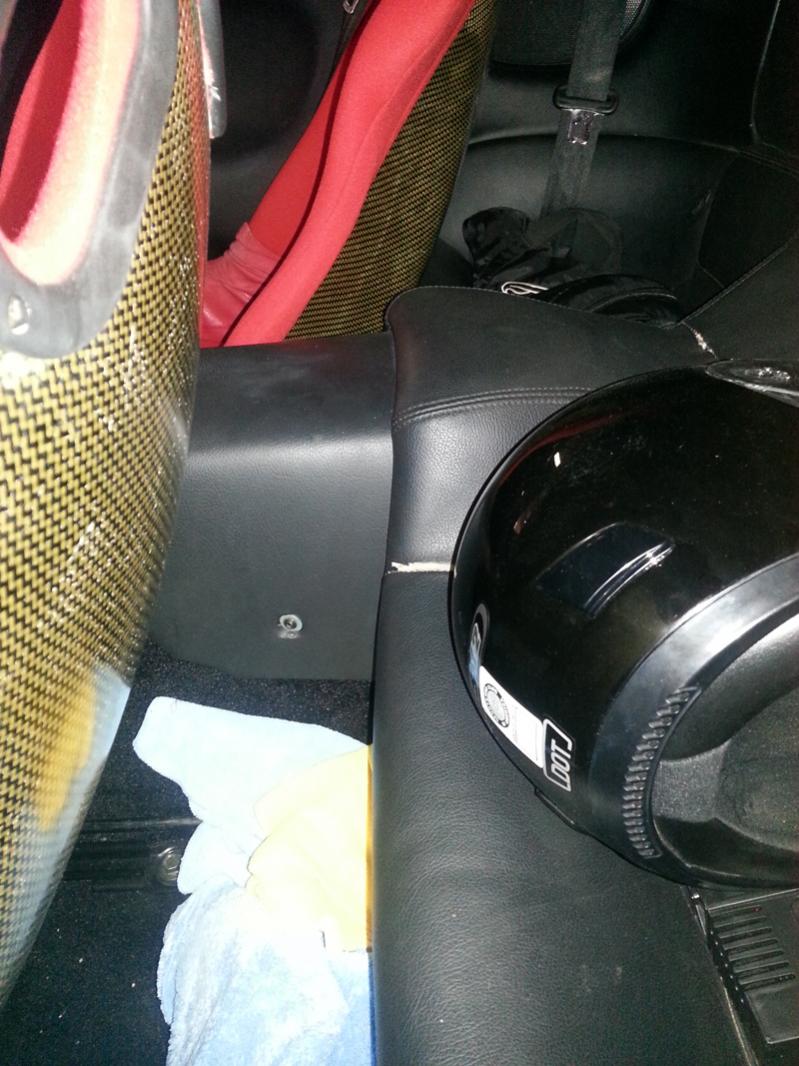
In order to get the rear brackets that hold the rear seat back tight you will need to pop out two places on the rear strut pillars.

You do not need to do this part, but you will want to if you have the rear seat not fall down on you when making a stop you will want to
There are two spots on each tower you will need to drill out or use a self taping bolt/screw.


NOW....This should be it....
Your end result will look like this:

Now the problems spots I personally did not like are these:
One each side under the pillars you will have spots that the US carpet will NOT cover:

To me it is annoying
Also, the rear seats will not work with the rear bin arm rest .
.

.In order to get the rear brackets that hold the rear seat back tight you will need to pop out two places on the rear strut pillars.
You do not need to do this part, but you will want to if you have the rear seat not fall down on you when making a stop you will want to
There are two spots on each tower you will need to drill out or use a self taping bolt/screw.
NOW....This should be it....
Your end result will look like this:
Now the problems spots I personally did not like are these:
One each side under the pillars you will have spots that the US carpet will NOT cover:
To me it is annoying
Also, the rear seats will not work with the rear bin arm rest

Trending Topics
How do you deal with the armrest length problem?


Joined: May 2005
Posts: 3,243
Likes: 42
From: Kennewick, Washington
I just finished installing my TFent carpet from the group buy years ago. I think the molds got sold to ACC. If the molds are still good the carpet wasn't bad. Could easily have been worse.
Edit: I just noticed my arm rest thingy seems to have a different shape than yours. Mine is an OEM USDM 93 armrest? It used to have the bins in it as I put the rear seats into the car.
Edit 2: Damn, wish I'd have cleaned up the micro fibers in the floor that I didnt know were there, could could see the carpet fitment well. Its the carpet from ACC.
Edit 3: You can also see where the seams in my rear seats ripped. Mazda uses some horribly cheap thin leather on the rear seats. I've had two sets thinking maybe it was just the original set I got, but nope the rear leather is absolute crap and rips even if its not ripped when you get it. I'l probably eventually send off the parts to get re-covered in nice leather. For now its in the back, dark, and I dont tend to move the seats forward enough to notice the rip

Ahhh yeah I initially installed it like you have it, but there was a gap under the seat I was bothered by lol.
I'll double check it and reinstall. Out of curious it's, how much you get your seats for?
I'll double check it and reinstall. Out of curious it's, how much you get your seats for?
Way more than is reasonable by most any standard. I do love them though. Totally recommended for an FD owner than wants a comfy seat that isnt a full on race seat and is willing to pay through the nose for it.
I got my trans tunnel cover to fit by trimming it. I found that simply laying the rear seats over the tunnel cover prevented them from seating completely and stressed the tunnel cover plastic. To get around this, I trimmed my cover to fit. It's a simple reupholster job and the results look great without spending money.
- Measure how much material needs to be removed from the tunnel cover and mark it with a sharpie, chalk, or whatever you have.
- Peel and fold back the black vinyl cover material (dont cut it yet!) from the tunnel up to the trim line you just drew to expose the plastic tunnel cover structure underneath.
- Cut the excess plastic material a little bit at a time until you reach your trim mark to make sure you don't cut more than needed. Test fitting between cuts is not a bad idea and shows where you have excess material that needs to be cut.
- Once you're happy with the tunnel cover's fitment, unfold the black vinyl cover and fold it under the tunnel cover.
- Trim the excess vinyl material off and apply some glue to keep it in place.
Your finished tunnel cover will look like it came from the factory that way and most people will never know it was modified. Attached is an unfinished picture of my modified cover as well as two pictures which show how small/short the JDM version is compared to my USDM modified cover.
Hope this helps


The "grills" are speaker covers. I assure you I still have my rear speakers in my fd. You'll need to remove the speaker brackets to install the rear seatbelt, but you can put the speaker bracket/speaker back where it was originally located.


