
engine disassembly question


engine disassembly question
ive taken off the two toughest bolts (the flywheel bolt and the front pulley bolt) and ive take off the front housing plate, i havent taken off the oil pump drive chain yet.
what do i need more to do to take the engine apart, i'm looking at the service manual and it looks like only thing holding the the rotor housings together are 2 long bolts in this picture (green arrow). Is this right? or am i missing something? when i disassemble the engine is there a direction i should start from? ie take it the back of the engine off first and work my way to the front or vice versa?
what do i need more to do to take the engine apart, i'm looking at the service manual and it looks like only thing holding the the rotor housings together are 2 long bolts in this picture (green arrow). Is this right? or am i missing something? when i disassemble the engine is there a direction i should start from? ie take it the back of the engine off first and work my way to the front or vice versa?
 .. i have my block sitting in front of me but im scared to take it apart right now.. looking for lots of info
Take everything off the front including the front cover. Then with the front of the motor turned face down on the stand; undo all the engine studs in the rear. Once you take those out, you'll be able to start pulling the housings apart. You should technically go in order loosening the bolts, but if you know the thing is done I don't think it matters all that much.
If you buy the Rotary Aviation video, it shows you exactly what to do.
If you buy the Rotary Aviation video, it shows you exactly what to do.

You have to remove the tension bolts that sandwich the motor together, if you haven't done so already. See factory service manual page C-45 and continue from there if you've done all the steps up to that point. Remove the bolts in the order they specify in the diagram (you will have to zoom in to see the diagram clearly). I would do it in that order. It's no different than messing with head bolts on a piston motor. I label each bolt by number and on assembly I put them back in the way they came out, after cleaning the threads on the bolt and in the front iron.
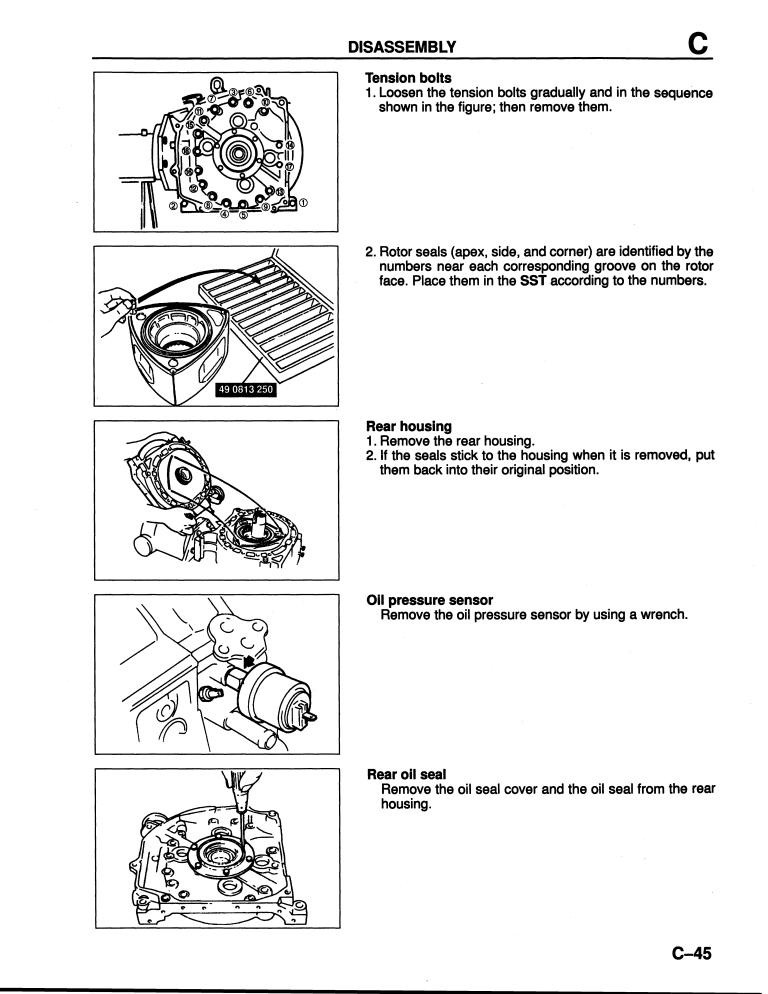
18 17MM Headed tension bolts from the rear. On the front remove everything off the e-shaft, you can leave in the stat gears, spacer, neadle bearings, etc. The oil pump nut is best removed with an impact gun and 17mm socket.

Thread
Thread Starter
Forum
Replies
Last Post
trickster
2nd Generation Specific (1986-1992)
25
Jul 1, 2023 04:40 PM

