
Driver-side keyhole plastic shutter replacement


Thread Starter
Senior Member


Joined: May 2006
Posts: 269
Likes: 20
From: San Diego, CA
Driver-side keyhole plastic shutter replacement
Recently, members jza80 and geilkyle2 were both selling lock cylinder shutter rebuild kits. The kits contain a new metal shield, a new shutter spring, and a new plastic shutter.
The light was working on my driver-side keyhole, but the plastic shutter was missing. I didn't even know this was a thing until I saw the for-sale threads--I just thought the keyhole didn't have a shutter!
I have placed photos and details in an imgur gallery, but here's the deets as well. You would only want to go to the imgur gallery if you want higher-res versions of the photos. There's also a few minor photos I left out due to the 12-image limit here.
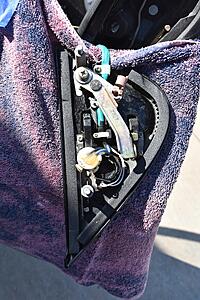
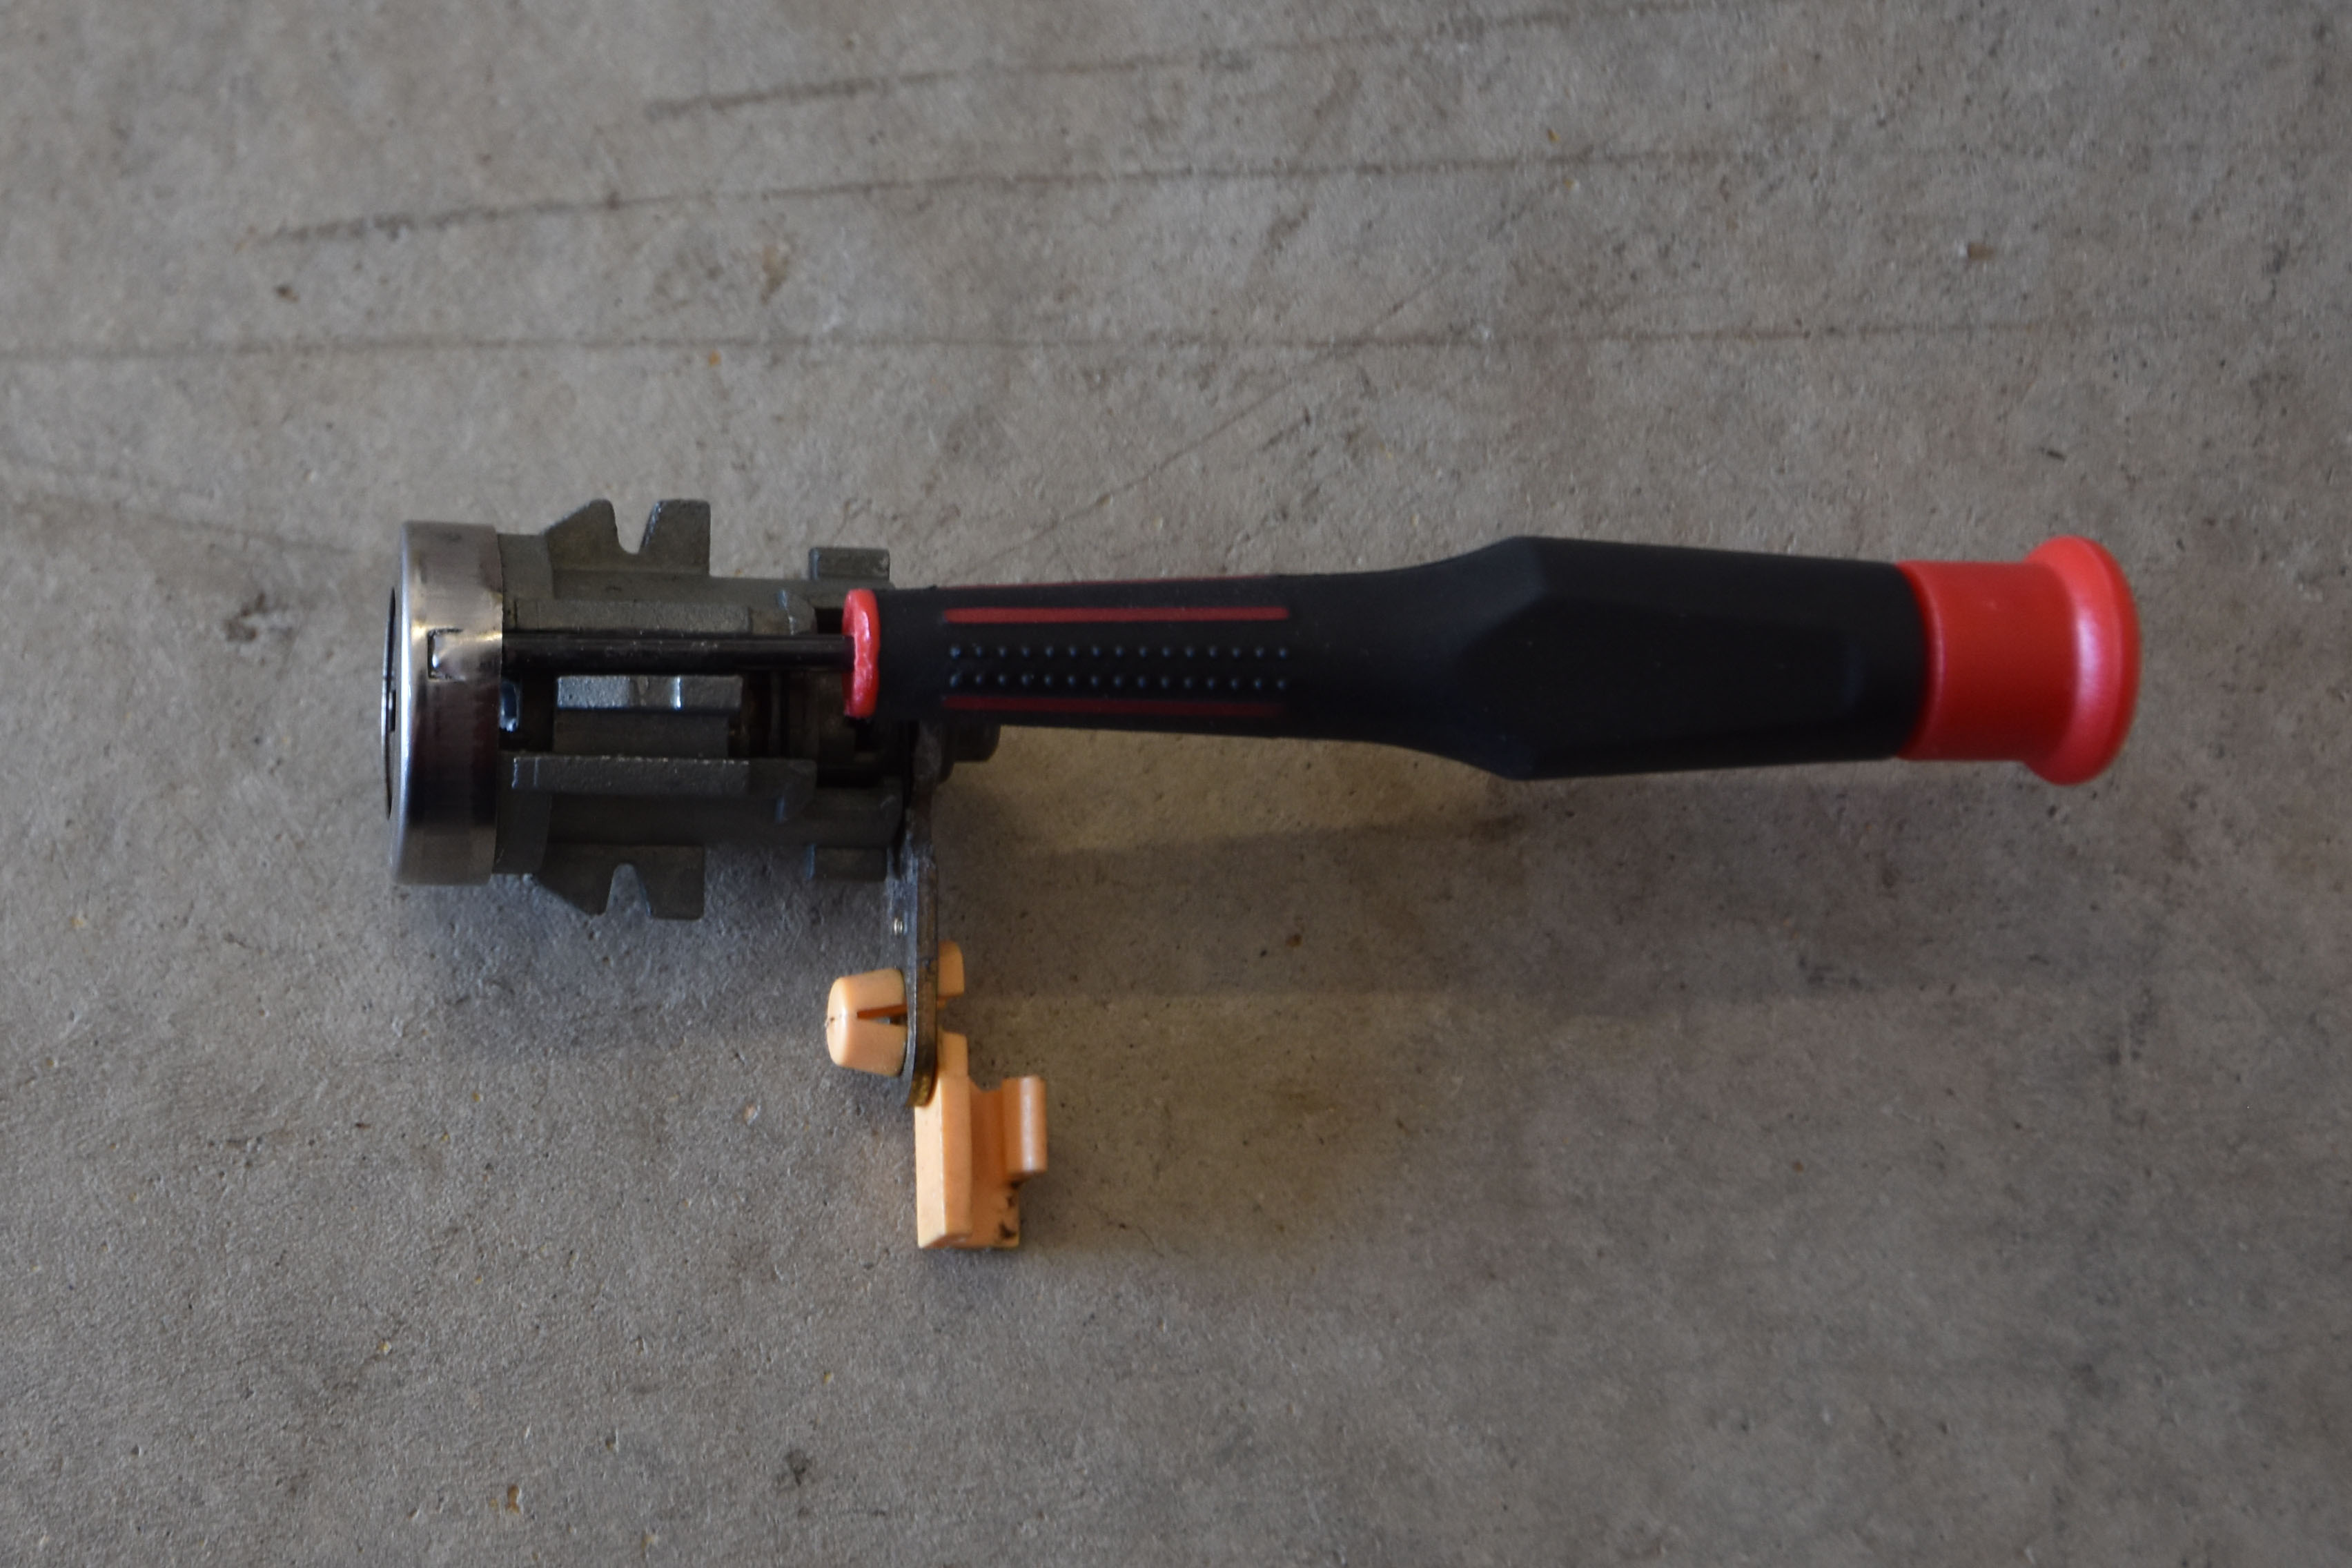
I didn't start taking photos until I already had the lock cylinder out of the car. I got that far by following Stephen Stanley's instructions.
Once you have the cylinder out, rotate the metal cover around until one of the tabs aligns with this channel on the lock cylinder. It might take some effort to make the cover rotate around. Jam a small flat head under the edge of the cover and work the tab up so the cover can slide off the cylinder. Once you've done one tab, rotate the cover around and do the other tab.
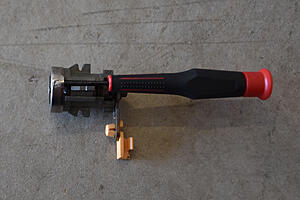
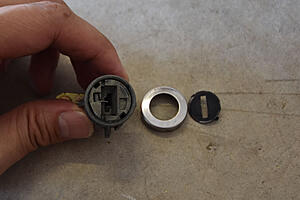
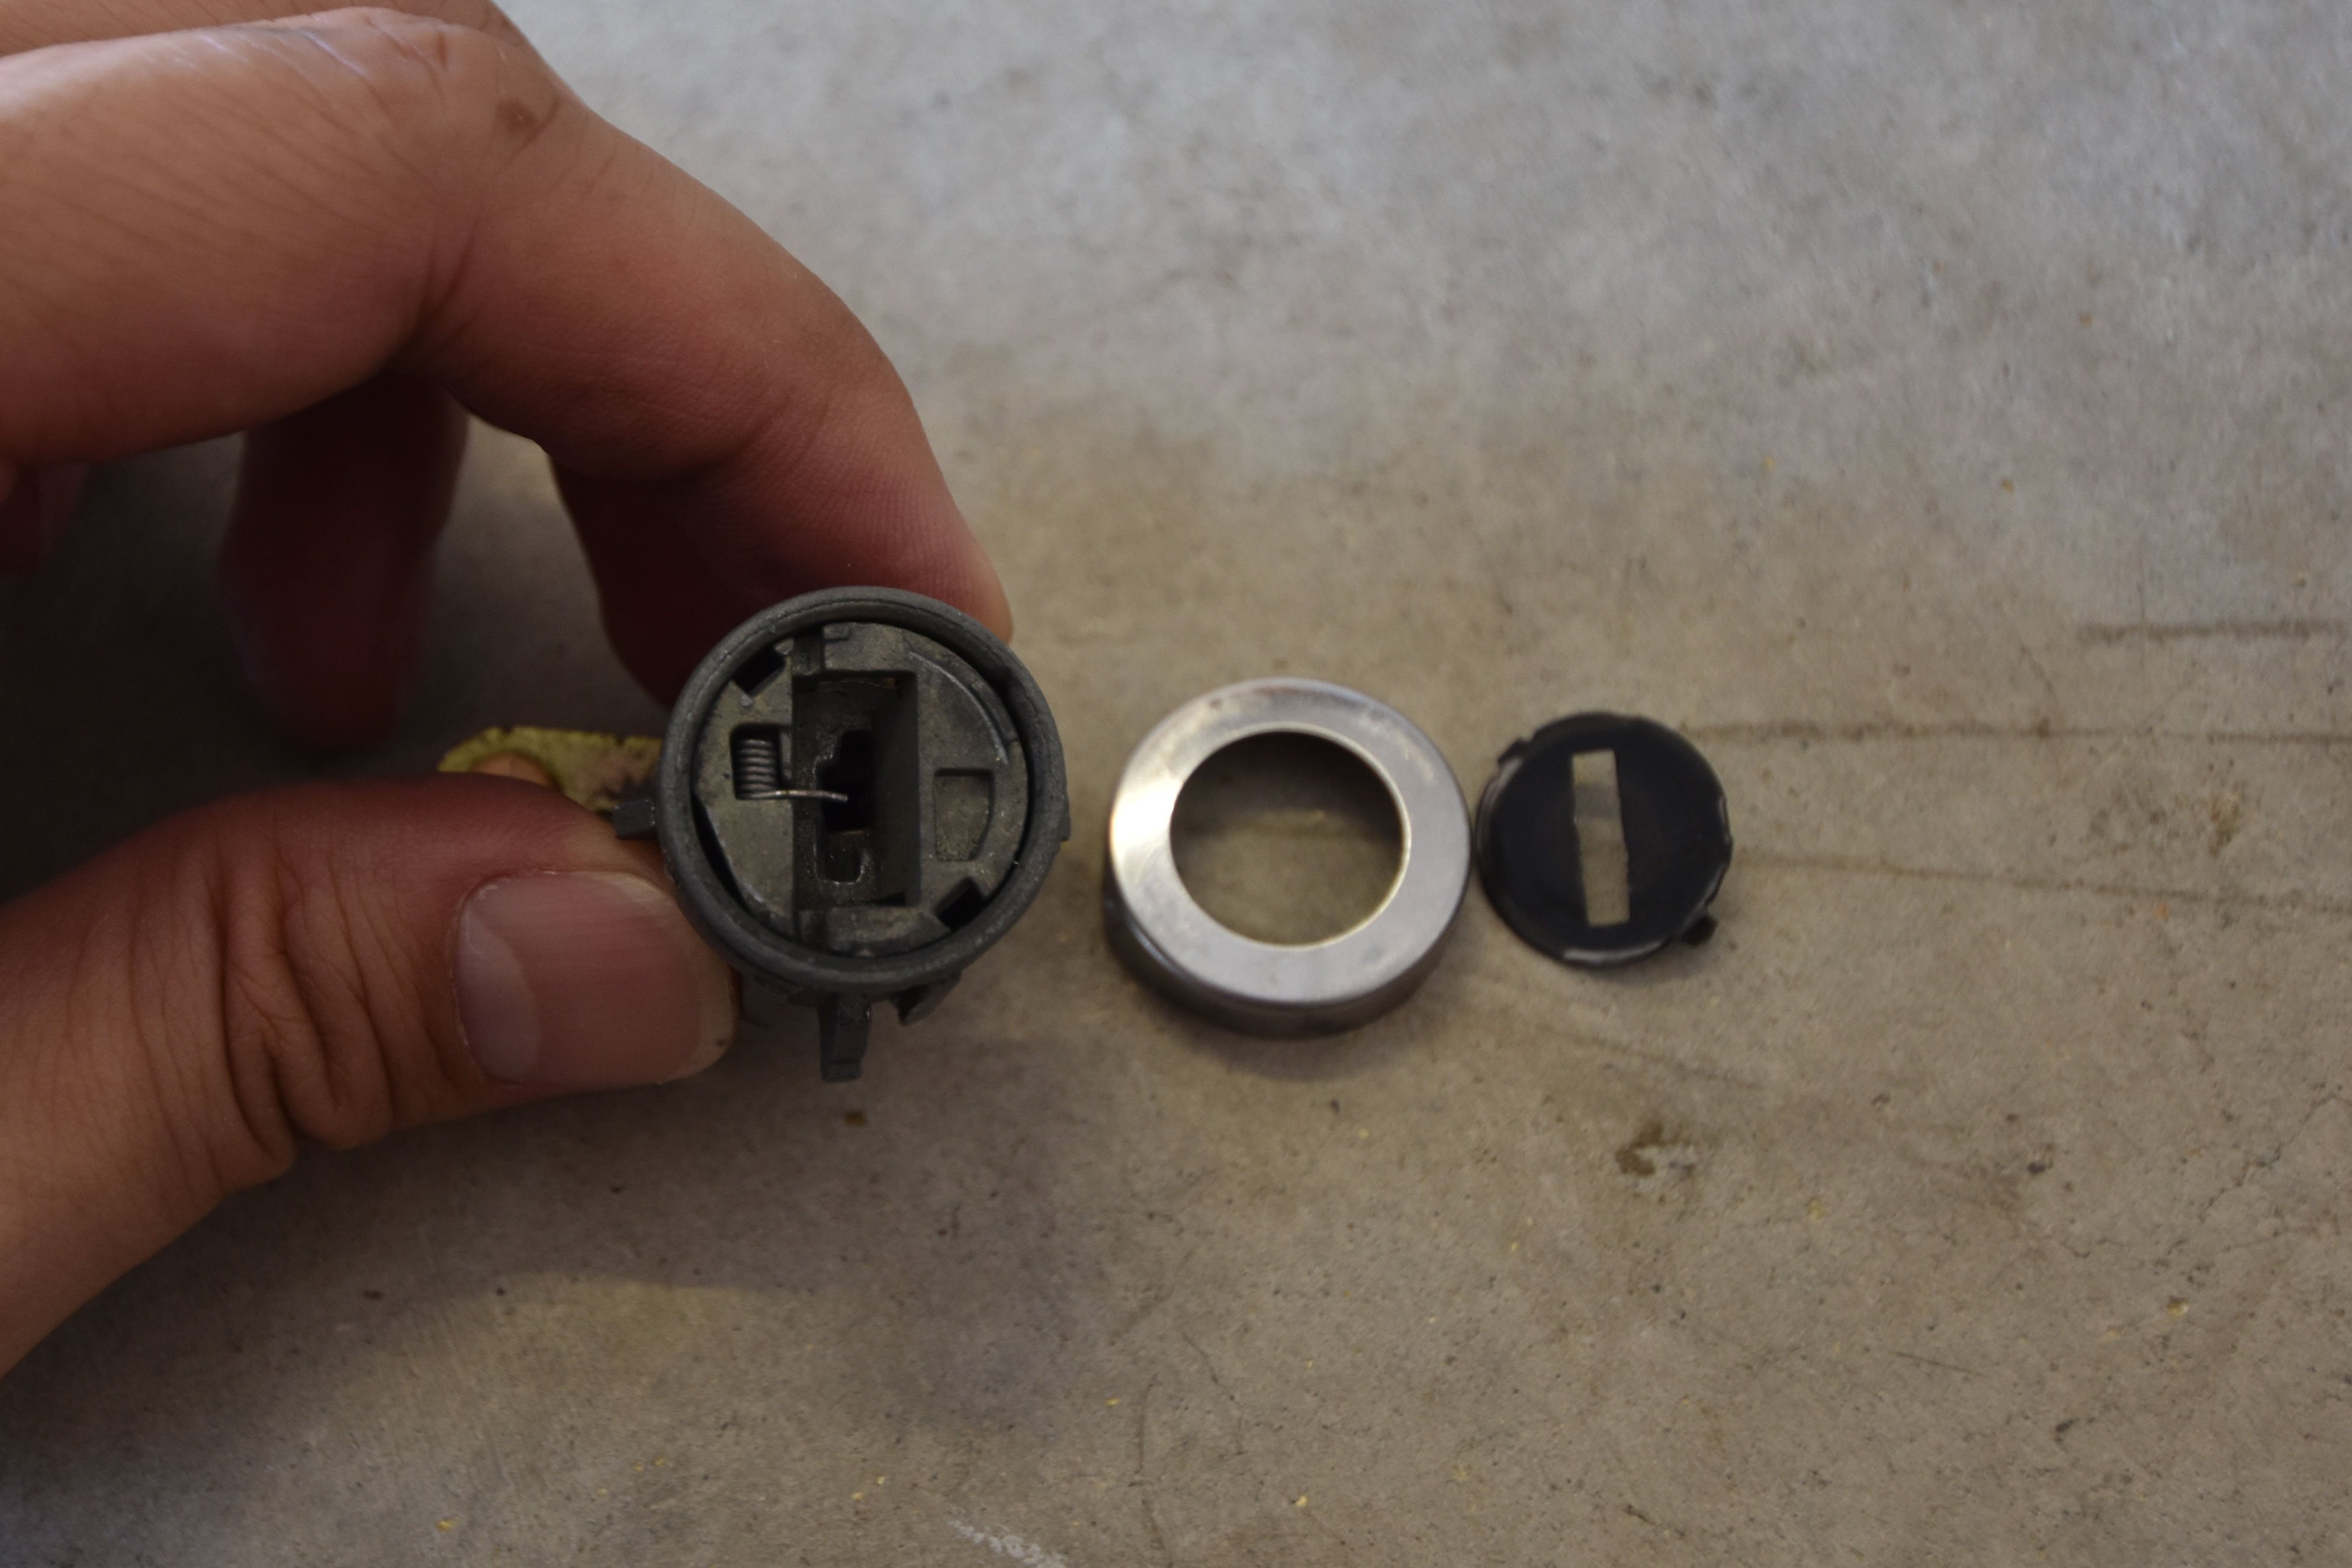
Cover removed. The spring may pop the black shield off once you remove the cover.

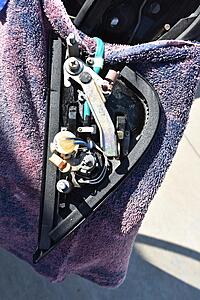
My spring was not very extended, but the new one was.
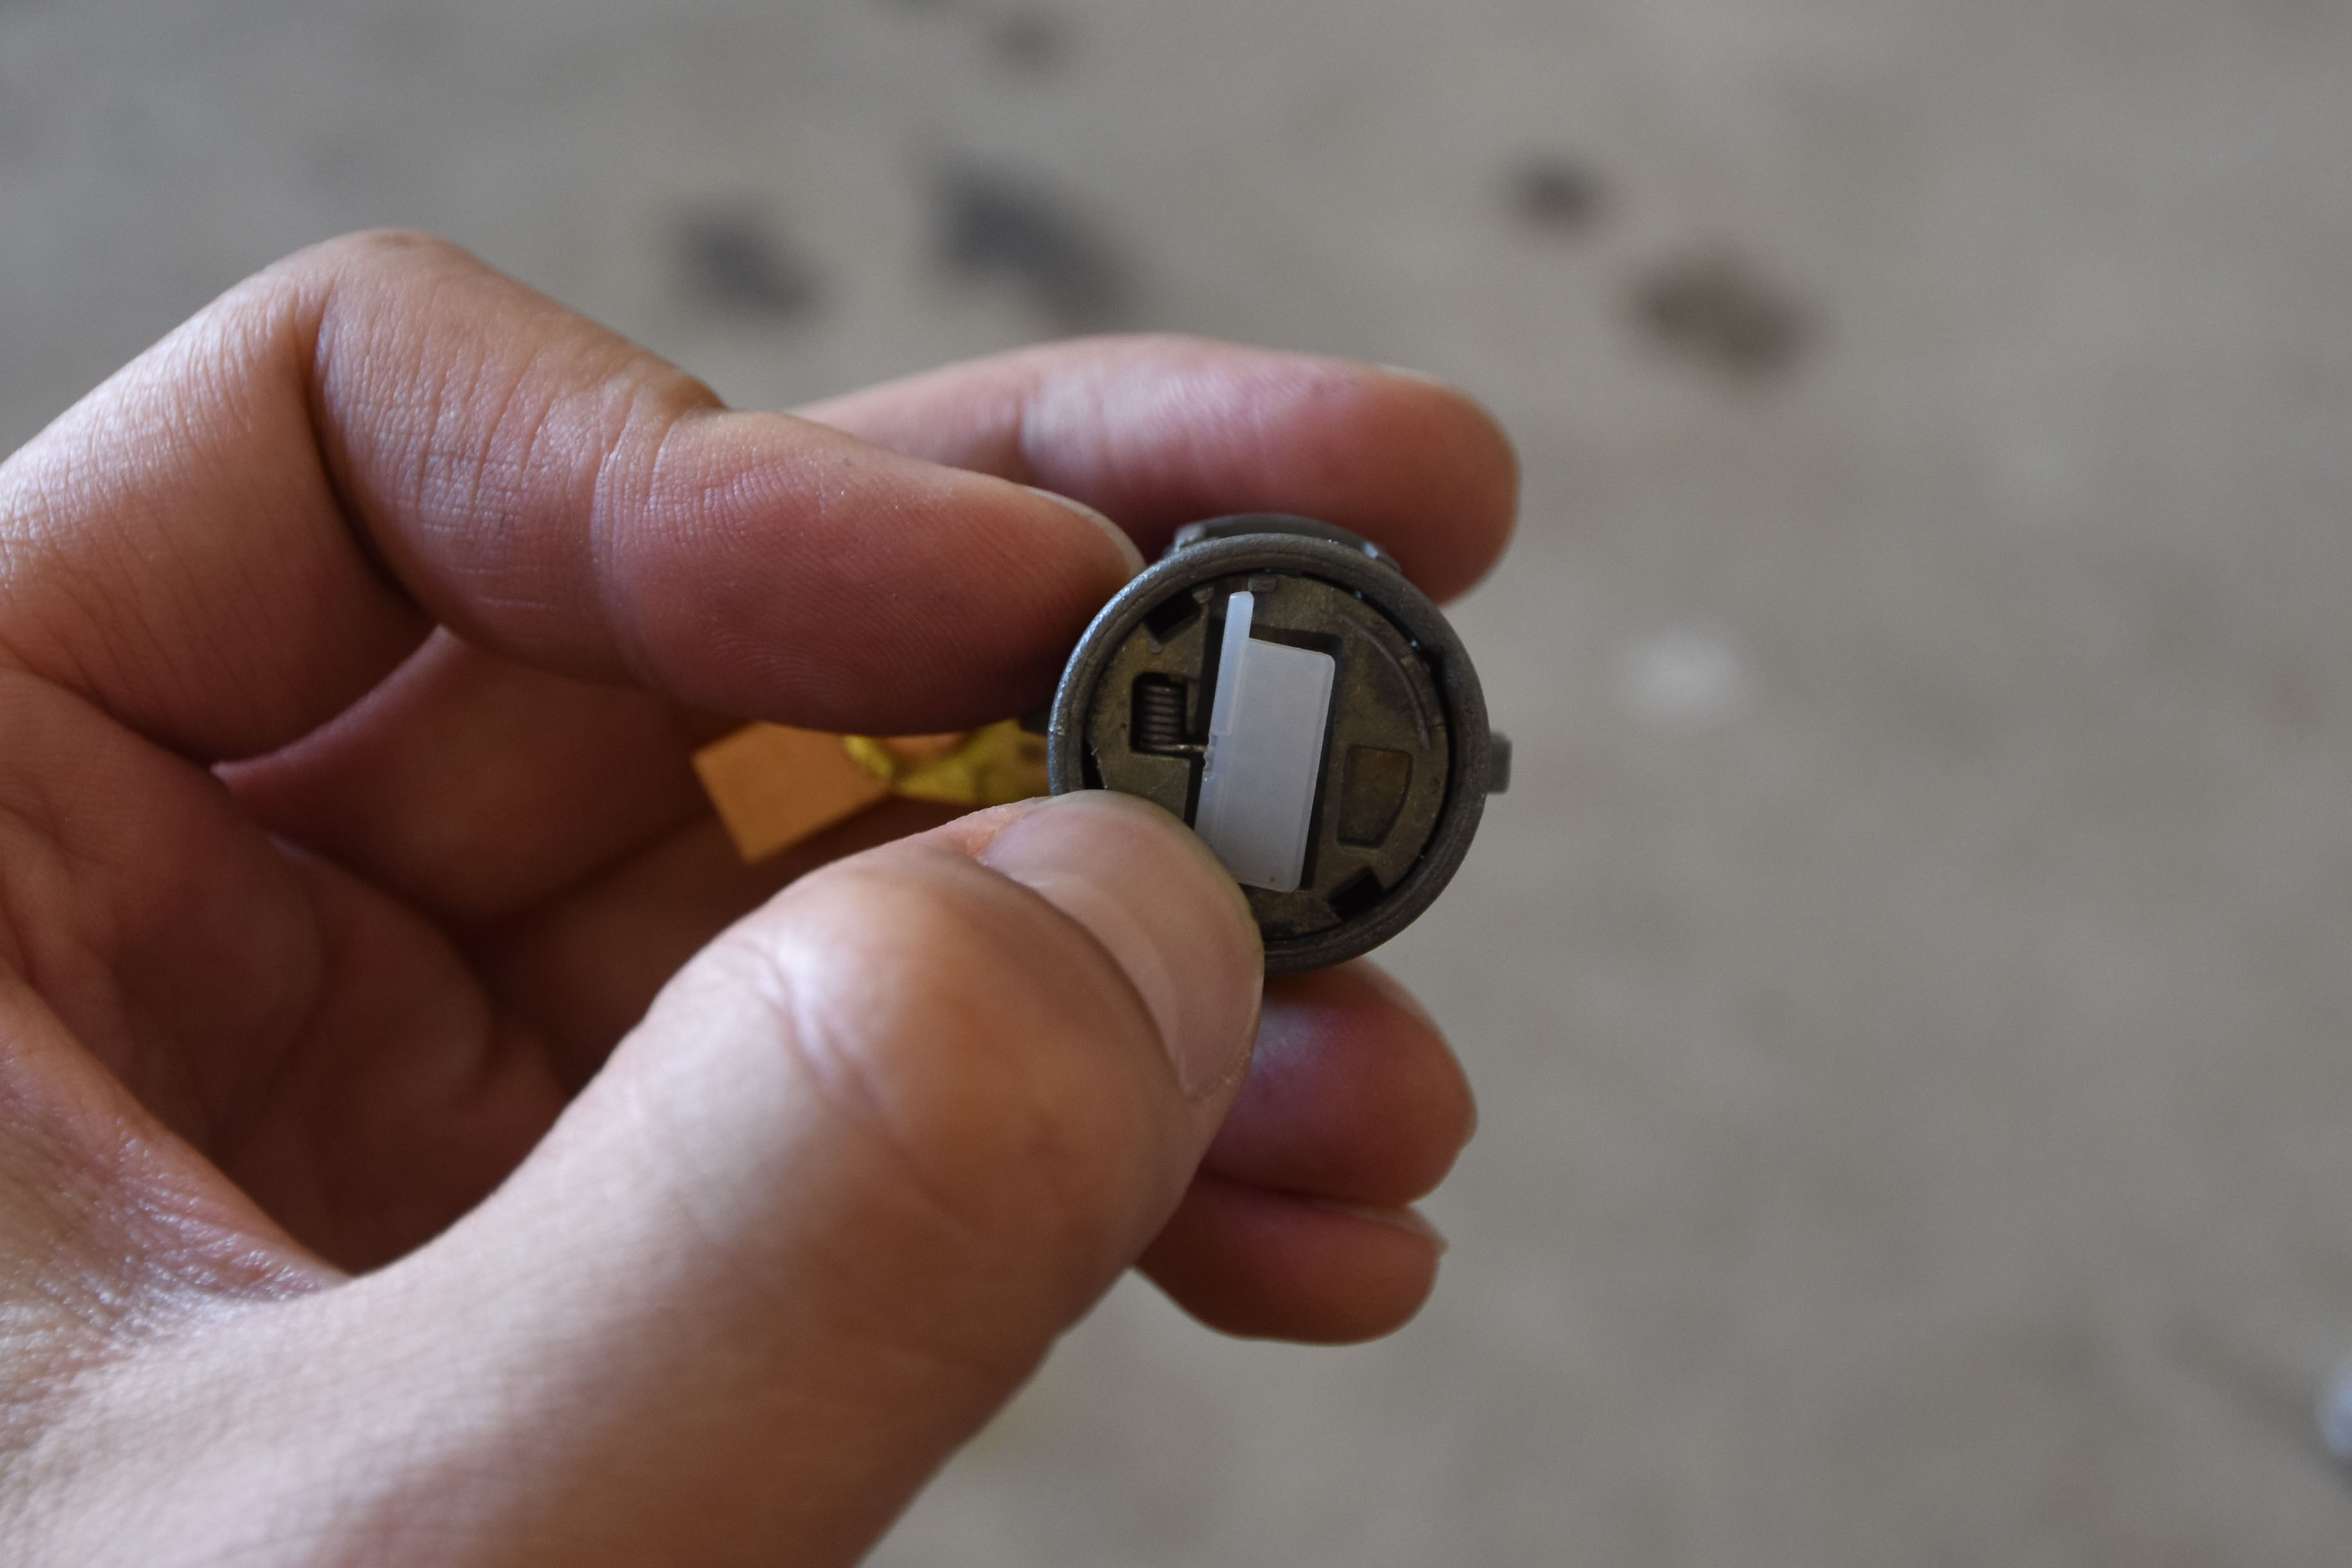
Pardon my thumb, it wouldn't stay in place without me holding it. You can see why these plastic covers break all the time. Just those two plastic dowels on each end to hold it in place. They probably wear over time and snap off.
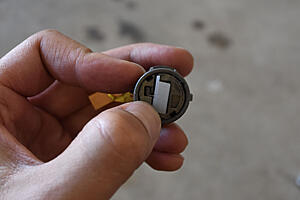
Put it all back together. The tabs on the cover can be pressed back down, but I couldn't make it fit snugly again so my cover rotates around a little freely. You can see that this doesn't matter at all, as that non-painted steel cover doesn't show at all.
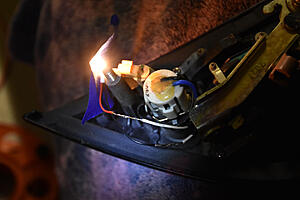
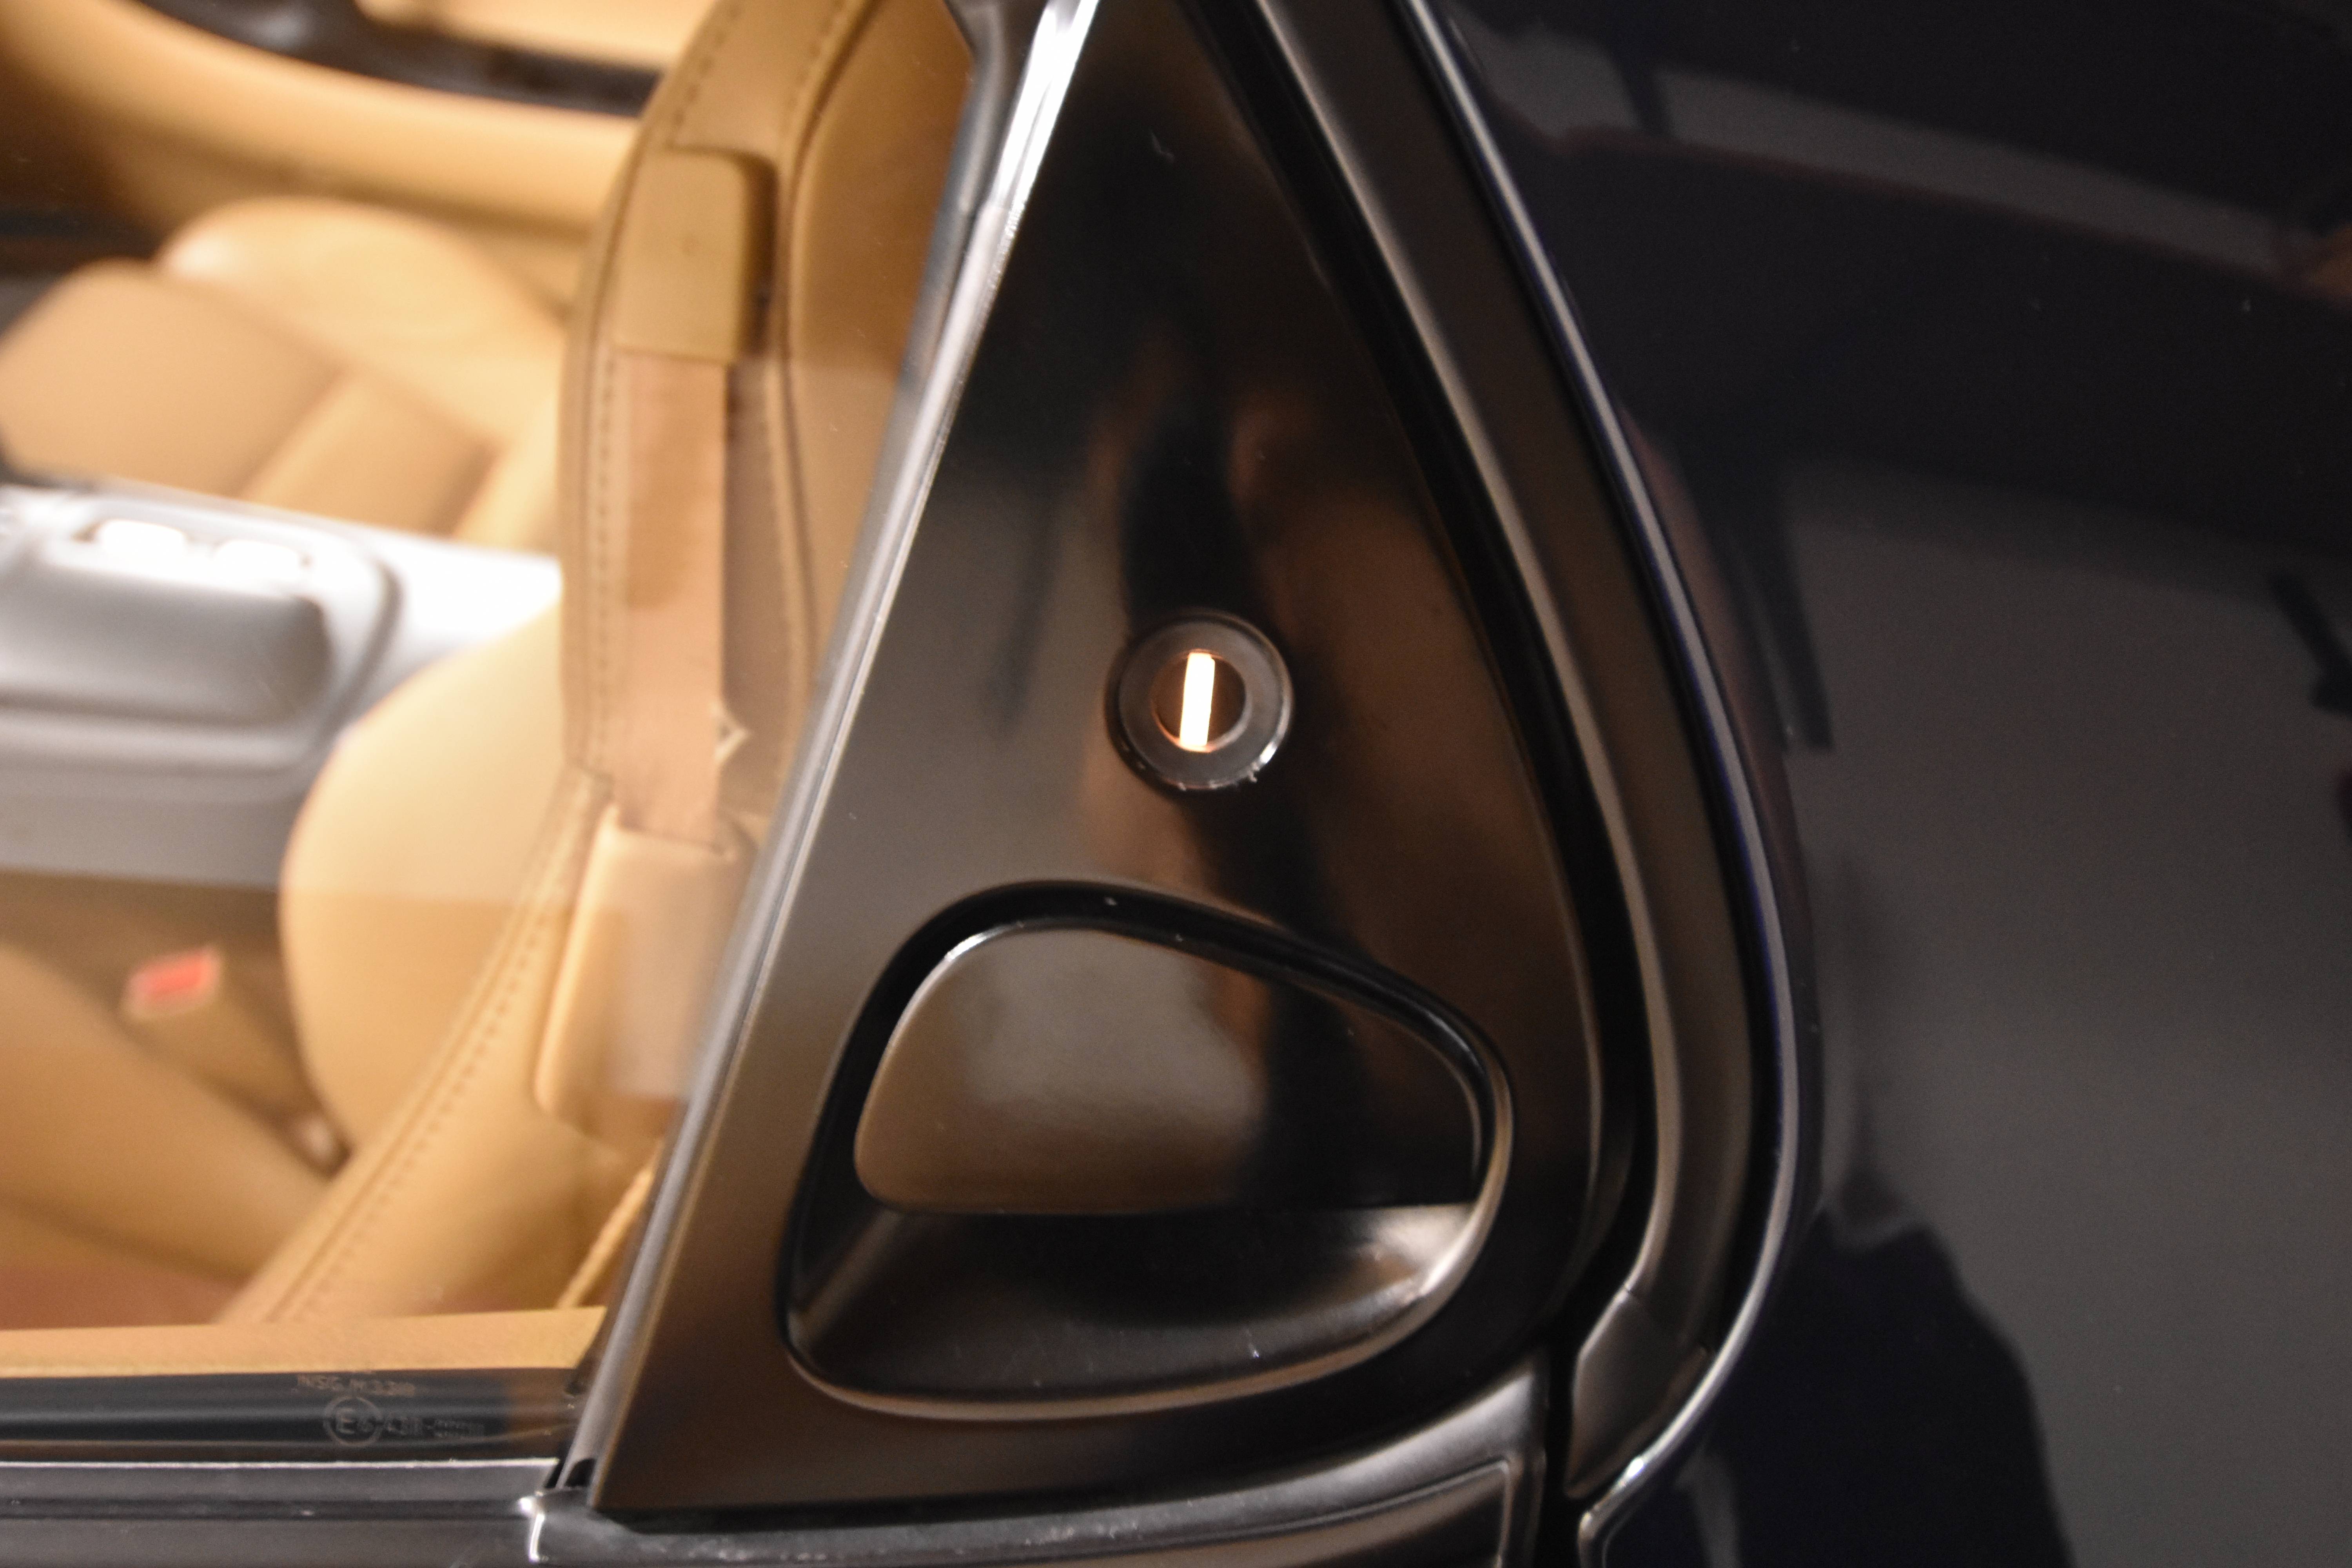
And now, success:
...or rather, my failure. I broke the keyhole illumination. If you read Stephen Stanley's instructions, he says, "The bulb is a small incandescent one with fly-leads which are very fragile. These wires break off where they enter the glass of the bulb."
No joke. I was extremely careful with the white wires leading to the keyhole light and somehow they still broke as I was putting everything back together. Sure enough, when I took it back apart for troubleshooting, one of the wires was broken right at the base of the light. I was able to wiggle/jam it back in and get the light to turn back on, but of course, that doesn't stay and so I need to replace the bulb.
I've ordered new ones from Amazon. They are 12V "Grain of Wheat" bulbs. The ones I ordered come with pigtails soldered on already. I'll update this thread once I do the repair. It seems easier to me to do this than to order a new one that goes all the way down the harness. You have to remove the door card and unwrap the existing wires from the harness if you want to do that. Whatta pain.
Also, here's some photos I took while reassembling things, in case anyone wants to know what this all looks like:
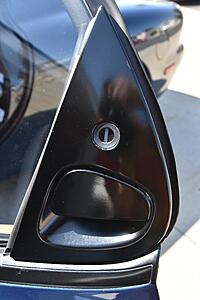
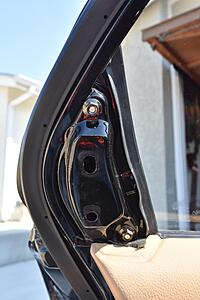
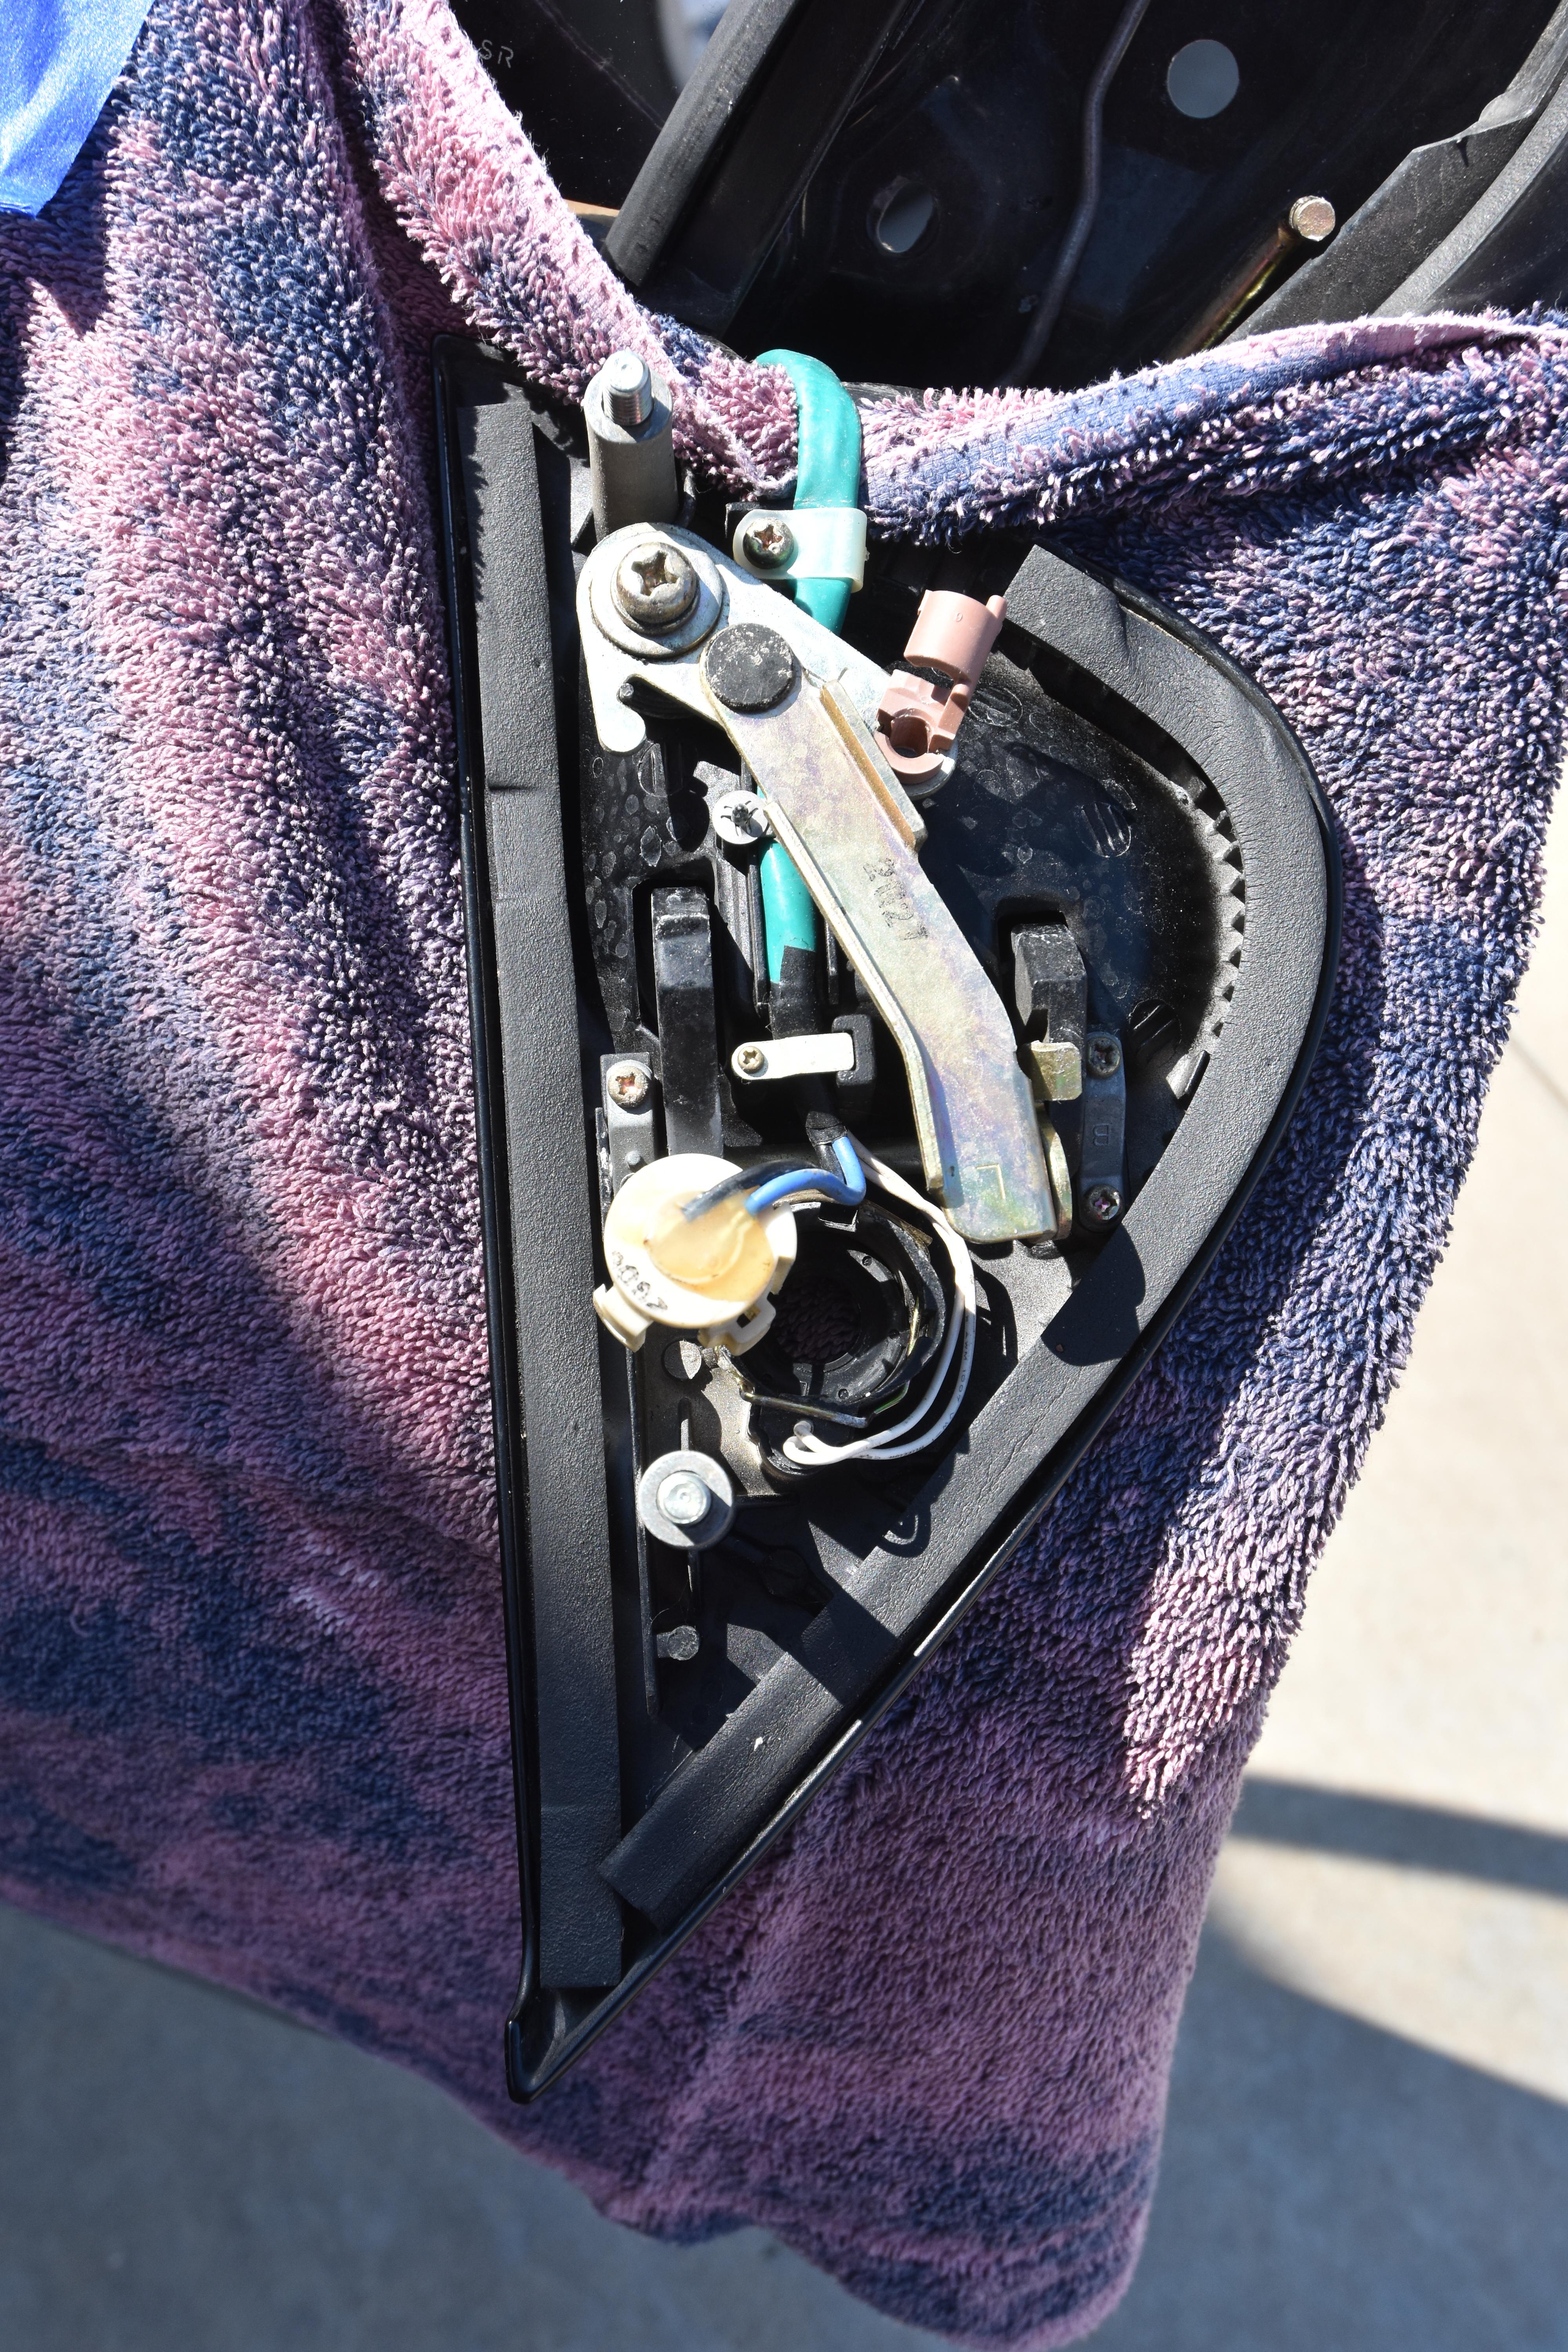
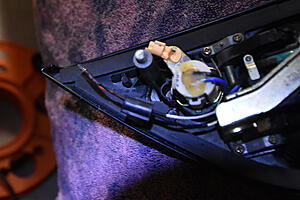
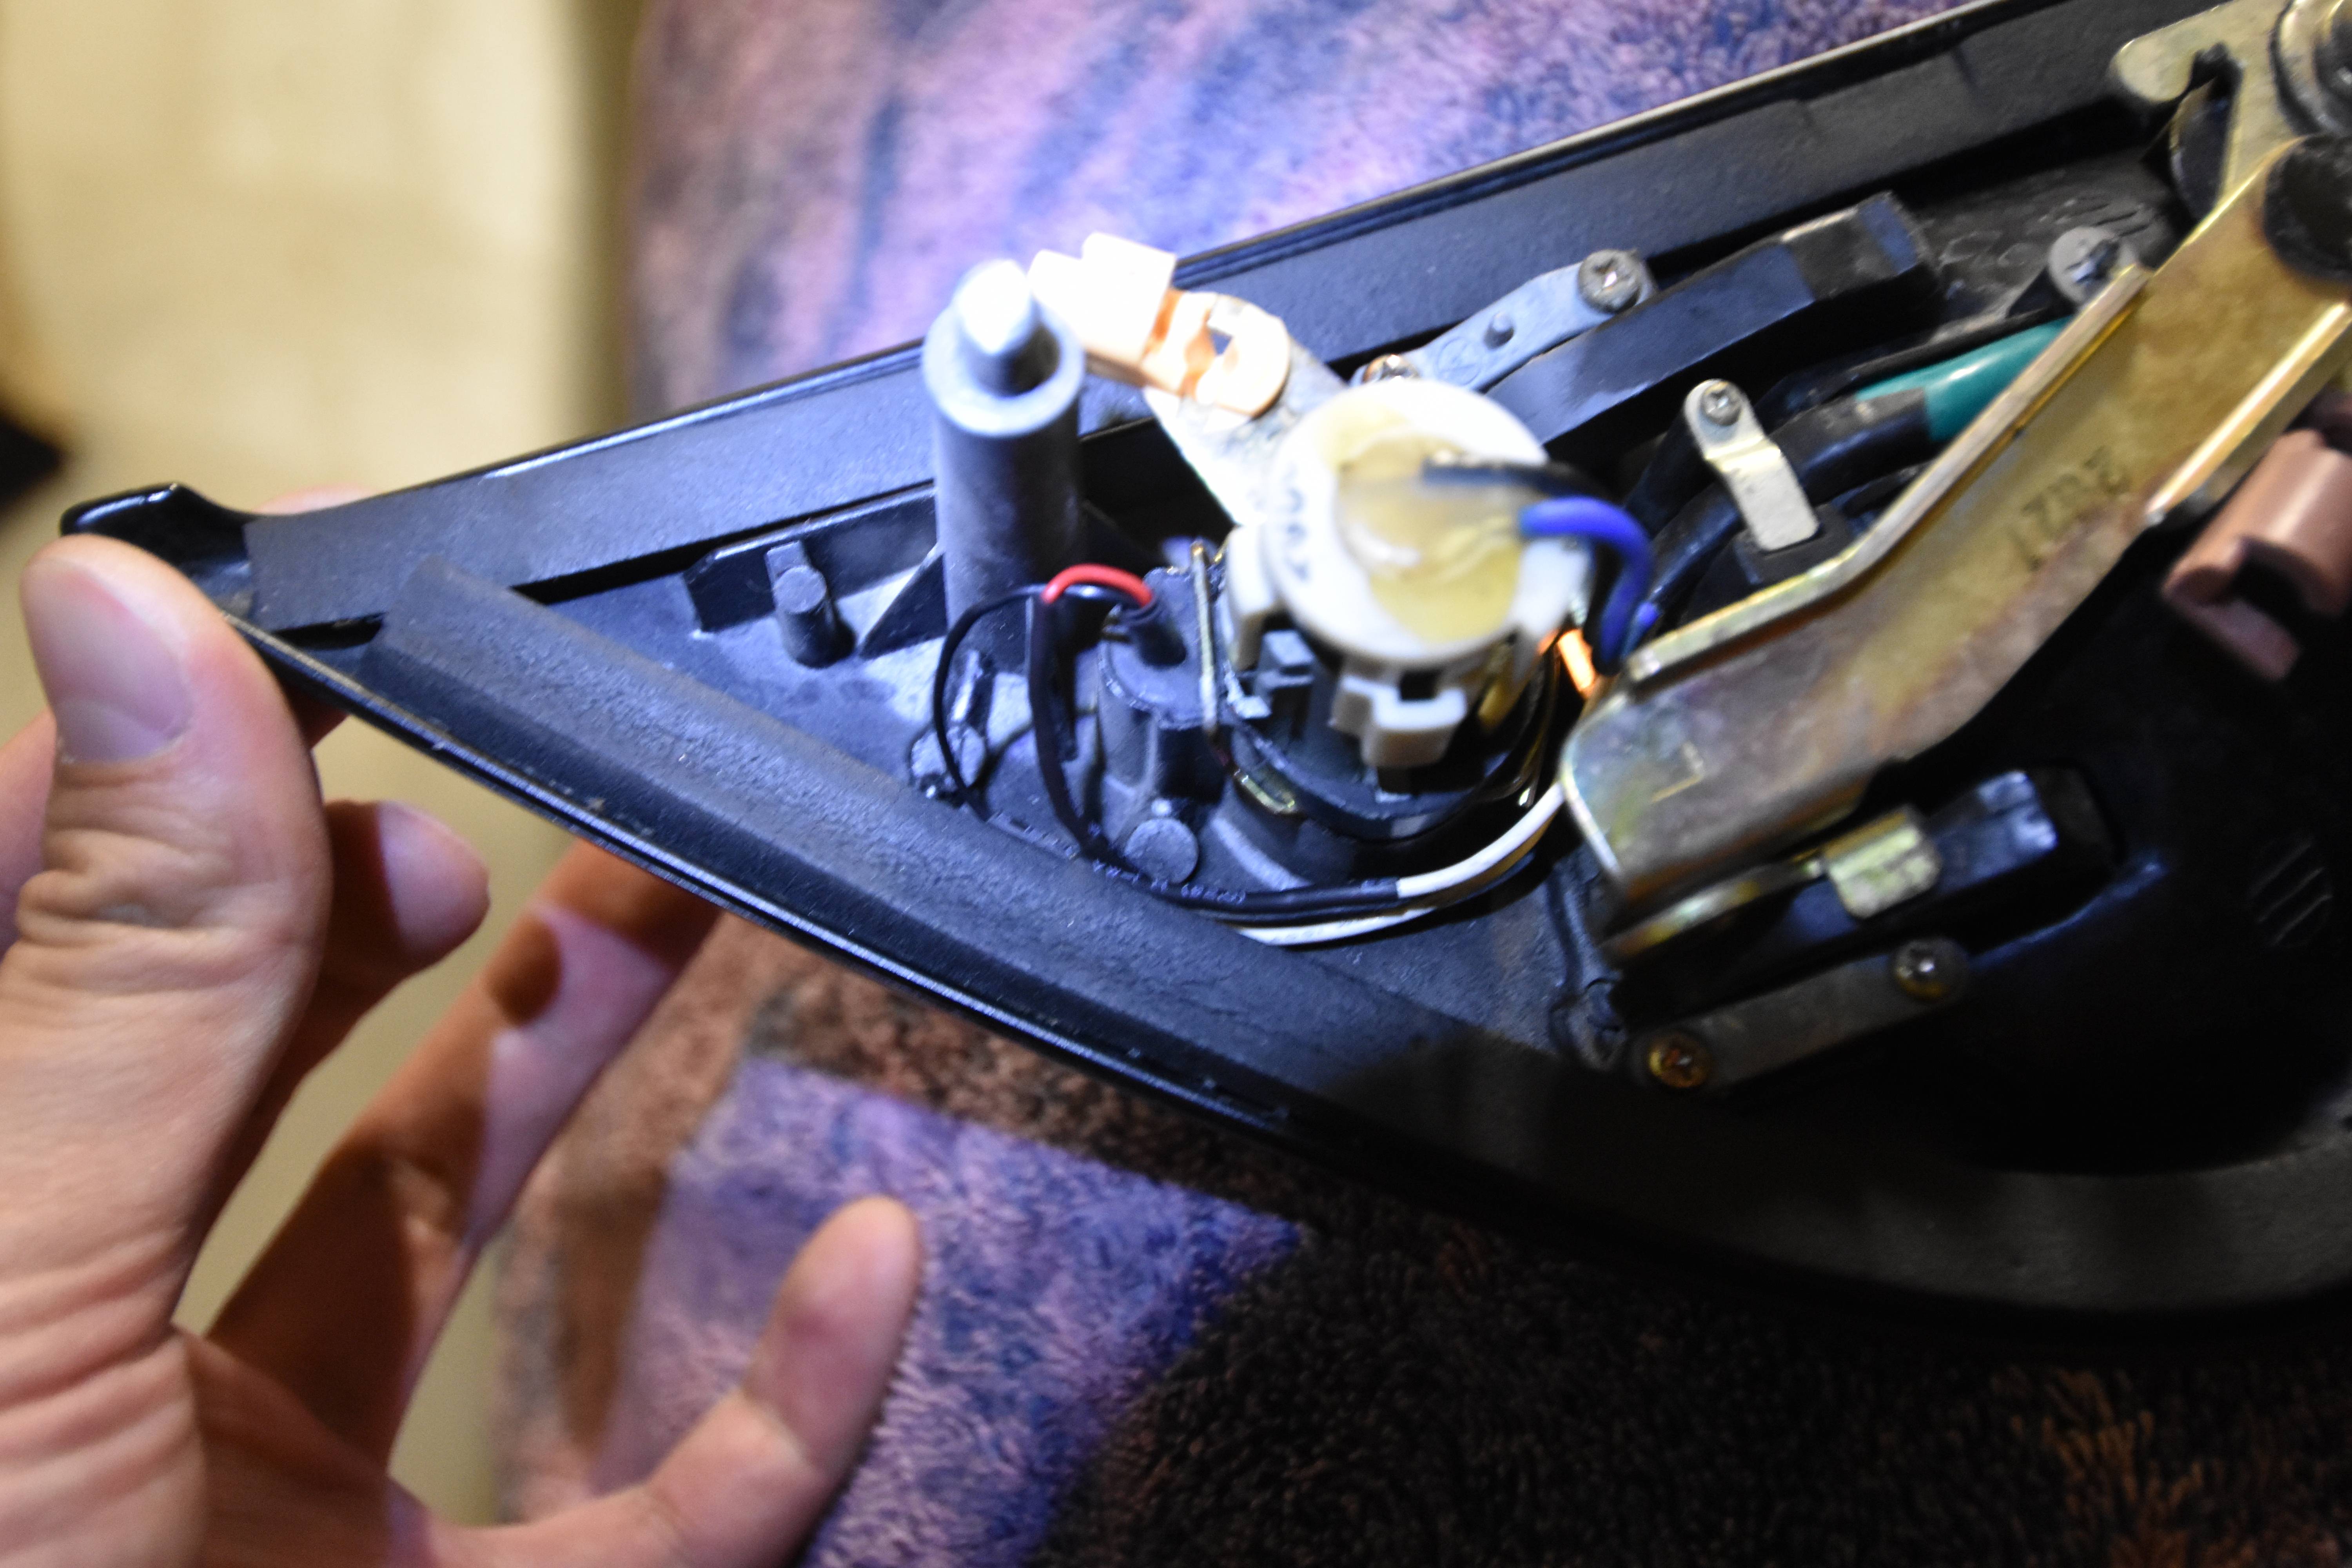
Photos of the back of the door handle. Lock cylinder not present. Those two white wires are delicate. Be careful with them. If you aren't extremely careful with them, you can break the keyhole light.
Cylinder back in place.
Just another angle on it. Note the white wires--be careful with them; try not to touch them at all or you might break your keyhole light.

Those two rods are for door lock and door latch actuation.

Underneath the sail panel.
The sail panel.
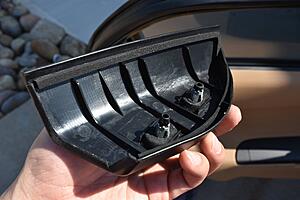
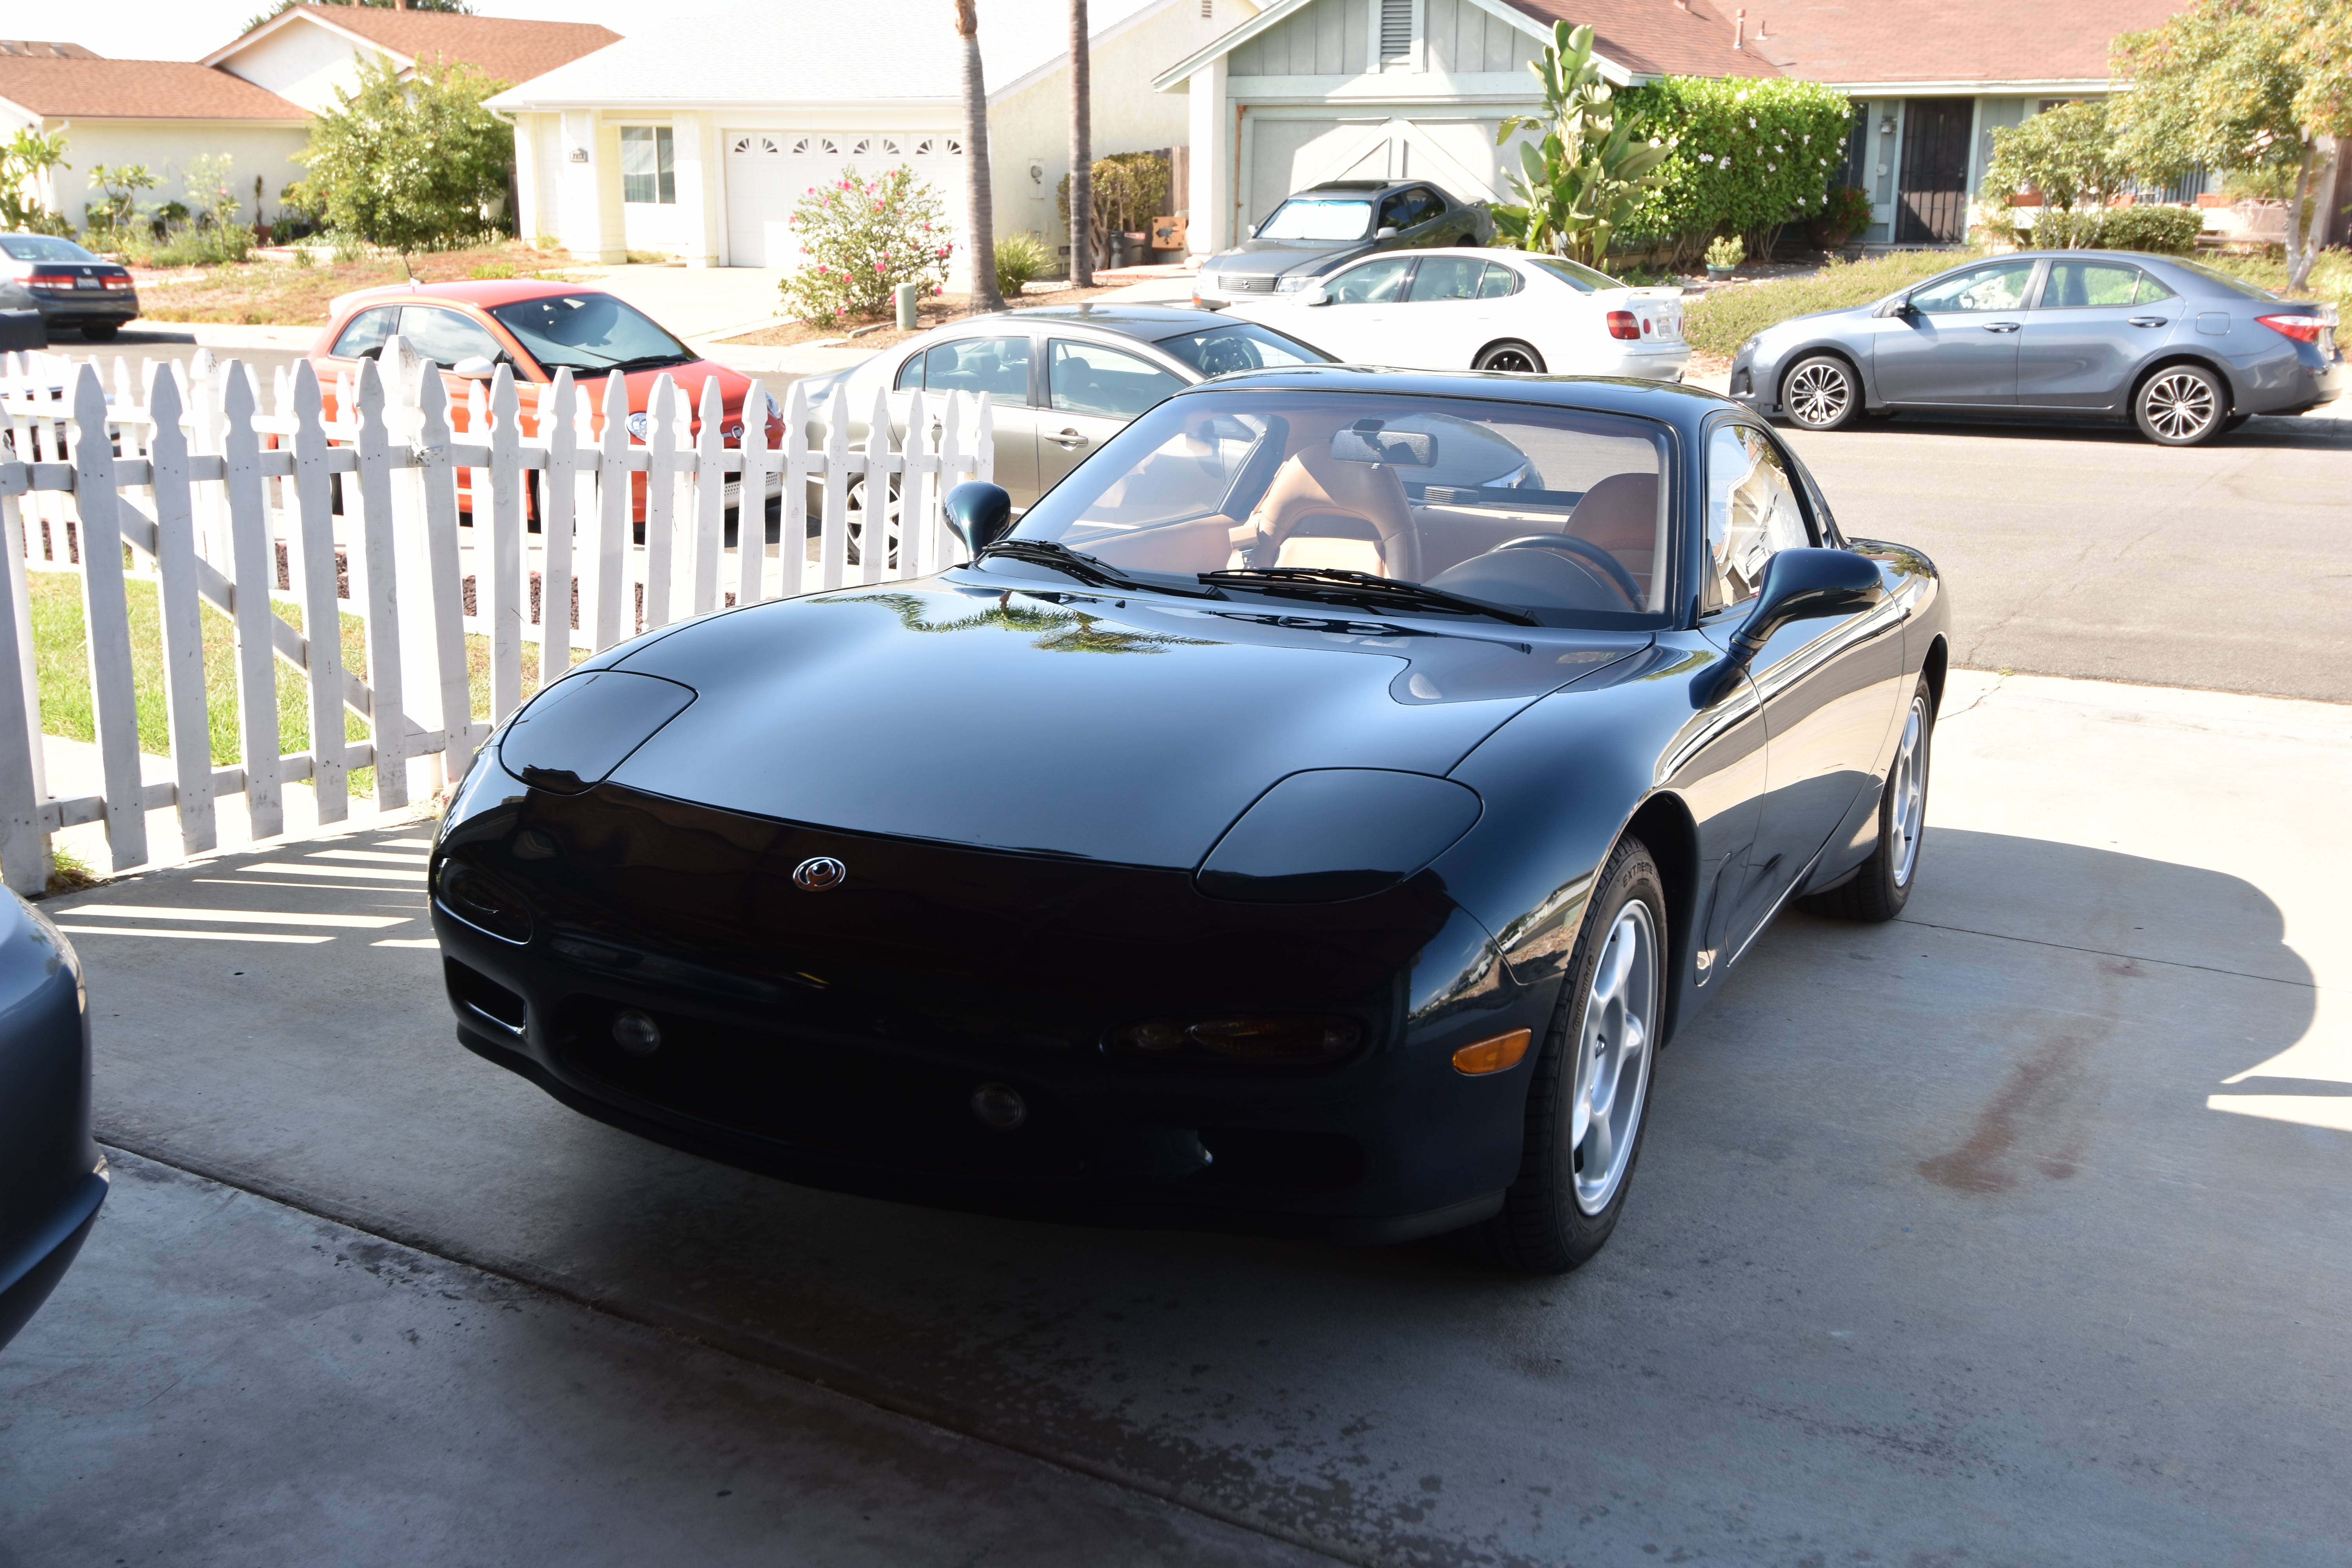
Gratuitous shot, just because the paint looked good.

Anyhow, yeah--I'll update in a week or so after I get the new bulbs in and repair the keyhole light.
The light was working on my driver-side keyhole, but the plastic shutter was missing. I didn't even know this was a thing until I saw the for-sale threads--I just thought the keyhole didn't have a shutter!
I have placed photos and details in an imgur gallery, but here's the deets as well. You would only want to go to the imgur gallery if you want higher-res versions of the photos. There's also a few minor photos I left out due to the 12-image limit here.
I didn't start taking photos until I already had the lock cylinder out of the car. I got that far by following Stephen Stanley's instructions.
Once you have the cylinder out, rotate the metal cover around until one of the tabs aligns with this channel on the lock cylinder. It might take some effort to make the cover rotate around. Jam a small flat head under the edge of the cover and work the tab up so the cover can slide off the cylinder. Once you've done one tab, rotate the cover around and do the other tab.
Cover removed. The spring may pop the black shield off once you remove the cover.
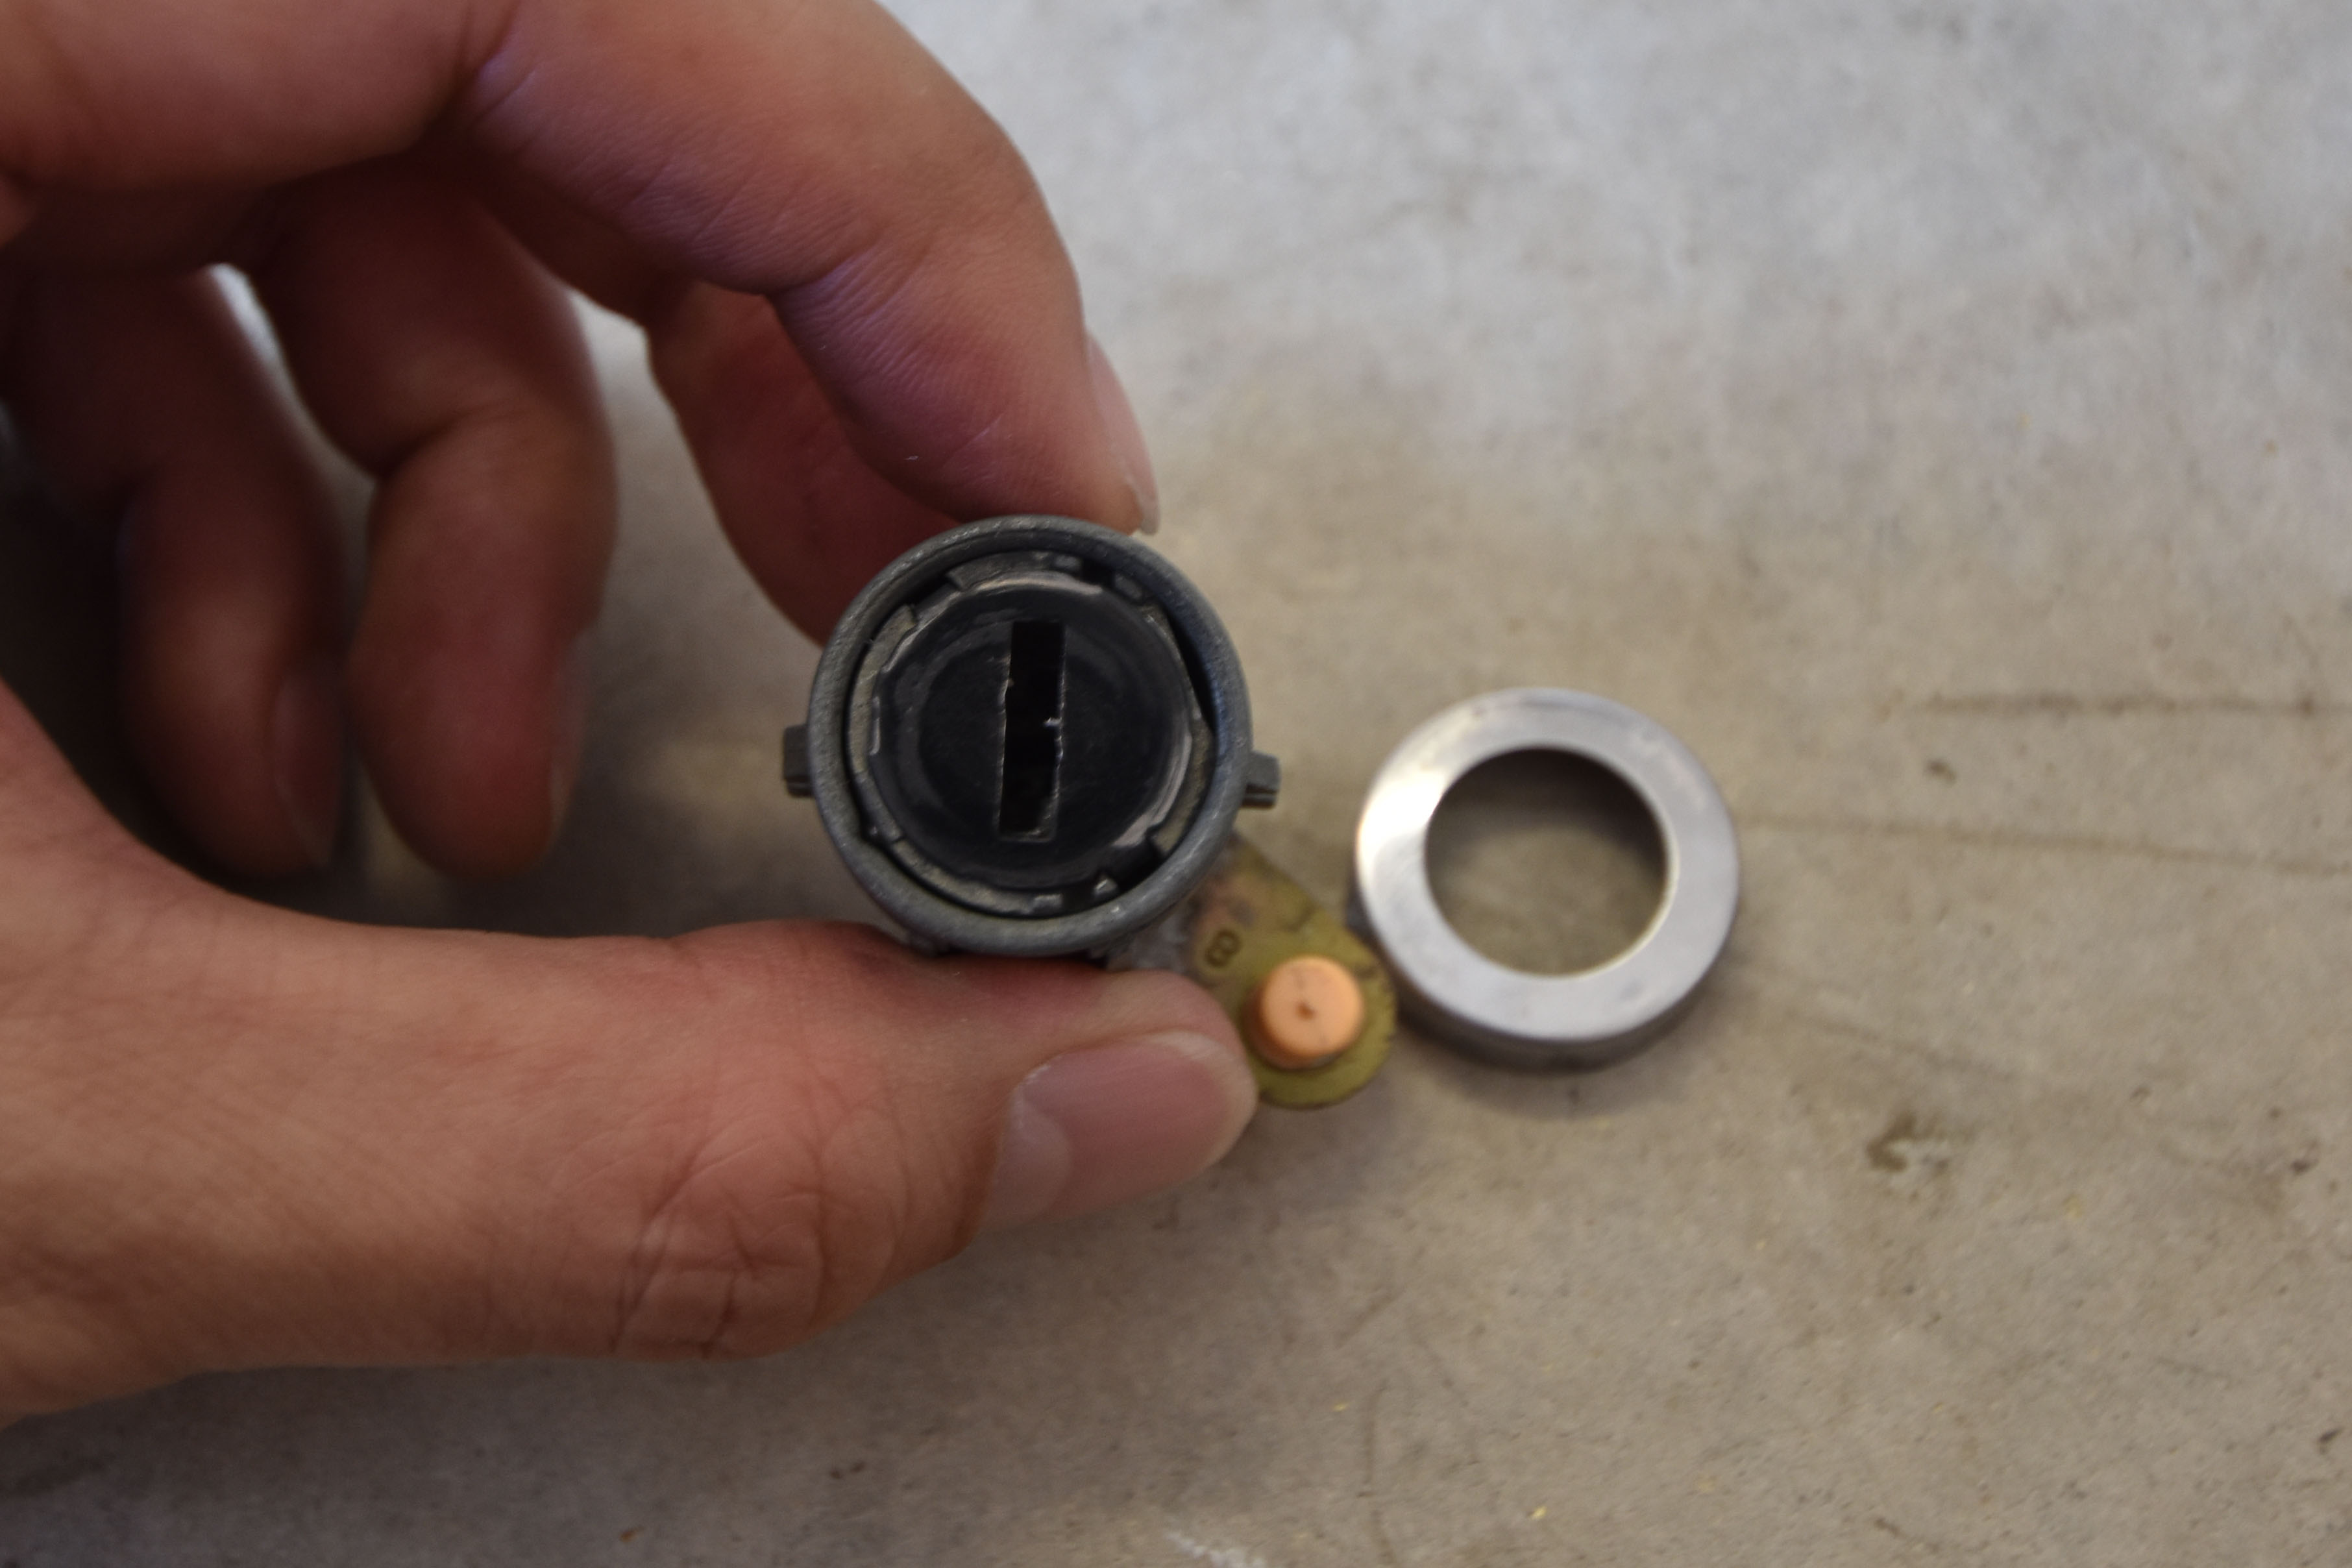
My spring was not very extended, but the new one was.
Pardon my thumb, it wouldn't stay in place without me holding it. You can see why these plastic covers break all the time. Just those two plastic dowels on each end to hold it in place. They probably wear over time and snap off.
Put it all back together. The tabs on the cover can be pressed back down, but I couldn't make it fit snugly again so my cover rotates around a little freely. You can see that this doesn't matter at all, as that non-painted steel cover doesn't show at all.

And now, success:
...or rather, my failure. I broke the keyhole illumination. If you read Stephen Stanley's instructions, he says, "The bulb is a small incandescent one with fly-leads which are very fragile. These wires break off where they enter the glass of the bulb."
No joke. I was extremely careful with the white wires leading to the keyhole light and somehow they still broke as I was putting everything back together. Sure enough, when I took it back apart for troubleshooting, one of the wires was broken right at the base of the light. I was able to wiggle/jam it back in and get the light to turn back on, but of course, that doesn't stay and so I need to replace the bulb.
I've ordered new ones from Amazon. They are 12V "Grain of Wheat" bulbs. The ones I ordered come with pigtails soldered on already. I'll update this thread once I do the repair. It seems easier to me to do this than to order a new one that goes all the way down the harness. You have to remove the door card and unwrap the existing wires from the harness if you want to do that. Whatta pain.
Also, here's some photos I took while reassembling things, in case anyone wants to know what this all looks like:
Photos of the back of the door handle. Lock cylinder not present. Those two white wires are delicate. Be careful with them. If you aren't extremely careful with them, you can break the keyhole light.
Cylinder back in place.
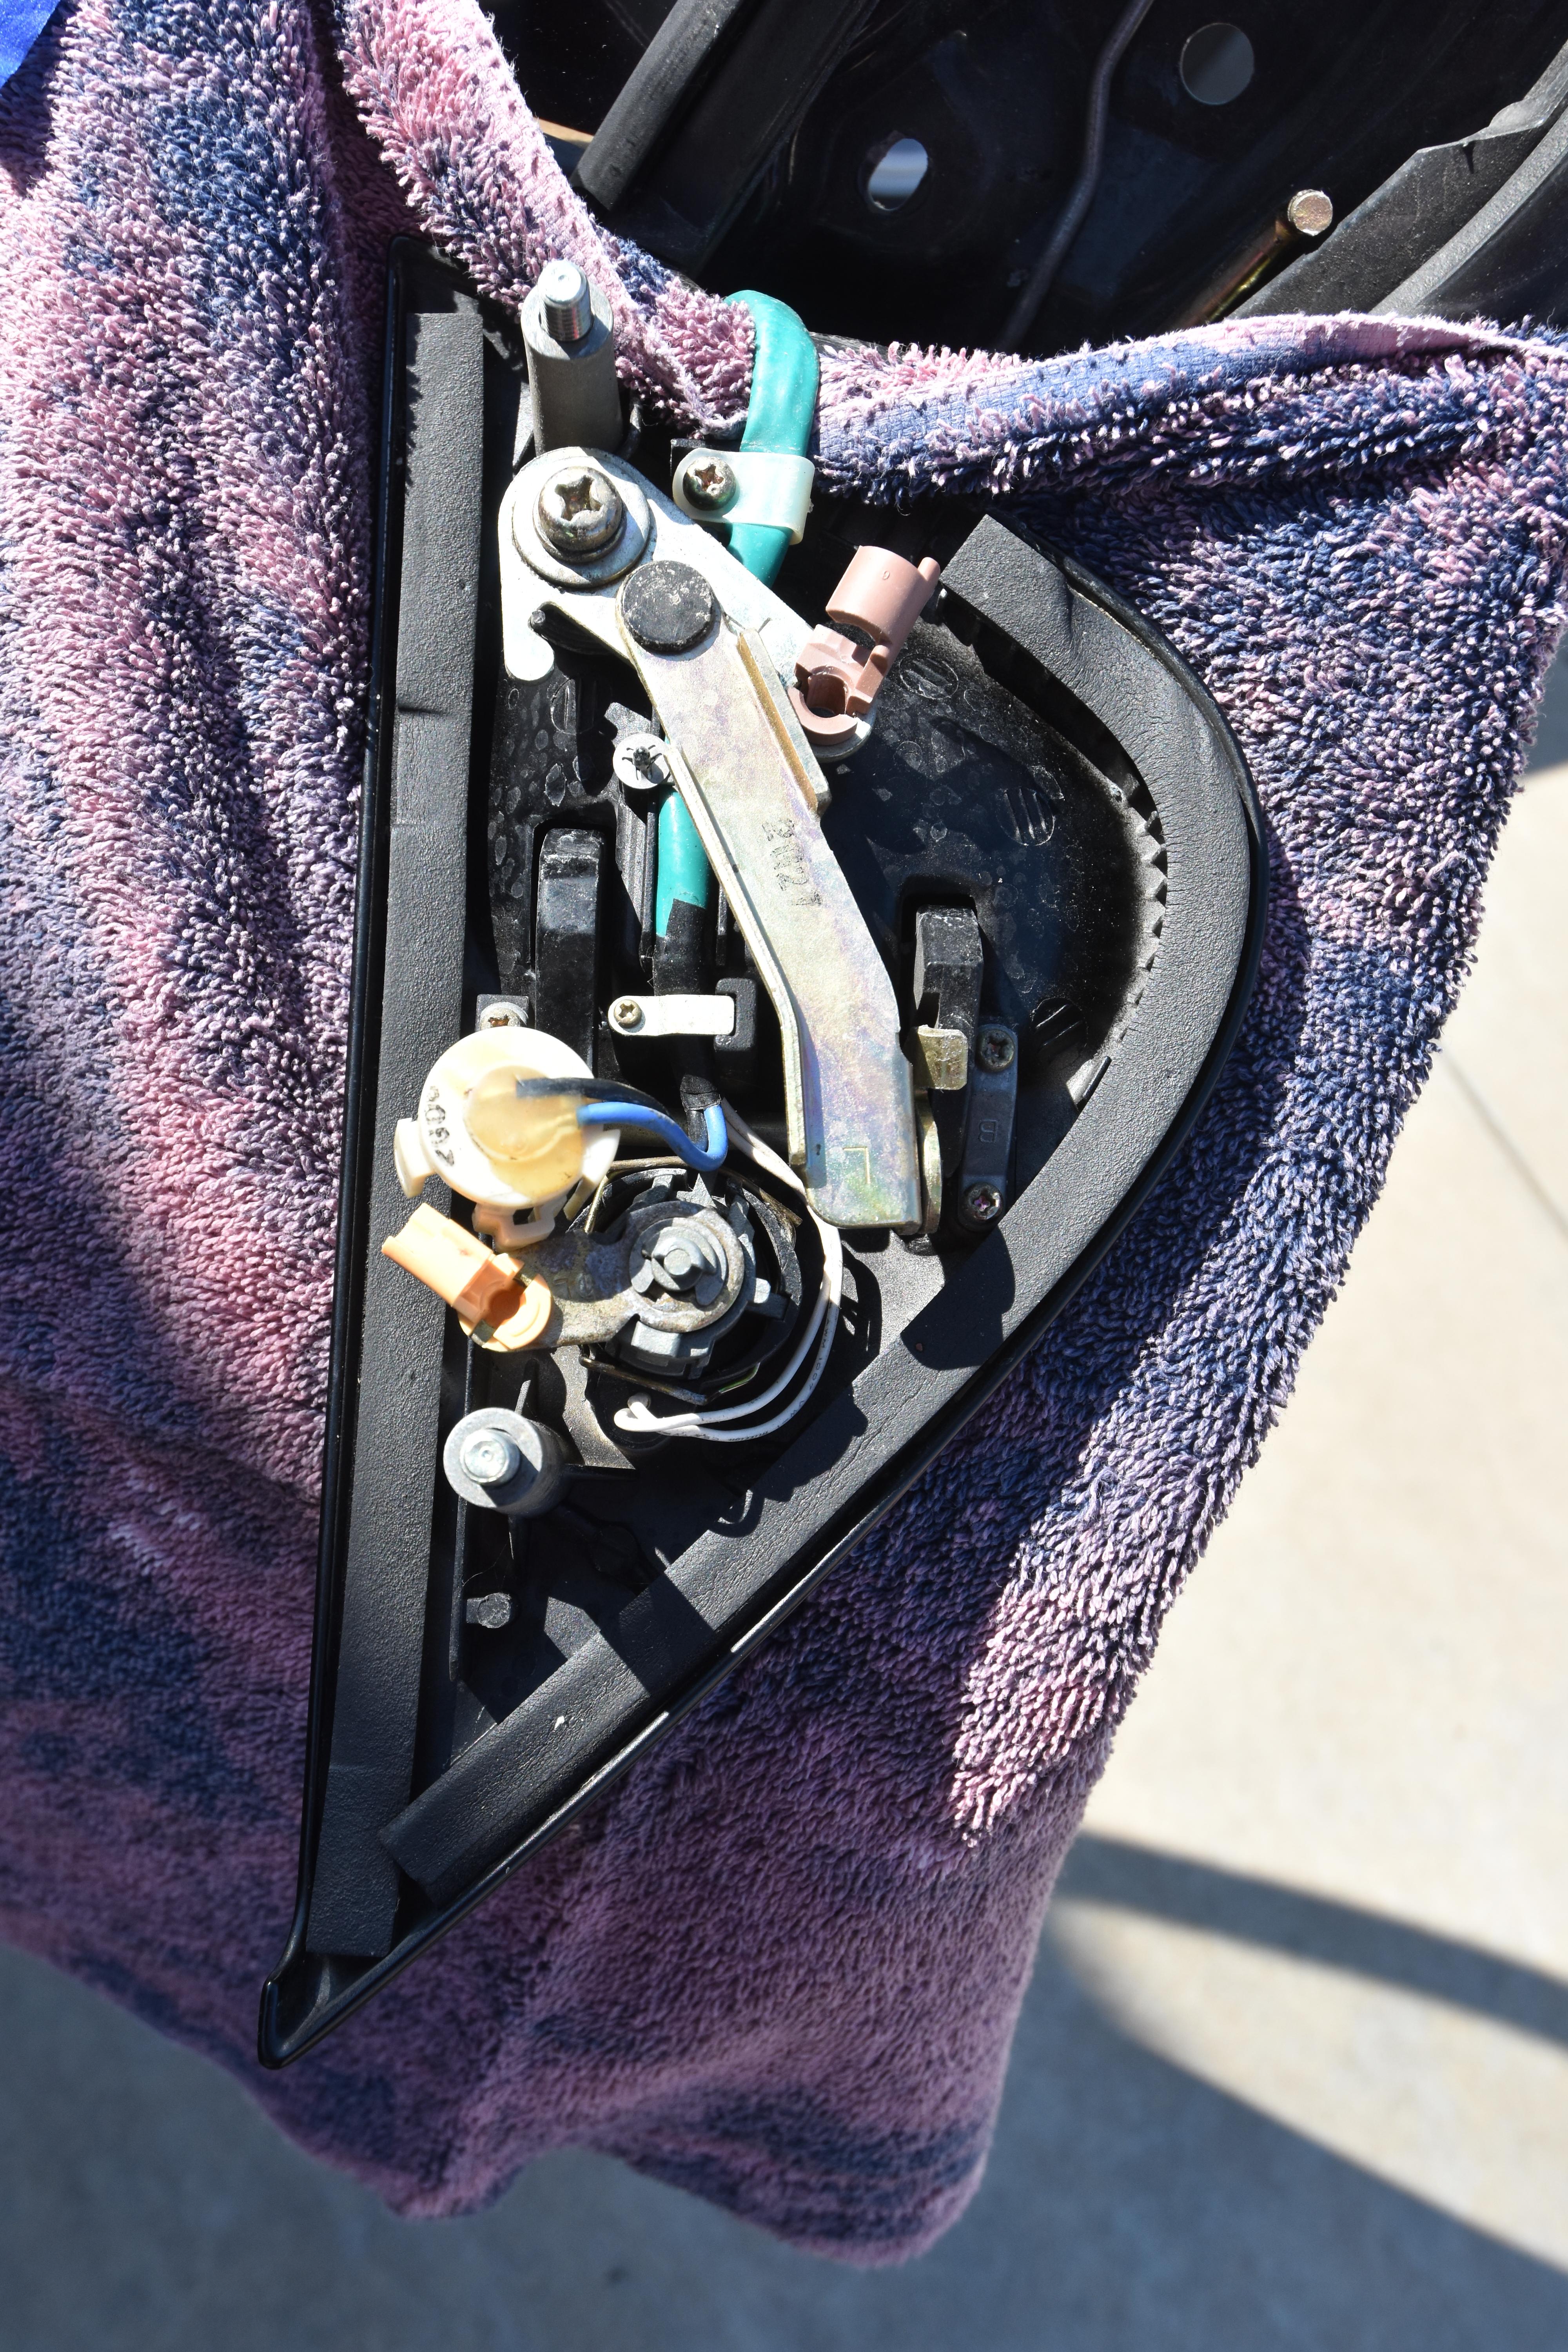
Just another angle on it. Note the white wires--be careful with them; try not to touch them at all or you might break your keyhole light.

Those two rods are for door lock and door latch actuation.
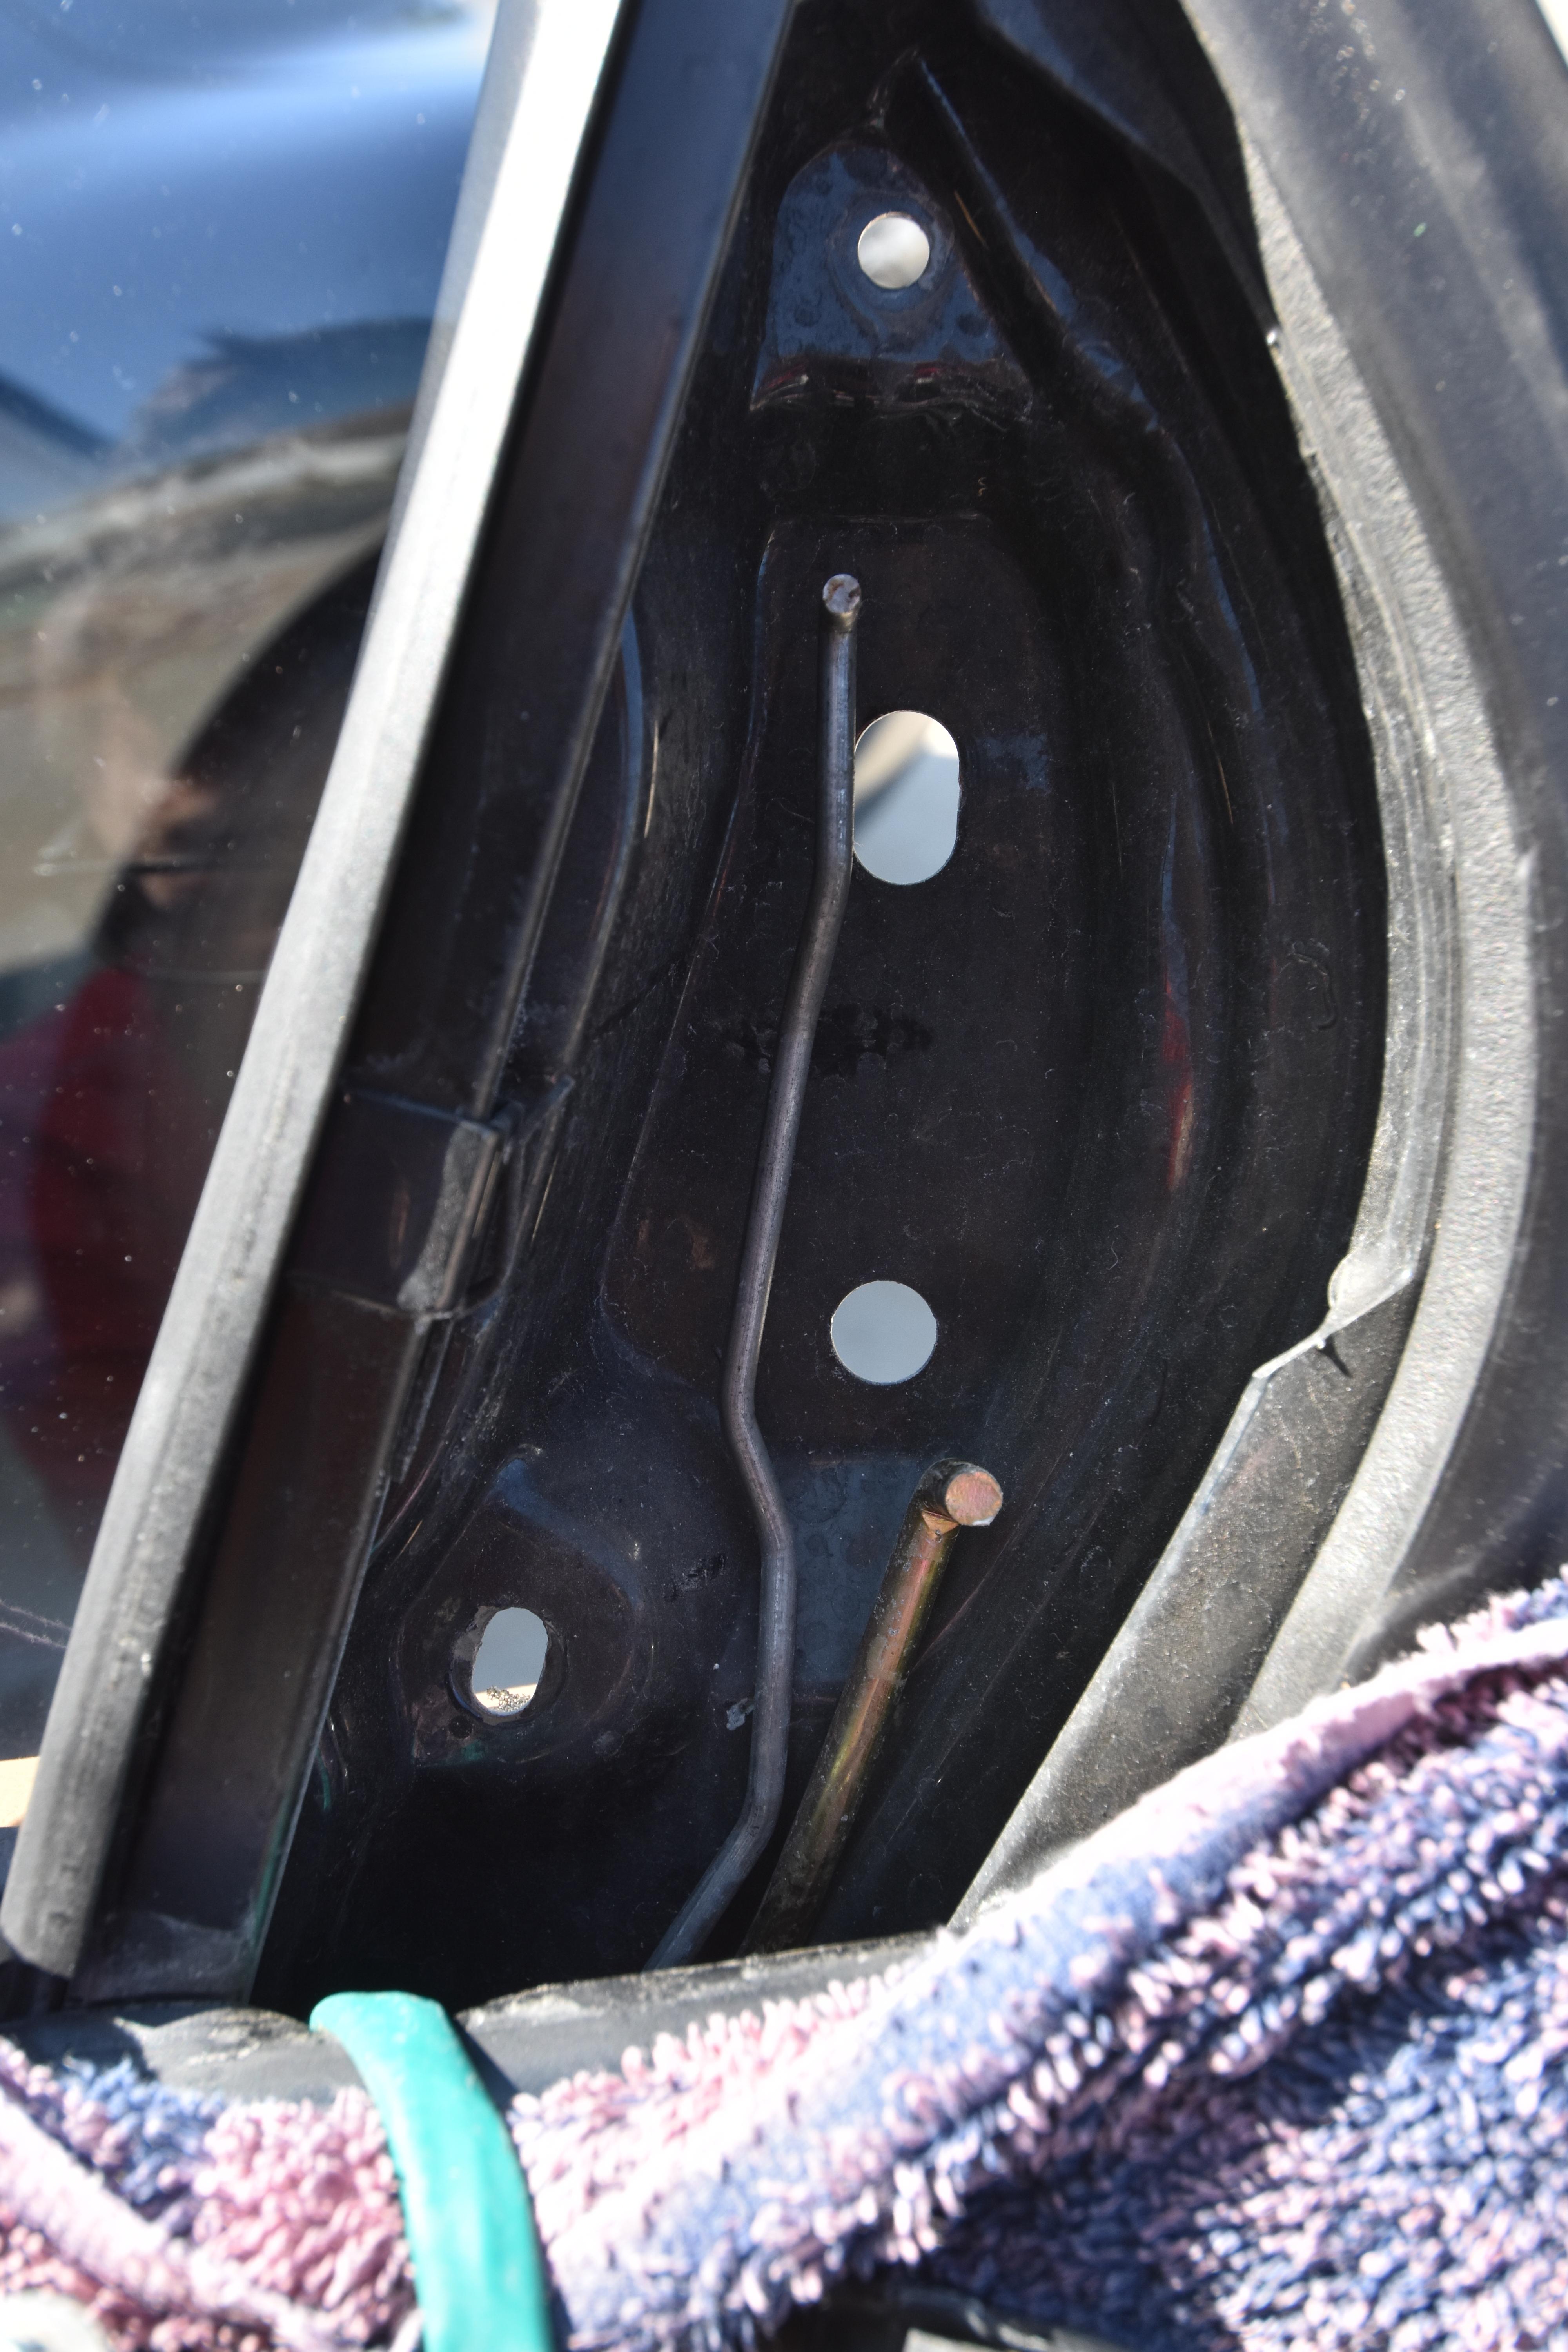
Underneath the sail panel.

The sail panel.

Gratuitous shot, just because the paint looked good.
Anyhow, yeah--I'll update in a week or so after I get the new bulbs in and repair the keyhole light.
Last edited by eslai; Sep 10, 2017 at 11:23 PM.

Nice! This is one of those small things that is so rewarding to get fixed up.
Did you consider getting an LED keyhole light instead of the stock style incandescent ?
Dale
Did you consider getting an LED keyhole light instead of the stock style incandescent ?
Dale
Thread Starter
Senior Member
Joined: May 2006
Posts: 269
Likes: 20
From: San Diego, CA
I did, although I wasn't sure if I cared to experiment. An LED light wouldn't fit in the rubber sleeve very well I believe, as it'd be fatter in diameter, and I didn't have plans to change the color or play with resistors to get the right level of light, y'know?
I changed mine to an led a while ago and trust me the white led looks way better, brighter and also is looks more up to date. The led bulb is a little fatter but you can squeeze it in. No messing with resistors just get a 12v led and they come with their needed resister on them.
It shouldn't need a resistor at all I'd think!
My car being a late model didn't come with the key hole light, so I could fit titanium covers as I don't need light to penetrate them, those wont be breaking .
.
My car being a late model didn't come with the key hole light, so I could fit titanium covers as I don't need light to penetrate them, those wont be breaking
.
Always Bad Advice
Joined: Nov 2005
Posts: 327
Likes: 88
From: San Diego

Seriously though, were can you get titanium covers?
Haha, take care of the grams and the kilos will take care of themselves .
I made them as I had some spare ti, seemed a good low maintenance option that wouldn't require a coating.
.I made them as I had some spare ti, seemed a good low maintenance option that wouldn't require a coating.
Trending Topics
Thread Starter
Senior Member
Joined: May 2006
Posts: 269
Likes: 20
From: San Diego, CA
The grain of wheat lights arrived today:
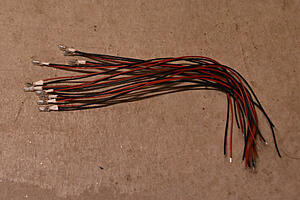
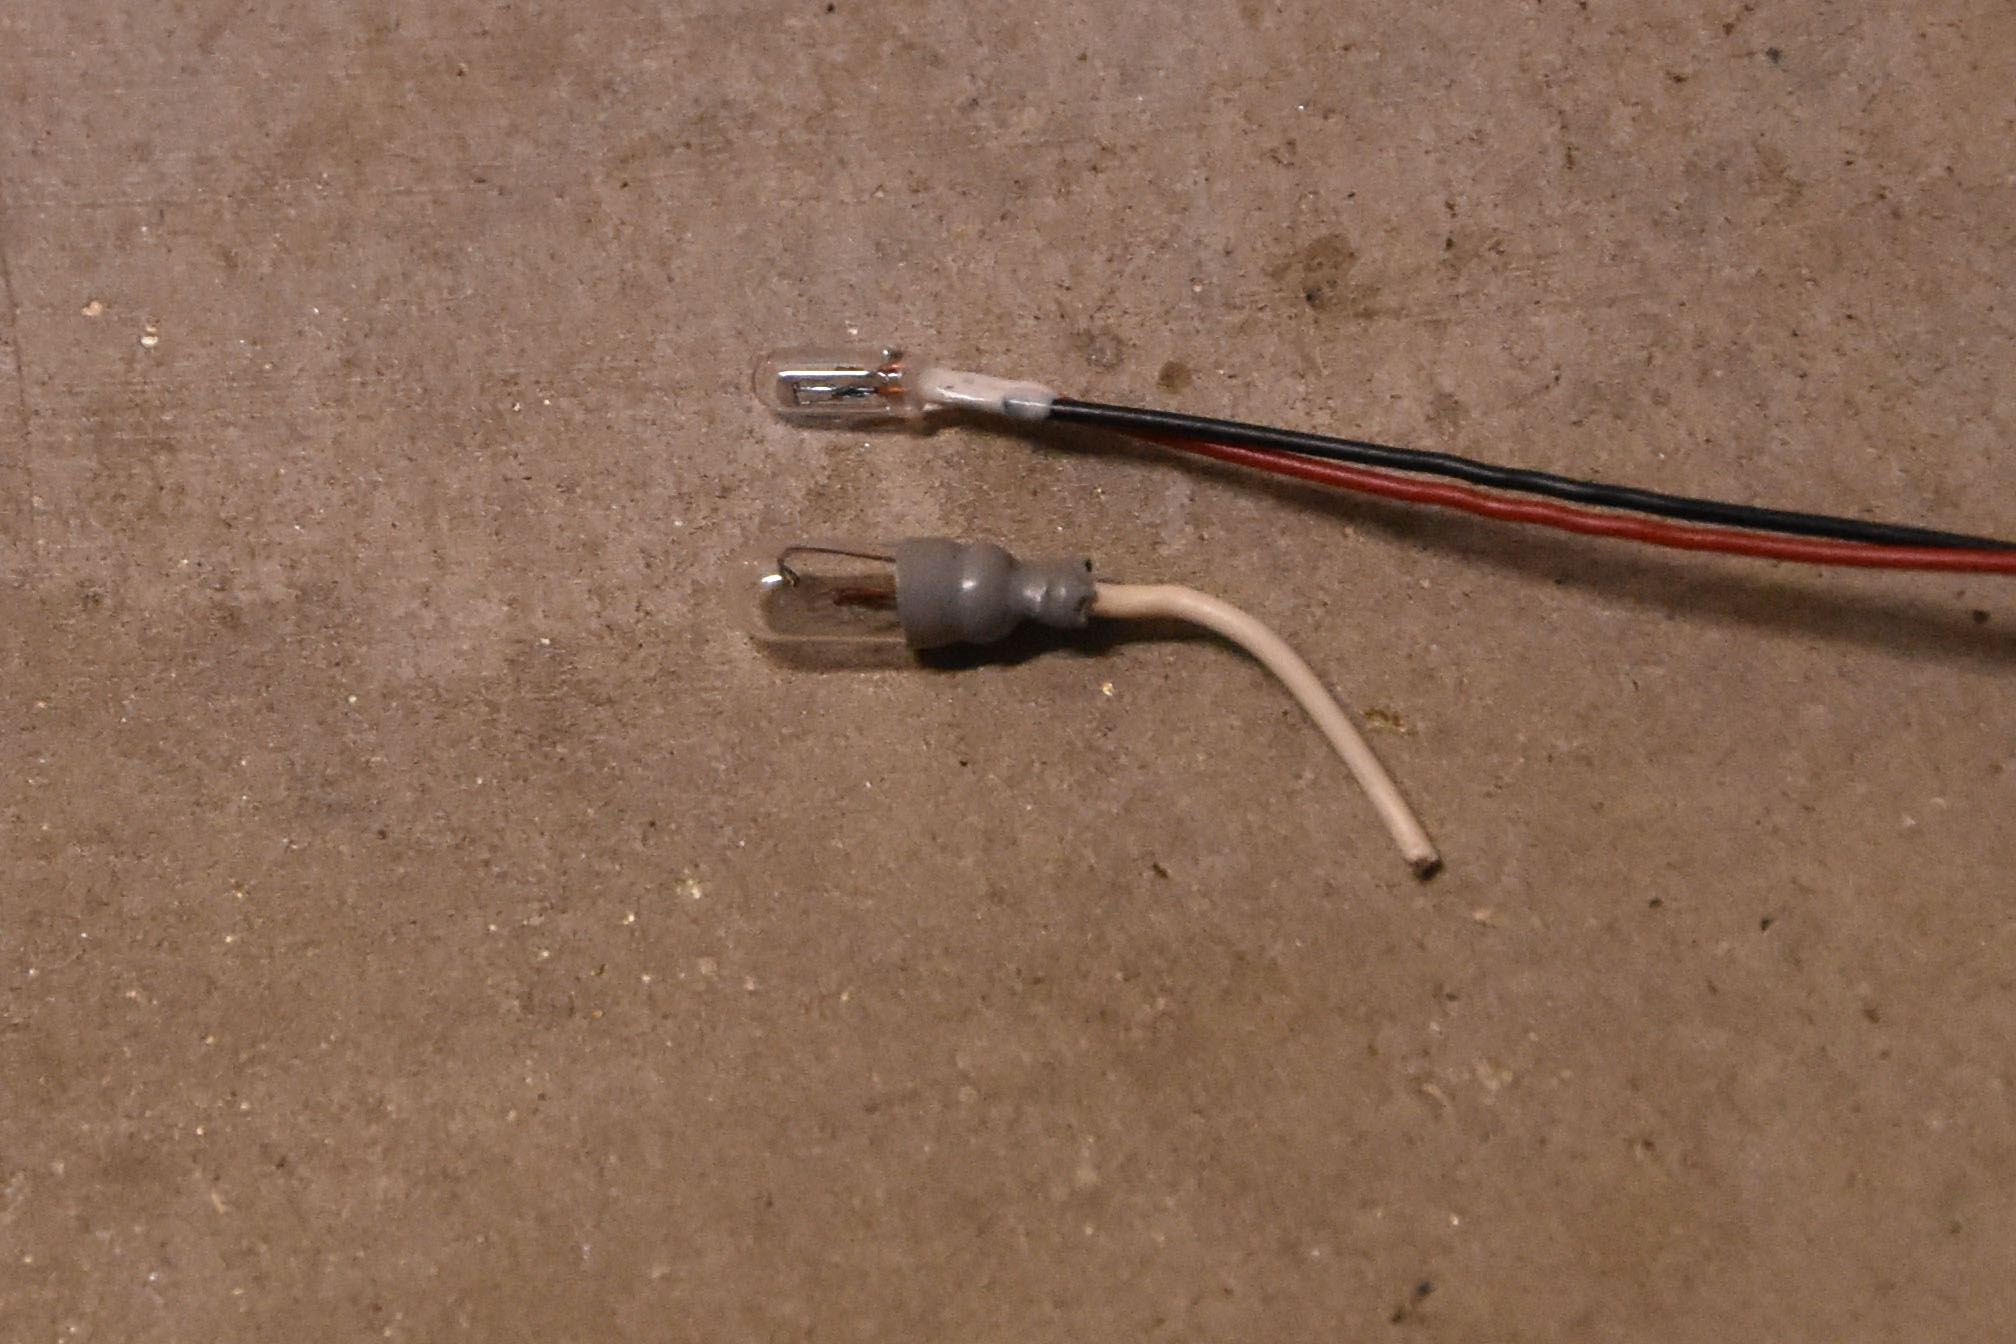
Only problem is: They're smaller than the stock bulbs. One of the reasons I went this route rather than going with LEDs was to maintain a stock fitment. Whoops.

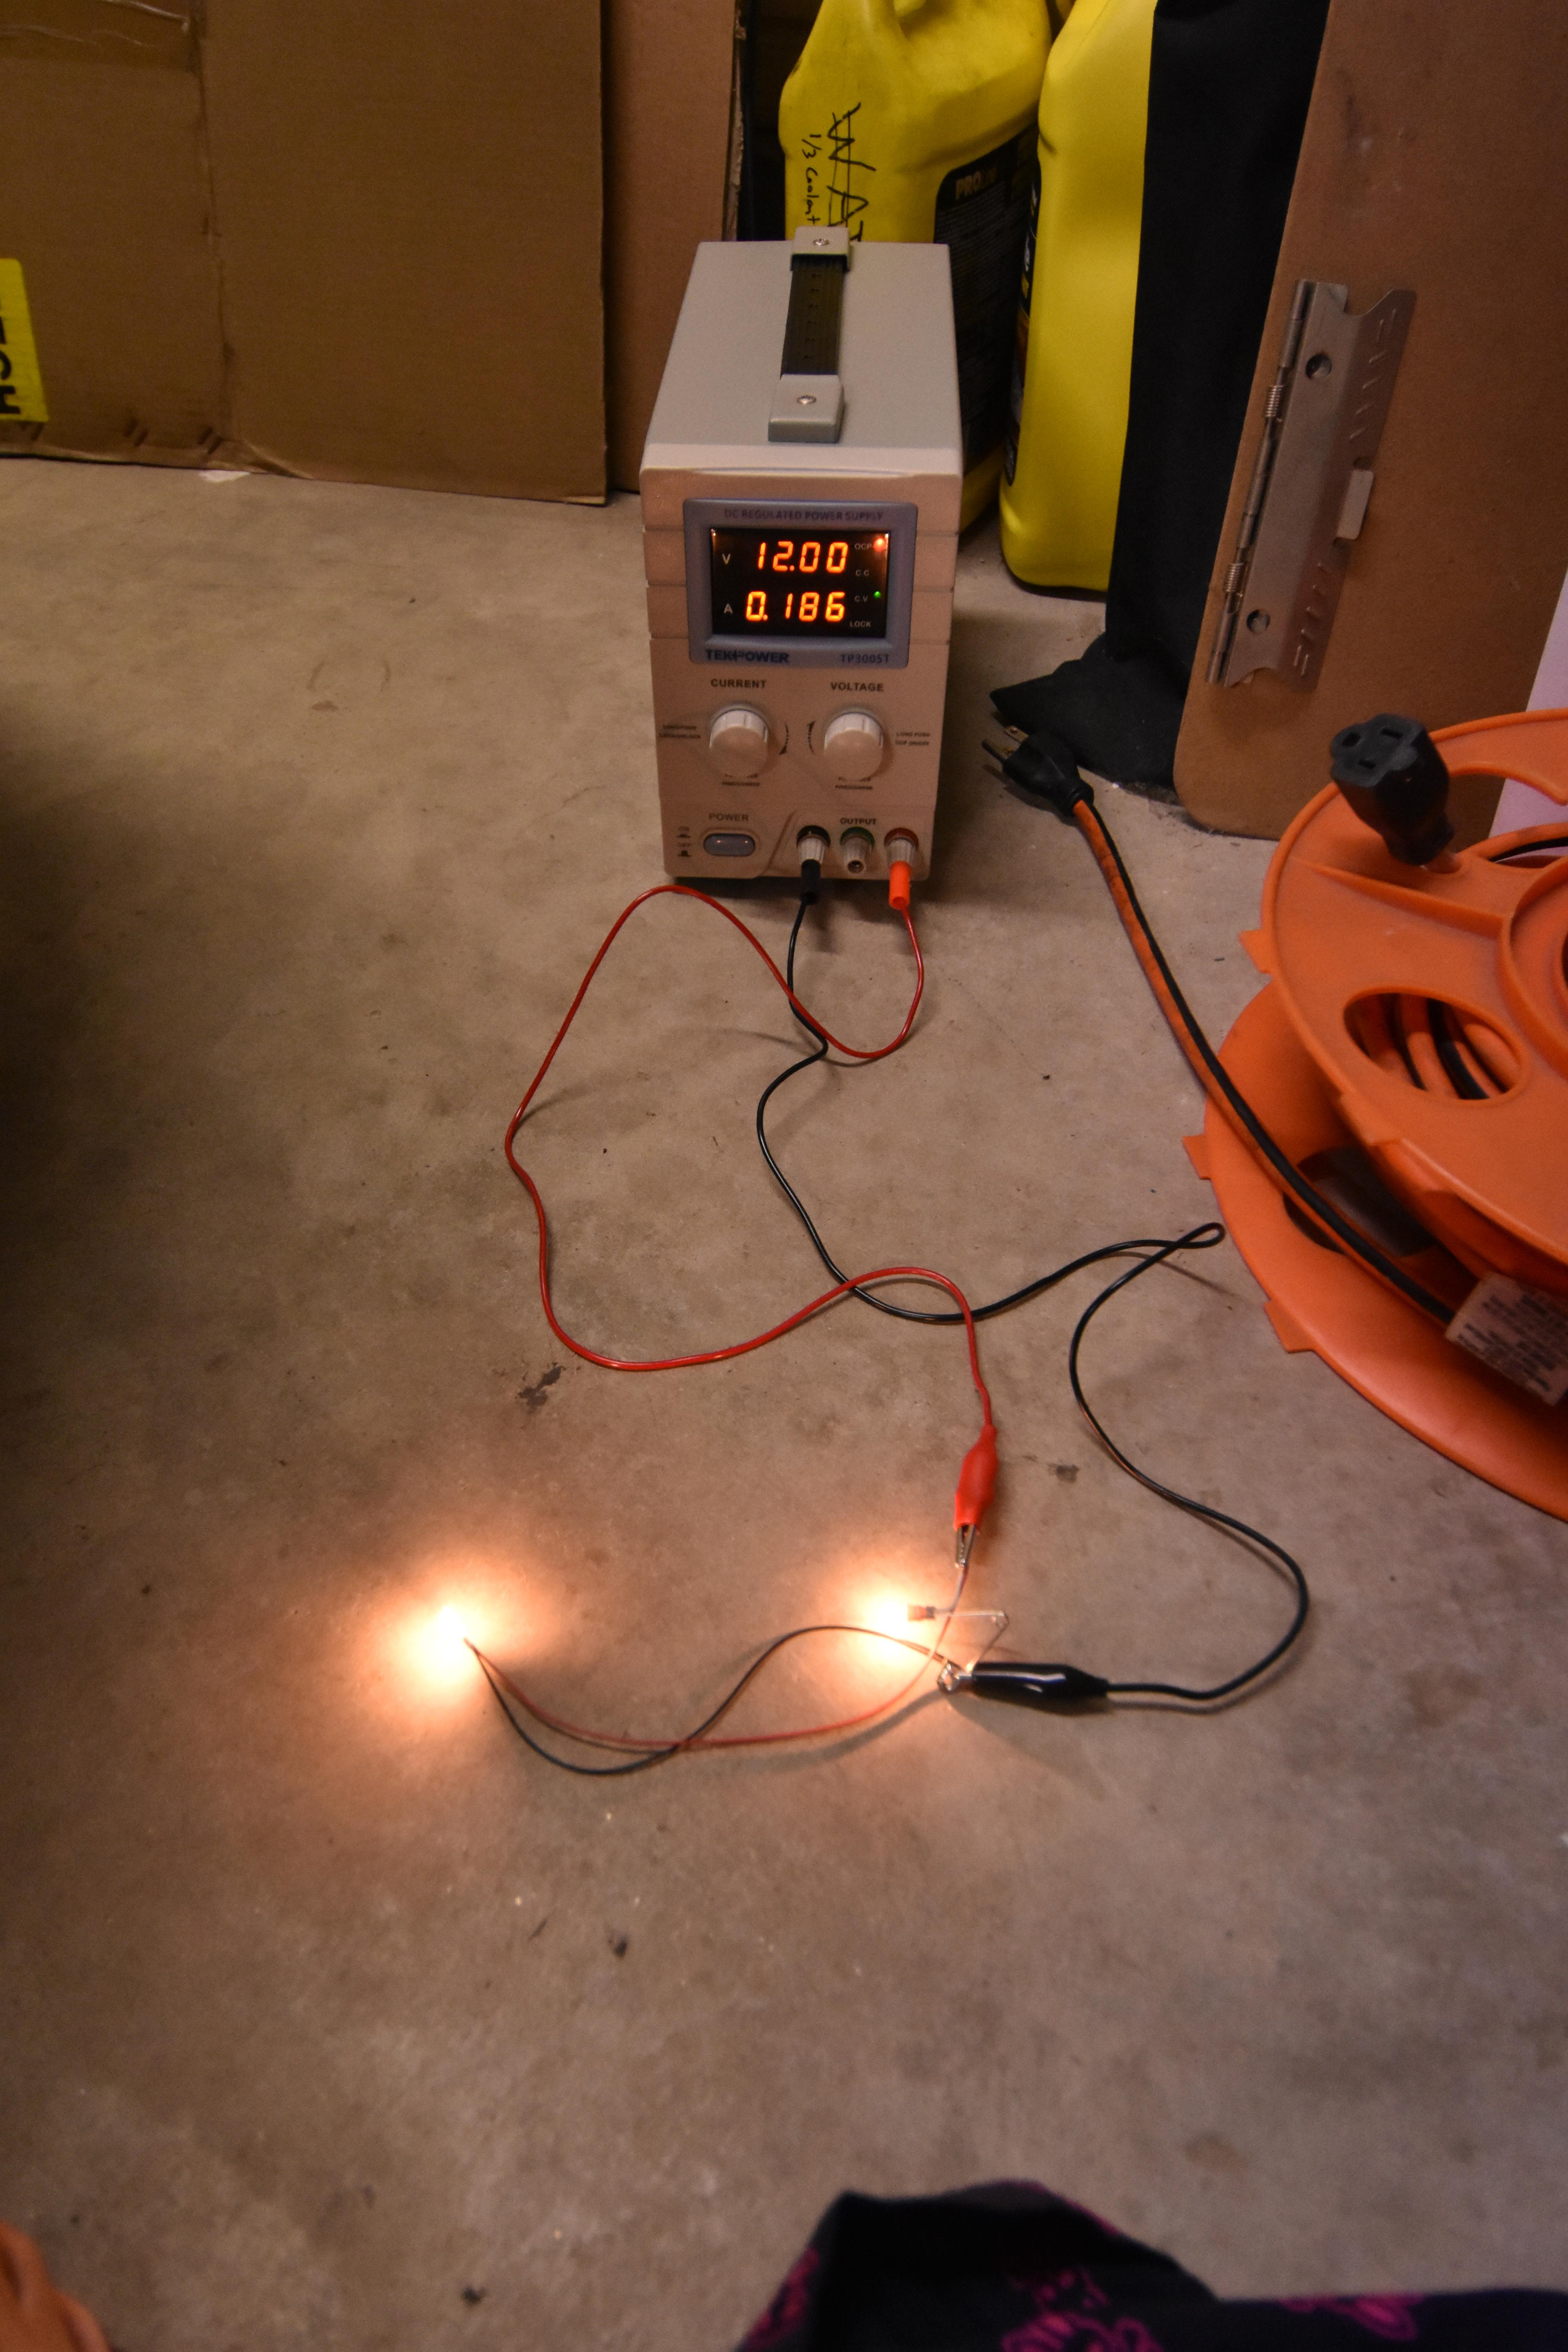
Okay, so, what kind of light do they give off, and what's their power draw?
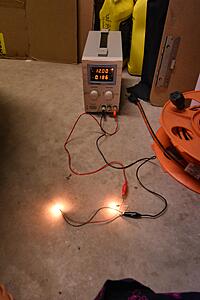
Well, at least the illumination is the same on both of them, right? What's the current draw?
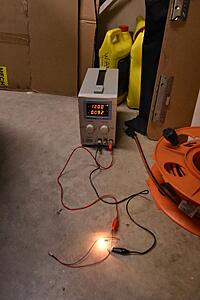
.092A @12V for the stock bulb. Given that in parallel they were .186 we'd expect the new bulb to be around .094A.
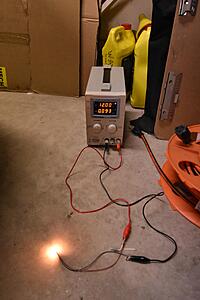
We'll chalk that up to a rounding error. So, the new bulbs pretty much draw the same current as the stock bulb. Safe to say that the bulb will work and won't cause any heat issues or load issues.
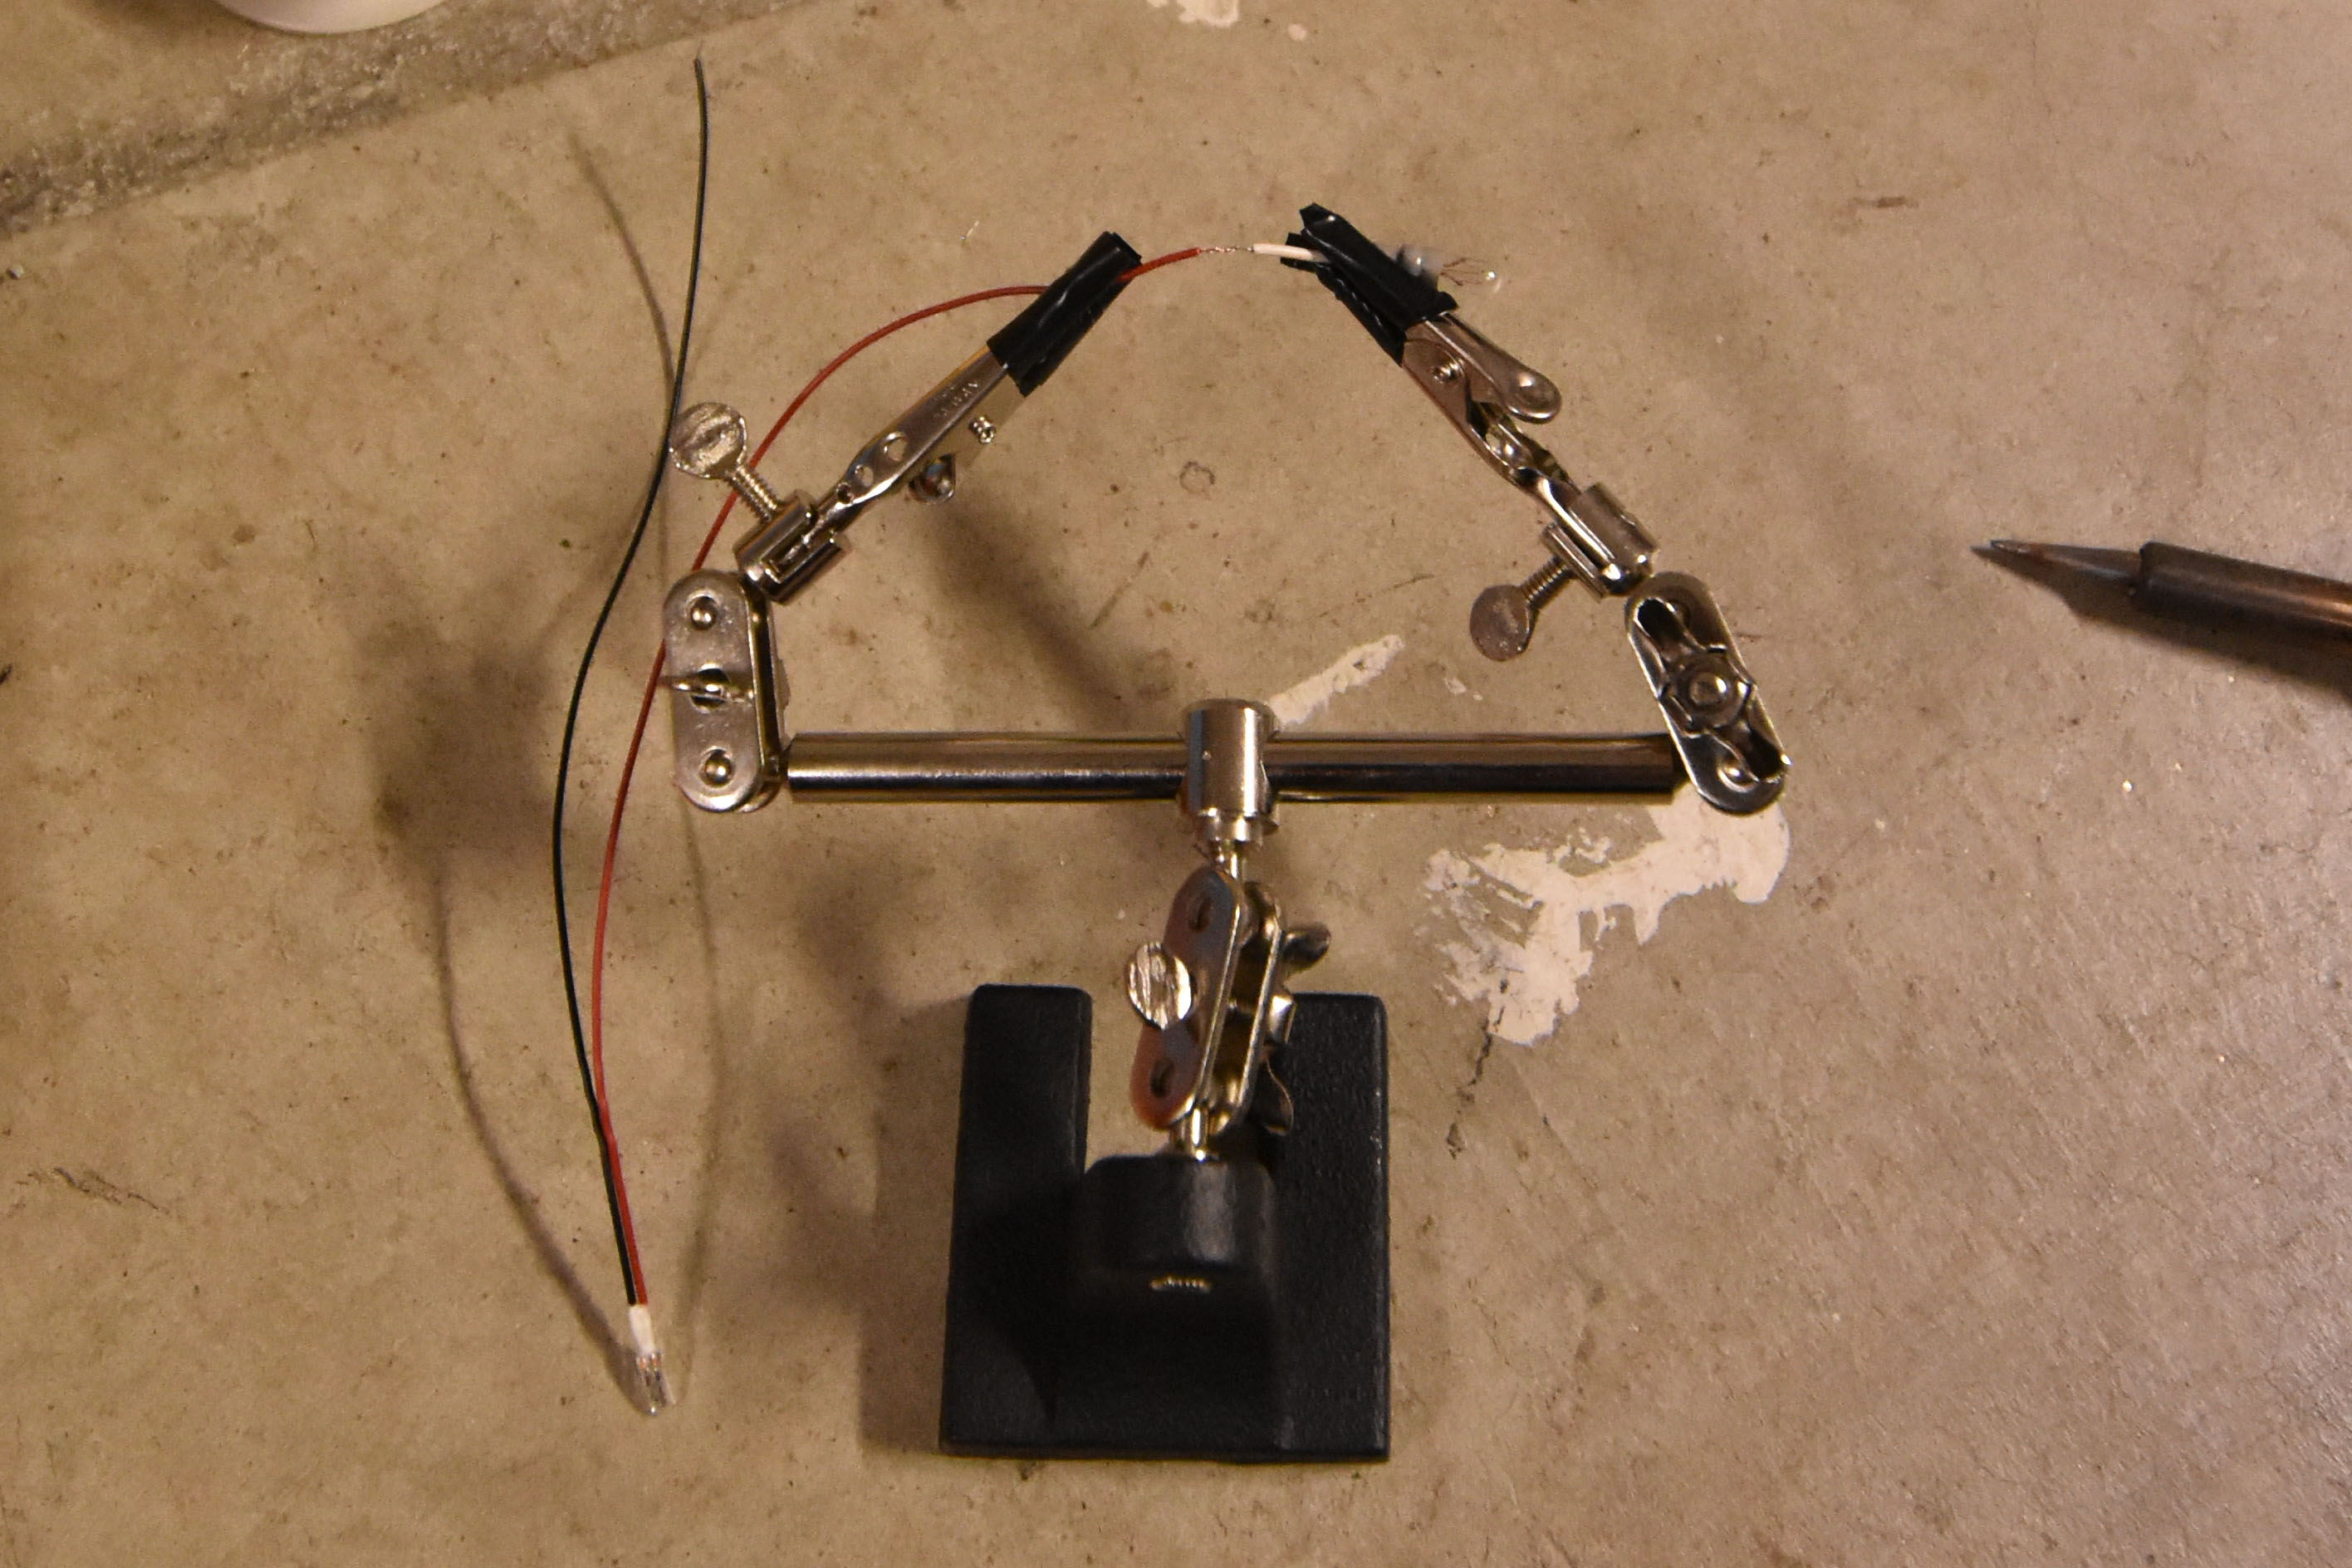
The wires are tiny though. I have never tried to solder any wires together of such small gauge before, so I practiced a bit first. I used a 25W iron.

I did the actual piece in-place on the car. Tried to be as careful as possible. Here's the repaired light before heat-shrinking:
To make the light fit snugly into the rubber holder, I shrank three layers of heat shrink tubing around the base of the lamp:
Everything fit back together well. The wires are a little longer now by about two inches. I think the extra length will help prevent damage if I ever get in here again.

So, what did all this excruciating detail that you just patiently wasted your time reading get me?

We'll see if the repair holds. If not, well I do have nine spares. Anyone need one?
I actually think I prefer this versus replacing with LEDs because of that slow glow that appears when you pull the lever, versus the instant-on effect you get from LEDs. Just seems more period-correct and dramatic, like theater lighting. Ooooo.
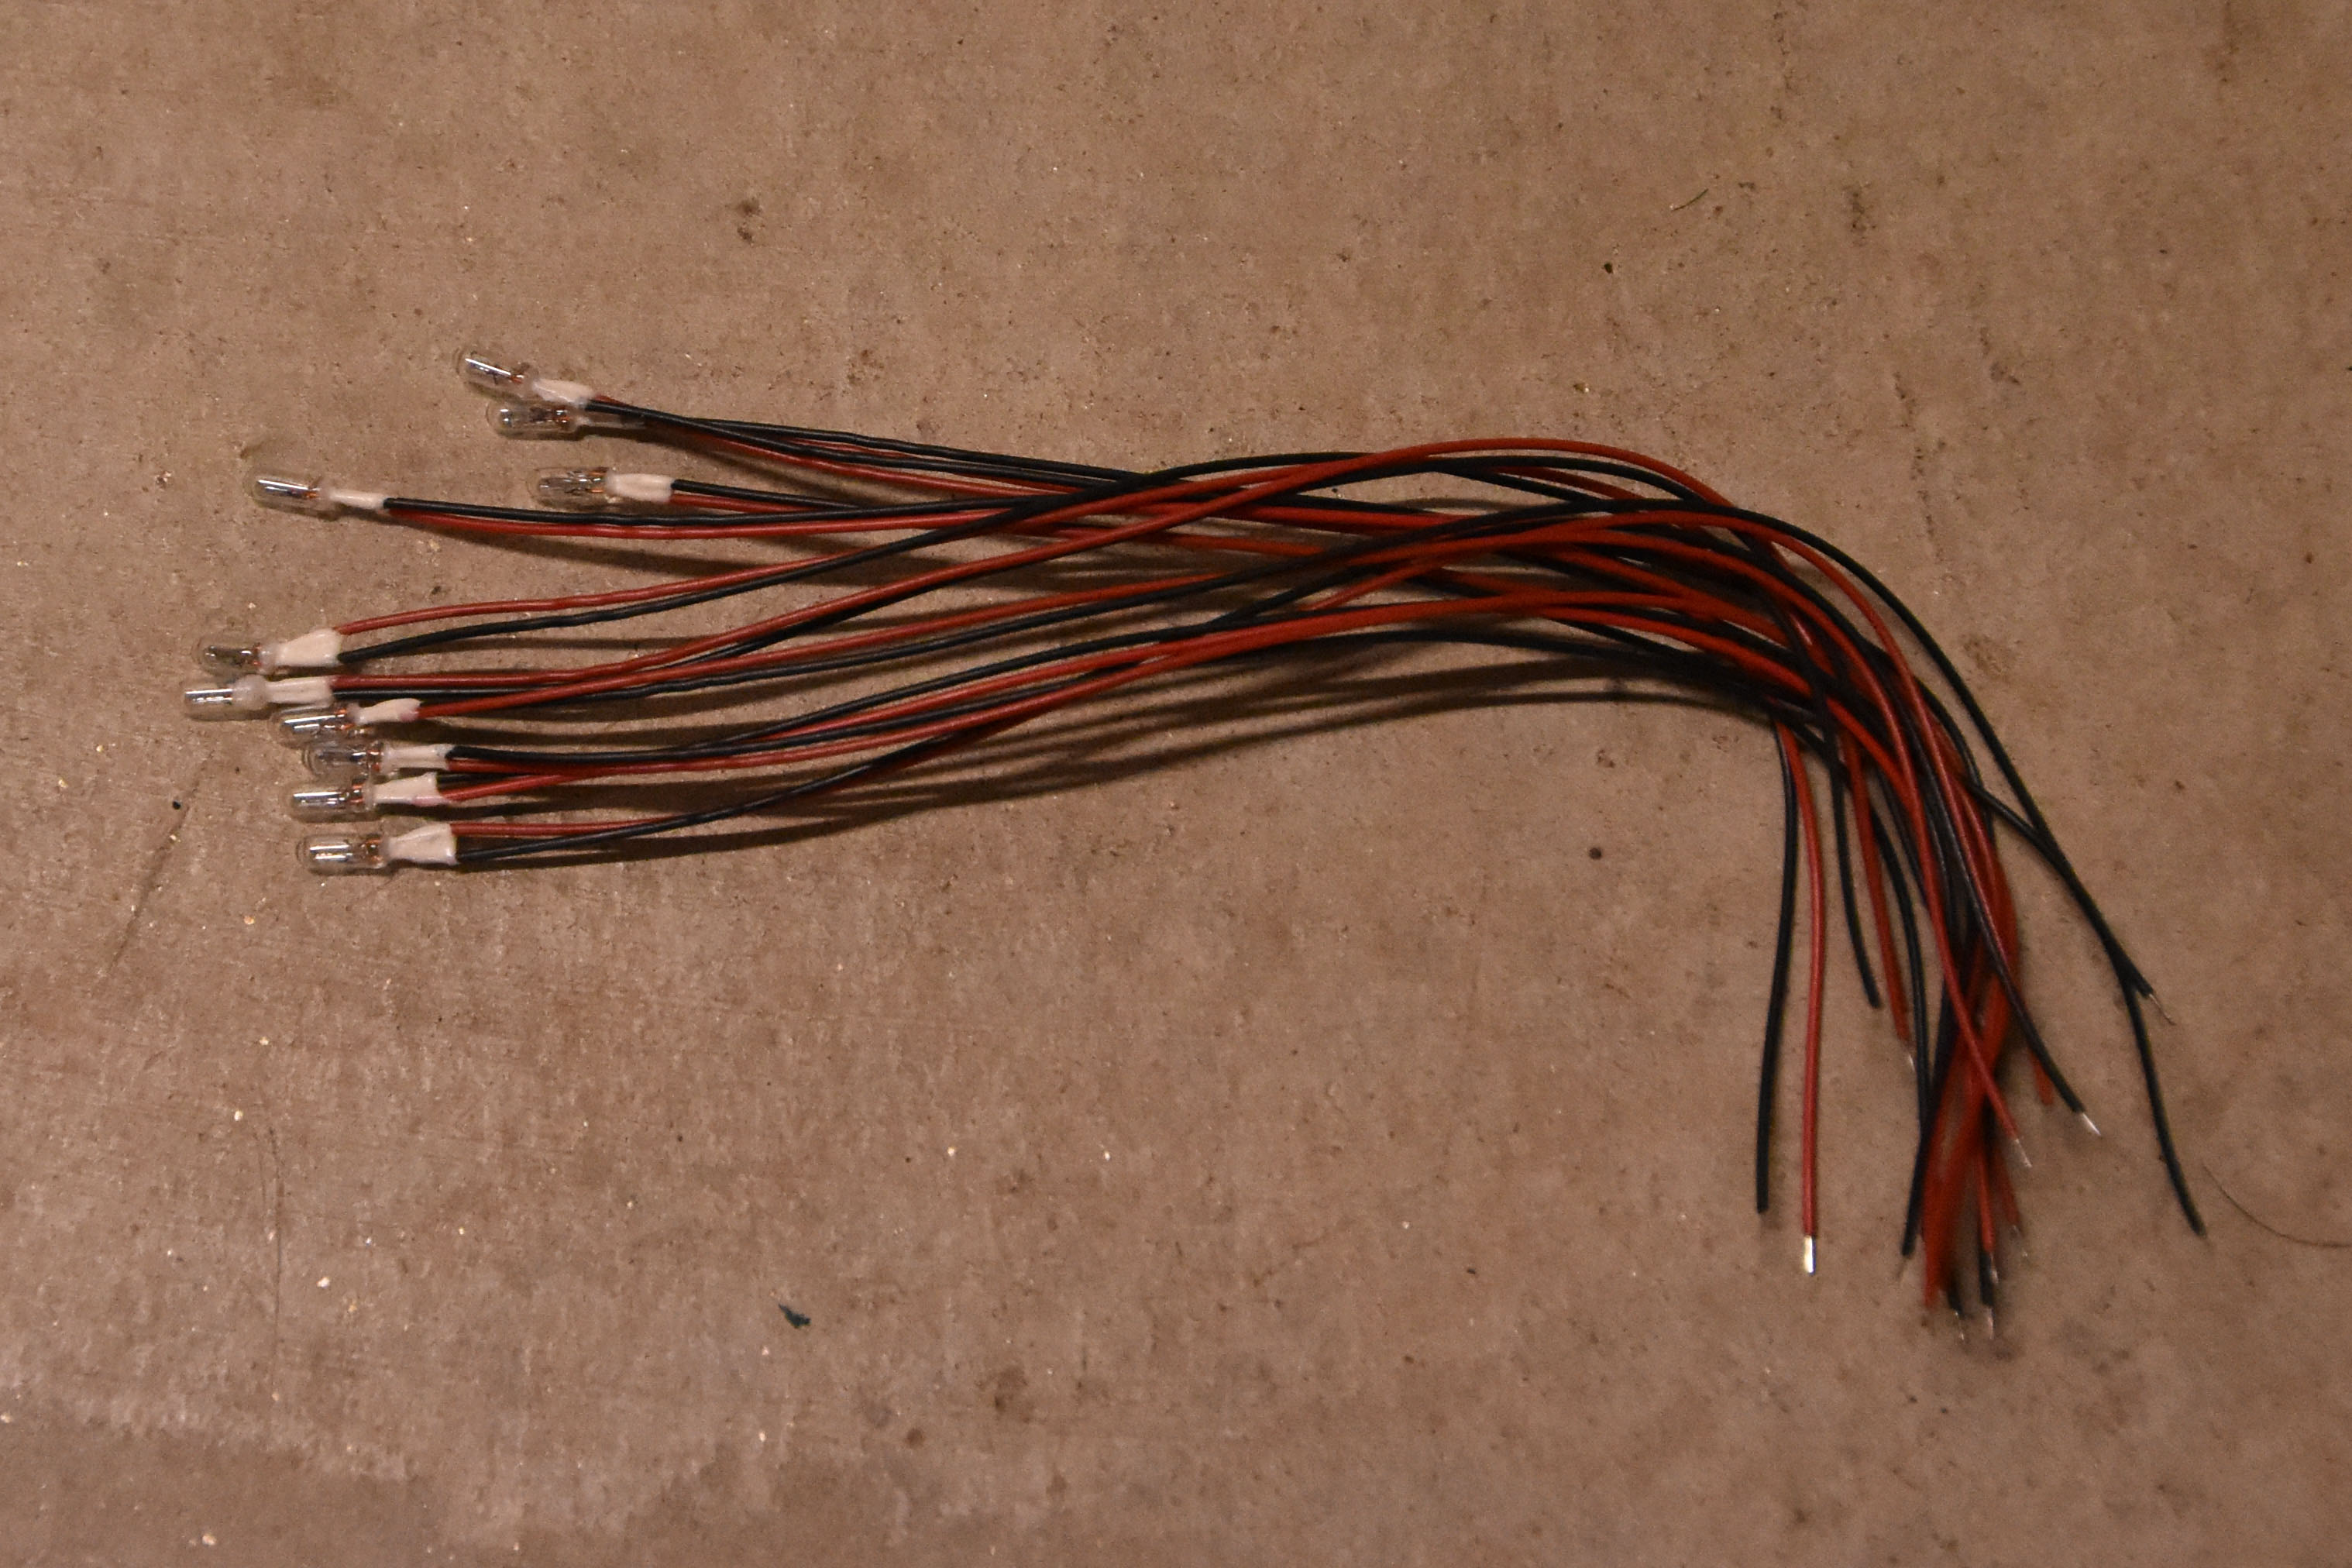
Only problem is: They're smaller than the stock bulbs. One of the reasons I went this route rather than going with LEDs was to maintain a stock fitment. Whoops.
Okay, so, what kind of light do they give off, and what's their power draw?
Well, at least the illumination is the same on both of them, right? What's the current draw?

.092A @12V for the stock bulb. Given that in parallel they were .186 we'd expect the new bulb to be around .094A.

We'll chalk that up to a rounding error. So, the new bulbs pretty much draw the same current as the stock bulb. Safe to say that the bulb will work and won't cause any heat issues or load issues.
The wires are tiny though. I have never tried to solder any wires together of such small gauge before, so I practiced a bit first. I used a 25W iron.
I did the actual piece in-place on the car. Tried to be as careful as possible. Here's the repaired light before heat-shrinking:

To make the light fit snugly into the rubber holder, I shrank three layers of heat shrink tubing around the base of the lamp:

Everything fit back together well. The wires are a little longer now by about two inches. I think the extra length will help prevent damage if I ever get in here again.
So, what did all this excruciating detail that you just patiently wasted your time reading get me?
We'll see if the repair holds. If not, well I do have nine spares. Anyone need one?
I actually think I prefer this versus replacing with LEDs because of that slow glow that appears when you pull the lever, versus the instant-on effect you get from LEDs. Just seems more period-correct and dramatic, like theater lighting. Ooooo.
This is a neat feature but after adding keyless entry I have no need for it  . But, excellent job documenting this, this is a nice, easy project that someone can tackle in an afternoon and it makes the car happy again.
Anyone want to document what LED bulb to get?
Dale
. But, excellent job documenting this, this is a nice, easy project that someone can tackle in an afternoon and it makes the car happy again.Anyone want to document what LED bulb to get?
Dale
Thread Starter
Senior Member
Joined: May 2006
Posts: 269
Likes: 20
From: San Diego, CA
Keyless entry would totally make this feature useless. I am very tempted to do it, but I don't really drive the car enough to bother with that mod I think.
For you keyless entry folks, someone should mod it so that the car plays some kind of audio clip when you pull the handle and it's locked. Something to freak people out. Would be a simple, hilarious hack.
For you keyless entry folks, someone should mod it so that the car plays some kind of audio clip when you pull the handle and it's locked. Something to freak people out.
Would be a simple, hilarious hack.

Joined: Nov 2011
Posts: 842
Likes: 115
From: South Orange County, CA
eslai, what brand/part number of bulb did you use?
I used a Radio Shack "grain of wheat" bulb in my restoration, and I think it was smaller than the bulb in your photo (also, the leads off the bulb were bare very thin wire so they needed to be heatshrink wrapped).
The original leads were broken off my OEM bulb, so I could not compare brightness but I think my keyhole shutter is not quite as bright as yours with the bulb illuminated.
Great write up BTW.
I also replaced mine couple months ago with an LED , My bulb socket was actually cut , so I kinda rigged a bulb at the end and added JB weld to seal it .
Anyways it would be interesting to know the exact LED needed .
Isn't it the same as the ignition light ? Or is it smaller , can't recall.
Anyways it would be interesting to know the exact LED needed .
Isn't it the same as the ignition light ? Or is it smaller , can't recall.
Dale, did you use the JDM factory kit for keyless entry? Or, something custom?
Thread Starter
Senior Member
Joined: May 2006
Posts: 269
Likes: 20
From: San Diego, CA
eslai, what brand/part number of bulb did you use?
I used a Radio Shack "grain of wheat" bulb in my restoration, and I think it was smaller than the bulb in your photo (also, the leads off the bulb were bare very thin wire so they needed to be heatshrink wrapped).
The original leads were broken off my OEM bulb, so I could not compare brightness but I think my keyhole shutter is not quite as bright as yours with the bulb illuminated.
Great write up BTW.
I used a Radio Shack "grain of wheat" bulb in my restoration, and I think it was smaller than the bulb in your photo (also, the leads off the bulb were bare very thin wire so they needed to be heatshrink wrapped).
The original leads were broken off my OEM bulb, so I could not compare brightness but I think my keyhole shutter is not quite as bright as yours with the bulb illuminated.
Great write up BTW.
Description, in case it goes dark:
10 Wheat Bulbs, 12V, 100mA, Clear, Bulb deminsions: 3mm diameter x 8mm length (approximately 1/8" x 5/16") ,7 inch wire leads (each lead is approximately 1mm o.d.), Please allow 2.4mm O.D. for the complete lead to bulb connection., From bulk packaging, not in retail packaging., Choking hazard, not for children on any age, not consumable, this is an electronic item.
Description for that one also:
This is a Set of 3 12-16 Volt 3.2mm Clear Grain of Wheat Light Bulbs
from Model Power.
These Lamp Bulbs are designed for use with Model Powers Lamp Posts.
FEATURES: (3) miniature pre-wired bulbs (clear).
Yellow/brown wire.
INCLUDES: 1- Set of 3 Grain of Wheat Bulbs.
SPECS: Voltage (12-16V) Size (3.2mm)
march8/95sk
BOX DIMENSIONS: 2.50" W. X .13" H. X 3.75" L.
BOX WEIGHT: .02 LBS.
Model Power
Part MDP381
Here's also a that I assume one could buy to replace the stock lighting.
And yeah, most of the time when you find the grain of wheat bulbs they come with those thin wire leads that are meant more for soldering into a PCB rather than any application that is going to see stress. The ones I bought had stranded copper leads soldered on, and then the base of the lamp was plastic coated at the connection there, so a little more solid. With the extra heat shrink collar I gave the bulb to make it fit the rubber mount, combined with the longer wires, I think this will be stronger than the way the stock bulb was set up.
Also, the illumination isn't quite as bright as it looks in the photos/videos I took. I could easily see why someone might want to do an LED instead and frankly, for the cost of the LED option (six bucks for 50!? In multiple colors!?) it could be fun to dick around with.
Constant threat
Joined: Jul 2001
Posts: 4,968
Likes: 39
From: near Wichita, Kansas
Excellent write up! There've been many over the years, but this is one of the best, especially for newbies.
Many, many years ago I replaced my little shutter with a piece I made from a Pringles can lid, lol...and it is still in place today.
Many, many years ago I replaced my little shutter with a piece I made from a Pringles can lid, lol...and it is still in place today.
Thread Starter
Senior Member
Joined: May 2006
Posts: 269
Likes: 20
From: San Diego, CA
Nice job, yeah I saw in another thread that someone had used part of a detergent bottle to make a new shutter!
Hey, so call me unobservant, but I just today noticed that the passenger-side lock is also a plastic shutter as opposed to a metal one. Does that mean that there is supposed to be a light on that side too, or is it really just the driver-side that gets illumination? My passenger-side definitely doesn't light up.
Hey, so call me unobservant, but I just today noticed that the passenger-side lock is also a plastic shutter as opposed to a metal one. Does that mean that there is supposed to be a light on that side too, or is it really just the driver-side that gets illumination? My passenger-side definitely doesn't light up.
Joined: Nov 2011
Posts: 842
Likes: 115
From: South Orange County, CA
Nice job, yeah I saw in another thread that someone had used part of a detergent bottle to make a new shutter!
Hey, so call me unobservant, but I just today noticed that the passenger-side lock is also a plastic shutter as opposed to a metal one. Does that mean that there is supposed to be a light on that side too, or is it really just the driver-side that gets illumination? My passenger-side definitely doesn't light up.
Hey, so call me unobservant, but I just today noticed that the passenger-side lock is also a plastic shutter as opposed to a metal one. Does that mean that there is supposed to be a light on that side too, or is it really just the driver-side that gets illumination? My passenger-side definitely doesn't light up.
Thread Starter
Senior Member
Joined: May 2006
Posts: 269
Likes: 20
From: San Diego, CA
 .
.I got a JDM left-side door actuator to use the motor that attaches to the door latch. Fortunately I got the whole assembly, it required a LOT of work and fiddling to make it happen. It seems like it would be easy but it's not.
I have a Viper Boa keyless entry system, I got it because it's just keyless entry, no alarm or remote start or crap. Also has a second output so you can have a hatch popper, I hooked that up as well.
I put it in about 12 years ago so I don't remember all the fine details, just remember it was a pain!
Dale
Constant threat
Joined: Jul 2001
Posts: 4,968
Likes: 39
From: near Wichita, Kansas
I've got the actuator for a keyless entry system...when I got the car someone had put in an aftermarket alarm/keyless entry that just wasn't working right; it locked me out of my car twice so I said to hell with it and took it all out. Recently I've been thinking about putting another system in...I'll have to check out that Viper Boa system.

