
downpipe to main cat bolts

Thread Starter
Joined: Apr 2003
Posts: 1,342
Likes: 0
From: Temple city, CA
downpipe to main cat bolts
How did you guys crack those two bolts off! These bitches are staying on tight *** hell. I already spray them with wd40 and soaked them for a day nothing seems to be doing the trick.

Senior Member
Joined: Jun 2004
Posts: 261
Likes: 0
From: Johnstown, PA
Bolts
I used Slick-50 Penetrating oil, sprayed it real well and let it sit, repeated a few times, then used a breaker bar with a piece of pipe on the end. Came off fairly easy with some muscle. Eat a bowl of wheaties before your next attempt, it may help.

Full Member
Joined: Jul 2003
Posts: 68
Likes: 1
From: New York, N.Y.
Everybody says they have trouble with these. I have a 94 with factory cat and precat. Clean those bolts off real good and you might find what I did. They were tack welded. I cut the weld with a small cut-off wheel and everything came apart normally. It had to have come from the factory like that because when i started the downpie install eveything was stock
2/4 wheel cornering fiend
Joined: Nov 2002
Posts: 3,090
Likes: 3
From: Pasadena, CA
Originally Posted by ManGaZeRo
How did you guys crack those two bolts off! These bitches are staying on tight *** hell. I already spray them with wd40 and soaked them for a day nothing seems to be doing the trick.
Joined: Oct 2001
Posts: 4,772
Likes: 2
From: My 350Z Roadster kicks my RX7's butt
Aftermarket studs are longer and the center bulge is bigger which makes getting them off harder. I soaked mine every day for a week. Since then i've replace with original OEM studs and nuts for a perfect fit. One trick I just used was on the bottom two studs, I used the shorter exhaust manifold nuts which makes getting a wrench ont here so much easier. Even just replacing the one bottom corner one makes a difference, if you're not comfortable replacing both with shoter nuts.

don't race, don't need to
Joined: Oct 2002
Posts: 1,292
Likes: 1
From: Tri-Cities, WA
Ummm.. he was talking about the DP to cat interface (two bolts), not the turbo to DP interface. Read that one three times before it made sense... 
PB blaster is your friend. So is a propane torch (heat the nut, NOT the stud. The nut expands, comes off easier).
PB blaster is your friend. So is a propane torch (heat the nut, NOT the stud. The nut expands, comes off easier).
Trending Topics
Joined: Oct 2001
Posts: 4,772
Likes: 2
From: My 350Z Roadster kicks my RX7's butt
^ oh whoops, yeah I threw that in but didn't seperate it. My DP to Cat' nuts were welded on with rust and I soaked those for days to. There's not enough room for a long enough breaker bar with just floor jacks. If a friend of yours has an impact gun, then zap it loose and then slightly tighten it to get home. 
Thread Starter
Joined: Apr 2003
Posts: 1,342
Likes: 0
From: Temple city, CA
Ok, took off the dp. Now having problem putting the new one on. Did you guys remove all you studs off the exhaust manifold when you guys put it on? I managed to take out 2 of the 4 when removing the bolt, now there is just 2 studs hanging there.
boost deprived
Joined: May 2002
Posts: 152
Likes: 0
From: sioux city, IA
which two studs are left? if one of them is the bottom/rear stud (closest to the ground), then you have to get the DP on there but leave a gap between it and the turbo. you have to get that nut started before getting the other three on. make sense?

Joined: Oct 2001
Posts: 4,772
Likes: 2
From: My 350Z Roadster kicks my RX7's butt
Sounds like you have aftermarket studs. Get new OEM ones and make sure the part # starts with a "N" and not a "9" which is generic. You can reuse the nuts if you have to be cheap. The bottom/left one is the one that would help if you replaced it with the exhaust manifold shorter nut.
5yr member, joined 2001
Joined: Dec 2001
Posts: 908
Likes: 1
From: Marco Island, FL
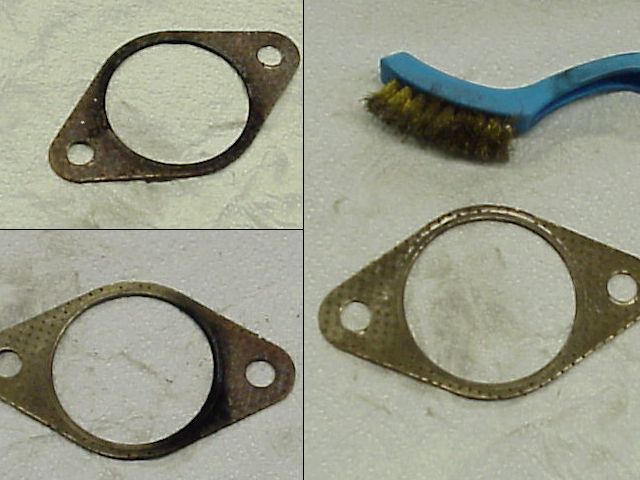
Two of my studs came out with the nuts from my turbo manifold. I just put them back in like they were bolts. No need to buy new parts if no studs were broken. Actually, the first few threads were bent on one of the studs that came out, and I was able to re-thread it with the appropriate die (like from a tap and die set for making machine screw holes). PB blaster was my main weapon. Also, be sure to brush your gaskets before you put them in, as your O2 sensor uses the exhaust piping as a ground.
Thread Starter
Joined: Apr 2003
Posts: 1,342
Likes: 0
From: Temple city, CA
well now with the spiffy dp attached to exhaust manifold I find there is now a est. 2 inch gap between the main cat and the dp....
And the lower left stud on the exhaust manifold is so long there isn't enough space between that and the dp to screw on a bolt... Could I use a dremel and sand the stud down and put it on?
And the lower left stud on the exhaust manifold is so long there isn't enough space between that and the dp to screw on a bolt... Could I use a dremel and sand the stud down and put it on?
Last edited by ManGaZeRo; Aug 17, 2004 at 12:55 AM.
5yr member, joined 2001
Joined: Dec 2001
Posts: 908
Likes: 1
From: Marco Island, FL
Originally Posted by ManGaZeRo
well now with the spiffy dp attached to exhaust manifold I find there is now a est. 2 inch gap between the main cat and the dp....
Originally Posted by ManGaZeRo
And the lower left stud on the exhaust manifold is so long there isn't enough space between that and the dp to screw on a bolt... Could I use a dremel and sand the stud down and put it on?


Mangazero, if you sand the stud down, it will make the threads more difficult to start, I've ran into that problem before. You're probably better off either buying the shorter stud mentioned earlier in this thread, or using socket head (allen) stainless bolts- M10x1.5mm , approx 20mm long (important no longer than 25mm).
more info here: https://www.rx7club.com/3rd-generation-specific-1993-2002-16/downpipe-nut-201768/
-s-
more info here: https://www.rx7club.com/3rd-generation-specific-1993-2002-16/downpipe-nut-201768/
-s-
Thread Starter
Joined: Apr 2003
Posts: 1,342
Likes: 0
From: Temple city, CA
Can you use washers to give you enough room so that the nut doesn't bottom out? Are you sure the stud is seated all the way in? Do I have the situation backwards?[/QUOTE]
Umm the stud is extending out too much rather then being short. When I try to attach the nut on it, its getting kinked between the stud and dp.
When I unbolted all the studs when taking out the stock dp only 2 of the studs came out. So I can't really replace them with shorter studs seeing that I can't take them out.

5yr member, joined 2001
Joined: Dec 2001
Posts: 908
Likes: 1
From: Marco Island, FL
Originally Posted by ManGaZeRo
Umm the stud is extending out too much rather then being short. When I try to attach the nut on it, its getting kinked between the stud and dp.
When I unbolted all the studs when taking out the stock dp only 2 of the studs came out. So I can't really replace them with shorter studs seeing that I can't take them out.
When I unbolted all the studs when taking out the stock dp only 2 of the studs came out. So I can't really replace them with shorter studs seeing that I can't take them out.
Thread Starter
Joined: Apr 2003
Posts: 1,342
Likes: 0
From: Temple city, CA
Ok I know you guys said pull the main cat and dp together to complete the little gap.. But this is one hell of a gap...
http://img.photobucket.com/albums/v4...o/DSC00214.jpg
http://img.photobucket.com/albums/v4...o/DSC00214.jpg
Joined: Oct 2001
Posts: 4,772
Likes: 2
From: My 350Z Roadster kicks my RX7's butt
Get a 2nd person to help you. Push the exhaust towards the front of the car. Since bot the cat and exhaust are on rubber donuts connected to the hangers, you have several inches of play. Whether they push with their foot on the tail pipe or underneath with both hands. You need just enough to start the nut on the threads and then the wrench will do the rest.
5yr member, joined 2001
Joined: Dec 2001
Posts: 908
Likes: 1
From: Marco Island, FL
Originally Posted by ManGaZeRo
Ok I know you guys said pull the main cat and dp together to complete the little gap.. But this is one hell of a gap...
http://img.photobucket.com/albums/v4...o/DSC00214.jpg
http://img.photobucket.com/albums/v4...o/DSC00214.jpg