
DIY: Undertray

Thread Starter

Joined: May 2008
Posts: 4,389
Likes: 965
From: Stamford, CT
DIY: Undertray
Hey Everybody, I just tackled a project that I've been wanting to do for a long time. I have a C-west front bumper and its about 4 inches longer than the stocker, so the front edge of the stock undertray wouldn't reach the bottom lip. You can purchase a longer undertray from Shine, but I figured I could just modify the stock one. Next I plan to seal up the sides and also make some ducts for the oil coolers, but i'll save that for another weekend.
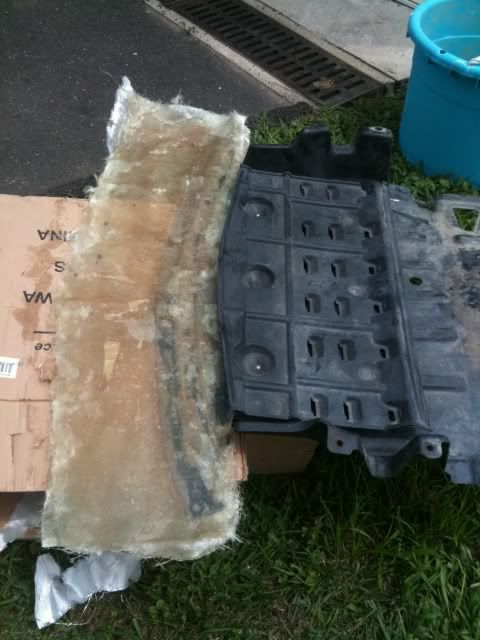
Stock undertray, all clean and ready for modding:
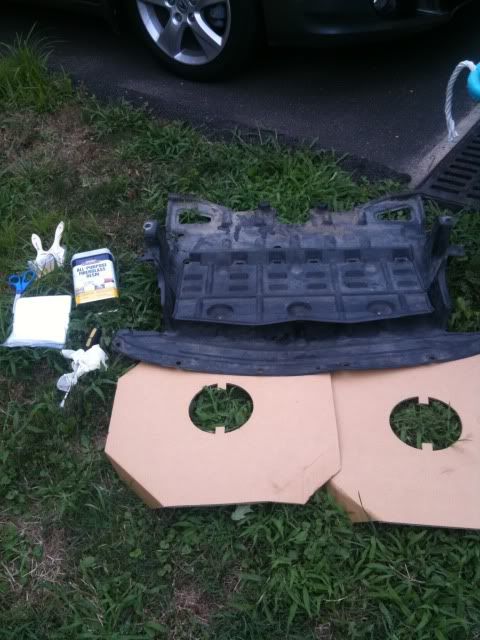
Cut fiberglass to fit (I used fiberglass cloth), make sure you have plenty of overlap onto the tray for sturdiness:
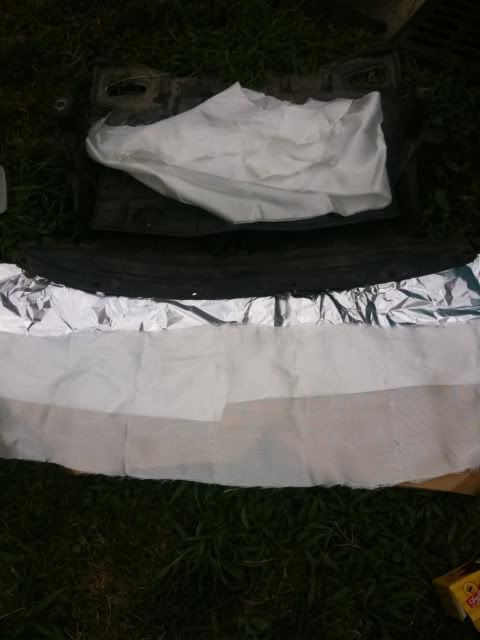
Coat with resin, add fiberglass, brush on more resin until fiberglass is saturated, here it is after the first layer of fiberglass has hardened:
Here it is after 3 layers of fiberglass cloth, and then a final layer of fiberglass mat (this is tougher and used for boat repairs), notice I applied the layers on both sides of the undertray, so the front 6 inches of the undertray is sandwhiched between the fiberglass.
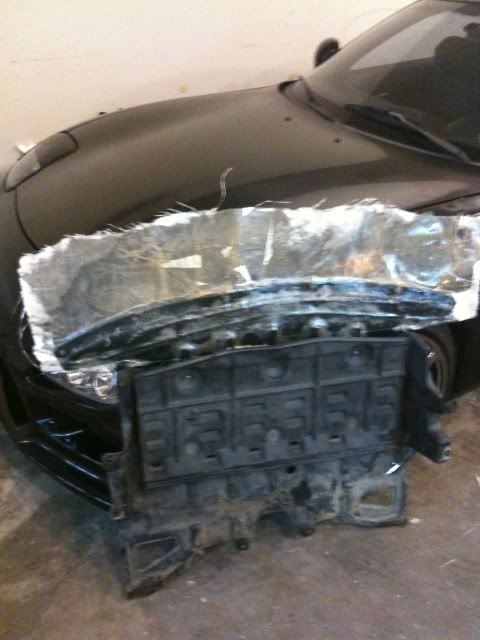
mounted and ready to be marked for trimming. Make sure you bolt up the back of it so you get it in right spot:

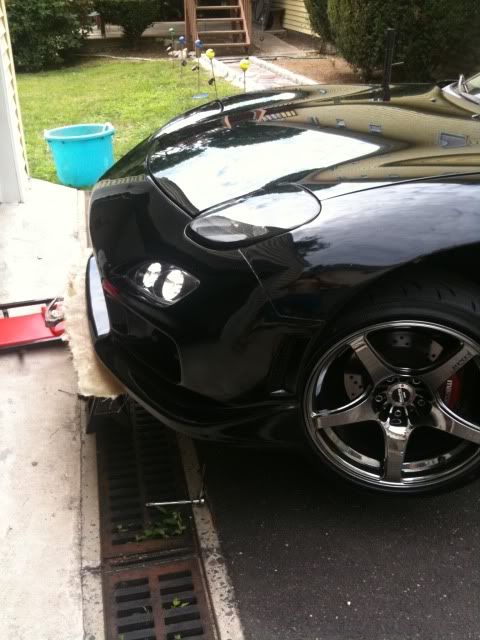
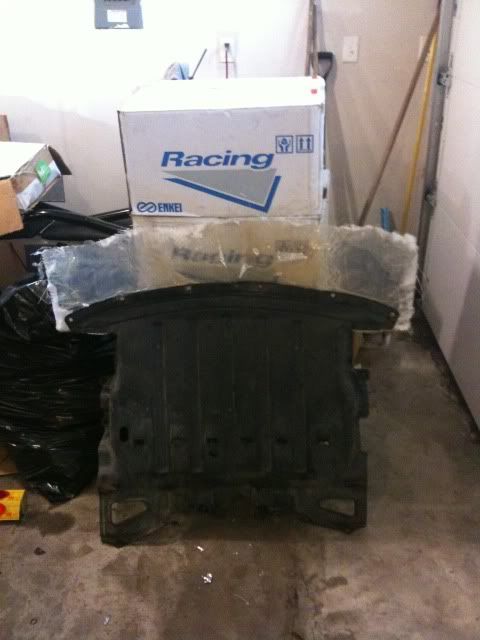
Trimmed (the notches are there because i have some support bars that hold the bottom of the bumper steady so it doesnt flap at high speeds):

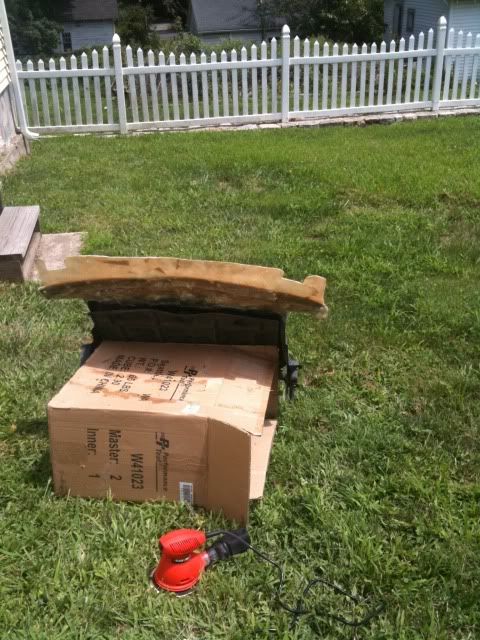
Sanded and Painted (I didn't use bondo to give it a great finish, so you can still see the strands of fiberglass, i did this because i wasn't sure how much flex it will see and I think the bondo would crack right away, hopefully the fiberglass holds up)


I took it for a quick spin, and it seems like its pretty sturdy. I haven't taken it on the highway yet so I'm not sure if it will improve the temps at all. I've gone all summer without a problem, so I'm sure it won't make a huge difference under normal driving conditions, but now maybe its almost ready to go to the track. It's also nice not being able to see the ground through the big opening in the front end, now I just have to do the brake ducts.
This took about 3 hours of work (not counting dry time), and it was extremely easy, I've worked with fiberglass before, but this would be a great project for the first timer.
Stock undertray, all clean and ready for modding:
Cut fiberglass to fit (I used fiberglass cloth), make sure you have plenty of overlap onto the tray for sturdiness:
Coat with resin, add fiberglass, brush on more resin until fiberglass is saturated, here it is after the first layer of fiberglass has hardened:
Here it is after 3 layers of fiberglass cloth, and then a final layer of fiberglass mat (this is tougher and used for boat repairs), notice I applied the layers on both sides of the undertray, so the front 6 inches of the undertray is sandwhiched between the fiberglass.
mounted and ready to be marked for trimming. Make sure you bolt up the back of it so you get it in right spot:
Trimmed (the notches are there because i have some support bars that hold the bottom of the bumper steady so it doesnt flap at high speeds):
Sanded and Painted (I didn't use bondo to give it a great finish, so you can still see the strands of fiberglass, i did this because i wasn't sure how much flex it will see and I think the bondo would crack right away, hopefully the fiberglass holds up)
I took it for a quick spin, and it seems like its pretty sturdy. I haven't taken it on the highway yet so I'm not sure if it will improve the temps at all. I've gone all summer without a problem, so I'm sure it won't make a huge difference under normal driving conditions, but now maybe its almost ready to go to the track. It's also nice not being able to see the ground through the big opening in the front end, now I just have to do the brake ducts.
This took about 3 hours of work (not counting dry time), and it was extremely easy, I've worked with fiberglass before, but this would be a great project for the first timer.
cool stuff! i think i see holes on the front, so im assuming u bolt it to the front bumper? i was gonna do something similar but got lazy to hack the stock one to fit and just made ducting with aluminum sheets from home depot.....
fg projects are always cool but messy and time consuming.. any reason why u didnt try aluminum sheets/rivets?
fg projects are always cool but messy and time consuming.. any reason why u didnt try aluminum sheets/rivets?
Thread Starter
Joined: May 2008
Posts: 4,389
Likes: 965
From: Stamford, CT
There are 3 holes in the front, it actual sits in a nook that the bumper has under it, then i use those plastic push pins that hold the fender liners in to secure it to the bottom of the bumber. Since it sits below the opening but above the bottom lip of the bumper its in there pretty good.
I didn't use aluminum because I had some fiberglass lying around and I wanted to practice for a different project. I've got a spoiler and a diffuser in the works.
I didn't use aluminum because I had some fiberglass lying around and I wanted to practice for a different project. I've got a spoiler and a diffuser in the works.


I like how you retain the function of the stock under tray with yours. I don't have the patience for fiberglass. lol. At some point I am going to make my own out of aluminum. I would just buy the Shine one, but it's hard to justify hundreds of dollars for just a big flat sheet of carbon.
Thread Starter
Joined: May 2008
Posts: 4,389
Likes: 965
From: Stamford, CT
I'm sure you could do it, it really only took a few hours. Working with fiberglass cloth is much easier than fiberglass mat.
But a thin piece of aluminum and some rivets will work just as good, or you can always buy a flat piece of carbon fiber and cut that too.
But a thin piece of aluminum and some rivets will work just as good, or you can always buy a flat piece of carbon fiber and cut that too.

Trending Topics
OP - This turned out really well.
Thread Starter
Joined: May 2008
Posts: 4,389
Likes: 965
From: Stamford, CT
I don't think I'll have a problem with it bonding. I prepped the undertray pretty well first (sanded & cleaned), then I used a ton of resin and sandwiched the plastic undertray between many layers of fiberglass & resin.
For interior pieces you'd only be coating one side with the fiberglass and using fewer layers, and also less resin (I really slopped it on). So I can see why there may be trouble when bonding it to interior pieces, although, the resin is so sticky that I find it hard to believe that it would ever come apart if you prepped the surfaces correctly.
For interior pieces you'd only be coating one side with the fiberglass and using fewer layers, and also less resin (I really slopped it on). So I can see why there may be trouble when bonding it to interior pieces, although, the resin is so sticky that I find it hard to believe that it would ever come apart if you prepped the surfaces correctly.
That is what I originally thought too but kept finding things to say it does not bond well.. Thanks, I wanted another opinion with recent usage of fb on plastics. I may give it a go anyways on the project I was researching for anyways. Worst case is it fails and I redo it.