
DIY Power window maintenance!!


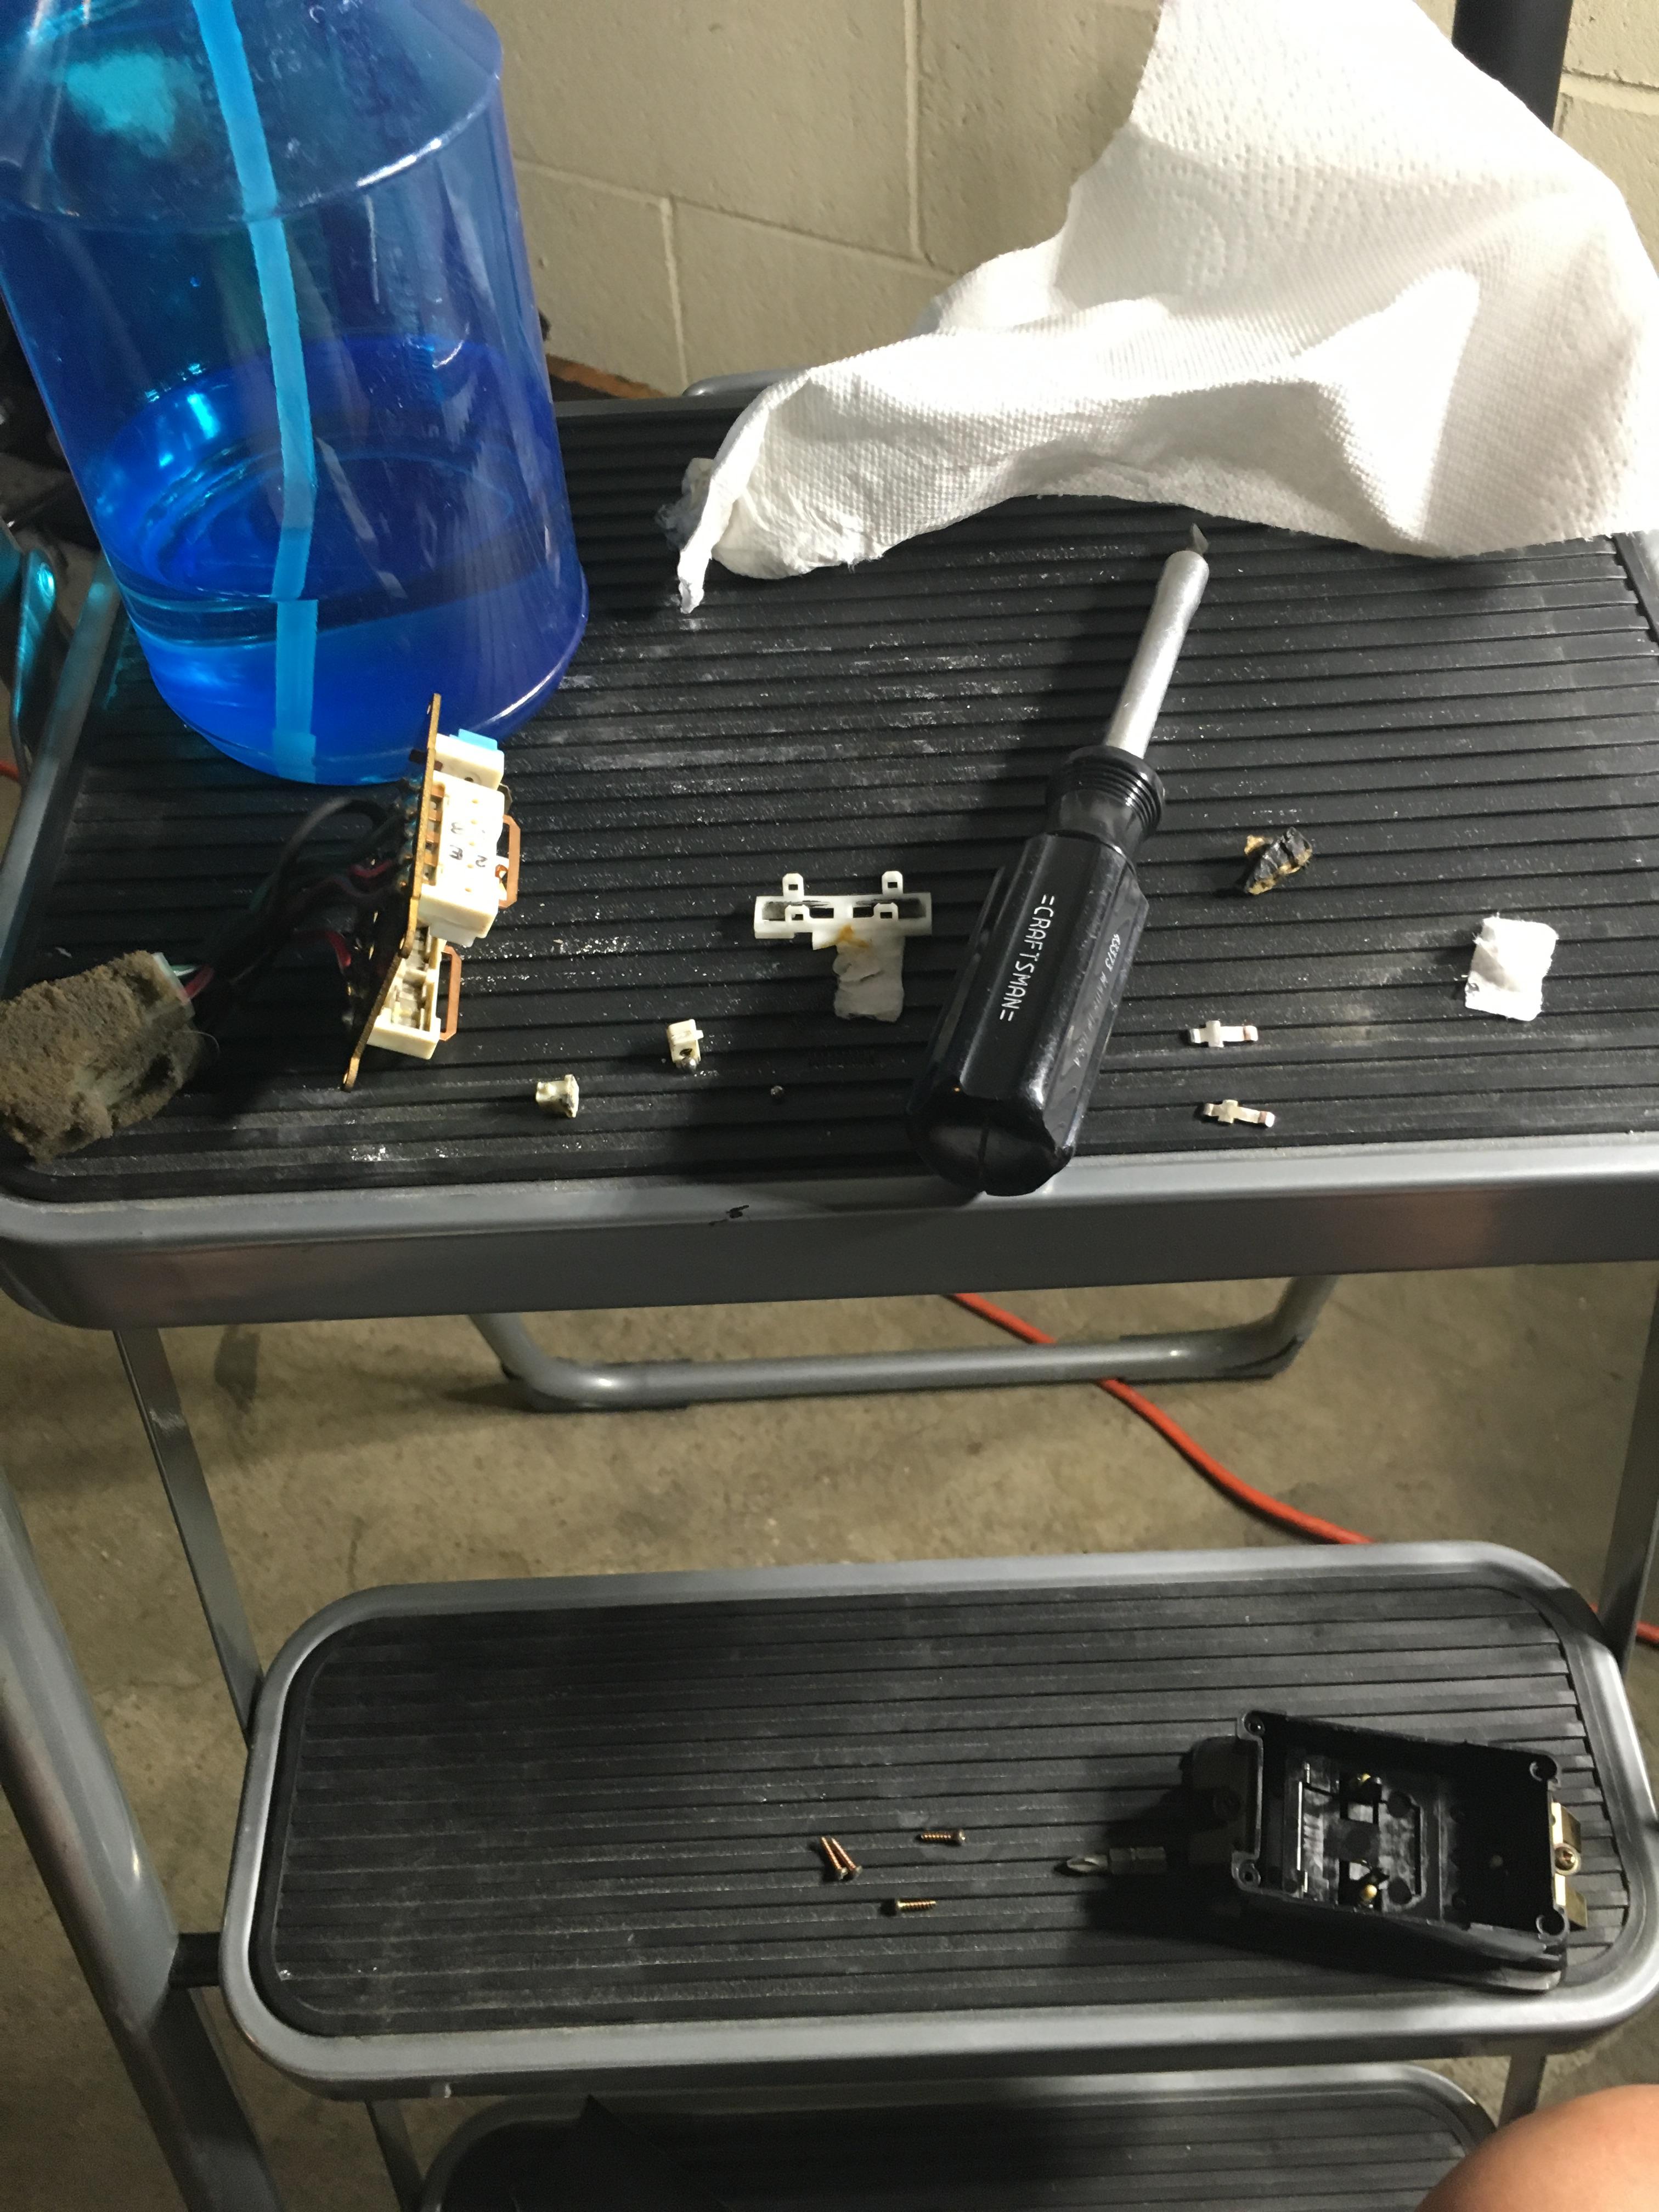
resurrection! I took my switch apart to sand all the connectors and ended up having 2 of the springs shoot off into oblivion.
I wanted to check if anybody knew of anywhere I might be able to pick up those tiny little springs before I bite the bullet and buy a new switch
I wanted to check if anybody knew of anywhere I might be able to pick up those tiny little springs before I bite the bullet and buy a new switch

you could probably check the part numbers online to see if they do, but as far as I know and recall, they don't sell it separarely. You'll have to buy the entire unit. This is based on my assumption that by "switch", you're referring to the window switch on the driver's side door. You could get the OE replacement aftermarket switch. Just look up RX7 FD window switch on eBay and you'll find a couple of replica switches at a reduced cost of up to 30-50% cheaper. Alternatively, I guess you could buy a used one to take parts from.
hope this helps and good luck!
thanks man! though I'd come back and post a solution - I was about to go to a electronics hobbyist store to see what they had when my coworker mentioned that the springs looked about the same size as the ones found in pens.
I spent about 20 min disassembling pens until I found 2 that worked, slapped everything together yesterday and it's all working.
I spent about 20 min disassembling pens until I found 2 that worked, slapped everything together yesterday and it's all working.
Thanks for the update!
Oh, and as a related side note, I've been scouring 7club and online but can't find any information... for some reason, prior to my passenger switch breaking, my passenger window would roll up and down slowly when controlled by the switch on the driver's side. However, what makes the situation funky is that the window works fine when controlled by the passenger side switch! Does this mean the driver side window switch is a goner? Or, is it that I need a new passenger window motor? I've already lubed up the motors before but the problem remains. I also bought a replacement but haven't installed it yet.
Oh, and as a related side note, I've been scouring 7club and online but can't find any information... for some reason, prior to my passenger switch breaking, my passenger window would roll up and down slowly when controlled by the switch on the driver's side. However, what makes the situation funky is that the window works fine when controlled by the passenger side switch! Does this mean the driver side window switch is a goner? Or, is it that I need a new passenger window motor? I've already lubed up the motors before but the problem remains. I also bought a replacement but haven't installed it yet.
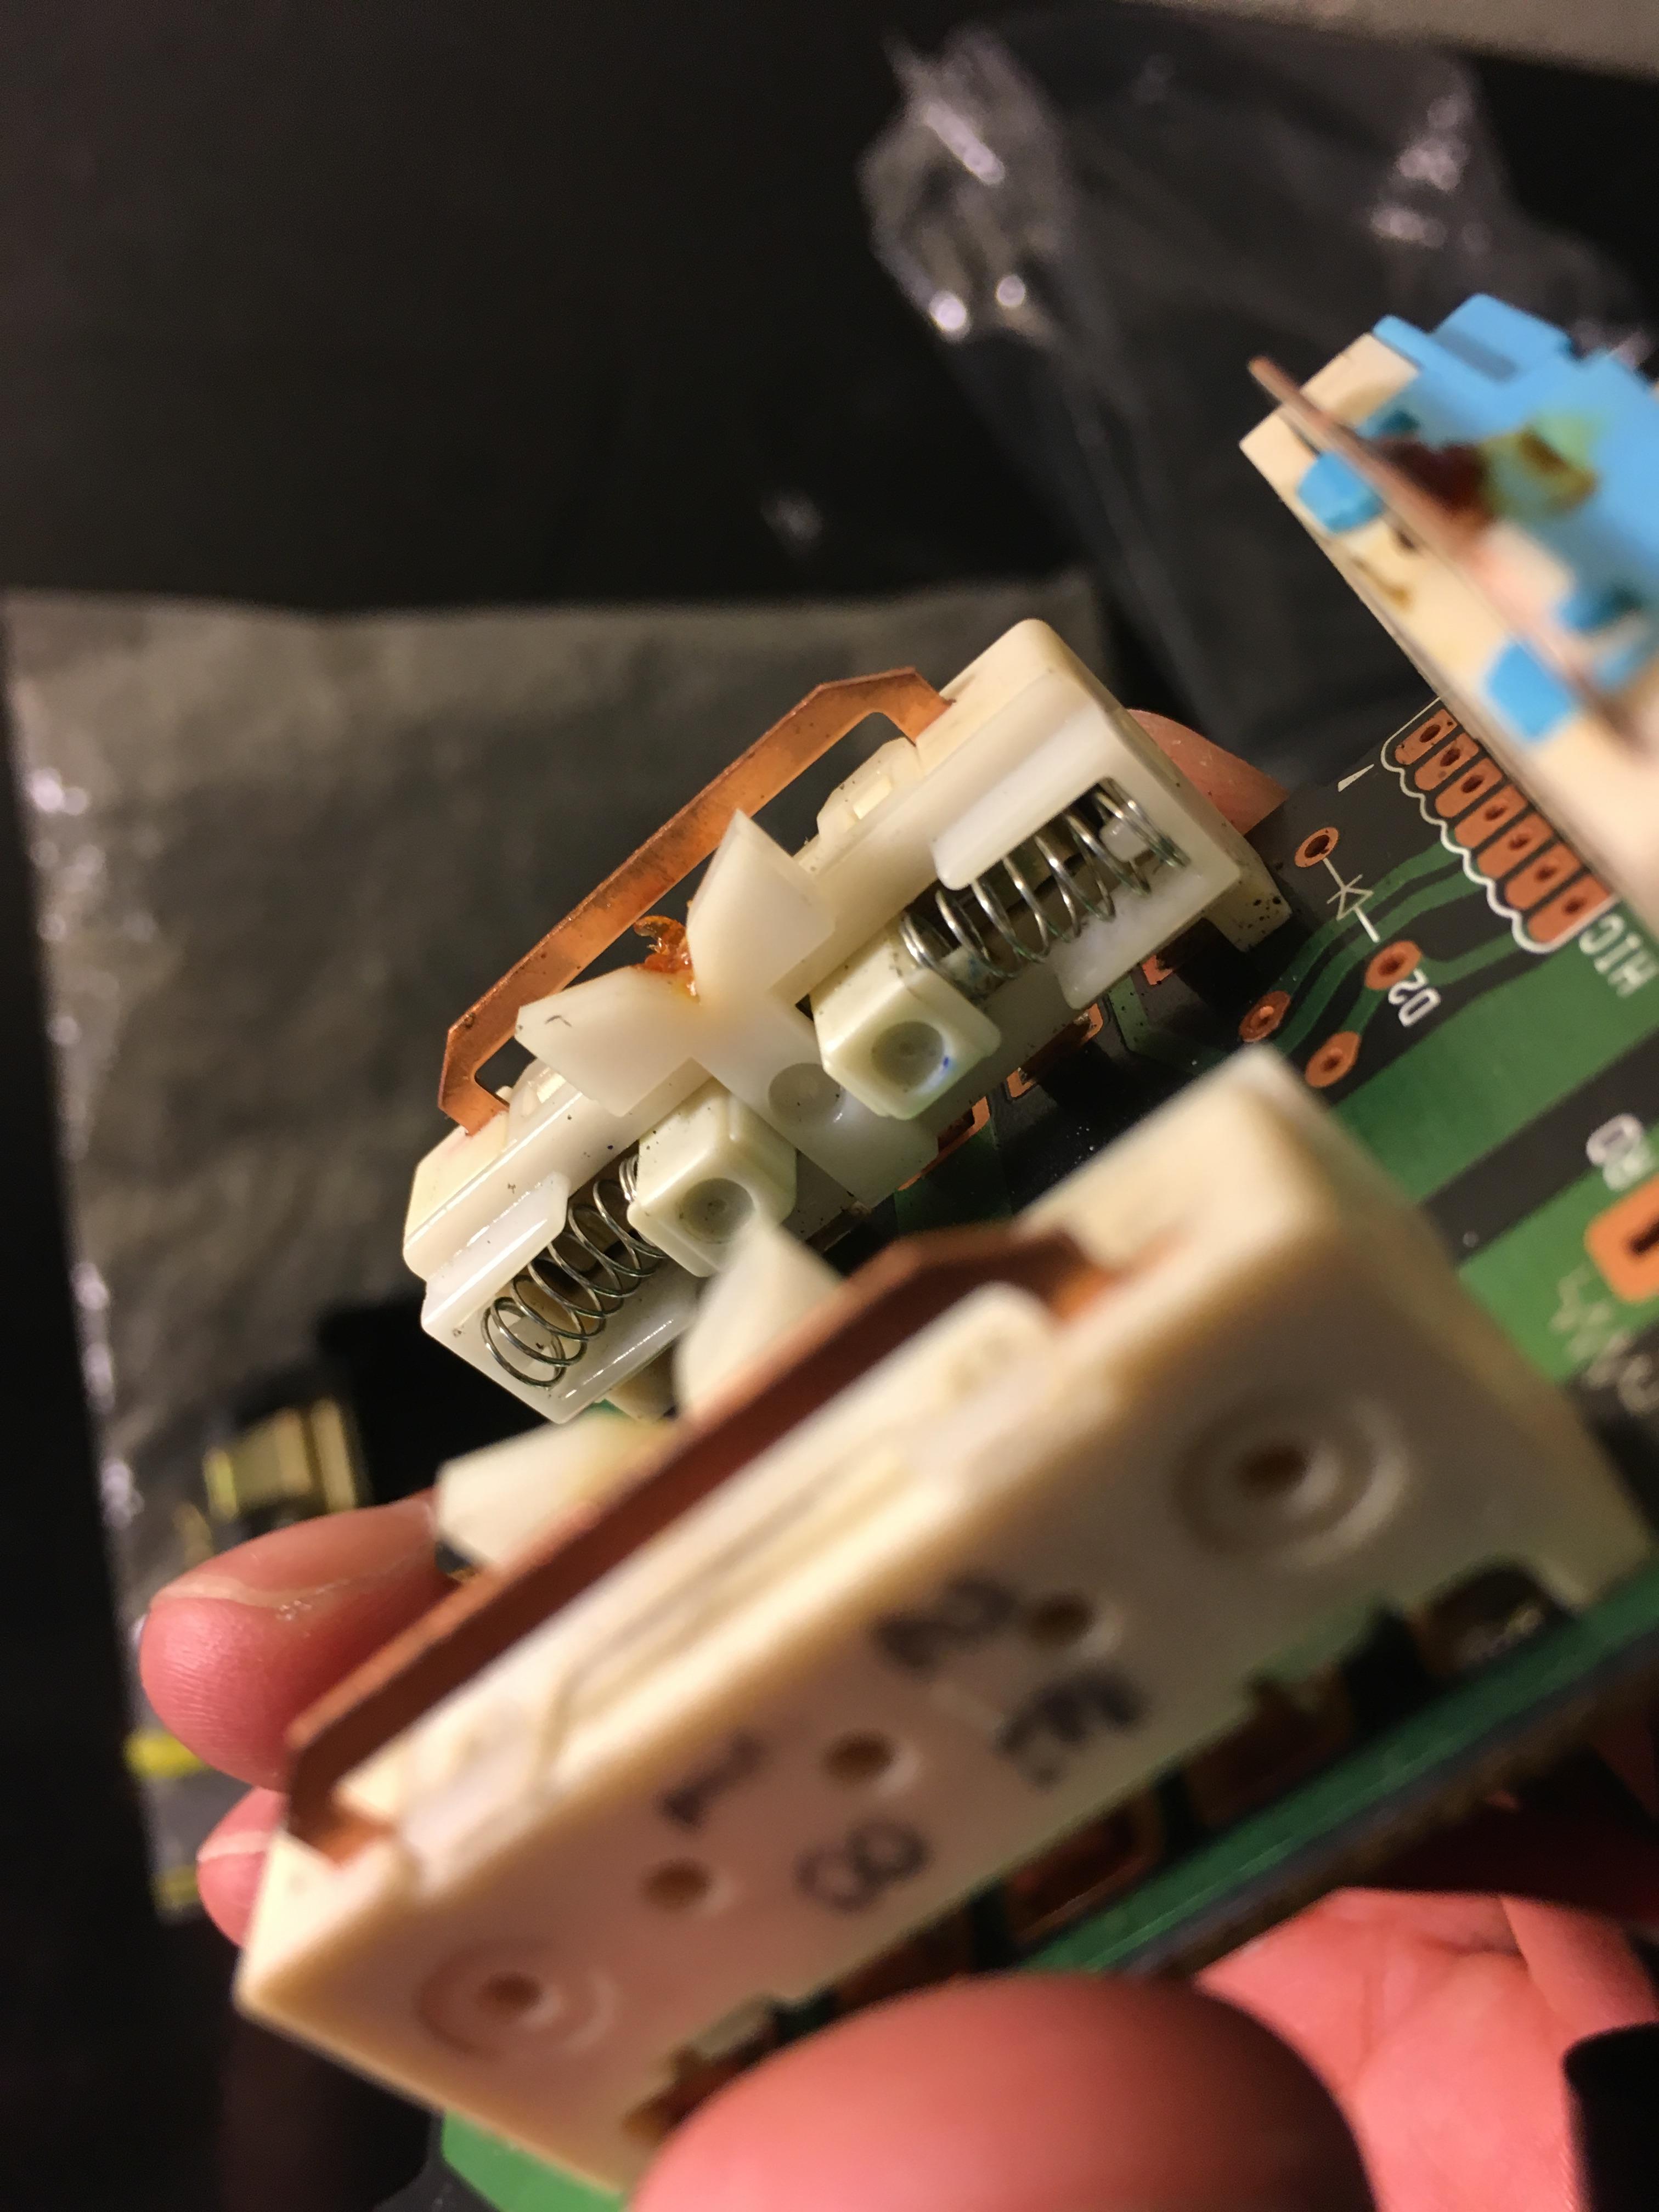
In the pic below, you can see the DS and PS mechanism. if you pop off the plastic "skeleton / holder" thing, all the parts will immediately fall out.
I highly recommend laying out a pad or cloth in a clean, well lit area so it'll catch everything that comes out. Also, do 1 side at a time, so you can refer to the assembled side to figure out how it's supposed to look.
Here's what the parts shake out to be:
- 2 springs
- 1 plastic skeleton thing that holds everything together
- 2 plastic cube sliders that push the actual copper connectors together (each one of these has a spring inside, but those shouldn't separate from the cubes)
- 2 ball bearings that are on the backside of the cubes that make direct contact with the copper connectors (absolutely do not lose these, I have no clue where to even begin to look for replacements)
- 2 copper arms
After everything is apart, I sanded down the copper arms and the side on the circuit board that the arms touch. You'll see all the gunk that needs to be cleaned off. It's really tight on the circuit board side, so you might need to use a chopstick or skinny eraser wrapped in sandpaper to get into the little valley.
Notes: when I popped everything apart, I thought I lost one of the ball bearings. I spent about 15 min crawling around my garage until I gave up, but it turns out it had wedged itself into one of the crevasses of the circuit board.
Last edited by stu2211; Aug 27, 2017 at 12:39 PM.
When you bought a new DS windows switch, did you get it new new, or used off the forum? I have the same problem, what fixed it was cleaning the connections out of my 24 year old switch. They designed the switch in a way where it directly completes the circuit and provides power for the windows to go up or down, so after years of wear and gunk, the connection isn't great anymore.
In the pic below, you can see the DS and PS mechanism. if you pop off the plastic "skeleton / holder" thing, all the parts will immediately fall out.
I highly recommend laying out a pad or cloth in a clean, well lit area so it'll catch everything that comes out. Also, do 1 side at a time, so you can refer to the assembled side to figure out how it's supposed to look.
Here's what the parts shake out to be:
- 2 springs
- 1 plastic skeleton thing that holds everything together
- 2 plastic cube sliders that push the actual copper connectors together (each one of these has a spring inside, but those shouldn't separate from the cubes)
- 2 ball bearings that are on the backside of the cubes that make direct contact with the copper connectors (absolutely do not lose these, I have no clue where to even begin to look for replacements)
- 2 copper arms
After everything is apart, I sanded down the copper arms and the side on the circuit board that the arms touch. You'll see all the gunk that needs to be cleaned off. It's really tight on the circuit board side, so you might need to use a chopstick or skinny eraser wrapped in sandpaper to get into the little valley.
Notes: when I popped everything apart, I thought I lost one of the ball bearings. I spent about 15 min crawling around my garage until I gave up, but it turns out it had wedged itself into one of the crevasses of the circuit board.
Just bumping this old thread to say THANKS to Trey for creating it and posting the info up. Did mine the first time last weekend after owning my FD for more than 17 years. The results are nothing short of amazing. If you haven't tried this, give it a shot. Easy to do and drastically improves your window cranking speed.
Thx again!
Thx again!
Thread Starter
Joined: Apr 2002
Posts: 6,719
Likes: 26
From: Midland Texas
Just bumping this old thread to say THANKS to Trey for creating it and posting the info up. Did mine the first time last weekend after owning my FD for more than 17 years. The results are nothing short of amazing. If you haven't tried this, give it a shot. Easy to do and drastically improves your window cranking speed.
Thx again!
Thx again!

Full Member
Joined: Feb 2015
Posts: 74
Likes: 11
From: Vancouver, Canada
It works!
I was also experiencing slow window speeds, although my door was apart for a different reason. I decided to follow the write up since all the hard work was pretty much done and what do you know? Windows work like new again. Now most of you probably wouldn�t consider this a �performance mod�, but with illegally tinted windows and cops coming up beside you, I might beg to differ 😂
Senior Member


Joined: Dec 2002
Posts: 336
Likes: 2
From: Redmond WA
Slow window is not my problem. Apparently my passenger side window motor has died. Mazda has no replacement parts, according to the dealer. A motor bought from a salvage yard was also defective/ not responsive. So, my question is whether anybody else has found a solution to this motor problem. Option 0: is there another thread about this? Option 1: every car in the last couple decades has electric windows; would any other motor/regulator work in a 93 Rx7? Option 2: Does anybody know a source of new/rebuilt or working Rx7 window motors? Option 3: Does anybody know what is failing on these motors and know a way they can be repaired? Option 4: No, I do not want to McGuiver up a hand crank to bypass the problem. Option 5: Duct tape closing the 1 inch gap, but that is not allowing opening and closing the window.
Option 6. Call Ray Crowe. He can probably tell you what Mazda replacement part will work from another car.
You will have to do a search for his phone number. I dont have it.
You will have to do a search for his phone number. I dont have it.
 ). Contact Fritz Flynn via PM and hit him up for a used one. I'm sure he has several on hand!

Joined: Aug 2004
Posts: 4,786
Likes: 145
From: Colorado Springs, CO
I just did this cleaning and re-lubing today. It helped the driver side but the passenger side was still slow rolling up. They're both pretty quick rolling down but the passenger side only rolled up quick when I wired in a power converter and bumped it up to 18v. The glass on both sides rocks back and forth a good bit since there is excess space between the glass and the track on both sides, but I don't see a way to fix that. And I think the passenger side has a voltage issue because it seems to be dropping to 9v or so while rolling up.

You can purchase PVC plastic welding rod, it's available in small diameter, you might be able to press it into the rubber groove and take up 1/16" or so on one or both sides. Just an idea that I would try to snug up the width of the track. A nylon or delrin rod would probably be better because there would be less friction.
Joined: Aug 2004
Posts: 4,786
Likes: 145
From: Colorado Springs, CO
Oh that's a good idea, I might try that. Thanks!
EDIT: So far I'm only able to find it as small as 1/8". I'm not sure if that will be small enough. I guess the window is about 1/8" thick so maybe it would work.
EDIT: So far I'm only able to find it as small as 1/8". I'm not sure if that will be small enough. I guess the window is about 1/8" thick so maybe it would work.
Last edited by speedjunkie; Sep 1, 2018 at 12:52 AM.
Joined: Aug 2004
Posts: 4,786
Likes: 145
From: Colorado Springs, CO
A little update, I tried both 1/16" and 1/8" plastic rod and neither helped. The power converter worked originally but even now at 18v the window still rolls up pretty slow. Looks like I might have to have a little L bracket welded under the window to keep it level while going up.
Joined: Aug 2004
Posts: 4,786
Likes: 145
From: Colorado Springs, CO
I was going to pull the window and bracket out again and mount an L bracket under the window so it doesn't rock back and forth, but it's not rocking there. The whole assembly is rocking back and forth on the track. I also didn't notice much difference in the speed with the window angled either way.
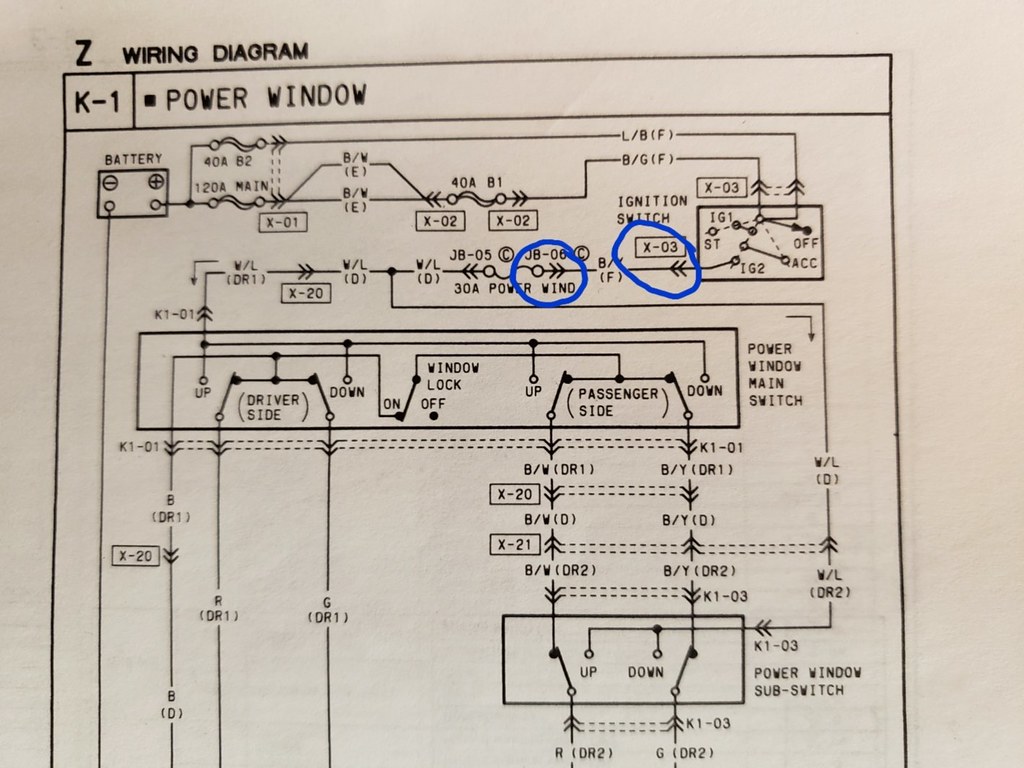
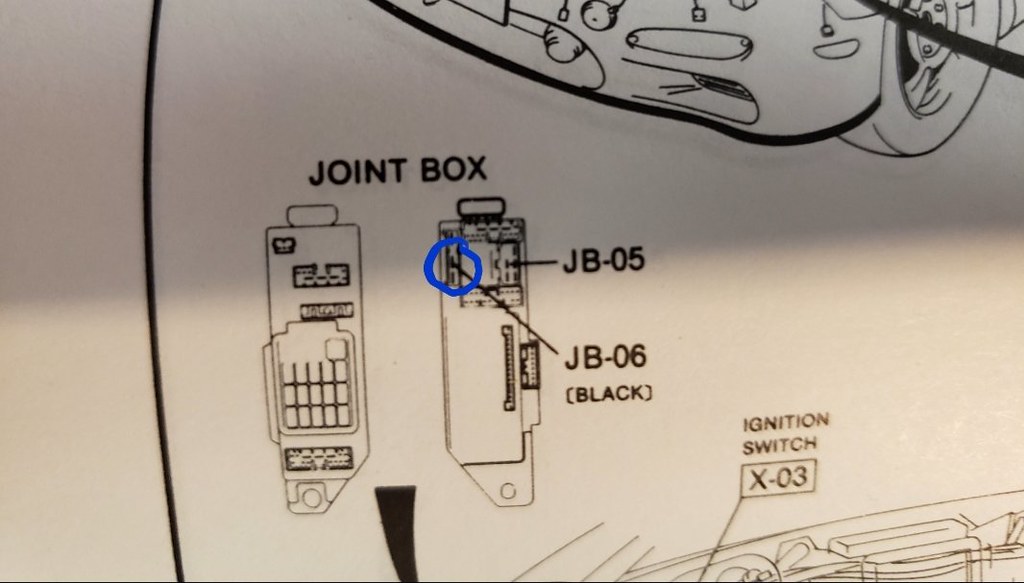
I did notice that my little power converter failed already. I was adjusting the rheostat and it never left 13v. No wonder the window still rolled up slowly. I remember someone saying something about Mazda not using relays on a lot of our wiring and they put a relay in line on their FC and it worked. I was looking at the diagram and wondering about putting a relay in the wire at J-06, or on IG2 at X-03 at the ignition switch would be even easier. Although now I'm thinking that won't work because it's not being switched on. Thoughts?
I did notice that my little power converter failed already. I was adjusting the rheostat and it never left 13v. No wonder the window still rolled up slowly. I remember someone saying something about Mazda not using relays on a lot of our wiring and they put a relay in line on their FC and it worked. I was looking at the diagram and wondering about putting a relay in the wire at J-06, or on IG2 at X-03 at the ignition switch would be even easier. Although now I'm thinking that won't work because it's not being switched on. Thoughts?
Last edited by speedjunkie; Nov 29, 2018 at 02:13 PM.
OK, so looking back in 2010 I posted "I really need to do this (grease the tracks) to my passenger side window".
9 years later....
I didn't end up doing anything with the power window motor itself, I left it in the car. Pulled both windows. Pulled the rubber window channels up and out of their tracks so I could get to them well. Sprayed a paper towel with WD-40 and thoroughly went through the rubber track, cleaning all the dirt, dust, and crap out. They weren't terribly dirty but there was black dirt on the towel when done.
After that I used Shin-Etsu grease to totally grease the rubber track. There's a lip in the track, I got the grease into that lip as well. Went at it just using my hands and the Shin-Etsu and got a good coat in there then wiped down with a paper towel. I also lubed the center track of the window regulator with the grease.
Just got everything back together and MAN what a difference. The passenger window has been slow for a while and has gotten slower over the years, now both windows are noticeably faster and they close at the same time.
This is a great technique!
Dale

Does anyone know which screws adjust how far the window moves inward/outward toward the street? I replaced the weatherstripping and still have a leak because the window is not making contact/pushing against the weatherstripping. I did a Google search but I can't find what the "Jack screws" are and I want to make sure before I mess up any other adjustment.
I don't think there is really any adjustment in the window track. You may want to double-check the shop manual on that.
Every time I've pulled and reinstalled the windows (and rails) I just bolted things in and it was good.
Dale
Every time I've pulled and reinstalled the windows (and rails) I just bolted things in and it was good.
Dale
Thanks Dale... The service manual only shows the 6 screws as shown on this DIY. The only other thing I can think of is a bent window track that's causing the glass to not press against the (new) weatherstrip... (I had an accident on my old door where only the doorskin was pushed in, all components were transferred to the new door during the repair).