DIY Power window maintenance!!
 06-25-10, 12:57 AM
#1
DIY Power window maintenance!!
Soooo are your power windows really really slow? Well here’s a write-up I decided to do. We often forget that there are more things on our cars to maintain than just the obvious. Things like the internal window regulators can be serviced to help keep them working for a really long time. I mean hell these things are over 15yrs old and have years of dirt and grime embedded in the tracks. I’m gonna show you how to clean and re-lube the regulators so they perform to almost brand new condition. So don’t go out and by new regulators thinking that’s what you need. Skill level is on the easy side. With all tools present it takes about 30min per door to remove the panels, windows, and regulator to complete the job. Trust me it’s not hard and you will absolutely love the end result. 
Stuff needed:
Philips screw driver
Straight screw driver
Shop rags
12volt power source
Gold bearing grease
Silicon lubricant
Extra wire to apply direct voltage to the regulators
For starters makes sure your window is at the half position.
Use you screw driver to remove the upper door handle cover

Now do the same with the front triangular cover.

Now use your screw driver to pop off the cover inside the door handle. Remove the screw with your philips.

Use your philips to remove these 3 screws here.

Now carefully pry up from the center bottom of the door panel (making sure not to damage the delicate cover inside the door pull handle section) to remove it. Now disconnect the 2 electrical door panel connectors and pull back on the tar plastic and this is what you have.

It's time to remove the window. With the window in the half postion you can now used your 10mm to remove the 2 screws in the middle. Pull the window up and tilt the rear upwards. The window will easily pull out of the rubber run channel track. With the window now removed, remove the 4 screws that hold the regulator and remove it from the door.
With the window out of the way, now is a good time to check the run channels to make sure they have an even uniform gap for the window to slide up and down through. If it's not even and uniform that may be your problem. You would then pull out the run channel to see if you can straighten it out. As you can see mine are fine.

Next post is about cleaning of the regulators.
Stuff needed:
Philips screw driver
Straight screw driver
Shop rags
12volt power source
Gold bearing grease
Silicon lubricant
Extra wire to apply direct voltage to the regulators
For starters makes sure your window is at the half position.
Use you screw driver to remove the upper door handle cover
Now do the same with the front triangular cover.
Now use your screw driver to pop off the cover inside the door handle. Remove the screw with your philips.
Use your philips to remove these 3 screws here.
Now carefully pry up from the center bottom of the door panel (making sure not to damage the delicate cover inside the door pull handle section) to remove it. Now disconnect the 2 electrical door panel connectors and pull back on the tar plastic and this is what you have.
It's time to remove the window. With the window in the half postion you can now used your 10mm to remove the 2 screws in the middle. Pull the window up and tilt the rear upwards. The window will easily pull out of the rubber run channel track. With the window now removed, remove the 4 screws that hold the regulator and remove it from the door.
With the window out of the way, now is a good time to check the run channels to make sure they have an even uniform gap for the window to slide up and down through. If it's not even and uniform that may be your problem. You would then pull out the run channel to see if you can straighten it out. As you can see mine are fine.
Next post is about cleaning of the regulators.

The following 4 users liked this post by t-von:
06-25-10, 01:13 AM
#2
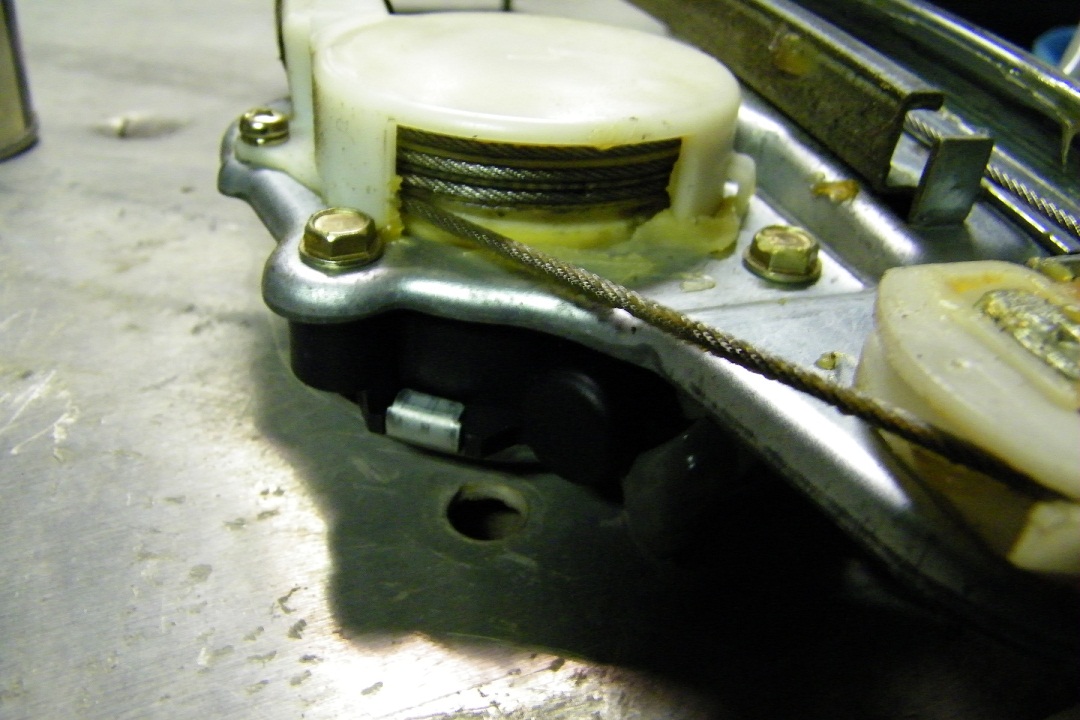
Ok here you will see the kind of grease I’m using. You will see the locations to clean and apply the lube. We wanna clean the track of all dirt and debris and re-lube.

You don’t really need a lot of grease. All were trying to do is re coat the cable throughout its track so everything slides smoothly. This also is a good time to use your wire and 12volt power source to power the regulator back and forward as you lube it. Just reverse the connection back and forward to make it go up and down.
Make sure when your finish to move it back to the half position.
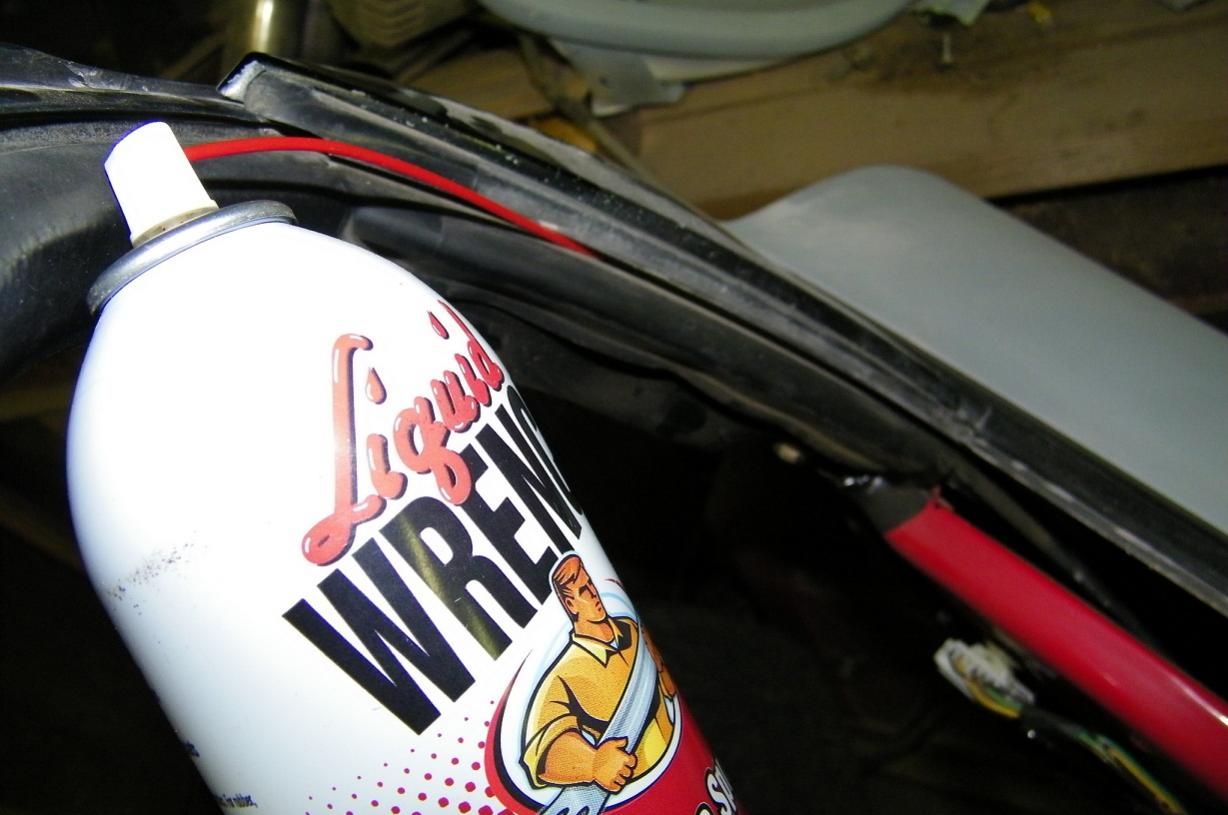
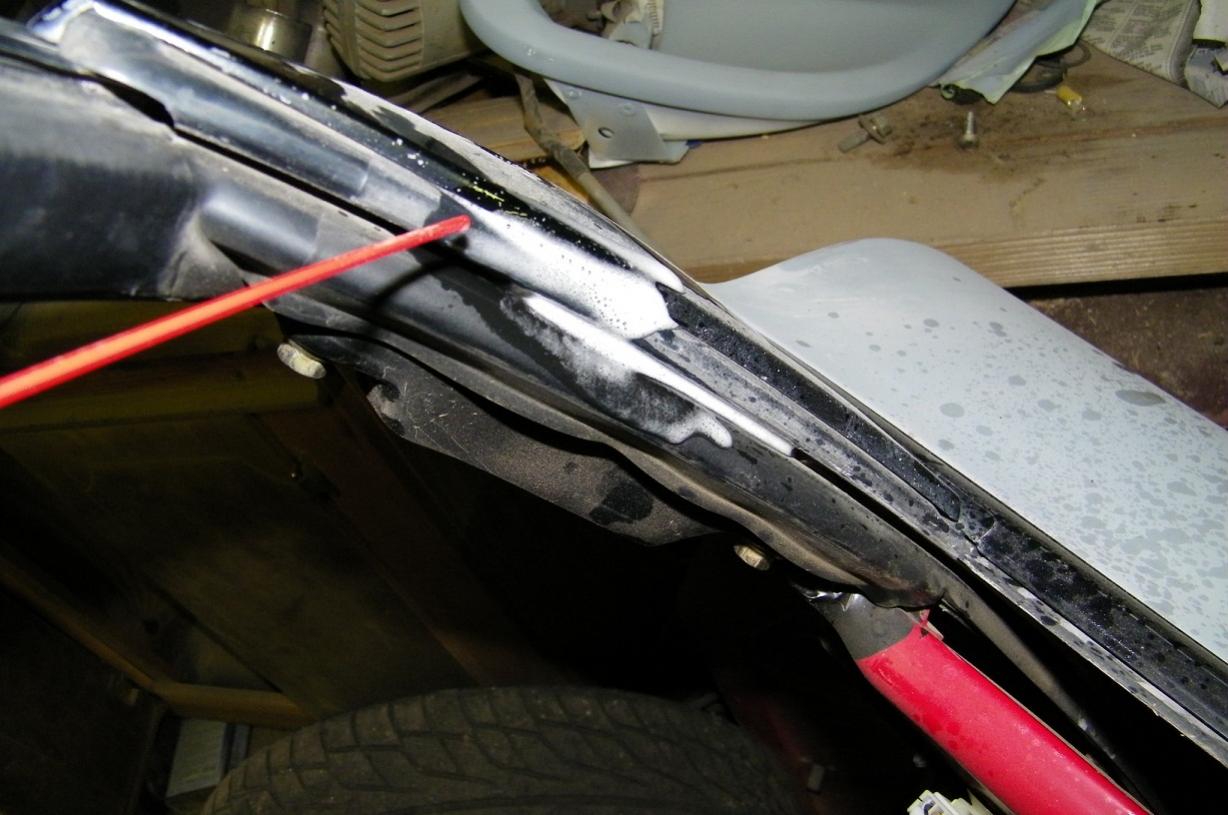
Now that the regulator is good to go, lets use the silicon lube to lube up the run channels.
Start high and let gravity do the job for you.
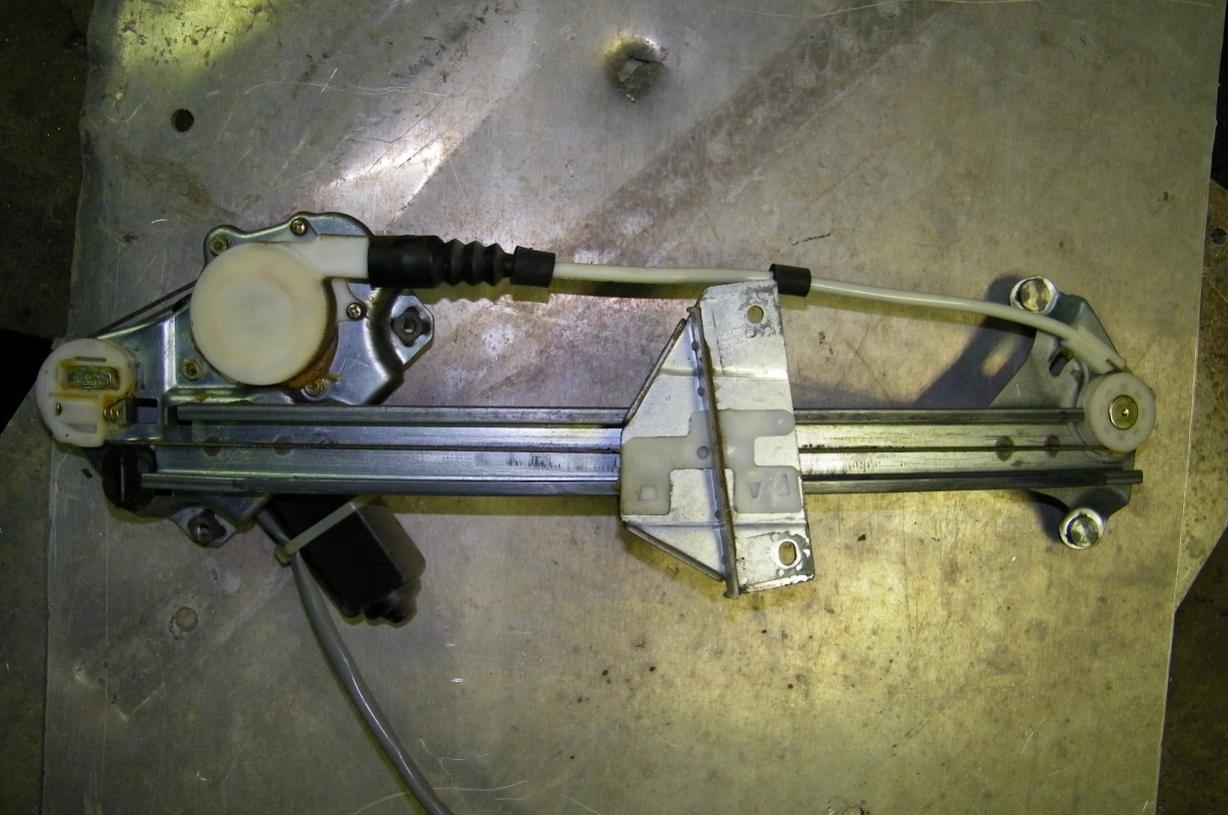
That’s pretty much the process. Keep in mind that it only works if your regulator and run channel aren't binding. You are now ready to re-install everything. Your window should freely move up and down a lot faster than before. I was shocked at the improvement. Don’t worry about window adjustment. Mazda did a great job with the design so adjustment isn’t necessary. Some of you with binding issues may think your run track is out of alighnment. I can assure you that’s not the case as it has no adjustment. See pic!

If you were wondering, I'm currently replacing my passenger door skin. That's why you can see in detail the inner door structure.
Now you can take a short cut with this DIY. Just lower the window and spray the silicon lube as I did earlier. The lube will still penetrate down the track. That by itself will free things up considerably but you will still have a dirty regulator. But if you really want to do it right, this is the way to go.
You don’t really need a lot of grease. All were trying to do is re coat the cable throughout its track so everything slides smoothly. This also is a good time to use your wire and 12volt power source to power the regulator back and forward as you lube it. Just reverse the connection back and forward to make it go up and down.
Make sure when your finish to move it back to the half position.
Now that the regulator is good to go, lets use the silicon lube to lube up the run channels.
Start high and let gravity do the job for you.
That’s pretty much the process. Keep in mind that it only works if your regulator and run channel aren't binding. You are now ready to re-install everything. Your window should freely move up and down a lot faster than before. I was shocked at the improvement. Don’t worry about window adjustment. Mazda did a great job with the design so adjustment isn’t necessary. Some of you with binding issues may think your run track is out of alighnment. I can assure you that’s not the case as it has no adjustment. See pic!
If you were wondering, I'm currently replacing my passenger door skin. That's why you can see in detail the inner door structure.
Now you can take a short cut with this DIY. Just lower the window and spray the silicon lube as I did earlier. The lube will still penetrate down the track. That by itself will free things up considerably but you will still have a dirty regulator. But if you really want to do it right, this is the way to go.
The following 4 users liked this post by t-von:
 .
06-25-10, 07:34 AM
.
06-25-10, 07:34 AM
#5
Full Member

Join Date: Mar 2010
Location: Milan, Italy
Posts: 126
Likes: 0
Received 0 Likes
on
0 Posts
Really like the writeup! my powerwindows are a little bit slow especially on the lower part of the run so i will give this a try and will give you a feedback on my experience!


Trending Topics
 06-26-10, 09:14 AM
#12
RX-7 Bad Ass
iTrader: (55)
Excellent! Love me a good writeup!
I'm actually fixin' to do this myself to the passenger side window, it's always slower than the driver's side. When I got my car they would both roll up and down at the exact same time and speed.
Guys, there's LOTS of fixes and things you can do on an FD with almost no money and a nice Saturday afternoon. Get to it!
Dale
06-26-10, 09:23 AM
#13
There is another fix/mod that you might consider performing at the same time as this.
Mazda runs all the power to the motor through the door switch and like most of the third gen switchgear, that switch ain't exactly robust.
As the switch contacts oxidize and pit, the motor gets less current and slows down.
Eliminate the problem forever by interposing a relay into the circuit and use the switch to only trip the relay...the switch contacts will now only carry a minimal load and the motor will feed off more consistent power.
 06-26-10, 07:50 PM
#19
Senior Member

My driver side window goes down no problem but sometimes wont go up unless i go down again, I was told that is more the regulator/motor than the switch itself? What do you guys think?
06-29-10, 06:36 AM
#21
Did the power window maintenance on my driver side and it seems like new. The only difference is that I used white lithium grease from an spray can. My driver window goes up just as fast an my passenger window. My system was pretty clean, not a lot of dirt and the grease still seemed ok but I cleaned and greased it anyways. I think the silicone in the rubber track is what really does the trick. I used q-tips to clean the rubber track. There was a lot of dirt in there.
06-29-10, 02:43 PM
#24
Actually your right. The silicon in the run channel is really what loosten things up and is something that should really be done once a year. Now as far as cleaning the regulator, it's still beneficial due to it's age.
 Oh yea how long did it take you?