
Custom waterpump outlets, newly finished and for purchase!!

Thread Starter
Collections Hold
iTrader: (5)
Joined: Mar 2003
Posts: 1,987
Likes: 3
From: Pataskala, Ohio
Custom waterpump outlets, newly finished and for purchase!!
As some of you may know I am starting to produce some custom parts for certain rx-7 applications. One is a 3-rotor conversion kit that utilizes the factory subframe. Then I realized some parts for this conversion may be wanted by other 13B FD3s owners as well. SO here you go!
These are fully custom machined water pump outlets for any FD waterpump. I replaces the big, bulky, and ugly factory outlet/ast with a nice free flowing outlet. It was very carfully machined for a exact fit, each one is double checked for clearance before leaving my shop. Comes with the included allen bolts for a much cleaner looking appearance as well. Even features a groove cut in the center of the outlet where the hose clamp will go, to produce a leak-proof seal. Price per one is $80.00, I currently have 3 made, more will be produced soon as orders come in. Thanks!!
These are fully custom machined water pump outlets for any FD waterpump. I replaces the big, bulky, and ugly factory outlet/ast with a nice free flowing outlet. It was very carfully machined for a exact fit, each one is double checked for clearance before leaving my shop. Comes with the included allen bolts for a much cleaner looking appearance as well. Even features a groove cut in the center of the outlet where the hose clamp will go, to produce a leak-proof seal. Price per one is $80.00, I currently have 3 made, more will be produced soon as orders come in. Thanks!!
Thread Starter
Collections Hold
iTrader: (5)
Joined: Mar 2003
Posts: 1,987
Likes: 3
From: Pataskala, Ohio
Also can be custom anodized. If enough people want the same color, at least 4 people, it would add $20 more per oder. If 8 people agree on the same color, then $10 more, and so on. If only one person wants a specific color, then it would be unfortunately $60 more.
I noticed it doesn't have a hose bead on it. I see it has grooves in it, but I would feel a little uneasy using something on my cooling system that did not have a bead. That's just my opinion
Originally Posted by dubulup
how do you fill the system? if using stock radiator position...is this a benefit only to vertical mounted radiators?
Last edited by HDP; Feb 3, 2006 at 09:57 AM. Reason: thought about how it could work

Trending Topics

development
Joined: Aug 2002
Posts: 5,714
Likes: 7
From: Lafayette, LA
Originally Posted by Diamond Geeza
dubulup- Could you please let me know how that works out for you? What kit did you buy for this?
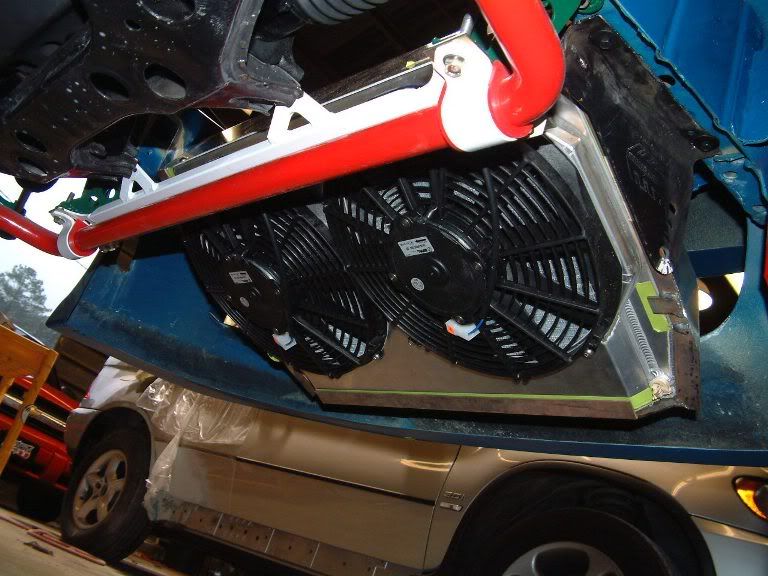
hows this for a custom radiator? with -16AN lines
7 Rx-7s since 1980
Joined: Mar 2004
Posts: 438
Likes: 1
From: oHIo
Originally Posted by GtoRx7
I will have a better pic in a little while, but this is the prototype on my 3-rotor.
Woo hooo! Looks nice! Can't wait to see it again. Or more like HEAR it again. Sex. Pure sex.
Tony

Junior Member
Joined: Feb 2005
Posts: 12
Likes: 0
From: kuala lumpur, malaysia
I'm interested in this, but im curious as to how it actually "works". Mine's a "standard" FD engine, standard rad, etc. If this replaces the "big, bulky, and ugly factory outlet/ast"... the original filler neck/cap is eliminated? where would you fill coolant thru, then? Can you keep the AST with this mod? And if you do keep the AST, you fill coolant thru that?
Thanks in advance.
Thanks in advance.
yes you keep the ast... thats pretty much were your gonna fill it from. i would also like the rim at the end of the outlet if possible to machine another set... keep us posted
Originally Posted by joe13
I'm interested in this, but im curious as to how it actually "works". Mine's a "standard" FD engine, standard rad, etc. If this replaces the "big, bulky, and ugly factory outlet/ast"... the original filler neck/cap is eliminated? where would you fill coolant thru, then? Can you keep the AST with this mod? And if you do keep the AST, you fill coolant thru that?
Thanks in advance.
Thanks in advance.
Thread Starter
Collections Hold
iTrader: (5)
Joined: Mar 2003
Posts: 1,987
Likes: 3
From: Pataskala, Ohio
If you look back at my pic, you can see the tank I purchased from miezer. It has a built in radiator cap, is all polished aluminum, and has a over flow nozzle too. I ran the bottom of the tank down to the small nipple on the koyo radiator. Then I just unplug the 3/8" upper coolant line off the top back side of the water pump to act as a air vent, and fill it up. It really didnt take that long at all to fill it up, and once it did, its COMPLETELY purged of any air at all, since your pushing the water from the bottom up. I will try to add a lip to the outlet, but seriously, I blew up a rad. hose before it even slipped a millimeter on something without even ribs and recessed. The lip adds alot of stretching to the radiator hose, and when it breaks, it usually breaks just past the clamp for this reason I think. But I will try anyway....
Originally Posted by GtoRx7
If you look back at my pic, you can see the tank I purchased from miezer. It has a built in radiator cap, is all polished aluminum, and has a over flow nozzle too. I ran the bottom of the tank down to the small nipple on the koyo radiator. Then I just unplug the 3/8" upper coolant line off the top back side of the water pump to act as a air vent, and fill it up. It really didnt take that long at all to fill it up, and once it did, its COMPLETELY purged of any air at all, since your pushing the water from the bottom up. I will try to add a lip to the outlet, but seriously, I blew up a rad. hose before it even slipped a millimeter on something without even ribs and recessed. The lip adds alot of stretching to the radiator hose, and when it breaks, it usually breaks just past the clamp for this reason I think. But I will try anyway....
1. modify our current AST or buy a new one (some have eliminated it)
2. modify or fabricate a new upper radiator hose
3. remove the crossover pipe and pressure tank in order to fill the system (to access the water pump hose)
just to eliminate something you feel is big, bulky and ugly, but is completely functional and makes servicing the cooling system a breeze?
Hmmm... I'll pass. I don't think many 13B guys will want to go there either. But it's still a great idea for the correct application.

Junior Member
Joined: May 2004
Posts: 40
Likes: 0
From: Malaysia
Originally Posted by GtoRx7
If you look back at my pic, you can see the tank I purchased from miezer. It has a built in radiator cap, is all polished aluminum, and has a over flow nozzle too. I ran the bottom of the tank down to the small nipple on the koyo radiator. Then I just unplug the 3/8" upper coolant line off the top back side of the water pump to act as a air vent, and fill it up. It really didnt take that long at all to fill it up, and once it did, its COMPLETELY purged of any air at all, since your pushing the water from the bottom up. I will try to add a lip to the outlet, but seriously, I blew up a rad. hose before it even slipped a millimeter on something without even ribs and recessed. The lip adds alot of stretching to the radiator hose, and when it breaks, it usually breaks just past the clamp for this reason I think. But I will try anyway....
Hey, thanks. Additional Q's if you dont mind... can i just use the *standard aluminium* AST and route it the same way as *standard / normal*? ie: you run the coolant lines exactly, but use your outlet to *just* replace the old bulky thing? Hence, you fill coolant via the AST. Am i making any sense here? And would you need any gasket / sealant / or the likes, in conjunction with this outlet?
THanks again. Joe
Originally Posted by 13Joe
Hey, thanks. Additional Q's if you dont mind... can i just use the *standard aluminium* AST and route it the same way as *standard / normal*? ie: you run the coolant lines exactly, but use your outlet to *just* replace the old bulky thing? Hence, you fill coolant via the AST. Am i making any sense here? And would you need any gasket / sealant / or the likes, in conjunction with this outlet?
THanks again. Joe
THanks again. Joe
Thread Starter
Collections Hold
iTrader: (5)
Joined: Mar 2003
Posts: 1,987
Likes: 3
From: Pataskala, Ohio
Originally Posted by HDP
So you're saying we would have to:
1. modify our current AST or buy a new one (some have eliminated it)
2. modify or fabricate a new upper radiator hose
3. remove the crossover pipe and pressure tank in order to fill the system (to access the water pump hose)
just to eliminate something you feel is big, bulky and ugly, but is completely functional and makes servicing the cooling system a breeze?
Hmmm... I'll pass. I don't think many 13B guys will want to go there either. But it's still a great idea for the correct application.
Junior Member
Joined: May 2004
Posts: 40
Likes: 0
From: Malaysia
Originally Posted by HDP
See post #19
1. what do we need to modify to our AST, other than getting the aluminium one?
2. ...
3. the water pump hose is the hose from the TB coolant passages, correct? Do we need to vent that, when filling up? i've plugged mine up, does this mean i cannot perform this *mod*?
TIA... again.

Originally Posted by 13Joe
Ok, pardon me, but just to clarify alittle bit more here;
You need to have the side hose inlet welded. Capping it will not work per other forum members who eliminated their AST and used caps.
Self-explanatory.
You would have to temporarily remove your plug and install a hose to direct any overflow. Once full quickly remove the hose and install your plug before losing much coolant.
TIA... again.
1. what do we need to modify to our AST, other than getting the aluminium one?
2. ...
3. the water pump hose is the hose from the TB coolant passages, correct? Do we need to vent that, when filling up? i've plugged mine up, does this mean i cannot perform this *mod*?
TIA... again.
Thread Starter
Collections Hold
iTrader: (5)
Joined: Mar 2003
Posts: 1,987
Likes: 3
From: Pataskala, Ohio
A aluminum ast would be better for reliability. As far as you plugging up your top water line, did you thread and tap it? Or weld it shut? If there is no way to vent it, then you could maybe use one of these two options,#1 if you have aluminum rad. and a front mount intercooler, weld on the first pic to your rad. #2 splice the second pic into your upper rad. hose and eliminate the ast altogether.