
Center Taillight: Need Pics of Interior Cover


Center Taillight: Need Pics of Interior Cover
Anyone able to take some pics of the cover that goes over the center taillight assembly? What I really need to know is how much space is there from the back of the twilight module (the part that has the three humps for the lights) to the cover?
If I remember correctly, there isn't any space as the center light assembly screws into the back cover to hold it in but I don't have the car here to confirm.
I have done an LED retrofit on a test unit and I want to ensure what I have will fit. I know I will need to figure out how to mount the retrofit as I have removed the two inside screw locations but I am thinking The outside two will hold it all in place.
TIA.

Sorry, not very clear. Assume the taillight assembly is all together and you are sliding it back into place. I need a shot of how it slides into the center piece (not part of the assembly) that remains in the interior.
I have a heatsink on the rear of what I've built and I need to see how it will fit in and what I need to do to retrofit. Used some pretty high powered LEDs (74 lumens each at 350 mA for a total of about 900 lumens) so I wanted to heat sink it.
I have a heatsink on the rear of what I've built and I need to see how it will fit in and what I need to do to retrofit. Used some pretty high powered LEDs (74 lumens each at 350 mA for a total of about 900 lumens) so I wanted to heat sink it.
If you're talking about the distance from the back of the tail light ( my index finger ) to the interior trim its just under/at a 3/16 of an inch from the best I can measure. Pretty tight fit. Removing the trim or modifying it won't gain much either due to the hatch trim fitting closely to it. I'm going to assume you need to bring the led directly in the back to get the correct viewing angle and not for the bottom like oem. I thought about doing this as well. But space is pretty limited. Hope this helps.
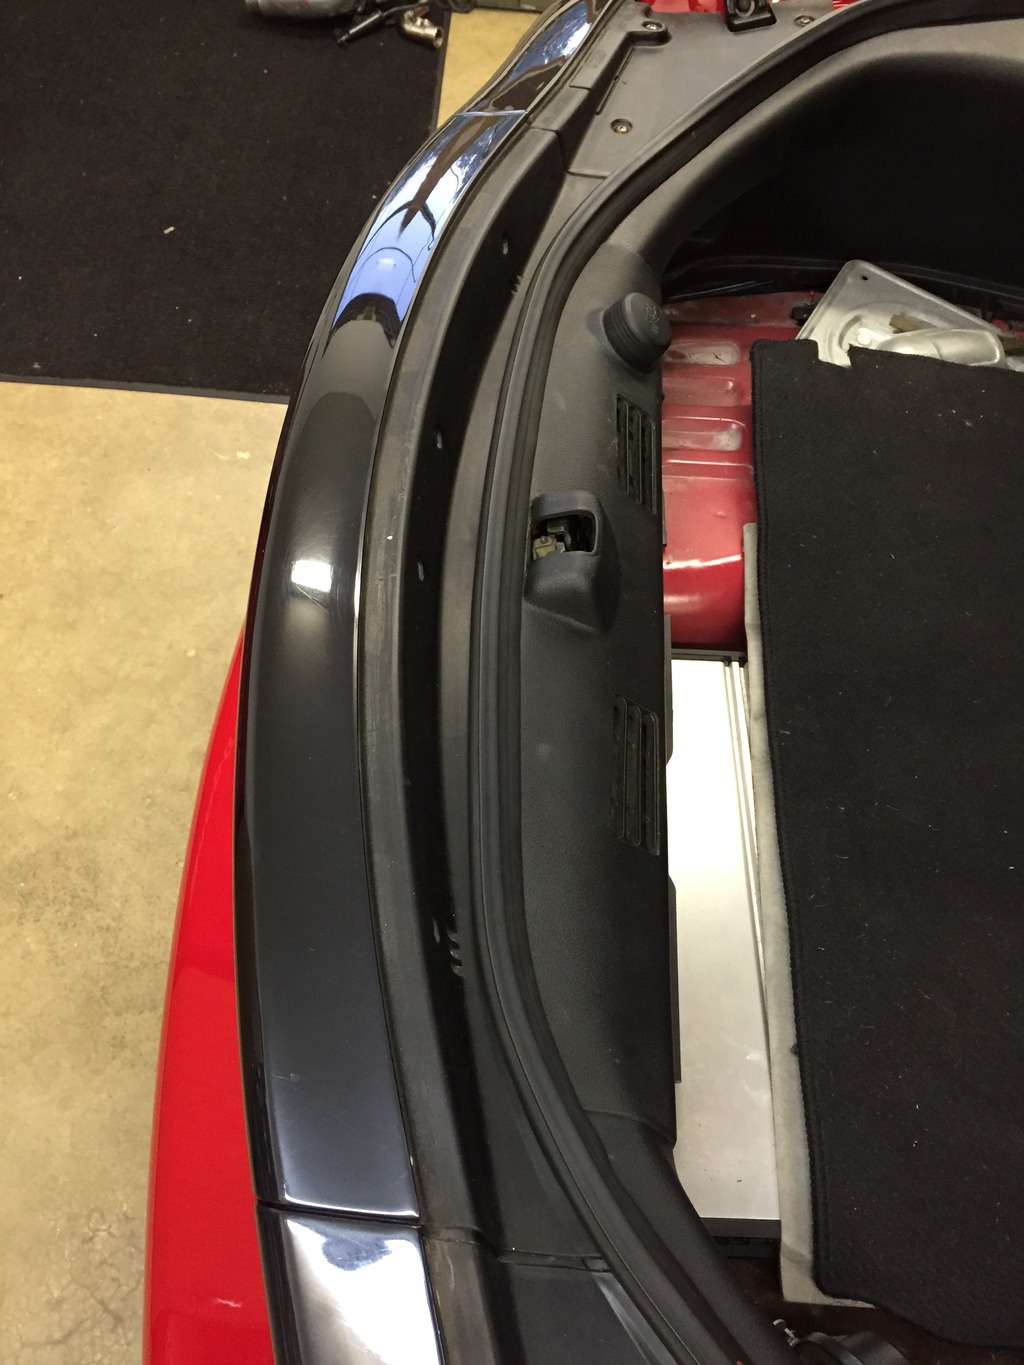
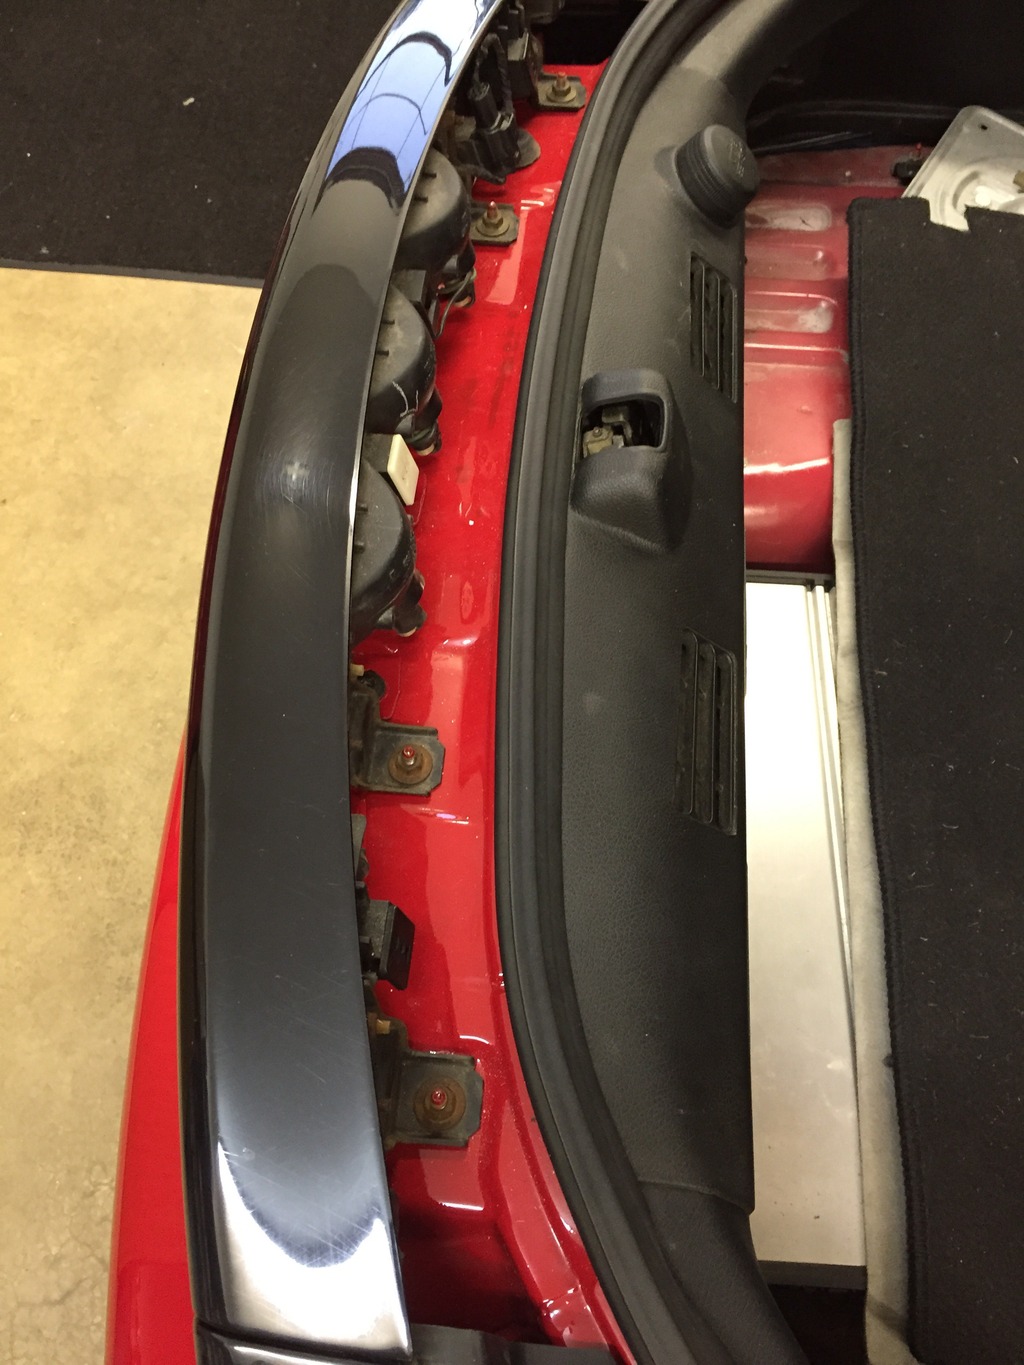

PS ~ the measurement from the bottom of the housing where the oem bulbs are inserted, (you will see the flat spot on every light) to the body sheet metal is dead on 1 1/4". 
I see now assuming you have the LEDs rear facing you won't have much space for a heatsink.
The 99 spec third brake light has the diffuser integrated into the lens so if you need more space to move the LEDs forward it should do the trick.
The 99 spec third brake light has the diffuser integrated into the lens so if you need more space to move the LEDs forward it should do the trick.
gdub29e, thanks so much. That is exactly what I needed.
TurboIIrotary, yes, the LEDs face rear. Here is the unit:

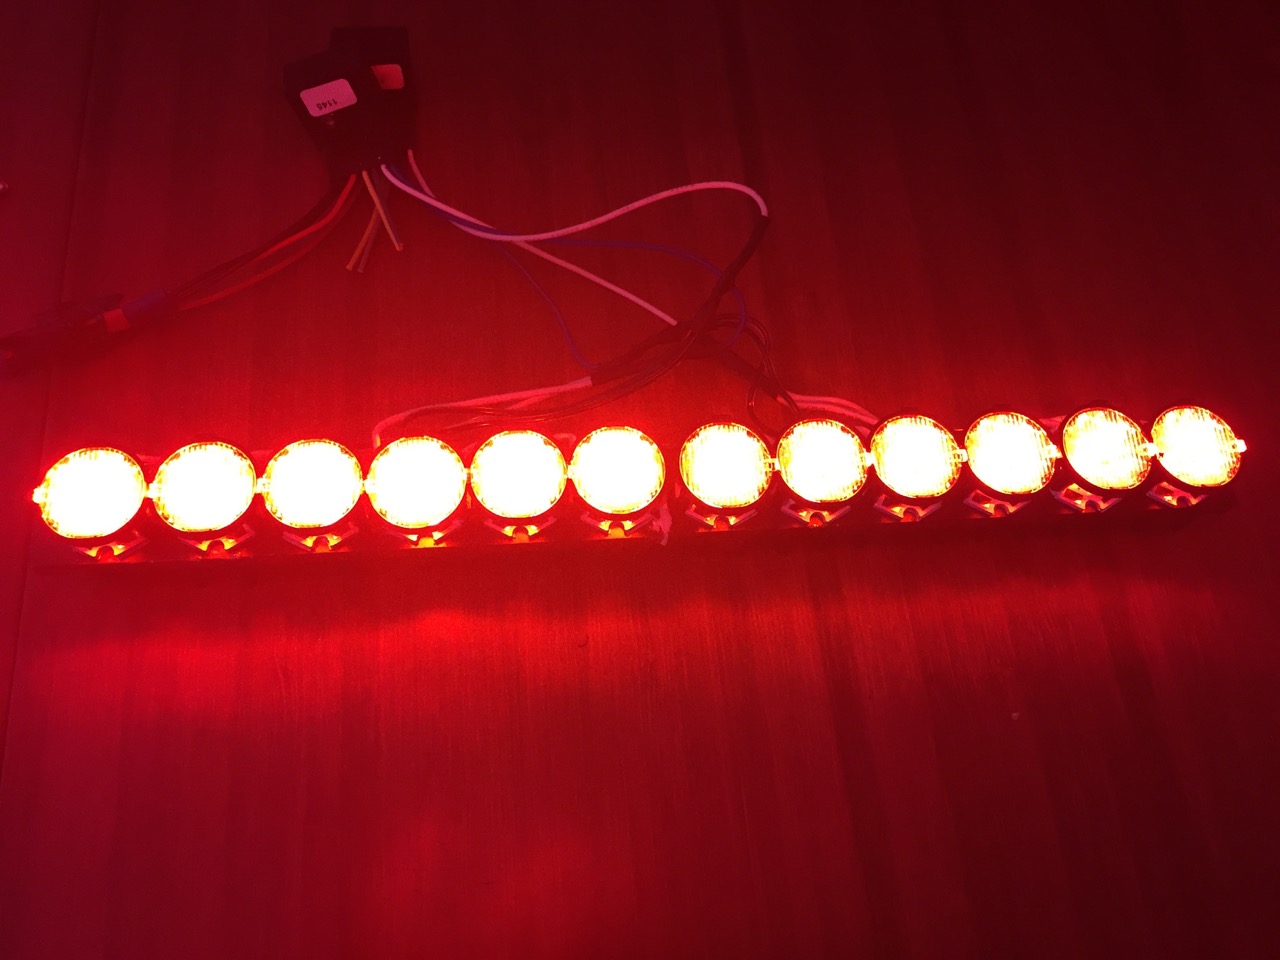
Can't tell you how bright this is but if you look directly at it, it will sear your retinas. After going through the Luminit diffuser film, the output will be around 828 lumens. By comparison, DRLs (daytime running lamps) need to be above 600 lumens so this should be pretty cool. I can dial them down in output if needed or double the output by using two more drivers.
So, the heatsink faces back into the car and the LEDs of course out the rear. The lenses I used are oval diffused so they spread the light wider than tall. I then have it run through some of the Luminit diffuser film which is coated in red so I don't need the stock diffuser lens. The result is a glowing red strip of light with none of the old OEM diffuser "graininess" of you get what I am saying. When the brake is not activated, just looks like a red lens.
The heatsink is a bit of overkill for sure, given one only has the brakes depressed for a short period of time. I can always scale that back if needed.
I cut a rectangular opening through the three OEM light "pods" to insert in the LED assembly and I wanted to know if I have room back into the car. It seems the answer is no and that is okay as the optimal insert distance (from the Luminit film) turns out to be right at the distance of the back of the OEM pods.
I'll post all of this up once completed. Thanks for the help!
TurboIIrotary, yes, the LEDs face rear. Here is the unit:
Can't tell you how bright this is but if you look directly at it, it will sear your retinas.
After going through the Luminit diffuser film, the output will be around 828 lumens. By comparison, DRLs (daytime running lamps) need to be above 600 lumens so this should be pretty cool. I can dial them down in output if needed or double the output by using two more drivers.So, the heatsink faces back into the car and the LEDs of course out the rear. The lenses I used are oval diffused so they spread the light wider than tall. I then have it run through some of the Luminit diffuser film which is coated in red so I don't need the stock diffuser lens. The result is a glowing red strip of light with none of the old OEM diffuser "graininess" of you get what I am saying. When the brake is not activated, just looks like a red lens.
The heatsink is a bit of overkill for sure, given one only has the brakes depressed for a short period of time. I can always scale that back if needed.
I cut a rectangular opening through the three OEM light "pods" to insert in the LED assembly and I wanted to know if I have room back into the car. It seems the answer is no and that is okay as the optimal insert distance (from the Luminit film) turns out to be right at the distance of the back of the OEM pods.
I'll post all of this up once completed. Thanks for the help!
Last edited by David Hayes; Aug 17, 2015 at 06:23 AM.
Trending Topics
So I completed the work and the center section turned out great. Here is the result, one continuous center section of high output glowing red:
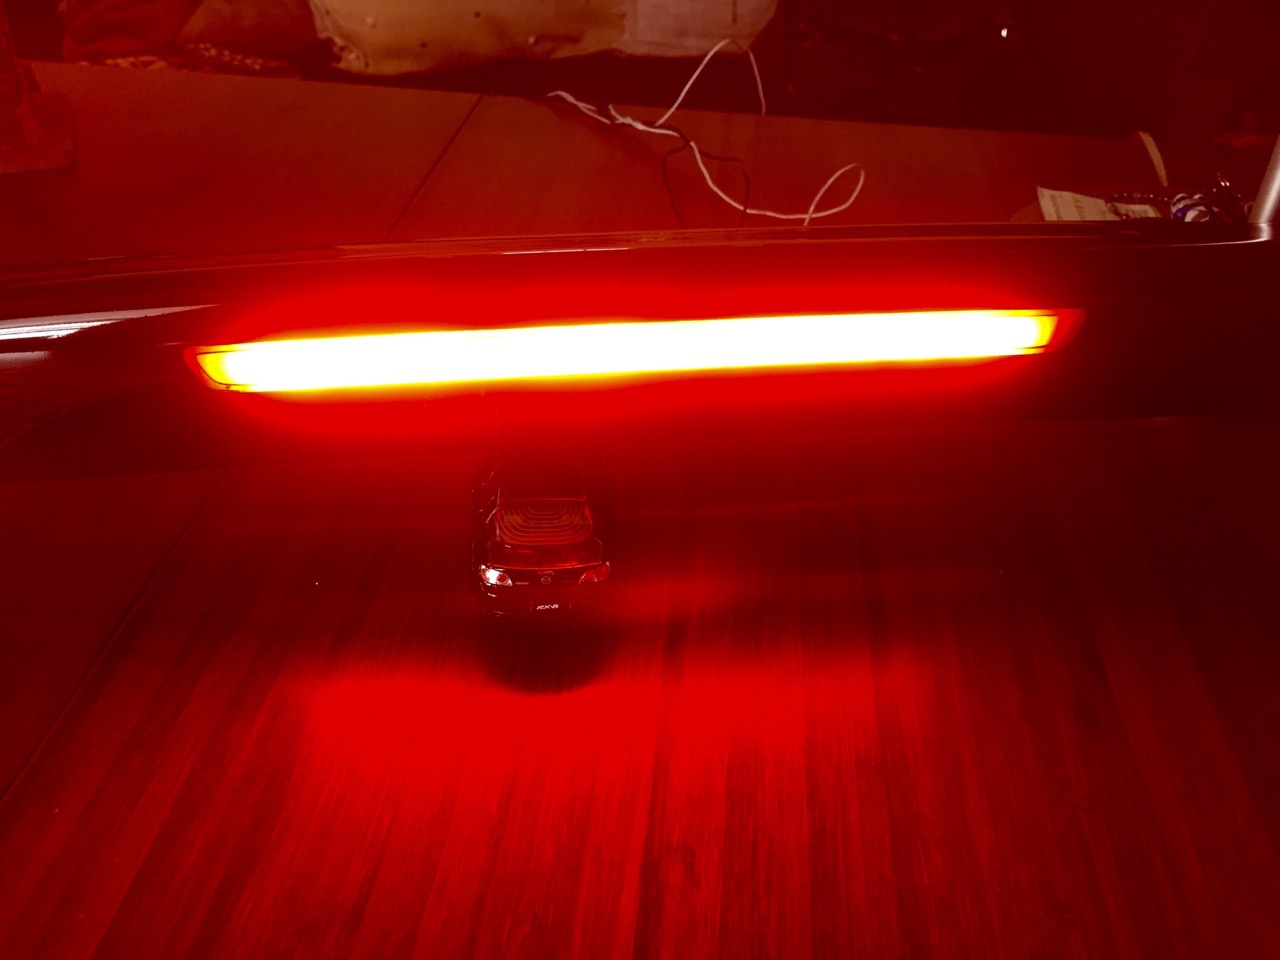
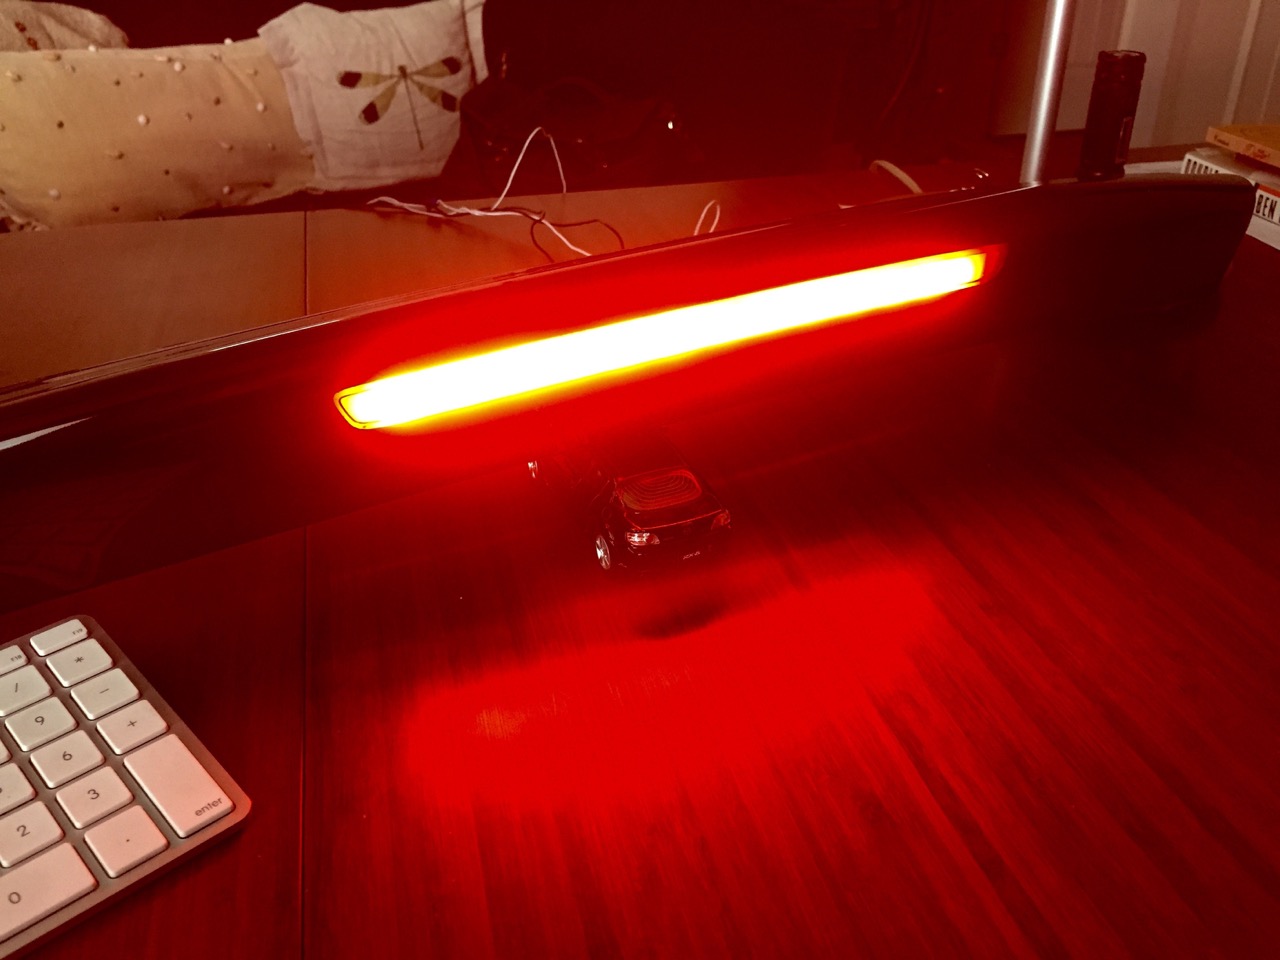
The light output is simply amazing. It's a total of a little over 800 lumens, an amount bright enough to qualify as a daytime running light (DRL). It's also fully adjustable based on the LuxDrive BuckPuck drivers I used.
Here is a shot of the unit which is inserted into the back of the center housing:
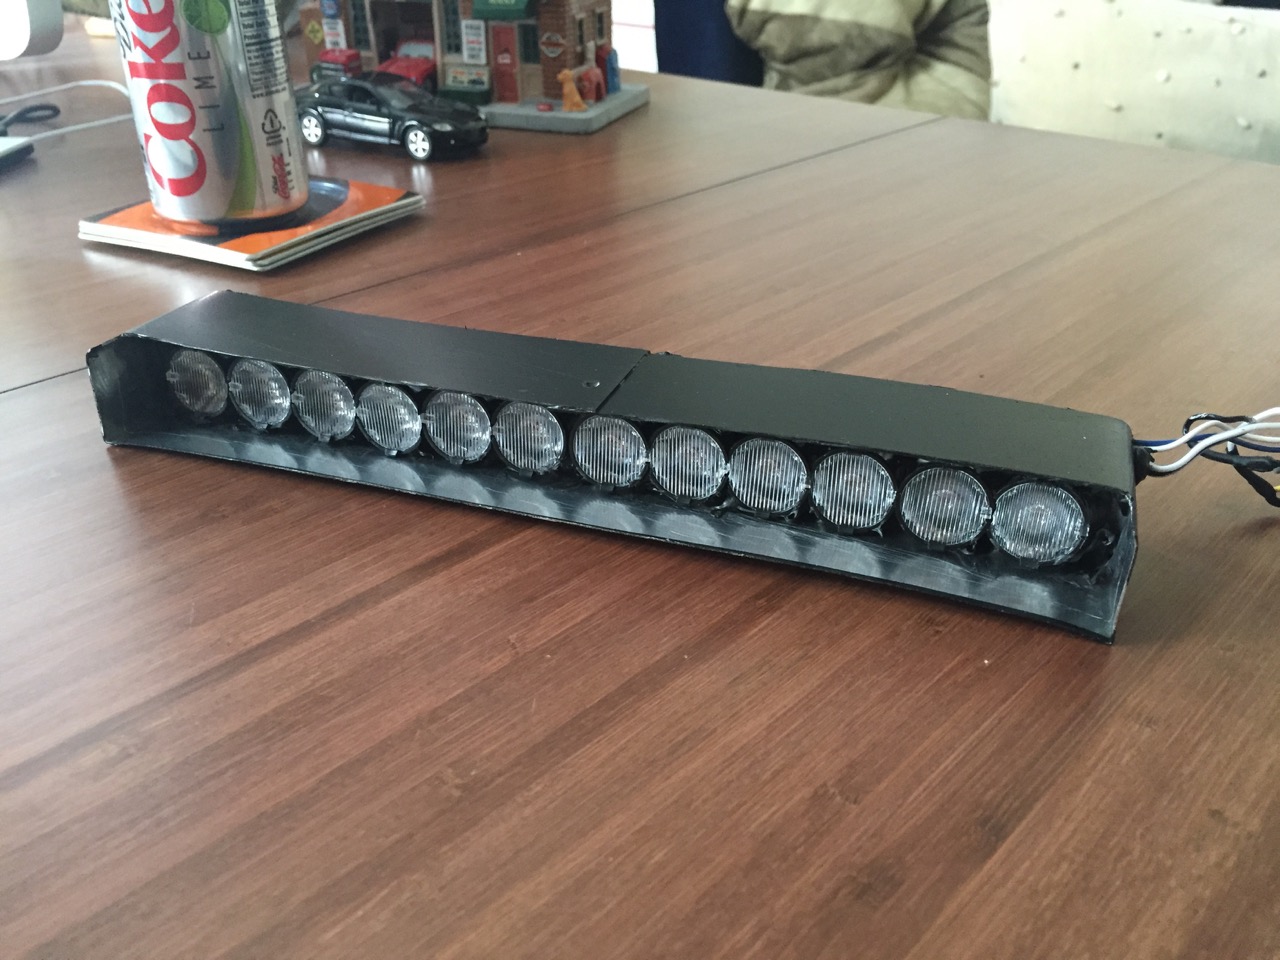

The LED assembly is currently test fitted into a spare center section and I will permanently affix it to my center unit on the car when I get it back, meaning I will slide the unit in and then silicone it in as well.
Here is a shot of the LED assembly I built onto a heatsink, with oval lenses attached:
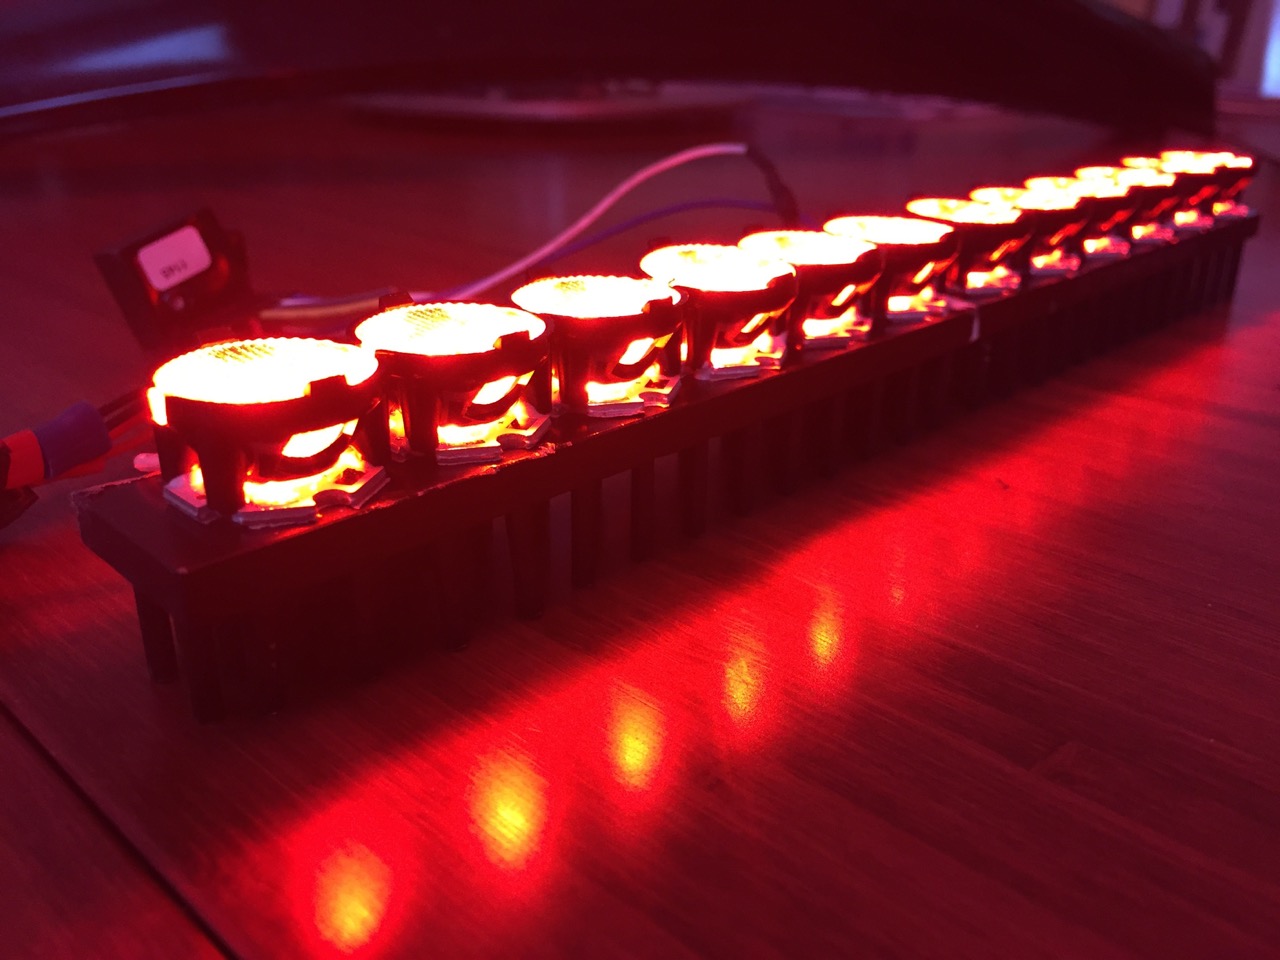
Finally, I used diffuser film from Luminit that I tinted red to match the OEM center (removed the old OEM diffuser for this as I wanted the continuous solid glow look).
Really happy with the way it turned out. Think it completes the updated LEDs on the front and back of the car.
The light output is simply amazing. It's a total of a little over 800 lumens, an amount bright enough to qualify as a daytime running light (DRL). It's also fully adjustable based on the LuxDrive BuckPuck drivers I used.
Here is a shot of the unit which is inserted into the back of the center housing:
The LED assembly is currently test fitted into a spare center section and I will permanently affix it to my center unit on the car when I get it back, meaning I will slide the unit in and then silicone it in as well.
Here is a shot of the LED assembly I built onto a heatsink, with oval lenses attached:
Finally, I used diffuser film from Luminit that I tinted red to match the OEM center (removed the old OEM diffuser for this as I wanted the continuous solid glow look).
Really happy with the way it turned out. Think it completes the updated LEDs on the front and back of the car.
Here are the specs. I ordered these from LED Supply. Good people and very helpful:
07040-PH000-G Luxeon Rebel Color LEDs
Options:
Board Configuration : Single 1 Up Color : Red Orange 617nm $4.59
(Not Taxable) 12 $55.08
I affixed them with the following. In the pat I used silver epoxy adhesive but the tape is much easier and works as well:
A001-H HexaTherm Thermally Conductive Tape with Center Hole
Options:
Sheet Size : 10 Sticker Sheet $7.99
(Not Taxable) 2 $15.98
Finally, if you want the diffused look I have, you will need to remove the red plastic optics component and replace it with diffuser film from Luminit. I ordered a sample pack from them as the materials are really pricey and the sample pack was around $50. Has enough of the correct film to do several center light sections. Finally, the Luminit film is clear, so if you want the center section to appear red when the lights are not on, you'll need to cover the Luminit film with some of the 3M red taillight repair tape you can buy at any automotive store.
PM me if you need more - David

There's probably a fusebox near the clutch pedal, assuming it's similar to a 1994 RX-7. You'll get better advice asking this question in the 2nd gen RX-7 section. What made you think this old thread about 3rd Gen taillights was the appropriate place to ask your question?

Thread
Thread Starter
Forum
Replies
Last Post
spectre6000
2nd Generation Specific (1986-1992)
42
Mar 10, 2015 02:13 PM