Almost ready to go in!!!! Have questions

Thread Starter
There and back again
Joined: Feb 2001
Posts: 967
Likes: 0
From: Camarillo, Ca
Almost ready to go in!!!! Have questions
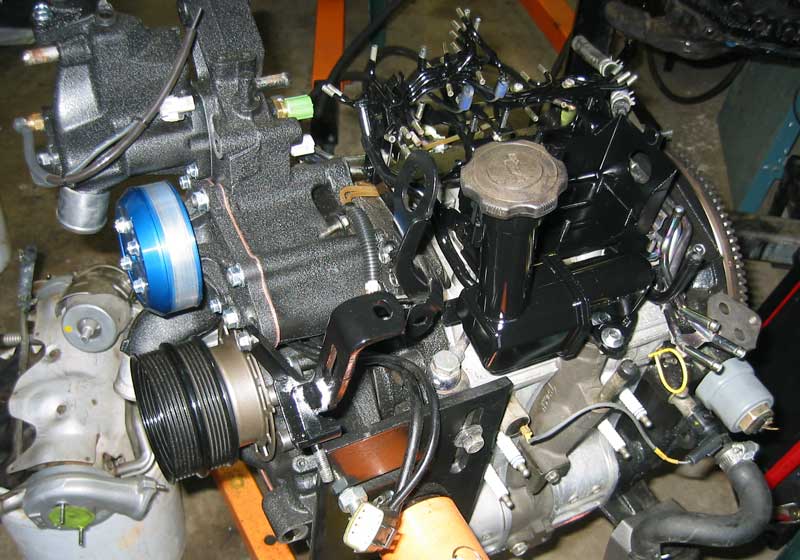
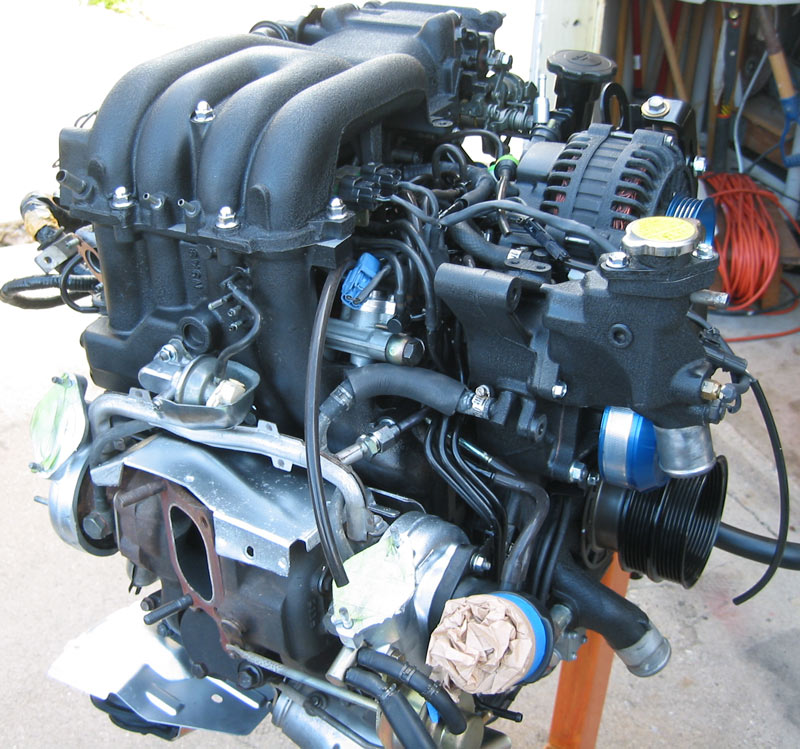
Here is a pic of my engine almost ready to go in. Well, almost. Tons of things to do, but I am slowly getting there.

Questions:
1. Which is the later model motor mount? My old engine has an aluminum left mount bracket. The motor mount was complete toast. It had rusted in half, and if it were not for the metal shield around it I am sure it would have fell off. My newer motor uses an identical motor mount to the right side.
2. Oil Level Sensor goop. What is with the goop all over the sensor. This was in my old motor (Replaced at 35K odometer miles by mazda). Do I need to goop this sensor? Also, Mazdatrix only sells up to 1992, would this sensor work, or is the FD sensor special?
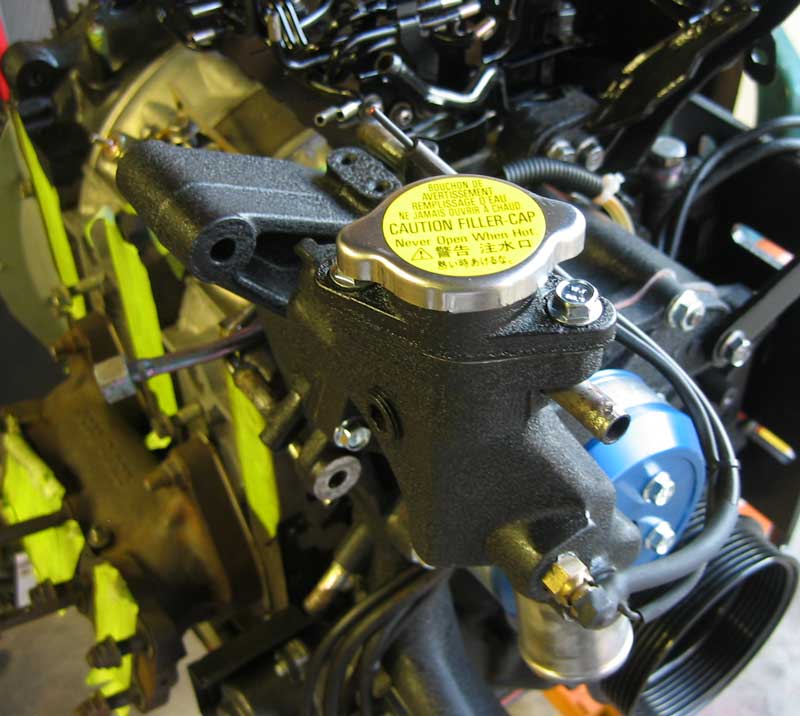
3. Thermo switch. I am thinking this sensor had a lot to do with my motor failing. The old sensor is on the right. Notice how it is missing the tip. Anyone think this could have caused excessive fuel consumption? I just perchused a new one since I don't trust the sensor that came with my newly rebuilt engine.
Questions:
1. Which is the later model motor mount? My old engine has an aluminum left mount bracket. The motor mount was complete toast. It had rusted in half, and if it were not for the metal shield around it I am sure it would have fell off. My newer motor uses an identical motor mount to the right side.
2. Oil Level Sensor goop. What is with the goop all over the sensor. This was in my old motor (Replaced at 35K odometer miles by mazda). Do I need to goop this sensor? Also, Mazdatrix only sells up to 1992, would this sensor work, or is the FD sensor special?
3. Thermo switch. I am thinking this sensor had a lot to do with my motor failing. The old sensor is on the right. Notice how it is missing the tip. Anyone think this could have caused excessive fuel consumption? I just perchused a new one since I don't trust the sensor that came with my newly rebuilt engine.

Is that black wrinkle powdercoat or i it just paint? The newer style mount mounts are all the same. They are black cast iron. That oil level sensor looks like someone tried to repair it. Use the new one. Thats actually the fan thermo switch. It tells the ecu when to turn the fans on. Good idea to replace it though.
Thread Starter
There and back again
Joined: Feb 2001
Posts: 967
Likes: 0
From: Camarillo, Ca
It's actually black wrinkle paint. I was going to do the black wrinkle powder coat, but the cost was more than i was willing to pay. For something that is cosmetic, I opted to use wrinkle paint and spend more on new sensors and bolts. the paint is good for 400 plus degrees, and I didn't paint the exhaust side or the middle iron. i built up about 5 coats of black primer so that if it does get scratched there will be a dark substrate.
official pussy inspector
Joined: Jan 2003
Posts: 109
Likes: 0
From: St. Louis
You should think about changing the water thermosensor anyway as cheap insurance. I think it's only like 25 bucks from Malloy. It's a lot easier to do it now. That would cause excessive fuel consumption, but then again, so would a lot of other things. I ended up replacing pretty much all of the critical sensors during my swap just b/c I didn't trust the old ones and didn't want to have to deal with it later.
B.T.W. - Your engine is beautiful man.
B.T.W. - Your engine is beautiful man.

Trending Topics
Thread Starter
There and back again
Joined: Feb 2001
Posts: 967
Likes: 0
From: Camarillo, Ca
Does anyone know if the oil level sensor is the same as a 1992? Mazdatrix shows a picture of one, but it doesn't list it up to 1993.

I purchased a 1992 Thermoswitch to get the lower temp fan activation.
I purchased a 1992 Thermoswitch to get the lower temp fan activation.
Originally Posted by spooledUP7
Does anyone know if the oil level sensor is the same as a 1992? Mazdatrix shows a picture of one, but it doesn't list it up to 1993.
Thread Starter
There and back again
Joined: Feb 2001
Posts: 967
Likes: 0
From: Camarillo, Ca
Originally Posted by Mahjik
I'm not sure, but why not just order the FD OEM sensor from Malloy Mazda?
I have found that similar parts for different generation are the same, but with a different part number, and price. Just look up the price for an FD coolant level sensor. The only difference is the harness, and the price.
Originally Posted by spooledUP7
No real reason other than I like how I can order online vs. having to call in the order. I also like supporting Mazdatrix. Mazdatrix has good pricing, and it's one day delivery to me.
Originally Posted by spooledUP7
I have found that similar parts for different generation are the same, but with a different part number, and price. Just look up the price for an FD coolant level sensor. The only difference is the harness, and the price.
Yes, there are a lot of shared parts across the cars (not only rotary ones). However, I doubt this sensor cost an arm and a leg to get from Mazda.
Most of those types of senders (fluid level sensors) are basically just grounded or not. Shouldn't be hard to test.
Thread Starter
There and back again
Joined: Feb 2001
Posts: 967
Likes: 0
From: Camarillo, Ca
Wire Harness
Spent about three-four hours cleaning and rebuilding the wire harness. This was very laborious, but I think it is worth it. I just could not put on a dirty harness and broken wire wraps.
I ordered high-temp wire looms and 3M electrical tape from McMaster Carr, and I used some high quality shrink tubing.
The green water temp sensor harness and green fuel temp sensor harness were very touchy to pull apart, and seemed very brittle. I managed to salvage them, but I was sweating for a moment there.


1) I don't know about the 'goop', but I would check with the Factory Service Manual. If it needs done, you'll see it there.
2) I think you're looking at the switch from an aluminum mount to cast-iron. I can't verify this off-hand, but I'm pretty sure the iron is the stronger component.
3) Yes, it could contribute to engine failure if it isn't switching on the fans. I don't think it would directly affect general fuel economy - the thermosensor would be responsible for that. Installing the FC t/s like you did is IMO the best fix.
Constant threat
Joined: Jul 2001
Posts: 4,968
Likes: 39
From: near Wichita, Kansas
Originally Posted by spooledUP7
Spent about three-four hours cleaning and rebuilding the wire harness. This was very laborious, but I think it is worth it. I just could not put on a dirty harness and broken wire wraps.
I ordered high-temp wire looms and 3M electrical tape from McMaster Carr, and I used some high quality shrink tubing.
The green water temp sensor harness and green fuel temp sensor harness were very touchy to pull apart, and seemed very brittle. I managed to salvage them, but I was sweating for a moment there.
I ordered high-temp wire looms and 3M electrical tape from McMaster Carr, and I used some high quality shrink tubing.
The green water temp sensor harness and green fuel temp sensor harness were very touchy to pull apart, and seemed very brittle. I managed to salvage them, but I was sweating for a moment there.

I know that one of the most often heard comments on MY engine rebuild is, "Oh wow....that looks....factory new!"
Good luck with the final installation, hope it all goes well for you.
By the way, what the hell IS that blue connector for? Obviously it is some California-only sensor or something....
You don't want to know how long I searched thru all my stuff looking for something to connect there, thinking I'd lost one of my labels.....until I finally found one of the pictures I took of my engine before and during the tear-down that showed there was nothing hooked to that on my car....lol!
Thread Starter
There and back again
Joined: Feb 2001
Posts: 967
Likes: 0
From: Camarillo, Ca
I shouldn't have posted those pictures here. The blue connector, yellow solenoid harness, and black 12 volt relay are examples of my EGR cure. Some people wanted to see what it looks like and since I hade the loom on my table, I took a few shots.
Thread Starter
There and back again
Joined: Feb 2001
Posts: 967
Likes: 0
From: Camarillo, Ca
Well, progress was slow this weekend. Lots of cleaning, and little assembly. I can't wait to get this thing back together. This is my daily driver, but at the same time it is my hobby, so it has been a struggle to pull back and settle for less. So far I have done little to pull back, but I am going to have to soon. I can't barrow a car forever!
This picture shows the rat's nest painted. You don't realize how many pieces there are to this thing until you have to degrease, clean, primer and paint them. I have at least 2 hours into these, not including dry time.
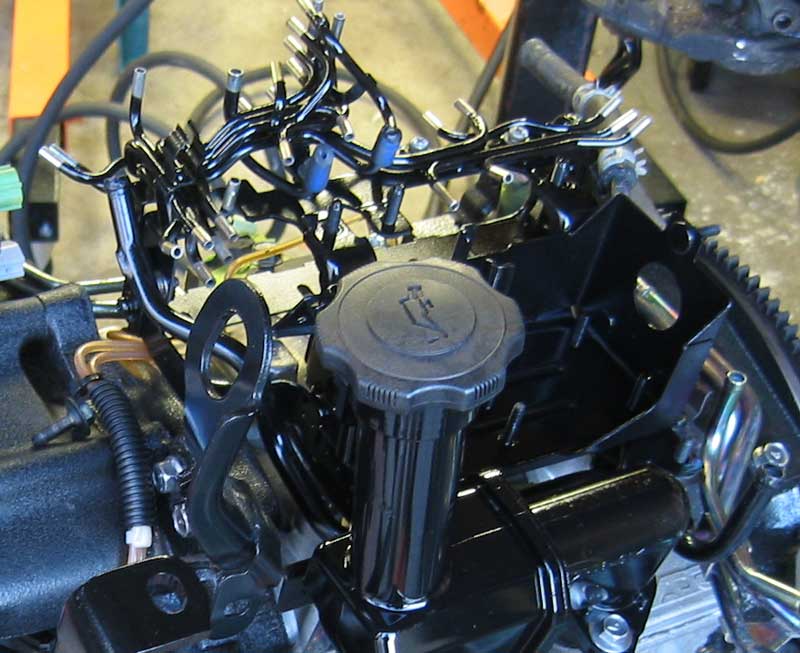
Starting to get the clean wire loom placed. It's like a monkey humping a football!
I don't know why, but when I unwrapped the new filler cap and twisted it on I felt acomplished. So here is a shot of that milestone.
This picture shows the rat's nest painted. You don't realize how many pieces there are to this thing until you have to degrease, clean, primer and paint them. I have at least 2 hours into these, not including dry time.
Starting to get the clean wire loom placed. It's like a monkey humping a football!
I don't know why, but when I unwrapped the new filler cap and twisted it on I felt acomplished. So here is a shot of that milestone.
Last edited by spooledUP7; Mar 13, 2006 at 08:34 AM.

Thread Starter
There and back again
Joined: Feb 2001
Posts: 967
Likes: 0
From: Camarillo, Ca
Small step today. I don't know what my deal is, but I felt compelled to label the solenoid valves. I even drove to staples to find replacement dots, and when they didn�t have the right colors or size I decided to make my own. So here it is, a total waste of time when I should be putting it back together.

 IMO, I don't think it's a waste of time. Good luck on the rest of the work!
Thread Starter
There and back again
Joined: Feb 2001
Posts: 967
Likes: 0
From: Camarillo, Ca
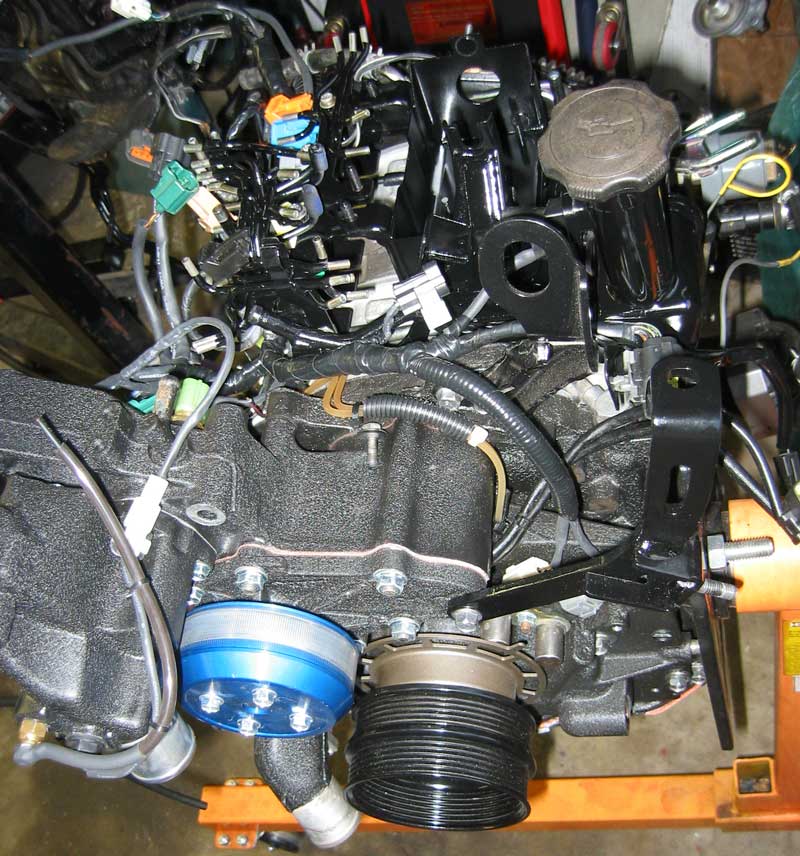
Now I am really almost ready to put the motor in. I have given up a little with the finer details in an effort to get the car rolling again, but overall I am happy with the cosmetic results so far. With all my efforts I hope the mechanicals work as good as it looks.

Last edited by spooledUP7; Apr 9, 2006 at 11:44 PM.
Banned. I got OWNED!!!
Joined: Jul 2004
Posts: 1,766
Likes: 1
From: ft. collins, colorado
Damn, I love it. I love the solenoid labeling. I think that is an awesome idea. Are you making some more of those labels, I will buy them. I wish I would have thought of that. Top notch!! That is absolutely the cleanest engine I have ever seen. I am impressed, can you tell? You just made my dream come true for the most part. Now I can sleep!! BTW, did you check the solenoids before installing them, I have found even new ones to fail, please don't ask me how I know. Can't wait to see the finished product.