
REVIEW - Sikky Manufacturing Differential Brace for swapped FDs


REVIEW - Sikky Manufacturing Differential Brace for swapped FDs
Hey guys!
So I was lucky enough to get my hands on the pre-release version of the Sikky Manufacturing Mazda RX-7 FD Differential Brace (P/N DBA-01). This is a Must Have part for anyone who is eliminating their PPF when swapping in a different motor into their RX-7, as it provides the maximum amount of support and strength that is needed to hold your differential in place.
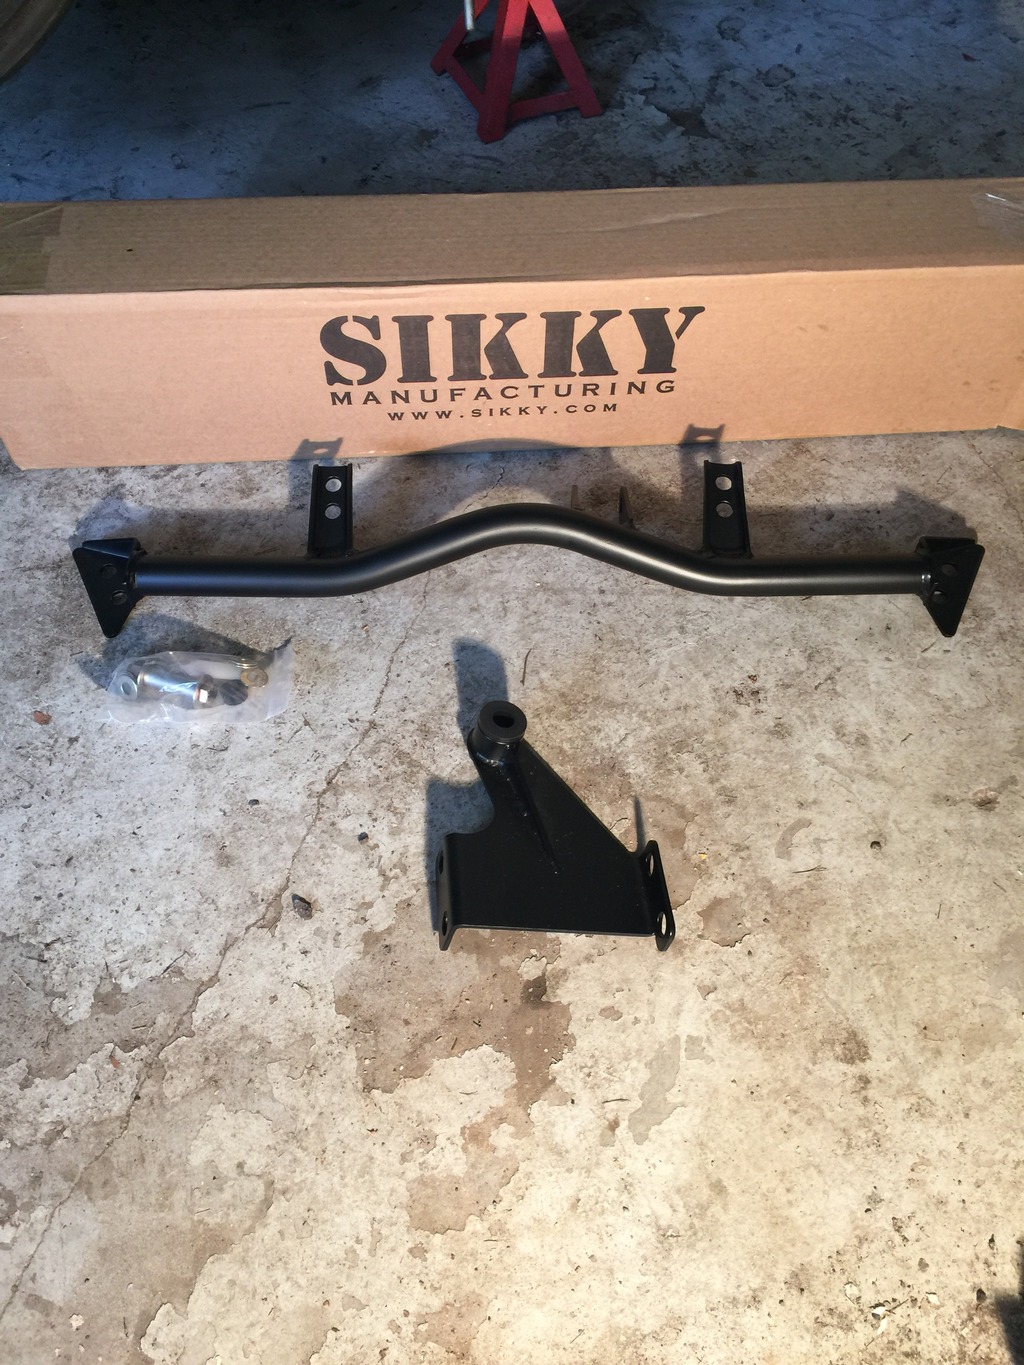
When you purchase the kit, it will contain:
Differential Brace (1)
Differential Bracket with Polyurethane Bushing (1)
Shoulder bolt with Bushing insert (1)
Washers (8)
Spacer for Upper Differential Stud (1)
Bushing Grease Packet (1)
Install difficulty: 2 out of 5
Install time: 1.5 hours (if you have a buddy, 1 hour)
Tools you will need:
21mm deep socket
12mm socket
19mm socket and wrench
3/8 or 1/2 drive ratchet
Jack or Deadman stand
Bench Vise
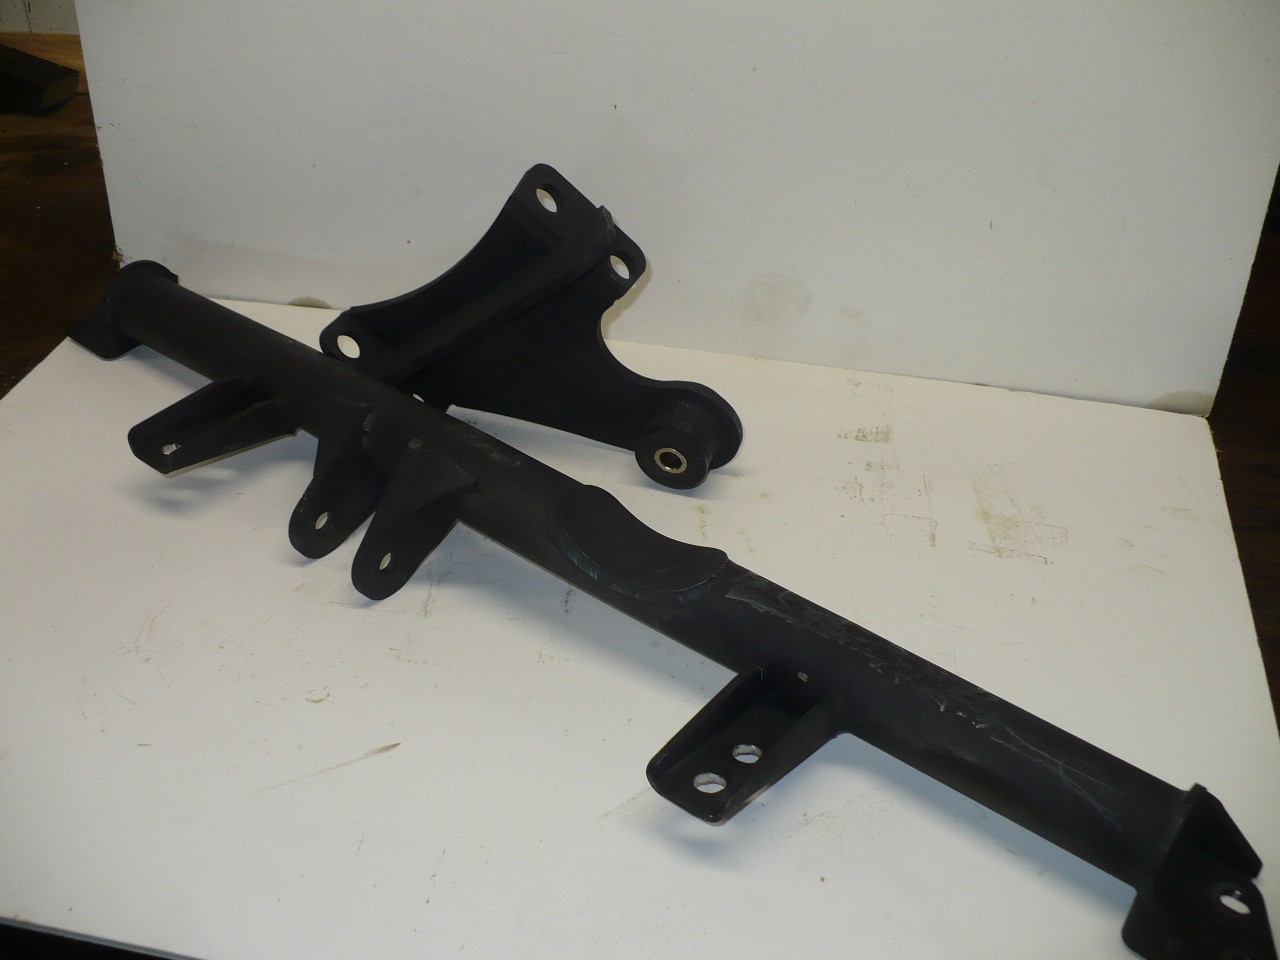
Here is the layout of the parts as they come. The bars and bracket are powdercoated satin black for extra durability.
This install was done on a shop floor with jacks, jack stands and no power/air tools by one person. Install time and difficulty may increase or decrease depending on your environment and help.
First you want to remove the PPF and the driveshaft off of the differential. Let the diff hang free as this will make it easier to set into place.
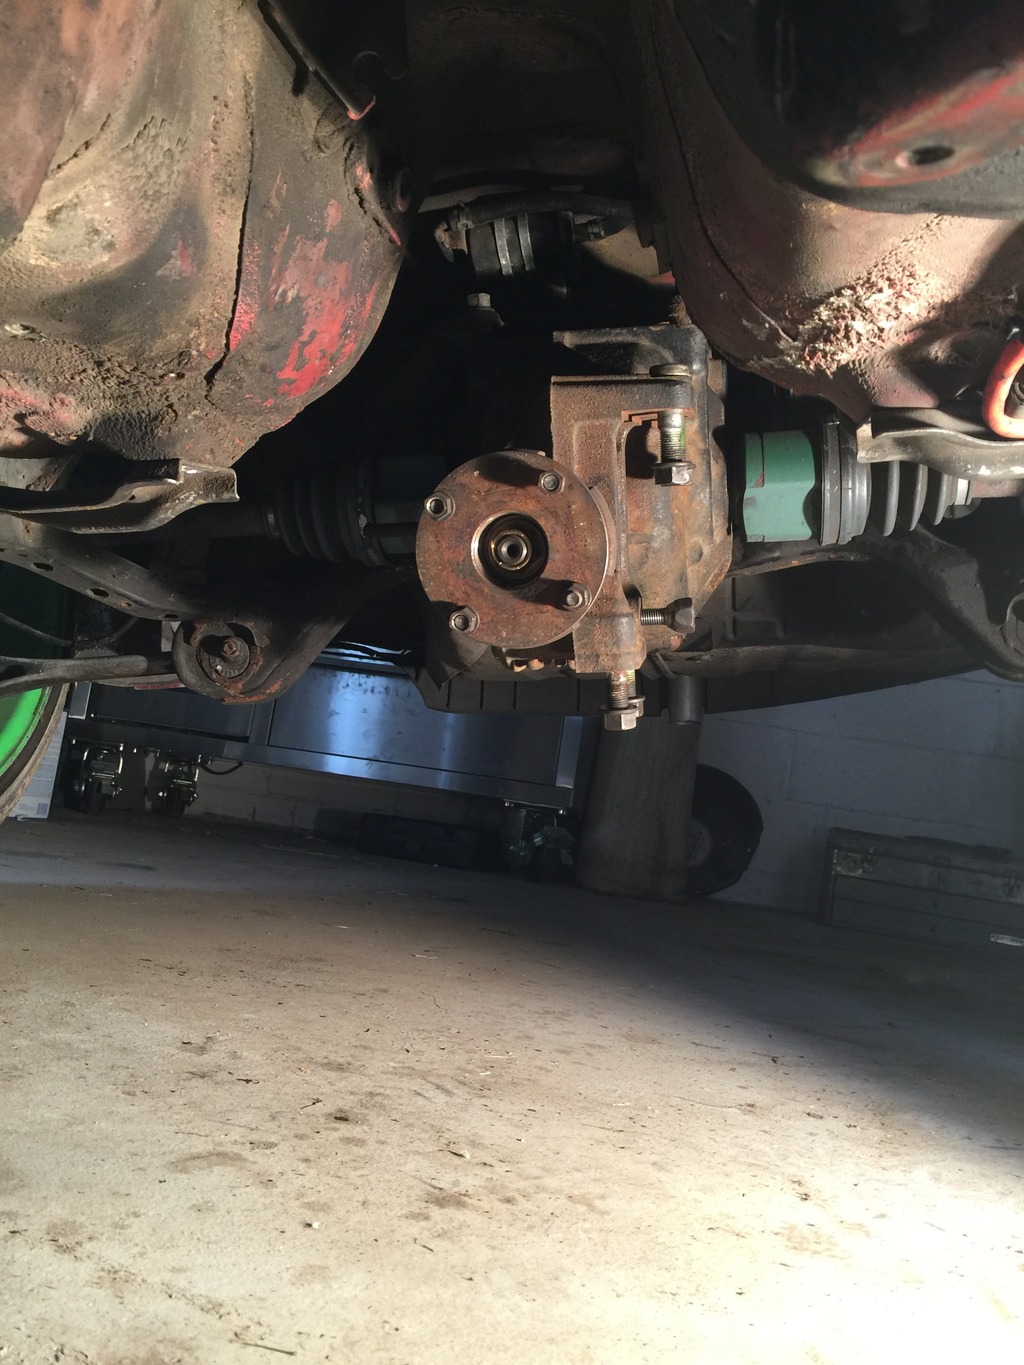
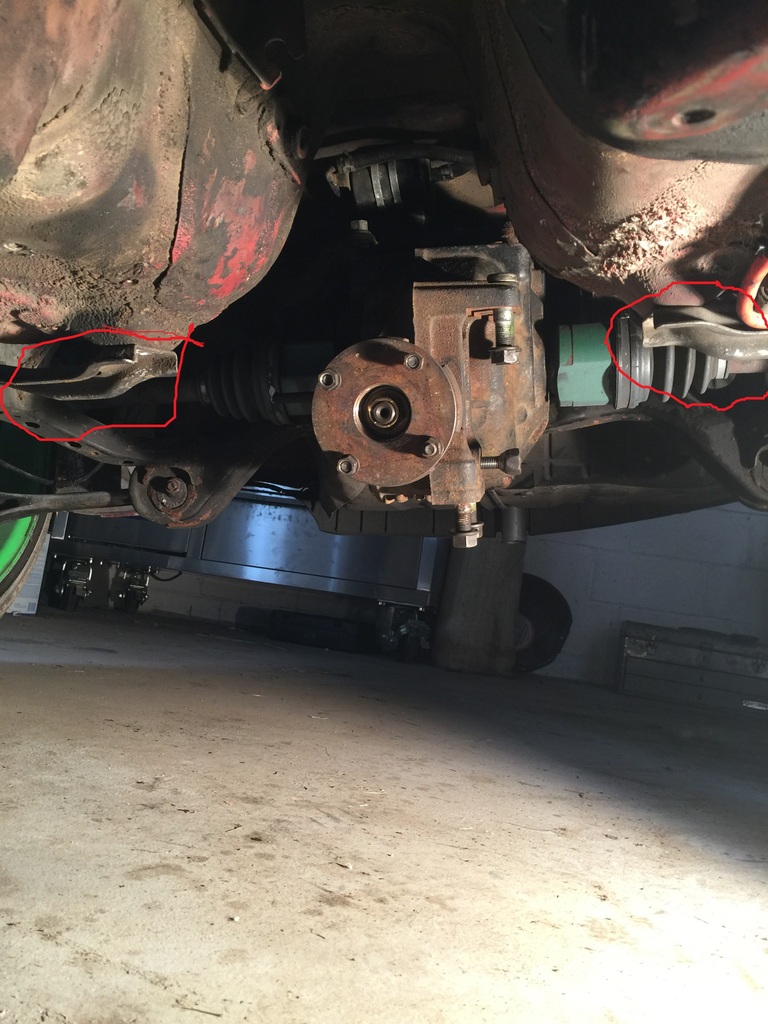
Start by removing the metal braces on either side of the differential. There should be 4 12mm bolts on each brace. They are indicated as such.
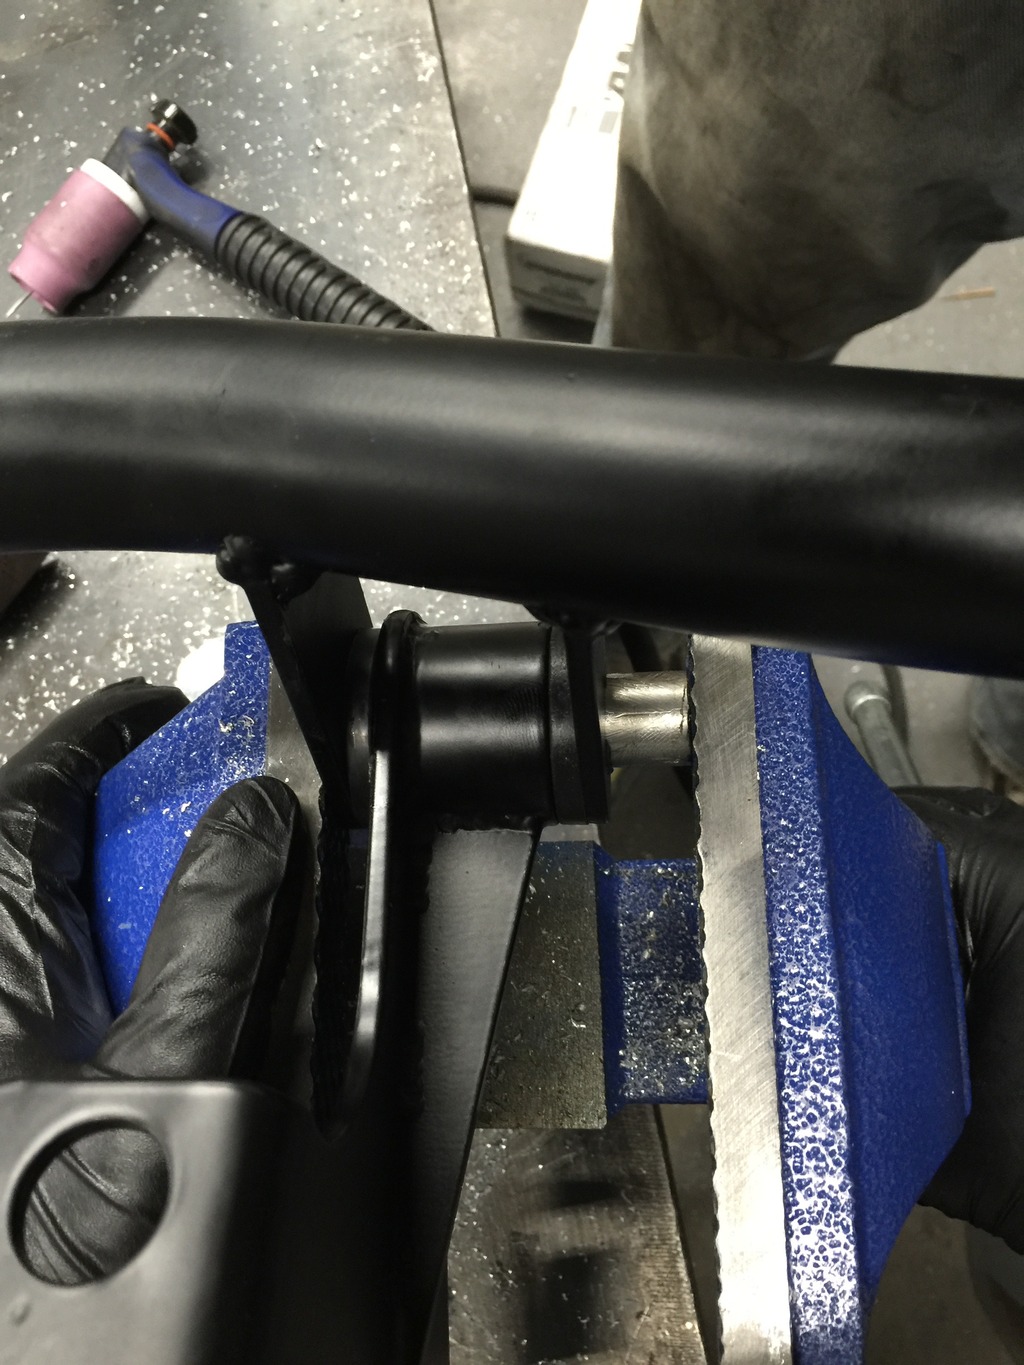
Next we will be installing the Bushing insert into the brace and differential bracket. The bushing and bracket MUST be slid into the brace before installing the insert. This should be what it looks like before you push the insert into place (be liberal with the grease. It helps!)
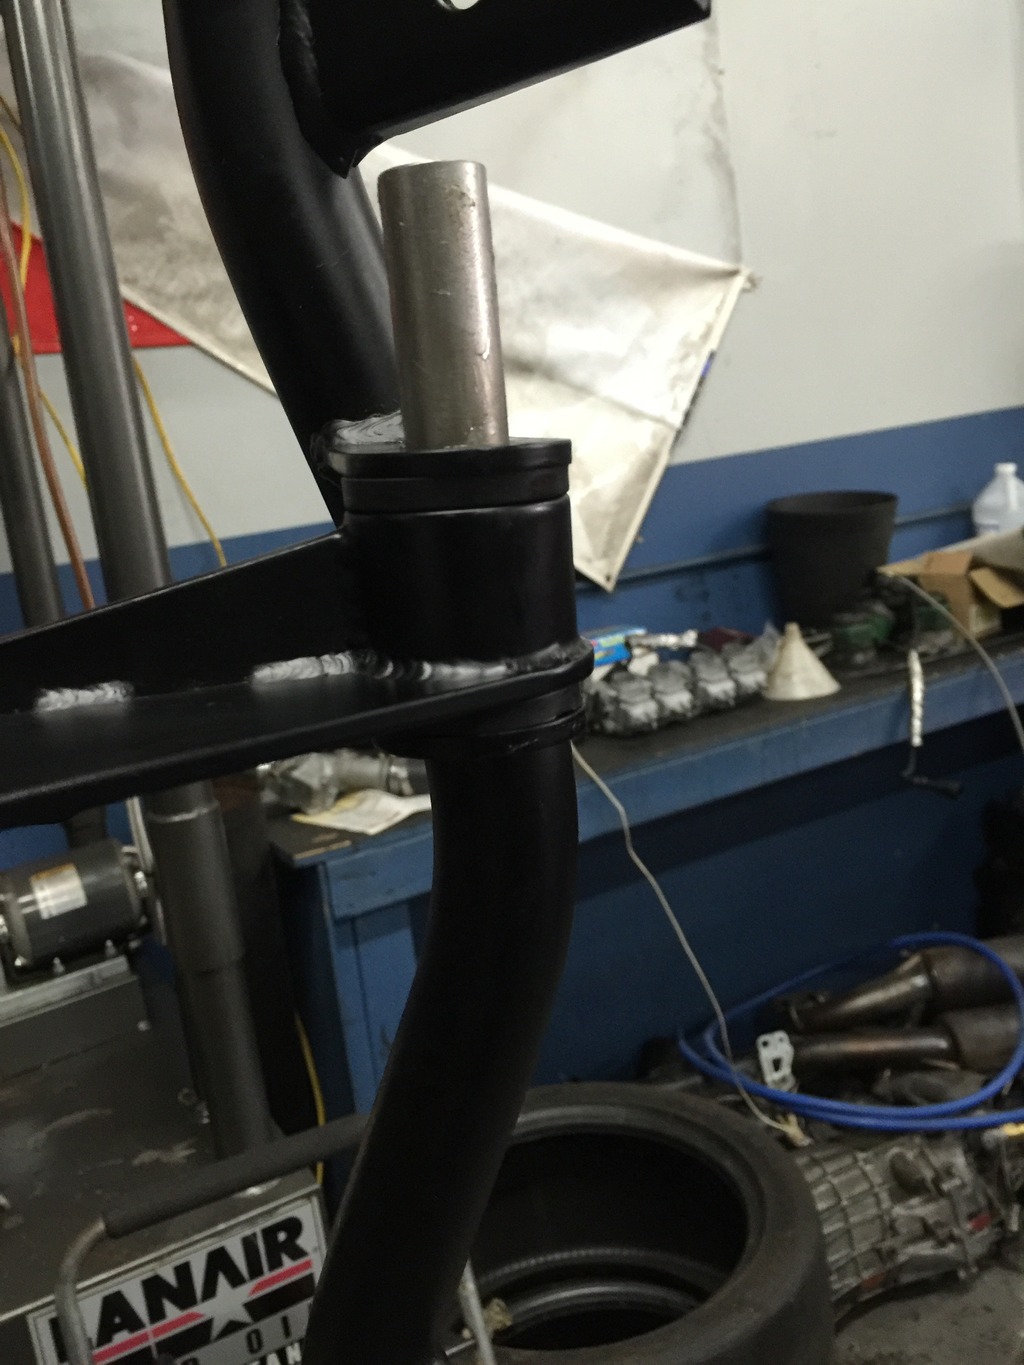
Next, put the setup in a vice to press the insert into place. This is where it helps to have two people to make sure it slides in straight. Be careful not to tear the bushing if the insert goes in crooked.
With the two pieces joined, now you want to get the diff into place. I used a jack since I was on the floor, but a Deadman or transmission jack can be used if you're using a lift
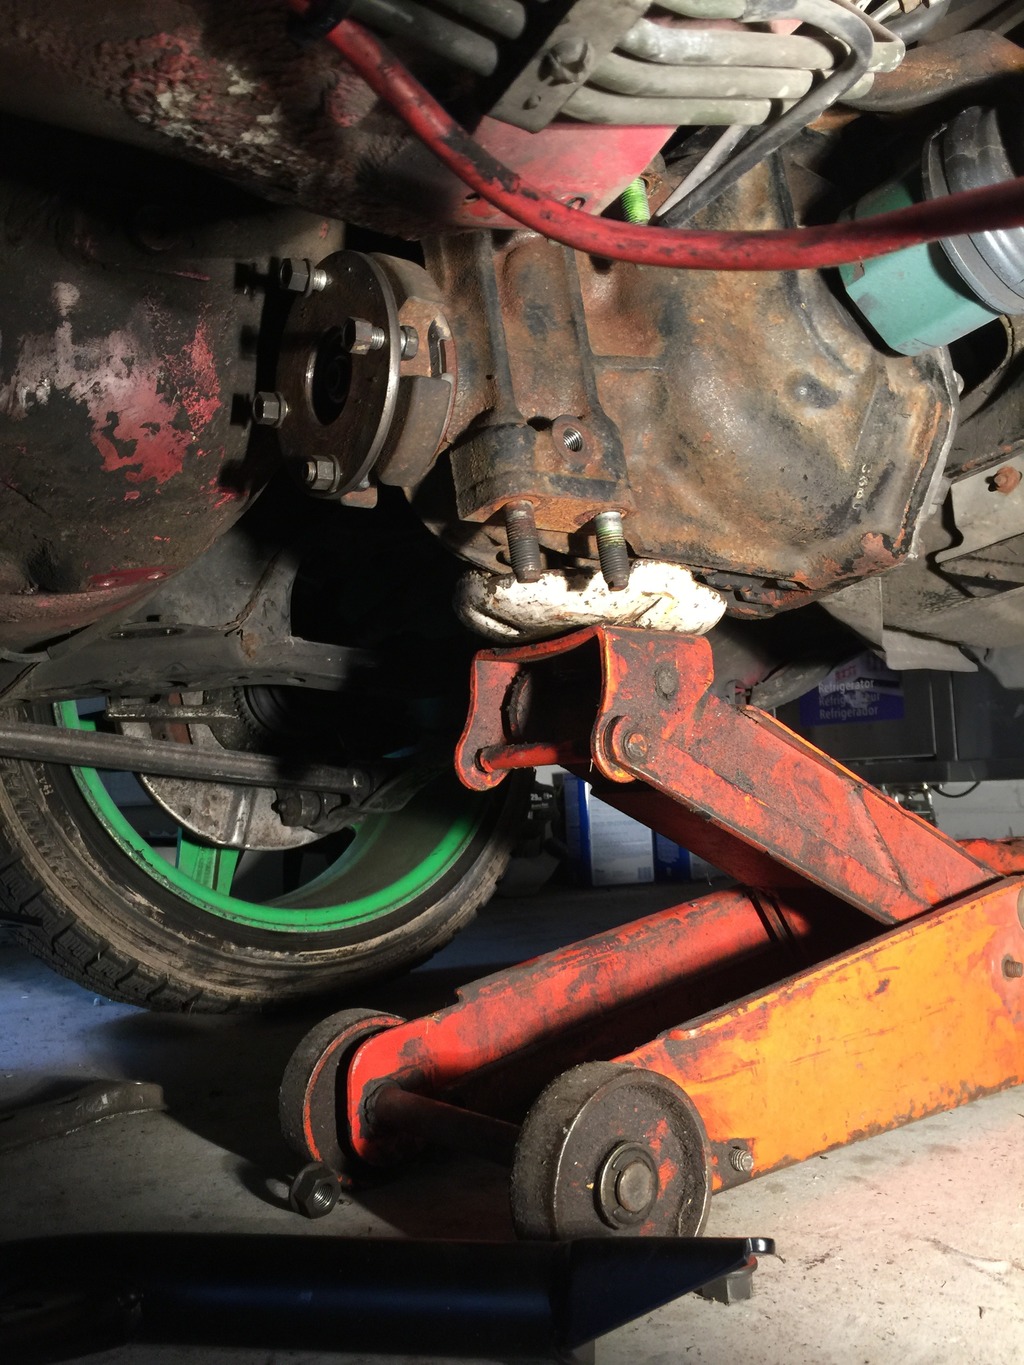
Once the diff is into place, attach the differential bracket and snug the nuts into place to secure it. This is where you need the 21mm deep socket and ratchet. Then reposition your jack onto the Differential Brace
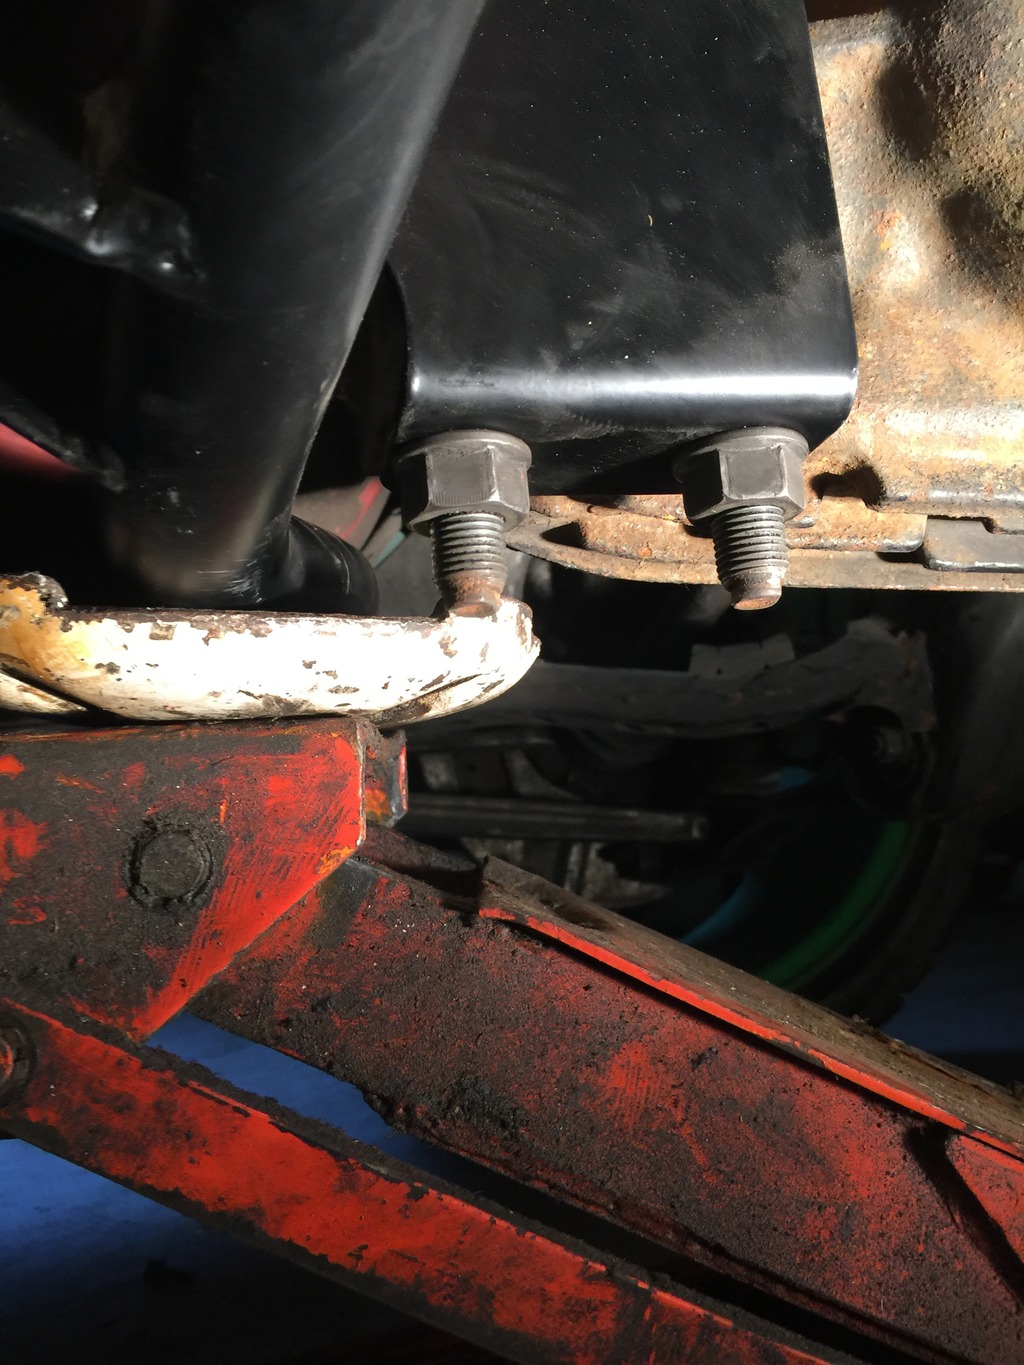
Once the brace is elevated, put the 12mm bolts back in and tighten them down.
With the 12mm bolts tight, you can install the upper nuts on the differential studs. The upper stud closest to the driveshaft requires the black spacer included with the kit. These are also 21mm so be sure to tighten them down as well
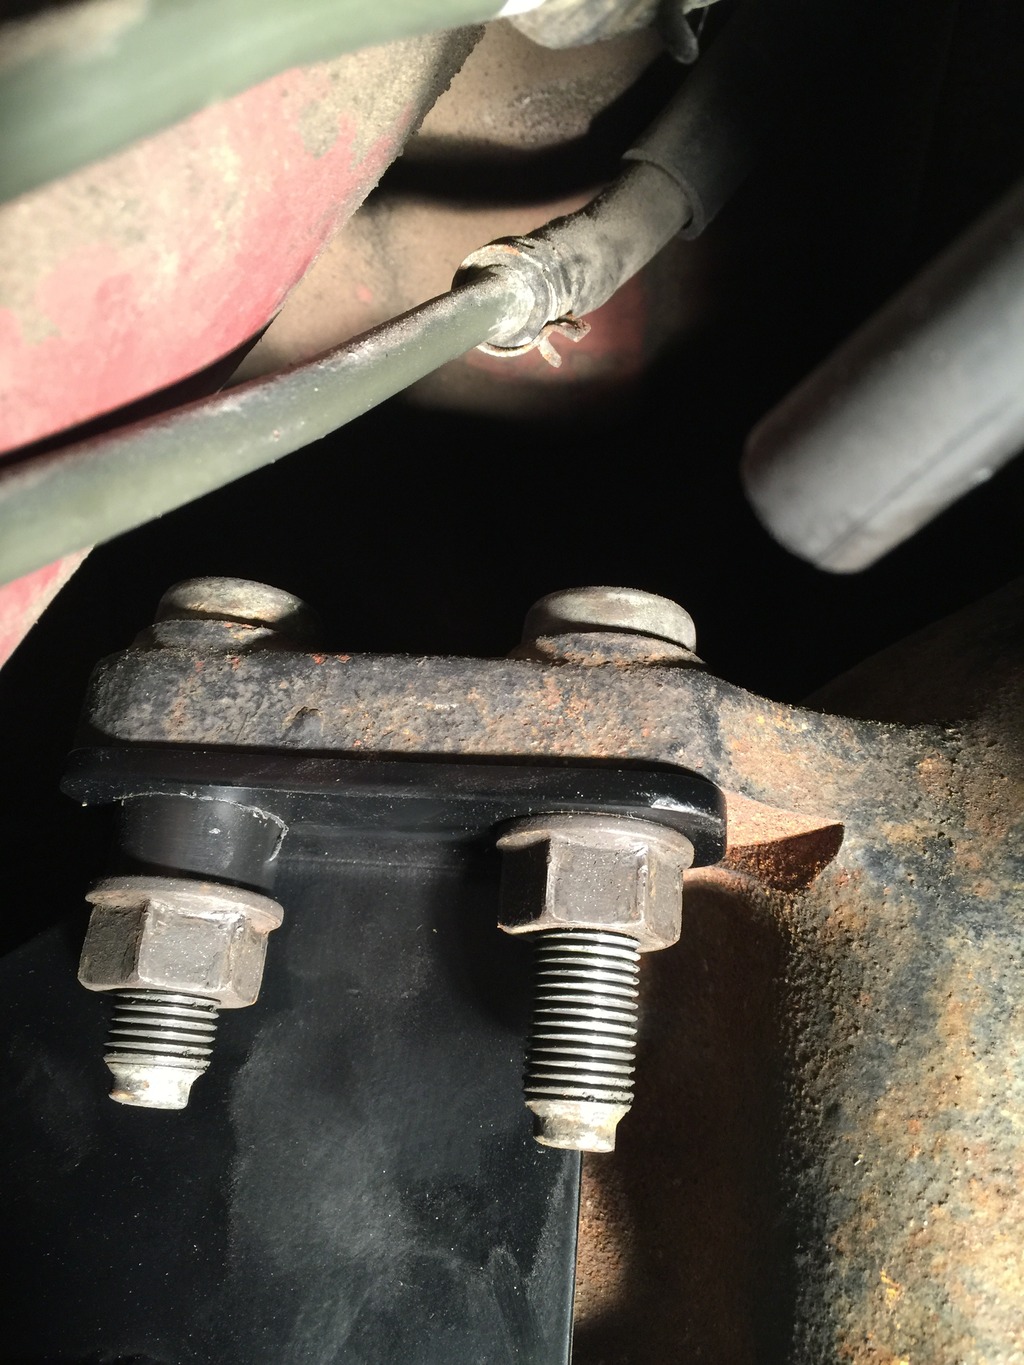
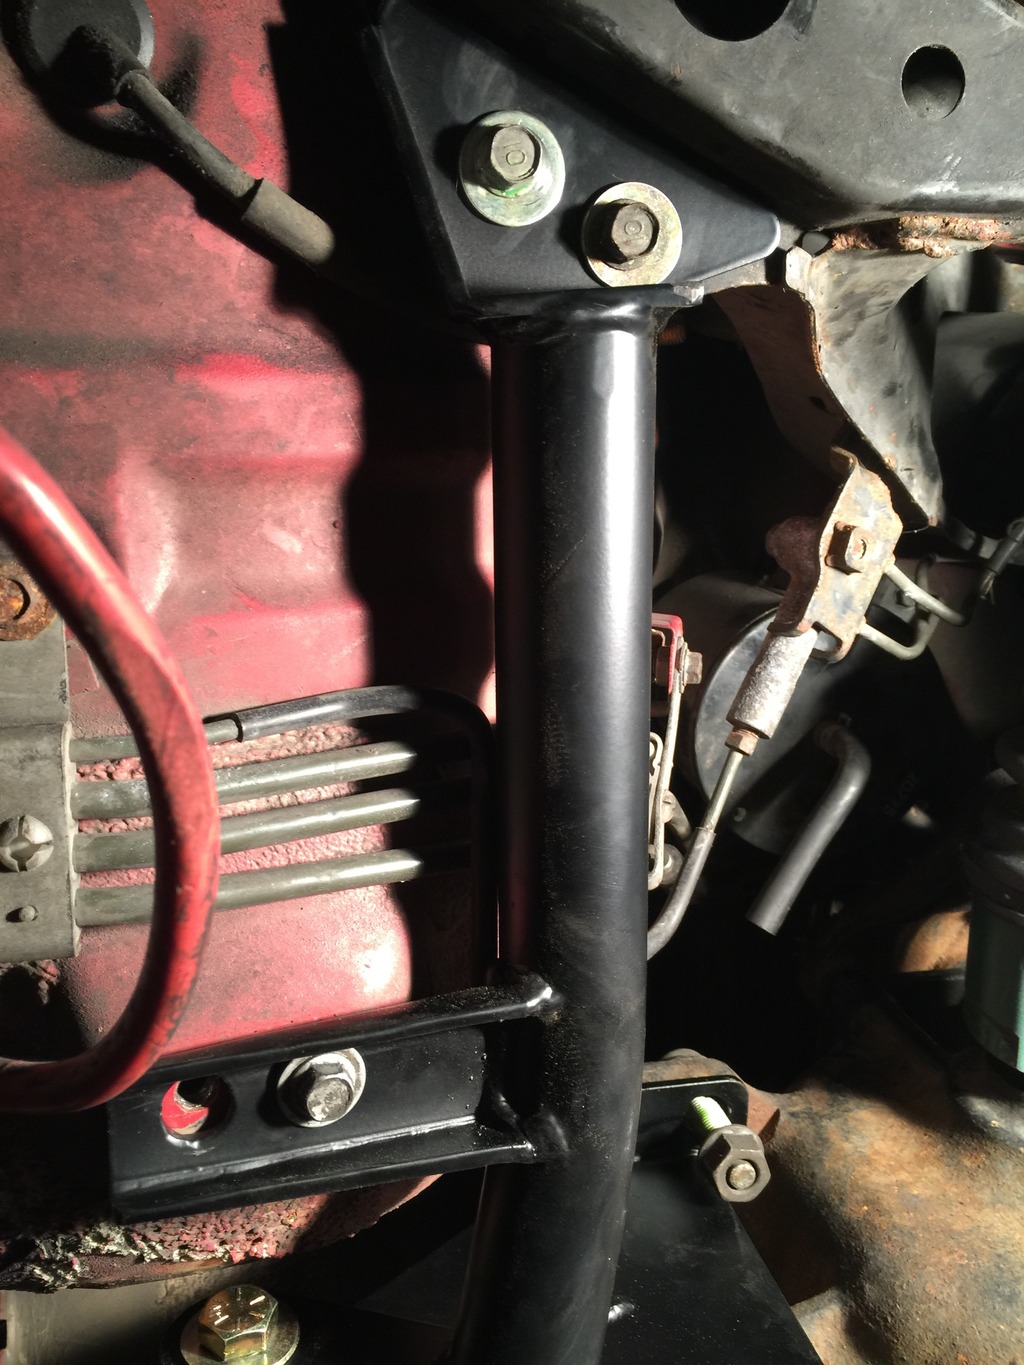
With all other bolts tight, use a 19mm socket and 19mm wrench the tighten the bolt connecting the bracket to the brace.
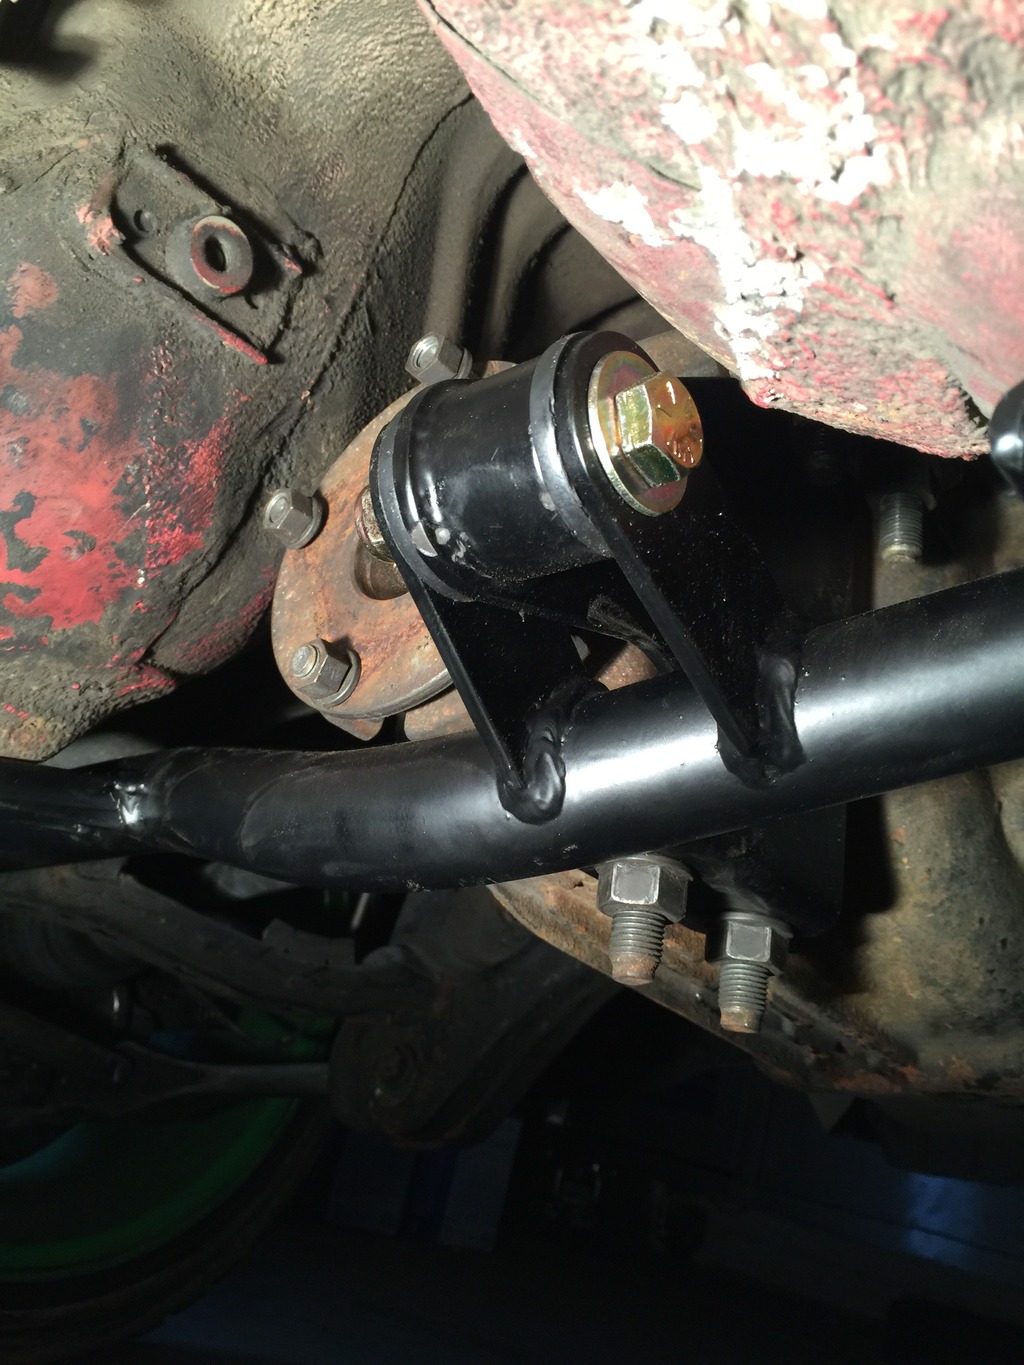
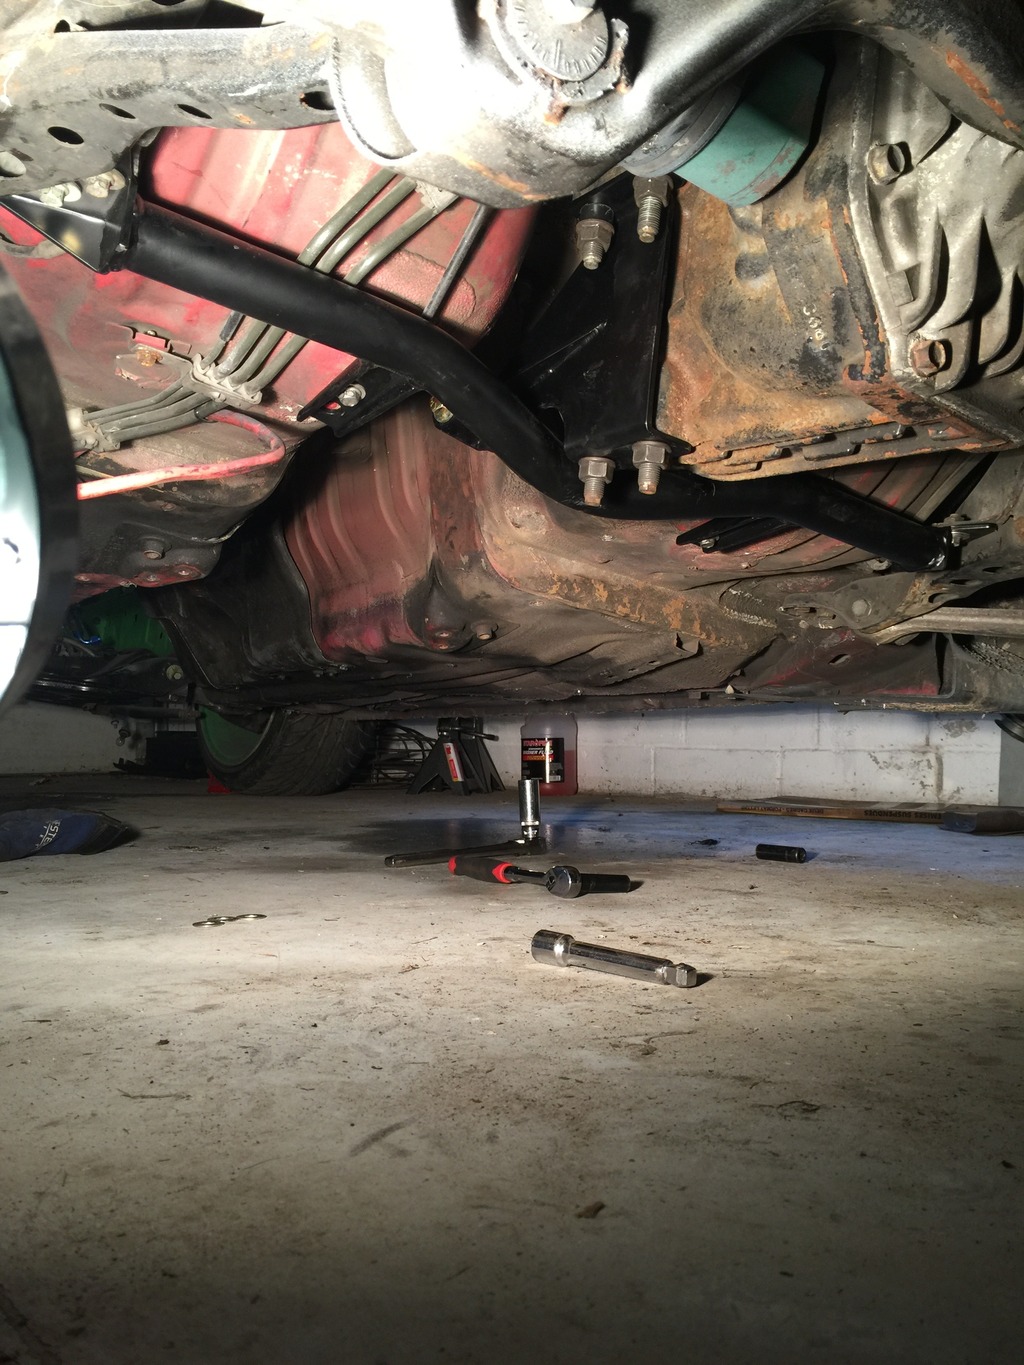
With all bolts tight, this should be the final result
Hope this install was helpful. As this is a pre-production part, feel free to contact sales@sikky.com for more information on pricing for this brace. ****I AM NOT A SIKKY EMPLOYEE****
So I was lucky enough to get my hands on the pre-release version of the Sikky Manufacturing Mazda RX-7 FD Differential Brace (P/N DBA-01). This is a Must Have part for anyone who is eliminating their PPF when swapping in a different motor into their RX-7, as it provides the maximum amount of support and strength that is needed to hold your differential in place.
When you purchase the kit, it will contain:
Differential Brace (1)
Differential Bracket with Polyurethane Bushing (1)
Shoulder bolt with Bushing insert (1)
Washers (8)
Spacer for Upper Differential Stud (1)
Bushing Grease Packet (1)
Install difficulty: 2 out of 5
Install time: 1.5 hours (if you have a buddy, 1 hour)
Tools you will need:
21mm deep socket
12mm socket
19mm socket and wrench
3/8 or 1/2 drive ratchet
Jack or Deadman stand
Bench Vise
Here is the layout of the parts as they come. The bars and bracket are powdercoated satin black for extra durability.

This install was done on a shop floor with jacks, jack stands and no power/air tools by one person. Install time and difficulty may increase or decrease depending on your environment and help.
First you want to remove the PPF and the driveshaft off of the differential. Let the diff hang free as this will make it easier to set into place.

Start by removing the metal braces on either side of the differential. There should be 4 12mm bolts on each brace. They are indicated as such.

Next we will be installing the Bushing insert into the brace and differential bracket. The bushing and bracket MUST be slid into the brace before installing the insert. This should be what it looks like before you push the insert into place (be liberal with the grease. It helps!)

Next, put the setup in a vice to press the insert into place. This is where it helps to have two people to make sure it slides in straight. Be careful not to tear the bushing if the insert goes in crooked.

With the two pieces joined, now you want to get the diff into place. I used a jack since I was on the floor, but a Deadman or transmission jack can be used if you're using a lift

Once the diff is into place, attach the differential bracket and snug the nuts into place to secure it. This is where you need the 21mm deep socket and ratchet. Then reposition your jack onto the Differential Brace

Once the brace is elevated, put the 12mm bolts back in and tighten them down.

With the 12mm bolts tight, you can install the upper nuts on the differential studs. The upper stud closest to the driveshaft requires the black spacer included with the kit. These are also 21mm so be sure to tighten them down as well

With all other bolts tight, use a 19mm socket and 19mm wrench the tighten the bolt connecting the bracket to the brace.

With all bolts tight, this should be the final result

Hope this install was helpful. As this is a pre-production part, feel free to contact sales@sikky.com for more information on pricing for this brace. ****I AM NOT A SIKKY EMPLOYEE****
Last edited by OC DEBO; Oct 27, 2015 at 05:41 PM. Reason: Slow upload
Not trying to be Mr negative nancy, but what exactly is the brace supposed to do in terms of Performance? There are a couple problems that instantly came to thought. Nice write up though!
Its based on the Samberg brace, but the bushing might be the different. I will say im not too familiar with that brace, but Sikky is launching a full LS based swap kit so this would be part of that line of products. I was just testing fitment for something they want to launch.


Thanks for the review! Looks like a good option.
Do that job sometime with air tools and you'll never go back . For about $150 at Harbor Freight you can get a compressor and an impact gun, it will be the best investment you ever made.
Dale
Do that job sometime with air tools and you'll never go back
. For about $150 at Harbor Freight you can get a compressor and an impact gun, it will be the best investment you ever made.Dale
It doesn't look bad.. I just don't know if you could really trust in it as a diff brace. When I think of diff Braces I think of a product that reinforces the diff and makes it stronger or aids performance in a way. I see that it does get rid of the PPF... But that means you need a solid transmission Brace because the PPF does more than reinforce the Diff.
There are 2 Major problems that would keep me from running this car in a Rotary Track car. Maybe a v8 is different but:
1) The Brace doesn't really reinforce one of the weakest parts of the drive train... Our diff case.
2) If running rotary still... You'd need a Hefty Transmission brace otherwise you may end up cracking rear Irons.
But again.....this is for Rotary guys as I have no experience with v8's. I like the HPP-2 in 1 brace because it locks down every weak point in the rear end. And at 480 RWHP in a Drift car with about 18 Events under the belt... I'd say the HPP 2-in-1 Brace has definitely proven itself.
Not trying to Knock the SIKKY brace. Just giving my experience. Good write up and Review!
@Dale, I totally agree and I have a compressor and impact tools in my garage. I was mainly doing this for the DIY guys who might not have access to that stuff to show that you CAN do it without air tools. Thanks though!
@Manny, I confirmed with SIKKY that this is intended for Swapped cars only and was never intended to work with the rotary/PPF. I am familiar with the HPP brace and agree with you. As the "diff brace" market is a little scarce, I feel that SIKKY is just looking to be the One stop shop for swaps like Hinson and Samberg.
@Manny, I confirmed with SIKKY that this is intended for Swapped cars only and was never intended to work with the rotary/PPF. I am familiar with the HPP brace and agree with you. As the "diff brace" market is a little scarce, I feel that SIKKY is just looking to be the One stop shop for swaps like Hinson and Samberg.
Trending Topics
I would be very interested in doing something like this and deleting my PPF. I think it simplifies things quite a bit but have some of the same concerns about the "bracing" that Manny has.
All of the bolts used to hold the diff to the car (ie on the body & rear sub frame) are weak bolts. I have had every single bolt break off in the body of the car where that is bolted to the body. That makes me very nervous.
If someone could come up with a FD trans mount for the rotary application I would be interested in this, I would just reinforce the floor and rear sub frame at the mounting points.


Are you serious? Products are inspired from/by other products all the time. This guy actually had the ***** to admit it.
It's the little things, the attention to detail and the overall quality of a product that make it good and will decide the fate of a product. Sikky is a new company and only time will tell if they suceed long term. Samberg has only been around since 2002 but has made a good name for themselves. Sikky isn't taking any business away from Samberg.
It's the little things, the attention to detail and the overall quality of a product that make it good and will decide the fate of a product. Sikky is a new company and only time will tell if they suceed long term. Samberg has only been around since 2002 but has made a good name for themselves. Sikky isn't taking any business away from Samberg.

Registered User
Joined: Dec 2014
Posts: 69
Likes: 0
From: Baltimore, MD
Are you serious? Products are inspired from/by other products all the time. This guy actually had the ***** to admit it.
It's the little things, the attention to detail and the overall quality of a product that make it good and will decide the fate of a product. Sikky is a new company and only time will tell if they suceed long term. Samberg has only been around since 2002 but has made a good name for themselves. Sikky isn't taking any business away from Samberg.
It's the little things, the attention to detail and the overall quality of a product that make it good and will decide the fate of a product. Sikky is a new company and only time will tell if they suceed long term. Samberg has only been around since 2002 but has made a good name for themselves. Sikky isn't taking any business away from Samberg.
Thanks for making the products available, perhaps in the future I will need one of them. More QUALITY products is a good thing for the FD, it's a small niche market already. Keep innovating new ideas and products!
Hey guys. Just wanted to clarify about this brace. It does of course look very similar to the Samberg mount. When using factory bolt locations there's only so many ways to design this brace. No need to reinvent the wheel on this one. If we made this setup require cutting and/or welding to install then we could have made it pretty different from what you see here but that didn't seem necessary at all. Our LS1 swap kit itself is what really distances us from the rest of market; no one else has a kit out that retains the factory steering geometry. This is just a necessary add-on when doing the swap so we developed it accordingly to ensure our customers are able to get everything needed.
Registered User
Joined: Dec 2014
Posts: 69
Likes: 0
From: Baltimore, MD
Joined: Oct 2001
Posts: 6,279
Likes: 728
From: Florence, Alabama
when i switched out my stock trans for a T56 (May 2010) i examined my options, Hinson torque arm V Samberg rear diff frame and fortunately made the correct decision. i remember it installed in less than an hour and when combined w a trans tailshaft mount solved all my powertrain support issues. simply.
while the Sikky rear support should find a welcome market for engine swappers rotary trans swappers will find it a welcome part of the install solution.
given the 2015 62 mm turbos (BW SXE, Garrett GTW, Precision GEN2 CEA) can get you very close to 600 HP, transmissions will become a bigger story.
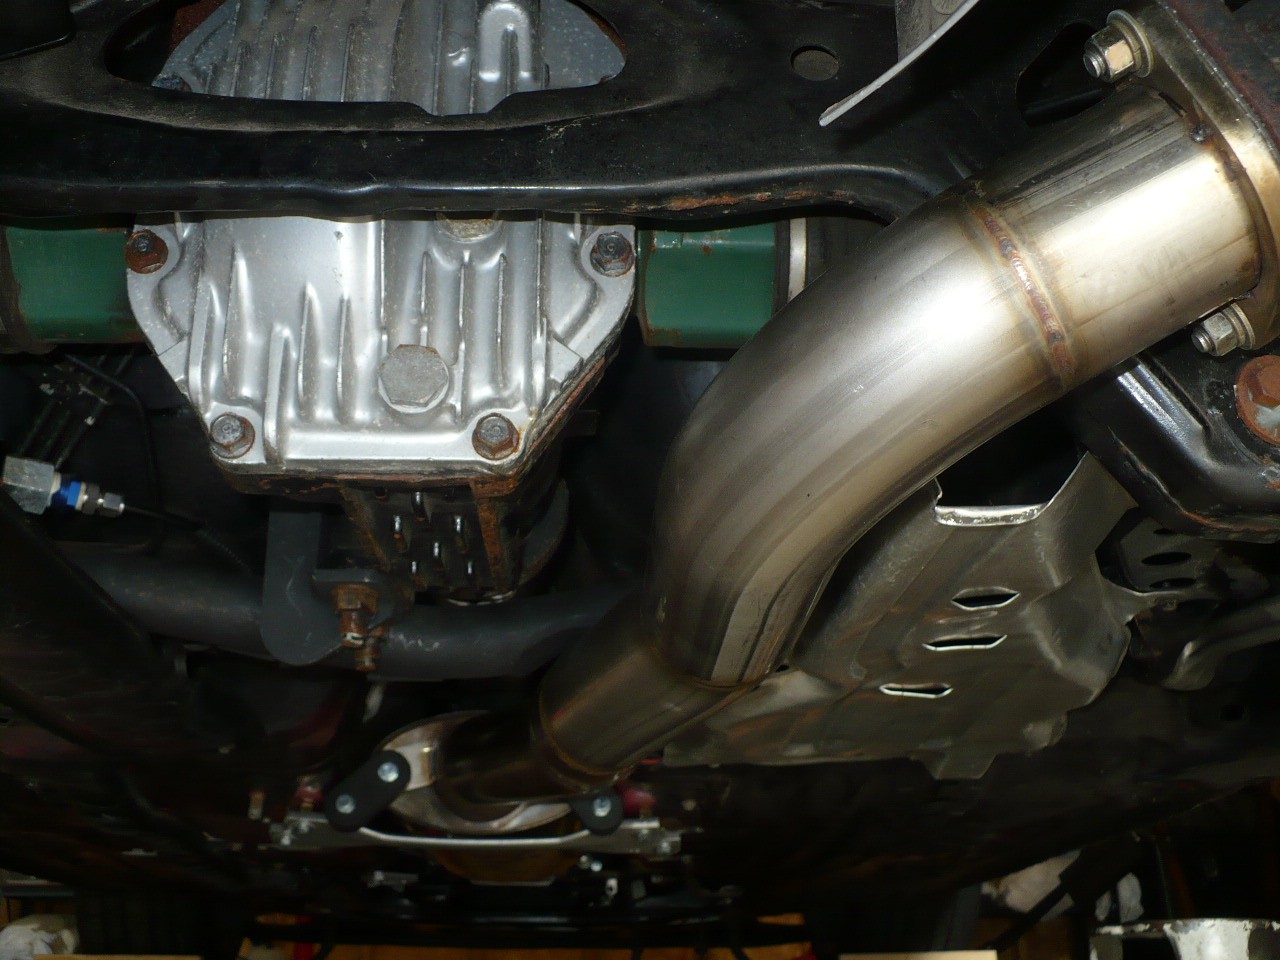
here's my Samberg as it appeared in 2010... BTW, the exhaust cutout is helpful.
while the Sikky rear support should find a welcome market for engine swappers rotary trans swappers will find it a welcome part of the install solution.
given the 2015 62 mm turbos (BW SXE, Garrett GTW, Precision GEN2 CEA) can get you very close to 600 HP, transmissions will become a bigger story.
here's my Samberg as it appeared in 2010... BTW, the exhaust cutout is helpful.
Last edited by Howard Coleman; Nov 15, 2015 at 08:29 AM.
Glad to see that you guys are getting your questions answered directly from the source (@SikkyMFG)
I am super excited to see how well it holds up to the abuse, and will post my results here, as well as answer questions on use/abuse that you guys may have.
I am super excited to see how well it holds up to the abuse, and will post my results here, as well as answer questions on use/abuse that you guys may have.

Senior Member
Joined: Apr 2007
Posts: 365
Likes: 2
From: Vancouver BC
The hinson torque arm is def the wrong choice. They are known to crack the floor pan and I even asked hinson to check/reinforce/correct that but they said it was fine. 2 years later i'm going to have to pull my interior to weld the crack and ditch the hinson system.