Taurus E-fan or Mercury Villager E-fan


 03-21-13, 07:56 AM
#29
If you're going to the junkyard for parts, get as much of the wiring as possible.
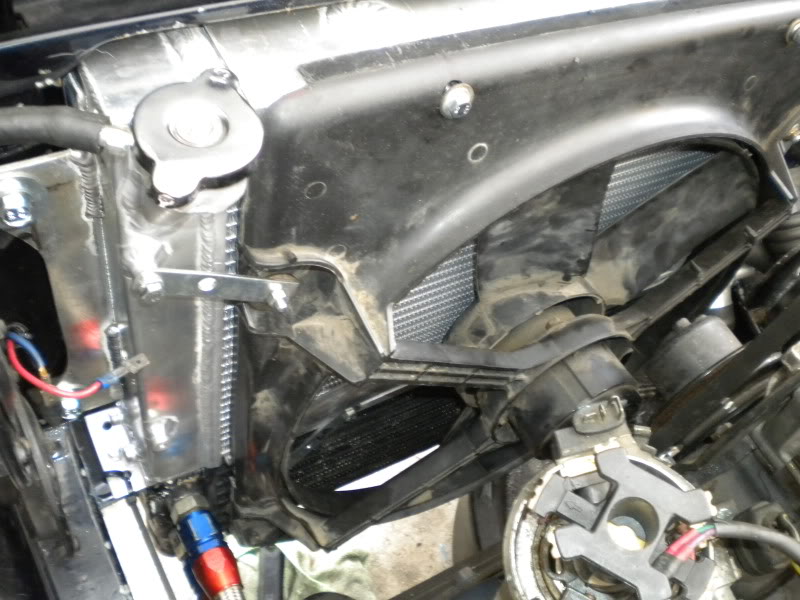
Can we see a pic of this car (specifically, the bay)?
It seems to have all sorts of electrical issues...
03-21-13, 08:24 AM
#30
However he had it wired up it turned on once you turn the key.
I can take some pics sometime later of the fans wiring harness, I'm not sure if he ordered a kit or what but it has a connecter that connects to the back of the fan, three wires iirc.
He had it hooked up merely to turn on, probably in the high position because he figured more air equals more cooling, while negating the fact that he's overloading the electrical system, as well as running the fan more than necessary, on a speed that's unnecessary.
I'll try to find everything from the volvo that I can at the junkyard after I get some money.
I was also thinking thermal switch at junkyard, if its not too much of a pita I could find a car with one using the same on->off and off->on temps, do you know any abundant candidates?
And this pic sucks, it was just something I took after the engine came out.
03-21-13, 08:49 AM
#31
If you don't use the dual trigger VW/Audi thermoswitch like I did (and it's size is a problem, I admit), you'll need a separate thermoswitch for each fan speed.
I had focused on the VW switch from the onset of my project and never even looked for alternatives, although I'm sure their are hundreds.
Go to NAPA, they have books full of switches with specs...you'll find what you need eventually.
I had focused on the VW switch from the onset of my project and never even looked for alternatives, although I'm sure their are hundreds.
Go to NAPA, they have books full of switches with specs...you'll find what you need eventually.
03-21-13, 09:39 AM
#32
Tell me you got some twankie dueces or some spreewells... 
or at least some chrome tips on the exhaust or flame decals!
Seriously, I get the minivan thing. We went through that Aerostar, then a Previa, but it's been a while back. Three kids, the wife and a 130# dog- We eventually upgraded to an E150. I once carried a 1200# pallet of frozen cookie dough in the back of that beast, another time a skid of Boy Scout Popcorn. The butter smell never completely faded...
l trailered car from Arizona to Texas just to keep my ManCard valid;
03-21-13, 09:48 AM
#33
We followed Aaron Cake's write-up that was mentioned earlier.
The GM fan was cheap and easy to find on eBay. We bent up some aluminum strap from HD to mount it and it fits on the FC radiator beautifully. We have a Godspeed aluminum rad but other than being thicker it is the same dimensions as the stock plastic rad.
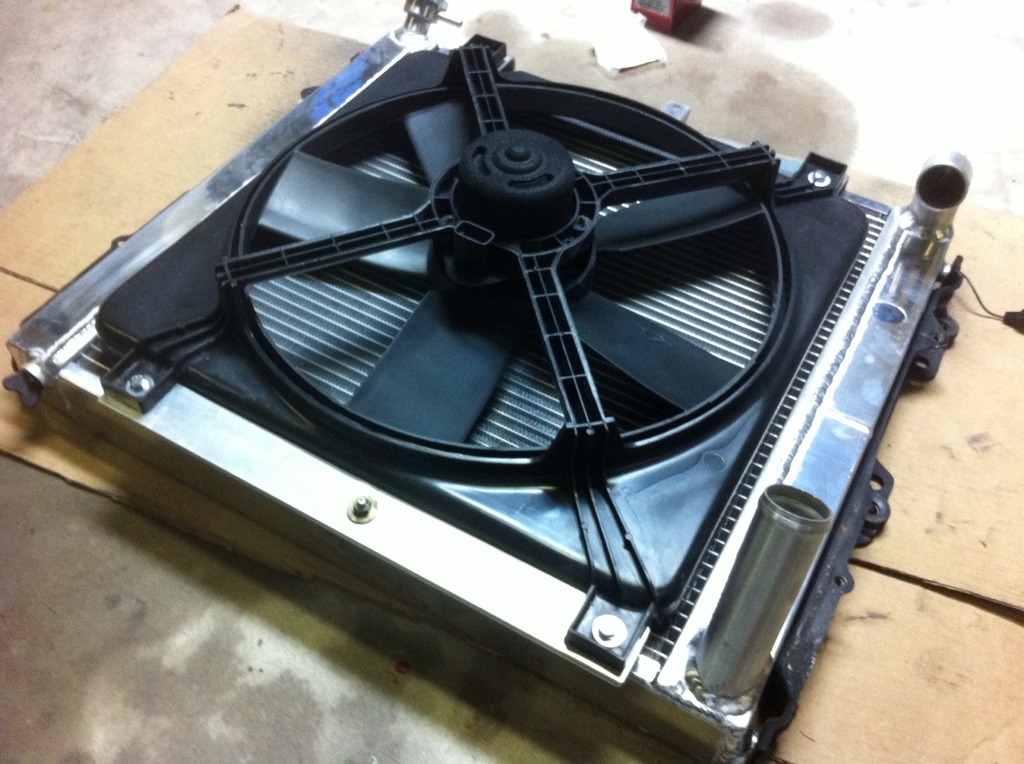
The GM fan is one speed so controlling it is easy. Here in Austin we regularly see 100+ degree summer days and with the R134a-converted A/C on in stop and go traffic there are no issues with cooling. And with the Pioneer 7" in-dash going the OEM S5 alt has no issues keeping up.
We used a common push-in style thermoswitch as recommended in Cake's write-up. You can get them on Summit for as cheap as $22. Here's a link.
I looked at getting fancy with a direct-in-the-coolant style switch but things get complicated and expensive pretty quickly. The probe-between-rad-fins style thermoswitches are well established, cheap and quick to install. You shouldn't spend more than 20 minutes.
The two speed fan idea is cool but in our experience is over engineering. Maybe if we lived in Phoenix or Death Valley...
In his write-up Cake talks about setting the fan-on temp so that it isnt fighting the thermostat. An adjustable thermoswitch is a good idea. We mounted the adjustment **** box to the bottom of the battery box where it was out of the way, away from water, but easy to reach.
It's easy to turn a simple project like this into a life-consuming epic quest. Cake's method is cheap, easy and effective.
That said, if you want to get a little more fancy, you could look into using a switch reading off the stock thermosensor the ECU uses to control the engine. The great and wise HAILERS talks about the switch in a thread on hot start problems here. I believe this is the switch to which he refers: Universal Voltage Switch. If you are hell-bent on exploiting the two-speed fan, maybe you could use two of the UVSs each controlling a different speed.
Good luck with your project and remember the KISS principle!
The GM fan was cheap and easy to find on eBay. We bent up some aluminum strap from HD to mount it and it fits on the FC radiator beautifully. We have a Godspeed aluminum rad but other than being thicker it is the same dimensions as the stock plastic rad.
The GM fan is one speed so controlling it is easy. Here in Austin we regularly see 100+ degree summer days and with the R134a-converted A/C on in stop and go traffic there are no issues with cooling. And with the Pioneer 7" in-dash going the OEM S5 alt has no issues keeping up.
We used a common push-in style thermoswitch as recommended in Cake's write-up. You can get them on Summit for as cheap as $22. Here's a link.
I looked at getting fancy with a direct-in-the-coolant style switch but things get complicated and expensive pretty quickly. The probe-between-rad-fins style thermoswitches are well established, cheap and quick to install. You shouldn't spend more than 20 minutes.
The two speed fan idea is cool but in our experience is over engineering. Maybe if we lived in Phoenix or Death Valley...
In his write-up Cake talks about setting the fan-on temp so that it isnt fighting the thermostat. An adjustable thermoswitch is a good idea. We mounted the adjustment **** box to the bottom of the battery box where it was out of the way, away from water, but easy to reach.
It's easy to turn a simple project like this into a life-consuming epic quest. Cake's method is cheap, easy and effective.
That said, if you want to get a little more fancy, you could look into using a switch reading off the stock thermosensor the ECU uses to control the engine. The great and wise HAILERS talks about the switch in a thread on hot start problems here. I believe this is the switch to which he refers: Universal Voltage Switch. If you are hell-bent on exploiting the two-speed fan, maybe you could use two of the UVSs each controlling a different speed.
Good luck with your project and remember the KISS principle!
03-21-13, 10:03 AM
#34
Not using the direct sensor makes your efan control no more sophisticated than the crude thermoclutch of the OEM fan...it's guessing the coolant temp rather than actually measuring it.
Plus, those units are notoriously inconsistent about the turn on/off temps...which I found to be a problem when I tried one (probably the same unit you have).
03-21-13, 11:50 AM
#35
I disagree that direct to coolant sensor are complicated or expensive. My Starion switch was (IIRC) less than $20 and is a direct bolt in on the back of S5 water pump housings. Time will tell whether the 195 on switch will be fighting my thermostat?
I've only got 2k miles on using my efan, but so far I'm content using only one of the two speeds on my fan. In Southern Indiana summer temps can get up 100 but tend to hover in the high 90s. I have my high and low setup with spade terminals. I can swap to high speed if I need to, but so far low has been fine. After spending more time with the efan I'll decide whether to setup both high and low.
One thing that I don't think has been mentioned yet is a manual override switch. I have mine setup with a toggle switch in the cockpit of the car. I put it on the underside of steering column cover.
03-21-13, 12:17 PM
#36
I'm surprised you think using a direct to coolant sensor is "complicated and expensive" but even ceding that, it's still worlds better than those push probe things, which I hate.
Not using the direct sensor makes your efan control no more sophisticated than the crude thermoclutch of the OEM fan...it's guessing the coolant temp rather than actually measuring it.
Plus, those units are notoriously inconsistent about the turn on/off temps...which I found to be a problem when I tried one (probably the same unit you have).
It is the contact of the probe with the radiator fins that is the weak link. The probe tends to loosen over time with vibration causing them to lose contact with the fins. Early on they work pretty well. Later on not so well.
I think if one could insert the probe along with some closed cell foam insulation as a filler on one side, the probe would stay more permanently in contact with the aluminum in the radiator.
Just musing, I have my thread-in switch inserted in the rad hose.
03-21-13, 01:53 PM
#39
I realized an error in my post. I believe it is only the S5 turbo water pump housings that have the a/c fan switch?? Correct me if I'm wrong though...
03-21-13, 02:34 PM
#40
When I was researching the e-fan I never saw anything to suggest there was an unused, available port in the back of the water pump. There isn't a write-up in the archives. In his article "How To Properly Install An Electric Fan" (emphasis added) Aaron Cake doesn't suggest or even acknowledge that route. In RotaryResurrection's writeup "ELECTRIC FAN INSTALLATION AND WIRING" he says he doesn't even bother with a switch as its just another thing to break.
I have an NA water pump housing in a box in the garage that I may go take a look at. I dont remember an unused port but obviously wasnt looking for it when disassembling the NA or rebuilding the Tii. I have seen where people drill into the coolant flow with drills and taps covered in grease (to prevent shavings from falling in) but that seemed like a lot of work.
I also looked at inline radiator hose temperature sensor adapters like these combined with a 3/8" NPT adjustable thermoswitch like this Derale but the cost doubles approaching $100 vs the probe-style.
Clokker isn't normally one for hyperbole (bad taste in GIANT foglights maybe but not hyperbole! ). The probe isn't "guessing" at the temp. At worst it has one level of indirection as it is measuring the temperature of the outside of the radiator not the coolant directly. And while not ideal, the metal of the radiator is specifically designed to quickly and easily transfer heat so that indirection is little more than a rounding error. As Jack notes, they work well. And in the Godspeed rad, the deeper core means almost the entire length of the probe is surrounded by aluminum and it is in there tight.
We used a laser temp gauge just below the thermostat and at the same time monitored the coolant temp via the RTek and found the probe-style thermoswitch consistently triggered the fan within a couple of degrees each time. We got the Flexalite brand thermoswitch from Jegs.
One of yall should do a write-up if it is really as easy as removing a plug in the back of the water pump housing, screwing in a Mitsubishi thermoswitch and hooking up two wires. I certainly would have gone that way instead of waiting for the probe style thermoswitch to ship from Jegs!
I have an NA water pump housing in a box in the garage that I may go take a look at. I dont remember an unused port but obviously wasnt looking for it when disassembling the NA or rebuilding the Tii. I have seen where people drill into the coolant flow with drills and taps covered in grease (to prevent shavings from falling in) but that seemed like a lot of work.
I also looked at inline radiator hose temperature sensor adapters like these combined with a 3/8" NPT adjustable thermoswitch like this Derale but the cost doubles approaching $100 vs the probe-style.
Clokker isn't normally one for hyperbole (bad taste in GIANT foglights maybe but not hyperbole!
). The probe isn't "guessing" at the temp. At worst it has one level of indirection as it is measuring the temperature of the outside of the radiator not the coolant directly. And while not ideal, the metal of the radiator is specifically designed to quickly and easily transfer heat so that indirection is little more than a rounding error. As Jack notes, they work well. And in the Godspeed rad, the deeper core means almost the entire length of the probe is surrounded by aluminum and it is in there tight. We used a laser temp gauge just below the thermostat and at the same time monitored the coolant temp via the RTek and found the probe-style thermoswitch consistently triggered the fan within a couple of degrees each time. We got the Flexalite brand thermoswitch from Jegs.
One of yall should do a write-up if it is really as easy as removing a plug in the back of the water pump housing, screwing in a Mitsubishi thermoswitch and hooking up two wires. I certainly would have gone that way instead of waiting for the probe style thermoswitch to ship from Jegs!
03-21-13, 03:16 PM
#41

When I was researching the e-fan I never saw anything to suggest there was an unused, available port in the back of the water pump. There isn't a write-up in the archives. In his article "How To Properly Install An Electric Fan" (emphasis added) Aaron Cake doesn't suggest or even acknowledge that route. In RotaryResurrection's writeup "ELECTRIC FAN INSTALLATION AND WIRING" he says he doesn't even bother with a switch as its just another thing to break.
I have an NA water pump housing in a box in the garage that I may go take a look at. I dont remember an unused port but obviously wasnt looking for it when disassembling the NA or rebuilding the Tii. I have seen where people drill into the coolant flow with drills and taps covered in grease (to prevent shavings from falling in) but that seemed like a lot of work.
I also looked at inline radiator hose temperature sensor adapters like these combined with a 3/8" NPT adjustable thermoswitch like this Derale but the cost doubles approaching $100 vs the probe-style.
Clokker isn't normally one for hyperbole (bad taste in GIANT foglights maybe but not hyperbole!). The probe isn't "guessing" at the temp. At worst it has one level of indirection as it is measuring the temperature of the outside of the radiator not the coolant directly. And while not ideal, the metal of the radiator is specifically designed to quickly and easily transfer heat so that indirection is little more than a rounding error. As Jack notes, they work well. And in the Godspeed rad, the deeper core means almost the entire length of the probe is surrounded by aluminum and it is in there tight.
We used a laser temp gauge just below the thermostat and at the same time monitored the coolant temp via the RTek and found the probe-style thermoswitch consistently triggered the fan within a couple of degrees each time. We got the Flexalite brand thermoswitch from Jegs.
One of yall should do a write-up if it is really as easy as removing a plug in the back of the water pump housing, screwing in a Mitsubishi thermoswitch and hooking up two wires. I certainly would have gone that way instead of waiting for the probe style thermoswitch to ship from Jegs!
I have an NA water pump housing in a box in the garage that I may go take a look at. I dont remember an unused port but obviously wasnt looking for it when disassembling the NA or rebuilding the Tii. I have seen where people drill into the coolant flow with drills and taps covered in grease (to prevent shavings from falling in) but that seemed like a lot of work.
I also looked at inline radiator hose temperature sensor adapters like these combined with a 3/8" NPT adjustable thermoswitch like this Derale but the cost doubles approaching $100 vs the probe-style.
Clokker isn't normally one for hyperbole (bad taste in GIANT foglights maybe but not hyperbole!
). The probe isn't "guessing" at the temp. At worst it has one level of indirection as it is measuring the temperature of the outside of the radiator not the coolant directly. And while not ideal, the metal of the radiator is specifically designed to quickly and easily transfer heat so that indirection is little more than a rounding error. As Jack notes, they work well. And in the Godspeed rad, the deeper core means almost the entire length of the probe is surrounded by aluminum and it is in there tight. We used a laser temp gauge just below the thermostat and at the same time monitored the coolant temp via the RTek and found the probe-style thermoswitch consistently triggered the fan within a couple of degrees each time. We got the Flexalite brand thermoswitch from Jegs.
One of yall should do a write-up if it is really as easy as removing a plug in the back of the water pump housing, screwing in a Mitsubishi thermoswitch and hooking up two wires. I certainly would have gone that way instead of waiting for the probe style thermoswitch to ship from Jegs!
03-21-13, 03:33 PM
#42
I really like all the input on this topic, I like being well informed on all the possible methods to to run the e-fan, gives me a better idea of what route best suites me, everyone is obviously different and has their own views/opinions .
As long as the method you're using works, as they say why fix something if its not broken. However if you're running with the fan constantly on that's bad, though I'm sure people may argue it works and there's no problems, just because its the easiest way certainly doesn't mean its the best.
As long as the method you're using works, as they say why fix something if its not broken. However if you're running with the fan constantly on that's bad, though I'm sure people may argue it works and there's no problems, just because its the easiest way certainly doesn't mean its the best.
03-21-13, 04:35 PM
#43
S5 FSM, page E-8 (cooling system section). Shows the two sensor/switches on the back on the waterpump. Depending on how your car was optioned, you may only have one of them. If you only have one, the port where the second one is not drilled, but is nice and flat. Usually its easy to drill a hole and tap it.
Or it might make sense to remove the a/c aux fan and use that connector to control the GM fan. That's be even easier and I'm not sure why the GM fan wouldn't be sufficient.
The thermoswitch comes on at 207 degrees and turns off at 194 per the FSM.
03-21-13, 04:57 PM
#44
That's interesting. Being a USDM vert we had a torque dissipater and so the thermoswitch. Since we are running a 5MT with the Tii, in theory we could have tapped directly into that circuit. In theory, if the car is running the a/c's auxiliary fan we would run the GM fan. I can't remember if the thermoswitch is installed though I don't remember removing it or having an extra plug in there.
Or it might make sense to remove the a/c aux fan and use that connector to control the GM fan. That's be even easier and I'm not sure why the GM fan wouldn't be sufficient.
The thermoswitch comes on at 207 degrees and turns off at 194 per the FSM.
Or it might make sense to remove the a/c aux fan and use that connector to control the GM fan. That's be even easier and I'm not sure why the GM fan wouldn't be sufficient.
The thermoswitch comes on at 207 degrees and turns off at 194 per the FSM.
03-21-13, 05:14 PM
#45
If my read of the the FSM (I think around page E-9) is correct then the aux fan comes on under either of two conditions:
That's the way I read the circuit diagram they provide.
What was odd is that in the text Mazda relates the thermoswitch to having an automatic tranny. I know the auto tranny was cooled by the radiator but you'd think the thermoswitch would have been driven by the tranny temp not the general coolant temp.
- the a/c is turned on, OR
- the coolant temp reaches 207
That's the way I read the circuit diagram they provide.
What was odd is that in the text Mazda relates the thermoswitch to having an automatic tranny. I know the auto tranny was cooled by the radiator but you'd think the thermoswitch would have been driven by the tranny temp not the general coolant temp.
03-21-13, 08:35 PM
#46
When I was researching the e-fan I never saw anything to suggest there was an unused, available port in the back of the water pump.
I have an NA water pump housing in a box in the garage that I may go take a look at. I dont remember an unused port but obviously wasnt looking for it when disassembling the NA or rebuilding the Tii. I have seen where people drill into the coolant flow with drills and taps covered in grease (to prevent shavings from falling in) but that seemed like a lot of work.
One of yall should do a write-up if it is really as easy as removing a plug in the back of the water pump housing, screwing in a Mitsubishi thermoswitch and hooking up two wires. I certainly would have gone that way instead of waiting for the probe style thermoswitch to ship from Jegs!
S5 FSM, page E-8 (cooling system section). Shows the two sensor/switches on the back on the waterpump. Depending on how your car was optioned, you may only have one of them. If you only have one, the port where the second one is not drilled, but is nice and flat. Usually its easy to drill a hole and tap it.
While the engine is apart I can easily get some pics of the port. I've also had a machine shop drill and tap the front of my housing for the temp sender for my aftermarket temp gauge. I used the air pump bracket bolt hole and it works wonderfully. I could have drilled the bolt hole open but I also wanted to have some of the material shaved off so that the sender had more depth to it.
The only downside to my setup (so far) is that the Starion switch and temp sender are directly across from each other. The switch is deep and that limits what types of senders/gauges I can use. I'm progressively swtching to AEM gauges and will have to find another location for their sender, it is deep also.
03-22-13, 07:37 AM
#47
One location I think would work for both you guys is here:
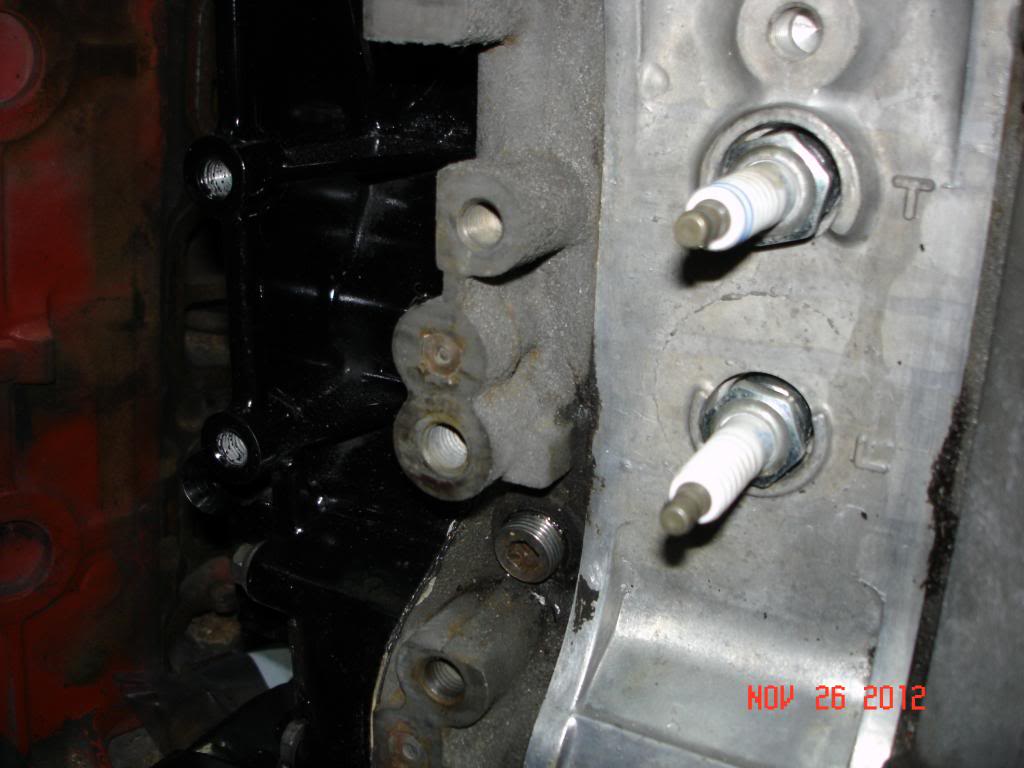
I'm referring to the allen plug nestled between the accessory bracket mounting studs.
I first came upon this in a casual remark about Canadian block heaters and checked out the coolant routing diagram in the FSM to see if it was a viable concept.
I was just beginning my experiments with efans and needed a place for the thermoswitch, this looked like an easy solution.
The objections, such as they were, claimed this was a stagnant backwater in the loop, not representative of temp in a more "active" area.
So, I decided to see.
I already had a VDO water temp gauge, plumbed into the stock location, and it was a trivial matter to install a second sending unit in the proposed spot. These were run to a toggle switch and the gauge could read from either location with a flick of the finger.
The two sensors read identically, perfect tracking.
That settled, I installed a fan trigger (single speed) and it worked fine:
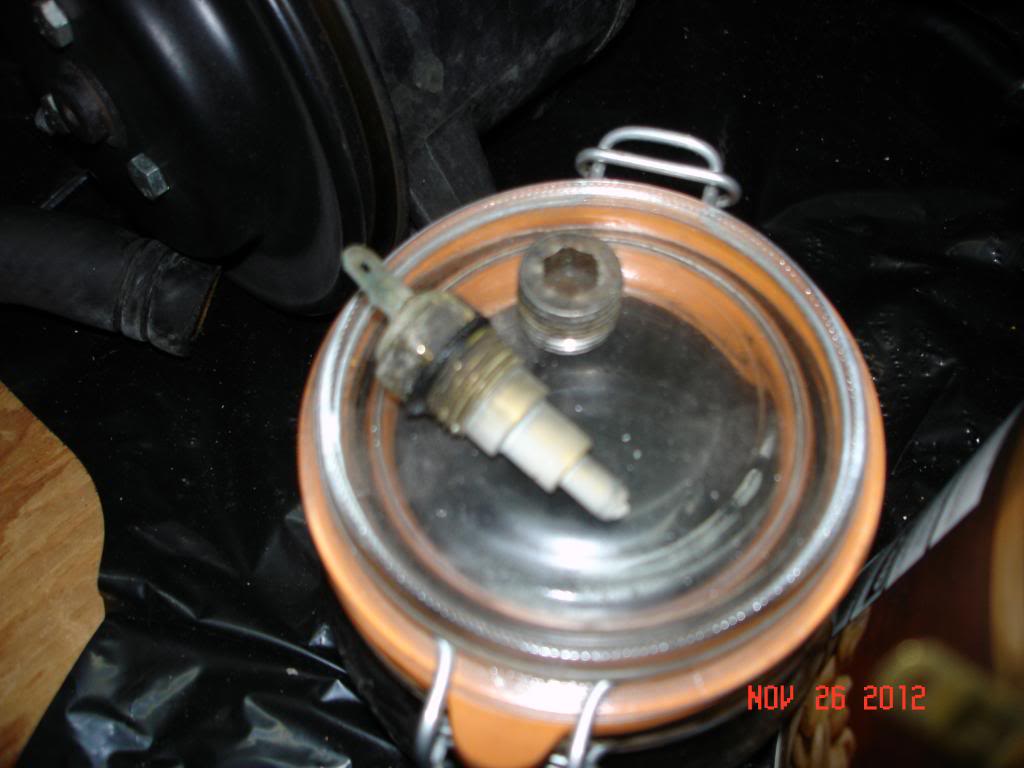
My fan control system became more sophisticated and sadly, the thermoswitch I wanted to use was too big for this location.
I just unplugged the switch and left it as a plug.
(These pics are from a recent engine refresh, where I flukishly came upon the original allen plug in my hardware pile and decided to put it back in.)
I think this port is a standard 12mm (but could definitely be wrong)...but I do know it's just standard metric (not the weird British Pipe Thread of the stock OP and water temp sending units), so adaptors should be easy if needed.
As you can see, I was using some OEM sensor that screwed right in.
No, I don't know where it came from.
Of course, this location is a bit problematical if you still have that massive accessory bracket bolted on the block (keg, sorry).
Depending on the installed height of your sensor, it may squeeze behind, I wouldn't know.
Anyway, it's worth your consideration, it worked for me.
Addendum:
I just wondered if maybe the stock water drain (in the driver side motor mount) might work as well.
I never tried it but if you have a motor on the bench, it would be worth looking into.
I'm referring to the allen plug nestled between the accessory bracket mounting studs.
I first came upon this in a casual remark about Canadian block heaters and checked out the coolant routing diagram in the FSM to see if it was a viable concept.
I was just beginning my experiments with efans and needed a place for the thermoswitch, this looked like an easy solution.
The objections, such as they were, claimed this was a stagnant backwater in the loop, not representative of temp in a more "active" area.
So, I decided to see.
I already had a VDO water temp gauge, plumbed into the stock location, and it was a trivial matter to install a second sending unit in the proposed spot. These were run to a toggle switch and the gauge could read from either location with a flick of the finger.
The two sensors read identically, perfect tracking.
That settled, I installed a fan trigger (single speed) and it worked fine:
My fan control system became more sophisticated and sadly, the thermoswitch I wanted to use was too big for this location.
I just unplugged the switch and left it as a plug.
(These pics are from a recent engine refresh, where I flukishly came upon the original allen plug in my hardware pile and decided to put it back in.)
I think this port is a standard 12mm (but could definitely be wrong)...but I do know it's just standard metric (not the weird British Pipe Thread of the stock OP and water temp sending units), so adaptors should be easy if needed.
As you can see, I was using some OEM sensor that screwed right in.
No, I don't know where it came from.
Of course, this location is a bit problematical if you still have that massive accessory bracket bolted on the block (keg, sorry).
Depending on the installed height of your sensor, it may squeeze behind, I wouldn't know.
Anyway, it's worth your consideration, it worked for me.
Addendum:
I just wondered if maybe the stock water drain (in the driver side motor mount) might work as well.
I never tried it but if you have a motor on the bench, it would be worth looking into.
03-22-13, 08:13 AM
#48
The two sensors read identically, perfect tracking.
Anyway, it's worth your consideration, it worked for me.
Addendum:
I just wondered if maybe the stock water drain (in the driver side motor mount) might work as well.
I never tried it but if you have a motor on the bench, it would be worth looking into.
Anyway, it's worth your consideration, it worked for me.
Addendum:
I just wondered if maybe the stock water drain (in the driver side motor mount) might work as well.
I never tried it but if you have a motor on the bench, it would be worth looking into.
Personally I'm too much of a baby to give up my A/C on a black on black convertible. Even if the switch would fit I would start kicking kittens if I found that sender leaking and had to get to it.
About the drain, I know some people on these forums have used that spot for aftermarket temp gauges. I can get a pitch for threads later today while I'm FINALLY assembling my engine.
Let me repeat, I'm FINALLY assembling my engine, 3 months after I was intending to be done!
03-22-13, 08:33 AM
#49
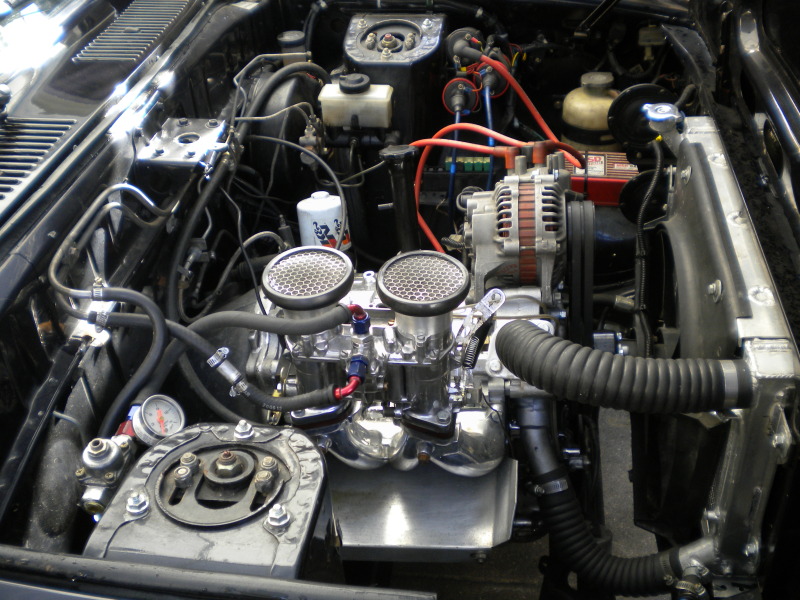
V6 Fiero fan on my bridge ported RX-3, fan was pulled from junkyard over 10 years ago and still runs strong but I just want to try something new. It is controlled by a 30-amp relay and a toggle switch. No issues even at 100 degree ambient over mojave desert coming back from Vegas during last year's WHIV
03-22-13, 11:00 AM
#50
V6 Fiero fan on my bridge ported RX-3, fan was pulled from junkyard over 10 years ago and still runs strong but I just want to try something new. It is controlled by a 30-amp relay and a toggle switch. No issues even at 100 degree ambient over mojave desert coming back from Vegas during last year's WHIV
And I have a question is that fan 2 speeds I believe I have the same fan. Do you have it set to run on low or high