
She Followed Me Home, Honest

Nevermind, it doesn't matter.
I've had somewhat of an epiphany, stood away and reevaluated the whole airpump swap from a more balanced perspective.
Although I obviously love changing **** around, there's usually a semi-reasonable excuse for doing so. Even aesthetics, flimsy an excuse as it may be, counts as valid.
Clearly, some of my mods are whimsically personal but there is always some sort of technical basis I can invoke.
But not this time.
Removing the OEM pump leaves two problems to solve- providing a new source of air (the epump) and rebelting the waterpump pulley so it doesn't slip.
At the end of the day I'd be adding a bunch of parts (for the epump and all the supporting stuff like wiring, relay, etc) and then building a "dummy" pump pulley to duplicate the original belt run.
Then I thought of it this way...
What if the car already had an electric pump and a welfare-style idler pulley installed?
We'll even grant that it was nicely done, given the components at hand.
One day I'm walking in the yard and come upon this mechanical airpump that will fit on the block (which the epump will not), requires no electricity at all and replaces the idler pulley.
I'd probably jump all over that swap.
tl/dr:
I got carried away by a love of complexity and tried to solve a problem that didn't exist. Viewed objectively, my proposed ideas were different but not better.
I've worked hard to gain all the empty space in the bay, why start cluttering it up for no good reason?
The stock airpump stays.
For now.


Joined: Mar 2001
Posts: 31,863
Likes: 3,244
From: https://www2.mazda.com/en/100th/
funny, i had a similar thought. we're running the Mazda race of NASA champions, this weekend, and they have 20 identically prepped 2009-2014 miatae.
the simplicity part is that we had the hood up with a dead starter, just like my old Tr3. and after a bunch of poking around they determined that you need to stroke the key just right so that some electricity goes somewhere and the ecu sees the key, and lets it crank. since this is a "fix" and not a FIX, it puts us in a fix, and we just start it and leave it running.
the cool part is that the whole 20 car field is like 1.5 seconds apart, so the guy on pole was only 1.5 seconds faster than position 20. its like 3 car lengths. the two guys ahead of us tied, 1:46.839! they are broadcasting it on their Mazdalive web feed
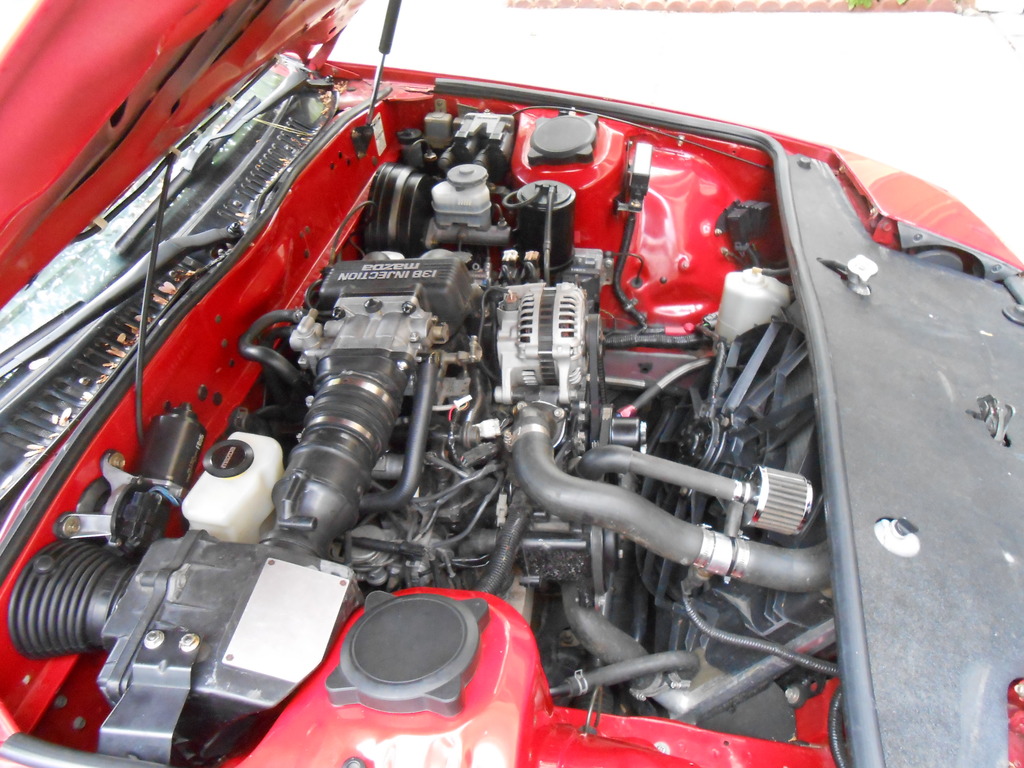
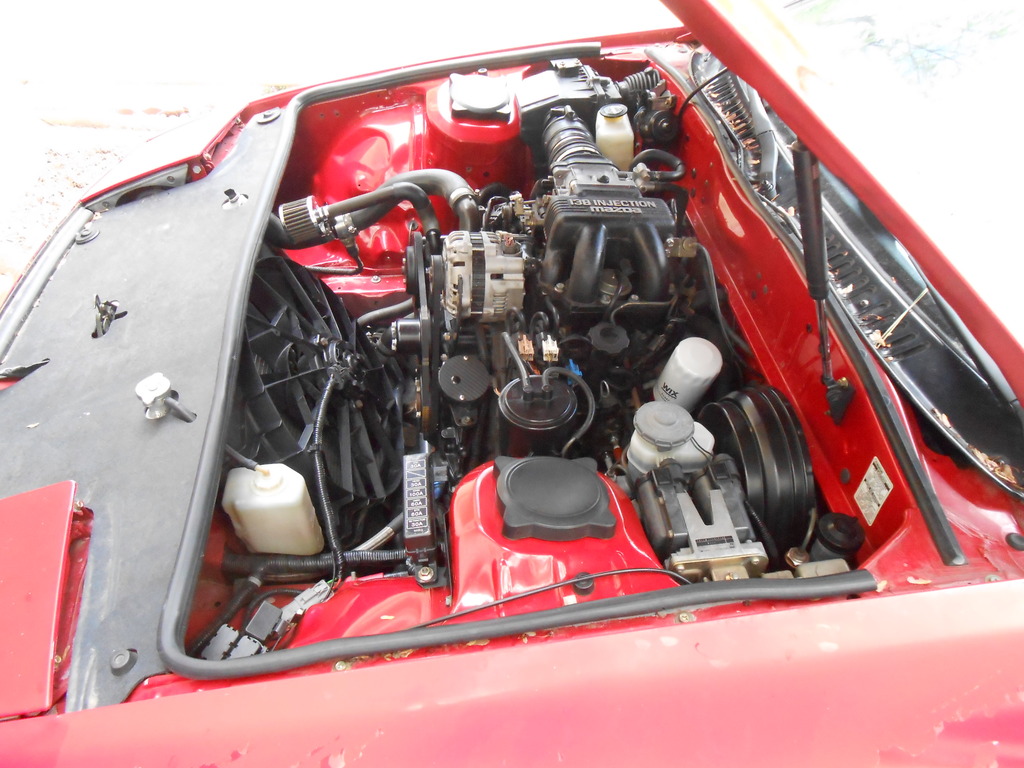
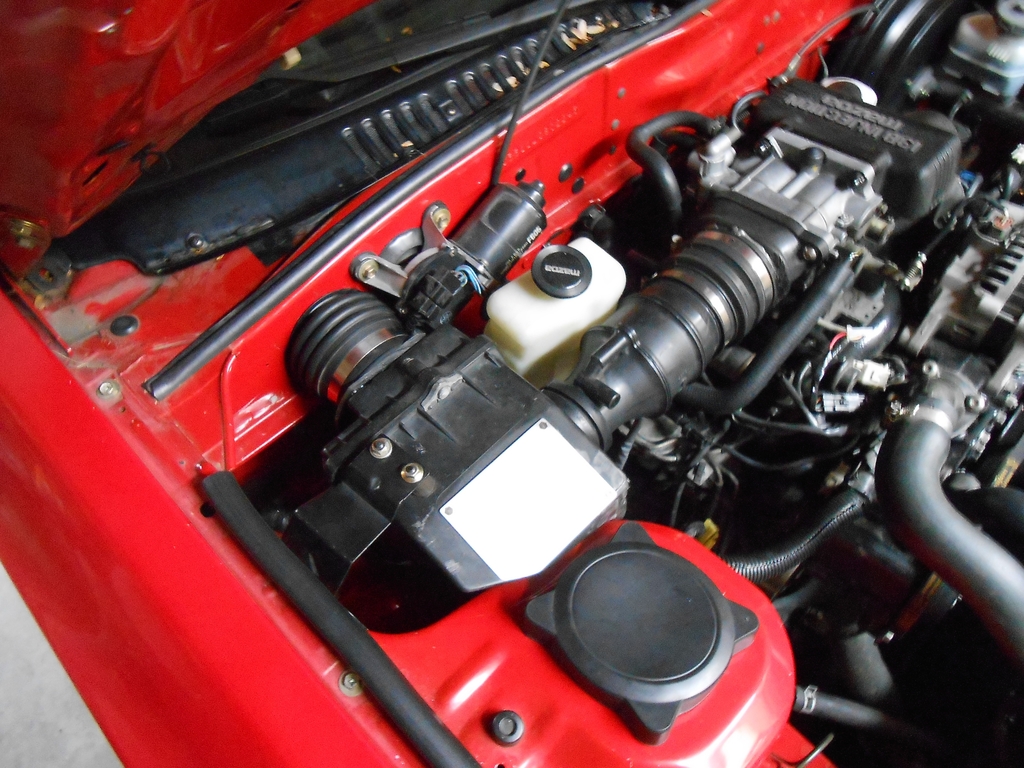
With newly clarified purpose, I reevaluated the bay and made some changes.
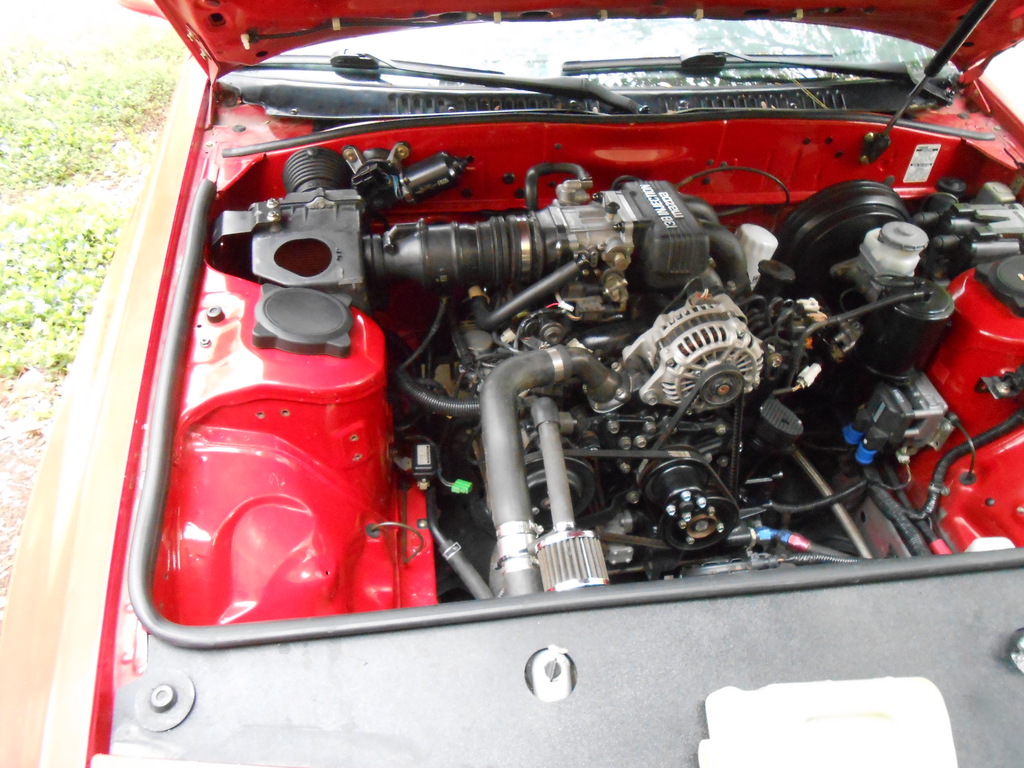
The airpump intake has been rerouted and supported by the upper rad hose:
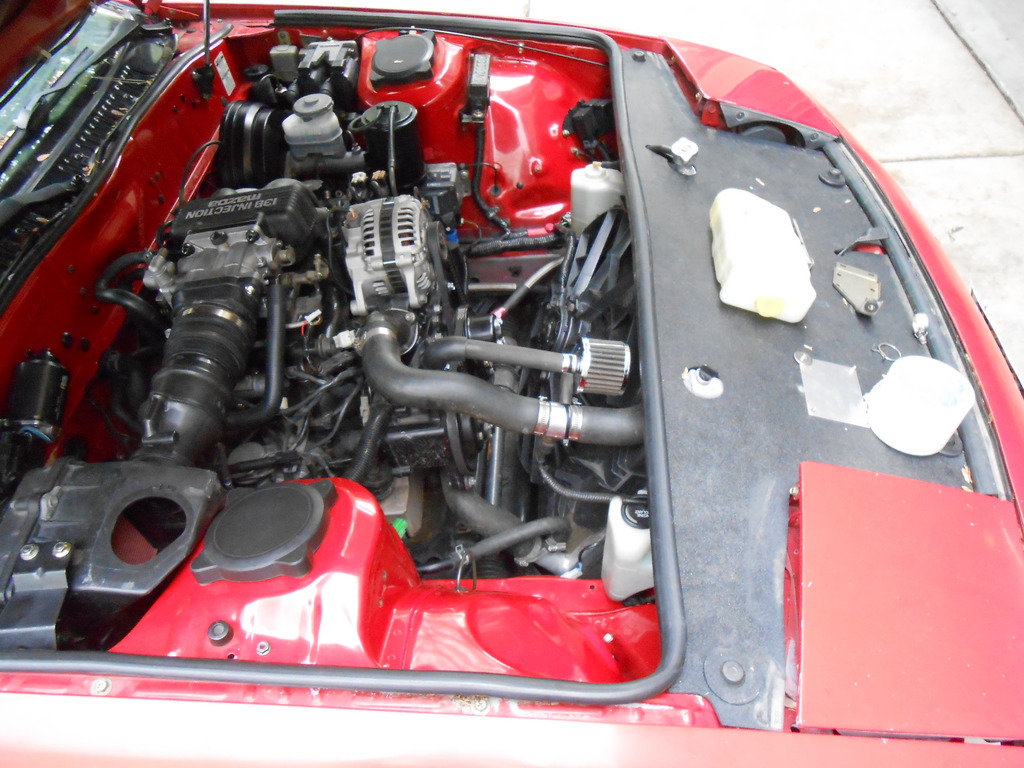
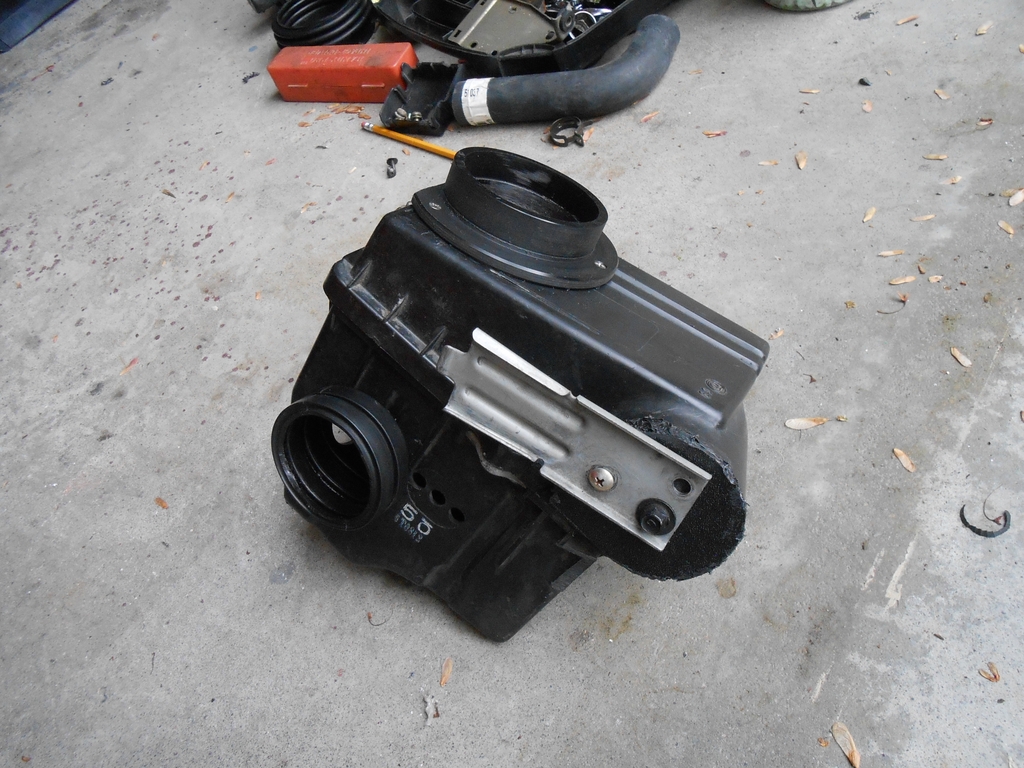
And, in a nod to spectre, I tried to make bracketry for the airbox, replacing the foam.
I tried various combinations- some of which would have worked- before this very oddly bent bracket turned up and within ten minutes, was installed:
I used two rubber bumper/studs (just like our fuel pump mounts) to "suspend" the airbox from the bracket. The box is firmly mounted but free(ish) to move in many planes, so I hope engine vibration will be accommodated.
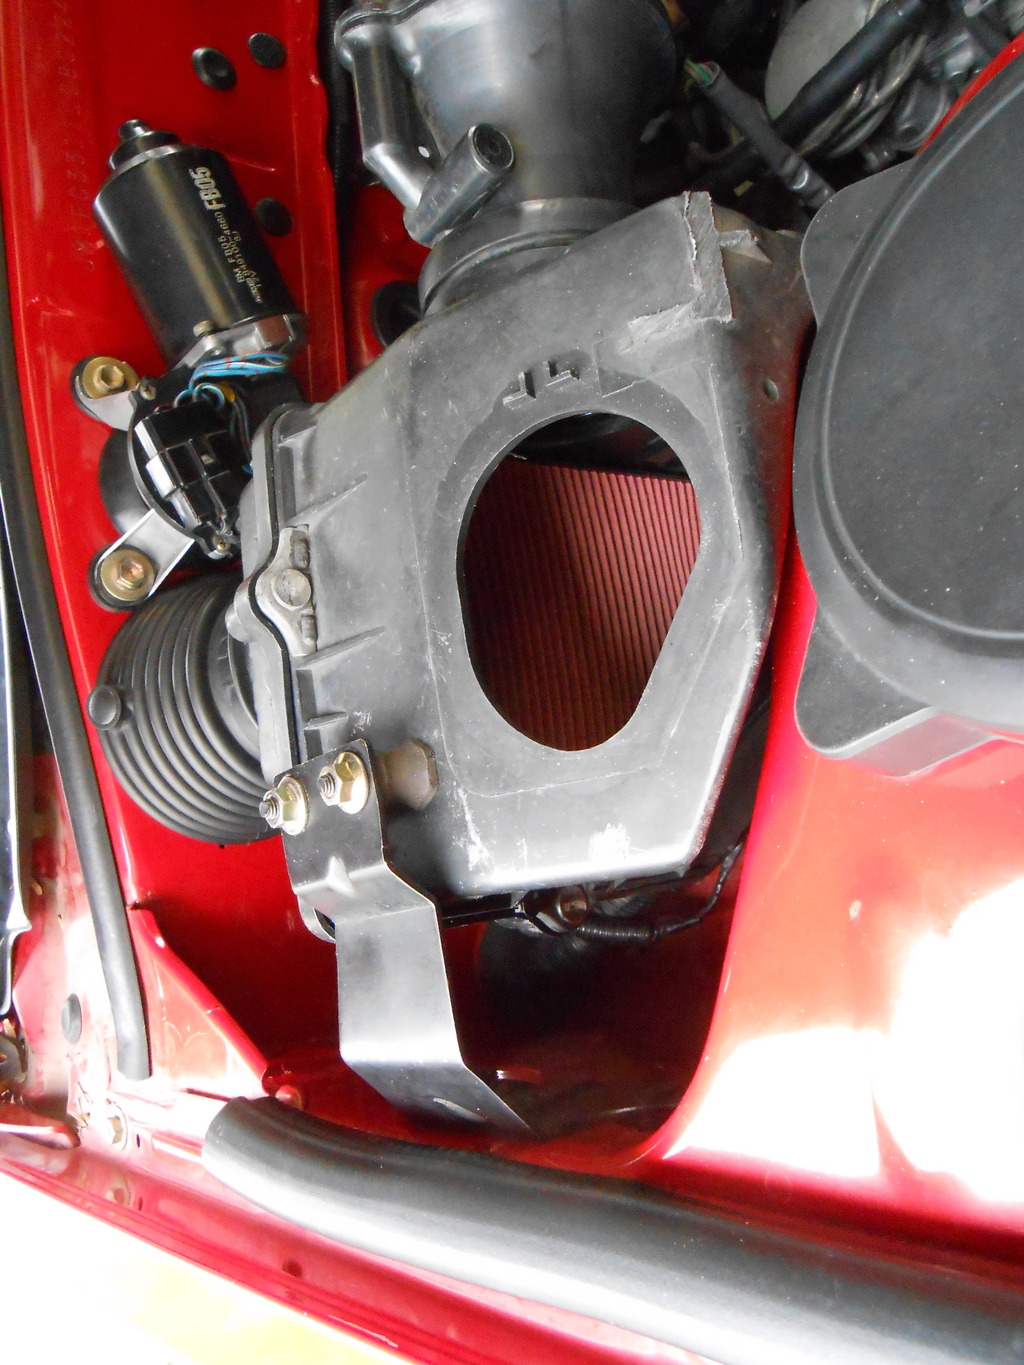
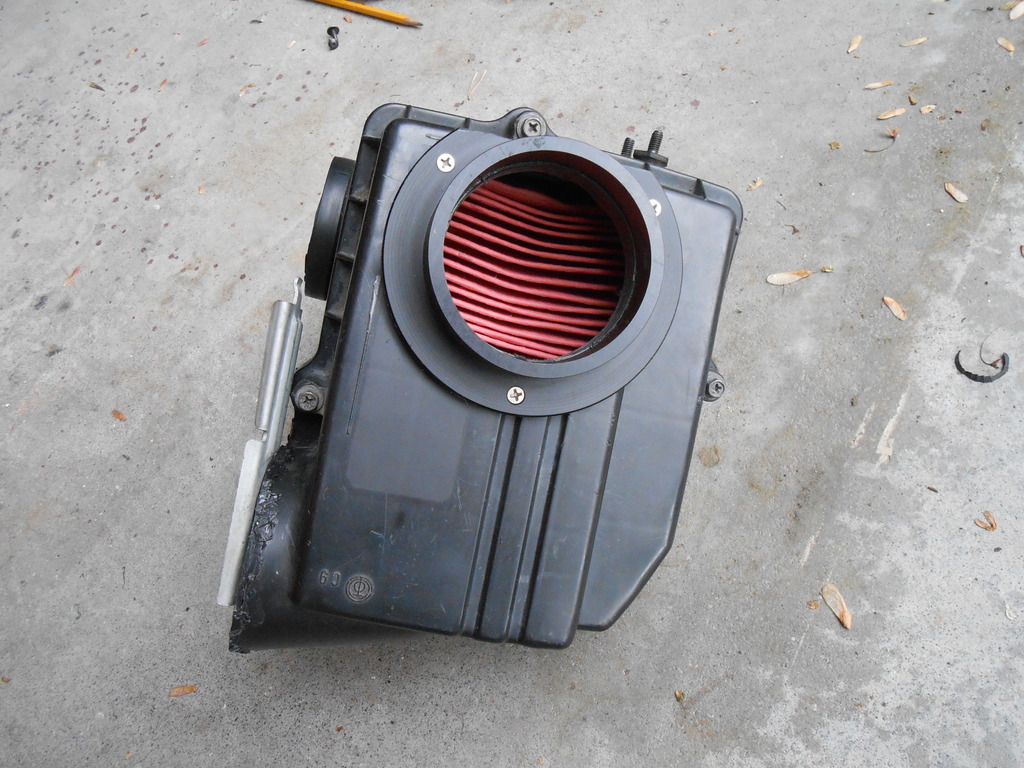
If you've wondered about the gaping hole in the airbox top, well, I kinda need it.
It makes popping the boot onto the end of the AFM a lot easier when you can access it from inside of the box and I've used it extensively.
I figured out a removable cover solution which is currently in the works.
The truly eagle eyed will note that the washer reservoir is MIA also.
That too is being addressed.
Requires a bit more pre-prep to happen but it's all stuff that needed doing anyway and should be done by tomorrow.
Seems like I've followed a lot of detours to get to here but I don't think I could have done it any other way.
The airpump intake has been rerouted and supported by the upper rad hose:
And, in a nod to spectre, I tried to make bracketry for the airbox, replacing the foam.
I tried various combinations- some of which would have worked- before this very oddly bent bracket turned up and within ten minutes, was installed:
I used two rubber bumper/studs (just like our fuel pump mounts) to "suspend" the airbox from the bracket. The box is firmly mounted but free(ish) to move in many planes, so I hope engine vibration will be accommodated.
If you've wondered about the gaping hole in the airbox top, well, I kinda need it.
It makes popping the boot onto the end of the AFM a lot easier when you can access it from inside of the box and I've used it extensively.
I figured out a removable cover solution which is currently in the works.
The truly eagle eyed will note that the washer reservoir is MIA also.
That too is being addressed.
Requires a bit more pre-prep to happen but it's all stuff that needed doing anyway and should be done by tomorrow.
Seems like I've followed a lot of detours to get to here but I don't think I could have done it any other way.
OK, here's a question...
I'm working on the airbox again, primarily enlarging/prettifying the passage between the firewall and the airbox.
I'd also like to route the air pump intake from the airbox (just like stock) and -wake up, here's the question!- I'm thinking of routing the air control valve dump air back into the box as well.
The pump intake is after the filter and the dump would go before the filter.
Anyone see a problem with that?

K. Well... Spitballing here.... Mayhap there's a slight increase in the potential for detonation... The temperature increase from compression is obviously trivial, but the intake for the air pump (assuming I recall correctly) is right behind the radiator (hot), which then goes to a component right there by the engine with all the thermal energy there (hot), gets compressed somewhat (hot), and then introduced to the intake... It's obviously not a super huge risk, but that's the only thing I can think of that might be potentially negative.
Why dump it before the filter instead of after? I don't know that it makes much difference, but is there a reason for it?
Why dump it before the filter instead of after? I don't know that it makes much difference, but is there a reason for it?
The (stock) air pump intake comes from the airbox, after the filter.
As for dumping back before the filter...no real reason, just seemed like the way to do it.
As for dumping back before the filter...no real reason, just seemed like the way to do it.
Oh yeah. Disregard that part then. Still a slight uptick in heat in the intake. Still super minor. Still the only issue I can come up with.
On the plus side, warm air leads to better fuel atomization, so you might get some slight (tenth of an MPG max) uptick in fuel economy... Probably more than offset by the fact that you're getting cold air again, but I'm still in spitball mode.
On the plus side, warm air leads to better fuel atomization, so you might get some slight (tenth of an MPG max) uptick in fuel economy... Probably more than offset by the fact that you're getting cold air again, but I'm still in spitball mode.
Joined: Mar 2001
Posts: 31,863
Likes: 3,244
From: https://www2.mazda.com/en/100th/
OK, here's a question...
I'm working on the airbox again, primarily enlarging/prettifying the passage between the firewall and the airbox.
I'd also like to route the air pump intake from the airbox (just like stock) and -wake up, here's the question!- I'm thinking of routing the air control valve dump air back into the box as well.
The pump intake is after the filter and the dump would go before the filter.
Anyone see a problem with that?
I'm working on the airbox again, primarily enlarging/prettifying the passage between the firewall and the airbox.
I'd also like to route the air pump intake from the airbox (just like stock) and -wake up, here's the question!- I'm thinking of routing the air control valve dump air back into the box as well.
The pump intake is after the filter and the dump would go before the filter.
Anyone see a problem with that?
Send me a pressure gauge and I will, just for you.
An IAT would be interesting too.
Y'all may have noticed that I tend to redo projects like this multiple times until I'm happy; there are so many things you (I) can't foresee until you get there.
This concept was functionally fine but not quite as well executed as it could be and I wanted it right.
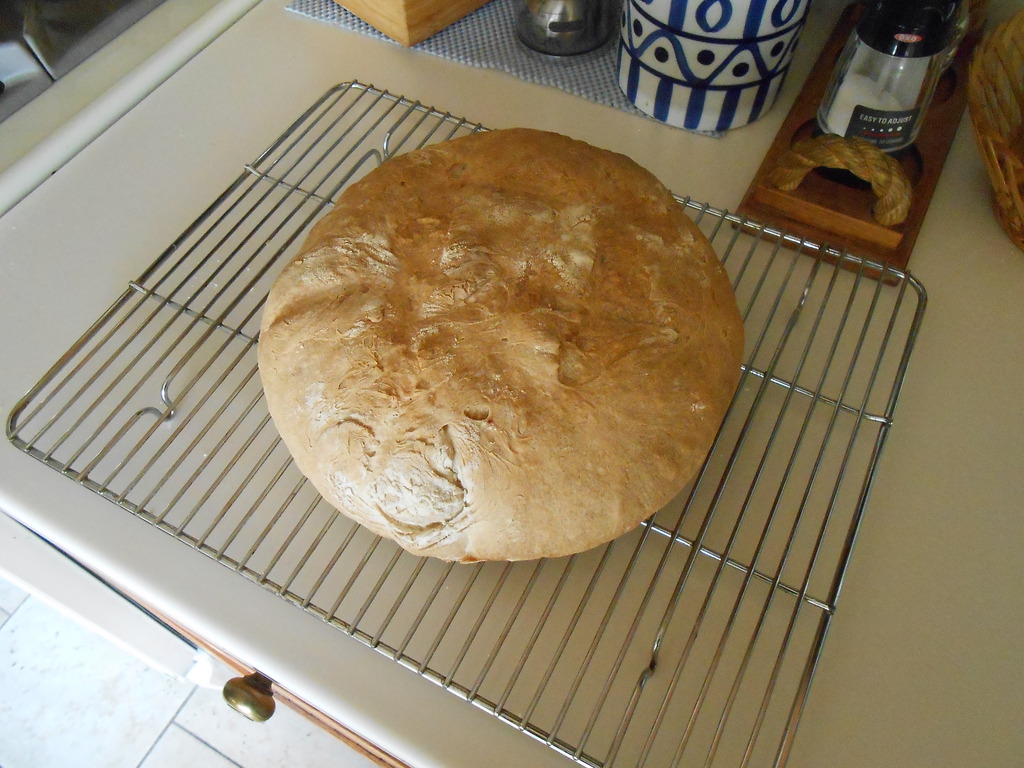
I took a day off to think about it.
I find baking to be relaxing, so I made bread.
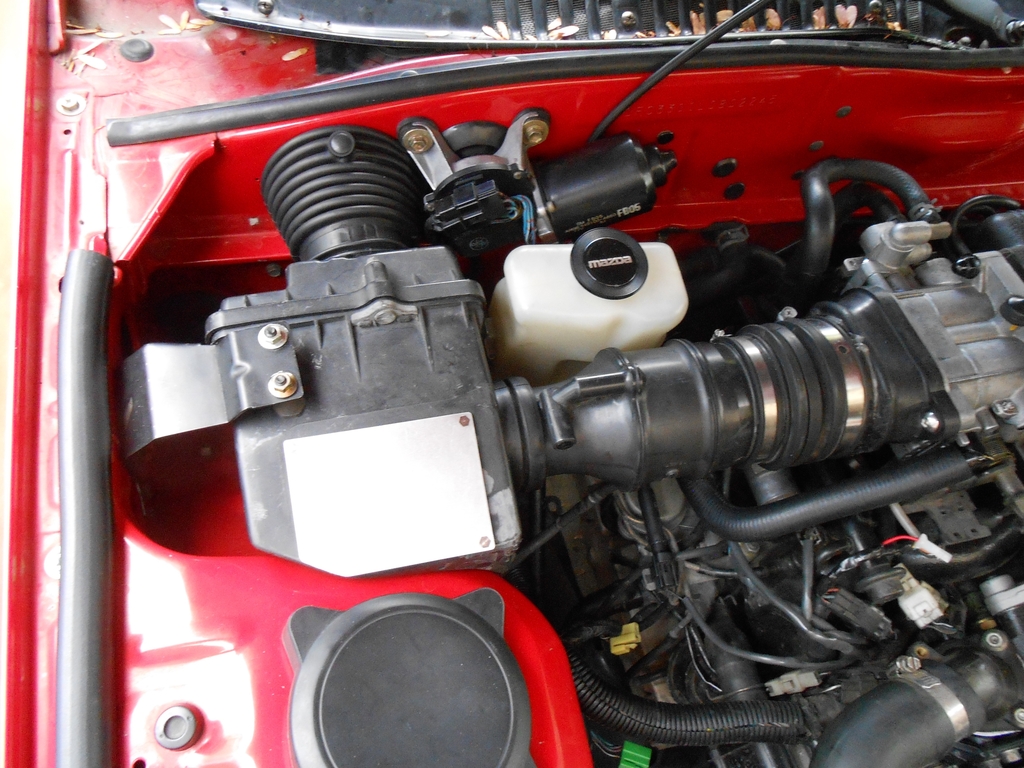
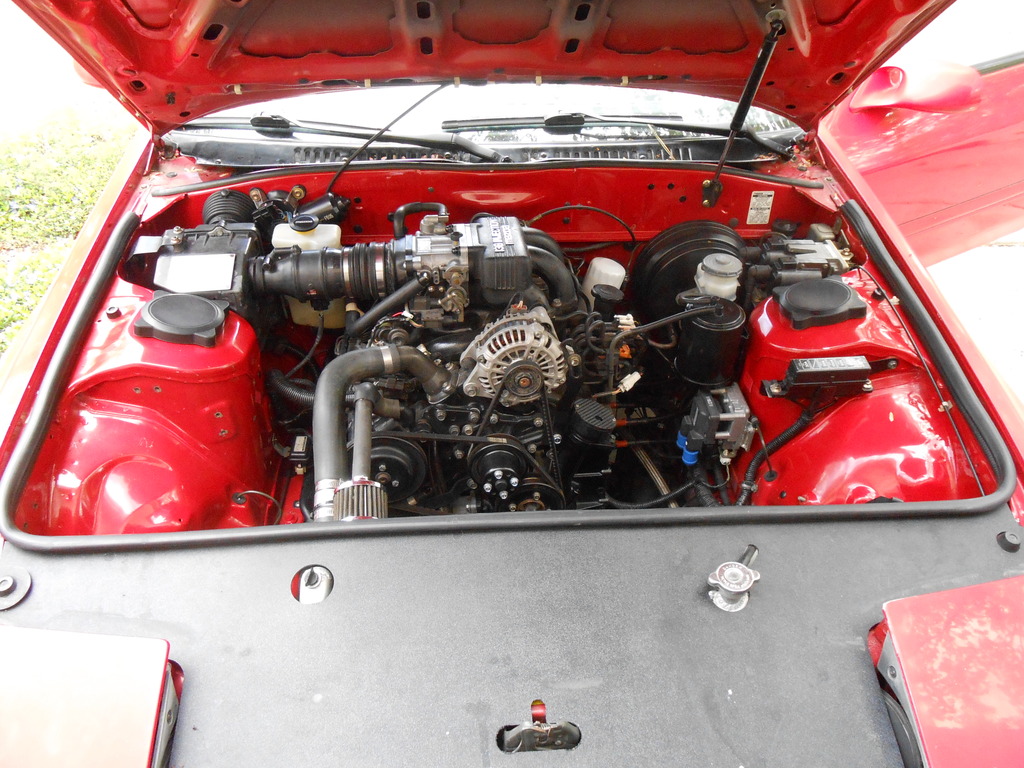
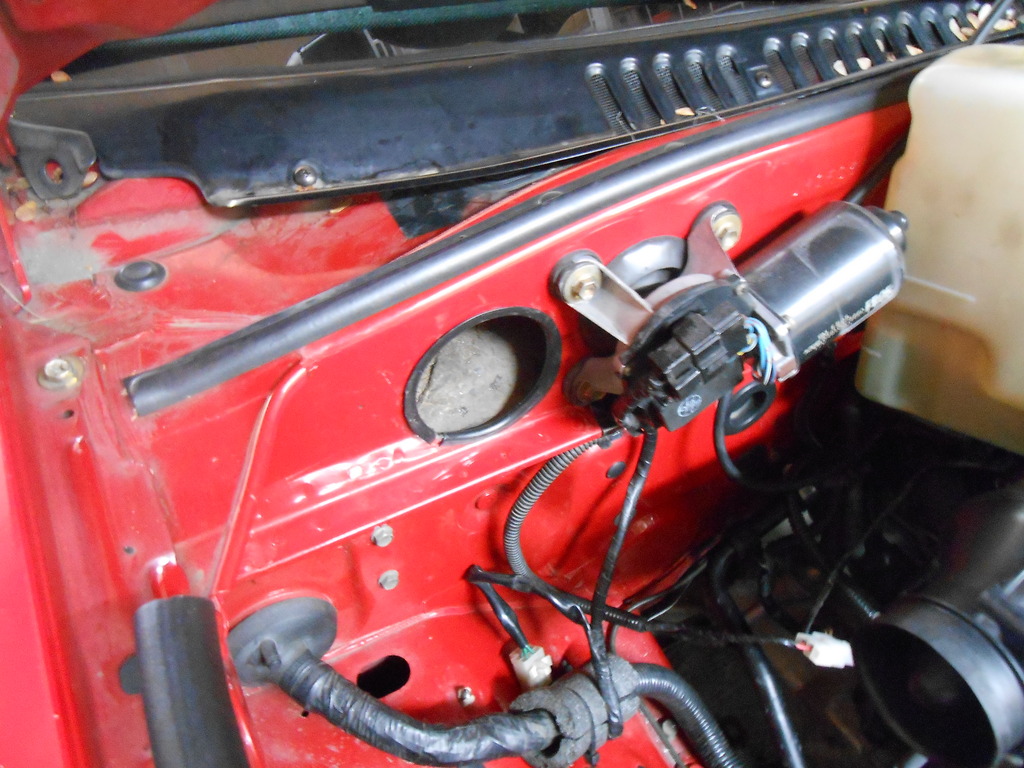
The main issues I wanted to address were enlarging the passage between the firewall>airbox and making that connection more secure. I started by machining a Delrin flange for the airbox lid:
The metal bracket on the left bottom is for the wiper reservoir.
Then I enlarged the hole in the firewall:
Machine a tube that fit the new hole and the boot:
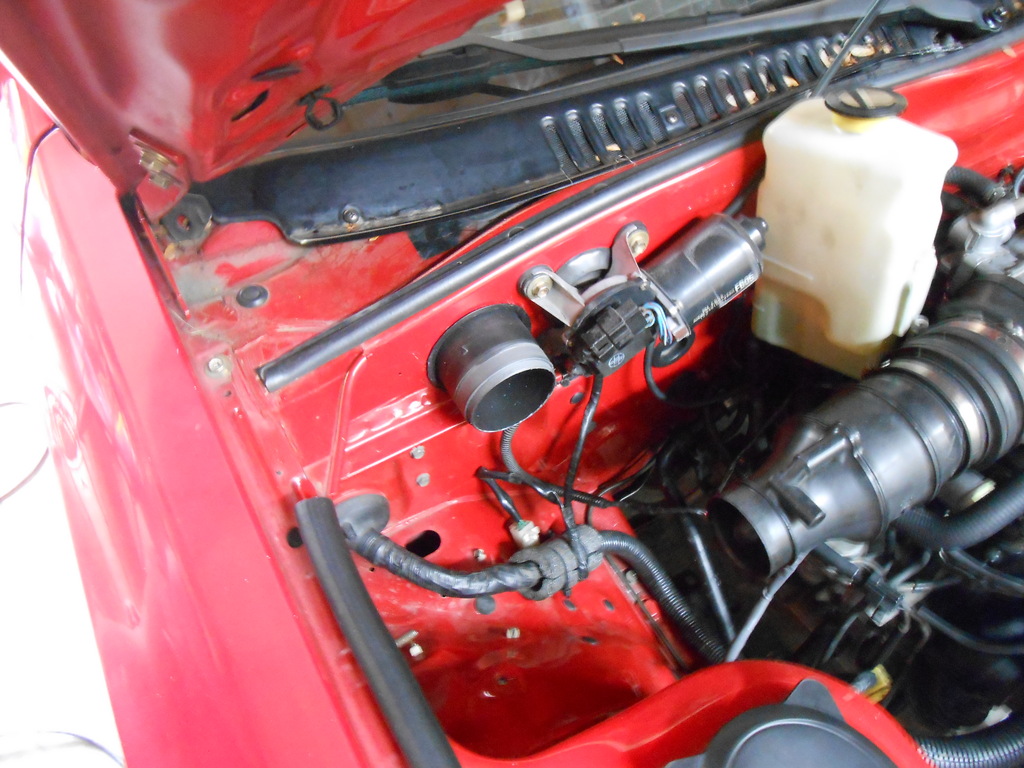
It took multiple tries/test fittings to get everything to work together.
The pieces all fit the first time but assembly was difficult, so I kept trimming and tweaking until it could be installed easily.
Altogether I spent about 10 hours to get back to where I started.
I have no appropriate bungs to redo the airpump hoses and will have to junkyard them when all this bloody rain finally stops.
Almost there though.
Wish I knew why Photobucket keeps randomly spinning picture around.
An IAT would be interesting too.
Y'all may have noticed that I tend to redo projects like this multiple times until I'm happy; there are so many things you (I) can't foresee until you get there.
This concept was functionally fine but not quite as well executed as it could be and I wanted it right.
I took a day off to think about it.
I find baking to be relaxing, so I made bread.
The main issues I wanted to address were enlarging the passage between the firewall>airbox and making that connection more secure. I started by machining a Delrin flange for the airbox lid:
The metal bracket on the left bottom is for the wiper reservoir.
Then I enlarged the hole in the firewall:
Machine a tube that fit the new hole and the boot:
It took multiple tries/test fittings to get everything to work together.
The pieces all fit the first time but assembly was difficult, so I kept trimming and tweaking until it could be installed easily.
Altogether I spent about 10 hours to get back to where I started.
I have no appropriate bungs to redo the airpump hoses and will have to junkyard them when all this bloody rain finally stops.
Almost there though.
Wish I knew why Photobucket keeps randomly spinning picture around.
It'd be interesting to know if drawing air from the high-pressure area at the base of the windshield gives a bit of a boost in intake air pressure (really, less vacuum, but you know what I mean). It shortens the fairly convoluted stock airbox cold air feed, and while theoretically the nose of the car is also a high-pressure area when the car is moving, I doubt it's very much so given the primary air movement there is through the oil cooler/rad/a/c condenser, and the intake air pickup is above that flow and behind the bumper.
Not to distract from your interesting air intake goings-on, but I was wanting to ask a couple questions about your steering wheel swap. Back 6 pages or so, you said you were able to just drop on your 6 steering wheel and plug in the horn. I knew I already liked the 6 wheel, and lo and behold, a short while later, for the first time, not just one but three Mazda6s appeared in the local Pick-n-Pull, including one with an undetonated hub/airbag, which I pounced on. However, I found a couple issues with mounting the 6 wheel in my 7 - it lacked the holes for the signal cancelling plastic ring to lock into on the back of the wheel - already remedied by drilling the soft metal it's made of. Before that though, I drove it around yesterday, and loved the thicker wheel, and the fact it is almost an inch deeper is great, since my long legs force a slightly over-long reach to the stock wheel. The lack of turn signal cancelling was annoying, but otherwise, it felt great.
The questions - I drilled holes for the signal-cancelling plastic ring thing to lock into the back of the 6 wheel - but the original RX-7 wheel has a the splined mount collar protruding so that it sat 1 cm inside that ring, while the 6 wheel has a wider metal boss around the splined shaft insert, which will crush the signal cancelling plastic ring. My thought is to just to dremel-cut that boss away, but of course leave the inner splined steel collar untouched. Did you do something different?
As you can see in the photo, the 6 wheel (left) also has no horn contact ring. Did yours? Or did you steal the horn ring off your old RX7 wheel (or another) and JB weld it on?
[IMG] [/IMG]
Not to distract from your interesting air intake goings-on, but I was wanting to ask a couple questions about your steering wheel swap. Back 6 pages or so, you said you were able to just drop on your 6 steering wheel and plug in the horn. I knew I already liked the 6 wheel, and lo and behold, a short while later, for the first time, not just one but three Mazda6s appeared in the local Pick-n-Pull, including one with an undetonated hub/airbag, which I pounced on. However, I found a couple issues with mounting the 6 wheel in my 7 - it lacked the holes for the signal cancelling plastic ring to lock into on the back of the wheel - already remedied by drilling the soft metal it's made of. Before that though, I drove it around yesterday, and loved the thicker wheel, and the fact it is almost an inch deeper is great, since my long legs force a slightly over-long reach to the stock wheel. The lack of turn signal cancelling was annoying, but otherwise, it felt great.
The questions - I drilled holes for the signal-cancelling plastic ring thing to lock into the back of the 6 wheel - but the original RX-7 wheel has a the splined mount collar protruding so that it sat 1 cm inside that ring, while the 6 wheel has a wider metal boss around the splined shaft insert, which will crush the signal cancelling plastic ring. My thought is to just to dremel-cut that boss away, but of course leave the inner splined steel collar untouched. Did you do something different?
As you can see in the photo, the 6 wheel (left) also has no horn contact ring. Did yours? Or did you steal the horn ring off your old RX7 wheel (or another) and JB weld it on?
[IMG]
 [/IMG]
Last edited by rx7racerca; May 8, 2015 at 06:55 PM.
I had to drill the TS collar holes at 12 & 6 just like you but that was it. It didn't crush the collar and the cancel works fine.
If you question the fit of the collar, remove the column surround trim so you can see what happens as you slowly tighten down the wheel. This also handy to check that the spring plunger for the horn is contacting the brass slipring. I use springs scavenged from ball point pens to alter the height/force of this contact.
I've been swapping in air-bagged wheels for so long that I have a collection of horn slip rings to choose from. If you want to use the one from your original wheel, you'll have to unscrew the plastic trim cover from the back of the hub and trim whatever to make it fit. You may have to trim the hub itself to maintain the inner plastic ring (so the brass ring doesn't contact any metal).
I think it's an easy job but then again I've done it about ten times now, so I probably minimize the aggro. I don't use JB weld, use GOOP instead. Works great and is totally reversible (handy if you swap wheels and want to reuse the horn ring).
I think you'll love the wheel, it's my favorite so far and looks almost stock.
Last edited by clokker; May 8, 2015 at 09:02 PM.
Okay, I didn't miss something in the absence of a horn ring - I'd rather not hack up the old wheel (I'm sentimental, and my car is so minty, I hate to lose the ability to put it back stock), so I'll hit the PicknPull tomorrow and find a donor horn ring. I was planning to anyway, looking for a miscellany of Mazda 6 bits - block heater, passenger door lock actuator, whatever spring is supposed to hold the "ashtray" lid up. Thanks for the tips.
Interestingly, Mazda3s GTs have a very similar, but not the same wheel - the airbag/horn portion is a little bulkier, and the internal structure it attaches to is completely different - despite the spokes, wheel-mounted controls, and outer portion matching exactly. How I know? The first 6 I found with a wheel had a blown airbag, and I assumed from the visual similarity, a 3 hub I found at another yard would work. It did not. But then I got lucky when another 6 turned up in the yard days later and I grabbed the wheel hub. The 3 wheel is also a bit less deep, making it pretty much the same reach as the original RX7 rim - which might suit some drivers, but the extra depth, placing the 6 rim almost an inch closer to me is just fantastic - it's like my 7 sprouted the telescoping wheel I've become spoiled by in our 6 and SVT Focus.

I kinda doubt it.
My really dumb idea, gestating ever since my work on the Z, is to use a rear wiper motor with a 180� sweep, centrally located like LMP/super cars. I looked into it a bit but not enough to find a multispeed unit, preferably with intermittent. I could live without the delay function but it'd be nice.
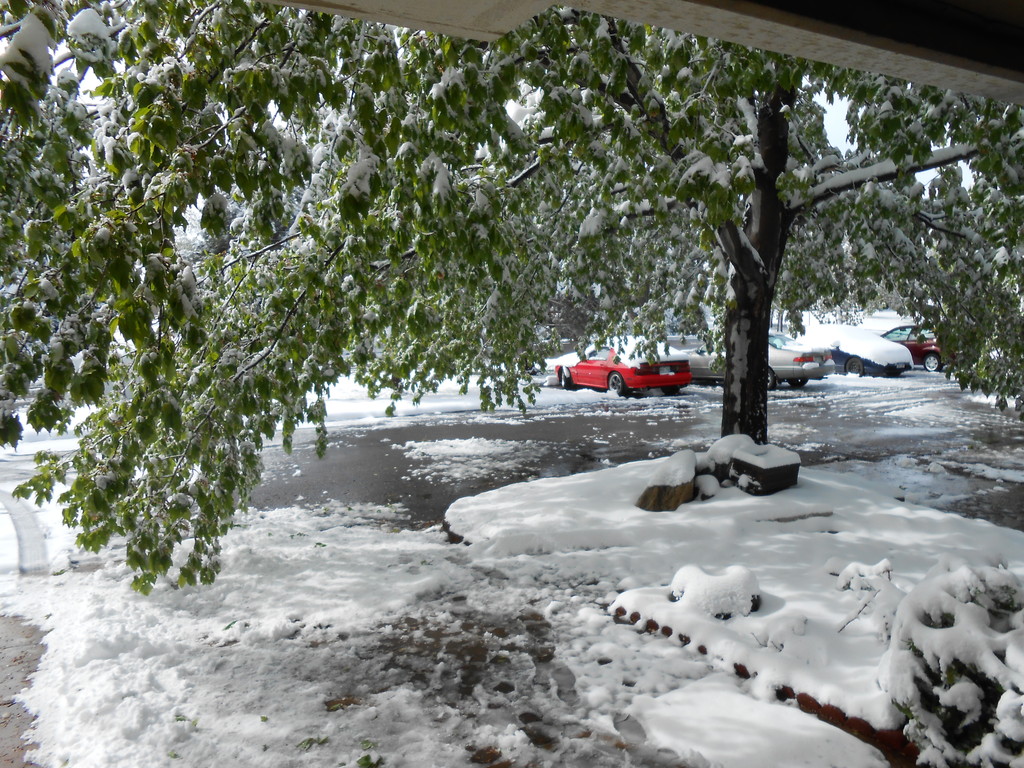
This will probably waste a lot of trees, the previous warm weather leafed them all up and this slush snow is very heavy. You can see how droopy my tree is and that's after trying to knock the snow off (which did not go well).
I'll take the occasional spring snow over hordes of black flies any day.
When I was racing, every year we'd be in Brainerd and get swarmed not only by flies but dragonflys, too.
That was weird.
Competitors have a separate entrance to the track and that's where vendors give away swag/samples...one year some company was giving away some natural orange cleaner spray, claiming it was good for fairings/windscreens. Everybody tried it and within a few hours the whole pit lane was covered in dragonflies and bees.
They LOVED that ****.
Wasn't very good for cleaning though.
Joined: Mar 2001
Posts: 31,863
Likes: 3,244
From: https://www2.mazda.com/en/100th/
You mean in the cavity?
I kinda doubt it.
My really dumb idea, gestating ever since my work on the Z, is to use a rear wiper motor with a 180� sweep, centrally located like LMP/super cars. I looked into it a bit but not enough to find a multispeed unit, preferably with intermittent. I could live without the delay function but it'd be nice.
however, you may be more interested in picking up a wiper assembly from a 1982-2015 Mercedes, its a single wiper, but it has some kind of length adjuster in it, so it wipes in nearly a rectangle. it also moves quickly, i believe the wiper tip approaches the speed of sound (its german, its probably make from something flammable too)
Competitors have a separate entrance to the track and that's where vendors give away swag/samples...one year some company was giving away some natural orange cleaner spray, claiming it was good for fairings/windscreens. Everybody tried it and within a few hours the whole pit lane was covered in dragonflies and bees.
They LOVED that ****.
Wasn't very good for cleaning though.
They LOVED that ****.
Wasn't very good for cleaning though.
Rear wipers are so simple- just the motor and spindle, so no linkage to mess with, but they're not commonly discussed and info is scarce.
It's just one of those ideas that will percolate until one day something grabs me at the junkyard and I get motivated. I hardly ever use the wipers since my brother gave me some super duper RainX type stuff that he sells at his car washes. I put it on over two years ago and the windshield still beads up and flows clear.
This is more of a "this would be cool/unusual" type things, not really necessity driven.

