She Followed Me Home, Honest

 01-29-13, 07:31 AM
#628
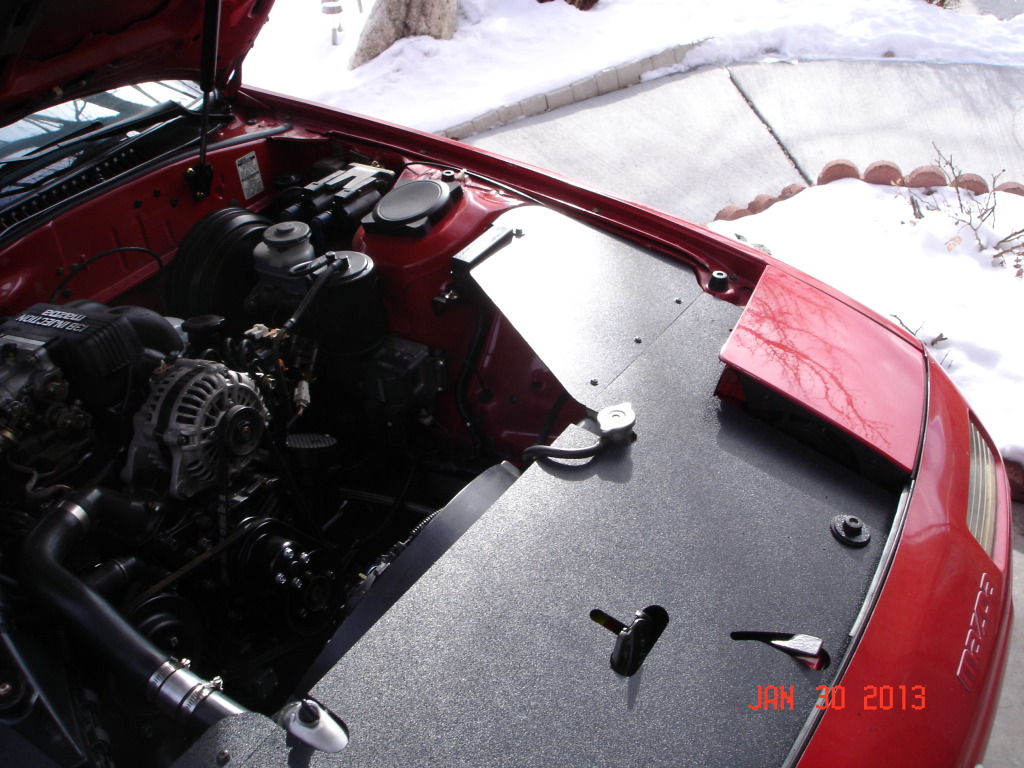
- I like the large blacked out space, it's just about how I envisioned it would look.
-The execution sucks. Not "sucks" in a poor craftsmanship sense, more that there are construction details that made life easier but degraded the final effect.
Primarily, I don't like the panel overlap, I think they should be edge butted together.
Remember, this is only the second of a three stage project and a flat surface is ideal.
Also, if you look, you'll see that the outer edge of the sidepanels is wedged underneath the fender flange. This was convenient as it saved having to scribe that edge and cut it nicely and it also greatly stiffens and supports the panel (this material is only 1/8" thick and gets floppy over large spans...the flexibility is handy as I could cut tighter tolerances and bend the panel into position).
Unfortunately, it also forces the panel to ride higher than it should, or, more accurately, higher than I would like.
-The shapes of the sidepanels aren't right. I started on the intake side with a much larger panel and kept trimming it down till I ended up where it is now. I then kind of mimicked that shape on the driver side. They are not mirror images but visually they are close.
"Baroque" is the word that comes to mind, they are too shapely/ornate for the surroundings.
I agree that the pushpins would look good but damn, I hate those things. I actually have enough on hand to do it, but given that they break every time they're removed, I'd need a bag-o-spares for the future. I think (I know!) we'll be using something less fragile...like a screw.
We're having a bit of a cold snap, I'll probably avoid the garage for a day or so and continue ruminating.
01-29-13, 10:24 AM
#629
Our OEM air filter box was breaking up (old brittle plastic) so inspired by your previous "in front of the rad" cover, we built an air box with the ABS sheet plastic we got at Grainger. I think it is only 1/16" though. We built cardboard patterns just like you would for sheet metal work.
We had to bend it of course and the way we did it was with a Harbor Freight workmate and an old (35 years) heat gun that I used as a kid to shrink monokote on RC planes.

Just like with sheet metal the bends bring a ton of rigidity. You could put some downward facing lips along the outside edges and trim them to 3/8" and it would strengthen and finish it all up quite nicely.
You could build a "brake" with some hinges and a piece of angle iron from HD. And Harbor Freight has their heat guns on sale for $7.99 with coupon if you dont have one. The trick we found is to slowly and evenly heat up the plastic. As you approach the softening point you can apply a little pressure to check. You don't want to rush though because you could break the plastic.
We were able to make 16" long bends with one heat gun. I suspect to go much longer you'd want an assistant and two guns.
01-29-13, 07:47 PM
#630
Thanks for the info.
I've had good luck heat bending ABS...well, "good luck" in the sense that I could get it to shape OK but the "stretch marks" in the surface pattern were noticable, an aesthetic fail.
I preheated the panel in the oven to minimize the heat gun time, seemed to speed things up a lot.
Today I had every intention of just pottering about but that changed.
While (halfheartedly) cleaning up my "idea area" (I put interesting hardware, brackets, widgets in a staging area to pick/pull from as I experiment) I came across the original mounting bracket for the Chrysler airbox, which I'd set aside as too clunky to be useful.
This time however, I could see just how it might work and a few hours of fiddlefucking around got me to here:
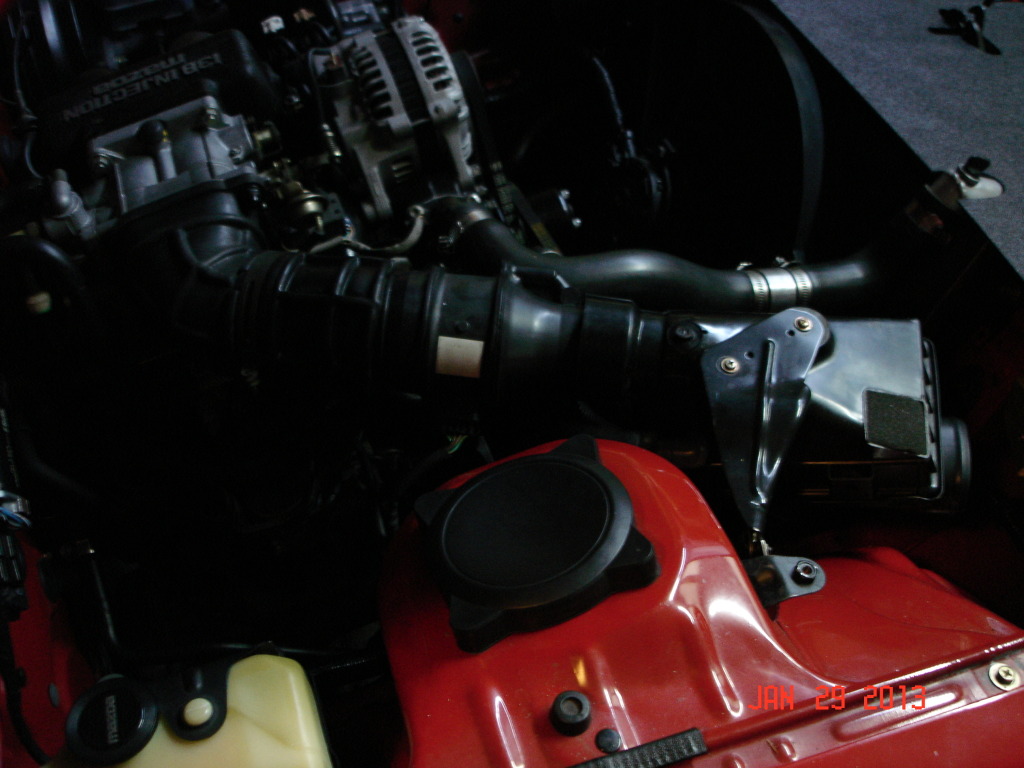
Yes, it's an awful pic, it was dark and the flash was being persnickety, I'll try again tomorrow.
Point being, I'm basically back to where I started but with a much better, very stable mounting system. I'm not adding any further intake tubing, she'll pull from behind the headlight for now.
I have got to stop messing with this...
As for the side panels...
I have formulated an approach for the second iteration, should be much cleaner this time.
As to the panels themselves and vr's comment about stiffening panels with bends...I have an edge trim picked out that not only adds the necessary visual weight to the panel edge but also substantially stiffens it up. I've held off picking it up till I get a better idea of how many linear feet I need. I have a 1' test strip (need to make sure my panel gaps are wide enough to fit the trim) and it makes a huge difference in how "finished" the panels appear.
There is also a special "feature" I haven't debuted yet, it's a finishing touch I've been saving...
I can't wait to see what I do tomorrow (because I probably have even less idea than you do...).
I've had good luck heat bending ABS...well, "good luck" in the sense that I could get it to shape OK but the "stretch marks" in the surface pattern were noticable, an aesthetic fail.
I preheated the panel in the oven to minimize the heat gun time, seemed to speed things up a lot.
Today I had every intention of just pottering about but that changed.
While (halfheartedly) cleaning up my "idea area" (I put interesting hardware, brackets, widgets in a staging area to pick/pull from as I experiment) I came across the original mounting bracket for the Chrysler airbox, which I'd set aside as too clunky to be useful.
This time however, I could see just how it might work and a few hours of fiddlefucking around got me to here:
Yes, it's an awful pic, it was dark and the flash was being persnickety, I'll try again tomorrow.
Point being, I'm basically back to where I started but with a much better, very stable mounting system. I'm not adding any further intake tubing, she'll pull from behind the headlight for now.
I have got to stop messing with this...
As for the side panels...
I have formulated an approach for the second iteration, should be much cleaner this time.
As to the panels themselves and vr's comment about stiffening panels with bends...I have an edge trim picked out that not only adds the necessary visual weight to the panel edge but also substantially stiffens it up. I've held off picking it up till I get a better idea of how many linear feet I need. I have a 1' test strip (need to make sure my panel gaps are wide enough to fit the trim) and it makes a huge difference in how "finished" the panels appear.
There is also a special "feature" I haven't debuted yet, it's a finishing touch I've been saving...
I can't wait to see what I do tomorrow (because I probably have even less idea than you do...).
01-30-13, 06:40 PM
#632
No air and med grade weed...it's a hell of a combination.
Awoke this morning with a very clear idea of how to proceed and got right to work.
It was much simpler the second time around, practice does make better.
Started off making up two flanges and gluing them to the center section:
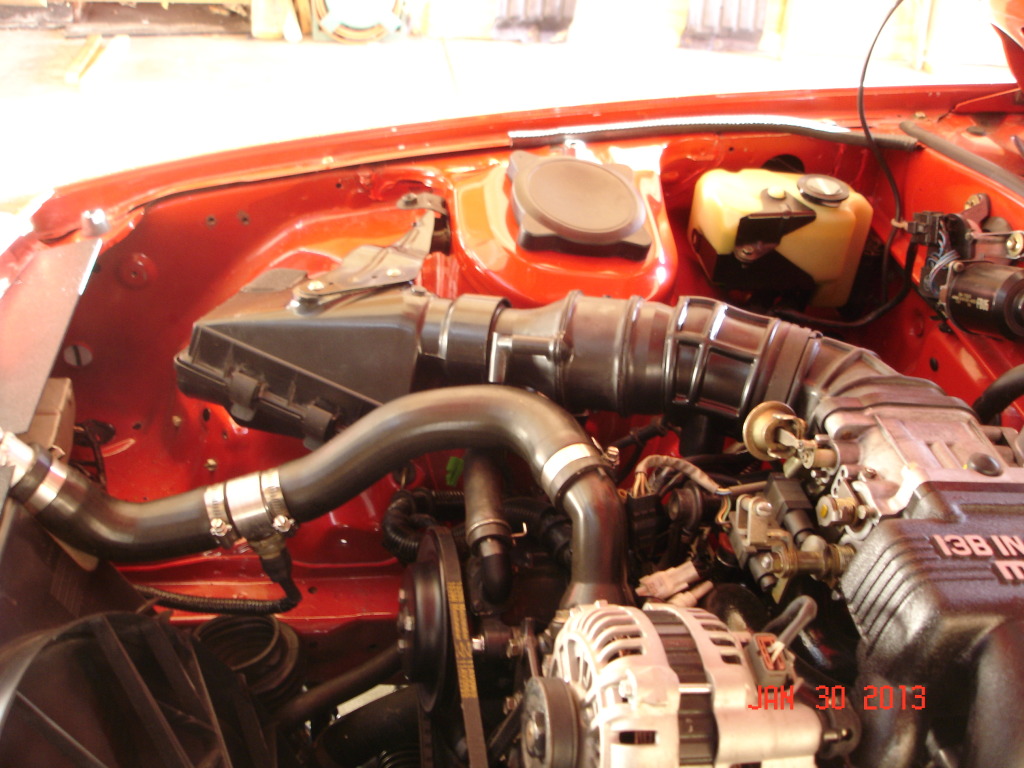
And before I forget, better shots of the current intake:

The flanges are intended to do two things- primarily they are a place to locate and fasten the sidepanels and hopefully they will stiffen the assembly somewhat.
A few hours later, we're here:
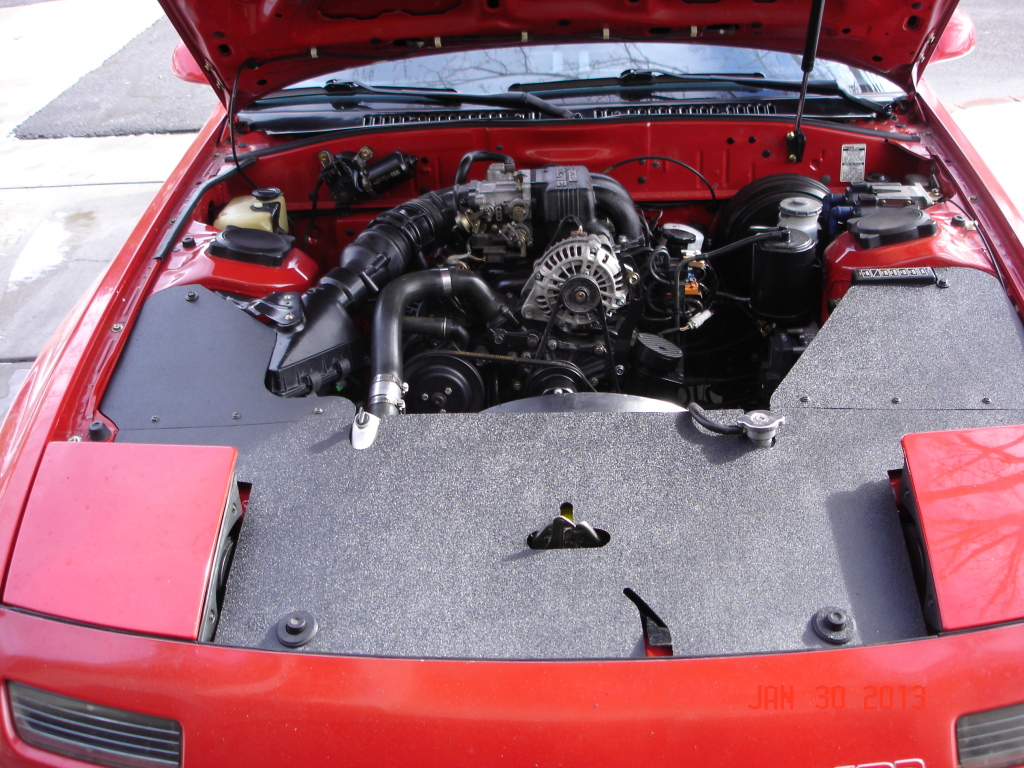

As before, what we're seeing is fresh from cutting, no final trimming or edge finishing has yet been done...it's beyond "proof of concept" but not "finished", either.
I think it's much better although I have qualms about the intake side.
Obviously the most difficult to work around, it's also completely dependent on the intake and I've been changing that almost daily of late.
I'll try just sitting on it for a while and see how it grows on me.
Awoke this morning with a very clear idea of how to proceed and got right to work.
It was much simpler the second time around, practice does make better.
Started off making up two flanges and gluing them to the center section:
And before I forget, better shots of the current intake:
The flanges are intended to do two things- primarily they are a place to locate and fasten the sidepanels and hopefully they will stiffen the assembly somewhat.
A few hours later, we're here:
As before, what we're seeing is fresh from cutting, no final trimming or edge finishing has yet been done...it's beyond "proof of concept" but not "finished", either.
I think it's much better although I have qualms about the intake side.
Obviously the most difficult to work around, it's also completely dependent on the intake and I've been changing that almost daily of late.
I'll try just sitting on it for a while and see how it grows on me.
01-31-13, 10:15 AM
#633
That looks very nice and clean. 
My only concern would be what happens after several heat cycles and cool down periods. If the plastic warps or sags badly, you could always duplicate the design in sheet aluminum - like a race car's interior panels.
My only concern would be what happens after several heat cycles and cool down periods. If the plastic warps or sags badly, you could always duplicate the design in sheet aluminum - like a race car's interior panels.
01-31-13, 10:41 AM
#634
None of the panels are in a particularly hot zone anyway.
If they sag- and that's a possibility, I suppose- it'll be because they're too thin to begin with and should that happen, some stiffening ribs should sort it out.
I finally know what's wrong with the intake sidepanel shape and how to fix it...just need another chunk of material as all my scrap pieces are slightly too small.
I also need another junkyard jaunt...my supply of both hardware and ideas is running short.
01-31-13, 11:01 AM
#635
Looks like you have way too much spare time lol! Having said that, your craftsmanship is commendable.
It's just that, for me, you're improving some things that don't really need it or make a big difference. But if it keeps you out of trouble, and you enjoy it, then props to you. I hope you're keeping all original parts somewhere, since that's such a clean car. I take it all maintenance is up to date and everything else is running very well?
It's just that, for me, you're improving some things that don't really need it or make a big difference. But if it keeps you out of trouble, and you enjoy it, then props to you. I hope you're keeping all original parts somewhere, since that's such a clean car. I take it all maintenance is up to date and everything else is running very well?
01-31-13, 08:29 PM
#636
Naturally, there is no performance advantage- I've called this "frippery" before and that's really all it is, but...what's the difference really between this and spending endless hours (see: Robb XX) smoothing, polishing, coating intake parts?
Lots of folks spend tons of time and energy on stuff that makes no big difference.
And yes, all maintenance has been performed (I recently stripped this chassis nearly down to the last bolt) and she runs better than ever.
02-01-13, 09:26 PM
#637
Would-be carjackers foiled by mysteries of the stick shift | The Sideshow - Yahoo! News
02-03-13, 09:04 AM
#638
Back from the (nearly and almost literally) dead...
Unusually for me, I got the flu this year...spent two days practically bedridden and am only now feeling back to human.
Worst part was the super nice weather I missed but c'est la vie.
My next project is installing sound into the car and it's a subject I know little/nothing about.
So, I have some questions:
I'm not looking for a top of the line super system and would prefer to keep the config similar to stock (i.e., speakers in the stock locations), without woofer boxes and neon lit amps.
Simpler is better.
So, first question is, can I use the stock speaker wiring?
I've been studying the FSM schematic and it appears that the rear tower speaker wiring runs directly to the install area but the door speakers (or "woofers" as Mazda calls them) are powered by some sort of amp...which I don't recall seeing while the dash was out.
I've been given a nearly new "Dual" brand headunit (never heard of 'em), model XHD7714 if anyone is familiar with them, and already have the adaptor harness to plug into the factory wiring.
At this point iI could tie to the factory plug or use use my own speaker wire and bypass the Mazda wiring...using the stock wiring is optimal in terms of ease and stealth but maybe not for performance?
Next would be speakers.
My door speakers were utter trash, I definitely need new ones.
The rears I'm not sure of...they appear intact but were never properly mounted (too big to sit flush in the adaptor ring, which I can fix), so I may need them as well. There are no markings on those, I have no clue what they are, but they do plug right into the factory harness so maybe they're original?
Any info/advice, general to specific, appreciated.
02-03-13, 10:52 AM
#639
Dual Amazon.com: dual stereo: Automotive like Pyle are the current crop of ultra cheap stereo gear. Think of Audiovox back in the day of cassette decks.
IMHO an 80's car is not an ideal listening environment so maximizing "performance" probably doesnt make sense!
When we replaced the vert's OEM stereo with a Pioneer double-DIN unit the improvement in sound with the stock speakers was remarkable.
So I'd start by replacing the head unit using the stock wires along with the obviously trashed speakers and see how it goes. My sense is that replacing the wires will take a lot of time and gymnastic-grade contortions and if there is any improvement the road, wind and exhaust noise will prevent you from hearing it.
And that's ignoring the cognitive dissonance of spending time and money on improved speaker wires for a $50 head unit!
02-03-13, 12:17 PM
#640
Moderator
iTrader: (3)
Join Date: Mar 2001
Location: https://www2.mazda.com/en/100th/
Posts: 30,933
Received 2,666 Likes
on
1,889 Posts
Clokker: there is an AMP for the front, where it is depends on which system the car had new (types I-IV!). my vert has the upper end type IV unit, and its got amps all over the place, the type I, probably just has the one amp next to the passenger front dash speaker.
on the type I, there are 4 outputs (LF,LR,RF,RR), and the rears just go right to the speakers, the front go to an amp, which is probably right next to the front dash speaker on the passenger side. the door speakers get the amplified signal, and dash speakers get a preamp signal.
on some of the front amps, you can unplug it, and just plug the remaining two plugs together to bypass it.
the stock front door speakers are not full range, so if you ditch the amp, they should be changed to something that is. i've actually found that buying really nice door speakers, and jsut running those works really well. its been a while but the infinity reference speakers were really nice.
02-03-13, 02:46 PM
#641
Rotary Enthusiast

Actually, your chassis is an S5. S4 stereos have separate amps, but S5 stereos have the amplifiers integrated into the headunit; that should be the case on the GTU. S5 coupes also had door mounted speakers, whereas S4s did not (convertibles did, obviously).
It shouldn't take more than an adapter harness for the headunit and 1/4" quick disconnect terminals for the speaker plugs.
I suggest Crutchfield as a resource for finding information such as speaker sizes. For purchasing speakers, do some searching on Google shopping. For vendors, ordered from onlinecarstereo.com. Low prices.
02-04-13, 07:18 AM
#642
Ok, thanks folks.
I'll be venturing to the garage today for the first time in a long while.
Hope to get the headunit installed and the rear speakers hooked up.
There is no structure behind the center stack, so I assume I'll have to fab some support for the headunit. Not sure how this is typically done but hanging the stereo off a plate bolted to the bezel seems like a bad idea.
My initial plan is to have the headunit and cubby below it held in a self supporting frame tied to the tunnel and the dash structure, the bezel only framing it, not carrying any weight.
This may be a grandiose fantasy, I haven't studied the terrain yet to see what's available to work with.
Wish I'd spent time thinking about this months ago when the interior was stripped (which would have helped with the rear wiper as well) but I had no stereo at the time and it just didn't make the list.
Oh well.
02-04-13, 07:27 AM
#643
Rotary Enthusiast
S4 and S5 stereo headunits do not mount to the trim at all. They were attached to the dashboard using a pair of steel brackets mounted at four points using philips screws and I think a rear support tab that sllotted into the dashboard. Two of the points are directly below the logicon, and the other two are above the ashtray/12v socket that have a set of locating studs.
If you can't obtain the steel mounting brackets, you can fab your own. A plastic metra installation kit for the RX7 will work in a pinch.
If you can't obtain the steel mounting brackets, you can fab your own. A plastic metra installation kit for the RX7 will work in a pinch.
02-04-13, 07:45 AM
#645
Rotary Enthusiast
Yw.
Since I got 88 GTU in 2001, it's been through... six different headunits, not counting the Kenwood CD player the PO had put in. Pioneer AM/FM cassette, Pioneer GM/Chrysler AM/FM CD, Pioneer double-din AM/FM/CD/cassette, Eclipse CD/MP3/BT, OEM Clarion (AM/FM with logic cassette and EQ, aux-in adapter and Parrot MP3/BT) with Eclipse amp (followed briefly by a convoluted setup with the Eclipse, the OE cassette deck and Parrot) and my current setup, an Alpine 7525 AM/FM cassette with aux-in adapter and Parrot bluetooth/MP3.
So, I've used both a Metra installation kit and the metal brackets, as well as fixed the wiring that the PO had haacked up installing a stereo, then later excised/repurposed the OE speaker wires and ran new 16-ga when I put in a 4ch Eclipse amp.
With the Dual headunit that has its own internal amp, and the general theme of keeping things simple and clean, the factory speaker wiring should do just fine.
02-05-13, 09:00 AM
#646
Well, yesterday was interesting.
First I built the patch harness to connect the headunit to the FC's wiring (which is 100% intact) and got LIGHTS! CAMERA! ACTION! on the first try.
That was encouraging.
I already knew the door speakers were trash but couldn't tell about the rears.
These had been halfassed installed, so poorly that the tower covers would not fit.
Hot glue was involved.
Spent an hour rectifying the mounting/wiring issues and...the rear speakers are crap as well.
It was becoming quite discouraging.
Sigfrid had bought this Dual for the FD project but removed it after a week because it was so bad, so I was already skeptical about the outcome in my car...now I had a (presumably) shitty headunit and 4 blown speakers.
It hardly seemed worth continuing.
As I pondered my next move, a neighbor stopped by (my open garage door is a magnet to oldsters) and offered a set of speakers he had laying around for years.
These turned out to be Radio Shack things- probably "indoor/outdoor" units judging by the cast aluminum housings.
So, great...a crappy stereo playing through Radio Shack speakers.
I was back in the sixties.
And they sounded like ****, too.
Besides confirming that the wiring was intact, the day was looking like a total loss and I figured I'd just remove everything and start over when I had some decent hardware to work with.
Casually discouraged, I idly began playing with the Dual's menu options and suddenly things got better...like lots better.
I even figured out why the flash drive wasn't being read (CODE 4, Will Robinson!)...turns out the drive must be formatted FAT/FAT32 instead of NTFS.
To be clear...it ain't great but it doesn't hurt, either.
It'll run full volume without breaking up (too badly) and the USB port works, I think I'll continue.
The speakers will wait for another day, today I concentrate on the headunit install.
When I had the dash out and had discovered the hack job to the cigar lighter ground (that's where the PO had tied the stereo ground in), I ran a dedicated ground wire for the stereo that was bundled with a group of grounds atop the steering column.
For some reason this ground isn't working and I want to know why.
This will require pulling the dash apart all the way to the gauge cluster and as long as I'm in there...
...If I run the ground wire from the newly installed rear wiper all the way to the stock bezel switch, it should work. Since the dash is mostly apart, this will be relatively easy to route, so I'm going to try it.
Assuming it does work, I'll also run a wire for the washer pump, so all functions will be accounted for (even though I have no pump/reservoir, ATM).
Presumably, I'll also discover what my grounding problem is as well.
Once the wiring is straightened out, I'll begin figuring out how to physically mount the headunit.
Fortunately, the weather is nice and I feel much better, so it should be enjoyable again to work on the car.
And of course, now I can listen to tunes while doing so.
A first world life is the life for me...
02-05-13, 09:32 AM
#647
Rotary Enthusiast
Ouch.
If you're looking for a better headunit, you could buy a used unit off eBay; I've seen plenty of used CD/MP3 units for under $100; some I've seen go for $30 to $50 (though keep shipping costs in mind).
For a new unit, I find that JVC has a lot of value and sound great on their internal amps (I've got an Arsenal unit in one car and a non-Arsenal in another). You can buy new ones for $100 or less if you shop around and don't need bluetooth (but you can add an adapter later if you want). Also, they work with almost any USB device (FAT32) or iPad without anything more than the USB cable.
As for speakers. You can't really go wrong with Kenwood or Pioneer. A quick search on sonic electronix gives you selections for between $30 all the way up to $100 for a pair of 6.5" speakers. I have a pair of Kenwood Kenwood KFC-1650s ($33 from onlinecarstereo.com in 2007) in my Insight and they sound good. I'd spend your money on getting the best speakers in your budget up front, and cheaper speakers for the real fill. I wouldn't bother mounting any speakers in the dashboard locations, just the front doors.
02-05-13, 10:05 AM
#648
When we looked at the RX8 R3 for my wife we didnt even mess with the stereo so have no idea what it sounds like. But in general when it comes to electronics I believe that with very few exceptions everything is better than it was.
The cheapest TV you can buy at Walmart today is better in all aspects than the absolute best TV you could buy in 1990. The cheapest MonoPrice HDMI cable you can buy today will transfer picture and sound better than the most expensive MonsterCable S-Video & RCA audio cables of 1990. And my iPhone5 blows away the MacII ci I had at work in 1990 in absolutely every dimension.
So Clokker the good news is there is every reason to believe the cheap Dual head unit you have produces better sound than the best Blaupunkt or Alpine of 1990! The bad news is that if your 60+ year old hearing is anything like my not quite 50 year old hearing you can't hear for **** anyways!
To solve your trashed speaker problem wouldn't a trip to the salvage yard be in order? I wouldnt think speakers would be a high demand item and so should be cheap, right? And as long as you focused on recent arrivals they shouldn't be too weathered.
02-05-13, 10:47 AM
#649
When we looked at the RX8 R3 for my wife we didnt even mess with the stereo so have no idea what it sounds like. But in general when it comes to electronics I believe that with very few exceptions everything is better than it was.
The cheapest TV you can buy at Walmart today is better in all aspects than the absolute best TV you could buy in 1990. The cheapest MonoPrice HDMI cable you can buy today will transfer picture and sound better than the most expensive MonsterCable S-Video & RCA audio cables of 1990. And my iPhone5 blows away the MacII ci I had at work in 1990 in absolutely every dimension.
So Clokker the good news is there is every reason to believe the cheap Dual head unit you have produces better sound than the best Blaupunkt or Alpine of 1990! The bad news is that if your 60+ year old hearing is anything like my not quite 50 year old hearing you can't hear for **** anyways!
To solve your trashed speaker problem wouldn't a trip to the salvage yard be in order? I wouldnt think speakers would be a high demand item and so should be cheap, right? And as long as you focused on recent arrivals they shouldn't be too weathered.
The cheapest TV you can buy at Walmart today is better in all aspects than the absolute best TV you could buy in 1990. The cheapest MonoPrice HDMI cable you can buy today will transfer picture and sound better than the most expensive MonsterCable S-Video & RCA audio cables of 1990. And my iPhone5 blows away the MacII ci I had at work in 1990 in absolutely every dimension.
So Clokker the good news is there is every reason to believe the cheap Dual head unit you have produces better sound than the best Blaupunkt or Alpine of 1990! The bad news is that if your 60+ year old hearing is anything like my not quite 50 year old hearing you can't hear for **** anyways!
To solve your trashed speaker problem wouldn't a trip to the salvage yard be in order? I wouldnt think speakers would be a high demand item and so should be cheap, right? And as long as you focused on recent arrivals they shouldn't be too weathered.
Look for the wrecked riced out cars. They have upgraded speakers out there. My salvage yard of choice also yanks the amplifiers out, selling them at the admission area. Some pretty bad and some pretty nice units, usually in the 415-30 range. A quick google on the old smart phone to look up the specs. If it doesn't work, you get credit (trade) toward another one .
02-05-13, 11:21 PM
#650
Guys, at this point I'm assuming the headunit is not my main issue, the speakers are.
I must say that with the Radio Shack speakers, she sounds pretty ah, okay.
Getting sound from the doors should make a big improvement as well.
My yard operates much like Jack's...shiny/blingy stuff is pulled and offered in the sign up area.
They also seem to focus on aftermarket speakers but leave OEM stuff alone.
When the money bush next blooms, that's where I plan to search first.
The unit install went 50/50.
I did strip down to the gauge cluster but was unable to fix the bad ground wire. Just not enough room to maneuver with the dash in place.
I also tried to rig the rear wiper to the stock bezel switch but that didn't work either.
Both of these are much more easily and properly addressed with the dash removed and they were both digressions from the main project anyway, so I tabled them and put it all back as it was.
I redid the ground on the patch harness, lengthened to reach a good mount point.
Then I started to imagineer the headunit/cubby install.
To get an idea of how the stereo and the bin below it would sit in the bezel opening, I started using foam to position the parts in the dash cavity.
You can see where this is going...
Basically I built a foam box in the dash cavity and stuffed the two parts into it.
They seem quite secure and are tweakable for a good fit in the bezel opening.
I have a few improvements to make so I'll wait till then for pics.