
She Followed Me Home, Honest

Today, the perfect storm of attitude, motivation, weather and components came together and this happened:

I went into the garage totally intending to waste more time "detailing" and almost without conscience thought, Rube Goldberged my way into an engine install.
It was as rustic a method as I've ever used but it did work and no animals were injured in the process.
The less said about it, the better.
All told it took about four hours...maybe 20 minutes actually getting the engine (basically) into position, the rest to align the trans to the clutch.
I was working alone and was super paranoid about the new pilot bearing, so I employed two floor jacks and myriad adjustments till the bellhousing slid home and I could run the bolts in by hand.
There were several smoke breaks along the way as well.
Anyways, this is another milestone step.
A lot more stuff can now happen and I'll finally get to see how some of my mods are going to work out.
Happy camper, happy camper, happy camper!

Thank you.
I still await funds for the penultimate shopping spree but a lot can be done in the meanwhile.
I've been visualizing this stage for so long that I hardly know where to begin.
I still await funds for the penultimate shopping spree but a lot can be done in the meanwhile.
I've been visualizing this stage for so long that I hardly know where to begin.
Start with something you don't like, fix it and then just keep going.
Like this, for instance:
Although it falls below the pinchweld and thus technically fits my "clean firewall" mandate, the clutch softline still offends my sensibilities.
I added a banjo, which lowered the profile quite a bit:
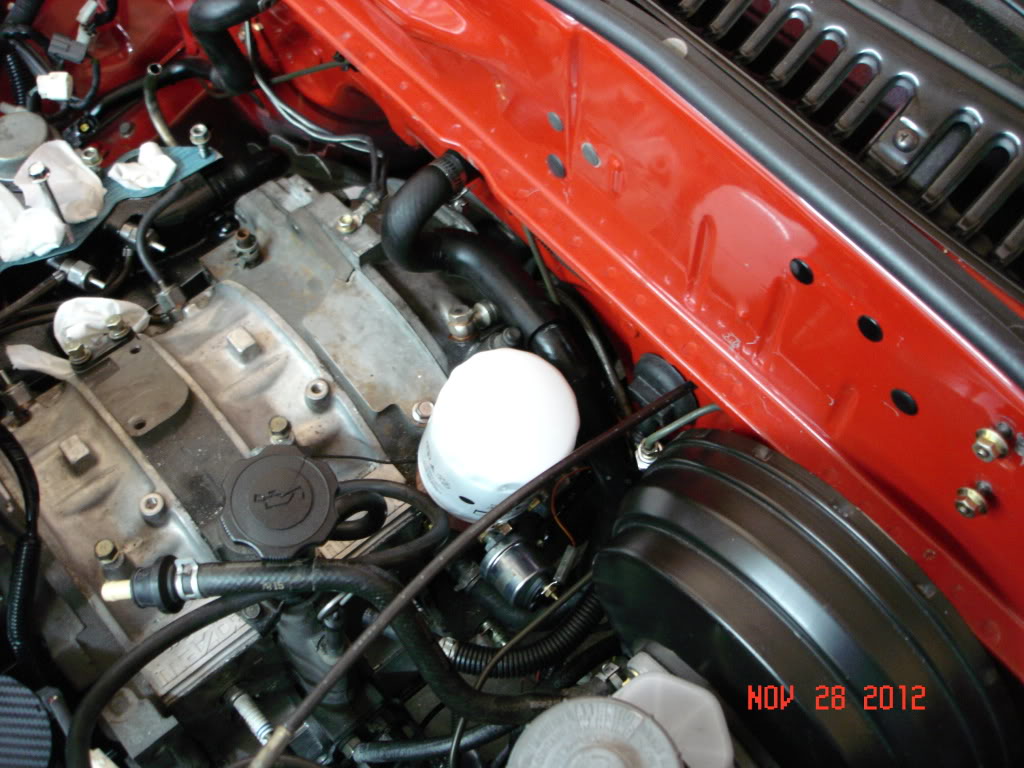
Much better.
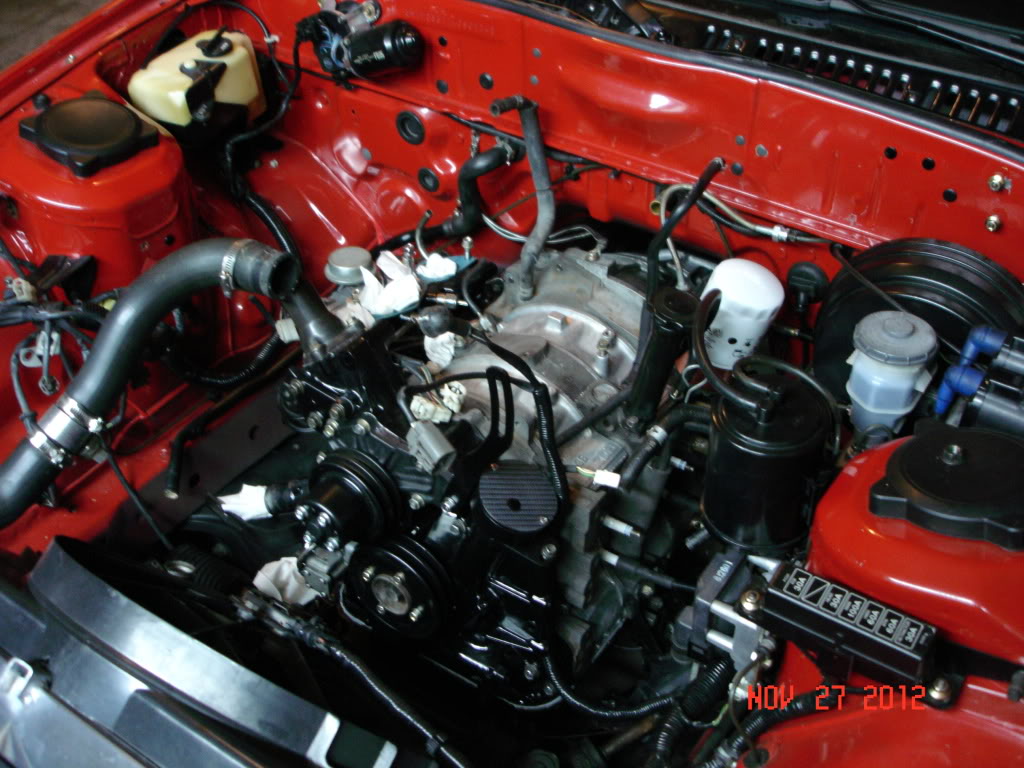
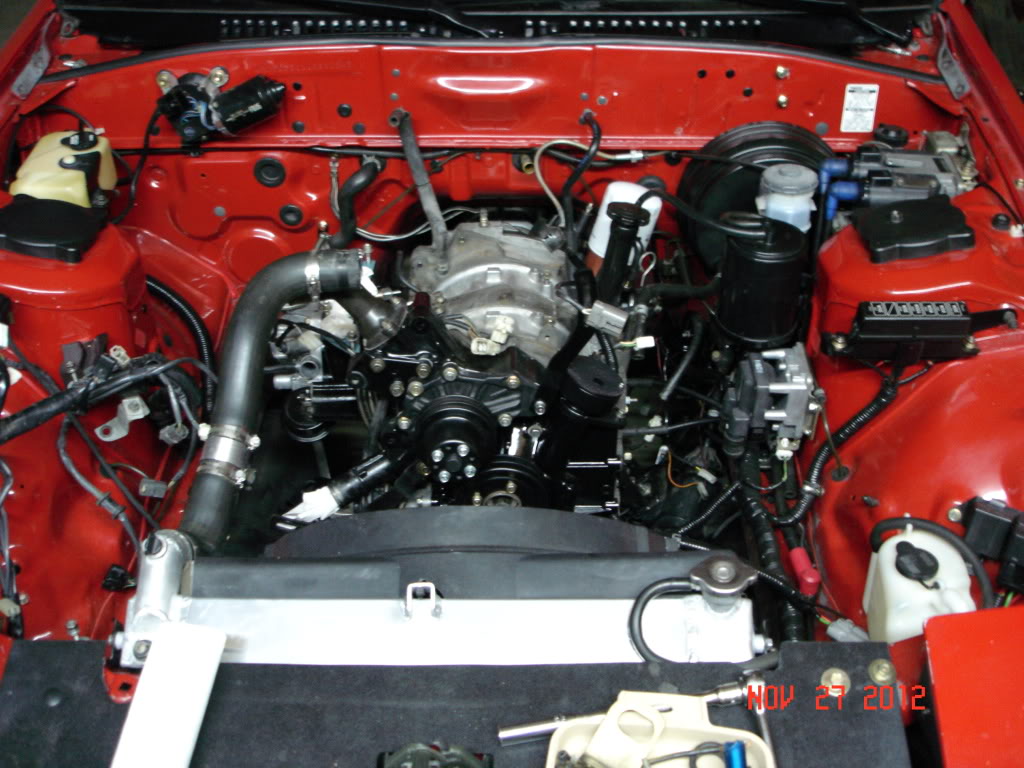
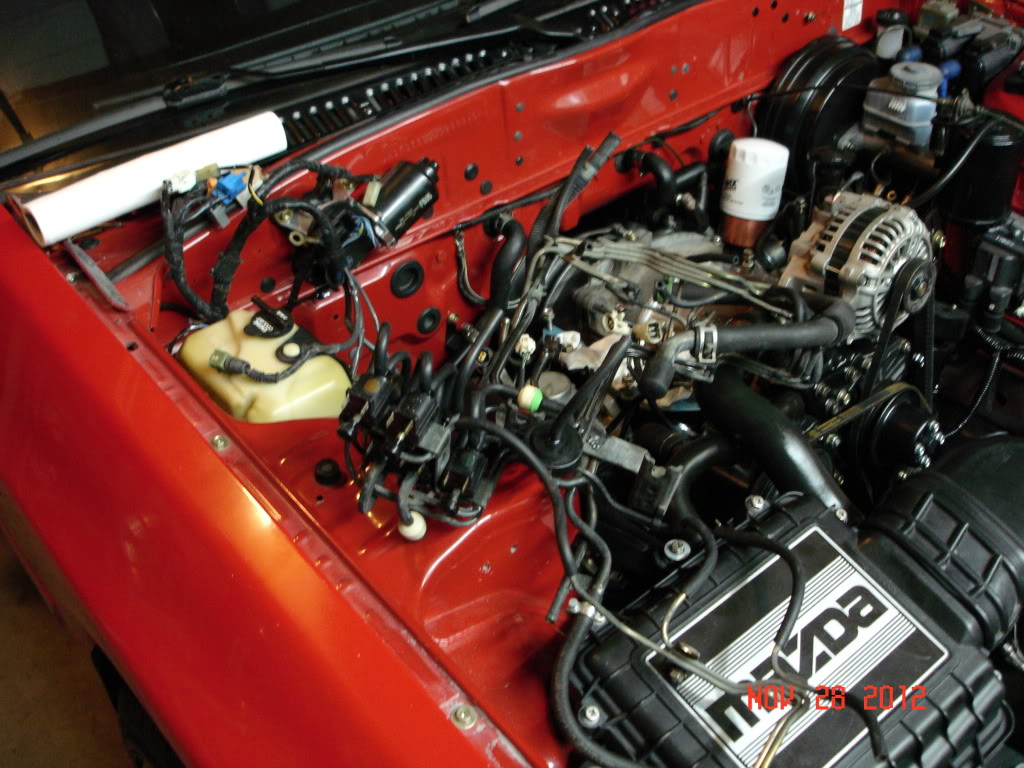
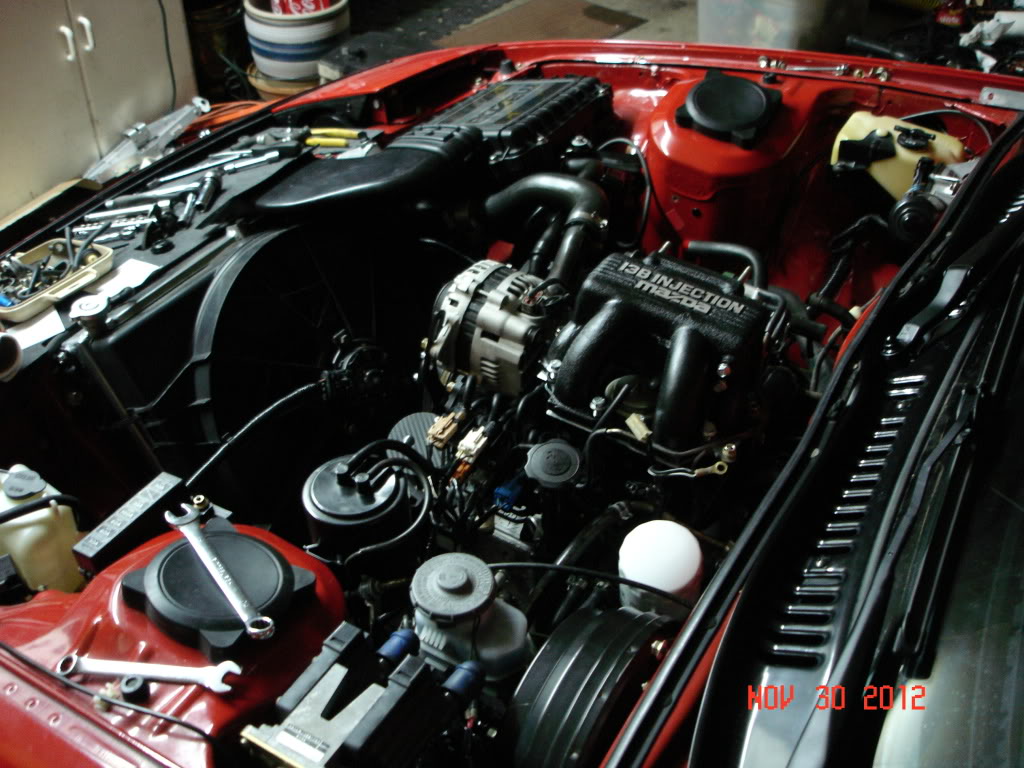
Mounted and wired the starter. All the chassis harness is finish connected now, in fact.
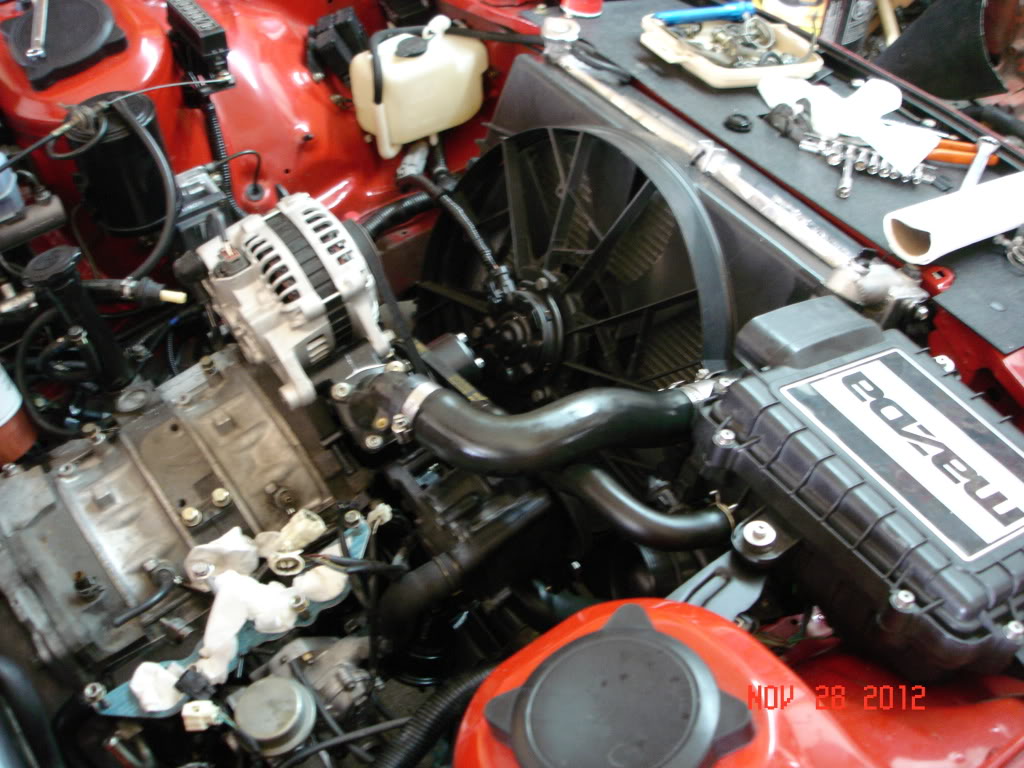
The major coolant hoses are in, all that remains is the BAC/thermowax subcircuit and the loop is complete. The two firewall heater hoses looked to be in good shape so I saved the $70 and reused them.
A judgement call.
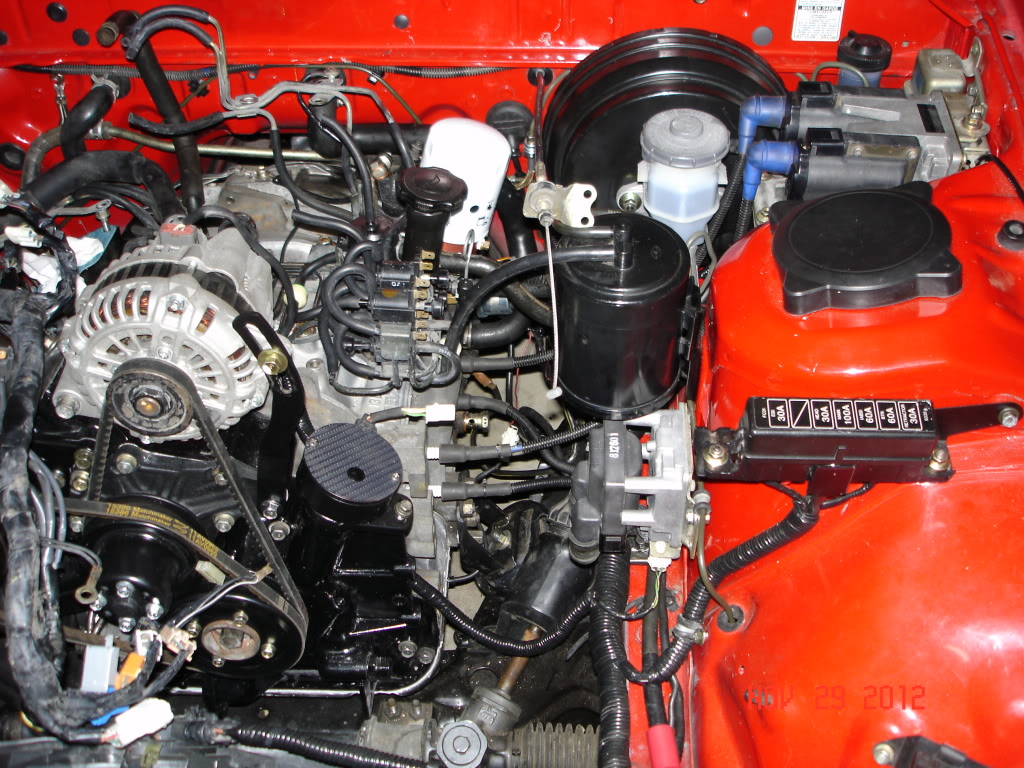
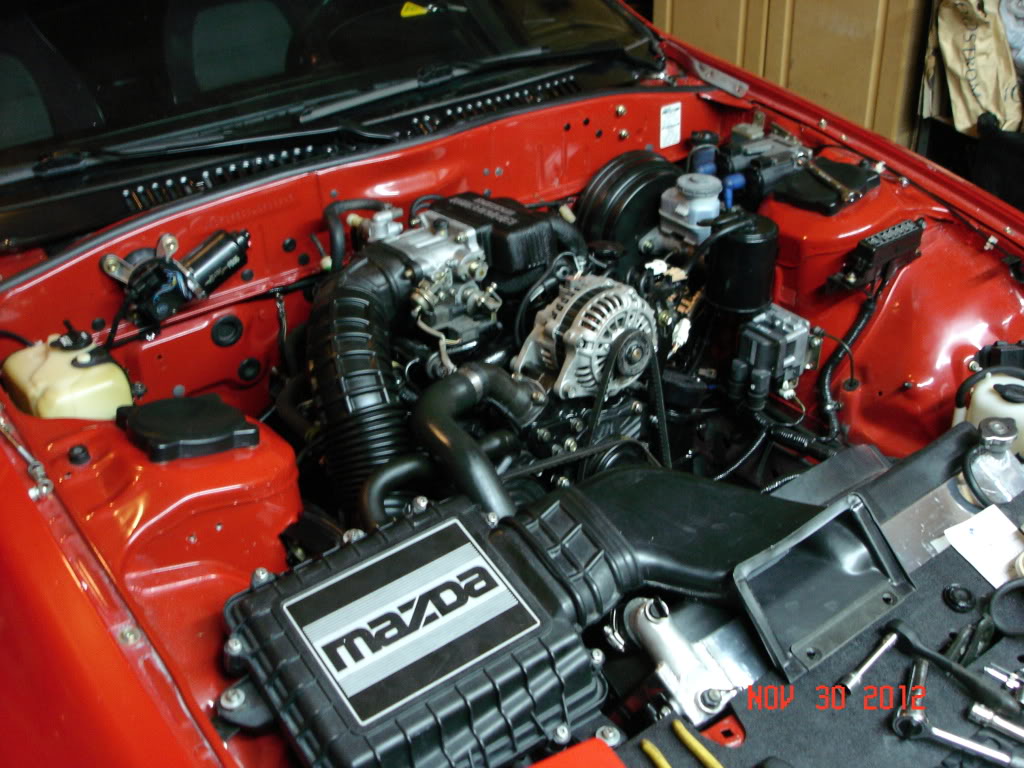
Airpump and alternator in place, as is the airbox/intake.
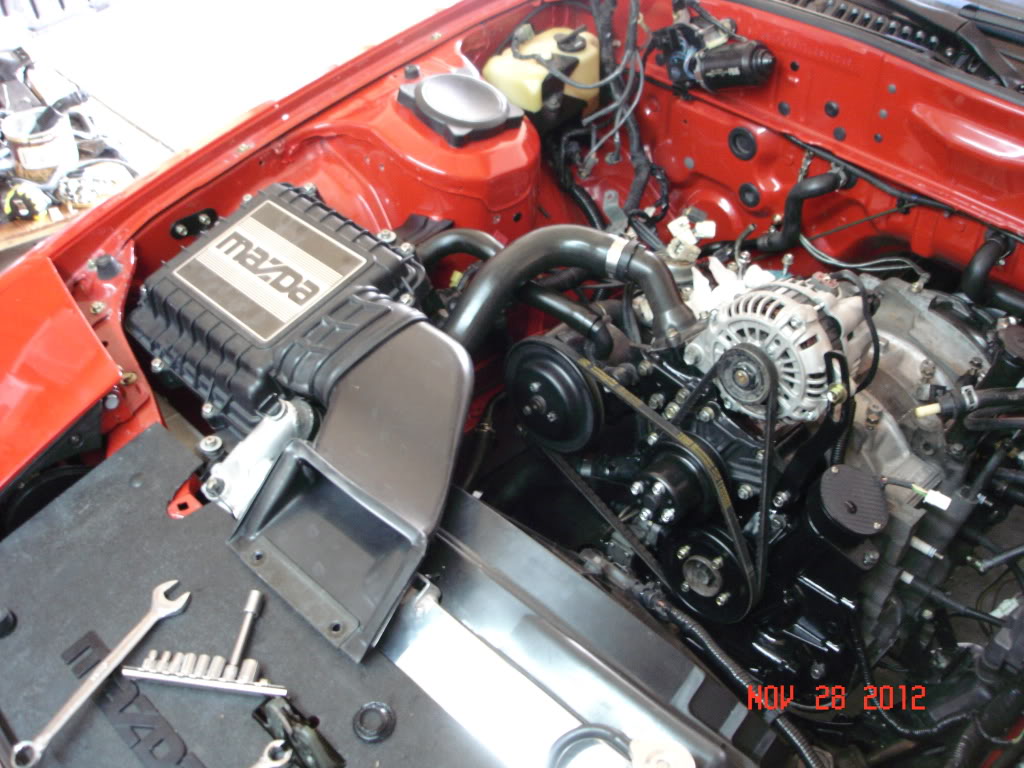
As the bay fills it inevitably gets more cluttered.
Things only get worse (before getting better, hopefully) as I FREE THE VACUUM SPIDER! and set it on the keg...
Like this, for instance:
Although it falls below the pinchweld and thus technically fits my "clean firewall" mandate, the clutch softline still offends my sensibilities.
I added a banjo, which lowered the profile quite a bit:
Much better.
Mounted and wired the starter. All the chassis harness is finish connected now, in fact.
The major coolant hoses are in, all that remains is the BAC/thermowax subcircuit and the loop is complete. The two firewall heater hoses looked to be in good shape so I saved the $70 and reused them.
A judgement call.
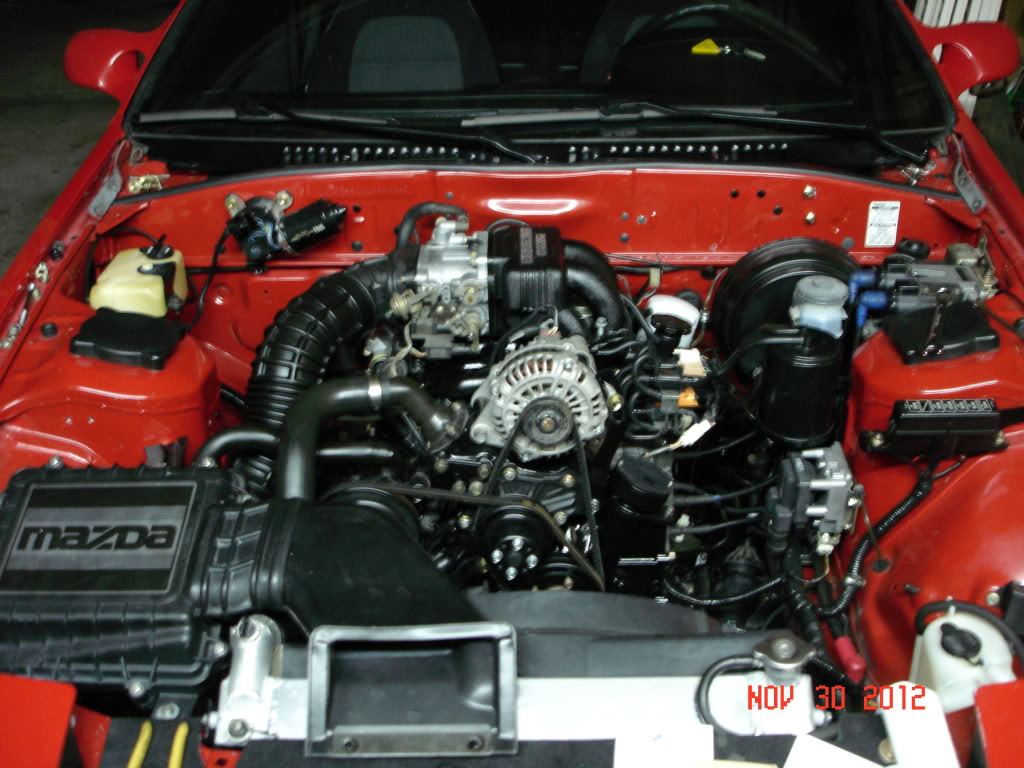
Airpump and alternator in place, as is the airbox/intake.
As the bay fills it inevitably gets more cluttered.
Things only get worse (before getting better, hopefully) as I FREE THE VACUUM SPIDER! and set it on the keg...

The itsy-bitsy spider...
Climbed up the waterspout:
Planning the kill shot:
And settling in for a big repast:
Before I go too much further I need to bleed the clutch (it's relatively easy to access right now) and figure out/install the brake booster vacuum line.
Those will be my priority projects for the morning.
Which means I'll probably go off on a tangent and do something completely different.
I replaced all the vacuum and fuel lines about 2 years ago.
I've washed the spider but used no product on it yet.
I've been swabbing the other hoses with Mother's Back to Black, which leaves a more natural sheen (eventually) than stuff like Armor All.
I don't expect the cosmetics to hold up for very long, she'll be making her debut in the middle of winter and it'll be sloppy till spring.
I had some boring, real-life errands demanding attention, so I only got a bit done today.
The clutch is bled.
Took about 5 minutes, I was shocked how easily it bled and how quickly I had pedal.
Engagement seems very light (Exedy "stock" clutch), no idea on the take up yet.
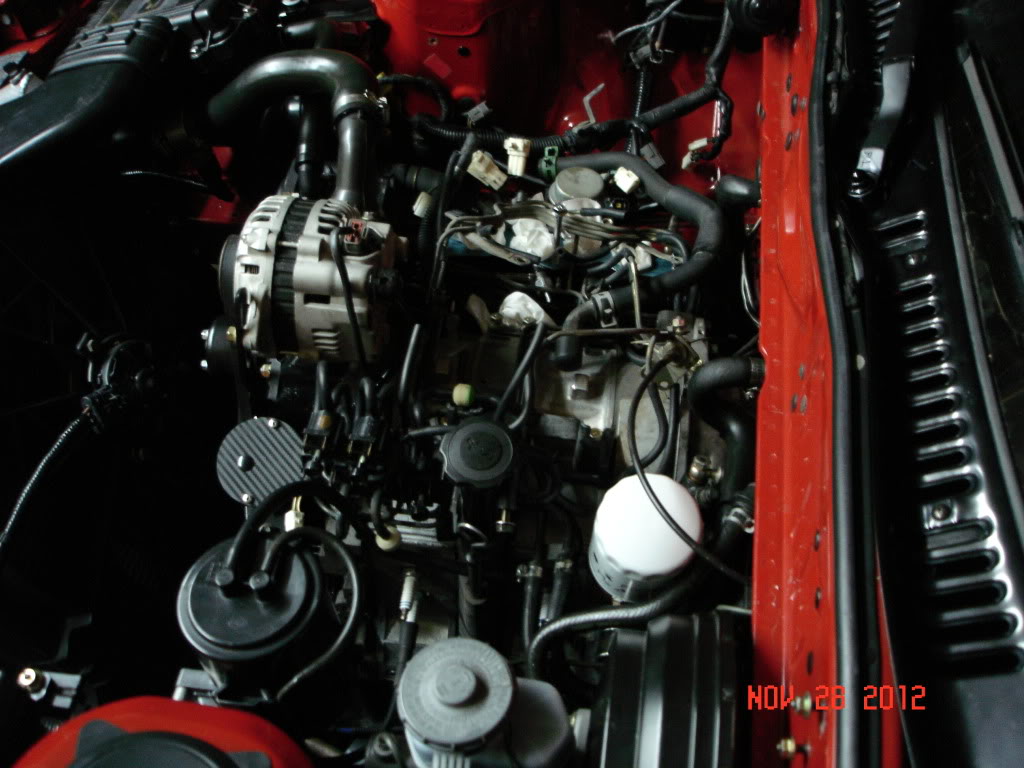
I spent a little time in the junkyard and failed to find the perfect vacuum line but that was more a function of effort than availability. I'm confident I can come up with a whizbang solution given enough search time.
For now however, quick and dirty it is. I trimmed and tweaked the stock hardline and the booster now has vacuum.
It's getting crowded in certain areas now, can't be helped but a lot of the clutter is masked by the intake, so I think it'll turn out OK.
Also made up a "ground spider" that ties the main ground strap on the bellhousing to the two ground clusters on the engine. There is also the large ground cable on the starter bolt, of course, so there should be no issues in that regard.
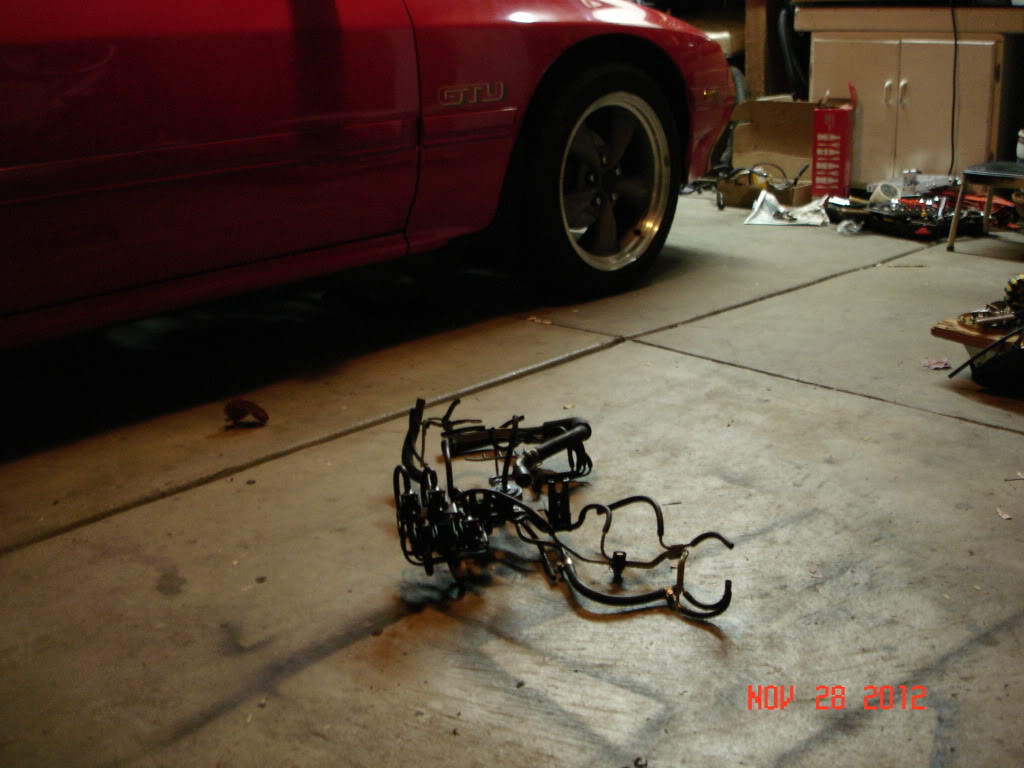
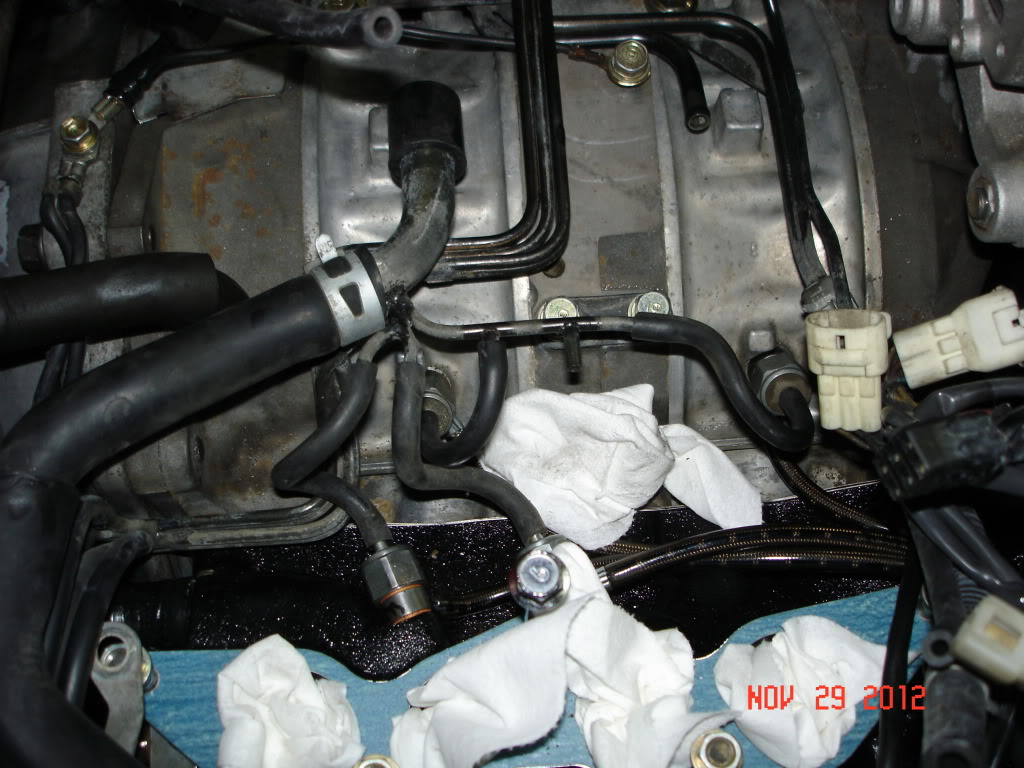
I have most of the vacuum spider figured out with one exception...
REAL QUESTION TIME!
Remember, this is a "91 NA engine.
Of the two ports on the main intake tube, one feeds the BAC, the second loops around and connects to the spider. This leg then splits into a branch with five connections. Four of these feed the OMP nozzles but what of the fifth...was it just capped off?
I cannot for the life of me recall and none of my pics show this detail.
Here's the leg in question:
Next up I lay the EM harness in place and try to make it fit nicely.
The clutch is bled.
Took about 5 minutes, I was shocked how easily it bled and how quickly I had pedal.
Engagement seems very light (Exedy "stock" clutch), no idea on the take up yet.
I spent a little time in the junkyard and failed to find the perfect vacuum line but that was more a function of effort than availability. I'm confident I can come up with a whizbang solution given enough search time.
For now however, quick and dirty it is. I trimmed and tweaked the stock hardline and the booster now has vacuum.
It's getting crowded in certain areas now, can't be helped but a lot of the clutter is masked by the intake, so I think it'll turn out OK.
Also made up a "ground spider" that ties the main ground strap on the bellhousing to the two ground clusters on the engine. There is also the large ground cable on the starter bolt, of course, so there should be no issues in that regard.
I have most of the vacuum spider figured out with one exception...
REAL QUESTION TIME!
Remember, this is a "91 NA engine.
Of the two ports on the main intake tube, one feeds the BAC, the second loops around and connects to the spider. This leg then splits into a branch with five connections. Four of these feed the OMP nozzles but what of the fifth...was it just capped off?
I cannot for the life of me recall and none of my pics show this detail.
Here's the leg in question:
Next up I lay the EM harness in place and try to make it fit nicely.
PCV or oil filler neck/iron? For venting-ing-ing?
Oops, nevermind... wrong side. No idea. I always kill that spider with fire, first thing. You're lucky I'm not near your garage, it gives me the creeps just seeing it in there.
Oops, nevermind... wrong side. No idea. I always kill that spider with fire, first thing. You're lucky I'm not near your garage, it gives me the creeps just seeing it in there.
The visual is not super rigorous but the closer to stock (and thus, the picture their computer shows them), the better off you are.
I'm curious as to whether my evap canister relocation will cause comment.
Anyway, the mystery of the unused nipple can marinate for a while, I'm moving forward with the EM harness install.
This was left untouched (at least the section actually on the keg) during the preprep because age had molded it into position and I figured it'd be easier to replace since connectors would fall into position.
It's kind of nasty looking though, so something will need to happen.
We'll see how it goes.
Well, we saw and it went.
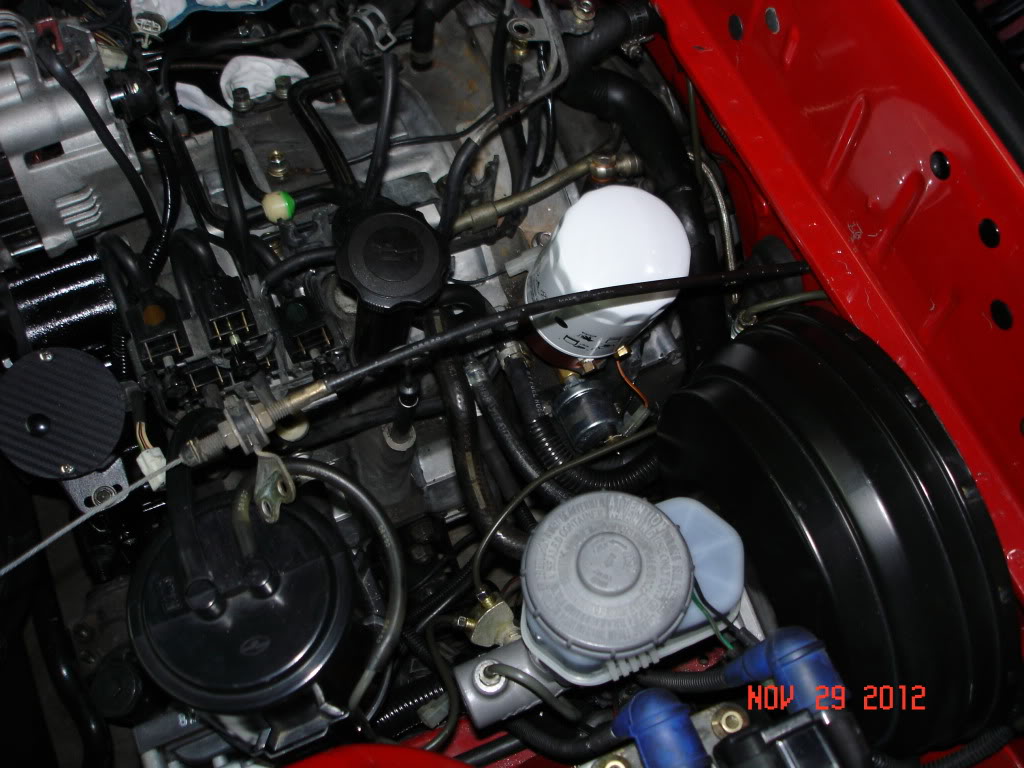
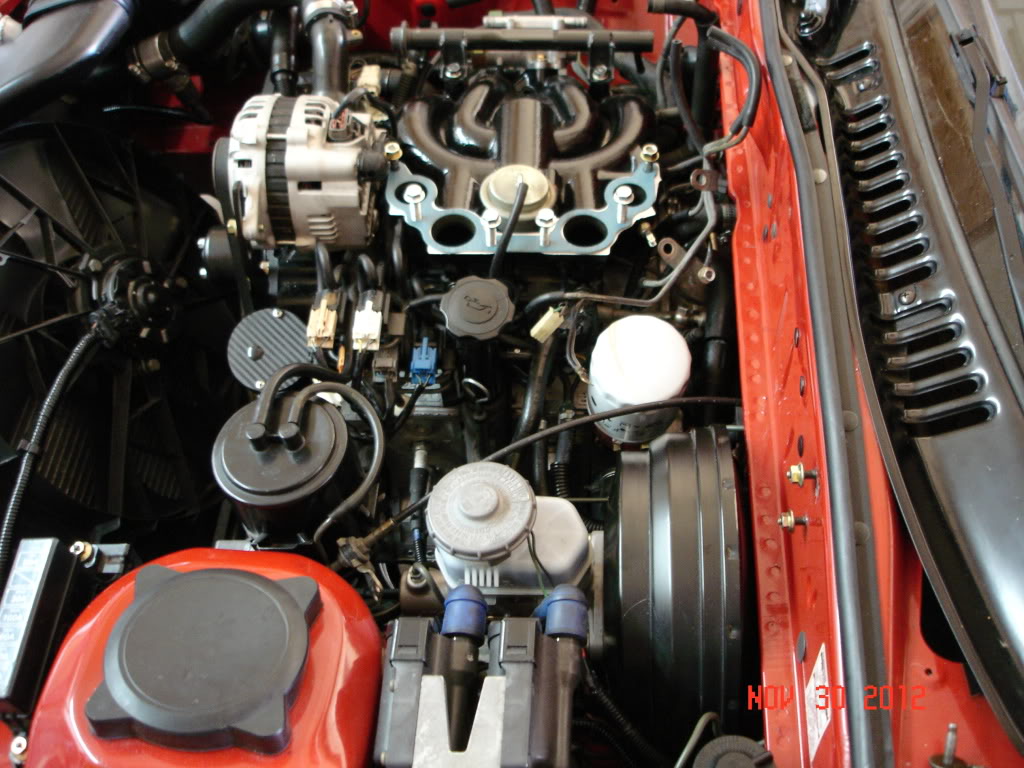
Spent quite a while weaving the EM harness and the vacuum spider together so they could peacefully coexist while facehuggering the block.
WARNING! Beyond here lies fakery...all this manifolding has to come off for injectors and is only loosely bolted in...
As I'd hoped, the giant black slab of the intermediate housing covers a multitude of sins:
The odd dynamic chamber adds some interest:
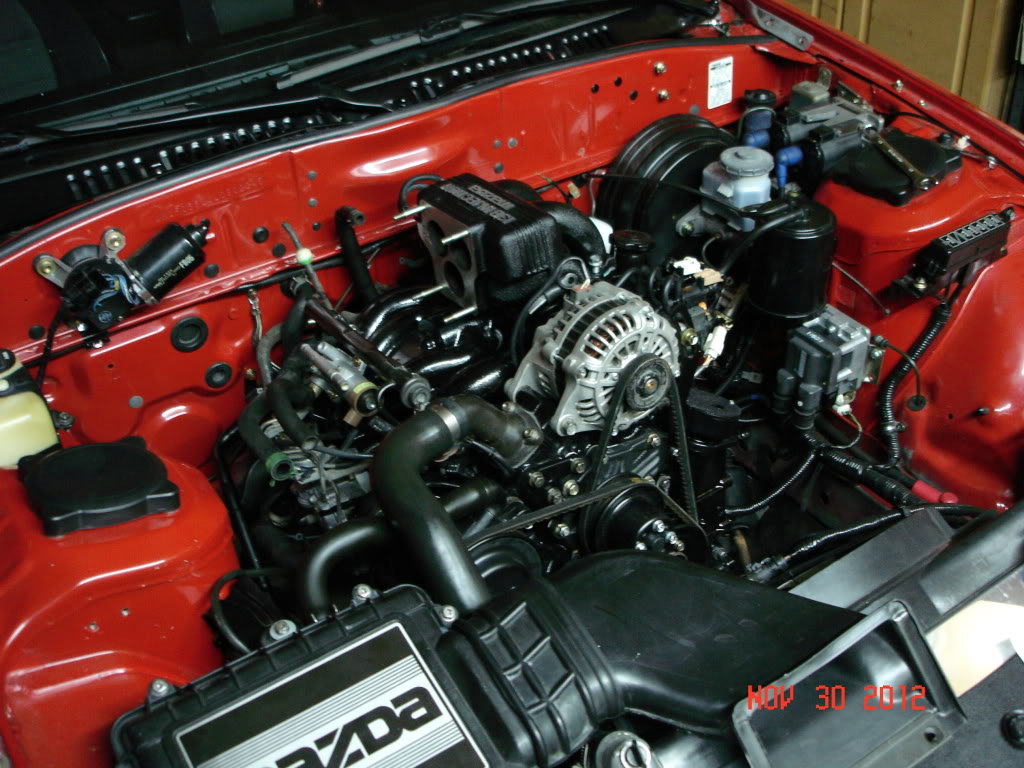
And the throttle body/intake finishes it off:
There are several minor adjustments to be made on the harness (nothing you can see in these deliberately ill lit shots) but for the most part, this is how she's gonna look when finished.
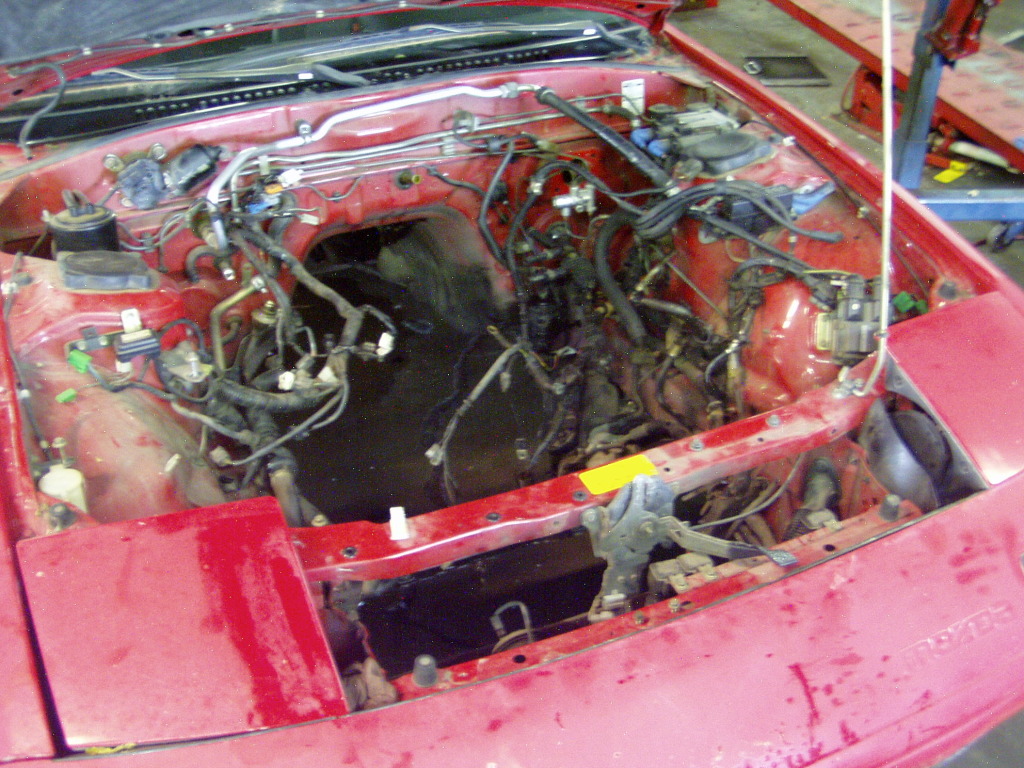
To refresh our memory, here's how she looked nearly four months ago:
To date I've spent $937 and anticipate about another $600 to get her running.
Still need the headers (eBay Pacesetters-$150), injectors serviced (WitchHunter-$100) and oil cooler lines ((Corksport-$145, unless I can find a local shop to redo the originals), Then there's the "little stuff" (that tends to aggregate quickly)- spark plugs, O2 and thermosensor, coolant, new headlights (remember, one of the low beams is burned out) and a tank of gas.
If this budget holds up, my investment in the car will be $1500, $500 of which was recouped selling the old shell.
She's a thousand dollar car then, viewed objectively.
Which I am unable to do.
Spent quite a while weaving the EM harness and the vacuum spider together so they could peacefully coexist while facehuggering the block.
WARNING! Beyond here lies fakery...all this manifolding has to come off for injectors and is only loosely bolted in...
As I'd hoped, the giant black slab of the intermediate housing covers a multitude of sins:
The odd dynamic chamber adds some interest:
And the throttle body/intake finishes it off:
There are several minor adjustments to be made on the harness (nothing you can see in these deliberately ill lit shots) but for the most part, this is how she's gonna look when finished.
To refresh our memory, here's how she looked nearly four months ago:
To date I've spent $937 and anticipate about another $600 to get her running.
Still need the headers (eBay Pacesetters-$150), injectors serviced (WitchHunter-$100) and oil cooler lines ((Corksport-$145, unless I can find a local shop to redo the originals), Then there's the "little stuff" (that tends to aggregate quickly)- spark plugs, O2 and thermosensor, coolant, new headlights (remember, one of the low beams is burned out) and a tank of gas.
If this budget holds up, my investment in the car will be $1500, $500 of which was recouped selling the old shell.
She's a thousand dollar car then, viewed objectively.
Which I am unable to do.
mmm soo tasty
I wish i didnt have to rebuild an engine and swap with no garage.
I thought my engine bay was clean till i saw yours
Very good work.
Cant wait till i get a real garage and not just a shop, then im doin that to my whole car
I wish i didnt have to rebuild an engine and swap with no garage.
I thought my engine bay was clean till i saw yours
Very good work.
Cant wait till i get a real garage and not just a shop, then im doin that to my whole car
I feel your pain, really.
As poorly equipped as I've been during this process, at least I've been protected from the elements.
Today all the manifold stuffs comes back off and the harness adjustments begin.
In truth, the only connector that needs work is the TPS, which is about 2" out of position.
That misadjustment however is a symptom of my lack of understanding exactly how the harness enters the engine.
I know there were brackets that used to be part of the harness, one of which bolted to the LIM flange, but mine are long gone, so I'm faking it.
With everything installed it's easier to see what I have to work with, so I figure I'll get it eventually.
My first booster vac line is workable but half-assed and that will get some attention as well.
And finally, the water temp gauge sensor wire (which bizarrely runs through the EM harness on the S5 NA) has the wrong fitting to mate with the VDO sending unit...that needs fixing.
I have matched all the vac lines with their fittings, with the exception of that one metered air port, everything is accounted for.
I figure it must have been capped off but I would have normally left the cap in place... so I'm not entirely sure yet.
It'll be about 3 weeks till I have the serviced injectors in hand, so there's plenty of time to attend to these details.


I've heard that...but then again, I've heard the opposite.
At this point headers are my easiest option and something I've been wanting to try for a while (not at all an intellectual decision, just a little kid "I WANT!" deal), so what the hell.
My stock manifold could be used again, although it would need some work on the studs/flange. I have (what I hope is) a good cat but no precats, so a "test pipe" would need to be made.
Headers solve the immediate "put the ****** together" urge and I'm willing to see how the performance changes.
Is your statement based on personal experience?
If so, what happened?
I did end up pulling all the manifolding off and all sorts of **** happened as a result.
I was staring at the mystery metered air port and finally decided to cap it.
The cap I found seemed a little loose, so I blew into the feed tube to check the integrity.
The cap was too loose and made a perfect swan dive off the vac spider and directly into the now open LIM, disappearing from sight.
Now that, my friends, is what we call a real pisser.
Lower intake now had to come off and guess what?
My super trick OMP line routing completely obscured one of the flange bolts.
Not only that, but I'd also noticed previously that one of the OMP hoses was dangerously close to the lower run of the airpump belt.
The new hoses, so carefully arranged, had to not only come off but also rerouted to make future service more practical.
Not like I had anything better to do.
Manifold off, I retreived the errant vac cap (it was laying right at the mouth of the iron) and solved the mystery port problem, all at the same time. Turns out, there's a nipple right on the top of the LIM to engine flange...it had been painted black and was nearly invisible unless you looked right at it.
Among the collection of vac hose I'd removed, there was one that exactly fit, so I'm pretty sure that's right.
Manifold was put back and the OMP hoses routed more like RE recommends, so it's not as stealthy, but it's also not in the way.
While everything was assembled I was able to see just where all the connectors needed to be and all was fine, save the TPS. In order to get that connection made, the whole trunk of the harness had to be relocated because the harness side is on a very short pigtail.
Again, not as neat as the initial attempt but I think I can work with it.
I still have to deal with the water temp connector and the booster vac line, neither of which make me happy.
well it sounds like you have some time still
might try to find a used RB header, im not saying a Pacesetter wont work, they just use really thin tubing and sub par welds.
Neither hold up well on a rotary, and the the thin wall tubing sounds " tinny" and it droans really bad
it would definitely be worth it in the long run for a quality built header