
Rebuildable front differential mount

Rebuildable front differential mount
So I'm broke again and need a diff mount to get going so I'm making one from scratch. My goal is to spend less than $50 buck, and be able to change the bushing if it fails, or I want a stiffer bushing.
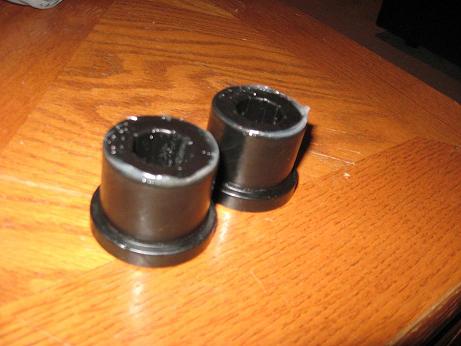
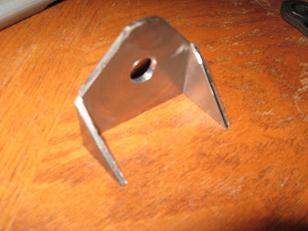
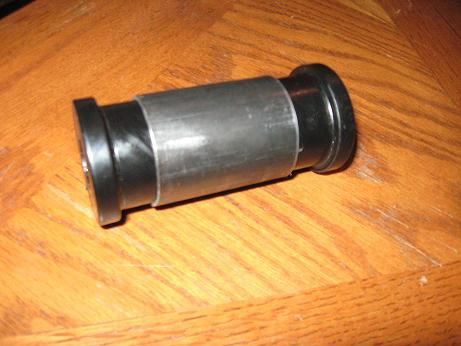
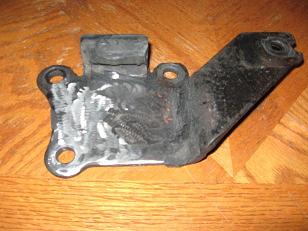
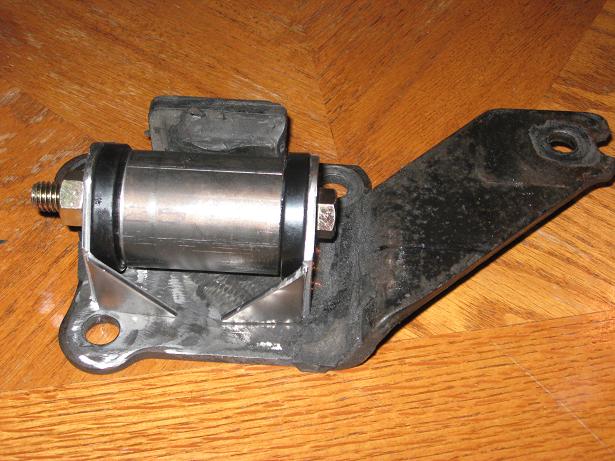
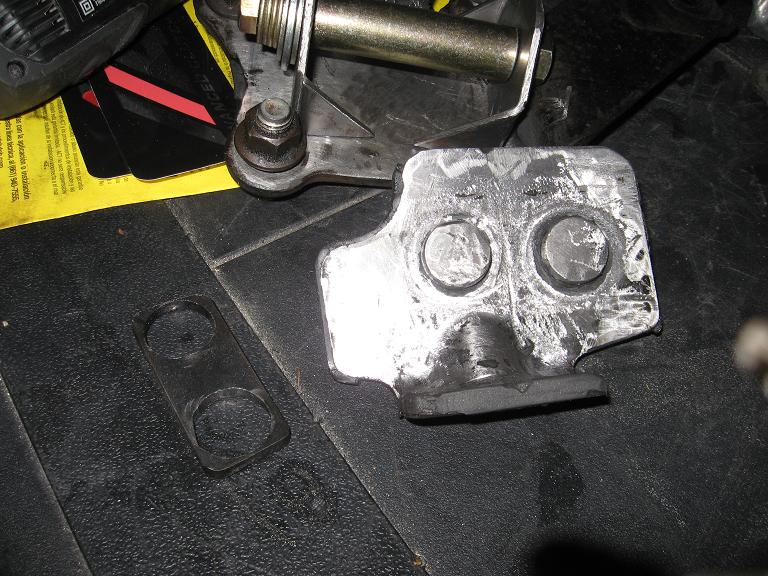
Here's what I got so far. Grade 8 hardware from bLowes, a bushing set (has a dowel not in picture) I had sitting around, two brackets I made from gussets, a pipe cut to fit the bushings, and the remains of my old diff mount. I spent $5.29 at bLowes and $5.50 at Alro steel for gussets and pipe. So I�ve got $39.21 left to make the other side.
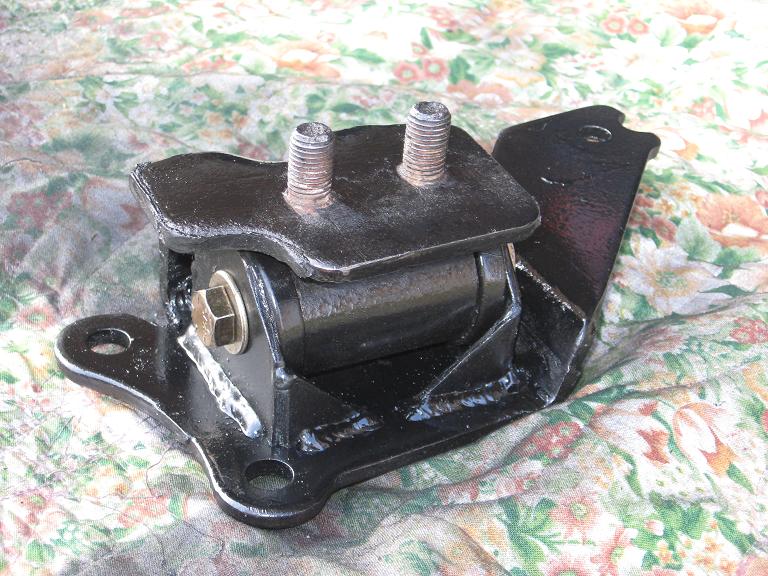
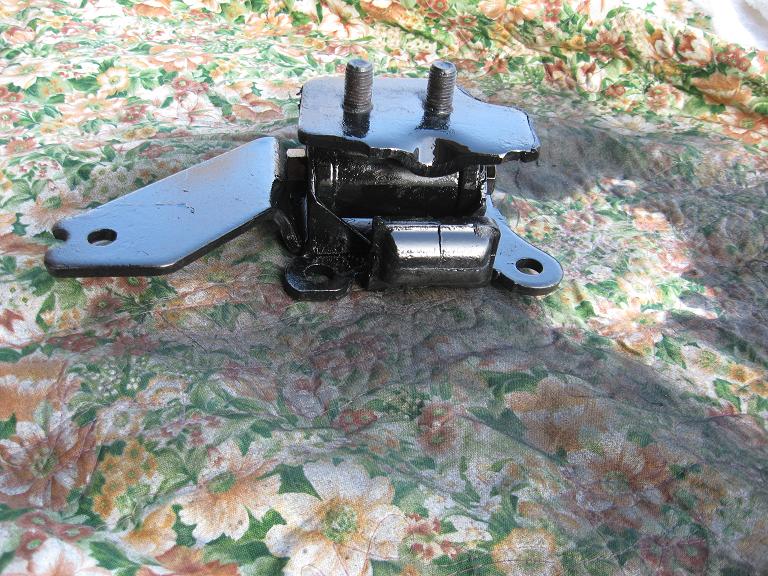
Here's what it looks like mocked up so far. (The bolt will go through the other way)

I still need to make an adapter to bolt to the sub frame; I'll get to that soon.
Let me know what you guys think.
Here's what I got so far. Grade 8 hardware from bLowes, a bushing set (has a dowel not in picture) I had sitting around, two brackets I made from gussets, a pipe cut to fit the bushings, and the remains of my old diff mount. I spent $5.29 at bLowes and $5.50 at Alro steel for gussets and pipe. So I�ve got $39.21 left to make the other side.
Here's what it looks like mocked up so far. (The bolt will go through the other way)
I still need to make an adapter to bolt to the sub frame; I'll get to that soon.
Let me know what you guys think.

Trending Topics


Here's the problem, you just made a stronger part instead of fixing the problem. The real issue at hand here is why does the diff mount break? Well it must not be strong enough so lets engineer a stronger one! Nope, the problem is the mount is in sheer and it tears the bushing in half.
Install a pinion snubber with a new factory mount and you'll be good to go. A pinion snubber will take forces in compression rather than sheer and it works along with the stock mount. It's win win.
Install a pinion snubber with a new factory mount and you'll be good to go. A pinion snubber will take forces in compression rather than sheer and it works along with the stock mount. It's win win.
In this configuration the steel is the structure and the bushing is the dampener. The bushing is only in compression, so it should never rip. When is does wear out it I can replace it for super cheap.
I am using the factory pinion snubber, I just put it on after I install the mount. Are you talking about a different snubber?
I am not trying to say this is best way, just trying to understand your post,
$5.29 at bLowes for fasteners
$5.50 at Alro steel for gussets and pipe
$10.00 at Wideside Speed Shop for welding
$20.79 total versus $100+ for stock one, or $40 for a used one that might rip.
MOre pics
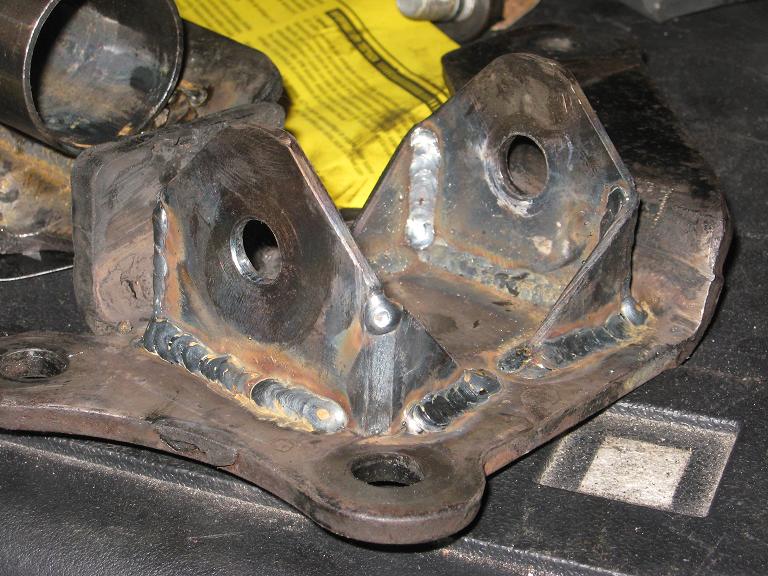
Heres the spacer I made, and the body side mount after grinding.
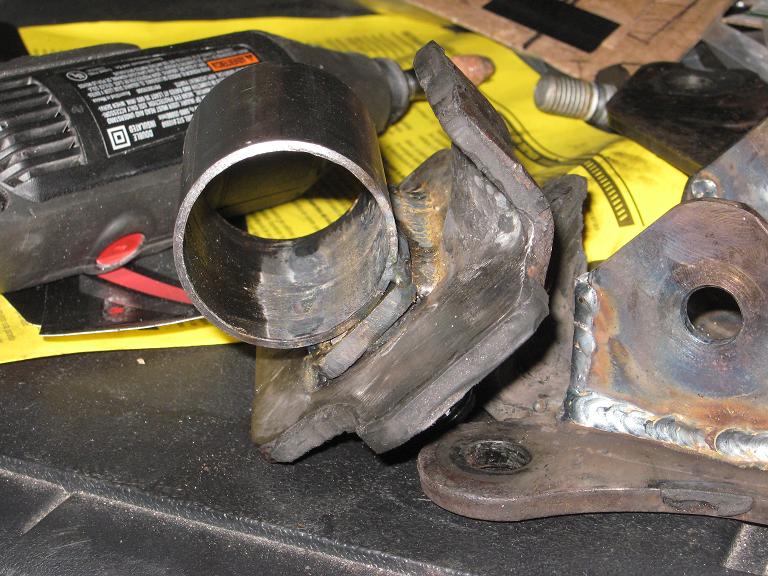
Heres it weloded together
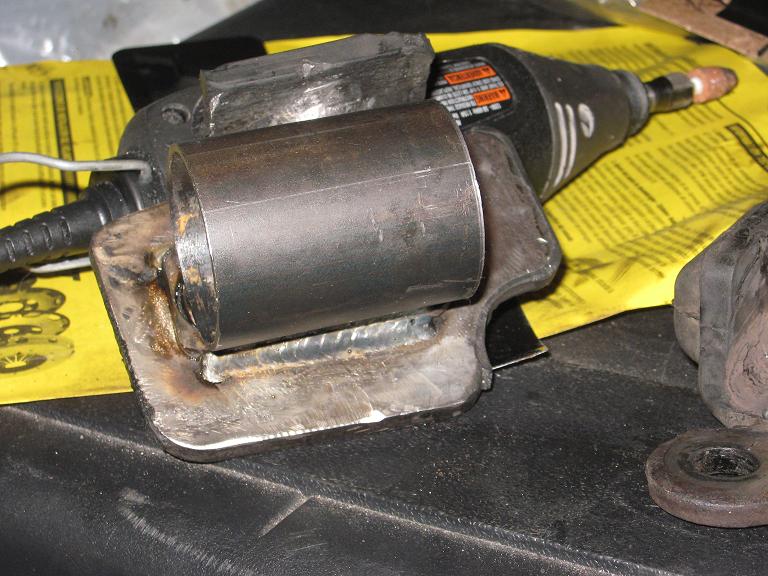
And heres the other side welded
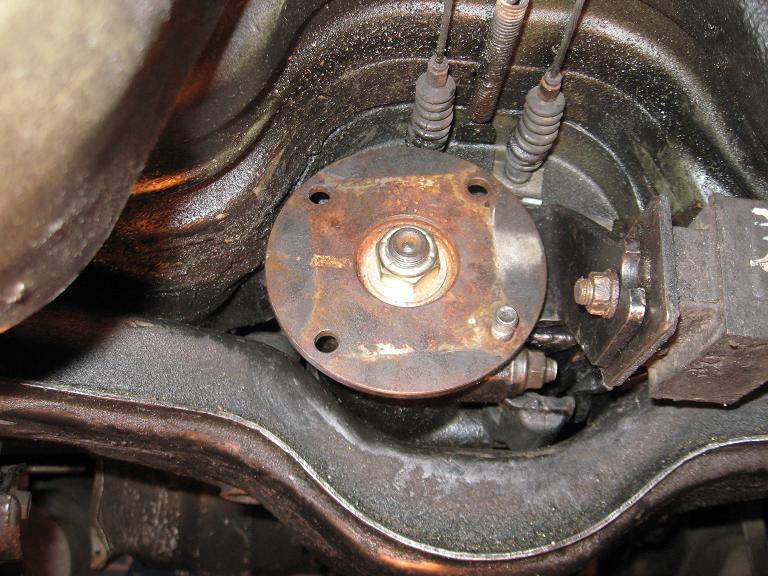
Here's what it looks like installed from the back, Notice your can easily tighten the bushing after installation
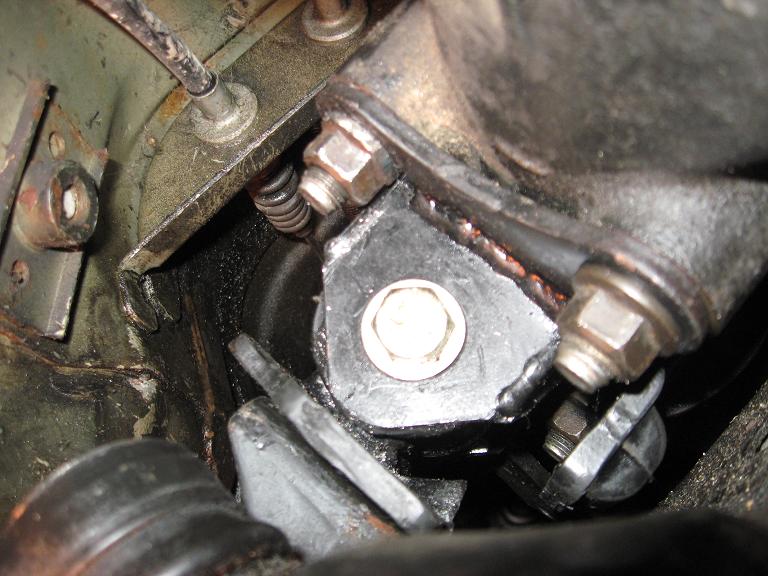
Here's the front with the snubber on. The final assembly came in large by 1/4 inch but all the clearances checked out. If I did this again I would remove the sub frame so I could install and mock up easier.
Heres it weloded together
And heres the other side welded
Here's what it looks like installed from the back, Notice your can easily tighten the bushing after installation
Here's the front with the snubber on. The final assembly came in large by 1/4 inch but all the clearances checked out. If I did this again I would remove the sub frame so I could install and mock up easier.
I had to loosen the rear diff mounts, remove the front sub frame bolts, and tip the sub frame down to install the mount. It would be much easier to do this while you have the sub frame off.
Maybe I missed something but I think this does fix the issue. The stock mount relies on the rubber as the structural and dampening. Rubber and all mounts break down in the elements, and when our mount breaks the whole thing is trash.
In this configuration the steel is the structure and the bushing is the dampener. The bushing is only in compression, so it should never rip. When is does wear out it I can replace it for super cheap.
I am using the factory pinion snubber, I just put it on after I install the mount. Are you talking about a different snubber?
I am not trying to say this is best way, just trying to understand your post,
over engineering is not so bad.
I need to replace my front diff mounts also after seeing this thread. I bought a mazdatrix comp mount, still havent replaced it yet, waiting till next year, mean while a pinion snubber is in.
This is a stupid question but, have anybody welded a bracket on the diff and subframe and mounted a rod, or some kind of metal to them to make a somewhat solid mount??
test drive
I went for a 40 mile test drive today and everything worked fine. No thumps, no noise from rear end.
I found one issue when I inspected it after the drive. The 1/4 extra width of the bracket worked its way out. It's an easy fix with the grinder.
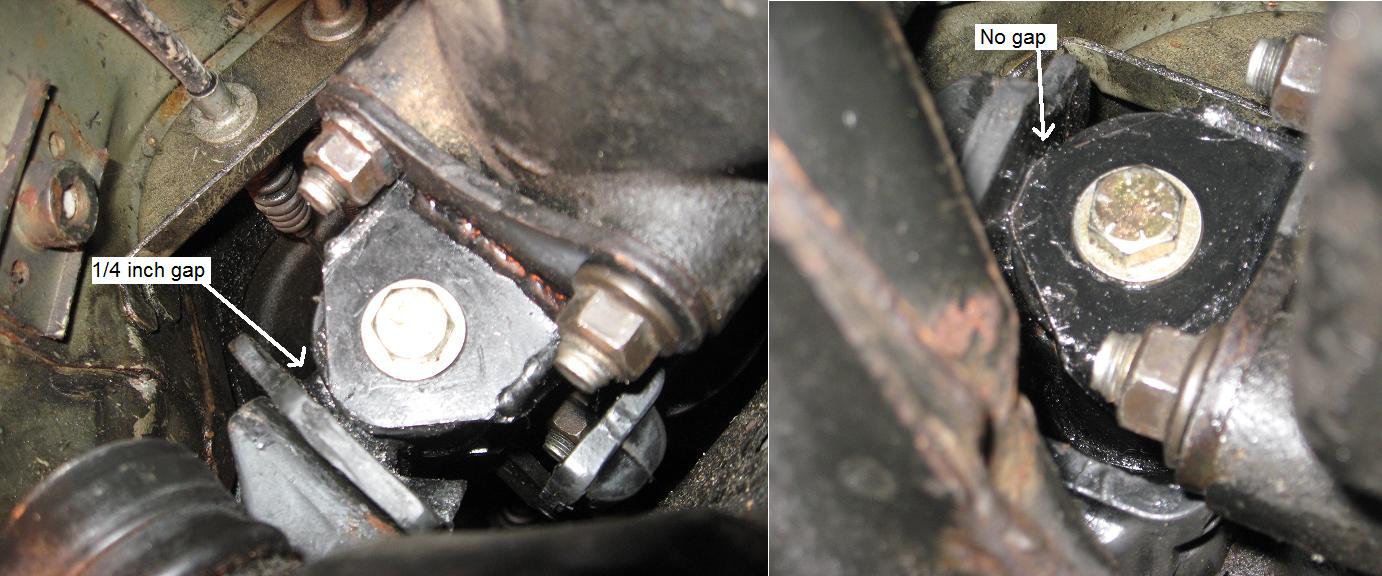
The mount moves up and down and to the passenger side fine, but it has a hard stop to the driver�s side.
I'll probable leave it be. I have 460 more miles of clutch break-in before I can give it a hard launch. If it starts to squeak I'll pop it out and fix it.
I found one issue when I inspected it after the drive. The 1/4 extra width of the bracket worked its way out. It's an easy fix with the grinder.
The mount moves up and down and to the passenger side fine, but it has a hard stop to the driver�s side.
I'll probable leave it be. I have 460 more miles of clutch break-in before I can give it a hard launch. If it starts to squeak I'll pop it out and fix it.
over engineering is not so bad.
I need to replace my front diff mounts also after seeing this thread. I bought a mazdatrix comp mount, still havent replaced it yet, waiting till next year, mean while a pinion snubber is in.
This is a stupid question but, have anybody welded a bracket on the diff and subframe and mounted a rod, or some kind of metal to them to make a somewhat solid mount??
I need to replace my front diff mounts also after seeing this thread. I bought a mazdatrix comp mount, still havent replaced it yet, waiting till next year, mean while a pinion snubber is in.
This is a stupid question but, have anybody welded a bracket on the diff and subframe and mounted a rod, or some kind of metal to them to make a somewhat solid mount??

Lives on the Forum
Joined: Sep 2003
Posts: 5,707
Likes: 6
From: BC, Canada
Yes, but do they do it with stock power and stock type tire and tire sizes? The issue may not be so much that they're designed "wrong" per-se, but that the loads that people are putting on them are just way higher than what the car was originally designed around so they break. It would seem to me to be more of an issue of exceeding the design strength more than it being a poor design.
If you run a stiff or solid front diff mount you NEED solid rear diff mounts AND solid subframe mounts or you will rip the tab off the subframe.
I run a welded front diff mount, and MMR subframe and rear diff mounts. No problems at all after 1000 track miles and a few thousand street miles.
I run a welded front diff mount, and MMR subframe and rear diff mounts. No problems at all after 1000 track miles and a few thousand street miles.

Update
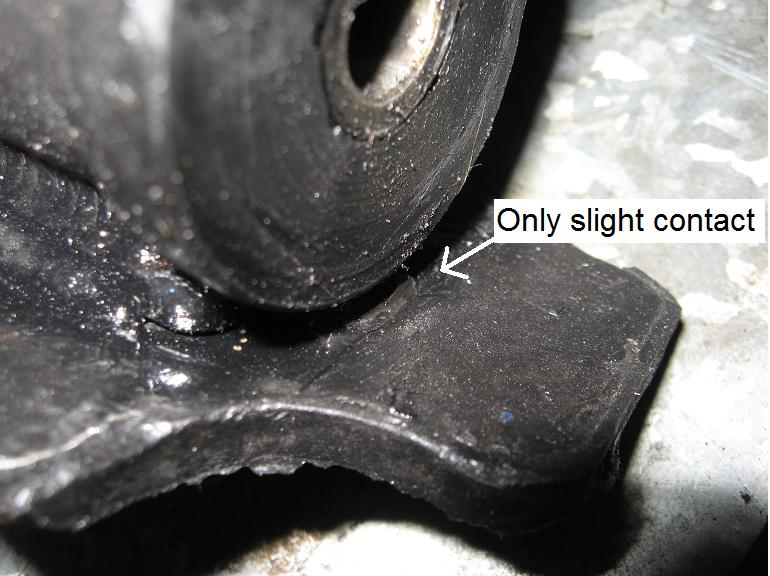
So I decided to correct the clearance issue so I pulled the diff mount off. I was surprised to find there was very little evidence of contact. Only one side had a clearance issue.
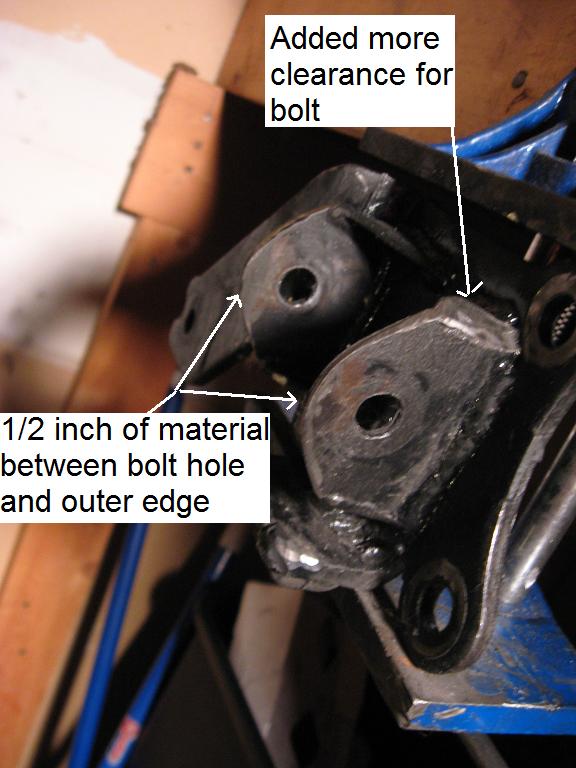
I ground the bracket down to add more clearance and to make install the top bolt easier.
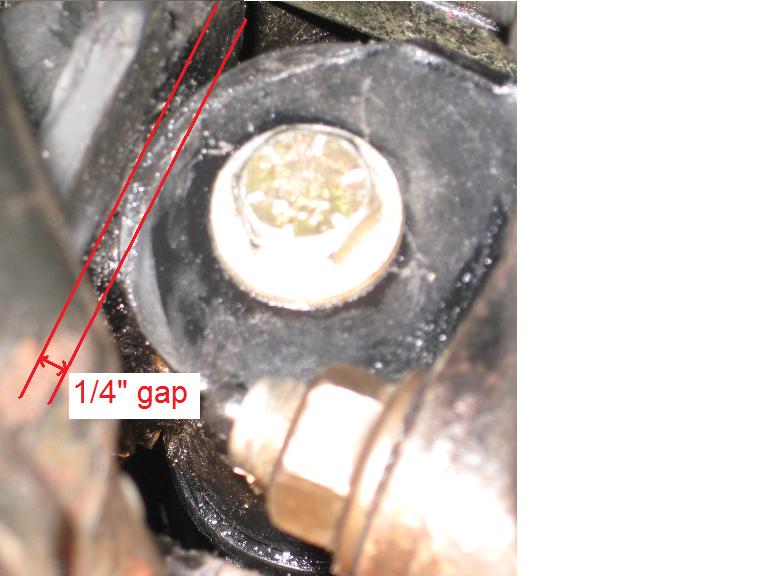
The picture sucks but I had about 1/4 inch of clearance when it was reinstalled.
I ground the bracket down to add more clearance and to make install the top bolt easier.
The picture sucks but I had about 1/4 inch of clearance when it was reinstalled.