
Rack Swap

Rack Swap
Having just swapped my powered steering rack for a manual version, I thought I'd share a few tips about the process.
A few caveats first..
I had already deleted my '91 NA's AC a few days ago so I didn't have any of the AC system to contend with. This probably made removing some of the PS hosing (and their brackets) a bit easier.
Although I've been extremely fortunate to date with hardware (nothing frozen/stripped) I still assume the worst when planning a major project.
Accordingly, at least a day ahead of time I nuke all the hardware I know I'll be touching with PB Blaster (or Seafoam Deep Creep) and see if there is anything missing or in need of replacement- I hate stopping in the middle of a job for a hardware store run.
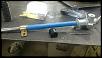
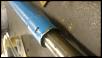
The manual rack I obtained seemed tight and in good shape save for the outer tierod boots.
The boots weren't torn yet but had enough cracking to make their replacement desirable and I really didn't want to be messing with them again after the (inevitable) alignment.
Googling turned up a reasonable replacement boot made by Energy Suspension- part #9.13103- and amazingly enough, my local Autozone had them in stock for a paltry $3.39/pair.
Removal of the stock boots and replacement with the new was a ten minute affair and I was ready to begin the actual swap (after a good night's sleep of course).
There is no need to detail the entire swap as it's very self-evident once you begin what will have to come out, so I'll just cut to the tricky bits.
Jack up the car (proper jack stands-yada,yada- not responsible for any damage/screwups-yada,yada) and remove wheels.
Redouse the tierod studs with PB Blaster (remember, you've already done this the day before, right?)
-Remove the clutch fan (assuming you have the stock cooling setup) but the shroud itself can stay in place.
-The sway bar will have to be removed- now would be the perfect time to replace the bushings/endlinks (or even the entire thing) if you've been thinking about it.
-Remove the battery and it's tray.
I started at the top and worked my way down so the pump and it's bracket were the first to go.
With all the hoses disconnected (leaving a nice puddle of fluid under the car) and the steering column undone, I decided to go for the hard part next...freeing the tierods from the steering hub.
Remarkably, both sides dropped out with one good whack of the hammer.
I must be living right.
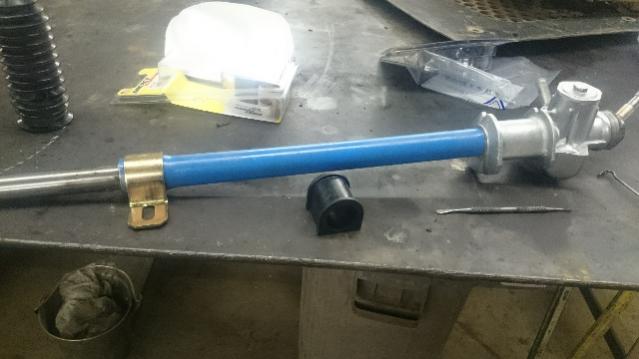
Unbolting the rack is self explanatory but take note of the brackets...they are not symetrical and must go back the way they come off. Looking from the top, one set of capture nuts is closer to the hump than the other...the longer side is forward.
I marked the front of each bracket with a Sharpie just to be sure.
Now comes the tricky part...weaseling out the rack.
Turns out, it's not that bad BUT you will have to undo the four bolts holding the radiator on (now we're at the reason why the fan had to come off).
The rad hoses can stay in place.
From under the car you can now move the rack forward off it's brackets and at the same time, push up on the radiator (if you're lucky you have a friend to help here- they can lift and hold the rad for the next few minutes) and wiggle the rack to the floor.
It's kind of a PITA due to the rack's hard lines and the extended casting where the spindle enters (where all the hoses bolted in) but all in all, it's not too hard even if like me, you're working solo.
You are now 90% finished, putting in the manual rack is very easy since it's not encumbered with the external hardlines and large quill casting.
I make it a habit to run a tap through any capture nuts (like the rack brackets or the swaybar mounts) and then apply antisieze to all the bolts when reassembling things, it just makes life simpler in the long run.
It took about four hours start to finish, moving at a pretty leisurely pace.
It would take longer if AC was in place (I think) and if you're not as lucky as I with the tierod studs.
I used an assortment of deep/shallow sockets (and extensions) and wrenches in sizes 10,12,14,17 & 19mm. Nothing exotic needed toolwise.
I've only taken a quick spin around the block (my alignment is tomorrow AM) so I can't say whether I like the manual rack better than power yet.
It is noticeably heavier in slow speed manoeuvers but I assume I'll acclimate and hopefully the increased feel at speed will outweigh the inconvenience.
If not, I'll be going through this again.
A few caveats first..
I had already deleted my '91 NA's AC a few days ago so I didn't have any of the AC system to contend with. This probably made removing some of the PS hosing (and their brackets) a bit easier.
Although I've been extremely fortunate to date with hardware (nothing frozen/stripped) I still assume the worst when planning a major project.
Accordingly, at least a day ahead of time I nuke all the hardware I know I'll be touching with PB Blaster (or Seafoam Deep Creep) and see if there is anything missing or in need of replacement- I hate stopping in the middle of a job for a hardware store run.
The manual rack I obtained seemed tight and in good shape save for the outer tierod boots.
The boots weren't torn yet but had enough cracking to make their replacement desirable and I really didn't want to be messing with them again after the (inevitable) alignment.
Googling turned up a reasonable replacement boot made by Energy Suspension- part #9.13103- and amazingly enough, my local Autozone had them in stock for a paltry $3.39/pair.
Removal of the stock boots and replacement with the new was a ten minute affair and I was ready to begin the actual swap (after a good night's sleep of course).
There is no need to detail the entire swap as it's very self-evident once you begin what will have to come out, so I'll just cut to the tricky bits.
Jack up the car (proper jack stands-yada,yada- not responsible for any damage/screwups-yada,yada) and remove wheels.
Redouse the tierod studs with PB Blaster (remember, you've already done this the day before, right?)
-Remove the clutch fan (assuming you have the stock cooling setup) but the shroud itself can stay in place.
-The sway bar will have to be removed- now would be the perfect time to replace the bushings/endlinks (or even the entire thing) if you've been thinking about it.
-Remove the battery and it's tray.
I started at the top and worked my way down so the pump and it's bracket were the first to go.
With all the hoses disconnected (leaving a nice puddle of fluid under the car) and the steering column undone, I decided to go for the hard part next...freeing the tierods from the steering hub.
Remarkably, both sides dropped out with one good whack of the hammer.
I must be living right.
Unbolting the rack is self explanatory but take note of the brackets...they are not symetrical and must go back the way they come off. Looking from the top, one set of capture nuts is closer to the hump than the other...the longer side is forward.
I marked the front of each bracket with a Sharpie just to be sure.
Now comes the tricky part...weaseling out the rack.
Turns out, it's not that bad BUT you will have to undo the four bolts holding the radiator on (now we're at the reason why the fan had to come off).
The rad hoses can stay in place.
From under the car you can now move the rack forward off it's brackets and at the same time, push up on the radiator (if you're lucky you have a friend to help here- they can lift and hold the rad for the next few minutes) and wiggle the rack to the floor.
It's kind of a PITA due to the rack's hard lines and the extended casting where the spindle enters (where all the hoses bolted in) but all in all, it's not too hard even if like me, you're working solo.
You are now 90% finished, putting in the manual rack is very easy since it's not encumbered with the external hardlines and large quill casting.
I make it a habit to run a tap through any capture nuts (like the rack brackets or the swaybar mounts) and then apply antisieze to all the bolts when reassembling things, it just makes life simpler in the long run.
It took about four hours start to finish, moving at a pretty leisurely pace.
It would take longer if AC was in place (I think) and if you're not as lucky as I with the tierod studs.
I used an assortment of deep/shallow sockets (and extensions) and wrenches in sizes 10,12,14,17 & 19mm. Nothing exotic needed toolwise.
I've only taken a quick spin around the block (my alignment is tomorrow AM) so I can't say whether I like the manual rack better than power yet.
It is noticeably heavier in slow speed manoeuvers but I assume I'll acclimate and hopefully the increased feel at speed will outweigh the inconvenience.
If not, I'll be going through this again.
Banned. I got OWNED!!!
Joined: Dec 2006
Posts: 26
Likes: 1
good job. How much do the manual racks run these days?
I removed my PS pump but did not go with the manual rack and recently the PS gave out in the other FC so I might look into getting the manual racks for at least one of the 7's.
I removed my PS pump but did not go with the manual rack and recently the PS gave out in the other FC so I might look into getting the manual racks for at least one of the 7's.
Banned. I got OWNED!!!
Joined: Dec 2006
Posts: 26
Likes: 1
drive around and tell me what you think. I've been using the PS rack de-powered for a couple of years now so I'm used to it but if I can get better response ffrom the manul then it's something worth looking at.


Well, it's been a week since I converted.
The first few days I was hyper aware of the manual rack's "feel"- no doubt about it, it's heavier than PS (plus, I went from the NA's 17.4 rack to a true manual's 20something ratio, so it was slower anyway).
Lately though, I find the new manual rack's feel to be completely natural and not at all onerous, even in parking lot situations.
Can't say I notice any greater precision or anything like that but I do think I "steer" the car less- especially on poorly paved roads, which Denver has in abundance.
All in all, I'm glad I did it.
Trending Topics
I think it depends on how your rack was depowered.
Are all the seals removed and the quill welded?
I admit though, I haven't driven a car so prepped...mine just has the "slow" standard manual rack and parking is no problem at all, even for my semi-feeble old fart's arms.
Are all the seals removed and the quill welded?
I admit though, I haven't driven a car so prepped...mine just has the "slow" standard manual rack and parking is no problem at all, even for my semi-feeble old fart's arms.
When a major system such as the steering becomes "too much work" to repair, your car is but a breath away from becoming a total POS.
Older cars require more care and effort than new ones and if you can't/won't accept the responsibility then it's time to find a new ride.
It would sure **** me off if my car was damaged by one that couldn't steer properly.
/nanny rant
Not to preach or anything, but it's a very slippery slope you stand atop.
When a major system such as the steering becomes "too much work" to repair, your car is but a breath away from becoming a total POS.
Older cars require more care and effort than new ones and if you can't/won't accept the responsibility then it's time to find a new ride.
It would sure **** me off if my car was damaged by one that couldn't steer properly.
/nanny rant
clokker when you removed the rack how did you get at the two bolts closest to the rear on the driver side bracket there doesnt look like much clearance between the oil pan/front cover to get in there
I just put in the manual rack today and yes those bolts go up from the bottem. I didn't have an issue. And I didn't have to remove the clutch fan, battery, or the four radiator bolts. Just the sway bar.
Hey, so I've heard that the manual rack uses a different mount for the passengers side. Norotors club members has a post saying Energy Suspension stabalizer bushings work as a substitute for factory which are getting hard to find. I've got the bushing but I'm not entirely sure where it fits or how to get the shaft cover off. (My searches revealed there was a pin in the power steering versions that hold it on.)
I don't believe I have this pin in the manual rack.
The 1 1/4" bushing fits over the end without the rubber bushing.. Which doesn't seem right. So I'm left thinking it should go on after the shaft cover is removed.
Any advice?
I don't believe I have this pin in the manual rack.
The 1 1/4" bushing fits over the end without the rubber bushing.. Which doesn't seem right. So I'm left thinking it should go on after the shaft cover is removed.
Any advice?
88- if I recall it also depends on the series of your FC if it will bolt in with the brackets you currently have.
I used an off the shelf bushing from a swaybar, but we just went through some boxes I didnt pay attention to what it came out of
I used an off the shelf bushing from a swaybar, but we just went through some boxes I didnt pay attention to what it came out of
I think I am going to buy a manual rack since having a de-powered unit, no matter how well it's done just doesn't seem right. It was meant to be hydraulic. The first rx7 I had has a mannual rack and the feeling was great and not to mention to ease of working on your engine without lines and a pump in the way.

Thread
Thread Starter
Forum
Replies
Last Post
Jeff20B
1st Generation Specific (1979-1985)
73
Sep 16, 2018 07:16 PM
gabescanlon
3rd Generation Specific (1993-2002)
2
Sep 15, 2015 06:57 AM
jakeishness
2nd Generation Specific (1986-1992)
11
Sep 11, 2015 11:33 AM