
My DIY Semi-front mount using factory evo8 cooler.

Thread Starter
F**K THE SYSTEM!!
Joined: Sep 2006
Posts: 2,591
Likes: 1
From: Florida
My DIY Semi-front mount using factory evo8 cooler.
EASY DIY.
Started with my brother's factory evo 8 intercooler since he upgraded it long ago.
Took the cooler to have the End tank pipes cut and clocked 90 to help with the piping.
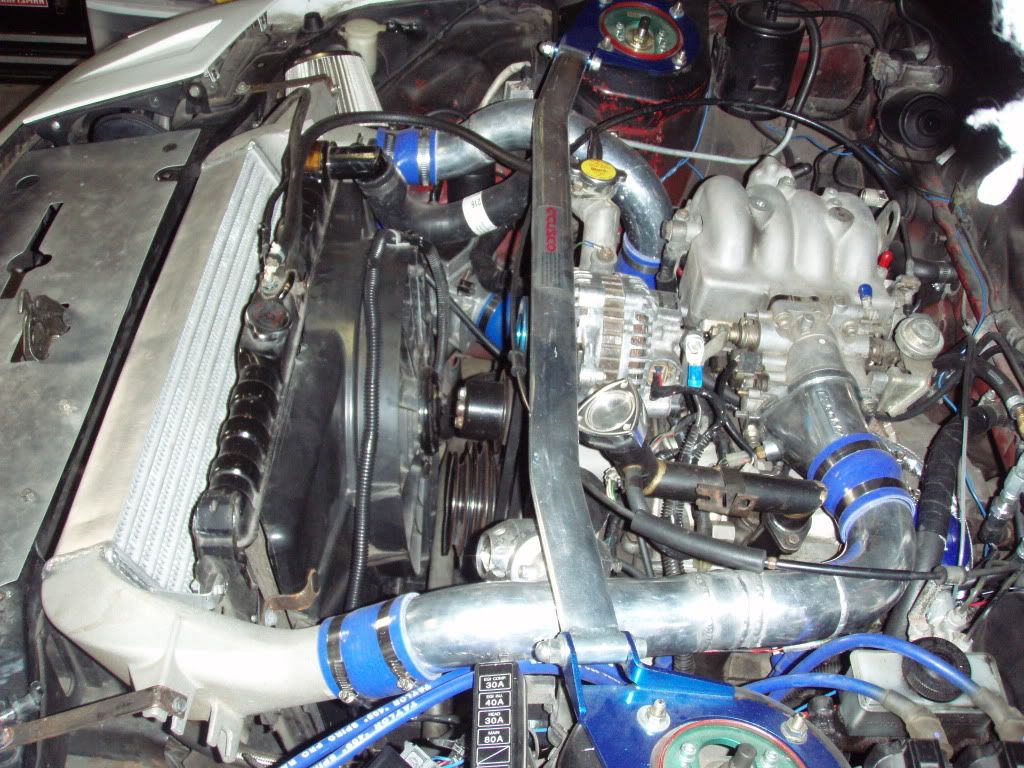
The evo 8 intercooler brackets made my life a lot easier. As you can see i made good use of the bracket it had. I mounted the cooler to the rad support and then mounted the RAD. to the intercooler..
IF you look closely The brakets on the endtanks were used to mount the raD to cooler. NO mods needed. THey happen to measure the same. =D Added another extra bracket for the rad. ON the bottom for reasurance.
The cooler was 100$ from my bro. ANd a few nuts and bolts worth about 4$ is all i have invested so far.
Started with my brother's factory evo 8 intercooler since he upgraded it long ago.
Took the cooler to have the End tank pipes cut and clocked 90 to help with the piping.
The evo 8 intercooler brackets made my life a lot easier. As you can see i made good use of the bracket it had. I mounted the cooler to the rad support and then mounted the RAD. to the intercooler..
IF you look closely The brakets on the endtanks were used to mount the raD to cooler. NO mods needed. THey happen to measure the same. =D Added another extra bracket for the rad. ON the bottom for reasurance.
The cooler was 100$ from my bro. ANd a few nuts and bolts worth about 4$ is all i have invested so far.

Thread Starter
F**K THE SYSTEM!!
Joined: Sep 2006
Posts: 2,591
Likes: 1
From: Florida
I will. I took a few quick pics just to get the idea out.
ALl of the factory rad supports were cut off. SO no the lower factory rad support is not being used. There are 3 main mounting points. The 2 main from IC to RAD. ANd one on the lbottom of the rad. For a total of 3. But its sturdy. This Intercooler is as wide as the rad so it all factory rad brackets had to come off so the rad would slide down in front of the rad which is its current position. I posted this so quick i didnt put all the info. BUt i will try to get a better cam and more pictures that show everything involved.
I also spent 40$ on having the end pipes cut clocked. SO total so far is 144$.
I like what you did. Good job, very cost effective, and you don't have that huge IC peering out of the front bumper (sleeper). I did something very similar but with a SRT-4 IC.
I did have to find a different upper Rad. Hose that would fit, and of course have pipes welded up.
I do need to have the tabs welded onto the IC that mount the Rad, but I also used threaded rod below to secure the Rad. I did cut the front bumper a little to allow more air into it, and also added some sheet metal to direct air into the IC. I have since taped off the IC with some metal tape(hvac tape?) AFM and TB air temps are great(at 10psi), but I have yet to crank the boost and heat up the air more and see how cool things stay. Heat soak is a thing of the past.

Did you do any cutting of the front bumper or add any ducting?
I did have to find a different upper Rad. Hose that would fit, and of course have pipes welded up.
I do need to have the tabs welded onto the IC that mount the Rad, but I also used threaded rod below to secure the Rad. I did cut the front bumper a little to allow more air into it, and also added some sheet metal to direct air into the IC. I have since taped off the IC with some metal tape(hvac tape?) AFM and TB air temps are great(at 10psi), but I have yet to crank the boost and heat up the air more and see how cool things stay. Heat soak is a thing of the past.
Did you do any cutting of the front bumper or add any ducting?
Thread Starter
F**K THE SYSTEM!!
Joined: Sep 2006
Posts: 2,591
Likes: 1
From: Florida
Thanks. Yours looks similar. But our IC cores are diff sizes. My IC sits on top of my OIL cooler Basically.
The factory radiator feed (coolant hose) was used and by triming about 4 in. out of the factory one makes it work perfect without any kinks.
As for ducting. Nothing besides the one in the picture.
But yes.. Heat soaking will be a thing of the past. =D
The factory radiator feed (coolant hose) was used and by triming about 4 in. out of the factory one makes it work perfect without any kinks.
As for ducting. Nothing besides the one in the picture.
But yes.. Heat soaking will be a thing of the past. =D
Trending Topics
Joined: May 2006
Posts: 3,881
Likes: 3
From: Jacksonville, Tampa & Tallahassee
I've put together a similar setup, the problem I'm running into is A/C. From what I'm told the condenser will be dumping some pretty warm air which will then have to pass through 2 other heat exchangers...
Thread Starter
F**K THE SYSTEM!!
Joined: Sep 2006
Posts: 2,591
Likes: 1
From: Florida
The finished custom intercooler setup. The total was more then I wanted but it was well worth it.
Total.
Evo 8 cooler 100$. MOdded end tank pipes 40$ = 140$
GReddy comp tube new = 100$
PAying shop for custom aluminum piping 250$
TOTAL = 490$
Total.
Evo 8 cooler 100$. MOdded end tank pipes 40$ = 140$
GReddy comp tube new = 100$
PAying shop for custom aluminum piping 250$
TOTAL = 490$
talking head
Joined: Apr 2008
Posts: 2,775
Likes: 15
From: Perth, WA, OZ
i did something similar for a big bar and plate cooler ,, mounting the radiator back on a frame at the original angle
( and made a custom panel for the top )

then i went 1 better,, i spun the IC flat/ V ,, and also flat mounted the oil cooler out from the bottom of the radiator
all serial airflows for oil cooler, IC and radiator
air intake temps no longer build up with heatsoak from the radiator


only the radiator support panels have been cut,, the front chassis support is still there
Thread Starter
F**K THE SYSTEM!!
Joined: Sep 2006
Posts: 2,591
Likes: 1
From: Florida
That is a good setup. But requires fab work and some welding just to mount the cooler and rad. That would be too much for me. I took the easy route.
THis is the BOV i have. TurboXS http://www.amazon.com/TurboXS-BOV-H-.../dp/B000WD06VI
ANd yes my Rx7 still runs... since 2005 when i bought it.
THis is the BOV i have. TurboXS http://www.amazon.com/TurboXS-BOV-H-.../dp/B000WD06VI
ANd yes my Rx7 still runs... since 2005 when i bought it.
Thread Starter
F**K THE SYSTEM!!
Joined: Sep 2006
Posts: 2,591
Likes: 1
From: Florida
Fellas. I was intalling a koyo rad and it does not fit. I blame it on koyo.
When you take a look at the OEM radiator the in and out are about 2 to 3 inches from the edge of the rad. For some damn reason koyo decides they want to put the right up against the edge.. so guess what ..... the lower return doesnt go in that swaybar groove... ******* my whole setup up.
Now i must go have that return welded and modded. Can you ******* believe im cutting an welding a brand new koyo N low!! WTF!!!!!!!!
Not meaning to stray from the topic, but I noticed in one of your pics up top, that your AFM is turned sideways. I thought the AFM wouldn't work properly if it were turned on either side or upside down...?
I read into the AFM mounting a bit more. Upside down is no big deal, but mounting it sideways is not proper. Anyway, it's irrelevant... Considering you have Haltech. I like the IC mounting, though! Good job. What kind of air temps are you seeing?