
Front Differential Mount Replacement Write-Up (PICS!)

Thread Starter
s4 Tails for Life!
Joined: Feb 2005
Posts: 577
Likes: 0
From: Dallas, TX
Hey everyone, I replaced my front diff mount today. I found quite a bit of useful information on these forums but I never found a real step-by-step write-up with pictures. So here goes:
(This is from memory, feel free to correct me on the details. Though I just finished replacing this mount two hours ago.)
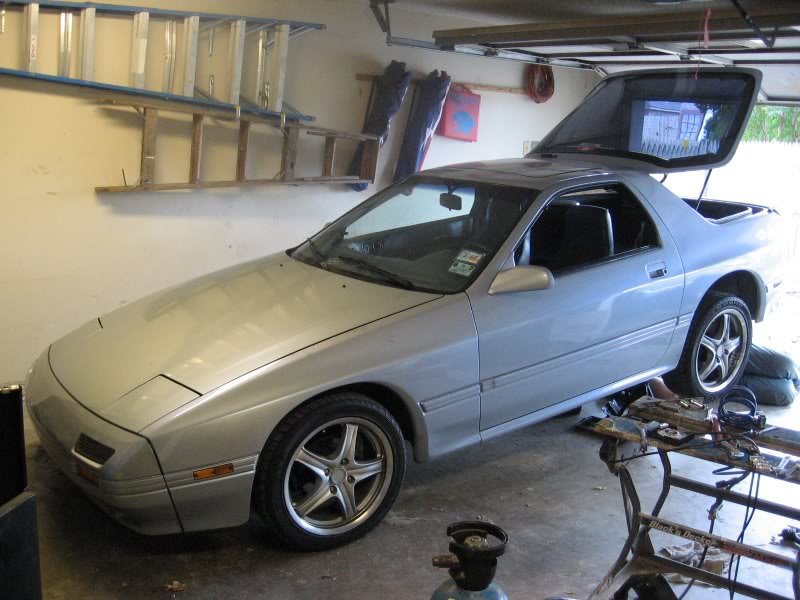
First, you'll need a jack. (duh?)
Lift the rear of the vehicle up. Use the subframe as a jack point. Place jack stands on the frame rails.
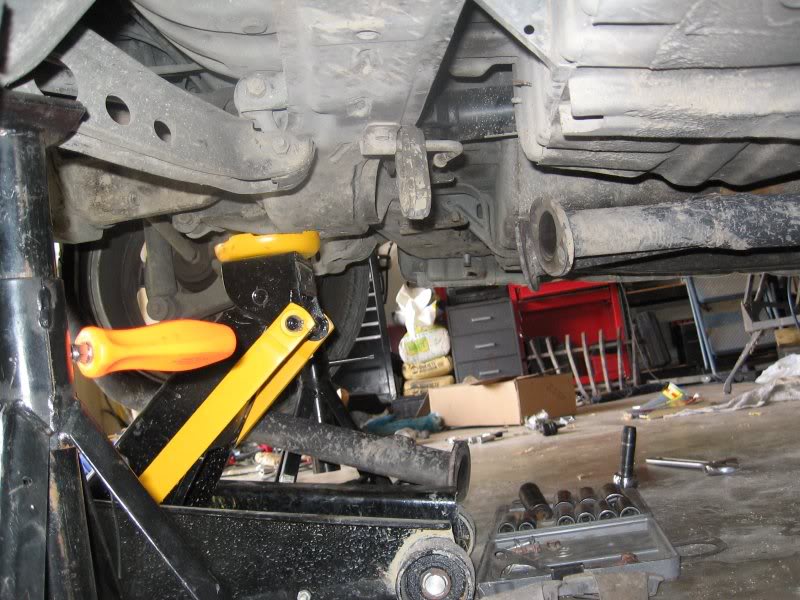
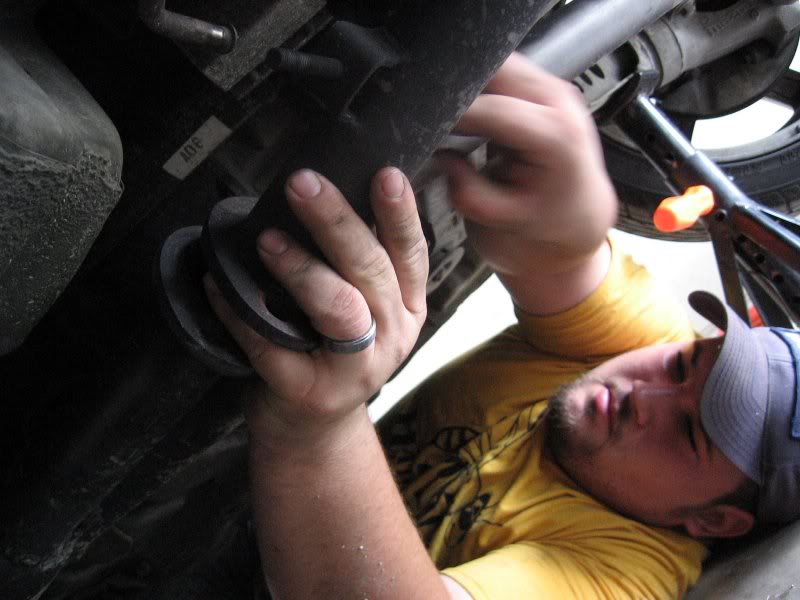
Now you need to lower the subframe. Unbolt each side and remove the bushings.
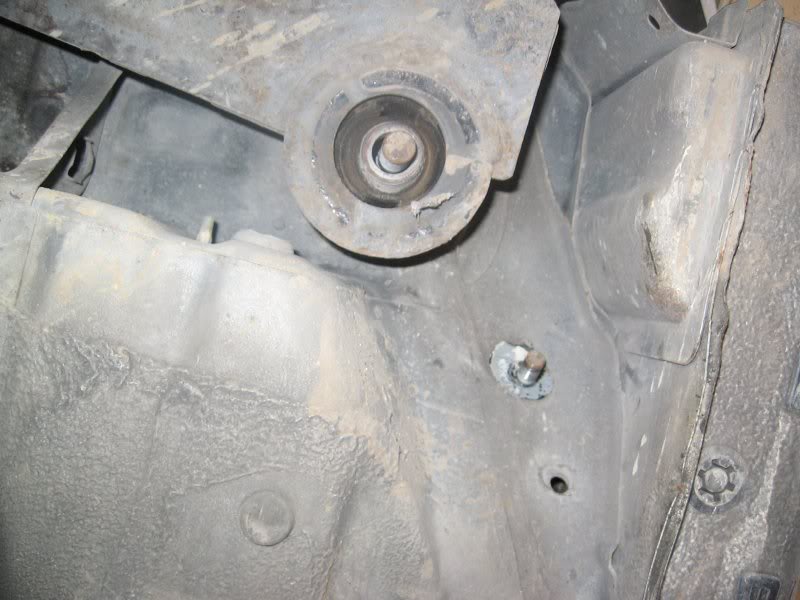
^ That's the mount point with the bushing already removed.
Now, finally remove another mount point - it's a mount that dangles from the body down to two prongs on the subframe. (Sorry no pictures of that) and you should be able to lower the subframe freely.
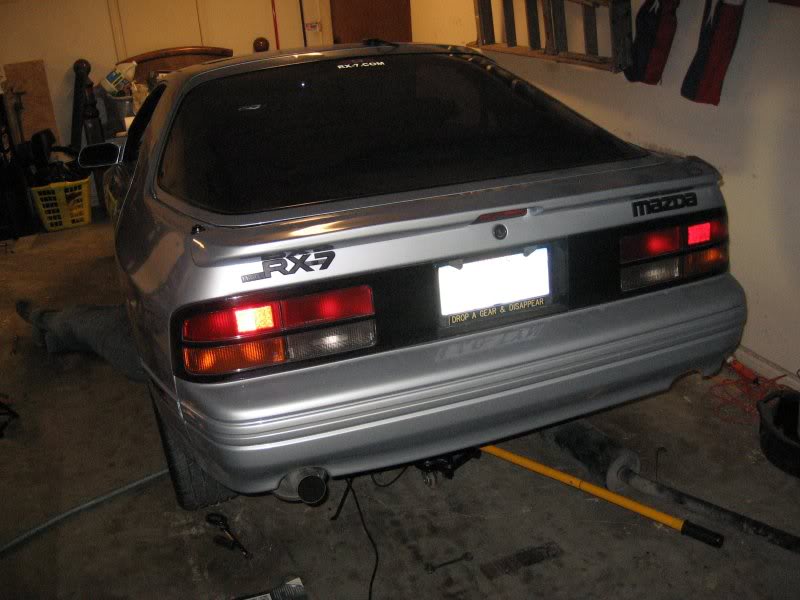
At this point, or maybe beforehand, you'll want to lose your exhaust y-pipe and maybe mufflers. (I removed one muffler and moved the other to the side, as you can see here:
Here's my buddy Nathan removing the y-pipe.
Now you'll need 17mm wrenches and sockets. (11/16ths will also work in some cases.)
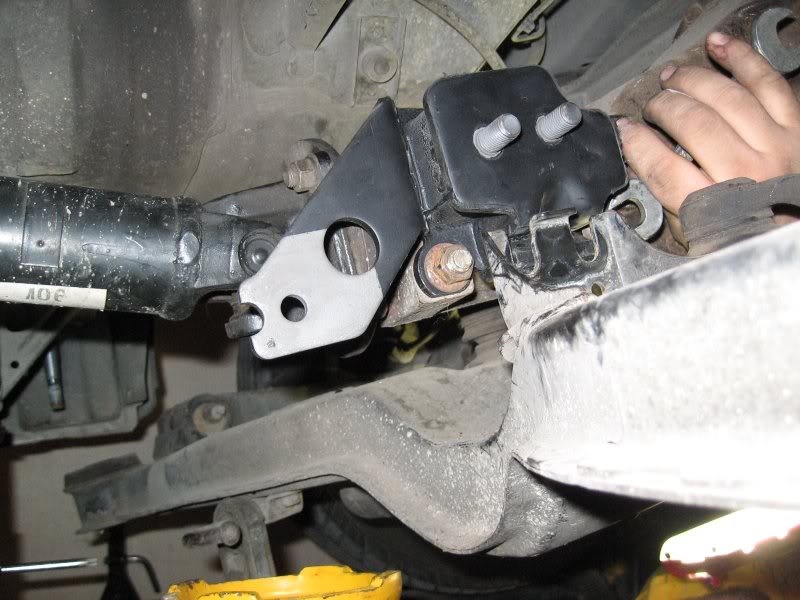
Unless I've forgotten something, it's time to remove that old front diff mount!
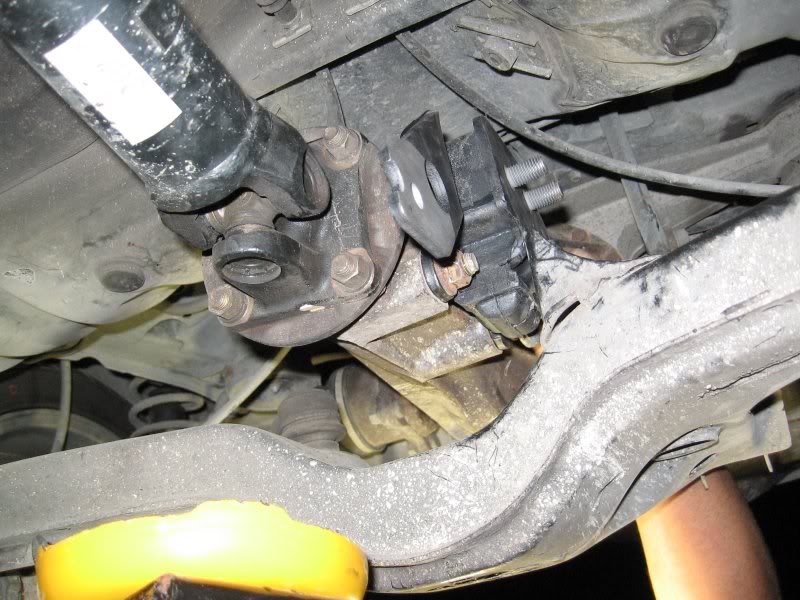
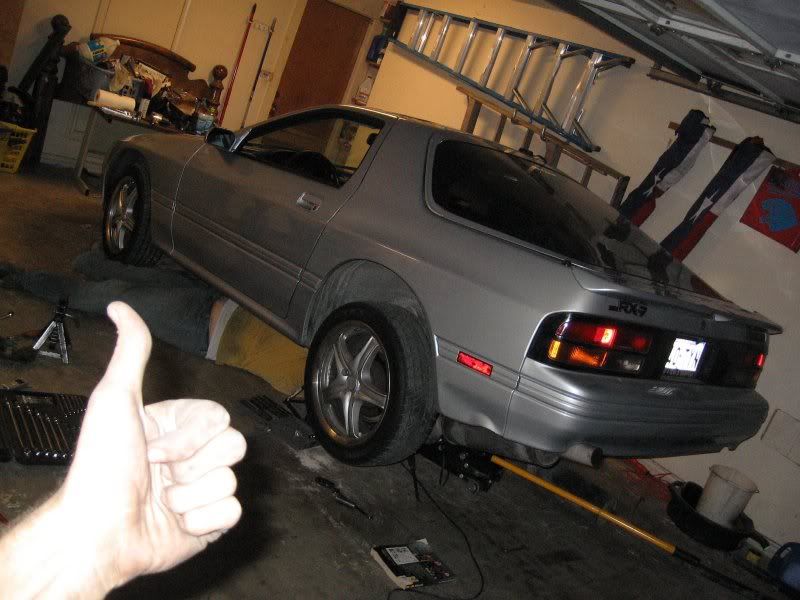
There's the new diff mount set in place.
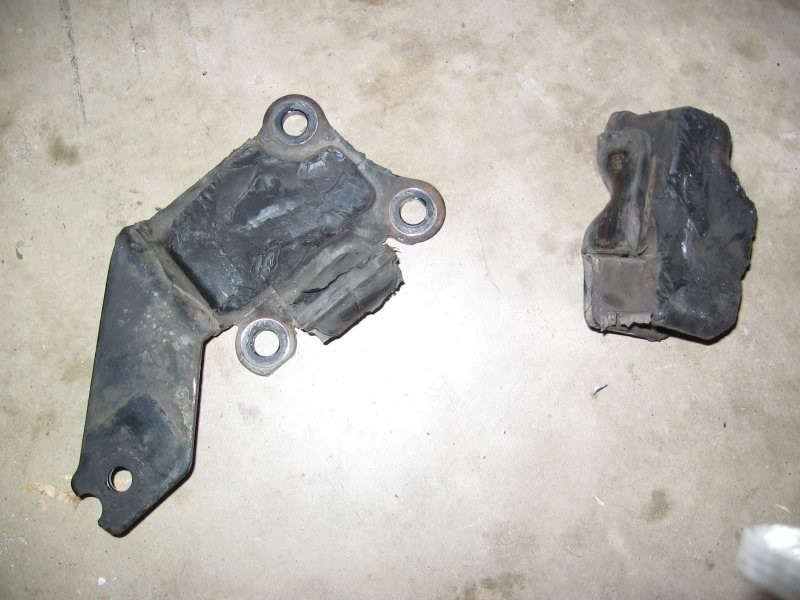
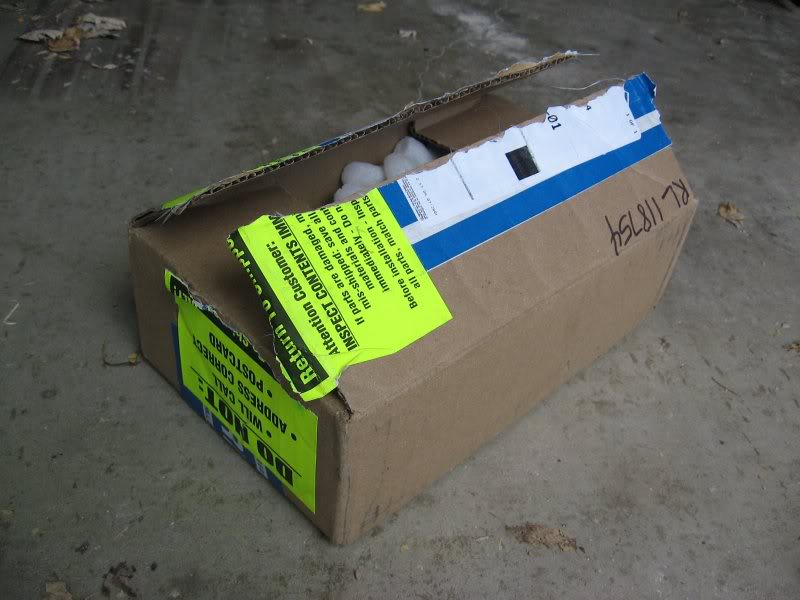
As for my old diff mount... it came off in two pieces...
But thanks MazdaTrix for the new one!! They shipped this mount really fast!

You have 5 bolts to remove in order to get that diff mount out. Just examine the mount above and you'll get the idea.
Now do everything in reverse order and you're done!
This took about 3-5 hours of casual work. Well worth it! My 7 drives like a dream now! No more POPPING on shifting / acceleration!!
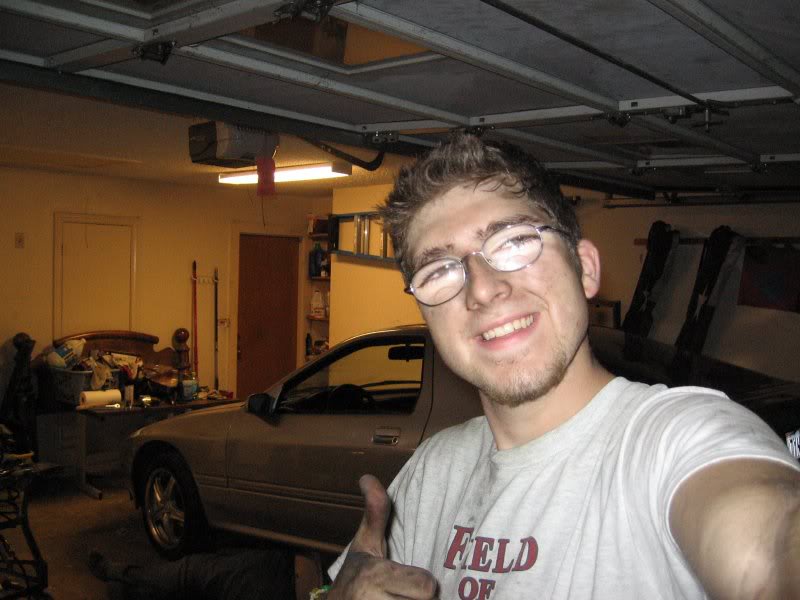
Yup, that's me. Don't expect to stay clean during this process!!
Cheers,
iSP33D-for-J3SUS
(This is from memory, feel free to correct me on the details. Though I just finished replacing this mount two hours ago.)
First, you'll need a jack. (duh?)
Lift the rear of the vehicle up. Use the subframe as a jack point. Place jack stands on the frame rails.
Now you need to lower the subframe. Unbolt each side and remove the bushings.
^ That's the mount point with the bushing already removed.
Now, finally remove another mount point - it's a mount that dangles from the body down to two prongs on the subframe. (Sorry no pictures of that) and you should be able to lower the subframe freely.
At this point, or maybe beforehand, you'll want to lose your exhaust y-pipe and maybe mufflers. (I removed one muffler and moved the other to the side, as you can see here:
Here's my buddy Nathan removing the y-pipe.
Now you'll need 17mm wrenches and sockets. (11/16ths will also work in some cases.)
Unless I've forgotten something, it's time to remove that old front diff mount!
There's the new diff mount set in place.
As for my old diff mount... it came off in two pieces...
But thanks MazdaTrix for the new one!! They shipped this mount really fast!
You have 5 bolts to remove in order to get that diff mount out. Just examine the mount above and you'll get the idea.
Now do everything in reverse order and you're done!
This took about 3-5 hours of casual work. Well worth it! My 7 drives like a dream now! No more POPPING on shifting / acceleration!!
Yup, that's me. Don't expect to stay clean during this process!!
Cheers,
iSP33D-for-J3SUS
Last edited by iSP33D-for-J3SUS; Sep 3, 2006 at 12:44 AM.


Senior Member
Joined: Jul 2005
Posts: 603
Likes: 0
From: FORT WAYNE
Nice write up. I'm going to replace all 3 diff mounts. Just waiting for "freinds" to help when they stop the b/s. I don't have a garage. It's kinda frustrating. I'm about to do the damn thing in front of my apt. by myself.
Trending Topics

Thread Starter
s4 Tails for Life!
Joined: Feb 2005
Posts: 577
Likes: 0
From: Dallas, TX
The pictures are up on my photobucket site. Unless photobucket goes down, these should be up forever. I have stuff on my photobucket from like two years ago or more.
And, yeah, I have magnifying glasses. :-P (Looking forward to corrective surgery once my eyes stop developing - around 18 - 24 - and I'm 18 now. After that I shouldn't need glasses at all except maybe for reading.)
Honestly, this job was well worth it. The rubber is much stiffer on the MazdaTrix competition mount. It drives great. It's not as big a hassle as it seems, just get a friend to help you and make sure to have some jack wands around for extra torque. (Especially on those subframe nuts.)
Cheers,
iSP33D-for-J3SUS
did you have much trouble getting the subframe lowered or back up into place? We did my ex's FC on a lift (my fc now muahaha) and getting the subframe back up was a BITCH. No that my mount went just a day ago i'm going to have to do this. Along with dropping my tranny . . .
Thread Starter
s4 Tails for Life!
Joined: Feb 2005
Posts: 577
Likes: 0
From: Dallas, TX
Originally Posted by staticguitar313
did you have much trouble getting the subframe lowered or back up into place? We did my ex's FC on a lift (my fc now muahaha) and getting the subframe back up was a BITCH. No that my mount went just a day ago i'm going to have to do this. Along with dropping my tranny . . .
Cheers,
iSP33D-for-J3SUS


Joined: Dec 2003
Posts: 6,598
Likes: 10
From: Temple, Texas (Central)
Originally Posted by Node
wow, strong prescription
Great writeup, too. I'm another of the "I'm gonna do this once I find some time" group. I got the comp mounts with the car, and they've just been collecting dust. The ones in there aren't broken but I might as well do it while I'm waiting for money to do the rebuild. I've gotta drop the subframe for other stuff anyway.
Joined: Apr 2002
Posts: 4,232
Likes: 0
From: Rotaryland, New Hampshire
Thats the first time ive seen somebody replace the front diff mount w/o removing the subframe
i thought it would be more cramped in there, however it seems you are actualy able to drop it pretty far
nice write up, hope it gets archived. as for the image hosting, would uploading them via rx7club work for a semi-permient hosting solution?
i thought it would be more cramped in there, however it seems you are actualy able to drop it pretty far
nice write up, hope it gets archived. as for the image hosting, would uploading them via rx7club work for a semi-permient hosting solution?

Like Ghandi with a gun
Joined: Mar 2003
Posts: 4,584
Likes: 0
From: Rapid City, SD
http://forumbinaries.rerev.com/rx7cl...ountpoints.jpg
http://forumbinaries.rerev.com/rx7club/rearshot.jpg
http://forumbinaries.rerev.com/rx7club/nate.jpg
http://forumbinaries.rerev.com/rx7cl...dshotfront.jpg
http://forumbinaries.rerev.com/rx7club/olddiffmount.jpg
http://forumbinaries.rerev.com/rx7club/diffmountbox.jpg
http://forumbinaries.rerev.com/rx7club/newdiffmount.jpg
http://forumbinaries.rerev.com/rx7club/thumbsup.jpg
http://forumbinaries.rerev.com/rx7club/meandthe7.jpg
http://forumbinaries.rerev.com/rx7club/jackthecarup.jpg
http://forumbinaries.rerev.com/rx7club/goodjackshot.jpg
Thread Starter
s4 Tails for Life!
Joined: Feb 2005
Posts: 577
Likes: 0
From: Dallas, TX
Originally Posted by staticguitar313
ok i just noticed this, but it seems you have the jackstands on the suspension arms? wtf?
Cheers,
iSP33D-for-J3SUS
10AE>ALL
Joined: May 2005
Posts: 167
Likes: 0
From: AZ
Oh My God. I've Been Searching For This.
It Needs To Be Archived. (if it's not already)
This Is My Problem Indefinitely!!! Crazy what a little searching on the forum will find you.
So $68 and 3-5 hours of labor later, I'll have a good running FC again!
Thank You So Much.
It Needs To Be Archived. (if it's not already)
This Is My Problem Indefinitely!!! Crazy what a little searching on the forum will find you.
So $68 and 3-5 hours of labor later, I'll have a good running FC again!
Thank You So Much.
Last edited by tougeFB; Feb 7, 2007 at 04:59 AM.


Originally Posted by nexpo8
nice good write up when i did mine i tried to find a write up but no one did. but now i have a solid mount on, i welded a piece of thick metal where the rubber part is at. works just as fine
-1000 for the welded mount, there is a reason it is rubber isolated. The correct way would be a pinion snubber, they are about $15, keep the isolation, but also don't allow the diff much upward movement.
Thread Starter
s4 Tails for Life!
Joined: Feb 2005
Posts: 577
Likes: 0
From: Dallas, TX
Originally Posted by Kenteth
http://forumbinaries.rerev.com/rx7cl...ountpoints.jpg
http://forumbinaries.rerev.com/rx7club/rearshot.jpg
http://forumbinaries.rerev.com/rx7club/nate.jpg
http://forumbinaries.rerev.com/rx7cl...dshotfront.jpg
http://forumbinaries.rerev.com/rx7club/olddiffmount.jpg
http://forumbinaries.rerev.com/rx7club/diffmountbox.jpg
http://forumbinaries.rerev.com/rx7club/newdiffmount.jpg
http://forumbinaries.rerev.com/rx7club/thumbsup.jpg
http://forumbinaries.rerev.com/rx7club/meandthe7.jpg
http://forumbinaries.rerev.com/rx7club/jackthecarup.jpg
http://forumbinaries.rerev.com/rx7club/goodjackshot.jpg
http://forumbinaries.rerev.com/rx7club/rearshot.jpg
http://forumbinaries.rerev.com/rx7club/nate.jpg
http://forumbinaries.rerev.com/rx7cl...dshotfront.jpg
http://forumbinaries.rerev.com/rx7club/olddiffmount.jpg
http://forumbinaries.rerev.com/rx7club/diffmountbox.jpg
http://forumbinaries.rerev.com/rx7club/newdiffmount.jpg
http://forumbinaries.rerev.com/rx7club/thumbsup.jpg
http://forumbinaries.rerev.com/rx7club/meandthe7.jpg
http://forumbinaries.rerev.com/rx7club/jackthecarup.jpg
http://forumbinaries.rerev.com/rx7club/goodjackshot.jpg
Like I said before, these photos are from my photobucket site, so unless photobucket screws up, they should be up here forever. Feel free to mirror them if you want though.
Cheers,
iSP33D-for-J3SUS
