
FC RX7 Remote Start and Keyless Entry Write-Up (Viper 5101/ Python 1401)


FC RX7 Remote Start and Keyless Entry Write-Up (Viper 5101/ Python 1401)
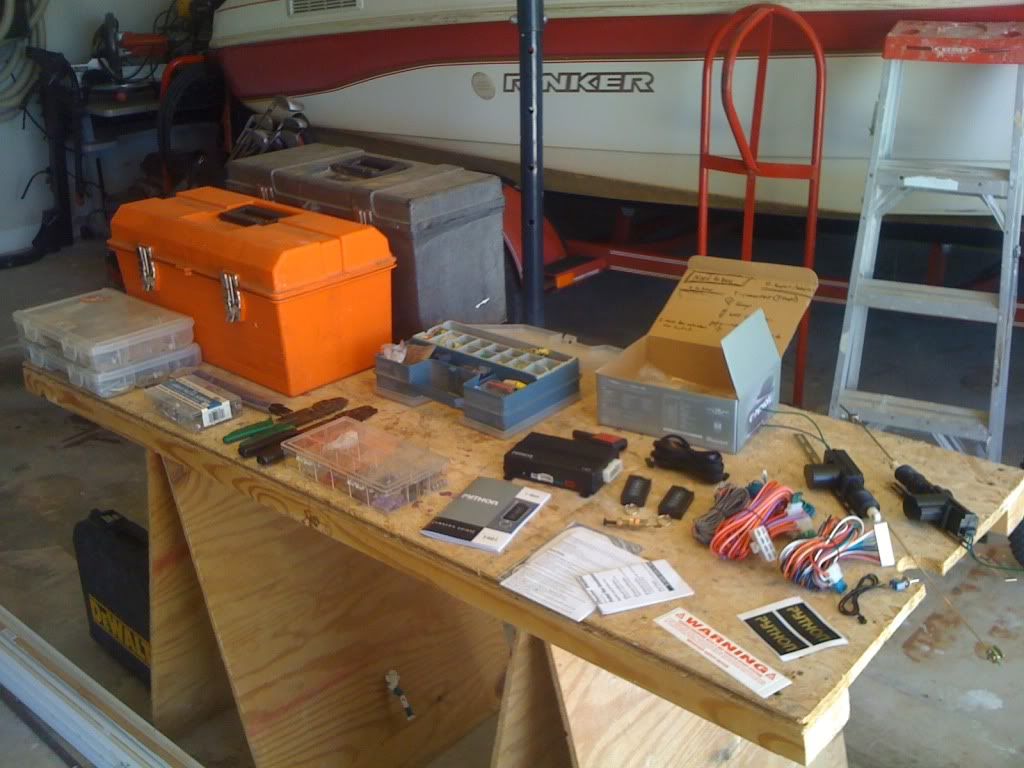
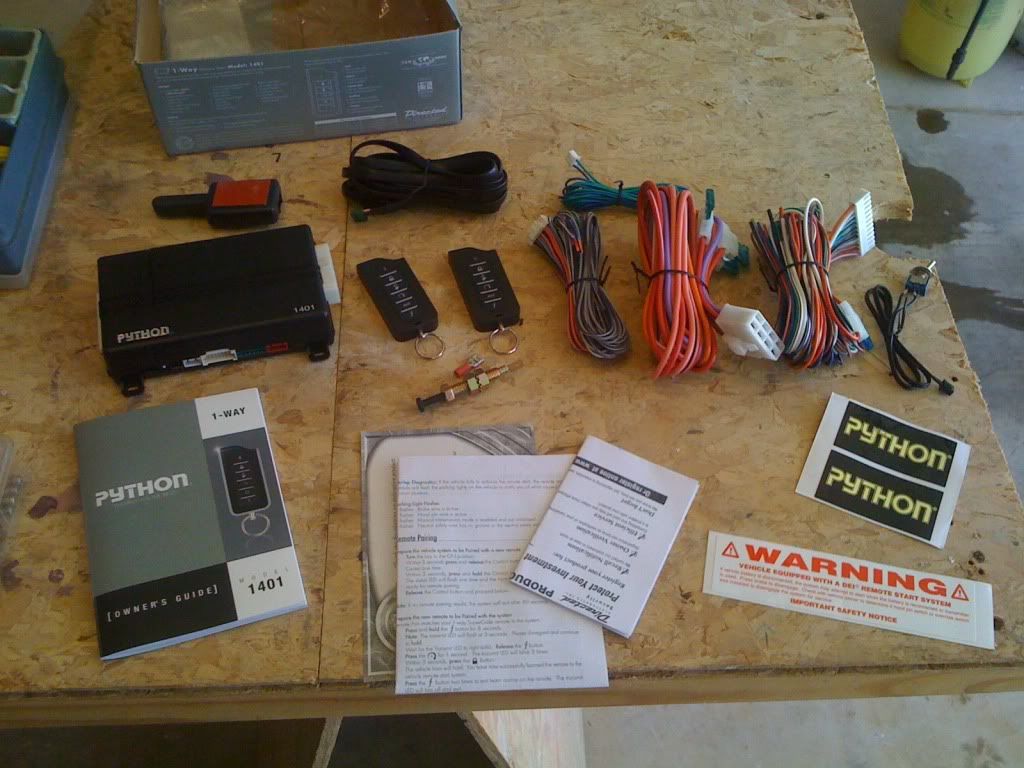
I recently installed the Python 1401 unit on my 87 GXL, and even though I had a decent amount of wiring experience before, this was a challenge. It might have been a little easier of better instructions were provided, but with the help of the 7 Club and The12Volt.com, I finally got everything working the way it should. Maybe this write up will save people who plan on installing this some time…
PARTS NEEDED
- Python 1401/ Viper 5101 Keyless Entry & Remote Start Unit ($90-$150 on Amazon and eBay)
- 1 DEI 451M Relay ($10 eBay)
- 1 momentary push button switch (optional for Turbo-timer/ Cool Down mode) ($5 Radio Shack)
- 4 12/10 gauge T-Taps ($5 Radio Shack)
- 12+ 16/14 Gauge T-Taps ($5 Wal-Mart)
- 12+ 16/14 Gauge Butt-connectors ($5 Wal-Mart)
- 1 pack assorted connectors (Ring Terminals, Spade Terminals, etc) ($5 Wal-Mart)
- 1 or 2 4-pin relays (2 possibly, still working on the hazard flash wiring) ($8 each, eBay)
- 2 or 4 door lock/ unlock actuators (2 for just the doors, 4 for the doors and the hatch) ($10/ pair, eBay)
- Assorted zip-ties, black preferably ($5 Wal-Mart)
- Electrical tape ($2 Wal-Mart)
Total Cost Estimate: $150-$228
TOOLS NEEDED
- 10 MM socket
- Drill
- ~3/8 inch drill bit
- Phillips head drill bit
- Wire stripper tool
- Wire crimp tool
- Pliers
WIRING INSTRUCTIONS
Note: This exact wiring is for the Python 1401. Some of the Viper 5101 wiring is arranged differently in the plugs but the wiring colors are the same.
Note: Wires that will need to go through the firewall (I put them through the speedometer cable hole):
1- Main Harness (12 pin)- Wire #2, red- (+) for Python unit
2- DEI 451M Relay- Purple wire- (+) for DEI unit
3- H2 Harness (18 pin)- Wire #9, violet/white- to trailing coil
4- H2 Harness (18 pin)- Wire #15, grey- to hood open/close sensor
Main Harness (12 pin):
1- Trunk release output (red/white)- connected to 4-pin relay wired to hatch actuators
2- Constant 12v input (red)- connected to (+) battery
3- Horn honk output (brown)- connected green/ orange stripe horn wire on column
4- Light flash insolation (white/brown)- DISCONNECTED
5- Ground (black)- grounded to chassis
6- (+) door trigger input (violet)- DISCONNECTED
7- Factory horn input (blue)- DISCONNECTED
8- (-) door trigger input (green)- connect to drivers side door ajar sensor (rear bottom of door jamb, only necessary if you are using the turbo timer button option)
9- Dome light input (black/light)- DISCONNECTED
10- Turbo timer input (white/blue)- connected to momentary push button, with other side of switch grounded
11- Parking light output (white)- on + side of hazard button (still have not worked on this one, but plan to wire up to hazard lights, may need a 4-pin relay)
12- Ground when armed output (orange)- DISCONNECTED
Door Lock (3 pin):
Use DEI 451M Relay and plug into here.
DEI 451M Relay:
Purple- connected to (+) battery
Thick Blue- wired to blue wire on door actuators
Thick Green- wired to green wire on door actuators
Brown- grounded to 10MM bolt on the driver side of the transmission tunnel behind the plastic cover on the lower dash
White/ black stripe- grounded " " " " " "
Blue/ Green/ Red wires on plug- plugged into Python 3-pin connector
H2 Harness (18 pin):
1- Factory alarm disarm (light green/black)- DISCONNECTED
2- Aux 4 (orange/black)- DISCONNECTED
3- Factory alarm arm (green/white)- DISCONNECTED
4- Aux 2 (violet/black)- DISCONNECTED
5- Aux 3 (white/black)- DISCONNECTED
6- Aux 1 (white/violet)- DISCONNECTED
7- Diesel wait to start (grey/black)- DISCONNECTED
8- empty
9- Tachometer input (violet/white)- tapped into (-) black wire on Trailing on coil
10- Status output (dark blue)- DISCONNECTED
11- Flex relay (pink/white)- DISCONNECTED
12- Accessory output (orange)- DISCONNECTED
13- Starter output (purple)- DISCONNECTED
14- Ignition 1 output (pink)- DISCONNECTED
15- Hood pin input (grey)- connected with provided sensor (I mounted this just above the drivers side headlight. A ~3/8 hole must be drilled)
16- 2nd status/ rear defog (blue/white)- DISCONNECTED
17- (+) brake shutdown input (brown)- tapped into white/ green stripe on brake switch and gets (+) when brake is pressed
18- Neutral safety input (black/white)- ground to green/black wire off of tranny (pin G on the ECU) (Thanks Icemark)
Remote Start (8 pin):
1- Ignition input (pink)- on black/ yellow stripe wire that sends (+) to ECU/ etc from ignition
2- Fused ignition 2 (red/white)- on solid black wire on ignition that receives constant 12v
3- Accessory Output (orange)- connected to solid blue wire on column that powers radio/ wipers/ etc.
4- Starter Output (violet)- on black/ red stripe wire that sends (+) to starter from ignition
5- Fused ignition 1 (red)- on solid black wire on ignition that receives constant 12v
6- Ignition 2/ flex relay (pink/white)- DISCONNECTED
7- Flex relay input (pink/black)- DISCONNECTED
8- Fused accessory/ starter input (red/black)- on solid black wire on ignition that receives constant 12v
PROGRAMMING
- Change the unit to Automatic mode (Menu 3, Item 1, Option 2)
- Turbo mode must be enabled if you use the switch (Menu 3, Item 6, Option 2, 3, 4, or 5 depending on length)
Joined: Dec 1999
Posts: 7,855
Likes: 517
From: Behind a workbench, repairing FC Electronics.
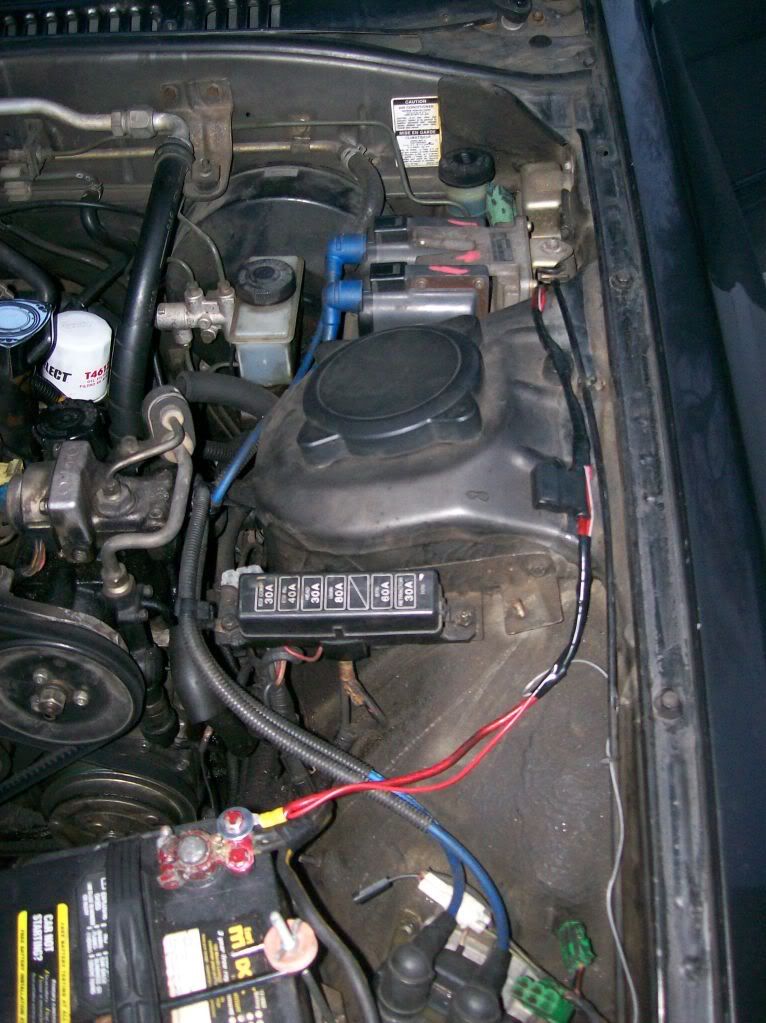
I'll try to get some pictures soon. Maybe even a video. I feel a little gangster when the doors lock when I turn the ignition on and unlock when I turn the ignition off. I also turned on another feature that makes the car honk at you if a door is not completely shut and you lock the car. Plus I'm planning on wiring up the dome light wire and hazard flash wire soon, so it'll be even neater.
But yes, pictures soon. It may be around a week from now since I'm planning on putting the car in the shop to fix some body damage Tuesday. Thanks for all the comments.
Trending Topics
I "lost" my emissions....
Joined: Apr 2005
Posts: 1,764
Likes: 6
From: lillington, nc
Joined: Dec 1999
Posts: 7,855
Likes: 517
From: Behind a workbench, repairing FC Electronics.


i realize your alarm system isn't a 2 way pager system.. I would look into one. I had one on my prior car and it is just awesome having that sense of security knowing that if someone messed with it, Ill know right away. esp the good ones that have awesome distance coverage.

Joined: Dec 1999
Posts: 7,855
Likes: 517
From: Behind a workbench, repairing FC Electronics.
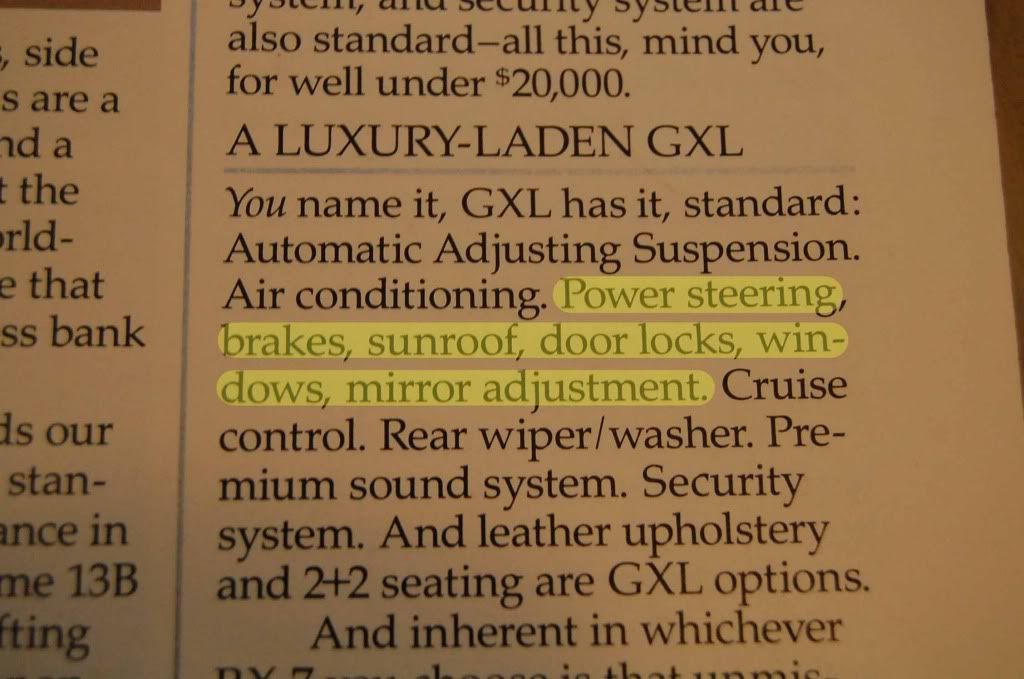
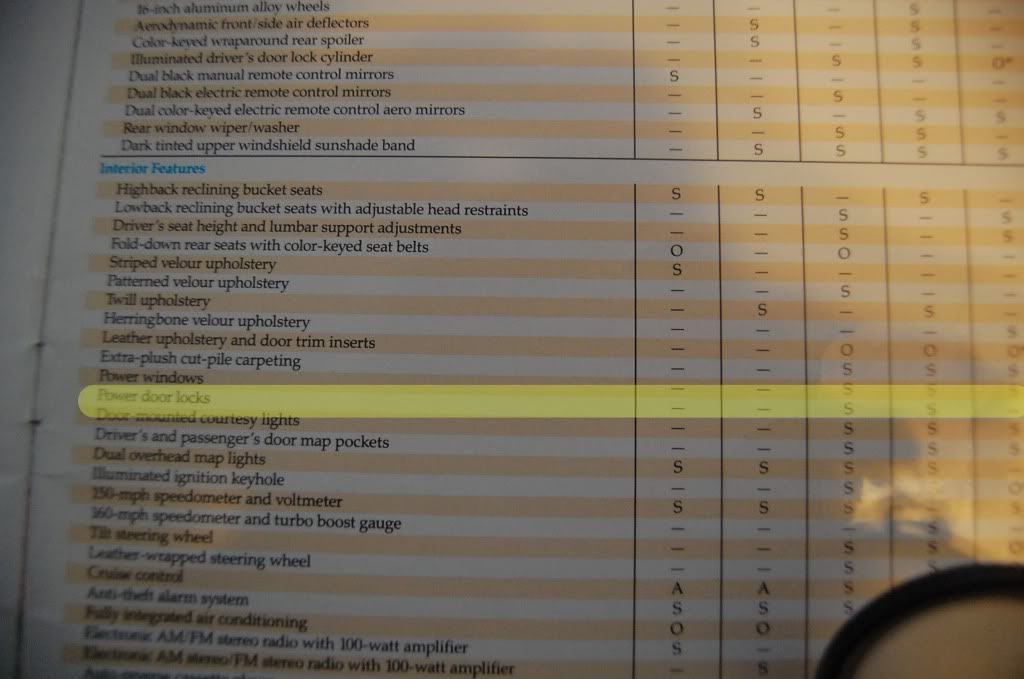
I have a 1986 GXL that does not have them, purchased from the Original Owner.
Have taken apart several 1986 GXLs as well, one of which is original down to the AAS shocks... Never seen power locks, so I had assumed S4s didn't have it.
i realize your alarm system isn't a 2 way pager system.. I would look into one. I had one on my prior car and it is just awesome having that sense of security knowing that if someone messed with it, Ill know right away. esp the good ones that have awesome distance coverage.

Speaking of distance coverage, I was good 500 feet away from the car tonight and was surprised that it reached that far. I think it's rated for 2000' or so, much much better than the factory alarms in both my old Maxima and my girlfriends Accord.
I remember swapping interiors between 2 S4 FC's, one a 86 GXL and the other an 88. The 88 did have the wiring and the actuator for the passenger side door lock, but the 86 didn't even have the wiring. I know that my early 87 did not come with a factory passenger side actuator, also, so I'm leaning with towards your idea...
Excellent write-up, man - and in perfect time!
Electrical troubleshooting is just not my forte, so here's to hoping that the carry-over is flawless for the other Viper model alarms....
I'll post back with my success.....thanks again!
Electrical troubleshooting is just not my forte, so here's to hoping that the carry-over is flawless for the other Viper model alarms....
I'll post back with my success.....thanks again!
UPDATE:
I had to pull part of the dash this weekend in an attempt to hunt down a rattle that's been driving me crazy. Since I was already in there I figured that I would go ahead and clean up the wiring for all of this since it looked horrible and had started to droop down. I also finished wiring in a few things (light flash, turbo timer, moved the on/off switch for the remote start). Here is the revised wiring instructions with a little blurb about where to put the unit and what not.
Main Harness (12 pin):
1- Trunk release output (red/white)- connected to 4-pin relay wired to hatch actuators (if you choose to install hatch actuators, I ended up not doing this)
2- Constant 12v input (red)- connected to (+) terminal of battery
3- Horn honk output (brown)- connected green/ orange stripe horn wire on column
4- Light flash insolation (white/brown)- DISCONNECTED
5- Ground (black)- grounded to chassis
6- (+) door trigger input (violet)- DISCONNECTED
7- Factory horn input (blue)- DISCONNECTED
8- (-) door trigger input (green)- connect to drivers side door ajar sensor (rear bottom of door jamb, only necessary if you are using the turbo timer button option)
9- Dome light input (black/light)- DISCONNECTED
10- Turbo timer input (white/blue)- connected to momentary push button, with other side of switch grounded
11- Parking light output (white)- tapped into the red/black wire on the headlight switch plug (There are two of these on the plug, so test which one it's supposed to be on. I believe it's the 2nd or 3rd one from the bottom on the plug and on the side opposite from the push-clip thing that holds the plug into the switch.)
12- Ground when armed output (orange)- DISCONNECTED
Door Lock (3 pin):
Use DEI 451M Relay and plug into here.
DEI 451M Relay:
Purple- connected to (+) battery wire
Thick Blue- wired to blue wire on door actuators
Thick Green- wired to green wire on door actuators
Brown- grounded to 10MM bolt on the driver side of the transmission tunnel behind the plastic cover on the lower dash
White/ black stripe- grounded to 10MM bolt on the driver side of the transmission tunnel behind the plastic cover on the lower dash
Blue/ Green/ Red wires on plug- plugged into Python 3-pin connector
H2 Harness (18 pin):
1- Factory alarm disarm (light green/black)- DISCONNECTED
2- Aux 4 (orange/black)- DISCONNECTED
3- Factory alarm arm (green/white)- DISCONNECTED
4- Aux 2 (violet/black)- DISCONNECTED
5- Aux 3 (white/black)- DISCONNECTED
6- Aux 1 (white/violet)- DISCONNECTED
7- Diesel wait to start (grey/black)- DISCONNECTED
8- empty
9- Tachometer input (violet/white)- tapped into (-) black wire on Trailing on coil
10- Status output (dark blue)- DISCONNECTED
11- Flex relay (pink/white)- DISCONNECTED
12- Accessory output (orange)- DISCONNECTED
13- Starter output (purple)- DISCONNECTED
14- Ignition 1 output (pink)- DISCONNECTED
15- Hood pin input (grey)- connected with provided sensor (I mounted this just above the drivers side headlight. A ~3/8 hole must be drilled)
16- 2nd status/ rear defog (blue/white)- DISCONNECTED
17- (+) brake shutdown input (brown)- tapped into white/ green stripe on brake switch and gets (+) when brake is pressed
18- Neutral safety input (black/white)- ground to green/black wire off of tranny (pin G on the ECU) (Thanks Icemark) (This makes it so that the remote start will not work unless the transmission is in Neutral, saving your car from hopping around your driveway/ parking lots into god knows what...)
Remote Start (8 pin):
1- Ignition input (pink)- on black/ yellow stripe wire that sends (+) to ECU/ etc from ignition
2- Fused ignition 2 (red/white)- on solid black wire on ignition that receives constant 12v
3- Accessory Output (orange)- connected to solid blue wire on column that powers radio/ wipers/ etc.
4- Starter Output (violet)- on black/ red stripe wire that sends (+) to starter from ignition
5- Fused ignition 1 (red)- on solid black wire on ignition that receives constant 12v
6- Ignition 2/ flex relay (pink/white)- DISCONNECTED
7- Flex relay input (pink/black)- DISCONNECTED
8- Fused accessory/ starter input (red/black)- on solid black wire on ignition that receives constant 12v
PROGRAMMING
- Change the unit to Automatic mode (Menu 3, Item 1, Option 2)
- Turbo mode must be enabled if you use the switch (Menu 3, Item 6, Option 2, 3, or 5 depending on length)
MOUNTING/ WIRING
I ended up putting the unit behind the radio surround- there was just enough room for it to fit under my single-DIN stereo (I do not have a pocket under the radio). I taped all of the loose wiring under the dash together and zip tied it up under the dash. Before, I had everything zip-tied up under the dash and it had started to sag down. It did not get in the way of your feet/ the pedals but you could see a few wires poking out from beneath the dash, very tacky and sloppy IMO.
For the extra wires on the 18-pin connector, I rolled them up and put a piece of tape around them to hold them together. They're so small that they don't really use much space, plus I may end up using some of them in the future.
On the 8 pin connector with the thick wires for the ignition and what not, I de-pinned the wires that I did not use. To do this, I used a small flat-head screw driver and slid it above the spade terminal into the plastic connector and pulled on wire. It popped out with a little bit of force and saved a little bit of space.

nice writeup, although i would recommend solder over t-taps and butt connectors. weve had countless cars come into our shop with remote start "issues" only to find the first shop that did it used ttaps and they halfassed everything. wires everywhere, t-taps not holding wires, just ugly installs. but all in all awesome info man!