
Budget interior refurbishing.


Thread Starter
Full Member
Joined: Sep 2002
Posts: 108
Likes: 0
From: Ventura County, CA
Budget interior refurbishing.
Since I have been spending a lot of time on my $50 FC, I decided it was time to get rid of the nasty, old, faded maroon interior. I wanted an all black interior and found that re-upholstering my old dash would be cheaper than buying a used one, sicne the cheapest replacement dash I could find was $150. All in all, I have spent around 50 bucks on this project so far. I am about 70% done with the entire interior.
I won't cover dash removal (use the search button, guys!), but I will say that there was ALOT of dust, dirt, crud and debris inside the dash. And I used to wonder why my car smelled so bad...
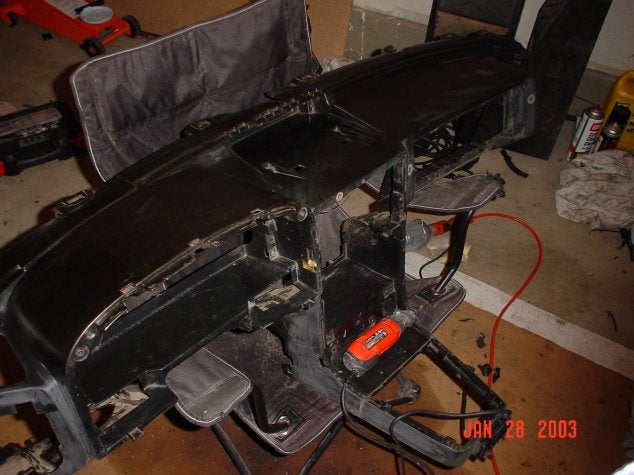
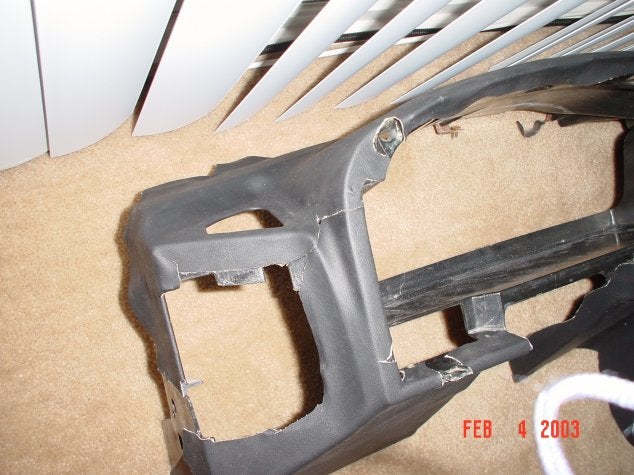
Once the dash was removed, I found that the foam was rotten under the old vinyl, which was all cracked from the AZ sun. I scraped everything off with a razor blade then cleaned it all off with paint thinner:
I won't cover dash removal (use the search button, guys!), but I will say that there was ALOT of dust, dirt, crud and debris inside the dash. And I used to wonder why my car smelled so bad...
Once the dash was removed, I found that the foam was rotten under the old vinyl, which was all cracked from the AZ sun. I scraped everything off with a razor blade then cleaned it all off with paint thinner:
Thread Starter
Full Member
Joined: Sep 2002
Posts: 108
Likes: 0
From: Ventura County, CA
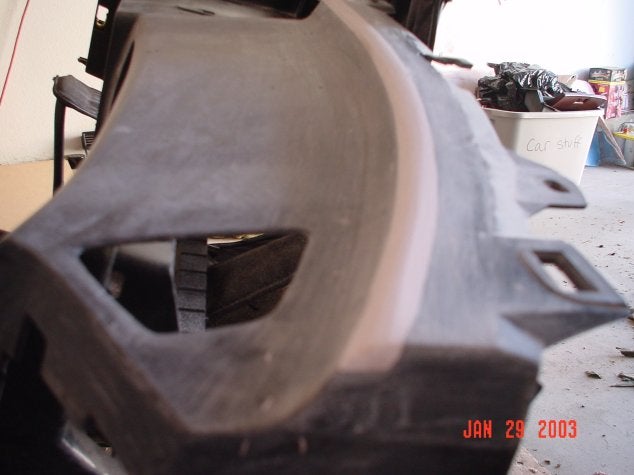
After that I proceeded to scuff the surface of the entire dash "skeleton." This is necessary to promote adequate adhesion. I am using DAP Weldwood for the vinyl. Read the container's instructions prior to attempting this. Below is a pic of the area above the clock cluster.

After some thought, I decided that it would not be wise to try to adhere the vinyl to the dimples illustrated above. Instead, I used bondo to smooth that area out. See below...

After some thought, I decided that it would not be wise to try to adhere the vinyl to the dimples illustrated above. Instead, I used bondo to smooth that area out. See below...
Thread Starter
Full Member
Joined: Sep 2002
Posts: 108
Likes: 0
From: Ventura County, CA
I also bondo'd the dimple on the length of the dash:

I sanded the dimple area to a smooth, curved finish so the vinyl would adhere easily.
I also bondo'd the corners around the gauge cluster to ease the vinyl fitment. Without the bondo, the composite angles and curves of the corners would not be manageable. The picture below shows results after some sanding:
Thread Starter
Full Member
Joined: Sep 2002
Posts: 108
Likes: 0
From: Ventura County, CA
After sanding, I cleaned the surface once more. Then it was time for the vinyl (am I spelling that right?). I decided to work top-down since the top was the most visible part.
I used a hair dryer and a roller to heat and mold the vinyl. It takes some time to get it right, but Weldwood is forgiving. Just be sure to not scratch the vinyl. Think ahead and do this part in steps.
Below is a pic of a problem area which has multiple compound curves. It is pretty-much impossible to do this with one single piece of vinyl, so you will need to cut and address the area from two angles. Before tackling this problem, I started to vinyl from the bottom up.

The pics below show the resulting seams after some work. The flash makes them look worse than they are, but you need to remember that I placed these seems in such a way that they are hardly visible once the trim panels and switched are installed.
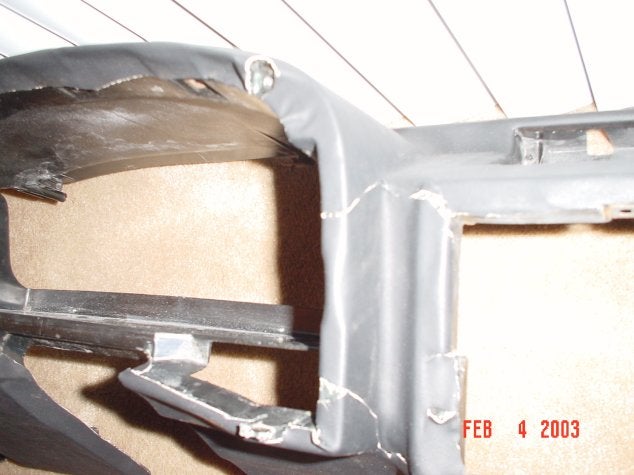
If the seams bother me when the dash is installed, I will purchase a vinyl repair kit and patch them up. In the end, there are solutions to this problem.
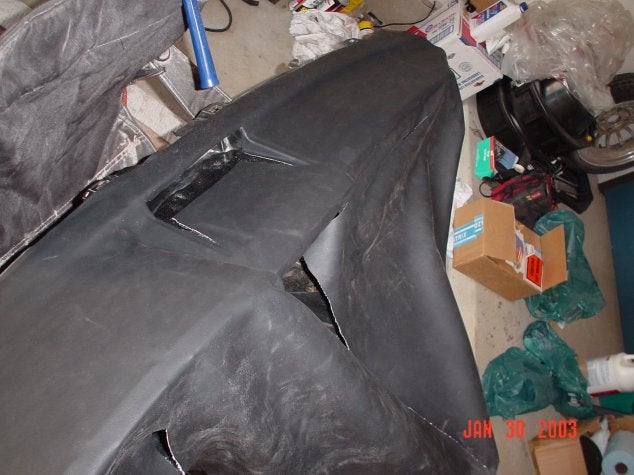
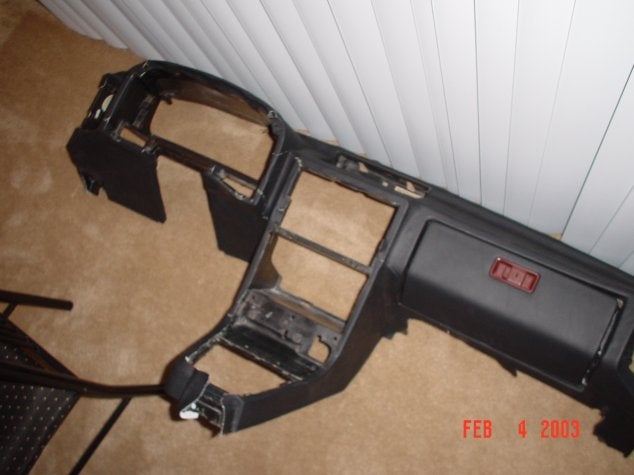
The pic below is of the finished dash skeleton. Most of the seams will be hidden by trim panels. The results thus far are better than I expected. I will update this post with pics of the work I am doing with the rest of the interior, so check back soon!
I hope this helps those of you who are not happy with your interiors.
Feel free to ask me any questions!
PJ
I used a hair dryer and a roller to heat and mold the vinyl. It takes some time to get it right, but Weldwood is forgiving. Just be sure to not scratch the vinyl. Think ahead and do this part in steps.
Below is a pic of a problem area which has multiple compound curves. It is pretty-much impossible to do this with one single piece of vinyl, so you will need to cut and address the area from two angles. Before tackling this problem, I started to vinyl from the bottom up.
The pics below show the resulting seams after some work. The flash makes them look worse than they are, but you need to remember that I placed these seems in such a way that they are hardly visible once the trim panels and switched are installed.
If the seams bother me when the dash is installed, I will purchase a vinyl repair kit and patch them up. In the end, there are solutions to this problem.
The pic below is of the finished dash skeleton. Most of the seams will be hidden by trim panels. The results thus far are better than I expected. I will update this post with pics of the work I am doing with the rest of the interior, so check back soon!
I hope this helps those of you who are not happy with your interiors.
Feel free to ask me any questions!
PJ
Last edited by PJ-4.2L; Feb 9, 2003 at 05:17 PM.

Thread Starter
Full Member
Joined: Sep 2002
Posts: 108
Likes: 0
From: Ventura County, CA
I got the vinyl from a local car stereo shop. Any good shop should carry some. I have seen vinyl for sale in fabric stores, but it wasn't the kind I wanted. I went to the audio store because they know what kind is best for this sort of project. It cost me $5.50/ foot off of a 5 ft wide spool. I bought 5 feet. I may buy more later if I don't like the way my door panels dye.
I'd like to see a two tone scheme... that would be interesting. BYW, the vent panel at the top, the one that goes between the back of the dash and the windshield, is gonna get dyed too. The grain may not match, but I can always upholster that too if it doesn't look good.
PJ
I'd like to see a two tone scheme... that would be interesting. BYW, the vent panel at the top, the one that goes between the back of the dash and the windshield, is gonna get dyed too. The grain may not match, but I can always upholster that too if it doesn't look good.
PJ
Trending Topics
WingmaN
Joined: Aug 2002
Posts: 4,324
Likes: 0
From: Fort Worth Texas
Great work! I like a guy who has the ***** to go after a tough job. If you ever get a dash out that is the best time to put down carpet.
For anyone that is thinking about trying this there is another option you might try; carbon fiber.
This place here has the best prices I have found. http://www.uscomposites.com/carbonpage.html Watch the weight and the widths. The lighter fabric (5.7 oz. as opposed to 19.7 oz.) is workable on something like this.
Since this application is for appearance only then the lighter the better. I won't go into details on this since it borderlines a thread hijacking but since I brought up the option I wanted to point out some things to watch out for.
For vinyl, locate an auto upholstery supply in your area for the best price and selection. I get most of mine from J&J Supply in Fort Worth.
Senior Member
Joined: Jan 2003
Posts: 417
Likes: 1
From: Toronto, Canada
No doubt that looks 100x's better than the regular burgandy interior, but have you considered trying the folla tech spray. That stuff is unbelievable, as long as you clean the areas being sprayed properly. This would eliminate the "seam" problem, and be an inexpensive way to change the colour of your interior. Just a thought! 
Yes, that is my car
Joined: Oct 2002
Posts: 653
Likes: 0
From: New Orleans La.
Jesus C! I thought I was bad about taking on labor intensive projects, but I have to admit, it is looking pretty good and it was probably a little fun too right? I am currently spending many hours of my time duplicating that projection headlight Aemimya kit myself. even at minimum wage for my labor, I will probably only break even with the $1300 Aemimya cost. But that's part of the fun of having an older car, doing it yourself and being proud of the results.
Good job
Good job

Thread Starter
Full Member
Joined: Sep 2002
Posts: 108
Likes: 0
From: Ventura County, CA
Originally posted by HKSTurboII
No doubt that looks 100x's better than the regular burgandy interior, but have you considered trying the folla tech spray. That stuff is unbelievable, as long as you clean the areas being sprayed properly. This would eliminate the "seam" problem, and be an inexpensive way to change the colour of your interior. Just a thought!
No doubt that looks 100x's better than the regular burgandy interior, but have you considered trying the folla tech spray. That stuff is unbelievable, as long as you clean the areas being sprayed properly. This would eliminate the "seam" problem, and be an inexpensive way to change the colour of your interior. Just a thought!
PJ
Thread Starter
Full Member
Joined: Sep 2002
Posts: 108
Likes: 0
From: Ventura County, CA
Scalliwag, dude, go ahead and post all the info...
Hopefully this will become an archived budget interior thread, so if anyone else has any advice or info to provide, post it!
PJ
Hopefully this will become an archived budget interior thread, so if anyone else has any advice or info to provide, post it!
PJ
What Subscription?
Joined: Apr 2001
Posts: 5,926
Likes: 2
From: Aiken SC USA
Here's a thought. Make a piece to cover the Instrument Cluster bubble[It will be one piece. Then take the main dash piece down to the Upholstry shop and have them fold back and stich the edge around the Instrument Cluster opening!
Senior Member
Joined: Jan 2003
Posts: 417
Likes: 1
From: Toronto, Canada
I'll be starting up my interior project very soon, I'll do a step by step write up for it as well. Stay tuned for it next month. I did the interior in my last car, and it came out very good. My total budget for that car was approx $200.
What Subscription?
Joined: Apr 2001
Posts: 5,926
Likes: 2
From: Aiken SC USA
Thread Starter
Full Member
Joined: Sep 2002
Posts: 108
Likes: 0
From: Ventura County, CA
Originally posted by banzaitoyota
Here's a thought. Make a piece to cover the Instrument Cluster bubble[It will be one piece. Then take the main dash piece down to the Upholstry shop and have them fold back and stich the edge around the Instrument Cluster opening!
Here's a thought. Make a piece to cover the Instrument Cluster bubble[It will be one piece. Then take the main dash piece down to the Upholstry shop and have them fold back and stich the edge around the Instrument Cluster opening!
PJ


WingmaN
Joined: Aug 2002
Posts: 4,324
Likes: 0
From: Fort Worth Texas
Originally posted by PJ-4.2L
Scalliwag, dude, go ahead and post all the info...
Hopefully this will become an archived budget interior thread, so if anyone else has any advice or info to provide, post it!
PJ
Scalliwag, dude, go ahead and post all the info...
Hopefully this will become an archived budget interior thread, so if anyone else has any advice or info to provide, post it!
PJ
I imagined what it would look like in carbon fiber and decided I had to do it. There are plenty of jacked up looking dashes out there and I can pull one and get it finished before I take mine out.
If you have ever worked fiberglass and had pretty good success you will do fine working carbon.
The resin is funky **** and it is not something I ever really enjoyed doing.
Thread Starter
Full Member
Joined: Sep 2002
Posts: 108
Likes: 0
From: Ventura County, CA
Scalliwag, I actually do have some experience with fiberglass... I actually considered a completely custom dash for a while but I figured that I didn't want to spend that much time on it. Had I done that, I would have incorporated speaker and gauge pods--- oh the possibilities!!!
I'm looking forward to the carbon fiber project, so don't wuss out on it! Does anybody know what happened to the whole "I'm gonna build carbon fiber surrounds," ordeal? I need to buy a new surround.
PJ
I'm looking forward to the carbon fiber project, so don't wuss out on it! Does anybody know what happened to the whole "I'm gonna build carbon fiber surrounds," ordeal? I need to buy a new surround.
PJ