
'88 Rebuild - up and running before the end of summer


Junior Member
Joined: Nov 2008
Posts: 17
Likes: 0
From: independence, MO
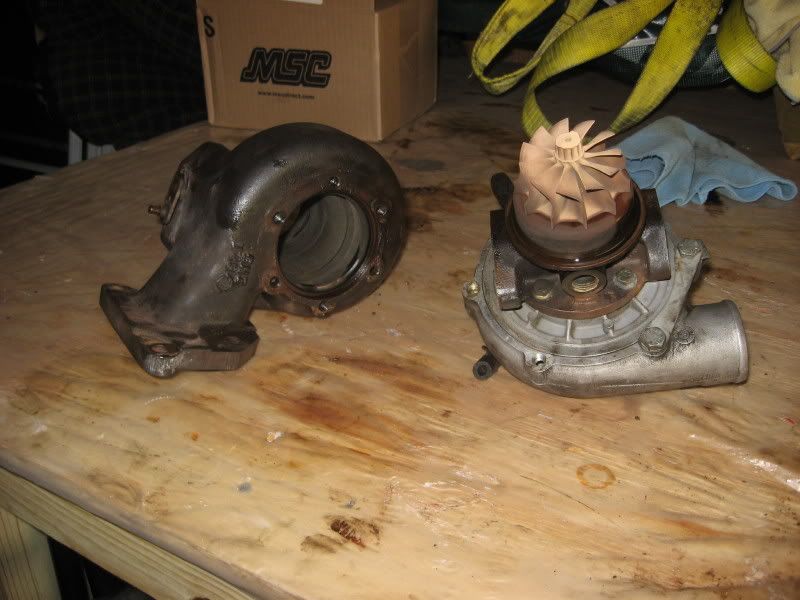
hey, is it running yet? do you have a service manual? im doing a 88 non turbo rebuild my self right now. my irons had the chips in the coolant jackets by the orange coolant seals they were talking about. how did the wear surface of the housings look?
Junior Member
Joined: Jan 2009
Posts: 8
Likes: 0
From: richmond, va
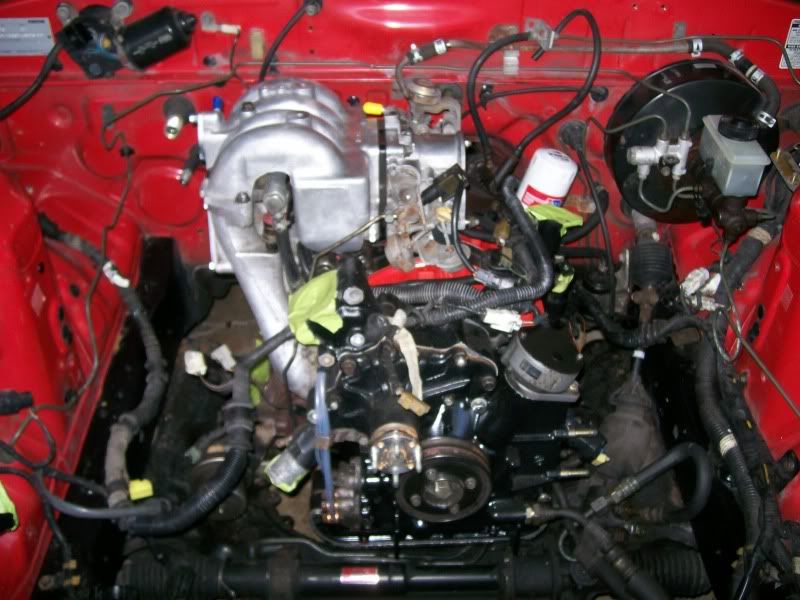
I'm going to go ahead and answer that for Sean. It's not running yet. The last picture is basically where we are at. From what I saw, the housings looked pretty good because they were still pretty new...right Sean? I have no doubt this car is going to run great when it's all said and done.
M50e30 sumed it up right. Yeah, its not running yet. I had to head back to school for another semester, so I can only work some weekends here and there. But the housings were new from my last rebuild so they were in great shape. They had prob around 10k miles on them. I lucked out and didn't crack the irons around the coolant seals though. So, if you cracked the irons you should get some new ones, maybe try the for sale section.
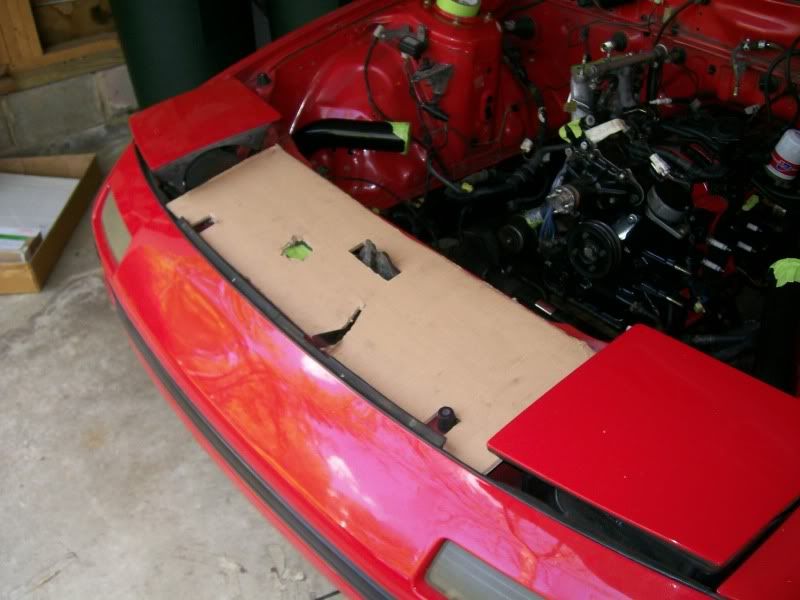
Well, Ive done some work on the car the past few weekends. Now that Im at
school I have to take a two hour trip to work in it so its going real slow. I'm at the
point were Im figuring out the wiring and finishing a few small things I've been
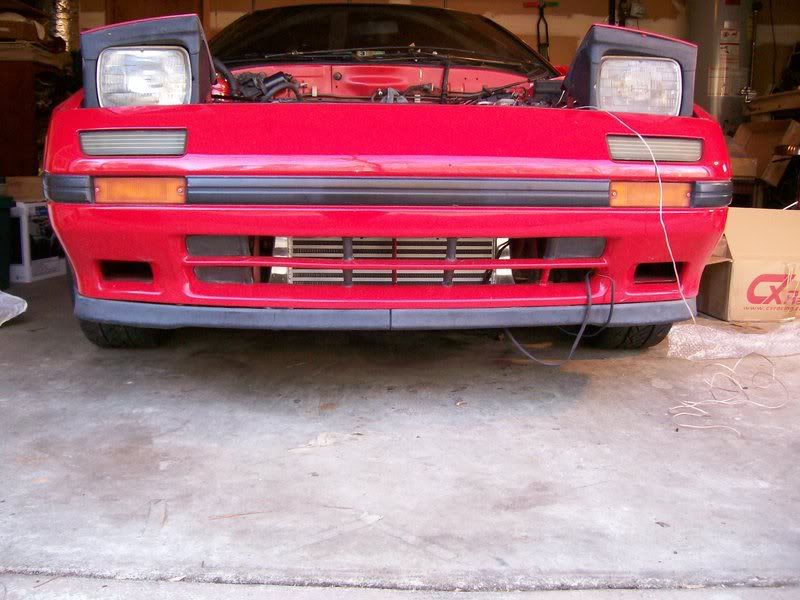
putting off. Just started fitting the front mount, and I recently bought a downpipe
and test pipe from a fellow forum member.
I dont have much pictures right now, but I plan to go back to work on it next
weekend and want to get a whole lot done. I plan to finish up the emissions
removal, relocate the battery, finsh the front mount, port the wastegate, and
figure out the rest of the wiring.
These are some pics from last weekend, and Ill take a bunch more next weekend.
I'm hoping to be able to try and start her up next weekend


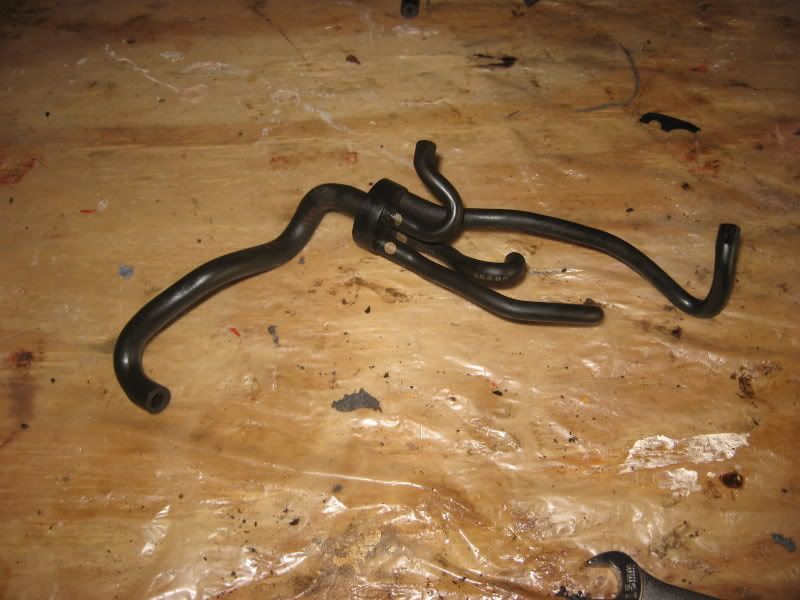
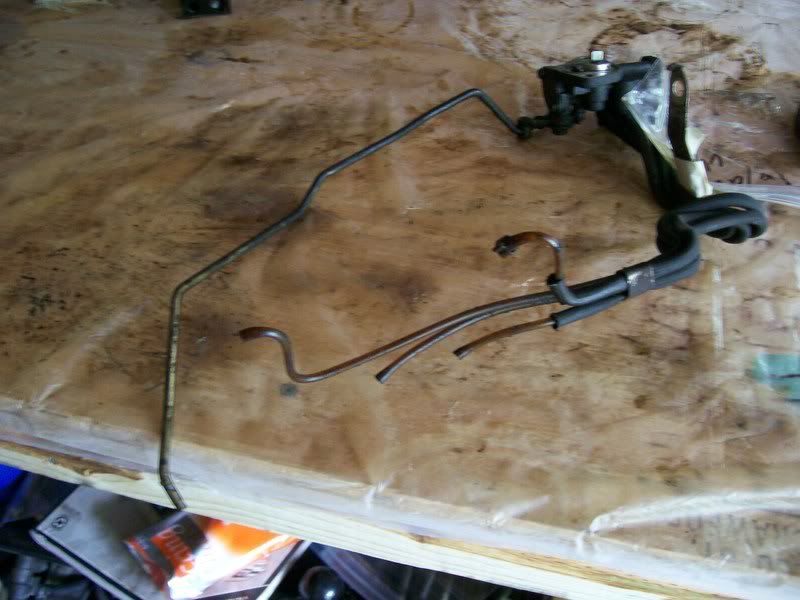
Also, I need to figure out were I can get this part from the oil injectors? Cant tell
from the pic but one of the lines is broken..
school I have to take a two hour trip to work in it so its going real slow. I'm at the
point were Im figuring out the wiring and finishing a few small things I've been
putting off. Just started fitting the front mount, and I recently bought a downpipe
and test pipe from a fellow forum member.
I dont have much pictures right now, but I plan to go back to work on it next
weekend and want to get a whole lot done. I plan to finish up the emissions
removal, relocate the battery, finsh the front mount, port the wastegate, and
figure out the rest of the wiring.
These are some pics from last weekend, and Ill take a bunch more next weekend.
I'm hoping to be able to try and start her up next weekend
Also, I need to figure out were I can get this part from the oil injectors? Cant tell
from the pic but one of the lines is broken..
The Firestarter
Joined: Aug 2002
Posts: 1,126
Likes: 2
From: Seattle, WA
^^ Spider Vac lines, can be purchased at Mazdatrix >> http://mazdatrix.com/c-5.htm
better to source it at a junkyard or classifieds, as brand new is pretty pricey.
better to source it at a junkyard or classifieds, as brand new is pretty pricey.
^^ Spider Vac lines, can be purchased at Mazdatrix >> http://mazdatrix.com/c-5.htm
better to source it at a junkyard or classifieds, as brand new is pretty pricey.
better to source it at a junkyard or classifieds, as brand new is pretty pricey.

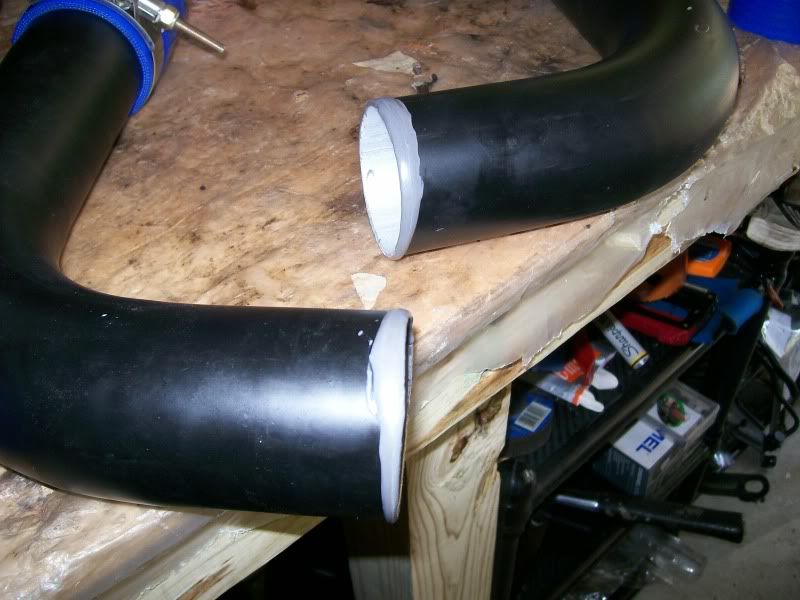
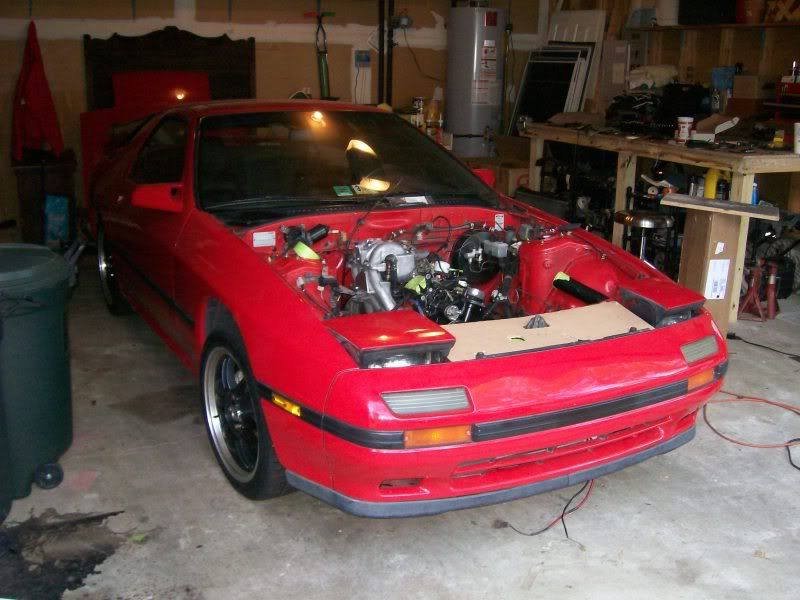
Well you seem like a real modest guy, you seemed a bit reserved about doing your rebuild, but it looks like you got things handled. Cutting that hose down the middle to make a grommet for a hole you cut, I assumed for I/c piping. Its a well known trick in the industry, although we usually used silicone vacuum lines. And that black + red on the housings fits perfectly.
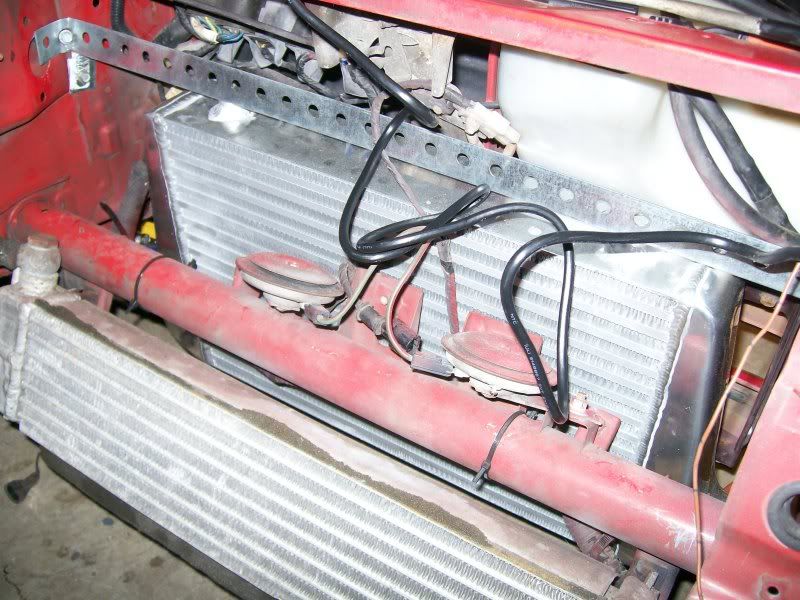
Speaking of that I like your Intercooler setup, just behind the oil cooler so it can get first pick at incoming air. I think I'll get a core of similar size and mount it there.
Speaking of that I like your Intercooler setup, just behind the oil cooler so it can get first pick at incoming air. I think I'll get a core of similar size and mount it there.
Yeah, that price seems a bit ridiculous for what it is. But I think I should be able to
find one in the for sale section. Ive been trying real hard to find a greddy elbow
and cant seem to catch one. If anyone has one Ill take it off your hands
immediatly.
Thanks. I agree the intercooler fits great in that spot, and since I'm not planning
on huge boost numbers it should work great. I think the core size was 18" x 12" x 3"
and end tank to end tank was like 25"
find one in the for sale section. Ive been trying real hard to find a greddy elbow
and cant seem to catch one. If anyone has one Ill take it off your hands
immediatly.
Well you seem like a real modest guy, you seemed a bit reserved about doing your rebuild, but it looks like you got things handled. Cutting that hose down the middle to make a grommet for a hole you cut, I assumed for I/c piping. Its a well known trick in the industry, although we usually used silicone vacuum lines. And that black + red on the housings fits perfectly.
Speaking of that I like your Intercooler setup, just behind the oil cooler so it can get first pick at incoming air. I think I'll get a core of similar size and mount it there.
Speaking of that I like your Intercooler setup, just behind the oil cooler so it can get first pick at incoming air. I think I'll get a core of similar size and mount it there.
on huge boost numbers it should work great. I think the core size was 18" x 12" x 3"
and end tank to end tank was like 25"
Can anyone tell me what size those "spider" vac hoses are?
Because I have some 5/16" and 5/32" vacuum hose in transit and if it is those sizes I could
just track down some ordinary spliters and rebuild them myself.
These:
Because I have some 5/16" and 5/32" vacuum hose in transit and if it is those sizes I could
just track down some ordinary spliters and rebuild them myself.
These:

Well, I managed to get a good amount accomplished on the seven this weekend.
Unfortunately, the battery relocated stuff and the Greddy throttle elbow didnt get
delivered, so I didnt get as far as I wanted. But, I did manage to finish up
removing the emissions crap, finish mounting and cutting for the intercooler,
ported the wastegate, and got the wiring in order.
I am getting very pumped to get this thing up and running, I�m getting pretty
damn close, and its going to be so much different than what it was before.
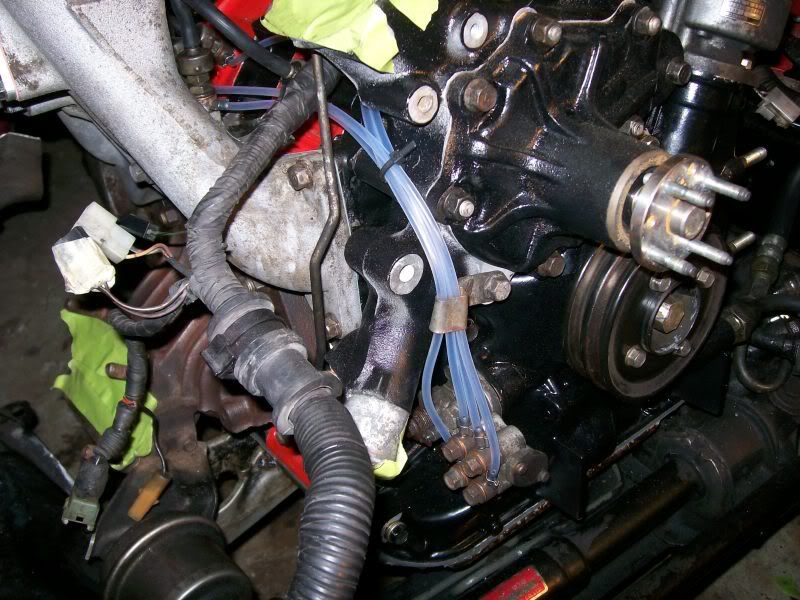
Here are the OMP lines that I rebuild following a write-up from the forum.
Someone posted the link to it earlier in this thread. Worked really well, and was
very easy. I thought it came out nicely.
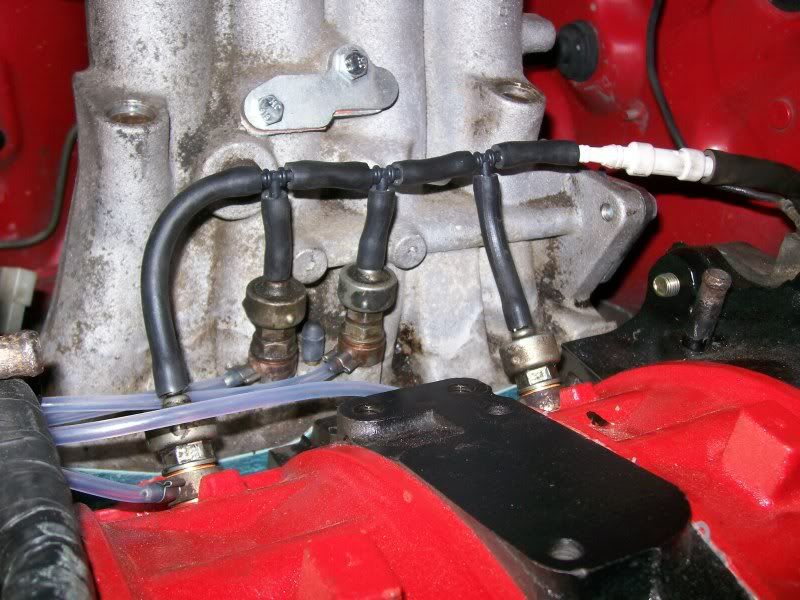
The vacuum lines from the injectors. I never found a write up or anything on this,
so this is what I did. The lines and splitters are 5/32" and then the white fitting is
a step up connector. Seems to me that that would be sufficient. Let me know if
that setup isn't ideal.
How I mounted the front mount. Picked that metal up from home depot and cut it
with a hack saw. Then, I had to cut the intercooler piping to fit in the bumper, so I
put some JB weld on there to create a bevel.
The wastegate port I did using just a Dremel. It took SOO long to port using a
dremel. I had to keep taking breaks because the dremel would get too hot to
hold. I though it came out very nice though. Ported to 25mm. Getting my friends
brother to weld the flapper for me.
Started mocking up a front cover piece too. I plan to find a piece of black plastic
somewhere and make it from that template.
I have some other stuff I will post up too a little later. Including a few questions about some vacant nipples..
Unfortunately, the battery relocated stuff and the Greddy throttle elbow didnt get
delivered, so I didnt get as far as I wanted. But, I did manage to finish up
removing the emissions crap, finish mounting and cutting for the intercooler,
ported the wastegate, and got the wiring in order.
I am getting very pumped to get this thing up and running, I�m getting pretty
damn close, and its going to be so much different than what it was before.
Here are the OMP lines that I rebuild following a write-up from the forum.
Someone posted the link to it earlier in this thread. Worked really well, and was
very easy. I thought it came out nicely.
The vacuum lines from the injectors. I never found a write up or anything on this,
so this is what I did. The lines and splitters are 5/32" and then the white fitting is
a step up connector. Seems to me that that would be sufficient. Let me know if
that setup isn't ideal.
How I mounted the front mount. Picked that metal up from home depot and cut it
with a hack saw. Then, I had to cut the intercooler piping to fit in the bumper, so I
put some JB weld on there to create a bevel.
The wastegate port I did using just a Dremel. It took SOO long to port using a
dremel. I had to keep taking breaks because the dremel would get too hot to
hold. I though it came out very nice though. Ported to 25mm. Getting my friends
brother to weld the flapper for me.
Started mocking up a front cover piece too. I plan to find a piece of black plastic
somewhere and make it from that template.
I have some other stuff I will post up too a little later. Including a few questions about some vacant nipples..
I ordered the hose from an ebay store that had all kinds of fuel and vacuum hose, and the spliters are from NAPA. I think NAPA has the hose too, you just have to ask them for the smaller sizes because they dont have it out on the floor. The only reason I oreded online is to have the parts waiting for me when Im in town to work on the car.
Here is a little bit more on the progress from this weekend. Figured out most of
the wiring, and actually started getting ready for the battery relocate, but I dont
have pics of that.
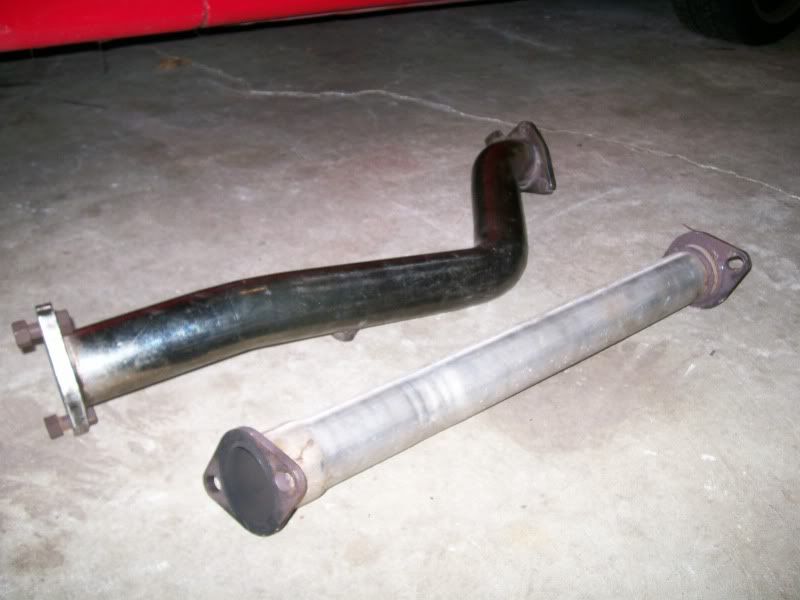
This is the racing beat 2.5" Downpipe and cat pipe I picked up from a forum
member. The test pipe doesnt bolt to the stock Y pipe, so Im having a friend
modify it to work.
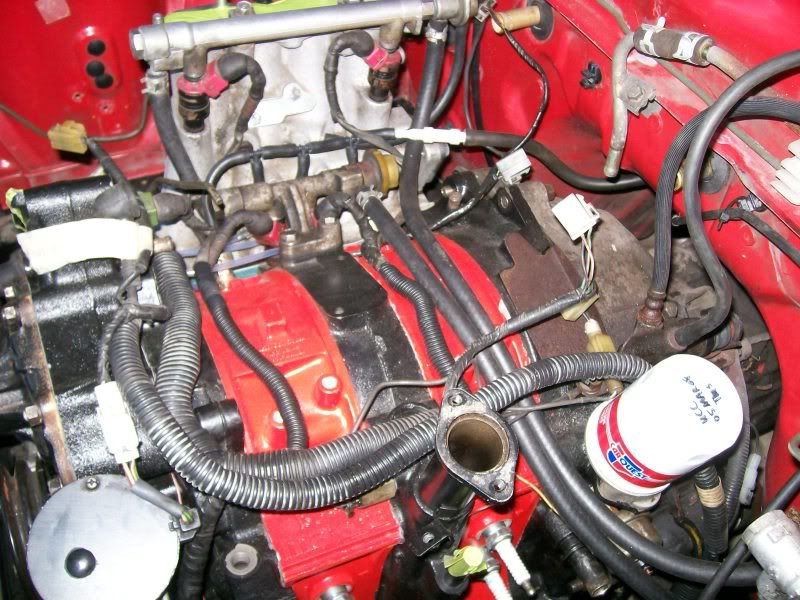
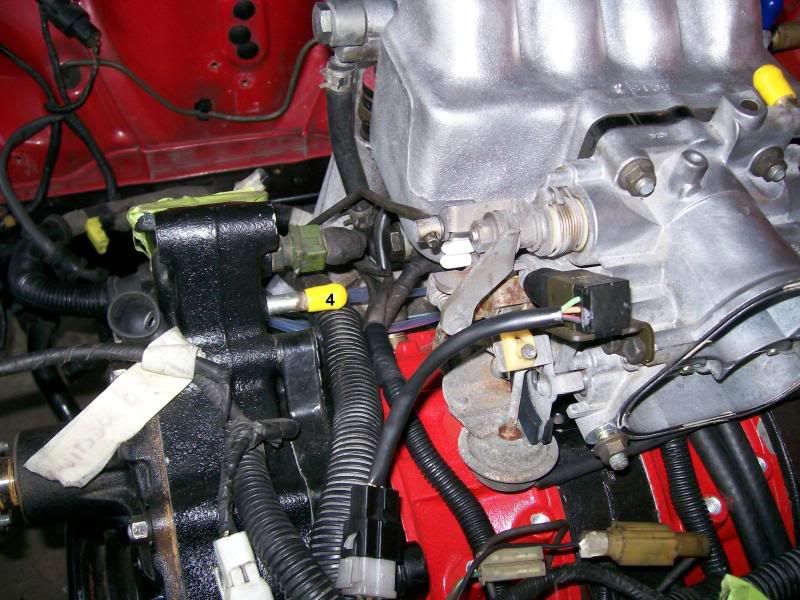
I cleaned up the UIM pretty well; I thought it looked pretty nice. I also went ahead and mounted it.

Where I am on the harness
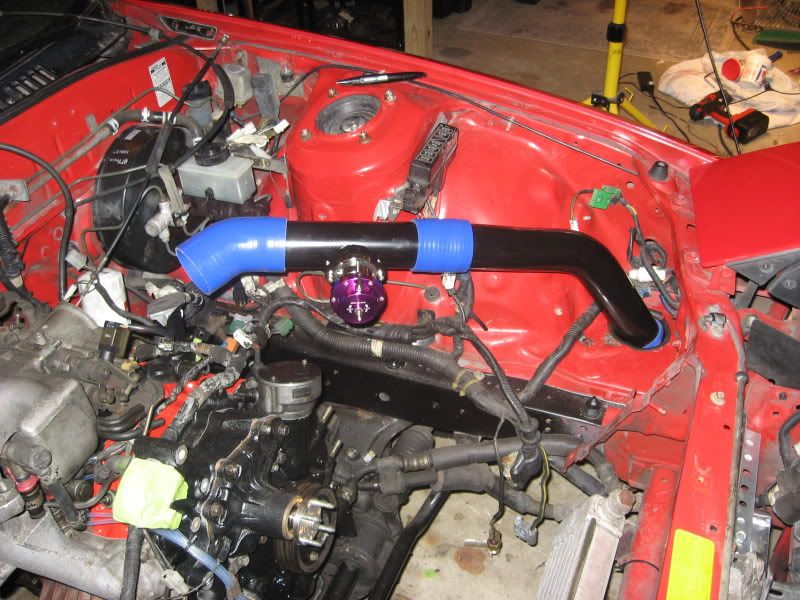
Here is a quick mock up of the IC piping with the turbo and UIM slapped on, but
not bolted down.
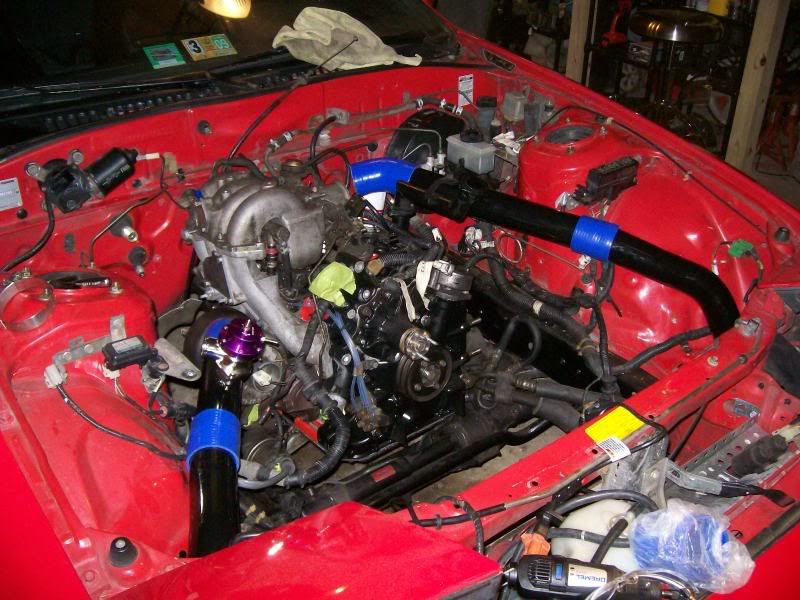
And, here is basically where I am with her right now. Ill be back in two weeks,
and all I have to do is relocate the batt, finalize the IC piping (need the greddy
elbow), and assemble the cooling equipment, add fluids and miscellaneous parts
like new plugs, T-stat ect. Its so close
the wiring, and actually started getting ready for the battery relocate, but I dont
have pics of that.
This is the racing beat 2.5" Downpipe and cat pipe I picked up from a forum
member. The test pipe doesnt bolt to the stock Y pipe, so Im having a friend
modify it to work.
I cleaned up the UIM pretty well; I thought it looked pretty nice. I also went ahead and mounted it.
Where I am on the harness
Here is a quick mock up of the IC piping with the turbo and UIM slapped on, but
not bolted down.
And, here is basically where I am with her right now. Ill be back in two weeks,
and all I have to do is relocate the batt, finalize the IC piping (need the greddy
elbow), and assemble the cooling equipment, add fluids and miscellaneous parts
like new plugs, T-stat ect. Its so close
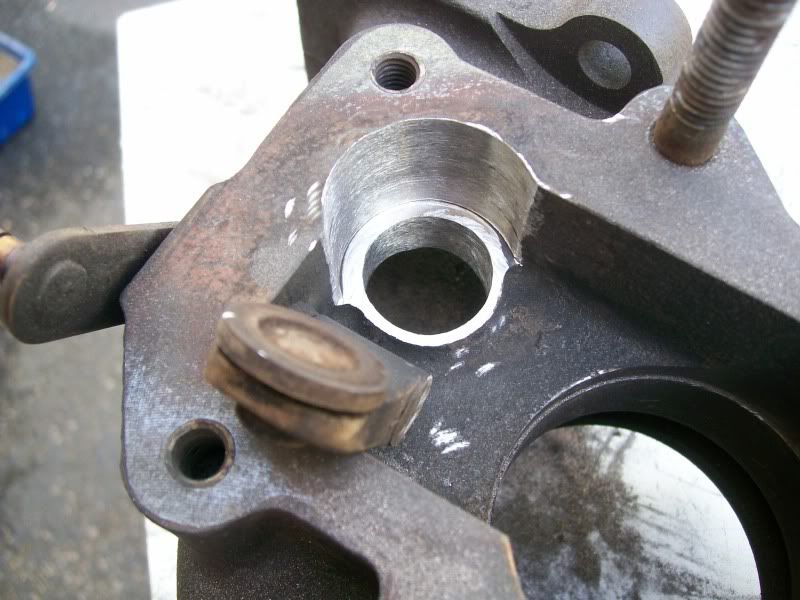
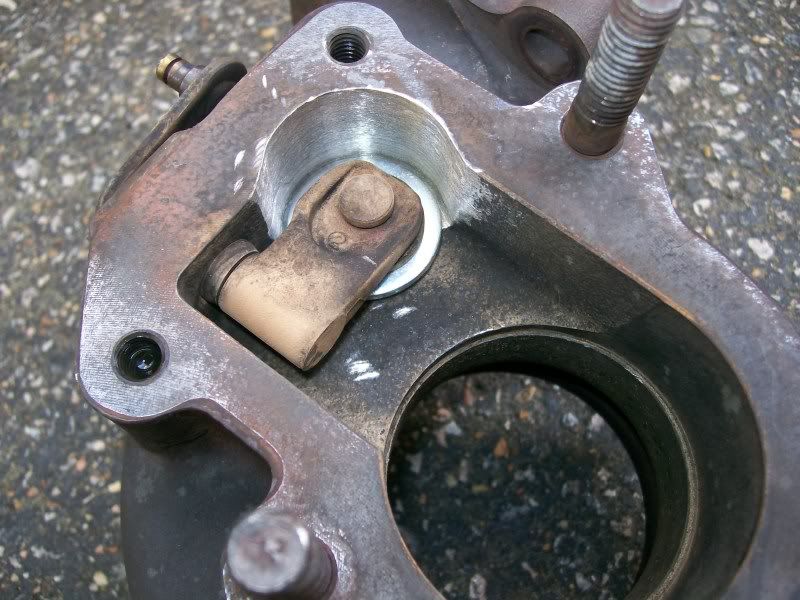
Quick Questions Here
I was unsure on where some of these nipples went, and my before pics are not
helping me to much.
In this one Im assuming 2 goes with 2, but a I'd like clarification. I kept the
thermowax in my emissions removal, so keep that in mind.
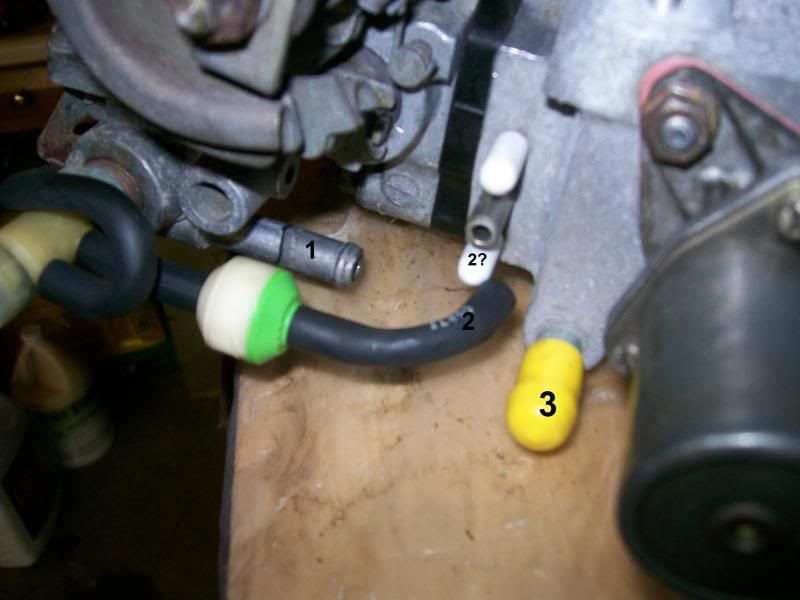
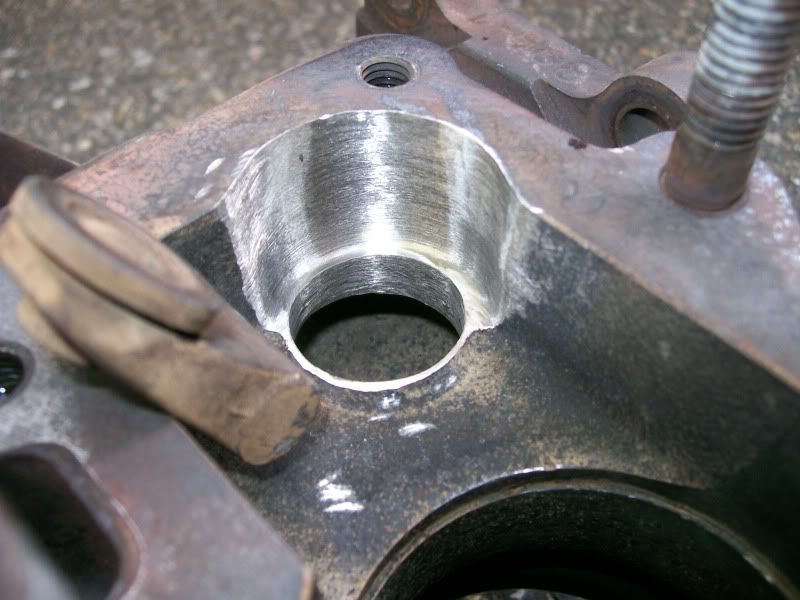
No clue on this one
helping me to much.
In this one Im assuming 2 goes with 2, but a I'd like clarification. I kept the
thermowax in my emissions removal, so keep that in mind.
No clue on this one
Full Member
Joined: Mar 2009
Posts: 87
Likes: 0
From: Central PA
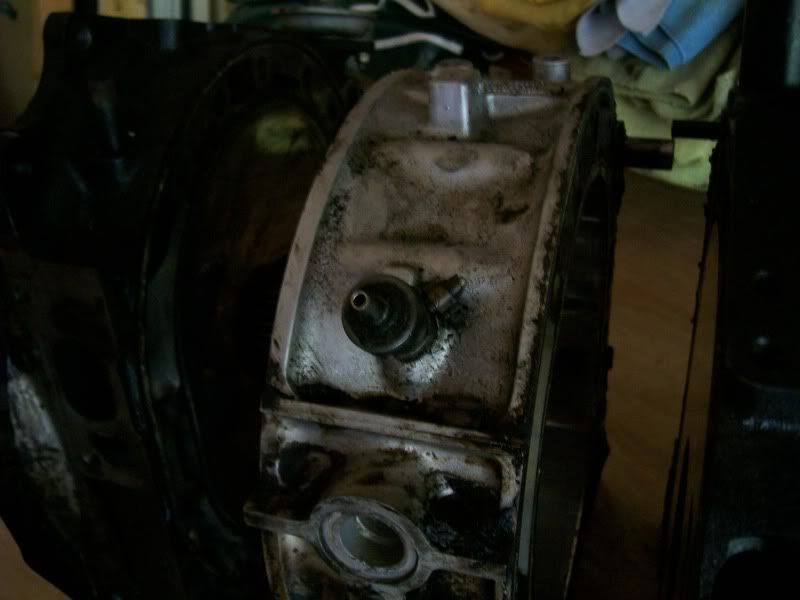
Also I broke these and I"m not sure where to get a replacement. It looks like oil injector lines..
I think its these: "Oil Injector Lines for Fuel Injected Engines" about halfway down the page but I don't know what to buy exactly.
MAZDATRIX
Here are pictures.
I think its these: "Oil Injector Lines for Fuel Injected Engines" about halfway down the page but I don't know what to buy exactly.
MAZDATRIX
Here are pictures.