
1985 Savanna GT-X Rotary Turbo emblem


@RotaryResurrection - Thanks for the pics. They're in the works! I'm going to assume that they're the same size as the Turbo II decal - but if you have a measurement from one edge of the color to the other (e.g. from left most edge of the "G" to the right most tip of the "X") then I'll be sure to get it sized correctly. I'll be honest - because I'm cutting vinyl, the very thin stripes of this design are hard to do. I'll do my best, but they may have fewer "gaps" between the color just so there is sufficient material.
I will check when I get home tonight and take some measurements as well if you need them turbogslse
@FAL - I know what @RotaryResurrection means. I make these decals from two parts. One part is a clear decal cut to the overall shape or border of the decal (its the solid part). The second is the colored part (the letters themselves) and they are actually made by using a set of thin stripes to form the letters. I lay down the colored part onto the sticky back of the clear decal and then peel away the extra material to leave the thin stripes that form the letters. It's quite time consuming compared to normal decals, and I've priced them a little higher because of that. I think I could make 50 of the RX-7 hatch decals in the time it takes to make one fender decal. But hey, our rotaries are worth it!
Dimensions are always welcome. If they're from an FB, I can always measure from my own car, but I don't have any 2nd Gens, so actual dimensions are best. If you just take a photo of a ruler or tape measure next to the decal in both the horizontal and vertical directions, that's sufficient (and best).
Dimensions are always welcome. If they're from an FB, I can always measure from my own car, but I don't have any 2nd Gens, so actual dimensions are best. If you just take a photo of a ruler or tape measure next to the decal in both the horizontal and vertical directions, that's sufficient (and best).
My friend cuts vinyl as well and I've helped him out a little so I think I know what you mean. It's like doing a two layer overlay vinyl cut sticker. He uses arrows to line them up and it is a bitch to do them.
I will do as you requested with the measuring tape
I will do as you requested with the measuring tape
Joined: Oct 2003
Posts: 11,576
Likes: 27
From: Morristown, TN (east of Knoxville)
@RotaryResurrection - Thanks for the pics. They're in the works! I'm going to assume that they're the same size as the Turbo II decal - but if you have a measurement from one edge of the color to the other (e.g. from left most edge of the "G" to the right most tip of the "X") then I'll be sure to get it sized correctly. I'll be honest - because I'm cutting vinyl, the very thin stripes of this design are hard to do. I'll do my best, but they may have fewer "gaps" between the color just so there is sufficient material.
GT-X Measurements
Sorry it took a few days to get this up, holiday season and all.
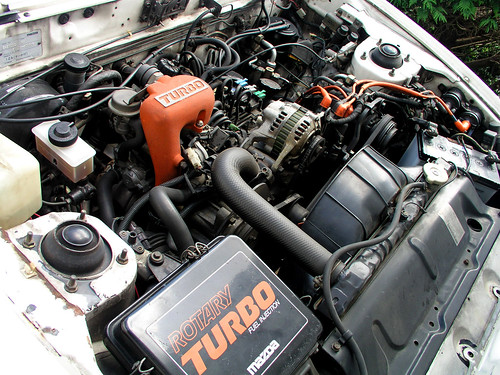
I've attached the measurements of the GT-X sticker height, length, and detail. The detail to show that the original stickers were printed stickers, not two layer. I wasn't sure if you guys were saying that they were or just informing that you would be making them two layer, but the originals were definitely printed. My 87 TURBO II sticker is the same way.
Not that it would matter either way, but I just wanted to add it for future reference.
@FAL - Thanks for the pics! This is very helpful.
You're right- The original stickers are printed. Unfortunately, I don't have that equipment so I'm trying with a 2-layer approach. I have a technique that I'm happy with - see the attached pic.
My Turbo II stickers didn't use this same technique - so I'm going to try re-cutting them with this technique. The lines are cleaner all around and they're easier to make. Still time consuming, but easier.
I'll have to consider a single layer though I worry that the two-layer version will collect dirt under the decal. So, it may just end up that I do a single layer for best results.
Glad I could help. Good luck with everything!

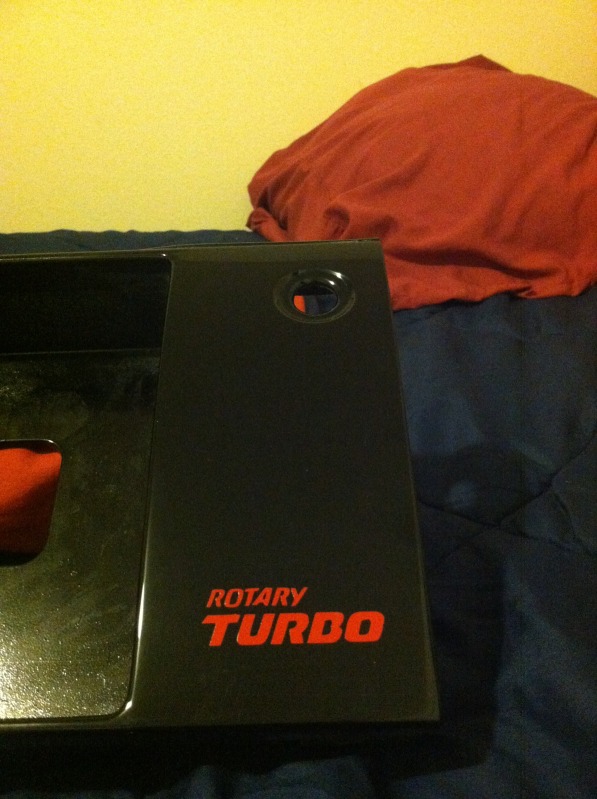
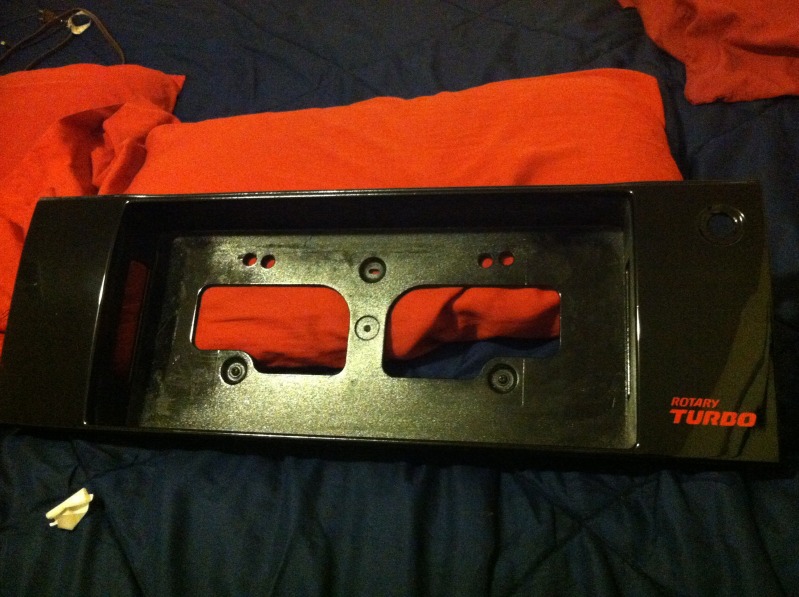
Just wanted to keep this thread updated, I finally finished painting and polishing my rear license plate bezel and applied the custom sized sticker being I have a vert. I'm extremely happy with the outcome, can't wait to install this unfortunately I will not be taking the car out much as I'm going to be doing a full paint job.


Yes, I can do a set. I'm not sure if there's someone local who can do them to save on postage, but I can do a pair for you if you like. Or let me know qty. They're $2.50 USD each plus whatever postage will be to you.
Dave
Dave

Newbie
Joined: Jul 2022
Posts: 3
Likes: 0
From: perth


Thread
Thread Starter
Forum
Replies
Last Post